

Line 6 Space Chorus Owner's Manual

Pilot’s Handbook for Space Chorus
Pilotenhandbuch für Space Chorus
Manuel de pilotage pour Space Chorus
Manual del Piloto para el
Space Chorus
Pilotenhandboek voor Space Chorus
Patent Pending
40-00-0183 Electrophonic Limited Edition available @ www.line6.com Rev D
Line 6, ToneCore, Constrictor, Crunchtone, Echo Park, Space Chorus,
Tap Tremolo and Über Metal are trademarks of Line 6, Inc.
CAUTION
This equipment has been tested and found to comply with the limits for a Class B digital device pursuant to Part
15 of FCC Rules. Operation is subject to the following two conditions: (1) This device may not cause harmful
interference, and (2) this device must accept any interference received, including interference that may cause
undesired operation.
WARNING
To reduce the risk of fire or electric shock, do not expose this appliance to rain or moisture.
The exclamation point within a triangle
means, “Caution!” Please read the
information next to all caution signs.
Space Chorus Pilot’s Handbook © 2004, Line 6, Inc.
The lightning symbol within a triangle
means, “Electrical caution!” It indicates the
presence of information about operating
voltage and potential risks of electrical shock.

You should read these Important Safety Instructions.
Keep these instructions in a safe place.
Before using your ToneCore, carefully read the applicable items of these operating instructions and the safety suggestions.
1. Obey all warnings on the pedal and in the ToneCore Pilot's Handbook.
2. Connect optional power supply only to AC power outlets rated 100-120V or 200-240V 47-63Hz (see indications on optional power supply).
3. Do not perform service operations beyond those described in the ToneCore Pilot's Handbook. Service is required when the apparatus has been
damaged in any way, such as:
• power-supply cord or plug is damaged
• liquid has been spilled or objects have fallen into the apparatus
• the unit has been exposed to rain or moisture
• the unit does not operate normally or changes in performance in a significant way
• the unit is dropped or the enclosure is damaged.
4. Do not place near heat sources, such as radiators, heat registers, or appliances which produce heat.
5. Guard against objects or liquids entering the enclosure. Do not use or place unit near water.
6. Unplug the power supply when not in use for extended periods of time. Unplug the power supply during lightning storms.
7. Clean only with a damp cloth.
8. Only use attachments/accessories specified by the manufacturer.
9. Prolonged listening at high volume levels may cause irreparable hearing loss and/or damage. Always be sure to practice “safe listening.”
Space Chorus Pilot’s Handbook
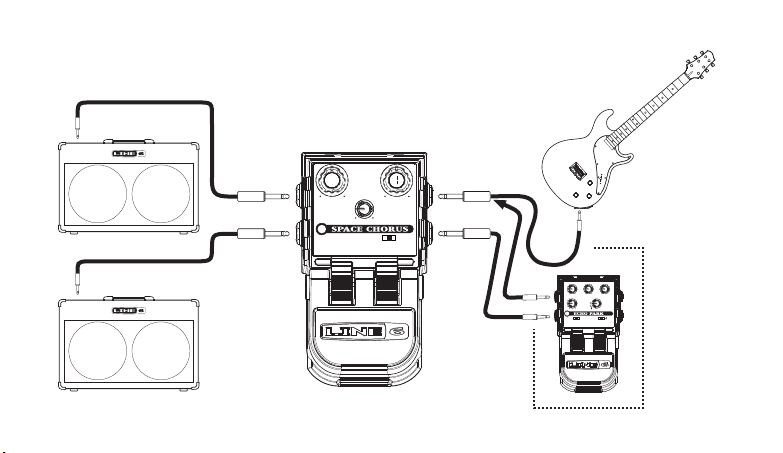
Output your effects mono to
a standard amplifer, or to a
stereo setup.
COLOR
SPEED DEPTH
TAP TEMPO:
•
•
CHORUS
TAP LIGHTLY
TRI
Be sure to connect
your guitar to the
mono input jack on
your ToneCore.
VIBRATO
MOD
•
TAPE
DIGITAL • ANALOG OFF
You can feed
the stereo
TIMEREPEATMIX
SWEEP
SWELL
DUCKING
input of your
SLAP
MULTI 1
MULTI 2
TAP
PING PONG
TAP
REVERSE
NORMAL (TAP )
TAP TEMPO:
TAP LIGHTLY
TRAILS
•
ON
ToneCore
with a mono
or stereo
effect pedal
instead of a
guitar.

Greetings and salutations! Thank you for inviting the
Line 6 Space Chorus pedal into your life.
Effect On-Off / Power Indicator Light
The Power Indicator Light on your ToneCore uses three
colors to indicate the pedal’s state:
•GREEN (flashing)– Effect is engaged (on). Light
is flashing to show modulation speed
•AMBER (flashing)– Effect is in bypass (off). Light
is flashing to show modulation speed
•RED (flashing) – Batteries need replacing
This low power indication will override all other states.
Power Jack
Connect an optional ToneCore-compatible Line 6
power supply like the DC-1, and you'll never need a
9-volt battery again!
Connections and Power Indicator Light
In Jacks
Use a standard guitar cable to connect your guitar, or
the output of another effect to use in combination with
your ToneCore. If you’re feeding a mono signal to your
Space Chorus, use the MONO/L jack. Like most
pedals, inserting a plug into this jack will turn on the
power to your ToneCore. Disconnect from both input
jacks when the ToneCore is not being used.
Out Jacks
Use standard guitar cables to connect to the inputs of
a guitar amp, or the inputs of another effect that will
feed your amp. For mono, use the MONO/L jack.
Foot Switch
Stomp on this to turn the effect sound processing on
and off. See the Tap Tempo section to learn how to set
speed with your feet.

Space Chorus Pilot’s Handbook
SPEED DEPTH
TAP TEMPO:
TAP LIGHTLY
COLOR
CHORUS
•
•
TRI
VIBRATO
Speed
Adjusts the effect sound from a slow sweep to a speedy
warble. With chorus, you’ll usually want to reduce depth
as you increase speed to avoid overly dramatic effects.
(See Tap Tempo to do this with your feet.)
Depth
Dial in the amount of effect, from subtle to dramatic.
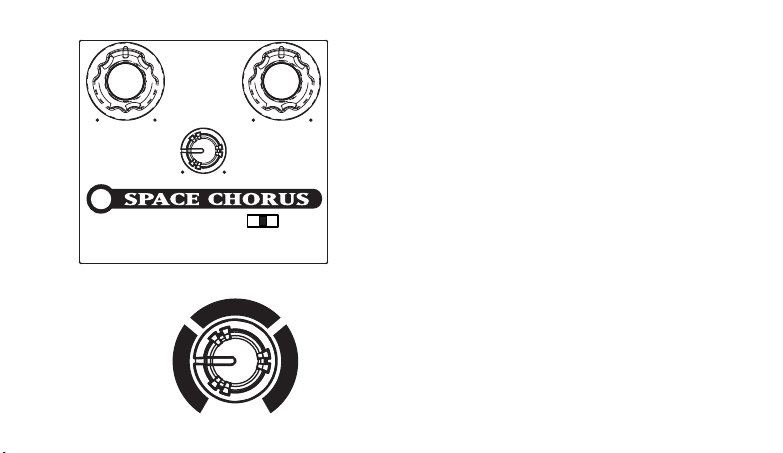
Color
The Color knob simultaneously adjusts many behindthe-scenes details of your sound:
Color knob modes
for Vibrato:
Vintage
Blue
Euro
• With the Chorus model, the Color knob lets you go
from vintage analog tones (knob pointing left) to more
modern chorus sounds (knob pointing right).
• For the Tri model, Color gives you a choice from
warm and mellow sound to shimmering and bright.
• For Vibrato, Color works more like a three-way
switch for Vintage, Blue and Euro style sounds, as shown
to the left.

Model Switch
Give this a flick to reconfigure the virtual circuitry
inside your Space Chorus, and enjoy three distinctly
different sound “flavors”:
Chorus
This model lets you get tones in the style of both
vintage and modern analog chorus circuits with “bucket
brigade” electronics. Feed it a mono in, and you’ll get
chorused sound on the left, and unprocessed “dry”
sound on the right. Feed it stereo, and you’ll get
processed sound to both left and right outputs.
Tri
Get thick, richly modulated tone from this model based
on the legendary multi-voiced chorus unit that is a
treasured “secret weapon” in many great studios.
Vibrato
This model gives a warbling pitch variation to your
sound, in the style of no-dry-mix vibrato units.
Controls
Tap Tempo
Put your foot to work and get your Space Chorus in the
groove! Using the innovative ToneCore double-action
footswitch, you can tap a couple times and have the
pulsations of your effects instantly match your tempo.
Here’s what you need to know:
• Whether the effect is active or bypassed, you can tap
the footswitch lightly to set your effect speed. Your first
two taps establish the tempo. Any additional taps
within 3 seconds will be averaged in.
• Taps will be ignored if the footswitch is pressed all
the way down to turn the effect processing on/off.
• Any time the Tap Tempo switch is used to alter
speed, the tapped value overrides the current setting
of the Speed knob. Whenever the Speed knob is turned,
it overrides the last value entered with the Tap Tempo
foot switch.
• The indicator light flashes the tempo in green when
the effect is on and amber when the effect is off.
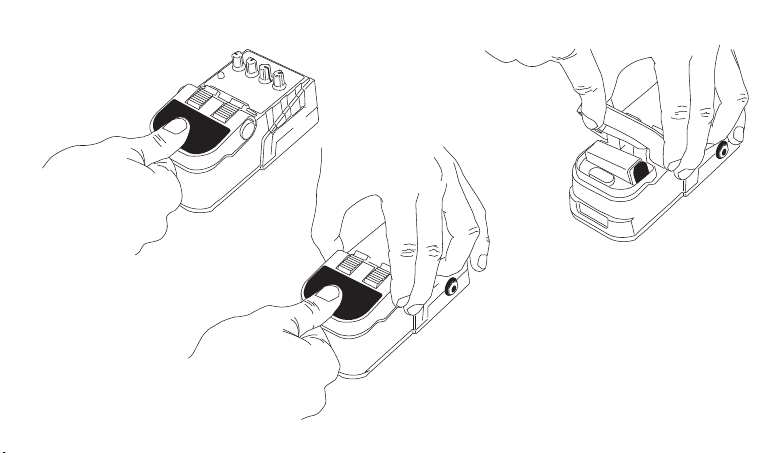
Battery Access Instructions
1) Depress pedal fully.
While holding pedal,
2)
squeeze both sides of
hinge as shown.
Squeezing hinge,
3)
raise pedal to
reveal battery.
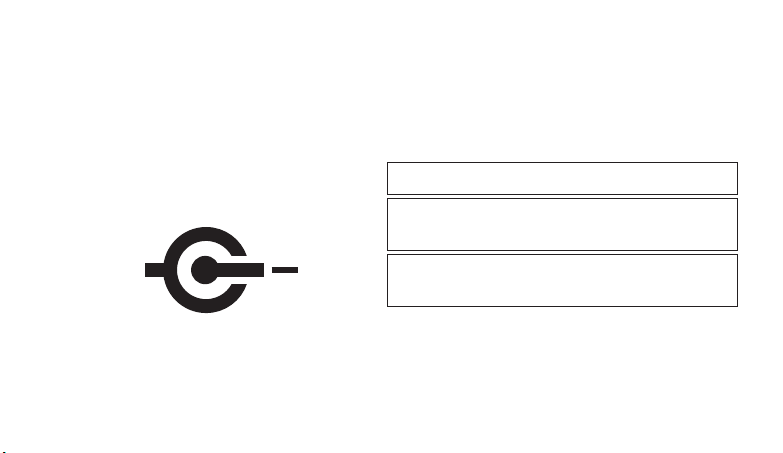
Power Supply
Connect an optional Line 6 DC-1 power supply and
you'll never need a 9-volt battery again! It is also
compatible with most popular 9 Volt DC stomp boxes.
Using the power supply will disconnect the battery.
Battery Access Instructions
POWER REQUIREMENTS
Min Nominal Max
Supply Voltage 6 VDC 9.6 VDC 16 VDC
Supply Current
@ 9.6 VDC 40mADC 60mADC 100mADC
+
Power
@ 9.6VDC 0.4 Watt 0.6 Watt 1 Watt
Space Chorus Pilot’s Handbook
TAP TEMPO:
TAP LIGHTLY
COLOR
CHORUS
•
•
TRI
VIBRATO
SPEED DEPTH
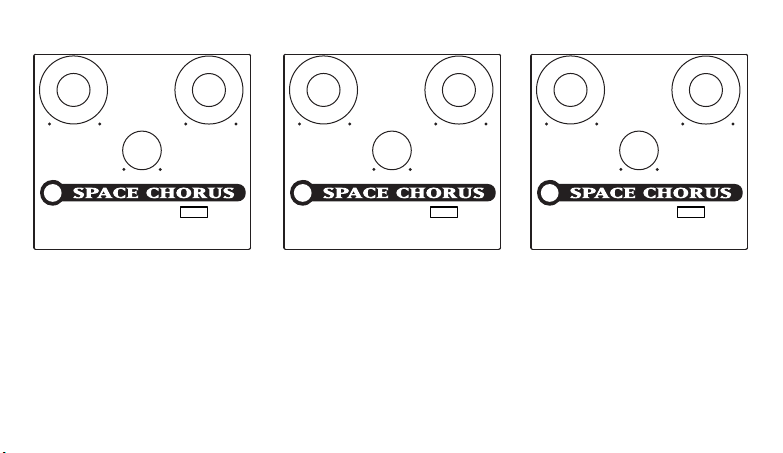
Mark the knob and switch settings for your favorite tones above.Mark the knob and switch settings for your favorite tones above.
TAP TEMPO:
TAP LIGHTLY
COLOR
CHORUS
•
•
TRI
VIBRATO
SPEED DEPTH
TAP TEMPO:
TAP LIGHTLY
COLOR
CHORUS
•
•
TRI
VIBRATO
SPEED DEPTH
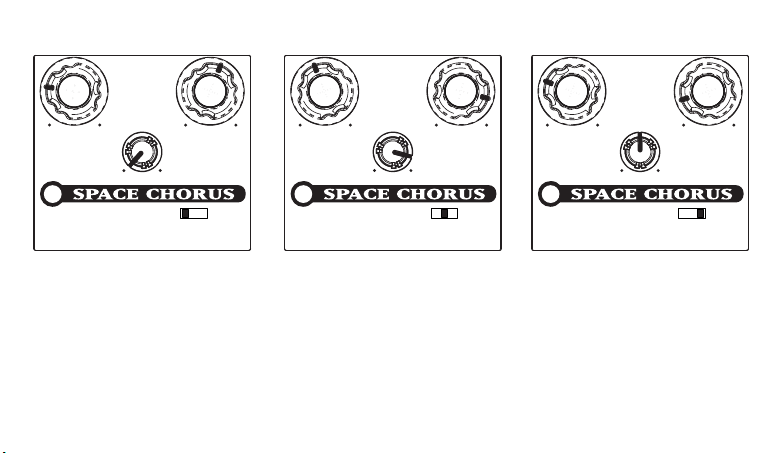
Example Tones
TAP TEMPO:
TAP LIGHTLY
COLOR
CHORUS
•
•
TRI
VIBRATO
SPEED DEPTH
Classic Chorus
Here’s a tasty bit of warm vintage
chorus, perfect for swirling chords
or a glimmering melody.
TAP TEMPO:
TAP LIGHTLY
COLOR
CHORUS
•
•
TRI
VIBRATO
SPEED DEPTH
Los Angeles Chorus
Here’s a taste of the big 80’s Los
Angeles chorus sound that was used
on many fusion records.
TAP TEMPO:
TAP LIGHTLY
COLOR
CHORUS
•
•
TRI
VIBRATO
SPEED DEPTH
Tremolo Arm Vibe
Here’s a nice vibrato, similar to what
you’d get when working your guitar’s
tremolo arm just right.

Space Chorus Pilot’s Handbook
Please register your purchase now at www.line6.com/register. Or fill out and send in the included
registration card. Once you’re registered, we can handle problems faster and inform you of advance information,
upgrades and other news. Thanks in advance for registering, and good luck in your music!
Line 6, Inc. (hereinafter “Line 6”) warrants that your new Line 6 product, when purchased at an authorized Line
6 dealer in the United States of America (“USA”) or Canada, shall be free of defects in materials and workmanship
for a period of one (1) year from the original date of purchase. Please contact your dealer for information on
warranty and service outside of the USA and Canada.
During the warranty period, Line 6 shall, at its sole option, either repair or replace any product that proves to
be defective upon inspection by Line 6.
Line 6 reserves the right to update any unit returned for repair and to change or improve the design of the
product at any time without notice. Line 6 reserves the right to use reconditioned parts and assemblies as
warranty replacements for authorized repairs.
This warranty is extended to the original retail purchaser. This warranty can be transferred to anyone who may
subsequently purchase this product provided that such transfer is made within the applicable warranty period
and Line 6 is provided with all of the following items: (i) all warranty registration information (as set forth on
the registration card) for the new owner, (ii) proof of the transfer within thirty (30) days of the transfer purchase,
and (iii) a photocopy of the original sales receipt. Warranty coverage shall be determined by Line 6 in its sole
discretion.
This is your sole warranty. Line 6 does not authorize any third party, including any dealer or sales representative,
to assume any liability on behalf of Line 6 or to make any warranty for Line 6.

Warranty Information
Line 6 may, at its option, require proof of original purchase date in the form of a dated copy of original authorized
dealer’s invoice or sales receipt.
Service and repairs of Line 6 products are to be performed only at the Line 6 factory or a Line 6 authorized
service center. Line 6 may require advanced authorization of repairs to authorized service centers. Unauthorized
service, repair or modification will void this warranty.
THE FOREGOING WARRANTY IS THE ONLY WARRANTY GIVEN BY LINE 6 AND IS IN LIEU OF ALL OTHER
WARRANTIES. ALL IMPLIED WARRANTIES, INCLUDING WARRANTIES OF MERCHANTABILITY AND FITNESS
FOR ANY PARTICULAR PURPOSE, EXCEEDING THE SPECIFIC PROVISIONS OF THIS WARRANTY ARE HEREBY
DISCLAIMED AND EXCLUDED FROM THIS WARRANTY. UPON EXPIRATION OF THE APPLICABLE EXPRESS
WARRANTY PERIOD (1 YEAR), LINE 6 SHALL HAVE NO FURTHER WARRANTY OBLIGATION OF ANY KIND,
EXPRESS OR IMPLIED. LINE 6 SHALL IN NO EVENT BE LIABLE FOR ANY SPECIAL, INCIDENTAL OR
CONSEQUENTIAL DAMAGES SUFFERED BY THE PURCHASER OR ANY THIRD PARTY, INCLUDING WITHOUT
LIMITATION, DAMAGES FOR LOSS OF PROFITS OR BUSINESS, OR DAMAGES RESULTING FROM USE OR
PERFORMANCE OF THE PRODUCT, WHETHER IN CONTRACT OR IN TORT. LINE 6 SHALL NOT BE LIABLE FOR
ANY EXPENSES, CLAIMS, OR SUITS ARISING OUT OF OR RELATING TO ANY OF THE FOREGOING. Some states
do not allow the exclusion or limitation of implied warranties so some of the above limitations and exclusions may
not apply to you. This warranty gives you specific legal rights, and you may also have other rights, which vary, from state
to state. This warranty only applies to products sold and used in the USA and Canada. Line 6 shall not be liable for
damages or loss resulting from the negligent or intentional acts of the shipper or its contracted affiliates. You should
contact the shipper for proper claims procedures in the event of damage or loss resulting from shipment.
DISCLAIMER AND LIMITATION OF WARRANTY

Customer Service
Before contacting the Line 6 Customer Service team, please take the time to look through this publication to see
if it can answer your questions. Additional helpful information is on the Support page of the Line 6 web site at
www.line6.com/support , including the searchable Knowlegebase/FAQTRAQ system which is often the fastest
and easiest way to get the answers you need.
Need to talk to an actual human on the Line 6 Customer Service team by phone? Have your serial number handy
and take some notes for yourself before you call, so you remember everything you want to ask about. In the USA
or Canada, you can contact Line 6 at (818) 575-3600, 8AM to 5PM Monday through Friday (Pacific Time). Outside
the USA and Canada, please contact your distributor directly to arrange service. The list of Line 6 distributors
is available on the Internet at www.line6.com.
To obtain factory service
You must obtain a return authorization (RA) number before sending any unit to Line 6 for service. Products
returned without an RA number will be returned to your at your sole expense. If you live in the United
States, log an incident in our online support system at www.line6.com/support or call (818) 575-3600 or and we
will help you find the best way to get your unit repaired, whether it be returning the unit to Line 6 or finding an
Authorized Service Center. If you live in Europe, email euroinfo@line6.com or call Line 6 UK at +44 (0)178 882
1600. If you live outside of these areas, please contact your local distributor. If you do not know whom your distributor
is, either call us at (818) 575-3600 or use the distributor locator at www.line6.com/support .


Line 6, ToneCore, Constrictor, Crunchtone, Echo Park, Space Chorus,
Tap Tremolo und Über Metal sind Warenzeichen der Line 6, Inc.
VORSICHT
Dieses Gerät entspricht den Grenzwerten von “Part 15” der FCC-Bestimmungen für Digital-Geräte der Klasse
B. Die Bedienung unterliegt folgenden beiden Bedingungen: (1) Das Gerät darf keine schädlichen Interferenzen
verursachen; (2) das Gerät muss alle empfangenen Interferenzen akzeptieren, darunter auch Interferenzen, die
Funktionsstörungen verursachen könnten.
WARNUNG
Um Brand- und Stromschlaggefahr zu vermeiden, dieses Gerät niemals Regen oder Feuchtigkeit aussetzen.
Das Ausrufezeichen in einem Dreieck
bedeutet “Vorsicht!” Lies dir alle
Informationen neben solchen Symbolen
sorgfältig durch.
Space Chorus – Pilotenhandbuch ©2004, Line 6, Inc.
Der Blitz in einem Dreieck stellt eine
“elektrische Warnung” bezüglich der
benötigten Stromspannung bzw. einer
denkbaren Stromschlaggefahr dar.

Bitte die folgenden wichtigen Sicherheitshinweise
durchlesen. Bewahre diese Anleitung an einem
sicheren Ort auf.
Vor dem Einsatz des ToneCore musst du dir alle zutreffenden Punkte und Sicherheitshinweise durchlesen.
1. Beachte alle auf dem ToneCore selbst und im Pilotenhandbuch aufgeführten Warnungen.
2. Verbinde das optionale Netzteil nur mit einer 100~120V- bzw. 200~240V/47~63Hz-Steckdose (je nachdem, welche Spannung dein Modell benötigt;
siehe das Typenschild des Netzteils).
3. Führe nur die im ToneCore-Pilotenhandbuch erwähnten Bedienvorgänge aus. In folgenden Fällen muss das Produkt zur Reparatur eingereicht werdens:
• wenn das Netzkabel oder der Stecker beschädigt ist
• wenn Flüssigkeiten oder Fremdkörper in das Geräteinnere gelangt sind
• wenn das Produkt Regen oder Feuchtigkeit ausgesetzt war
• wenn sich das Gerät abnormal oder nicht mehr in vollem Umfang erwartungsgemäß verhält
• wenn das Produkt hingefallen ist und das Gehäuse Schäden aufweist.
4. Stelle das Produkt niemals in die Nähe von Wärmequellen, z.B. Heizkörpern, Öfen oder anderen Geräten, die starke Hitze erzeugen.
5. Sorge dafür, dass weder Fremdkörper noch Flüssigkeiten in das Geräteinnere gelangen. Verwende dieses Produkt niemals in der Nähe von Wasser.
6. Löse den Netzanschluss, wenn du das Gerät längere Zeit nicht verwenden möchtest. Im Falle eines Gewitters muss sofort der Netzanschluss gelöst
werden.
7. Reinige diese Produkt nur mit einem feuchten Tuch.
8. Verwende nur Halterungen/Zubehörteile, die vom Hersteller ausdrücklich empfohlen werden.
9. Setze dich niemals über längere Zeiträume hohen Schallpegeln aus, weil das zu Gehörverlust führen kann. Achte immer auf einen auch aus medizinischer
Warte “vernünftigen” Pegel.

Space Chorus-Pilotenhandbuch
Dieses Pedal kann entweder in Mono an
einen Verstärker oder in Stereo an eine
andere Anlage angeschlossen werden
COLOR
SPEED DEPTH
TAP TEMPO:
•
•
CHORUS
TAP LIGHTLY
TRI
Deine Gitarre musst du an
den Mono-Eingang dieses
ToneCore anschließen
VIBRATO
.
MOD
•
TAPE
DIGITAL • ANALOG OFF
Allerdings weist
das ToneCore-
TIMEREPEATMIX
SWEEP
SWELL
DUCKING
MULTI 1
MULTI 2
PING PONG
REVERSE
TRAILS
•
ON
Pedal Stereo-
Eingänge auf, an
die man auch
SLAP
TAP
TAP
NORMAL (TAP )
TAP TEMPO:
TAP LIGHTLY
Stereo-Signale
anlegen kann.

Sei gegrüßt und geküsst! Erstmal vielen Dank, dass du
dich zur Adoption eines “Space Chorus”-Pedals von
Line 6 durchgerungen hast.
Effekt-/Stromdiode
Die Stromdiode zeigt den Status des ToneCore-Pedals
anhand dreier Farben an:
•GRÜN (blinkt)– Der Effekt ist aktiv (an). Die
Diode blinkt im Tempo der Modulationsgeschwindigkeit
•GELB (blinkt)– Der Effekt wird umgangen (aus).
Die Diode blinkt im Tempo der Modulationsgeschwindigkeit
•ROT (blinkt) – Die Batterie muss ausgewechselt
werden. Diese Warnung hat Vorrang vor allen anderen
Angaben.
Anschlüsse und Stromanzeige
Eingänge
Schließe hier das Kabel deiner Gitarre bzw. den
Ausgang eines anderen Effekts an, den du mit diesem
ToneCore kombinieren möchtest. Mono-Signale
müssen an die MONO/L-Buchse des Space Chorus
angelegt werden. Wie die meisten Tretminen wird das
ToneCore eingeschaltet, sobald man hier einen
Klinkenstecker anschließt. Löse beide Eingangsverbindungen, wann immer du das ToneCore-Pedal
nicht verwenden möchtest.
Ausgänge
Diese Buchsen musst du über herkömmliche
Gitarrenkabel mit dem Verstärker bzw. den Eingängen
eines anderen Effektpedals verbinden. Bei MonoVerwendung nur MONO/L anschließen.
Netzanschluss
Wenn du hier ein (optionales) ToneCore-kompatibles
Netzteil wie das DC-1 von Line 6 anschließt, brauchst
du nie mehr eine 9V-Batterie!
Fußschalter
Hiermit schaltest du den Effekt abwechselnd ein und
aus. Das Tempo kann auch per Fuß eingestellt werden
(“Tap Tempo”).
Space Chorus-Pilotenhandbuch
SPEED DEPTH
COLOR
Speed
Hiermit kann die Effektgeschwindigkeit eingestellt
werden. Im Falle eines Chorus-Effekts muss man
DEPTH bei hohen SPEED-Werten in der Regel
verringern, um unbrauchbare Ergebnisse zu vermeiden.
(Siehe auch “Tap Tempo”.)
Depth
Hiermit kann die Effektintensität eingestellt werden.
TAP TEMPO:
TAP LIGHTLY
Modi des COLORReglers für Vibrato:
Vintage
CHORUS
Blue
•
•
TRI
VIBRATO
Color
Mit dem COLOR-Regler werden mehrere SoundAspekte beeinflusst:
• Bei Anwahl des “Chorus”-Modells kann man den
Sound mit COLOR zwischen “analog” (ganz links) und
“modern” (ganz rechts) ändern.
• Im Falle des “Tri”-Modells dient COLOR zum
Regeln der Klangfarbe (“dumpf” bis “hell perlend”).
Euro
• Bei “Vibrato” dient COLOR als 3-fach-Schalter für
die Anwahl von “Vintage”, “Blue” und “Euro” (siehe
links).

Modellwahlschalter
Hiermit kannst du die virtuellen Schaltkreise des Space
Chorus “umpolen” und eine von drei Bearbeitungen
wählen:
Chorus: Dieses Modell beruht auf einem ChorusEffekt, der die gleiche “Kaskadentechnik” verwendet
wie die Analog-Echos seliger. Bei Verwendung eines
Mono-Eingangssignals werden das Chorus-Signal über
den linken und das trockene Signal über den rechten
Ausgang ausgegeben. Ist das Eingangssignal stereo, so
wird das Effektsignal über beide Kanäle ausgegeben.
Tri: Hiermit erzielst du jenen dezent modulierten SuperChorus, der in vielen Studios nach wie vor als
“Geheimwaffe” gehandelt wird.
Vibrato: Hiermit versiehst du das Eingangssignal mit
Tonhöhenmodulationen beliebter Vibrateure.
Bedienelemente
Tap Tempo
Sorge mit deinem starken rechten Fuß dafür, dass sich
Space Chorus in den Song-Groove einklinkt! Der
Fußtaster des ToneCore hat eine Doppelfunktion und
erlaubt u.a. das “Tappen” des gewünschten Tempos. Das
geht so:
• Auch wenn der Effekt umgangen wird, kann man die
Effektgeschwindigkeit durch leichtes Betätigen des
Pedals einstellen. Mit den ersten beiden “Taps”
bestimmst du das Tempo. Alle weiteren Taps, die innerhalb von 3 Sekunden erfolgen, werden ebenfalls berücksichtigt.
• Wenn du den Schalter etwas kräftiger drückst, wird
jedoch nur der Effekt ein-/ausgeschaltet – das gilt also
nicht als “Tap”.
• Bei Verwendung der Tap Tempo-Funktion wird die
Einstellung des SPEED-Reglers ignoriert. Drehst du
danach am SPEED-Regler, so wird umgekehrt das
getappte Tempo ignoriert.
• Die Diode blinkt jeweils im eingestellten Tempo:
Grün, wenn der Effekt aktiv ist und orange, wenn er
umgangen wird.
 Loading...