

Page 1
Ultra High-Speed,High-capacity Multi-camera
Machine Vision System
XG Series
Easy Setup Guide
372GB
FTP Image Output - FileZilla
Page 2

Contents
Easy Setup Guide: FTP Image Output - FileZilla
1. Installing and Setting Up the FileZilla Server
2. Configuring the XG FTP Settings
3. In the back of the manual: Troubleshooting - Connection Problems
Page 3
Page
12
Page 18
KEYENCE CORPORATION. Vision System Division
‐ 2 ‐ www.keyence.com
Page 3
Saving images from XG to PC via FTP (Using FileZilla)
This example uses the free FTP software FileZilla as a representative example of an FTP server software.
We cannot guarantee that all FTP server software, including FileZilla, can communicate with the XG Series.
Be sure to confirm that communication is possible beforehand.
✎Downloading, Installing and Setting Up FileZilla Server.
1
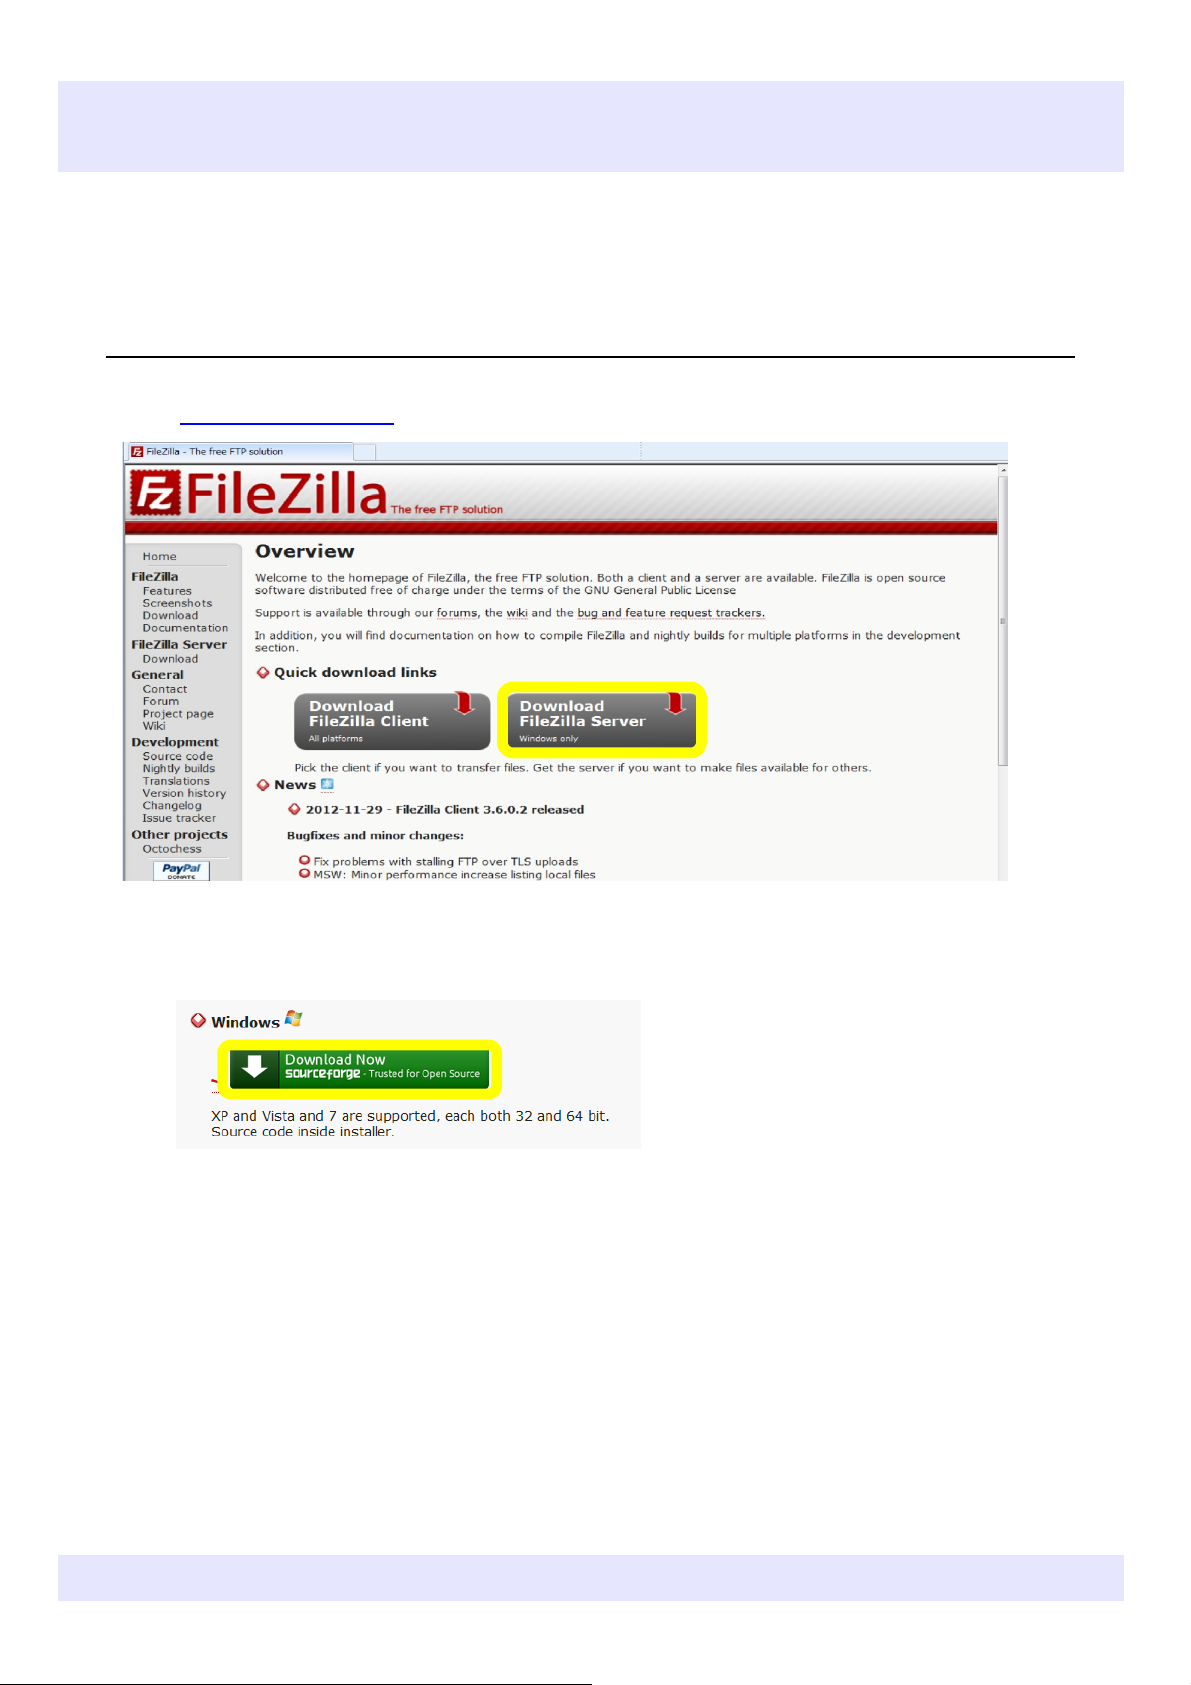
Download FileZilla Server (Be sure not to download FileZilla Client by mistake)
http://filezilla-project.org/
2
Select the Windows version. (This manual uses Windows 7 as a base to explain operations)
FileZilla supports both the 32 bit and 64 bit versions of XP, Vista and 7.
KEYENCE CORPORATION. Vision System Division
372GB
- 3 - www.keyence.com
Page 4

3
Select "I Agree".
4
Do not change the boxes that are checked. Select "Next >".
KEYENCE CORPORATION. Vision System Division
‐ 4 ‐ www.keyence.com
Page 5
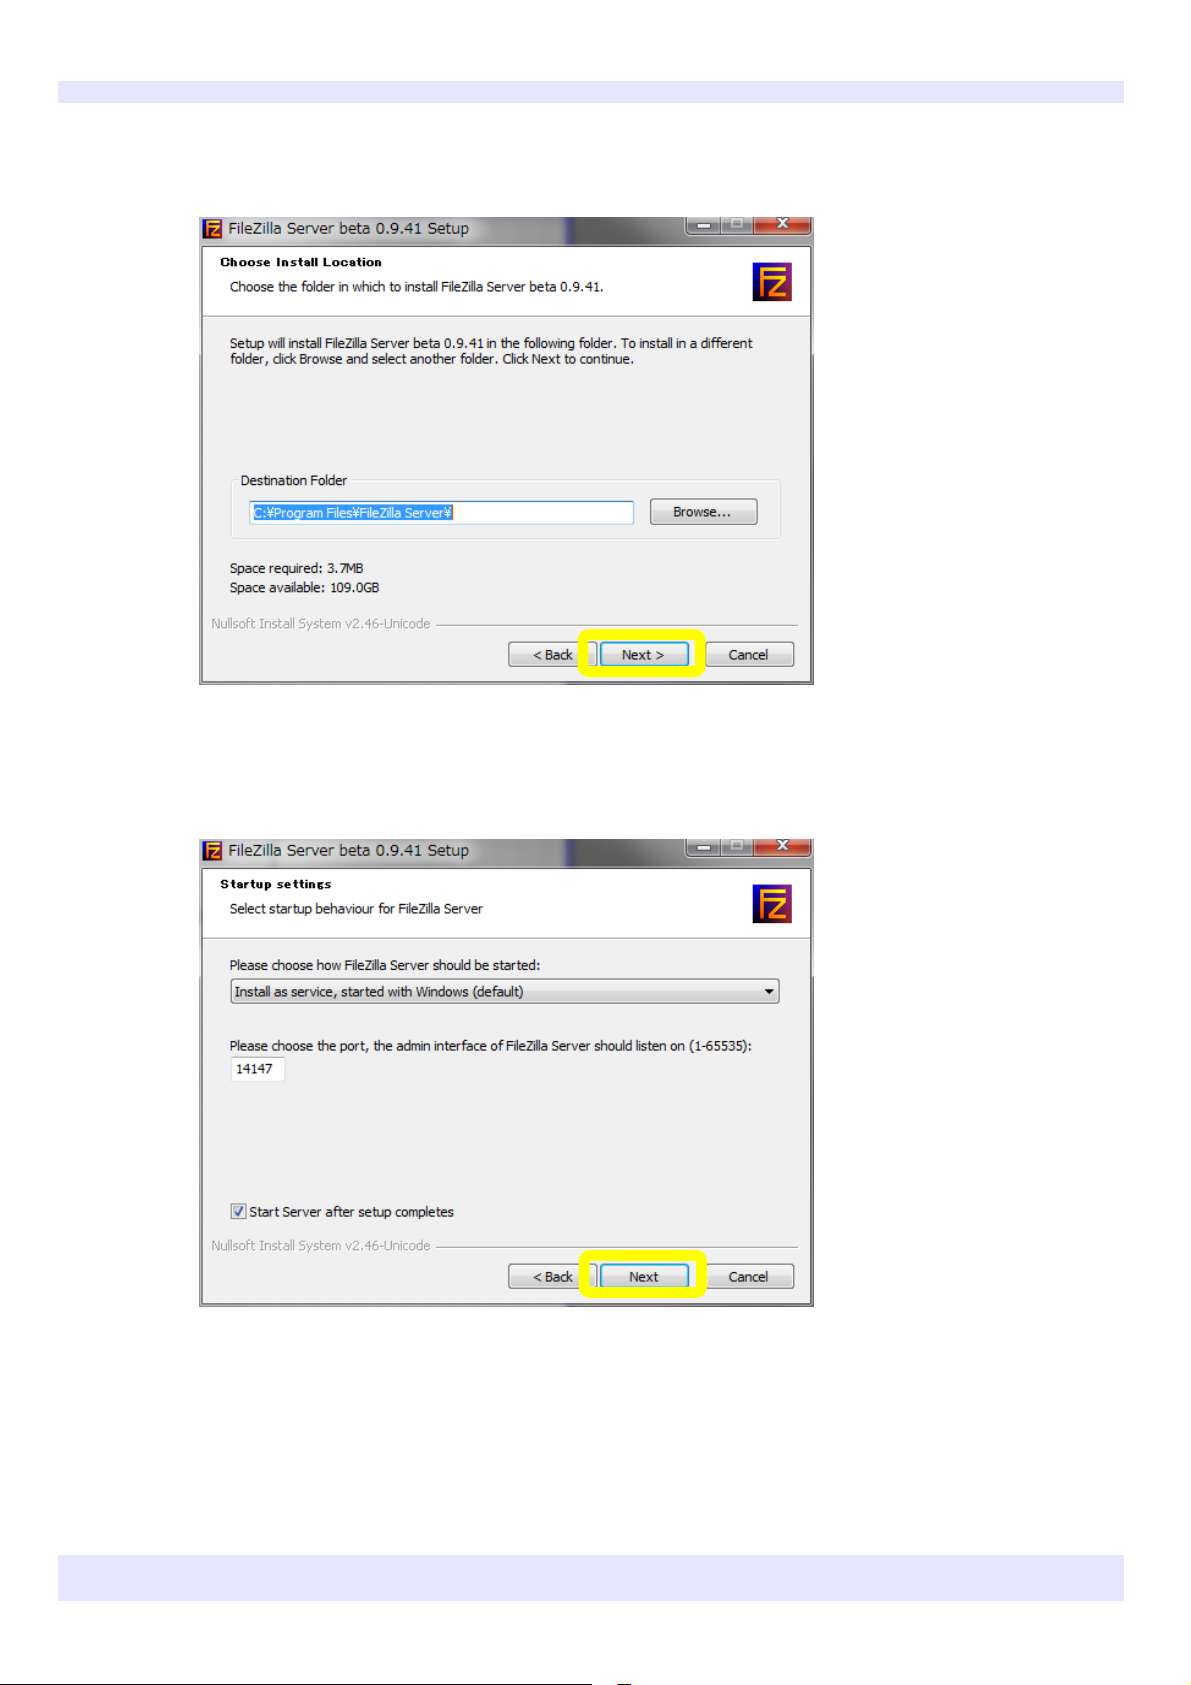
5
Specify a folder to install in and select "Next >".
6
Do not change the settings. Select "Next".
KEYENCE CORPORATION. Vision System Division
‐ 5 ‐ www.keyence.com
Page 6
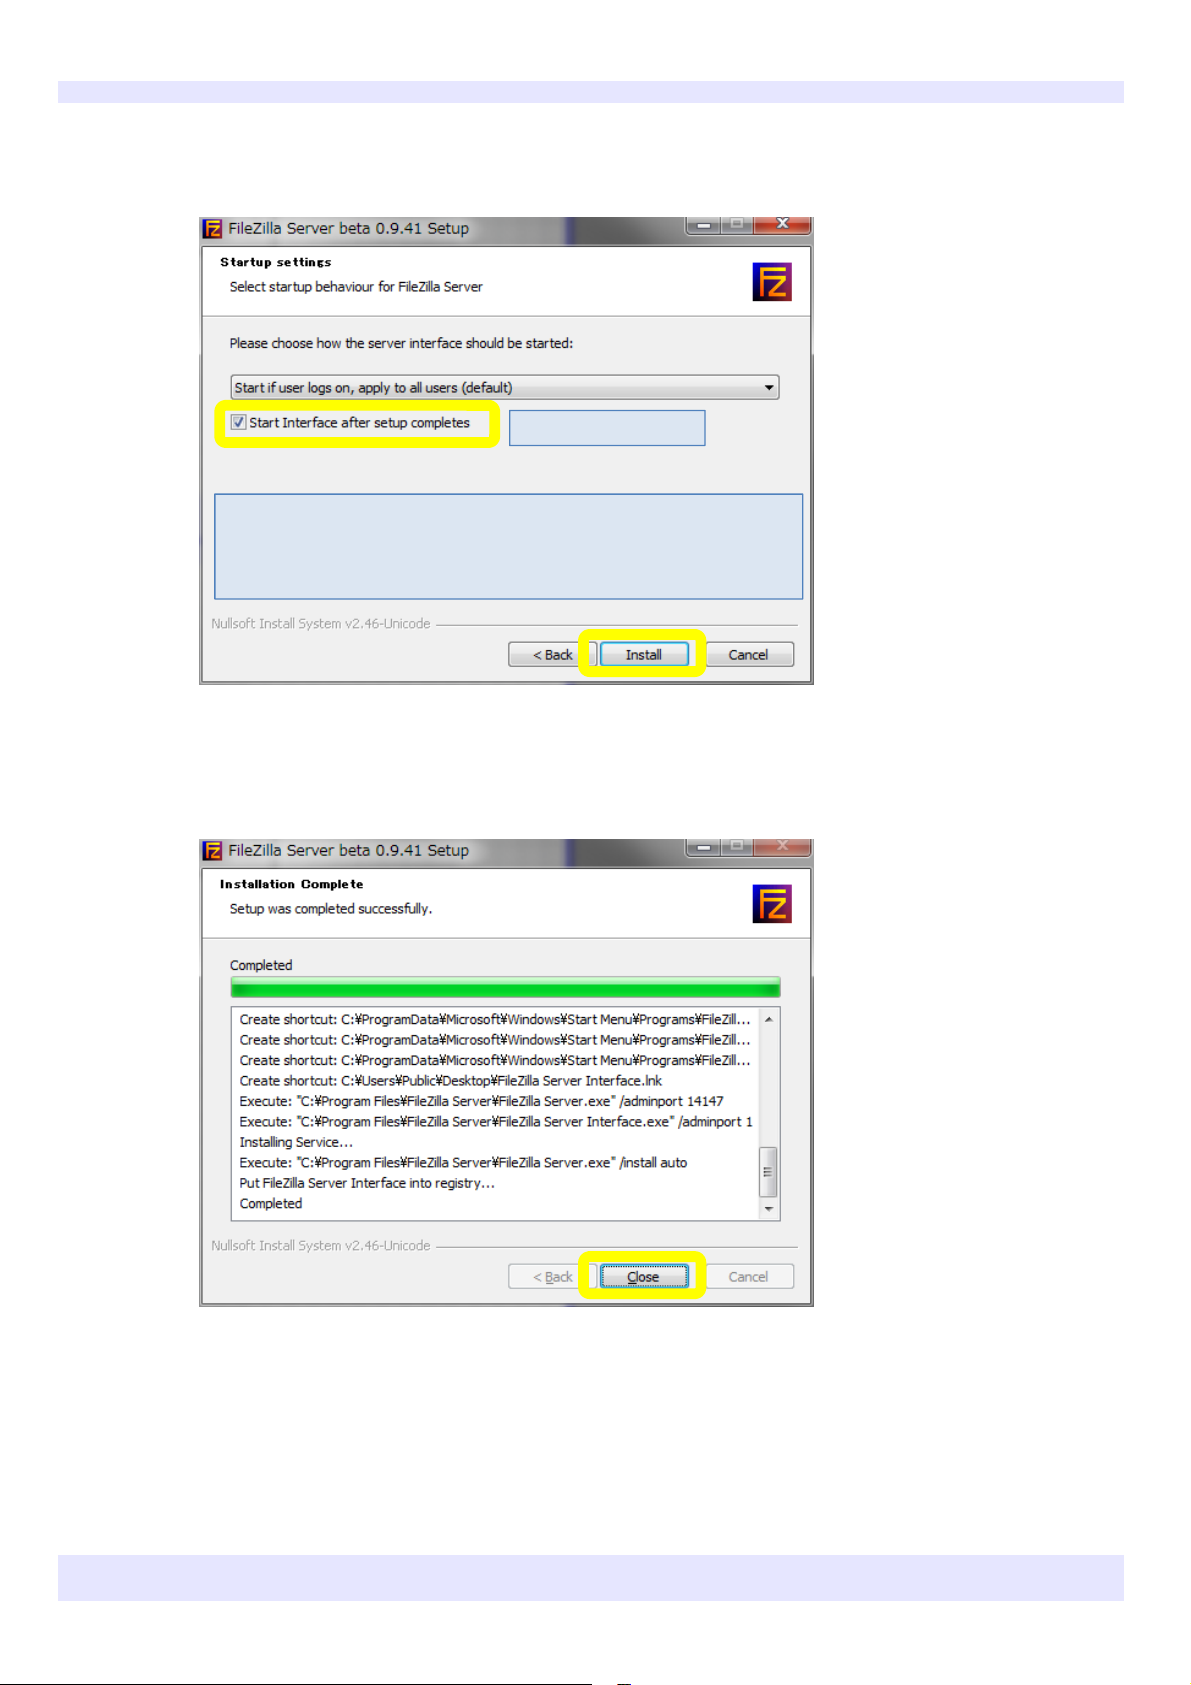
7
Do not change the settings. Select "Install".
For reference: The default setting is to start up FileZilla automatically
when the PC starts up, as selected here. To start FileZilla manually,
select "Start manually".
Check this box.
8
Select "Close" when the installation is complete.
KEYENCE CORPORATION. Vision System Division
‐ 6 ‐ www.keyence.com
Page 7
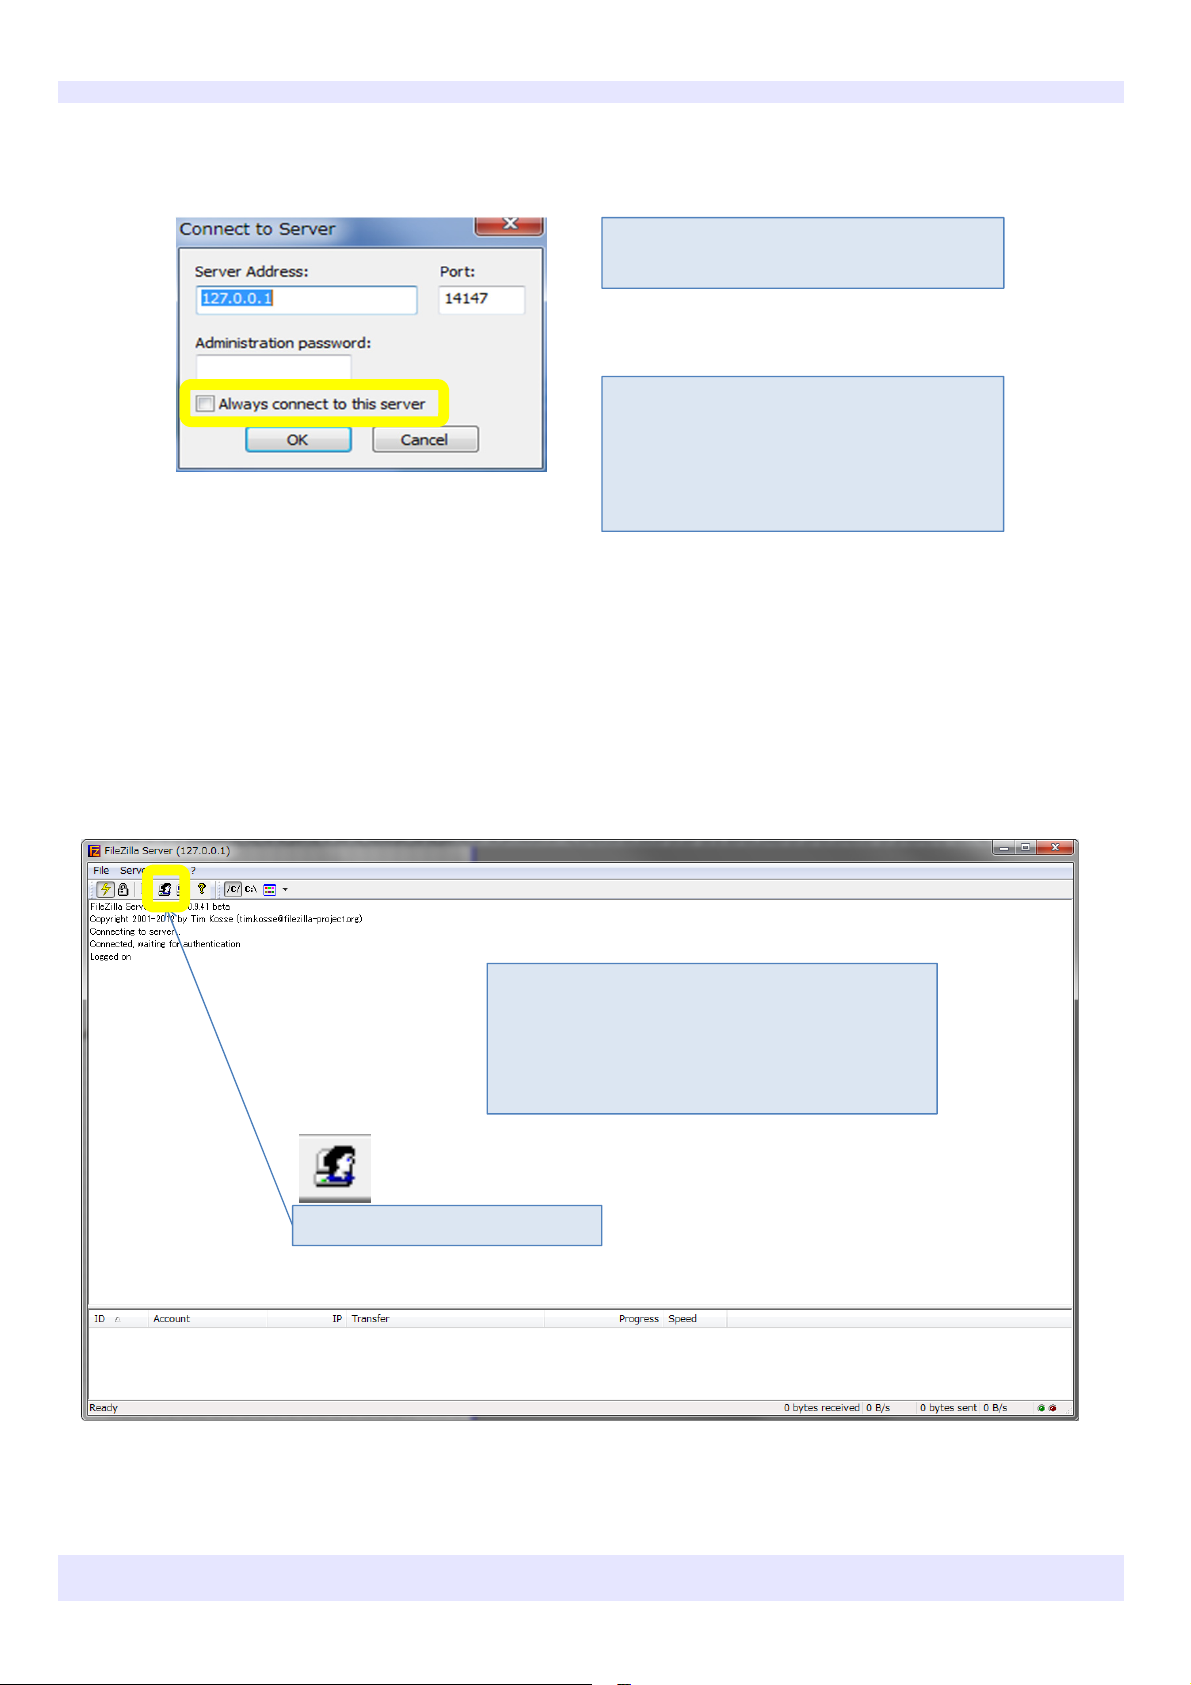
9
Do not change the settings below unless necessary. Press "OK".
[Important] Do not change the Server Address
or Port.
For reference: If you do not want the
"Connect to Server" dialog box to be displayed
again during start‐up, check the "Always
connect to this server" box.
(This box can be checked or left unchecked.)
10
The software automatically starts up when the installation is complete.
A screen like this should appear.
If "Error" appears in red letters, "Start Interface
after setup completes" was not checked in step 7.
In this case, the software must be reinstalled.
Next, press this button.
KEYENCE CORPORATION. Vision System Division
‐ 7 ‐ www.keyence.com
Page 8

11
Select "Add".
12
Enter a user name and select "OK". ("abc" is a temporary user name. Choose and enter a new user name)
Make a note of the user name as it will be
used in the XG settings.
KEYENCE CORPORATION. Vision System Division
‐ 8 ‐ www.keyence.com
Page 9

13
Check the "Password" box, and set a password.
Make a note of the password
you set as it will be used later.
14
Select "Shared folders".
KEYENCE CORPORATION. Vision System Division
‐ 9 ‐ www.keyence.com
Page 10

15
Select "Add".
16
Specify the folder to be written to by the FTP.
In this example, the desktop is
specified.
The path cannot contain any full‐
width characters.
Specify a folder with a path that
contains only half‐width characters
(standard English characters).
KEYENCE CORPORATION. Vision System Division
‐ 10 ‐ www.keyence.com
Page 11

17
Check all of the boxes under "Files" and "Directories".
The FileZilla setup is now
complete. Press "OK".
[Important] Ensure that
the boxes are checked like
this.
KEYENCE CORPORATION. Vision System Division
‐ 11 ‐ www.keyence.com
Page 12

✎Configuring the XG FTP Settings
1
Configure the XG settings. Press the FNC button on the console, and select "Go Offline" from the function
menu.
2
While offline, select "FTP" from the "Communications&I/O" submenu.
KEYENCE CORPORATION. Vision System Division
‐ 12 ‐ www.keyence.com
Page 13

3
In general the settings can be left as they are, but make sure that the Server Port No. is 21.
[Important] Do not change the Server
Port No. from 00021 unless absolutely
necessary.
There is no "High Speed Mode" option
for the XG‐7000 Series.
For the XG‐8000 Series, turn the "High
Speed Mode" on as necessary.
For Reference: About the FTP High Speed Mode
When "High Speed Mode" is on, data can be output from the FTP even faster. As a
result, output from things other than the FTP may become slow, and it may take longer
for the display to refresh.
4
Select "Settings" ⇒ "Target FTP Server Settings" from the return flow editing screen in run mode.
KEYENCE CORPORATION. Vision System Division
‐ 13 ‐ www.keyence.com
Page 14

5
Specify the Server IP Address, User ID and Password.
Specify the Server (PC in this
example) IP Address.
Enter the User Name and
Password set in FileZilla.
The other settings can be left as
the default.
When the settings are complete,
press the OK button to close the
window.
6
Configure the Image Archive settings.
KEYENCE CORPORATION. Vision System Division
‐ 14 ‐ www.keyence.com
Page 15

7
Enable the archive conditions, and set "Output Location" to "FTP".
Check the "Enable" box.
Set the conditions that images must
meet to be saved in "Reference".
If set to "None", all images are saved.
(It may not be possible to save all
images depending on the operating
conditions.)
Set the "Output Location" to
"FTP".
Select "Settings".
8
Set a destination folder.
Place the cursor over this box
and click the button (0).
KEYENCE CORPORATION. Vision System Division
‐ 15 ‐ www.keyence.com
Page 16

9
If the settings are valid, the PC desktop folders appear, and the connection can be confirmed.
If the settings are correct, the desktop
can be seen from the XG, and the
folders are displayed.
Full‐width characters will appear
corrupted.
Folder names that include full‐width
The desktop folders
are displayed.
characters cannot be specified as the
destination folder.
In this example, there is no folder
called XG on the desktop when the
were finished.
In this case, the /xg/hist/ folder will
be automatically created when the XG
operates.
KEYENCE CORPORATION. Vision System Division
If the settings are not valid, a "Failed to
connect to FTP server." error will occur.
Check the settings again.
‐ 16 ‐ www.keyence.com
Page 17

10
When these settings have been configured, images will be saved to the FTP server when the unit is operating.
This screenshot shows the destination
folder when it is checked again after
operating the XG and saving images.
Confirm that the /xg/hist/(camera
number)_(year month day)_(hour
minute second) folder has been created.
Images are saved to this folder.
11
To check the images saved to the FTP server during operation...
Images on the FTP server can be
browsed using the image strip.
・Use the MENU button to display the
image strip
↓
・"Image Strip Files Settings"
↓
・"SD Card / FTP"
↓
・Set "Device" to "FTP"
↓
・Specify the folder you wish to check.
The images on the FTP server are
displayed in the image strip. They can be
confirmed, or tests can be performed
again.
KEYENCE CORPORATION. Vision System Division
‐ 17 ‐ www.keyence.com
Page 18

✎Troubleshooting - Connection Problems
1
(1) Change the Windows firewall settings (For Windows 7)
You may not be able to connect due to security software or the Windows firewall settings.
‐ From the Start menu, select "Control Panel" ⇒ "Security" ⇒ "Windows Firewall" to
open this window.
(In this screenshot, the settings are being managed by Symantec antivirus software.)
Change the Windows firewall settings to unblock or block programs as necessary.
Check how to configure the settings with the network administrator before changing any
settings.
*Note
It may pose a risk to change these
settings on a PC that is connected to
internal or external company networks.
Set up a PC only for using FileZilla, or
check with the network administrator
before changing the settings.
2
(2) Use a fixed IP Address
If the IP Address settings are set to DHCP (set automatically), it may not be possible to
connect.
In this case, specify a fixed IP Address.
For Windows 7
‐ From the Start menu select "Control Panel" ⇒ "Network and Internet" ⇒ "Network and
Sharing Center" to open the above window.
*Note
If these settings are changed, it may not
be possible to connect to internal or
external company networks.
Change the settings back as necessary.
KEYENCE CORPORATION. Vision System Division
‐ 18 ‐ www.keyence.com
Page 19

3
(2) Use a fixed IP Address
Select "Local Area Connection".
4
(2) Use a fixed IP Address
Select
"Properties".
KEYENCE CORPORATION. Vision System Division
‐ 19 ‐ www.keyence.com
Page 20

5
(2) Use a fixed IP Address
Select "Internet Protocol Version 4 (TCP/IPv4)",
and then select "Properties".
6
(2) Use a fixed IP Address
When the settings are configured
like this...
Configure the settings as shown above.
Set the IP Address and Subnet Mask to the
following:
IP Address: 192.168.0.20
Subnet Mask: 255.255.255.0
The Default Gateway and other settings can
be left blank.
KEYENCE CORPORATION. Vision System Division
‐ 20 ‐
www.keyence.com
Page 21

Page 22

Copyright (c) 2014 KEYENCE CORPORATION. All rights reserved. 197114E 1084-1 372GB Printed in Japan
 Loading...