

Page 1

Operation and Safety Manual
TOUCAN 800
TOUCAN 870
English - Operation and Safety Manual - Original Instructions
31210031
January 01, 2010
Page 2

Page 3

FOREWORD
FOREWORD
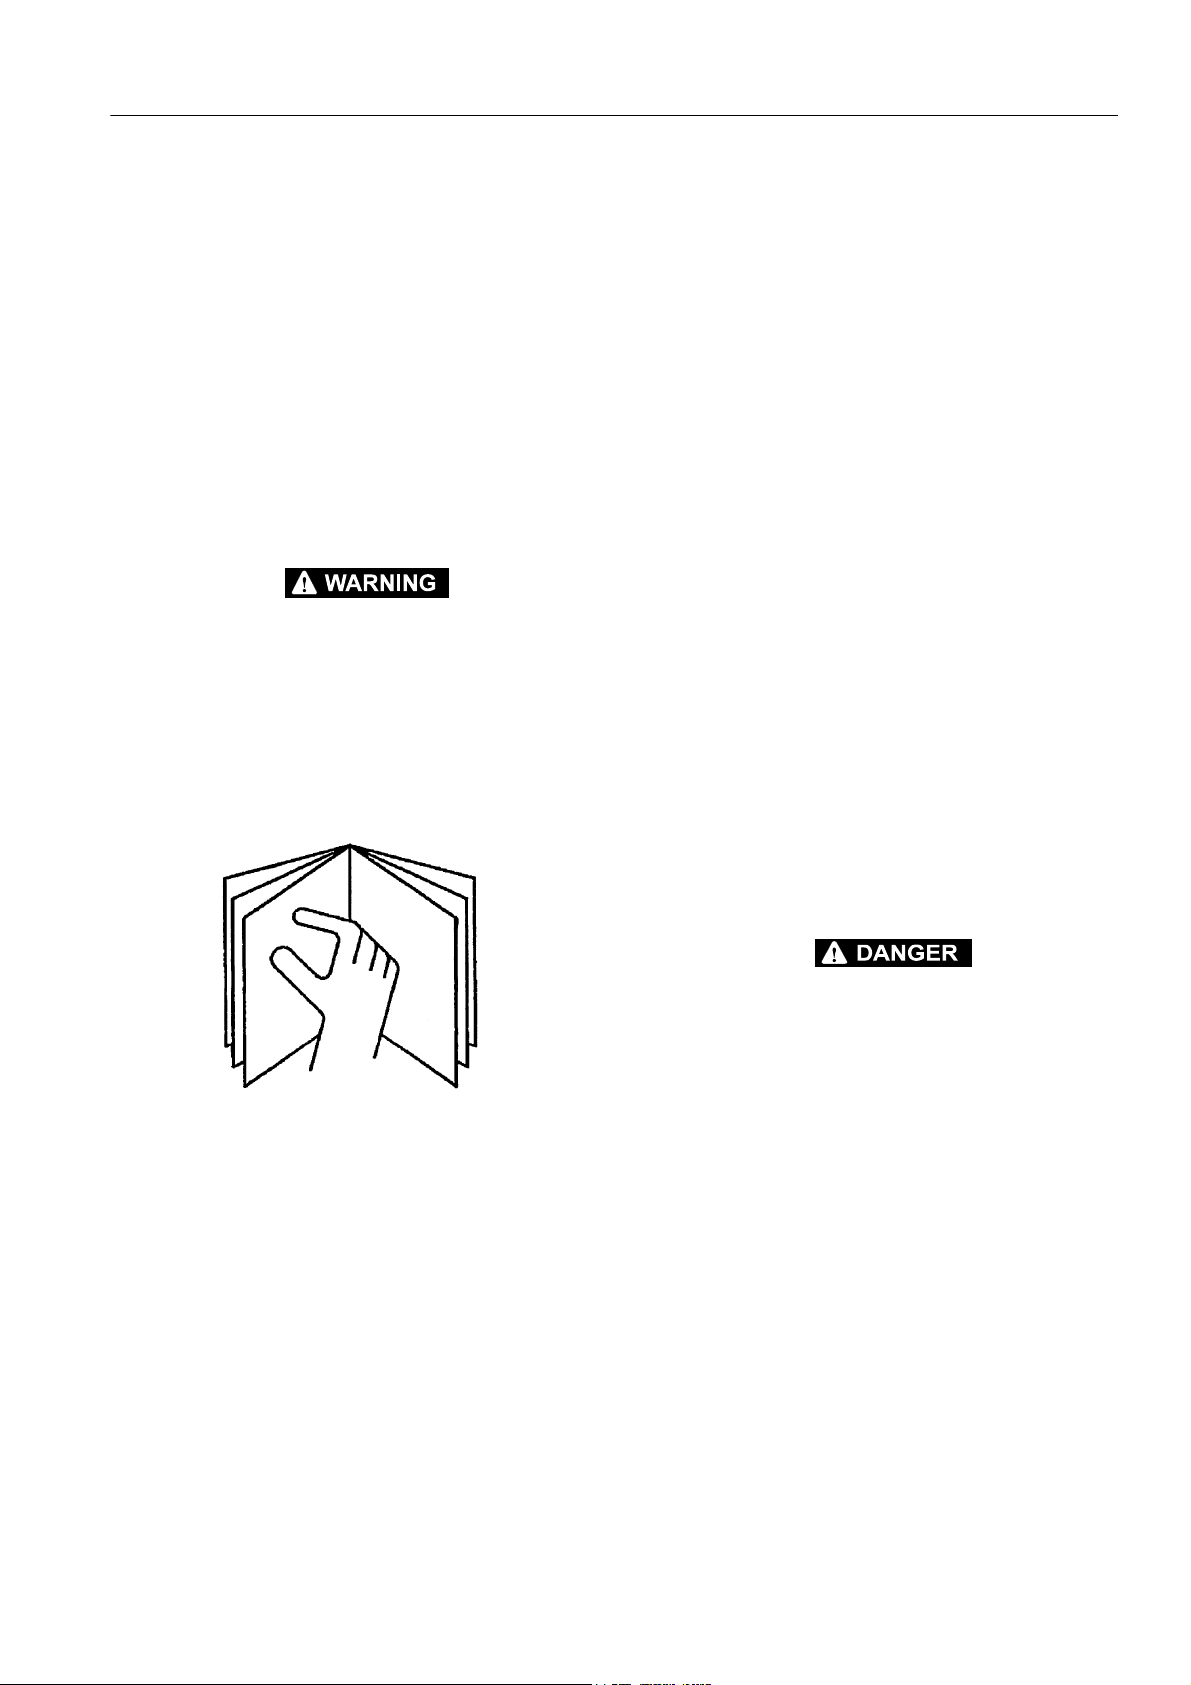
This manual is a very important tool! Keep it with the machine at all times.
The purpose of this manual is to provide owners, users, operators, lessors, and lessees with the precautions and
operating procedures essential for the safe and proper machine operation for its intended purpose.
Due to continuous product improvements, JLG Industries, Inc. reserves the right to make specification changes
without prior notification. Contact JLG Industries, Inc. for updated information.
Other Publications Available:
Service and Maintenance Manual French ........................................... MA0306
Service and Maintenance Manual English .......................................... MA0318
Illustrated Parts Manual Toucan 800..................................................31210056
Illustrated Parts Manual Toucan 870..................................................31210058
Hydraulic schematic Toucan 800.......................................................... FL0147
Hydraulic schematic Toucan 870.......................................................... FL0146
Electrical schematic .............................................................................. ELE240
31210031 – JLG Lift – a
Page 4
FOREWORD
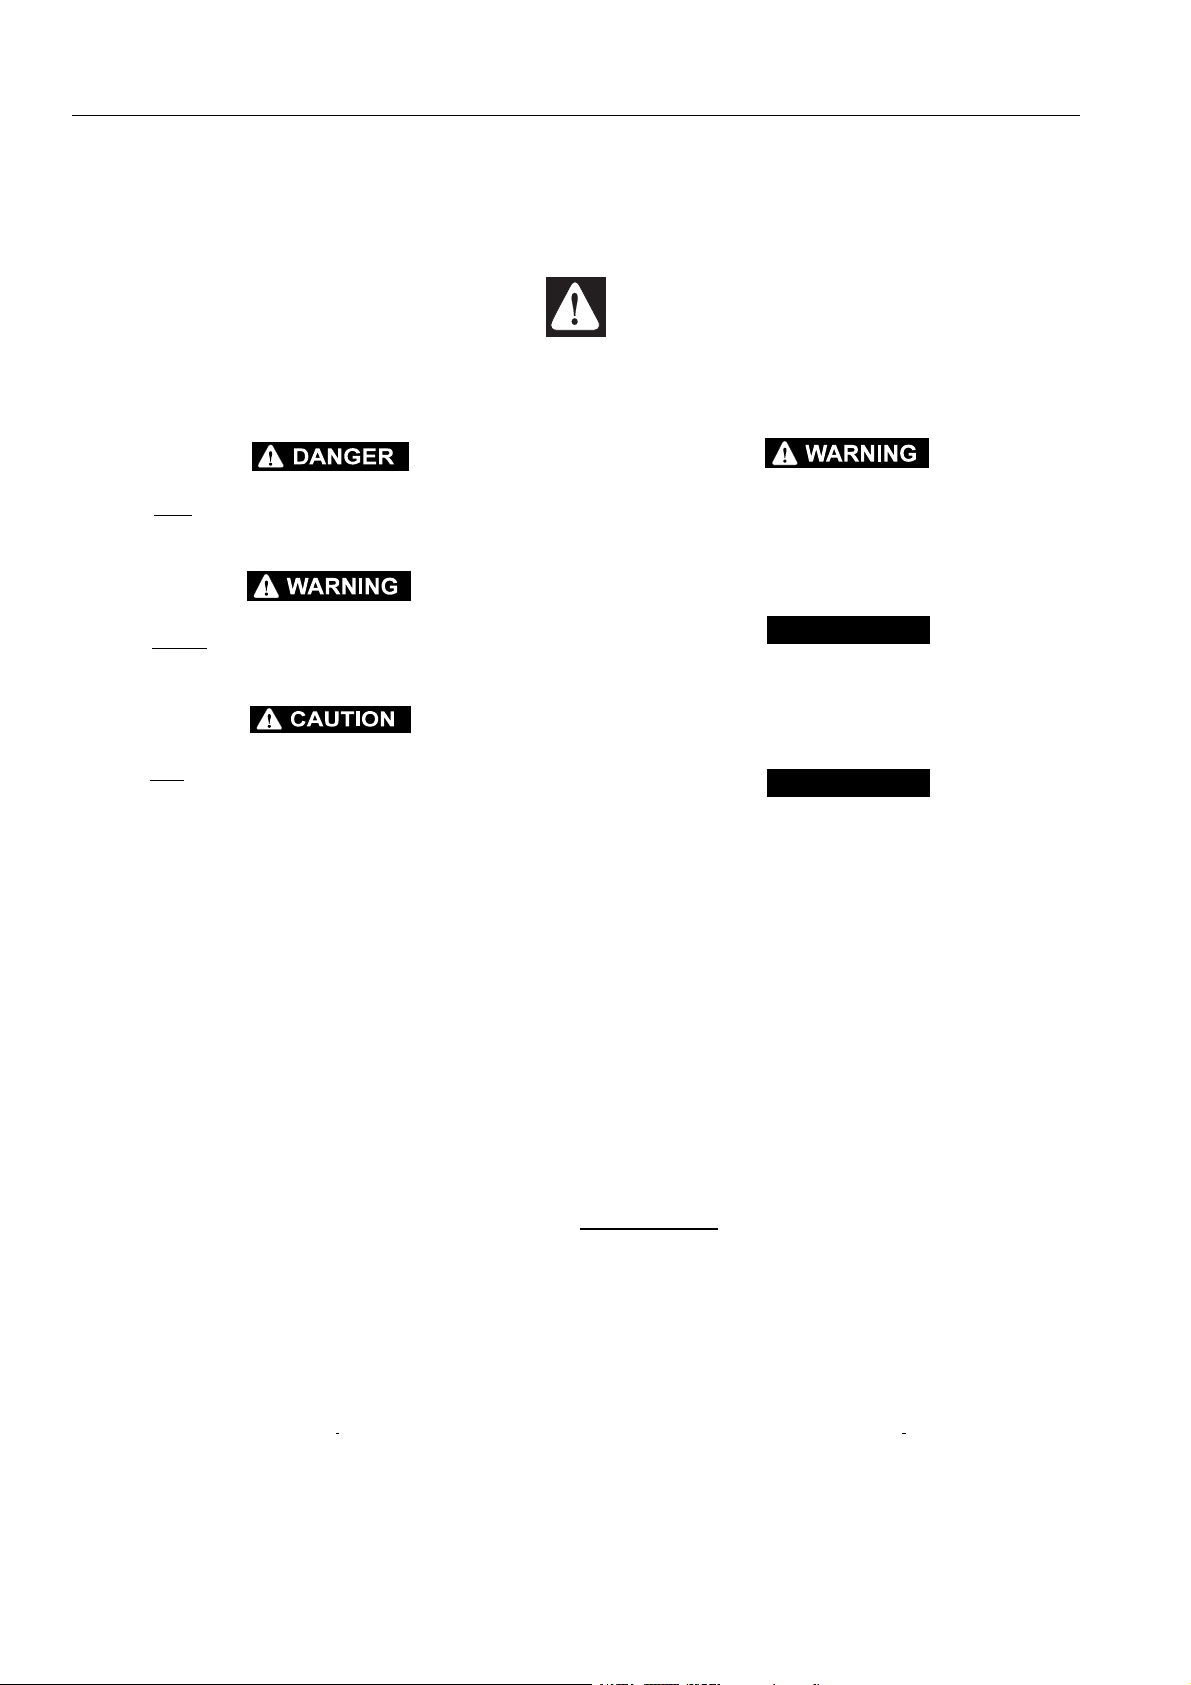
SAFETY ALERT SYMBOLS AND SAFETY SIGNAL WORDS
This is the Safety Alert Symbol. It is used to alert you to the potential personal
injury hazards. Obey all safety messages that follow this symbol to avoid possible
injury or death.
INDICATES AN IMMINENTLY HAZARDOUS SITUATION. IF NOT
AVOIDED, WILL
DECAL WILL HAVE A RED BACKGROUND.
INDICATES A POTENTIALITY HAZARDOUS SITUATION. IF NOT
AVOIDED, COULD
DECAL WILL HAVE AN ORANGE BACKGROUND.
INDICATES A POTENTIALITY HAZARDOUS SITUATION. IF NOT
AVOIDED, MAY RESULT IN MINOR OR MODERATE INJURY. IT MAY
ALSO ALERT AGAINST UNSAFE PRACTICES.
INDICATES PROCEDURES ESSENTIAL FOR SAFE OPERATION.
THIS DECAL WILL HAVE A YELLOW BACKGROUND.
RESULT IN SERIOUS INJURY OR DEATH. THIS
RESULT IN SERIOUS INJURY OR DEATH. THIS
THIS PRODUCT MUST COMPLY WITH ALL SAFETY RELATED BULLETINS, CONTACT JLG INDUSTRIES, INC. OR THE LOCAL AUTHORIZED JLG REPRESENTATIVE FOR INFORMATION REGARDING
SAFETY-RELATED BULLETINS WHICH MAY HAVE BEEN ISSUED
FOR THIS PRODUCT.
JLG INDUSTRIES, INC. SENDS SAFETY RELATED BULLETINS TO
THE OWNER OF RECORDS OF THIS MACHINE. CONTACT JLG
INDUSTRIES, INC. TO ENSURE THAT THE CURRENT OWNER
RECORDS ARE UPDATED AND ACCURATE.
JLG INDUSTRIES, INC. MUST BE NOTIFIED IMMEDIATELY IN ALL
INSTANCES WHERE JLG PRODUCTS HAVE BEEN INVOLVED IN
AN ACCIDENT INVOLVING BODILY INJURY OR DEATH OF PERSONNEL OR WHEN SUBSTANTIAL DAMAGE HAS OCCURRED TO
PERSONAL PROPERTY OR THE JLG PRODUCT.
For:
• Accident Reporting
• Product Safety Publications
• Current Owner Updates
• Questions Regarding Product Safety
CONTACT:
• Standards and Regulations Compliance Information
• Questions Regarding Special Product Applications
• Questions Regarding Product Modifications
In USA: Outside USA:
JLG Industries, Inc.
Product Safety & Reliability Department,
13224 Fountain Head Plaza
Hagerstown, MD
USA 21742
Toll Free :+1 (877) 554-7233
Tel. : +1 (240) 420-2661
Fax : +1 (301) 745-3713
Email : ProductSafety@JLG.com
JLG Industries,
Wright Business Centre,
1 Lonmay Road
Queenslie
Glasgow,
Scotland G33 4EL
Tel : +44(0)141 781 6700
Fax : +44(0)141 773 1907
Email : ProductSafety@JLG.com
IMPORTANT
IMPORTANT
or Your Local JLG Office
(see adresses on manual rear cover)
b – JLG Lift – 31210031
Page 5

REVISION LOG
Original Issue - September 14, 2007
Revision - January 01, 2010
FOREWORD
31210031 – JLG Lift – c
Page 6

FOREWORD
d – JLG Lift – 31210031
Page 7

TABLE OF CONTENTS
SECTION - 1 - SAFETY PRECAUTIONS
1.1 GENERAL . . . . . . . . . . . . . . . . . . . . . . . . . . . 1-1
1.2 PRE-OPERATION. . . . . . . . . . . . . . . . . . . . . 1-1
Operator Training and Knowledge. . . . . 1-1
Workplace Inspection. . . . . . . . . . . . . . . 1-1
Machine Inspection . . . . . . . . . . . . . . . . 1-1
1.3 OPERATION . . . . . . . . . . . . . . . . . . . . . . . . . 1-1
General . . . . . . . . . . . . . . . . . . . . . . . . . . 1-1
Trip and Fall Hazards . . . . . . . . . . . . . . . 1-2
Electrocution Hazards . . . . . . . . . . . . . . 1-2
Tipping Hazards . . . . . . . . . . . . . . . . . . . 1-3
Crushing and Collision Hazards . . . . . . 1-3
1.4 TOWING, LIFTING, AND HAULING . . . . . . . 1-4
1.5 ADDITIONAL HAZARDS / SAFETY . . . . . . . 1-4
SECTION - 2 - USER RESPONSIBILITIES, MACHINE
PREPARATION, AND INSPECTION
2.1 PERSONNEL TRAINING . . . . . . . . . . . . . . . 2-1
Operator Training . . . . . . . . . . . . . . . . . . 2-1
Training Supervision. . . . . . . . . . . . . . . . 2-1
Operator Responsibility . . . . . . . . . . . . . 2-1
2.2 PREPARATION, INSPECTION, AND MAINTE-
NANCE . . . . . . . . . . . . . . . . . . . . . . . . . . . . . 2-1
2.3 PRE-START INSPECTION . . . . . . . . . . . . . . 2-3
2.3.1 Walk-Around Inspection. . . . . . . . . . . . . . . . 2-5
2.3.2 Function Check . . . . . . . . . . . . . . . . . . . . . . 2-6
Control Stations . . . . . . . . . . . . . . . . . . . 2-6
Tilt Sensor Check . . . . . . . . . . . . . . . . . . 2-6
Overload Sensor Check (Toucan 800 & Toucan
800 DI) 2-7
Slack / Broken Chain Sensors Check . . 2-8
Gate sensors check (Toucan 800 DI only) 2-8
SECTION - 3 - MACHINE CONTROLS AND INDICATORS
3.1 GENERAL . . . . . . . . . . . . . . . . . . . . . . . . . . . 3-2
3.2 CONTROLS AND INDICATORS. . . . . . . . . . 3-2
Ground Control Station . . . . . . . . . . . . . 3-3
Manual Lowering Controls . . . . . . . . . . . 3-5
Platform Control Station . . . . . . . . . . . . . 3-6
Platform Control Indicator Panel. . . . . . . 3-7
SECTION - 4 - MACHINE OPERATION
4.1 EMERGENCY CONTROL OPERATION . . . . 4-1
Platform/Off/Ground Selector Switch. . . 4-1
Emergency Stop Switch. . . . . . . . . . . . . 4-1
4.2 PLATFORM CONTROLS . . . . . . . . . . . . . . . 4-1
Drive Speed Selector Switch . . . . . . . . . 4-1
Traveling (Driving) . . . . . . . . . . . . . . . . . 4-1
Raising And Lowering The Mast . . . . . . 4-3
Raising And Lowering The Jib . . . . . . . . 4-4
Slewing The Turntable . . . . . . . . . . . . . . 4-4
Work Platform Functions Combination . 4-4
4.3 MANUAL LOWERING CONTROLS . . . . . . . 4-4
4.4 ALARMS . . . . . . . . . . . . . . . . . . . . . . . . . . . . 4-4
Horn . . . . . . . . . . . . . . . . . . . . . . . . . . . . 4-4
Motion Alarm . . . . . . . . . . . . . . . . . . . . . 4-4
Tilt Light And Alarm . . . . . . . . . . . . . . . . 4-4
Overload Light And Alarm (Toucan 800 only)4-4
Slack Chain Light And Alarm . . . . . . . . 4-4
Soft Touch System Light and Alarm (Option)4-5
4.5 SHUT DOWN AND PARK . . . . . . . . . . . . . . 4-5
4.6 CHARGERS . . . . . . . . . . . . . . . . . . . . . . . . . 4-6
ZIVAN BC1 High Frequency Electronic Charger4-6
EMB-MP HAWKER Charger (40 or 70 A) 4-7
4.7 EMERGENCY TOWING. . . . . . . . . . . . . . . . 4-8
4.8 LIFTING AND TIE DOWN . . . . . . . . . . . . . . 4-8
Lifting . . . . . . . . . . . . . . . . . . . . . . . . . . . . 4-8
Tie Down . . . . . . . . . . . . . . . . . . . . . . . . . 4-9
4.9 LOADING AND UNLOADING . . . . . . . . . . . 4-9
Using a fork lift truck . . . . . . . . . . . . . . . . 4-9
Using a winch for loading . . . . . . . . . . . . 4-9
SECTION - 5 - DECALS
SECTION - 6 - EMERGENCY PROCEDURES
6.1 GENERAL . . . . . . . . . . . . . . . . . . . . . . . . . . 6-1
6.2 INCIDENT NOTIFICATION . . . . . . . . . . . . . 6-1
6.3 EMERGENCY OPERATION. . . . . . . . . . . . . 6-1
Operator Unable to Control Machine . . . 6-1
Platform or Mast Caught Overhead. . . . . 6-1
6.4 EMERGENCY LOWERING . . . . . . . . . . . . . 6-1
6.5 EMERGENCY TOWING PROCEDURES . . . 6-1
SECTION - 7 - INSPECTION AND REPAIR LOG
SECTION - 8 - GENERAL SPECIFICATIONS & OPERATOR
MAINTENANCE
8.1 INTRODUCTION . . . . . . . . . . . . . . . . . . . . . 8-1
8.2 OPERATING SPECIFICATIONS . . . . . . . . . 8-2
Fluid Capacities . . . . . . . . . . . . . . . . . . . . 8-3
Hydraulic Power Unit . . . . . . . . . . . . . . . . 8-3
Batteries . . . . . . . . . . . . . . . . . . . . . . . . . . 8-3
8.3 OPERATOR MAINTENANCE. . . . . . . . . . . . 8-5
Batteries . . . . . . . . . . . . . . . . . . . . . . . . . . 8-5
Hydraulic filters . . . . . . . . . . . . . . . . . . . . 8-8
Turntable Lubrication. . . . . . . . . . . . . . . . 8-9
Lifting chains lubrication . . . . . . . . . . . . . 8-9
Mast Section Lubrication . . . . . . . . . . . . . 8-9
Wheel Bearing & Steering Knuckle Lubrication8-9
Hydraulic Oil Reservoir . . . . . . . . . . . . . 8-10
Steering hydraulic unit reservoir . . . . . . 8-11
Tires And Wheels. . . . . . . . . . . . . . . . . . 8-11
Verification Of The Overload Detection Setting
(Toucan 800 only) . . . . . . . . . . . . . . . . . 8-12
Verification Of The Tilt Alarm Setting. . . 8-12
31210031 – JLG Lift – 1
Page 8

TABLE OF CONTENTS
2 – JLG Lift – 31210031
Page 9
SECTION 1 - SAFETY PRECAUTIONS
SECTION 1. SAFETY PRECAUTIONS
1.1 GENERAL
This section outlines the necessary precautions for
proper and safe machine operation and maintenance.
For proper machine use, it is mandatory that a daily
routine is established based on the content of this
manual. A maintenance program, using the
information provided in this manual and the Service
and Maintenance Manual, must also be established by
a qualified person and followed to ensure the machine
is safe to operate.
If there are any questions with regard to safety,
training, inspection, maintenance, application, and
operation, please contact JLG Industries, Inc. (“JLG”).
FAILURE TO COMPLY WITH THE SAFETY PRECAUTIONS LISTED
IN THIS MANUAL COULD RESULT IN MACHINE DAMAGE,
PROPERTY DAMAGE, PERSONAL INJURY OR DEATH.
1.2 PRE-OPERATION
Operator Training and Knowledge
• Read and understand this manual before operating
the machine.
Workplace Inspection
• The operator is to take safety measures to avoid all
hazards in the work area prior to machine operation.
• Do not operate or raise the platform while on trucks,
trailers, railway cars, floating vessels, scaffolds or
other equipment unless approved in writing by JLG.
• Do not operate the machine in hazardous
environments unless approved for that purpose by
JLG.
• Be sure that the ground conditions are able to
support the maximum load of the machine.
• This machine can be operated in temperatures of
o
C to 40oC. Consult JLG for operation outside
-20
this range.
• This machine must be used in a sufficient ambient
light.
Machine Inspection
• Before machine operation, perform inspections and
functional checks. Refer to Section 2 of this manual
for detailed instructions.
• Do not operate this machine until it has been
serviced and maintained according to requirements
specified in the Service and Maintenance Manual.
• Be sure the footswitch and all other safety devices
are operating properly. Modification of these
devices is a safety violation.
• Do not operate this machine until complete training
is performed by authorized persons.
• Only authorized and qualified personnel can
operate the machine.
• Read, understand, and obey all DANGERS,
WARNINGS, CAUTIONS, and operating instructions
on the machine and in this manual.
• Use the machine in a manner which is within the
scope of its intended application set by JLG.
• All operating personnel must be familiar with the
emergency controls and emergency operation of
the machine as specified in this manual.
• Read, understand, and obey all applicable
employer, local, and governmental regulations as
they pertain to operation of the machine.
MODIFICATION OR ALTERATION OF AN AERIAL WORK
PLATFORM SHALL BE MADE ONLY WITH WRITTEN PERMISSION
FROM THE MANUFACTURER
• Do not operate any machine on which safety or
instruction placards or decals are missing or
illegible.
• Avoid any buildup of debris on the platform floor.
Keep mud, oil, grease, and other slippery
substances from footwear and platform floor.
• Do not clean electrical components with a high
pressure cleaner.
1.3 OPERATION
General
• Do not use the machine for any purpose other than
positioning personnel, their tools, and equipment.
• Never operate a machine that is not working
properly. If a malfunction occurs, shut down the
machine.
• Never slam a control switch or lever through neutral
to an opposite direction. Always return switch to
31210031 – JLG Lift – 1-1
Page 10
SECTION 1 - SAFETY PRECAUTIONS
neutral and stop before moving the switch to the
next function. Operate controls with slow and even
pressure.
• Park the machine in stowed position when not in
service.
• Do not allow personnel to tamper with or operate
the machine from the ground with personnel in the
platform, except in an emergency.
• Do not carry materials directly on platform railing
unless approved by JLG.
• When two persons are in the platform, the operator
shall be responsible for all machine operations.
• Always ensure that power tools are properly stowed
and never left hanging by their cord from the
platform work area.
• Supplies or tools which extend outside the platform
are prohibited unless approved by JLG.
• When driving, always position extending structure
over rear axle in line with the direction of travel.
Remember, if extending structure is over the front
axle, steer and drive functions will be reversed.
• Do not assist a stuck or disabled machine by
pushing, pulling, or by using extending structure
functions. Only pull the unit from the towing points
on the chassis.
• Do not place extending structure or platform against
any structure to steady the platform or to support
the structure.
• Stow extending structure and shut off all power
before leaving machine.
• Keep both feet firmly positioned on the platform
floor at all times. Never use ladders, boxes, steps,
planks, or similar items on platform to provide
additional reach.
• Always enter or leave the platform using the access
gate.
• Use extreme caution when entering or leaving
platform. Be sure that the mast assembly is fully
lowered. Face the machine, maintain “three point
contact” with the machine, using two hands and one
foot or two feet and one hand during entry and exit.
Electrocution Hazards
• This machine is not insulated and does not provide
protection from contact or proximity to electrical
current.
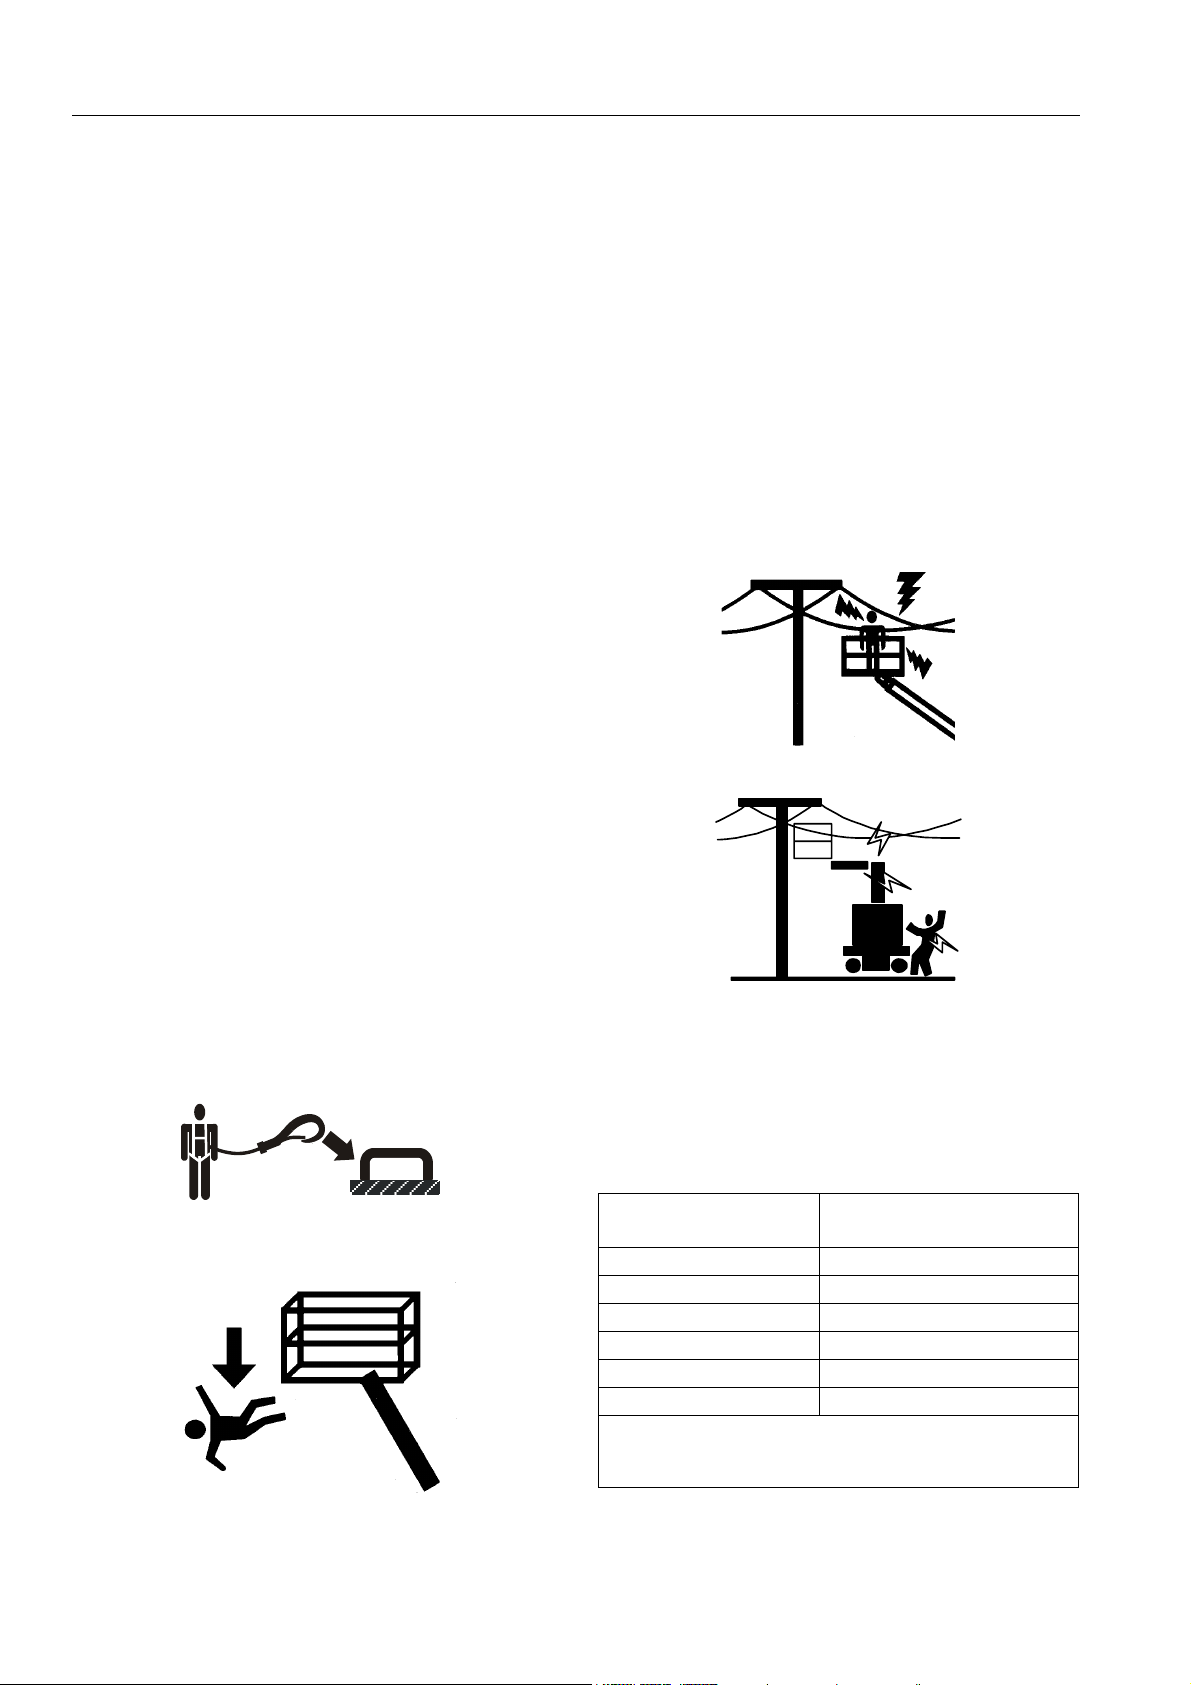
Trip and Fall Hazards
JLG recommends that occupants of the platform wear
a full body harness with a lanyard attached to an
authorized lanyard anchorage point. For further
information regarding fall protection requirements on
JLG products, contact JLG Industries, Inc.
• Before operating the machine, make sure all gates
are closed and fastened in their proper position.
• Maintain distance from electrical lines, apparatus, or
any energized (exposed or insulated) parts
according to the Minimum Approach Distance
(MAD) as shown in Table 1-1.
• Allow for machine movement and electrical line
swaying.
Table 1-1. Minimum Approach Distances (M.A.D.)
Voltage Range
(Phase to Phase)
0 to 50 kV 3
Over 50 kV to 200 kV 5
Over 200 kV to 350 kV 6
Over 350 kV to 500 kV 8
Over 500 kV to 750 kV 11
Over 750 kV to 1000 kV 14
NOTE: This requirement shall apply except where
employer, local or governmental regulations
are more stringent.
MINIMUM APPROACH DISTANCE
in Meters
1-2 – JLG Lift – 31210031
Page 11
DO NOT MANOEUVER MACHINE OR PERSONNEL INSIDE
PROHIBITED ZONE (MAD). ASSUME ALL ELECTRICAL PARTS
AND WIRING ARE ENERGIZED UNLESS KNOWN OTHERWISE.
Maintain a clearance of at least 3 m between any part
of the machine and its occupants, their tools and their
equipment from any electrical line or apparatus
carrying up to 50 000 volts. A 0,3 m additional
clearance is required for every additional 30 000 volts
or less.
The minimum approach distance may be reduced if
insulating barriers are installed to prevent contact and
the barriers are rated for the voltage of the line being
guarded. These barriers shall not be part of (or
attached to) the machine. The minimum approach
distance shall be reduced to a distance within the
designed working dimensions or the insulating barrier.
This determination shall be made by a qualified person
in accordance with employer, local or governmental
requirements for work practices near energized
equipment.
SECTION 1 - SAFETY PRECAUTIONS
• Keep the chassis of the machine at least 0,6 m from
holes, bumps, drop-offs, obstructions, debris,
concealed holes, and other potential hazards on the
floor/surface.
• Do not push or pull any object with the extending
structure.
• Never attempt to use the machine as a crane. Do
not tie-off machine to any adjacent structure.
• Do not operate the machine when wind conditions
exceed the rating specified on the manufacturer’s
nameplate.
• Do not increase the surface area of the platform or
the load. Increase of the area exposed to the wind
will decrease stability.
• Do not increase the platform size with unauthorized
deck extensions or attachments.
• If extending structure assembly or platform is in a
position that one or more wheels are off the ground,
all persons must be removed before attempting to
stabilize the machine. Use appropriate equipment to
stabilize machine and remove personnel.
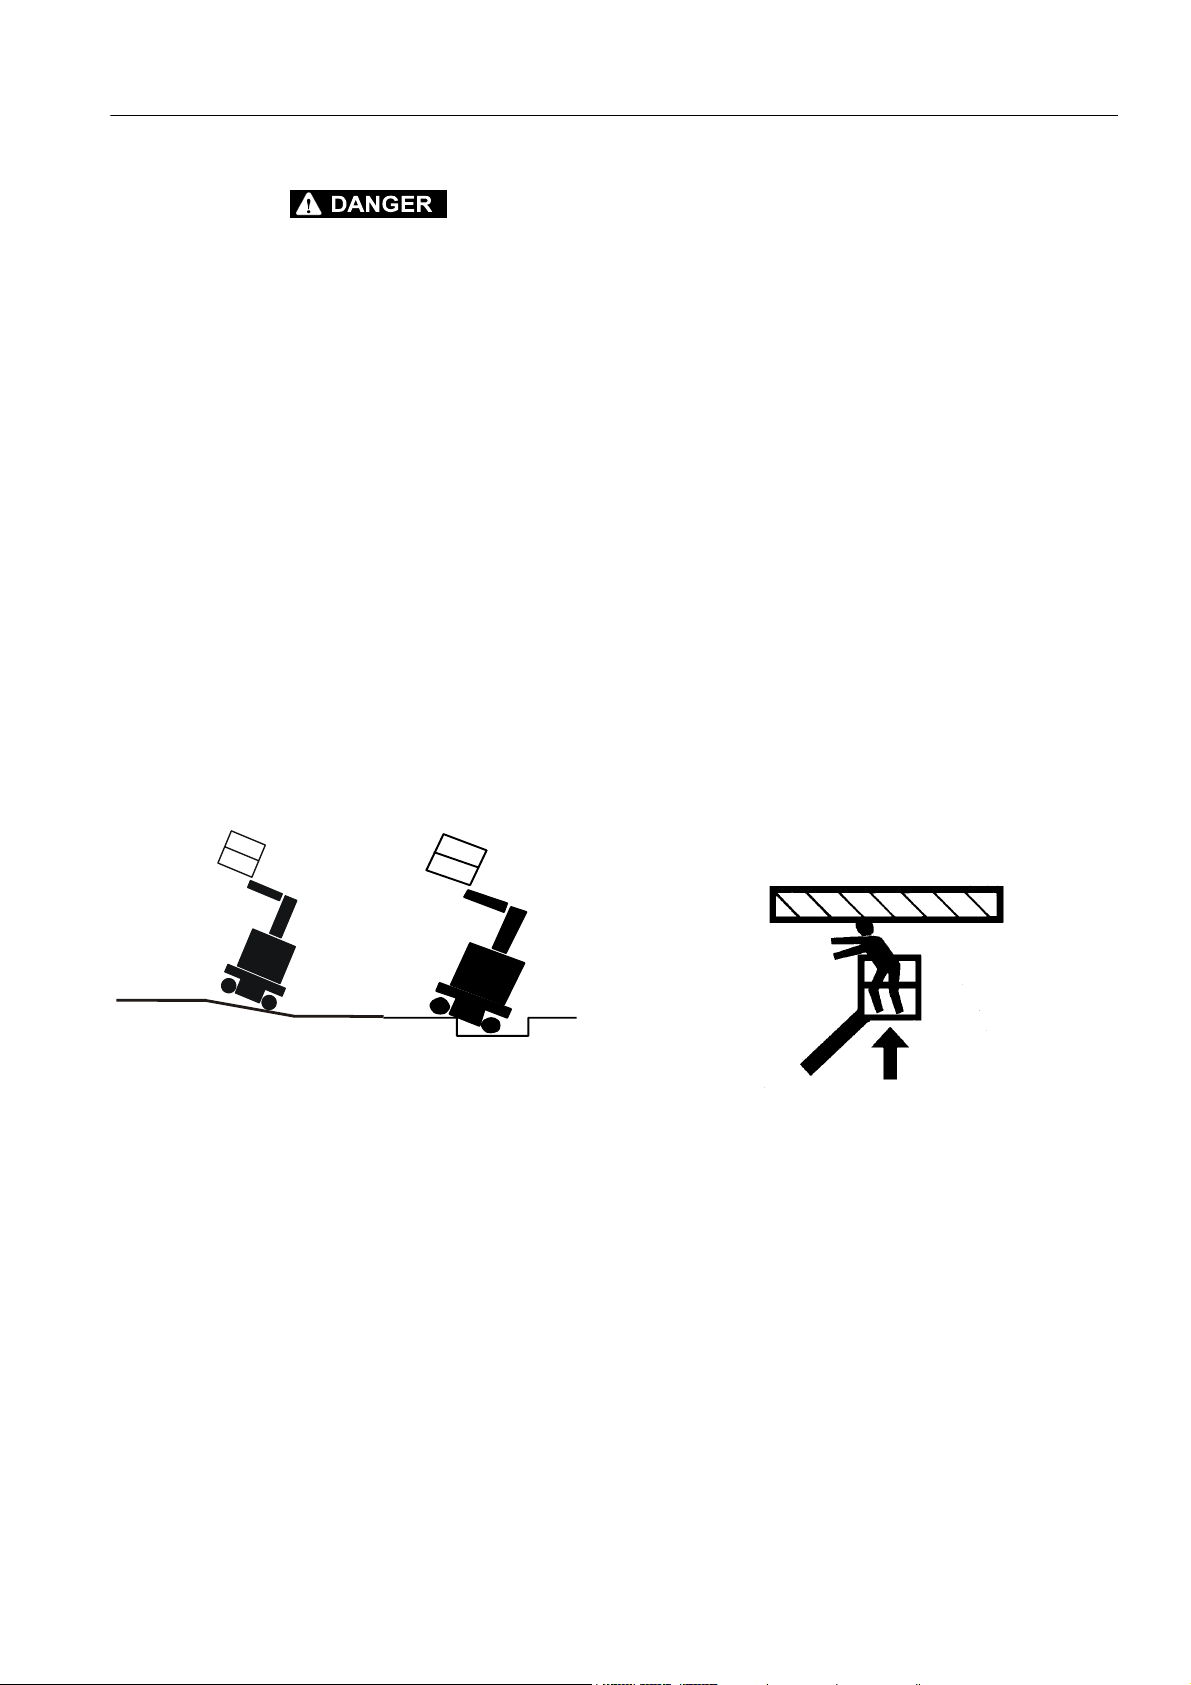
Tipping Hazards
• The user should be familiar with the surface before
driving. Do not exceed the allowable sideslope and
grade while driving.
• Never exceed the maximum platform capacity.
Distribute loads evenly on platform floor.
• Before driving on floors, bridges, trucks, and other
surfaces, check allowable capacity of the surfaces.
Check the ramp or slope for good adhesion of the
wheels. Ensure that the driving surfaces are free of
moisture, ice, grease or from any other substance
that could affect wheel adhesion.
• Do not elevate platform or drive with platform
elevated while on a sloping, uneven, or soft surface.
• Do not raise the platform or drive from an elevated
position unless the machine is on firm, level
surfaces and evenly supported.
• When travelling on slopes (Refer to section 8), the
platform MUST be fully lowered, the machine MUST
travel in second gear. It is recommended to drive up
the slope in FORWARD gear and to REVERSE down
the slope as the machine will perform better.
Crushing and Collision Hazards
• Approved head gear must be worn by all operating
and ground personnel.
• Check work area for clearances overhead, on sides,
and bottom of platform when lifting, slewing or
lowering platform, and driving.
• During operation, keep all body parts inside
platform railing.
• Always post a lookout when driving in areas where
vision is obstructed.
• Keep non-operating personnel at least 1,8 m away
from machine during all driving and slewing
operations.
• Limit travel speed according to conditions of ground
surface, congestion, visibility, slope, location of
personnel, and other factors which may cause
collision or injury to personnel.
• Be aware of stopping distances in all drive speeds.
When driving in high speed, slow down the machine
using the controller before stopping.
• Do not use high speed drive in restricted or close
quarters or when driving in reverse.
31210031 – JLG Lift – 1-3
Page 12

SECTION 1 - SAFETY PRECAUTIONS
• Exercise extreme caution at all times to prevent
obstacles from striking or interfering with operating
controls and persons in the platform.
• Be sure that operators of other overhead and floor
level machines are aware of the aerial work
platform’s presence. Disconnect power to overhead
cranes.
• Warn personnel not to work, stand, or walk under a
raised extending structure or platform. Position
barricades on floor if necessary.
1.4 TOWING, LIFTING, AND HAULING
• Never allow personnel in platform while towing,
lifting, or hauling.
• This machine should not be towed, except in the
event of emergency, malfunction, power failure, or
loading/unloading. Refer to the Emergency
Procedures section of this manual for emergency
towing procedures.
• Ensure extending structure is in the stowed position
prior to towing, lifting or hauling. The platform must
be completely empty of tools.
• When lifting machine, lift only at designated areas of
the machine. Lift the unit with equipment of
adequate capacity.
• Refer to the Machine Operation section of this
manual for lifting information.
1.5 ADDITIONAL HAZARDS / SAFETY
• Do not use machine as a ground for welding.
• When performing welding or metal cutting
operations, precautions must be taken to protect the
chassis from direct exposure to weld and metal
cutting spatter.
• Battery fluid is highly corrosive. Avoid contact with
skin and clothing at all times.
• Charge batteries only in a well ventilated area.
1-4 – JLG Lift – 31210031
Page 13

SECTION 2 - USER RESPONSIBILITIES, MACHINE PREPARATION, AND INSPECTION
SECTION 2. USER RESPONSIBILITIES, MACHINE PREPARATION, AND INSPECTION
2.1 PERSONNEL TRAINING
The aerial platform is a personnel handling device; so it
is necessary that it be operated and maintained only
by trained personnel.
Persons under the influence of drugs or alcohol or who
are subject to seizures, dizziness or loss of physical
control must not operate this machine.
Operator Training
Operator training must cover:
1. Use and limitations of the controls in the platform
and at the ground, emergency controls and safety
systems.
2. Control labels, instructions, and warnings on the
machine.
3. Rules of the employer and government
regulations.
4. Use of approved fall protection device.
5. Enough knowledge of the mechanical operation of
the machine to recognize a malfunction or
potential malfunction.
6. The safest means to operate the machine where
overhead obstructions, other moving equipment,
and obstacles, depressions, holes, drop-offs.
2.2 PREPARATION, INSPECTION, AND
MAINTENANCE
The following table covers the periodic machine
inspections and maintenance required by JLG
Industries, Inc. Consult local regulations for further
requirements for aerial work platforms. The frequency
of inspections and maintenance must be increased as
necessary when the machine is used in a harsh or
hostile environment, if the machine is used with
increased frequency, or if the machine is used in a
severe manner.
7. Means to avoid the hazards of unprotected
electrical conductors.
8. Specific job requirements or machine application.
Training Supervision
Training must be done under the supervision of a
qualified person in an open area free of obstructions
until the trainee has developed the ability to safely
control and operate the machine.
Operator Responsibility
The operator must be instructed that he/she has the
responsibility and authority to shut down the machine
in case of a malfunction or other unsafe condition of
either the machine or the job site.
31210031 – JLG Lift – 2-1
Page 14

SECTION 2 - USER RESPONSIBILITIES, MACHINE PREPARATION, AND INSPECTION
Table 2-1.Inspection and Maintenance Table
Type Frequency
Pre-Start Inspection
Pre-Delivery
Inspection (See
Note)
Frequent
Inspection
(See Note)
Annual Machine
Inspection
(See Note)
Preventative
Maintenance
Before using each day; or
whenever there’s an Operator change.
Before each sale, lease, or rental delivery. O w n er, D e a le r, or
In service for 3 months or 150 hours, whichever comes first; or
Out of service for a period of more than 3
months; or
Purchased used.
Annually, no later than 13 months from the
date of prior inspection.
At intervals as specified in the Service and
Maintenance Manual.
Primary
Responsibility
User or Operator User or Operator Operator and Safety Man-
User
Owner, Dealer, or
User
Owner, Dealer, or
User
Owner, Dealer, or
User
Service
Qualification
Qualified JLG
Mechanic
Qualified JLG
Mechanic
Qualified JLG
Mechanic
Qualified JLG
Mechanic
Reference
ual
Service and Maintenance
Manual and applicable
JLG inspection form
Service and Maintenance
Manual and applicable
JLG inspection form
Service and Maintenance
Manual and applicable
JLG inspection form
Service and Maintenance
Manual
NOTE: Inspection forms are available from JLG. Use the Service and Maintenance Manual to perform inspections.
2-2 – JLG Lift – 31210031
Page 15
SECTION 2 - USER RESPONSIBILITIES, MACHINE PREPARATION, AND INSPECTION
2.3 PRE-START INSPECTION
The Pre-Start Inspection should include each of the
following:
1. Cleanliness – Check all surfaces for leakage (oil
or battery fluid) or foreign objects. Report any
leakage to the proper maintenance personnel.
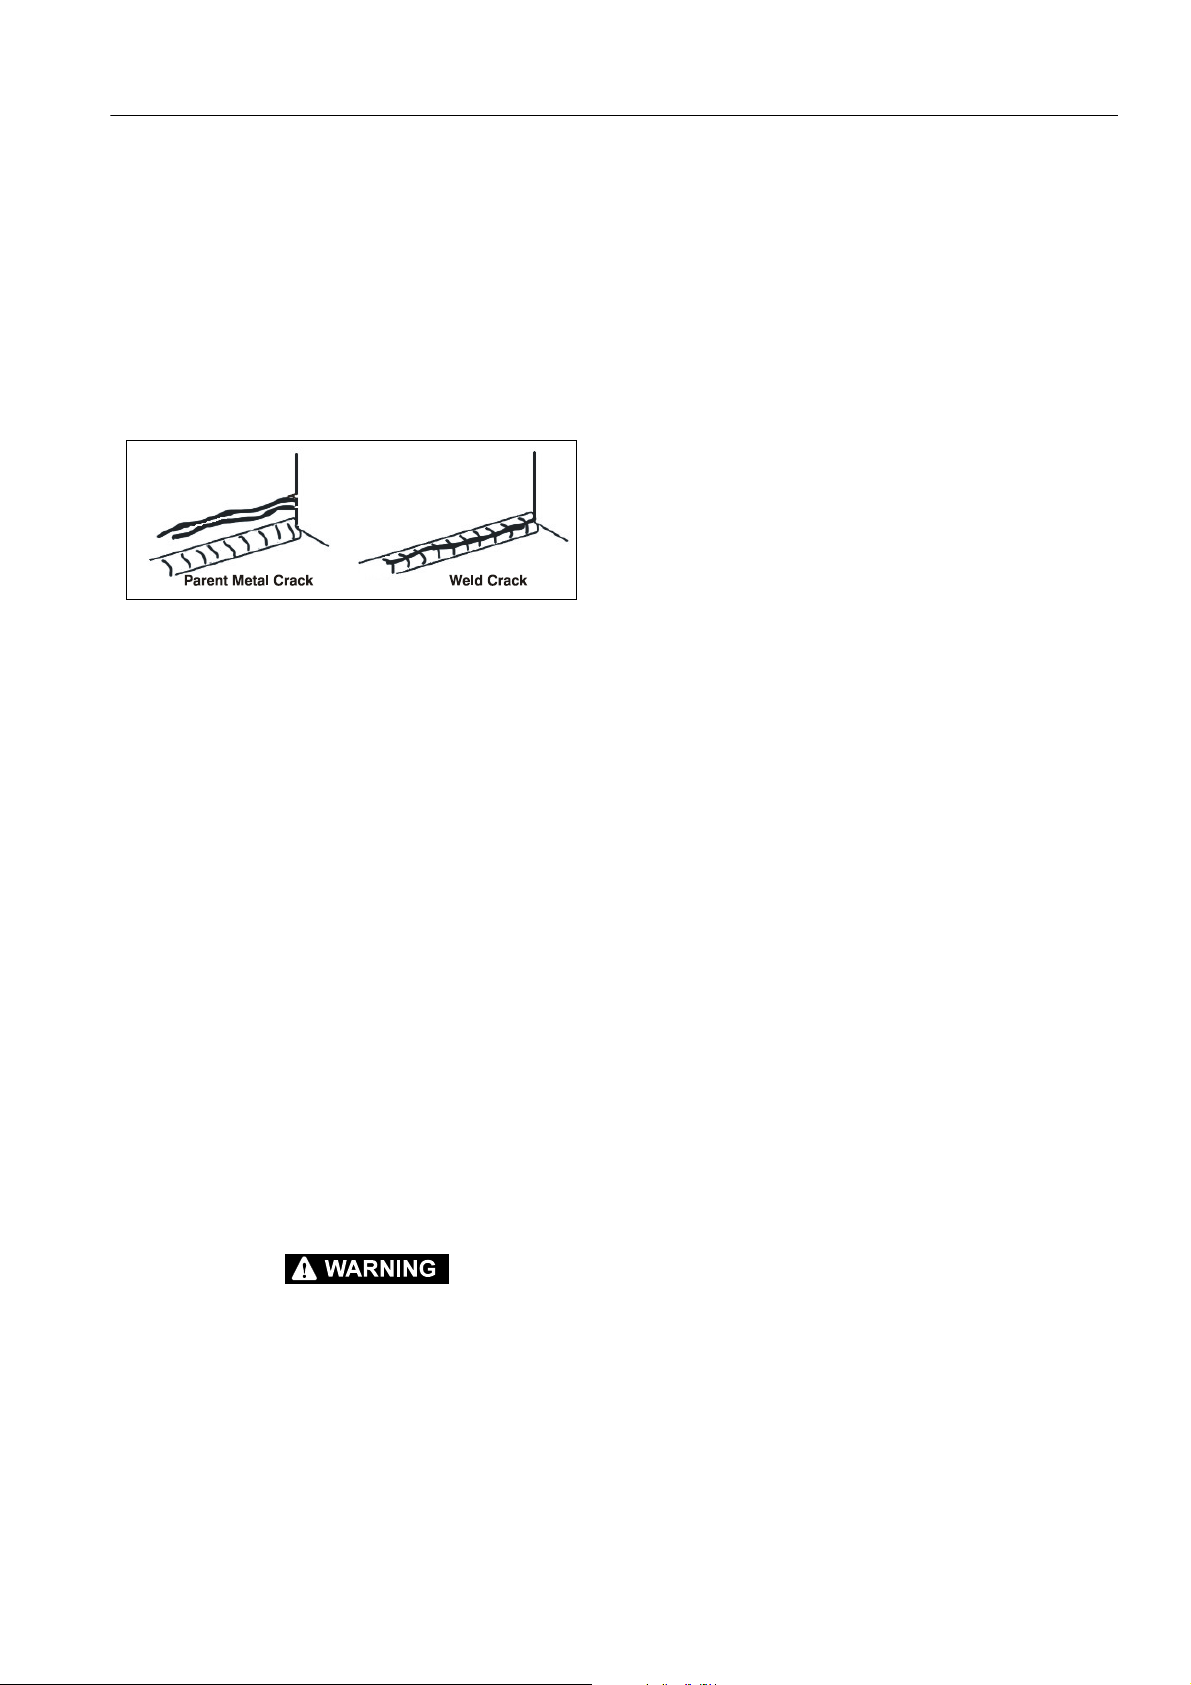
2. Structure – Inspect the machine structure for
dents, damage, weld or parent metal cracks or
other discrepancies.
3. Decals and Placards – Check all for cleanliness
and legibility. Make sure none of the decals and
placards are missing. Make sure all illegible
decals and placards are cleaned or replaced.
4. Operation and Safety Manuals – Make sure a
copy of the Operator and Safety Manual, AEM
Safety Manual (ANSI markets only), and ANSI
Manual of Responsibilities (ANSI markets only) is
enclosed in the weather resistant storage
container.
5. “Walk-Around” Inspection – Refer to Figure 2-1.
6. Battery – Charge as required.
7. Hydraulic Oil – Check the hydraulic oil level.
Ensure hydraulic oil is added as required.
8. Accessories/Attachments - Reference the
Operator and Safety Manual of each attachment or
accessory installed upon the machine for specific
inspection, operation, and maintenance
instructions.
9. Function Check – Once the “Walk-Around”
Inspection is complete, perform a function check
(section 2.3.2) of all systems in an area free of
overhead and ground level obstructions. Refer to
Section 4 for more specific operating instructions.
IF THE MACHINE DOES NOT OPERATE PROPERLY, TURN OFF
THE MACHINE IMMEDIATELY! REPORT THE PROBLEM TO THE
PROPER MAINTENANCE PERSONNEL. DO NOT OPERATE THE
MACHINE UNTIL IT IS DECLARED SAFE FOR OPERATION.
31210031 – JLG Lift – 2-3
Page 16

SECTION 2 - USER RESPONSIBILITIES, MACHINE PREPARATION, AND INSPECTION
Toucan 800
Toucan 800 DI
2-4 – JLG Lift – 31210031
Page 17

Toucan 870
SECTION 2 - USER RESPONSIBILITIES, MACHINE PREPARATION, AND INSPECTION
Figure 2-1. Daily Walk-Around Inspection
2.3.1 Walk-Around Inspection
Begin the "Walk-Around Inspection" at Item 1, as noted
on the diagram. Continue checking each item in
sequence for the conditions listed in the following
checklist.
TO AVOID POSSIBLE INJURY, BE SURE MACHINE POWER IS
OFF.
DO NOT OPERATE MACHINE UNTIL ALL MALFUNCTIONS HAVE
BEEN CORRECTED.
INSPECTION NOTE: On all components, make sure
there are no loose or missing parts, that they are
securely fastened, and no visible damage, leaks or
excessive wear exists in addition to any other criteria
mentioned.
1. Platform Guardrails and Gate - Footswitch works
properly, not modified, disabled or blocked. The
gate opens and closes properly.
2. Platform & Ground Control Consoles - Switches
and levers return to neutral, decals/placards
secure and legible, control markings legible.
6. Hand Pump - See Inspection Note.
7. All Hydraulic Cylinders - No visible damage;
pivot pins and hydraulic hoses undamaged, not
leaking.
8. Steering Spindles - See Inspection Note.
9. Lifting Chains, Chain Yo k e s an d C l evi s Pins -
Must be installed and in good condition. Chains
must be correctly tensioned and lubricated.
3. Wheel/Tire Assemblies - Properly secured, no
missing lug nuts.
4. Drive Motor, Brake - No evidence of leakage.
5. Hood Assemblies - See Inspection Note.
31210031 – JLG Lift – 2-5
Page 18

SECTION 2 - USER RESPONSIBILITIES, MACHINE PREPARATION, AND INSPECTION
2.3.2 Function Check
Refer to section 3 & 4 for description and operation of
machine functions.
DO NOT OPERATE MACHINE UNTIL ALL MALFUNCTIONS HAVE
BEEN CORRECTED.
Perform the Function Check as follows:
Control Stations
1. From the Ground Control Console :
• Operate all functions;
• Ensure that all machine functions are disabled
when the Emergency Stop Button is pushed in;
• Position the selector switch to Platform Control
Console ; try to use the Ground Control Cons
- No movement shall occur.
2. From the Platform Control Console :
• Ensure that the platform control console is firmly
secured;
• Ensure proper operation of horn;
• Ensure proper operation of all functions;
• Ensure that all machine functions are disabled
when the Emergency Stop Button is pushed in;
• Ensure that no functions can be operated unless
the footswitch is depressed;
• Activate simultaneously a drive movement and
superstructure movement. No movement shall
occur.
• Drive the machine on a grade, not to exceed the
rated gradeability and stop to ensure the brakes
hold.
ole :
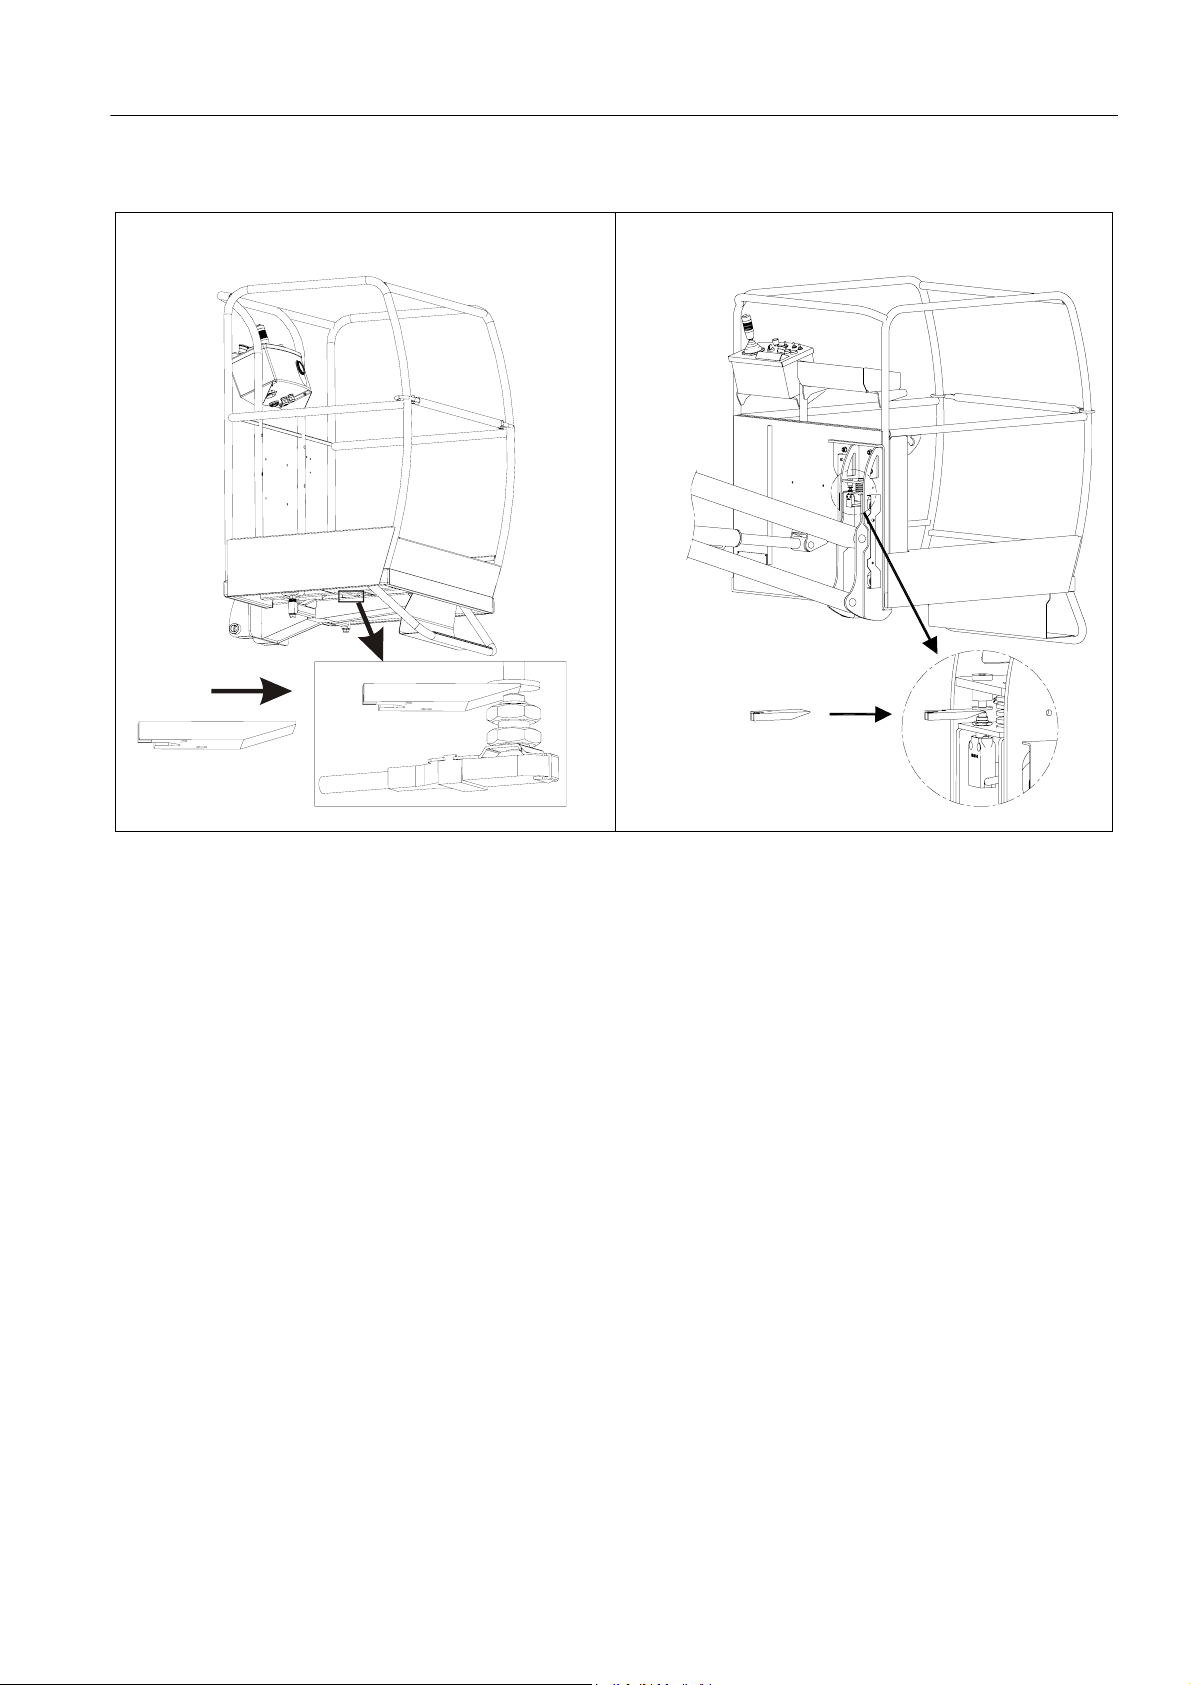
Tilt Sensor Check
Check the tilt sensor, located on the left side (Toucan
800), on the right side (Toucan 870) of the chassis, to
ensure proper operation. Wedge a block (P/N :
ST2741, located in the manual storage container) as
illustrated above to activate the tilt sensor and keep it
tilted. Raise the mast by approximately 1m.
The system is functioning properly if :
1. From the Platform Control Console :
• An acoustic alarm sounds.
• The red tilt indicator lights up on the Platform
Control Panel.
• The drive function is disabled.
• The jib raising function is performed at reduced
speed.
• The mast raising function is performed at
reduced speed.
• The slewing movements are performed at
reduced speed.
• All other functions are working normally.
• Prohibited movements are indicated by the
orange light indicator on the platform control
panel.
2. From the Ground Control Console :
• An acoustic alarm sounds.
2-6 – JLG Lift – 31210031
Page 19
SECTION 2 - USER RESPONSIBILITIES, MACHINE PREPARATION, AND INSPECTION
Overload Sensor Check (Toucan 800 & Toucan 800 DI)
Machine manufactured before 2010
Machine manufactured after 2010
Check the overload sensor, located on the platform
support, to ensure proper operation. Wedge a block (P/N :
ST2741) as illustrated above to activate the overload
sensor and keep it activated. The system is functioning
properly if :
1. From the Platform Control Console :
• An acoustic alarm sounds.
• The overload red light indicator flashes on the
platform control panel.
• Each attempt to perform a movement actuates
the orange light indicator on the platform control
panel.
• Every function is disabled from the upper control
panel.
2. From the Ground Control Console :
• An acoustic alarm sounds.
• The overload red indicators on the platform
control panel and on the ground control console
flash.
• Every function is disabled from the ground
control console.
31210031 – JLG Lift – 2-7
Page 20

SECTION 2 - USER RESPONSIBILITIES, MACHINE PREPARATION, AND INSPECTION
Slack / Broken Chain Sensors Check
Gate sensors check (Toucan 800 DI only)
Check the slack/broken chain sensors to ensure proper
operation :
2 sensors.
Location : one at the top of mast 1 and one at the bottom of
mast 4.
NOTE: The mast 1 is attached to the turntable and mast 4
Wedge a block (P/N : ST2741) as illustrated above to
activate the slack chain sensor and keep it activated.
The system is functioning properly if :
supports the jib.
1. From the Platform Control Console :
• An acoustic alarm sounds.
• The red slack chain indicator lights up on the
Platform Control Panel.
• The jib and mast lowering functions are
disabled.
• The slewing movements are disabled.
• The driving function is disabled.
• Prohibited movements are indicated by the
orange light indicator on the platform control
panel.
• All other functions work normally.
2. From the Ground Control Console :
• An acoustic alarm sounds.
Check the gate sensors to ensure proper operation :
2 sensors.
Location : under gate articulation axis.
Open the right gate. The system is functioning properly if :
1. From the Platform Control Console :
• The orange light indicator is continuously lit.
• Every function is disabled from the upper control
console.
2. From the Ground Control Console :
• Every function is disabled from the ground control console.
3. Repeat steps 1 to 2 for each slack chain sensor.
2-8 – JLG Lift – 31210031
Page 21

Toucan 800 - Toucan 800 DI
SECTION 3 - MACHINE CONTROLS AND INDICATORS
SECTION 3. MACHINE CONTROLS AND INDICATORS
Toucan 870
1. Driving wheels
2. Steering wheels
3. Counter weight
4. Jib
5 . G r o un d co n tr o l st a ti o n
6. Charger
7. Telescopic mast
8 . H a n d p u mp
9 . P l a tf o rm
10. Platform control station
11. Manual storage container
12. Battery cover
13. Manual lowering controls
14. Chassis cover
15. Circuit-breaker (Toucan 800 : ¼ turn - Toucan 870 : Push/Pull)
Figure 3-1. Basic Nomenclature
31210031 – JLG Lift – 3-1
Page 22

SECTION 3 - MACHINE CONTROLS AND INDICATORS
3.1 GENERAL
This section provides the necessary information
needed to understand control functions.
NOTICE
THE MANUFACTURER HAS NO DIRECT CONTROL OVER MACHINE
APPLICATION AND OPERATION. THE USER AND OPERATOR ARE
RESPONSIBLE FOR CONFORMING WITH GOOD SAFETY
PRACTICES.
3.2 CONTROLS AND INDICATORS
TO AVOID SERIOUS INJURY, DO NOT OPERATE MACHINE IF ANY
CONTROL LEVERS OR TOGGLE SWITCHES CONTROLLING
PLATFORM MOVEMENT DO NOT RETURN TO THE OFF POSITION
WHEN RELEASED.
Ground Control Station
NOTICE
DO NOT OPERATE FROM GROUND CONTROL STATION WITH
PERSONNEL IN THE PLATFORM EXCEPT IN AN EMERGENCY.
NOTICE
WHEN THE MACHINE IS SHUT DOWN FOR OVERNIGHT PARKING
OR BATTERY CHARGING, THE PLATFORM/OFF/GROUND
SELECTOR AND THE EMERGENCY STOP SWITCHES MUST BE
POSITIONED TO OFF TO PREVENT DRAINING THE BATTERIES.
3-2 – JLG Lift – 31210031
Page 23

Toucan 800
SECTION 3 - MACHINE CONTROLS AND INDICATORS
1. Platform /Off/Ground Selector Switch
2 . E m e rg e nc y St o p Sw i tc h
3. Function Enable Switch
4. Jib Up / Down Switch
5 . M as t Up / D o wn Sw i tc h
6. Turntable Slewing Switch
7. Charger Indicator
8. Circuit Breaker
9. Overload Indicator
10. Battery Filling Pump Switch
11. Main Circuit Breaker
Toucan 870
1. Platform /Off/Ground Selector Switch
2 . E m e rg e nc y St o p Sw i tc h
3. Function Enable Switch
4. Jib Up / Down Switch
5 . M as t Up / D o wn Sw i tc h
6. Turntable Slewing Switch
7. Charger Indicator (if fitted)
8. Circuit Breaker
10. Battery Filling Pump Switch
11. Main Circuit Breaker
Figure 3-2. Ground Control Stations
31210031 – JLG Lift – 3-3
Page 24

SECTION 3 - MACHINE CONTROLS AND INDICATORS
1. Platform / Off / Ground Selector Switch
Movement Control from the Platform Controls
Control Circuit Off Position
Movement Control From The Ground Controls
2. Emergency Stop Switch.
Depress the switch to stop all functions. The
switch must be turned clockwise to restore the
machine’s function.
3. Function Enable Switch.
Must be pushed and held to operate any function.
4. Jib Up / Down Switch.
Move the switch UP to RAISE the jib. Move the
switch DOWN to LOWER the jib.
5. Mast Up / Down Switch.
Move the switch UP to RAISE the mast. Move the
switch DOWN to LOWER the mast.
6. Turntable Slewing Switch.
Move the switch to the RIGHT to slew the turntable
to the RIGHT or to the LEFT to slew the turntable
to the LEFT.
7. Charger Indicator
(Depending on equipment, see § 4-6)
8. Circuit Breaker.
Protection of the control circuit.
9. Overload Indicator
Flashing red light indicator.
10. Battery Filling Pump Switch.
Depress the push button to activate the battery
filling pump.
(See Maintenance section for further instructions).
11. Main Circuit Breaker
T800
(horizontal lever) to insulate the battery "+".
Position the circuit-breaker to its "I" position (vertical
lever) to restore battery supply.
T870
battery.
Pull the circuit breaker knob to restore the battery
supply.
: Position the circuit-breaker to its "O" position
: Push the circuit breaker knob to insulate the
3-4 – JLG Lift – 31210031
Page 25

Manual Lowering Controls
SECTION 3 - MACHINE CONTROLS AND INDICATORS
Toucan 800
Toucan 870
1. Jib Raising / Lowering Control Valve
2. Mast Raising / Lowering Control Valve
3. Slewing Control Valve
4 . P u mp H a nd l e
5 . H a n d P u mp
Figure 3-3. Manual Lowering Controls
Electro-Hydraulic Control Valve With Manual Control Push Buttons
1. Jib Raising / Lowering Control Valve :
Depress and keep depressed the top push button
while activating the hand pump to lower the jib.
Depress and keep depressed the bottom push
button while activating the hand pump to raise the
jib.
2. Mast Raising / Lowering Control valve :
Depress and keep depressed the top push button
while activating the hand pump to lower the mast.
Depress and keep depressed the bottom push
button while activating the hand pump to raise the
mast.
3. Slewing Control Valve :
Depress and keep depressed the top push button
while activating the hand pump to slew the
turntable to the right. Depress and keep
depressed the bottom push button while
activating the hand pump to slew the turntable to
the left.
4. Pump Handle :
Insert the pump handle in the hand pump to
activate a movement.
5. Hand Pump :
Operate the hand pump while activating the
desired movement.
31210031 – JLG Lift – 3-5
Page 26

SECTION 3 - MACHINE CONTROLS AND INDICATORS
Platform Control Station
Figure 3-4. Platform Control Console
1. Emergency Stop Switch
2. Footswitch
3 . J ib Fu n ct i on Co n tr ol S wi t ch
4. Mast Function Control Switch
5. Turntable Slewing Control Switch
6 . F un ct i on S pe ed C on tr o l
7. Battery Discharge Indicator
8. Auxiliary Power Button
9. Drive Control Joystick
10. Drive Speed Selector Switch
11. Horn
12. Steering Control
(See Figure 3-5., Platform Control Indicator Panel)
1. Emergency Stop Switch
Depress the switch to stop all the functions of the
machine. The switch must be turned clockwise to
restore the machine’s functions.
2. Footswitch
Must be depressed before any movement is
controlled. The controls are enabled for a period
of 5 seconds. If no function is operated within this
period, the footswitch must be recycled.
3. Jib Function Control Switch
Pull the switch to raise the jib.
Push the switch to lower the jib.
4. Mast Function Control Switch
Pull the switch to raise the mast.
Push the switch to lower the mast.
5. Turntable Slewing Control Switch
Toggle the switch to the right to slew the turntable
to the right.
Toggle the switch to the left to slew the turntable
to the left.
6. Function Speed Control
When the knob is turned counter-clockwise to the
left (
movement) are performed at low speed. Turn the
knob clockwise to the right (
speed of the movements.
7. Battery Discharge Indicator
As the battery discharges, the bar lit in (1) moves
from the right to the left (5 green bars followed by
3 orange bars).
At this point, the LED flashes indicating "energy
reserve" (70% discharged).
The 2 red LEDs most to the left flash indicating
"empty" (80% discharged). At this point, power is
cut-off. The battery must be recharged.
1 - Discharge Indicator
2 - Hourmeter
), the movements (except the drive
)to increase the
3-6 – JLG Lift – 31210031
Page 27

SECTION 3 - MACHINE CONTROLS AND INDICATORS
8. Auxiliary Power Button
Once the electrical power is cut due to excessive
battery discharge (80%), the Auxiliary Power
Button can be pressed to use the remaining
battery charge to travel to the charging station.
NOTE: The button must be actuated and held BEFORE the
controls are enabled and the desired movement is
controlled. An intermittent acoustic signal is
actuated when the button is actuated.
IMPORTANT
A TOTAL DISCHARGE WILL RESULT IN IRREVERSIBLE DAMAGE
TO THE BATTERY.
9. Drive Control Joystick
Move the controller forward to drive forward.
Move the controller backward to reverse.
10. Drive Speed Selector Switch
1st gear or slow speed
2nd gear or climbing speed (max. 20%)
3rd gear or high speed
11. Horn
Sounds when the button is depressed.
12. Steering control
Push the right side of the thumb switch to steer the
wheels to the right. Push the left side of the thumb
switch to steer the wheels to the left.
Platform Control Indicator Panel.
Figure 3-5. Platform Control Indicator Panel
1. Tilt Indicator Light and Alarm
2. Slack Chain Indicator Light and Alarm
3. Overload Indicator Light and Alarm
4. Unauthorized Movement Indicator
5. Power Enable Indicator
1. Tilt Indicator Light and Alarm.
Excessive tilt. Red light and audible alarm
indicates the rated slope has been exceeded.
2. Slack Chain Indicator Light and Alarm.
Slack lifting chain. Red light and audible alarm
indicates slack chain condition has been detected.
3. Overload Indicator Light And Alarm
Flashing red light and audible alarm indicates the
platform has been overloaded (Toucan 800 only).
4. Unauthorized Movement Indicator.
Orange light which indicates the machine is in a
configuration where the activation of movement is
not permitted.
5. Power Enable Indicator.
Green light indicates that the controls are ready.
31210031 – JLG Lift – 3-7
Page 28

SECTION 3 - MACHINE CONTROLS AND INDICATORS
3-8 – JLG Lift – 31210031
Page 29

SECTION 4 - MACHINE OPERATION
SECTION 4. MACHINE OPERATION
NOTE: A delay-timer, integrated to the electrical system,
disconnects the control boxes approximately 4
hours after the last operation of the machine. This
system preserves the battery should the operator
forget to disconnect the machine. After cut out, the
emergency stop switch on the ground control
console must be depressed then turned clockwise
to restore the functions of the machine.
• To energize the machine :
Toucan 800 : turn the circuit-breaker handle to "I"
position.
Toucan 870 : pull the knob of the circuit-breaker
to "I" position.
4.2 PLATFORM CONTROLS
TO AVOID SERIOUS INJURY, DO NOT OPERATE MACHINE IF ANY
CONTROL LEVERS OR SWITCHES CONTROLLING THE PLAT
FORM MOVEMENT DOES NOT RETURN TO THE OFF OR NEUTRAL POSITION WHEN RELEASED.
IF THE PLATFORM DOES NOT STOP WHEN CONTROL LEVER OR
THE ENABLE SWITCH/TRIGGER IS RELEASED, USE THE EMER
GENCY STOP SWITCH TO STOP THE MACHINE.
Drive Speed Selector Switch
The DRIVE SPEED selector switch can be positioned
either to 3rd gear ( ), 2nd gear ( ) or 1st ( )
position and that speed will be obtained. When the
mast is raised (and/or the jib is raised for Toucan 800
manufactured before 2010), the high speed drive
(TORQUE or HIGH position) is cutout and only the low
drive speed is attainable.
Trav eli ng ( Dri v ing )
See Figure 4-1., Grade and Side Slope
NOTE: Refer to the General Specifications (Section 8) for
Gradeability and Side slope ratings.
All ratings for Gradeability and Side slope are based
upon the machine in transport mode with the mast
and jib being in the stowed position, fully lowered,
and retracted.
-
-
4.1 EMERGENCY CONTROL OPERATION
The machine has a Ground Control Station which will
override the Platform Control Station. Ground Controls
operate Lift and Slew, and are to be used in an
emergency to lower the platform to the ground should
the operator in the platform be unable to do so.
Platform/Off/Ground Selector Switch
With the switch in the ground position, power is
supplied to the Ground Control Station. When the
switch is in the platform position, power is supplied to
the Platform Control Station.
Operate the ground controls as follow :
1. Position PLATFORM/OFF/GROUND CONTROLS
selector switch to GROUND CONTROLS (
2. Push and hold the Function Enable Switch.
3. Activate slewing, mast or jib function switch.
Emergency Stop Switch
This switch, when in the on (out) position, provides
electrical power to the ground controls or platform
controls, as applicable. In addition, the switch can be
used to turn off power (push the switch IN) to the
function controls in the event of an emergency.
rd
NOTE: When the platform is driven in 3
steeper than 5%, the machine switches automati-
cally to 2
when the platform is driven on a slope below 5%.
Either of the following actions must be done :
- release and activate the enable control again.
- return the joystick to neutral and control the movement again.
- position the drive speed selector to 2nd gear
( ) and return it to 3
DO NOT DRIVE WITH MAST OUT OF TRANSPORT MODE EXCEPT
ON A SMOOTH, FIRM AND LEVEL SURFACE.
).
TO AVOID LOSS OF TRAVEL CONTROL OR “TIP OVER”, DO NOT
DRIVE MACHINE ON GRADES EXCEEDING THOSE SPECIFIED IN
SECTION 8.2 OF THIS MANUAL.
USE EXTREME CAUTION WHEN DRIVING IN REVERSE AND AT
ALL TIMES WHEN THE PLATFORM IS ELEVATED.
BEFORE DRIVING, LOCATE THE BLACK/WHITE ORIENTATION
ARROWS ON BOTH THE CHASSIS AND THE PLATFORM
nd
gear. The 3rd gear will be restored only
rd
gear ( ).
gear on a slope
31210031 – JLG Lift – 4-1
Page 30

SECTION 4 - MACHINE OPERATION
CONTROLS. MOVE THE DRIVE CONTROLS IN A DIRECTION
MATCHING THE DIRECTIONAL ARROWS.
With the machine in transport mode, traveling is limited
by two factors, gradeability and side slope.
Gradeability is the percent of grade of the incline the
machine can climb. Sideslope, is the angle of the slope
the machine can be driven across. Reference section 8
for gradeability and side slope ratings.
When the mast (or the jib for Toucan 800
manufactured before 2010) is extended, the machine
must not be operated on grades or side slopes that are
greater than that specified in Section 8. The tilt alarm
will sound and tilt indicator will light to alert the
operator when the machine has exceeded the rated
slope. The drive movements are cut and the slewing,
jib and mast raising movements switch automatically
to slow speed.
4-2 – JLG Lift – 31210031
Page 31

Figure 4-1. Grade and Side Slope
SECTION 4 - MACHINE OPERATION
Forward
1. Position the DRIVE SPEED selector to 1st gear
), 2nd gear ( ) or 3rd gear ( ).
(
2. Match the black and white direction arrows on
both platform control panel and chassis to
determine the direction the machine will travel.
3. Depress footswitch.
4. Push the controller forward within 5 seconds after
the footswitch has been depressed.
Stopping
Stopping is accomplished by slowly returning the
DRIVE controller to the neutral position. The brakes will
apply automatically.
Reverse
Traveling in reverse is accomplished the same way as
traveling forward except for pulling the DRIVE
controller toward the operator to reverse (REV).
Steering
Steering is accomplished by pressing the left side of
the THUMB switch (on top of the controller) to steer to
the left or the right side of the THUMB switch (on top
on the controller) to steer to the right.
TO AVOID TIP OVER, LOWER PLATFORM TO GROUND LEVEL.
THEN DRIVE MACHINE TO A LEVEL SURFACE BEFORE RAISING
MAST.
TO AVOID SERIOUS INJURY, DO NOT OPERATE MACHINE IF ANY
CONTROL LEVER OR TOGGLE SWITCH CONTROLLING
PLATFORM MOVEMENT DOES NOT RETURN TO THE ’OFF’ OR
NEUTRAL POSITION WHEN RELEASED.
IF THE PLATFORM DOES NOT STOP WHEN A CONTROL SWITCH
OR LEVER IS RELEASED, REMOVE FOOT FROM FOOTSWITCH
OR USE EMERGENCY STOP SWITCH TO STOP THE MACHINE.
Raising And Lowering The Mast
Raising the mast :
1. Depress footswitch.
2. Pull the mast function control switch toward the
operator to raise the mast within 5 seconds after
the footswitch has been depressed.
3. Adjust the speed movement using the function
speed control.
Lowering the mast :
1. Depress footswitch.
2. Push the mast function control switch away from
the operator to lower the mast within 5 seconds
after the footswitch has been depressed.
3. Adjust the speed movement using the function
speed control.
31210031 – JLG Lift – 4-3
Page 32

SECTION 4 - MACHINE OPERATION
Raising And Lowering The Jib
Raising the jib :
1. Depress footswitch.
2. Pull the jib function control switch toward the
operator to raise the jib within 5 seconds after the
footswitch has been depressed.
3. Adjust the speed movement using the function
speed control.
Lowering the jib :
1. Depress footswitch.
2. Push the jib function control switch away from the
operator to lower the jib within 5 seconds after the
footswitch has been depressed.
3. Adjust the speed movement using the function
speed control.
Slewing The Turntable
To s l e w :
1. Depress footswitch.
2. Move the turntable slewing control switch to the
right to slew the turntable to the right. Move the
turntable slewing control switch to the left to slew
the turntable to the left. The switch has to be
operated within 5 seconds after the footswitch has
been depressed.
3. Adjust the speed movement using the function
speed control.
4.4 ALARMS
Horn
Horn is activated when the corresponding push button
located on the Platform Control Console is depressed.
Motion Alarm
The machine is fitted with 2 lights (beacons) that come
on as soon as a function is controlled from the platform
control panel or from the ground control panel.
Tilt Light And Alarm
The alarm is triggered by a tilt sensor located on the
right hand side (Toucan 870), left hand side (Toucan
800) of the chassis under the chassis cover. This alarm
is active once the mast (and/or the jib for Toucan 800
manufactured before 2010), has left its lowered
position. It consists of a light on the platform control
panel and an alarm. The alarm and light indicate that
the work platform is at its maximum out of level limit
(refer Table 8.1) and is nearing an unstable position.
Drive function is disabled and the jib, mast and
turntable slewing movements are operable at a
reduced speed.
When the tilt light or alarm is activated, it is
recommended to place the machine in the following
configuration :
1. Mast lowered.
2. Jib in line with the chassis length.
3. Jib lowered.
The tilt alarm and light are also operational from the
ground control panel.
Work Platform Functions Combination
A drive movement cannot be combined with a structure
movement.
If a mast or jib raising movement is activated with a
slewing movement, only one function will work and only at
low speed (lower than normal slewing speed) will be
attainable.
4.3 MANUAL LOWERING CONTROLS
The manual lowering controls should be used in
emergency situations or mechanical breakdown. The
manual lowering controls provide an auxiliary means of
lowering and raising the platform and slewing the
turntable in the event of primary power loss.
DO NOT RAISE MAST OR OPERATE JIB WITH MAST RAISED
WHEN MACHINE IS OUT OF LEVEL.
Overload Light And Alarm (Toucan 800
only)
A sensor located on the platform support is actuated
when the maximum rated load is exceeded. In case of
overload, all functions are disabled, the red indicator
on the platform control panel and on the emergency
control panel flash and an acoustic alarm is triggered.
The work platform must be unloaded until the flashing
light and acoustic alarm stop.
Slack Chain Light And Alarm
The slack chain detection system prevents movements
if the platform or the jib come to rest on an obstacle
while lowering the mast or jib.
When a slack chain is detected, the sensor actuates an
acoustic alarm and a red light is lit on the platform
control panel. All functions of the machine, except the
mast and jib raising movements, are disabled.
Procedure to follow in case this feature is activated :
4-4 – JLG Lift – 31210031
Page 33

SECTION 4 - MACHINE OPERATION
1. Raise the mast or the jib (generally the reverse
movements to the one that caused the alarm to
sound).
2. Identify the cause.
3. Perform the movement which will clear the
machine and prevent contact with the obstacle.
If the examination of the surroundings does not reveal
any possible obstacle, the alarm may have been
triggered by the telescopic mast jamming which could
be due to :
• A foreign body entering the guiding system.
• A lack of lubrication.
• Incorrect operation.
NOTE: The slack chain and light alarms are also
operational from the ground control station.
IF THE SLACK CHAIN ALARM HAS BEEN TRIGGERED BY MAST
JAMMING, DISCONTINUE OPERATION IMMEDIATELY. DO NOT
USE THE MANUAL LOWERING CONTROLS. PLATFORM
OCCUPANTS MUST BE RESCUED AND THE MACHINE SERVICED
BY A QUALIFIED TECHNICIAN.
4.5 SHUT DOWN AND PARK
To shut down and park the machine, the procedures
are as follow :
1. Drive machine to a reasonably well protected
area.
2. Ensure mast is lowered and jib stowed.
3. Push in the Emergency Stop at Platform Control
Station.
4. Push in the Emergency Stop at Ground Control
Station. Position Platform/Off/Ground select
switch to center OFF.
5. Toucan 800 : Position the circuit-breaker to its "O"
position.
Toucan 870 : Depress the circuit breaker push
button.
6. If necessary, cover Platform Controls to protect
instruction placards, warning decals and
operating controls from hostile environment.
7. Charge the batteries if the LEDs on the discharge
indicator are orange or red.
Soft Touch System Light and Alarm (Option)
The soft touch system detects contacts with outside
obstacles under the platform.
When this system is actuated, all the movements of the
platform are disabled, an acoustic alarm sounds and
the movement cut off indicator (orange) lights up on
the platform control panel.
Procedure to follow in case this feature is actuated :
1. Return all controls to neutral.
2. Locate the part of the platform contacting or
interfering with the outside obstacle.
3. Determine the appropriate clearance movement
(generally the opposite movement to the one that
caused the contact).
4. Actuate and keep actuated the auxiliary power
button (
required to clear the obstacle.
This feature is operational only when the platform is
controlled from the platform control panel.
) BEFORE operating the functions
31210031 – JLG Lift – 4-5
Page 34

SECTION 4 - MACHINE OPERATION
4.6 CHARGERS
The work platform on-board electronic charger is
designed to automatically charge 24 V DC lead-acid
rechargeable batteries.
Several types of chargers can be fitted on the machine
depending on the capacity of the battery.
The covers of the machine must be open during
battery charge.
LEAD-ACID BATTERIES MAY EMIT HIGHLY EXPLOSIVE GASES.
THE EMISSION IS GREATLY INCREASED DURING CHARGING.
NEVER INTRODUCE FLAMES, SPARKS OR OTHER SOURCES OF
IGNITION TO BATTERY AREA. FAILURE TO COMPLY WITH THIS
WARNING COULD RESULT IN DEATH OR INJURY TO
PERSONNEL. ALWAYS CHARGE BATTERIES IN A WELLVENTILATED AREA.
DO NOT DISCONNECT BATTERY PLUG WHEN THE CHARGER IS
ON. THE RESULTING ARCING COULD CAUSE BATTERY TO
EXPLODE AND BURNS TO THE OPERATOR.
NOTE: It is not necessary to charge the battery if the
electrolyte specific gravity has not dropped under
1.240 kg/l. Regular charge of a battery when its
specific gravity is higher then 1.240 kg/l can greatly
reduce the battery life.
NOTE: The charger has an interlock feature which causes
the work platform power circuit to open anytime the
charger is plugged into a live AC outlet.
NOTE: If power supply is stopped during the charge cycle,
the charger switches to a waiting mode and restarts
automatically as soon as the power returns.
Supply Voltage :
Always ensure the voltage selected corresponds to the
network voltage and the socket protection is sufficient
to support the charger power.
Incorrect setting of the charger voltage may result in
malfunction or breakdown.
The chargers are factory preset based upon the plug
type fitted.
ZIVAN BC1 High Frequency Electronic Charger
Charging the battery :
- Plug the charger into the mains (single phase 2 poles
+ ground).
- The charger starts automatically.
Remote charge-phase indicator on emergency control
unit :
Red LED :
The charger is in the charge initial phase (phase 1).
Flashing Red LED :
At the end of this phase, the battery is 80% charged
(phase 2).
Red and Green fixed LED :
Battery between 80 and 100% charged.
Green LED :
Battery charge complete, the charging process stops.
Alarms :
A flashing LED and an intermittent acoustic alarm indicate a faulty situation. When the alarm is on, the
charger does no longer deliver any current.
Troubleshooting :
TYPE OF ALARM DESCRIPTION (Action)
Temporisation
Battery current
Battery voltage
The charging phase 1 is lasting longer than the
maximum authorised (check the capacity of the
battery. Contact JLG Product Support).
Loss of control of the output current (fault on
control logic : Contact JLG Product Support).
Loss of control on output voltage (fault on control
logic : Contact JLG Product Support).
Thermal safety
Overheating of semi-conductors (check for proper
operation of the fan).
4-6 – JLG Lift – 31210031
Page 35

SECTION 4 - MACHINE OPERATION
EMB-MP HAWKER Charger (40 or 70 A)
a. Charge indicator (green)
b. Final charge indicator (yellow)
c. Battery indicator charge completed (green)
d. Fault indicator (red)
e. Circuit breaker
Charging the battery :
- Plug the charger into the mains (single phase 2 poles +
ground).
- Once the charger is connected, all the leds begin to flash
for a short period of time, indicating the charger is completing a self-test.
- The leds (c) and (d) will then flash for a short period of
time, indicating the charger is in "automatic starting"
mode.
- The charging phase starts, the green led (a) flashes
slowly (Frequency = 1 second) during the duration of
the charge.
- Once the final charging phase has been reached
(approximately 80%), led (a) still flashes and led (b)
lights up fixed.
- At the end of the charging process, both leds (a) and (c)
are on fixed.
Equalization charge :
- When the charger is doing an equalization charge :
• both leds (a) and (c) flash slowly.
• Led (b) is lit fixed.
Fault indicator :
- Should the transformer overheat, the red led (d) flashes
quickly (Frequency = 0,2 second).
- If the battery does not reach 2.4 V/cell after a 10 hour
charge, the charging process stops and the red led (d)
lights up.
It is advisable to have either the charger or the battery
checked by a technician.
Leds signal :
OFF = the led is off
ON = the led is lit fixed
BL = the led flashes (T=1 second)
BV = the led flashes quickly (T = 0.2 second)
* = the led can be on or off, depending on the state of
charge of the battery and on the charger’s operation at that moment.
31210031 – JLG Lift – 4-7
Page 36

SECTION 4 - MACHINE OPERATION
4.7 EMERGENCY TOWING
Towing is discouraged and must only be performed as
a last option.
IMPORTANT
VERIFY THE CAPACITY OF THE EQUIPMENT USED TO TOW THE
MACHINE.
ENSURE THE MACHINE IS ON LEVEL GROUND BEFORE
RELEASING THE BRAKES.
THE MACHINE MUST ALWAYS BE IN STOWED POSITION DURING
TOWING PROCEDURE.
NO PERSONNEL IS ALLOWED ON THE PLATFORM DURING
TOWING PROCEDURE.
To tow, release the brakes and the wheel motors as follow:
1. Fully lower the platform.
2. Remove the pump handle from its support.
3. Before releasing the valve, wait 30 seconds after
the end of a drive movement.
4. Pull the lever of the brake release valve (located at
the rear side of the chassis) to "BRAKE
UNLOCKED" position (
5. Insert the handle in the hand pump.
).
4.8 LIFTING AND TIE DOWN
IMPORTANT
WHEN TRANSPORTING THE MACHINE, THE MACHINE MUST BE
STOWED.
Lifting
1. The weight of the machine is stamped on the
serial number plate (See § 8.2). If the plate is
missing or illegible, call JLG Industries or weigh
the individual unit to find out the Gross Vehicle
Weight.
2. Place the machine in the stowed position.
3. Remove all loose items from the machine.
4. Attach lifting device and equipment only to the
designated lifting points. (See below).
To uc an 80 0
6. Activate the hand pump until the movement gets
harder.
7. Use a winch to tow the machine (if a winch is not
available, use another low speed towing device).
THERE IS ONE TIE DOWN/EMERGENCY TOW LUG INSTALLED
ON EACH END OF THE CHASSIS OF THE WORK PLATFORM.
8. At the end of the procedure, return the release
valve to NORMAL USE ( ). The machine and
the brakes are operational.
MACHINE HAS NO TOWING BRAKES. TOWING VEHICLE MUST
BE ABLE TO CONTROL MACHINE AT ALL TIMES, ON-HIGHWAY
TOWING NOT PERMITTED, FAILURE TO FOLLOW INSTRUCTIONS
COULD CAUSE SERIOUS INJURY OR DEATH. MAXIMUM TOWING
GRADE 20%.
BEFORE TOWING, THE BRAKES AND THE WHEEL MOTORS
MUST BE RELEASED. TOWING IS LIMITED TO EXTREMELY
SHORT DISTANCES AT A MAXIMUM SPEED OF 1 KM/H. SEVERE
DAMAGE TO THE DRIVE SYSTEM MAY RESULT IF TOWING IS
OTHERWISE ACCOMPLISHED.
Toucan 870
USE BOTH RINGS TO LIFT THE MACHINE.
5. Properly adjust the rigging to prevent damage to
the machine.
4-8 – JLG Lift – 31210031
Page 37

SECTION 4 - MACHINE OPERATION
Tie Down
1. Place the machine in the stowed position.
2. Remove all loose items from the machine.
3. Chock wheels in both directions.
4. Secure the chassis using straps or chains of
adequate strength and attached to the designated
tie down points.
Toucan 800
4.9 LOADING AND UNLOADING
Using a fork lift truck
Toucan 800
Toucan 870
Toucan 870
Figure 4-2. Position of the forks
VERIFY THE CAPACITY OF THE FORKLIFT TRUCK AND OF ITS
EQUIPMENT. FORK LIFT ONLY AT THE DESIGNATED POINTS. ANY
OTHER POSITION OF THE FORKS WILL CAUSE THE MACHINE TO
TIP OVER. NOBODY MUST BE ON THE PLATFORM OF THE
MACHINE DURING LOADING AND UNLOADING OPERATIONS.
THE WORK PLATFORM MUST BE KEPT AS NEAR TO THE
GROUND AS POSSIBLE DURING FORK LIFT OPERATION.
Using a winch for loading
If the work platform cannot be loaded safely using the
work platform controls, use a winch (release brakes
prior to the operation).
CHECK THE CAPACITY OF THE EQUIPMENT USED. PLACE THE
MACHINE IN TOWING MODE (SEE § 4.7) FOR THE LOADING AND
UNLOADING PROCEDURES. NOBODY MUST BE IN THE
PLATFORM DURING THIS OPERATION.
31210031 – JLG Lift – 4-9
Page 38

SECTION 4 - MACHINE OPERATION
4-10 – JLG Lift – 31210031
Page 39

Tou ca n 8 00
SECTION 5 - DECALS
SECTION 5. DECALS
Instructions AU1743
Loads AU1095
31210031 – JLG Lift – 5-1
Page 40

SECTION 5 - DECALS
5-2 – JLG Lift – 31210031
Page 41

Toucan 800 DI
SECTION 5 - DECALS
Instructions AU1743
Loads AU1755
Load Transfer AU1387
31210031 – JLG Lift – 5-3
Page 42

SECTION 5 - DECALS
5-4 – JLG Lift – 31210031
Page 43

Toucan 870
SECTION 5 - DECALS
Standard Platform
Instructions AU1757
Loads AU1756
Large Platform
Instructions AU1757
Loads AU1758
31210031 – JLG Lift – 5-5
Page 44

SECTION 5 - DECALS
5-6 – JLG Lift – 31210031
Page 45

SECTION 6 - EMERGENCY PROCEDURES
SECTION 6. EMERGENCY PROCEDURES
6.1 GENERAL
This section explains the steps to be taken in case of
an emergency situation while operating.
6.2 INCIDENT NOTIFICATION
JLG Industries, Inc. must be notified immediately of
any incident involving a JLG product. Even if no injury
or property damage is evident, the factory should be
contacted by telephone and provided with all
necessary details.
In USA : 877-JLG-SAFE (Toll free)
Outside USA: +44 (0) 141 781 6700
E-mail:ProductSafety@JLG.com
Failure to notify the manufacturer of an incident
involving a JLG Industries product within 48 hours of
such an occurrence may void any warranty
consideration on that particular machine.
IMPORTANT
FOLLOWING ANY ACCIDENT, THOROUGHLY INSPECT THE
MACHINE AND TEST ALL FUNCTIONS FIRST FROM THE GROUND
CONTROLS, THEN FROM THE PLATFORM CONTROLS. DO NOT
LIFT ABOVE 3 M UNTIL YOU ARE SURE THAT ALL DAMAGE HAS
BEEN REPAIRED, IF REQUIRED, AND THAT ALL CONTROLS ARE
OPERATING CORRECTLY.
6.4 EMERGENCY LOWERING
If primary power is lost, the platform may be lowered
manually. Reference section 3 for Manual Lowering
Control procedures.
6.5 EMERGENCY TOWING PROCEDURES
Towing this machine is discouraged. However,
provisions for towing the machine in emergency
situations have been incorporated. For specific
procedures, refer to Section 4.
6.3 EMERGENCY OPERATION
Operator Unable to Control Machine
IF THE PLATFORM OPERATOR IS PINNED, TRAPPED
OR UNABLE TO OPERATE OR CONTROL MACHINE:
1. Other personnel should operate the machine from
ground controls only as required.
2. Other qualified personnel on the platform may use
the platform controls. DO NOT CONTINUE
OPERATION IF CONTROLS DO NOT FUNCTION
PROPERLY.
3. Appropriate equipment can be used to remove
platform occupants and stabilize motion of the
machine.
Platform or Mast Caught Overhead
If the platform or mast becomes jammed or snagged in
overhead structures or equipment, rescue platform
occupants prior to freeing the machine.
31210031 – JLG Lift – 6-1
Page 46

SECTION 7 - INSPECTION AND REPAIR LOG
SECTION 7. INSPECTION AND REPAIR LOG
Type of machine :_______________________________________ Machine Serial Number :__________________________________
Table 7-1. Inspection and Repair Log
Date Comments
Name :______________________________________
Signature :____________________________________
31210031 – JLG Lift – 7-1
Page 47

SECTION 8 - GENERAL SPECIFICATIONS & OPERATOR MAINTENANCE
SECTION 8. GENERAL SPECIFICATIONS & OPERATOR MAINTENANCE
8.1 INTRODUCTION
This section of the manual provides additional
necessary information to the operator for proper
operation and maintenance of this machine.
The maintenance portion of this section is intended as
information to assist the machine operator to perform
daily maintenance tasks only, and does not replace the
more thorough Preventive Maintenance and Inspection
Schedule included in the Service and Maintenance
Manual.
Other Publications Available :
Service and Maintenance Manual French........ MA0306
Service and Maintenance Manual English ....... MA0318
Illustrated Parts Manual Toucan 800 ..............31210056
Illustrated Parts Manual Toucan 870 ..............31210058
Hydraulic schematic Toucan 800 .......................FL0147
Hydraulic schematic Toucan 870 .......................FL0146
Electrical schematic........................................... ELE240
31210031 – JLG Lift – 8-1
Page 48

SECTION 8 - GENERAL SPECIFICATIONS & OPERATOR MAINTENANCE
8.2 OPERATING SPECIFICATIONS
Table 8-1. Operating Specifications And Dimensions
TOUCAN 800 A TOUCAN 800 A TOUCAN 800 DI TOUCAN 870 TOUCAN 870
Platform Size 700 x 900 1010 x 900 1300 x 900 700 x 900 1010 x 900
220 kg
Maximum Work Load 200 kg (2 persons + 40 kg material)
Slewing 360° non-continuous 180°
Max. Platform Height 6.10 m 6.72 m
Horizontal Reach
( fr o m ce n te r li n e of m ac h in e )
( fr o m re a r w h ee l e dg e )
( fr o m s i de w he e l e d ge )
Up and Over Clearance 5.35 m 5.42 m
Max. Hydraulic System Pressure 23 MPa
Maximum Operating Wind Speed 45 km/h (12.5 m/s) 0 km /h 45 km/h (12.5 m/s)
Maximum Horizontal Manual Force 400 N
Electrical System Voltage 24V
Gross Machine Weight
Gross Machine Weight
Overall Length before 2010 1.90 m 2.20 m 2.50 m 2.67 m 2.99 m
Overall Length since 2010 1.94 m 2.25 m 2.53 m 2.67 m 2.99 m
Overall Height 1.99 m
Overall Width 0.99 m
Maximum Wheel Load 1400 kg 1500 kg 1950 kg
Maximum Travel Grade (Gradeability)
With mast in stowed position and jib below horizontal
Maximum Travel Grade (Side slope)
With mast in stowed position and jib below horizontal
Tilt Sensor Setting 2°
Tu rn in g R ad iu s
Inside :
Outside :
Vibration levels
Acoustic pressure
(Platform Empty) before 2010 1950 kg 2000 kg 2980 kg
(Platform Empty) since 2010 2100 kg 2200 kg 2980 kg
1.89 m
1.10 m
1.40 m
The weighed root mean square acceleration value to which the arms are subjected (control levers)
is inferior to 2,5m/s/s.
The weighed root mean square acceleration value to which the feet are subjected (platform floor)
is inferior to 0,5m/s/s/.
The equivalent continuous ’A’ weighed sound pressure level at the work station is <to 70 dB(A).
The measure has been taken by placing the sonometer at 1,60 m above the platform floor.
2.19 m
1.40 m
1.70 m
20% (11°) 15% (8.5°)
2.40 m
1.60 m
1.90 m
1.05 m
2.40 m
(2 persons + 60 kg
material)
2.64 m
1.84 m
2.15 m
5°
200 kg
(2 persons + 40 kg
material)
2.96 m
2.15 m
2.46 m
8-2 – JLG Lift – 31210031
Page 49

SECTION 8 - GENERAL SPECIFICATIONS & OPERATOR MAINTENANCE
Fluid Capacities
Table 8-2. Capacities
Main Hydraulic Tank 19 l
Hydraulic Power Unit
Table 8-3. Hydraulic Power Unit Specifications
Maximum 24 MPa
Powe r 4.8 k W
Vol tage 24 V DC
Flow Rate 9.1 l/mn
Displacement 3.5 cm³/t
Powe r 0.8 k W
Vol tage 24 V DC
Main
Power
Unit
Steering
Unit
Motor
Pump
Maximum 12 MPa
Motor
Pump Displacement 0.5 cm³/t
Batteries
Table 8-4. Battery Specifications
Voltage 24 Volt
Amp Hour Rating
Life Cycle Rating 1200 Cycles
Toucan 800 240 Ah (5h rate)
Toucan 870 620 Ah (5h rate)
31210031 – JLG Lift – 8-3
Page 50

SECTION 8 - GENERAL SPECIFICATIONS & OPERATOR MAINTENANCE
To uc a n 8 00
To uc a n 8 70
Figure 8-1. Operator Maintenance & Lubrication Diagram
1 - B a t te r ie s
2- Hydraulic Filters
3- Turntable Lubrication
4- Lifting Chains Lubrication
5 - M a s t S e ct i on L u br i ca t io n
6 - W h ee l B ea r in g & S t eering Knuckles Lubrication
7- Hydraulic Oil Reser voir
8- Steering Hydraulic Unit Reservoir
9- Tires & Wheels
10- Verification of the Overload Detection Setting (if fitted)
11- Verification of the Tilt Alarm Setting
8-4 – JLG Lift – 31210031
Page 51

SECTION 8 - GENERAL SPECIFICATIONS & OPERATOR MAINTENANCE
8.3 OPERATOR MAINTENANCE
1. Batteries
DRAINED WATER MAY HAVE BEEN IN CONTACT WITH ACID AND
MAY HAVE BECOME CORROSIVE. DO NOT ALLOW DRAIN
WATER TO CONTACT THE SKIN OR EYES. IF IT OCCURS, FLUSH
THE CONTACTED AREA WITH WATER AND CONSULT A DOCTOR
IMMEDIATELY. APPROPRIATE EQUIPMENT MUST BE WORN
(GLOVES, GOGGLES, RUBBER APRON) TO PREVENT THE
DRAINED WATER FROM CONTACTING THE SKIN OR ANY PART
OF THE BODY.
BATTERY ELECTROLYTE MUST NOT BE ALLOWED TO CONTACT
THE SKIN OR EYES. IF IT DOES OCCUR, FLUSH THE
CONTACTED AREA WITH WATER AND CONSULT A DOCTOR
IMMEDIATELY. APPROPRIATE EQUIPMENT MUST BE WORN
(GLOVES, GOGGLES, RUBBER APRON) TO PREVENT THE
ELECTROLYTE FROM CONTACTING THE SKIN OR ANY OTHER
PART OF THE BODY DURING ANY SERVICING OPERATION ON
THE BATTERY.
• Fill the can with distilled water.
• Depress and hold the push button to activate the
battery filling pump until the flow indicator slows
down.
DURING MAINTENANCE OR ANY SERVICING OPERATION ON
THE BATTERY, RINGS, WATCHES OR ANY OTHER JEWELLERY
MUST BE REMOVED.
Daily maintenance
Electrolyte level
Verify the electrolyte level after the charge using the floats in
the center of each filling cap.
NOTE: Tilt the charger to gain access to the front battery
pack.
Fill the battery cells, if necessary, after the charge
using the filling system.
• Check that the level is correct in each battery cell.
Weekly maintenance
Cleaning - Battery maintenance
It is necessary to clean the battery regularly to prevent
salt formation and current arcing which could damage
the machine.
• Clean and dry the battery top.
• Ensure the connections are clean and tight.
• Keep the metallic containers clean. In case of
corrosion, clean, neutralize corrosion and apply
anti-acid paint on the affected area.
• Drain the water that can accumulate at the bottom of
the container (electrolyte overflow, leak in the
centralized filling circuit, battery cleaning...).
To drain the water :
IMPORTANT
USE ONLY DISTILLED OR DEMINERALIZED WATER TO FILL THE
BATTERY CELLS. BATTERY CELLS MUST BE FILLED ONLY
AFTER THE CHARGE (DURING THE CHARGE, THE
ELECTROLYTE LEVEL INCREASES AND CAN OVERFLOW).
31210031 – JLG Lift – 8-5
• A draining bulb is supplied with the work platform
NOTE: The water that contacted a battery is classified as
industrial waste, it must be disposed of according
to regulations in force.
Page 52

SECTION 8 - GENERAL SPECIFICATIONS & OPERATOR MAINTENANCE
Monthly maintenance
Checking voltage and electrolyte specific gravity
NOTE: Voltage and specific gravity measures should not
be performed after battery cells have been filled.
These measures must be done after a complete
charge once the charger has been unplugged and
the machine has been standing for 15 mn.
• Open the battery cell filling cap.
• Using the hydrometer, take a quantity of electrolyte
sufficient so that the float emerges. Ensure the float
top does not touch the rubber bulb or that the float
does not stick by capillarity to the glass wall.
• Read the value as indicated on the example below :
Various recommendations
Use of a battery in a cold chamber or in a cold climate
Low temperatures decrease battery capacity. The
battery must be fully charged when the work platform
is operated in a cold chamber or in cold weather
condition.
Battery not working continuously or inactive battery
A battery that is not used or used intermittently must be
stored charged in a dry area away from freezing
temperatures. A charge must be performed once a
month.
• Unplug the battery to insulate it electrically.
• Keep the top of the battery clean and dry to prevent
self discharge.
IMPORTANT
IF THE BATTERY IS NOT USED CONTINUOUSLY, IT MUST BE
RECHARGED BEFORE USE AND AT LEAST ONCE A MONTH, EVEN
IF THE ELECTROLYTE SPECIFIC GRAVITY MEASURES ARE HIGH.
BEFORE PLACING IN SERVICE A BATTERY WHICH REMAINED
INACTIVE FOR A LONG PERIOD OF TIME, YOU MUST RECHARGE
THE BATTERY AND CHECK THE ELECTROLYTE LEVEL IN THE
CELLS
• Return the electrolyte in the cell and record cell
electrolyte specific gravity in the battery service log.
• Repeat operation for each battery cell.
• Contact JLG Industries if important disparities are
noticed between the gravity of the different cells and
if the values are lower than 1.24.
• Check each cell voltage.
• Contact JLG Industries if important disparities are
noticed between the voltage of the different cells.
Annual maintenance
Filling system maintenance
It is necessary to service the centralized filling system
at least once a year. Cleaning frequency must be
increased in case of premature clogging of the filter or
a reduction in water flow.
• Disconnect and clean the filter by reversing the
water flow from the normal direction.
• Check the hoses for flexibility. In case of hardening
in the connection areas, replace the hose.
• Check every fitting for tightness and leakage.
• Check the cell caps individually. Ensure the perfect
mobility of the floats. In case of excessive clogging,
replace the cap. In any case, it is recommended to
replace the caps every 2 to 3 years.
8-6 – JLG Lift – 31210031
Page 53

SECTION 8 - GENERAL SPECIFICATIONS & OPERATOR MAINTENANCE
Battery troubleshooting
Symptoms Probable causes Solutions
Electrolyte overflow.
Inequal electrolyte specific gravity or
electrolyte specific gravity too low.
Low voltage in the cells in open circuit.
Battery cells temperature too high (over 113°F
(45°C)).
Battery incapable of supporting regular
operation.
Filling done before the charge.
Cells overfilled.
Overcharge.
Filling done before the charge.
Loss of electrolyte due to overflow.
Stratification of the electrolyte.
Electrolyte specific gravity too low.
Short-circuit.
Problem with the charger.
Bad air circulation during charge.
Cell weak or faulty
Cells shorted.
Battery under charged.
Cell faulty.
Faulty cable or connection.
Battery at the end of its service life.
Fill battery cells after the charge.
Never charge battery if electrolyte specific gravity is above 1,240 kg/l.
Fill battery cells after the charge.
Perform an equalization charge.
Contact your JLG Distributor/Product Support.
Refer to "electrolyte specific gravity too low".
Clean battery top.
Get the charger checked by a technician.
Open access doors to batteries during charge.
Reduce temperature of the area where the battery is charged (artificial ventilation).
Change battery cell.
Perform an equalization charge.
Replace faulty cell.
Check wire condition and connection.
Replace the battery.
31210031 – JLG Lift – 8-7
Page 54

SECTION 8 - GENERAL SPECIFICATIONS & OPERATOR MAINTENANCE
Lubrication Specification
ST ANDA RD
NERVOFLU ID VG 32 NERVO L - EQUI VIS XV 32 MOBI LTAC 81
NE R VO F L UI D DVG 3 2 NE R VO L - HY DR AL F XV 32
A
B
MOBIL DTE 13M
FO OD C OM PATI BL E
NERVOL - AGROFLUID DVG 32 NERVOL - AGROFLUID MOBIL DTE 16M
MOBIL - DTE FM 32 CHAINE FILANTE HYDRELF XV 32
ST ANDA RD
COMPLEX EP 2 NERVO L - CRYOGREASE MOBILUX EP2
MOBILUX EP2 MOBILITH SHC 220 COMPLEX EP2
2. Hydraulic filters
LOW TEMPERATURE
DOWN -35°C
FO OD COM P ATIB LE
LOW TEMPERATURE
LOW TEMPERATURE
DOWN -35°C
C
D
E
• Install a new filter cartridge.
• Install the filter container.
IMPORTANT
ALWAYS REPLACE BOTH FILTERS AT THE SAME TIME.
Pressure Filter
To uc an 8 00
Toucan 870
Return Filter
Interval - After first 50 hours of operation and
every 250 hours thereafter.
• Position the Platform/Off/Ground
Selector Switch to "O" position.
• Remove the return filter cap and remove
the spring.
• Replace the filter cartridge with a new
one.
• Check the presence and condition of the
O ring, close the filter cover. Do not
forget to install the spring.
STANDARD
STANDARD
STANDARD
LOW TEMPERATURE
DO WN -3 5°C
Interval - After first 50 hours of operation and
every 250 hours thereafter.
.
• Position the Platform/Off/Ground
Selector Switch to "O" position.
• Activate the release valve (located at
the rear side of the chassis) to release
the pressure in the hydraulic circuit
(position the release valve lever to
"release position" ( ).
• Unscrew the filter container.
HIGH PRESSURE OIL COULD PENETRATE SKIN AND CAUSE
INJURIES OR BURNS.
LOOSEN THE FILTER TANK VERY SLOWLY TO ALLOW THE OIL
PRESSURE TO DROP GRADUALLY.
NOTE: Use a container to collect the oil from the hydraulic
lines or from the filter and prevent it from spilling on
the work platform or on the ground.
IMPORTANT
AFTER INSTALLATION, PERFORM A FEW MOVEMENTS TO
BLEED THE AIR FROM THE HYDRAULIC CIRCUIT, CHECK THE
OIL LEVEL IN THE TANK (PLATFORM IN RETRACTED POSITION).
NOTE: Used oils and cartridges must be disposed of
according to regulations in force.
NOTE: Aside from JLG recommendations, it is not
advisable to mix oils of different brands or types, as
they may not contain the same required additives or
be of comparable viscosities. If use of hydraulic oil
or grease other than recommended in the previous
chart, contact JLG Industries for proper
recommendations.
IMPORTANT
LUBRICATION INTERVALS ARE BASED ON MACHINE
OPERATION UNDER NORMAL CONDITIONS. FOR MACHINES
USED IN MULTI-SHIFT OPERATIONS AND/OR SEVERE
ENVIRONMENTS, LUBRICATION FREQUENCY MUST BE
INCREASED ACCORDINGLY.
8-8 – JLG Lift – 31210031
Page 55

SECTION 8 - GENERAL SPECIFICATIONS & OPERATOR MAINTENANCE
3. Turntable Lubrication
Bearing Track :
Lube Point - Grease Fitting
Lube - TYPE E
Interval - Every 250 hours of operation.
Grease the bearing track using a grease pump.
Turntable Teeth :
Lube Point(s) - Coat each tooth.
Lube - TYPE C
Interval - Every 1000 hours of operation
• Remove the protection covers.
5. Mast Section Lubrication
Lube - TYPE B
Interval - every 125 hours of operation or after each
cleaning.
Comments - Clean the inside wall of mast to remove
the old grease. Lubricate the mast inside wall using a
brush.
6. Wheel Bearing & Steering Knuckle Lubrication
OPERATION MUST BE PERFORMED ON FLAT AND HORIZONTAL
GROUND, IN AN AREA ALLOWING FULL ROTATION OF THE
STRUCTURE.
• Apply new grease with a brush on the turntable
teeth. Rotate the structure to ensure all the teeth
have been greased.
4. Lifting chains lubrication
Lube - TYPE D
Interval - every 125 hours or once every 30 days of
operation.
Comments - Lubricant can be applied manually with a
brush or by spraying. Apply lubricant :
- Longitudinally : in areas where joints are under small
load to facilitate penetration of the lubricant.
- Transversally : between the plates to enable the
lubricant to reach the joint and between the internal
plates and the rollers.
Lube point(s) - 2 Grease Fittings
Lube - TYPE E
Interval - every 125 hours of operation.
Comments - One fitting on each hub and one fitting
on each knuckle.
31210031 – JLG Lift – 8-9
Page 56

SECTION 8 - GENERAL SPECIFICATIONS & OPERATOR MAINTENANCE
7. Hydraulic Oil Reservoir
To uc an 8 00
To uc a n 8 70
b. Place a container with a minimum capacity of 25
liters under the oil reservoir plug.
Toucan 800
Toucan 870
Lube point(s) - Return filters
Capacity : 19 liters
Lube - TYPE A
Interval - Check oil daily. Change after every 1000
hours of operation or at least every 2 years.
Reservoir Draining :
IMPORTANT
THE FILTERS MUST BE REPLACED WHEN THE OIL IS CHANGED
IN THE MAIN RESERVOIR.
a. Position the Platform/Off/Ground Selector
Switch to "O" position.
c. Unscrew the drain plug.
NOTE: Do not let the oil spill on the work platform or on the
ground.
d. Tighten the drain plug once all the oil has been
drained.
e. Used oils must be disposed of according to
regulations in force.
Reservoir Filling :
f. Replace the pressure filter cartridge (refer to
"Hydraulic Filters section").
g. Unscrew the return filter cover and remove the
spring.
h. Remove the filter cartridge.
i. Fill the tank with new oil to the maximum level.
j. Install a new filter cartridge, check the presence
of the O-ring and close the filter lid.
k. Perform a few movements to bleed the air from
the hydraulic circuit.
l. Check oil level in the tank through sight gauge
on the reservoir and add oil if necessary, with
THE WORK PLATFORM IN RETRACTED
POSITION, without exceeding maximum level.
8-10 – JLG Lift – 31210031
Page 57

SECTION 8 - GENERAL SPECIFICATIONS & OPERATOR MAINTENANCE
8. Steering hydraulic unit reservoir
Lube Point(s) - Breather Cap
Capacity - 1 liter
Lube - TYPE A
Interval - Check after every 125 hours of operation.
Drain after 1000 hours of operation or at least every 2
years.
Reservoir Draining :
a. Disconnect the battery form the work platform.
b. Tag and disconnect electrical cables from the
hydraulic unit motor.
c. Tag and disconnect the hydraulic lines from the
hydraulic unit output. Cap the hydraulic lines
and the unit port holes.
HIGH PRESSURE OIL COULD PENETRATE SKIN AND CAUSE
INJURIES OR BURNS. LOOSEN THE HYDRAULIC CONNECTIONS
VERY SLOWLY TO ALLOW THE PRESSURE TO DROP GRADUALLY
NOTE: Use a container to collect the oil from the hydraulic
lines or from the hydraulic group and prevent it from
spilling on the work platform or on the ground.
.
9. Tires And Wheels
Tire wear and damage :
Inspect tires periodically for wear or damage. Tires with
worn edges or distorted profiles require replacement.
Tires with significant damage in the tread area or side
wall, require immediate evaluation before placing the
machine into service.
Wheel installation :
It is extremely important to apply and maintain proper
wheel mounting torque.
WHEEL NUTS MUST BE INSTALLED AND MAINTAINED AT THE
PROPER TORQUE TO PREVENT LOOSE WHEELS, BROKEN
STUDS AND POSSIBLE SEPARATION OF WHEEL FROM THE
AXLE. BE SURE THAT THE LUG NUTS ARE SEATED PROPERLY
TO THE WHEEL.
Use a torque wrench to tighten the fasteners. If you do
not have a torque wrench, tighten the fasteners with a
lug wrench, then immediately have a service garage or
dealer tighten the lug nuts to the proper torque. Overtightening will result in breaking the studs or
permanently deforming the mounting stud holes in the
wheels. The proper procedure for attaching wheels is
as follows :
• Start all nuts by hand to prevent cross threading.
DO NOT use a lubricant on threads or nuts.
• Tighten nuts in the following sequence :
d. Remove the hydraulic unit.
e. Place the hydraulic unit above a container, open
the filling hole and turn the group upside down
to drain the oil from the reservoir.
f. Wipe the outside of the group with a non fluffy
rag.
g. Install the hydraulic unit, reconnect the hydraulic
lines and the electrical cables.
h. Used oils must be disposed of according to
regulations in force.
Reservoir Filling :
i. Unscrew the filling cap and fill the tank with new
oil until the oil level is visible through the filling
hole.
j. Install the cap and perform a few steering
movements to bleed the air from the hydraulic
circuit.
NOTE: Tighten the hydraulic lines as soon as the oil starts
flowing out.
k. Add oil in the tank if necessary, with the steering
cylinder in retracted position.
Figure 8-2. Wheel Torque Chart
To rq u e V al ue s (N m ) 15 0
• Tightening of the nuts should be done in stages.
Following the recommended sequence, tighten nuts
as follow :
To rq u e S ta g es ( Nm )
1st stage 2nd stage 3rd stage
50 100 150
• Wheel nuts should be torqued after first 50 hours or
after each wheel removal. Check and torque every 3
months or 150 hours of operation.
IMPORTANT
TIGHTEN THE NUTS USING A TORQUE WRENCH. DO NOT USE
IMPACT WRENCH.
31210031 – JLG Lift – 8-11
Page 58

SECTION 8 - GENERAL SPECIFICATIONS & OPERATOR MAINTENANCE
10. Verification Of The Overload Detection
Setting (Toucan 800 only)
Interval - Check after every 6 months of operation.
a. Place a 200 kg load evenly distributed on the
platform floor.
b. Position the Platform/Off/Ground selector switch
to "Platform Controls". ensure the lower
emergency stop is not activated.
c. Apply a slight pressure F1 on the platform and
ensure that :
• An acoustic alarm sounds.
• The corresponding LED lights up.
• Every function is disabled from the platform controls.
d. Position the Platform/Off/Ground selector switch
to "Ground Controls" and ensure that :
• An acoustic alarm sounds.
• The corresponding LED lights up.
• Every function disabled from the ground controls.
e. Apply a slight traction F2 on the platform and
ensure that the acoustic alarm stops.
Machine manufactured before 2010
Machine manufactured after 2010
8-12 – JLG Lift – 31210031
Page 59

SECTION 8 - GENERAL SPECIFICATIONS & OPERATOR MAINTENANCE
11. Verification Of The Tilt Alarm Setting
Interval - Check after every 6 months of operation.
a. Place machine on a known level surface.
b. Position the selector switch to "Ground controls".
c. Chock both rear wheels.
d. Place a spirit level (digital display) on the chassis
positioned lengthways.
e. With a jack of appropriate capacity, lift the front
of the chassis to tilt level specified in Table 8.1
and ensure that :
• An acoustic alarm sounds when the chassis is
tilted at its max value.
• The corresponding LED lights up on the
platform controls.
f. Repeat steps (d) to (e) with the front wheels
chocked and lift at the rear.
g. Place a spirit level (digital display) across the
chassis.
h. With a jack of appropriate capacity, lift the right
hand side of the chassis to tilt level specified in
Table 8.1 and ensure that :
• An acoustic alarm sounds when the chassis is
tilted at its max value.
• The corresponding LED lights up on the
platform controls
i. Repeat steps (g) and (h) with the left side of the
chassis lifted.
j. Remove the blocks.
31210031 – JLG Lift – 8-13
Page 60

SECTION 8 - GENERAL SPECIFICATIONS & OPERATOR MAINTENANCE
8-14 – JLG Lift – 31210031
Page 61

Page 62

JLG Worldwide Locations
Corporate Office
JLG Industries, Inc.
1 JLG Drive
McConnellsburg PA. 17233-9533
USA
Phone: (717) 485-5161
Fax: (717) 485-6417
JLG Industries (Australia)
P.O. Box 5119
11 Bolwarra Road
Port Macquarie
N.S.W. 2444
Australia
Phone: (61) 2 65 811111
Fax: (61) 2 65 810122
JLG Deutschland GmbH
Max Planck Strasse 21
D-27721 Ritterhude/lhlpohl
Germany
Phone: (49) 421 69 350 - 20
Fax: (49) 421 69 350 - 45
JLG Polska
UI. Krolewska
00-060 Warsawa
Poland
Phone: (48) 91 4320 245
Fax: (48) 91 4358 200
JLG Latino Americana Ltda.
Rua Eng. Carlos Stevenson,
80-Suite 71
13092-310 Campinas-SP
Brazil
Phone: (55) 19 3295 0407
Fax: (55) 19 3295 1025
JLG Equipment Services Ltd
Rm 1107 Landmark North
39 Lung Sum Avenue
Sheung Shui N.T.
Hong Kong
Phone: (852) 2639 5783
Fax: (852) 2639 5797
JLG Industries (Scotland)
Wright Business Centre,
1 Lonmay Road
Queenslie
Glasgow G33 4EL
Scotland
Phone: (44) 141 781 6700
Fax: (44) 141 773 1907
JLG Industries (UK) Ltd
Bentley House
Bentley Avenue
Middleton
Greater Manchester
M24 2GP
England
Phone: (44) 161 654 1000
Fax: (44) 161 654 1003
JLG Industries (Italia)
Via Po. 22
20010 Pregnana Milanese - MI
Italy
Phone: (39) 02 9359 5210
Fax: (39) 02 9359 5845
Plataformas Elevadoras
JLG Iberica, S.L.
Trapadella, 2
P.I. Castellbisbal Sur
08755Castellbisbal
Spain
Phone: (34) 93 77 24700
Fax: (34) 93 77 11762
JLG France SAS
Z.I. Guillaume mon Amy
BP 20
47400 Fauillet
France
Phone: (33) 553 883 170
Fax: (33) 553 883 179
JLG Europe B.V.
Polaris Avenue 63
2132 HJ Foofddorp
The Netherlands
Phone: (31) 23 565 5665
Fax: (31) 23 557 2493
JLG Sverige AB
Enkopingsvagen 150
Box 704
SE - 176 27 Jarfalla
Sweden
Phone: (46) 8 506 59500
Fax: (46) 8 506 59534
www.jlg.com
 Loading...