

Page 1
Chromasit
Instructions for Use
SR
Page 2
2
Table of Contents
3 SR Chromasit
4 Composition
5 Range and description of products
5 SR Chromasit Opaquer
5 SR Chromasit Intensive Oqaquer
6 SR Chromasit Opaquer Liquid
7 SR Chromasit Dentin
7 SR Chromasit Incisal
8 SR Chromasit Creative Dentin
8 SR Chromasit Creative Incisal
9 SR Chromasit Color
9 SR Chromasit Intensive
10 Bonding systems and accessories
10 SR Link
10 SR Chroma Link
10 SR Spectrasit Liquid
10 SR Chromasit Fluid
11 Retention Adhesive
11 Micro- and Macroretention
11 Separating Fluid
12 Shade selection
13 Processing instructions
13 Fabricating the model
13 Designing the framework / Contouring
14 Preparing the framework
16 Conditioning the metal surfaces with SR Link or SR Chroma Link
17 Applying the opaquer
19 Layering diagram
20 Layering technique
21 Possibilities of customizing SR Chromasit with SR Chromasit Color and SR Chromasit Intensive
22 Preparing the restoration for polymerization
22 Finishing
24 Processing instructions for fully veneered restorations
26 Cleaning
26 Repairs
26 Warnings
27 SR Chromasit – Materials combination table
Page 3
3
Chromasit
SR
SR Chromasit is a pressure/heat-curing micro-
filled veneering material. It features excellent
physical properties and provides true-tonature shade effects. The material therefore
facilitates the fabrication of lifelike composite
veneers.
The consistencies of the various ready-to-use
SR Chromasit veneering materials are
coordinated and compatible with each other.
As a result, SR Chromasit Dentin, Incisal and
the various special compounds can be
layered without intermediate polymerization.
The combination of the SR Chromasit
veneering material with the SR Link or
SR Chroma Link bonding system produces
long-lasting high-quality results.
Indication
– metal-supported crowns and bridges
– fully veneered restorations up to the
second premolar
– metal-supported implant-borne
superstructures
– veneers in combination dentures
– long-term temporaries in combination with
Vectris
Contraindication
– occlusal veneers on molars
– layer thicknesses of less than 1.5 mm in
the occlusal region
– alloys containing more than 50% silver
and/or copper
– alloys containing more than 90% gold,
palladium and platinum
– non-precious metal alloys or titanium with-
out mechanical retention
– bruxism
Important restrictions on
application
If the following advice is not followed, the
success of SR Chromasit restorations may be
jeopardized:
– Do not apply the material in layers thinner
than the stipulated minimum layer
thickness.
– If the polymerization unit is contaminated
(eg lime build-up), the polymerization
temperature may fall below the required
minimum temperature (115–120 °C /
239–248 °F). If the required temperature is
not reached, incompletely polymerized
veneers, which are prone to the formation
of accrection and plaque, may result.
– If used inappropriately, ultrasonic cleaning
fluids may dissolve the resin surfaces
because of their high degree of acidity.
– It is advisable to use a special jet medium
(Al
2O3
) with a grit size of 100 microns at
2 bar pressure for blasting purposes.
– The use of a jet medium with a lower grit
size may result in veneering material
chipping off.
Side effects
Systemic side effects have not been reported
to date. Allergic reactions may occur in rare
cases. Do not use SR Chromasit restorations
in patients with a suspected or known allergy
to any of the material’s ingredients.
Page 4

4
Composition
– SR Chromasit Dentin, Creative Dentin
and Opaque Dentin
Ingredients: The monomer matrix consists
of urethane dimethacrylate and deca-
methylene dimethacrylate (34 wt%). The
fillers are highly dispersed silicon dioxide
and copolymers (65 wt%).
Additionally, the material contains
stabilizers, catalysts and pigments
(1 wt%). The total content of inorganic
fillers is 30 wt%, or 13.8 vol%. The
particle size ranges between 5 and 20 nm.
– SR Chromasit Incisal, Creative Incisal
and Transparent
Ingredients: The monomer matrix consists
of urethane dimethacrylate and deca-
methylene dimethacrylate (35 wt%). The
fillers are highly dispersed silicon dioxide
and copolymers (64 wt%).
Additionally, the material contains
stabilizers, catalysts, and pigments
(1 wt%). The total content of inorganic
fillers is 30 wt%, or 13.7 vol%. The
particle size ranges between 5 and 20 nm.
– SR Chromasit Color and Intensive
Ingredients: dimethacrylate
(61.5–63.5 wt%), fillers (33.5–35.5 wt%).
Additional ingredients: stabilizers, catalysts
and pigments (1–4 wt%).
– SR Chromasit Opaquer
Ingredients: copolymers, aluminium oxide,
titanium dioxide, barium sulphate and zinc
oxide (98.5 wt%).
Additional ingredients are catalysts and
pigments (1.5 wt%).
– SR Spectra Opaquer Pink
Ingredients: polymethyl methacrylate and
titanium dioxide (97.5 wt%)
Additional ingredients: catalysts and
pigments (2.5 wt%).
– SR Chromasit Intensive Opaquer
Ingredients: polymethyl methacrylate,
aluminium oxide, titanium dioxide, barium
sulphate and zinc oxide (> 97 wt%).
Additional ingredients: catalysts and
pigments (1–3 wt%).
– SR Chromasit Opaquer Liquid
Ingredients: methyl methacrylate and
urethane dimethacrylate (100 wt%).
– SR Chroma Link
Ingredients: methyl methacrylate
(> 98 wt%)
Additional ingredients: acid ester and
alcohol (< 2 wt%).
Storage
– Storage temperature: 12–28 °C
(54–82 °F)
– Keep packages in use at room
temperature (18–25 °C / 65–77 °F).
– Store SR Chromasit Fluid and SR Link in
the refrigerator (2–8 °C / 36–46 °F).
Once opened, Chromasit Fluid remains
usable for six months, if stored in a
refrigerator. Possible crystal formations
can be dissolved by warming the
material up to room temperature.
– Protect SR Chromasit Fluid from
humidity.
– SR Chromasit Fluid may exhibit a slightly
yellowish tinge after some time.
However, this does not affect the
quality of the Fluid or the veneer.
– Protect the material against direct
sunlight.
– Do not use the material after the expiry
date.
– Keep the materials out of the reach of
children.
– SR Chromasit Fluid
Ingredients: copolymers and benzoyl
peroxide dissolved in diethyl ketone.
– SR Link
Ingredients: bisphenol A-polyethoxy
dimethacrylate, hydrophobic
dimethacrylate, hydrogen phosphate,
solvent and benzoyl peroxide.
– SR Spectrasit Liquid
Ingredients: urethane dimethacrylate and
decamethylene dimethacrylate
(> 99 wt%), catalyst (< 1 wt%).
– SR Spectrasit Gel
Ingredients: glycerine, highly dispersed
silicon dioxide and aluminium oxide.
– Separating Fluid
Ingredients: sodium alginate, sodium
tetraborate, glycerine and pigments in an
aqueous solution.
– Retention Adhesive
Ingredients: copolymers, resin and
softener (30 wt%) dissolved in acetone
(70 wt%).
– Micro- and Macroretention
Ingredients: copolymer (99.5 wt%) and
titanium oxide (0.5 wt%).
– microretention beads: 200–300 microns
– macroretention beads: 400–600 microns
Page 5

5
Range and description of products
SR Chromasit Opaquer
The heat-curing SR Chromasit Opaquer
reacts with metal surfaces that have been
conditioned with SR Chroma Link or SR Link.
It masks the metal framework in a toothcoloured shade.
Delivery form
– SR Chromasit Opaquer, 5 g
Colour designations: 011, 012, 014, 015, 016, 023, 024
SR Chromasit Intensive Opaquer
These intensive shades are coordinated with
the SR Chromasit Opaquer and are used to
customize the shade of the opaquer.
Delivery form
– SR Chromasit Intensive Opaquer, 5 g
Shades: 01 white, 02 light yellow, 03 yellow, 04 brown,
05 pink, 06 violet, 07 grey
Page 6
6
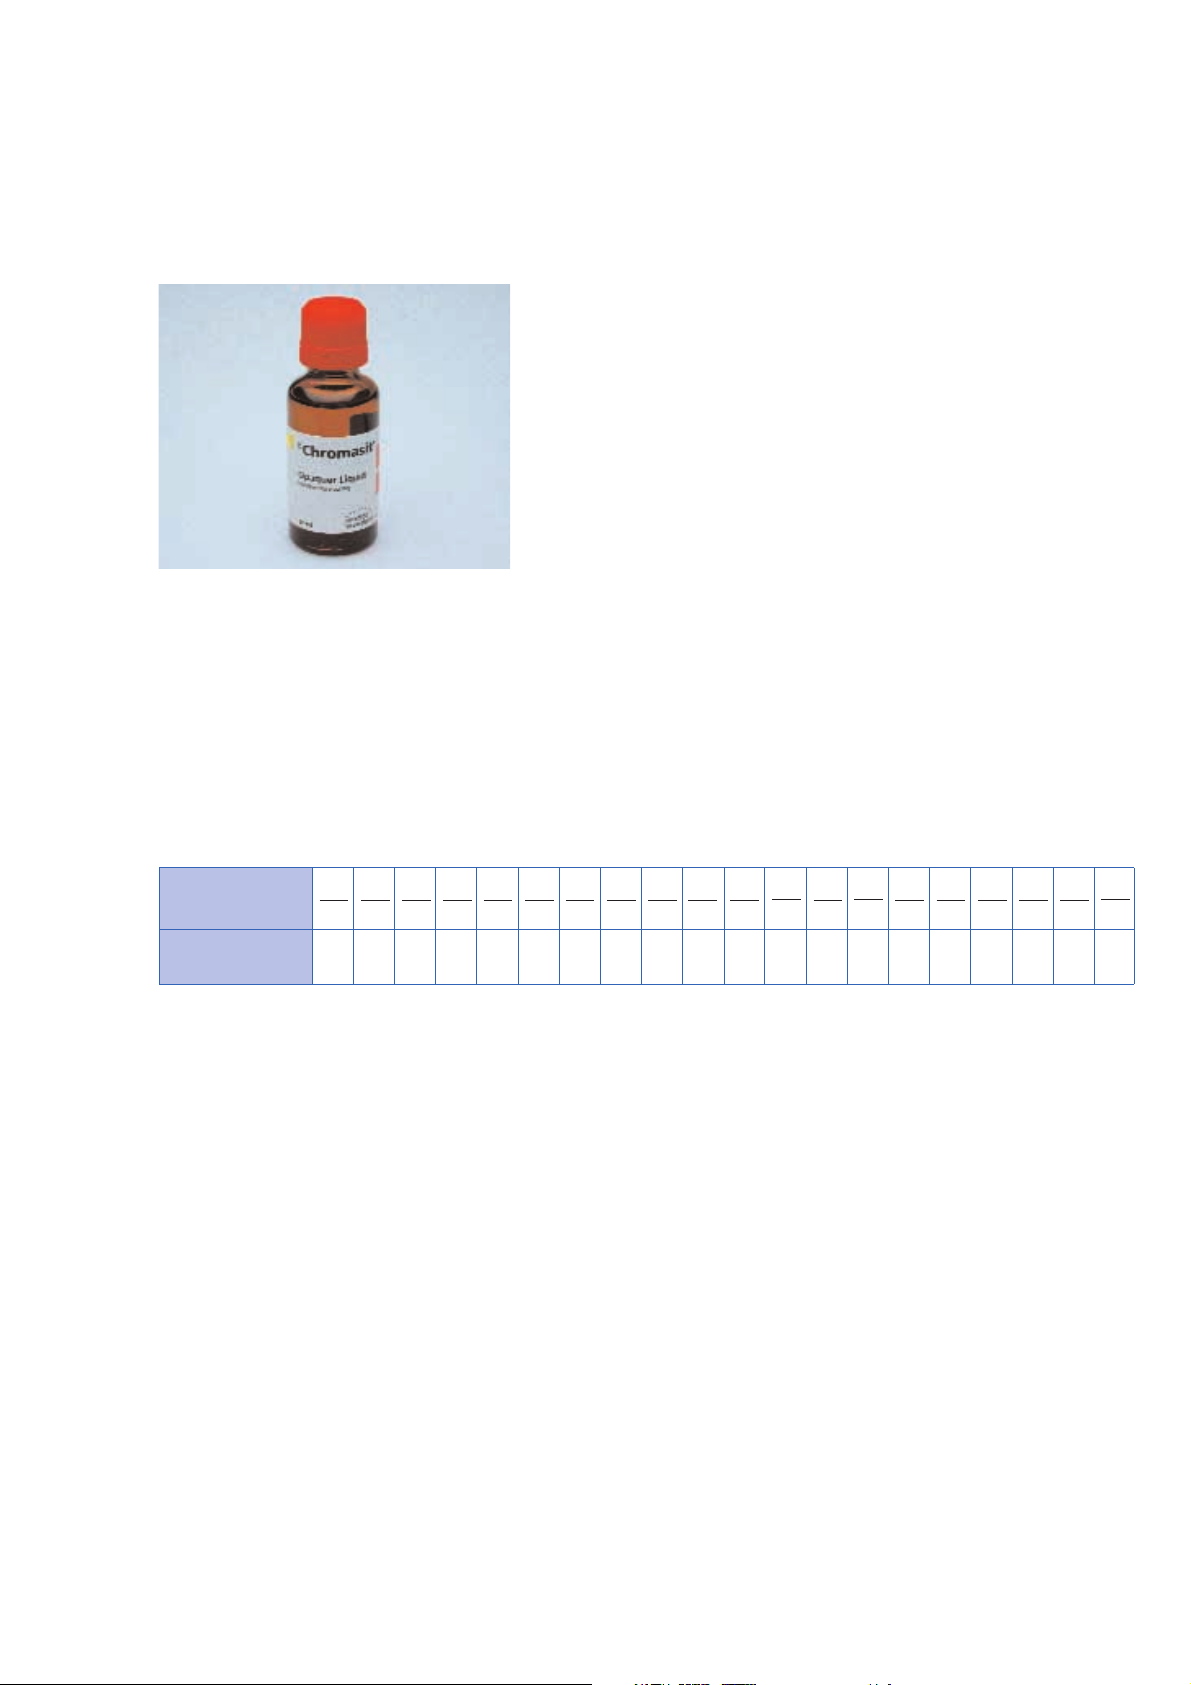
SR Chromasit Opaquer Liquid
This opaquer liquid is used for mixing the
SR Chromasit Opaquer.
Delivery form
– SR Chromasit Opaquer Liquid, 30 ml and 100 ml
Opaquer combination table
Chromascop
SR Chromasit
Opaquer O...
110
01
11
120
1A
11
130
2A
16
140
1C
14
210
2B
15
220
1D
15
230
1E
15
240
2C
12
310
3A
14
320
5B
24
330
2E
14
340
3E
23
410
4A
23
420
6B
14
430
4B
14
440
6C
16
510
6D
23
520
4C
23
530
3C
23
540
4D
12
Page 7

7
SR Chromasit Dentin
These Dentin materials are shaded according
to the Chromascop shade guide and are
compatible with the SR Chromasit Opaquer.
Additionally, they can be ideally combined
with the resin teeth from Ivoclar Vivadent.
Delivery form
– SR Chromasit Dentin, 10 g or 3 x 10 g
Shades: 110, 120, 130, 140, 210, 220, 230, 240, 310,
320, 330, 340, 410, 420, 430, 440, 510, 520, 530, 540
SR Chromasit Incisal
The shade of these incisal materials has been
matched to the Chromascop shade guide,
the SR Vivodent shade guide as well as the
natural incisal structure.
Delivery form
– SR Chromasit Incisal, 10 g or 3 x 10 g
Colour gradation: S1, S2, S3, S4, S5
Dentin/Incisal combination table
Dentin D
Incisal S
110
01
1
120
1A
1
130
2A
1
140
1C
1
210
2B
1
220
1D
2
230
1E
2
240
2C
2
310
3A
2
320
5B
3
330
2E
2
340
3E
1
410
4A
4
420
6B
5
430
4B
5
440
6C
3
510
6D
3
520
4C
3
530
3C
3
540
4D
5
Page 8

8
SR Chromasit Creative Dentin
These ready-mixed, intensely coloured
Dentin materials allow technicians to
incorporate special effects into their veneers.
Delivery form
– SR Chromasit Creative Dentin, 5 g
Shades: CD 21 vanilla-white; CD 22 yellow-orange;
CD 23 orange-brown; CD 24 dark-brown
SR Chromasit Creative Incisal
These ready-mixed, intensely coloured Incisal
materials round off the range of Creative
Dentin materials.
Delivery form
– SR Chromasit Creative Incisal, 5 g
Shades: CS 21 dove-blue; CS 22 transparent-pink;
CS 23 transparent-orange
Page 9
9
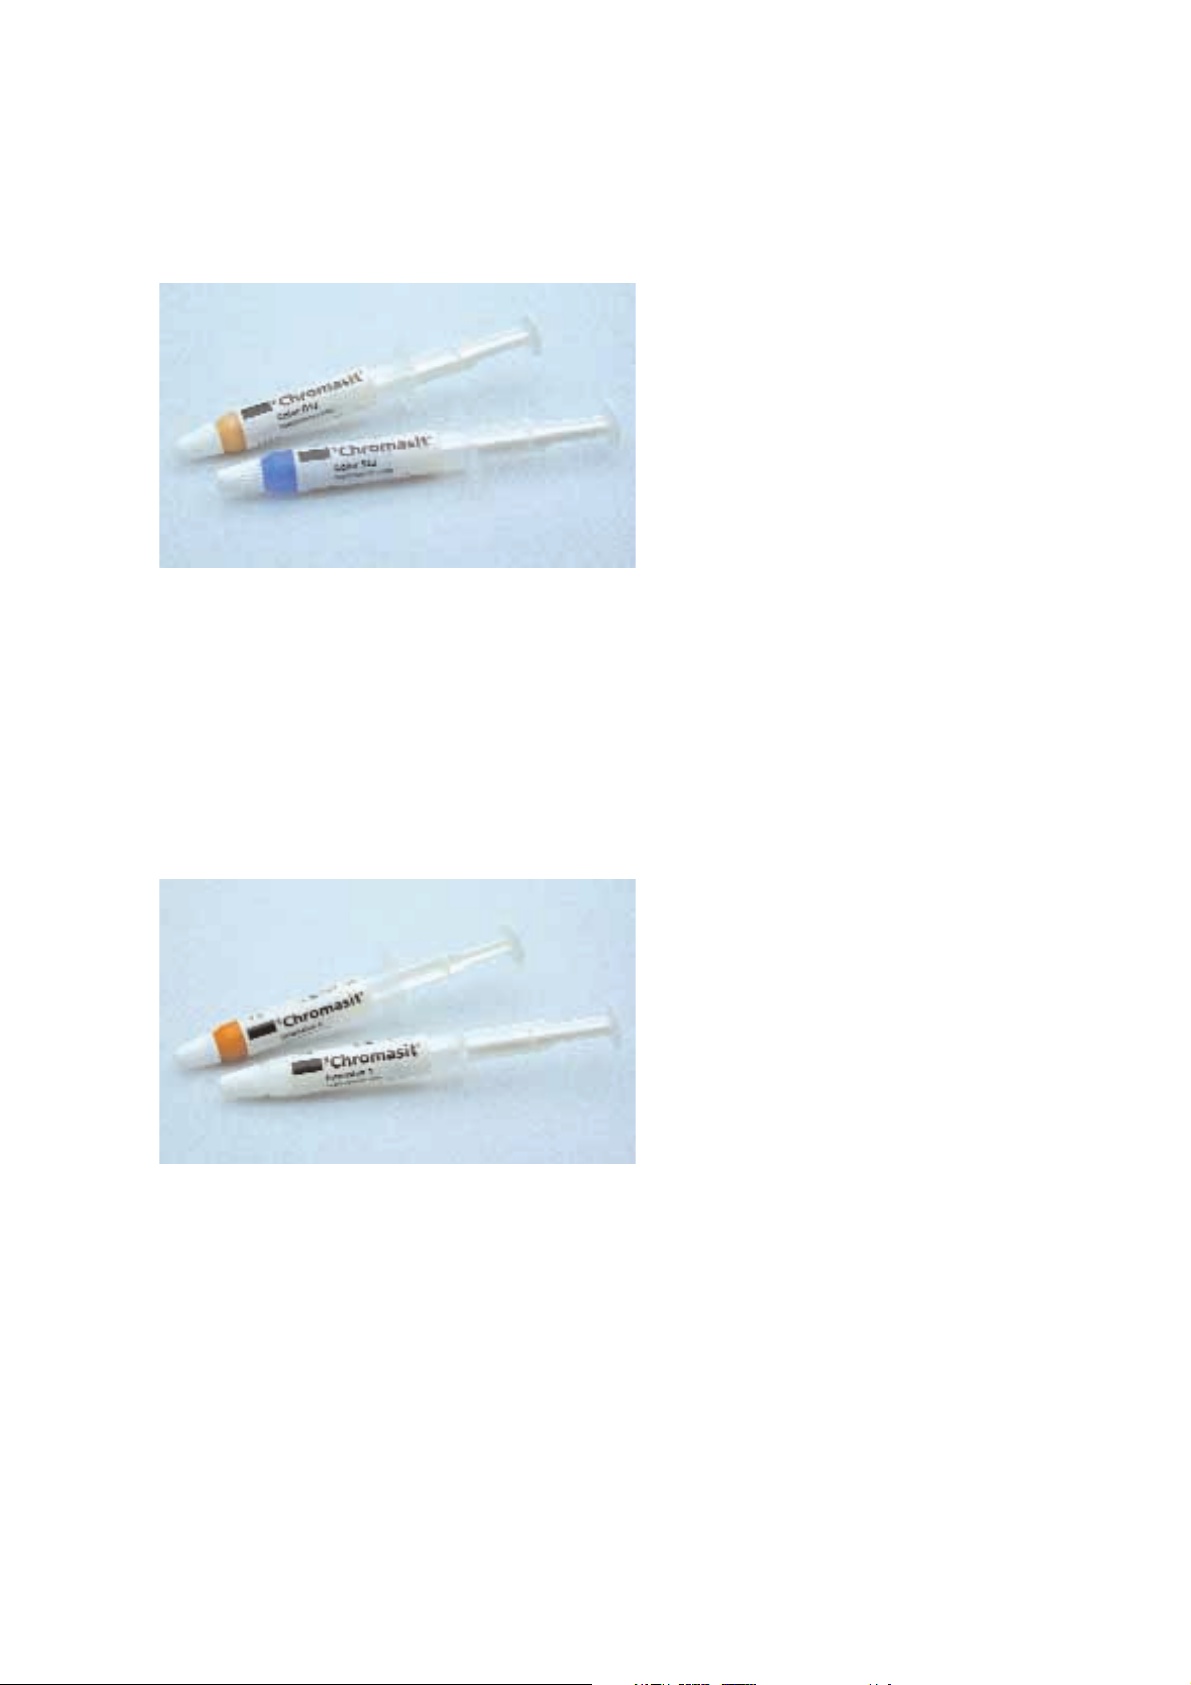
SR Chromasit Color
These colour materials are based on the
same materials as SR Chromasit.
SR Chromasit Color is used to customize the
shade of polymerized Chromasit veneers.
Delivery form
– SR Chromasit Color, 2 g
Shades: D12 red-beige; D13 yellow-beige; D14 brownbeige; D15 grey-beige; M1 ivory; M3 honey-yellow;
M4 light-brown; M5 dark-brown; S22 blue-transparent
SR Chromasit Intensive
The Intensive materials are based on the
same materials as SR Chromasit.
SR Chromasit Intensive is used for colouring
or customizing the shade of the
pressure/heat-curing Chromasit materials.
Delivery form
– SR Chromasit Intensive, 2 g
Shades: 0 clear; 1 white; 2 pink; 3 blue; 4 anthracite;
6 light-brown; 7 red-brown; 8 olive-brown; 9 dark-brown
Page 10

10
SR Link
SR Link is a fast, reliable and
easy-to-use bonding system,
consisting of a metal-active,
a resin-active and a
hydrophobic component.
Delivery form
– SR Link, 5 ml
SR Spectrasit Liquid
The light-curing Spectrasit
Liquid is used for wetting
polymerized SR Spectrasit
and SR Chromasit veneers in
case they need to be
modified.
Delivery form
– SR Spectrasit Liquid, 5 ml
SR Chromasit Fluid
Chromasit Fluid prevents the
formation of an inhibition
layer during the polymerization of Chromasit. The fluid
is applied to the
SR Chromasit veneer before
each polymerization cycle
and must be completely
removed after polymerization.
Delivery form
– SR Chromasit Fluid, 3 ml or 4 x 3 ml
SR Chroma Link
The metal-active component
of SR Chroma Link reacts
with the metal oxide on the
metal surface, thereby
creating the appropriate
conditions for an optimum
bond.
Delivery form
– SR Chroma Link, 2.5 g
Bonding systems and accessories
Page 11

11
Retention Adhesive
This retention varnish is
used to secure micro- or
macroretention beads. If
space is limited, microretention beads are used
and if sufficient space is
available, macroretention
beads are used.
Delivery form
– Retention Adhesive, 20 ml
Micro- and Macroretention
Retention beads are
available in two different
sizes: macroretention and
microretention beads. They
are used according to the
space available.
– microretention beads
200–300 microns
– macroretention beads
400–600 microns
Delivery form
– Microretention, 15 g
– Macroretention, 15 g
Separating Fluid
This alginate-based
separating fluid is used for
isolating composite from
plaster.
Delivery form
– Separating Fluid, 30 ml
Page 12

12
Shade selection
The Chromascop shade
guide represents the shade
standard for Ivoclar Vivadent
products. With its logically
arranged shades, the
Chromascop shade guide
permits quick and highly
accurate shade matching.
The 20 shades are divided
into 5 consistently arranged,
detachable shade groups.
After determining the basic
shade group, the correct
shade within that shade
group is selected. The strict
omission of superfluous
effects (eg cervicals,
transparent areas,
pronounced discoloration
of the incisal and dentin
areas, as well as surface
characterization) greatly
facilitates determining the
appropriate shade.
– SR Chromasit,
SR Spectrasit, SR Ivocron
– SR Antaris / SR Postaris
tooth lines
– IPS d.SIGN
– IPS Empress / IPS Empress 2
– Tetric Ceram
restorative materials
Page 13

13
Fabricating the model
Fabricate a stone model with detachable segments according
to the impression.
Fabricating the framework / Contouring
Fabricate a wax framework on the model according to the
requirements of the case in question. The following measures
are indispensable to achieve a long-lasting bond between the
framework and veneer: accurate contouring of the margins,
application of retention wires to the pontics and appropriate
application of micro- and macroretention (eg retention
splinters) on the areas to be veneered.
Prepare a cervical metal margin if possible, or prepare a
chamfer. Flatten out the incisal edge into a chamfer, if
possible. Provide sufficient protection of the incisal edge.
Contouring the pontics
Processing instructions
Make sure to provide sufficient protection of the incisal
edge.
Adequate retention is particular important in the case of fully veneered restorations.
Anatomical modellation with sufficient protection of the incisal edge on the palatal/lingual surface
Use a wax wire to bring the pontics to the same
level.
Page 14
14
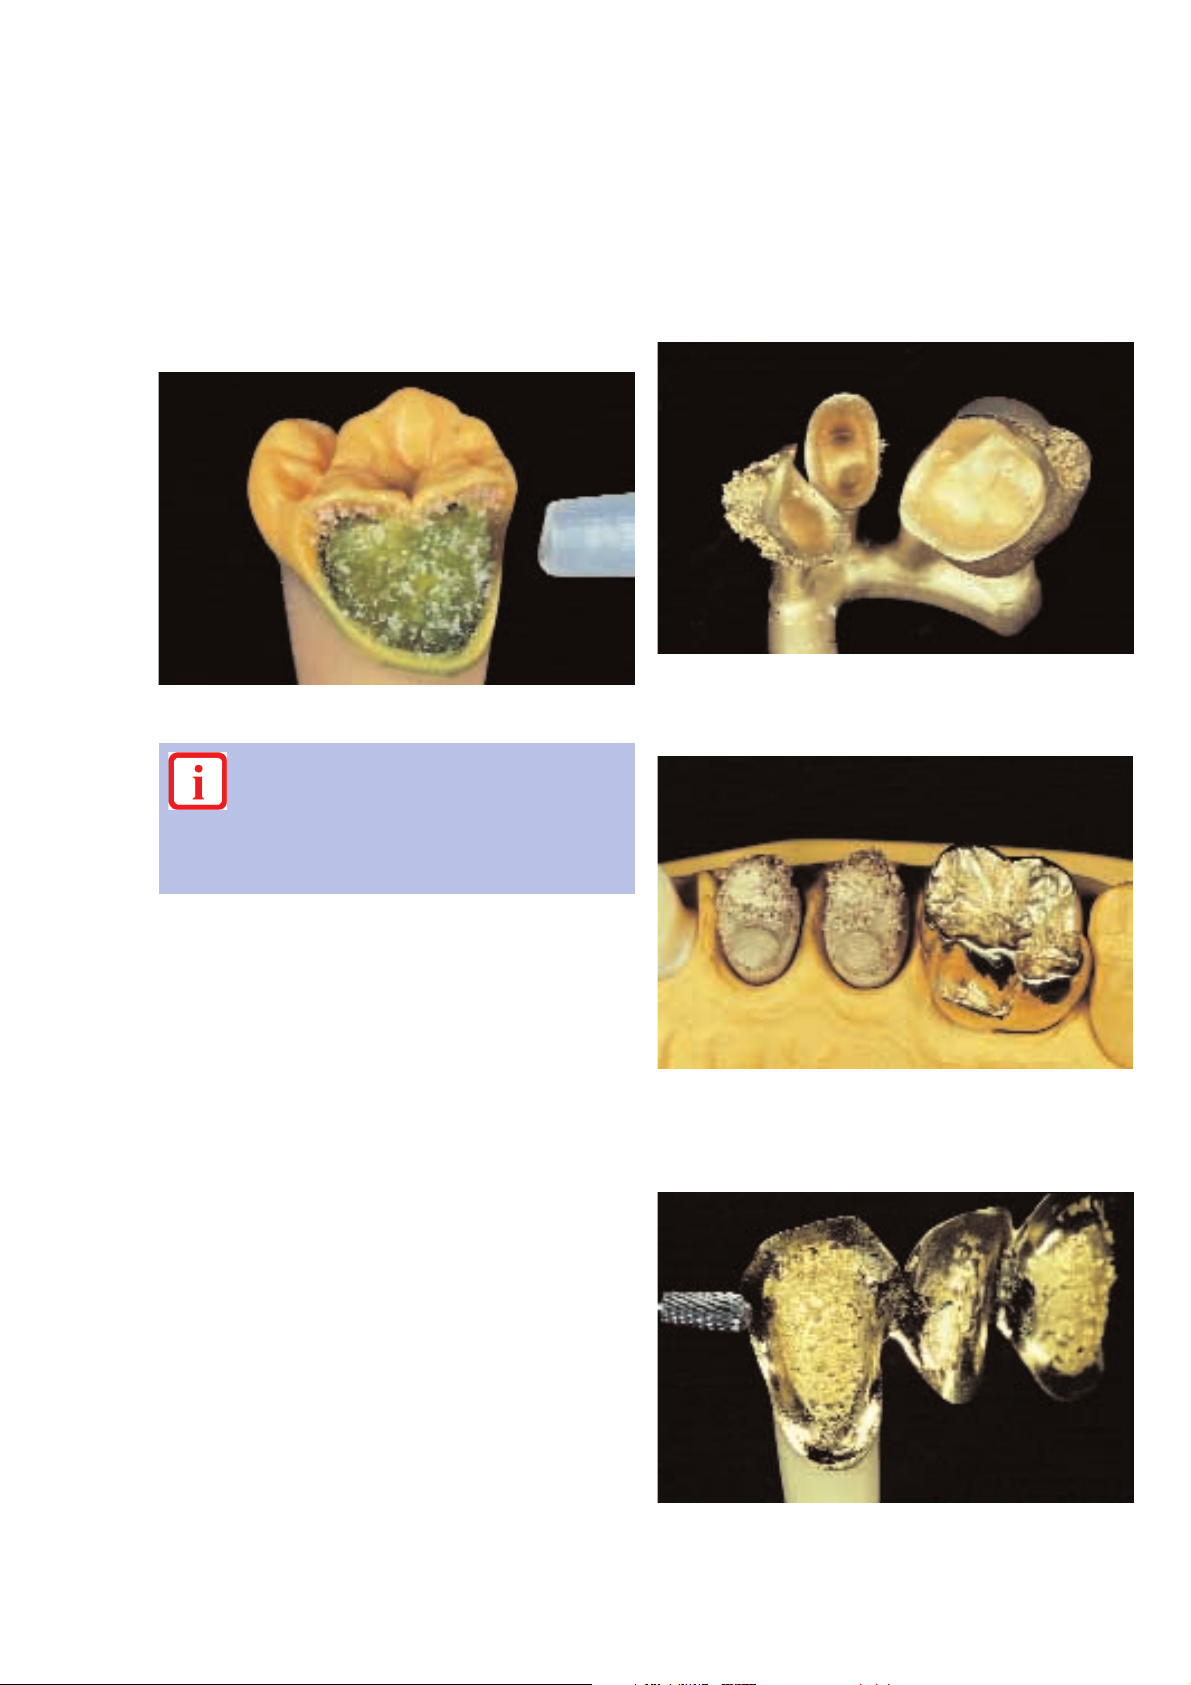
Preparing the framework
After divesting, finish and adjust the metal surfaces to be
veneered as usual.
Framework after casting and sandblasting.
Appropriate application of retention beads is essential to ensure a favourable mechanical bond.
Fitting the copings.
Finishing the framework, particularly the marginal areas.
The retention beads should neither be too close
together nor should they be too wide apart – the
retentive effect would be lost in both cases. If the
Retention Adhesive is not applied appropriately, the retention beads may become submerged and lose their retentive
effect.
Designing frameworks with pontics
It is advisable to bring large pontics (eg upper centrals,
molars) to the same level as the neighbouring crowns by
applying a wax wire in a targeted fashion. This measure
helps to create a harmonious shade effect in bridges which
involve various layer thicknesses.
Before the sprues are attached, apply a thin layer of
Retention Adhesive onto the veneering surface (‘veneering
window’) of the wax model. Let the solvent evaporate for
approximately 30 seconds. Then, carefully apply the retention
beads onto the surface where required.
Page 15

15
Sandblast the metal framework with aluminium oxide or with
Ivoclar Vivadent Special Jet Medium.
If SR Link is used as the bonding system, remove blasting
residue only by tapping it off or by applying oil-free
compressed air.
If SR Chroma Link is used as the bonding system, the framework may be steam-cleaned. Subsequently, dry with
compressed oil-free air.
The surface to be veneered must be clean to produce a bond
at a molecular level. Even invisible traces of dirt may
compromise the bond between the framework and veneer.
Consequently, all traces of dirt and grease must be
thoroughly removed.
Do not touch cleaned surfaces!
The jet pressure is chosen according to the grit size
of the jet medium. We recommend using aluminium
oxide, Type 100 microns, at 2 bar pressure to sand-
blast the framework. The use of a lower grit size
and/or jet pressure may result in the material
chipping off.
After having been fitted to the model, the metal framework is finished.
After having been fitted to the model and completed, the metal framework is sandblasted with aluminium
oxide.
Completed framework fitted on the model.
Use only metals that are resistant to corrosion and
oral conditions.Alloys which have a high silver or
copper content are prone to corrosion in the oral
cavity and we therefore advise against using them, particularly if they contain more than 50% silver or copper. Alloys
that have a precious metal content of more than 90%
develop only a limited amount of bonding oxides. They
must therefore not be used.
Please take the alloy manufacturer’s information about the
alloy’s resistance to the conditions in the oral cavity into
account. That information has to be considered to produce a
long-lasting, reliable restoration.
Metal framework after sandblasting and cleaning.
Page 16
16
Conditioning the metal surfaces with
SR Link or SR Chroma Link
Version 1: SR Link
Application of SR Link
After the framework has been sandblasted (Al
2O3
/
100 microns/2 bar) and cleaned of blasting residue by
tapping it off, SR Link is applied. Apply SR Link with a clean
disposable brush and allow it to react for 3 minutes.
Do not apply SR Link on alloys containing more
than 50% silver and/or copper or on alloys
containing more than 90% gold, palladium or
platinum.
Non-precious metal and titanium alloys require mechanical
retention to provide a long-lasting bond.
Mechanical retention is generally advantageous to
improving the bond between the framework and veneer.
Application of SR Chroma Link
After you have sandblasted (Al
2O3
/100 microns/2 bar) the
framework and cleaned it of blasting residue by tapping it
off, apply a thin coat of SR Chroma Link on the blasted
metal surface. Subsequently, leave to evaporate for 3 to
4 minutes. The opaquer is applied immediately after the
evaporation time.
If SR Chroma Link is used, retention beads must be
applied onto all types of metal frameworks
(precious metal, non-precious metal, or titanium).
Apply a thin coat of SR Chroma Link, using a disposable brush.
Version 2: SR Chroma Link
Apply SR Link.
Page 17

17
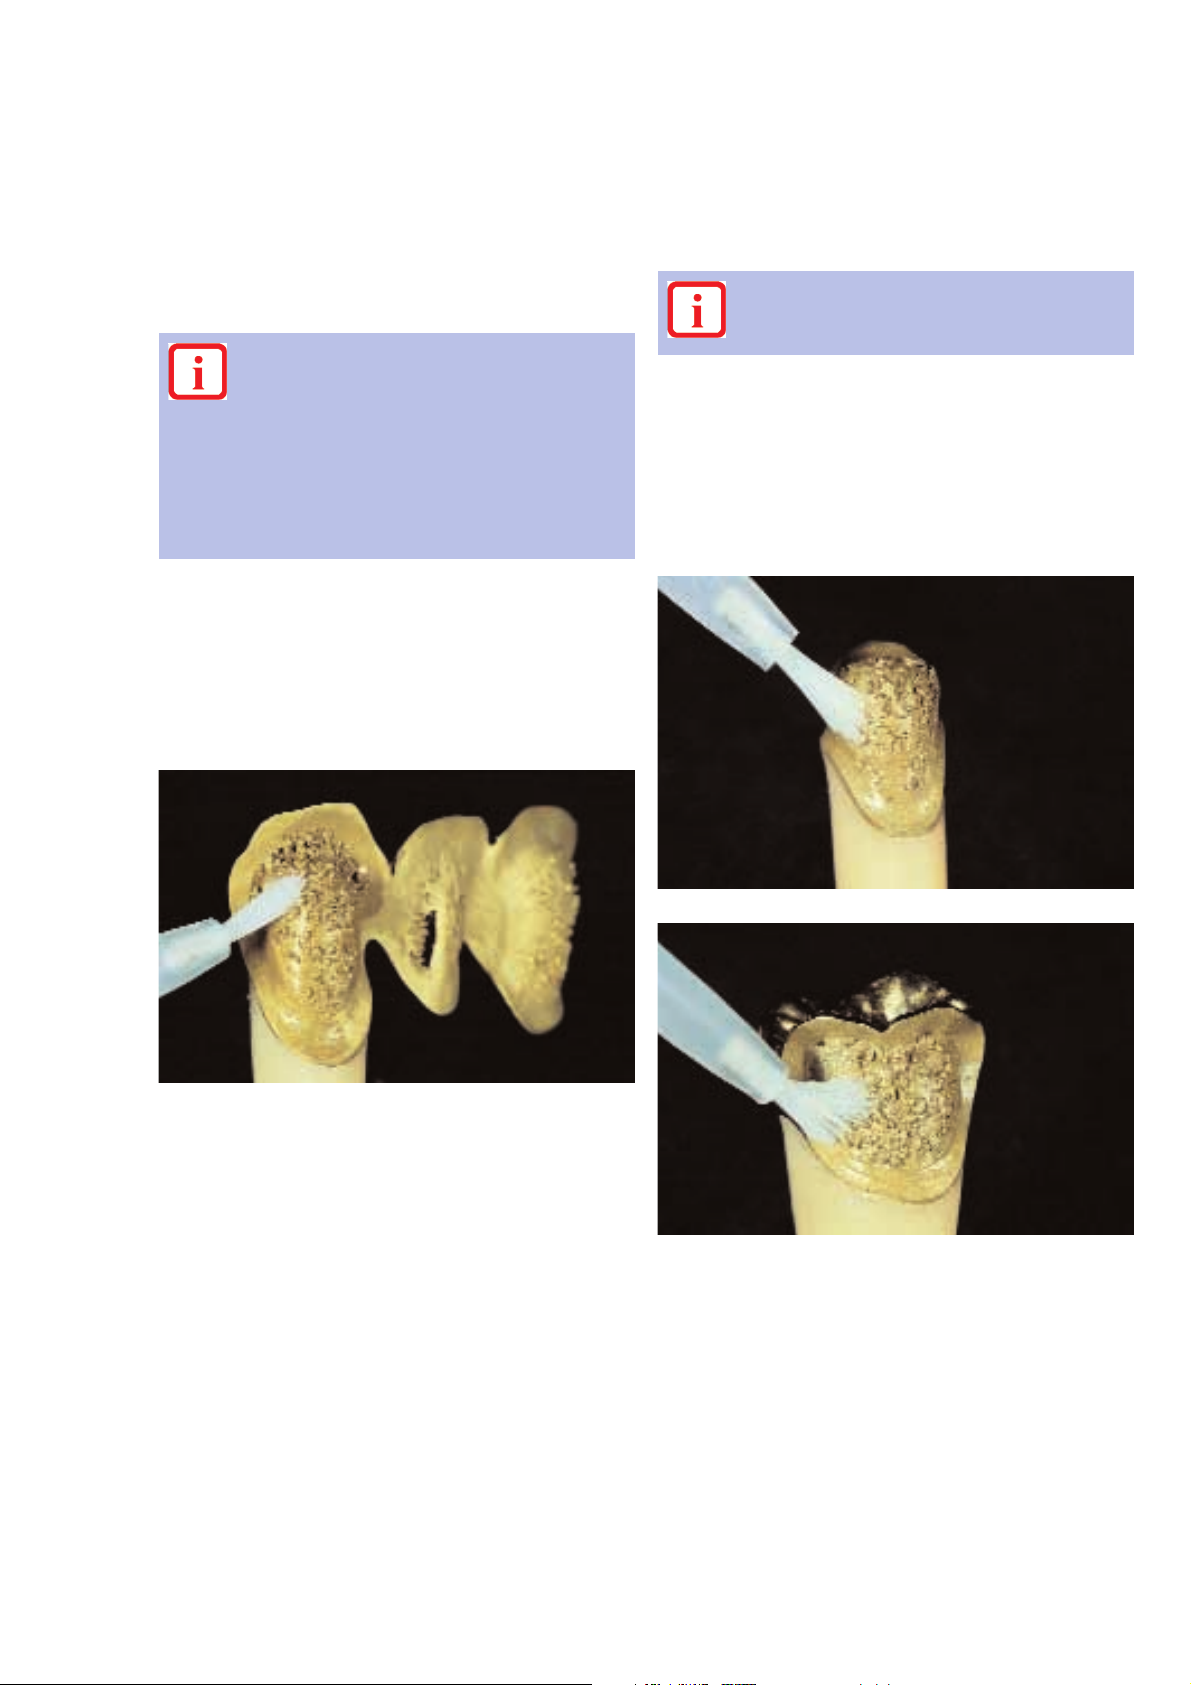
Apply a thin coat of opaquer (wash).
Apply the second opaquer layer, covering the entire metal surface.
Completely opaqued surface.
Leave the opaquer to dry for a few seconds.
Applying the opaquer
Mix SR Chromasit Opaquer with SR Chromasit Opaquer
Liquid to a thick-flowing mixture, using a brush. Cover the
mixture and leave it to swell for approximately 2 minutes.
Then, apply the first coat of opaquer without masking the
framework completely (wash). Make sure to apply opaquer
to all retention areas.
After that, apply another layer of opaquer. This time, the
metal surface should be entirely covered with opaquer. If
necessary, thin the consistency of the opaquer by adding
SR Chromasit Opaquer Liquid.
Mix the opaquer to a thick-flowing mixture, cover
the mixture and leave it to swell for 2 minutes.
To ensure a smooth transition between the metal and
veneering resin, let the opaquer thin out at the metal
margins.
If a smooth surface is required, the opaquer can be
smoothed by applying a vibrating motion for a short time.
Check all critical areas for thorough polymerization, using a
probe.
Page 18

18
Processing procedure for pontics
Step 1:
Sandblast the completed framework with aluminium oxide,
clean with steam (only if you are using SR Chroma Link) and
dry with oil-free compressed air.
Step 2:
Apply SR Chroma Link or SR Link and allow to dry
(SR Chroma Link: 3 to 4 minutes; SR Link: 3 minutes).
After the drying time has elapsed, apply a thin coating of
SR Chromasit Opaquer to the pontic and build up with
SR Chromasit Dentin until the pontic is at the same level as
the abutment crowns.
Step 3:
Next, apply a masking layer of opaquer to the veneering
areas of the abutment crowns as well as to the pontic,
which has been built up with Dentin. Then, polymerize the
object in the Ivomat (with water) at 120 °C (248 °F) and
6 bar pressure for 5 minutes.
Step 4:
Continue with the veneering procedure.
After having left the opaquer to swell, apply it to the
veneering area and polymerize another time at 120 °C
(248 °F) and 6 bar pressure for 5 minutes.
Polymerizing the opaquer
After applying the opaquer, polymerize the material in the
Ivomat (with water) at 120 °C (248 °F) and 6 bar pressure
for 5 minutes.
The opaqued surface must be free of water. If not, a
separation layer between the opaquer and resin forms. To
prevent such a separation layer from occurring, carefully dry
the opaqued surface with compressed oil-free air before
veneering.
Characterizing the opaquer
Depending on the customary techniques of the technician,
the shade of the standard opaquer can be modified by
adding SR Chromasit Intensive Opaquer. For this purpose, a
small quantity of SR Chromasit Intensive Opaquer is added
to the standard opaquer powder during the mixing procedure. Alternatively, mix SR Chromasit Intensive Opaquer with
SR Chromasit Opaquer Liquid and apply the mixture to the
polymerized standard opaquer.
Polymerization parameters for the opaquer
Pressure
6 bar
Time
5 minutes
Temperature
120 °C (248 °F)
Page 19

19
Chromascop layering diagram
PE layering diagram
Layering diagram
Page 20

If desired, the dentin can be built up and poly-
merized so that mamelons and details can be shaped more easily and more selectively. The entire
surface should in any case be ground, blasted with Al
2O3
,
cleaned and wetted with SR Spectrasit Liquid before finishing the restoration with the Incisal Materials.
The SR Chromasit Materials can be protected from dirt by
means of the orange cover of the working pad.
Use the modelling instruments recommended by Ivoclar
Vivadent for layering.
Application of cervical characterizations
20
Layering technique
Isolating
Before building up the veneer, isolate all contact surfaces
with the wet plaster model, using Separating Fluid. Remove
excess with oil-free compressed air.
The SR Chromasit materials can be applied either according
to the layering diagram to produce the Chromascop shades
or individually. Make sure to build up the pontic areas
adequately.
SR Chromaist Creative Dentin is applied to achieve special
effects such as characterization of cervicals or proximal areas.
The Dentin and Incisal materials can be layered without
intermediate polymerization.
The Dentin and Incisal Materials can be layered without intermediate polymerization.
Page 21

21
SR Chromasit Color or SR Chromasit Intensive can also be
used to apply individual characterizations. These materials
can be applied directly to the restoration, using a brush.
Alternatively, they are first mixed with SR Chromasit Dentin
or Incisal and then applied.
Possibilities of customizing SR Chromasit with SR Chromasit Color and SR Chromasit
Intensive during layering
Characterizations are applied to the proximal area (here: Creative Incisal CS21 dove-blue)
Creative Dentin or Dentin which has been modified with SR Chromasit Color is used to create mamelons….
…which are subsequently covered with Incisal or Creative Incisal Material.
Creative Dentin dove-blue or SR Chromasit Color is applied to accentuate the proximal incisal edge.
Fully layered veneer
After applying the characterizations, complete the veneer
according to the layering diagram, using the SR Chromasit
Incisal materials. The contours created in the dentin are
retained owing to the softer consistency of the Incisal
material.
Avoid trapping air when mixing the shades.
Page 22

22
…and coat the fully modelled veneer with SR Chromasit Fluid.
Finish the contact points and interdental spaces,…
…surface characterizations,…
… and proximal surfaces.
Remove the fully layered restoration from the model…
Peparing the restoration for
polymerization
Remove the fully layered restoration from the model and add
Incisal material to the contact points. Make sure that the
material is fully adapted in the marginal areas, ie at the
transition between the metal and veneer.
When fabricating a bridge, separate the individual veneers
using a thin implement.
SR Chromasit Fluid forms a separation layer and
should therefore only be applied to surfaces. It
should not be used as a wetting agent to make
shape adjustments with SR Chromasit.
After polymerization, thoroughly remove SR Chromasit Fluid.
Polymerizing the veneer
Polymerize the veneer in the Ivomat (with water) at 120 °C
(148 °F) and 6 bar pressure for 7 minutes.
Finishing
Finish shape and contact points using appropriate grinding
instruments. Make sure to completely remove SR Chromasit
Fluid from the surfaces of the veneer.
Do not use coarse-grained diamonds, coarse burs or similar
instruments, as it is difficult to produce a sufficiently smooth
surface with this type of instruments.
Polymerization parameters for the Dentin/Incisal
materials
Pressure
6 bar
Time
7 minutes
Temperature
120 °C (148 °F)
Page 23

Final polishing
Carefully polish the restoration to a high gloss using a leather
buffer and Ivoclar Vivadent universal polishing paste.
Microscopic projections on finished veneering
surfaces easily pick up deposits. Finishing and
polishing should therefore be performed very
carefully.
Pay particular attention to crown margins, interdental
spaces and surfaces in contact with gingival tissue.
23
Finish the surfaces and then use a soft rubber polisher to
eliminate rough projections. Next, prepolish the restoration
with a goat’s hair brush and Ivoclar universal polishing paste.
Polishing
Prepolishing
As a rule, polishing should only be performed by means of a
handpiece rather than a polishing lathe. This is the only way
possible to polish all parts of the veneer – and in particular
the interdental spaces – properly.
Finish surfaces and then utilize a soft rubber polisher…
… and prepolish with a goat’s hair brush and Ivoclar Vivadent universal polishing paste.
Polish the restoration to a high gloss, using a leather buffer…
… and Ivoclar Vivadent universal polishing paste.
Completed restoration from labial
Page 24

24
Contraindication
– occlusal veneers on molars
– layer thickness of less than 1.5 mm
Important notes
– If the layer thickness of the crown and the pontic are sig-
nificantly different in the labial region, the shade effect
may be compromised because of the inherent properties
of translucent materials.
– In order as not to compromise the shade effect, the opa-
qued pontic can be characterized with SR Chromasit
Intensive Opaquer and/or built up with SR Chromasit
Creative or SR Chromasit Dentin, which has been modified with SR Chromasit Intensive, so that approximately
the same layer thickness is used on the entire bridge.
After that, the Dentin and Incisal materials are applied as
usual.
– There must be sufficient space between the metal frame-
work and the antagonist (1.5 mm) so that the layering
material can be applied in the required thickness
(1.5 mm). Thinner thicknesses may result in the
material chipping off.
– If the space available is less than 1.5 mm, an occlusal
metal surface should be preferred.
– After completing the restoration, make appropriate grin-
ding adjustments in the articulator, paying particular
attention to the centric and masticatory movements to
prevent inappropriate stresses from occurring.
First, apply the Dentin material to the cervical region…
Apply a coat of SR Chromasit Fluid to the veneering surface and then polymerize.
… after that, contour the labial and lingual aspects and add Incisal material.
Processing instructions for fully
veneered restorations
Preparing the framework
The occlusal space between the metal framework and the
antagonist should be at least 1.5 mm in order to provide
sufficient space for the veneering material. In addition, the
minimum thickness of the metal (0.3 mm) has to be taken
into account.
Condition the framework and apply the bonding system and
opaquer as described on page 17.
Layering technique
Separate plaster surfaces using Separating Fluid. Next, apply
Dentin material, first to the cervical area and after that,
adapt the material in the labial and lingual areas and finally,
adapt the material on the occlusal surface, according to the
layering diagram. Remove the fully layered restoration from
the model and add Incisal material to the contact areas.
Page 25

25
We would like to thank Mr. T. Michel, Schorndorf/Germany, for the clinical pictures.
Page 26

26
Warnings
– SR Chromasit has been designed for use in dentistry.
– Avoid contact of the skin or eyes with uncured material
(pastes). Prolonged or repeated contact of the skin with
uncured material may cause a slight sensitizing reaction
and lead to a sensitization against methacrylate.
– SR Chroma Link, SR Link, SR Chromasit Fluid, SR Opaquer
Liquid and Retention Adhesive contain methyl methacrylate
and solvent. These liquids are easily flammable and irritant.
Keep away from sources of ignition. Do not smoke. Do not
breathe in vapours. Avoid contact with the skin and eyes.
Unpolymerized liquids irritate the eyes, respiratory system
and skin. Sensitization through skin contact is possible.
– Please observe danger signs on the individual primary
packagings and labels.
Cleaning
– Do not clean removable dentures with alkaline or similar
cleaning agents, as they severely corrode the surfaces and
the bonding layer.
– The use of a toothbrush and toothpaste is the best and
simplest way of cleaning removable dentures. If performed
regularly, this cleaning method effectively helps to prevent
the formation of deposits.
Repairs
Repairs in the laboratory
– The veneer to be repaired should be ground with a tung-
sten carbide bur or sandblasted at reduced jet pressure of
1 bar with aluminium oxide, 100 microns, or Ivoclar
Vivadent Special Jet Medium. Next, steam-clean and dry
with oil-free compressed air.
– Then, apply SR Spectrasit Liquid and allow to evaporate.
– Apply the light-curing SR Spectrasit to the prepared
surface.
– Next, apply Spectrasit Gel and polymerize the veneer in the
Spectramat for 5 minutes.
– Then, finish and polish the veneer as described above.
Repairs by the dentist
– The Ceramic Repair Set from Ivoclar Vivadent offers
dentists a comprehensive range of materials and
accessories to repair composite and ceramic restorations.
– Please refer to the Instructions for Use of the
corresponding materials for detailed information.
Page 27

27
Chromasit
Materials combination table
SR
Chromascop
Opaquer
Intensive Opaquer
Dentin
Creative Dentin
Incisal
Creative Incisal
SR Chromasit Intensive
110
01
11
110
01
1
120
1A
11
120
1A
1
130
2A
16
130
2A
1
140
1C
14
140
1C
1
210
2B
15
210
2B
1
220
1D
15
220
1D
2
230
1E
15
230
1E
2
240
2C
12
240
2C
2
310
3A
14
310
3A
2
320
5B
24
320
5B
3
330
2E
14
330
2E
2
340
3E
23
340
3E
1
410
4A
23
410
4A
4
420
6B
14
420
6B
5
430
4B
14
430
4B
5
440
6C
16
440
6C
3
510
6D
23
510
6D
3
520
4C
23
520
4C
3
530
3C
23
530
3C
3
540
4D
12
540
4D
5
21 vanilla-white; 22 yellow-orange; 23 orange-brown; 24 dark-brown
21 dove-blue; 22 transparent--pink; 23 transparent-orange
0 clear; 1 white, 2 pink; 3 blue; 4 anthracite; 6 light-brown; 7 red-brown; 8 olive-brown; 9 dark-brown
1 white, 2 light-yellow, 3 yellow, 4 brown, 5 pink, 6 violet, 7 grey
Page 28

Ivoclar Vivadent AG
Bendererstrasse 2
FL-9494 Schaan
Liechtenstein
Tel. +423 / 235 35 35
Fax +423 / 235 33 60
www.ivoclarvivadent.com
Ivoclar Vivadent Pty. Ltd.
1 – 5 Overseas Drive
P.O. Box 367
Noble Park,Vic. 3174
Australia
Tel. 03 / 97959599
Ivoclar Vivadent Ltda.
Rua Maestro João Gomes de
Araújo 50; Salas 92/94
Sao Paulo, CEP 02332-020
Brasil
Tel. +55 11 69 59 89 77 /
69 71 17 50
Ivoclar Vivadent Marketing
Ltd.
Calle 134 No. 13-83, Of. 520
Bogotá
Colombia
Tel. +57 1 627 33 99
Ivoclar Vivadent S.A.
B.P. 118
F-74410 Saint-Jorioz
France
Tel. 04.50.88.64.00
Ivoclar Vivadent GmbH
Dr. Adolf-Schneider-Str. 2
D-73479 Ellwangen, Jagst
Tel. +49 (0) 79 61 / 8 89-0
Fax: +49 (0) 79 61 / 63 26
Ivoclar Vivadent UK Limited
Meridian South
Leicester
LE3 2WY
Great Britain
Tel. 116 / 265 40 55
Ivoclar Vivadent s.r.l.
Via dell’Industria 16
I-39025 Naturno (BZ)
Italy
Tel. 0473 / 67 01 11
Ivoclar Vivadent S.A. de C.V.
Av. Mazatlán No. 61, Piso 2
Col. Condesa
06170 México, D.F.
Mexico
Tel. +52 (55) 5553-0038
Fax +52 (55) 5553-1426
Ivoclar Vivadent Ltd
12 Omega St, Albany
PO Box 5243 Wellesley St
Auckland, New Zealand
Tel. 09 / 914-9999
Ivoclar Vivadent
Polska Sp. z.o.o.
PL-01-501 Warszawa
ul. Jana Pawla II 78
Poland
Tel. 635 54 96 / 635 54 97
Ivoclar Vivadent S.A.
c/Valderribas 82
E-28007 Madrid
Spain
Tel. 91 / 513 10 08
Ivoclar Vivadent AB
Dalvägen 16
S-169 56 Solna
Sweden
Tel. 08 / 514 93 930
Fax 08 / 514 93 940
Ivoclar Vivadent, Inc.
175 Pineview Drive
Amherst, N.Y. 14228
USA
Tel. (800) 533-6825
Ivoclar Vivadent, Inc.
23 Hannover Drive
St. Catharines, Ont. L2W 1A3
Canada
Tel. (800) 263-8182
Ivoclar Vivadent – worldwide
Date information prepared: 02/2002
These materials have been developed solely for use
in dentistry. Processing should be carried out strictly
according to the Instructions for Use. Liability cannot
be accepted for damages resulting from failure to
observe the Instructions or the stipulated area of
application. The user is responsible for testing the
materials for their suitability and use for any purpose
not explicitly stated in the Instructions. Descriptions
and data constitute no warranty of attributes and
are not binding.
Printed in Liechtenstein
© Ivoclar Vivadent AG, Schaan / Liechtenstein
564136/0702/e/0.5/BVD
 Loading...