


www.RobotShop.com |
Ch. 3: How to Open Up Roomba |
Roomba 500 Series Servicing and Repair Guide
Chapter 3: How to Open Up Roomba
1
www.RobotShop.com |
Ch. 3: How to Open Up Roomba |
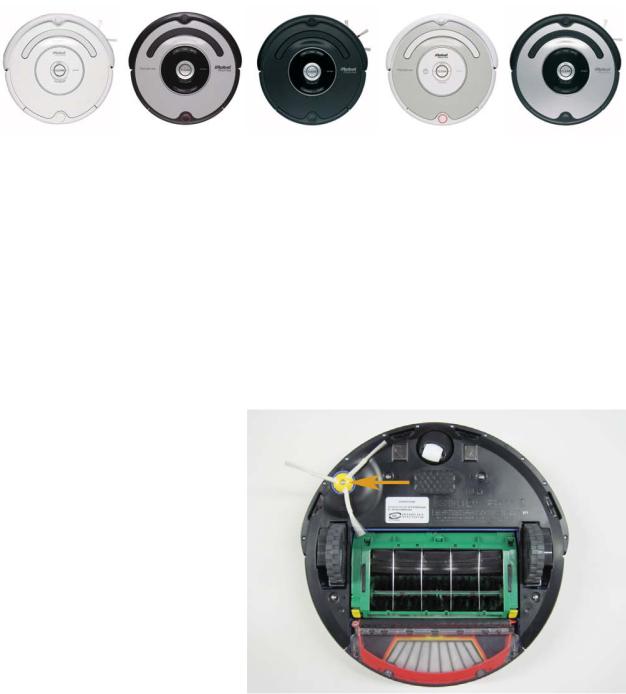
This repair guide explains how to perform general disassembly on the Roomba 500 series robot vacuum. It is suggested to consult this guide when attempting any other repairs, as it will explain how to open up the frame to begin the repairs. Some of the 500 series Roombas are pictured below:
Looking for a different guide? Please see the full list of repair guides available at the Ultimate Roomba Resource Center.
Please note that if your Roomba is under warranty, servicing the robot will void the warranty. For robots under warranty, please consult the warranty policy of the distributor where purchased, and/or contact iRobot’s customer service.
3 How to Open Up Roomba
3.1How to Disassemble Roomba
3.1.1 Start by flipping the Roomba on its back and removing the side screw, shown by the orange arrow.
2

www.RobotShop.com |
Ch. 3: How to Open Up Roomba |
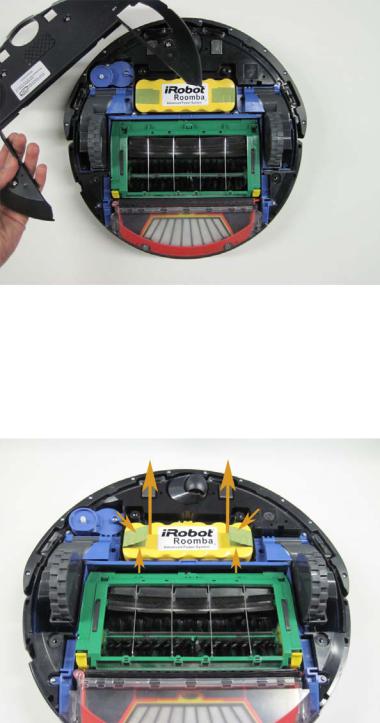
3.1.2 Once the screw is removed, you can grab the side brush by any two of its three brushes and pull up away from the robot.
3.1.3 The brush should gently snap out of place.
3

www.RobotShop.com |
Ch. 3: How to Open Up Roomba |
3.1.4 Loosen the four screws holding the bottom cover in place.
3.1.5 Once the cover is loose, using one of your fingers, hook the bottom cover near the openings for either drive wheel…
4
www.RobotShop.com |
Ch. 3: How to Open Up Roomba |
3.1.6 …and remove the bottom cover from the robot.
3.1.7 Now remove the battery, lifting it out of the robot using the pull tabs on each end of the battery.
5

www.RobotShop.com |
Ch. 3: How to Open Up Roomba |
3.1.8 Loosen the 10 screws that hold the front bumper’s bottom trim piece in place.
3.1.9 With the screws loose, now remove the bumper’s bottom trim piece from the robot.
6
www.RobotShop.com |
Ch. 3: How to Open Up Roomba |
3.1.10 Flip the Roomba back on it’s wheels.
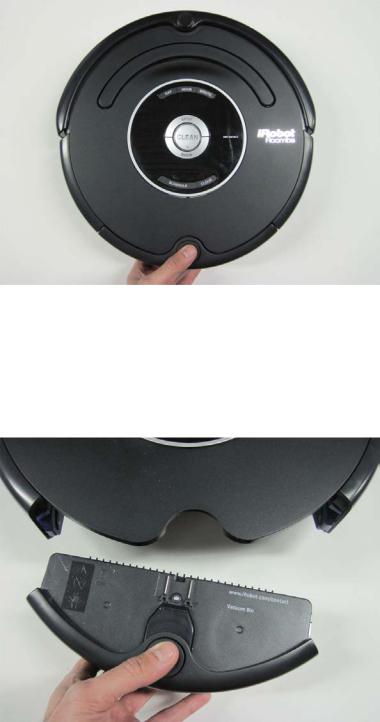
3.1.11 Remove the dustbin.
7
www.RobotShop.com |
Ch. 3: How to Open Up Roomba |
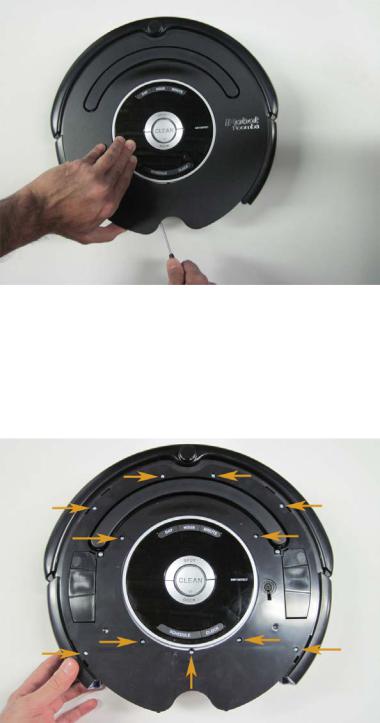
3.1.12 Remove the faceplate from the Roomba. Starting at the bottom where the dustbin goes, lift up the edge of the faceplate, and insert a long screwdriver (or similar tool) into the gap. Then, while holding the Roomba in place, lift the handle end of the screwdriver like a lever to un-clip the faceplate from the Roomba.
3.1.13 Remove the 11 screws in the Roomba’s top frame.
8
 Loading...