

Page 1

DTR-60.7/DTR-50.7
CONTENTS
Front Panel .......................................................................... 3
Display ................................................................................. 4
Rear Panel...........................................................................5
Step 1: Connections .............................................. 6
1 Connecting speakers........................................................ 6
・ Speaker layout ..............................................................6
・ Height speaker types ....................................................7
・ Instructions on how to connect speakers ......................8
2 Connecting the TV and players ........................................ 9
・ HDMI cable connection .................................................9
・ Connecting Components without HDMI ......................10
3 Other connections .......................................................... 11
Basic Manual
Step 2: Initial Setup ............................................. 12
1 AccuEQ Room Calibration ............................................. 12
2 Source Connection ......................................................... 13
3 Remote Mode Setup ...................................................... 14
4 Network Connection ....................................................... 14
Step 3: Playing Back ........................................... 15
1 Basic operations ............................................................. 15
・ Remote controller parts name .....................................15
2 Network Functions .......................................................... 16
3 AirPlay® .......................................................................... 16
4 AM/FM Radio ................................................................. 17
5 Multi-zone ....................................................................... 17
The Basic Manual includes information needed
when starting up and also instructions for
frequently used operations. The Advanced
Manual has more detailed information and
advanced settings.
・ Making Multi-zone Connection ....................................17
・ Performing Multi-zone Playback .................................18
6 Quick Setup menu .......................................................... 19
7 Other useful functions .................................................... 20
Troubleshooting .................................................................21
Specifications ....................................................................22
Table of image resolutions ................................................. 23
Resolutions supported by HDMI ........................................ 23
Supplied Accessories .......................................... Back cover
E
n
Page 2

Features
DTR-60.7/DTR-50.7:
・ Equipped with 7 ch amplifier
・ Supports playback in Dolby Atmos format and has Dolby
Surround listening mode
・ Supports playback in DTS:X format and has DTS
Neural:X listening mode
・ THX Select2 Plus certified
・ Equipped with 4K compatible HDMI IN/OUT jacks
・ Equipped with 2 HDMI output jacks
・ Supports the HDMI Standby Through function which
allows transmission from players to the TV in standby
state
・ Supports HDCP2.2 (supported by HDMI IN1 to IN5/
HDMI OUT MAIN/SUB)
・ Supports ARC (Audio Return Channel)
・ Supports variety of network functions such as Internet
Radio, DLNA, AirPlay, etc.
・ Bi-Amping capability
・ A/V Sync Function to correct deviation of audio and
video
・ Multi-zone function (Zone 2 and Zone 3) which allows
you to play something in the main room while enjoying
a different source in a separate room (Video and audio
can also be output to Zone 2 through HDMI)
・ Music Optimizer™ for compressed digital music files
・ Phase Matching Bass System
・ Automatic speaker setup available using supplied
calibrated microphone (AccuEQ Room Calibration)
・ Supports playback of MP3, WMA, WMA Lossless,
FLAC, WAV, Ogg Vorbis, Apple Lossless, DSD, Dolby
TrueHD via network and USB storage device (the
supported formats will differ depending on the use
environment)
DTR-60.7:
・ The two front channels have parallel push-pull circuits
for reproducing powerful bass
・ Equipped with a high-class toroidal transformer as an
independent power source for the audio circuitry
En-2
Page 3

N
LM
Front Panel
12496578
3
O
F
(Australian models)
GH IJ
K
SQRP
1
On/Standby button: Turns the unit on or into standby
z
mode.
2
Hybrid Standby indicator: Lights if the unit enters
standby mode when the HDMI Standby Through, USB
Power Out at Standby or Network Standby function is
enabled.
3
DTS:X indicator: Lights when playing DTS:X.
4
Dolby Atmos indicator: Lights when playing Dolby
Atmos.
5
HDMI Out button: Allows you to select the HDMI jack to
output video signals.
6
Remote control sensor: Receives signals from the
remote controller.
7
Tone, Tone Level buttons: Adjusts the high tone and
low tone. Press the Tone button repeatedly to select
the item to adjust from "Bass", "Treble" and "Phase
Matching Bass", and press the Tone Level buttons to
adjust.
8
Display
9
Listening Mode button: Allows you to select the
listening mode.
Dimmer button (North American models): Switches
F
the brightness of the display.
RT/PTY/TP button (Australian models): Can be used
when receiving the station transmitting text information.
Memory button: Registers a radio station.
G
Tuning Mode button: Switches the tuning mode.
H
Display button: Switches the information on the
I
display.
Setup button: Used when making settings.
J
Cursor buttons, Tuningjl button, Presetdc button
K
and Enter button: Moves the cursor and confirms the
selection. When listening to AM/FM broadcasting, tune
in to the station with Tuning
station with Presetdc.
Return button: Returns the display to the previous
L
state.
Master Volume: Allows you to adjust the volume.
M
Zone2/Zone3/Off button: Controls the multi-zone
N
function.
Whole House Mode, Off button: Controls the WHOLE
O
HOUSE MODE function to play the same source in all
the multi-zone connected rooms.
jl
or select the registered
En-3
Page 4

Phones jack: Stereo headphones with a standard plug
FG
98
P
are connected.
Setup Mic jack: The supplied speaker setup
Q
microphone is connected.
Input selector buttons: Switches the input to be
R
played.
AUX Input HDMI jack: A HD camera or such other
S
device is connected.
Display
12
3
4
5
76
1
Speaker/Channel display: Displays the output channel
that corresponds to the selected listening mode.
2
Z2/ Z3: Lights when the output to Zone 2/ Zone 3 is set
to on.
3
Lights according to the type of input digital audio signals
and the listening mode.
4
Stays lit when Music Optimizer is enabled.
5
Lights when playing NET or USB.
6
"NET": Lights when "NET" input is selected and the unit
is connected to the network. It will flash if the connection
is not correct.
"USB": Lights when input is "NET" and USB is
connected and selected. It will flash if the connection is
not correct.
"HDMI": Lights when HDMI signals are input and the
HDMI input is selected.
"DIGITAL": Lights when digital signals are input and the
digital input is selected.
"MUTING": Flashes when muting is on.
"ANALOG": Lights when analog signals are input and
the analog input is selected or when HDMI and digital
signal inputs are not assigned.
"SLEEP": Lights when the sleep timer is set.
7
Lights in the following conditions.
"RDS" (Australian models): Receiving RDS
broadcasting.
"AUTO": Tuning mode is auto.
"TUNED": Receiving AM/FM radio. flashes
while tuning is automatically performed.
"FM STEREO": Receiving FM stereo.
8
"Bi AMP": Using bi-amp.
9
Stays lit when headphones are connected.
Displays various information of the input signals.
F
Pressing Display displays the type of input digital
signals and the listening mode.
Shows the volume level.
G
En-4
Page 5

KL MN
Rear Panel
21 3 4 5 6 78 9 FGHI
J
1
RI REMOTE CONTROL jack: An Onkyo product with RI
jack can be connected and synchronized with this unit.
2
DIGITAL IN COAXIAL/OPTICAL jacks: Digital audio
signals are input.
3
RS232 port: Connected to the home control system.
()
4
USB port: A USB storage device is connected so that
music files stored in it can be played. Connect a USB
device with a USB cable to supply it with power.
5
ETHERNET port: Used for LAN connection
6
VIDEO IN/OUT jacks: Composite video signals input/
output jacks.
7
HDMI IN/OUT jacks: Digital video signals and audio
signals are transmitted between the unit and the
connected devices.
8
COMPONENT VIDEO IN/OUT jacks: Component video
signals input/output jacks.
9
TUNER AM/FM(75Ω) terminal: The supplied antennas
are connected.
HDBaseT™ IN/OUT jack: HDMI input signals are
F
output via the Ethernet cable. As they are covered with
a seal when shipped, remove it when you use the ports.
Do not use the ports to connect the Ethernet port of
network device. ()
IR IN A/B, IR OUT jack: Connected to the multiroom
G
remote control kit. ()
12V TRIGGER OUT A/B/C jack: Allows you to connect
H
a device with 12V trigger input jack to enable link
operation between the device and the unit. ()
PRE/LINE OUT ZONE 2/ZONE 3 jack: Audio output
I
jack connected to the power amplifier and pre-main
amplifier for multi-zone playback in a separate room.
AC INLET: The supplied
J
GND terminal: The ground wire of the turntable is
K
power cord is connected.
connected.
AUDIO IN jacks: Analog audio signals are input.
L
PRE OUT jacks: A power amplifier or subwoofer with
M
built-in amplifier is connected.
Speaker terminals: Speakers are connected. To use
N
the Multi-zone function, connect the speakers in the
separate room to the ZONE2 speaker terminals.
* Special devices or cable connections are necessary to use the 3,
and H functions. Contact the specialized stores for more
F, G
information.
En-5
Page 6

Step 1:
Connections
Connecting speakers
1
Speaker layout
9
"
'
%
Important: The power cord must be connected only after all other connections are completed.
Front speakers
" #
Center speaker
$
Surround speakers
% &
Subwoofer
'
Back speakers
7 8
Height speakers (Front High)
9 F
Height speakers (Rear High)
G H
・ 5.1 ch:
"#$%&'
・ 7.1 ch:
"#$%&'
"#$%&'
"#$%&'
・ To enjoy the Dolby Atmos listening mode, height speakers or back speakers need to
be installed. There are a variety of height speakers apart from this type. See the next
section "Height speaker types" for details.
+78, or
+9F, or
+
GH
F
#
$
&
H
G
8
7
Characteristics of speaker types
output front stereo sound and $
"#
outputs center sound such as dialogs and
vocals. %& create back sound field. '
reproduces bass sounds and creates rich
sound field.
Connecting 78, 9F, or GH speakers
enables playback in 7.1 ch configuration.
(back) speakers improve sense of
78
envelopment created by back sound field
as well as seamlessness of back sounds,
providing more natural sound experiences
in the sound field. 9F and GH (height)
speakers produce surround effects on
a height plane. Note that this unit can
perform optimal sound field processing
for the type of height speakers actually
installed and registered in Initial Setup.
You can connect both back speakers and
height speakers at the same time, but you
can only output audio from one of these at
a time. When connected at the same time,
you can switch speakers to prioritize in the
Quick Setup menu that appears when you
press the Q button on the remote controller
(Speaker Layout function). For details, see
"6 Quick Setup menu" of "Step 3: Playing
Back".
・ The speaker setting is 7.1 channels at
the time of purchase. You can change it
manually or by using automatic speaker
setting.
・ To use the multi-zone function, see
"5 Multi-zone" in "Step 3: Playing Back".
Important: Connect speakers with 4 Ω to
16 Ω impedance. You have to change the
setting if any of the speakers have 4 Ω or
more to less than 6 Ω impedance. Using
a speaker with less impedance than the
setting may result in failure. You can set
up by viewing the guidance displayed on
the TV screen. Select the item with the
cursor buttons of the remote controller
and press Enter to confirm your selection.
To return to the previous screen, press
Return. Press RCV and then Setup on
the remote controller. Select "2. Speaker"
- "Configuration" - "Speaker Impedance"
and change the default value from
"6ohms" to "4ohms".
En-6
Page 7

Step 1:
Connections
8
Right back
FH
Height R
&
Surround R
#
Front R
'
Subwoofer with built-
in power amplifier
$
Center
%
Surround L
"
Front L
7
Left back
A speaker configuration
where only one back
speaker is connected is
not supported.
9G
Height L
Height speaker types
Installing speakers in ceiling
e f
dc
a b
Top front
a b
Top middle
c d
Top Rear
e f
Ceiling speakers, etc. are used for maximizing effects in
Dolby Atmos or Dolby Surround listening mode. Install
Top Front speakers so that they are positioned at a point
between directly above the listening position and directly
above the front speakers. Install Top Middle speakers so
they are directly above the listening position. Install Top
Rear speakers so they are positioned at a point between
directly above the listening position and directly above the
back speakers. You can select ab, cd, or ef on this
unit. For connection with the unit, use the HEIGHT speaker
terminals.
・ Dolby Laboratories recommends placing the speakers
as described in "Installing speakers in ceiling" to obtain
the best Dolby Atmos effect.
Make correct connection between the unit's jacks and
speaker's jacks (+ to + and - to -).
En-7
Page 8

Using Dolby Enabled Speakers
i
g
k l
Dolby Enabled Speaker (Front)
g h
Dolby Enabled Speaker (Surround)
i j
Dolby Enabled Speaker (Back)
k l
A Dolby Enabled Speaker is specially designed to be used
as a Height speaker. There are two types of Dolby Enabled
Speakers; types placed on top of other speakers such as
front speakers and surround speakers (), and types that
are integrated with the normal speakers. Dolby Enabled
Speakers placed with their diaphragms facing toward the
ceiling create higher effect in the Dolby Atmos and Dolby
Surround listening modes by providing sounds echoing
off the ceiling. You can select gh, ij, or kl on this
unit. For connection with the unit, use the HEIGHT speaker
terminals.
* You can put kl on top of back speakers, but even if you connect both
back speakers and kl speakers at the same time, you can only output
audio from one of these at a time.
h
j
When playing Dolby Atmos, the speakers required depend
on how you have setup your back speakers or height
speakers. The following shows speaker combinations.
Connection
pattern
1 Back
2 Front High
3 Rear High
4 Top Front
5 Top Middle
6 Top Rear
7 Dolby Enabled Speaker (Front)
8 Dolby Enabled Speaker (Surround)
9 Dolby Enabled Speaker (Back)
Required Optional Connection of a subwoofer is optional.
Back or Height
Front
Center
Surround
Instructions on how to connect speakers
Cut and remove the plastic coating from the end of the
speaker cable, twist the core and connect it to the terminal.
Make correct connection between the unit's jacks and
speaker's jacks (+ to + and - to -) for each channel. If
connection is wrong, a bass sound may become poor due
to reverse phase. Up to two subwoofers with built-in power
amplifier can be connected to the SUBWOOFER jacks.
Set the cut-off filter selection switch of the subwoofer to
DIRECT. If the subwoofer does not have a cut-off filter
selection switch but has a cut-off frequency adjusting dial,
turn it to the maximum frequency. If your subwoofer does
not have built-in power amplifier, you can connect a power
amplifier between the unit and the subwoofer.
・ Short-circuiting the + cable and - cable or contacting
the cable core to the rear panel of the unit may cause
failure. Also do not connect two or more cables to one
speaker terminal or one speaker to several terminals.
Step 1:
Connections
When using commercially available banana plugs:
tighten the speaker terminals to the end and then insert
the banana plugs. Do not insert the core of speaker cable
directly into the hole for banana plug of speaker terminal.
(North American model)
En-8
Page 9

Connecting the TV and players
2
TV
Step 1:
Connections
HDMI
IN
To use the ARC function, connect to the ARC
compatible HDMI jack of the TV and make an
appropriate setting on the unit. See "2 Source
Connection" of "Step 2: Initial Setup".
HDMI
OUT
Blu-ray Disc/
DVD player
set-top box, etc.
HDMI cable connection
Refer to the above figure and connect the player to the
HDMI jack on the back of this unit. For example, connect
a Blu-ray Disc Player to the HDMI IN1 (BD/DVD) jack.
To play the player, press the Input Selector button on the
remote controller with the same name as the jack to which
you connected the player so that the input on the unit is
selected.
To connect the TV and the unit, connect the HDMI OUT
MAIN jack of the unit and the HDMI IN jack of the TV
using an HDMI cable. With this connection, it becomes
possible to display the setting screen of the unit on the
TV or transmit video/audio signals from the player to the
TV. If your TV supports ARC (Audio Return Channel), it
is possible to play the TV sound with the AV receiver's
HDMI cable
HDMI
OUT
HDMI
OUT
speakers with this connection only. If your TV does not
support ARC, you need, in addition to the HDMI OUT MAIN
jack connection, a digital optical cable connection between
the digital audio out optical jack of the TV and the DIGITAL
IN OPTICAL jack of the unit or an analog audio cable
connection between the audio output jack of the TV and the
AUDIO IN TV jack of the unit.
HDMI
OUT
Game console
HDMI
OUT
Personal computer
Streaming media player, etc.Satellite/Cable
Audio connection with a TV not supporting ARC
* Select an appropriate connection
for your TV.
TV
DIGITAL
OPTICAL
OUT
AUDIO
OUT
The unit supports the HDMI Standby Through function that
allows transmission from players to the TV even if the unit
is in standby. You have to modify the settings to enable
the input selection link with CEC (Consumer Electronics
En-9
Page 10

Control) compliant device, connection with ARC compatible
4
5
TV, and HDMI Standby Through function. See "2 Source
Connection" of "Step 2: Initial Setup".
・ Another TV can be connected to the HDMI OUT
SUB jack. In this case, press the HDMI Out button
on the main unit several times to display "SUB" or
"MAIN+SUB" and select the output method. You have to
modify the settings to enable the CEC functions, such
as ARC, for the TV connected to the HDMI OUT SUB
jack. Set "Step 3: Playing Back" - "6 Quick Setup menu"
- "Control TV" to "SUB".
・ To enjoy HDCP2.2 protected video, connect the player
to one of the HDMI IN1 to IN5 jacks and connect
the HDMI output jack on this unit and to a HDCP2.2
compatible HDMI input jack on the TV. You will be
unable to view images protected by HDCP2.2 if your TV
does not have a HDCP2.2 compatible input jack.
・ To play 4K or 1080p video, use a high speed HDMI
cable or high speed HDMI with Ethernet cable.
Connecting Components without HDMI
If your AV component does not have HDMI jack, use an
available jack of your component for cable connection with
this unit.
* It is possible to change assignment of the input jacks and input selector
buttons. For how to make settings, see "1. Input/Output Assign" in
"Advanced Settings (Setup Menu)" in the Advanced Manual.
321
Step 1:
Connections
■ Video signal connection
The unit has a video upconversion function. For details,
see the next section.
1
A TV with component video input jacks or a player with
component video output jacks can be connected.
* Only images input through the COMPONENT VIDEO IN jacks can be
output through the COMPONENT VIDEO OUT jacks.
Component video cable
* Its transmitted video has higher quality than
that of composite video cable.
2
A TV with composite video input jacks or a player with
composite video output jacks can be connected.
* Only images input through the VIDEO IN jack (composite) can be
output through the VIDEO OUT jack.
Composite video cable
■ Audio signal connection
3
A player with a digital audio out jack can be connected.
Digital optical cable (OPTICAL)
* The DIGITAL IN OPTICAL jack of the unit has
a cover. Push in the cable against the cover
as it is turned inside.
Digital coaxial cable (COAXIAL)
4
A player with analog audio out jacks can be connected.
When using jacks 1 and 2 for video input, connect
to the audio input jacks corresponding to the jacks
connected at 1 and 2. (For example, when video input
connection is to the 1 BD/DVD jack, the audio input
connection should also be to the 4 BD/DVD jacks.)
En-10
Analog audio (RCA) cable
5
Connect a turntable that uses an MM type cartridge
and does not have a built-in audio equalizer. If the
connected turntable has a built-in audio equalizer,
connect it to the 4 analog audio input jack.
* If it uses an MC type cartridge, install an audio equalizer compatible
with MC type cartridge between the unit and the turntable by
connecting it to the 4 analog audio input jack. For details, refer to
the turntable's instruction manual.
* If the turntable has a ground wire, connect it to the GND terminal of
this unit. If connecting the ground wire increases noise, disconnect it.
Page 11

Step 1:
Connections
Video upconversion function
Video signals input to the VIDEO IN jack or the
COMPONENT VIDEO IN jacks will be upconverted
to HDMI signals and then output from the HDMI
output jack.
AV Receiver
* When you upconvert video signals input to the
COMPONENT VIDEO IN jacks and output them
from the HDMI OUT jack, set the output resolution of
the player to 480i or 576i. If the input has 480p/576p
or higher resolution, a message prompting you to
change the resolution setting will appear. If your
player does not support 480i or 576i output, use the
VIDEO IN jack.
* If multiple video signal inputs are put into one input
system, HDMI signal output is prioritized.
Other connections
3
AM/FM antenna connections
Connect the antennas to listen to AM/FM broadcast. When
listening to the broadcast for the first time, adjust the
antenna position and orientation to get the best reception.
AM loop
antenna
(supplied)
Indoor FM antenna
(supplied)
Fix with a tack on the
wall.
(North American
models)
(Australian models)
Network connection
You can enjoy Internet radio, DLNA and AirPlay by
connecting the unit to LAN. Connect the Ethernet cable to
the Ethernet port of the router.
Internet radio
Router
NAS
Headphones connection
Connect stereo headphones with a standard plug (1/4 inch
or φ6.3 mm) to the Phones jack on the front panel. Sound
from the speakers will be off while you are using the
headphones.
・ If you selected any other listening mode than Stereo,
Mono and Direct, connecting headphones will switch the
listening mode to Stereo.
Assemble the AM loop antenna (supplied).
Power cord
This model includes a removable power cord. Connect
the power cord to AC INLET of the unit and then connect
to the outlet. Always disconnect the outlet side first when
disconnecting the power cord. When the unit is turned on, a
large instantaneous current may flow affecting functionality
of the computer and other devices, so it is recommended to
use a separate outlet.
En-11
Page 12

Step 2:
Initial Setup
"Initial Setup" automatically starts on the television when
you first turn the unit on.
Initial Setup
Language Select
English
Deutsch
Français
Español
Italiano
Nederlands
Svenska
˹୫
SETUP
Exit
Settings proceed in the following order:
1 AccuEQ Room Calibration
・ Automatic calibration for optimum speaker settings
2 Source Connection
・ Checking that each input source is connected correctly
・ HDMI link function settings
3 Remote Mode Setup
・ Settings required to operate other AV Components with
the Remote Controller
4 Network Connection
・ Checking network connections
* Firmware update notification: If the unit is connected via LAN and there
is firmware update available, the "Firmware Update Available" message will
appear. To execute updating, select "Update Now" with the cursor buttons of
the remote controller and press Enter.
When "Completed!" appears, press zOn/Standby on the main unit to turn
the unit into standby mode. Then updating will be completed. (The unit
automatically turns itself into standby mode after about 3 minutes even if
you don't press zOn/Standby, and updating will be complete.)
Before Start
Setup is performed as a series of responses to questions
asked by the unit. Select the item with the cursors of the
remote controller and press Enter to confirm your selection.
To return to the previous screen, press Return.
・ Switch the input on the TV to that assigned to the unit.
Select the language first. Next, a summary of the initial
settings is displayed. Select "Yes" in this screen and press
Enter on the remote controller.
Initial Setup
Welcome to initial setup.
Have you connected all the speakers and devices?
Before starting, please connect speakers and sources.
Now, would you like to start initial setup?
1st Step : AccuEQ Room Calibration
2nd Step : Source Connection
3rd Step : Remote Mode Setup
4th Step : Network Connection
Yes
No
SETUP
Exit
Re-doing initial setup: If you terminate the
procedure on the way or change the setting made in
the initial setup and want to call up the setup wizard
again, press RCV and then Setup on the remote
controller, select "8. Miscellaneous" - "Initial Setup",
and press Enter.
AccuEQ Room Calibration
1
The test tone coming from each speaker will be measured
to enable setting of the number of speakers, volume
level, each speaker's optimum crossover frequencies,
and distance from the primary listening position, and also
enable correction of distortion caused by the room acoustic
environment.
・ You cannot return to the previous screen during speaker
setup, even if you press Return.
1. Place the speaker setup microphone.
Initial Setup
AccuEQ Room Calibration
This step you can automatically calibrate
your room to get correct surround sound.
Would you like to calibrate your room now
or later?
Do it Now
Do it Later
SETUP
Exit
When the above screen is displayed, before starting
the procedure, place the supplied speaker setup
microphone at the measurement position ★ by referring
to the following figure.
Listening area
Measurement position
with microphone
En-12
Page 13

* Correct measurement will not be possible if the microphone is held
by hand. Measurement is not possible if headphones are being used.
* The subwoofer sound may not be detected since it is extremely
low frequencies. Set the subwoofer volume to around the half of its
maximum volume.
* Measurement may be interrupted if there is ambient noise or radio
frequency interference. If this occurs, close the window and turn off
the home appliance and fluorescent light.
2. After placing the microphone at the measurement
position, select "Do it Now" with the cursors and
press Enter.
3. When "Please plug microphone that came in a
box with AV receiver" is displayed, connect the
microphone to the Setup Mic jack of the unit.
Setup Mic jack
Calibration
microphone
4. Set the speakers you have connected and the type
of Height Speakers.
AccuEQ Room Calibration
Speaker Channels
Subwoofer
Height Speaker
Bi-Amp
Powered Zone2
Select how many speakers you have.
7.1ch
Yes
-----
No
No
ENTER
Next
When the screen above is displayed, set the items with
the cursors on the remote controller. The image on the
screen changes as you choose the number of channels
in "Speaker Channels", so refer to it when performing
the settings. After completing all the settings, press
Enter on the remote controller.
After this, follow the guidance displayed on the TV screen.
・ When the cursor is on an item, the content of the item
will be shown in the lower part of the screen.
5. The test tones sound from the connected speakers
and automatic speaker setting starts.
Measurement will be made three or more times for each
speaker. It takes several minutes to be completed. Keep
the room as quiet as possible during measurement. If
any of the speakers do not produce the test tone, check
for disconnection.
・ During measurement, each speaker outputs the test
tones at a high volume. Be careful of sound leak
that may disturb your neighbors, or be careful not to
frighten young children.
6. When the measurement is completed, the
measurement result is displayed.
t/u
Press
on the remote controller to check the
settings. Press Enter with "Save" selected. To have the
settings reflected for all the speakers, select "On (All
Channels)" in the next screen and press Enter on the
remote controller.
・ Select "On (Except Front Left / Right)" to disable just
the front speakers.
・ If there is an error message, follow the on-screen
instruction to remove the error cause. If the
subwoofer was not detected, turn the volume of the
subwoofer up to maximum and then select "Retry".
About THX playback
THX recommends setting the speakers manually if
you use THX-certified speakers or playing back with
THX listening modes.
・ THX recommends setting the crossover frequency
to "80Hz(THX)" manually.
・ Due to the electrical complexities and the
interaction with the room, you may notice irregular
results when setting the level or distance of each
speaker. If this happens, THX recommends
setting the speakers and the subwoofer manually.
7. When "Please unplug setup microphone." is
displayed, disconnect the microphone.
Source Connection
2
Step 2:
Initial Setup
You can check the connections for each of the inputs and
configure the HDMI link function.
1. When the Source Connection start screen is
displayed, select "Yes, Continue" with the cursors
and press Enter.
Initial Setup
Source Connection
This step will start to check if the
connections were made correctly.
Would you like to continue?
Yes. Continue
No. Skip
SETUP
Exit
2. Select the desired input to check the connection and
press Enter.
Start playback of the selected device. If connection is
correct, video/audio of the input source selected on the
unit will be played.
3. After checking the connection, select "Yes" with the
cursors and press Enter.
・ If you select "No" and press Enter, the error cause
will be displayed. Follow the guidance to remove the
error cause and check the connection again.
4. Select "Yes" with the cursors and press Enter on the
remote controller to check the connection of other
inputs or select "No, Done Checking" and press
Enter to skip.
If you select "Yes", you will return to the screen of
step 2.
If you select "No, Done Checking", you will proceed to
step 5.
5. Settings for the CEC link function.
To enable the HDMI link function with CEC compatible
equipment, select "Yes", then select "Yes" again in the
next screen.
En-13
Page 14
Step 2:
Initial Setup
Source Connection
The following CEC-compatible devices are found;
Do you wish to turn on the CEC link?
xxxxxxxxxxx
Yes
No
SETUP
Exit
If you select "Yes", the connection with ARC compatible
TV and HDMI Standby Through function will be set to
"On" and enabled.
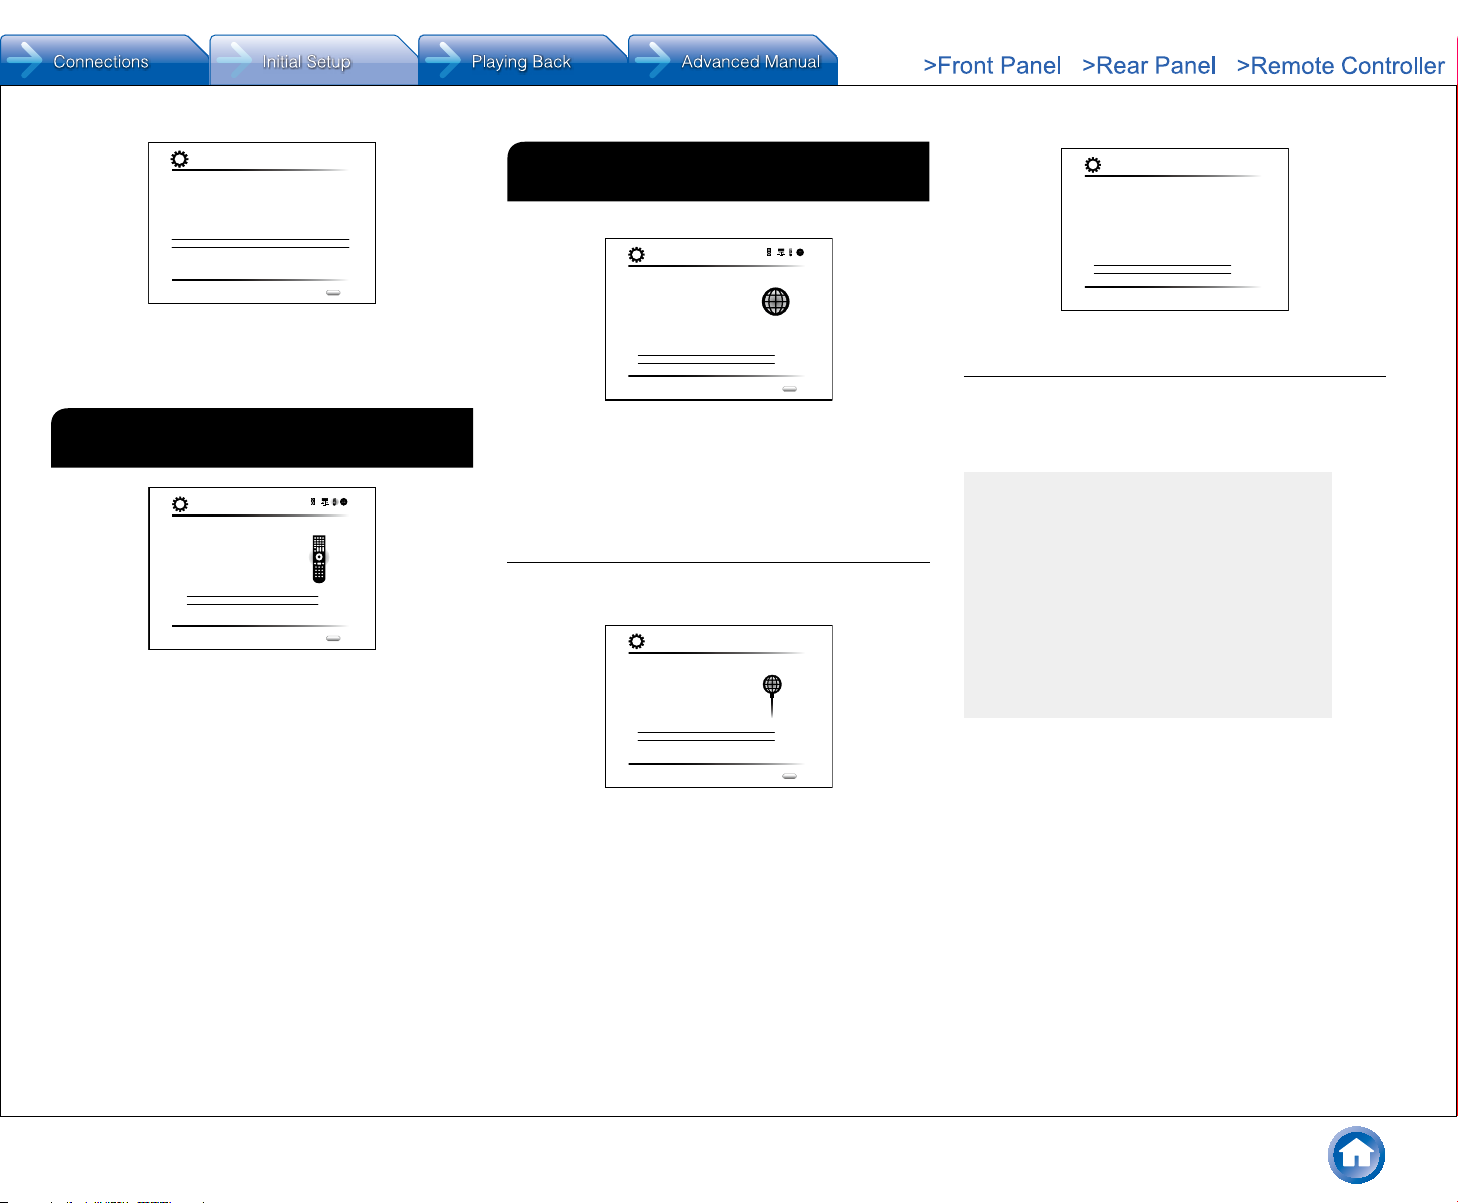
Remote Mode Setup
3
Initial Setup
Remote Mode Setup
Preprograming remote will give you control
of other devices from AV receiver remote.
Would you like to setup your remote to
control your devices? This may take a while
depending on what and how many you have
connected. You can always come back to remote
setup from setup “7-2 Remote Mode Setup”.
Yes, Continue
No, Skip
SETUP
Exit
You can enable operation of the other components using
the remote controller of the unit. When the Remote Mode
Setup start screen is displayed, select "Yes, Continue"
with the cursors and press Enter on the remote controller.
Follow the guidance to select the desired Remote Mode
button and in the keyboard screen, enter the first three
characters of the brand name of the device you are going
to program and search for the remote control code. The
guidance will also explain how to set the remote controller.
Network Connection
4
Initial Setup
Network Connection
Do you want to connect network connection?
It gives you network services that our AV
receiver support. If you wish to skip this step.
select “No. Skip”.
Yes
No, Skip
SETUP
Exit
You can check the network connection. When the Network
Connection start screen is displayed, select "Yes" with the
cursors and press Enter on the remote controller. If you
select "Yes" in the next screen, you can view the Ethernet
cable connection status.
■ If connection is successful
"Successfully Connected" is displayed on the screen.
Network Connection
MAC Address xxxxxxxxxxx
IP Address, Subnet Mask, Gateway, DNS Server
Gateway Ping
Internet Service Test
Successfully connected.
Next
SETUP
Exit
If this is not displayed, try doing the setting again.
ONKYO PRIVACY STATEMENT
To improve our products and services of Onkyo Corporation,
Onkyo may collect information about your receiver usage.
To know more about what type of information we collect and
how we use it please review Onkyo’s Privacy Policy at
http://www.onkyo.com/privacy/
I have read Onkyo’s Privacy Policy and agree to its terms.
Yes
No
■ Terminating initial setup
After finishing the initial setup, keep "Finished" selected
and press Enter on the remote controller. Connection and
setting of the unit is now complete.
Audio output of connected players
To enjoy digital surround sound including Dolby
Digital and DTS, audio output should be set to
"Bitstream output" on the connected Blu-ray Disc
Player or other device. Depending on the settings
on the Blu-ray Disc Player there may be cases when
Dolby TrueHD, Dolby Atmos, and DTS-HD Master
Audio audio is not output according to the format of
the source. In this case, in the Blu-ray Disc Player
settings try setting "BD video supplementary sound"
(or secondary sound) to "Off". Change the listening
mode after changing the setting to confirm.
En-14
* Privacy policy
A confirmation screen asking you to agree to the privacy
policy is displayed during network setting. Select "Yes" and
press Enter to indicate agreement.
Page 15

Step 3:
1
8
F
H
G
2
3
4
5
6
7
Basic operations
1
● To control the unit: The remote controller of this
unit has the remote mode function for controlling
other devices. You cannot control this unit when the
remote controller is in the remote mode other than
RECEIVER mode (for controlling this unit). Be sure
to press the 2RCV button to select the RECEIVER
mode before starting operation.
1. Turning the power on.
Press
1
power on.
・ Switch the input on the TV to that assigned to the
unit. Use the TV's remote controller.
2. Select the input on the unit.
Press the 3Input Selector button with the same name
as the jack used for connection. Press TV to listen the
TV's sound. You can also use the input selector buttons
on the main unit.
・ Input will automatically be selected if the TV or player
is CEC compliant and connected to the unit with
HDMI cable.
3. Select the desired listening mode.
After pressing 2RCV, press the 7 listening mode
buttons to switch the mode so that you can enjoy
different listening modes.
4. Adjust the volume with G VOL.
Playing Back
Receiver on the remote controller to turn the
z
Remote controller parts name
9
I
J
1
Receiver button: Turns the unit on or into standby
z
mode.
2
RCV button: Switches the remote controller to the
mode for operating this unit.
3
Remote Mode/Input Selector buttons: Switch the
input to be played. Furthermore, by registering a
particular remote control code to a button, you can
switch the remote control mode to operate other
equipment by pressing that button.
4
Zone2, Zone3 buttons: For use when the unit is
connected with a pre-main amplifier and speakers in a
separate room and sound is played there.
5
Cursor buttons and Enter button: Moves the cursor
and confirms the selection.
6
Setup button: Displays the screen for making various
settings for this unit.
7
Listening mode buttons: Allows you to select the
listening mode.
Movie/TV button: You can select a listening mode
suitable for movies and TV programs.
Music button: You can select a listening mode suitable
for music.
Game button: You can select a listening mode suitable
for games.
THX button: You can select a THX listening mode.
・ For details on the listening modes, see the Advanced
Manual.
8
Dimmer button: Switches the brightness of the display.
9
Custom button: You can register a preset code to
enable operation of other devices. For how to make
settings, see the Advanced Manual.
Muting button: Temporarily mutes audio. Press again
F
to cancel muting.
Volume buttons: Allows you to adjust the volume. This
G
button also cancels the muting.
Return button: Returns the display to the previous
H
state.
Q button: Displays the Quick Setup menu that allows
I
you to quickly access the frequently used setting items
including sound quality adjustment.
En-15
Page 16

Display button: Switches the information on the
J
display.
Network Functions
2
You can enjoy sources such as Internet radio by connecting
the unit to a network. For details on the operation, see the
Advanced Manual.
・ The operations described in this section are not
displayed on the TV when the OSD (the feature to show
information such as setting menus on the TV) language
is set to "Chinese". Operate by confirming the display on
the main unit.
Press NET on the remote controller to display the NET TOP
screen on the TV. Select the item with the cursors of the
remote controller and press Enter to confirm your selection.
To return to the previous screen, press Return.
Network
TuneIn Radio
Pandora
Spotify
SiriusXM Internet Radio
Slacker Personal Radio
Deezer
AirPlay
Internet Radio services
The unit comes preset with Internet radio services such as
TuneIn Radio. After selecting the desired service, follow
the on-screen instructions, using the cursors to select radio
stations and programs, then press Enter to play.
・ Network services or contents may become unavailable if
the service provider terminates its service.
・ Available services may vary depending on your area of
residence.
DLNA
You can play music files stored in the PC or NAS device
connected to the network. Select the server with the
cursors, select the desired music file and press Enter to
start playback.
・ This unit needs to be connected to the same router as a
computer or NAS device.
Home media
You can play music files in a shared folder on the PC or
NAS device connected to the network. Select the server
with the cursors, select the desired music file and press
Enter to start playback.
・ This unit needs to be connected to the same router as a
computer or NAS device.
USB
Play music files on a USB storage device. Connect the
USB storage device to the USB jack on the rear of the unit,
select the desired folder or music file with the cursors, and
press Enter to confirm and start playback.
AirPlay
3
You can enjoy the audio from iPhone®, iPod touch®, iPad®
and PCs with iTunes.
Important: The iOS device or PC needs to be connected to
the network through the same router as this unit.
®
■ Playing music files from an iPhone, iPod
touch, or iPad
Update the OS version on your iOS device to the latest
version before connecting it to this unit.
1. Press NET on the remote controller.
2. Tap the AirPlay icon on the iPhone, iPod touch,
or iPad, select this unit from the list of devices
displayed, and click "Done".
Step 3:
・ The AirPlay icon is displayed in the control center under
iOS 7 and later. To display the control center, swipe
from the bottom of the screen of the iOS device.
・ If the AirPlay icon is not displayed, confirm that this unit
and the iOS device are both connected to the router
correctly.
3. Playing music files from an iPhone, iPod touch, or
iPad.
Playing Back
■ Playing music files from a computer
・ AirPlay is compatible with iTunes 10.2 or later.
1. Press NET on the remote controller.
2. Switch on your computer and start iTunes.
3. Click the AirPlay icon in iTunes and select this unit
from the list of devices displayed.
4. Playing iTunes music files.
・ If "6. Hardware"-"Power Management"-"Network
Standby" is set to "On" in the Setup menu, then once
AirPlay starts, this unit switches on automatically and
the "NET" input source can be selected. Even if this
setting is "Off", if the unit is already on then the "NET"
input source can be selected.
・ Information such as the name of the track is displayed
on the unit's display during AirPlay playback.
・ Due to the characteristics of AirPlay wireless
technology, the sound produced on this unit may slightly
be behind the sound played on the AirPlay-enabled
device.
・ There may be some differences in how operations are
performed depending on the iOS or iTunes version.
・ OSD are not displayed when the OSD language is set
En-16
Page 17

to "Chinese". Operate by confirming the display on the
TUNED
FM STEREO
main unit.
Volume: The volume of this unit and the AirPlayenabled device are linked. Take care that the
volume doesn't become too loud when you adjust
the volume on the AirPlay-enabled device. You may
damage the unit or the speakers. Stop play on the
AirPlay-enabled device immediately if the volume
becomes too loud at any point.
AM/FM Radio
4
The Basic Manual explains the method using automatic
tuning. For manual tuning, see the Advanced Manual.
1. Press the Tuner button on the main unit several
times to select either "AM" or "FM".
2. Press Tuning Mode on the unit, so that the "AUTO"
indicator on the display lights.
3. Press Tuning
on the unit.
The automatic tuning to a radio station starts. Searching
stops when one is tuned. When tuned into a radio
station, the "
TUNED " indicator on the display lights.
The "FM STEREO" indicator lights if the radio station is
an FM radio station.
number between 1 and 40 while the preset number is
flashing (about 8 seconds).
4. Press Memory again on the main unit to register the
station.
When registered, the preset number stops flashing.
To select a preset radio station, press Preset
the main unit or CH +/- on the remote controller.
・ To delete a registered preset station, press the
Preset
button on the main unit, select the preset
number you want to delete, then while holding down the
Memory button, press the Tuning Mode button. When
deleted, the number on the display goes off.
AM/FM frequency step setting
It may be necessary for you to change the frequency
step to tune the radio in your area. Change the step
with the following procedure. Note that when this
setting is changed, all radio presets are deleted.
1 After pressing RCV on the remote controller,
press Setup.
2. Select "6. Hardware" with the cursor and press
Enter.
3. Select "Tuner" with the cursor and press Enter.
4. Select "AM/FM Frequency Step" (North American
models) or "AM Frequency Step" (Australian
models) with the cursor and select the frequency
step for your area.
on
Step 3:
be played and that some players require audio output setting. Only
players connected to the AUDIO IN jack by analog connection can
be played in Zone 3.
*2 DSD and Dolby TrueHD audio cannot be played in Zone 2/Zone 3.
Playing Back
Making Multi-zone Connection
There are the following three methods of connection.
Simultaneous playback in all zones is also possible.
a. Connecting a TV in a separate room
b. Connecting with an integrated amplifier or power
amplifier in a separate room
c. Connecting with speakers in a separate room
■ a. Connecting a TV in a separate room
You can play video and audio of the HDMI connected
player on the TV in a separate room. With an HDMI cable,
connect between the HDMI OUT SUB/ZONE 2 jack of the
unit and the HDMI IN jack of the TV in a separate room.
Main room
AUTO
Actual display varies depending on the country or region
Registering a radio station: You can register up to 40
of your favorite AM/FM radio stations.
1. Tune into the AM/FM radio station you want to
register.
2. Press Memory on the unit so that the preset number
on the display flashes.
3. Repeatedly press Preset
on the unit to select a
Multi-zone
5
You can listen to audio in a room (called Zone 2 or Zone 3)
other than the one where this unit is located (called the
main room). You can also output video and audio to a TV in
the separate room (Zone 2) via HDMI.
■ Sources you can playback
・ External players (1)
・ NET (2)
・ AM/FM Radio
*1 In Zone 2, you can play equipment connected to any of the HDMI
IN1 to IN5 jacks, DIGITAL IN COAXIAL/OPTICAL jacks, or AUDIO
IN jacks. Note that only analog or 2-channel PCM audio signals can
Zone 2
Settings are required: Press RCV and then Setup
on the remote controller, select "1. Input/Output
Assign" - "TV Out" and set the "Zone 2 HDMI"
setting to "Use".
・ The information for a connected device can
be displayed on the TV screen in a separate
room. Press the Zone2 button on the remote
controller to select Zone 2 and press Display.
・ Adjust the volume on the TV in the separate
room.
En-17
Page 18

Step 3:
Playing Back
■ b. Connecting with an integrated amplifier or
power amplifier in a separate room
It is possible to play 2 ch source in a separate room while
7.1 ch source is being played in the main room.
Connect the PRE/LINE OUT ZONE 2 jacks or PRE/LINE
OUT ZONE 3 jacks of the unit and the line-in jacks of the
integrated amplifier in a separate room with an RCA cable.
Settings are required to listen to HDMI input
audio in Zone 2: Press RCV and then Setup on the
remote controller, select "1. Input/Output Assign"
- "TV Out" and set the "Zone 2 HDMI" setting to
"Use".
Main room
■ c. Connecting with speakers in another room
Connect the speakers in another room to the ZONE2
speaker terminals of the unit using speaker cables. Note
that 5.1 ch will be the maximum () in the main room
during Zone 2 playback. No sound will be output from the
back speakers and height speakers.
* In this case, the Dolby Atmos listening mode cannot be selected.
Main room
Zone 2
Performing Multi-zone Playback
It is possible to perform playback in the main room and a
separate room at the same time, for example by playing
the Blu-ray Disc player in the main room where the unit is
placed while playing Internet radio in a separate room. It is
also possible to perform playback only in a separate room.
・ With external players, it is possible to play the same
source or different sources in the main room and
separate room.
・ You cannot select separate network services for the
main room and another room with the "NET" input.
・ When listening to AM/FM broadcasting, you cannot
select different stations for the main room and separate
room. Therefore broadcasting of the same station will be
heard in the both rooms.
・ If you have connected the same player by HDMI in the
main room and in a separate room, input to this unit (the
main room) will be 2-channel PCM.
Playing Back
1. Press Zone2 or Zone3 on the remote controller,
point the remote controller at the main unit and
press zReceiver.
"Z2" or "Z3" lights on the main unit display and the multizone function is enabled. (Zone 2 or Zone 3 is now on.)
Zone 2
Settings are required to adjust audio using this
unit: Press RCV and then Setup on the remote
controller, select "3. Audio Adjust" - "Multi Zone"
and set the "Zone 2 Out" or "Zone 3 Out" setting
to "Variable". Be sure to make this setting if you
connect a power amplifier. If you do not, the volume
output may be big enough to cause damage.
En-18
Zone 3
These settings are required: After connecting the
speakers, press RCV and then Setup on the remote
controller, select "2. Speaker" - "Configuration" and
set "Powered Zone 2" to "Yes".
Settings are required to listen to HDMI input
audio in Zone 2: Press RCV and then Setup on the
remote controller, select "1. Input/Output Assign"
- "TV Out" and set the "Zone 2 HDMI" setting to
"Use".
2. Press Zone2 or Zone3 again on the remote
controller and press Input Selector of the input to be
played in a separate room.
・ If you turn the unit to standby during multi-zone
playback, the Z2/Z3 indicators are dimmed and the
playback mode is switched to playback in a separate
room only. Performing steps 1 and 2 while the unit is in
standby also switches the playback mode to playback
in a separate room only. To play the same source in
the main room and separate room, hold down Zone2 or
Zone3 for approximately 3 seconds.
Page 19

To control on the main unit: press Zone2 or Zone3 and
within 8 seconds, press the input selector button of the
source to be played in the other room. To play the same
source in the main room and separate room, press Zone2
or Zone3 twice.
To adjust the audio in Zone 2 or Zone 3
To adjust the volume, press Zone2 or Zone 3 on the remote
controller and then adjust with VOLj/l. You can also
temporarily mute sound by pressing Muting. To control on
the main unit, press Zone2 or Zone 3 and within 8 seconds,
adjust with the Master Volume control.
To adjust the sound quality, press Zone2 or Zone 3 on the
main unit and press Tone several times to display "Bass",
"Treble" or "Balance" on the main unit display and adjust it
with + or -.
To turn off the function
After pressing Zone2 or Zone3 on the remote controller,
press zReceiver. To control on the main unit, press Zone2
or Zone3 and press zOn/Standby.
・ Power consumption in standby mode increases when
the multi-zone function is being used.
・ While using the multi-zone function, the RI linked
system function (link between Onkyo components) is
disabled.
・ Pressing Input Selector on the remote controller while
you are using the remote controller for Zone 2 or Zone 3
will switch the controlled target to the main room. To
control Zone 2 or Zone 3 again, press the Zone2 or
Zone3 button to enter the Zone control mode.
WHOLE HOUSE MODE: If you press Whole House
Mode while playback is being performed in the
main room, the WHOLE HOUSE MODE is turned
on, "Z2" and "Z3" on the display light at the same
time and the playback sources of all the rooms are
switched to the same source at once.
・ The sources that can be played in Zone 2 can
be played in all rooms.
・ This function cannot be used if headphones are
connected or audio is output from the speakers
of the TV.
Quick Setup menu
6
You can perform common settings on the television screen
while playing.
1. Press Q on the remote controller.
The Quick Setup menu is displayed on the connected
TV's screen.
Quick Setup
Listening Mode
Audio
HDMI
Information
MOVIE/TV
MUSIC
GAME
THX
BD/DVD
2. Select the items with the cursors on the remote
controller and then press Enter.
・ To return to the previous screen, press Return.
3. Select the content with the cursors of the remote
controller.
■ Listening Mode: Select the listening mode from the
categories of "MOVIE/TV", "MUSIC", "GAME" and "THX".
After selecting, press Enter button to confirm.
・ It cannot be set when audio is played from the TV's
speakers.
Step 3:
Playing Back
■ Audio: You can perform various audio settings including
audio quality and speaker level adjustment.
・ You cannot select this item when audio is output from
the TV's speakers.
Bass, Treble: Adjust volume of the front speaker.
・ It cannot be set if the listening mode is Direct or THX.
Phase Matching Bass: Suppress phase shift in the
midrange to enhance bass sound. Thus smooth and
powerful bass sound can be obtained.
・ It cannot be set if the listening mode is Direct or THX.
Center Level, Subwoofer Level: Adjust the speaker
level while listening to the sound. The adjustment you
made will be reset to the previous status when you turn
the unit to standby mode.
・ Changes may not be possible depending on the
speaker settings.
・ This setting is not possible during MUTING or when
using headphones.
Speaker Layout: Select the speakers to prioritize when
back speakers and height speakers are connected at
the same time.
・ Changes may not be possible depending on the
speaker settings.
A/V Sync: If the video is behind the audio, you can
delay the audio to offset the gap. Different settings can
be set for each input selector.
・ It cannot be set if the listening mode is Direct.
AccuEQ Room Calibration: Enable or disable the
settings made by automatic speaker setting. If this is to
be enabled, then normally you should select "On (All
Ch)", and to disable just the front speakers you should
select "On (ex. L/R)". The setting can be separately set
to each input selector.
・ This setting cannot be selected if the automatic
speaker setting has not been performed.
・ It cannot be set if headphones are connected or the
listening mode is Direct.
En-19
Page 20

Equalizer: Select "Preset1" to "Preset3" configured in
"2. Speaker" - "Equalizer Settings" in the Setup menu.
The same sound field setting is applied all ranges when
set to "Off".
・ It cannot be set if the listening mode is Direct.
Music Optimizer: Improve the quality of the
compressed audio. Playback sound of lossy
compressed files such as MP3 will be improved. The
setting can be separately set to each input selector.
・ The setting is effective in the signals of 48 kHz or
less. The setting is not effective in the bitstream
signals.
・ It cannot be set if the listening mode is Direct.
Late Night: Make small sounds to be easily heard. It
is useful when you need to reduce the volume while
watching a movie late night. You can enjoy the effect
only with Dolby Digital, Dolby Digital Plus, Dolby
TrueHD, and DTS sources.
・ Turning the unit to standby mode will set the setting
to "Off". In case of Dolby TrueHD, the setting will be
set to "Auto".
・ The setting cannot be used in the following cases.
– If "3. Audio Adjust" - "Dolby" - "Loudness
Management" in the Setup menu is set to "Off"
when playing Dolby Digital Plus or Dolby TrueHD
– When the input signal is DTS and "Dialog
Control" is other than 0 dB
Re-EQ, Re-EQ(THX): Adjust the soundtrack that was
processed to enhance its treble, in order to make it
suitable for home theater.
・ This function can be used in the following listening
modes: Dolby Digital, Dolby Digital Plus, Dolby
TrueHD, Multichannel, DTS, DTS-ES, DTS 96/24,
DTS-HD High Resolution Audio, DTS-HD Master
Audio, and DTS Express.
・ In Re-EQ(THX), the following listening modes can
be used: THX Cinema, THX Surround EX, and THX
Select2 Cinema.
Center Spread: Adjust the width of the sound field of
the front channel when playing in the Dolby Surround
listening mode.
To spread the width of the sound field to the left and
right, set to "On". To concentrate sound in the center, set
to "Off".
・ Depending on the speaker settings, this becomes
"Off".
Dialog Control: You can increase the dialog portion of
the audio in 1 dB steps up to 6 dB so that you can make
dialog easier to hear over background noise.
・ This cannot be set for content other than DTS:X.
・ The effect may not be selectable with some content.
■ HDMI :
HDMI OUT: Select the HDMI OUT jack to be used for
output.
Control TV: Set whether to enable the CEC link
function for TVs connected through one of the HDMI
OUT MAIN or SUB jacks.
■ Information:
Audio: Displays the audio input source, format, number
of channels, sampling frequency, listening mode, and
number of output channels.
Video: Displays information such as the video input
source, resolution, color space, color depth, 3D
information, aspect ratio, and output.
Tuner: Displays information such as the band,
frequency, and preset number. This is displayed only
when "TUNER" is selected as the input source.
Other useful functions
7
To adjust the sound quality
It is possible to enhance or moderate the bass and treble
of front speakers. Press Tone on the main unit several
times to select the desired setting from "Bass", "Treble" and
"Phase Matching Bass", and adjust with +/-.
・ This cannot be set if the listening mode is Direct, or
Step 3:
THX.
"Bass": Allows you to enhance or moderate the bass.
"Treble": Allows you to enhance or moderate the treble.
"Phase Matching Bass": Allows you to keep the clear
midrange and effectively enhance the bass.
Playing Back
Checking the Input Format
Press Display on the remote controller several times to
switch the display of the main unit in order of:
Input source &
Listening mode
Signal format & Sampling
frequency (Audio)
Input signal resolution
・ If "Dolby D 5.1" is displayed in Signal format, the
Dolby Digital 5.1 ch signals are being input. When
listening to AM/FM radio, the band, frequency and
preset number are displayed.
(Video)
Playing Audio and Video from Separate Sources
It is possible to play audio and video from different sources.
For example, you can play audio from the CD player and
video from the BD/DVD player. In this case, press BD/DVD
on the remote controller and then CD. Then start playback
on the BD/DVD player and CD player. This function is
effective when an input with audio only has been selected
(CD, NET, TUNER, and PHONO in the initial setting). ()
* When NET is selected, press either the NET button then press MODE on
the remote controller.
En-20
Page 21

Others
Troubleshooting
Before starting the procedure
Problems may be solved by simply turning the
power on/off or disconnecting/connecting the
power cord, which is easier than working on the
connection, setting and operating procedure. Try
the simple measures on both the unit and the
connected device. If the problem is that the video
or audio is not output or the HDMI linked operation
does not work, disconnecting/connecting the HDMI
cable may solve it. When reconnecting, be careful
not to wind the HDMI cable since if wound the
HDMI cable may not fit well. After reconnecting, turn
off and on the unit and the connected device.
The AV receiver turns off unexpectedly.
The AV receiver will automatically enter standby mode when
・
Auto Standby or Sleep Timer is set and launched.
The protective circuit function may have been activated. If this
・
has occurred, "AMP Diag Mode" appears on the display when
the unit is turned on again, and the unit enters diagnostic mode.
If the results of the diagnosis is that there is no problem, the
"AMP Diag Mode" display disappears and you can use the unit
normally again. If "CHECK SP WIRE" appears on the display,
the speaker cables may be short-circuited. Make sure bare
speaker wires are not touching each other or the back panel
of the unit, then turn the unit on again. If "NG" is displayed,
immediately unplug the power cord from the wall outlet and
contact your dealer.
Thereʼs no sound, or itʼs very quiet.
A wrong input selector button has been selected. Select a
・
correct input for the player. Also check that muting is not on.
Not all listening modes use all speakers.
・
Thereʼs no picture.
A wrong input selector button has been selected.
・
To display video from the connected player on the TV screen
・
while the unit is in standby, you need to enable HDMI Standby
Through function.
When the TV image is blurry or unclear, power code or
・
connection cables of the unit may have interfered. In that case,
keep distance between TV antenna cable and cables of the unit.
If you connect a player supporting HDCP2.2, be sure to connect
・
it to one of the HDMI IN1 to IN5 jacks of the unit.
Video and audio are out of synch
Video may be delayed relative to audio depending on the
・
settings and connections with your television. Adjust in "Step 3:
Playing Back", "6 Quick Setup menu", "A/V Sync".
Cannot play digital surround
To enjoy digital surround sound including Dolby Digital and
・
DTS, audio output should be set to "Bitstream output" on the
connected Blu-ray Disc Player or other device.
Cannot output audio such as Dolby Atmos according
to the format of the source.
If you cannot output formats such as Dolby TrueHD, Dolby
・
Atmos, or DTS-HD Master Audio according to the format of the
source, in the Blu-ray Disc Player settings try setting "BD video
supplementary sound" (or secondary sound) to "Off". Change
the listening mode for each source after changing the setting to
confirm.
HDMI control does not function correctly.
Set the CEC link function of the unit to on. It is also necessary
・
to make the HDMI linked system setting on the TV. See the TV's
instruction manual for details.
Cannot access to network.
Try plugging/unplugging the unit or router or check their power-
・
on status. This will work well in many cases.
■ Resetting the unit
Resetting the unit to the status at the time of shipment may solve
the problem. If the measures above do not solve the problem, reset
the unit with the following procedure. If you reset the unit status,
your preferences will be reset to the defaults. Note them down
before starting reset.
● How to reset:
While holding down CBL/SAT on the main unit (note that
1.
step 2 must be performed with this button pressed down)
Press zOn/Standby on the main unit ("Clear" appears on
2.
the display and the unit returns to standby)
Do not unplug the power cord until "Clear" disappears from the
・
display.
While holding
1.
Press zOn/Standby.
2.
down the CBL/SAT
button
● How to reset the remote controller:
While holding down RCV on the remote controller, press Q
1.
until the remote indicator stays lit (about 3 seconds).
2. Within 30 seconds, press RCV again.
RCV
Remote
indicator
Q
En-21
Page 22

Specifications
Amplifier Section
Rated Output Power (North American)
With 8 ohm loads, both channels driven, from 20-20,000 Hz; rated 140
watts (DTR-60.7)/135 watts (DTR-50.7) per channel minimum RMS
power, with no more than 0.08% total harmonic distortion from 250
milliwatts to rated output.
Surround Mode Output Power ()
(6 ohms, 1 kHz THD 0.9%) 200 W (DTR-60.7)/185 W (DTR-50.7) per
channel
* Reference output for each speakers.
Depending on the source and the listening mode settings, there may be
no sound output.
Rated Output Power (Others)
7 ch × 200 W (DTR-60.7)/185 W (DTR-50.7) at 6 ohms, 1 kHz, 1 ch
driven of 1% (IEC)
Maximum Effective Output Power
7 ch × 235 W (DTR-60.7)/215 W (DTR-50.7) at 6 ohms, 1 kHz, 1 ch
driven (JEITA) (Asian)
Dynamic Power ()
* IEC60268-Short-term maximum output power
320 W (DTR-60.7)/300 W (DTR-50.7) (3 Ω, Front)
270 W (DTR-60.7)/250 W (DTR-50.7) (4 Ω, Front)
160 W (DTR-60.7)/150 W (DTR-50.7) (8 Ω, Front)
THD+N (Total Harmonic Distortion+Noise)
0.08% (20 Hz - 20 kHz, half power)
Input Sensitivity and Impedance
200 mV/47 kΩ (LINE, 1 kHz 100 W/8 Ω)
3.5 mV/47 kΩ (PHONO MM)
Rated RCA Output Level and Impedance
1 V/470 Ω (PRE OUT)
1 V/470 Ω (SUBWOOFER PRE OUT)
100 mV/2.2 kΩ (ZONE2/ZONE3 LINE OUT)
1 V/2.2 kΩ (ZONE2/ZONE3 PRE OUT)
Phono Overload
70 mV (MM 1 kHz 0.5% Direct)
Frequency Response
5 Hz - 100 kHz/+1 dB, –3 dB (Direct mode)
Tone Control Characteristics
±10 dB, 20 Hz (BASS)
±10 dB, 20 kHz (TREBLE)
Signal to Noise Ratio
106 dB (LINE, IHF-A)
80 dB (PHONO MM, IHF-A)
Speaker Impedance
4 Ω - 16 Ω or 6 Ω - 16 Ω
Video Section
Signal Level
1.0 Vp-p/75 Ω (Component Y)
0.7 Vp-p/75 Ω (Component Pb/Cb, Pr/Cr)
1.0 Vp-p/75 Ω (Composite)
Component Video Frequency Response
5 Hz - 100 MHz/+0 dB, –3 dB
Corresponding maximum resolution
480i/576i (Component to HDMI)
720p/1080i (Component to Component)
Tuner Section
FM Tuning Frequency Range
87.5 MHz - 107.9 MHz (North American)
87.5 MHz - 108.0 MHz, RDS (Others)
AM Tuning Frequency Range
522/530 kHz - 1611/1710 kHz
Preset Channel
40
Network Section
Ethernet LAN
10BASE-T/100BASE-TX
General
Power Supply
120 V AC, 60 Hz (North American)
220 - 240 V AC, 50/60 Hz (Others)
Power Consumption
8.5 A (DTR-60.7)/7.8 A (DTR-50.7)/ (North American)
840 W (DTR-60.7)/720 W (DTR-50.7) (Others)
0.15 W (Stand-by, North American)
0.2 W (Stand-by, Others)
2.7 W (Network Standby)
95 W (DTR-60.7)/90 W (DTR-50.7) (No-sound)
Dimensions (W × H × D)
(DTR-60.7)
435 mm × 199 mm × 427.5 mm
17-1/8" × 7-13/16" × 16-13/16"
(DTR-50.7)
435 mm × 199 mm × 433.5 mm
17-1/8" × 7-13/16" × 17-1/16"
Weight
18.0 kg (39.7 lbs.) (DTR-60.7)/17.0 kg (37.5 lbs.) (DTR-50.7)
・ HDMI
Input
IN1 (BD/DVD, HDCP2.2), IN2 (CBL/SAT, HDCP2.2), IN3 (STRM BOX,
HDCP2.2), IN4 (PC, HDCP2.2), IN5 (GAME1, HDCP2.2), IN6 (GAME2),
IN7, AUX INPUT HDMI (front)
Output
OUT MAIN, OUT SUB/ZONE2
Video Resolution
4K 60 Hz (RGB/YCbCr4:4:4/YCbCr4:2:2, 24bit)
Audio Format
Dolby Atmos, Dolby TrueHD, Dolby Digital Plus, Dolby Digital, DTS:X,
DTS-HD Master Audio, DTS-HD High Resolution Audio, DTS 96/24, DTS-
ES, DTS, DTS Express, Multichannel PCM (up to 8ch)
Supported
3D, Audio Return Channel, Deep Color, x.v.Color™, LipSync, CEC, 4K,
Extended Colorimetry (sYCC601, Adobe RGB, Adobe YCC601), Content
Type, 3D Dual View, 21:9 Aspect Ratio Video Format
・ HDBaseT
OUT ()/IN (HDMI)
* 3G bps or less for 4K (use a CAT 5e or better cable, 70 m or less in length)
Others
・ Video Inputs
Component
IN1 (BD/DVD), IN2 (GAME2)
Composite
IN1 (GAME1), IN2 (CBL/SAT), IN3 (STRM BOX)
・ Video Outputs
Component
OUT
Composite
OUT
・ Audio Inputs
Digital
OPTICAL 1 (STRM BOX), 2 (CD), 3 (TV)
COAXIAL 1 (BD/DVD), 2 (CBL/SAT)
Analog
BD/DVD, GAME2, PC, GAME1, CBL/SAT, STRM BOX, TV, CD, PHONO
・ Audio Outputs
Analog
PRE/LINE OUT (ZONE2/ZONE3)
PRE OUT (FRONT L/R, CENTER, SURROUND L/R, BACK or HEIGHT L/
R, 2 SUBWOOFER)
Speaker Outputs
FRONT L/R, CENTER, SURROUND L/R, BACK L/R, HEIGHT or Bi-AMP
L/R, ZONE2 L/R
Phones
PHONES (Front, ø 6.3)
・ Others
Setup Mic 1 (Front)
RS232 1
RI REMOTE CONTROL 1
USB 1 (Ver. 1.1, 5 V/1 A)
Ethernet 1
IR IN 2 (A/B)
IR OUT 1
12V TRIGGER OUT 3 (A: 100 mA, B: 25 mA, C: 25 mA)
Multi language on-screen display
(North American) English, German, French, Spanish, Italian, Dutch,
Swedish, Chinese ()
(Others) English, German, French, Spanish, Italian, Dutch, Swedish,
Russian, Chinese ()
* OSD are not displayed when input is "NET". Operate by confirming
the display on the main unit.
Specifications and features are subject to change without notice.
En-22
Page 23

Table of image resolutions
Refer to the following table for information about the image formats and resolutions output by this unit in
response to input signals
HDMI
Input
Output
4K 1080p/24 1080p 1080i 720p
480p/576p 480i/576i
4K
1080p/24
1080p
HDMI
1080i
720p
480p/576p
480i/576i
1080p
1080i
Component
720p
480p/576p
480i/576i
Composite 480i/576i
Resolutions supported by HDMI
■ HDMI IN1 to IN5 (when using in the main room)
Copyright protection
technology
HDCP1.4
HDCP2.2
Display
resolution
720×480i 60 Hz
720×576i 50 Hz
720×480p 60 Hz
720×576p 50 Hz
1920×1080i 50/60 Hz
1280×720p 24/25/30/50/60 Hz
1680×720p 24/25/30/50/60 Hz
1920×1080p 24/25/30/50/60 Hz
2560×1080p
4K
(3840×2160p)
4K SMPTE
(4096×2160p)
Frame rate Color space Color Depth Remarks
24/25/30 Hz
50/60 Hz
24/25/30 Hz
50/60 Hz
24/25/30 Hz
50/60 Hz
RGB/
YCbCr4:4:4/
YCbCr4:2:2
RGB/YCbCr4:4:4 8/10/12/16 bit
YCbCr4:2:2 12 bit
RGB/YCbCr4:4:4 8bit
YCbCr4:2:2 12 bit
YCbCr4:2:0 8/10/12/16 bit
RGB/YCbCr4:4:4 8/10/12/16 bit
YCbCr4:2:2 12 bit
RGB/YCbCr4:4:4 8 bit
YCbCr4:2:2 12 bit
YCbCr4:2:0 8/10/12/16 bit
8/10/12/16 bit
With YCbCr4:2:2, only
12 bit Color Depth is
supported.
HDBaseT output is not
possible.
With output by HDBaseT, only
8 bit Color Depth is supported.
HDBaseT output is not
possible.
With output by HDBaseT, only
8 bit Color Depth is supported.
■ HDMI IN1 to IN5 (when using in Zone 2)
Copyright protection
technology
HDCP1.4
HDCP2.2
Display resolution Frame rate Color space Color Depth Remarks
720×480i 60 Hz
720×576i 50 Hz
720×480p 60 Hz
720×576p 50 Hz
1920×1080i 50/60 Hz
1280×720p 24/25/30/50/60 Hz
1680×720p 24/25/30/50/60 Hz
1920×1080p 24/25/30/50/60 Hz
2560×1080p
4K
(3840×2160p)
4K SMPTE
(4096×2160p)
24/25/30 Hz
50/60 Hz
24/25/30 Hz
50/60 Hz YCbCr4:2:0 8bit
24/25/30 Hz
50/60 Hz YCbCr4:2:0 8 bit
■ HDMI IN6, IN7, Front
Copyright protection
technology
HDCP1.4
Display resolution Frame rate Color space Color Depth Remarks
720×480i 60 Hz
720×576i 50 Hz
720×480p 60 Hz
720×576p 50 Hz
1920×1080i 50/60 Hz
1280×720p 24/25/30/50/60 Hz
1680×720p 24/25/30/50/60 Hz
1920×1080p 24/25/30/50/60 Hz
2560×1080p
4K
(3840×2160p)
4K SMPTE
(4096×2160p)
24/25/30 Hz
50/60 Hz
24/25/30 Hz
50/60 Hz YCbCr4:2:0 8 bit
24/25/30 Hz
50/60 Hz YCbCr4:2:0 8 bit
RGB/YCbCr4:4:4/
YCbCr4:2:2
RGB/YCbCr4:4:4 8/10/12 bit
YCbCr4:2:2 12 bit
RGB/YCbCr4:4:4 8 bit
YCbCr4:2:2 12 bit
RGB/YCbCr4:4:4 8 bit
YCbCr4:2:2 12 bit
RGB/YCbCr4:4:4/
YCbCr4:2:2
RGB/YCbCr4:4:4 8/10/12 bit
YCbCr4:2:2 12 bit
RGB/YCbCr4:4:4 8 bit
YCbCr4:2:2 12 bit
RGB/YCbCr4:4:4 8 bit
YCbCr4:2:2 12 bit
8/10/12/16 bit
8/10/12/16 bit
Others
With YCbCr4:2:2,
only 12 bit Color
Depth is supported.
With YCbCr4:2:2,
only 12 bit Color
Depth is supported.
En-23
Page 24

Precautions
For U.S. Models
FEDERAL COMMUNICATIONS COMMISSION
DECLARATION OF CONFORMITY
This device complies with part 15 of the FCC Rules. Operation is subject to the
following two conditions:
(1) this device may not cause interference, and
(2) this device must accept any interference, including interference that may
cause undesired operation of the device.
Product Name: AV Receiver
Model Number: DTR-60.7/DTR-50.7
Responsible Party Name: Onkyo U.S.A. Corporation
Address: 18 PARK WAY, UPPER SADDLE RIVER,
Phone: 1-800-229-1687
NEW JERSEY 07458, USA
For European Models
Declaration of Conformity
We declare, under our sole responsibility, that
this product complies with the standards:
–Safety
–Limits and methods of measurement of
radio disturbance characteristics
–Limits for harmonic current emissions
–Limitation of voltage changes, voltage
fluctuations and flicker
–RoHS Directive, 2011/65/EU
–Hereby, Onkyo Corporation, declares that this DTR-60.7/DTR-50.7 is in
compliance with the essential requirements and other relevant provisions of
Directive 1999/5/EC.
–С настоящето, Onkyo Corporation, декларира, че DTR-60.7/DTR-50.7
е в съответствие със съществените изисквания и другитеприложими
разпоредби на Директива 1999/5/EC.
–Onkyo Corporation tímto prohlašuje, že DTR-60.7/DTR-50.7 splňuje
základní požadavky a všechna příslušná ustanoveni Směrnice 1999/5/ES.
–Undertegnede Onkyo Corporation erklærer herved, at følgende udstyr DTR-
60.7/DTR-50.7 overholder de væsentlige krav og øvrige relevante krav i
direktiv 1999/5/EF.
–Hiermit erklärt Onkyo Corporation, dass sich das Gerät DTR-60.7/DTR-50.7
in Übereinstimmung mit den grundlegenden Anforderungen und den übrigen
einschlägigen Bestimmungen der Richtlinie 1999/5/EG befindet.
–Käesolevaga kinnitab Onkyo Corporation seadme DTR-60.7/DTR-
50.7 vastavust direktiivi 1999/5/EÜ põhinõuetele ja nimetatud direktiivist
tulenevatele teistele asjakohastele sätetele.
–ΜΕ ΤΗΝ ΠΑΡΟΥΣΑ Ο ΚΑΤΑΣΚΕΥΑΣΤΗΣ Onkyo Corporation ΔΗΛΩΝΕΙ
ΟΤΙ DTR-60.7/DTR-50.7 ΣΥΜΜΟΡΦΩΝΕΤΑΙ ΠΡΟΣ ΤΙΣ ΟΥΣΙΩΔΕΙΣ
ΑΠΑΙΤΗΣΕΙΣ ΚΑΙ ΤΙΣ ΛΟΙΠΕΣ ΣΧΕΤΙΚΕΣ ΔΙΑΤΑΞΕΙΣ ΤΗΣ ΟΔΗΓΙΑΣ
1999/5/ΕΚ
–Por la presente, Onkyo Corporation, declara que este DTR-60.7/DTR-50.7
cumple con los requisitos esenciales y otras exigencias relevantes de la
Directiva 1999/5/EC.
–Par la présente, Onkyo Corporation déclare que l’appareil DTR-60.7/DTR-
50.7 est conforme aux exigences essentielles et aux autres dispositions
pertinentes de la directive 1999/5/CE.
–Con la presente Onkyo Corporation dichiara che questo DTR-60.7/DTR-
50.7 è conforme ai requisiti essenziali ed alle altre disposizioni pertinenti
stabilite dalla direttiva 1999/5/CE.
–Ar šo Onkyo Corporation deklarē, ka DTR-60.7/DTR-50.7 atbilst Direktīvas
1999/5/EK būtiskajām prasībām un citiem ar to saistītajiem noteikumiem.
–Šiuo Onkyo Corporation deklaruoja, kad šis DTR-60.7/DTR-50.7 atitinka
esminius reikalavimus ir kitas 1999/5/EB Direktyvos nuostatas.
–A Onkyo Corporation ezzennel kijelenti, hogy a DTR-60.7/DTR-50.7 típusú
beren-dezés teljesíti az alapvető követelményeket és más 1999/5/EK
irányelvben meghatározott vonatkozó rendelkezéseket.
–Hierbij verklaart Onkyo Corporation dat het toestel l DTR-60.7/DTR-50.7
in overeenstemming is met de essentiële eisen en de andere relevante
bepalingen van richtlijn 1999/5/EG.
–Niniejszym Onkyo Corporation deklaruje że DTR-60.7/DTR-50.7 jest
zgodny z zasadniczymi wymaganiami i innymi właściwymi postanowieniami
Dyrektywy 1999/5/EC.
–Eu, Onkyo Corporation, declaro que o DTR-60.7/DTR-50.7 cumpre os
requisitos essenciais e outras provisões relevantes da Directiva 1999/5/EC.
–Prin prezenta, Onkyo Corporation, declară că aparatul DTR-60.7/DTR-50.7
este în conformitate cu cerinţele esenţiale şi cu alte prevederi pertinente ale
Directivei 1999/5/CE.
–Onkyo Corporation týmto vyhlasuje, že DTR-60.7/DTR-50.7 a spĺňa
základné požiadavky a všetky príslušné ustanovenia Smernice 1999/5/ES.
–Onkyo Corporation izjavlja, da je ta DTR-60.7/DTR-50.7 v skladu z
bistvenimi zahtevami in drugimi relevantnimi določili direktive 1999/5/ES.
–Onkyo Corporation vakuuttaa täten että DTR-60.7/DTR-50.7 tyyppinen laite
on direktiivin 1999/5/EY oleellisten vaatimusten ja sitä koskevien direktiivin
muiden ehtojen mukainen.
–Härmed förklarar Onkyo Corporation att denna DTR-60.7/DTR-50.7 följer de
väsentliga kraven och andra relevanta stadgar i Direktiv 1999/5/EC.
–Hér með lýsir Onkyo Corporation því yfir að varan DTR-60.7/DTR-50.7 er í
samræmi við grunnkröfur og aðrar kröfur sem gerðar eru í tilskipun 1999/5/
EC.
–Onkyo Corporation erklærer herved at denne DTR-60.7/DTR-50.7 er i
overensstemmelse med vesentlige krav og andre relevante bestemmelser i
direktiv 1999/5/EC.
–Ovime Onkyo Corporation, potvrđuje da je DTR-60.7/DTR-50.7 u
suglasnosti sa osnovnim zahtjevima i ostalim relevantnim odredbama
Direktive 1999/5/EC.
Others
En-24
Page 25

License and Trademark Information
®
Manufactured under license from Dolby Laboratories. Dolby, Dolby Atmos,
Dolby Surround, Surround EX and the double-D symbol are trademarks of
Dolby Laboratories.
For DTS patents, see http://patents.dts.com. Manufactured under license from
DTS, Inc. DTS, the Symbol, DTS in combination with the Symbol, the DTSHD logo, and DTS-HD Master Audio are registered trademarks or trademarks
of DTS, Inc. in the United States and/or other countries. © DTS, Inc. All Rights
Reserved.
Manufactured under license from THX Ltd. THX and the THX logo are
registered in the U.S. and other jurisdictions. All rights reserved. Surround EX is
a trademark of Dolby Laboratories. Used with permission.
U.S. Pat. nos. 7,254,239 & 7,593,533 & 7,974,425 & 8,452,028 & 8,509,457
Taiwan Pat. I238671 European Pat. 1,360,874
THX Select2 Plus
Before any home theater component can be THX Select2 Plus certified, it must
pass a rigorous series of quality and performance tests. Only then can a product
feature the THX Select2 Plus logo, which is your guarantee that the Home
Theater products you purchase will give you superb performance for many
years to come. THX Select2 Plus requirements define hundreds of parameters,
including power amplifier performance, and integrated amplifier performance
and operation for both digital and analog domains. THX Select2 Plus receivers
also feature proprietary THX technologies (e.g., THX Mode) which accurately
translate movie soundtracks for home theater playback.
Re-Equalization and the "Re-EQ" logo are trademarks of THX Ltd.
The terms HDMI and HDMI High-Definition Multimedia Interface, and the HDMI
Logo are trademarks or registered trademarks of HDMI Licensing LLC in the
United States and other countries.
AirPlay, iPad, iPhone, and iPod touch are trademarks of Apple Inc., registered in
the U.S. and other countries.
iPad Air and iPad mini are trademarks of Apple Inc.
"Made for iPod", "Made for iPhone" and "Made for iPad" mean that an electronic
accessory has been designed to connect specifically to iPod, iPhone, or
iPad, respectively, and has been certified by the developer to meet Apple
performance standards. Apple is not responsible for the operation of this device
or its compliance with safety and regulatory standards.
Please note that the use of this accessory with iPod, iPhone or iPad may affect
wireless performance.
AirPlay works with iPhone, iPad, and iPod touch with iOS 4.3.3 or later, Mac
with OS X Mountain Lion or later, and PC with iTunes 10.2.2 or later.
Apple, Apple TV and Safari are trademarks of Apple Inc., registered in the U.S.
and other countries.
HDBaseT™ and the HDBaseT Alliance logo are trademarks of the HDBaseT Alliance.
SIRIUS, XM and all related marks and logos are trademarks of Sirius XM Radio
Inc. and its subsidiaries. All rights reserved.
®
DLNA
, the DLNA Logo and DLNA CERTIFIED® are trademarks, service marks,
or certification marks of the Digital Living Network Alliance.
This product is protected by certain intellectual property rights of Microsoft. Use
or distribution of such technology outside of this product is prohibited without a
license from Microsoft.
Windows and the Windows logo are trademarks of the Microsoft group of
companies.
QR Code is a registered trademark of DENSO WAVE INCORPORATED.
"x.v.Color" and "x.v.Color" logo are trademarks of Sony Corporation.
DSD and the Direct Stream Digital logo are trademarks of Sony Corporation.
MPEG Layer-3 audio coding technology licensed from Fraunhofer IIS and
Thomson.
AccuEQ, Music Optimizer, RIHD and WRAT are trademarks of Onkyo
Corporation.
"All other trademarks are the property of their respective owners."
DISCLAIMER
Through this device you are able to link to other services or websites
which are not under the control of any company which has designed,
manufactured or distributed/have distributed this device, and its
affiliates (collectively, "Company"). We have no control over the
nature, content and availability of those services. The inclusion of any
links does not necessarily imply a recommendation or endorse the
views expressed within them.
All information, content and services available through this device
belong to third parties and are protected by copyright, patent,
trademark and/or other intellectual property laws of applicable
countries.
The information, content and services provided through this device
are for your personal, noncommercial use only. Any information,
Others
content or services may not be used in any manner other than
previously approved by the appropriate content owner or service
provider.
You may not modify, copy, republish, translate, exploit, create
derivative works, upload, post, transmit, sell or distribute in any
manner any information, content or services available through this
device, unless expressly permitted by the appropriate copyright,
patent, trademark and/or other intellectual property owner, including,
without limitation, content owner or service provider.
THE CONTENT AND SERVICES AVAILABLE THROUGH THIS
DEVICE ARE PROVIDED "AS IS".
COMPANY DOES NOT WARRANT INFORMATION, CONTENT OR
SERVICES SO PROVIDED, EITHER EXPRESSLY OR IMPLIEDLY,
FOR ANY PURPOSE.
COMPANY EXPRESSLY DISCLAIMS ANY WARRANTIES,
EXPRESS OR IMPLIED, INCLUDING BUT NOT LIMITED
TO, WARRANTIES OF TITLE, NON-INFRINGEMENT,
MERCHANTABILITY OR FITNESS FOR A PARTICULAR PURPOSE.
Company makes no representation or warranty of any kind, express
or implied, about the completeness, accuracy, validity, legality,
reliability, suitability or availability with respect to the information,
content or services available through this device. Company shall not
be liable, whether in contract or tort, including negligence and strict
liability, for any direct, indirect, special, incidental or consequential
damages or any other damages arising out of, or in connection with,
any information contained in, or as a result of the use of any content
or service by you or any third party, even if Company has been
advised of the possibility of such damages, nor shall Company be
liable for any third party claims against users of this device or any
third party.
In no event shall Company be responsible nor liable for, without
limiting the generality of the foregoing, any interruption or suspension
of any information, content or service available through this device.
Company is neither responsible nor liable for customer service related
to the information, content and services available through this device.
Any question or request for service relating to the information, content
or services should be made directly to the appropriate content owners
and services providers.
En-25
Page 26

GNUライセンス
Important Notice Regarding Software
The software package installed in this product includes software licensed to Onkyo Corporation (hereinafter, called "Onkyo")
directly or indirectly by third party developers. Please be sure to read this notice regarding such software.
Notice Regarding GNU GPL/LGPL-applicable Software
This product includes the following software that is covered by GNU General Public License (hereinafter, called "GPL") or by GNU
Lesser General Public License (hereinafter, called "LGPL").
Onkyo notifies you that, according to the attached GPL/LGPL, you have right to obtain, modify, and redistribute software source
code for the listed software.
ソフトウェアに関する重要なお知らせ
本製品に搭載されるソフトウェアには、オンキヨー株式会社(以下「弊社」とします)が第三者より直接的に又は間接的に使用
の許諾を受けたソフトウェアが含まれております。 これらのソフトウェアに関する本お知らせを必ずご一読くださいますようお
願い申しあげます。
GNU GPL/LGPL 適用 ソフトウ ェアに 関 する お知 らせ
本製品には、以下のGNU General Public License(以下「GPL」とします)またはGNU Lesser General Public License(以下
「LGPL」とします)の適用を受けるソフトウェアが含まれております。
お客様は添付のGPL/LGPLに従いこれらのソフトウェアソースコードの入手、改変、再配布の権利があることをお知らせいたし
ます。
Package List
パッケージリスト
linux uClibc busybox
libgcc libstdc++ libmms
compat-wireless wpa_supplicant dnsmasq
libiconv bluez dbus
iperf faad
これらのソースコードのご提供に関しましては 、コールセンターにお問い合わせください。
なお、ソースコードの中身についてのお問い合わせはご遠慮ください。
GNU LESSER GENERAL PUBLIC LICENSE
Version 2.1, February 1999
Copyright (C) 1991, 1999 Free Software Foundation, Inc. 59 Temple Place, Suite 330, Boston, MA 02111-1307 USA Everyone
is permitted to copy and distribute verbatim copies of this license document, but changing it is not allowed.
[This is the first released version of the Lesser GPL. It also counts as the successor of the GNU Library Public License, version 2,
hence the version number 2.1.]
Preamble
The licenses for most software are designed to take away your freedom to share and change it. By contrast, the GNU General
Public Licenses are intended to guarantee your freedom to share and change free software--to make sure the software is free for
all its users.
This license, the Lesser General Public License, applies to some specially designated software packages--typically libraries--of
the Free Software Foundation and other authors who decide to use it. You can use it too, but we suggest you first think carefully
about whether this license or the ordinary General Public License is the better strategy to use in any particular case, based on the
explanations below.
When we speak of free software, we are referring to freedom of use, not price. Our General Public Licenses are designed to make
sure that you have the freedom to distribute copies of free software (and charge for this service if you wish); that you receive
source code or can get it if you want it; that you can change the software and use pieces of it in new free programs; and that you
are informed that you can do these things.
To protect your rights, we need to make restrictions that forbid distributors to deny you these rights or to ask you to surrender
these rights. These restrictions translate to certain responsibilities for you if you distribute copies of the library or if you modify it.
For example, if you distribute copies of the library, whether gratis or for a fee, you must give the recipients all the rights that we
gave you. You must make sure that they, too, receive or can get the source code. If you link other code with the library, you must
provide complete object files to the recipients, so that they can relink them with the library after making changes to the library and
recompiling it. And you must show them these terms so they know their rights.
We protect your rights with a two-step method: (1) we copyright the library, and (2) we offer you this license, which gives you
legal permission to copy, distribute and/or modify the library. To protect each distributor, we want to make it very clear that there
is no warranty for the free library. Also, if the library is modified by someone else and passed on, the recipients should know that
what they have is not the original version, so that the original author's reputation will not be affected by problems that might be
introduced by others.
Finally, software patents pose a constant threat to the existence of any free program. We wish to make sure that a company
cannot effectively restrict the users of a free program by obtaining a restrictive license from a patent holder. Therefore, we insist
that any patent license obtained for a version of the library must be consistent with the full freedom of use specified in this license.
Most GNU software, including some libraries, is covered by the ordinary GNU General Public License. This license, the GNU
Lesser General Public License, applies to certain designated libraries, and is quite different from the ordinary General Public
License. We use this license for certain libraries in order to permit linking those libraries into non-free programs.
When a program is linked with a library, whether statically or using a shared library, the combination of the two is legally speaking
a combined work, a derivative of the original library. The ordinary General Public License therefore permits such linking only if the
entire combination fits its criteria of freedom. The Lesser General Public License permits more lax criteria for linking other code
with the library.
We call this license the "Lesser" General Public License because it does Less to protect the user's freedom than the ordinary
General Public License. It also provides other free software developers Less of an advantage over competing non-free programs.
These disadvantages are the reason we use the ordinary General Public License for many libraries. However, the Lesser license
provides advantages in certain special circumstances.
For example, on rare occasions, there may be a special need to encourage the widest possible use of a certain library, so that it
becomes a de-facto standard. To achieve this, non-free programs must be allowed to use the library. A more frequent case is that
a free library does the same job as widely used non-free libraries. In this case, there is little to gain by limiting the free library to
free software only, so we use the Lesser General Public License.
In other cases, permission to use a particular library in non-free programs enables a greater number of people to use a large body
of free software. For example, permission to use the GNU C Library in non-free programs enables many more people to use the
whole GNU operating system, as well as its variant, the GNU/Linux operating system.
Although the Lesser General Public License is Less protective of the users' freedom, it does ensure that the user of a program
that is linked with the Library has the freedom and the wherewithal to run that program using a modified version of the Library.
The precise terms and conditions for copying, distribution and modification follow. Pay close attention to the difference between a
"work based on the library" and a "work that uses the library". The former contains code derived from the library, whereas the latter
must be combined with the library in order to run.
TERMS AND CONDITIONS FOR COPYING, DISTRIBUTION AND MODIFICATION
0. This License Agreement applies to any software library or other program which contains a notice placed by the
copyright holder or other authorized party saying it may be distributed under the terms of this Lesser General
Public License (also called "this License"). Each licensee is addressed as "you".
A "library" means a collection of software functions and/or data prepared so as to be conveniently linked with application programs
(which use some of those functions and data) to form executables.
The "Library", below, refers to any such software library or work which has been distributed under these terms. A "work based
on the Library" means either the Library or any derivative work under copyright law: that is to say, a work containing the Library
or a portion of it, either verbatim or with modifications and/or translated straightforwardly into another language. (Hereinafter,
translation is included without limitation in the term "modification".)
"Source code" for a work means the preferred form of the work for making modifications to it. For a library, complete source code
means all the source code for all modules it contains, plus any associated interface definition files, plus the scripts used to control
compilation and installation of the library.
Activities other than copying, distribution and modification are not covered by this License; they are outside its scope. The act of
running a program using the Library is not restricted, and output from such a program is covered only if its contents constitute a
work based on the Library (independent of the use of the Library in a tool for writing it). Whether that is true depends on what the
Library does and what the program that uses the Library does.
1. You may copy and distribute verbatim copies of the Library's complete source code as you receive it, in any
medium, provided that you conspicuously and appropriately publish on each copy an appropriate copyright
notice and disclaimer of warranty; keep intact all the notices that refer to this License and to the absence of any
warranty; and distribute a copy of this License along with the Library.
You may charge a fee for the physical act of transferring a copy, and you may at your option offer warranty protection in exchange
for a fee.
2. You may modify your copy or copies of the Library or any portion of it, thus forming a work based on the
Library, and copy and distribute such modifications or work under the terms of Section 1 above, provided that
you also meet all of these conditions:
a) The modified work must itself be a software library.
b) You must cause the files modified to carry prominent notices stating that you changed the files and the date
of any change.
c) You must cause the whole of the work to be licensed at no charge to all third parties under the terms of this
License
d) If a facility in the modified Library refers to a function or a table of data to be supplied by an application
program that uses the facility, other than as an argument passed when the facility is invoked, then you must
make a good faith effort to ensure that, in the event an application does not supply such function or table, the
facility still operates, and performs whatever part of its purpose remains meaningful.
(For example, a function in a library to compute square roots has a purpose that is entirely well-defined
independent of the application. Therefore, Subsection 2d requires that any application-supplied function or table
used by this function must be optional: if the application does not supply it, the square root function must still
compute square roots.)
These requirements apply to the modified work as a whole. If identifiable sections of that work are not derived
from the Library, and can be reasonably considered independent and separate works in themselves, then this
License, and its terms, do not apply to those sections when you distribute them as separate works. But when you
distribute the same sections as part of a whole which is a work based on the Library, the distribution of the
whole must be on the terms of this License, whose permissions for other licensees extend to the entire whole,
and thus to each and every part regardless of who wrote it.
Thus, it is not the intent of this section to claim rights or contest your rights to work written entirely by you; rather, the intent is to
exercise the right to control the distribution of derivative or collective works based on the Library.
In addition, mere aggregation of another work not based on the Library with the Library (or with a work based on the Library) on a
volume of a storage or distribution medium does not bring the other work under the scope of this License.
3. You may opt to apply the terms of the ordinary GNU General Public License instead of this License to a given
copy of the Library. To do this, you must alter all the notices that refer to this License, so that they refer to the
ordinary GNU General Public License, version 2, instead of to this License. (If a newer version than version 2 of
the ordinary GNU General Public License has appeared, then you can specify that version instead if you wish.)
Do not make any other change in these notices.
Once this change is made in a given copy, it is irreversible for that copy, so the ordinary GNU General Public License applies to all
subsequent copies and derivative works made from that copy.
This option is useful when you wish to copy part of the code of the Library into a program that is not a library.
4. You may copy and distribute the Library (or a portion or derivative of it, under Section 2) in object code or
executable form under the terms of Sections 1 and 2 above provided that you accompany it with the complete
corresponding machine-readable source code, which must be distributed under the terms of Sections 1 and 2
above on a medium customarily used for software interchange.
If distribution of object code is made by offering access to copy from a designated place, then offering
equivalent access to copy the source code from the same place satisfies the requirement to distribute the
source code, even though third parties are not compelled to copy the source along with the object code.
5. A program that contains no derivative of any portion of the Library, but is designed to work with the Library by
being compiled or linked with it, is called a "work that uses the Library". Such a work, in isolation, is not a
derivative work of the Library, and therefore falls outside the scope of this License.
However, linking a "work that uses the Library" with the Library creates an executable that is a derivative of the Library (because
it contains portions of the Library), rather than a "work that uses the library". The executable is therefore covered by this License.
Section 6 states terms for distribution of such executables.
When a "work that uses the Library" uses material from a header file that is part of the Library, the object code for the work may be
a derivative work of the Library even though the source code is not. Whether this is true is especially significant if the work can be
linked without the Library, or if the work is itself a library. The threshold for this to be true is not precisely defined by law.
If such an object file uses only numerical parameters, data structure layouts and accessors, and small macros and small inline
functions (ten lines or less in length), then the use of the object file is unrestricted, regardless of whether it is legally a derivative
work. (Executables containing this object code plus portions of the Library will still fall under Section 6.)
Otherwise, if the work is a derivative of the Library, you may distribute the object code for the work under the terms of Section 6.
Any executables containing that work also fall under Section 6, whether or not they are linked directly with the Library itself.
6. As an exception to the Sections above, you may also combine or link a "work that uses the Library" with the
Library to produce a work containing portions of the Library, and distribute that work under terms of your
choice, provided that the terms permit modification of the work for the customer's own use and reverse
engineering for debugging such modifications.
You must give prominent notice with each copy of the work that the Library is used in it and that the Library and its use are
Others
covered by this License. You must supply a copy of this License. If the work during execution displays copyright notices, you must
include the copyright notice for the Library among them, as well as a reference directing the user to the copy of this License. Also,
you must do one of these things:
a) Accompany the work with the complete corresponding machine-readable source code for the Library
including whatever changes were used in the work (which must be distributed under Sections 1 and 2 above);
and, if the work is an executable linked with the Library, with the complete machine-readable "work that
uses the Library", as object code and/or source code, so that the user can modify the Library and then relink
to produce a modified executable containing the modified Library. (It is understood that the user who changes
the contents of definitions files in the Library will not necessarily be able to recompile the application to use
the modified definitions.)
b) Use a suitable shared library mechanism for linking with the Library. A suitable mechanism is one that (1)
uses at run time a copy of the library already present on the user's computer system, rather than copying
library functions into the executable, and (2) will operate properly with a modified version of the library, if the
user installs one, as long as the modified version is interface-compatible with the version that the work was
made with.
c) Accompany the work with a written offer, valid for at least three years, to give the same user the materials
specified in Subsection 6a, above, for a charge no more than the cost of performing this distribution.
d) If distribution of the work is made by offering access to copy from a designated place, offer equivalent
access to copy the above specified materials from the same place.
e) Verify that the user has already received a copy of these materials or that you have already sent this user a
copy.
For an executable, the required form of the "work that uses the Library" must include any data and utility programs needed for
reproducing the executable from it. However, as a special exception, the materials to be distributed need not include anything that
is normally distributed (in either source or binary form) with the major components (compiler, kernel, and so on) of the operating
system on which the executable runs, unless that component itself accompanies the executable.
It may happen that this requirement contradicts the license restrictions of other proprietary libraries that do not normally
accompany the operating system. Such a contradiction means you cannot use both them and the Library together in an
executable that you distribute.
7. You may place library facilities that are a work based on the Library side-by-side in a single library together
with other library facilities not covered by this License, and distribute such a combined library, provided that the
separate distribution of the work based on the Library and of the other library facilities is otherwise permitted,
and provided that you do these two things:
a) Accompany the combined library with a copy of the same work based on the Library, uncombined with any
other library facilities. This must be distributed under the terms of the Sections above.
b) Give prominent notice with the combined library of the fact that part of it is a work based on the Library, and
explaining where to find the accompanying uncombined form of the same work.
8. You may not copy, modify, sublicense, link with, or distribute the Library except as expressly provided under
this License. Any attempt otherwise to copy, modify, sublicense, link with, or distribute the Library is void, and will
automatically terminate your rights under this License. However, parties who have received copies, or rights,
from you under this License will not have their licenses terminated so long as such parties remain in full
compliance.
9. You are not required to accept this License, since you have not signed it. However, nothing else grants you
permission to modify or distribute the Library or its derivative works. These actions are prohibited by law if you
do not accept this License. Therefore, by modifying or distributing the Library (or any work based on the
Library), you indicate your acceptance of this License to do so, and all its terms and conditions for copying,
distributing or modifying the Library or works based on it.
10. Each time you redistribute the Library (or any work based on the Library), the recipient automatically receives
a license from the original licensor to copy, distribute, link with or modify the Library subject to these terms and
conditions. You may not impose any further restrictions on the recipients' exercise of the rights granted herein.
You are not responsible for enforcing compliance by third parties with this License.
11. If, as a consequence of a court judgment or allegation of patent infringement or for any other reason (not
limited to patent issues), conditions are imposed on you (whether by court order, agreement or otherwise) that
contradict the conditions of this License, they do not excuse you from the conditions of this License. If you
cannot distribute so as to satisfy simultaneously your obligations under this License and any other pertinent
obligations, then as a consequence you may not distribute the Library at all. For example, if a patent license
would not permit royalty-free redistribution of the Library by all those who receive copies directly or indirectly
through you, then the only way you could satisfy both it and this License would be to refrain entirely from
distribution of the Library.
If any portion of this section is held invalid or unenforceable under any particular circumstance, the balance of the section is
intended to apply, and the section as a whole is intended to apply in other circumstances.
It is not the purpose of this section to induce you to infringe any patents or other property right claims or to contest validity of
any such claims; this section has the sole purpose of protecting the integrity of the free software distribution system which is
implemented by public license practices. Many people have made generous contributions to the wide range of software distributed
through that system in reliance on consistent application of that system; it is up to the author/donor to decide if he or she is willing
to distribute software through any other system and a licensee cannot impose that choice.
This section is intended to make thoroughly clear what is believed to be a consequence of the rest of this License.
12. If the distribution and/or use of the Library is restricted in certain countries either by patents or by
copyrighted interfaces, the original copyright holder who places the Library under this License may add an
explicit geographical distribution limitation excluding those countries, so that distribution is permitted only in or
among countries not thus excluded. In such case, this License incorporates the limitation as if written in the
body of this License.
13. The Free Software Foundation may publish revised and/or new versions of the Lesser General Public License
from time to time. Such new versions will be similar in spirit to the present version, but may differ in detail to
address new problems or concerns.
Each version is given a distinguishing version number. If the Library specifies a version number of this License which applies to
it and "any later version", you have the option of following the terms and conditions either of that version or of any later version
published by the Free Software Foundation. If the Library does not specify a license version number, you may choose any version
ever published by the Free Software Foundation.
14. If you wish to incorporate parts of the Library into other free programs whose distribution conditions are
incompatible with these, write to the author to ask for permission. For software which is copyrighted by the
Free Software Foundation, write to the Free Software Foundation; we sometimes make exceptions for this. Our
decision will be guided by the two goals of preserving the free status of all derivatives of our free software and
of promoting the sharing and reuse of software generally.
NO WARRANTY
15. BECAUSE THE LIBRARY IS LICENSED FREE OF CHARGE, THERE IS NO WARRANTY FOR THE LIBRARY, TO THE
EXTENT PERMITTED BY APPLICABLE LAW. EXCEPT WHEN OTHERWISE STATED IN WRITING THE COPYRIGHT
HOLDERS AND/OR OTHER PARTIES PROVIDE THE LIBRARY "AS IS" WITHOUT WARRANTY OF ANY
KIND, EITHER EXPRESSED OR IMPLIED, INCLUDING, BUT NOT LIMITED TO, THE IMPLIED WARRANTIES OF
MERCHANTABILITY AND FITNESS FOR A PARTICULAR PURPOSE. THE ENTIRE RISK AS TO THE QUALITY AND
PERFORMANCE OF THE LIBRARY IS WITH YOU. SHOULD THE LIBRARY PROVE DEFECTIVE, YOU ASSUME THE
En-26
Page 27

COST OF ALL NECESSARY SERVICING, REPAIR OR CORRECTION.
16. IN NO EVENT UNLESS REQUIRED BY APPLICABLE LAW OR AGREED TO IN WRITING WILL ANY COPYRIGHT
HOLDER, OR ANY OTHER PARTY WHO MAY MODIFY AND/OR REDISTRIBUTE THE LIBRARY AS PERMITTED
ABOVE, BE LIABLE TO YOU FOR DAMAGES, INCLUDING ANY GENERAL, SPECIAL, INCIDENTAL OR
CONSEQUENTIAL DAMAGES ARISING OUT OF THE USE OR INABILITY TO USE THE LIBRARY (INCLUDING BUT
NOT LIMITED TO LOSS OF DATA OR DATA BEING RENDERED INACCURATE OR LOSSES SUSTAINED BY YOU
OR THIRD PARTIES OR A FAILURE OF THE LIBRARY TO OPERATE WITH ANY OTHER SOFTWARE), EVEN IF
SUCH HOLDER OR OTHER PARTY HAS BEEN ADVISED OF THE POSSIBILITY OF SUCH DAMAGES.
END OF TERMS AND CONDITIONS
How to Apply These Terms to Your New Libraries
If you develop a new library, and you want it to be of the greatest possible use to the public, we recommend making it free
software that everyone can redistribute and change. You can do so by permitting redistribution under these terms (or, alternatively,
under the terms of the ordinary General Public License).
To apply these terms, attach the following notices to the library. It is safest to attach them to the start of each source file to most
effectively convey the exclusion of warranty; and each file should have at least the "copyright" line and a pointer to where the full
notice is found.
<one line to give the library's name and an idea of what it does.>
Copyright (C) <year> <name of author>
This library is free software; you can redistribute it and/or modify it under the terms of the GNU Lesser General Public License as
published by the Free Software Foundation; either version 2.1 of the License, or (at your option) any later version.
This library is distributed in the hope that it will be useful, but WITHOUT ANY WARRANTY; without even the implied warranty
of MERCHANTABILITY or FITNESS FOR A PARTICULAR PURPOSE. See the GNU Lesser General Public License for more
details.
You should have received a copy of the GNU Lesser General Public License along with this library; if not, write to the Free
Software Foundation, Inc., 59 Temple Place, Suite 330, Boston, MA 02111-1307 USA
Also add information on how to contact you by electronic and paper mail.
You should also get your employer (if you work as a programmer) or your school, if any, to sign a "copyright disclaimer" for the
library, if necessary. Here is a sample; alter the names:
Yoyodyne, Inc., hereby disclaims all copyright interest in the library `Frob' (a library for tweaking knobs) written by James Random
Hacker.
signature of Ty Coon, 1 April 1990
Ty Coon, President of Vice
That's all there is to it!
GNU GENERAL PUBLIC LICENSE
Version 2, June 1991
Copyright (C) 1989, 1991 Free Software Foundation, Inc.59 Temple Place - Suite 330, Boston, MA 02111-1307, USA
Everyone is permitted to copy and distribute verbatim copies of this license document, but changing it is not allowed.
Preamble
The licenses for most software are designed to take away your freedom to share and change it. By contrast, the GNU General
Public License is intended to guarantee your freedom to share and change free software--to make sure the software is free for
all its users. This General Public License applies to most of the Free Software Foundation's software and to any other program
whose authors commit to using it. (Some other Free Software Foundation software is covered by the GNU Library General Public
License instead.) You can apply it to your programs, too.
When we speak of free software, we are referring to freedom, not price. Our General Public Licenses are designed to make sure
that you have the freedom to distribute copies of free software (and charge for this service if you wish), that you receive source
code or can get it if you want it, that you can change the software or use pieces of it in new free programs; and that you know you
can do these things.
To protect your rights, we need to make restrictions that forbid anyone to deny you these rights or to ask you to surrender the
rights. These restrictions translate to certain responsibilities for you if you distribute copies of the software, or if you modify it.
For example, if you distribute copies of such a program, whether gratis or for a fee, you must give the recipients all the rights that
you have. You must make sure that they, too, receive or can get the source code. And you must show them these terms so they
know their rights.
We protect your rights with two steps: (1) copyright the software, and (2) offer you this license which gives you legal permission
to copy, distribute and/or modify the software.
Also, for each author's protection and ours, we want to make certain that everyone understands that there is no warranty for this
free software. If the software is modified by someone else and passed on, we want its recipients to know that what they have is
not the original, so that any problems introduced by others will not reflect on the original authors' reputations.
Finally, any free program is threatened constantly by software patents. We wish to avoid the danger that redistributors of a free
program will individually obtain patent licenses, in effect making the program proprietary. To prevent this, we have made it clear
that any patent must be licensed for everyone's free use or not licensed at all.
The precise terms and conditions for copying, distribution and modification follow.
TERMS AND CONDITIONS FOR COPYING, DISTRIBUTION AND MODIFICATION
This License applies to any program or other work which contains a notice placed by the copyright holder saying it may be
distributed under the terms of this General Public License. The "Program", below, refers to any such program or work, and a "work
based on the Program" means either the Program or any derivative work under copyright law: that is to say, a work containing the
Program or a portion of it, either verbatim or with modifications and/or translated into another language. (Hereinafter, translation is
included without limitation in the term "modification".) Each licensee is addressed as "you".
Activities other than copying, distribution and modification are not covered by this License; they are outside its scope. The act of
running the Program is not restricted, and the output from the Program is covered only if its contents constitute a work based on
the Program (independent of having been made by running the Program). Whether that is true depends on what the Program
does.
You may copy and distribute verbatim copies of the Program's source code as you receive it, in any
medium, provided that you conspicuously and appropriately publish on each copy an appropriate copyright notice and disclaimer
of warranty; keep intact all the notices that refer to this License and to the absence of any warranty; and give any other recipients
of the Program a copy of this License along with the Program.
You may charge a fee for the physical act of transferring a copy, and you may at your option offer warranty protection in exchange
for a fee.
You may modify your copy or copies of the Program or any portion of it, thus forming a work based on the Program, and copy and
distribute such modifications or work under the terms of Section 1 above, provided that you also meet all of these conditions:
a) You must cause the modified files to carry prominent notices stating that you changed the files and the date
of any change.
b) You must cause any work that you distribute or publish, that in whole or in part contains or is derived from
the Program or any part thereof, to be licensed as a whole at no charge to all third parties under the terms of this License.
c) If the modified program normally reads commands interactively when run, you must cause it, when started
running for such interactive use in the most ordinary way, to print or display an announcement including an appropriate copyright
notice and a notice that there is no warranty (or else, saying that you provide a warranty) and that users may redistribute the
program under these conditions, and telling the user how to view a copy of this License. (Exception: if the Program itself is
interactive but does not normally print such an announcement, your work based on the Program is not required to print an
announcement.)
These requirements apply to the modified work as a whole. If identifiable sections of that work are not derived from the Program,
and can be reasonably considered independent and separate works in themselves, then this License, and its terms, do not apply
to those sections when you distribute them as separate works. But when you distribute the same sections as part of a whole which
is a work based on the Program, the distribution of the whole must be on the terms of this License, whose permissions for other
licensees extend to the entire whole, and thus to each and every part regardless of who wrote it.
Thus, it is not the intent of this section to claim rights or contest your rights to work written entirely by you; rather, the intent is to
exercise the right to control the distribution of derivative or collective works based on the Program.
In addition, mere aggregation of another work not based on the Program with the Program (or with a work based on the Program)
on a volume of a storage or distribution medium does not bring the other work under the scope of this License.
You may copy and distribute the Program (or a work based on it, under Section 2) in object code or executable form under the
terms of Sections 1 and 2 above provided that you also do one of the following:
a) Accompany it with the complete corresponding machine-readable source code, which must be distributed
under the terms of Sections 1 and 2 above on a medium customarily used for software interchange;or,
b) Accompany it with a written offer, valid for at least three years, to give any third party, for a charge no more
than your cost of physically performing source distribution, a complete machine-readable copy of the corresponding source code,
to be distributed under the terms of Sections 1 and 2 above on a medium customarily used for software interchange; or,
c) Accompany it with the information you received as to the offer to distribute corresponding source code. (This
alternative is allowed only for noncommercial distribution and only if you received the program in object code or executable form
with such an offer, in accord with Subsection b above.)
The source code for a work means the preferred form of the work for making modifications to it. For an executable work, complete
source code means all the source code for all modules it contains, plus any associated interface definition files, plus the scripts
used to control compilation and installation of the executable. However, as a special exception, the source code distributed need
not include anything that is normally distributed (in either source or binary form) with the major components (compiler, kernel, and
so on) of the operating system on which the executable runs, unless that component itself accompanies the executable.
If distribution of executable or object code is made by offering access to copy from a designated place, then offering equivalent
access to copy the source code from the same place counts as distribution of the source code, even though third parties are not
compelled to copy the source along with the object code.
You may not copy, modify, sublicense, or distribute the Program except as expressly provided under this License. Any attempt
otherwise to copy, modify, sublicense or distribute the Program is void, and will automatically terminate your rights under this
License. However, parties who have received copies, or rights, from you under this License will not have their licenses terminated
so long as such parties remain in full compliance.
You are not required to accept this License, since you have not signed it. However, nothing else grants you permission to modify
or distribute the Program or its derivative works. These actions are prohibited by law if you do not accept this License. Therefore,
by modifying or distributing the Program (or any work based on the Program), you indicate your acceptance of this License to do
so, and all its terms and conditions for copying, distributing or modifying the Program or works based on it.
Each time you redistribute the Program (or any work based on the Program), the recipient automatically receives a license from
the original licensor to copy, distribute or modify the Program subject to these terms and conditions. You may not impose any
further restrictions on the recipients' exercise of the rights granted herein. You are not responsible for enforcing compliance by
third parties to this License.
If, as a consequence of a court judgment or allegation of patent infringement or for any other reason (not limited to patent issues),
conditions are imposed on you (whether by court order, agreement or otherwise) that contradict the conditions of this License,
they do not excuse you from the conditions of this License. If you cannot distribute so as to satisfy simultaneously your obligations
under this License and any other pertinent obligations, then as a consequence you may not distribute the Program at all. For
example, if a patent license would not permit royalty-free redistribution of the Program by all those who receive copies directly or
indirectly through you, then the only way you could satisfy both it and this License would be to refrain entirely from distribution of
the Program.
If any portion of this section is held invalid or unenforceable under any particular circumstance, the balance of the section is
intended to apply and the section as a whole is intended to apply in other circumstances.
It is not the purpose of this section to induce you to infringe any patents or other property right claims or to contest validity of
any such claims; this section has the sole purpose of protecting the integrity of the free software distribution system, which is
implemented by public license practices. Many people have made generous contributions to the wide range of software distributed
through that system in reliance on consistent application of that system; it is up to the author/donor to decide if he or she is willing
to distribute software through any other system and a licensee cannot impose that choice.
This section is intended to make thoroughly clear what is believed to be a consequence of the rest of this License.
If the distribution and/or use of the Program is restricted in certain countries either by patents or by copyrighted interfaces, the
original copyright holder who places the Program under this License may add an explicit geographical distribution limitation
excluding those countries, so that distribution is permitted only in or among countries not thus excluded. In such case, this License
incorporates the limitation as if written in the body of this License.
The Free Software Foundation may publish revised and/or new versions of the General Public License from time to time. Such
new versions will be similar in spirit to the present version, but may differ in detail to address new problems or concerns.
Each version is given a distinguishing version number. If the Program specifies a version number of this License which applies
to it and "any later version", you have the option of following the terms and conditions either of that version or of any later version
published by the Free Software Foundation. If the Program does not specify a version number of this License, you may choose
any version ever published by the Free Software Foundation.
If you wish to incorporate parts of the Program into other free programs whose distribution conditions are different, write to the
author to ask for permission. For software which is copyrighted by the Free Software Foundation, write to the Free Software
Foundation; we sometimes make exceptions for this. Our decision will be guided by the two goals of preserving the free status of
all derivatives of our free software and of promoting the sharing and reuse of software generally.
NO WARRANTY
BECAUSE THE PROGRAM IS LICENSED FREE OF CHARGE, THERE IS NO WARRANTY FOR THE PROGRAM, TO
THE EXTENT PERMITTED BY APPLICABLE LAW. EXCEPT WHEN OTHERWISE STATED IN WRITING THE COPYRIGHT
HOLDERS AND/OR OTHER PARTIES PROVIDE THE PROGRAM "AS IS" WITHOUT WARRANTY OF ANY KIND, EITHER
EXPRESSED OR IMPLIED, INCLUDING, BUT NOT LIMITED TO, THE IMPLIED WARRANTIES OF MERCHANTABILITY
AND FITNESS FOR A PARTICULAR PURPOSE. THE ENTIRE RISK AS TO THE QUALITY AND PERFORMANCE OF THE
PROGRAM IS WITH YOU. SHOULD THE PROGRAM PROVE DEFECTIVE, YOU ASSUME THE COST OF ALL NECESSARY
SERVICING, REPAIR OR CORRECTION.
IN NO EVENT UNLESS REQUIRED BY APPLICABLE LAW OR AGREED TO IN WRITING WILL ANY COPYRIGHT HOLDER,
OR ANY OTHER PARTY WHO MAY MODIFY AND/OR REDISTRIBUTE THE PROGRAM AS PERMITTED ABOVE, BE
LIABLE TO YOU FOR DAMAGES, INCLUDING ANY GENERAL, SPECIAL, INCIDENTAL OR CONSEQUENTIAL DAMAGES
ARISING OUT OF THE USE OR INABILITY TO USE THE PROGRAM (INCLUDING BUT NOT LIMITED TO LOSS OF DATA
OR DATA BEING RENDERED INACCURATE OR LOSSES SUSTAINED BY YOU OR THIRD PARTIES OR A FAILURE OF
THE PROGRAM TO OPERATE WITH ANY OTHER PROGRAMS), EVEN IF SUCH HOLDER OR OTHER PARTY HAS BEEN
ADVISED OF THE POSSIBILITY OF SUCH DAMAGES.
END OF TERMS AND CONDITIONS
How to Apply These Terms to Your New Programs
If you develop a new program, and you want it to be of the greatest possible use to the public, the best way to achieve this is to
make it free software which everyone can redistribute and change under these terms.
To do so, attach the following notices to the program. It is safest to attach them to the start of each source file to most effectively
Others
convey the exclusion of warranty; and each file should have at least the "copyright" line and a pointer to where the full notice is
found.
<one line to give the program's name and an idea of what it does.>
Copyright (C) <year> <name of author>
This program is free software; you can redistribute it and/or modify it under the terms of the GNU General Public License as
published by the Free Software Foundation; either version 2 of the License, or (at your option) any later version.
This program is distributed in the hope that it will be useful, but WITHOUT ANY WARRANTY; without even the implied warranty of
MERCHANTABILITY or FITNESS FOR A PARTICULAR PURPOSE. See the GNU General Public License for more details.
You should have received a copy of the GNU General Public License along with this program; if not, write to the Free Software
Foundation, Inc., 59 Temple Place - Suite 330, Boston, MA 02111-1307, USA.
Also add information on how to contact you by electronic and paper mail.
If the program is interactive, make it output a short notice like this when it starts in an interactive mode:
Gnomovision version 69, Copyright (C) year name of author Gnomovision comes with ABSOLUTELY NO WARRANTY; for details
type `show w'. This is free software, and you are welcome to redistribute it under certain conditions; type `show c' for details.
The hypothetical commands `show w' and `show c' should show the appropriate parts of the General Public License. Of course,
the commands you use may be called something other than `show w' and `show c'; they could even be mouse-clicks or menu
items--whatever suits your program.
You should also get your employer (if you work as a programmer) or your school, if any, to sign a "copyright disclaimer" for the
program, if necessary. Here is a sample; alter the names:
Yoyodyne, Inc., hereby disclaims all copyright interest in the program `Gnomovision' (which makes passes at compilers) written by
James Hacker.
<signature of Ty Coon>, 1 April 1989
Ty Coon, President of Vice
This General Public License does not permit incorporating your program into proprietary programs. If your program is a subroutine
library, you may consider it more useful to permit linking proprietary applications with the library. If this is what you want to do, use
the GNU Library General Public License instead of this License.
Notice Regarding Third-party Software
This product includes the following software that is directly or indirectly licensed to Onkyo by third-party developers.
1. bfsh-sk
2. ixml
3. libcurl
4. libFLAC
5. libjpeg
6. libogg
7. libpng
8. libvorbis
9. ntp
10. OpenSSL
11. popt
12. RSA Data Security, Inc. MD5 Message-Digest Algorithm
13. thttpd 2.25b
14. zlib
15. Apple Lossless
16. Boost
17. Expat
18. FastDelegate
19. Tremolo
20. Tremor
21. Mersenne Twister
22. cURL
23. c-ares
24. LZ4
In response to requests from the copyright owners of each piece of software, Onkyo notifies you of the following:
Important Notice Regarding Other Third-Party Software
This product includes the following software licensed to Onkyo Corporation directly or indirectly by third party developers:
1. bfsh-sk
2. ixml
3. libcurl
4. libFLAC
5. libjpeg
6. libogg
7. libpng
8. libvorbis
9. ntp
10. OpenSSL
11. popt
12. RSA Data Security, Inc. MD5 Message-Digest Algorithm
13. thttpd 2.25b
14. zlib
15. Apple Lossless
16. Boost
17. Expat
18. FastDelegate
19. Tremolo
20. Tremor
21. Mersenne Twister
22. cURL
23. c-ares
24. LZ4
In response to requests from the copyright owners of each piece of software, Onkyo notifies you of the following:
(1) bfsh-sk
Copyright (c) 2007 Samuel KABAK
Permission is hereby granted, free of charge, to any person obtaining a copy of this software and associated documentation files
(the "Software"), to deal in the Software without restriction, including without limitation the rights to use, copy, modify, merge,
publish, distribute, sublicense, and/or sell copies of the Software, and to permit persons to whom the Software is furnished to do
so, subject to the following conditions:
The above copyright notice and this permission notice shall be included in all copies or substantial portions of the Software.
THE SOFTWARE IS PROVIDED "AS IS", WITHOUT WARRANTY OF ANY KIND, EXPRESS OR IMPLIED, INCLUDING
En-27
Page 28

BUT NOT LIMITED TO THE WARRANTIES OF MERCHANTABILITY, FITNESS FOR A PARTICULAR PURPOSE AND
NONINFRINGEMENT. IN NO EVENT SHALL THE AUTHORS OR COPYRIGHT HOLDERS BE LIABLE FOR ANY CLAIM,
DAMAGES OR OTHER LIABILITY, WHETHER IN AN ACTION OF CONTRACT, TORT OR OTHERWISE, ARISING FROM, OUT
OF OR IN CONNECTION WITH THE SOFTWARE OR THE USE OR OTHER DEALINGS IN THE SOFTWARE.
(2) ixml
Copyright (c) 2000-2003 Intel Corporation All rights reserved.
Redistribution and use in source and binary forms, with or without modification, are permitted provided that the following
conditions are met:
* Redistributions of source code must retain the above copyright notice, this list of conditions and the
following disclaimer.
* Redistributions in binary form must reproduce the above copyright notice, this list of conditions and the
following disclaimer in the documentation and/or other materials provided with the distribution.
* Neither name of Intel Corporation nor the names of its contributors may be used to endorse or promote
products derived from this software without specific prior written permission.
THIS SOFTWARE IS PROVIDED BY THE COPYRIGHT HOLDERS AND CONTRIBUTORS "AS IS" AND ANY EXPRESS OR
IMPLIED WARRANTIES, INCLUDING, BUT NOT LIMITED TO, THE IMPLIED WARRANTIES OF MERCHANTABILITY AND
FITNESS FOR A PARTICULAR PURPOSE ARE DISCLAIMED. IN NO EVENT SHALL INTEL OR CONTRIBUTORS BE LIABLE
FOR ANY DIRECT, INDIRECT, INCIDENTAL, SPECIAL, EXEMPLARY, OR CONSEQUENTIAL DAMAGES (INCLUDING, BUT
NOT LIMITED TO, PROCUREMENT OF SUBSTITUTE GOODS OR SERVICES; LOSS OF USE, DATA, OR PROFITS; OR
BUSINESS INTERRUPTION) HOWEVER CAUSED AND ON ANY THEORY OF LIABILITY, WHETHER IN CONTRACT, STRICT
LIABILITY, OR TORT (INCLUDING NEGLIGENCE OR OTHERWISE) ARISING IN ANY WAY OUT OF THE USE OF THIS
SOFTWARE, EVEN IF ADVISED OF THE POSSIBILITY OF SUCH DAMAGE.
(3) libcurl
COPYRIGHT AND PERMISSION NOTICE
Copyright (c) 1996 - 2007, Daniel Stenberg, <daniel@haxx.se>.
All rights reserved.
Permission to use, copy, modify, and distribute this software for any purpose with or without fee is hereby granted, provided that
the above copyright notice and this permission notice appear in all copies.
THE SOFTWARE IS PROVIDED "AS IS", WITHOUT WARRANTY OF ANY KIND, EXPRESS OR IMPLIED, INCLUDING
BUT NOT LIMITED TO THE WARRANTIES OF MERCHANTABILITY, FITNESS FOR A PARTICULAR PURPOSE AND
NONINFRINGEMENT OF THIRD PARTY RIGHTS. IN NO EVENT SHALL THE AUTHORS OR COPYRIGHT HOLDERS
BE LIABLE FOR ANY CLAIM, DAMAGES OR OTHER LIABILITY, WHETHER IN AN ACTION OF CONTRACT, TORT OR
OTHERWISE, ARISING FROM, OUT OF OR IN CONNECTION WITH THE SOFTWARE OR THE USE OR OTHER DEALINGS
IN THE SOFTWARE.
Except as contained in this notice, the name of a copyright holder shall not be used in advertising or otherwise to promote the
sale, use or other dealings in this Software without prior written authorization of the copyright holder.
(4) libFLAC
Copyright (C) 2000,2001,2002,2003,2004,2005,2006,2007 Josh Coalson
Redistribution and use in source and binary forms, with or without modification, are permitted provided that the following
conditions are met:
- Redistributions of source code must retain the above copyright notice, this list of conditions and the
following disclaimer.
- Redistributions in binary form must reproduce the above copyright notice, this list of conditions and the
following disclaimer in the documentation and/or other materials provided with the distribution.
- Neither the name of the Xiph.org Foundation nor the names of itsy be us contributors may be used to
endorse or promote products derived from this software without specific prior written permission.
THIS SOFTWARE IS PROVIDED BY THE COPYRIGHT HOLDERS AND CONTRIBUTORS "AS IS"AND ANY EXPRESS OR
IMPLIED WARRANTIES, INCLUDING, BUT NOT LIMITED TO, THE IMPLIED WARRANTIES OF MERCHANTABILITY AND
FITNESS FOR A PARTICULAR PURPOSE ARE DISCLAIMED. IN NO EVENT SHALL THE FOUNDATION OR CONTRIBUTORS
BE LIABLE FOR ANY DIRECT, INDIRECT, INCIDENTAL, SPECIAL, EXEMPLARY, OR CONSEQUENTIAL DAMAGES
(INCLUDING, BUT NOT LIMITED TO, PROCUREMENT OF SUBSTITUTE GOODS OR SERVICES; LOSS OF USE, DATA,
OR PROFITS; OR BUSINESS INTERRUPTION) HOWEVER CAUSED AND ON ANY THEORY OF LIABILITY, WHETHER IN
CONTRACT, STRICT LIABILITY, OR TORT (INCLUDING NEGLIGENCE OR OTHERWISE) ARISING IN ANY WAY OUT OF THE
USE OF THIS SOFTWARE, EVEN IF ADVISED OF THE POSSIBILITY OF SUCH DAMAGE.
(5) libjpeg
The authors make NO WARRANTY or representation, either express or implied, with respect to this software, its quality, accuracy,
merchantability, or fitness for a particular purpose. This software is provided "AS IS", and you,its user, assume the entire risk as to
its quality and accuracy.
This software is copyright (C) 1991-1998, Thomas G. Lane.
All Rights Reserved except as specified below.
Permission is hereby granted to use, copy, modify, and distribute this software (or portions thereof) for any purpose, without fee,
subject to these conditions:
If any part of the source code for this software is distributed, then this README file must be included, with this copyright and nowarranty notice unaltered; and any additions, deletions, or changes to the original files must be clearly indicated in accompanying
documentation.
If only executable code is distributed, then the accompanying documentation must state that "this software is based in part on the
work of the Independent JPEG Group".
Permission for use of this software is granted only if the user accepts full responsibility for any undesirable consequences; the
authors accept NO LIABILITY for damages of any kind.
These conditions apply to any software derived from or based on the IJG code, not just to the unmodified library. If you use our
work, you ought to acknowledge us.
Permission is NOT granted for the use of any IJG author's name or company name in advertising or publicity relating to this
software or products derived from it. This software may be referred to only as "the Independent JPEG Group's software".
We specifically permit and encourage the use of this software as the basis of commercial products, provided that all warranty or
liability claims are assumed by the product vendor.
ansi2knr.c is included in this distribution by permission of L. Peter Deutsch, sole proprietor of its copyright holder, Aladdin
Enterprises of Menlo Park, CA. ansi2knr.c is NOT covered by the above copyright and conditions, but instead by the usual
distribution terms of the Free Software Foundation; principally, that you must include source code if you redistribute it. (See the
file ansi2knr.c for full details.) However, since ansi2knr.c is not needed as part of any program generated from the IJG code, this
does not limit you more than the foregoing paragraphs do.
The Unix configuration script "configure" was produced with GNU Autoconf. It is copyright by the Free Software Foundation but is
freely distributable. The same holds for its supporting scripts (config.guess, config.sub, ltconfig, ltmain.sh). Another support script,
install-sh, is copyright by M.I.T. but is also freely distributable.
It appears that the arithmetic coding option of the JPEG spec is covered by patents owned by IBM, AT&T, and Mitsubishi. Hence
arithmetic coding cannot legally be used without obtaining one or more licenses. For this reason, support for arithmetic coding
has been removed from the free JPEG software.
(Since arithmetic coding provides only a marginal gain over the unpatented Huffman mode, it is unlikely that very many
implementations will support it.) So far as we are aware, there are no patent restrictions on the remaining code.
The IJG distribution formerly included code to read and write GIF files. To avoid entanglement with the Unisys LZW patent, GIF
reading support has been removed altogether, and the GIF writer has been simplified to produce "uncompressed GIFs". This
technique does not use the LZW algorithm; the resulting GIF files are larger than usual, but are readable by all standard GIF
decoders.
We are required to state that
"The Graphics Interchange Format(c) is the Copyright property of ompuServe Incorporated. GIF(sm) is a Service Mark property
of CompuServe Incorporated."
(6) libogg
Copyright (c) 2002, Xiph.org Foundation
Redistribution and use in source and binary forms, with or without modification, are permitted provided that the following
conditions are met:
- Redistributions of source code must retain the above copyright notice, this list of conditions and the
following disclaimer.
- Redistributions in binary form must reproduce the above copyright notice, this list of conditions and the
following disclaimer in the documentation and/or other materials provided with the distribution.
- Neither the name of the Xiph.org Foundation nor the names of its contributors may be used to endorse or
promote products derived from this software without specific prior written permission.
THIS SOFTWARE IS PROVIDED BY THE COPYRIGHT HOLDERS AND CONTRIBUTORS "AS IS" AND ANY EXPRESS OR
IMPLIED WARRANTIES, INCLUDING, BUT NOT LIMITED TO, THE IMPLIED WARRANTIES OF MERCHANTABILITY AND
FITNESS FOR A PARTICULAR PURPOSE ARE DISCLAIMED. IN NO EVENT SHALL THE FOUNDATION OR CONTRIBUTORS
BE LIABLE FOR ANY DIRECT, INDIRECT, INCIDENTAL, SPECIAL, EXEMPLARY, OR CONSEQUENTIAL DAMAGES
(INCLUDING, BUT NOT LIMITED TO, PROCUREMENT OF SUBSTITUTE GOODS OR SERVICES; LOSS OF USE, DATA,
OR PROFITS; OR BUSINESS INTERRUPTION) HOWEVER CAUSED AND ON ANY THEORY OF LIABILITY, WHETHER IN
CONTRACT, STRICT LIABILITY, OR TORT (INCLUDING NEGLIGENCE OR OTHERWISE) ARISING IN ANY WAY OUT OF THE
USE OF THIS SOFTWARE, EVEN IF ADVISED OF THE POSSIBILITY OF SUCH DAMAGE.
(7) libpng
COPYRIGHT NOTICE, DISCLAIMER, and LICENSE:
If you modify libpng you may insert additional notices immediately following this sentence.
This code is released under the libpng license.
libpng versions 1.2.6, August 15, 2004, through 1.4.0, January 3, 2010, are Copyright (c) 2004, 2006-2007 Glenn RandersPehrson, and are distributed according to the same disclaimer and license as libpng-1.2.5 with the following individual added to
the list of Contributing Authors:
Cosmin Truta
libpng versions 1.0.7, July 1, 2000, through 1.2.5 - October 3, 2002, are Copyright (c) 2000-2002 Glenn Randers-Pehrson,
and are distributed according to the same disclaimer and license as libpng-1.0.6 with the following individuals added to the list of
Contributing Authors:
Simon-Pierre Cadieux
Eric S. Raymond
Gilles Vollant
and with the following additions to the disclaimer:
There is no warranty against interference with your enjoyment of the library or against infringement. There is no warranty that our
efforts or the library will fulfill any of your particular purposes or needs. This library is provided with all faults, and the entire risk of
satisfactory quality, performance, accuracy, and effort is with the user.
libpng versions 0.97, January 1998, through 1.0.6, March 20, 2000, are Copyright (c) 1998, 1999 Glenn Randers-Pehrson,
and are distributed according to the same disclaimer and license as libpng-0.96, with the following individuals added to the list of
Contributing Authors:
Tom Lane
Glenn Randers-Pehrson
Willem van Schaik
libpng versions 0.89, June 1996, through 0.96, May 1997, are Copyright (c) 1996, 1997 Andreas Dilger Distributed according to
the same disclaimer and license as libpng-0.88, with the following individuals added to the list of Contributing Authors:
John Bowler
Kevin Bracey
Sam Bushell
Magnus Holmgren
Greg Roelofs
Tom Tanner
libpng versions 0.5, May 1995, through 0.88, January 1996, are Copyright (c) 1995, 1996 Guy Eric Schalnat, Group 42, Inc.
For the purposes of this copyright and license, "Contributing Authors" is defined as the following set of individuals:
Andreas Dilger
Dave Martindale
Guy Eric Schalnat
Paul Schmidt
Tim Wegner
The PNG Reference Library is supplied "AS IS". The Contributing Authors and Group 42, Inc. disclaim all warranties, expressed
or implied, including, without limitation, the warranties of merchantability and of fitness for any purpose. The Contributing Authors
and Group 42, Inc. assume no liability for direct, indirect, incidental, special, exemplary, or consequential damages, which may
result from the use of the PNG Reference Library, even if advised of the possibility of such damage.
Permission is hereby granted to use, copy, modify, and distribute this source code, or portions hereof, for any purpose, without
fee, subject to the following restrictions:
The origin of this source code must not be misrepresented.
Altered versions must be plainly marked as such and must not be misrepresented as being the original
source.
This Copyright notice may not be removed or altered from any source or altered source distribution.
The Contributing Authors and Group 42, Inc. specifically permit, without fee, and encourage the use of this source code as a
component to supporting the PNG file format in commercial products. If you use this source code in a product, acknowledgment
is not required but would be appreciated.
(8) libvorbis
Copyright (c) 2002-2004 Xiph.org Foundation
Redistribution and use in source and binary forms, with or without modification, are permitted provided that the following
conditions are met:
- Redistributions of source code must retain the above copyright notice, this list of conditions and the
following disclaimer.
- Redistributions in binary form must reproduce the above copyright notice, this list of conditions and the
following disclaimer in the documentation and/or other materials provided with the distribution.
- Neither the name of the Xiph.org Foundation nor the names of its contributors may be used to endorse or
promote products derived from this software without specific prior written permission.
THIS SOFTWARE IS PROVIDED BY THE COPYRIGHT HOLDERS AND CONTRIBUTORS "AS IS" AND ANY EXPRESS OR
IMPLIED WARRANTIES, INCLUDING, BUT NOT LIMITED TO, THE IMPLIED WARRANTIES OF MERCHANTABILITY AND
FITNESS FOR A PARTICULAR PURPOSE ARE DISCLAIMED. IN NO EVENT SHALL THE FOUNDATION OR CONTRIBUTORS
BE LIABLE FOR ANY DIRECT, INDIRECT, INCIDENTAL, SPECIAL, EXEMPLARY, OR CONSEQUENTIAL DAMAGES
(INCLUDING, BUT NOT LIMITED TO, PROCUREMENT OF SUBSTITUTE GOODS OR SERVICES; LOSS OF USE, DATA,
Others
OR PROFITS; OR BUSINESS INTERRUPTION) HOWEVER CAUSED AND ON ANY THEORY OF LIABILITY, WHETHER IN
CONTRACT, STRICT LIABILITY, OR TORT (INCLUDING NEGLIGENCE OR OTHERWISE) ARISING IN ANY WAY OUT OF THE
USE OF THIS SOFTWARE, EVEN IF ADVISED OF THE POSSIBILITY OF SUCH DAMAGE.
(9) ntp
This file is automatically generated from html/copyright.html
Copyright Notice
jpg "Clone me," says Dolly sheepishly
Last update: 20:31 UTC Saturday, January 06, 2007
The following copyright notice applies to all files collectively called the Network Time Protocol Version 4 Distribution. Unless
specifically declared otherwise in an individual file, this notice applies as if the text was explicitly included in the file.
Copyright (c) David L. Mills 1992-2007
Permission to use, copy, modify, and distribute this software and its documentation for any purpose with or without fee is hereby
granted, provided that the above copyright notice appears in all copies and that both the copyright notice and this permission
notice appear in supporting documentation, and that the name University of Delaware not be used in advertising or publicity
pertaining to distribution of the software without specific, written prior permission. The University of Delaware makes no
representations about the suitability this software for any purpose. It is provided "as is" without express or implied warranty.
The following individuals contributed in part to the Network Time Protocol Distribution Version 4 and are acknowledged as authors
of this work.
[1]Mark Andrews <mark_andrews@isc.org> Leitch atomic clock controller
[2]Bernd Altmeier <altmeier@atlsoft.de> hopf Elektronik serial line and PCI-bus devices
[3]Viraj Bais <vbais@mailman1.intel.com> and [4]Clayton Kirkwood <kirkwood@striderfm.intel.com> port to WindowsNT 3.5
[5]Michael Barone <michael,barone@lmco.com> GPSVME fixes
[6]Jean-Francois Boudreault <Jean-Francois.Boudreault@viagenie.qc.ca>IPv6 support
[7]Karl Berry <karl@owl.HQ.ileaf.com> syslog to file option
[8]Greg Brackley <greg.brackley@bigfoot.com> Major rework of WINNT port. Clean up recvbuf and iosignal code into separate
modules.
[9]Marc Brett <Marc.Brett@westgeo.com> Magnavox GPS clock driver
[10]Piete Brooks <Piete.Brooks@cl.cam.ac.uk> MSF clock driver, Trimble PARSE support
[11]Reg Clemens <reg@dwf.com> Oncore driver (Current maintainer)
[12]Steve Clift <clift@ml.csiro.au> OMEGA clock driver
[13]Casey Crellin <casey@csc.co.za> vxWorks (Tornado) port and help with target configuration
[14]Sven Dietrich <sven_dietrich@trimble.com> Palisade reference clock driver, NT adj. residuals, integrated Greg's Winnt port.
[15]John A. Dundas III <dundas@salt.jpl.nasa.gov> Apple A/UX port
[16]Torsten Duwe <duwe@immd4.informatik.uni-erlangen.de> Linux port
[17]Dennis Ferguson <dennis@mrbill.canet.ca> foundation code for NTP Version 2 as specified in RFC-1119
[18]John Hay <jhay@icomtek.csir.co.za> IPv6 support and testing
[19]Glenn Hollinger <glenn@herald.usask.ca> GOES clock driver
[20]Mike Iglesias <iglesias@uci.edu> DEC Alpha port
[21]Jim Jagielski <jim@jagubox.gsfc.nasa.gov> A/UX port
[22]Jeff Johnson <jbj@chatham.usdesign.com> massive prototyping overhaul
[23]Hans Lambermont <Hans.Lambermont@nl.origin-it.com> or [24]<H.Lambermont@chello.nl> ntpsweep
[25]Poul-Henning Kamp <phk@FreeBSD.ORG> Oncore driver (Original author)
[26]Frank Kardel [27]<kardel (at) ntp (dot) org> PARSE <GENERIC> driver (>14 reference clocks), STREAMS modules for
PARSE, support scripts, syslog cleanup, dynamic interface handling
[28]William L. Jones <jones@hermes.chpc.utexas.edu> RS/6000 AIX modifications, HPUX modifications
[29]Dave Katz <dkatz@cisco.com> RS/6000 AIX port
[30]Craig Leres <leres@ee.lbl.gov> 4.4BSD port, ppsclock, MagnavoxGPS clock driver
[31]George Lindholm <lindholm@ucs.ubc.ca> SunOS 5.1 port
[32]Louis A. Mamakos <louie@ni.umd.edu> MD5-based authentication
[33]Lars H. Mathiesen <thorinn@diku.dk> adaptation of foundation code for Version 3 as specified in RFC-1305
[34]Danny Mayer <mayer@ntp.org>Network I/O, Windows Port, Code Maintenance
[35]David L. Mills <mills@udel.edu> Version 4 foundation: clock discipline, authentication, precision kernel; clock drivers:
Spectracom, Austron, Arbiter, Heath, ATOM, ACTS, KSI/Odetics; audio clock drivers: CHU, WWV/H, IRIG
[36]Wolfgang Moeller <moeller@gwdgv1.dnet.gwdg.de> VMS port
[37]Jeffrey Mogul <mogul@pa.dec.com> ntptrace utility
[38]Tom Moore <tmoore@fievel.daytonoh.ncr.com> i386 svr4 port
[39]Kamal A Mostafa <kamal@whence.com> SCO OpenServer port
[40]Derek Mulcahy <derek@toybox.demon.co.uk> and [41]Damon Hart-Davis <d@hd.org> ARCRON MSF clock driver
[42]Rainer Pruy <Rainer.Pruy@informatik.uni-erlangen.de> monitoring/trap scripts, statistics file handling
[43]Dirce Richards <dirce@zk3.dec.com> Digital UNIX V4.0 port
[44]Wilfredo Sanchez <wsanchez@apple.com> added support for NetInfo
[45]Nick Sayer <mrapple@quack.kfu.com> SunOS streams modules
[46]Jack Sasportas <jack@innovativeinternet.com> Saved a Lot of space on the stuff in the html/pic/ subdirectory
[47]Ray Schnitzler <schnitz@unipress.com> Unixware1 port
[48]Michael Shields <shields@tembel.org> USNO clock driver
[49]Jeff Steinman <jss@pebbles.jpl.nasa.gov> Datum PTS clock driver
[50]Harlan Stenn <harlan@pfcs.com> GNU automake/autoconfigure makeover, various other bits (see the ChangeLog)
[51]Kenneth Stone <ken@sdd.hp.com> HP-UX port
[52]Ajit Thyagarajan <ajit@ee.udel.edu>IP multicast/anycast support
[53]Tomoaki TSURUOKA <tsuruoka@nc.fukuoka-u.ac.jp>TRAK clock driver
[54]Paul A Vixie <vixie@vix.com> TrueTime GPS driver, generic TrueTime clock driver
[55]Ulrich Windl <Ulrich.Windl@rz.uni-regensburg.de> corrected and validated HTML documents according to the HTML DTD
References
mailto: mark_andrews@isc.org
mailto: altmeier@atlsoft.de
mailto: vbais@mailman1.intel.co
mailto: kirkwood@striderfm.intel.com
mailto: michael.barone@lmco.com
mailto: Jean-Francois.Boudreault@viagenie.qc.ca
mailto: karl@owl.HQ.ileaf.com
mailto: greg.brackley@bigfoot.com
mailto: Marc.Brett@westgeo.com
mailto: Piete.Brooks@cl.cam.ac.uk
mailto: reg@dwf.com
mailto: clift@ml.csiro.au
mailto: casey@csc.co.za
mailto: Sven_Dietrich@trimble.COM
mailto: dundas@salt.jpl.nasa.gov
mailto: duwe@immd4.informatik.uni-erlangen.de
mailto: dennis@mrbill.canet.ca
En-28
Page 29

mailto: jhay@icomtek.csir.co.za
mailto: glenn@herald.usask.ca
mailto: iglesias@uci.edu
mailto: jagubox.gsfc.nasa.gov
mailto: jbj@chatham.usdesign.com
mailto: Hans.Lambermont@nl.origin-it.com
mailto: H.Lambermont@chello.nl
mailto: phk@FreeBSD.ORG
http://www4.informatik.uni-erlangen.de/%7ekardel
mailto: kardel(at)ntp(dot)org
mailto: jones@hermes.chpc.utexas.edu
mailto: dkatz@cisco.com
mailto: leres@ee.lbl.gov
mailto: lindholm@ucs.ubc.ca
mailto: louie@ni.umd.edu
mailto: thorinn@diku.dk
mailto: mayer@ntp.org
mailto: mills@udel.edu
mailto: moeller@gwdgv1.dnet.gwdg.de
mailto: mogul@pa.dec.com
mailto: tmoore@fievel.daytonoh.ncr.com
mailto: kamal@whence.com
mailto: derek@toybox.demon.co.uk
mailto: d@hd.org
mailto: Rainer.Pruy@informatik.uni-erlangen.de
mailto: dirce@zk3.dec.com
mailto: wsanchez@apple.com
mailto: mrapple@quack.kfu.com
mailto: jack@innovativeinternet.com
mailto: schnitz@unipress.com
mailto: shields@tembel.org
mailto: pebbles.jpl.nasa.gov
mailto: harlan@pfcs.com
mailto: ken@sdd.hp.com
mailto: ajit@ee.udel.edu
mailto: tsuruoka@nc.fukuoka-u.ac.jp
mailto: vixie@vix.com
mailto: Ulrich.Windl@rz.uni-regensburg.de
(10) OpenSSL
LICENSE ISSUES
==============
The OpenSSL toolkit stays under a dual license, i.e. both the conditions of the OpenSSL License and the original SSLeay license
apply to the toolkit. See below for the actual license texts. Actually both licenses are BSD-style Open Source licenses. In case of
any license issues related to OpenSSL please contact openssl-core@openssl.org.
OpenSSL License
--------------============================================
Copyright (c) 1998-2007 The OpenSSL Project. All rights reserved.
Redistribution and use in source and binary forms, with or without modification, are permitted provided that the following
conditions are met:
Redistributions of source code must retain the above copyright notice, this list of conditions and the
following disclaimer.
Redistributions in binary form must reproduce the above copyright notice, this list of conditions and the following disclaimer in the
documentation and/or other materials provided with the distribution.
All advertising materials mentioning features or use of this software must display the following acknowledgment:
"This product includes software developed by the OpenSSL Project for use in the OpenSSL Toolkit. (http://www.openssl.org/)"
The names "OpenSSL Toolkit" and "OpenSSL Project" must not be used to endorse or promote products derived from this
software without prior written permission. For written permission, please contact openssl-core@openssl.org.
Products derived from this software may not be called "OpenSSL" nor may "OpenSSL" appear in their names without prior written
permission of the OpenSSL Project.
Redistributions of any form whatsoever must retain the following acknowledgment:
"This product includes software developed by the OpenSSL Project for use in the OpenSSL Toolkit
(http://www.openssl.org/)"
THIS SOFTWARE IS PROVIDED BY THE OpenSSL PROJECT "AS IS" AND ANY EXPRESSED OR IMPLIED WARRANTIES,
INCLUDING, BUT NOT LIMITED TO, THE IMPLIED WARRANTIES OF MERCHANTABILITY AND FITNESS FOR A
PARTICULAR PURPOSE ARE DISCLAIMED. IN NO EVENT SHALL THE OpenSSL PROJECT OR ITS CONTRIBUTORS BE
LIABLE FOR ANY DIRECT, INDIRECT, INCIDENTAL, SPECIAL, EXEMPLARY, OR CONSEQUENTIAL DAMAGES (INCLUDING,
BUT NOT LIMITED TO, PROCUREMENT OF SUBSTITUTE GOODS OR SERVICES; LOSS OF USE, DATA, OR PROFITS; OR
BUSINESS INTERRUPTION) HOWEVER CAUSED AND ON ANY THEORY OF LIABILITY, WHETHER IN CONTRACT, STRICT
LIABILITY, OR TORT (INCLUDING NEGLIGENCE OR OTHERWISE) ARISING IN ANY WAY OUT OF THE USE OF THIS
SOFTWARE, EVEN IF ADVISED OF THE POSSIBILITY OF SUCH DAMAGE.
============================================
This product includes cryptographic software written by Eric Young (eay@cryptsoft.com). This product includes software written
by Tim Hudson (tjh@cryptsoft.com).
Original SSLeay License
--------------------------Copyright (C) 1995-1998 Eric Young (eay@cryptsoft.com) All rights reserved.
This package is an SSL implementation written by Eric Young (eay@cryptsoft.com).
The implementation was written so as to conform with Netscapes SSL.
This library is free for commercial and non-commercial use as long as the following conditions are aheared to. The following
conditions apply to all code found in this distribution, be it the RC4, RSA, lhash, DES, etc., code; not just the SSL code. The SSL
documentation included with this distribution is covered by the same copyright terms except that the holder is Tim Hudson (tjh@
cryptsoft.com).
Copyright remains Eric Young's, and as such any Copyright notices in the code are not to be removed.
If this package is used in a product, Eric Young should be given attribution as the author of the parts of the library used.
This can be in the form of a textual message at program startup or in documentation (online or textual) provided with the package.
Redistribution and use in source and binary forms, with or without modification, are permitted provided that the following
conditions are met:
Redistributions of source code must retain the copyright notice, this list of conditions and the following
disclaimer.
Redistributions in binary form must reproduce the above copyright notice, this list of conditions and the following disclaimer in the
documentation and/or other materials provided with the distribution.
All advertising materials mentioning features or use of this software must display the following acknowledgement: "Eric Young
(eay@cryptsoft.com)"
The word `cryptographic' can be left out if the rouines from the library being used are not cryptographic related :-).
If you include any Windows specific code (or a derivative thereof) from the apps directory (application code) you must include an
acknowledgement: "This product includes software written by Tim Hudson (tjh@cryptsoft.com)"
THIS SOFTWARE IS PROVIDED BY ERIC YOUNG "AS IS" AND ANY EXPRESS OR IMPLIED WARRANTIES, INCLUDING,
BUT NOT LIMITED TO, THE IMPLIED WARRANTIES OF MERCHANTABILITY AND FITNESS FOR A PARTICULAR
PURPOSE ARE DISCLAIMED. IN NO EVENT SHALL THE AUTHOR OR CONTRIBUTORS BE LIABLE FOR ANY DIRECT,
INDIRECT, INCIDENTAL, SPECIAL, EXEMPLARY, OR CONSEQUENTIAL DAMAGES (INCLUDING, BUT NOT LIMITED
TO, PROCUREMENT OF SUBSTITUTE GOODS OR SERVICES; LOSS OF USE, DATA, OR PROFITS; OR BUSINESS
INTERRUPTION) HOWEVER CAUSED AND ON ANY THEORY OF LIABILITY, WHETHER IN CONTRACT, STRICT LIABILITY,
OR TORT (INCLUDING NEGLIGENCE OR OTHERWISE) ARISING IN ANY WAY OUT OF THE USE OF THIS SOFTWARE,
EVEN IF ADVISED OF THE POSSIBILITY OF SUCH DAMAGE.
============================================
(11) popt
Copyright (c) 1998 Red Hat Software
Permission is hereby granted, free of charge, to any person obtaining a copy of this software and associated documentation files
(the "Software"), to deal in the Software without restriction, including without limitation the rights to use, copy, modify, merge,
publish, distribute, sublicense, and/or sell copies of the Software, and to permit persons to whom the Software is furnished to do
so, subject to the following conditions:
The above copyright notice and this permission notice shall be included in all copies or substantial portions of the Software.
THE SOFTWARE IS PROVIDED "AS IS", WITHOUT WARRANTY OF ANY KIND, EXPRESS OR IMPLIED, INCLUDING
BUT NOT LIMITED TO THE WARRANTIES OF MERCHANTABILITY, FITNESS FOR A PARTICULAR PURPOSE AND
NONINFRINGEMENT. IN NO EVENT SHALL THE X CONSORTIUM BE LIABLE FOR ANY CLAIM, DAMAGES OR
OTHER LIABILITY, WHETHER IN AN ACTION OF CONTRACT, TORT OR OTHERWISE, ARISING FROM, OUT OF OR IN
CONNECTION WITH THE SOFTWARE OR THE USE OR OTHER DEALINGS IN THE SOFTWARE.
Except as contained in this notice, the name of the X Consortium shall not be used in advertising or otherwise to promote the sale,
use or other dealings in this Software without prior written authorization from the X Consortium.
(12) RSA Data Security, Inc. MD5 Message-Digest Algorithm
Copyright (C) 1991-2, RSA Data Security, Inc. Created 1991. All rights reserved.
License to copy and use this software is granted provided that it is identified as the "RSA Data Security, Inc. MD5 Message-Digest
Algorithm" in all material mentioning or referencing this software or this function.
License is also granted to make and use derivative works provided that such works are identified as "derived from the RSA Data
Security, Inc. MD5 Message-Digest Algorithm" in all material mentioning or referencing the derived work.
RSA Data Security, Inc. makes no representations concerning either the merchantability of this software or the suitability of this
software for any particular purpose. It is provided "as is" without express or implied warranty of any kind.
These notices must be retained in any copies of any part of this documentation and/or software.
(13) thttpd 2.25b
Copyright c 2000 by Jef Poskanzer <jef@mail.acme.com>. All rights reserved.
Redistribution and use in source and binary forms, with or without modification, are permitted provided that the following
conditions are met:
Redistributions of source code must retain the above copyright notice, this list of conditions and the
following disclaimer.
Redistributions in binary form must reproduce the above copyright notice, this list of conditions and the following disclaimer in the
documentation and/or other materials provided with the distribution.
THIS SOFTWARE IS PROVIDED BY THE AUTHOR AND CONTRIBUTORS "AS IS" AND ANY EXPRESS OR IMPLIED
WARRANTIES, INCLUDING, BUT NOT LIMITED TO, THE IMPLIED WARRANTIES OF MERCHANTABILITY AND FITNESS
FOR A PARTICULAR PURPOSE ARE DISCLAIMED. IN NO EVENT SHALL THE AUTHOR OR CONTRIBUTORS BE LIABLE
FOR ANY DIRECT, INDIRECT, INCIDENTAL, SPECIAL, EXEMPLARY, OR CONSEQUENTIAL DAMAGES (INCLUDING, BUT
NOT LIMITED TO, PROCUREMENT OF SUBSTITUTE GOODS OR SERVICES; LOSS OF USE, DATA, OR PROFITS; OR
BUSINESS INTERRUPTION) HOWEVER CAUSED AND ON ANY THEORY OF LIABILITY, WHETHER IN CONTRACT, STRICT
LIABILITY, OR TORT (INCLUDING NEGLIGENCE OR OTHERWISE) ARISING IN ANY WAY OUT OF THE USE OF THIS
SOFTWARE, EVEN IF ADVISED OF THE POSSIBILITY OF SUCH DAMAGE.
(14) zlib
zlib.h -- interface of the `zlib' general purpose compression library version 1.1.4, March 11th, 2002
Copyright (C) 1995-2002 Jean-loup Gailly and Mark Adler
This software is provided `as-is', without any express or implied warranty. In no event will the authors be held liable for any
damages arising from the use of this software.
Permission is granted to anyone to use this software for any purpose, including commercial applications, and to alter it and
redistribute it freely, subject to the following restrictions:
The origin of this software must not be misrepresented; you must not claim that you wrote the original
software. If you use this software in a product, an acknowledgment in the product documentation would be appreciated but is not
required.
Altered source versions must be plainly marked as such, and must not be misrepresented as being the original software.
This notice may not be removed or altered from any source distribution.
Jean-loup Gailly Mark Adler
jloup@gzip.org madler@alumni.caltech.edu
The data format used by the zlib library is described by RFCs (Request for Comments) 1950 to 1952 in the files
ftp://ds.internic.net/rfc/rfc1950.txt (zlib format), rfc1951.txt (deflate format) and rfc1952.txt (gzip format).
(15) Apple Lossless
Apache License
Version 2.0, January 2004
http://www.apache.org/licenses/
TERMS AND CONDITIONS FOR USE, REPRODUCTION, AND DISTRIBUTION
Definitions.
"License" shall mean the terms and conditions for use, reproduction, and distribution as defined by Sections 1 through 9 of this
document.
"Licensor" shall mean the copyright owner or entity authorized by the copyright owner that is granting the License.
"Legal Entity" shall mean the union of the acting entity and all other entities that control, are controlled by, or are under common
control with that entity. For the purposes of this definition, "control" means (i) the power, direct or indirect, to cause the direction or
management of such entity, whether by contract or otherwise, or (ii) ownership of fifty percent (50%) or more of the outstanding
shares, or (iii) beneficial ownership of such entity.
Others
"You" (or "Your") shall mean an individual or Legal Entity exercising permissions granted by this License.
"Source" form shall mean the preferred form for making modifications, including but not limited to software source code,
documentation source, and configuration files.
"Object" form shall mean any form resulting from mechanical transformation or translation of a Source form, including but not
limited to compiled object code, generated documentation, and conversions to other media types.
"Work" shall mean the work of authorship, whether in Source or Object form, made available under the License, as indicated
by a copyright notice that is included in or attached to the work (an example is provided in the Appendix below).
"Derivative Works" shall mean any work, whether in Source or Object form, that is based on (or derived from) the Work and
for which the editorial revisions, annotations, elaborations, or other modifications represent, as a whole, an original work of
authorship. For the purposes of this License, Derivative Works shall not include works that remain separable from, or merely link
(or bind by name) to the interfaces of, the Work and Derivative Works thereof.
"Contribution" shall mean any work of authorship, including the original version of the Work and any modifications or additions
to that Work or Derivative Works thereof, that is intentionally submitted to Licensor for inclusion in the Work by the copyright
owner or by an individual or Legal Entity authorized to submit on behalf of the copyright owner. For the purposes of this definition,
"submitted" means any form of electronic, verbal, or written communication sent to the Licensor or its representatives, including
but not limited to communication on electronic mailing lists, source code control systems, and issue tracking systems that are
managed by, or on behalf of, the Licensor for the purpose of discussing and improving the Work, but excluding communication
that is conspicuously marked or otherwise designated in writing by the copyright owner as "Not a Contribution."
"Contributor" shall mean Licensor and any individual or Legal Entity on behalf of whom a Contribution has been received by
Licensor and subsequently incorporated within the Work.
Grant of Copyright License.
Subject to the terms and conditions of this License, each Contributor hereby grants to You a perpetual, worldwide, non-exclusive,
no-charge, royalty-free, irrevocable copyright license to reproduce, prepare Derivative Works of, publicly display, publicly perform,
sublicense, and distribute the Work and such Derivative Works in Source or Object form.
Grant of Patent License.
Subject to the terms and conditions of this License, each Contributor hereby grants to You a perpetual, worldwide, non-exclusive,
no-charge, royalty-free, irrevocable (except as stated in this section) patent license to make, have made, use, offer to sell, sell,
import, and otherwise transfer the Work, where such license applies only to those patent claims licensable by such Contributor
that are necessarily infringed by their Contribution(s) alone or by combination of their Contribution(s) with the Work to which such
Contribution(s) was submitted. If You institute patent litigation against any entity (including a cross-claim or counterclaim in a
lawsuit) alleging that the Work or a Contribution incorporated within the Work constitutes direct or contributory patent infringement,
then any patent licenses granted to You under this License for that Work shall terminate as of the date such litigation is filed.
Redistribution.
You may reproduce and distribute copies of the Work or Derivative Works thereof in any medium, with or without modifications,
and in Source or Object form, provided that You meet the following conditions:
You must give any other recipients of the Work or Derivative Works a copy of this License; and
You must cause any modified files to carry prominent notices stating that You changed the files; and
You must retain, in the Source form of any Derivative Works that You distribute, all copyright, patent, trademark, and attribution
notices from the Source form of the Work, excluding those notices that do not pertain to any part of the Derivative Works; and
If the Work includes a "NOTICE" text file as part of its distribution, then any Derivative Works that You distribute must include
a readable copy of the attribution notices contained within such NOTICE file, excluding those notices that do not pertain to any
part of the Derivative Works, in at least one of the following places: within a NOTICE text file distributed as part of the Derivative
Works; within the Source form or documentation, if provided along with the Derivative Works; or, within a display generated
by the Derivative Works, if and wherever such third-party notices normally appear. The contents of the NOTICE file are for
informational purposes only and do not modify the License. You may add Your own attribution notices within Derivative Works that
You distribute, alongside or as an addendum to the NOTICE text from the Work, provided that such additional attribution notices
cannot be construed as modifying the License.
You may add Your own copyright statement to Your modifications and may provide additional or different license terms and
conditions for use, reproduction, or distribution of Your modifications, or for any such Derivative Works as a whole, provided Your
use, reproduction, and distribution of the Work otherwise complies with the conditions stated in this License.
Submission of Contributions.
Unless You explicitly state otherwise, any Contribution intentionally submitted for inclusion in the Work by You to the Licensor shall
be under the terms and conditions of this License, without any additional terms or conditions.
Notwithstanding the above, nothing herein shall supersede or modify the terms of any separate license agreement you may have
executed with Licensor regarding such Contributions.
Trademarks.
This License does not grant permission to use the trade names, trademarks, service marks, or product names of the Licensor,
except as required for reasonable and customary use in describing the origin of the Work and reproducing the content of the
NOTICE file.
Disclaimer of Warranty.
Unless required by applicable law or agreed to in writing, Licensor provides the Work (and each Contributor provides its
Contributions) on an "AS IS" BASIS, WITHOUT WARRANTIES OR CONDITIONS OF ANY KIND, either express or implied,
including, without limitation, any warranties or conditions of TITLE, NON-INFRINGEMENT, MERCHANTABILITY, or FITNESS
FOR A PARTICULAR PURPOSE. You are solely responsible for determining the appropriateness of using or redistributing the
Work and assume any risks associated with Your exercise of permissions under this License.
Limitation of Liability.
En-29
Page 30

In no event and under no legal theory, whether in tort (including negligence), contract, or otherwise, unless required by applicable
law (such as deliberate and grossly negligent acts) or agreed to in writing, shall any Contributor be liable to You for damages,
including any direct, indirect, special, incidental, or consequential damages of any character arising as a result of this License
or out of the use or inability to use the Work (including but not limited to damages for loss of goodwill, work stoppage, computer
failure or malfunction, or any and all other commercial damages or losses), even if such Contributor has been advised of the
possibility of such damages.
Accepting Warranty or Additional Liability.
While redistributing the Work or Derivative Works thereof, You may choose to offer, and charge a fee for, acceptance of
support, warranty, indemnity, or other liability obligations and/or rights consistent with this License. However, in accepting such
obligations, You may act only on Your own behalf and on Your sole responsibility, not on behalf of any other Contributor, and only
if You agree to indemnify, defend, and hold each Contributor harmless for any liability incurred by, or claims asserted against,
such Contributor by reason of your accepting any such warranty or additional liability.
END OF TERMS AND CONDITIONS
APPENDIX: How to apply the Apache License to your work.
To apply the Apache License to your work, attach the following boilerplate notice, with the fields enclosed by brackets "[]"
replaced with your own identifying information. (Don't include the brackets!) The text should be enclosed in the appropriate
comment syntax for the file format. We also recommend that a file or class name and description of purpose be included on the
same "printed page" as the copyright notice for easier identification within third-party archives.
Copyright © 2011 Apple Inc. All rights reserved.
Licensed under the Apache License, Version 2.0 (the "License");
you may not use this file except in compliance with the License.
You may obtain a copy of the License at
http://www.apache.org/licenses/LICENSE-2.0
Unless required by applicable law or agreed to in writing, software distributed under the License is distributed on an "AS IS"
BASIS, WITHOUT WARRANTIES OR CONDITIONS OF ANY KIND, either express or implied.
See the License for the specific language governing permissions and limitations under
the License.
(16) Boost
http://www.boost.org/
Boost Software License - Version 1.0 - August 17th, 2003
Permission is hereby granted, free of charge, to any person or organization obtaining a copy of the software and accompanying
documentation covered by this license (the "Software") to use, reproduce, display, distribute, execute, and transmit the Software,
and to prepare derivative works of the Software, and to permit third-parties to whom the Software is furnished to do so, all subject
to the following:
The copyright notices in the Software and this entire statement, including the above license grant, this restriction and the
following disclaimer, must be included in all copies of the Software, in whole or in part, and all derivative works of the Software,
unless such copies or derivative works are solely in the form of machine-executable object code generated by a source language
processor.
THE SOFTWARE IS PROVIDED "AS IS", WITHOUT WARRANTY OF ANY KIND, EXPRESS OR IMPLIED, INCLUDING BUT
NOT LIMITED TO THE WARRANTIES OF MERCHANTABILITY, FITNESS FOR A PARTICULAR PURPOSE, TITLE AND NONINFRINGEMENT. IN NO EVENT SHALL THE COPYRIGHT HOLDERS OR ANYONE DISTRIBUTING THE SOFTWARE BE
LIABLE FOR ANY DAMAGES OR OTHER LIABILITY, WHETHER IN CONTRACT, TORT OR OTHERWISE, ARISING FROM,
OUT OF OR IN CONNECTION WITH THE SOFTWARE OR THE USE OR OTHER DEALINGS IN THE SOFTWARE.
(17) Expat
http://www.jclark.com/xml/expat.html
Expat License. Copyright (c) 1998, 1999, 2000 Thai Open Source Software Center Ltd
Permission is hereby granted, free of charge, to any person obtaining a copy of this software and associated documentation files
(the "Software"), to deal in the Software without restriction, including without limitation the rights to use, copy, modify, merge,
publish, distribute, sublicense, and/or sell copies of the Software, and to permit persons to whom the Software is furnished to do
so, subject to the following conditions:
The above copyright notice and this permission notice shall be included in all copies or substantial portions of the Software.
THE SOFTWARE IS PROVIDED "AS IS", WITHOUT WARRANTY OF ANY KIND, EXPRESS OR IMPLIED, INCLUDING
BUT NOT LIMITED TO THE WARRANTIES OF MERCHANTABILITY, FITNESS FOR A PARTICULAR PURPOSE AND
NONINFRINGEMENT. IN NO EVENT SHALL THE AUTHORS OR COPYRIGHT HOLDERS BE LIABLE FOR ANY CLAIM,
DAMAGES OR OTHER LIABILITY, WHETHER IN AN ACTION OF CONTRACT, TORT OR OTHERWISE, ARISING FROM, OUT
OF OR IN CONNECTION WITH THE SOFTWARE OR THE USE OR OTHER DEALINGS IN THE SOFTWARE.
(18) FastDelegate
http://www.codeproject.com/KB/cpp/FastDelegate.aspx
THE WORK (AS DEFINED BELOW) IS PROVIDED UNDER THE TERMS OF THIS CODE PROJECT OPEN LICENSE
("LICENSE"). THE WORK IS PROTECTED BY COPYRIGHT AND/OR OTHER APPLICABLE LAW. ANY USE OF THE WORK
OTHER THAN AS AUTHORIZED UNDER THIS LICENSE OR COPYRIGHT LAW IS PROHIBITED.
BY EXERCISING ANY RIGHTS TO THE WORK PROVIDED HEREIN, YOU ACCEPT AND AGREE TO BE BOUND BY THE
TERMS OF THIS LICENSE. THE AUTHOR GRANTS YOU THE RIGHTS CONTAINED HEREIN IN CONSIDERATION OF
YOUR ACCEPTANCE OF SUCH TERMS AND CONDITIONS. IF YOU DO NOT AGREE TO ACCEPT AND BE BOUND BY THE
TERMS OF THIS LICENSE, YOU CANNOT MAKE ANY USE OF THE WORK.
Definitions.
a. "Articles" means, collectively, all articles written by Author which describes how the Source Code and
Executable Files for the Work may be used by a user.
b. "Author" means the individual or entity that offers the Work under the terms of this License.
c. "Derivative Work" means a work based upon the Work or upon the Work and other pre-existing works.
d. "Executable Files" refer to the executables, binary files, configuration and any required data files included
in the Work.
e. "Publisher" means the provider of the website, magazine, CD-ROM, DVD or other medium from or by
which the Work is obtained by You.
f. "Source Code" refers to the collection of source code and configuration files used to create the Executable
Files.
g. "Standard Version" refers to such a Work if it has not been modified, or has been modified in accordance
with the consent of the Author, such consent being in the full discretion of the Author.
h. "Work" refers to the collection of files distributed by the Publisher, including the Source Code, Executable
Files, binaries, data files, documentation, whitepapers and the Articles.
i. "You" is you, an individual or entity wishing to use the Work and exercise your rights under this License.
Fair Use/Fair Use Rights. Nothing in this License is intended to reduce, limit, or restrict any rights arising from fair use, fair
dealing, first sale or other limitations on the exclusive rights of the copyright owner under copyright law or other applicable laws.
License Grant. Subject to the terms and conditions of this License, the Author hereby grants You a worldwide, royalty-free, nonexclusive, perpetual (for the duration of the applicable copyright) license to exercise the rights in the Work as stated below:
a. You may use the standard version of the Source Code or Executable Files in Your own applications.
b. You may apply bug fixes, portability fixes and other modifications obtained from the Public Domain or from
the Author. A Work modified in such a way shall still be considered the standard version and will be subject to this License.
c. You may otherwise modify Your copy of this Work (excluding the Articles) in any way to create a Derivative
Work, provided that You insert a prominent notice in each changed file stating how, when and where You changed that file.
d. You may distribute the standard version of the Executable Files and Source Code or Derivative Work in
aggregate with other (possibly commercial) programs as part of a larger (possibly commercial) software distribution.
e. The Articles discussing the Work published in any form by the author may not be distributed or republished
without the Author's consent. The author retains copyright to any such Articles. You may use the Executable Files and Source
Code pursuant to this License but you may not repost or republish or otherwise distribute or make available the Articles, without
the prior written consent of the Author.
Any subroutines or modules supplied by You and linked into the Source Code or Executable Files this Work shall not be
considered part of this Work and will not be subject to the terms of this License.
Patent License. Subject to the terms and conditions of this License, each Author hereby grants to You a perpetual, worldwide,
non-exclusive, no-charge, royalty-free, irrevocable (except as stated in this section) patent license to make, have made, use,
import, and otherwise transfer the Work.
Restrictions. The license granted in Section 3 above is expressly made subject to and limited by the following restrictions:
a. You agree not to remove any of the original copyright, patent, trademark, and attribution notices and
associated disclaimers that may appear in the Source Code or Executable Files.
b. You agree not to advertise or in any way imply that this Work is a product of Your own.
c. The name of the Author may not be used to endorse or promote products derived from the Work without
the prior written consent of the Author.
d. You agree not to sell, lease, or rent any part of the Work. This does not restrict you from including the Work
or any part of the Work inside a larger software distribution that itself is being sold. The Work by itself, though, cannot be sold,
leased or rented.
e. You may distribute the Executable Files and Source Code only under the terms of this License, and You
must include a copy of, or the Uniform Resource Identifier for, this License with every copy of the Executable Files or Source
Code You distribute and ensure that anyone receiving such Executable Files and Source Code agrees that the terms of this
License apply to such Executable Files and/or Source Code. You may not offer or impose any terms on the Work that alter
or restrict the terms of this License or the recipients' exercise of the rights granted hereunder. You may not sublicense the
Work. You must keep intact all notices that refer to this License and to the disclaimer of warranties. You may not distribute
the Executable Files or Source Code with any technological measures that control access or use of the Work in a manner
inconsistent with the terms of this License.
f. You agree not to use the Work for illegal, immoral or improper purposes, or on pages containing illegal,
immoral or improper material. The Work is subject to applicable export laws. You agree to comply with all such laws and
regulations that may apply to the Work after Your receipt of the Work.
Representations, Warranties and Disclaimer. THIS WORK IS PROVIDED "AS IS", "WHERE IS" AND "AS AVAILABLE",
WITHOUT ANY EXPRESS OR IMPLIED WARRANTIES OR CONDITIONS OR GUARANTEES. YOU, THE USER, ASSUME
ALL RISK IN ITS USE, INCLUDING COPYRIGHT INFRINGEMENT, PATENT INFRINGEMENT, SUITABILITY, ETC. AUTHOR
EXPRESSLY DISCLAIMS ALL EXPRESS, IMPLIED OR STATUTORY WARRANTIES OR CONDITIONS, INCLUDING
WITHOUT LIMITATION, WARRANTIES OR CONDITIONS OF MERCHANTABILITY, MERCHANTABLE QUALITY OR FITNESS
FOR A PARTICULAR PURPOSE, OR ANY WARRANTY OF TITLE OR NON-INFRINGEMENT, OR THAT THE WORK (OR ANY
PORTION THEREOF) IS CORRECT, USEFUL, BUG-FREE OR FREE OF VIRUSES. YOU MUST PASS THIS DISCLAIMER ON
WHENEVER YOU DISTRIBUTE THE WORK OR DERIVATIVE WORKS.
Indemnity. You agree to defend, indemnify and hold harmless the Author and the Publisher from and against any claims, suits,
losses, damages, liabilities, costs, and expenses (including reasonable legal or attorneys' fees) resulting from or relating to any
use of the Work by You.
Limitation on Liability. EXCEPT TO THE EXTENT REQUIRED BY APPLICABLE LAW, IN NO EVENT WILL THE AUTHOR OR
THE PUBLISHER BE LIABLE TO YOU ON ANY LEGAL THEORY FOR ANY SPECIAL, INCIDENTAL, CONSEQUENTIAL,
PUNITIVE OR EXEMPLARY DAMAGES ARISING OUT OF THIS LICENSE OR THE USE OF THE WORK OR OTHERWISE,
EVEN IF THE AUTHOR OR THE PUBLISHER HAS BEEN ADVISED OF THE POSSIBILITY OF SUCH DAMAGES.
Termination.
a. This License and the rights granted hereunder will terminate automatically upon any breach by You of any
term of this License. Individuals or entities who have received Derivative Works from You under this License, however, will not
have their licenses terminated provided such individuals or entities remain in full compliance with those licenses. Sections 1, 2, 6,
7, 8, 9, 10 and 11 will survive any termination of this License.
b. If You bring a copyright, trademark, patent or any other infringement claim against any contributor over
infringements You claim are made by the Work, your License from such contributor to the Work ends automatically.
c. Subject to the above terms and conditions, this License is perpetual (for the duration of the applicable
copyright in the Work). Notwithstanding the above, the Author reserves the right to release the Work under different license terms
or to stop distributing the Work at any time; provided, however that any such election will not serve to withdraw this License (or
any other license that has been, or is required to be, granted under the terms of this License), and this License will continue in
full force and effect unless terminated as stated above.
Publisher. The parties hereby confirm that the Publisher shall not, under any circumstances, be responsible for and shall not
have any liability in respect of the subject matter of this License. The Publisher makes no warranty whatsoever in connection with
the Work and shall not be liable to You or any party on any legal theory for any damages whatsoever, including without limitation
any general, special, incidental or consequential damages arising in connection to this license. The Publisher reserves the right
to cease making the Work available to You at any time without notice.
Miscellaneous
a. This License shall be governed by the laws of the location of the head office of the Author or if the Author is
an individual, the laws of location of the principal place of residence of the Author.
b. If any provision of this License is invalid or unenforceable under applicable law, it shall not affect the
validity or enforceability of the remainder of the terms of this License, and without further action by the parties to this License,
such provision shall be reformed to the minimum extent necessary to make such provision valid and enforceable.
c. No term or provision of this License shall be deemed waived and no breach consented to unless such
waiver or consent shall be in writing and signed by the party to be charged with such waiver or consent.
d. This License constitutes the entire agreement between the parties with respect to the Work licensed
herein. There are no understandings, agreements or representations with respect to the Work not specified herein. The Author
shall not be bound by any additional provisions that may appear in any communication from You. This License may not be
modified without the mutual written agreement of the Author and You.
(19) Tremolo
http://wss.co.uk/pinknoise/tremolo
Copyright (C) 2002-2009 Xiph.org Foundation Changes Copyright (C) 2009-2010 Robin Watts for Pinknoise Productions Ltd
Redistribution and use in source and binary forms, with or without modification, are permitted provided that the following
conditions are met:
Others
- Redistributions of source code must retain the above copyright notice, this list of conditions and the
following disclaimer.
- Redistributions in binary form must reproduce the above copyright notice, this list of conditions and the
following disclaimer in the documentation and/or other materials provided with the distribution.
- Neither the name of the Xiph.org Foundation nor the names of its contributors may be used to endorse or
promote products derived from this software without specific prior written permission.
THIS SOFTWARE IS PROVIDED BY THE COPYRIGHT HOLDERS AND CONTRIBUTORS "AS IS" AND ANY EXPRESS
OR IMPLIED WARRANTIES, INCLUDING, BUT NOT LIMITED TO, THE IMPLIED WARRANTIES OF MERCHANTABILITY
AND FITNESS FOR A PARTICULAR PURPOSE ARE DISCLAIMED. IN NO EVENT SHALL THE FOUNDATION OR
CONTRIBUTORS BE LIABLE FOR ANY DIRECT, INDIRECT, INCIDENTAL, SPECIAL, EXEMPLARY, OR CONSEQUENTIAL
DAMAGES (INCLUDING, BUT NOT LIMITED TO, PROCUREMENT OF SUBSTITUTE GOODS OR SERVICES; LOSS OF
USE, DATA, OR PROFITS; OR BUSINESS INTERRUPTION) HOWEVER CAUSED AND ON ANY THEORY OF LIABILITY,
WHETHER IN CONTRACT, STRICT LIABILITY, OR TORT (INCLUDING NEGLIGENCE OR OTHERWISE) ARISING IN ANY
WAY OUT OF THE USE OF THIS SOFTWARE, EVEN IF ADVISED OF THE POSSIBILITY OF SUCH DAMAGE.
(20) Tremor
http://wiki.xiph.org/index.php/Tremor
Copyright (c) 2002, Xiph.org Foundation
Redistribution and use in source and binary forms, with or without modification, are permitted provided that the following
conditions are met:
- Redistributions of source code must retain the above copyright notice, this list of conditions and the
following disclaimer.
- Redistributions in binary form must reproduce the above copyright notice, this list of conditions and the
following disclaimer in the documentation and/or other materials provided with the distribution.
- Neither the name of the Xiph.org Foundation nor the names of its contributors may be used to endorse or
promote products derived from this software without specific prior written permission.
THIS SOFTWARE IS PROVIDED BY THE COPYRIGHT HOLDERS AND CONTRIBUTORS "AS IS" AND ANY EXPRESS
OR IMPLIED WARRANTIES, INCLUDING, BUT NOT LIMITED TO, THE IMPLIED WARRANTIES OF MERCHANTABILITY
AND FITNESS FOR A PARTICULAR PURPOSE ARE DISCLAIMED. IN NO EVENT SHALL THE FOUNDATION OR
CONTRIBUTORS BE LIABLE FOR ANY DIRECT, INDIRECT, INCIDENTAL, SPECIAL, EXEMPLARY, OR CONSEQUENTIAL
DAMAGES (INCLUDING, BUT NOT LIMITED TO, PROCUREMENT OF SUBSTITUTE GOODS OR SERVICES; LOSS OF
USE, DATA, OR PROFITS; OR BUSINESS INTERRUPTION) HOWEVER CAUSED AND ON ANY THEORY OF LIABILITY,
WHETHER IN CONTRACT, STRICT LIABILITY, OR TORT (INCLUDING NEGLIGENCE OR OTHERWISE) ARISING IN ANY
WAY OUT OF THE USE OF THIS SOFTWARE, EVEN IF ADVISED OF THE POSSIBILITY OF SUCH DAMAGE.
(21) Mersenne Twister
http://www.math.sci.hiroshima-u.ac.jp/~m-mat/MT/MT2002/CODES/mt19937ar.c
Copyright (C) 1997 - 2002, Makoto Matsumoto and Takuji Nishimura,
All rights reserved.
Redistribution and use in source and binary forms, with or without modification, are permitted provided that the following
conditions are met:
Redistributions of source code must retain the above copyright notice, this list of conditions and the following disclaimer.
Redistributions in binary form must reproduce the above copyright notice, this list of conditions and the following disclaimer in the
documentation and/or other materials provided with the distribution.
The names of its contributors may not be used to endorse or promote products derived from this software without specific prior
written permission.
THIS SOFTWARE IS PROVIDED BY THE COPYRIGHT HOLDERS AND CONTRIBUTORS "AS IS" AND ANY EXPRESS
OR IMPLIED WARRANTIES, INCLUDING, BUT NOT LIMITED TO, THE IMPLIED WARRANTIES OF MERCHANTABILITY
AND FITNESS FOR A PARTICULAR PURPOSE ARE DISCLAIMED. IN NO EVENT SHALL THE COPYRIGHT OWNER OR
CONTRIBUTORS BE LIABLE FOR ANY DIRECT, INDIRECT, INCIDENTAL, SPECIAL, EXEMPLARY, OR CONSEQUENTIAL
DAMAGES (INCLUDING, BUT NOT LIMITED TO, PROCUREMENT OF SUBSTITUTE GOODS OR SERVICES; LOSS OF
USE, DATA, OR PROFITS; OR BUSINESS INTERRUPTION) HOWEVER CAUSED AND ON ANY THEORY OF LIABILITY,
WHETHER IN CONTRACT, STRICT LIABILITY, OR TORT (INCLUDING NEGLIGENCE OR OTHERWISE) ARISING IN ANY
WAY OUT OF THE USE OF THIS SOFTWARE, EVEN IF ADVISED OF THE POSSIBILITY OF SUCH DAMAGE.
(22) cURL
http://curl.haxx.se
COPYRIGHT AND PERMISSION NOTICE
Copyright (c) 1996 - 2011, Daniel Stenberg, <daniel@haxx.se>. All rights reserved.
Permission to use, copy, modify, and distribute this software for any purpose with or without fee is hereby granted, provided that
the above copyright notice and this permission notice appear in all copies.
THE SOFTWARE IS PROVIDED "AS IS", WITHOUT WARRANTY OF ANY KIND, EXPRESS OR IMPLIED, INCLUDING
BUT NOT LIMITED TO THE WARRANTIES OF MERCHANTABILITY, FITNESS FOR A PARTICULAR PURPOSE AND
NONINFRINGEMENT OF THIRD PARTY RIGHTS. IN NO EVENT SHALL THE AUTHORS OR COPYRIGHT HOLDERS
BE LIABLE FOR ANY CLAIM, DAMAGES OR OTHER LIABILITY, WHETHER IN AN ACTION OF CONTRACT, TORT OR
OTHERWISE, ARISING FROM, OUT OF OR IN CONNECTION WITH THE SOFTWARE OR THE USE OR OTHER DEALINGS
IN THE SOFTWARE.
Except as contained in this notice, the name of a copyright holder shall not be used in advertising or otherwise to promote the
sale, use or other dealings in this Software without prior written authorization of the copyright holder.
(23) c-ares
http://c-ares.haxx.se
Copyright 1998 by the Massachusetts Institute of Technology.
Permission to use, copy, modify, and distribute this software and its documentation for any purpose and without fee is hereby
granted, provided that the above copyright notice appear in all copies and that both that copyright notice and this permission
notice appear in supporting documentation, and that the name of M.I.T. not be used in advertising or publicity pertaining to
distribution of the software without specific, written prior permission. M.I.T. makes no representations about the suitability of this
software for any purpose. It is provided "as is" without express or implied warranty.
(24)LZ4
Copyright (c) 2011-2014, Yann Collet All rights reserved.
Redistribution and use in source and binary forms, with or without modification,are permitted provided that the following
conditions are met:
* Redistributions of source code must retain the above copyright notice, this list of conditions and the following disclaimer.
* Redistributions in binary form must reproduce the above copyright notice, this list of conditions and the following disclaimer in
the documentation and/or other materials provided with the distribution.
THIS SOFTWARE IS PROVIDED BY THE COPYRIGHT HOLDERS AND CONTRIBUTORS "AS IS" AND ANY EXPRESS
OR IMPLIED WARRANTIES, INCLUDING, BUT NOT LIMITED TO, THE IMPLIED WARRANTIES OF MERCHANTABILITY
AND FITNESS FOR A PARTICULAR PURPOSE ARE DISCLAIMED. IN NO EVENT SHALL THE COPYRIGHT HOLDER OR
CONTRIBUTORS BE LIABLE FOR ANY DIRECT, INDIRECT, INCIDENTAL, SPECIAL, EXEMPLARY, OR CONSEQUENTIAL
DAMAGES (INCLUDING, BUT NOT LIMITED TO, PROCUREMENT OF SUBSTITUTE GOODS OR SERVICES;
LOSS OF USE, DATA, OR PROFITS; OR BUSINESS INTERRUPTION) HOWEVER CAUSED AND ON
ANY THEORY OF LIABILITY, WHETHER IN CONTRACT, STRICT LIABILITY, OR TORT(INCLUDING NEGLIGENCE OR
OTHERWISE) ARISING IN ANY WAY OUT OF THE USE OF THISSOFTWARE, EVEN IF ADVISED OF THE POSSIBILITY OF
SUCH DAMAGE.
En-30
Page 31

En-31
Page 32

SN 29402051
(C) Cop
F1506-0
Supplied Accessories
Integra Division of
18 park W
T
http://www.integrahometheate
Integra Division of
Liegnitzerstrasse 6, 82194 Groebenzell, GERMANY
T
http://www.integra.eu
Integra Division of
302, Building 1, 20 North Chaling Rd., Xuhui District, Shanghai,
China 200032, T
http://www.integra.com.c
Integra Division of
Kitahama Chuo Bldg, 2-2-22 Kitahama, Chuo-ku, OSAKA 541-0041, JA
T
http://www.integraworldwide.com
How to use the remote controller
Indoor FM antenna --- (1)
AM loop antenna --- (1)
Remote controller (RC-901M) --- (1)
Batteries (AA/R6) --- (2)
Power cord --- (1)
Speaker setup microphone --- (1)
* The number in parenthesis indicates the quantity. On packaging, the
letter at the end of the product name indicates the color.
ay, Upper Saddle River, N.J. 07458, U.S.A.
el: 800-225-1946, 201-818-9200 Fax: 201-785-2650
el: +49-8142-4401-0 Fax: +49-8142-4208-213
r.com
Remote control sensor
Batteries (AA/R6)
Approx.
16 ft. (5 m)
* If you do not use the remote controller for a long time, remove the
batteries to prevent leakage.
* Note that keeping consumed batteries inside may cause corrosion
resulting in damage of the remote controller.
el: 86-21-52131366 Fax: 86-21-52130396
el: 072-831-8023 Fax: 072-831-8163
yright 2015 Onkyo Corporation Japan. All rights reserved. Onkyo has the Privacy Policy. You can review it at [http://www.onkyo.com/privacy/].
n
PAN
* 2 9 4 0 2 0 5 1 *
Page 33

CONTENTS
E
n
DTR-60.7/DTR-50.7
Advanced Manual
The Basic Manual includes information needed
when starting up and also instructions for
frequently used operations. The Advanced
Manual has more detailed information and
advanced settings.
Details on AM/FM reception 2
Tuning into a Radio Station 2
Presetting an AM/FM Radio Station 3
Using RDS (Australian models) 3
Playing Music Files on a USB Storage Device 5
Listening to Internet Radio 6
About Internet Radio 6
TuneIn Radio 6
R
Pandora
New Zealand only) 7
Spotify 8
SiriusXM Internet Radio (North American only) 8
Slacker Personal Radio (North American only) 9
Registering Other Internet Radios 10
Playing Music with DLNA 12
About DLNA 12
Configuring the Windows Media
DLNA Playback 12
Controlling Remote Playback from a PC 13
Playing Music Files in a Shared Folder 14
About Shared Folder 14
Setting PC 14
Playing from a Shared Folder 14
–Getting Started (U.S., Australia and
R
Player 12
Operating Music Files with the Remote Controller 16
About the Remote Controller 16
Remote Controller Buttons 16
Icons Displayed during Playback 16
Using the Listening Modes 17
Selecting Listening Mode 17
Listening Mode Types 17
Selectable Listening Modes 20
Checking the Input Format 32
Advanced Settings (Setup Menu) 33
How to Set 33
1. Input/Output Assign 34
2. Speaker 37
3. Audio Adjust 43
4. Source 45
5. Listening Mode Preset 46
6. Hardware 47
7. Remote Controller 62
8. Miscellaneous 62
Operating Other Components with the Remote
Controller 63
Functions of Remote Mode Buttons 63
Programming Remote Control Codes 63
TV operation 64
Blu-ray Disc player/DVD player/DVD recorder
operation 65
VCR/PVR operation 65
Satellite receiver / Cable receiver operation 66
CD player operation 66
Cassette tape deck operation 67
To operate CEC-compatible components 67
Advanced Connections 68
Connecting Bi-amp Speakers 68
Connecting Dipole Speakers 68
Connecting a Power Amplifier 68
Connecting and Operating Onkyo RI Components 69
About RI Function 69
RI Connection and Setting 69
R
iPod
/iPhoneR Operation 70
Control Function between the Unit and External
Component 71
Firmware Update 72
About Firmware Update 72
Updating the Firmware via Network 72
Updating the Firmware via USB 73
Troubleshooting 75
Reference Information 80
Page 34

Details on AM/FM reception
Tuning into a Radio Station
Tuning automatically
1. Press Tuner on the main unit several times to select
either "AM" or "FM".
2. Press Tuning Mode so that the "AUTO" indicator on the
display lights.
3. Press Tuning to start automatic tuning.
● Searching automatically stops when a station is
found. When tuned into a radio station, the "
TUNED " indicator on the display lights. When
tuned into an FM radio station, the "FM STEREO"
indicator lights.
● No sound is output while the " TUNED " indicator
is off.
Tuning manually
1. Press Tuner on the main unit several times to select
either "AM" or "FM".
2. Press Tuning Mode so that the "AUTO" indicator on the
display goes off.
3. Press Tuning to select the desired radio station.
● The frequency changes by 1 step each time
you press the button. The frequency changes
continuously if the button is held down and stops
when the button is released. Tune by looking at the
display.
To return to automatic tuning: Press Tuning Mode on the
main unit again. The unit automatically tunes into a radio
station. Normally "AUTO" should be displayed.
Details on AM/FM reception
2. Press D.TUN.
3. Using the number buttons, enter the frequency of the
radio station within 8 seconds.
● To enter 87.5 (FM), for example, press 8, 7, 5, or
8, 7, 5, 0. If you entered the wrong number, press
D.TUN and enter the correct one.
When the signal from an FM radio station is weak:
Radio wave may be weak depending on the building
structure and environmental conditions. In that case,
perform the manual tuning procedure as explained in the
next section, "Tuning manually", to manually select the
desired station.
En-2
Tuning to the frequency directly
It allows you to directly enter the frequency of the radio
station you want to listen to.
1. Press Tuner on the remote controller several times to
select either "AM" or "FM".
Page 35

Details on AM/FM reception
Presetting an AM/FM Radio Station
It allows you to register up to 40 of your favorite AM/FM
radio stations. Registering radio stations in advance allows
you to tune into your radio station of choice directly.
Registration Procedure
1. Tune into the AM/FM radio station you want to register.
2. Press Memory on the unit so that the preset number on
the display flashes.
3. Press Preset several times to select a number
between 1 and 40 while the preset number is flashing
(about 8 seconds).
4. Press Memory again to register the station.
● When the station is registered, the preset number
stops flashing.
● Repeat this procedure for all of your favorite AM/FM
radio stations.
Deleting a Preset Radio Station
1. Press CH +/- on the remote controller to select the
preset number to delete.
2. Press and hold Memory on the main unit and press
Tuning Mode to delete the preset number.
● When deleted, the number on the display goes off.
Using RDS (Australian models)
RDS stands for Radio Data System and is a method of
transmitting data in FM radio signals.
● RDS works only in areas where RDS broadcasts are
available.
● In some cases, the text information appeared on the
display is not identical to the content transmitted by
the RDS station. Furthermore, unexpected characters
may be displayed when the unit receives unsupported
characters. However, this is not a malfunction.
● If the signal from an RDS station is weak, the RDS data
may be displayed continuously or not at all.
PS (Program Service): Tuning into a radio station
distributing Program Service information displays the
radio station name. Pressing Display displays the
frequency for 3 seconds.
RT (Radio Text): Tuning into a radio station transmitting
Radio Text information displays text on the display of the
unit.
PTY (Program Type): Allows you to search for RDS
stations by program type.
TP (Traffic Program): Allows you to search for radio
stations transmitting traffic information.
Displaying Radio Text (RT)
1. Press RT/PTY/TP on the main unit once.
● The Radio Text (RT) is displayed scrolling across
the display. "No Text Data" is displayed when no text
information is available.
Selecting a Preset Radio Station
1. Press CH +/- on the remote controller to select a preset
number.
● Alternatively you can press Preset on the
main unit. You can also select by directly entering
the preset number with the number buttons on the
remote controller.
Searching by Type (PTY)
1. Press RT/PTY/TP on the main unit twice.
● The current program type appears on the display.
En-3
Page 36

2. Press Preset to select the type of program to search
for.
Details on AM/FM reception
3. Press Enter to search the radio stations of the selected
type.
● The following RDS station types are displayed:
None
News (News reports)
Affairs (Current affairs)
Info (Information)
Sport
Educate (Education)
Drama
Culture
Science (Science and technology)
Varied
Pop M (Pop music)
Rock M (Rock music)
Easy M (Middle of the road music)
Light M (Light classics)
Classics (Serious classics)
Other M (Other music)
Weather
Finance
Children (Children's programmes)
Social (Social affairs)
Religion
Phone In
Travel
Leisure
Jazz (Jazz music)
Country (Country music)
Nation M (National music)
Oldies (Oldies music)
Folk M (Folk music)
Document (Documentary)
4. When such a radio station is found, the indication on the
display flashes. Then, press Enter again.
● If no stations are found, the message "Not Found" is
displayed.
Listening to Traffic Information (TP)
1. Press RT/PTY/TP on the main unit three times.
● "[TP]" will be displayed if traffic information is
transmitted by the radio station you are tuned in.
"TP" only is displayed if no traffic information is
available.
2. Press Enter to search a radio station distributing traffic
information.
3. When a radio station is found, searching stops and
traffic information is received.
● "Not Found" is displayed if no radio station
distributing traffic information is found.
En-4
Page 37

Playing Music Files on a USB
Storage Device
● Operation: You can set up by viewing the guidance
displayed on the TV screen (OSD). Select the item with the
cursor buttons of the remote controller and press Enter to
confirm your selection. To return to the previous screen,
press Return.
● If the OSD language is set to Chinese, the operations
in this section are not displayed on the TV. Operate by
looking at the display on the main unit. Note that the
display on the main unit does not support the display
of Chinese characters. Characters that cannot be
displayed are replaced with asterisks ( ).
Playing Back
1. Plug your USB storage device with the music files into
the USB port on the rear of the unit.
2. Press NET on the remote controller to display the NET
TOP screen.
Network
TuneIn Radio
Pandora
Spotify
SiriusXM Internet Radio
Slacker Personal Radio
Deezer
AirPlay
Playing Music Files on a USB Storage Device
5. With the cursors, select the music file to play, and then
press Enter or
● The USB port of this unit conforms with the USB 1.1
standard. The transfer speed may be insufficient
for some content you play, which may cause some
interruption in sound.
to start playback.
3. Select "USB" with the cursors and press Enter.
● If the "USB" indicator on the display flashes, check
whether the USB storage device is plugged in
properly.
● Do not unplug the USB storage device while
"Connecting..." is on the display. This may cause
data corruption or malfunction.
4. Press Enter again in the next screen. The list of
folders and music files on the USB storage device are
displayed. Select the folder with the cursors and press
Enter to confirm your selection.
En-5
Page 38

Listening to Internet Radio
Listening to Internet Radio
About Internet Radio
The unit comes preset with Internet radio stations such
as TuneIn Radio for you to enjoy these services, just by
connecting the unit to the Internet.
● Network services or contents may become unavailable if
the service provider terminates its service.
Network
TuneIn Radio
Pandora
Spotify
SiriusXM Internet Radio
Slacker Personal Radio
Deezer
AirPlay
TuneIn Radio
With more than 70,000 radio stations and 2 million ondemand programs registered, TuneIn Radio is a service
where you can enjoy music, sports and news from all over
the world.
● Operation: You can set up by viewing the guidance
displayed on the TV screen (OSD). Select the item with the
cursor buttons of the remote controller and press Enter to
confirm your selection. To return to the previous screen,
press Return.
● If the OSD language is set to Chinese, the operations
in this section are not displayed on the TV. Operate by
looking at the display on the main unit. Note that the
display on the main unit does not support the display
of Chinese characters. Characters that cannot be
displayed are replaced with asterisks (
).
Playing Back
1. Press NET on the remote controller to display the NET
TOP screen.
Network
TuneIn Radio
Pandora
Spotify
SiriusXM Internet Radio
Slacker Personal Radio
Deezer
AirPlay
2. Select "TuneIn Radio" with the cursors and press Enter
to display the TuneIn Radio top screen.
3. With the cursors, select a radio station or program and
press Enter to start playing.
Regarding the TuneIn Radio Menu
To display the TuneIn menu, press Menu or Enter while
playing a radio station. Selecting the corresponding menu
item with the cursors and pressing Enter allows you to
perform the following operations:
Add to My Presets: Registers the radio station or
program being broadcast in "My Presets". Once
registered, "My Presets" is displayed in the level under
TuneIn Radio. To play, select the program from "My
Presets".
Remove from My Presets: Deletes a radio station or
program from your "My Presets" within TuneIn Radio.
Report a problem: Reports a problem or interactively
solves a problem related to TuneIn Radio.
View Schedule: Displays the radio station or program
schedule.
Clear recents: Clears all radio stations and programs
from the "Recents" within TuneIn Radio. (This menu is
displayed only when a radio station or program inside
the "Recents" is being played.)
Add to My Favorites: Registers the radio station
or program being broadcast in "My Favorites". "My
Favorites" are displayed in the level under the one
displayed when you press NET. To play, select the
program from "My Favorites".
En-6
Page 39

Listening to Internet Radio
Regarding the TuneIn Radio Account
Creating an account on the TuneIn Radio website
(tunein.com) and logging in it from the unit allows you to
automatically add radio stations and programs to your "My
Presets" on the unit as you follow them on the website. "My
Presets" are displayed in the level under TuneIn Radio.
To display a radio station registered in "My Presets", you
must log into TuneIn Radio from the unit. To log in, select
"Login" - "I have a TuneIn account" in the "TuneIn Radio"
top list on the unit, and then enter your user name and
password.
● If you associate the device on My Page within the
TuneIn Radio website using the registration code
obtained by selecting "Login" - "Login with a registration
code" on the unit, you can log in without entering the
user name and password.
PandoraR–Getting Started (U.S., Australia and New Zealand only)
Pandora is a free, personalized Internet radio service that
plays the music you know and helps you discover music
you’ll love.
● Operation: You can set up by viewing the guidance
displayed on the TV screen (OSD). Select the item with the
cursor buttons of the remote controller and press Enter to
confirm your selection. To return to the previous screen,
press Return.
● If the OSD language is set to Chinese, the operations
in this section are not displayed on the TV. Operate by
looking at the display on the main unit. Note that the
display on the main unit does not support the display
of Chinese characters. Characters that cannot be
displayed are replaced with asterisks (
).
Playing Back
1. Press NET on the remote controller to display NET TOP
screen.
Network
TuneIn Radio
Pandora
Spotify
SiriusXM Internet Radio
Slacker Personal Radio
Deezer
AirPlay
2. With the cursors on the remote controller, select
"Pandora", and then press Enter.
3. Use
/ to select "I have a Pandora Account" or "I’m
new to Pandora" and then press Enter.
If you are new to Pandora select "I’m new to Pandora".
You will see an activation code on your TV screen.
Please write down this code. Go to an Internet
connected computer and point your browser to www.
pandora.com/integra. Enter your activation code and
then follow the instructions to create your Pandora
account and your personalized Pandora stations. You
can create your stations by entering your favorite tracks
and artists when prompted. After you have created your
account and stations you can return to your Integra
receiver and press Enter to begin listening to your
personalized Pandora.
If you have an existing Pandora account, you can
add your Pandora account to your Integra receiver by
selecting "I have a Pandora Account" and logging in with
your email and password.
● If you want to use multiple user accounts, see "Using
Multiple Accounts". Login can be made from the
"Users" screen.
4. To play a station, use
/ to select the station from your
station list, and then press Enter. Playback starts and
the playback screen appears.
Create a New Station
Enter the name of a track, artist, or genre and Pandora will
create a unique radio station for you based on the musical
qualities of that track, artist, or genre.
I like this track: Give a track "thumbs-up" and Pandora
will play more music like it.
I don’t like this track: Give a track "thumbs-down" and
Pandora will ban that track from the current station.
En-7
Page 40

Why is this track playing?: Discover some of the
musical attributes that Pandora uses to create your
personal radio stations.
I’m tired of this track: If you are tired of a track, you
can put the track to sleep and Pandora will not play it for
one month.
Create station from this artist: Creates a radio station
from this artist.
Create station from this track: Creates a radio station
from this track.
Delete this station: This will permanently delete a
station from your Pandora account. All of your thumbs
feedback will be lost should you choose to re-create the
station with the same track or artist.
Rename this station: Lets you rename the current
radio station.
Bookmark this artist: Pandora will bookmark your
favorite artist for your profile on www.pandora.com.
Bookmark this track: Pandora will bookmark the
current track and allow you to buy them all from Amazon
or iTunes in one step!
Add to My Favorites: Adds a station to My Favorites
list.
PANDORA, the PANDORA logo, and the Pandora trade
dress are trademarks or registered trademarks of Pandora
Media, Inc. Used with permission.
Spotify
This unit is compatible with Spotify Connect. To enable
Spotify Connect, install the Spotify application on your
smartphone or tablet and create a Spotify premium
account.
● The unit and smartphone or tablet must be connected to
the same router.
● Refer to the following for the procedures for configuring
Spotify:
www.spotify.com/connect/
● The Spotify software is subject to third party licenses
found here:
www.spotify.com/connect/third-party-licenses
Playing Back
Just by clicking the Connect icon in the playback screen
of the Spotify application and selecting this unit, you can
automatically turn this unit on (auto power on function),
switch input to the NET position, and start playback of highquality streaming from Spotify. To enable the auto power on
function, make sure the "Network Standby" setting item in
this unit's Setup is "On".
Notes for using the multi-zone function
● To enjoy Spotify music in a separate room, select Zone
2/Zone 3, and manually select "NET" as the input of
the separate room. Also select this unit in the Spotify
application.
● You can adjust the volume in the Spotify app only when
either outputting to Zone 2 when "Zone 2 Out" is set to
"Variable" and you have connected a pre-main amplifier,
or when you have connected to the speakers in the
separate room. In other cases, adjust the volume on the
audio equipment placed in a separate room.
● To enjoy Spotify music in the main room after playing
it in a separate room, select "NET" as the input of the
main room.
Listening to Internet Radio
SiriusXM Internet Radio (North American only)
If you want to listen to the service, you must subscribe. To
subscribe go to www.siriusxm.com/internetradio with your
computer. When you subscribe, you will be provided with
a username and password which has to be entered into
the AV receiver. To use SiriusXM Internet Radio, you must
have your AV receiver connected to the Internet. Using the
remote control, follow these steps:
● Operation: You can set up by viewing the guidance
displayed on the TV screen (OSD). Select the item with the
cursor buttons of the remote controller and press Enter to
confirm your selection. To return to the previous screen,
press Return.
● If the OSD language is set to Chinese, the operations
in this section are not displayed on the TV. Operate by
looking at the display on the main unit. Note that the
display on the main unit does not support the display
of Chinese characters. Characters that cannot be
displayed are replaced with asterisks (
).
En-8
Page 41

Playing Back
1. Press NET on the remote controller to display NET TOP
screen.
Network
TuneIn Radio
Pandora
Spotify
SiriusXM Internet Radio
Slacker Personal Radio
Deezer
AirPlay
2. With the cursors on the remote controller, select
"SiriusXM Internet Radio", and then press Enter.
3. Select "Sign In", and then press Enter. If you have an
existing SIRIUS account, you can sign in by selecting
"Sign In". Enter your user name and password in the
next keyboard screen, or in Web Setup. If you do not
know your username or password, call Sirius XM at
(888) 539-7474 for assistance.
● If you want to use multiple user accounts, see "Using
Multiple Accounts". Login can be made from the
"Users" screen.
Using the keyboard screen
1 Use / / / and Enter to enter your user name and
password.
2 Select "OK".
3 Press Enter. The "Confirm your entries" screen
appears.
4 Press Enter. "Please wait..." appears and then
"SiriusXM Internet Radio" screen appears which
displays the category available for selection.
4. Use / to select the category and then press Enter. The
channel list screen for the selected category appears.
5. Use
/ to select the desired channel and then press
Enter.
The playback screen for the selected channel appears
and you can listen to SiriusXM Internet Radio. You can
control the tracks with the buttons on the remote control.
Enabled buttons:
, , ,
Add to My Favorites: Adds a channel to My Favorites
list.
Add to Presets: Adds the currently playing station to
presets list.
Delete from Presets: Deletes the currently playing
station from presets list.
SiriusXM Internet Radio subscriptions are sold separately
and are governed by the Sirius Terms and Conditions (see
www.sirius.com). Be sure to read this agreement before
you purchase your subscription.
Sirius, XM and all related marks and logos are trademarks
of Sirius XM Radio Inc. and its subsidiaries. All rights
reserved.
Listening to Internet Radio
Slacker Personal Radio (North American only)
● Operation: You can set up by viewing the guidance
displayed on the TV screen (OSD). Select the item with the
cursor buttons of the remote controller and press Enter to
confirm your selection. To return to the previous screen,
press Return.
● If the OSD language is set to Chinese, the operations
in this section are not displayed on the TV. Operate by
looking at the display on the main unit. Note that the
display on the main unit does not support the display
of Chinese characters. Characters that cannot be
displayed are replaced with asterisks ( ).
Playing Back
1. Press NET on the remote controller to display NET TOP
screen.
En-9
Page 42

Network
TuneIn Radio
Pandora
Spotify
SiriusXM Internet Radio
Slacker Personal Radio
Deezer
AirPlay
2. With the cursors on the remote controller, select
"Slacker Personal Radio", and then press Enter.
3. If you do not have an account, create one on the Slacker
website (www.slacker.com) with your computer. If you
already have a Slacker account, select "Sign in to your
account" and then press Enter. The keyboard screen
appears. You can enter information from the remote
control or the keys on the main unit.
4. If there are no mistakes in the information you have
entered, use
/ / / to select "OK" then press Enter.
An account information confirmation screen appears.
5. If you do not have an account, select "Access without
Sign In" and press Enter to use a restricted version of
the service. Note that use will be restricted.
● If you want to use multiple user accounts, see "Using
Multiple Accounts". Login can be made from the
"Users" screen.
6. Use
/ to select a menu item and then press Enter. To
sign out, use / to select "Sign out" from this screen
and then press Enter.
7. Use
/ to select a station and then press Enter or
to start playback from the station. The playback screen
appears.
8. You can control the tracks with the buttons on the
remote control.
Enabled buttons:
, , ,
Rate Song as Favorite: Stores information to server,
making it more likely that the song will be played again.
Ban Song: Stores information to server, making it less
likely that the song will be played again.
Ban Artist: Stores information to server, making it less
likely that the songs from this artist will be played again.
Mark Favorite: Adds the currently playing station to
your favorites.
Unmark Favorite: Deletes the currently playing station
from your favorites.
Add song to Library: Adds the currently playing track
to your library.
Delete song from Library: Deletes the currently
playing track from your library.
Add to My Favorites: Adds a station or song to My
Favorites list.
Using Multiple Accounts: The AV receiver supports
multiple user accounts, which means you can freely switch
between several logins. After registering user accounts,
login is performed from the "Users" screen.
Press Menu while the Users screen is displayed. "Add new
user", "Remove this user" menu appear. You can either
store a new user account, or delete an existing one.
● Some of the services do not allow the use of multiple
user accounts.
● You can store up to 10 user accounts.
● To switch between accounts you must first log out from
the current account, and log in again on the "Users"
screen.
Listening to Internet Radio
Registering Other Internet Radios
To listen to other Internet radio program, register the
program in the "My Favorites" list as described in the next
section. "My Favorites" are displayed in the level under the
one displayed when you press NET.
● You can register up to 40 Internet radio stations.
● The unit supports Internet radio stations stored in the
following formats: PLS (URL ending in .pls), M3U (URL
ending in .m3u) and RSS (URL ending in rss/rdf/xml).
Depending on the data type and playback format, there
may be some you cannot play.
● Available services may vary depending on your area of
residence.
● Operation: You can set up by viewing the guidance
displayed on the TV screen (OSD). Select the item with the
cursor buttons of the remote controller and press Enter to
confirm your selection. To return to the previous screen,
press Return.
● If the OSD language is set to Chinese, the operations
in this section are not displayed on the TV. Operate by
looking at the display on the main unit. Note that the
display on the main unit does not support the display
of Chinese characters. Characters that cannot be
displayed are replaced with asterisks (
Registration Procedure
Before Performing any Operation: The name and URL
of the radio station that you want to add are required for
registration. Check the specifications before use.
).
En-10
Page 43

1. Press NET on the remote controller to display the NET
TOP screen.
1. Press RCV on the remote controller.
● Always press RCV first to change the remote
controller to RECEIVER mode (the mode to operate
this unit) since its mode may be changed to operate
another component.
Listening to Internet Radio
Playing a Registered Radio Station
1. Press NET on the remote controller to display the NET
TOP screen.
Network
TuneIn Radio
Pandora
Spotify
SiriusXM Internet Radio
Slacker Personal Radio
Deezer
AirPlay
2. Select "My Favorites" with the cursors and press Enter
to display the "My Favorites" list screen.
3. With the cursors, select a blank area of "My Favorites"
and press Menu to display the menu screen.
4. Select "Create new station" with the cursors and press
Enter to display the keyboard screen.
5. Enter the name and URL of the radio station to add.
● Select "A/a" and press Enter to toggle between
upper and lower case. Select "←" or "→" and press
Enter to move the cursor to the selected direction.
Select "
" and press Enter to delete one character
to the left of the cursor position.
Registering a Station with PC
Before Performing any Operation: The name and URL
of the radio station that you want to add are required for
registration. Check the specifications before use. Also,
make sure this unit and a computer are connected to the
same router.
2. Press Setup to display the Setup menu.
3. With the cursors, select "6. Hardware" - "Network" -"IP
Address" to display the IP address.
● Take note of the IP address since you will need it
later.
4. Open the Internet browser on your PC or smartphone
and enter the IP address of the unit in the URL field.
● When using Internet Explorer, you can alternatively
select "Open" in the "File" menu to enter the IP
address.
● Information of the unit is displayed on the browser.
("WEB Setup")
5. Click "
" tab, then enter the name and URL of the
Internet radio station.
6. Click "Save" to register the entered Internet radio station
in "My Favorites".
To rename the registered radio station: Select the radio
station in the "My Favorites" list and press Menu to display
the menu screen. Select "Rename this station" with the
cursors and press Enter to display the keyboard screen.
Rename the station as desired.
● Radio stations can be renamed also from "WEB Setup".
2. Select "My Favorites" with the cursors and press Enter
to display the registered Internet radio stations.
3. With the cursors, select a radio station and press Enter
to start playing.
Deleting a Registered Radio Station
1. Press NET on the remote controller to display the NET
TOP screen.
2. Select "My Favorites" with the cursors and press Enter
to display the registered Internet radio stations.
3. With the cursors, select the radio station to delete and
press Menu to display the menu screen.
4. With the cursors, select "Delete from My Favorites", and
then press Enter. A confirmation screen will appear.
5. With the cursors, select "OK", and then press Enter to
delete the radio station.
● Select "Back" to return to the previous screen.
● Radio stations can be deleted also from "WEB
Setup".
En-11
Page 44

Playing Music with DLNA
NAS
Playing Music with DLNA
About DLNA
Digital Living Network Alliance (DLNA) can be referred
to as a technology standard or the industry group to
develop the technology standard to interconnect and use
AV components, computers and other devices in a home
network. This unit allows you to use DLNA to play music
files stored on a computer or a hard disk connected to your
home network (NAS device). Make sure this unit and a
computer or NAS device are connected to the same router.
Internet radio
Router
● To stream a music file, you need a NAS device with
DLNA server functions or a PC where a player (e.g.,
Windows MediaR Player 11 or Windows MediaR Player
12) with DLNA server functions is installed. To enable
streaming with Windows MediaR Player 11 or Windows
MediaR Player 12, you must first configure the settings.
PC
Configuring the Windows MediaR Player
R
Windows Media
Player 11
R
2. In the "Library" menu, select "Media Sharing" to display
a dialog box.
3. Select the "Share my media" check box, and then click
"OK" to display the compatible devices.
4. Select this unit, and then click "Allow".
● When it is clicked, the corresponding icon is
checked.
5. Click "OK" to close the dialog.
R
● Depending on the version of Windows Media
Player,
the names of the items you need to select may differ
from the explanation here.
Windows MediaR Player 12
1. Turn on your PC and start Windows MediaR Player 12.
2. In the "Stream" menu, select "Turn on media streaming"
to display a dialog box.
● If media streaming is already turned on, select "More
streaming options..." in the "Stream" menu to list
players in the network, and then go to step 4.
3. Click "Turn on media streaming" to list players in the
network.
4. Select this unit in "Media streaming options" and check
that it is set to "Allow".
5. Click "OK" to close the dialog.
● Depending on the version of Windows Media
the names of the items you need to select may differ
from the explanation here.
R
Player,
DLNA Playback
● Operation: You can set up by viewing the guidance
displayed on the TV screen (OSD). Select the item with the
cursor buttons of the remote controller and press Enter to
confirm your selection. To return to the previous screen,
press Return.
● If the OSD language is set to Chinese, the operations
in this section are not displayed on the TV. Operate by
looking at the display on the main unit. Note that the
display on the main unit does not support the display
of Chinese characters. Characters that cannot be
displayed are replaced with asterisks ( ).
Playing Back
1. Start the server (Windows MediaR Player 11, Windows
MediaR Player 12, or NAS device) containing the music
files to play.
2. Press NET on the remote controller to display the NET
TOP screen.
● If the "NET" indicator on the display flashes, the unit
is not properly connected to the network. Check the
connection.
En-12
Page 45

Network
TuneIn Radio
Pandora
Spotify
SiriusXM Internet Radio
Slacker Personal Radio
Deezer
AirPlay
3. Select "DLNA" with the cursors and press Enter.
4. Select the target server with the cursors and press Enter
to display the items list screen.
● Searching does not work in servers that do not
support search functions.
● The unit cannot access pictures and videos stored
on servers.
● Contents stored on the server may not be displayed
depending on the server sharing settings.
5. With the cursors, select the music file to play, and then
press Enter or
to start playback.
● If "No Item." is displayed, check whether the network
is properly connected.
Controlling Remote Playback from a PC
You can use this unit to play music files stored on your PC
by operating the PC inside your home network. The unit
supports remote playback with Windows MediaR Player 12.
To use the remote playback function with Windows MediaR
Player 12, Windows MediaR Player 12 must be configured
in advance.
● Using a DLNA-compatible controller (such as an
Android application), you can select a music file stored
on Windows MediaR Player 12 and stream to this unit
by operating the controller. For information on how to
remotely play using the controller, refer to the controller's
instruction manual.
Setting PC
1. Turn on your PC and start Windows MediaR Player 12.
2. In the "Stream" menu, select "Turn on media streaming"
to display a dialog box.
● If media streaming is already turned on, select "More
streaming options..." in the "Stream" menu to list
players in the network, and then go to step 4.
3. Click "Turn on media streaming" to list players in the
network.
4. Select this unit in "Media streaming options" and check
that it is set to "Allow".
5. Click "OK" to close the dialog box.
6. Open the "Stream" menu and check that "Allow remote
control of my Player..." is checked.
● Depending on the version of Windows Media
the names of the items you need to select may differ
from the explanation here.
R
Player,
Playing Music with DLNA
● Operations during remote playback are possible
from the "Play to" window on the PC. The playback
screen is displayed on the TV connected to the
HDMI output of the unit. If your PC is running on
Windows
5. Adjust the volume using the volume bar on the "Play to"
window.
● Sometimes, the volume displayed on the remote
playback window may differ from that appeared on
the display of the unit.
● When the volume is adjusted from the unit, the value
is not reflected in the "Play to" window.
● This unit cannot play music files remotely in the
following conditions.
● Depending on the version of Windows Media
the names of the items you need to select may differ
from the explanation here.
R
8, click "Play to", and then select this unit.
− It is using a network service.
− It is playing a music file on a USB storage
device.
R
Player,
Remote playback
1. Turn on the power of the unit.
2. Turn on your PC and start Windows Media
3. Select and right-click the music file to play with Windows
Media
R
Player 12.
● To remotely play a music file on another server, open
the target server from "Other Libraries" and select
the music file to play.
4. Select this unit in "Play to" to open the "Play to" window
of Windows Media
R
Player 12 and start playback on the
unit.
R
Player 12.
En-13
Page 46

Playing Music Files in a Shared Folder
NAS
Playing Music Files in a Shared
Folder
About Shared Folder
A shared folder is configured in a network device such as a
PC or NAS (hard disk connected to your home network) for
access from other users.
You can play music files in a shared folder on your PC or
NAS connected to the same home network as that of the
unit. To play music files in a shared folder, you must first
configure WindowsR 8 or WindowsR 7. Make sure the unit
and PC or NAS device are connected to the same router.
Internet radio
Router
PC
Setting PC
Configuring the Sharing Options
1. Select "Choose home group and sharing options" on the
"Control Panel".
● If the menu is not displayed, check whether "View
by" is set to "Category".
2. Select "Change advanced sharing settings".
3. Check whether the following radio buttons are selected
in "Home or Work":
"Enable network discovery"
"Turn on file and printer sharing"
"Turn on sharing so anyone with network access can
read and write files in the Public folders."
"Turn off password protected sharing"
4. Select "Save Changes" and click "OK" on the dialog box.
Creating a Shared Folder
1. Select and right-click the folder to share.
2. Select "Properties".
3. Select "Advanced Sharing" on the "Sharing" tab.
4. Select the "Share this folder" check box and click "OK".
5. Select "Share" for "Network File and Folder Sharing".
6. Select "Everyone" from the pull-down menu. Click "Add",
and then "Share".
● To set user name and password to a shared folder,
set "Permissions" in "Advanced Sharing" on the
"Sharing" tab.
● Check whether a workgroup is set.
Playing from a Shared Folder
● Operation: You can set up by viewing the guidance
displayed on the TV screen (OSD). Select the item with the
cursor buttons of the remote controller and press Enter to
confirm your selection. To return to the previous screen,
press Return.
● If the OSD language is set to Chinese, the operations
in this section are not displayed on the TV. Operate by
looking at the display on the main unit. Note that the
display on the main unit does not support the display
of Chinese characters. Characters that cannot be
displayed are replaced with asterisks ( ).
Playing Back
1. Press NET on the remote controller to display the NET
TOP screen.
● If the "NET" indicator on the display flashes, the unit
is not properly connected to the network. Check the
connection.
● The sharing options must be configured and a shared
folder created on the PC in advance.
● For information on how to configure the NAS device
and create a shared folder, refer to the NAS device's
instruction manual.
En-14
Page 47

Network
TuneIn Radio
Pandora
Spotify
SiriusXM Internet Radio
Slacker Personal Radio
Deezer
AirPlay
2. With the cursors, select "Home Media", and then press
Enter.
3. With the cursors, select the target server, and then press
Enter.
● You can check the server name of your PC from the
PC properties.
4. With the cursors, select the target shared folder, and
then press Enter.
5. If a username and password is required, enter the
necessary login information.
● The login information is the account information set
at the time of creating the shared folder.
● Once entered, the login information will be
remembered from the next time onward.
6. With the cursors, select the music file to play, and then
press Enter or
to start playback.
Playing Music Files in a Shared Folder
En-15
Page 48

Operating Music Files with the
1
5
6
7
8
9
2
3
4
F
I
K
L
M
G
H
J
Remote Controller
About the Remote Controller
The remote controller of this unit allows you to play music
files stored on USB storage devices, Internet radio, PCs
and NAS devices on your home network. It also allows
you to view information of the music file being played and
perform various other operations.
● Available buttons may vary depending on the service
and device to play.
Remote Controller Buttons
1. Press NET on the remote controller.
2. Operate the remote controller by referring to the name
and function of each of the buttons.
1 Top Menu: This button displays the top menu for
each media or server.
2 / , Enter: These buttons navigate through items
En-16
and activate the selected item.
/ : These buttons allow you to navigate to other
pages when the list continues on other pages.
3 : This button fast-reverses the current track. This
button is not operable from 10 seconds before the
playback ends.
4 : This button plays the current track from the
beginning. Pressing this button twice plays the
previous track.
5 +/–: Moves the cursor up or down on the Internet
radio stations list in "My Favorites".
6 Menu: This button displays the menu of each Internet
radio service.
7 Return: This button returns to the previous screen.
8 : This button fast-forwards the current track. This
button is not operable from 10 seconds before the
playback ends.
9 : This button plays the next track.
F : This button starts the playback.
G : This button pauses the playback.
H Search: This button toggles between the playback
screen and list screen during playback.
I : This button stops the playback.
J Mode: This button displays the video from the input
selected in "Video Select". Each press of the button
displays or turns off the video. You can change the
display position of the OSD by pressing Enter while
the video is displayed on the screen.
● These buttons are disabled when the OSD
language is set to Chinese.
K Random: This button performs random playback.
L Repeat: This button replays the track(or tracks).
Pressing this button repeatedly cycles through the
repeat modes.
M Display: This button changes the displayed track
information during playback. Pressing this button
Operating Music Files with the Remote Controller
when the list screen is displayed toggles the screen
to playback.
Icons Displayed during Playback
Icons are displayed on the display during music file
playback. The meaning of each icon is as follows:
: Folder
: Track
: Play
: Pause
: Fast-forward
: Fast-reverse
: Artist
: Album
: Repeat one track
: Repeat within a folder
: Repeat
: Shuffle
Page 49

Using the Listening Modes
Using the Listening Modes
Selecting Listening Mode
The listening modes allow you to select the best sound
effect for your input source.
1. After pressing RCV on the remote controller, press one
of the following four buttons.
2. Press the selected button repeatedly to switch the
modes displayed on the display of the unit.
● Set the listening mode of your choice by listening to
the actual sound.
For details on the listening modes see "Listening Mode
Types". For listening modes selectable with each button,
refer to "Selectable Listening Modes".
Listening Mode Types
The unit allows you to enjoy audio in a variety of listening
modes. This section lists the types of listening modes
available on the unit and describes their functions.
Future listening mode update
A future firmware update is planned to enable the unit to
support playback in DTS:X audio format. For this reason,
the available listening modes will vary depending on the
firmware version.
Versions before the release of an update with support for
the DTS:X audio format
● Neo:6 Cinema and Neo:6 Music are available.
Versions that support the DTS:X audio format
● DTS:X and DTS Neural:X are available. (Neo:6 Cinema
and Neo:6 Music become unavailable after the update.)
In alphabetical order
AllCh Stereo
Ideal for background music, this mode fills the entire
listening area with stereo sound.
Direct
In this mode, audio from the input source is output as-is.
For example, if a 2 ch source from a music CD is input, the
output will be stereo, or if Dolby Digital signal is input, the
sound field will be controlled in accordance with the number
of channels present.
Dolby Atmos
Introduced first in the cinema, Dolby Atmos brings a
revolutionary sense of dimension and immersion to the
Home Theater experience. Dolby Atmos is an adaptable
and scalable object based format that reproduces
audio as independent sounds (or objects) that can be
accurately positioned and move dynamically throughout
the 3 dimensional listening space during playback. A key
ingredient of Dolby Atmos is the introduction of a height
plane of sound above the listener.
Dolby D (Dolby Digital)
Mode suitable for playing sources recorded in Dolby Digital.
● This listening mode can be selected only if your Blu-ray
Disc/DVD player is digitally connected to the unit or the
player's output setting is bitstream.
Dolby D+ (Dolby Digital Plus)
Mode suitable for playing sources recorded in Dolby Digital
Plus.
● This listening mode can be selected only if your Blu-ray
Disc/DVD player is digitally connected to the unit or the
player's output setting is bitstream.
Dolby Surround
Dolby surround is a next generation surround technology
that intelligently up mixes stereo; 5.1 and 7.1 content for
playback through your surround speaker system. Dolby
surround is compatible with traditional speaker layouts,
as well as Dolby Atmos enabled playback systems that
employ inceiling speakers or products with Dolby speaker
technology.
Dolby TrueHD
Mode suitable for playing sources recorded in Dolby
TrueHD.
● This listening mode can be selected only if your Blu-ray
Disc/DVD player is digitally connected to the unit or the
player's output setting is bitstream.
DSD
Mode suitable for playing sources recorded in DSD.
● This unit supports DSD signals input through HDMI IN.
However, depending on the connected player, better
sound is possible when output from the PCM output of
the player.
● This listening mode can be selected only if your Blu-ray
Disc/DVD player's output setting is DSD.
DTS
Mode suitable for playing sources recorded in DTS.
● This listening mode can be selected only if your Blu-ray
Disc/DVD player is digitally connected to the unit or the
player's output setting is bitstream.
En-17
Page 50

Using the Listening Modes
DTS 96/24
Mode suitable for playing sources recorded in DTS 96/24.
With 96 kHz sampling rate and 24-bit resolution, it provides
superior fidelity.
● Depending on the settings, this listening mode becomes
DTS.
● This listening mode can be selected only if your Blu-ray
Disc/DVD player is digitally connected to the unit or the
player's output setting is bitstream.
DTS Express
Mode suitable for playing sources recorded in DTS
Express.
● This listening mode can be selected only if your Blu-ray
Disc/DVD player is digitally connected to the unit or the
player's output setting is bitstream.
DTS-HD HR (DTS-HD High Resolution Audio)
Mode suitable for playing sources recorded in DTS-HD
High Resolution Audio.
● This listening mode can be selected only if your Blu-ray
Disc/DVD player is digitally connected to the unit or the
player's output setting is bitstream.
DTS-HD MSTR (DTS-HD Master Audio)
Mode suitable for playing sources recorded in DTS-HD
Master Audio.
● This listening mode can be selected only if your Blu-ray
Disc/DVD player is digitally connected to the unit or the
player's output setting is bitstream.
DTS Neo:6
This mode expands any 2 ch source for 5.1 ch multichannel
surround playback. It offers full-bandwidth on all channels,
with great independence between the channels. There
are two variants for this mode: one ideal for movies and
another ideal for music.
– Neo:6 Cinema: Use this mode with any 2 ch movie.
– Neo:6 Music: Use this mode with any 2 ch music
source.
DTS Neural:X
Neural:X enables upmixing of legacy content such as
mono, stereo, 5.1 or 7.1ch to many higher speaker count
including the layout using elevated channels set for DTS:X
playback.
DTS:X
This mode is for use with DTS sources. DTS:X is DTS's
next-generation object-based surround sound technology
that includes height to deliver a fully-immersive listening
experience to your living room.
ES Discrete (DTS-ES Discrete)
This mode is for use with DTS-ES Discrete sources and
enables 6.1 ch or 7.1 ch playback using back channel.
Completely discrete seven channels will improve spatial
imaging and enable 360-degree sound localization
producing a sound crossing between the surround
channels.
● This listening mode can be selected only if your Blu-ray
Disc/DVD player is digitally connected to the unit or the
player's output setting is bitstream.
● Use on the DVD with DTS ES logo, particularly on the
software containing DTS-ES Matrix soundtrack.
ES Matrix (DTS-ES Matrix)
This mode is for use with DTS-ES Matrix soundtrack and
enables 6.1 ch or 7.1 ch playback using matrix-encoded
back channel.
● This listening mode can be selected only if your Blu-ray
Disc/DVD player is digitally connected to the unit or the
player's output setting is bitstream.
● Use on the CD, DVD or LD with DTS ES logo,
particularly on the software containing DTS-ES Matrix
soundtrack.
Full Mono
In this mode, all speakers output the same sound in mono,
so the sound you hear is the same regardless of where you
are within the listening room.
Game-Action
In this mode, sound localization is distinct with emphasis
on bass.
Game-Rock
In this mode, sound pressure is emphasized to heighten
live feel.
Game-RPG
In this mode, the sound has a dramatic feel with a similar
atmosphere to Orchestra mode.
Game-Sports
Suitable for audio source with much reverberation.
Mono
Use this mode when watching an old movie with a mono
soundtrack, or use it to separately reproduce soundtracks
in two different languages recorded in the left and right
channels of some movies. It is also suitable for DVDs or
other sources containing multiplexed audio.
Multich (Multichannel)
Mode suitable for playing sources recorded in PCM
multichannel.
Orchestra
Suitable for classical or operatic music. This mode
emphasizes the surround channels in order to widen the
stereo image, and simulates the natural reverberation of a
large hall.
Stereo
In this mode, sound is output from the front left and right
speakers and subwoofer.
Studio-Mix
Suitable for rock or pop music, Listening to music in this
mode creates a lively sound field with a powerful acoustic
image, like being at a club or rock concert.
T-D (Theater-Dimensional)
In this mode, you can enjoy a virtual playback of
multichannel surround sound even with only two or three
speakers. This works by controlling how sounds reach the
listener’s left and right ears.
En-18
Page 51

THX
Founded by George Lucas, THX develops stringent
standards that ensure movies are reproduced in movie
theaters and home theaters just as the director intended.
THX Modes carefully optimize the tonal and spatial
characteristics of the soundtrack for reproduction in
the home-theater environment. They can be used with
2-channel matrixed and multichannel sources. Back
speaker output depends on the source material and the
selected listening mode.
● The THX mode can finely adjust the acoustic and
spatial characteristics of the soundtrack for the best
reproduction of home theater sound. It will work on 2 ch
source and multichannel source. Back speaker sound
will differ depending on the source and selected listening
mode.
– THX Cinema: THX Cinema mode corrects theatrical
soundtracks for playback in a home theater
environment. In this mode, THX Loudness Plus is
configured for cinema levels and Re-EQ, Timbre
Matching, and Adaptive Decorrelation are active.
– THX Games: THX Games mode is meant for spatially
accurate playback of game audio, which is often mixed
similarly to movies but in a smaller environment. THX
Loudness Plus is configured for game audio levels, with
Timbre Matching active.
– THX Music: THX Music mode is tailored for listening to
music, which is typically mastered at significantly higher
levels than movies. In this mode, THX Loudness Plus is
configured for music playback and only Timbre Matching
is active.
– THX S2 Cinema (THX Select2 Cinema): THX Select2
Cinema mode plays 5.1 movie using 7.1 ch giving you
the best possible movie watching experience. In this
mode, THX ASA processing blends the side surround
speakers and back surround speakers providing the
optimal mix of ambient and directional surround sounds.
– THX S2 Games (THX Select2 Games): For the replay
of multichannel game audio, the THX Select2 Games
mode should be selected. In this mode, THX ASA
processing is applied to the surround channels of all
5.1 encoded game sources such as PCM, DTS, and
Dolby Digital. This accurately places all game audio
surround information creating a full 360 degree playback
environment. THX Select2 Games is unique as it gives
you a smooth transition of audio in all points of the
surround field.
– THX S2 Music (THX Select2 Music) : For the replay of
multichannel music, the THX Select2 Music should be
selected. In this mode, THX ASA processing is applied
to the surround channels of all 5.1 encoded music
sources such as DTS, Dolby Digital, DVD-Audio, etc. to
provide a wide and stable rear soundstage.
– THX Surr EX (THX Surround EX) : This mode expands
5.1-channel sources for 7.1- channel playback. It’s
especially suited to Dolby Digital EX sources. THX
Surround EX, also known as Dolby Digital Surround EX,
is a joint development between Dolby Laboratories and
THX Ltd.
TV Logic
Suitable for TV shows produced in a TV studio. This mode
enhances the surround effects to the entire sound to give
clarity to voices and create a realistic acoustic image.
Unplugged
Suitable for acoustic instruments, vocals and jazz. This
mode emphasizes the front stereo image, giving the
impression of being right in front of the stage.
Using the Listening Modes
Reference
Dialogue Normalization
Dialogue Normalization (DialogNorm) is a feature of
Dolby Digital, which is used to keep the programs at
the same average listening level so the user does not
have to change the volume control between Dolby
Digital, Dolby Digital Plus and Dolby TrueHD programs.
When playing back software which has been encoded
in Dolby Digital, Dolby Digital Plus and Dolby TrueHD,
sometimes you may see a brief message in the front
panel display which will read "DialogNorm: X dB" (X
being a numeric value). The display is showing how the
program level relates with THX calibration level. If you
want to play the program at calibrated theatrical levels,
you may wish to adjust the volume. For example, if you
see the following message: "DialogNorm: + 4 dB" in
the front panel display, to keep the overall output level
at THX calibrated loudness, just turn down the volume
control by 4dB. However, unlike a movie theater where
the playback loudness is preset, you can choose your
preferred volume setting for best enjoyment.
THX Cinema Processing
THX is an exclusive set of standards and technologies
established by the world-renowned film production
company Lucasfilm Ltd. THX grew from George Lucas’
personal desire to make your experience of the film
soundtrack in both movie theaters and in your home
theater as faithful as possible to what the director
intended. Movie soundtracks are mixed in special
environments called dubbing stages and are designed to
be played back in movie theaters with similar equipment
and conditions. Most of those soundtracks are remixed
using flat response loudspeakers similar to those used
in the small home theater environment before being
transferred onto Blu-ray Discs, DVD, etc. THX engineers
developed patented technologies to accurately translate
the sound from the movie theater environment into the
home, correcting the tonal and spatial errors that occur.
On this product, when the THX indicator is on, THX
features are automatically added in Cinema modes (e.g.
THX Cinema, THX Surround EX).
Timbre Matching
The human ear changes our perception of a sound
depending on the direction from which the sound is
coming. In a movie theater, there is an array of surround
speakers so that the surround information is all around
you. In a home theater, you may only have two speakers
located to the side of your head. In this case, the Timbre
En-19
Page 52

Matching feature filters the information going to the
surround speakers so that they more closely match the
tonal characteristics of the sound coming from the front
speakers. This ensures seamless panning between the
front and surround speakers.
Adaptive Decorrelation
In a movie theater, a large number of surround speakers
help create an enveloping surround sound experience.
If a home theater only has two sidewall surround
speakers, the surround speakers may sound similar to
headphones lacking spaciousness and envelopment.
Surround sounds will also collapse toward the closet
speaker as you move away from the middle seating
position. Adaptive Decorrelation slightly changes one
surround channel’s time and phase relationship with
respect to the other surround experience as in a movie
theater using only two speakers.
ASA (Advanced Speaker Array)
ASA is a proprietary THX technology which processes
the audio on the two side and two back surround
speakers for the optional surround sound experience.
When you set up your home theater system using eight
speaker outputs (Left, Center, Right, Surround Right,
Back Right, Back Left, Surround Left, and Subwoofer),
be sure to go to the THX Audio Setup screen and
choose the setting that closely corresponds to the back
speaker spacing. This will reoptimize the surround
sound field. ASA is used in three modes: THX Select2
Cinema, THX Select2 Music and THX Select2 Games.
Selectable Listening Modes
Listening modes that can be selected with the listening
mode buttons will differ depending on the input signal
format and actual speaker configuration. Also note that
depending on the player settings and content, some
listening modes may not be available for selecting.
● Listening modes available when headphones are
connected are: Mono, Direct, and Stereo.
Future listening mode update
A future firmware update is planned to enable the unit to
support playback in DTS:X audio format. For this reason,
the available listening modes will vary depending on the
firmware version.
Versions before the release of an update with support for
the DTS:X audio format
● Neo:6 Cinema and Neo:6 Music are available.
Versions that support the DTS:X audio format
● DTS:X and DTS Neural:X are available. (Neo:6 Cinema
and Neo:6 Music become unavailable after the update.)
Using the Listening Modes
Movie/TV button
You can select a mode suitable for movies and TV
programs.
Input Format Listening Mode
Analog Direct
Mono
Dolby Surround
Neo:6 Cinema
DTS Neural:X
THX Cinema
TV Logic
AllCh Stereo
Full Mono
T-D
1
Center speaker or surround speakers need to be installed.
2
Surround speakers need to be installed.
3
Surround speakers or height speakers need to be installed.
4
Center speaker, surround speakers or height speakers need to be
installed.
Input Format Listening Mode
PCM Direct
Mono
Dolby Surround
Neo:6 Cinema
DTS Neural:X
THX Cinema
TV Logic
AllCh Stereo
Full Mono
T-D
1
Center speaker or surround speakers need to be installed.
2
Surround speakers need to be installed.
3
Surround speakers or height speakers need to be installed.
4
Center speaker, surround speakers or height speakers need to be
installed.
1
2
3
4
4
1
2
3
4
4
En-20
Page 53

Using the Listening Modes
Input Format Listening Mode
Multich PCM Direct
Mono
1
Multich
Dolby Surround
DTS Neural:X
THX Cinema
THX S2 Cinema
THX Surr EX
TV Logic
AllCh Stereo
Full Mono
2
3
3
4
5
5
T-D
1
Center speaker or surround speakers need to be installed.
2
Surround speakers need to be installed.
3
Back speakers need to be installed. Can be selected when the input
format is 5.1 ch.
4
Surround speakers or height speakers need to be installed.
5
Center speaker, surround speakers or height speakers need to be
installed.
Input Format Listening Mode
DSD Direct
Mono
1 2
DSD
Dolby Surround
Neo:6 Cinema
3
DTS Neural:X
THX Cinema
THX S2 Cinema
THX Surr EX
TV Logic
AllCh Stereo
Full Mono
4
5
5
6
7
7
T-D
1
Cannot be selected when the input format is monaural or 2 ch.
2
Center speaker or surround speakers need to be installed.
3
Can only be selected when the input format is 2 ch and a center speaker
or surround speakers are installed.
4
Surround speakers need to be installed.
5
Back speakers need to be installed. Can be selected when the input
format is 5.1 ch.
6
Surround speakers or height speakers need to be installed.
7
Center speaker, surround speakers or height speakers need to be
installed.
Input Format Listening Mode
Dolby Atmos
● The listening mode
of Dolby Digital Plus
or Dolby TrueHD can
be selected if back
speakers or height
speakers are not
connected.
Direct
Mono
Dolby Atmos
TV Logic
AllCh Stereo
Full Mono
T-D
Input Format Listening Mode
Dolby D Direct
Mono
1 2
Dolby D
Dolby Surround
Neo:6 Cinema
3
DTS Neural:X
THX Cinema
THX S2 Cinema
THX Surr EX
TV Logic
AllCh Stereo
Full Mono
4
5
5
6
7
7
T-D
1
Cannot be selected when the input format is monaural or 2 ch.
2
Center speaker or surround speakers need to be installed.
3
Can only be selected when the input format is 2 ch and a center speaker
or surround speakers are installed.
4
Surround speakers need to be installed.
5
Back speakers need to be installed. Can be selected when the input
format is 5.1 ch.
6
Surround speakers or height speakers need to be installed.
7
Center speaker, surround speakers or height speakers need to be
installed.
En-21
Page 54

Using the Listening Modes
Input Format Listening Mode
Dolby D+ Direct
Mono
Dolby D+
1 2
Dolby Surround
Neo:6 Cinema
3
DTS Neural:X
THX Cinema
THX S2 Cinema
THX Surr EX
TV Logic
AllCh Stereo
Full Mono
4
5
5
6
7
7
T-D
1
Cannot be selected when the input format is monaural or 2 ch.
2
Center speaker or surround speakers need to be installed.
3
Can only be selected when the input format is 2 ch and a center speaker
or surround speakers are installed.
4
Surround speakers need to be installed.
5
Back speakers need to be installed. Can be selected when the input
format is 5.1 ch.
6
Surround speakers or height speakers need to be installed.
7
Center speaker, surround speakers or height speakers need to be
installed.
Input Format Listening Mode
Dolby TrueHD Direct
Mono
Dolby TrueHD
1 2
Dolby Surround
Neo:6 Cinema
3
DTS Neural:X
THX Cinema
THX S2 Cinema
THX Surr EX
TV Logic
AllCh Stereo
Full Mono
4
5
5
6
7
7
T-D
1
Cannot be selected when the input format is monaural or 2 ch.
2
Center speaker or surround speakers need to be installed.
3
Can only be selected when the input format is 2 ch and a center speaker
or surround speakers are installed.
4
Surround speakers need to be installed.
5
Back speakers need to be installed. Can be selected when the input
format is 5.1 ch.
6
Surround speakers or height speakers need to be installed.
7
Center speaker, surround speakers or height speakers need to be
installed.
Input Format Listening Mode
DTS Direct
Mono
1 2
DTS
Dolby Surround
Neo:6 Cinema
3
DTS Neural:X
THX Cinema
THX S2 Cinema
THX Surr EX
TV Logic
AllCh Stereo
Full Mono
4
5
5
6
7
7
T-D
1
Cannot be selected when the input format is monaural or 2 ch.
2
Center speaker or surround speakers need to be installed.
3
Can only be selected when the input format is 2 ch and a center speaker
or surround speakers are installed.
4
Surround speakers need to be installed.
5
Back speakers need to be installed. Can be selected when the input
format is 5.1 ch.
6
Surround speakers or height speakers need to be installed.
7
Center speaker, surround speakers or height speakers need to be
installed.
En-22
Page 55

Using the Listening Modes
Input Format Listening Mode
DTS 96/24 Direct
Mono
DTS 96/24
1 2
Dolby Surround
Neo:6 Cinema
3
DTS Neural:X
THX Cinema
THX S2 Cinema
THX Surr EX
TV Logic
AllCh Stereo
Full Mono
4
5
5
6
7
7
T-D
1
Cannot be selected when the input format is monaural or 2 ch.
2
Center speaker or surround speakers need to be installed.
3
Can only be selected when the input format is 2 ch and a center speaker
or surround speakers are installed.
4
Surround speakers need to be installed.
5
Back speakers need to be installed. Can be selected when the input
format is 5.1 ch.
6
Surround speakers or height speakers need to be installed.
7
Center speaker, surround speakers or height speakers need to be
installed.
Input Format Listening Mode
DTS Express Direct
Mono
DTS Express
1 2
Dolby Surround
Neo:6 Cinema
3
DTS Neural:X
THX Cinema
THX S2 Cinema
THX Surr EX
TV Logic
AllCh Stereo
Full Mono
4
5
5
6
7
7
T-D
1
Cannot be selected when the input format is monaural or 2 ch.
2
Center speaker or surround speakers need to be installed.
3
Can only be selected when the input format is 2 ch and a center speaker
or surround speakers are installed.
4
Surround speakers need to be installed.
5
Back speakers need to be installed. Can be selected when the input
format is 5.1 ch.
6
Surround speakers or height speakers need to be installed.
7
Center speaker, surround speakers or height speakers need to be
installed.
Input Format Listening Mode
DTS-HD HR Direct
Mono
DTS-HD HR
1 2
Dolby Surround
Neo:6 Cinema
3
DTS Neural:X
THX Cinema
THX S2 Cinema
THX Surr EX
TV Logic
AllCh Stereo
Full Mono
4
5
5
6
7
7
T-D
1
Cannot be selected when the input format is monaural or 2 ch.
2
Center speaker or surround speakers need to be installed.
3
Can only be selected when the input format is 2 ch and a center speaker
or surround speakers are installed.
4
Surround speakers need to be installed.
5
Back speakers need to be installed. Can be selected when the input
format is 5.1 ch.
6
Surround speakers or height speakers need to be installed.
7
Center speaker, surround speakers or height speakers need to be
installed.
En-23
Page 56

Using the Listening Modes
Input Format Listening Mode
DTS-HD MSTR Direct
Mono
DTS-HD MSTR
1 2
Dolby Surround
Neo:6 Cinema
3
DTS Neural:X
THX Cinema
THX S2 Cinema
THX Surr EX
TV Logic
AllCh Stereo
Full Mono
4
5
5
6
7
7
T-D
1
Cannot be selected when the input format is monaural or 2 ch.
2
Center speaker or surround speakers need to be installed.
3
Can only be selected when the input format is 2 ch and a center speaker
or surround speakers are installed.
4
Surround speakers need to be installed.
5
Back speakers need to be installed. Can be selected when the input
format is 5.1 ch.
6
Surround speakers or height speakers need to be installed.
7
Center speaker, surround speakers or height speakers need to be
installed.
Input Format Listening Mode
DTS-ES Direct
Mono
1
DTS
ES Matrix
ES Discrete
Dolby Surround
2
2
3
DTS Neural:X
THX Cinema
TV Logic
AllCh Stereo
Full Mono
4
5
6
6
T-D
1
Can only be selected when the back speakers are not installed.
2
Back speakers need to be installed.
3
Height speakers need to be installed.
4
Surround speakers need to be installed.
5
Surround speakers or height speakers need to be installed.
6
Center speaker, surround speakers or height speakers need to be
installed.
Input Format Listening Mode
DTS:X Direct
Mono
DTS:X
TV Logic
AllCh Stereo
Full Mono
1
2
2
T-D
1
Surround speakers or height speakers need to be installed.
2
Center speaker, surround speakers or height speakers need to be
installed.
Music button
You can select a mode suitable for music.
Input Format Listening Mode
Analog Direct
Stereo
Dolby Surround
Neo:6 Music
DTS Neural:X
THX Music
Orchestra
Unplugged
Studio-Mix
AllCh Stereo
Full Mono
1
Center speaker or surround speakers need to be installed.
2
Surround speakers need to be installed.
3
Surround speakers or height speakers need to be installed.
4
Center speaker, surround speakers or height speakers need to be
installed.
Input Format Listening Mode
PCM Direct
Stereo
Dolby Surround
Neo:6 Music
DTS Neural:X
THX Music
Orchestra
Unplugged
Studio-Mix
AllCh Stereo
Full Mono
1
Center speaker or surround speakers need to be installed.
2
Surround speakers need to be installed.
3
Surround speakers or height speakers need to be installed.
4
Center speaker, surround speakers or height speakers need to be
installed.
1
2
3
3
3
4
4
1
2
3
3
3
4
4
En-24
Page 57

Using the Listening Modes
Input Format Listening Mode
Multich PCM Direct
Stereo
1
Multich
Dolby Surround
DTS Neural:X
THX Music
THX S2 Music
Orchestra
Unplugged
Studio-Mix
AllCh Stereo
Full Mono
1
Center speaker or surround speakers need to be installed.
2
Surround speakers need to be installed.
3
Back speakers need to be installed. Can be selected when the input
format is 5.1 ch.
4
Surround speakers or height speakers need to be installed.
5
Center speaker, surround speakers or height speakers need to be
installed.
2
3
4
4
4
5
5
Input Format Listening Mode
DSD Direct
Stereo
1 2
DSD
Dolby Surround
Neo:6 Music
3
DTS Neural:X
THX Music
THX S2 Music
Orchestra
Unplugged
Studio-Mix
AllCh Stereo
Full Mono
1
Cannot be selected when the input format is monaural or 2 ch.
2
Center speaker or surround speakers need to be installed.
3
Can only be selected when the input format is 2 ch and a center speaker
or surround speakers are installed.
4
Surround speakers need to be installed.
5
Back speakers need to be installed. Can be selected when the input
format is 5.1 ch.
6
Surround speakers or height speakers need to be installed.
7
Center speaker, surround speakers or height speakers need to be
installed.
4
5
6
6
6
7
7
Input Format Listening Mode
Dolby Atmos
● The listening mode
of Dolby Digital Plus
or Dolby TrueHD can
be selected if back
speakers or height
speakers are not
connected.
Direct
Stereo
Dolby Atmos
Orchestra
Unplugged
Studio-Mix
AllCh Stereo
Full Mono
Input Format Listening Mode
Dolby D Direct
Stereo
1 2
Dolby D
Dolby Surround
Neo:6 Music
3
DTS Neural:X
THX Music
THX S2 Music
Orchestra
Unplugged
Studio-Mix
AllCh Stereo
Full Mono
1
Cannot be selected when the input format is monaural or 2 ch.
2
Center speaker or surround speakers need to be installed.
3
Can only be selected when the input format is 2 ch and a center speaker
or surround speakers are installed.
4
Surround speakers need to be installed.
5
Back speakers need to be installed. Can be selected when the input
format is 5.1 ch.
6
Surround speakers or height speakers need to be installed.
7
Center speaker, surround speakers or height speakers need to be
installed.
4
5
6
6
6
7
7
Input Format Listening Mode
Dolby D+ Direct
Stereo
Dolby D+
1 2
Dolby Surround
Neo:6 Music
3
DTS Neural:X
THX Music
THX S2 Music
Orchestra
Unplugged
Studio-Mix
AllCh Stereo
Full Mono
4
5
6
6
6
7
7
En-25
Page 58

Using the Listening Modes
Input Format Listening Mode
1
Cannot be selected when the input format is monaural or 2 ch.
2
Center speaker or surround speakers need to be installed.
3
Can only be selected when the input format is 2 ch and a center speaker
or surround speakers are installed.
4
Surround speakers need to be installed.
5
Back speakers need to be installed. Can be selected when the input
format is 5.1 ch.
6
Surround speakers or height speakers need to be installed.
7
Center speaker, surround speakers or height speakers need to be
installed.
Input Format Listening Mode
Dolby TrueHD Direct
Stereo
Dolby TrueHD
1 2
Dolby Surround
Neo:6 Music
3
DTS Neural:X
THX Music
THX S2 Music
Orchestra
Unplugged
Studio-Mix
AllCh Stereo
Full Mono
1
Cannot be selected when the input format is monaural or 2 ch.
2
Center speaker or surround speakers need to be installed.
3
Can only be selected when the input format is 2 ch and a center speaker
or surround speakers are installed.
4
Surround speakers need to be installed.
5
Back speakers need to be installed. Can be selected when the input
format is 5.1 ch.
6
Surround speakers or height speakers need to be installed.
7
Center speaker, surround speakers or height speakers need to be
installed.
4
5
6
6
6
7
7
Input Format Listening Mode
DTS Direct
Stereo
1 2
DTS
Dolby Surround
Neo:6 Music
3
DTS Neural:X
THX Music
THX S2 Music
Orchestra
Unplugged
Studio-Mix
AllCh Stereo
Full Mono
1
Cannot be selected when the input format is monaural or 2 ch.
2
Center speaker or surround speakers need to be installed.
3
Can only be selected when the input format is 2 ch and a center speaker
or surround speakers are installed.
4
Surround speakers need to be installed.
5
Back speakers need to be installed. Can be selected when the input
format is 5.1 ch.
6
Surround speakers or height speakers need to be installed.
7
Center speaker, surround speakers or height speakers need to be
installed.
4
5
6
6
6
7
7
Input Format Listening Mode
DTS 96/24 Direct
Stereo
DTS 96/24
1 2
Dolby Surround
Neo:6 Music
3
DTS Neural:X
THX Music
THX S2 Music
Orchestra
Unplugged
Studio-Mix
AllCh Stereo
Full Mono
4
5
6
6
6
7
7
Input Format Listening Mode
1
Cannot be selected when the input format is monaural or 2 ch.
2
Center speaker or surround speakers need to be installed.
3
Can only be selected when the input format is 2 ch and a center speaker
or surround speakers are installed.
4
Surround speakers need to be installed.
5
Back speakers need to be installed. Can be selected when the input
format is 5.1 ch.
6
Surround speakers or height speakers need to be installed.
7
Center speaker, surround speakers or height speakers need to be
installed.
Input Format Listening Mode
DTS Express Direct
Stereo
DTS Express
1 2
Dolby Surround
Neo:6 Music
3
DTS Neural:X
THX Music
THX S2 Music
Orchestra
Unplugged
Studio-Mix
AllCh Stereo
Full Mono
1
Cannot be selected when the input format is monaural or 2 ch.
2
Center speaker or surround speakers need to be installed.
3
Can only be selected when the input format is 2 ch and a center speaker
or surround speakers are installed.
4
Surround speakers need to be installed.
5
Back speakers need to be installed. Can be selected when the input
format is 5.1 ch.
6
Surround speakers or height speakers need to be installed.
7
Center speaker, surround speakers or height speakers need to be
installed.
4
5
6
6
6
7
7
En-26
Page 59

Using the Listening Modes
Input Format Listening Mode
DTS-HD HR Direct
Stereo
DTS-HD HR
1 2
Dolby Surround
Neo:6 Music
3
DTS Neural:X
THX Music
THX S2 Music
Orchestra
Unplugged
Studio-Mix
AllCh Stereo
Full Mono
1
Cannot be selected when the input format is monaural or 2 ch.
2
Center speaker or surround speakers need to be installed.
3
Can only be selected when the input format is 2 ch and a center speaker
or surround speakers are installed.
4
Surround speakers need to be installed.
5
Back speakers need to be installed. Can be selected when the input
format is 5.1 ch.
6
Surround speakers or height speakers need to be installed.
7
Center speaker, surround speakers or height speakers need to be
installed.
4
5
6
6
6
7
7
Input Format Listening Mode
DTS-HD MSTR Direct
Stereo
DTS-HD MSTR
1 2
Dolby Surround
Neo:6 Music
3
DTS Neural:X
THX Music
THX S2 Music
Orchestra
Unplugged
Studio-Mix
AllCh Stereo
Full Mono
4
5
6
6
6
7
7
Input Format Listening Mode
1
Cannot be selected when the input format is monaural or 2 ch.
2
Center speaker or surround speakers need to be installed.
3
Can only be selected when the input format is 2 ch and a center speaker
or surround speakers are installed.
4
Surround speakers need to be installed.
5
Back speakers need to be installed. Can be selected when the input
format is 5.1 ch.
6
Surround speakers or height speakers need to be installed.
7
Center speaker, surround speakers or height speakers need to be
installed.
Input Format Listening Mode
DTS-ES Direct
Stereo
1
DTS
ES Matrix
ES Discrete
Dolby Surround
2
2
3
DTS Neural:X
THX Music
Orchestra
Unplugged
Studio-Mix
AllCh Stereo
Full Mono
1
Can only be selected when the back speakers are not installed.
2
Back speakers need to be installed.
3
Height speakers need to be installed.
4
Surround speakers need to be installed.
5
Surround speakers or height speakers need to be installed.
6
Center speaker, surround speakers or height speakers need to be
installed.
4
5
5
5
6
6
Input Format Listening Mode
DTS:X Direct
Stereo
DTS:X
Orchestra
Unplugged
Studio-Mix
AllCh Stereo
Full Mono
1
Surround speakers or height speakers need to be installed.
2
Center speaker, surround speakers or height speakers need to be
installed.
1
1
1
2
2
En-27
Page 60

Using the Listening Modes
Game button
You can select a mode suitable for games.
Input Format Listening Mode
Analog Direct
Dolby Surround
DTS Neural:X
THX Games
Game-RPG
Game-Action
Game-Rock
Game-Sports
AllCh Stereo
Full Mono
T-D
1
Surround speakers need to be installed.
2
Surround speakers or height speakers need to be installed.
3
Center speaker, surround speakers or height speakers need to be
installed.
Input Format Listening Mode
PCM Direct
Dolby Surround
DTS Neural:X
THX Games
Game-RPG
Game-Action
Game-Rock
Game-Sports
AllCh Stereo
Full Mono
T-D
1
Surround speakers need to be installed.
2
Surround speakers or height speakers need to be installed.
3
Center speaker, surround speakers or height speakers need to be
installed.
1
2
2
2
2
3
3
1
2
2
2
2
3
3
Input Format Listening Mode
Multich PCM Direct
1
Multich
Dolby Surround
DTS Neural:X
THX Games
THX S2 Games
Game-RPG
Game-Action
Game-Rock
Game-Sports
AllCh Stereo
Full Mono
2
3
4
4
4
4
5
5
T-D
1
Center speaker or surround speakers need to be installed.
2
Surround speakers need to be installed.
3
Back speakers need to be installed. Can be selected when the input
format is 5.1 ch.
4
Surround speakers or height speakers need to be installed.
5
Center speaker, surround speakers or height speakers need to be
installed.
Input Format Listening Mode
DSD Direct
1 2
DSD
Dolby Surround
DTS Neural:X
THX Games
THX S2 Games
Game-RPG
Game-Action
Game-Rock
Game-Sports
AllCh Stereo
Full Mono
3
4
5
5
5
5
6
6
T-D
1
Cannot be selected when the input format is monaural or 2 ch.
2
Center speaker or surround speakers need to be installed.
3
Surround speakers need to be installed.
4
Back speakers need to be installed. Can be selected when the input
format is 5.1 ch.
5
Surround speakers or height speakers need to be installed.
6
Center speaker, surround speakers or height speakers need to be
installed.
Input Format Listening Mode
Dolby Atmos
● The listening mode
of Dolby Digital Plus
or Dolby TrueHD can
be selected if back
speakers or height
speakers are not
connected.
Direct
Dolby Atmos
Game-RPG
Game-Action
Game-Rock
Game-Sports
AllCh Stereo
Full Mono
T-D
En-28
Page 61

Using the Listening Modes
Input Format Listening Mode
Dolby D Direct
1 2
Dolby D
Dolby Surround
DTS Neural:X
THX Games
THX S2 Games
Game-RPG
Game-Action
Game-Rock
Game-Sports
AllCh Stereo
Full Mono
3
4
5
5
5
5
6
6
T-D
1
Cannot be selected when the input format is monaural or 2 ch.
2
Center speaker or surround speakers need to be installed.
3
Surround speakers need to be installed.
4
Back speakers need to be installed. Can be selected when the input
format is 5.1 ch.
5
Surround speakers or height speakers need to be installed.
6
Center speaker, surround speakers or height speakers need to be
installed.
Input Format Listening Mode
Dolby D+ Direct
Dolby D+
1 2
Dolby Surround
DTS Neural:X
THX Games
THX S2 Games
Game-RPG
Game-Action
Game-Rock
Game-Sports
AllCh Stereo
Full Mono
3
4
5
5
5
5
6
6
T-D
1
Cannot be selected when the input format is monaural or 2 ch.
2
Center speaker or surround speakers need to be installed.
3
Surround speakers need to be installed.
4
Back speakers need to be installed. Can be selected when the input
format is 5.1 ch.
5
Surround speakers or height speakers need to be installed.
6
Center speaker, surround speakers or height speakers need to be
installed.
Input Format Listening Mode
Dolby TrueHD Direct
Dolby TrueHD
1 2
Dolby Surround
DTS Neural:X
THX Games
THX S2 Games
Game-RPG
Game-Action
Game-Rock
Game-Sports
AllCh Stereo
Full Mono
3
4
5
5
5
5
6
6
T-D
1
Cannot be selected when the input format is monaural or 2 ch.
2
Center speaker or surround speakers need to be installed.
3
Surround speakers need to be installed.
4
Back speakers need to be installed. Can be selected when the input
format is 5.1 ch.
5
Surround speakers or height speakers need to be installed.
6
Center speaker, surround speakers or height speakers need to be
installed.
En-29
Page 62

Using the Listening Modes
Input Format Listening Mode
DTS Direct
1 2
DTS
Dolby Surround
DTS Neural:X
THX Games
THX S2 Games
Game-RPG
Game-Action
Game-Rock
Game-Sports
AllCh Stereo
Full Mono
3
4
5
5
5
5
6
6
T-D
1
Cannot be selected when the input format is monaural or 2 ch.
2
Center speaker or surround speakers need to be installed.
3
Surround speakers need to be installed.
4
Back speakers need to be installed. Can be selected when the input
format is 5.1 ch.
5
Surround speakers or height speakers need to be installed.
6
Center speaker, surround speakers or height speakers need to be
installed.
Input Format Listening Mode
DTS 96/24 Direct
DTS 96/24
1 2
Dolby Surround
DTS Neural:X
THX Games
THX S2 Games
Game-RPG
Game-Action
Game-Rock
Game-Sports
AllCh Stereo
Full Mono
3
4
5
5
5
5
6
6
T-D
1
Cannot be selected when the input format is monaural or 2 ch.
2
Center speaker or surround speakers need to be installed.
3
Surround speakers need to be installed.
4
Back speakers need to be installed. Can be selected when the input
format is 5.1 ch.
5
Surround speakers or height speakers need to be installed.
6
Center speaker, surround speakers or height speakers need to be
installed.
Input Format Listening Mode
DTS Express Direct
DTS Express
1 2
Dolby Surround
DTS Neural:X
THX Games
THX S2 Games
Game-RPG
Game-Action
Game-Rock
Game-Sports
AllCh Stereo
Full Mono
3
4
5
5
5
5
6
6
T-D
1
Cannot be selected when the input format is monaural or 2 ch.
2
Center speaker or surround speakers need to be installed.
3
Surround speakers need to be installed.
4
Back speakers need to be installed. Can be selected when the input
format is 5.1 ch.
5
Surround speakers or height speakers need to be installed.
6
Center speaker, surround speakers or height speakers need to be
installed.
En-30
Page 63

Using the Listening Modes
Input Format Listening Mode
DTS-HD HR Direct
DTS-HD HR
1 2
Dolby Surround
DTS Neural:X
THX Games
THX S2 Games
Game-RPG
Game-Action
Game-Rock
Game-Sports
AllCh Stereo
Full Mono
3
4
5
5
5
5
6
6
T-D
1
Cannot be selected when the input format is monaural or 2 ch.
2
Center speaker or surround speakers need to be installed.
3
Surround speakers need to be installed.
4
Back speakers need to be installed. Can be selected when the input
format is 5.1 ch.
5
Surround speakers or height speakers need to be installed.
6
Center speaker, surround speakers or height speakers need to be
installed.
Input Format Listening Mode
DTS-HD MSTR Direct
DTS-HD MSTR
1 2
Dolby Surround
DTS Neural:X
THX Games
THX S2 Games
Game-RPG
Game-Action
Game-Rock
Game-Sports
AllCh Stereo
Full Mono
3
4
5
5
5
5
6
6
T-D
1
Cannot be selected when the input format is monaural or 2 ch.
2
Center speaker or surround speakers need to be installed.
3
Surround speakers need to be installed.
4
Back speakers need to be installed. Can be selected when the input
format is 5.1 ch.
5
Surround speakers or height speakers need to be installed.
6
Center speaker, surround speakers or height speakers need to be
installed.
Input Format Listening Mode
DTS-ES Direct
1
DTS
ES Matrix
ES Discrete
Dolby Surround
2
2
3
DTS Neural:X
THX Games
Game-RPG
Game-Action
Game-Rock
Game-Sports
AllCh Stereo
Full Mono
4
5
5
5
5
6
6
T-D
1
Can only be selected when the back speakers are not installed.
2
Back speakers need to be installed.
3
Height speakers need to be installed.
4
Surround speakers need to be installed.
5
Surround speakers or height speakers need to be installed.
6
Center speaker, surround speakers or height speakers need to be
installed.
En-31
Page 64

Using the Listening Modes
Input Format Listening Mode
DTS:X Direct
DTS:X
Game-RPG
Game-Action
Game-Rock
Game-Sports
AllCh Stereo
Full Mono
1
1
1
1
2
2
T-D
1
Surround speakers or height speakers need to be installed.
2
Center speaker, surround speakers or height speakers need to be
installed.
THX button
You can select a THX listening mode.
Input Format Listening Mode
All formats other than
Dolby Atmos and DTS:X
THX Cinema
THX Music
THX Games
THX S2 Cinema
THX S2 Music
THX S2 Games
THX Surr EX
1
Surround speakers need to be installed.
2
Back speakers need to be installed. Can be selected when the input
format is 5.1 ch.
1
1
1
2
2
2
2
Checking the Input Format
While audio from the player is being input, press Display on
the remote controller several times to switch the information
shown on the main unit display. For example, if "Dolby D
5.1" is displayed, the Dolby Digital 5.1 ch signals are being
input.
● The number of channels is not displayed when the input
signal is "Dolby Atmos" format.
En-32
Page 65

Using the Listening Modes
Advanced Settings (Setup Menu)
How to Set
The unit allows you to configure advanced settings in order
to provide even better experience.
● Operation: You can set up by viewing the guidance
displayed on the TV screen (OSD). Select the item with the
cursor buttons of the remote controller and press Enter to
confirm your selection. To return to the previous screen,
press Return.
Operation
1. Press RCV on the remote controller.
● Always press RCV first to change the remote
controller to RECEIVER mode (the mode to operate
this unit) since its mode may be changed to operate
another component.
2. Press Setup to display the Setup menu.
3. Press / to select the desired menu, and then press
Enter.
Setup
1. Input/Output Assign
2. Speaker
3. Audio Adjust
4. Source
5. Listening Mode Preset
6. Hardware
7. Remote Controller
8. Miscellaneous
4. Press / to select the item, and then press Enter.
1. TV Out
2. HDMI Input
3. Video Input
4. Digital Audio Input
5. With the
/ / / cursors, select the item to configure
the settings.
1-1. TV Out
HDMI Out
Zone 2 HDMI
HDBaseT (TM)
OSD Language
Impose OSD
Screen Saver
MAIN
Not Use
Not Use
English
On
3 minutes
To exit the setup menu, press Setup.
Overview of the Setup menu:
1. Input/Output Assign
Make settings to assign the various jacks and for the onscreen display function on the TV when you use the setting
menu, for example.
2. Speaker
Make advanced settings for the speakers.
3. Audio Adjust
Make a variety of settings related to sound.
4. Source
Make settings for input sources, such as volume difference
adjustments for each input selector for the connected
equipment.
5. Listening Mode Preset
You can preset your favorite listening mode.
6. Hardware
Make a variety of settings such as for linked operation
with connected HDMI equipment, the standby mode and
network connection for this unit.
7. Remote Controller
Make settings related to the remote controller.
Update the firmware and perform initial settings, etc.
En-33
Page 66

Advanced Settings (Setup Menu)
1. Input/Output Assign
TV Out
Select the HDMI jack to be connected with the TV. Make settings for the on-screen display
function on the TV when you use the setting menu, for example.
Setting Item Default Value Setting Details
HDMI Out MAIN Select the HDMI jack to be connected with the
TV.
"MAIN": When connecting the TV to the HDMI
OUT MAIN jack
"SUB": When connecting the TV to the HDMI
OUT SUB jack
"MAIN+SUB": When connecting to both the
MAIN and SUB jacks
Zone 2 HDMI Not Use Make the setting when you output to the Zone
2 TV connected to the HDMI OUT SUB/ZONE
2 jack.
"Use": Enable this function
"Not Use": Disable this function
HDBaseT(TM) Not Use Set when outputting the input HDMI signals from
the HDBaseT port via an Ethernet cable.
"MAIN": When connecting the HDMI OUT MAIN
jack and the HDBaseT IN port
"SUB/ZONE 2": When connecting the HDMI
OUT SUB/ZONE 2 jack and the HDBaseT IN
port
OSD Language English Select the on-screen display language.
Select from English, German, French, Spanish,
Italian, Dutch, Swedish, Russian (Australian
models), or Chinese.
Impose OSD On Set whether or not to display the information on
the TV when the volume is adjusted or input is
changed, for example.
"On": OSD will be displayed on the TV.
"Off": OSD will not be displayed on the TV.
● The OSD may not be displayed depending
on the input signal even if "On" is selected. If
the operation screen is not displayed, change
the resolution of the connected device.
Screen Saver 3 minutes Set the time to start the screen saver. Select
a value from "3 minutes", "5 minutes", "10
minutes" and "Off".
HDMI Input
You can change input assignment between the input selectors and HDMI IN jacks.
Setting Item Default Value Setting Details
BD/DVD HDMI 1 (HDCP
2.2)
CBL/SAT HDMI 2 (HDCP
2.2)
STRM BOX HDMI 3 (HDCP
2.2)
PC HDMI 4 (HDCP
2.2)
GAME 1 HDMI 5 (HDCP
2.2)
GAME 2 HDMI 6 "HDMI 1 (HDCP 2.2)" to "HDMI 7": Assign a
AUX (Front) The setting cannot be changed.
CD ----- "HDMI 1 (HDCP 2.2)" to "HDMI 7": Assign a
"HDMI 1 (HDCP 2.2)" to "HDMI 7": Assign a
desired HDMI IN jack to the BD/DVD button. If
you do not assign a jack, select "-----". To select
an HDMI IN jack already assigned to another
input selector, change its setting to "-----" first.
"HDMI 1 (HDCP 2.2)" to "HDMI 7": Assign a
desired HDMI IN jack to the CBL/SAT button. If
you do not assign a jack, select "-----". To select
an HDMI IN jack already assigned to another
input selector, change its setting to "-----" first.
"HDMI 1 (HDCP 2.2)" to "HDMI 7": Assign a
desired HDMI IN jack to the STRM Box button. If
you do not assign a jack, select "-----". To select
an HDMI IN jack already assigned to another
input selector, change its setting to "-----" first.
"HDMI 1 (HDCP 2.2)" to "HDMI 7": Assign a
desired HDMI IN jack to the PC button. If you
do not assign a jack, select "-----". To select an
HDMI IN jack already assigned to another input
selector, change its setting to "-----" first.
"HDMI 1 (HDCP 2.2)" to "HDMI 7": Assign a
desired HDMI IN jack to the Game 1 button. If
you do not assign a jack, select "-----". To select
an HDMI IN jack already assigned to another
input selector, change its setting to "-----" first.
desired HDMI IN jack to the Game 2 button. If
you do not assign a jack, select "-----". To select
an HDMI IN jack already assigned to another
input selector, change its setting to "-----" first.
desired HDMI IN jack to the CD button. If you
do not assign a jack, select "-----". To select an
HDMI IN jack already assigned to another input
selector, change its setting to "-----" first.
En-34
Page 67

Advanced Settings (Setup Menu)
Setting Item Default Value Setting Details
PHONO ----- "HDMI 1 (HDCP 2.2)" to "HDMI 7": Assign a
desired HDMI IN jack to the Phono button. If you
do not assign a jack, select "-----". To select an
HDMI IN jack already assigned to another input
selector, change its setting to "-----" first.
TV ----- "HDMI 1 (HDCP 2.2)" to "HDMI 7": Assign a
desired HDMI IN jack to the TV button. If you
do not assign a jack, select "-----". To select an
HDMI IN jack already assigned to another input
selector, change its setting to "-----" first.
Video Input
You can change assignment of the COMPONENT VIDEO IN 1 and 2 jacks and the VIDEO
IN 1 to 3 jacks between the input selectors. If you do not assign a jack, select "-----".
Setting Item Default Value Setting Details
BD/DVD COMPONENT 1"COMPONENT 1", "COMPONENT 2": Assign the
COMPONENT VIDEO IN jacks to the BD/DVD
button.
"VIDEO 1" to "VIDEO 3": Assign a desired
VIDEO IN jack to the BD/DVD button.
CBL/SAT VIDEO 2 "COMPONENT 1", "COMPONENT 2": Assign the
COMPONENT VIDEO IN jacks to the CBL/SAT
button.
"VIDEO 1" to "VIDEO 3": Assign a desired
VIDEO IN jack to the CBL/SAT button.
STRM BOX VIDEO 3 "COMPONENT 1", "COMPONENT 2": Assign the
COMPONENT VIDEO IN jacks to the STRM Box
button.
"VIDEO 1" to "VIDEO 3": Assign a desired
VIDEO IN jack to the STRM Box button.
PC ----- "COMPONENT 1", "COMPONENT 2": Assign the
COMPONENT VIDEO IN jacks to the PC button.
"VIDEO 1" to "VIDEO 3": Assign a desired
VIDEO IN jack to the PC button.
GAME 1 VIDEO 1 "COMPONENT 1", "COMPONENT 2": Assign
the COMPONENT VIDEO IN jacks to the Game
1 button.
"VIDEO 1" to "VIDEO 3": Assign a desired
VIDEO IN jack to the Game 1 button.
GAME 2 COMPONENT 2"COMPONENT 1", "COMPONENT 2": Assign
the COMPONENT VIDEO IN jacks to the Game
2 button.
"VIDEO 1" to "VIDEO 3": Assign a desired
VIDEO IN jack to the Game 2 button.
AUX ----- The setting cannot be changed.
CD ----- "COMPONENT 1", "COMPONENT 2": Assign the
COMPONENT VIDEO IN jacks to the CD button.
"VIDEO 1" to "VIDEO 3": Assign a desired
VIDEO IN jack to the CD button.
En-35
Page 68

Advanced Settings (Setup Menu)
Setting Item Default Value Setting Details
PHONO ----- "COMPONENT 1", "COMPONENT 2": Assign
the COMPONENT VIDEO IN jacks to the Phono
button.
"VIDEO 1" to "VIDEO 3": Assign a desired
VIDEO IN jack to the Phono button.
TV ----- "COMPONENT 1", "COMPONENT 2": Assign the
COMPONENT VIDEO IN jacks to the TV button.
"VIDEO 1" to "VIDEO 3": Assign a desired
VIDEO IN jack to the TV button.
● When you convert video signals input to the COMPONENT VIDEO IN jacks and output them from the
HDMI OUT jack, set the output resolution of the player to 480i or 576i. If the input has 480p/576p or
higher resolution, an error message will appear.
Digital Audio Input
You can change input assignment between the input selectors and DIGITAL IN COAXIAL 1
to 2/OPTICAL 1 to 3 jacks. If you do not assign a jack, select "-----".
Setting Item Default Value Setting Details
BD/DVD COAXIAL 1 "COAXIAL 1", "COAXIAL 2", "OPTICAL 1",
"OPTICAL 2", "OPTICAL 3": Assign a desired
DIGITAL IN jack to the BD/DVD button.
CBL/SAT COAXIAL 2 "COAXIAL 1", "COAXIAL 2", "OPTICAL 1",
"OPTICAL 2", "OPTICAL 3": Assign a desired
DIGITAL IN jack to the CBL/SAT button.
STRM BOX OPTICAL 1 "COAXIAL 1", "COAXIAL 2", "OPTICAL 1",
"OPTICAL 2", "OPTICAL 3": Assign a desired
DIGITAL IN jack to the STRM Box button.
PC ----- "COAXIAL 1", "COAXIAL 2", "OPTICAL 1",
"OPTICAL 2", "OPTICAL 3": Assign a desired
DIGITAL IN jack to the PC button.
GAME 1 ----- "COAXIAL 1", "COAXIAL 2", "OPTICAL 1",
"OPTICAL 2", "OPTICAL 3": Assign a desired
DIGITAL IN jack to the Game 1 button.
GAME 2 ----- "COAXIAL 1", "COAXIAL 2", "OPTICAL 1",
"OPTICAL 2", "OPTICAL 3": Assign a desired
DIGITAL IN jack to the Game 2 button.
AUX ----- The setting cannot be changed.
CD OPTICAL 2 "COAXIAL 1", "COAXIAL 2", "OPTICAL 1",
"OPTICAL 2", "OPTICAL 3": Assign a desired
DIGITAL IN jack to the CD button.
PHONO ----- "COAXIAL 1", "COAXIAL 2", "OPTICAL 1",
"OPTICAL 2", "OPTICAL 3": Assign a desired
DIGITAL IN jack to the Phono button.
TV OPTICAL 3 "COAXIAL 1", "COAXIAL 2", "OPTICAL 1",
"OPTICAL 2", "OPTICAL 3": Assign a desired
DIGITAL IN jack to the TV button.
En-36
● Sampling rates for PCM signals (stereo, mono) from a digital input are 32 kHz, 44.1 kHz, 48 kHz,
88.2 kHz, 96 kHz/16 bit, 20 bit, and 24 bit.
Page 69

Advanced Settings (Setup Menu)
2. Speaker
Allows you to change the speaker configuration such as presence or not of subwoofer,
crossover frequency, and so on. Settings are automatically configured if you use the
Automatic Speaker Setup.
This setting cannot be selected if headphones are connected or audio is output from the
speakers of the TV.
Configuration
You can change the number of speaker channels connected, the type of front speaker
connection, the height speaker type, and other speaker settings.
Setting Item Default Value Setting Details
Speaker Channels 7.1 ch Select "2.1 ch", "3.1 ch", "4.1 ch", "5.1 ch", "6.1 ch",
"7.1 ch", "2.1.2 ch", "3.1.2 ch", "4.1.2 ch", "5.1.2 ch",
"6.1.2 ch", or "7.1.2 ch" to suit the number of
speaker channels connected.
Subwoofer Ye s Set whether a subwoofer is connected or not.
"Yes": When subwoofer is connected
"No": When subwoofer is not connected
Height Speaker Front High Set the speaker type if height speakers are
connected to the HEIGHT terminals.
Select "Front High", "Top Front", "Top Middle",
"Top Rear", "Rear High", "Dolby Speaker (Front)",
"Dolby Speaker (Surr)", or "Dolby Speaker (Back)"
according to the connected speaker type and
location.
● If an item cannot be selected even though
connection is correct, check that the settings
in "Speaker Channels" matches the number of
connected channels.
Bi-Amp No Set whether your front speaker connection is bi-
amp.
"No": When front speakers are connected in a
normal manner
"Yes": When front speakers are bi-amp connected
● If an item cannot be selected even though
connection is correct, check that the settings
in "Speaker Channels" matches the number of
connected channels.
Setting Item Default Value Setting Details
Powered Zone 2 No Set the connection of speakers to Zone 2 speaker
terminals.
"Yes": When speakers are connected to ZONE 2
speaker terminals
"No": When speakers are not connected to ZONE 2
speaker terminals
● This item will be set to "No" when "Bi-Amp" is set
to "Yes".
Speaker
Impedance
6ohms Set the impedance of the connected speakers.
"4ohms": When any of the connected speakers have
4 Ω or more to less than 6 Ω impedance
"6ohms": When the connected speakers all have
6 Ω or more impedance
● For impedance, check the indications on the back
of the speakers or their instruction manual.
En-37
Page 70

Advanced Settings (Setup Menu)
Crossover
Allows you to change speaker configurations, such as crossover frequency. Settings are
automatically configured if you use the Automatic Speaker Setup. Audio will not be output
while you are making this setting.
● If you are using THX-certified speakers, we recommend the following settings:
– Set a value "80Hz(THX)" in Crossover frequency.
– Set a value "80Hz" in "LPF of LFE".
– Set a value "Off" in "Double Bass".
Setting Item Default Value Setting Details
Front 80 Hz(THX) Select the crossover frequency from "40Hz" to
"200Hz" to start outputting frequencies for each
channel.
"Full Band": Full band will be output.
● If "Configuration" - "Subwoofer" is set to "No",
"Front" will be fixed to "Full Band" and the low
pitched range of the other channels will be output
from the front speakers. Refer to the instruction
manual of your speakers to make the setting.
Center 80 Hz(THX) Select the crossover frequency from "40Hz" to
"200Hz" to start outputting frequencies for each
channel.
"Full Band": Full band will be output.
● "Full Band" can be selected only when "Front" is
set to "Full Band".
● If an item cannot be selected even though
connection is correct, check that the settings in
"Configuration" - "Speaker Channels" matches
the number of connected channels.
Height 80 Hz(THX) Select the crossover frequency from "40Hz" to
"200Hz" to start outputting frequencies for each
channel.
"Full Band": Full band will be output.
● This cannot be selected when the setting for
"Configuration" - "Bi-Amp" is "Yes".
● "Full Band" can be selected only when "Front" is
set to "Full Band".
● If an item cannot be selected even though
connection is correct, check that the settings in
"Configuration" - "Speaker Channels" matches
the number of connected channels.
Setting Item Default Value Setting Details
Surround 80 Hz(THX) Select the crossover frequency from "40Hz" to
"200Hz" to start outputting frequencies for each
channel.
"Full Band": Full band will be output.
● "Full Band" can be selected only when "Front" is
set to "Full Band".
● If an item cannot be selected even though
connection is correct, check that the settings in
"Configuration" - "Speaker Channels" matches
the number of connected channels.
Back 80 Hz(THX) Select the crossover frequency from "40Hz" to
"200Hz" to start outputting frequencies for each
channel.
"Full Band": Full band will be output.
● This cannot be selected when the setting for
"Configuration" - "Bi-Amp" is "Yes".
● "Full Band" can be selected only when
"Surround" is set to "Full Band".
● If an item cannot be selected even though
connection is correct, check that the settings in
"Configuration" - "Speaker Channels" matches
the number of connected channels.
LPF of LFE 120Hz Set the low-pass filter for LFE (low-frequency effect)
signals in order to pass lower frequency signals than
the set value and thus cancel unwanted noises. The
low-pass filter will be effective only on sources with
LFE channel.
The value from "80Hz" to "120Hz" can be set.
"Off": Do not use this function
Subwoofer Phase 0° Bass sound of the subwoofers may be insufficient
depending on the type of sound and the listening
position. In that case, change the phase of
subwoofers. Set the phase value while listening to
the sound so that you can obtain your preferred
bass sound.
"0°": The subwoofer is in normal phase.
"180°": The subwoofer is in reverse phase.
● The setting cannot be changed if "Configuration"
- "Subwoofer" is set to "No".
En-38
Page 71

Advanced Settings (Setup Menu)
Setting Item Default Value Setting Details
Double Bass On This can only be selected when "Configuration" -
"Subwoofer" is set to "Yes" and "Front" is set to "Full
Band".
Boost bass output by feeding bass sounds from
the front left and right, and center speakers to the
subwoofer.
"On": Bass output will be boosted.
"Off": Bass output will not be boosted.
● The setting will not automatically be configured
even if you performed the automatic speaker
setup.
Distance
Set the distance from each speaker to the listening position. Settings are automatically
configured if you use the automatic speaker setup.
Setting Item Default Value Setting Details
Unit feet/meters Specify the unit of distance for configuring
settings.
"feet": When setting in feet (0.1 ft to 30.0 ft, in
increments of 0.1 ft)
"meters": When setting in meters (0.03 m to
9.00 m, in increments of 0.03 m)
Front Left 12.0ft/3.60m Specify the distance between each speaker and
the listening position.
Center 12.0ft/3.60m Specify the distance between each speaker and
the listening position.
Front Right 12.0ft/3.60m Specify the distance between each speaker and
the listening position.
Height Left 9.0ft/2.70m Specify the distance between each speaker and
the listening position.
● This setting cannot be changed if
"Configuration" - "Powered Zone 2" is set to
"Yes" and Zone2 is set to on.
Height Right 9.0ft/2.70m Specify the distance between each speaker and
the listening position.
● This setting cannot be changed if
"Configuration" - "Powered Zone 2" is set to
"Yes" and Zone2 is set to on.
Surround Right 7.0ft/2.10m Specify the distance between each speaker and
the listening position.
Back Right 7.0ft/2.10m Specify the distance between each speaker and
the listening position.
● This setting cannot be changed if
"Configuration" - "Powered Zone 2" is set to
"Yes" and Zone2 is set to on.
Back Left 7.0ft/2.10m Specify the distance between each speaker and
the listening position.
● This setting cannot be changed if
"Configuration" - "Powered Zone 2" is set to
"Yes" and Zone2 is set to on.
Surround Left 7.0ft/2.10m Specify the distance between each speaker and
the listening position.
Subwoofer 12.0ft/3.60m Specify the distance between each speaker and
the listening position.
En-39
Page 72

● Default values vary depending on the regions.
● The speaker "Distance" may be unable to be changed depending on the settings in "Configuration" -
"Speaker Channels" / "Subwoofer".
Level Calibration
Adjust the level of each speaker with the built-in test tone. Settings are automatically
configured if you use the Automatic Speaker Setup.
Setting Item Default Value Setting Details
Front Left 0.0dB Select a value between "-12.0 dB" and "+12.0
dB" (in 0.5 dB increments). A test tone will be
output each time you change the value. Select
the desired level.
Center 0.0dB Select a value between "-12.0 dB" and "+12.0
dB" (in 0.5 dB increments). A test tone will be
output each time you change the value. Select
the desired level.
Front Right 0.0dB Select a value between "-12.0 dB" and "+12.0
dB" (in 0.5 dB increments). A test tone will be
output each time you change the value. Select
the desired level.
Height Left 0.0dB Select a value between "-12.0 dB" and "+12.0
dB" (in 0.5 dB increments). A test tone will be
output each time you change the value. Select
the desired level.
● This cannot be selected in the following
conditions.
– The setting for "Configuration" - "Bi-Amp"
is "Yes"
– "Configuration" - "Powered Zone 2" is set
to "Yes" and ZONE 2 is on
Height Right 0.0dB Select a value between "-12.0 dB" and "+12.0
dB" (in 0.5 dB increments). A test tone will be
output each time you change the value. Select
the desired level.
● This cannot be selected in the following
conditions.
– The setting for "Configuration" - "Bi-Amp"
is "Yes"
– "Configuration" - "Powered Zone 2" is set
to "Yes" and ZONE 2 is on
Advanced Settings (Setup Menu)
Setting Item Default Value Setting Details
Surround Right 0.0dB Select a value between "-12.0 dB" and "+12.0
dB" (in 0.5 dB increments). A test tone will be
output each time you change the value. Select
the desired level.
Back Right 0.0dB Select a value between "-12.0 dB" and "+12.0
dB" (in 0.5 dB increments). A test tone will be
output each time you change the value. Select
the desired level.
● This cannot be selected in the following
conditions.
– The setting for "Configuration" - "Bi-Amp"
is "Yes"
– "Configuration" - "Powered Zone 2" is set
to "Yes" and ZONE 2 is on
Back Left 0.0dB Select a value between "-12.0 dB" and "+12.0
dB" (in 0.5 dB increments). A test tone will be
output each time you change the value. Select
the desired level.
● This cannot be selected in the following
conditions.
– The setting for "Configuration" - "Bi-Amp"
is "Yes"
– "Configuration" - "Powered Zone 2" is set
to "Yes" and ZONE 2 is on
Surround Left 0.0dB Select a value between "-12.0 dB" and "+12.0
dB" (in 0.5 dB increments). A test tone will be
output each time you change the value. Select
the desired level.
Subwoofer 0.0dB Select a value between "-15.0 dB" and "+12.0
dB" (in 0.5 dB increments). A test tone will be
output each time you change the value. Select
the desired level.
● The speaker "Level Calibration" may be unable to be changed depending on the settings in
"Configuration" - "Speaker Channels" / "Subwoofer".
● "Level Calibration" cannot be changed while muting is on.
En-40
Page 73

Advanced Settings (Setup Menu)
Equalizer Settings
Adjust the output volume of each range of each connected speaker. You can adjust the
volume of each range of each speaker. You can set three types of equalizer settings in the
Presets 1, 2, and 3.
● You can adjust the bass in the low range frequencies (63 Hz, etc.), and the treble in the high range
frequencies (16 kHz, etc.).
● You can select up to seven frequency bands for each speaker.
Setting Item Default Value Setting Details
Front 0 dB First select the frequency of the speaker from
"25 Hz" to "16 kHz" with the
use / to adjust the volume of the frequency
between "−6dB" to "+6dB".
Center 0 dB First select the frequency of the speaker from
"25 Hz" to "16 kHz" with the
use / to adjust the volume of the frequency
between "−6dB" to "+6dB".
Height 0 dB First select the frequency of the speaker from
"25 Hz" to "16 kHz" with the
use / to adjust the volume of the frequency
between "−6dB" to "+6dB".
● This cannot be selected in the following
conditions.
– The setting for "Configuration" - "Bi-Amp"
is "Yes"
– "Configuration" - "Powered Zone 2" is set
to "Yes" and ZONE 2 is on
Surround 0 dB First select the frequency of the speaker from
"25 Hz" to "16 kHz" with the
use / to adjust the volume of the frequency
between "−6dB" to "+6dB".
Back 0 dB First select the frequency of the speaker from
"25 Hz" to "16 kHz" with the
use / to adjust the volume of the frequency
between "−6dB" to "+6dB".
● This cannot be selected in the following
conditions.
– The setting for "Configuration" - "Bi-Amp"
is "Yes"
– "Configuration" - "Powered Zone 2" is set
to "Yes" and ZONE 2 is on
/ cursors, then
/ cursors, then
/ cursors, then
/ cursors, then
/ cursors, then
Setting Item Default Value Setting Details
Subwoofer 0 dB First select the frequency of the speaker from
"25 Hz" to "160Hz" with the
/ cursors, then
use / to adjust the volume of the frequency
between "−6dB" to "+6dB".
● This cannot be selected if "Configuration" -
"Subwoofer" is set to "No".
● The Speaker "Equalizer Settings" may be unable to be changed depending on the settings in
"Configuration" - "Speaker Channels" / "Subwoofer".
● Adjust the volume of each speaker in "Level Calibration".
● Adjust the volume in 1 dB steps.
● This is not effective if the listening mode is Direct.
● The result may not be as expected depending on the input source and listening mode setting.
En-41
Page 74

Advanced Settings (Setup Menu)
THX Audio
Setting item Default Value Setting Details
Back Speaker
Spacing
THX Ultra2/
Select2 Subwoofer
BGC Off If your listening room layout (for practical or
>4.0 ft / >1.2 m Select the distance between the back speakers
from the following values.
When "Distance" - "Unit" is set to "feet".: Select
a value from "<1.0 ft", "1.0-4.0 ft", and ">4.0 ft".
When "Distance" - "Unit" is set to "meters".:
Select a value from "<0.3 m", "0.3-1.2 m", and
">1.2 m".
● This cannot be selected in the following
conditions.
– The setting for "Configuration" - "Bi-Amp"
is "Yes"
– "Configuration" - "Powered Zone 2" is set
to "Yes" and ZONE 2 is on
● If an item cannot be selected even though
connection is correct, check that the settings
in "Configuration" - "Speaker Channels"
matches the number of connected channels.
No Set "Yes" or "No" of the connection of the THX
certified subwoofer.
"Yes": When a THX-certified subwoofer is
connected
"No": When a THX-certified subwoofer is not
connected
● The setting cannot be changed if
"Configuration" - "Subwoofer" is set to "No".
aesthetic reasons) locates most of the listeners
close to the rear wall, the resulting bass level
can be sufficiently reinforced by the boundary
that the overall sound becomes "boomy". THX
Select2 Plus receivers contain a Boundary Gain
Compensation (BGC) feature to improve bass
balance.
"On": Use this function
"Off": Do not use this function
● In the following cases, the setting cannot be
changed:
– "Configulation" - "Subwoofer" is set to
"No".
– "THX Ultra2/Select2 Subwoofer" is set
to "No".
Setting item Default Value Setting Details
Loudness Plus On When the setting is set to "On", it is possible to
enjoy even subtle nuances of audio expression
at low volume. This is only available when the
THX listening mode is selected.
THX Loudness Plus
THX Loudness Plus is a new volume control
technology featured in THX Ultra2 Plus™ and
THX Select2 Plus™ Certified receivers.
With THX Loudness Plus, home theater
audiences can now experience the rich details
in a surround mix at any volume level.
A consequence of turning the volume below
Reference Level is that certain sound elements
can be lost or perceived differently by the
listener. THX Loudness Plus compensates for
the tonal and spatial shifts that occur when the
volume is reduced by intelligently adjusting
ambient surround channel levels and frequency
response. This enables users experience
the true impact of soundtracks regardless of
the volume setting. THX Loudness Plus is
automatically applied when listening in any THX
listening mode. The new THX Cinema, THX
Music, and THX Games modes are tailored to
apply the proper THX Loudness Plus settings
for each type of content.
En-42
Page 75

Advanced Settings (Setup Menu)
3. Audio Adjust
Configure various settings related to sound, such as settings for listening to multiplex audio
or multilingual TV broadcasts and sound field settings for listening modes.
Multiplex/Mono
Setting Item Default Value Setting Details
Multiplex
Input Channel
Mono
Input Channel
Mono
Output
Speaker
Main Set the audio channel or language to be output
when playing multiplex audio or multilingual TV
broadcasts etc.
"Main": Main channel only
"Sub": Sub channel only
"Main/Sub": Main and sub channels will be
output at the same time.
● If multiplex audio is being played, "1+1" will
be displayed when Display is pressed.
Left+Right Set the input channel to use for playing any 2
ch digital source such as Dolby Digital, or 2-ch
analog/PCM source in the Mono listening mode.
"Left": Left channel only
"Right": Right channel only
"Left + Right" : Left and right channels
Center Select the speaker to output monaural audio in
the Mono listening mode.
"Center": Audio is output from the center
speaker.
"Left/Right": Audio is output from the front L/R
speakers.
● If an item cannot be selected even though
connection is correct, check that the settings
in "Configuration" - "Speaker Channels"
matches the number of connected channels.
Dolby
Make the settings for Dolby listening mode.
Setting Item Default Value Setting Details
Loudness
Management
On Enable the Late Night function that allows
you to enjoy surround sound of Dolby TrueHD
playback even in low volume.
"On": Use this function
"Off": Do not use this function
Theater-Dimensional
Make the settings for Theater-Dimensional listening mode.
Setting Item Default Value Setting Details
Listening Angle Wide To enhance the effect of Theater-Dimensional,
select the actual angle of the left and right
front speakers as it appears from the listening
position.
"Narrow": Less than 30°
"Wide": Greater than 30°
● Position the front speakers 20° to the listening position if you have selected "Narrow" in "Listening
Angle" and 40° if you have selected "Wide".
LFE Level
Set the low-frequency effect (LFE) level of the Dolby Digital, DTS, Multichannel PCM and
DSD signals.
Setting item Default Value Setting Details
Dolby D/Dolby D+/
TrueHD
DTS/DTS-ES/DTS-HD0dB Select the low-frequency effect (LFE) level of
0dB Select the low-frequency effect (LFE) level of
each type of signal from "0dB" to "-∞dB". If the
low-frequency effect sound is too strong, select
"-20dB" or "-∞dB".
each type of signal from "0dB" to "-∞dB". If the
low-frequency effect sound is too strong, select
"-20dB" or "-∞dB".
● This setting works on LFE channel volume of
DTS, DTS-ES, DTS-HD High Resolution and
DTS-HD Master Audio sources.
En-43
Page 76

Advanced Settings (Setup Menu)
Setting item Default Value Setting Details
Other Multich Source 0dB Select the low-frequency effect (LFE) level of
each type of signal from "0dB" to "-∞dB". If the
low-frequency effect sound is too strong, select
"-20dB" or "-∞dB".
● This setting works on LFE channel volume of
Multichannel PCM and DSD sources.
Volume
Make the detailed volume setting of the unit.
Setting Item Default Value Setting Details
Volume Display Absolute Switch the volume display between the absolute
value and relative value. The absolute value 82.0
is equivalent to the relative value 0.0dB.
"Absolute": Absolute value such as "0.5" to "99.5"
"Relative": Relative value such as "-81.5dB" and
"+18.0dB"
● If the absolute value is set to "82.0", "82.0Ref"
will appear on the display.
Muting Level -∞dB Set the volume lowered from the listening volume
when muting is on.
Select a value from "-∞dB", "-40dB" to "-20dB".
Maximum Volume Off Set the maximum value to avoid too high volume.
Select a value from "Off", "50" to "99". (When
"Volume Display" is set to "Absolute")
Power On Volume Last Set the volume level of when the power is turned
on. Select a value from "Last" (Volume level
before entering standby mode), "Min", "1" to "99"
and "Max". (When "Volume Display" is set to
"Absolute")
● You cannot set a higher value than that of
"Maximum Volume".
Headphone Level 0 dB Adjust the output level of the headphones.
Select a value between "-12 dB" and "+12 dB".
Multi Zone
Setting Item Default Value Setting Details
Zone 2 Out Fixed Select which of the integrated amplifier in a
separate room or this unit should be used to
adjust the volume when Zone 2 is active.
"Fixed": Adjust on the Integrated amplifier in a
separate room
"Variable": Adjust on the unit
Zone 2 Maximum
Volume
Zone 2 Power On
Volume
Zone 3 Out Fixed Select which of the integrated amplifier in a
Zone 3 Maximum
Volume
Zone 3 Power On
Volume
Off Set the maximum value for Zone 2 to avoid
too high volume. Select a value from "Off",
"50" to "99". (When "Volume Display" is set to
"Absolute")
Last Set the Zone 2 volume level of when the unit is
turned on. Select a value from "Last" (Volume
level when the unit was turned off), "Min", "1" to
"99" and "Max". (When "Volume Display" is set
to "Absolute")
● You cannot set a higher value than that of
"Zone 2 Maximum Volume".
separate room or this unit should be used to
adjust the volume when Zone 3 is active.
"Fixed": Adjust on the Integrated amplifier in a
separate room
"Variable": Adjust on the unit
Off Set the maximum value for Zone 3 to avoid
too high volume. Select a value from "Off",
"50" to "99". (When "Volume Display" is set to
"Absolute")
Last Set the Zone 3 volume level of when the unit is
turned on. Select a value from "Last" (Volume
level when the unit was turned off), "Min", "1" to
"99" and "Max". (When "Volume Display" is set
to "Absolute")
● You cannot set a higher value than that of
"Zone 3 Maximum Volume".
En-44
Page 77

Advanced Settings (Setup Menu)
4. Source
Make settings for input sources, such as volume difference adjustments for each input
selector for the connected equipment. Select the input selector to configure.
IntelliVolume
Setting Item Default Value Setting Details
IntelliVolume 0 dB Adjust the volume level difference between the
devices connected to the unit. Select a value
between "-12 dB" and "+12 dB". Set a negative
value if the volume of the target device is larger
than the others and a positive value if smaller.
When you select a desired input to check the
audio, start playback of the connected device.
● This function is not effective in Zone 2/Zone
3.
Name Edit
Set an easy name to each input. The set name will be shown on the main unit display.
Select the input selector to configure.
Setting Item Default Value Setting Details
Name Input name 1. Select a character or symbol with the
cursors and press Enter.
Repeat it to input 10 or less characters.
"A/a": Switches between upper and lower
cases. (Pressing +10 on the remote
controller also toggles between upper and
lower cases.)
"←" "→": Moves the cursor to the arrow
direction.
": Removes a character on the left of the
"
cursor.
"Space": Puts a space.
● Pressing CLR on the remote controller
will remove all the input characters.
2. After inputting, select "OK" with the cursors
and press Enter.
The input name will be saved.
Audio Select
Make the audio input setting. The setting can be separately set to each input selector
button. Select the input selector to configure.
Setting Item Default Value Setting Details
Audio Select BD/DVD:
HDMI
CBL/SAT:
HDMI
STRM BOX:
HDMI
PC:
HDMI
GAME 1:
HDMI
GAME 2:
HDMI
AUX:
HDMI
CD:
OPTICAL
TV:
OPTICAL
PHONO:
Analog
PCM Fixed Mode Off Select whether to fix input signals to PCM
Select the priority for input selection when
multiple audio sources are connected to one
input selector, such as connections to both
the "BD/DVD" of HDMI jack and "BD/DVD" of
AUDIO jack. You cannot select a jack that is not
associated with the currently selected input.
"ARC": When giving priority to input signal from
ARC compatible TV.
● The setting can be selected only when "HDMI"
- "Audio Return Channel" is set to "Auto" and
also the "TV" input is selected.
"HDMI": When giving priority to input signal from
HDMI jacks
● The setting can be selected only when the
input is assigned to the HDMI IN jack in the
"HDMI Input" setting.
"COAXIAL": When giving priority to input signal
from COAXIAL jacks.
● The setting can be selected only when the
input is assigned to the COAXIAL jack in the
"Digital Audio Input" setting.
"OPTICAL": When giving priority to input signal
from OPTICAL jacks.
● The setting can be selected only when the
input is assigned to the OPTICAL jack in the
"Digital Audio Input" setting.
"Analog": To always output analog audio
independently of the input signal
(except multi-channel PCM) when you have
selected "HDMI", "COAXIAL", or "OPTICAL" in
the "Audio Select" setting. Set this item to "On"
if noise is produced or truncation occurs at the
beginning of a track when playing PCM sources.
Select "Off" normally.
● Changing "Audio Select" changes the setting
to "Off".
● To name a preset radio station, press Tuner on the remote controller, select AM/FM and select the
preset number.
● It cannot be set if the "NET" input is selected.
● The setting cannot be changed when "TUNER" or "NET" input is selected.
En-45
Page 78

Advanced Settings (Setup Menu)
Video Select
Setting Item Default Value Setting Details
Video Select Last Select the video input played along with audio
output when either "TUNER" or "NET" is
selected.
● This setting is effective only for an input
selector which is assigned in "HDMI Input" or
"Video Input".
"Last": Select the video input played immediately
prior.
"BD/DVD", "CBL/SAT", "STRM BOX", "PC",
"GAME 1", "GAME 2", "AUX", "CD", "PHONO",
"TV": Play the video from the selected input.
● The setting cannot be changed when input other than "TUNER" or "NET" is selected.
● When input is "NET", switch between displaying and not displaying video by pressing Mode on the
remote controller.
5. Listening Mode Preset
You can preset your favorite listening mode to each input. (For example, you can always
apply straight decode to the Dolby TrueHD source of Blu-ray Disc to play it in unchanged
sound field.)
When the list of input sources is displayed, set the signal type and listening mode.
Although it is possible to select the listening mode during playback, the selected mode will
be reset when the unit enters standby mode.
Setting Item Default Value Setting Details
Analog/PCM AllCh Stereo Set the listening mode for playing PCM signals
of CD and analog signals of record and cassette
tape.
Mono/Multiplex Full Mono Set the listening mode for playing Dolby Digital
and other digital signals recorded in monaural or
multiplex audio.
2 ch Source Dolby Surround Set the listening mode for playing Dolby Digital
and other digital signals recorded in 2 channels.
Dolby D/Dolby D+/
TrueHD
Dolby Surround Set the listening mode for playing multi-channel
Dolby Digital, Dolby Digital Plus and Dolby
TrueHD signals.
● Input signals are played as they are input if
you select "Straight Decode".
Setting Item Default Value Setting Details
DTS/DTS-ES/
DTS-HD
DTS Neural:X
(before
updating to a
version that
supports DTS:X
audio:
Straight
Decode
)
Set the listening mode for playing multi-channel
digital audio signals in DTS and DTS-HD High
Resolution formats. Select the listening mode
specified for Blu-ray or such other DTS-HD
Master Audio source.
● Input signals are played as they are input if
you select "Straight Decode".
Other Multich Source Dolby Surround Set the listening mode for playing multi-channel
audio such as DVD-audio and DSD signals.
● Input signals are played as they are input if
you select "Straight Decode".
● Available listening modes vary depending on speaker configuration and the input signal.
● Setting "Last Valid" will always select the last selected mode.
● Only "Analog" can be set to the "TUNER" input.
● "Digital" and "TrueHD" can be set to the "NET" input.
En-46
Page 79

Advanced Settings (Setup Menu)
6. Hardware
Tuner
Setting Item Default Value Setting Details
AM/FM Frequency
Step (North American
models)
AM Frequency Step
(Australian models)
10kHz/0.2MHz Select a frequency step depending on your
area of residence.
Select "10kHz/0.2MHz" or "9kHz/0.05MHz".
● When this setting is changed, all radio
presets are deleted.
9kHz Select a frequency step depending on your
area of residence.
Select "10kHz" or "9kHz".
● When this setting is changed, all radio
presets are deleted.
HDMI
Setting Item Default Value Setting Details
HDMI CEC (RIHD) Off Setting to "On" enables the input selection link
and other link functions with HDMI connected
CEC compliant device.
"On": Use this function
"Off": Do not use this function
When changing this setting, turn off and then on
again the power of all connected components.
● Depending on the TV set, a link may need to
be configured on the TV.
● When this setting is "On", the names of the
CEC-compatible components and "CEC On"
are displayed after this operation screen is
closed.
● Setting to "On" increases the power
consumption even when the unit is on
standby. However, the increase in power
consumption is kept to a minimum by
automatically entering the HYBRID
STANDBY mode, where only the essential
circuit is operating.
● If you operate the Master Volume control on
the unit when this setting is "On" and audio
is output from the TV speakers, audio will be
output also from the speakers connected to
the unit. If you want to output from only either
of them, change the unit or TV settings, or
reduce the volume of the unit.
● If abnormal operation occurs when you set
the setting to "On", set it to "Off".
● When connecting a non-CEC compatible
component, or when you are not sure
whether it is compatible, set the setting to
"Off".
Control TV MAIN Set whether to enable the CEC link function for
TVs connected through one of the HDMI OUT
MAIN or SUB jacks. To change this setting, set
"HDMI CEC (RIHD)" to "On" in advance.
● When you have set "TV Out" - "HDMI Out" to
"SUB" you cannot select "MAIN".
En-47
Page 80

Advanced Settings (Setup Menu)
Setting Item Default Value Setting Details
HDMI Standby
Through
Off When this is set to anything other than "Off",
you can play the video and audio of an HDMI
connected player on the TV even if the unit is in
standby mode. Only "Auto" and "Auto(Eco)" can
be selected if "HDMI CEC (RIHD)" is set to "On".
If you select anything else, set "HDMI CEC
(RIHD)" to "Off".
● Power consumption in standby mode
increases if set to anything other than "Off".
"BD/DVD", "CBL/SAT", "STRM BOX", "PC",
"GAME 1", "GAME 2", "AUX", "CD", "PHONO",
"TV": For example, if you select "BD/DVD", you
can play the equipment connected to the "BD/
DVD" terminal on the TV even if the unit is in
standby mode. Select this setting if you have
decided which player to use with this function.
"Last": You can play the video and audio of the
input selected immediately prior to the unit being
switched to standby on the TV.
"Auto", "Auto (Eco)": Select one of these
settings when you have connected equipment
that conforms to the CEC standard. You can
play the video and audio of the input selected on
the TV, irrespective of what input was selected
immediately prior to the unit being switched to
standby, using the CEC link function.
● To play players on the TV that do not conform
to the CEC standard, you will need to turn the
unit on and switch to the relevant input.
● When using a TV that conforms to the
CEC standard, you can reduce the power
consumption in standby mode by selecting
"Auto (Eco)".
Setting Item Default Value Setting Details
Audio TV Out (MAIN) Off You can enjoy audio through the speakers of the
HDMI connected TV while this unit is on.
"On": Use this function
"Off": Do not use this function
● To select "On", set "HDMI CEC (RIHD)" to
"Off".
● The setting is fixed to "Auto" if "HDMI CEC
(RIHD)" is set to "On" and "Control TV" is set
to "MAIN".
● Listening mode cannot be changed while
"Audio TV Out (MAIN)" is set to "On" and
audio is being output through the speakers
of the TV.
● Depending on your TV set or input signal of
the component, audio may not output through
the speakers of the TV even if this setting
is set to "On". In such case, audio is output
from the speakers of the unit.
● If you operate the Master Volume control on
the unit when audio input to the unit is being
output from the TV speakers, audio will be
output from the unit. If you do not want to
output audio from the unit, change the unit or
TV settings, or reduce the volume of the unit.
● This setting is fixed to "Off" if "TV Out" -
"HDMI Out" is set to "SUB".
En-48
Page 81

Advanced Settings (Setup Menu)
Setting Item Default Value Setting Details
Audio TV Out (SUB) Off You can enjoy audio through the speakers of the
HDMI connected TV while this unit is on.
"On": Use this function
"Off": Do not use this function
● The setting is fixed to "Auto" if "HDMI CEC
(RIHD)" is set to "On" and "Control TV" is set
to "SUB".
● Listening mode cannot be changed while
"Audio TV Out (SUB)" is set to "On" and
audio is being output through the speakers
of the TV.
● Depending on your TV set or input signal of
the component, audio may not output through
the speakers of the TV even if this setting
is set to "On". In such case, audio is output
from the speakers of the unit.
● If you operate the Master Volume control on
the unit when audio input to the unit is being
output from the TV speakers, audio will be
output from the unit. If you do not want to
output audio from the unit, change the unit or
TV settings, or reduce the volume of the unit.
● This setting is fixed to "Off" if "TV Out" -
"HDMI Out" is set to "MAIN".
Audio Return
Channel
Auto LipSync On This setting automatically corrects any
Auto () You can enjoy sound of the HDMI connected
ARC compatible TV through the speakers
connected to the unit.
To use this function, set "HDMI CEC (RIHD)"
to "On" in advance.
"Auto": When enjoying the TV sound through the
speakers connected to the unit
"Off": When not using the ARC function
desynchronization between the video and audio
signals based on data from the HDMI LipSync
compatible TV.
"On": Automatic correction will be enabled.
"Off": Automatic correction will be disabled.
Power Management
Setting Item Default Value Setting Details
Sleep Timer Off Select to turn the unit into standby mode
automatically when the specified time elapses.
Select a value between "10 minutes" to "90
minutes".
"Off": Select if you do not want the unit to
automatically switch to standby.
Auto Standby On/Off This setting places the unit on standby
automatically after 20 minutes of inactivity
without any video or audio input. (When "USB
Power Out at Standby" or "Network Standby"
is on, the unit enters the HYBRID STANDBY
mode, which minimizes the increase in power
consumption.)
"On": The unit will automatically enter standby
mode.
"Off": The unit will not automatically enter
standby mode.
● "Auto Standby" is appeared on the display
and TV screen 30 seconds before the Auto
Standby comes on.
● "Auto Standby" does not work when Zone
2 is on.
● Default values vary depending on the
regions.
Auto Standby in
HDMI Standby
Through
USB Power Out at
Standby
Off Enable or disable "Auto Standby" while "HDMI
Standby Through" is on.
"On": The setting will be enabled.
"Off": The setting will be disabled.
● This setting cannot be set to "On" if "Auto
Standby" is set to "Off".
Off When this function is "On", you can still have
equipment connected to the USB port supplied
with power even when this unit is in standby.
● When this function is being used, the power
consumption increases even when the unit
is on standby. However, the increase in
power consumption is kept to a minimum
by automatically entering the HYBRID
STANDBY mode, where only the essential
circuit is operating.
En-49
Page 82

Advanced Settings (Setup Menu)
Setting Item Default Value Setting Details
Network Standby Off When this function is "On", you can turn on
the power of the unit via network using an
application such as Integra Remote.
● When "Network Standby" is used, the power
consumption increases even when the unit
is on standby. However, the increase in
power consumption is kept to a minimum
by automatically entering the HYBRID
STANDBY mode, where only the essential
circuit is operating.
● Wait for a while if "Network Standby" cannot be selected. It will appear when the network function is
started up.
Network
Make the network setting.
● When LAN is configured with a DHCP, set "DHCP" to "Enable" to configure the
setting automatically. ("Enable" is set by default) To assign fixed IP addresses to each
components, you must set "DHCP" to "Disable" and assign an address to this unit in
"IP Address" as well as set information related to your LAN, such as Subnet Mask and
Gateway.
Setting Item Default Value Setting Details
MAC Address – This is the MAC address of the AV receiver.
This value is specific to the component and
cannot be changed.
DHCP Enable "Enable": Auto configuration by DHCP
"Disable": Manual configuration without DHCP
● If selecting "Disable", you must set "IP
Address", "Subnet Mask", "Gateway", and
"DNS Server" manually.
IP Address – Displays/Sets the IP address.
Subnet Mask – Displays/Sets the subnet mask.
Gateway – Displays/Sets the gateway.
DNS Server – Displays/Sets the primary DNS server.
Proxy URL – Displays/Sets the proxy server URL.
Proxy Port – Displays/Sets the proxy server port number when
you enter "Proxy URL".
En-50
Page 83

Advanced Settings (Setup Menu)
Setting Item Default Value Setting Details
Friendly Name DTR-60.7/
DTR-50.7
Change the name for this unit to a simple one for
display on the equipment connected by network.
1. Press Enter to display the Edit screen.
2. Select a character or symbol with the cursors
and press Enter.
Repeat it to input 31 or less characters.
"A/a": Switches between upper and lower
cases. (Pressing +10 on the remote
controller also toggles between upper and
lower cases.)
"←" "→": Moves the cursor to the arrow
direction.
": Removes a character on the left of the
"
cursor.
"Space": Puts a space.
● Pressing CLR on the remote controller will
remove all the input characters.
3. After inputting, select "OK" with the cursors
and press Enter.
The input name will be saved.
AirPlay Password ----- You can enter a password (maximum of 31
places) so that only the entered user can use
R
AirPlay
.
1. Press Enter to display the Edit screen.
2. Select a character or symbol with the cursors
and press Enter.
Repeat it to input 31 or less characters.
"A/a": Switches between upper and lower
cases. (Pressing +10 on the remote
controller also toggles between upper and
lower cases.)
"←" "→": Moves the cursor to the arrow
direction.
" ": Removes a character on the left of the
cursor.
"Space": Puts a space.
● Pressing D on the remote controller will
switch whether to mask the password with
" " or display in the plain text.
● Pressing CLR on the remote controller will
remove all the input characters.
3. After inputting, select "OK" with the cursors
and press Enter.
The input password will be saved.
Setting Item Default Value Setting Details
Usage Data No As a means of improving the quality of our
products and services, Onkyo may collect
information about your usage over the network.
Select "Yes" if you agree to our collecting this
information. Select "No" if you do not want us to
collect this information.
● You can set this after confirming the Privacy
Policy. When you select "Usage Data" and
press Enter, the Privacy Policy is displayed.
(The same screen is displayed once also
when setting up the network connection.) If
you agree to the collection of the information,
this setting also becomes "Yes". Note that
if you agree to the Privacy Policy but select
"No" for this setting, the information will not be
collected.
Network Check – You can check the network connection.
Press Enter when "Start" is displayed.
● Wait for a while if "Network" cannot be selected. It will appear when the network function is started up.
En-51
Page 84

Advanced Settings (Setup Menu)
12V Trigger A
Set when outputting the control signal (maximum 12 V/100 mA) through the 12V TRIGGER
OUT A jack. Different settings can be set for each input selector. You can enable power link
operation when you connect the unit and the external devices equipped with 12V trigger
input jack.
Setting Item Default Value Setting Details
Delay 0 sec Set after how many seconds the 12V trigger
output will occur in response to the unit's
operation. As some devices cause a large
current when they turn on, delay the output if
such devices are connected. Select a value
between "0 sec" to "3 sec".
BD/DVD Main Set the 12V trigger output setting to each
input.
"Off": No output
"Main": Output when "BD/DVD" is selected as
input for main room.
"Zone2": Output when "BD/DVD" is selected
as input for ZONE2.
"Main/Zone2": Output when "BD/DVD" is
selected as input for main room or ZONE2.
"Zone3": Output when "BD/DVD" is selected
as input for ZONE3.
"Main/Zone3": Output when "BD/DVD" is
selected as input for main room or ZONE3.
"Zone2/Zone3": Output when "BD/DVD" is
selected as input for ZONE2 or ZONE3.
"Main/Zone2/Zone3": Output when "BD/DVD"
is selected as input for main room, ZONE2 or
ZONE3.
Setting Item Default Value Setting Details
CBL/SAT Main Set the 12V trigger output setting to each
input.
"Off": No output
"Main": Output when "CBL/SAT" is selected
as input for main room.
"Zone2": Output when "CBL/SAT" is selected
as input for ZONE2.
"Main/Zone2": Output when "CBL/SAT" is
selected as input for main room or ZONE2.
"Zone3": Output when "CBL/SAT" is selected
as input for ZONE3.
"Main/Zone3": Output when "CBL/SAT" is
selected as input for main room or ZONE3.
"Zone2/Zone3": Output when "CBL/SAT" is
selected as input for ZONE2 or ZONE3.
"Main/Zone2/Zone3": Output when "CBL/SAT"
is selected as input for main room, ZONE2 or
ZONE3.
STRM BOX Main Set the 12V trigger output setting to each
input.
"Off": No output
"Main": Output when "STRM BOX" is selected
as input for main room.
"Zone2": Output when "STRM BOX" is
selected as input for ZONE2.
"Main/Zone2": Output when "STRM BOX" is
selected as input for main room or ZONE2.
"Zone3": Output when "STRM BOX" is
selected as input for ZONE3.
"Main/Zone3": Output when "STRM BOX" is
selected as input for main room or ZONE3.
"Zone2/Zone3": Output when "STRM BOX" is
selected as input for ZONE2 or ZONE3.
"Main/Zone2/Zone3": Output when "STRM
BOX" is selected as input for main room,
ZONE2 or ZONE3.
En-52
Page 85

Advanced Settings (Setup Menu)
Setting Item Default Value Setting Details
PC Main Set the 12V trigger output setting to each
input.
"Off": No output
"Main": Output when "PC" is selected as input
for main room.
"Zone2": Output when "PC" is selected as
input for ZONE2.
"Main/Zone2": Output when "PC" is selected
as input for main room or ZONE2.
"Zone3": Output when "PC" is selected as
input for ZONE3.
"Main/Zone3": Output when "PC" is selected
as input for main room or ZONE3.
"Zone2/Zone3": Output when "PC" is selected
as input for ZONE2 or ZONE3.
"Main/Zone2/Zone3": Output when "PC" is
selected as input for main room, ZONE2 or
ZONE3.
GAME 1 Main Set the 12V trigger output setting to each
input.
"Off": No output
"Main": Output when "GAME 1" is selected as
input for main room.
"Zone2": Output when "GAME 1" is selected
as input for ZONE2.
"Main/Zone2": Output when "GAME 1" is
selected as input for main room or ZONE2.
"Zone3": Output when "GAME 1" is selected
as input for ZONE3.
"Main/Zone3": Output when "GAME 1" is
selected as input for main room or ZONE3.
"Zone2/Zone3": Output when "GAME 1" is
selected as input for ZONE2 or ZONE3.
"Main/Zone2/Zone3": Output when "GAME 1"
is selected as input for main room, ZONE2 or
ZONE3.
Setting Item Default Value Setting Details
GAME 2 Main Set the 12V trigger output setting to each
input.
"Off": No output
"Main": Output when "GAME 2" is selected as
input for main room.
"Zone2": Output when "GAME 2" is selected
as input for ZONE2.
"Main/Zone2": Output when "GAME 2" is
selected as input for main room or ZONE2.
"Zone3": Output when "GAME 2" is selected
as input for ZONE3.
"Main/Zone3": Output when "GAME 2" is
selected as input for main room or ZONE3.
"Zone2/Zone3": Output when "GAME 2" is
selected as input for ZONE2 or ZONE3.
"Main/Zone2/Zone3": Output when "GAME 2"
is selected as input for main room, ZONE2 or
ZONE3.
AUX Main Set the 12V trigger output setting to each
input.
"Off": No output
"Main": Output when "AUX" is selected as
input for main room.
"Zone2": Output when "AUX" is selected as
input for ZONE2.
"Main/Zone2": Output when "AUX" is selected
as input for main room or ZONE2.
En-53
Page 86

Advanced Settings (Setup Menu)
Setting Item Default Value Setting Details
CD Main Set the 12V trigger output setting to each
input.
"Off": No output
"Main": Output when "CD" is selected as input
for main room.
"Zone2": Output when "CD" is selected as
input for ZONE2.
"Main/Zone2": Output when "CD" is selected
as input for main room or ZONE2.
"Zone3": Output when "CD" is selected as
input for ZONE3.
"Main/Zone3": Output when "CD" is selected
as input for main room or ZONE3.
"Zone2/Zone3": Output when "CD" is selected
as input for ZONE2 or ZONE3.
"Main/Zone2/Zone3": Output when "CD" is
selected as input for main room, ZONE2 or
ZONE3.
PHONO Main Set the 12V trigger output setting to each
input.
"Off": No output
"Main": Output when "PHONO" is selected as
input for main room.
"Zone2": Output when "PHONO" is selected
as input for ZONE2.
"Main/Zone2": Output when "PHONO" is
selected as input for main room or ZONE2.
"Zone3": Output when "PHONO" is selected
as input for ZONE3.
"Main/Zone3": Output when "PHONO" is
selected as input for main room or ZONE3.
"Zone2/Zone3": Output when "PHONO" is
selected as input for ZONE2 or ZONE3.
"Main/Zone2/Zone3": Output when "PHONO"
is selected as input for main room, ZONE2 or
ZONE3.
Setting Item Default Value Setting Details
TV Main Set the 12V trigger output setting to each
input.
"Off": No output
"Main": Output when "TV" is selected as input
for main room.
"Zone2": Output when "TV" is selected as
input for ZONE2.
"Main/Zone2": Output when "TV" is selected
as input for main room or ZONE2.
"Zone3": Output when "TV" is selected as
input for ZONE3.
"Main/Zone3": Output when "TV" is selected
as input for main room or ZONE3.
"Zone2/Zone3": Output when "TV" is selected
as input for ZONE2 or ZONE3.
"Main/Zone2/Zone3": Output when "TV" is
selected as input for main room, ZONE2 or
ZONE3.
TUNER Main Set the 12V trigger output setting to each
input.
"Off": No output
"Main": Output when "TUNER" is selected as
input for main room.
"Zone2": Output when "TUNER" is selected
as input for ZONE2.
"Main/Zone2": Output when "TUNER" is
selected as input for main room or ZONE2.
"Zone3": Output when "TUNER" is selected
as input for ZONE3.
"Main/Zone3": Output when "TUNER" is
selected as input for main room or ZONE3.
"Zone2/Zone3": Output when "TUNER" is
selected as input for ZONE2 or ZONE3.
"Main/Zone2/Zone3": Output when "TUNER"
is selected as input for main room, ZONE2 or
ZONE3.
En-54
Page 87

Operating Other Components with the Remote Controller
Setting Item Default Value Setting Details
NET Main Set the 12V trigger output setting to each
input.
"Off": No output
"Main": Output when "NET" is selected as
input for main room.
"Zone2": Output when "NET" is selected as
input for ZONE2.
"Main/Zone2": Output when "NET" is selected
as input for main room or ZONE2.
"Zone3": Output when "NET" is selected as
input for ZONE3.
"Main/Zone3": Output when "NET" is selected
as input for main room or ZONE3.
"Zone2/Zone3": Output when "NET" is
selected as input for ZONE2 or ZONE3.
"Main/Zone2/Zone3": Output when "NET" is
selected as input for main room, ZONE2 or
ZONE3.
12V Trigger B
Set when outputting the control signal (maximum 12 V/25 mA) through the 12V TRIGGER
OUT B jack. Different settings can be set for each input selector. You can enable power link
operation when you connect the unit and the external devices equipped with 12V trigger
input jack.
Setting Item Default Value Setting Details
Delay 1 sec Set after how many seconds the 12V trigger
output will occur in response to the unit's
operation. As some devices cause a large
current when they turn on, delay the output if
such devices are connected. Select a value
between "0 sec" to "3 sec".
Setting Item Default Value Setting Details
BD/DVD Zone2 Set the 12V trigger output setting to each
input.
"Off": No output
"Main": Output when "BD/DVD" is selected as
input for main room.
"Zone2": Output when "BD/DVD" is selected
as input for ZONE2.
"Main/Zone2": Output when "BD/DVD" is
selected as input for main room or ZONE2.
"Zone3": Output when "BD/DVD" is selected
as input for ZONE3.
"Main/Zone3": Output when "BD/DVD" is
selected as input for main room or ZONE3.
"Zone2/Zone3": Output when "BD/DVD" is
selected as input for ZONE2 or ZONE3.
"Main/Zone2/Zone3": Output when "BD/DVD"
is selected as input for main room, ZONE2 or
ZONE3.
CBL/SAT Zone2 Set the 12V trigger output setting to each
input.
"Off": No output
"Main": Output when "CBL/SAT" is selected
as input for main room.
"Zone2": Output when "CBL/SAT" is selected
as input for ZONE2.
"Main/Zone2": Output when "CBL/SAT" is
selected as input for main room or ZONE2.
"Zone3": Output when "CBL/SAT" is selected
as input for ZONE3.
"Main/Zone3": Output when "CBL/SAT" is
selected as input for main room or ZONE3.
"Zone2/Zone3": Output when "CBL/SAT" is
selected as input for ZONE2 or ZONE3.
"Main/Zone2/Zone3": Output when "CBL/SAT"
is selected as input for main room, ZONE2 or
ZONE3.
En-55
Page 88

Operating Other Components with the Remote Controller
Setting Item Default Value Setting Details
STRM BOX Zone2 Set the 12V trigger output setting to each
input.
"Off": No output
"Main": Output when "STRM BOX" is selected
as input for main room.
"Zone2": Output when "STRM BOX" is
selected as input for ZONE2.
"Main/Zone2": Output when "STRM BOX" is
selected as input for main room or ZONE2.
"Zone3": Output when "STRM BOX" is
selected as input for ZONE3.
"Main/Zone3": Output when "STRM BOX" is
selected as input for main room or ZONE3.
"Zone2/Zone3": Output when "STRM BOX" is
selected as input for ZONE2 or ZONE3.
"Main/Zone2/Zone3": Output when "STRM
BOX" is selected as input for main room,
ZONE2 or ZONE3.
PC Zone2 Set the 12V trigger output setting to each
input.
"Off": No output
"Main": Output when "PC" is selected as input
for main room.
"Zone2": Output when "PC" is selected as
input for ZONE2.
"Main/Zone2": Output when "PC" is selected
as input for main room or ZONE2.
"Zone3": Output when "PC" is selected as
input for ZONE3.
"Main/Zone3": Output when "PC" is selected
as input for main room or ZONE3.
"Zone2/Zone3": Output when "PC" is selected
as input for ZONE2 or ZONE3.
"Main/Zone2/Zone3": Output when "PC" is
selected as input for main room, ZONE2 or
ZONE3.
Setting Item Default Value Setting Details
GAME 1 Zone2 Set the 12V trigger output setting to each
input.
"Off": No output
"Main": Output when "GAME 1" is selected as
input for main room.
"Zone2": Output when "GAME 1" is selected
as input for ZONE2.
"Main/Zone2": Output when "GAME 1" is
selected as input for main room or ZONE2.
"Zone3": Output when "GAME 1" is selected
as input for ZONE3.
"Main/Zone3": Output when "GAME 1" is
selected as input for main room or ZONE3.
"Zone2/Zone3": Output when "GAME 1" is
selected as input for ZONE2 or ZONE3.
"Main/Zone2/Zone3": Output when "GAME 1"
is selected as input for main room, ZONE2 or
ZONE3.
GAME 2 Zone2 Set the 12V trigger output setting to each
input.
"Off": No output
"Main": Output when "GAME 2" is selected as
input for main room.
"Zone2": Output when "GAME 2" is selected
as input for ZONE2.
"Main/Zone2": Output when "GAME 2" is
selected as input for main room or ZONE2.
"Zone3": Output when "GAME 2" is selected
as input for ZONE3.
"Main/Zone3": Output when "GAME 2" is
selected as input for main room or ZONE3.
"Zone2/Zone3": Output when "GAME 2" is
selected as input for ZONE2 or ZONE3.
"Main/Zone2/Zone3": Output when "GAME 2"
is selected as input for main room, ZONE2 or
ZONE3.
En-56
Page 89

Operating Other Components with the Remote Controller
Setting Item Default Value Setting Details
AUX Zone2 Set the 12V trigger output setting to each
input.
"Off": No output
"Main": Output when "AUX" is selected as
input for main room.
"Zone2": Output when "AUX" is selected as
input for ZONE2.
"Main/Zone2": Output when "AUX" is selected
as input for main room or ZONE2.
CD Zone2 Set the 12V trigger output setting to each
input.
"Off": No output
"Main": Output when "CD" is selected as input
for main room.
"Zone2": Output when "CD" is selected as
input for ZONE2.
"Main/Zone2": Output when "CD" is selected
as input for main room or ZONE2.
"Zone3": Output when "CD" is selected as
input for ZONE3.
"Main/Zone3": Output when "CD" is selected
as input for main room or ZONE3.
"Zone2/Zone3": Output when "CD" is selected
as input for ZONE2 or ZONE3.
"Main/Zone2/Zone3": Output when "CD" is
selected as input for main room, ZONE2 or
ZONE3.
Setting Item Default Value Setting Details
PHONO Zone2 Set the 12V trigger output setting to each
input.
"Off": No output
"Main": Output when "PHONO" is selected as
input for main room.
"Zone2": Output when "PHONO" is selected
as input for ZONE2.
"Main/Zone2": Output when "PHONO" is
selected as input for main room or ZONE2.
"Zone3": Output when "PHONO" is selected
as input for ZONE3.
"Main/Zone3": Output when "PHONO" is
selected as input for main room or ZONE3.
"Zone2/Zone3": Output when "PHONO" is
selected as input for ZONE2 or ZONE3.
"Main/Zone2/Zone3": Output when "PHONO"
is selected as input for main room, ZONE2 or
ZONE3.
TV Zone2 Set the 12V trigger output setting to each
input.
"Off": No output
"Main": Output when "TV" is selected as input
for main room.
"Zone2": Output when "TV" is selected as
input for ZONE2.
"Main/Zone2": Output when "TV" is selected
as input for main room or ZONE2.
"Zone3": Output when "TV" is selected as
input for ZONE3.
"Main/Zone3": Output when "TV" is selected
as input for main room or ZONE3.
"Zone2/Zone3": Output when "TV" is selected
as input for ZONE2 or ZONE3.
"Main/Zone2/Zone3": Output when "TV" is
selected as input for main room, ZONE2 or
ZONE3.
En-57
Page 90

Operating Other Components with the Remote Controller
Setting Item Default Value Setting Details
TUNER Zone2 Set the 12V trigger output setting to each
input.
"Off": No output
"Main": Output when "TUNER" is selected as
input for main room.
"Zone2": Output when "TUNER" is selected
as input for ZONE2.
"Main/Zone2": Output when "TUNER" is
selected as input for main room or ZONE2.
"Zone3": Output when "TUNER" is selected
as input for ZONE3.
"Main/Zone3": Output when "TUNER" is
selected as input for main room or ZONE3.
"Zone2/Zone3": Output when "TUNER" is
selected as input for ZONE2 or ZONE3.
"Main/Zone2/Zone3": Output when "TUNER"
is selected as input for main room, ZONE2 or
ZONE3.
NET Zone2 Set the 12V trigger output setting to each
input.
"Off": No output
"Main": Output when "NET" is selected as
input for main room.
"Zone2": Output when "NET" is selected as
input for ZONE2.
"Main/Zone2": Output when "NET" is selected
as input for main room or ZONE2.
"Zone3": Output when "NET" is selected as
input for ZONE3.
"Main/Zone3": Output when "NET" is selected
as input for main room or ZONE3.
"Zone2/Zone3": Output when "NET" is
selected as input for ZONE2 or ZONE3.
"Main/Zone2/Zone3": Output when "NET" is
selected as input for main room, ZONE2 or
ZONE3.
12V Trigger C
Set when outputting the control signal (maximum 12 V/25 mA) through the 12V TRIGGER
OUT C jack. Different settings can be set for each input selector. You can enable power link
operation when you connect the unit and the external devices equipped with 12V trigger
input jack.
Setting Item Default Value Setting Details
Delay 2 sec Set after how many seconds the 12V trigger
output will occur in response to the unit's
operation. As some devices cause a large
current when they turn on, delay the output if
such devices are connected. Select a value
between "0 sec" to "3 sec".
BD/DVD Main/Zone2/Zone3 Set the 12V trigger output setting to each
input.
"Off": No output
"Main": Output when "BD/DVD" is selected as
input for main room.
"Zone2": Output when "BD/DVD" is selected
as input for ZONE2.
"Main/Zone2": Output when "BD/DVD" is
selected as input for main room or ZONE2.
"Zone3": Output when "BD/DVD" is selected
as input for ZONE3.
"Main/Zone3": Output when "BD/DVD" is
selected as input for main room or ZONE3.
"Zone2/Zone3": Output when "BD/DVD" is
selected as input for ZONE2 or ZONE3.
"Main/Zone2/Zone3": Output when "BD/DVD"
is selected as input for main room, ZONE2 or
ZONE3.
En-58
Page 91

Operating Other Components with the Remote Controller
Setting Item Default Value Setting Details
CBL/SAT Main/Zone2/Zone3 Set the 12V trigger output setting to each
input.
"Off": No output
"Main": Output when "CBL/SAT" is selected
as input for main room.
"Zone2": Output when "CBL/SAT" is selected
as input for ZONE2.
"Main/Zone2": Output when "CBL/SAT" is
selected as input for main room or ZONE2.
"Zone3": Output when "CBL/SAT" is selected
as input for ZONE3.
"Main/Zone3": Output when "CBL/SAT" is
selected as input for main room or ZONE3.
"Zone2/Zone3": Output when "CBL/SAT" is
selected as input for ZONE2 or ZONE3.
"Main/Zone2/Zone3": Output when "CBL/SAT"
is selected as input for main room, ZONE2 or
ZONE3.
STRM BOX Main/Zone2/Zone3 Set the 12V trigger output setting to each
input.
"Off": No output
"Main": Output when "STRM BOX" is selected
as input for main room.
"Zone2": Output when "STRM BOX" is
selected as input for ZONE2.
"Main/Zone2": Output when "STRM BOX" is
selected as input for main room or ZONE2.
"Zone3": Output when "STRM BOX" is
selected as input for ZONE3.
"Main/Zone3": Output when "STRM BOX" is
selected as input for main room or ZONE3.
"Zone2/Zone3": Output when "STRM BOX" is
selected as input for ZONE2 or ZONE3.
"Main/Zone2/Zone3": Output when "STRM
BOX" is selected as input for main room,
ZONE2 or ZONE3.
Setting Item Default Value Setting Details
PC Main/Zone2/Zone3 Set the 12V trigger output setting to each
input.
"Off": No output
"Main": Output when "PC" is selected as input
for main room.
"Zone2": Output when "PC" is selected as
input for ZONE2.
"Main/Zone2": Output when "PC" is selected
as input for main room or ZONE2.
"Zone3": Output when "PC" is selected as
input for ZONE3.
"Main/Zone3": Output when "PC" is selected
as input for main room or ZONE3.
"Zone2/Zone3": Output when "PC" is selected
as input for ZONE2 or ZONE3.
"Main/Zone2/Zone3": Output when "PC" is
selected as input for main room, ZONE2 or
ZONE3.
GAME 1 Main/Zone2/Zone3 Set the 12V trigger output setting to each
input.
"Off": No output
"Main": Output when "GAME 1" is selected as
input for main room.
"Zone2": Output when "GAME 1" is selected
as input for ZONE2.
"Main/Zone2": Output when "GAME 1" is
selected as input for main room or ZONE2.
"Zone3": Output when "GAME 1" is selected
as input for ZONE3.
"Main/Zone3": Output when "GAME 1" is
selected as input for main room or ZONE3.
"Zone2/Zone3": Output when "GAME 1" is
selected as input for ZONE2 or ZONE3.
"Main/Zone2/Zone3": Output when "GAME 1"
is selected as input for main room, ZONE2 or
ZONE3.
En-59
Page 92

Advanced Connections
Setting Item Default Value Setting Details
GAME 2 Main/Zone2/Zone3 Set the 12V trigger output setting to each
input.
"Off": No output
"Main": Output when "GAME 2" is selected as
input for main room.
"Zone2": Output when "GAME 2" is selected
as input for ZONE2.
"Main/Zone2": Output when "GAME 2" is
selected as input for main room or ZONE2.
"Zone3": Output when "GAME 2" is selected
as input for ZONE3.
"Main/Zone3": Output when "GAME 2" is
selected as input for main room or ZONE3.
"Zone2/Zone3": Output when "GAME 2" is
selected as input for ZONE2 or ZONE3.
"Main/Zone2/Zone3": Output when "GAME 2"
is selected as input for main room, ZONE2 or
ZONE3.
AUX Main/Zone2 Set the 12V trigger output setting to each
input.
"Off": No output
"Main": Output when "AUX" is selected as
input for main room.
"Zone2": Output when "AUX" is selected as
input for ZONE2.
"Main/Zone2": Output when "AUX" is selected
as input for main room or ZONE2.
Setting Item Default Value Setting Details
CD Main/Zone2/Zone3 Set the 12V trigger output setting to each
input.
"Off": No output
"Main": Output when "CD" is selected as input
for main room.
"Zone2": Output when "CD" is selected as
input for ZONE2.
"Main/Zone2": Output when "CD" is selected
as input for main room or ZONE2.
"Zone3": Output when "CD" is selected as
input for ZONE3.
"Main/Zone3": Output when "CD" is selected
as input for main room or ZONE3.
"Zone2/Zone3": Output when "CD" is selected
as input for ZONE2 or ZONE3.
"Main/Zone2/Zone3": Output when "CD" is
selected as input for main room, ZONE2 or
ZONE3.
PHONO Main/Zone2/Zone3 Set the 12V trigger output setting to each
input.
"Off": No output
"Main": Output when "PHONO" is selected as
input for main room.
"Zone2": Output when "PHONO" is selected
as input for ZONE2.
"Main/Zone2": Output when "PHONO" is
selected as input for main room or ZONE2.
"Zone3": Output when "PHONO" is selected
as input for ZONE3.
"Main/Zone3": Output when "PHONO" is
selected as input for main room or ZONE3.
"Zone2/Zone3": Output when "PHONO" is
selected as input for ZONE2 or ZONE3.
"Main/Zone2/Zone3": Output when "PHONO"
is selected as input for main room, ZONE2 or
ZONE3.
En-60
Page 93

Connecting and Operating Onkyo RI Components
Setting Item Default Value Setting Details
TV Main/Zone2/Zone3 Set the 12V trigger output setting to each
input.
"Off": No output
"Main": Output when "TV" is selected as input
for main room.
"Zone2": Output when "TV" is selected as
input for ZONE2.
"Main/Zone2": Output when "TV" is selected
as input for main room or ZONE2.
"Zone3": Output when "TV" is selected as
input for ZONE3.
"Main/Zone3": Output when "TV" is selected
as input for main room or ZONE3.
"Zone2/Zone3": Output when "TV" is selected
as input for ZONE2 or ZONE3.
"Main/Zone2/Zone3": Output when "TV" is
selected as input for main room, ZONE2 or
ZONE3.
TUNER Main/Zone2/Zone3 Set the 12V trigger output setting to each
input.
"Off": No output
"Main": Output when "TUNER" is selected as
input for main room.
"Zone2": Output when "TUNER" is selected
as input for ZONE2.
"Main/Zone2": Output when "TUNER" is
selected as input for main room or ZONE2.
"Zone3": Output when "TUNER" is selected
as input for ZONE3.
"Main/Zone3": Output when "TUNER" is
selected as input for main room or ZONE3.
"Zone2/Zone3": Output when "TUNER" is
selected as input for ZONE2 or ZONE3.
"Main/Zone2/Zone3": Output when "TUNER"
is selected as input for main room, ZONE2 or
ZONE3.
Setting Item Default Value Setting Details
NET Main/Zone2/Zone3 Set the 12V trigger output setting to each
input.
"Off": No output
"Main": Output when "NET" is selected as
input for main room.
"Zone2": Output when "NET" is selected as
input for ZONE2.
"Main/Zone2": Output when "NET" is selected
as input for main room or ZONE2.
"Zone3": Output when "NET" is selected as
input for ZONE3.
"Main/Zone3": Output when "NET" is selected
as input for main room or ZONE3.
"Zone2/Zone3": Output when "NET" is
selected as input for ZONE2 or ZONE3.
"Main/Zone2/Zone3": Output when "NET" is
selected as input for main room, ZONE2 or
ZONE3.
En-61
Page 94

Connecting and Operating Onkyo RI Components
7. Remote Controller
Setting Item Default Value Setting Details
Remote ID 1 Select an ID for the unit's remote controller from
"1", "2", and "3" to prevent interference between
the unit and other Integra/Onkyo components
that are installed in the same room. After
changing the ID on the main unit, change the
ID on the remote controller accordingly with the
following procedure.
1. While holding down RCV, press and hold
Setup for about 3 seconds until the remote
indicator lights.
2. With the number buttons, press one of 1, 2,
and 3. The remote indicator flashes twice.
Remote Mode – Input and register the remote controller code of
other devices.
● For registration of the remote control code,
refer to the next section, "Operating Other
Components with the Remote Controller".
8. Miscellaneous
Firmware Update
Setting Item Default Value Setting Details
Update Notice Enable Availability of a firmware update will be notified
via network.
"Enable": Notify updates
"Disable": Do not notify updates
Version – The current firmware version will be displayed.
Update via NET – Press Enter to select when you want to update
the firmware via network.
● You will not be able to select this setting if
you do not have Internet access or there is
nothing to update.
Update via USB – Press Enter to select when you want to update
the firmware via USB.
● You will not be able to select this setting if
a USB storage device is not connected or
there is nothing to update in the USB storage
device.
● Wait for a while if "Firmware Update" cannot be selected. It will appear when the network function is
started up.
● Refer to the "Firmware Update" section for details about how to update the firmware.
Initial Setup
You can make the initial setup from the setup menu.
● Wait for a while if "Initial Setup" cannot be selected. It will appear when the network
function is started up.
En-62
Lock
Setting Item Default Value Setting Details
Setup Parameter Unlocked Lock the Setup menu to protect the settings.
"Locked": The menu is locked.
"Unlocked": The menu is unlocked.
Page 95

Operating Other Components with
the Remote Controller
Control Function between the Unit and External Component
Programming Remote Control Codes
Searching in the Setup Menu
You can search a remote control code and register it to a
desired Remote Mode button in the unit's Setup menu.
1. After pressing RCV on the remote controller, press
Setup.
● Program a remote control code in accordance
with the input since each button also works as the
input selector. (For example, when the CD player
is connected to the CD jack, program the remote
control code for the CD player to CD)
● If the component cannot be operated, select "Try
Next Code" with the cursors and press Enter to
display another code.
Functions of Remote Mode Buttons
You can control any other device than this unit by
programming a specified remote control code to a Remote
Mode button of the remote controller. Register a remote
control code to a desired Remote Mode button and press
it to enter the remote mode that allows you to operate the
corresponding device.
The RCV and Zone2/Zone3 buttons cannot be programmed.
2. With the cursors, select "7. Remote Controller" "Remote Mode" and press Enter.
3. With the cursors, select the Remote Mode button for
which you want to register a remote control code and
press Enter to display the subcategory selection screen.
4. With the cursors, select the target subcategory, and then
press Enter to display the brand name input screen.
5. Select a character with the cursors and press Enter.
Repeat it to enter the first three characters of the brand
name.
6. Select "OK" with the cursors and press Enter.
● After a search is done, the list of possible brand
names is displayed. If the brand name list is not
displayed, select "Not Listed" with the cursors and
press Enter to return to the brand name input screen
in step 5.
7. With the cursors, select the target brand name, and then
press Enter.
● When the brand name is specified, the remote
control code of the brand and how to register it will be
displayed on the TV screen.
8. Follow the guidance displayed on the TV screen.
9. If the component can successfully be operated with its
registered remote control code, select "OK" with the
cursors and press Enter.
● Only TV remote control codes can be entered for TV.
Consulting the Remote Control Code List
Find the remote control code in the remote control code list.
1. Look up the Remote Control Codes at the back of the
manual for the corresponding remote control code.
● The codes in the Remote Control Code List are those
known as of the date of publication and may be
changed.
● The following Remote Mode buttons are
preprogrammed with remote control codes.
BD/DVD: Integra/Onkyo Blu-ray Disc/DVD player
CD: Integra/Onkyo CD player
STRM Box: Apple TV
● Only TV remote control codes can be entered for TV.
● Program a remote control code in accordance
with the input since each button also works as the
input selector. (For example, when the CD player
is connected to the CD jack, program the remote
control code for the CD player to CD)
2. Press and hold Display for 3 or more seconds while
holding down the Remote Mode button to which you
want to program the remote control code.
● The remote indicator lights in the input mode.
3. With the number buttons, enter the 5-digit remote control
code within 30 seconds.
● Programming is complete when the remote indicator
flashes twice. The remote indicator flashes once
slowly when programming the remote control code
fails. Try programming again.
En-63
Page 96

Firmware Update
1
2
3
4
58
9
6
7
Remapping the Colored Buttons
The colored button assignment on the AV receiver's remote
controller can be remapped to match that on the remote
controller of the component whose remote control code
you programmed to Remote Mode. However, you will not
be able to remap the colored buttons if Zone 2/Zone 3 is
selected.
1. Hold down the Remote Mode button to map and A (Red)
simultaneously until the remote indicator lights (about 3
seconds).
● Remapping is possible only for codes included in the
categories of the Remote Control Code List (DVD
player, TV, etc.)
2. Within 30 seconds, press the colored buttons from left to
right, in the order you want to remap.
● For example, if the colored buttons on the remote
controller of the other component are yellow, green,
blue, and red from left to right, press the buttons on
the AV receiver's remote controller in that order.
● Programming is complete when the remote indicator
flashes twice. The remote indicator flashes once
slowly when programming the remote control code
fails. Try programming again.
● Pressing any other button than a colored button
cancels the remap operation.
Resetting the Remote Mode Buttons
You can reset the remote control code registered in the
Remote Mode button to its default status. This operation
can be executed on a single Remote Mode button.
1. Press and hold Q for 3 or more seconds while holding
down the Remote Mode button you want to reset.
● The remote indicator will light.
2. Within 30 seconds, press the Remote Mode button
again.
● Resetting is complete when the remote indicator
flashes twice.
To reset all the remote controller settings: While holding
down RCV, press and hold Q for 3 or more seconds until
the remote indicator stays lit. Within 30 seconds, press
RCV again. Resetting is complete when the remote
indicator flashes twice.
TV operation
Press the Remote Mode button programmed with the
remote control code for the relevant AV component to
switch the remote controller mode to that for the AV
component. Then, operate by using the corresponding
buttons. Available buttons vary depending on the product
category of the component. Operation may be incorrect or
impossible depending on the product.
1 Remote Mode
2 , Input, VOL /
3 Muting
4 CH +/–
5 Guide
6 / / / , Enter
7 Home
8 PREV CH
9 Return
En-64
Page 97

F
G
H
I
F , , , , , , ()
1
2
4
3
58
9
6
7
F
G
H
I
1
2
4
3
58
9
6
7
G A (Red), B (Green), C (Yellow), D (Blue)
H Number 1 to 9, 0, +10
I CLR, Display
Not CEC-compatible.
Blu-ray Disc player/DVD player/DVD recorder operation
Press the Remote Mode button programmed with the
remote control code for the relevant AV component to
switch the remote controller mode to that for the AV
component. Then, operate by using the corresponding
buttons. Available buttons vary depending on the product
category of the component. Operation may be incorrect or
impossible depending on the product.
Firmware Update
VCR/PVR operation
Press the Remote Mode button programmed with the
remote control code for the relevant AV component to
switch the remote controller mode to that for the AV
component. Then, operate by using the corresponding
buttons. Available buttons vary depending on the product
category of the component. Operation may be incorrect or
impossible depending on the product.
5 Top Menu
6 / / / , Enter
7 Home
8 Menu
9 Return
1 Remote Mode
2 Source
3 Muting
4 CH +/–
F , , , , , ,
G A (Red), B (Green), C (Yellow), D (Blue)
H Number 1 to 9, 0, +10 ()
I CLR, Display
Not CEC-compatible.
1 Remote Mode
2 Source
3 Muting
4 CH +/–, Disc +/–
5 Guide
6 / / / , Enter
7 Home
8 PREV CH
9 Return
En-65
Page 98

F
G
H
F , , , , , ,
1
2
4
3
58
9
6
7
F
G
H
I
1
2
4
3
5
6
G Number 1 to 9, 0, +10
H CLR, Display
Satellite receiver / Cable receiver operation
Press the Remote Mode button programmed with the
remote control code for the relevant AV component to
switch the remote controller mode to that for the AV
component. Then, operate by using the corresponding
buttons. Available buttons vary depending on the product
category of the component. Operation may be incorrect or
impossible depending on the product.
Firmware Update
CD player operation
Press the Remote Mode button programmed with the
remote control code for the relevant AV component to
switch the remote controller mode to that for the AV
component. Then, operate by using the corresponding
buttons. Available buttons vary depending on the product
category of the component. Operation may be incorrect or
impossible depending on the product.
5 Guide
6 / / / , Enter
7 Home
8 PREV CH
9 Return
1 Remote Mode
2 Source
3 Muting
4 Disc +/–
F , , , , , ,
G A (Red), B (Green), C (Yellow), D (Blue)
H Number 1 to 9, 0, +10
I CLR, Display
1 Remote Mode
2 Source
3 Muting
4 CH +/–
En-66
5 / / / , Enter
6 Home
Page 99

Troubleshooting
7
8
9
F
1
2
3
4
7 , , , , , ,
8 Search, Repeat, Random, Mode
9 Number 1 to 9, 0, +10
F CLR, Display
Cassette tape deck operation
Press the Remote Mode button programmed with the
remote control code for the relevant AV component to
switch the remote controller mode to that for the AV
component. Then, operate by using the corresponding
buttons. Available buttons vary depending on the product
category of the component. Operation may be incorrect or
impossible depending on the product.
1 Remote Mode
2 Source
3 Muting
4 , (Reverse Playback), , , , ,
To operate CEC-compatible components
If this unit is connected via HDMI to a TV or BD/DVD
player, you may be able to control the devices using
the remote controller of this unit with CEC (Consumer
Electronics Control) linked operation.
TV: The TV button on the remote controller is
preprogrammed with remote control codes for linked
operation of some CEC(Consumer Electronics Control)compatible TV sets.
● If you cannot operate your CEC-compatible TV,
program one of the following remote control codes
(11807/13100/13500) to the TV button.
BD/DVD player: By registering a remote control code
(32910/33101/33501/31612) in the BD/DVD button, your
remote controller will be able to take advantage of linked
operation with CEC-compatible BD/DVD players.
En-67
Page 100

Advanced Connections
Front R Front L
aa
bb
Power amplifier
Connecting Bi-amp Speakers
It is possible to connect speakers supporting bi-amping to
improve quality of the bass and treble. Up to 5.1 ch will be
played in bi-amping.
jack and the subwoofer (bass) jack.
● Use speakers supporting bi-amping only. For
details, refer to the speakers' instruction manual.
Connecting Dipole Speakers
A dipole speaker is bidirectional speaker outputting the
same sound in two directions, for example forward and
backward.
Troubleshooting
Connecting a Power Amplifier
You can connect a power amplifier to the unit and use the
unit as a pre-amplifier in order to produce a large volume
that cannot be output with the unit only. Connect the
speakers to the power amplifier. For details, refer to the
power amplifier's instruction manual.
Connections
1. Connect as below using the PRE OUT terminals.
Connections
1. Connect as below using the FRONT terminals and
HEIGHT terminals.
Tweeter
(high pitched tone)
Woofer
(low pitched tone)
2. Turn the unit on and make the bi-amping setting.
1 After pressing RCV on the remote controller, press
Setup.
2 With the cursors, select "2. Speaker" -
"Configuration" - "Bi-Amp".
3 Select "Yes" with the cursors.
● Before bi-amping, be sure to remove the short-
circuit connector that connects the tweeter (treble)
TV
Connections
An arrow for matching the phases () is marked on a
dipole speaker. Place the surround speakers (a) so that
their arrows ( ) point to the TV and the back speakers (b)
so that their arrows ( ) point to each other.
If the phases do not match due to mistake in speaker distance,
installation angle or positive/negative of wiring, sound image and sound
field may be unclear or hard of listening.
● Set to suit the number of speaker channels connected.
– After pressing the RCV button, press the Setup
button on the remote controller. Select "2. Speaker"
- "Configuration" - "Speaker Channels" in order with
the cursors, and set the number of speaker channels.
En-68
 Loading...