

Page 1

HP LaserJet M4345 MFP
Getting Started Guide
הדובעה תליחת ךירדמ
Page 2

Copyright and License
© 2006 Copyright Hewlett-Packard Development Company, L.P.
Reproduction, adaptation or translation without prior written
permission is prohibited, except as allowed under the
copyright laws.
The information contained herein is subject to change
without notice.
The only warranties for HP products and services are set
forth in the express warranty statements accompanying such
products and services. Nothing herein should be construed as
constituting an additional warranty. HP shall not be liable for
technical or editorial errors or omissions contained herein.
Part number: CB425-90963
Edition 1, 10/2006
FCC Regulations
This equipment has been tested and found to comply with the
limits for a Class B digital device, pursuant to Part 15 of the
FCC rules. These limits are designed to provide reasonable
protection against harmful interference in a residential
installation. This equipment generates, uses, and can radiate
radio-frequency energy. If this equipment is not installed and
used in accordance with the instructions, it may cause
harmful interference to radio communications. However, there is
no guarantee that interference will not occur in a particular
installation. If this equipment does cause harmful interference
to radio or television reception, which can be determined by
turning the equipment off and on, correct the interference by
one or more of the following measures:
• Reorient or relocate the receiving antenna.
• Increase separation between equipment and receiver.
• Connect equipment to an outlet on a circuit different from
that to which the receiver is located.
• Consult your dealer or an experienced radio/TV technician.
Any changes or modifications to the printer that are not
expressly approved by HP could void the user’s authority to
operate this equipment. Use of a shielded interface cable is
required to comply with the Class B limits of Part 15 of FCC
rules. For more regulatory information, see the
HP LaserJet M4545MFP printer electronic user guide.
Hewlett-Packard shall not be liable for any direct, indirect,
incidental, consequential, or other damage alleged in
connection with the furnishing or use of this information.
Page 3

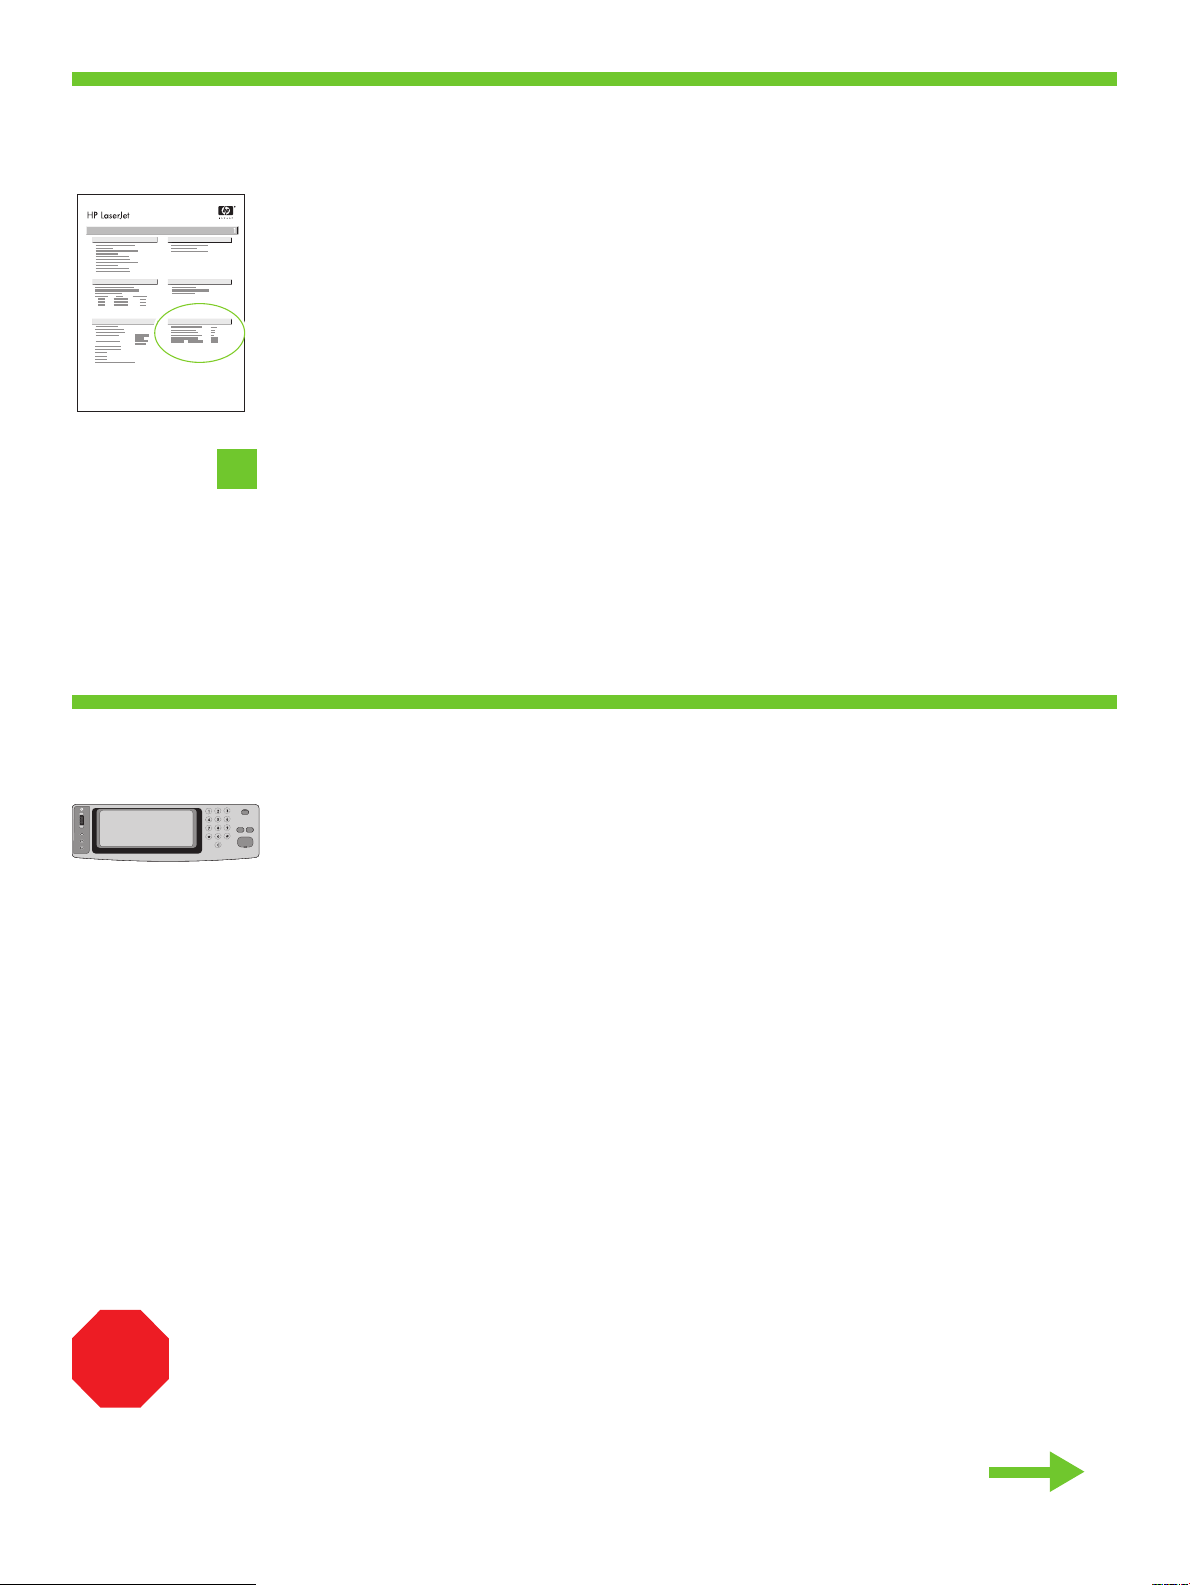
•Overview
הריקס•
•Prepare the site.
•Unpack the device.
•Prepare the hardware.
•Set up the control panel.
•Install the software.
•Install the send fax driver.
.רתאה תא ןכה•
.ותזיראמ ןקתהה תא אצוה•
.הרמוחה תא ןכה•
.הרקבה חול תא רדגה•
.הנכותה תא ןקתה•
.םיסקפ רוגישל ןקתהה להנמ תא ןקתה•
•Set up digital send.
.ילטיגיד רוגיש רדגה•
1
Page 4

•Prepare the site
הדובעה םוקמ תא ןכה•
•Select a well-ventilated, dust-free area to position the device.
.ןקתהה תא וב םקמל ידכ ,קבאמ יקנו בטיה ררוואמ רוזא רחב•
11
2
Page 5

•Unpack the device.
•Use this guide for the full accessory installation. Disregard the individual guides in the product boxes .
!
.ותזיראמ ןקתהה תא אצוה•
. רצומה תוביתב םידרפנה םיכירדמהמ םלעתה .רזיבאה לש האלמה הנקתהל הז ךירדמב שמתשה•
2
3
•Install paper tray 3 (+ bundle only).
•Unpack the MFP.
.(דבלב המירע +) 3 ריינ שגמ ןקתה•
2
.ותזיראמ MFP-ה תא אצוה•
3
3
Page 6

•Remove the packaging. .הזיראה תא רסה•
4
4
5
5
4
Page 7

•Remove the shipping tape.
.הזיראה יטרס תא רסה•
6
7
•Install the output bin.
6
.טלפה לס תא ןקתה•
7
!
•You are done unpacking the device. Now proceed to the next step: Preparing the hardware.
.הרמוחה תא ןכה :אבה בלשל ךשמה תעכ .ותזיראמ ןקתהה תאצוה תא תמייס•
5
Page 8

•Prepare the hardware.
.הרמוחה תא ןכה•
8
9
•Attach the control panel overlay (if necessary).
•Lift the scanner lid and remove the foam.
.(ךרוצה תדימב) הרקבה חול יוסיכ תא רבח•
8
.הזיראה רמוח תא רסהו קרוסה הסכמ תא םרה•
9
10
•Unlock the scanner.
.קרוסה תא ררחש•
10
6
Page 9

•Lift the cartridge door and remove the foam.
.הזיראה רמוח תא רסהו תינסחמה תלד תא םרה•
11
12
•Remove the toner cartridge packaging.
11
.רנוטה תינסחמ תזירא תא רסה•
12
13
14
•Install the cartridge.
•Close the cartridge door.
.תינסחמה תא ןקתה•
13
.תינסחמה תלד תא רוגס•
14
7
Page 10

•Open tray 2.
.2 שגמ תא חתפ•
15
16
•Remove the cardboard.
15
.ןוטרקה תא רסה•
16
•Adjust the paper guides.
17
•Load the print media.
18
.ריינה ינווכמ תא ןנווכ•
17
.הספדהה רמוח תא ןעט•
18
8
Page 11

•Close tray 2.
.2 שגמ תא רוגס•
19
•Connect the network cable to the device.
20
• Note: If connecting a USB cable, see step 27.
•(Optional) Connect the fax cable to the device.
19
.ןקתהל תשרה לבכ תא רבח•
20
.27 בלשב ןייע ,USB לבכ רבחמ התא םא :הרעה •
.ןקתהל סקפה לבכ תא רבח (ילנויצפוא)•
21
22
•Plug in the power cord and turn on the device
21
ןקתהה תא לעפהו חתמה לבכ תא רבח•
22
1
2
!
•You are done preparing the hardware.
Proceed with: Set up the control panel.
.הרמוחה תנכה תא תמייס•
.הרקבה חול תא רדגה :לא ךשמה
9
Page 12

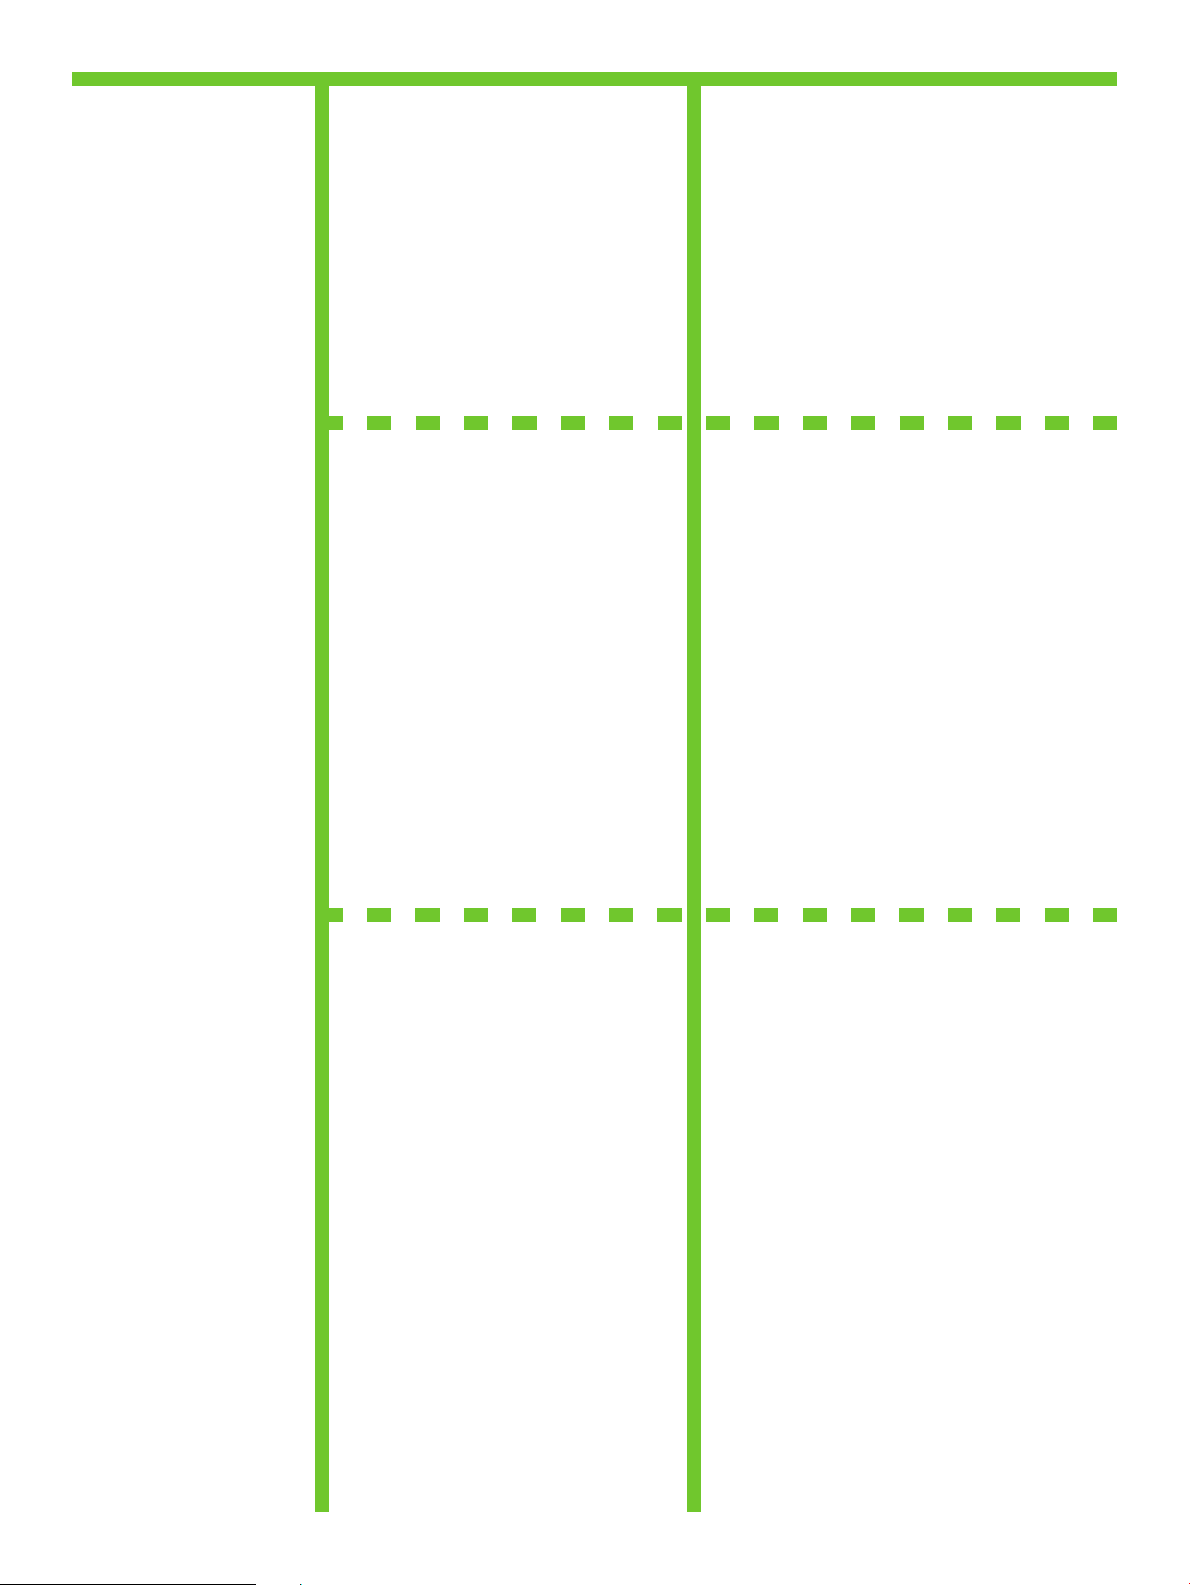
•Set up the control panel.
.הרקבה חול תא רדגה•
23
24
23
• Set language, date, time, and fax settings (if necessary) . If prompted, select your language, the date, and the time.
Follow the instructions on the control panel.
.העשה תאו ךיראתה תא ,הפשה תא רחב ,ךכל שקבתת םא . (ךרוצה תדימב) סקפ תורדגהו העש ,ךיראת ,הפש רדגה •
.הרקבה חולב תועיפומה תוארוהה יפל לעפ
24
• Set the media size and type for the input trays . At the control panel, touch Supplies Status , and then touch Trays .
Touch the name of the tray, and touch Modify to change the media size or type for the tray.
,(םילכתמה םירמוחה בצמ) Supplies Status תורשפאב עג הרקבה חולב . הנזהה ישגמ רובע הספדהה רמוח לש גוסהו לדוגה תא רדגה •
רובע הספדהה רמוח לש גוסה וא לדוגה יונישל (יוניש) Modify תורשפאב עג ןכמ רחאלו שגמה םשב עג .(םישגמ) Trays תורשפאב עג ןכמ רחאלו
.שגמה
10
Page 13
25
• Find the IP address . On the control panel, touch Network Address , and then touch Print to print the Jetdirect
configuration page. The IP address is on the Jetdirect page, under “TCP/IP”. Note: You might need to assign an IP
address depending on the type of network that is installed. See “Configure an IP address (if necessary)” on the next
page, for more information.
(הספדה) Print תורשפאב עג ןכמ רחאלו (תשר תבותכ) Network Address תורשפאב עג ,הרקבה חולב . IP-ה תבותכ תא רתא •
IP תבותכ תוצקהל ךילע היהיש ןכתיי :הרעה .“TCP/IP” תחת ,Jetdirect ףדב תאצמנ IP-ה תבותכ .Jetdirect תרוצת ףד תספדהל
.אבה דומעב "(ךרוצה תדימב) IP תבותכ רדגה" ףיעסב ןייע ,ףסונ עדימ תלבקל .תנקתומה תשרה גוסל םאתהב
• Note: If the address location displays a series of zeros, make sure that you are connected to the network
and reprint the configuration page.
.הרוצתה ףד תא שדחמ ספדהו תשרל רבוחמ התאש אדו ,םיספא לש הרוש העיפומ תבותכה םוקימב םא :הרעה •
25
• Configure the IP address (if necessary) . On the control panel, touch Administration . Scroll to and touch Initial
Setup , and then touch Networking and I/O . Touch Embedded Jetdirect , touch TCP/IP , and then touch IPV4
26 26
Settings . Touch Manual Settings , and then enter the IP Address , Subnet Mask , and Default Gateway .
Initial תורשפאה לא לולג .(לוהינ) Administration תורשפאב עג ,הרקבה חולב . (ךרוצה תדימב) IP-ה תבותכ תא רדגה •
תורשפאב עג .(טלפ/טלקו תשרב הדובע) Networking and I/O תורשפאב עג ןכמ רחאלו הב עגו (תינושאר הרדגה) Setup
.(IPV4 תורדגה) IPV4 Settings תורשפאב עג ןכמ רחאלו TCP/IP תורשפאב עג ,(ץבושמ Jetdirect ) Embedded Jetdirect
תשר תכיסמ) Subnet Mask ,( IP תבותכ) IP Address ןזה ןכמ רחאלו (תוינדי תורדגה) Manual Settings תורשפאב עג
.(לדחמ תרירב רעש) Default Gateway -ו (הנשמ
!
•You are done with the setup of the control panel. Now move to your computer and proceed with: Install the software.
.הנכותה תא ןקתה :לא ךשמהו ךתושרבש בשחמל שג תעכ .הרקבה חול תרדגה תא תמייס•
11
Page 14

•Install the software.
•For Windows® software installation instructions, go to step 27.
.הנכותה תא ןקתה•
.27 בלשל רובע ,Windows ® תנכות לש הנקתהל תוארוה תלבקל•
•For Macintosh software installation instructions, go to step 29.
.29 בלשל רובע ,Macintosh תנכות לש הנקתהל תוארוה תלבקל•
12
Page 15

• Install software. 1) Insert the CD that came with the printer. 2) On the welcome screen, click Install Printer . The
Setup Wizard appears. 3) Follow the on screen instructions. Note: If the welcome screen does not appear, click
27
28 28
Start and then click Run . Type X:SETUP, where X corresponds to the CD-ROM drive letter, and then click OK .
תנקתה) Install Printer לע ץחל ,םיאבה םיכורב ךסמב (2 .תספדמל ףרוצמה רוטילקתה תא סנכה (1 .הנכותה תא ןקתה •
וניא םיאבה םיכורב ךסמ םא :הרעה .ךסמה יבג-לעש תוארוהה יפל לעפ (3 .עיפומ (הנקתהה ףשא) Setup Wizard .(תספדמ
םירוטילקתה ןנוכ תואל םאות X רשאכ ,X:SETUP דלקה .(הלעפה) Run לע ץחל ןכמ רחאלו (לחתה) Start לע ץחל ,עיפומ
.(רושיא) OK לע ץחל ןכמ רחאלו
• Note: If installing a fax driver, choose the “custom” software install.
.(תישיא תמאתומ) “custom” הנכות תנקתהב רחב ,סקפ ןקתה להנמ תנקתה תעב :הרעה •
• Note: For a USB installation do not connect the USB cable until prompted by the software.
.הנכותה ידי-לע ךכל שקבתתש דע USB-ה לבכ תא רבחת לא USB תנקתהל :הרעה •
• 4) Click Finish . If prompted, restart the computer. 5) Go to step 33.
.33 בלשל רובע (5 .בשחמה תא שדחמ לעפה ,שקבתת םא .(םויס) Finish לע ץחל (4 •
27
13
Page 16

29
30
!
• 2) Place the CD in the CD-ROM drive and run the installer. Complete an easy install.
.הלק הנקתה םלשה .הנקתהה תינכות תא לעפהו םירוטילקתה ןנוכב רוטילקתה תא םקמ (2 •
• Connect to a Macintosh computer . 1) Connect a USB cable between the device and the computer.
Note: HP does not recommend using USB hubs. Use a USB cable that is no longer than 2 meters (6.5 feet).
.USB תוזכרב שומיש לע הצילממ הניא HP :הרעה .בשחמל ןקתהה ןיב USB לבכ רבח (1 . Macintosh בשחמל רבח •
.רטמ 2 לע וכרואב הלוע וניאש USB לבכב שמתשה
• Note: Install the software before connecting the USB cable. If the USB cable was connected first, perform steps 32-33. If the software installation
was performed first, proceed to step 33.
.33 בלשל ךשמה ,הליחת העצוב הנכותה תנקתה םא .32-33 םיבלש עצב ,הליחת רבוח USB-ה לבכ םא .USB-ה לבכ לש רוביח ינפל הנכותה תא ןקתה :הרעה •
29
30
31
32
• 3) From Apple System Preferences (available on the Apple pull-down menu or in the dock), click the Print & Fax
icon and then click the Printing tab at the top of the window. 4) To add your new printer, click the ‘+’ icon to launch
the Printer Browser . By default, the Printer Browser shows printers that are connected through USB, Bonjour, or
Appletalk networking.
רחאלו Print & Fax למסה לע ץחל ,(הניגעה תנחתב וא Apple לש חתפנה טירפתב ןימז) Apple System Preferences ךותמ (3 •
ליעפהל ידכ ‘+’ למסה לע ץחל ,ךתושרבש השדחה תספדמה תפסוהל (4 .ןולחה לש ןוילעה קלחב Printing הייסיטרכה לע ץחל ןכמ
הדובע וא Bonjour ,USB תועצמאב תורבוחמה תוספדמ גיצמ Printer Browser-ה ,לדחמ תרירבכ . Printer Browser -ה תא
.Appletalk תשרב
• 5) From the Printer Browser window, select the HP printer. For Mac OS X V10.4: If HP software is installed, the
printer software should be automatically configured. 6) Click Add to create a printer queue. You are prompted to
configure the installable options manually. Note: Mac OS X V10.2 and V10.3 might require you to manually select
the printer model from the Printer Model drop-down list. 7) Under Model Name , select your device and click Add .
תנכות לש הרוצתה ,HP לש הנכות תנקתומ םא :Mac OS X V10.4 רובע .HP תספדמב רחב , Printer Browser ןולחב (5 •
תויורשפאה תרוצת תא ינדי ןפואב רידגהל שקבתת התא .תספדמ רות תריציל Add לע ץחל (6 .יטמוטוא ןפואב תרדגומ תספדמה
תחתפנה המישרהמ תספדמה םגד תא ינדי ןפואב רוחבל שקבתתש ןכתיי V10.3 -ו Mac OS X V10.2-ב :הרעה .הנקתהל תונתינה
. Add לע ץחלו ךלש ןקתהה תא רחב , Model Name תחת (7 . Printer Model
31
32
14
Page 17

33
34
• Test the software installation . Print a page from any program to make sure that the software is correctly installed.
Note: If the installation failed, reinstall the software or see Troubleshooting at the end of this guide.
ןקתה ,הלשכנ הנקתהה םא :הרעה .יוארכ הנקתוה הנכותהש אדוול ידכ איהש תינכות לכמ דומע ספדה . הנכותה תנקתה תא קודב •
.הז ךירדמ ףוסב 'תויעב ןורתפ' ףיעסב ןייע וא הנכותה תא שדחמ
• Congratulations! . The device is ready to use. The user guide is located on the CD and in the HP Easy Printer Care
Software.
Note: Save the boxes and the packing material in case you need to transport the device.
.HP Easy Printer Care הנכותבו רוטילקתב םקוממ שמתשמל ךירדמה .שומישל ןכומ ןקתהה . !וניתוכרב •
.ןקתהה תא ענשל ךילע היהיש הרקמל הזיראה רמוח תאו תואספוקה תא רומש :הרעה
33
34
35
!
• Register your device . Register at www.register.hp.com. This is the quickest and easiest way for you to register to
receive the following information: technical support updates, enhanced support options, ideas for and ways to use
your new HP device, and news about emerging technologies.
עצבל ךרובע רתויב הלקהו הריהמה ךרדה יהוז .www.register.hp.com תבותכב םושיר עצב . ךתושרבש ןקתהה לש םושיר עצב •
שדחה HP ןקתהב שומישל םיכרדו תונויער ,תורפושמ הכימת תויורשפא ,םיינכט הכימת ינוכדע :אבה עדימה תא לבקל ידכ םושיר
.תושדח תויגולונכט תודוא םימוסרפו ךתושרבש
•You are done installing your software. Congratulations! You are ready to use your HP printer.
.ךתושרבש HP תספדמב שמתשהל ליחתהל ךתורשפאב !וניתוכרב .הנכותה תנקתה תא תמייס•
35
15
Page 18

•Install the send fax driver.
36
.םיסקפ רוגישל ןקתהה להנמ תא ןקתה•
• Install send fax driver . If the fax driver was not installed in step 28, it can be installed now. 1) Insert the CD that came with the
device. 2) On the welcome screen, click Install Printer . The setup wizard appears. 3) Choose the “custom” install option, and
select the Send Fax Driver in the installation options. 4) Follow the onscreen instructions.
.ןקתהל ףרוצמה רוטילקתה תא סנכה (1 .תעכ וניקתהל ןתינ ,28 בלשב ןקתוה אל סקפה ןקתה להנמ םא . םיסקפ רוגישל ןקתה להנמ ןקתה •
תמאתומ) “custom” הנקתהה תורשפא לע ץחל (3 .עיפומ הנקתהה ףשא .(תספדמ תנקתה) Install Printer לע ץחל ,םיאבה םיכורב ךסמב (2
.ךסמה יבג-לעש תוארוהה יפל לעפ (4 .הנקתהה תויורשפאב (םיסקפ רוגישל ןקתה להנמ) Send Fax Driver תורשפאב רחבו ,(תישיא
36
16
Page 19

•Set up the digital send features.
.ילטיגידה רוגישה ינייפאמ תא רדגה
37
38
• 1) Open the web browser.
2) Input device IP address (found on configuration page).
• 3) Select the Digital Sending tab. 4) Complete the information under General Settings : name, address, and other information.
עדימו תבותכ ,םש :(תויללכ תורדגה) General Settings תחת עדימה תא םלשה (4 .(ילטיגיד רוגיש) Digital Sending הייסיטרכב רחב (3 •
.(הרוצתה ףדב תאצמנ) ןקתהה לש IP-ה תבותכ תא ןזה (2
.טנרטניאה ןפדפד תא חתפ (1 •
37
38
.ףסונ
39
• 5) On the left navigation menu, select E-mail Settings . Input the SMTP server address, use the default From and Subject fields.
Note: If you are using an ISP (Internet Service Provider) for internet access and e-mail, you may need to contact your ISP to obtain
the SMTP server name, and to determine if you need to enter an account name and password for SMTP authentication.
תרירב תודשב שמתשה ,SMTP-ה תרש תבותכ תא ןזה .(ינורטקלא ראוד תורדגה) E-mail Settings תורשפאב רחב ,ילאמשה טווינה טירפתב (5 •
היהיש ןכתיי ,ינורטקלאה ראודלו טנרטניאל תשגל ידכ (ISP) טנרטניא יתוריש קפסב שמתשמ התא םא :הרעה .(אשונ) Subject-ו (-מ) From לדחמה
.SMTP תומיא רובע המסיסו ןובשח םש ןיזהל ךילע םאה עובקל ידכו ,SMTP-ה תרש םש תא גישהל ידכ ךלש ISP-ה םע רשק רוציל ךילע
17
39
Page 20

40
41
• 6) On the left navigation menu, select E-mail Address Book , to enter frequently-used e-mail addresses and e-mail distribution
lists. Note: The Fax Address Book and Fax Speed Dials is also located in the left navigation area. These two features allow you to
manage frequently-used fax numbers and speed dial lists.
ינורטקלא ראוד תובותכ ןיזהל ידכ ,(ינורטקלא ראוד לש תובותכ רפס) E-mail Address Book תורשפאב רחב ,ילאמשה טווינה טירפתב (6 •
Fax Speed תורשפאהו (םיסקפ תובותכ רפס) Fax Address Book תורשפאה :הרעה .ינורטקלא ראוד לש הצפה תומישרו בחרנ שומישבש
שומישבש םיסקפ ירפסמ להנל ךל םירשפאמ וללה םינייפאמה ינש .ילאמשה טווינה רוזאב ןה ףא תומקוממ (םיסקפ לש םירצוקמ םיגויח) Dials
.םירצוקמ םיגויח תומישרו בחרנ
• 7) To scan a document to your PC or network share folder, use the Send To Folder option (on the left navigation bar) to set up
one or more folder destinations. For more information on configuring Send to Folder, consult the Embedded Web Server (EWS)
User Guide.
Note: See www.hp.com/support for more information about the digital send features.
(ילאמשה טווינה לגרסב) (הייקיתל רוגיש) Send To Folder תורשפאב שמתשה ,תשרב ףותיש תייקיתל וא ךלש בשחמל ךמסמ קורסל ידכ (7 •
לש שמתשמל ךירדמב רזעיה ,(הייקיתל רוגיש) Send to Folder לש הרוצת תרדגה תודוא ףסונ עדימ תלבקל .רתוי וא דחא הייקית דעי רידגהל ידכ
.(EWS) ץבושמה טנרטניאה תרש
.www.hp.com/support תבותכב רקב ,ילטיגידה רוגישה ינייפאמ תודוא ףסונ עדימ תלבקל :הרעה
40
41
18
Page 21

•Troubleshooting.
.תויעב ןורתפ
•Area. •Symptom.
•Control-panel display. •Blank. •Make sure that the power cable is connected to a working power outlet.
.הרקבה חול תגוצת•
.רוזא• .העפות•
See page 9 for more information.
•Make sure that the device is turned on. See page 9 for more information.
•Turn off the device, reset the formatter, and then turn on the device.
.הקיר• . 9 דומעב ןייע ,ףסונ עדימ תלבקל .ליעפ למשח עקשל רבוחמ חתמה לבכש אדו•
. 9 דומעב ןייע ,ףסונ עדימ תלבקל .לעפומ ןקתההש אדו•
.ןקתהה תא לעפה ןכמ רחאלו םאה חול תא ספא ,ןקתהה תא הבכ•
•Buttons appear grey. •Make sure that the scanner lock is in the unlock position.
•Turn off the device, and then turn it on again.
•See page 6 for more information.
.רופא עבצב םיעיפומ םינצחלה• .ררחושמ בצמב תאצמנ קרוסה תליענש אדו•
•Load letter/A4 error message. •Make sure that the media is loaded long-edge leading (with the shortedge toward you.
.( Letter/A4 לדוגב ריינ ןעט) Load letter/A4 האיגש תעדוה• .(ךרבעל הנופ רצקה הצקה) ליבומ ךוראה הצקהשכ ןעטנ הספדהה רמוחש אדו•
.בוש ותוא לעפה ןכמ רחאלו ןקתהה תא הבכ•
.6 דומעב ןייע ,ףסונ עדימ תלבקל•
19
Page 22
•Print. •Not printing. •Check the network or USB cable.
.הספדה•
•If you are printing over a network, print a configuration page and make
sure that the IP address is correct.
•Reinstall the print driver.
•Jams.
.סיפדמ אל•
.הנוכנ IP-ה תבותכש אדוו הרוצת ףד ספדה ,תשרב סיפדמ התא םא•
•Make sure that the orange packing tape, cardboard, and orange plastic
shipping locks have been removed.
•Make sure that you are using supported print media. See the user
reference guide on the CD-ROM for more information.
•Make sure that the media is loaded correctly.
.ריינ תומיסח• .ורסוה םותכ קיטסלפמ חולשמה ילוענמו ןוטרקה ,םותכה הזיראה טרסש אדו•
ןויע ךירדמב ןייע ,ףסונ עדימ תלבקל .ךמתנ הספדה רמוחב שמתשמ התאש אדו•
.USB-ה לבכ תא וא תשרה תא קודב•
.הספדהה ןקתה להנמ תא שדחמ ןקתה•
.רוטילקתבש שמתשמל
.יוארכ ןעטנ הספדהה רמוחש אדו•
•Blank pages. •Make sure that the pull tape is removed from the print cartridge.
.םיקיר םיפד• .הספדהה תינסחממ רסוה הכישמה טרסש אדו•
20
Page 23

•Copy. •Buttons appear grey.
.הקתעה•
•Make sure that the scanner lock is in the unlock position.
•Turn off the device, and then turn it on again.
.רופא עבצב םיעיפומ םינצחלה• .ררחושמ בצמב תאצמנ קרוסה תליענש אדו•
•Fax. •Buttons appear grey or fax is not available. •Enter the fax number, locale, and date/time to make sure that the fax is
.סקפ•
.ןימז וניא סקפהש וא רופא עבצב םיעיפומ םינצחלה• הרדגוה סקפה תרוצתש אדוול ידכ העש/ךיראתו רוזא/הנידמה ,סקפה רפסמ תא ןזה•
•No fax icon on the control-panel display.
.הרקבה חול תגוצתב סקפ למס עיפומ אל• .ףפוכמ וניא םיזיזהמ דחא ףאשו םאה חולב הכלהכ ןקתומ סקפה סיטרכש אדו•
configured correctly.
•Make sure that the fax card is installed in the formatter correctly, and
that none of the pins are bent.
•Print a configuration page and check the modem status. If “Operational/
Enabled” is not listed, it might be disabled or there might be a problem
with the fax hardware. See the analog fax user guide for more
information.
“Operational/Enabled” ןייוצמ אל םא .םדומה סוטטס תא קודבו הרוצת ףד ספדה•
.סקפה לש הרמוחה םע היעב הנשיש וא תבשומ אוהש ןכתיי ,("לעפומ/שומישל ןכומ")
.יגולנאה סקפה רובע שמתשמל ךירדמב ןייע ,ףסונ עדימ תלבקל
.בוש ותוא לעפה ןכמ רחאלו ןקתהה תא הבכ•
.הכלהכ
•Fax icon displays: “Not Configured”. •Go to the Administration
Make the required entries to activate the fax.
.("הרוצת הרדגוה אל") “Not Configured” :סקפ למס תוגוצת• ףשא) Fax Setup Wizard תא לעפהו (לוהינ) Administration טירפתל רובע•
menu and activate the Fax Setup Wizard .
.סקפה תא ליעפהל ידכ תושרדנה תונזהה תא עצב .(סקפ תנקתה
21
Page 24

•Fax configured but not sending fax (phone line not
connected).
•Make sure to use the phone cord that came with the device.
•Make sure that the phone cord is connected securely to the device and
to an active telephone port. Note:
is active.
Use a telephone to verify that the port
וניא ןופלטה וק) םיסקפ רגשמ וניא אוה ךא סקפה תרוצת הרדגוה•
•Fax configured but not sending fax (phone line incompatible).
אל ןופלטה וק) םיסקפ רגשמ וניא אוה ךא סקפה תרוצת הרדגוה•
•Fax configured but not receiving fax. •Make sure that a line splitter or surge-protection device is not being used.
.(רבוחמ
.(םיאתמ
שמתשה :הרעה .הליעפ ןופלט תאיצילו ןקתהל בטיה רבוחמ ןופלטה לבכש אדו•
•Make sure that the fax is connected to a dedicated analog telephone
line.
•Make sure that voice mail or an answering machine is not receiving the
incoming fax before the device. Remove these, or set the device “rings-toanswer” to a lower number.
•Make sure that a roll-over line is not being used, and that the fax is
connected to a dedicated analog telephone line.
.ןקתהל ףרוצמה ןופלטה לבכב שמתשמ התאש אדו•
.הליעפ האיציהש אדוול ידכ ןופלטב
.ידועיי יגולנא ןופלט וקל רבוחמ סקפהש אדו•
.םיסקפ לבקמ וניא אוה ךא סקפה תרוצת הרדגוה• .שומישב םיאצמנ םניא קספ-לא ןקתה וא לצפמש אדו•
רסה .ןקתהה ינפל סנכנה סקפה תא םילבקמ םניא ןובישמ וא ילוקה ראודה אתש אדו•
ןקתהה לש ("הנעמל םילוצלצ") “rings-to-answer” תורשפאה תא רדגה וא ,םתוא
.רתוי ךומנ רפסמל
.ידועיי יגולנא ןופלט וקל רבוחמ סקפהשו ,שומישב אצמנ וניא תוחיש תרבעה וקש אדו•
22
Page 25
•E-mail.
.ינורטקלא ראוד•
•Digital sending tab in the embedded Web server (EWS) does
not appear.
•An administrative password might be configured. Select Log On
upper right corner of the EWS.
in the
טנרטניאה תרשבש (ילטיגיד רוגיש) Digital sending הייסיטרכה•
• E-mail Gateway Not Responding
panel display when attempting to send an e-mail.
ראוד רעש) E-mail Gateway Not Responding העדוהה•
חולשל ןויסינ תעב הרקבה חול תגוצתב העיפומ (ביגמ וניא ינורטקלא
.העיפומ הניא (EWS) ץבושמה
appears on the control-
.ינורטקלא ראוד
הניפב (תכרעמל הסינכ) Log On תורשפאב רחב .להנמ תמסיס תרדגומש ןכתיי•
•1) The SMTP gateway address might be incorrect. Contact you IT
administrator to obtain the correct address.
2) IF you are using an Internet Service Provider (ISP) for e-mail, contact
your ISP provider for the hostname of your SMTP gateway (request the fully
qualified domain name (FQDN), no the IP address).
3) Make sure that the entered SMTP authentication user name and
password are correct. Note:
and password.
גישהל ידכ ךלש IT-ה להנמ םע רשק רוצ .היוגש SMTP-ה רעש תבותכש ןכתיי (1•
םע רשק רוצ ,ינורטקלא ראודל (ISP) טנרטניא יתוריש קפסב שמתשמ התא םא (2
רשואמה םוחתה םש תא שקב) SMTP -ה רעש לש חראמה םש תלבקל ISP -ה קפס
ירעש לכ אל :הרעה .םינוכנ ונזוהש SMTP תומיא תמסיסו שמתשמ םשש אדו (3
.ץבושמה טנרטניאה תרשב הנוילעה תילאמש/תינמיה
Not all SMTP gateways require a user name
.הנוכנה תבותכה תא
.( IP -ה תבותכ תא אל ,(FQDN) אלמה
.המסיסו שמתשמ םש םישרוד SMTP
•The “from” address cannot be changed in Send E-mail
רוגיש) Send E-mail -ב ("-מ") “from” תבותכה תא תונשל ןתינ אל•
.
.(ינורטקלא ראוד
23
•The “Prevent Device User from changing the e-mail address” feature in the
EWS might be selected, or “Device Authentication” is enabled.
Prevent Device User from changing the e-mail” ןייפאמה ןמוסמש ןכתיי•
תרשב (ינורטקלאה ראודה תבותכ תא תונשל ןקתהה שמתשממ ענמ) “address
תומיא) “Device Authentication” תורשפאה תלעפומש וא ,ץבושמה טנרטניאה
.(ןקתה
Page 26

•You want to scan and send-to-email in black and white TIFF
format.
•Use the EWS to change the default image file format by selecting Digital
Sending
, Send to E-mail , and Advanced .
.ןבל-רוחש TIFF תינבתב ינורטקלא ראודל רגשלו קורסל ךנוצרב• תרירב תנומת לש ץבוקה תינבת תא תונשל ידכ ץבושמה טנרטניאה תרשב שמתשה•
•You want to change the file type or the color setting for e-mail
attachments.
םיצבקה לש עבצה תרדגה תא וא ץבוקה גוס תא תונשל ךנוצרב•
.ינורטקלאה ראודה תעדוהל םיפרוצמה
•A “job failed” message is received with a document is
scanned and sent to e-mail.
קרסנ ךמסמ רשאכ העיפומ (הלשכנ הדובעה) “job failed” העדוהה•
.ינורטקלא ראודל רגושמו
Send to ,(ילטיגיד רוגיש) Digital Sending תורשפאב הריחב תועצמאב לדחמה
•On the control-panel e-mail feature, select More Options to change the
image file format before sending the e-mail.
(תופסונ תויורשפא) More Options רחב ,הרקבה חולבש ינורטקלא ראוד ןייפאמב•
.ינורטקלאה ראודה תחילש ינפל הנומתה לש ץבוקה תינבת תא תונשל ידכ
•1) Send a test e-mail to make sure that the e-mail address is correct.
2) Make sure that the scanned document does not exceed your SMTP
gateway’s maximum allowable attachment size. If it does, use the EWS to
change the size by selecting Digital Sending
.הנוכנ ינורטקלאה ראודה תבותכש אדוול ידכ הקידבל ינורטקלא ראוד חלש (1•
רעשב השרומה ףרוצמה ץבוקה לש יברמה לדוגהמ גרוח וניא קרסנש ךמסמהש אדו (2
תא תונשל ידכ ץבושמה טנרטניאה תרשב שמתשה ,הנוכנ איה םא .ךלש SMTP -ה
Send to E-mail -ו (ילטיגיד רוגיש) Digital Sending -ב הריחב תועצמאב לדוגה
.(םדקתמ) Advanced -ו ,(ינורטקלא ראודל רוגיש) E-mail
and Send to E-mail .
.(ינורטקלא ראודל רוגיש)
•Other. •All symptoms. •See the user reference guide on the CD-ROM for more information.
.רחא•
.תועפותה לכ• .רוטילקתבש שמתשמל ןויע ךירדמב ןייע ,ףסונ עדימ תלבקל•
24
Page 27

25
Page 28

© 2006 Hewlett-Packard Development Company, L.P.
www.hp.com
Printed in Germany
*CB425-90963*
*CB425-90963*
CB425-90963
 Loading...