


HTT16BBSHRWW
Hotpoint HTT16BBSHRWW, HTS18GCSDRWW, HTS18GBSFRWW, HTS18GBSFRCC, HTS18GBSDRCC Owner’s Manual
...
ge.com
N
0
Safety Instructions . ......... 2-4
Operating Instructions
Automatic Icemaker ............ 7
Care and Cleaning ............. 8
Shelves ..................... 5, 6
Storage Drawers ............... 6
Temperature Controls .......... 5
Installation Instructions
Preparing to Install
the Refrigerator ............... 9
Reversing the Door Swing ...13-16
Water i,ine Installation ...... 10-12
Troubleshooting Tips
Befi)re You Call For Service .. 17, 18
Normal Operating Sounds ...... 17
Consumer Support
Consumer Support .... Back Cover
Product Registration
(Canadian) ............... 21, 22
Product Registration (U.S.) . 20-22
Warranty fi)r
Canadian Customers .......... 19
Warranty for U.S. Customers ... 23
Write the model and serial
numbers here:
Model #
Serial #
You can find them on a label on
the upper left side of the flesh food
compartment.
Models 16,17,18
197D7799PO01 49-60521-1 08-08Jfl
IMPORTANT SAFETYINFORMATION.
READALL INSTRUCTIONS BEFOREUSING.
[, DANGER! RISK OFCHILD ENTRAPMENT
PROPERDISPOSALOFTHEREFRIGERATOR
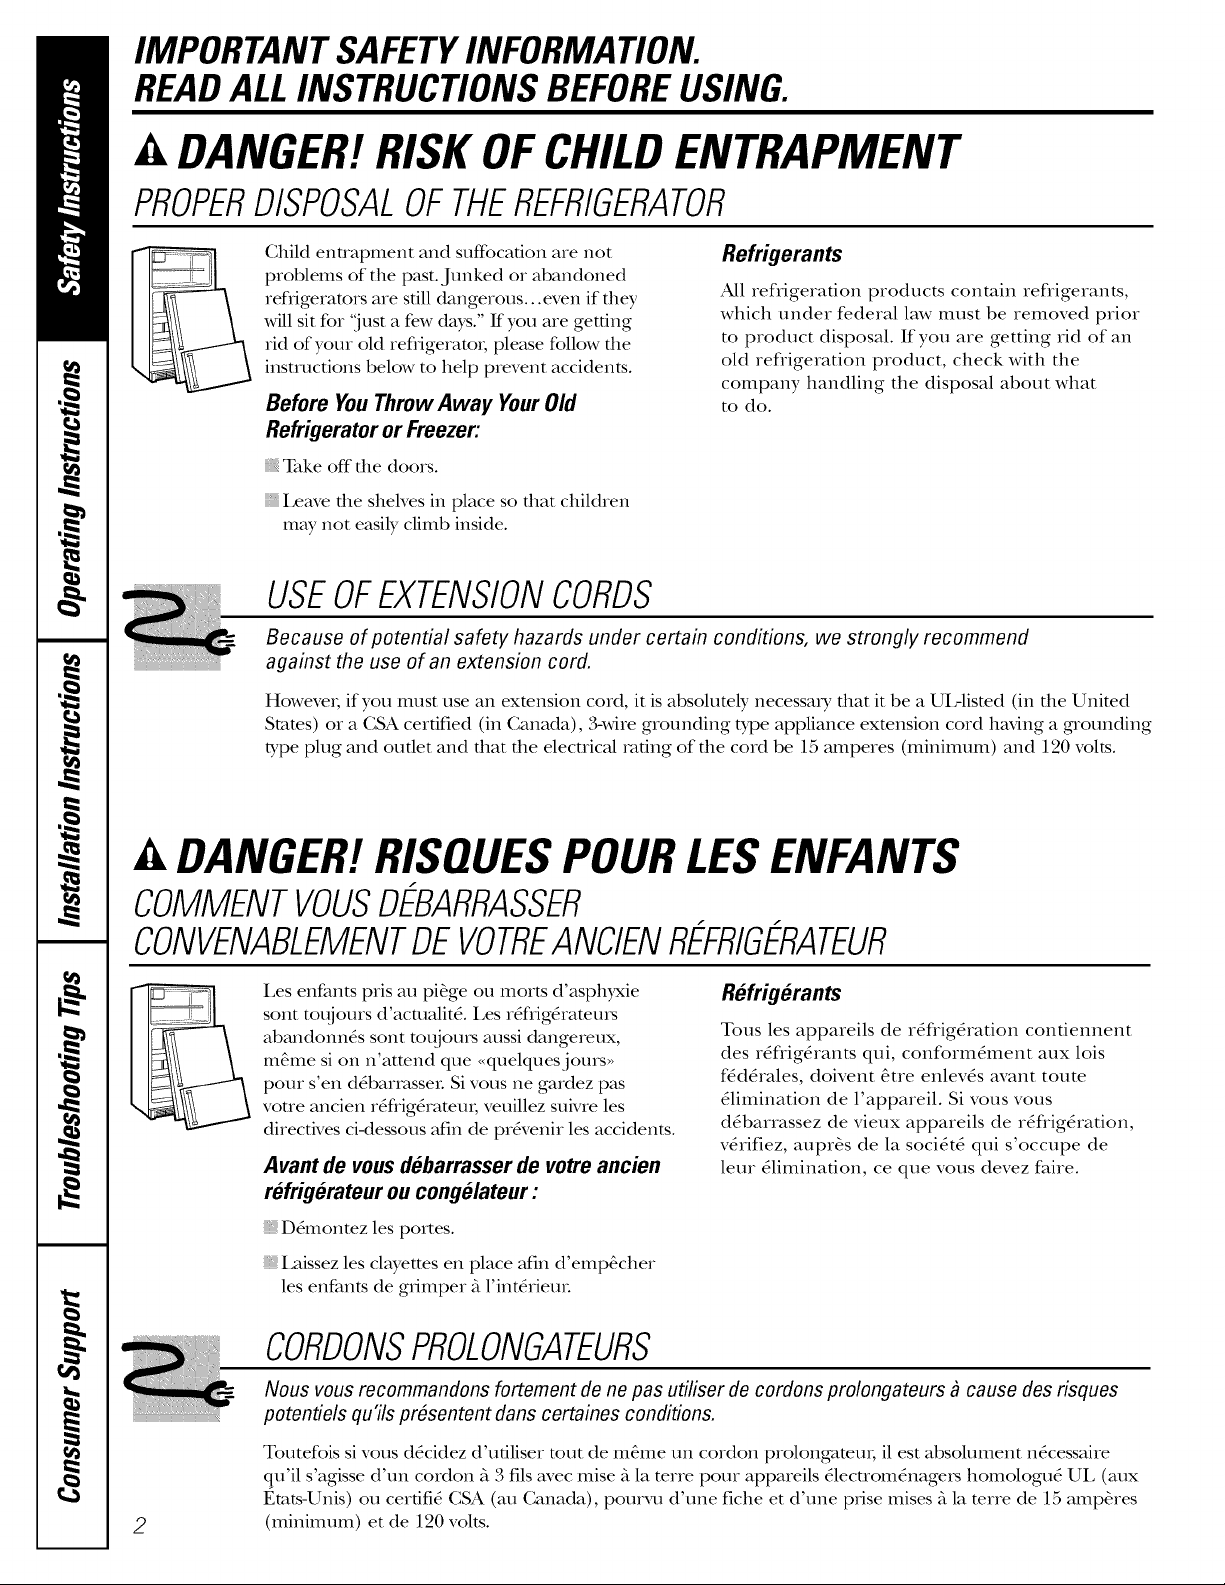
Child entrapment and suffbcation are not
problems of the past. Junked or abandoned
refJigeramrs are still dangerous.., even if they
will sit for "just a few dws." If you are getting
rid of your old refl-igeramt; please follow tile
instructions below to help prevent accidents.
Before You ThrowAway Your Old
Refrigerator or Freezer:
_ke offthe doors.
I,eave the shelves in place so that children
may not easily climb inside.
Refrigerants
All refrigeration products contain refiigerants,
which under federal law must be removed prior
to product disposal. If you are getting rid of an
old refiigeration product, check with the
company handling the disposal about what
to do.
USEOFEXTENSIONCORDS
Because of potential safety hazards under certain conditions, we strongly recommend
against the use of an extension cord.
However; if you must use an extension cord, it is absolutely necessat T that it be a UIAisted (in the United
States) or a CSA certified (in Canada), 3-wire grounding type appliance extension cord having a grounding
type plug and outlet and that the electrical rating of the cord be 15 amperes (minimum) and 120 volts.
DANGER! RISQUES POUR LESENFANTS
COMMENTVOUSDEBARRASSER
CONVENABLEMENTDEVOTREANCIENREFRIGERATEUR
Les enfants pris au pi&ge ou morts d'asphyxie
sent tot_jours d'acmalit_. Les r_fl_ig&amm_
abandonn_s sent mr{joins aussi dangereux,
tile.tIle si on n'attend que <<quelquesjours,,
pour s'en d_barrasseL Si vous ne gardez pas
voue ancien r_flig&amuI; veuillez suMe les
directives ci-dessous afin de pr&_enir les accidents.
Avant de vous d_.barrasser de votre ancien
refrigerateur ou congelateur :
D_montez les portes.
Laissez les clayettes en place afin d'emp_cher
les enfants de grimper ?_l'int_riem.
Refrigerants
Tous les appareils de r_flig_ration confiennent
des r_flig_rants qui, conform_ment aux lois
f_d_rales, doivent &.treenlev_s avant route
_limination de l'appareil. Si vous vous
d_barrassez de vieux appareils de r_flig_ration,
v_.rifiez, aupr&s de la soci_t_ qui s'occupe de
leur _limilmtion, ce que vous devez faire.
2
CORDONSPROLONGATEURS
Nous vous recommandons fortement de no pas utiliser de cordons prolongateurs _ cause des risques
potenfiels qu'ils prOsentent dans certaines conditions.
Toutefois si vous d_cidez d'utiliser tout de re&me tm cordon prolongateuI; il est absolument n_cessaire
qu'il s'agisse d'un coMon _'_3 ills avec raise ?_la terre pour appareils _lectrom&mgeis homologu_ UL (aux
t_mts-Unis) ou cerfifi_ CSA (au Canada), pourvu d'une fiche et d'une prise mises ?_la terre de 115amp&res
(minimum) et de 120 volts.
IMPORTANT SAFETYINFORMATION.
READALL INSTRUCTIONS BEFOREUSING.
A WARNING!
ge.com
Use this appliance only for its intended purpose as described in this Owner's Manual
SAFETYPRECAUTIONS
When using electrical appfiances, basic safety precautions should be followed, including the following:
This refrigerator must be properly installed
and located in accoMance with the Inst_fllation
Instructions before it is used.
Do not allow children to climb, stand or hang
on the shelves in the reffigeramL They could
&mmge the refrigerator and seriously i_jure
themseNes.
{{_iDo not touch the cold surfaces in the fleezer
compamnent when hands are damp or wet.
Skin may stick to these extremely cold surfaces.
{{_iDo not store or use gasoline or other flammable
vapors and liquids in the vicinity of this or any
other appliance.
{{_iKeep fingers out of the "pinch point" areas;
clearances between the doors and between
the (loots and cabinet are necessarily small.
Be careflfl closing doors when children are
in the area.
In refligeramrs Mill automatic icemakers,
avoid contact with the moving parts of the
ejector mechanism, or with the heating element
that releases the cubes. Do not place fingers or
hands on the automatic icemaking mechanism
while the refligeramr is plugged in.
Unplug die refligetamr before cleaning and
making repai,_.
NOTE:Westrong&recommendthatanyservicingbe
performedbyaquafifiedindividual
{{_iTurning the control to the 0 position does
not remove power to the light circuit.
{{_iDo not refleeze flozen foods which have
thawed completel):
MESURESDES 'CURIT "IMPORTANTES.
LISEZD'ABORDTOUTESLESDIRECTIVES.
.4,AVERTISSEMENT!
N'utilisez cot filectromfinager que pour I'usage auquel il est destinfi, comme expliqufi dans le
prOsent manuel
MESURESDESECURITE
Lorsque vous utilisez un appareil filectrique, observez toujours Insmesures de sficurffi de base,
y compris les suivantes.
Insmllez le r4flig4rateur conform4ment aux
directives d'insmllation avant de l'utiliset.
Ne lmssez pas les enfants grimpet; s'asseoiI;
se mnir debout ni se pendre aux clayettes du
r_ffig_ramtn. Ils pourraient endommager le
r_ffig_ramur et se blesser gmvement.
N'enueposez et n'ufilisez pas d'essence ou
auues vapetn_ et liquides inflammables _'_
proximit_ de cet appareil ou de rout autre
appareil _lecuom_naget.
t_loignez les doigts des parties du r_flig&ateur
off l'on peut facilement se pincer : les espaces
entre les portes et entre les porms et les placards
sont tot{jours _uoits. Soyez prudent lorsque
vous femlez les potms de l'appareil en presence
des enfants.
Si votre r_flig&ateur est dot_, d'une machine A
glacons automatique _vitez le contact avec les
pi_ces mobiles du m_canisme _jectem; ou avec
l'_l_ment chauffant qui lib&re les glacons.
Ne posez pas les doigts ou les mmns sur le
m_canisme de la machine _'_glacons pendant
que le r_flig&amur est branch,.
Ne touchez pas les surfaces ffoides du cong_lateur
si vous avez les mains humides ou mouill_es :la
peau risque d'adh&er ?_ces surfaces tr_s floides.
D_branchez voue r_flig_tamur avant de le
nettoyer ou de le r_paret.
REMARQUE: Nousvousrecommandonsvivementde
confiertouter#paration_untechnicienqua/iriS
Lorsque vous r_ez la commande sur 0 (&eint),
l'alimenmtion _lectrique de l'ampoule n'est pas
couple.
Ne recongelez pas les aliments surgel_s qui ont
compl_tement d_gel& 3

IMPORTANT SAFETYINFORMATION.
READALL INSTRUCTIONS BEFOREUSING.
A WARNING'!
HOWTOCONNECTELECTRICITY
Do not, under any circumstances, cut or remove the third (ground) prong from the power cord.
For personal safety, this appfiance must be properly grounded.
The power cord of dds appliance is equipped widl a _g
prong (gnounding) plug which mates with a standmd
,%prong (grounding) wall outlet m minimize the
possibililyof electric shock h_taud flom this appliance.
Have file wall outlet and circuit checked bya qualified
elecnician m make sure the outlet isproperly
grounded.
X_rhere a standard 2-prong wall outlet is encounmred, it
is your personal responsibility and obligation to have it
replaced with a properly grounded ,%prong wall outlet.
The refligerator shouM alwa}sbe plugged into itsown
indMdual elecnical outlet which has a voltage mdng
flint matches the mdng plato.
This prcMdes file best perfomlance and also prevents
overloading house wiring circuits which could cause a
fire hazaJd from oveflleamd wir_.
Never unplug your refligermor by pulling on file
power cord. Alwa)s grip plug firefly and pull smdght
out flom file outlet.
Repair or replace immediately all power cords dlat
have become flayed or oflletwise damaged. Do not use
a cord fllat shows crocks or abrasion damage along its
length or at either end.
X4rhenmoving file refligemtor away flom the
wall, be carefifl not m roll over or &unage the
power cord.
READAND FOLLOWTHISSAFETYINFORMATIONCAREFULLY.
SAVE THESEINSTRUCTIONS
MESURESDES_'CURIT_"IMPORTANTES.
LISEZD'ABORDTOUTESLESDIRECTIVES.
A A VERTISSEMENT!
RACCORDEMENT&ECTRIQUE
Ne coupez ni retirez en aucun cas la troisiOme broche (mise _ la terre) de la fiche du cordon
d'alimentation. Pour votre sOcurit#, cet appareil dolt Otrecorrectement mis _ la terre.
I_ coition d'alimentation de cet app_ueil est muni
d'une fiche _'_3 brochm (raise _'tla tene) qui se braxlche
dmls une prise tamale ordinaire _'_3 alvg_des (raise _'_la
term) pour r_duire au minimum lm fisqum de chocs
41ecuiqum.
Faims examiner la prise de courant et le circuit par un
_lectficien qualifi_ pour vous _tssurer que la prise mt
conectement raise _'_la terre.
Si la prise murale est du t)pe st_m(Lud _'_2 alv_oles, il
vous incombe de la faire remplacer par une pfi_ _'_3
ah'_olm conecmment raise _'_la mne.
Le r_fl_ig_rateur dolt toujoms &re branch_ dmls sa
propre prise de coumnt, dont la mnsion nominate est
idenfique _'_celle indiqu_e sur la plaque signal_fique.
Cette precaution mt recommand_e [K_urgmantir un
rendement optimum et gMmrune smcha_ge des
drcuits dlecniques de la rd0dence, ce qui potmait
crder un risque d'incendie par smvhaufIb dm ills.
Ne d_bmnchezj_un_fis le r_flig&ateur en fimnt sur le
cordon d'alimentation. Ndsissezfemaement la fiche du
cordon et drez droit pour la redrer de la prise.
R@arez ou remplacez imm_diatement tout cordon
effiloch_ ou endommag_. N'udlisez pas un cordon
fendill_ ou pr&enmnt des signes d'usure.
I_nsque vous d_placez voue r_flig&ateur du ram;
thims attention de ne pas le faire fouler sur le cordon
d'alimenmdon mqn de ne p_ts l'endommagen
VEUILLEZLIREETSUIVREATTENTIVEMENTCESMESURESDESECURITE.
CONSERVEZCESDIRECTIVES
4
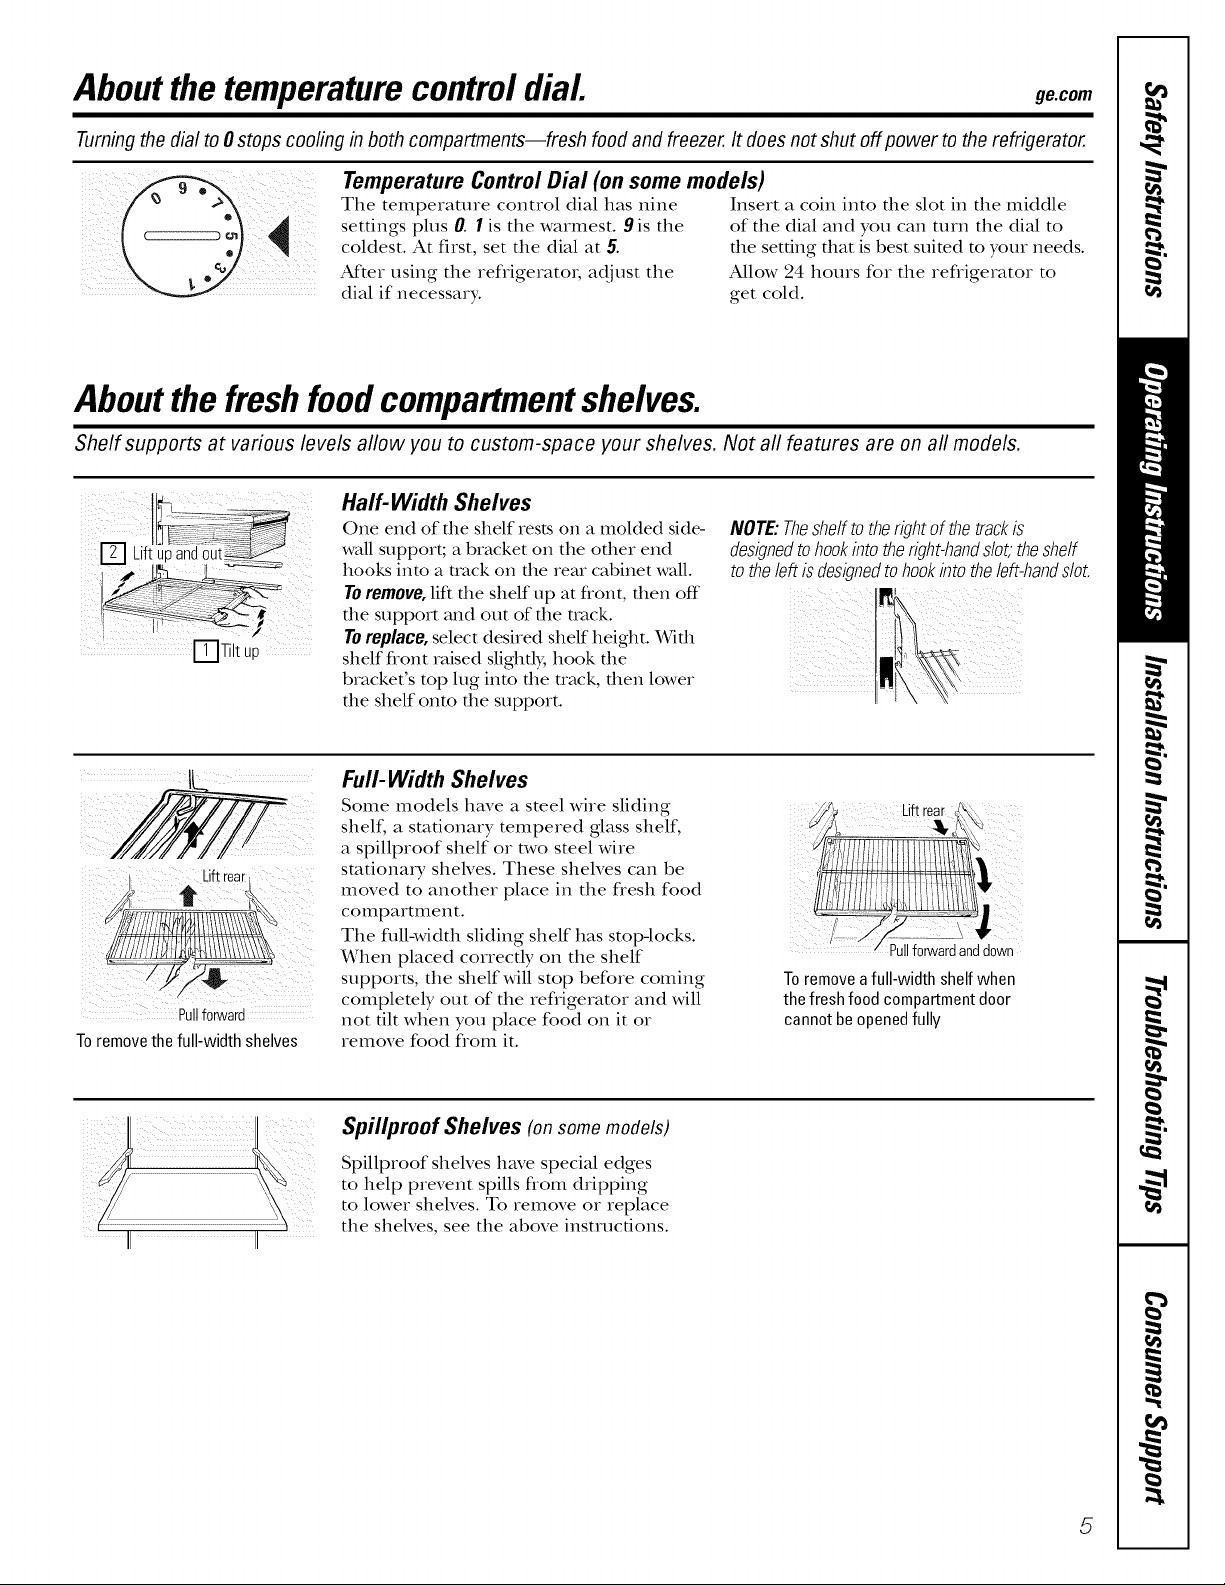
Aboutthe temperaturecontroldial ge.oom
Turningthe dial to 0stops cooling in both compartments--fresh food and freezer.It does notshut off power to the refrigerator.
The temperature control dial has nine Insert a coin into the slot in the middle
settings plus/7. I is the warmest. 9 is the of the dial and you can turn the dial to
coldest. At first, set the dial at 5. the set6ng that is best suited to your needs.
After using the refrigerator; adjust the Allow 24 hours for the refrigerator to
dial if necessary, get cold.
Aboutthe freshfoodcompartmentshelves.
Shelf supports at various levels allow you to custom-space your shelves. Not all features are on all models.
[_Tilt up
Half- Width Shelves
One end of tile shelf rests on a molded side-
wall support; a bracket on the other end
hooks into a track on tile Ie_tl cabinet waU.
TOremove, lift the shelf up at flont, then off
tile support and out of tile track.
Toreplace, select desired shelf height. With
shelf front raised slightly, hook the
bracket's mp lug into tile track, then lower
the shelf Ohm the support.
NOTE:Theshelftotherightof thetrackis
designedtohookintotheright-handslot,theshelf
totheleftisdesignedtohookintotheleft-handslot.
_i iI
kiftrearj
Pullfo_vard
Toremovethe full-width shelves
Full- Width Shelves
Some models have a steel wire sliding
shelf, a stationary tempered glass shelf,
a spillproof shelf or two steel wire
stationary shelves. These shelves can be
moved to another place in tile flesh food
compartlnent.
Tile full-width sliding shelf has stop-locks.
When placed correctly on the shelf
supports, tile shelf will stop before coming
completely out of the refrigerator and will
not flit when you place food on it or
remove food flom it.
Toremovea full-width shelf when
the fresh food compartmentdoor
cannot be openedfully
II II
Spillproof Shelves (on some models)
Spillproof shelves have special edges
to help prevent spills flom dripping
to lower shelves. To remove or replace
tile shekes, see tile above insu_ucfions.
5
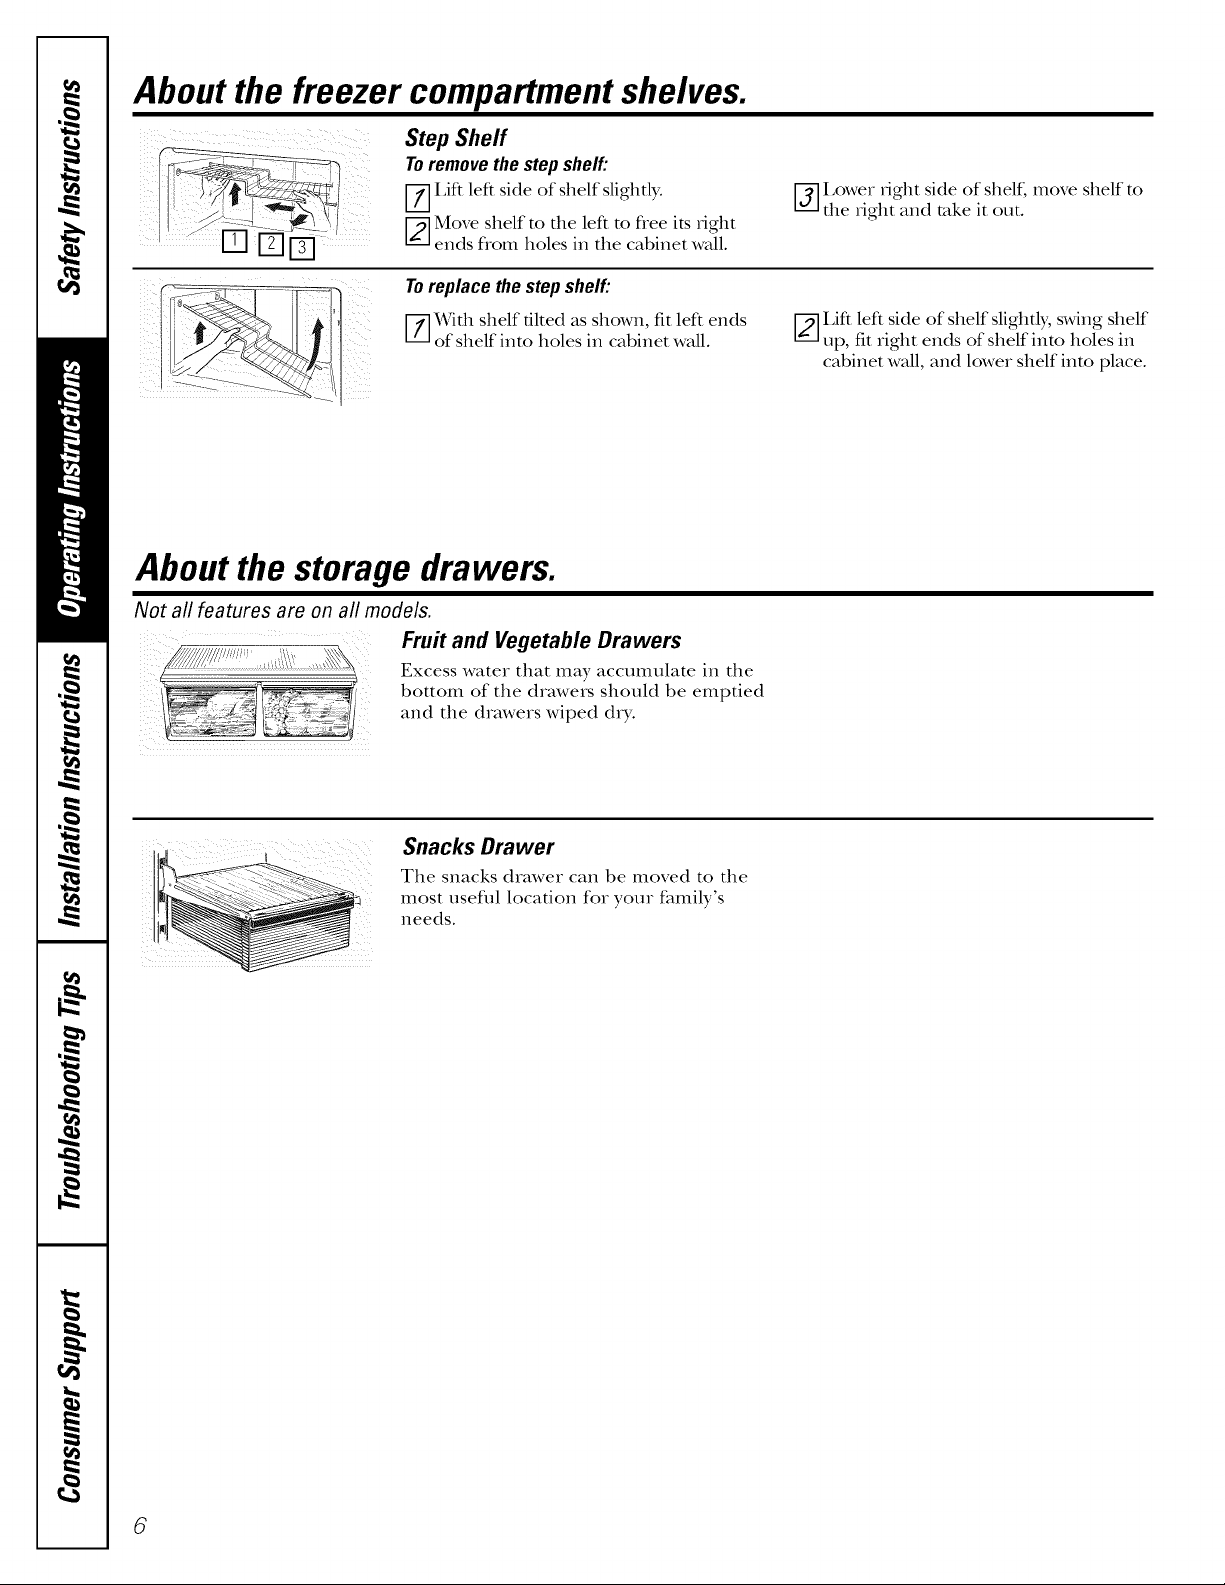
About the freezer compartment shelves.
Step Shelf
Toremovethestepshelf:
[-7]I,ift left side of shelf slightly.
[_-]Move shelf to the left to free its iight
ends flom holes in the cabinet wall.
[-_] Lower _ight side of shelf, move shelf to
the _ight and rake it out.
Toreplacethestepshelf:
[--_]With shelf tilted as shown, fit left ends
of shelf into holes in cabinet wall.
[_--]I_iffleft side of shelf slightly, swing shelf
up, fit right ends of shelf into holes in
cabinet wall, and lower shelf into place.
About the storage drawers.
Not aft features are on all models.
Fruit and Vegetable Drawers
Excess water that may accumulate in the
bottom of the drawers should be emptied
and the drawers wiped d_T.
..... i Snacks Drawer
The snacks drawer can be moved to the
most useflfl location for your family's
needs.
6
About storage drawer and cover removal, ge.com
Not aft features are on aft models.
Humidity Control
HIGH LOW
Adjustable Humidity Drawer (onsomemodels)
Slide the control all die way to the Slide the control all die way to the LOW
HIGHsetting to provide high humidity setting to provide lower humidity levels
recommended for most vegetables, recommended for most fl_uits.
Drawer and Cover Removal
Drawers can be removed easily by grasping the sides and lifting up slighdy while pulling
drawers past tile stop location.
i
Full-Width Drawer with
Plastic Cover
Toremovethe cover,lift it off its supports,
pull it forward, tilt it and take it out.
!iii /iii
7 ¸ • :i;i •_ ....
Twin Drawer Shelf
Toremove:
[-'7]Remove tile dxmvers.
F_-]Reach in, push the flont of glass cover
up, and at the same time, pull it forward
_tsfar as it will come.
Tilt it and take it out. Avoid cleaning the cold
glass covet"with hot water becmlse the exu'eme
temperature difference mW cause it m break.
_] Remove tile drawer flmne. (Always
remove tile ,glasscover before you rake
out the drawer flame.)
iJfi the fi'mne off the supports at each side
aud back, pull it forward, flit it aud take it out.
Toreplace:
[-_ Lower tile frame until it rests (m tile
supports at each side and back.
F_--]Replace tile glass covei, pushing its rear
edge firmly into the rear flvmm channel
and gendy lowedng tile flont into place.
[j] Replace tile (hmve_s.
About the automatic icemaker.
A newly-installed refrigerator may take 12to 24 hours to begin making ice.
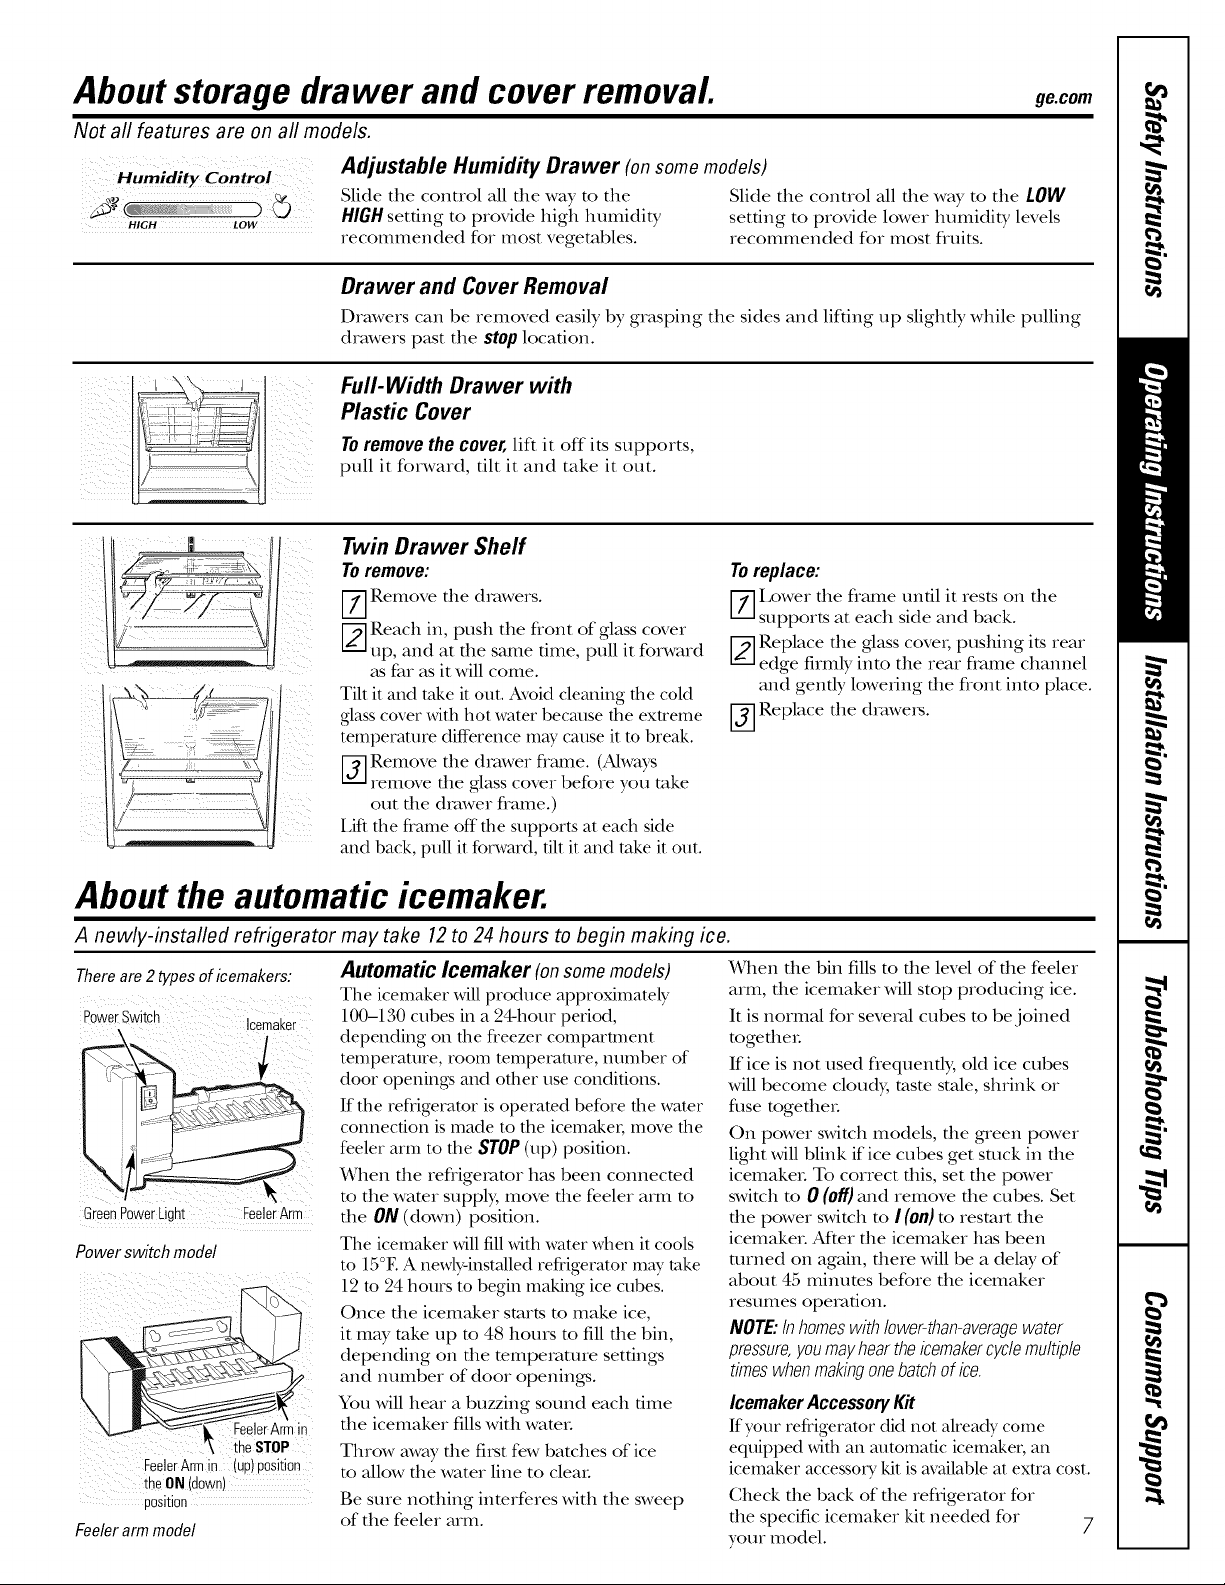
There are 2 types of icemakers:
PowerSwitih ]cemaier
GreenPowerLight FeelerArm
Power switchmodel
FeelerArmin
theSTOP
FeelerArmin (up) position
theON (down)
position
Feelerarm model
Automatic Icemaker (onsomemodels)
The icemaker will produce approximately
100-130 cubes in a 24-hour period,
depending on the fl'eezer compai'unent
temperature, room temperature, number of
door openings mid other rise conditions.
If the refl'igeramr is operamd before the water
connection is made to the icemaket; move the
feeler m'm to the STOP(.p) position.
When the refligeramr has been connecmd
m the wamr supply, move the feeler am1 m
the ON (down) position.
The icemaker willfill with water when it cools
to 15°E A newly-installed refi'igerator mW rake
12 m 24 hours to begin making ice cubes.
Once the icemaker starts m make ice,
it mW take up m 48 hours m fill the bin,
depending on the mmperamre setdngs
and number of door openings.
You will hear a buzzing sound each dine
the icemaker fills with WamL
Throw away tile fi[st few batches of ice
to allow the water line to cleaL
Be sure nothing interferes with tile sweep
of tile feeler arm.
When die bin fills to die level of die feeler
arm, die icemaker will stop producing ice.
It is normal for severed cubes m be joined
mgetheL
If ice is not used flequendy, old ice cubes
will become cloudy, tasm stale, shrink or
fuse mgetbeL
On power switch models, the g_een power
light will blink if ice cubes get stuck in the
icemakeL To correct this, set the power
switch m 0 (off) and remove the cubes. Set
the power switch m I (on) m resm_* the
icemakeL Af_er the icemaker h_ts been
turned on again, there will be a del W of
about 45 minums before tile icemaker
resumes ope_v_fion.
NOTE:In homeswith lower-than-averagewater
pressure,you mayhear the icemakercycle multiple
times when makingonebatch of ice.
IcemakerAccessoryKit
If your refi'igerator did not ah'eady come
equipped with an maomafic icemaker, an
icemaker accessoW kit is available at extra cost.
Check tlle back of tlle refligerator for
tile specific icemaker kit needed for
7
your model.
Care and cleaning of the refrigerator.
Cleaning the Outside
Thedoorhandlesandtrim (on some models). Clean
with a cloth dampened Mtb soapy wateL Dry Mtb a
soft cloth.
Keep the outsideclean.Wipe Mtb a clean cloth lighdy
dampened with kitchen appliance wax or mild liquid
dish detergent. DxT and polish with a clean,
soft cloth.
The stainless steel panels and door handles (on some
models) can be cleaned with a commercially available
stainless steel cleaneL Do not use appliance wax or polish
on the stainless steel.
Donotwipe therefrigeratorwith asoileddishclothor wet
towel.Thesemayleavea residuethatcanerodethepaint.
Donotusescouringpads,powderedcleaners,bleachorcleaners
containingbleachbecausetheseproductscanscratchand
weakenthe paintfinish.
Cleaning the Inside
Tohelp preventodors,leave an open box of baking soda
in the flesh food and freezer compartments.
Unplugthe refrigeratorbeforecleaning.
If this is not practical, wring excess moisture out of
sponge or cloth when cleaning around switches, lights
or controls.
Use warm wamr and baking soda solution--about a
tablespoon (15 ml) of baking soda to a quart (1 liter)
ofwateL This both cleans and neutralizes odors. Rinse
and wipe dry.
Aider cleaning the door gaskets, apply a thin layer of
peuoleum jelly to the door gaskets at the hinge side.
This helps keep the gaskets from sticking and bending
out of shape.
Avoidcleaningcoldglassshelves(onsomemodels)withhot water
becausethe extremetemperaturedifferencemaycausethemto
break.Handleglassshelvescarefully.Bumpingtemperedglasscan
causeit toshatter.
Donotwashany.plasticrefrigeratorparts in thedishwasher.
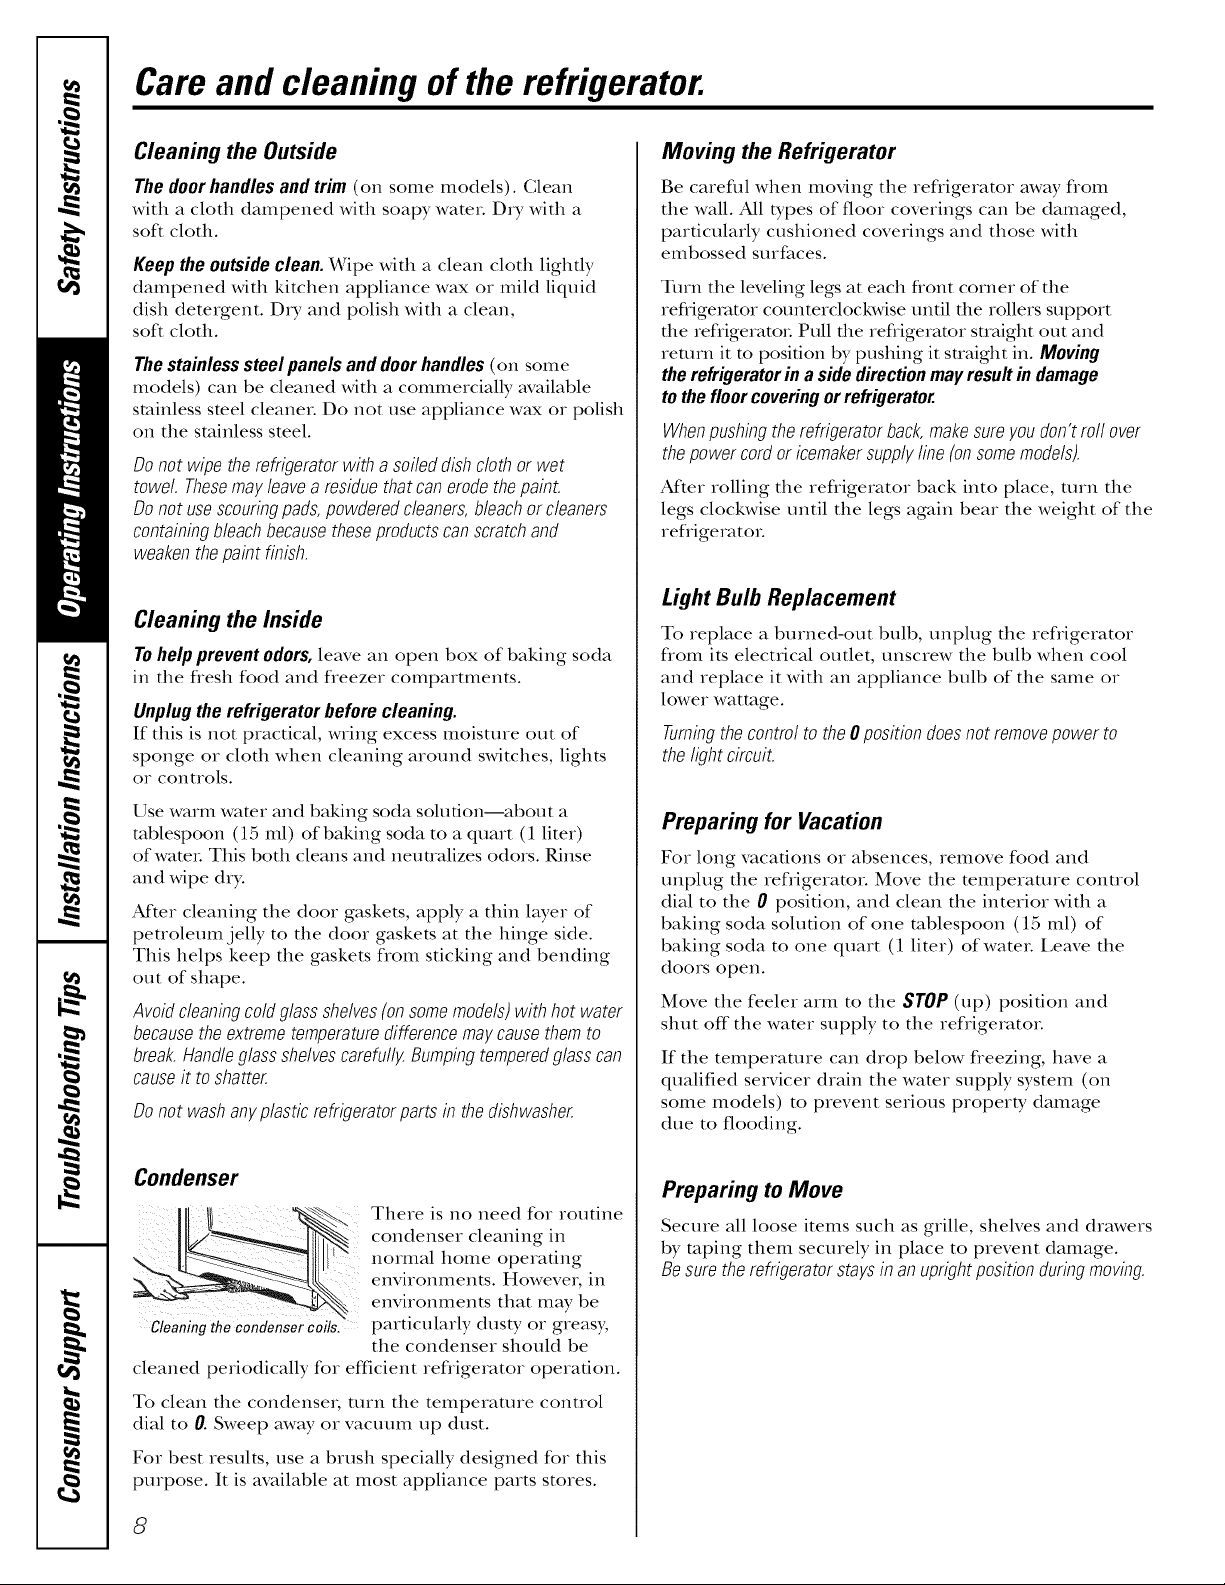
Condenser
/ _"-, There is no need for routine
_;,_ condenser cleaning in
normal home operating
ex,vi,ox,mex,ts.Howevex,ix,
environments that may be
gleaning thecondensercoils, particularly dusty or greasy,
the condenser should be
cleaned periodically for efficient refrigerator operation.
To clean the condensex; turn the temperature control
dial to 0. Sweep away or vacuum up dust.
Fox best results, use a brush specially designed for this
purpose. It is available at most appliance parts stores.
8
Moving the Refrigerator
Be carefld when moving the refligerator away flom
the wall. All types of floor coverings can be damaged,
particularly cushioned coverings and those with
embossed surfaces.
Turn the leveling legs at each flont corner of the
refiigemtor counterclockwise until the rollers support
the refiigeratoL Pull the refiigeramr suaight out and
rental it m position by pushing it suaigbt in. Moving
the refrigeratorin a side directionmat,resultin damage
tothefloorcoveringorrefrigerator.
Whenpushingthe refrigeratorback,makesurey.oudon'troll over
thepower cordoricemakersupplyline (onsomemodels).
Aider rolling the refligerator back into place, mrn the
legs clockwise until the legs again bear the weight of the
refiigeratoL
Light Bulb Replacement
To replace a burned-out bulb, unplug the refrigerator
flom its electrical outlet, unscrew the bulb when cool
and replace it with an appliance bulb of the same or
lower wattage.
Turning the control to the 0 position does not remove power to
the light circuit.
Preparing for Vacation
Fox long vacauons or absences, remove food and
unplug the refrigerator. Move the temperature control
dial to the 0 position, and clean the interior with a
baking soda solution of one tablespoon (15 ml) of
baking soda to one quart (1 liter) ofwateL Leave the
doors open.
Move the feeler arm to the SlOP (up) posidon and
slmt off"the water supply to the refligeratoL
If the temperature can drop below fleezing, have a
qualified servicer drain the water supply system (on
some models) to prevent serious property damage
due to flooding.
Preparing to Move
Secure all loose items such as grille, shelves and drawers
by roping them securely in place to prevent damage.
Besuretherefrigeratorstaysin anuprightpositionduringmoving.
 Loading...