


Service Manual
Audio
RR 420 CD
|
|
UM E |
|
|
|
160 |
|
TAPE |
|
|
|
|
125 |
FM |
|
O |
L |
|
|
125 |
160 |
LW |
|
|
|
|
|
||||
RADIO |
|
|
|
|
|
125 |
MW |
CD |
|
|
|
|
75 |
125 |
|
|
R R 4 2 0 C D |
R ADIO RECORDER WITH |
CD |
|
|
||
|
|
|
|
75 |
BAND |
||
M I N |
|
MAX |
|
61 |
|
61 |
SELECT |
UBS |
|
53 |
53 |
STOP |
|
REPEAT |
|
|
|
PREVIOUS |
|
PLAY/PAUSE |
|
NEXT |
|
PLAYBACK/RECORD A |
|
|
|
ONE TOUCH RECORDING |
|
AUTOSTOP |
|
RR 420 CD |
RADIO RECORDER WITH |
CD |
|
|
|
Zusätzlich erforderliche
Unterlagen für den Komplettservice
Additionally required
Service Manuals for the Complete Service
|
|
|
|
|
Service |
|
Service |
||
Manual |
|
Manual |
||
RR 420 CD |
|
Sicherheit |
||
|
|
|
Safety |
|
Sach-Nr./Part No. |
|
Sach- |
|
Nr./Part No. |
72010-752.40 |
|
72010 |
-800.00 |
|
|
|
|
|
|
|
|
|
|
|
|
|
|
|
|
|
|
|
|
|
|
|
|
|
|
|
|
|
|
|
|
|
|
|
|
|
|
|
|
|
|
|
|
|
|
Btx * 32700 #
Sachnummer
Part Number 72010-752.40
Änderungen vorbehalten Subject to alteration
Printed in Germany VK231 0297

Allgemeiner Teil / General Section |
RR 420 CD |
|
|
Es gelten die Vorschriften und Sicherheitshinweise gemäß dem Service Manual "Sicherheit", Sach-Nummer 72010-800.00, sowie zusätzlich die eventuell abweichenden, landesspezifischen Vorschriften!
The regulations and safety instructions shall be valid as provided by the "Safety" Service Manual, part number 72010-800.00, as well as the respective national deviations.
j |
|
k |
|
Inhaltsverzeichnis |
|
Table of Contents |
|
|
Seite |
|
Page |
Allgemeiner Teil ............................ |
1 - 2 … 1 - 8 |
General Section ............................. |
1 - 2 … 1 - 8 |
Meßgeräte / Meßmittel ............................................................... |
1 - 2 |
Test Equipment / Aids ................................................................ |
1 - 2 |
Technische Daten ...................................................................... |
1 - 3 |
Technical Data ........................................................................... |
1 - 3 |
Servicehinweise ......................................................................... |
1 - 3 |
Service Hints ............................................................................. |
1 - 3 |
Bedienhinweise ........................................................................... |
1 - 4 |
Operating Instructions ................................................................ |
1 - 5 |
Ausbauhinweise .......................................................................... |
1 - 6 |
Disassembly Instructions ............................................................ |
1 - 6 |
CD-Fehlersuchdiagramm ........................................................... |
1 - 8 |
CD Troubleshooting .................................................................... |
1 - 8 |
Einstellvorschriften ......................... |
2 - 1 ... 2 - 2 |
Adjustment Procedures ................. |
2 - 3 ... 2 - 4 |
Schaltpläne |
|
Circuit Diagrams |
|
und Platinenabbildungen ........... |
3 - 1 … 3 - 12 |
and Layout of the PCBs.............. |
3 - 1 … 3 - 12 |
Verdrahtungsplan ....................................................................... |
3 - 1 |
Wiring Diagram .......................................................................... |
3 - 1 |
Schaltpläne: |
|
Circuit Diagrams: |
|
CD-Teil ................................................................................... |
3 - 5 |
CD Section ............................................................................. |
3 - 5 |
Tuner und NF-Teil ................................................................... |
3 - 7 |
Tuner and AF Part .................................................................. |
3 - 7 |
Platinenabbildungen: |
|
Layout of the PCBs: |
|
CD-Teil ................................................................................... |
3 - 3 |
CD Section ............................................................................. |
3 - 3 |
CD Control-, Main Board ........................................................ |
3 - 9 |
CD Control-, Main Board ........................................................ |
3 - 9 |
Cassette-, Volume-, Beat Cut Board .................................... |
3 - 10 |
Cassette-, Volume-, Beat Cut Board .................................... |
3 - 10 |
IC Blockdiagramme .................................................................. |
3 - 11 |
IC Block Diagrams .................................................................... |
3 - 11 |
Explosionszeichnungen |
|
Exploded Views and |
|
und Ersatzteilliste ......................... |
4 - 1 … 4 - 3 |
Spare Parts List ............................. |
4 - 1 … 4 - 3 |
Explosionszeichnungen .............................................................. |
4 - 1 |
Exploded Views .......................................................................... |
4 - 1 |
Ersatzteilliste .............................................................................. |
4 - 3 |
Spare Parts List .......................................................................... |
4 - 3 |
Allgemeiner Teil
Meßgeräte / Meßmittel
Trenntrafo |
Wobbelsender |
Meßsender |
Oszilloskop |
Frequenzzähler |
Tonhöhenschwankungsmesser |
DC-Voltmeter |
NF-Voltmeter |
Testcassette 449 Sach-Nr. 35079-019.00
Drehmomentcassette 456 Sach-Nr. 35079-014.00
Test-CD Sach-Nr. 72008-376.00
Beachten Sie bitte das GRUNDIG Meßtechnik-Programm, das Sie unter folgender Adresse erhalten:
GRUNDIG electronics GmbH
Würzburger Str. 150, D-90766 Fürth/Bay
Tel. 0911/703-0, Telefax 0911/703-4479
General Section
Test Equipment / Aids
Isolating Transformer |
Sweep Generator |
Test Generator |
Oscilloscope |
Frequency Counter |
Wow and Flutter Meter |
DC Voltmeter |
AF Voltmeter |
Testcassette 449 Part No. 35079-019.00
Cassette torque meter 456 Part No. 35079-014.00
Test CD Part No. 72008-376.00.
Please note the Grundig Catalog “Test and Measuring Equipment” obtainable from:
GRUNDIG electronics GmbH
Würzburger Str. 150, D-90766 Fürth/Bay
Tel. 0911/703-0, Telefax 0911/703-4479
1 - 2 |
GRUNDIG Service |

RR 420 CD Allgemeiner Teil / General Section
Technische Daten |
|
|
Technical Data |
|
|
Spannungsversorgung: |
|
|
Power Supply: |
|
|
Netzbetrieb ............................................................... |
|
230V, 50/60Hz |
Mains operation ........................................................ |
|
230V, 50/60Hz |
Batteriebetrieb ................................................. |
|
8 x 1,5V (R14, UM2) |
Battery operation ............................................. |
|
8 x 1.5V (R14, UM2) |
Verstärkerteil: |
|
|
Amplifier Section: |
|
|
Ausgangsleistung (DIN 45324, 10% THD): |
|
Output power (DIN 45324, 10% THD): |
|||
Musikleistung ................................................................ |
|
2 x 3200mW |
Music power ................................................................. |
|
2 x 3200mW |
Sinusleistung ................................................................ |
|
2 x 2000mW |
Nominal power .............................................................. |
|
2 x 2000mW |
Stereo-Kopfhörer-Klinkenbuchse ........................................ |
3,5mm ø |
Jack socket for stereo headphones |
................................... 3.5mm ø |
||
Rundfunkteil: |
|
|
Radio Section: |
|
|
Wellenbereiche .................................................... |
|
FM 87,5 - 108MHz |
Waveband ............................................................ |
|
FM 87.5 - 108MHz |
|
|
MW 526,5 - 1606,5kHz |
|
|
MW 526.5 - 1606.5kHz |
|
|
LW 148,5 - 283,5kHz |
|
|
LW 148.5 - 283.5kHz |
Zwischenfrequenzen ...................................... |
|
10,7MHZ und 465kHz |
Intermediate frequencies ................................ |
|
10.7MHz and 465kHz |
Antennen .................................................... |
|
Teleskopantenne für FM |
Aerials ......................................................... |
|
Telescopic aerial for FM |
eingebaute Ferritstab-Antenne für MW/LW |
|
Built in ferrite rod aerial for MW/LW |
|||
Cassettenteil: |
|
|
Cassette Section: |
|
|
Tonträger .................................. |
Compact-Cassette nach DIN 45516 |
Cassette ........................................ |
|
Compact cassette to DIN 45516 |
|
Spurlage ....................................................... |
|
Viertelspur international |
Track System ........................................... |
|
International quartertrack |
Bandgeschwindigkeit ..................................................... |
|
4,76cm/sec. |
Tape Speed ................................................................... |
|
4.76cm/sec. |
Motor ..................................................................... |
|
Gleichstrommotor |
Motor .................................................................................. |
|
DC motor |
Frequenzübertragungsbereich .................................... |
125Hz - 8kHz |
Frequency Range ........................................................ |
|
125Hz - 8kHz |
|
Geräuschspannungsabstand ..................................................... |
42dB |
S/N Ratio (weighted) ................................................................ |
|
42dB |
|
Gleichlauffehler ........................................................................ |
|
0,35% |
Wow and Flutter ..................................................................... |
|
0.35% |
Automatik ........................... |
Aussteuerungsautomatik bei Aufnahme, |
Automatic ..................................... |
Automatic recording level control |
||
Automatisches Auslösen der Tasten am Bandende |
|
Automatic button release at tape end |
|||
CD-Teil: |
|
|
CD Section: |
|
|
Frequenzübertragungsbereich .................................... |
20Hz - 20kHz |
Frequency range ......................................................... |
|
20Hz - 20kHz |
|
Geräuschspannungsabstand ..................................................... |
65dB |
S/N ratio, weighted ................................................................... |
|
65dB |
|
Servicehinweise
Cassettenteil
Überprüfen Sie vor Beginn der Service-Arbeiten, ob die Magnetköpfe, die Tonwelle und die Gummiandruckrolle frei von Bandabrieb sind.
Zum Reinigen dieser Teile verwenden Sie ein mit Spiritus oder Reinigungsbenzin getränktes Wattestäbchen; dadurch verbessert sich der Aufnahmeund Wiedergabepegel, sowie der Bandlauf.
Nach dem Ersatz von Magnetköpfen oder sonstiger Bauteile müssen die technischen Daten des Gerätes anhand der im Service Manual vorgegebenen Meßwerte überprüft bzw. eingestellt werden.
CD-Teil
Bei Ausbau der CD-Lasereinheit muß vor Abziehen der Steckverbindungen eine Schutzlötstelle auf der Leiterplatte der
Lasereinheit angebracht werden, um eine Zerstörung der Laserdiode durch statische Aufladung zu vermeiden.
Beim Einbau einer neuen Lasereinheit (CD-Laufwerk) muß nach Einstecken der Steckverbinder die werkseitig angebrachte Schutzlötstelle entfernt werden!
Schutzlötstelle protective soldered joint 
Laseranschlußplatte
Laser PCB
Service Hints
Cassette Section
Before commencing service work, ensure that the magnetic heads, the capstan and the pinch roller are free from particles produced by tape abrasion. The recording and playback levels and the tape run can be improved by cleaning these parts with a cotton-wool tip soaked in spirit or cleaning benzine.
If the heads or other components have been replaced, the technical data of the recorder must be checked or adjusted according to the values specified in the Service Manual.
CD Section
When removing the Laser pick-up, the Laser pick-up PCB must be provided with a protective soldered joint before unplugging the connectors to avoid damage to the Laser diode by static charges.
When inserting the new Laser pick-up (CD drive mechanism) the soldered joint fitted at the factory must be removed after the connectors are plugged in.
GRUNDIG Service |
1 - 3 |
-1 |
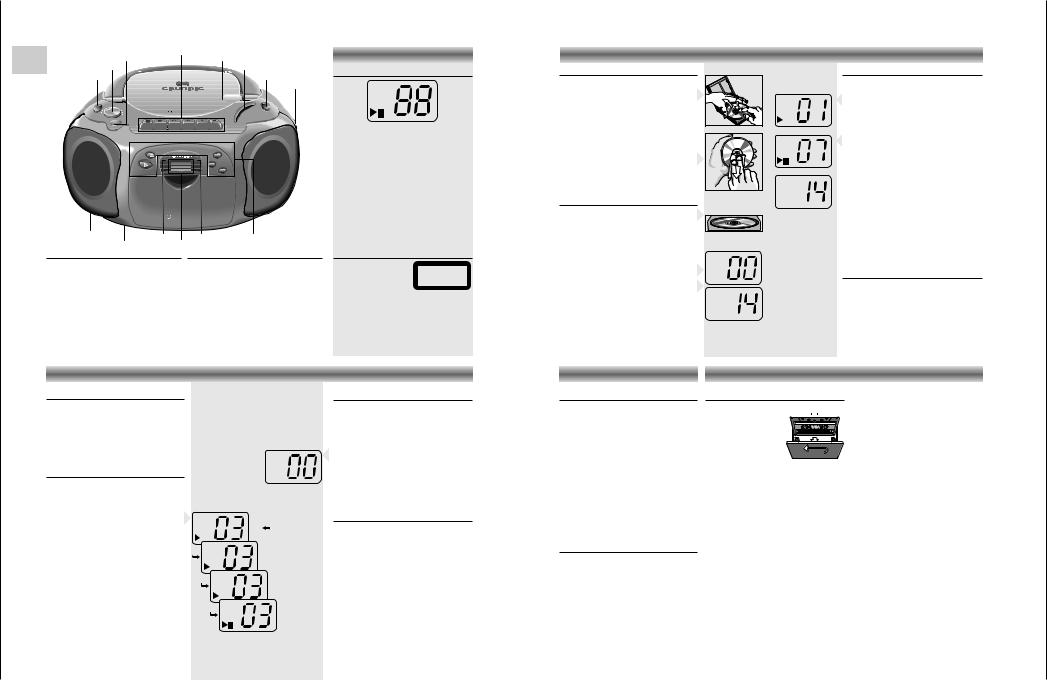
Bedienhinweise |
4 |
Hinweis: Dieses Kapitel enthält Auszüge aus der Bedienungsanleitung. Weitergehende Informationen entnehmen Sie |
|
|
|
bitte der gerätespezifischen Bedienungsanleitung, deren Sachnummer Sie in der entsprechenden Ersatzteilliste finden. |
|
|
D |
Cassette Control |
OPEN/ |
|
|
|
BEDIENELEMENTE |
|
CD-SPIELER |
|
||
UBS |
|
CLOSE |
|
|
|
|
|
||||
|
|
|
|
|
|
|
|
|
|
|
|
VOLUME |
|
|
Scale |
|
CD Display |
Umgang mit CDs |
Abspielen einer CD |
||||
Function |
|
|
|
|
|
|
|||||
|
|
|
|
|
BAND SELECT |
|
• Nur digitale Audio-CDs verwenden. ( +) |
• Zum Starten des Abspielens auf PLAY/PAUSE 2; |
|||
|
|
|
|
|
|
|
TUNING |
RANDOM |
|||
|
|
|
|
|
|
|
• Um die CD aus der Box herauszunehmen, beim |
|
drücken. |
||
|
|
|
|
|
|
|
|
REPEAT 1 |
– |
Sobald das Abspielen beginnt, erscheinen '2' |
|
|
|
|
|
|
|
|
|
ALL PROG |
Anheben der CD gegen die Mittenachse drücken. |
||
|
OLUM |
|
|
|
|
|
FMLW |
2 |
und die Nummer des laufenden Stücks. |
||
TAPE |
|
|
125 |
125 |
160 |
PROG |
|
||||
|
E |
|
|
|
160 |
|
|
|
• Die CD niemals beschriften oder mit einem |
|
|
CD |
V |
CD |
75 |
|
125 |
|
|
|
1 |
|
|
RADIO |
|
|
|
125 |
|
MW |
|
|
|
||
M I N |
MAX |
|
61 |
|
61 |
|
SELECT |
|
Aufkleber versehen. |
• Den Ton mit den Reglern VOLUME und UBS |
|
|
RR 420 CD RADIO RECORDER WITH |
|
|
|
75 |
|
BAND |
|
|
|
|
|
UBS |
|
|
|
|
|
|
|
|
einstellen. |
|
|
|
53 |
53 |
|
|
|
|
• Fassen Sie die CD immer am Rande an und |
|
||
|
|
|
|
|
|
|
|
|
• Für kurzzeitige Unterbrechungen auf PLAY/PAUSE |
||
|
|
|
|
|
|
|
Das Display zeigt: |
legen Sie sie immer in die Verpackung zurück. |
|||
|
|
|
|
|
|
|
|
2; drücken. |
|||
|
|
|
|
|
|
|
• Zum Reinigen die CD anhauchen und mit einem |
|
|||
|
|
|
|
|
|
|
RANDOM: |
während der Funktion RANDOM |
– |
Im Anzeigefeld erscheint das Zeichen ';'. |
|
|
|
|
|
|
|
|
weichen, nichtfasernden Tuch geradlinig von der |
||||
|
STOP |
|
REPEAT |
|
|
|
• Zum Fortsetzen der Wiedergabe die Taste |
||||
|
|
|
|
|
|
|
REPEAT 1: |
Wiederholung eines Stücks |
Mitte aus in Richtung des Randes abwischen. |
||
|
|
|
|
|
|
|
|
PLAY/PAUSE 2; erneut drücken. |
|||
|
|
|
PREVIOUS |
|
|
|
ALL: |
Wiederholung aller Stücke |
Reinigungsmittel können die CD beschädigen! |
|
|
|
|
|
|
|
|
|
• Zum Stoppen auf STOP 9 drücken. |
||||
|
PLAY/PAUSE |
|
NEXT |
|
|
|
PROG: |
Programmieren oder Abspielen des |
• Schützen Sie die CDs vor Regen und Feuchtigkeit, |
||
|
|
|
|
|
|
|
– |
Das Display zeigt die Anzahl der Titel auf der CD. |
|||
|
|
|
|
|
|
|
|
Programms |
vor Sand und vor Hitze z.B. von Heizgeräten oder |
||
PLAYBACK/RECORD A |
|
ONE TOUCH RECORDING |
AUTOSTOP |
RR 420 CD |
RADIO RECORDER WITH CD |
PHONES |
ON 6 |
FM ST 6 |
CD Control |
|
BEAT CUT |
CD Display |
|
Cassette Control
;– unterbrechen der Wiedergabe/Aufnahme
9 / |
– Stoppen des Bandlaufs und |
|
Öffnen des Cassettenfachs |
Q– schneller Vorlauf
R– schneller Rücklauf
A– Starten der Wiedergabe
0– Starten der Aufnahme
CD Control
PLAY/PAUSE 2; – zum Starten/Unterbrechen der Wiedergabe
STOP 9 |
– zum Stoppen der Wiedergabe |
MODE |
– zum Wählen der verschiedenen |
|
Wiedergabefunktionen |
|
(RANDOM oder REPEAT) und |
|
zum Programmieren von Titeln |
|
im Speicher |
PREVIOUS/ |
|
NEXT |
– zum Überspringen von Stücken |
|
und zum Suchen in Vorwärts- |
|
oder Rückwärtsrichtung |
2: |
PLAY |
;: |
PAUSE |
88 |
Stücknummer |
Warnung
CLASS 1 LASER PRODUCT bedeutet, daß der Laser wegen seines technischen Aufbaus eigensicher ist, so daß der maximal erlaubte
Ausstrahlwert unter keinen Umständen überschritten werden kann.
VORSICHT: Wenn andere als die hier spezifizierten Bedienungseinrichtungen benutzt oder andere Verfahrensweisen ausgeführt werden, kann es zu gefährlicher Strahlungsexposition kommen.
im Innenraum von in der Sonne geparkten Autos.
Einlegen einer CD
• Den Function-Schalter auf CD stellen.
– Die Einschaltanzeige ON 6 leuchtet auf.
•Zum Öffnen des Deckels, heben Sie den CD-Deckel an der mit OPEN/CLOSE gekennzeichneten Stelle an.
•Die CD mit der bedruckten Seite nach oben einlegen.
•Den Deckel schließen.
–Der CD-Spieler startet und tastet die Inhaltsangabe der CD ab.
Danach erscheint die Anzahl der Titel.
OIOIOIOI |
OIOIOIOIOI |
OIOIOIOIOIOIOIOI |
OIOIOIOIOOOIOIOIOIOOIOIOIOIOI |
OIOIOIOIOIOOIO |
 – Der CD-Spieler geht ebenfalls in Stellung STOP:
–durch Öffnen des CD-Fachs;
–wenn das Ende der CD erreicht wird;
–wenn der Function-Schalter betätigt wird;
–wenn die Batterien ausgehen oder bei anderen Stromunterbrechungen.
•Zum Herausnehmen der CD öffnen Sie den Deckel durch Anheben der mit OPEN/CLOSE markierten Stelle.
•Den CD-Deckel erst öffnen wenn sich der CDSpieler in Stellung STOP befindet.
Previous / Next
Wahl eines anderen Titels während der Wiedergabe
• Taste PREVIOUS oder NEXT drücken, bis die Nummer des gewünschten Titels im Display erscheint.
–Die Wiedergabe wird unterbrochen, und danach beginnt die Wiedergabe des gewählten Stücks.
Beginnen mit einem bestimmten Titel
•Taste PREVIOUS oder NEXT drücken, bis die Nummer des gewünschten Titels im Display erscheint.
•Taste PLAY/PAUSE 2; drücken.
Service GRUNDIG
Rasches Suchen einer Passage
•PREVIOUS gedrückt halten, um in Richtung Plattenanfang zu suchen.
•NEXT gedrückt halten, um in Richtung Plattenende zu suchen.
Hinweis: Dies ist ein 'hörbares Suchen'. Während des Suchens wird die Lautstärke reduziert und nach dem Loslassen der Taste wird die Lautstärke auf ihren normalen Wert zurückgestellt.
Auswahl verschiedener Wiedergabemodi
Die Taste MODE ermöglicht Ihnen, zwischen vier verschiedenen Wiedergabemodi auszuwählen. Diese können nur während der Wiedergabe ausgewählt oder geändert werden.
•Drücken Sie mehrmals die Taste MODE bis im Display die gewünschte Wiedergabeart erscheint:
–REPEAT 1: ein Musiktitel wird wiederholt;
–REPEAT ALL: alle Musiktitel werden wiederholt;
–RANDOM: die Musiktitel werden in zufälliger Reihenfolge abgespielt;
–gewöhnliche Wiedergabe.
•Die Funktion 'RANDOM' ist nicht möglich, solange Sie ein Programm abspielen.
•Durch Drücken der MODE-Taste bis die Modianzeigen aus dem Display erlöschen, gelangen Sie zu dem gewöhnlichen Wiedergabemodus.
•Sie können auch die Taste STOP 9 drücken, um die Wiedergabe zu beenden.
CD-SPIELER
PROG
REPEAT
ALL
RANDOM
Programmieren
Sie können maximal 20 Titel in jeder beliebigen Reihenfolge speichern. Beim Versuch, mehr als 20 Titel zu speichern, wird die Programmierfunktion von Anfang an wiederholt.
Speichern eines Programms
•In Stellung STOP, drücken Sie die Taste MODE. Im Display erscheint: '00' und 'PROG'.
•Wählen Sie den gewünschten Titel mit den Tasten PREVIOUS oder NEXT.
•Speichern Sie diese Nummer durch Drücken der MODE-Taste.
•Wählen und speichern Sie in dieser Weise alle gewünschten Titel.
MODE drücken, zeigt das Display nacheinander alle gespeicherten Stücknummern in Reihenfolge.
– Anschließend erscheint die Angabe '00'.
•Nun können Sie zu der aktuellen Reihenfolge, wie oben beschrieben, bis zu 20 Titel speichern.
CD-SPIELER |
CASSETTENDECK |
Abspielen des Programms
Hinweis: Wenn Sie MODE drücken, ohne Titel zu speichern, wird der CD-Spieler nicht starten
(siehe 'Fehlersuche').
•Drücken Sie einmal MODE, um 'PROG' anzeigen zu lassen.
•Drücken Sie PLAY/PAUSE 2;.
–Das Abspielen beginnt mit dem ersten Programmtitel.
–Im Display erscheint: 'PROG 2'
–Nach dem letzten Titel wird das Abspielen gestoppt. Das Display zeigt die Anzahl der Titel auf der CD.
Hinweise:
•Drücken Sie STOP 9, um das Abspielen des Programms zu beenden.
•Während der Wiedergabe eines Programms können mit den Tasten PREVIOUS oder NEXT die gewünschten programmierten Titel angewählt werden.
Löschen eines Programms
• Der Inhalt des Programms wird gelöscht:
–durch Öffnen des CD-Fachs;
–wenn der Function-Schalter betätigt wird;
–wenn die Batterien ausgehen oder bei anderen Stromunterbrechungen.
Aufnahme
•Öffnen Sie den Cassettenhalter mit 9 /.
•Legen Sie eine Cassette ein. 
• Beim Mithören der Aufnahme, den Ton mit den Reglern VOLUME und UBS einstellen.
Die Stellung dieser Regler hat keinen Einfluß auf die Aufnahme.
•Zum Aufnahmestart auf 0 drücken (die Taste A rastet automatisch mit ein).
–Wenn das Bandende erreicht ist, werden die Recorder-Tasten freigegeben.
•Zum Unterbrechen der Aufnahme die Taste ; drücken.
•Zum Fortsetzen der Aufnahme die Taste ; erneut drücken.
•Die Taste 9 / drücken, wenn die Aufnahme vor Erreichen des Bandendes gestoppt werden soll. Durch erneutes Drücken dieser Taste öffnet sich das Cassettenfach.
•Das Gerät ist ausgeschaltet, wenn sich der Function-Wahlschalter in der Position TAPE
befindet und keine Tasten gedrückt sind.
– Die Einschaltanzeige ON6 erlischt.
CD Synchro – Aufnahme vom CD-Spieler
•Den Function-Schalter auf CD stellen.
•Sie brauchen den CD-Spieler nicht separat zu starten: sobald Sie auf 0 drücken, startet der
CD-Spieler automatisch.
–Steht der CD-Spieler in Stellung STOP, startet die Aufnahme vom Anfang der CD (oder vom Anfang des gespeicherten Programms).
•Um eine Aufnahme in der Mitte eines Stücks zu starten, beginnen Sie die CD-Wiedergabe wie gewohnt.
•Sobald die gewünschte Passage erreicht ist, drücken Sie auf PLAY/PAUSE 2; und anschließend auf 0, um die Aufnahme zu starten.
Aufnahme vom Radio
•Den Function-Schalter auf RADIO stellen.
•Mit dem BAND SELECT-Schalter den Wellenbereich wählen.
•Mit dem TUNING-Einsteller auf den gewünschten Radiosender abstimmen.
•Wenn während der Aufnahme eines MW/LWSenders Pfeifgeräusche zu hören sind, können diese unterdrückt werden, indem der Schalter BEAT CUT auf die andere Position gestellt wird.
Section General / Teil Allgemeiner
CD 420 RR
Service GRUNDIG
5 - 1
Operating Instructions
Note: This chapter contains excerpts from the operating instructions. For further particulars please refer to the appropriate user instructions the part number of which is indicated in the relevant spare parts list.
|
|
Cassette Control |
OPEN/ |
|
GB |
UBS |
CLOSE |
||
|
||||
|
|
|||
|
VOLUME |
|
Scale |
|
|
Function |
|
BAND SELECT |
TUNING
|
E |
|
|
|
|
160 |
FM |
TAPE |
UM |
|
|
|
|
125 |
|
OL |
|
|
|
125 |
160 |
LW |
|
RADIO |
V |
|
|
|
|
125 |
MW |
CD |
RR 420 CD |
RADIO RECORDER WITH |
CD |
75 |
|
125 |
|
|
|
|
|
75 |
BAND |
||
M I N |
MAX |
|
|
61 |
|
|
SELECT |
|
|
|
61 |
|
|||
|
UBS |
|
|
53 |
53 |
|
|
|
STOP |
|
|
REPEAT |
|
|
|
|
|
|
|
PREVIOUS |
|
|
|
|
PLAY/PAUSE |
|
|
NEXT |
|
|
|
PLAYBACK/RECORD A |
|
ONE TOUCH RECORDING |
AUTOSTOP |
RR 420 CD |
RADIO RECORDER WITH CD |
PHONES |
ON 6 |
FM ST 6 |
CD Control |
|
BEAT CUT |
CD Display |
|
Cassette Control
;– to interrupt playback/recording
9 / |
– to stop and eject the cassette |
Q– fast forward
R– fast rewind
A– to start cassette playback
0– to start recording
CD Control
PLAY/PAUSE 2; |
– to start and interrupt |
|
playback |
STOP 9 |
– to stop playback |
MODE |
– to select a different playback |
|
mode (RANDOM or REPEAT) |
|
and to programme track |
|
numbers |
PREVIOUS/ |
|
NEXT |
– to skip and search |
|
backward/forward |
CONTROLS
CD Display
|
RANDOM |
|
|
REPEAT 1 |
|
|
ALL PROG |
|
|
PROG |
|
The display indicates: |
|
|
RANDOM: |
during the RANDOM function |
|
REPEAT 1: |
repeat one |
|
ALL: |
repeat all |
|
PROG: |
programming or programme play- |
|
|
back |
|
2: |
PLAY |
|
;: |
PAUSE |
|
88 |
track number |
|
Warning |
|
|
CLASS 1 LASER PRODUCT |
|
|
means that the laser´s |
CLASS 1 |
|
construction makes it |
LASER PRODUCT |
|
inherently safe so that the legally prescribed maximum
permissible ratiation values can never be exceeded.
CAUTION: Using any equipment or devices other than those described and specified in these operating instructions, or tampering with the unit in any way, can result in dangerous exposure to radiation.
Searching for a passage during play
•Hold PREVIOUS down to search backwards to the beginning.
•Hold NEXT down to search forwards to the end.
Note: This function can be described as “audibly” searching for a title. During the search, volume is reduced and returns to its adjusted level as soon as the button is released.
Selecting a different playback mode
The MODE button allows you to select four different playback modes. These can only be selected or changed during playback.
•During playback, press the MODE button until the display shows the desired function:
–REPEAT 1: one track is repeated;
–REPEAT ALL: all tracks are repeated;
–RANDOM: the tracks are played in random order;
–normal playback.
•The random function is not possible during playback of a programme.
•To go back to normal playback, press MODE repeatedly until all the mode indications disappear.
•You can also press STOP 9 to stop playback.
CD PLAYER
PROG
REPEAT
ALL
RANDOM
Programming
By programming the player you can play up to 20 tracks in any desired order. If you exceed the maximum of 20 tracks, the programme function will start again from the beginning.
Storing a programme
•In STOP mode, press MODE.
The display will show '00' and 'PROG'.
•Select the first desired track using PREVIOUS or
NEXT.
•Store this track by pressing MODE again.
•Select and store in this way all desired titles.
Checking the programme
MODE repeatedly. sequence all programmed
track numbers. Then, '00' appears again.
•At this point you can also add more tracks to the programme (up to 20).
CD PLAYER
CD handling
•Use only Digital Audio CDs which have the symbol +.
•To take the CD out of its box easily, press the centre spindle while lifting the CD.
•Never write on a CD or attach any sticker to the CD.
•Always hold the CD at the edge and always store it in its box after use with the label facing up.
•To remove dust and dirt, breathe on the CD and wipe it with a soft, lint-free cloth in a straight line from the center towards the edge. Cleaning agents may damage the CD.
•Do not expose the CD to rain, moisture, sand, or to excessive heat. (E.g. from heating equipment or in motor cars parked in the sun).
Inserting a CD
•Set the Function switch to CD.
– The ON indicator 6 lights up.
•To open the CD compartment, lift the CD door on the edge marked OPEN/CLOSE.
•Insert the AUDIO CD, printed side facing up.
•Close the cover.
–The CD-player scans the contents list of the CD. After that, the total number of tracks appears on the display.
2 |
1 |
OIOIOIOI |
OIOIOIOIOI |
OIOIOIOIOIOIOIOI |
OIOIOIOIOOOIOIOIOIOOIOIOIOIOI |
OIOIOIOIOIOOIO |
Playing a CD
• Press PLAY/PAUSE 2; to start playback.
– The display shows '2' and the track number.
•Adjust the sound using the VOLUME and UBS controls.
•For brief interruptions, press PLAY/PAUSE 2;.
– ';' appears on the display.
•To resume playback, press PLAY/PAUSE 2; again.
•To stop playback, press STOP 9.
–The total number of tracks will then appear on the display.
–The CD player also goes to position STOP:
–if you open the CD door;
–when the end of the CD is reached;
–if you move the Function selector;
–if the batteries run down or if the power supply is interrupted.
•To take out the CD, open the CD door by lifting the edge marked OPEN/CLOSE.
•Open the CD door only if the CD-player is in position STOP.
Previous / Next
Selecting another track during play
•Press PREVIOUS or NEXT until the required track number appears in the display.
–The selected track begins to play.
Starting with a particular track
•Press PREVIOUS or NEXT until the required track number appears in the display.
•Press PLAY/PAUSE 2;.
– Play starts from the selected track.
CD PLAYER |
CASSETTE DECK |
Playing a programme
Note: If you press MODE and don't programme any tracks, CD playback will not start (see Troubleshooting).
•Press MODE once to show the 'PROG' indication.
•Press PLAY/PAUSE 2;.
–Play starts with the first track of the programme.
–The display shows 'PROG 2'
–After the last track playback stops. The total number of tracks will then appear on the display.
Note:
•Press STOP 9 to stop playback.
•While playing a programme, it is possible to use PREVIOUS or NEXT to select the desired programmed tracks.
Erasing a programme
• The programme is erased:
–by opening the CD door;
–if you move the Function selector;
–if the batteries are exhausted or if the power supply is interrupted in another way.
Cassette recording
• Press 9 / to open the cassette holder.
• Insert the cassette.
• When monitoring during recording, adjust the sound using the controls
VOLUME and UBS. These controls do not affect the recording.
•Start recording by pressing 0.
(the A button is automatically also pressed).
–When the end of the tape is reached, the recorder buttons are released.
•To interrupt recording, press ;.
•To continue recording, press ; again.
•Press 9 / if you want to stop recording before the end of the tape.
On pressing again, the cassette holder will open.
•The set is switched off if the Function switch is in position TAPE and no buttons are pressed.
– The ON indicator 6 goes out.
Recording from the CD-player (CD synchro recording)
•Set the Function switch to CD.
•It is not necessary to start the CD player
separately: by pressing 0 the CD player starts automatically.
–If the CD player is in STOP position, recording will start from the beginning of the CD (or from the beginning of the programmed selection).
•To start a recording in the middle of a track, play the CD in the normal way.
•As soon as the desired passage is reached, pause the CD and then start recording by pressing 0.
Recording from the radio
•Set the Function selector to RADIO.
•Select the wave band using the BAND SELECT switch.
•Tune to desired radio station using the TUNING control.
•If during the recording of an MW/LW station, a whistling sound is heard, this sound can be suppressed by setting the BEAT CUT switch to another position.
CD 420 RR
Section General / Teil Allgemeiner

Allgemeiner Teil / General Section |
RR 420 CD |
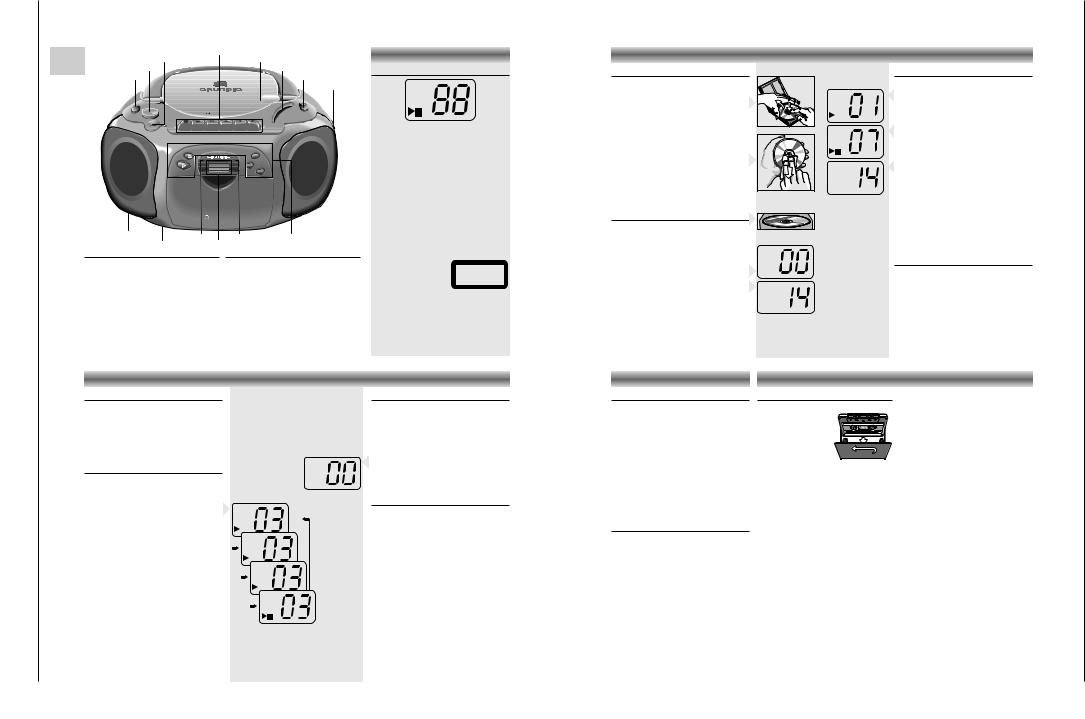
Ausbauhinweise |
Disassembly Instructions |
1. Gehäusevorderteil abnehmen
- 5 Schrauben A herausdrehen (Fig. 1).
- Gehäusevorderteil und Gehäuserückteil vorsichtig ca. 5cm auseinanderziehen.
- Stecker CN107 B und CN108 C (Fig. 3) von der CD-Platte abziehen.
- Gehäusevorderteil und Gehäuserückteil auseinandernehmen.
- Bei Bedarf Steckverbindungen abziehen, bzw. Verbindungs-
leitungen ablöten.
D
A
A
Fig. 1
2.CD-Einheit ausbauen
-Gehäusevorderteil abnehmen (siehe Pkt. 1).
-2 Schrauben D (Fig. 1) herausdrehen.
-CD-Fachdeckel öffnen.
-CD-Teil nach vorne herausnehmen.
-Steckverbindungen von der CD-Platte abziehen.
1. Removing the Cabinet Front
-Undo 5 screws A (Fig. 1).
-Pull apart approx. 5cm the cabinet front and the rear panel carefully.
-Unplug the connectors CN107 Band CN108 C(Fig. 3) from the
CD circuit board.
-Dismantle the cabinet front and the rear panel.
-Disconnect the plug-in connections and unsolder the connections if necessary.
 A
A
A
2. Dismantling the CD Assembly
-Remove the cabinet front (see para 1).
-Undo 2 screws D (Fig. 1).
-Open the CD compartment lid.
-Take out the CD assembly towards the front.
-Disconnect the plug-in connections from the CD circuit board.
Hauptplatte
Main Board
|
|
C |
I |
E |
B |
|
||
Fig. 2 |
Fig. 3 |
CD-Platte |
CD Board |
||
3. Hauptplatte ausbauen |
3. Removing the Main Board |
|
-Gehäusevorderteil abnehmen (siehe Pkt. 1).
-Schraube E herausdrehen (Fig. 2).
-Tuningrad F (Fig. 4) ausrasten und herausnehmen.
-Hauptplatte nach hinten herausziehen.
Achten Sie dabei auf die beiden Schalthebel G und H (Fig. 4/5).
-Bei Bedarf Steckverbindungen abziehen.
-Remove the cabinet front (see para 1).
-Undo the screw E (Fig. 2).
-Disengage the tuning wheel F (Fig. 4) and take it out.
-Remove the main board towards the rear.
-Take care of the two switch levers G and H (Fig. 4/5).
-Disconnect the plug-in connections if necessary.
 H
H
F G
G
Hauptlatte
Main Board
Fig. 4 |
Fig. 5 |
1 - 6 |
GRUNDIG Service |

RR 420 CD |
Allgemeiner Teil / General Section |
4.Cassettenlaufwerk ausbauen
-Hauptplatte ausbauen (siehe Pkt. 3).
-2 Schrauben I (Fig. 2) herausdrehen.
-Cassettenplatte abnehmen.
-2 Schrauben J (Fig. 6) herausdrehen.
-Lautstärkereglerknopf abziehen.
-Plattenhalter K (mit Lautstärkeregler-Platte und Schalthebel H) abnehmen.
-2 Schrauben L (Fig. 6) herausdrehen.
-Zeigerführung M (mit Schalthebel G) abnehmen.
-2 Schrauben N (Fig. 6) herausdrehen.
-Cassettenfachdeckel durch Drücken der Taste STOP/EJECT öffnen.
-Cassettenlaufwerk nach hinten herausnehmen.
4.Dismantling the Cassette Drive Mechanism
-Remove the main board (see para 3).
-Undo 2 screws I (Fig. 2).
-Remove the cassette board.
-Undo 2 screws J (Fig. 6).
-Pull off the volume knob.
-Remove the board holder K (with volume board and switch lever H).
-Undo 2 screws L (Fig. 6).
-Remove the pointer guide M (with switch lever G).
-Undo 2 screws N (Fig. 6).
-Open cassette compartment lid by pressing the button STOP/
EJECT.
-Take out the cassette drive mechanism towards the rear.
Lautstärkeregler-Platte
Volume Board
M
K
G
H
L |
|
J |
|
|
|
N |
Cassettenplatte |
N |
Cassette Board |
Fig. 6
5. CD-Laufwerk ausbauen
Bei Ausbau der CD-Lasereinheit (CD-Laufwerk) muß vor Abziehen der Steckverbindungen eine Schutzlötstelle Oauf der Leiterplatte der Lasereinheit angebracht werden, um eine Zerstörung der Laserdiode durch statische Aufladung zu vermeiden (Fig. 8).
-CD-Einheit ausbauen (siehe Pkt. 2).
-CD-Leiterplatte abnehmen (4 Schrauben herausdrehen).
-Steckverbindungen von der CD-Leiterplatte abziehen.
-4 Schrauben P herausdrehen (Fig. 7).
-CD-Laufwerk herausnehmen.
Achten Sie dabei auf die Puffer (Fig. 7) Q(schwarz) und R(blau).
Diese Puffer haben einen unterschiedlichen Auflagedruck (schwarz = stärker, blau = schwächer).
5. Removing the CD Mechanism
When removing the Laser pick-up (CD drive mechanism), the pickup PCB must be provided with a protective soldered joint O before unplugging the connectors to avoid damage to the Laser diode by static charges (Fig. 8).
-Remove the CD Assembly (see para 2).
-Take out the CD circuit board (undo 4 screws).
-Unplug the connectors from the CD circuit board.
-Undo 4 screws P (Fig. 7).
-Remove the CD mechanism.
Take care of the buffers Q (black) and R (blue) Fig. 7. The buffer pressure is different (black = stronger, blue = weaker).
P P
Schutzlötstelle protective soldered joint
O
Q
 R
R
Q |
|
|
R |
|
|
|
Laseranschlußplatte |
|
|
|
Laser Board |
P |
Fig. 7 |
P |
Fig. 8 |
|
|
GRUNDIG Service |
1 - 7 |
 Loading...