

Page 1
Easy to use.
Self-centering design for quick efficient
dead-center pen blank drilling.
Drill as many pen blanks as you want in a
flash.
Adjust the vise only once (per blank size).
Drill pen blanks of up to 1" square.
Drill holes at the exact center of a round
object on their width.
MAXIMUM JAW OPENING
1 3/8” (33.8 mm)
REVISION 1 - AUGUST 31/07
© COPYRIGHT GENERAL INTERNATIONAL 08/2007
Page 2

THANK YOU
for choosing this General® International model 70-120 self-centering pen drilling vise. This self-centering pen drilling vise has been carefully tested and inspected before shipment and if properly used and maintained, will provide you with years of reliable service. To ensure optimum performance and trouble-free operation, and to get the most
from your investment, please take the time to read this manual before installing and adjusting
the unit.
The manual’s purpose is to familiarize you with the safe operation, basic function, and features
of this vise as well as the set-up and identification of its parts and components. This manual is
not intended as a substitute for formal woodworking instruction, nor to offer the user instruction
in the craft of woodworking. If you are not sure about the safety of performing a certain operation or procedure, do not proceed until you can confirm, from knowledgeable and qualified
sources, that it is safe to do so.
Once you’ve read through these instructions, keep this manual handy for future reference.
All component parts of General® International machinery are carefully tested and inspected during all stages of
production, and each machine is thoroughly inspected upon completion of assembly. Because of our commitment to quality and customer satisfaction, General® International agrees to repair or replace, within a period of 24
months from date of purchase, any genuine part or parts which, upon examination, prove to be defective in workmanship or material. In order to obtain this warranty, all defective parts must be returned freight pre-paid to
General® International Mfg. Co., Ltd. Repairs attempted without our written authorization will void this warranty.
GENERAL ® INTERNATIONAL WARRANTY
Disclaimer:
The information and specifications in this manual pertain to
the unit as it was supplied from the factory at the time of printing.
Because we are committed to making constant improvements, General
International reserves the right to make changes to components, parts
or features of this unit as deemed necessary, without prior notice and
without obligation to install any such changes on previously delivered
units. Reasonable care is taken at the factory to ensure that the specifications and information in this manual corresponds with that of the unit
with which it was supplied. However, special orders and “after factory”
modifications may render some or all information in this manual
inapplicable to your machine. Further, as several generations of this vise
and several versions of this manual may be in circulation, if you own an
earlier or later version of this unit, this manual may not depict your item
exactly. If you have any doubts or questions contact your retailer or our
support line with the model and serial number of your unit for clarification.
GENERAL® INTERNATIONAL
8360 Champ-d’Eau, Montreal (Quebec) Canada H1P 1Y3
Telephone (514) 326-1161 • Fax (514) 326-5555 • www.general.ca
Page 3
1. Refer to your drill press manual. Carefully follow all operating instructions and safety guidelines.
2. Firmly clamp the self-centering vise to the drill press table with at least two C clamps or vise clamps, one on each
end of the self-centering vise, to prevent it from moving while drilling.
3. Always lock the jaws of the vise before drilling, so the pen blank will not move and get damaged.
Rules for Safe Operation
To help ensure safe operation, please take a moment to learn the tool’s applications and limitations,
as well as potential hazards. General® International disclaims any real or implied warranty and holds
itself harmless for any injury that may result from improper use of its equipment.
BASIC FUNCTIONS OF THIS VISE
Thank your for choosing this General® International model 70-120 self-centering pen drilling
vise.
This easy to use self-centering design enables quick efficient dead-center pen blank drilling.
First perform the alignment of the pen blank dead-center with the drill bit of your drill press,
then drill as many pen blanks as you want, in a flash.
Changing blanks after drilling requires no further adjustments and it is done efficiently with the
red lever.
Drill pen blanks of up to 1" square.
The vise jaws have chamfered edges on the inside, creating a “V” shape and, with a simple
adjustment of the clamp, you can drill perfectly centered holes along the width of any round
objects of diameter up to 1 3/8".
BEFORE PROCEEDING WITH THE DRILLING OR YOUR PEN BLANKS, READ THE OPERATING INSTRUCTIONS MANUAL
AND FAMILIARIZE YOURSELF WITH CORRECT INSTALLATION AND ADJUSTMENTS, AS WELL ALL SAFETY PROCEDURES.
Page 4

1. Prepare yourself a pen blank that you will use as
a guide to align your vise to the drill press. Trace an
“X” on either the top or bottom of the blank with a
pencil, to determine the exact center of the width
of the pen blank.
4
INSTALLATION AND ALIGNMENT
Note: You will require at least two vise clamps or “C”
clamps to firmly clamp the self-centering vise to the drill
press table.
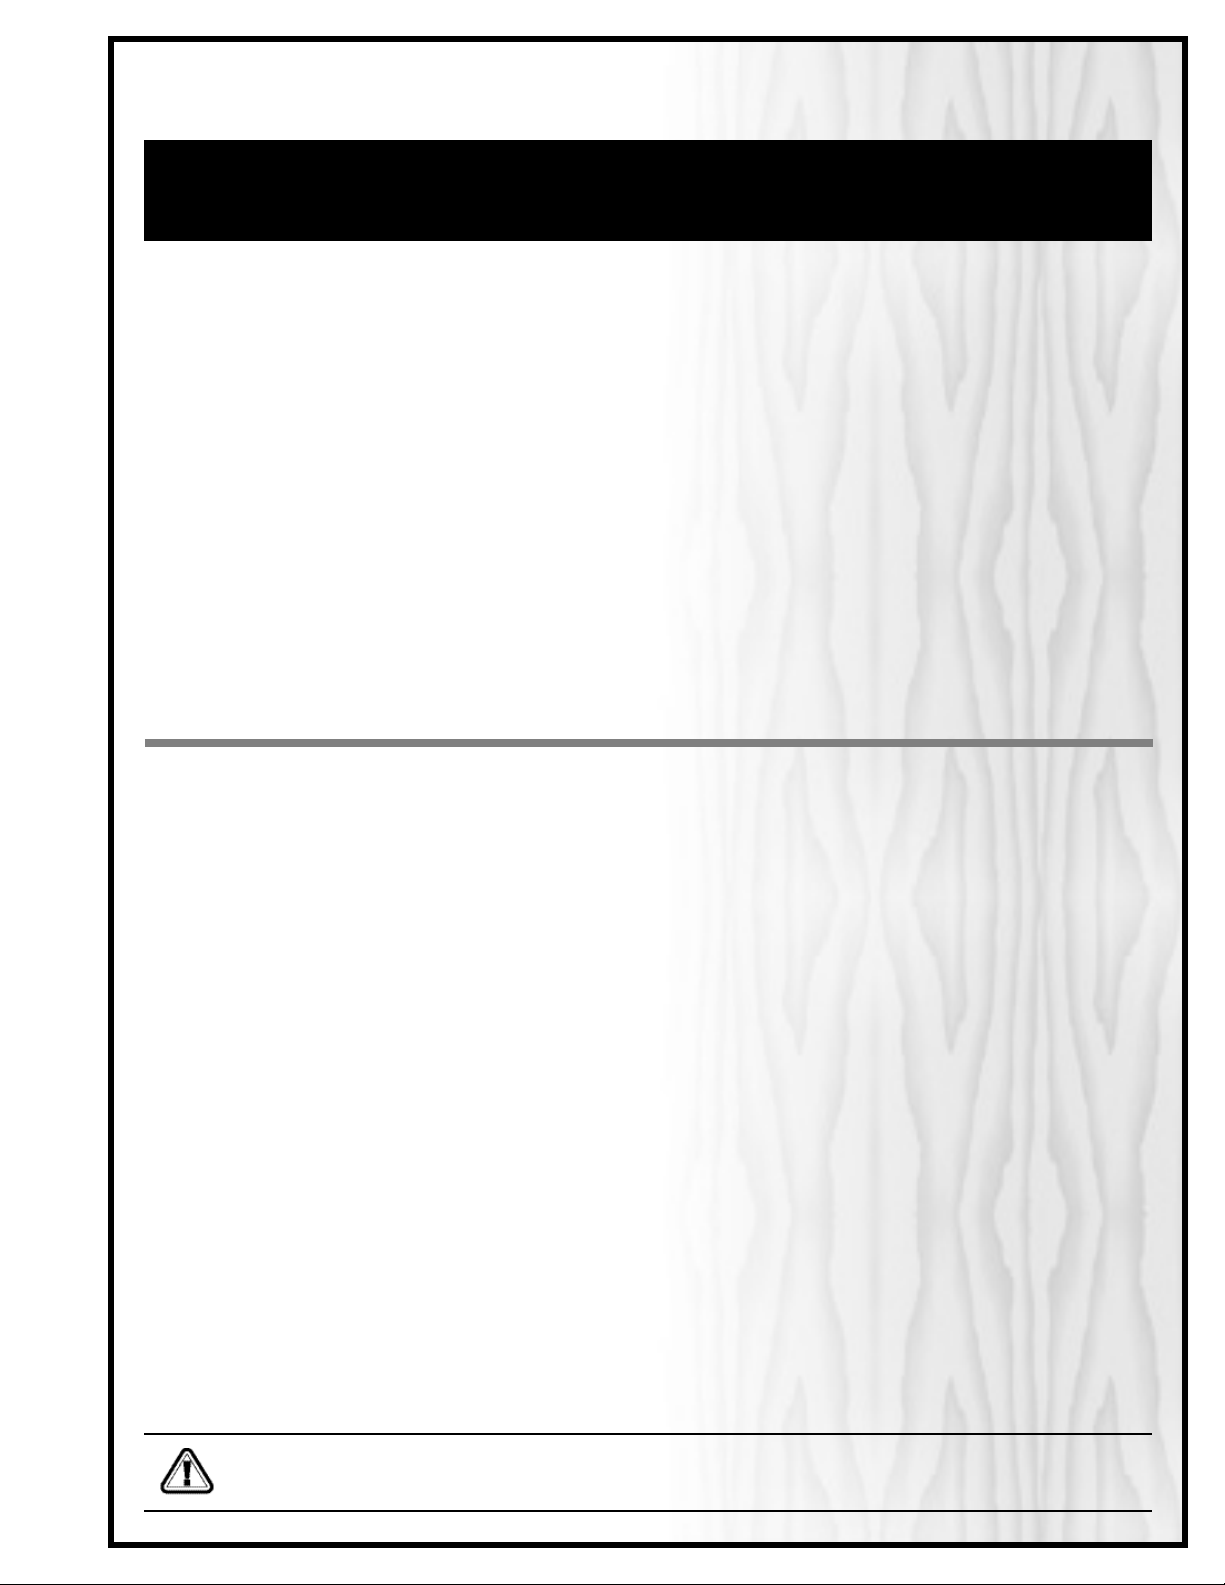
2. Place the pen blank between the jaws of the self-
centering vise, with opposite corners positioned in
the V-shaped chamfer edges, .
Note: For precision alignment, use a perfectly square pen blank,
3⁄4" x 3⁄4" for instance, to complete the following adjustments.
Tip: Keep this pen blank as a guide for a later usage, whenever
you will have to center the vise on your drill press again.
3. Set the opening width of the self-centering vise jaws
by turning the toggle screw, ,with your fingers,
either right to tighten or left to loosen. Adjust the
jaws so that the pen blank is firmly held in place
between the jaws.
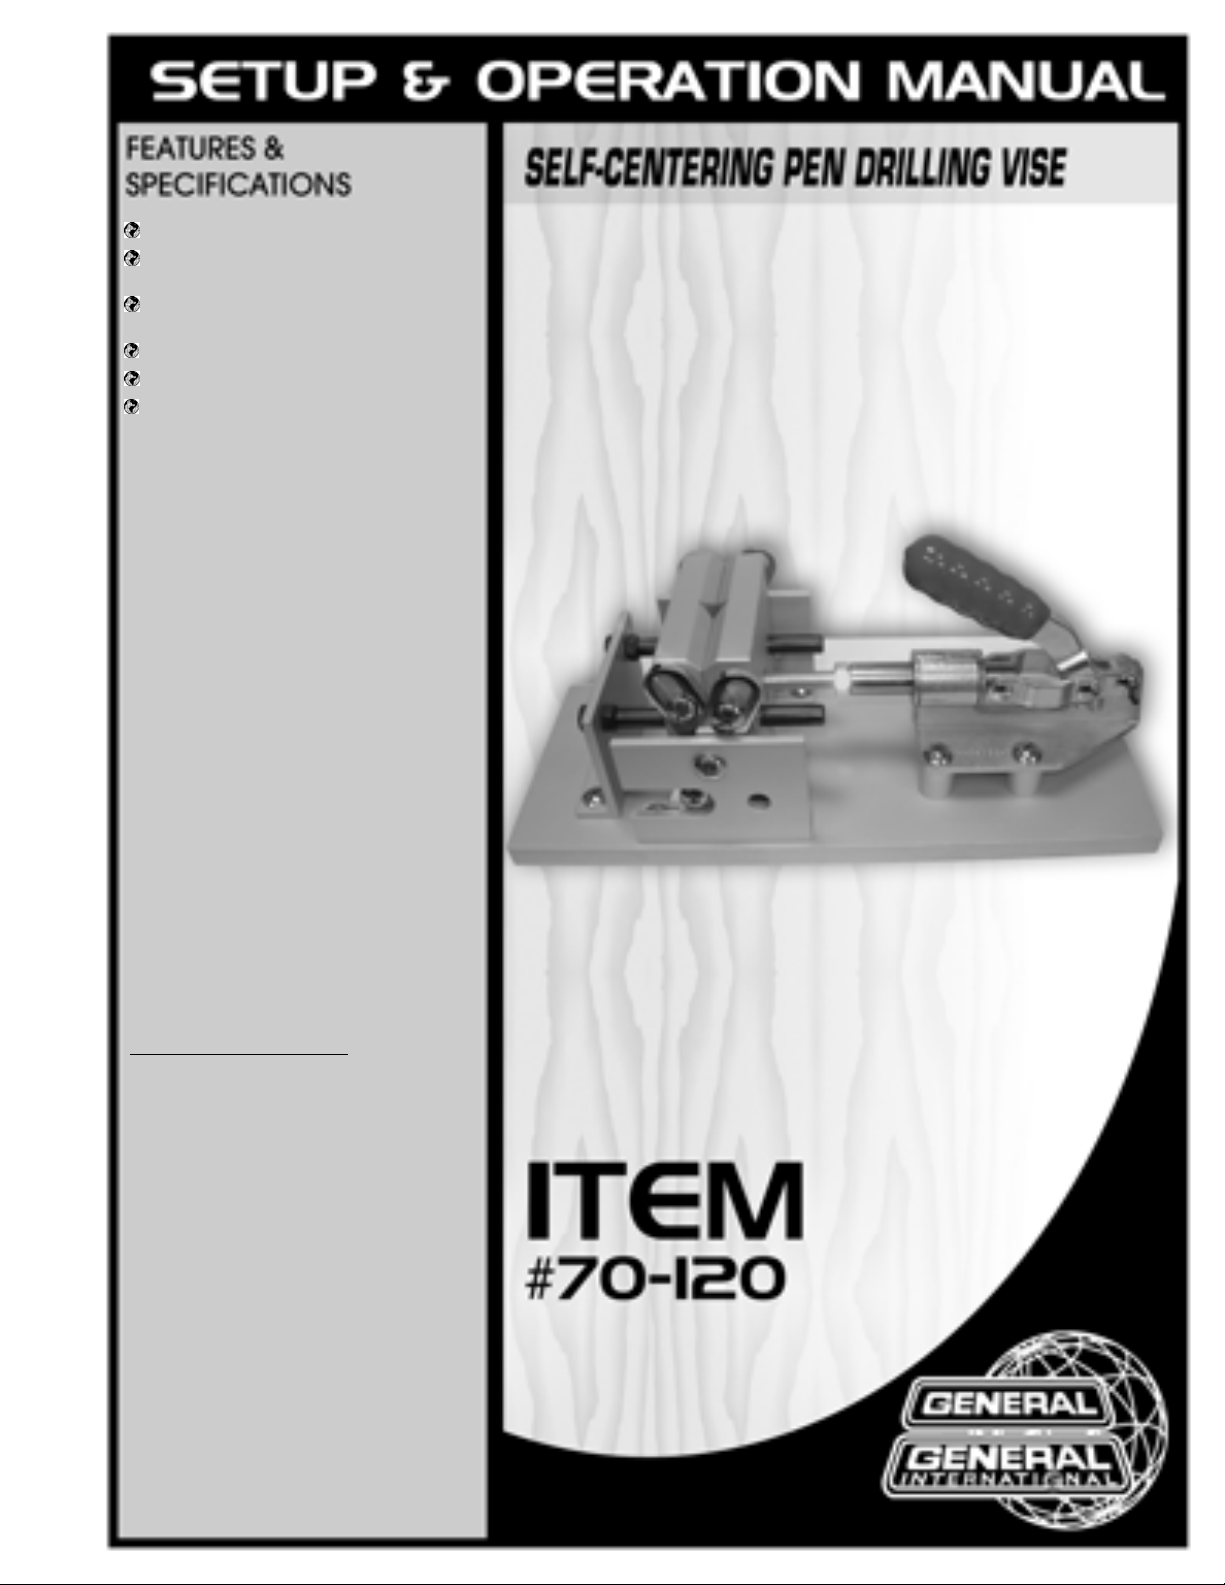
4. Lock the toggle screw by tightening the lock nut,
, against the barrel, , of the clamp, then push
the red lever forward to lock the jaws of the vise.
Note: If you are not able to lock down the red lever, loosen
the jaws a little further.
5. Place the vise on the table of your drill press.
6. Install the appropriate drill bit in your drill press.
Refer to your drill press manual, if needed.
2 x
or
Page 5

7. Adjust the positioning of the vise on the drill press
table to align the pointed end of the drill bit with
the center of the pen blank.
8. Firmly clamp the vise to the drill press table with
at least two “C” clamps or vise clamps, , one on
each end of the self-centering vise.
9. Adjust the height of the table as well as the depth of the drill bit of your drill press. Perform a few tests, if needed.
Note: To avoid damaging the drill bit or piercing the base of the vise, the depth of drilling must allow the drill bit to pierce
completely through the pen blank, but avoid contact with the base of the vise. Make sure to leave at least 1⁄4” between
the base of the vise and the bottom of the pen blank.
TO DO
NOT TO DO
5
Note: The installation shown is provided as an example only. Your
installation may vary, depending on the size of your drill press
table and type of clamps used.
1/4”
Page 6
6
2. Adjust the height of the table as well as the depth
of the drill bit of your drill press. Perform a few tests,
if needed.
DRILLING ROUND OBJECTS
1. Place a round object in the horizontal position, into
the V-shaped chamfered edges, , on the inside
edges of the vise jaws.
Once the self-centering vise is aligned with the pointed end of the drill bit (see “Installation and Alignment”,on page
4), you can drill perfectly centered holes on the width of any round object (up to 1 3⁄8" in diameter).
DRILLING PEN BLANKS
1. Set the red lever of the vise in the upright position to unlock the jaws.
2. Remove the guide blank that was used to align the vise to the drill bit.
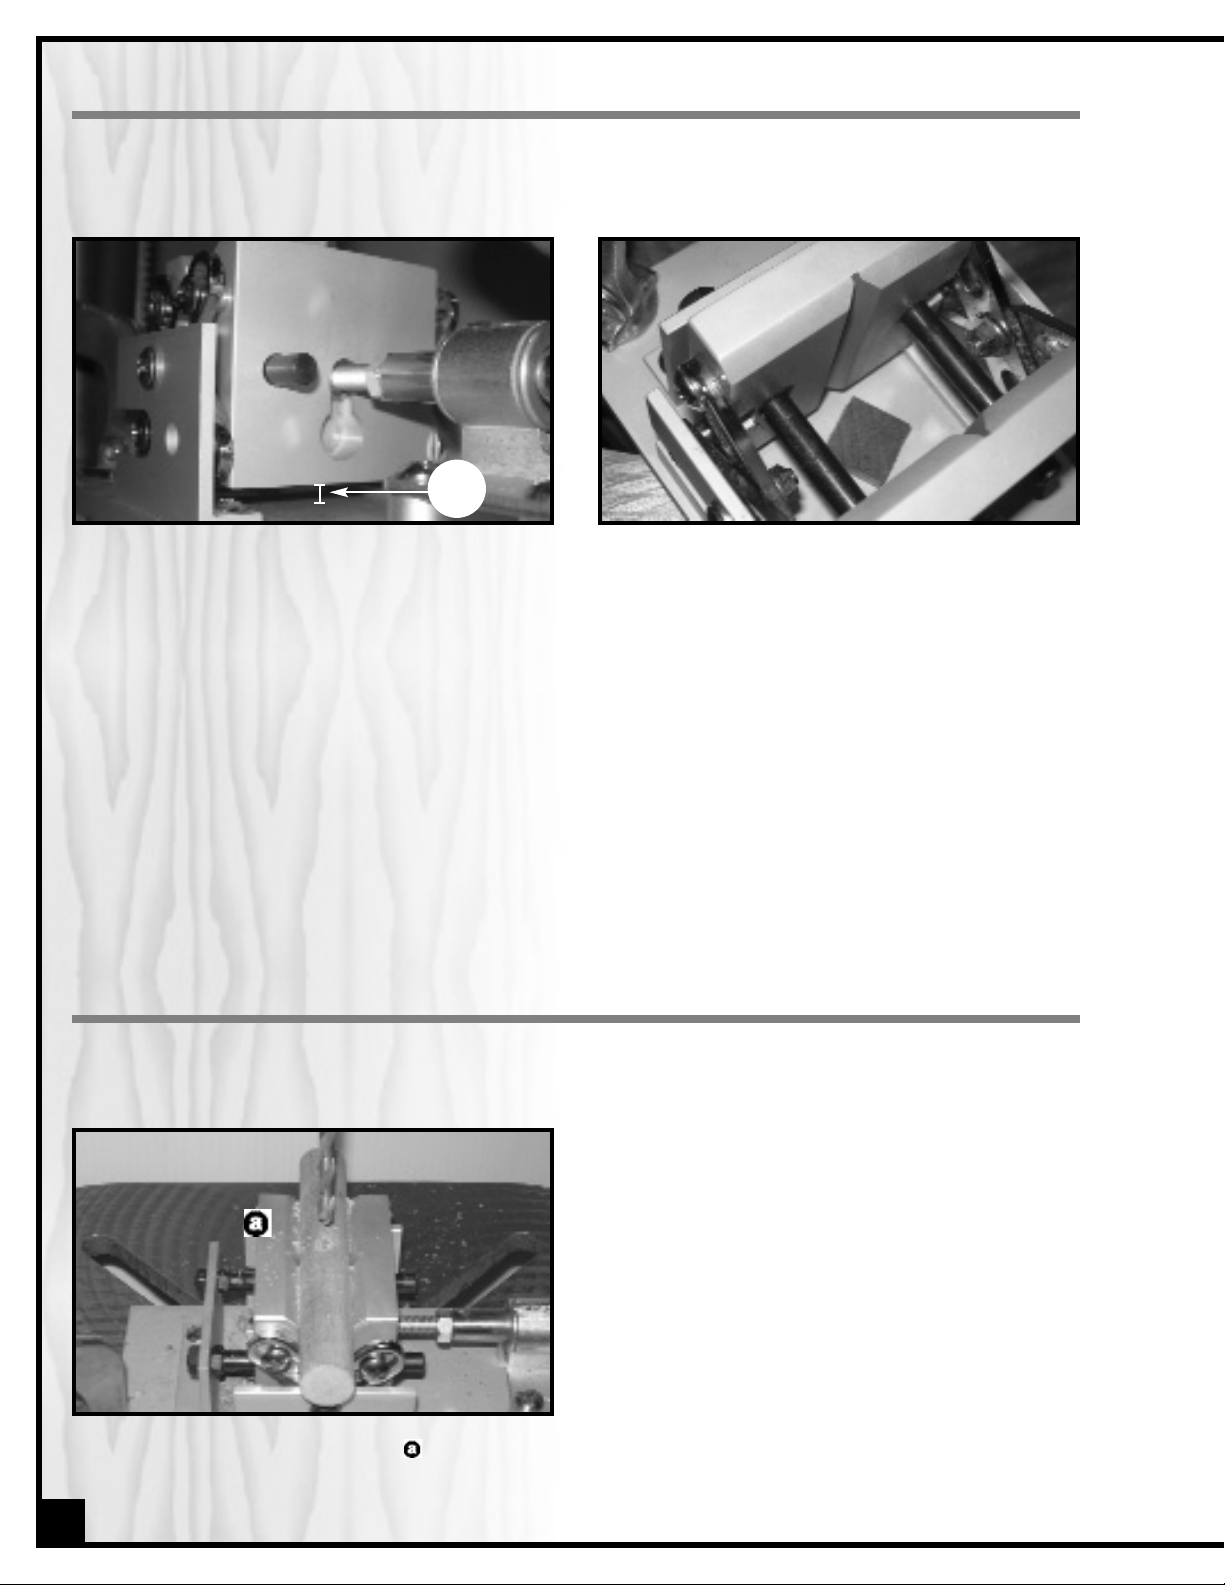
3. Place a pen blank in the jaws, leaving a space of
at least 1⁄4” between the base of the vise and the
bottom of the pen blank.
1/4”
Tip: To avoid tearout when drilling through the bottom of
the blank, place a 1⁄4” (approx.) scrap of wood under your
pen blank.
4. Use the red lever to lock down the jaws and secure the pen blank in the vise.
5. You are now ready to drill your pen blank.
Page 7

7
PARTS LIST
70-120
PART N0. REF. N0. DESCRIPTION SPECIFICATION QTY
70120-01 1 BASE 250X100X10MM 1
70120-02 2 LEFT JAW 70X66X16MM 1
70120-03 3 RIGHT JAW 70X66X16MM 1
70120-04 4 FRONT L-BRACKET 65X50X4MM 1
70120-05 5 REAR L-BRACKET 65X50X4MM 1
70120-06 6 LEFT L-BRACKET 70X50X4MM 1
70120-07 7 SLIDER 4
70120-08 8 SLIDER BUSHING (LENGTH : 4.5MM) 4
70120-09 9 SLIDER BUSHING (LENGTH : 8.5MM) 6
70120-10 10 CLAMP MOUNT BUSHING 14X9.0X14MM 4
70120-11 11 GUIDE SHAFT 2
70120-12 12 NUT M5XP0.8 2
70120-13 13 NUT M6XP1.0 4
70120-14 14 WASHER 12X5.2X1.0T 4
70120-15 15 TOGGLE CLAMP ASSEMBLY 5/16" 1
70120-16 16 TRUSS HEAD MACHINE SCREWS M5XL12 6
70120-17 17 TRUSS HEAD MACHINE SCREWS M5XL15 8
70120-18 18 TRUSS HEAD MACHINE SCREWS M5XL20 2
70120-19 19 TRUSS HEAD MACHINE SCREWS M5XL25 4
Page 8

IMPORTANT: When ordering replacement parts, always give the model number, serial number of
the machine and part number. Also a brief description of each item and quantity
desired.
70-120
8360 Champ-d’Eau, Montreal (Quebec)
Canada H1P 1Y3
Tel.: (514) 326-1161
Fax : (514) 326-5565
Parts & Service
Fax : (514) 326-5555 Order Desk
orderdesk@general.ca
www.general.ca
 Loading...