


Food processor
Model Number: 169203
UPC: 681131692038
Customer Assistance
1 877 207 0923 (US)
1 877 556 0973 (Canada)
Thank you for purchasing this GE appliance.
In keeping with the GE ecomagination initiative, please consider the option to recycle the packaging material and donate any appliance you are no longer using.
To read more about GE's ecomagination commitment, visit: ge.ecomagination.com

IMPORTANT SAFEGUARDS
When using electrical appliances, basic safety precautions should always be followed, including the following:
•Read all instructions.
•To protect against risk of electrical shock, do not immerse the cord or the food processor’s base in water or other liquid. If base or cord falls into liquid, unplug the cord from outlet immediately. Do not reach into the liquid.
•Close supervision is necessary when the food processor is used near children. Never allow a child to use this product.
•Unplug from outlet when not in use, before putting on or taking off parts, and before cleaning.
•Avoid contacting moving parts. Keep hands, hair, clothing as well as spatulas and other utensils away from processor tools during operation, to prevent personal injury and/or damage to the appliance. A scraper may be used but must be used only when the food processor is not running.
•Never put your fingers into the feed chute or tube. Always use food pusher.
•Do not operate appliance with a damaged cord or plug, or after the appliance malfunctions or is dropped or damaged in any manner. Call our toll-free customer assistance number for information on examination, repair, or adjustment.
•The use of attachments, not recommended by the manufacturer may cause injury to persons.
•Do not use outdoors or in a damp area.
•Do not let cord hang over edge of table or counter.
•Remove chopper, slicer/grater or dough kneader from food processor before washing.
•Blades of chopper and slicer/grater are sharp. Handle carefully.
•Always operate food processor with lid locked in place.
•When using food processor do not remove lid until the blade has stopped rotating.
•Do not process for longer than the time periods recommended.
•Do not fill the processing container more than 80% of its capacity.
•Do not process hot foodstuffs.
•Container must be properly in place before operating the appliance.
•Do not place food processor on or near a hot burner (gas or electric).
•Do not use appliance for other than intended use.
•Do not use the appliance without the interlock construction disengaged to avoid injury.
Save these instructions!

ADDITIONAL SAFEGUARDS
This appliance is for HOUSEHOLD USE ONLY.
DO NOT OPERATE APPLIANCE IF THE LINE CORD SHOWS ANY DAMAGE OR IF APPLIANCE WORKS INTERMITTENTLY OR STOPS WORKING ENTIRELY.
EXTENSION CORDS
A short power-supply cord is to be provided to reduce the risk resulting from becoming entangled in or tripping over a longer cord. Longer detachable power-supply cords or extension cords are available and may be used if care is exercised in their use. If a longer detachable power-supply cord or extension cord is used,
1)The marked electrical rating of the cord set or extension cord should be at least as great as the electrical rating of the appliance, and
2)The longer cord should be arranged so that it will not drape over the countertop or tabletop where it can be tripped over, snagged, or pulled on unintentionally (especially by children).
POLARIZED PLUG
This appliance has a polarized plug (one blade is wider than the other). To reduce the risk of electric shock, this plug is intended to fit into a polarized outlet only one way. If the plug does not fit fully into the outlet, reverse the plug. If it still does not fit, contact a qualified electrician. Do not attempt to modify the plug in any way.
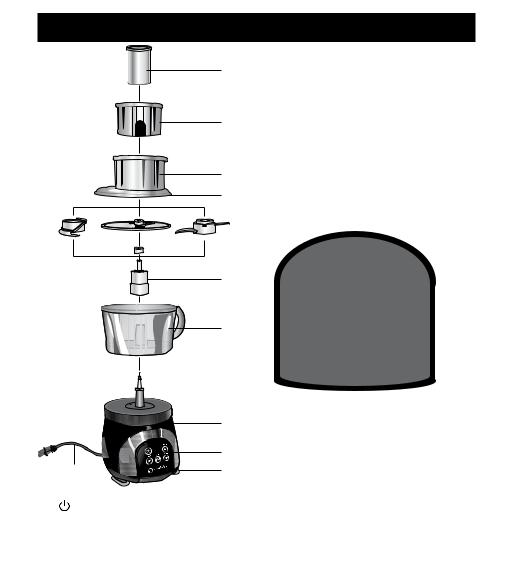
parts
|
|
8 |
|
|
|
|
|
9 |
|
|
|
|
|
10 |
|
|
|
|
|
11 |
1 |
2 |
3 |
|
|
|
|||
12 |
13 |
14 |
|
|
|
|
|
15 |
|
|
|
|
|
16 |
7 |
|
4 |
|
|
|
|
|
|
|
|
|
6 |
|
5 |
|
17 |
|
18 |
20 |
19 |
Control panel: |
Main unit: |
|
|
||
|
on/off button |
8 |
Food pusher |
15 |
Stem |
2 |
slice/shred blade button |
9 |
Food stopper |
16 |
Bowl |
3 |
pulse button |
10 |
Feeding chute |
17 |
Base |
4 |
dough blade button |
11 |
Container lid |
18 |
Control panel |
5 |
Timer LED |
12 |
Chop blade |
19 |
Suction feet |
6 |
timer button |
13 |
Slice/shred blade |
20 |
Power cord and plug |
7 |
chop blade button |
14 |
Dough blade |
|
|

a |
d |
illustrations |
b |
e |
c |
f |
g |
h |
i |
Illustrations
j |
k |
l |
m |
n |
p |
q |
o |
|
Illustrations |
s |
t |

OPERATION
Before first use
• |
Remove all packaging materials, labels and/or stickers from your food |
. |
• |
Clean your food processor thoroughly before using for the first time |
Cleaning). |
|
The food processor must not be connected to power during cleaning. |
|
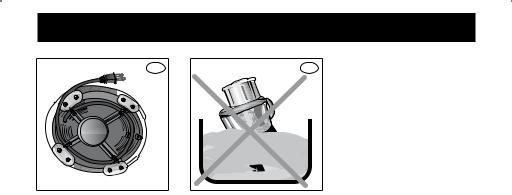
Warning: Do not immerse the food processor in water or any liquids (ill. t |
). This may |
|
cause electric shock or damage the appliance. |
|
|
Before operation
•Unwind the power cord (20) from the base (17) of food processor (ill. a ).
•Lead the power cord (20) through the guide on the bottom of base (17) (ill. b ).
•Place the suction feet (19) on the bottom of base (17) on a flat, even and steady surface (ill. c ).
Operating instructions
Always unplug the food processor from the outlet when putting on or taking off parts. Before plugging in the food processor, check that the electrical circuit is not overloaded with other appliances.
You can chop, knead, slice, or grate food with this appliance. To do so, insert the accessory needed for the action you want to perform. Please see the following sub-chapters to find out how to use the control panel, and how to assemble the appliance correctly.
Operating the control panel
To switch on the appliance, insert the plug into outlet. The on/off button (1) will light up.
There are two possibilities to process food:
1.To process manually:
•Push the button (2), (4) or (7), which corresponds to the action you want to perform ( 3 following sub-chapters).
2.Programmed processing time (chop and dough function only):
•Push the timer button (6) repeatedly (ill. r ). You can select a processing time of 15, 30, 45 or 60 seconds. The timer LED (5) indicates the selected time.
•Push the button (4) or (7) to start processing for the programmed time. Additionally, you can always push the pulse button (3) for additional power (ill. q ).
OPERATION
Using the chopper
•Disconnect the power plug (20) from the wall outlet.
•Place the bowl (16) on the base (17) (ill. d ).
•Turn bowl (16) clockwise until it locks into place.
•Place the stem (15) onto the shaft in the middle of the container (ill. e / f ).
|
• Place the chop blade (12) on the stem (15). Turn slowly until it drops into |
||
|
|
place (ill. g ). |
|
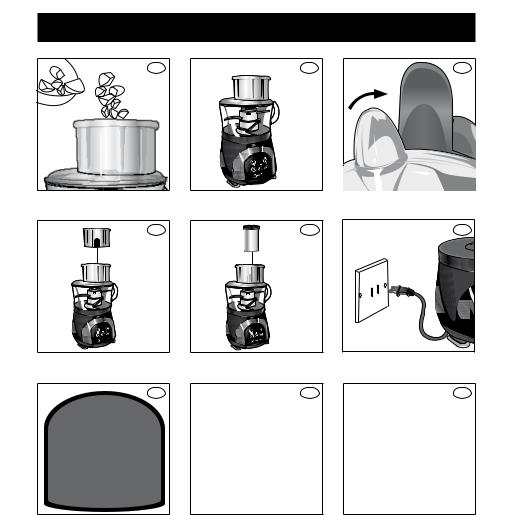
Assembly |
• |
Put the prepared ingredients into the bowl (16) (ill. j ). |
|
• |
Close the bowl (16) with the lid (11) (ill. k ). Turn the lid until the metal |
||
|
|||
|
|
pointer of the lid (11) aligns with the upper part of the stem (15) to ensure |
|
|
|
reliable closure of lid. Close locking lid (11) by turning clockwise until |
|
|
|
the tab is aligned with the container handle and locked into position |
|
|
|
(ill. l ). |
|
•Slide the food stopper (9) into the feeding chute (10) (ill. m ). When inserting, align the railings of the stopper (9) to the railings of the chute (10).
•Slide the food pusher (8) into the tube opening of the food stopper (9)
(ill. n ).
•Insert the power plug (20) into a wall outlet (ill. o ).
•To start processing the food:
Push the chop blade button (7) or
Set the desired processing time by pushing the timer button (6) repeatedly and push the chop blade button (7) to start.
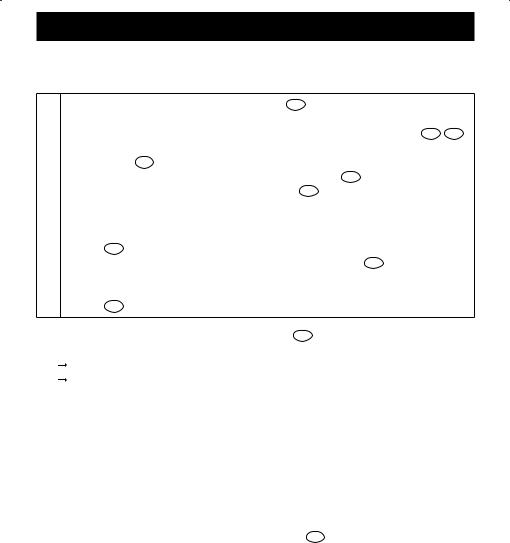
See the function table on page 12 for maximum chopping quantities and recommended chopping times.
Tip: Add liquid ingredients into the bowl (16) first before adding food. This way all ingredients are mixed evenly. For best results, cut solid food into approximately 0.5 inch (1.3 cm) to 1 inch (2.5 cm) cubes. Do not process starchy vegetables like potatoes.
• To stop processing, push the on/off button (1) (ill. p ).
• Wait until chop blade (12) has stopped rotating before removing lid (11).
 Loading...