

Page 1
Page 2

Table Of Contents
Note: When reading through the Ultimate Wizardry Archives’ manual, keep in mind
that each chapter is a manual of its own. From time to time a chapter may refer you to
a “section of this manual”, meaning “this chapter”.
Proving Grounds of 5
the Mad Overlord
Knight of Diamonds 59
Legacy of Llylgamyn 61
Return of Werdna 69
Heart of the Maelstrom 79
Bane of the Cosmic Forge 127
Crusaders of the Dark Savant 185
& Wizardry Gold
Warranty 249
Customer Service 251
Interplay Web Site 255
Credits 257
Notes 259
Page 3

Proving Grounds
of the
Mad Overlord
5
Page 4

Proving Grounds of the Mad Overlord
Wizardry Copyright 1981-1987
Sir-Tech Software, Inc., Andrew Greenberg, Inc., and Robert J. Woodhead
All Rights Reserved.
Wizardry is a registered trademark of 1259190 Ontario Inc.
The Special Effects Department
Each brand of computer has its own unique features. Your IBM PC (or 100%
compatible) is no exception. The IBM PC version of Wizardry has been specially
programmed to take advantage of some of these features.
Pauses for Thought
Occasionally the program pauses to allow you to read messages. Although this delay
is adjustable (by pressing [T] when in the Maze), experienced players will often want
no time delay at all. Pressing [ALT] when the program is pausing will end the pause
immediately. If you get tired of pressing [ALT], you can press [SCROLL-LOCK]to
switch all the pauses off and on. These features are especially handy during long
combats.
Sounding Off
There are times (2 A.M. in particular) when you need to play in silence. Pressing
[CAPS-LOCK] will switch the sound on and off.
6
Page 5

Proving Grounds of the Mad Overlord
Acknowledgements
In a large endeavor, people close to the principals often contribute so much that their
participation cannot go without mention. Without the many hours that these people
have spent, Wizardry might never have been. The authors would like to thank:
Playtesters
Roe R. Adams III R2A4 Jay Banks
William Bensburg John Day William Dewhurst
Lee Drake Valerie Drake Virginia Drake
Rick Dutton Walt Freitag Brenda Garno
Jerry Lazar Susan Lee Sheila McDonald
Mike Massamilla Helen Murphy Paul Murphy
Elizabeth Rowe Dave Shaw Ami Silberman
Testing Staff
Janice Hindle Tim Woodhead Linda Sirotek
Becky Woodhead Katy Woodhead
Technical Staff
Hideki Akiyama Yasuhiro Furuichi Kazuyoshi Horiguchi
Les Cannon Ryu Koriama Seijin Maeda
Shigeya Suzuki John Hood Yoshito Takcuchi Shinya
Yamada Shinji Yamamoto Anton Treuenfels
Authors of the Manual
Roe R. Adams, III Robert Woodhead
Illustrators
Rick Austin Will Mclain Linda Wheelin
7
Page 6
Proving Grounds of the Mad Overlord
8
Page 7

Proving Grounds of the Mad Overlord
It was in the fall of the fifth year of the fanatical wizard Werdna that our campaign
began. What season or year it is now, none of us knows. I believe we are on the ninth
level of this accursed maze, but time and distance are ever shifting, and reality is
fleeting.
As we break camp, my five companions and I sort out our weapons and supplies. We
have accumulated wondrous treasures and mighty weapons. Dreams of returning to
enjoy the subtle pleasures that this shared booty could bring fill our wakeful sleep.
Sezmar, the samurai; Sarah, the priest, and I, a ninja, are the vanguard. Moradin, the
thief; Prospero, the mage; and Tuck, the bishop, bring up the rear.
We slowly make our way down the zigzagging corridor. Suddenly, the eldritch light
cast by Sarah's Lomilwa spell reveals a secret door. Kicking the door open, we charge
into a small room. Unfortunately, the hellhounds, demons and deadly creeping coins
do not welcome company. A fierce battle ensues that shakes the very foundation of
the maze. I slay one demon with my bare hands, while Sezmar dispatches hellhounds
with his Muramasa blade. The tide of battle turns and twists in a kaleidoscope of
weapons and mystical energies. Finally Prospero ends it. While Sarah shields us
behind a Maporfic spell, Prospero casts the dreaded Tiltowait. We are victorious!
Bare, magic-blasted walls hardly reward our heroic effort. Our luck suddenly takes a
dramatic turn -downward! The secret chute masks the hidden entrance to the tenth
level. The final path to Werdna's lair is open. As we are standing around, slapping
each other on the back, the air is pierced with a maniacal laugh....Werdna waits!
Sobered, we regroup, heal our wounds, and set out again. We have no delusions: our
greatest challenge lies ahead.
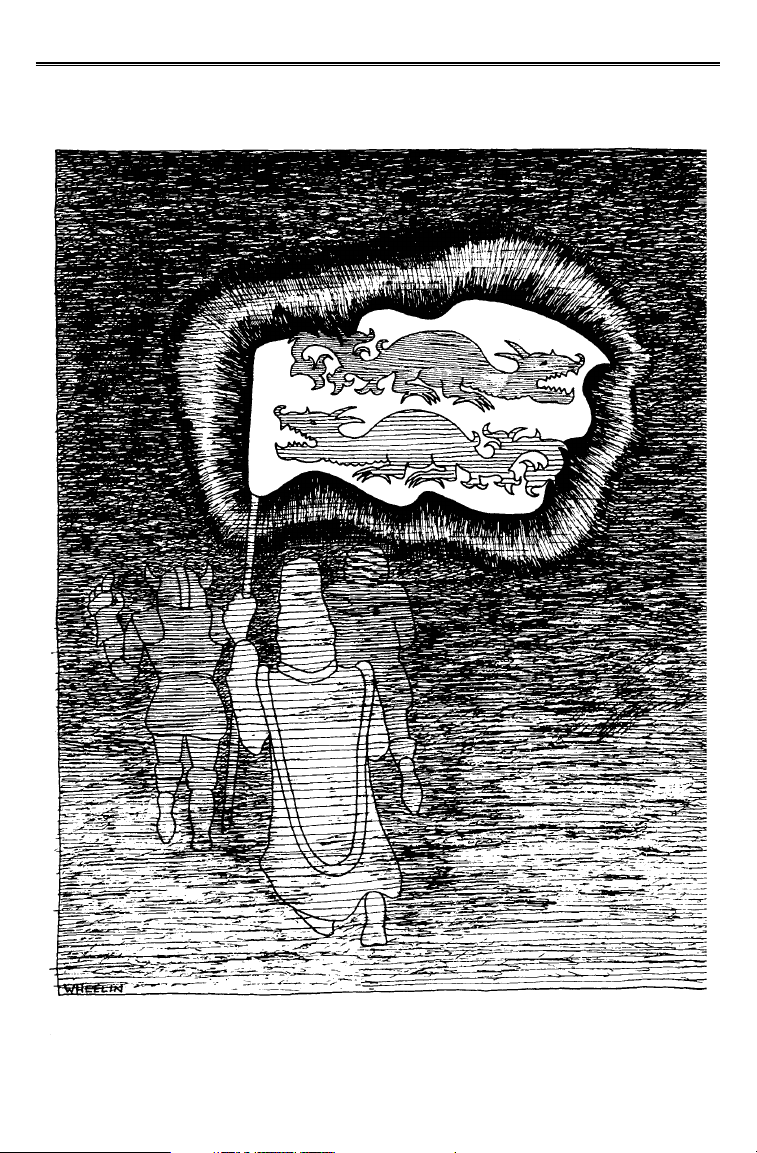
Resolutely raising our banner high, we stealthily tiptoe forward. We quickly vanish
into the stygian darkness. Momentarily, our banner shines with the gold and silver
dragons of Hawkwind's Hunters, then it too vanishes as distant sounds of battle
reverberate.
- Book 1, Chapter 9, the Chronicles of Hawkwind
9
Page 8
Proving Grounds of the Mad Overlord
Journey to the Land of Wizardry
The Wizardry program is truly magical. It allows your computer to open a portal into
a world far removed from todays high tech living. There brave warriors do battle with
evil wizards and fearsome monsters for riches beyond compare. It is a place where
careful planning and strategy are more important than mere reflexes. You will be able
to create and captain a party of stalwart adventurers about whose adventures the
troubadours will sing epics for years hence.
Proving Grounds of the Mad Overlord is only the main module of an extensive series
of scenarios. Each scenario will take you deeper into the legend and lore of the
Wizardry world. The characters and skills that you develop in Proving Grounds will
carry forward into the other programs. So hone your talents well, as Knight of
Diamonds, Legacy of Llylgamyn, The Return of Werdna, Heart of the Maelstrom,
Bane of the Cosmic Forge, Crusaders of the Dark Savant, and Wizardry Gold await!
In times to come, many other new scenarios will enrich your Wizardry experience and
challenge your leadership skills. Wizardry is not just a single game to play and put
away, it is Fantasy Role-Playing at its finest with years of campaigning ahead of you.
Journey now to Wizardry and let your imagination flow through the screen into a
world of magic and adventure.
10
Page 9

Proving Grounds of the Mad Overlord
Characters
Each Wizardry character is a unique individual with strengths, weaknesses, and special
abilities. A character is portrayed in the game by hundreds of separate pieces of
information, each of which is influenced by the actions that the character performs.
Statistics
Statistics are basic measures of a character's ability to do things. The higher the
statistic, the better the character's performance.
Strength affects your skill in combat.
I.Q. and Piety influence your ability to cast and resist spells.
Vitality affects your ability to withstand damage.
Agility helps you avoid attacks and open treasure chests.
Luck comes to your aid in many mysterious ways.
Characteristics
Characteristics are descriptions of the physical, emotional and intellectual makeup of
your character.
Race is the most important. Wizardry characters can belong to one of five races.
Each race has different strengths and weaknesses, most visibly reflected in the
minimum ability values (statistics) for each race.
Humans excel at nothing, but have no particular weaknesses, except for a decided
lack of piety.
Elves are intelligent and pious, but not very robust. They excel at intellectual
pursuits, and are excellent spell-casters.
Dwarves are strong and hardy. They love fine weapons and armor and delight in
a good fight.
Gnomes are pious and agile, probably from praying underground during
earthquakes. Due to their ascetic traditions, they make excellent priests.
Hobbits are agile and very, very lucky. They are a happy-go-lucky people, and,
with the right training, become superb thieves.
Alignment describes your character's general ethical outlook.
Good characters are really good. They go out of their way to help old ladies
cross the street.
Neutral characters take life as it comes. They would help an old lady cross the
street if they were traveling in the same direction.
Evil characters are not really evil when compared to some of the things they
fight in the Maze. They are self-centered, and always want to know "what's in it
for them." Evil characters help old ladies cross the street for a small fee.
Note: In the above, we are assuming the adventurer is male, as we may sometimes do
in this guidebook. Wizardry is a non-sexist game, however, English is a sexist
language.
11
Page 10

Proving Grounds of the Mad Overlord
Other characteristics include hit points, which describe how much damage a character
can tolerate before death, and armor class, which describes how well protected the
character is.
Possessions
Possessions are objects that characters own.
Gold is a very important possession. When your character begins life, he has a
pittance (probably won in a lottery), barely enough to buy some simple armor and a
few paltry weapons. As your character explores the Maze, he will find great riches in
gold, which may be used to purchase better items, lodging, and perhaps occasionally
acquire the services of a high priest to cure, heal, or even resurrect a friend.
Gathering and maintaining the best possible set of items is a major pastime for
Wizardry adventurers, as they can make the difference between life and death! The
number and variety of items found in Wizardry may be a little bewildering at first.
We won't tell you how the items work, but do offer some general guidelines here.
First of all, not all items may be used by every character. Some items may be used
only by specific character classes. You will learn what works by practice and
experience.
For example, mages may not use armor, shields, swords or maces.
Also, some items have an alignment, just as your characters do. If a character equips
an item that has a different alignment, the item will seriously impair him. In addition,
it will become cursed.
A cursed item is any item that cannot be voluntarily unequipped. If you equip such an
item, you will be "cursed to wear it."
Cursed items are not always bad for you. Some of the better items in the game
like to "stick around."
The only safe way to rid a character of a cursed item is to pay to have it removed
at Boltac's Trading Post.
Some items may be used to cast spells. Each time you use the item to cast a spell,
there is a chance it will break. Generally, scrolls and potions can only be used once,
while rods and staffs may work a dozen times.
Items may affect a character even though they are not equipped; they can do things
just because they are being carried around.
Finally, certain magic items have special powers which you can invoke. When you try
to equip yourself with one of these items, you will be asked if you wish to invoke its
power.
12
Page 11
Proving Grounds of the Mad Overlord
Experience
Experience is a measure of the character's mettle and abilities, as tested in the real
world. Where the abilities and characteristics describe the character's potential,
perhaps the best way to measure the ability of a character to help the party is by the
number of experience points he has earned.
A character can gain experience points only through the test of steel, in real combat
with a mortal enemy. After each combat, all surviving members of the party will
receive an award of experience points; the amount they get depends on the difficulty
of the combat.
Since the experience award is divided amongst the survivors of the batte, if you
manage to defeat a formidable group of monsters with only a few adventurers,
they will each get considerably more experience points.
As the character gains experience points, certain thresholds will be passed, depending
upon his or her class. When the number of experience points are obtained, your
character is said to have made the next level. When a character makes a level, his
statistics and characteristics change, usually for the better.
Class
A character's class is a sort of job description. It describes what the character has
trained himself to be. A character always belongs to one class, and under certain
circumstatnces can change his class. Characters start their careers in one of the basic
classes, and usually choose an elite profession when they become more powerful.
Each class has special requirements as to minimum abilities, alignment and allowed
possessions of its members. A complete list of the entrance requirements for each of
the classes can be found on page 22.
13
Page 12

Proving Grounds of the Mad Overlord
The four basic classes are:
Fighter: The basic man-at-arms. Fighters have high hit points, can use any armor
and weapon, and relish their role as shock-troops. They may be of any alignment.
Mage: The sorcerer. Mages have poor hit points, can use only daggers and staffs
as weapons, and can wear no armor except for robes! They can cast mage spells,
and may be of any alignment.
Priest: The holy one. Priests have fairly high hit points, and, although they
cannot wear helmets, they use almost any armor or shield. Priests do not fare as
well in combat as fighters, and must use specially consecrated weapons, such as
maces and flails. Priests have unusual abilities, however; in addition to casting
priest spells, they can dispell the undead (skeletons and zombies, for example).
Priest may not be of neutral alignment.
Thief: The trickster. Thieves have average hit points. Their weapons are limited
to daggers or short swords; they can wear leather armor and use a shield. Thieves
are very good at circumventing the noxious treasure chest traps which often lie
between a party of adventurers and their hard-earned loot. They may not be of
good alignment.
The four elite classes are:
Bishop: A combination of priest and mage, with some advantages and
disadvantages of both. Bishops have average hit points, can wear leather armor,
and use priests' weapons. They can cast both mage and priest spells, although
they do not learn them as quickly as the other classes do. Bishops start learning
mage spells immediately, but must reach the fourth level of ability before
acquiring knowledge of priest spells. Bishops are capable of identifying magical
items, and thus they can avoid the hefty charge levied for that service in Boltac's
Trading Post. Like priests, bishops may not be neutral.
Samurai: These folk are fantastic warriors, and can use all fighter weapons and
armor. They start out life with more hit points than fighters; in the long run,
though, a fighter will have better hit points. At the fourth level of ability, samurai
14
Page 13
Proving Grounds of the Mad Overlord
slowly begin to learn mage spells. The strict code of Bushido prevents Samurai
from being of evil alignment.
Lord: A combination of fighter and priest. They have the hit points and abilities
of fighters, but at the fourth level of ability they gain the ability to cast priest
spells, and the ability to dispell. Lords must be of good alignment.
Ninja: A superhuman fighting machine. Ninjas can use any weapons or armor,
but work best without any! When fighting with their bare hands they can wreak
havoc and destruction, sometimes killing the strongest opponent with a single
blow. As long as they disdain armor, their great training gives them lower and
lower armor class as they reach higher and higher levels of ability. Ninjas earn hit
points as does a thief, and learn no spells. Finally, they must be evil.
Spells
Spells are magical formulas that allow the caster to bend the physical laws of the
universe.
There are two basic categories of spells, mage and priest. Within each category there
are 7 levels of spells, from weak level 1 spells to the powerful level 7 spells.
Each character has a spell book, which lists all spells that are able to cast. For a
character to be able to cast a particular spell, he needs to have that spell in his book,
and he needs a spell point with which to cast it. So in order to cast the third level
mage spell MAHALITO, a character must have the spell in his book, and would need
a third level mage spell point.
Characters learn new spells by making levels in classes that teach spells. If they later
change their class, they will retain the knowledge of the spells they have learned so far,
but won't learn new spells unless their new class also teaches spells.
15
Page 14

Proving Grounds of the Mad Overlord
There is a minor exception to this rule. If a character knows at least one spell of
a particular category and level, then he will eventually learn all the spells of that
category and level, even if he changes to a class that doesn't learn spells.
For every spell you know, you are granted at least one spell point with which to cast it.
Thus, if you know 3 first level mage spells, 2 second level mage spells, and 1 third level
mage spell, you will have at least 3 first level mage spell points, 2 second level mage
spell points, and 1 third level mage spell points.
If you are currently a member of a spell-casting class, you may gain extra points,
based upon what level you have attained. You can never have more than 9 points
in any category and level.
Points are reset to their current maximum values each time you enter the Maze for an
adventure (It's assumed you got a good night's sleep and studied your books over
breakfast.) Each time you cast a spell, you lose a point of the appropriate category and
level. When you have none left, you cannot throw that category and level of spell
again without going back to the Castle to rest.
If you know 3 spells of a certain category and level, and have 3 points of that
category and level, you could cast one spell three times, or each of the spells once,
or any combination.
Places
Your Adventurers spend their time in one of two places, the Castle or the Maze.
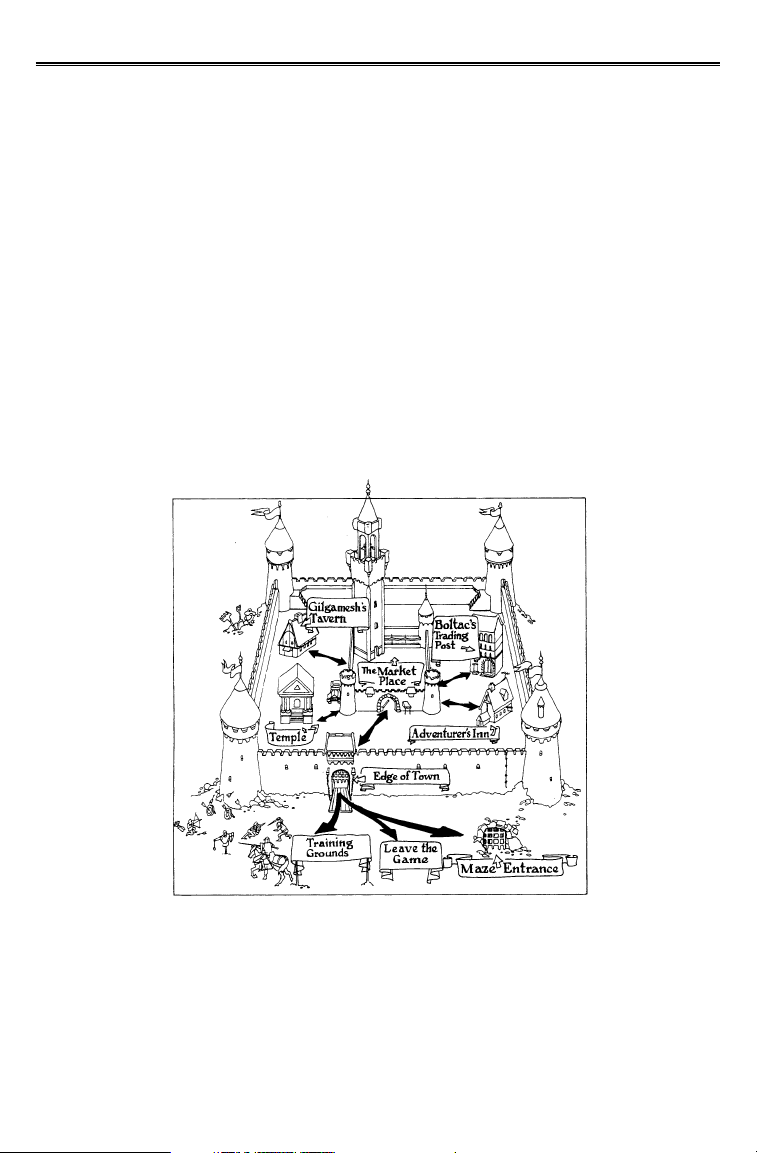
The Castle
The Castle is a safe haven where your Adventurers can train, rest and lick their
wounds, be ripped off by the shopkeeper, or even resurrected from the grave. The
Castle encompasses five locations which provide special services to the Wizardry
player. These are the Training Grounds, Gilgamesh's Tavern, Boltac's Trading Post,
the Temple of Cant, and the Adventurer's Inn.
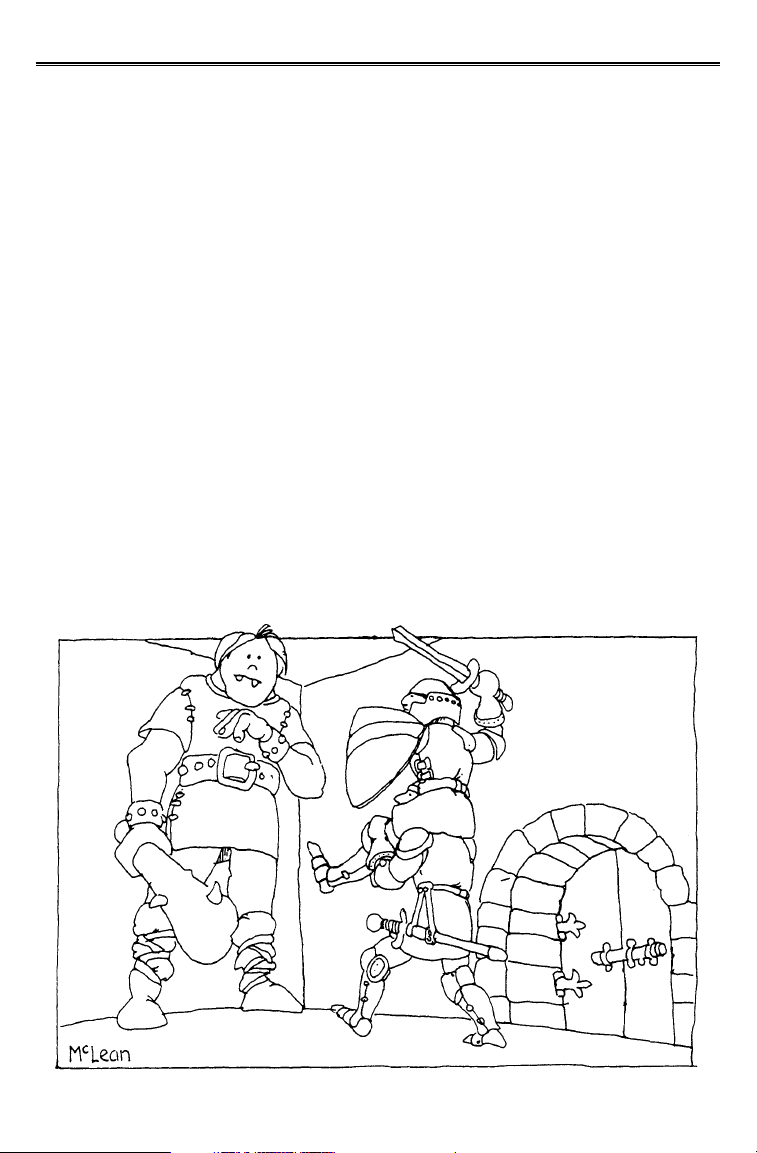
The Training Grounds, located just outside the Castle, rings with the sounds of swords
clashing and timid battle cries. A closer inspection shows youngsters hitting pells with
wooden blades, and many of the battle cries turn into yelps when the blade bounces
back and hits them! It is here that you create new, novice characters, and can inspect
veteran characters, who are standing around shouting encouragement (and other
things) to the novices.
Gilgamesh's Tavern is dim and smoke-filled from the haunch of boar roasting slowly
over the fire. Small groups of adventurers talk in low tones around deeply scarred
wooden tables. Here is where you hope to find a team capable of surviving the
arduous rigors of the Maze.
16
Page 15
Proving Grounds of the Mad Overlord
Boltac's Trading Post is the commercial center of the Castle. It is owned and operated
by a friendly dwarf named Boltac. Like all dwarves, Boltac likes gold, and will sell you
your own arms (not your "armaments," your arms!) if he can get away with it. Here
the spoils from a hundred forays find their dubious way to sale. This place has all the
equipment you need to make it your one-stop shopping center, and it is open around
the clock for your adventuring convenience.
The Temple of Cant is the first stop whenever a party brings back characters who are
dead, paralyzed, or similarly distressed. If the high priests of the Temple can do
anything to help the poor devil you've hauled in, they will tell you what tithe is
required. But since the fees expected by the clergy are rather high these days, it is
likely that afflicted person may not be able to afford the "donation", so be prepared to
help him out.
Poisoned characters are automatically cured when they return to the Castle from
the Maze. Lost characters are beyond mortal help, and are given a free burial.
The Adventurer's Inn offers several important amenities for your characters. To being
with, staying in the Inn overnight or longer can help you recuperate from rough fights
with monsters by restoring some or all of the hit points you've lost in combat. If
you've accumulated enough experience points to qualify you for a higher experience
level, checking into the Inn will let you learn of your success, and provide details
about the changes in your character statistics. Otherwise, you'll be told how many
more experience points you need to increase your level.
The changes in your character statistics may enable you to change from one
character class to another. To check, go to the Training Grounds and use the
(C)HANGE CLASS option.
17
Page 16

Proving Grounds of the Mad Overlord
The Maze
The Maze is where the adventurers go in search of monsters to kill, loot to "borrow",
and clues to help determine the whereabouts of the evil wizard. As the characters
become more proficient, they will be able to adventure for longer periods of time, and
penetrate deeper into the Maze; eventually, they may come face to face with their
nemesis, Werdna!
The Mission
Trebor, the Mad Overload, was not always mad, merely power crazed. Several years
ago, he had obtained a fabled amulet, whose awesome powers were the subject of
many legends. As he sat in his throne room gloating over the empire this amulet
would bring him, a great incapacitating fear gripped him. When the terror had
passed, a trembling Trebor no longer held the amulet. Only one wizard could cast
such a terrible spell - his arch nemesis, the Evil Wizard Werdna. How was Trebor to
find him and get back the amulet?
The answer arrived swiftly, the very next day, when the earth groaned and the Castle
rocked from side to side. For to taunt his enemy, Werdna had used the amulet to
carve out of the ground below the Castle a ten level fortress maze. Secure in the vast
depths, surrounded by monsters most foul, Werdna, to this day, still plumbs the secrets
of the amulet to some unknown purpose.
The shock of all these events completely unhinged Trebor. He became thoroughly
paranoid and strove to protect himself with an elite guard of the best characters in
each class, while plotting on how to get the amulet back.
Trebor, though, is also well known for killing two birds with one stone (or any other
handy weapon). He quickly turned the affront of Werdna's Mazes below his Castle
into an asset, by declaring that these were the special Proving Grounds he had ordered
built! He told his subjects that these Mazes would form the perfect place to train the
bodyguards he needed (and quite possibly recover the amulet at the same time.)
Needless to say, any Adventurers who did recover the amulet will be immediately
inducted into his Elite Guard, by force if need be...
This, then, is the situation your characters are thrust into. With a little luck, they will
map the Maze, maul the monsters, make off with some of the goodies, find the
Amulet and only get killed a few times while doing it!
Using the Wizardry program
In almost all cases, when Wizardry asks you what you want to do, the program will
display a menu of options. For example:
M)AKE A SCENARIO DISK
S)TART THE GAME
To select an option, simply press it's first letter. The program places a ")" after the
first letter of each option to remind you that you type the first letter to select the
menu option.
To make the manual easier to read, we will not put the )'s in prompts. Instead, we
always CAPITALIZE any menu options we mention, and we highlight the first letter
in a special (W)AY, so that it looks like a little key. Any time you see this special
highlighting, you'll know you can press that key.
18
Page 17

Proving Grounds of the Mad Overlord
When you have to enter a single key, you'll be asked to press a key; when more than
one key is required, you'll be asked to type what is required and press [ENTER]. The
only times you will be asked to enter more than one keystroke is when you are typing
the name of a character or spell, or answering a riddle.
On some computers, [ENTER] is called [RETURN].
If you are asked to confirm a choice, the program will ask you something like "DO
YOU WANT TO DO THIS ( Y / N ) ?". In this case, select the option you want and
press the appropriate key.
If the question or a menu contains a "#", the program expects a number key [1,2,3
etc.) as the answer.
Finally, in some menus you will see a graphic symbol that looks like a " " instead of
the ")" after the first letter of one of the options. This means that the option
containing it is the default option, which you can select by pressing [ENTER].
In describing the game, it will sometimes be necessary for us to use terms that may be
unfamiliar to you. Don't panic! These terms will be defined later on, usually in the
Adventuring section. If curiosity gets the better of you, a quick perusal of the
Glossary will help.
Getting Started
Starting the Game
Ah, to adventure! To begin Wizardry, just follow the following instructions.
1. From the Windows START/PROGRAMS mean select Wizardry and then the
scenario you wish to play.
2. Select (S)tart Game (Press [S]).
3. Ignore the program’s insistence to insert a scenario disk and simply press
[ENTER].
Note: Since the original Wizardry games were released on floppy disks, it was
important to make copies of the original disks to play on. These copies were
called “scenario disks”. These disks are not needed any longer, as the game is
running directly off your hard drive, where the hard drive serves as the scenario
disks.
Making a Scenario Diskette
This option is a left over from the good old days of floppy disks. Since you have
already installed the game from your CD-ROM on your hard drive, the game has
automatically created a Scenario Disc for you there. Therefore you can completey
ignore this menu entry. It does no longer work.
If all else fails, Read the Manual!
We can't overemphasize the importance of the instructions given in this manual. It's
possible to stumble through the game without reading it, but you'll probably be a lot
happier if you sit down with this book in front of you as you explore each aspect of
Wizardry. Studies at the previously mentioned university have shown that 99% of all
computer users read software manuals only after they have become hopelessly
frustrated. Please be one of the one percent who won't have to call us at 3 A.M. to
complain about losing their favorite characters...because you read the manual!
19
Page 18
Proving Grounds of the Mad Overlord
About "Cheat" Programs
Wizardry is a very popular game, and several people have written "cheat" programs
that let you create "super" characters. We recommend that you do not use these
programs for three reasons:
The cheat programs are unreliable and may damage your files.
They destroy much of the challenge of the game. In the long run, it isn't much
fun to play with a set of characters that simply cannot be hurt.
We are always making changes and improvements to the Wizardry game, and the
cheat programs may not work with future versions of Wizardry.
Moving about
The Castle contains a variety of locations, which you can get to by selecting from a
menu. Some of the locations are reached by going to the (E)DGE OF TOWN and
selecting a location from that menu. Refer to the Wizardry map on this page. If the
location is inside the walls, you can enter it directly; if outside, you must first go
through the Edge of Town.
Creating a Character in the Training Grounds
From the main menu of the Castle, press [E] to go the Edge of Town. When the next
menu appears, press [T] to select the Training Grounds.
There are 4 options in the Training Grounds:
(C)REATE A CHARACTER
20
Page 19

Proving Grounds of the Mad Overlord
(I)NSPECT A CHARACTER
(R)OSTER OF CHARACTERS
(L)EAVE
Press [C] to create a new character. Next, choose a name for the character and type it
in, ending by pressing [ENTER].
If you want to put a password on the character, type one in (YOU have to remember
the password!) Most times you wouldn't need a password, so just press [ENTER].
Now you must choose your character’s Race and Alignment. For each you will be
given a menu of choices. Simply press the letter associated with your choice.
The next selection concerns the character's statistics. Your new character will qualify
for admission into one or more of the eight classes on the basis of these statistics.
Based upon your choice, for race, a profile set of minimum statistic values will be
displayed. You now have a chance to influence the profession of your character by
distributing bonus points.
Note the special line that tells you how many bonus points you have to work with.
The number of bonus points is selected randomly each time you create a character.
You'll distribute these points among the various statistics. The [ENTER] key moves a
selection arrow down the list of statistics. When you have the arrow pointing to the
statistic you want to change, press [+] or [-] to add to subract points.
If you move the arrow off the bottom of the list of statistics, it will pop up to the
top of the list.
Some computers also have up and down arrow keys. You can use these in
addition to [+] or [-].
You can change the statistics any way you like, but you must use up all the bonus
points you've been given. Also, you cannot push a statistic below its original
value, or above 18.
21
Page 20

Proving Grounds of the Mad Overlord
When you make changes in the statistics, class options will begin to show. Each class
has different minimum statistic requirements, and when you have added enough bonus
points to the right statistics to qualify for a class, it will appear in one of the windows.
The minimum statistic scores required to qualify for each of the classes is as follows:
Fighters need 11 strengths.
Mages need 11 I.Q.
Priests need 11 piety and may not be of neutral alignment.
Thieves need 11 agility and may not be good.
Bishops need 12 I.Q. and 12 piety and may not be neutral.
Samurai need 15 strength, 11 I.Q., 10 piety, 14 vitality, and10 agility and my not be
evil.
Lords need 15 strength, 12 I.Q., 12 piety, 15 vitality, 14 agility and 15 luck. They
must be good.
Ninjas need 17 in all their statistics, and can only be evil.
You will never get enough bonus points to create a Lord or a Ninja. Eventually
the statistics of one of your characters will rise high enough to qualify for these
classes, and you will be able to change class. This is explained later in this section.
Once you've allocated all the bonus points and qualify for a class that you want, press
the [ESC] key to signal that you are done. Then, if you like the character, press [Y] to
store him in the roster.
Before you go charging off, filling the universe with alter egos of yourself, keep in
mind several important facts:
A team can consist of up to 6 members, and any less increases the chances of
disaster. There is a word for "Lone heroes battling against incredible odds." This
word is "dead."
22
Page 21
Proving Grounds of the Mad Overlord
Developing a well balanced team with diverse talents is one of the major keys to
success (See the section on adventuring.)
Decide which alignment you prefer your party to have before you start generating
characters. Evil cannot play with good, but neutrals may play with either. Some
character types are only available to one alignment or the other, so select the
whole makeup of your team first to avoid disappointments, such as finally
generating a fantastic samurai, only to discover that he cannot join the rest of
your evil team!
Other Training Grounds Options
The (R)OSTER OF CHARACTERS option will display all the characters available, and
show you whether they are alive or dead, and in the castle or out on expeditions.
The (I)NSPECT A CHARACTER option lets you look at your character in detail, and
perform character specific "housekeeping" actions.
To return to the Castle, simply (L)EAVE.
Inspecting a Character in the Training Grounds
Press [I] at the main Training Grounds prompt to inspect a character. Next, select a
character by pressing a letter. Now you can (I)NSPECT, (D)ELETE, (C)HANGE
CLASS, OR (A)LTER PASSWORD.
(I)NSPECT shows the character's vital statistics, weapons, armor, spell books, and any
special goodies he has found so far in his forays into the dungeon. This display will be
covered in more detail in the section describing Gilgamesh's Tavern.
(D)ELETE allows you to retire old, world-weary adventurers, but will ask you again,
just to make sure. Retired characters pack up all their belongings, go to Club Wiz, and
are deleted forever from the game.
23
Page 22

Proving Grounds of the Mad Overlord
(C)HANGE CLASS gives characters the option of changing their professions in midlife. When you change class, you are entering the new class as a level one character.
Therefore, changing class has the following side-effects:
Your character statistics drop to the minimum for your race.
Your experience points drop to zero.
All your equipment will remain in your possession, but your items will be
unequipped. Since you are changing class, you may not be able to use them
anymore.
You will retain knowledge of any spells you already know, and you always get one
spell point per spell in your spell books. However, you lose the extra spell points
you got for being a member of your previous class. Though you may learn new
spells and get new bonuses for being a member of your new class, it is likely that,
at least at first, you will have fewer spell points to work with.
If you know at least one spell of a particular type and level, then you will
eventually learn all the spells of that type and level, even if your new class doesn't
learn spells of that type. So, for example, if you change a mage into a ninja, and
the mage knew the 3rd level mage spell MAHALITO, then the ninja would
eventually learn MOLITO, the other 3rd level mage spell.
(A)LTER PASSWORD changes the character's password in case of security problems
(younger sibling, devious friends, parents who hate to be shown up!).
You must know a character's current password in order to change it.
This option will not delete a forgotten password.
Gilgamesh's Tavern
Gilgamesh's is where you assemble your party. Enter the Tavern by pressing [G] at the
main Castle Menu. Gilgamesh's menu provides you with several options.
(A)DD lets you add characters to your party. You will be shown a list of all the
characters compatible with the other members (if any) of your party. You can select
one by pressing the letter associated with the character.
As soon as you select someone who is not neutral, the alignment of the team is
chosen, and disappointed incompatibles will wander back to their drinks.
(#)INSPECT lets you look at the current status of a character. This option is
extensively described on the next page.
Remember, whenever you see a #, Wizardry expects you to type a number, not
the actual (#) key.
(R)EMOVE lets you remove a character from the party.
(D)IVVY GOLD pools the gold belonging to the party, and then evenly splits it up
between the party members.
(L)EAVE exits the Tavern.
If you decide to visit the Training Grounds once a party has been formed, the
party will disband automatically. You will have to go back to the Tavern and
reassemble them.
24
Page 23
Proving Grounds of the Mad Overlord
Inspecting a Character
When you are in the Tavern, (#)INSPECT lets you inspect a character in the party by
typing the number key associated with that character.
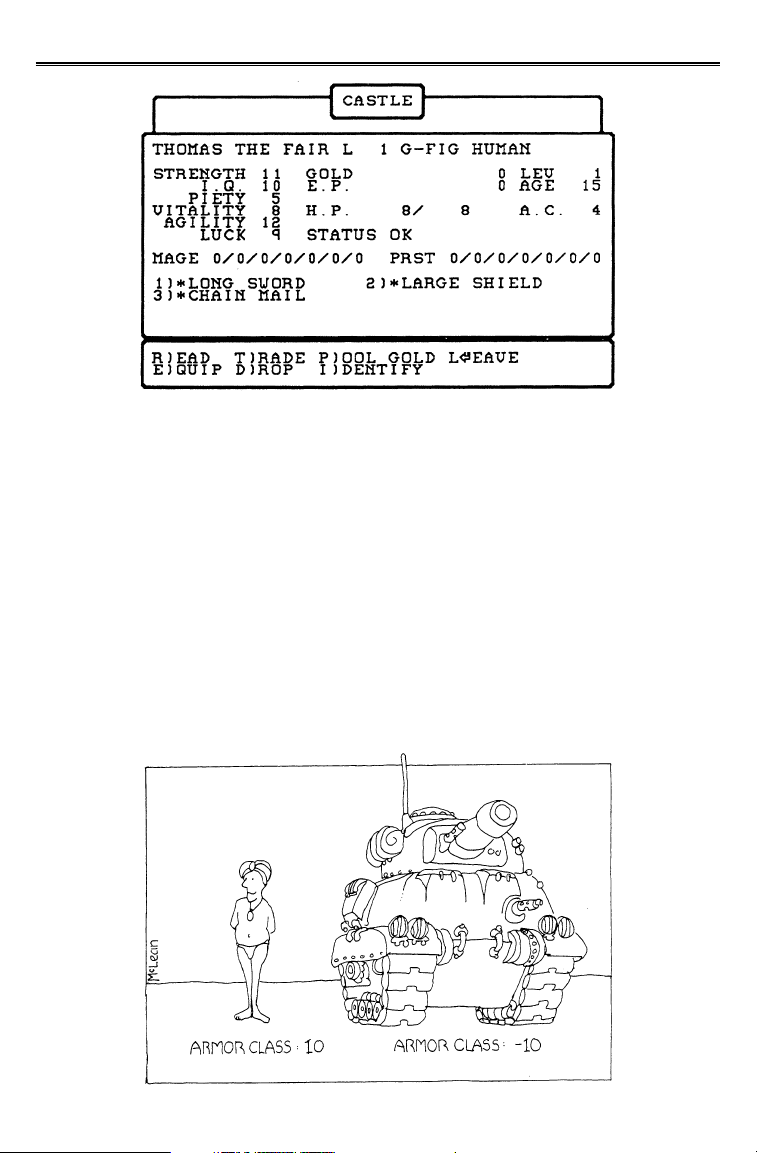
When you inspect a character, a window appears that offers a wealth of facts about
your character. Five pieces of information are found at the top. Your character's name
and level appear first. Next are alignment, race and class. On the lines below appear
your character's statistics, characteristics and possessions.
Your character's hit points and maximum hits are displayed as 8/8, where the second
number is your max hits. Hit points describe the amount of damage you can tolerate
before death. Max hits are the maximum number of hit points you can have. Each
time you are injured in combat, hit points are deducted. For example, during a
combat you take 2 points worth of damage, then your screen will show 6/8. If the hit
points reach zero, your character dies.
25
Page 24
Proving Grounds of the Mad Overlord
Armor Class is a measure of how well-protected you are against attack. Note that,
unlike other measures in this game, a better armor class, or AC, corresponds to a
lower number. Thus AC may be expressed as a negative number if it is unusually
good. Bare skin, for example, has an AC of 10. A character with an AC of -10 is about
as well armored as a Sherman Tank.
When a character acquires armor that is +1, +2, or +3, that means that upon
being equipped with the armor, his AC will be lowered 1, 2, or 3 points below
what is normal for that piece of armor. For example, Leather Armor lowers AC
by 2 (10-2= new AC of 8), while Leather +1 lowers AC by 3 (10-3= new AC of 7).
Some items in Wizardry do you more harm than good. Such items are frequently
noted as having minus numbers. For example, a defective piece of Leather Armor
might be Leather -1, giving the wearer an AC of 9 instead of the usual 8. Such
items are almost always cursed.
Remember that while a cursed item is usually bad, it doesn't have to be. In
Wizardry, cursed means that the player who equips it is "cursed to wear it".
26
Page 25

Proving Grounds of the Mad Overlord
Status will tell you about any problems you may have. Being DEAD is one of these,
although you'll also see other maladies here. Characters who are marked OUT are lost
somewhere in the Maze! Their status may become OUT due to any of three causes:
Obliteration (everyone was killed), Starvation (Power failure or turning off the
computer) or Vacation (using the (Q)UIT option while in the Maze.)
OUT characters can be retrieved. Either select the (R)ESTORE AN "OUT"
PARTY option from the Utilities menu, or send a small party down into the Maze
to pick them up.
Shown next are your mage and priest spell points. These strings of numbers tell you
how many spells of each spell level you can cast. Within each spell category, mage and
priest, there are seven power levels. You can throw one spell of a given type and
power level for each spell point you have in that slot. For example, mage spell points
are 5/3/2/0/0/0/0 would mean that you can cast five first-level, three second-level,
and two third-level mage spells. You must have a spell written in your spell books
before you can cast it.
Below the spell points are two columns for your weapons, armor, and any goodies you
have found on your forays. You can carry up to eight items at a time. To the left of
each item may be found one of the following symbols (no symbol means the item can
be equipped or carried):
* indicates that the item is equipped. Equipping is explained below.
# reminds you that the item cannot be equipped by that class of character. For
example, priests cannot use edged weapons, and thieves cannot wear chainmail.
? tells you that the item is not identified, which means you don't know exactly
what it is.
- warns you that the item is cursed. Since it is stuck to you and probably doing
more harm than good, a trip to Boltac's to remove it maybe in order.
At the bottom of the screen is a menu of commands that will allow you to perform all
sorts of interesting tasks.
(R)EAD offers you the chance to peruse your character's spell books. Select the
category of book you want to read. All the spells he has learned so far will be
displayed. Refer to the Spells section beginning on page 52 for detailed descriptions on
what each is and what it does.
(D)ROP lets you drop any item onto the dusty floor of the Maze or the muddy streets
of the Castle.
Dropped items are gone forever. Be careful not to drop the wrong item.
(P)OOL GOLD moves all the party's gold to the character. If you later need to give
back some gold to other party members, choose the DIVVY GOLD option while in
Gilgamesh's Tavern.
(I)DENTIFY allows Bishops to attempt to identify an unknown Item. If they fail,
there is a chance they will be forced to equip it; and if it is cursed, they may be in
trouble!
(E)QUIP lets you select the items your character is to wear. For each type of item
(Weapon, Armor, Shield, etc.) you will be shown a list of what items of that type you
have and invited to select the one your character will use.
27
Page 26

Proving Grounds of the Mad Overlord
Weapons and armor you possess, but have not equipped, will not be of any use to
you in combat.
You can unequip an item by simply choosing no item of that type when you
equip. You do this by pressing [ENTER] instead of a number.
(T)RADE allows the characters to exchange gold and items amongst themselves. To
trade, first press in the number of the character with whom you wish to trade. Then
type the amount of gold, if any, that you want to transfer. Next, if you wish to trade
an item, press the number of the item you want to trade. When you have finished
trading items, press [ENTER].
If you don't wish to trade any gold, you can press [ENTER] instead of entering
"0" as the amount.
An item must be unequipped before it can be traded.
(L)EAVE ends the inspection of your character.
While you are on a foray in the Maze, you can also inspect your characters by going to
Camp. When you do so, two extra options are available.
(S)PELL casts spells. The spell must be in your Spell Books and you must have an
appropriate spell point available in order to cast it. If the spell is one of the healing,
you will be asked upon which member of the party you wish to spell cast.
Some spells can only be cast while in combat with the monsters. In the Spells
section beginning on page 52, if the "WHEN" category says Camp or Anytime,
you can cast it in Camp.
(U)SE allows you to cast a spell using a special item, such as a potion bought at
Boltac's. Anyone can use an item; you don't need to know the spell it casts, and you
don't need a spell point to cast it.
This means that big dumb fighters can keep DIOS potions around and cure
themselves.
As with casting spells normally, you can't cast some spells in camp.
Each magical item has an unknown number of charges, and may break after
being used. If it does, it will be displayed in your list of items as a BROKEN
ITEM.
Depending on where you were when you inspected your character, some of the
options may not be available:
From the Training Grounds, you may only (R)EAD your spell books or (L)EAVE.
From Gilgamesh's Tavern, you may do everything but cast a (S)PELL or (U)SE an
item.
When you are in the Maze and have (C)AMPED, you may do everything.
28
Page 27

Proving Grounds of the Mad Overlord
Boltac's Trading Post
Boltac's is where you buy equipment for your party. Enter the establishment by
pressing [B] at the main Castle menu. Immediately, Boltac will ask which of your
characters wishes to be served.
Once you have selected a character, the shopping display will appear. You can (B)UY,
(S)ELL OR (I)DENTIFY items, (U)NCURSE cursed items, (P)OOL GOLD from any
party members into your possession or (L)EAVE the Shop.
Buying Items
Boltac has an enviable inventory, but he may sometimes run out of certain items.
Other items won't turn up in the Trading Post unless someone brings them back from
the depths of the Maze and sells them to the proprietor. So the inventory list may
change in length and content as the game progresses.
To buy an item, press [B] to browse through Boltac's wares. Then press [F] for
forward or [B] for backward until you find the screen with the item you want. You'll
be told how much it costs and whether the character can use it.
If you still want it, press [P] to purchase, then indicate the item you want by number.
If you select an item that the character buying cannot use, Boltac will inquire as
to whether you are sure you want it.
CAUTION: After leaving the store, you will probably be delighted with your
shiny new items. But be aware that merely owning an item does not enable you
to use it in the Maze. Only those items with which you are equipped can be
called into play during combat.
Selling Items
Selling off excess equipment is a good way to raise cash for impoverished expeditions.
Be aware, however, that Boltac is accustomed to making a tidy profit on every
transaction, even those which involve buying back what he just sold you ten minutes
before.
To sell an item, press [S]. You will see a list of your items, alongs with the price Boltac
will pay. Select the item you wish to sell off by pressing the number.
29
Page 28
Proving Grounds of the Mad Overlord
You cannot sell an item that is cursed or which needs to be identified.
If you attempt to sell an item that is equipped, you will be asked if that's what
you really want to do.
Removing Curses
Cursed items picked up in the Maze are very uncooperative and they stick like glue to
anyone who equips them. If you manage to get back to the Trading Post in one piece
carrying such an item, Boltac can uncurse it for you. Press [U]. You will see a display
similar to the one used when you sell an item. Select the cursed item by pressing its
number, and if you have the cash, Boltac will take it off your hands (or whatever part
of your body it is attached to.)
Identifying Items
When you first find certain items in the Maze you cannot be certain of their exact
properties. The names of these items describe only their appearance. Whenever
possible, have such items identified before you equip yourself with them in case they
turn out to be cursed.
One of the special powers of the bishop is the ability to identify items. However,
there are some risks associated with having a bishop identify an item. If the bishop is
not very careful, he or she may touch the item by accident. This will cause the item to
be equipped, and if the item is cursed, the hapless bishop will be forced to use it. For
this reason, Boltac has begun to perform such inspections himself. Needless to say,
Boltac exacts a fee for this service.
The procedure for identifying items is similar to that of uncursing them, except that
you press [I] to identify instead.
Pooling Gold
Since few adventurers can qualify for a Dungeon Express Card, the trading post
features a (P)OOL GOLD option to help bring big-ticket items within reach of those
on a limited budget. This option transfers the gold possessed by party members to the
person shopping.
30
Page 29
Proving Grounds of the Mad Overlord
The Temple of Cant
Whenever a party brings back characters who are dead, paralyzed or similarly
distressed, they can be carried to the Temple of Cant.
Enter the Temple by pressing [T] at the main Castle menu. You will be shown a list of
the characters the Temple can help. Select a character from the list and the Temple
priests will tell you what tithe is required. Choose which character in the party will
pay the tithe. Should that character not have enough gold, the entire party's gold will
be kicked into the fund. Unless the victim is dead or blown to ashes, (worse than just
being merely dead), the healing arts of the Temple practitioners are assured of success.
In those other more serious cases, there is a chance that the best efforts of the priests
will be to no avail!
A character with a good vitality rating has a good chance of being helped, but old,
infirm characters may be in big trouble. Dead characters who fail to be raised from
the dead are reduced to ashes. Even in such depressing circumstances though, there is
still hope: for a larger tithe, it is sometimes possible to resurrect a person even from an
ashen mess - but if this attempt fails, the character is lost forever and cannot be
restored by any means.
Anyone brought back from the dead will have but a single hit point and should limp
post-haste to the Adventurer's Inn. Those resurrected from their ashes will have all
their hit points restored (for all the money, you should get something free.)
31
Page 30

Proving Grounds of the Mad Overlord
The Adventurer's Inn
The Inn is where characters recover lost hit points and learn whether they have made
the next level of experience. Enter the Inn by pressing [A] at the main Castle menu.
Next, select a character who needs some rest & relaxation (R&R) in the same way you
would for the Trading Post.
Once you've checked a character into the Inn, you'll be able to look over the types of
rooms available. The more expensive rooms allow faster, but less economical, healing
of wounds.
Note: Age is important in Wizardry. Beyond the age of 50, you will become
more and more feeble until eventually you will not be good for much of anything
except chatting about the "good old days" before the invention of the wheel.
Therefore, you do not want to spend too many weeks in bed.
As you'll soon discover, certain spells can also be thrown on your characters which
will restore hit points without the trouble, expense and wasted time of a visit to
the Inn. But the Inn provides such medical services, even to those without spellcasting friends, as long as you have the cash.
Select one of the room types. Each type restores hit points in return for a weekly fee.
Hits/points week Fee/week
Stables none none
Barracks 1 10
Double Occupancy 3 50
Private Room 7 200
Royal Suite 10 500
Need more money? You can also (P)OOL GOLD from your party. This strips all the
other party members of all their gold and gives it to the character in the Inn.
Once you have chosen a room, you will stay there until you are either fully healed or
have run out of money. A display will count up your hit points and count down your
bank balance. If the latter becomes alarming, you can check out early by pressing the
[SPACE BAR].
Making a Level
After any stay in the Inn, a check will be made to see if you have made a level.
Making a level is a joyous occasion. You'll see a declaration that you have attained the
next level of experience and get all the news about any changes to your character
statistics. Spell-casting characters may learn new spells. At the end of this sequence,
you'll learn how far away the next experience level is.
There's a chance you might qualify for more than one level per visit to the Inn. This
could happen if it's been a long time since you've had a good night's rest. If you
suspect this might be the case, stay an extra night in the stables.
32
Page 31

Proving Grounds of the Mad Overlord
The Edge of Town
The Edge of Town lets you go to other areas outside the central Castle: The
(T)RAINING GROUNDS, the (M)AZE, the (C)ASTLE, the (U)TILITIES, and
(L)EAVE GAME. The (T)RAINING GROUNDS section has already been explained
and (C)ASTLE returns you to the main Castle menu. From the screams of terror and
loud munching noises issuing from the entrance to the (M)AZE, this is undoubtedly
where your Party has to go when it is ready to begin adventuring.
(L)EAVE GAME is what you do when you are finished playing a session of Wizardry.
NEVER, EVER, turn off your computer without using the (L)EAVE GAME option.
If your expedition is suddenly interrupted - power failure - (3-year old pulled the plug),
reality check (Dinner ready, so you turned off your computer), or Deus ex-machina
(Electrical storm) - your party will be left stranded in the Maze. When you restart
your game, you'll find your characters are marked as OUT. There are two ways to get
them back:
You can (R)ESTART the party using the (U)TILITIES option (described later in
this section).
You can mount a rescue expedition to find the characters. You will need to
(I)NSPECT areas of the Maze for the characters - this is explained in this section
on moving around the Maze.
If you want to deliberately interrupt an expedition (It's 4 a.m. and you have to go to
work soon), you can use the (Q)UIT option that is available in the Maze. This option
will be described more completely in the Adventuring section.
33
Page 32
Proving Grounds of the Mad Overlord
The Utilities
The Utilities offer you the ability to do things to the characters outside the adventure.
(C)HANGE NAME. If you want to give a character a new persona, select, by letter,
the character whose name you wish to change. Then type in the new name.
(R)ESTART AN "OUT" PARTY. Select, by letter, the name of any character that is
stuck in an OUT party. The entire party will be restored to exactly the same spot in
the dungeon.
This option is usually used when you (Q)UIT an expedition while still in the
Maze. (Q)UIT is described in the section on Adventuring.
(L)EAVE the Utilities and return to the Castle.
Adventuring
The heart of Wizardry is adventuring. It's time to accept the challenge...time to leave
the safe, but expensive, confines of the Castle and venture into the unsafe, but
potentially lucrative, corridors of the Maze.
Successful adventures consist of four steps:
• Preparing the party for the adventure.
• Touring and mapping the Maze.
• Fighting the monsters
• Getting back alive.
Preparing the Party
A party is a team of adventurers who band together to explore the Maze. You can
have up to six characters in your party at one time.
To assemble a party, go to Gilgamesh's Tavern and recruit compatible characters.
34
Page 33

Proving Grounds of the Mad Overlord
Only characters in the Castle may be added to the party. If you wish to resume an
expedition that was stranded in the Maze, use the (R)ESTART AN "OUT" PARTY
option of the utilities.
Balance your party. When first starting out, try a party of two fighters, a priest, a
thief, and two mages. This is the strongest party you can make using characters
with low experience levels.
Good characters will refuse to cooperate with evil ones; if you try to put them
together, you'll hear loud complaints.
Dead or otherwise incapacitated characters can be added to the party, although
you will be asked if you really want to do this.
Checking out your Characters
Before you enter the Maze, it is usually a good idea to check the "vital statistics" of
each character in your party. Here are a few things to watch out for:
If anyone is without full hit points, a stay in the Adventurer's Inn is advisable. You
may also wish to do this if you think anyone is ready to gain a level.
Characters who are incapacitated should be attended to at the Temple.
If you have some extra gold, a trip to Boltac's might be warranted.
Make sure that each character is equipped with the right items. That shiny new
sword you just bought is nothing but ballast unless you tell your character to
equip it!
Once you have placed the desired characters in the party, enter the Maze by going to
the (E)DGE OF TOWN and selecting (M)AZE as your destination. In a few moments,
you will be deposited in Camp.
35
Page 34

Proving Grounds of the Mad Overlord
Camping Out
When you are in the Maze, you are constantly subject to the attacks of monsters.
Fortunately, you can make (C)AMP at any time that you are not fighting. When you
are in Camp, it is assumed that you have set up guards so that the monsters cannot
attack you.
When you are in Camp, you may:
(#)INSPECT a member of the party. The display is the same as in the Training
Grounds and the Tavern, but you will have more options. All the options that are
available have been mentioned in the Tavern section of the manual.
(R)EORDER the party. This option lets you choose which characters go in which slots
of the marching order. Obviously, someone has to be in the front of the party and
others (the lucky ones) can stand (or cower) behind them. Generally, you should order
the party so that the best fighters are in the front and the spell-casters are in the back.
Select which characters go where by typing the number of the character you want in
first position, then the number of the character you want in second position, and so
on.
Remember, only the first three members of a party can attack monsters with
weapons.
(E)QUIP the entire party. This option is the same as the equip option in (#)INSPECT
except that it does it for every number of the party. This is convenient when you have
just bought a lot of equipment at Boltac's.
(L)EAVE the Camp and enter the Maze proper.
36
Page 35

Proving Grounds of the Mad Overlord
Touring the Maze
The Maze window displays a 3-D view of the Maze passageways directly in front of
you. You will also see the party status window, which will tell you how your
characters are doing. At the top of a screen, a window will remind you of most of the
options that are available.
When you are in the maze, you can move around by pressing:
[W] to move one step forward.
[A] to turn 90 degrees left.
[D] to turn 90 degrees right.
[X] to turn 180 degrees about.
These keys form a convenient diamond shape on the keyboard. If your keyboard has
cursor keys, they can be used as well. You can also press [F] for forward, [L] for turn
left and [R] for turn right.
In addition to moving, you can also press:
[C] to go to Camp.
[O] to toggle some of the information windows on and off, in case you like a less
cluttered view of the Maze.
[I] to inspect the current area of the Maze for other adventurers. If a party of
adventurers gets lost in the Maze or killed, Wizardry remembers where they are. If
you start another expedition and go down to where they are, you can inspect the area.
This lets you find them and add them to your party.
In order to find them, you must be close enough to them so that you could walk
to where they are without going through a door.
There must be room in your party to hold the new members. Thus, if a six
person party got killed, you would have to make 2 trips with a 3 persn rescue
party to get them all back to the Castle.
[S] to update the party status window and make it visible if it has been hidden by [O].
This is especially useful if someone is poisoned.
[T] to adjust the message delay time. This is the amount of time that a message is
displayed before Wizardry continues.
You can enter a number from 1 to 99. Each unit represents about 1/10th of a
second of delay. The standard delay is 20.
[Q] to quit the current expedition. Wizardry will remember where you quit, and you
will be able to use the (R)ESTART A PARTY utility option to pick up where you left
off. You could also take a rescue party down to find the first party.
If you quit an expedition, Wizardry won't remember whether you had MILWA,
LOMILWA, LATUMAPIC or MAPORFIC spells active. These are all spells that
last for the duration of an expedition.
37
Page 36

Proving Grounds of the Mad Overlord
Graffiti
As you travel through the Maze, you will occasionally find unusual markings. These
may represent stairs upwards and downwards, special passageways you might want to
explore, messages scrawled on the walls and dark areas into which you cannot see.
Mapping
Each time you enter the Maze, you will be told that you are at the foot of the staircase
which links the Castle with the first (topmost) Maze level. If you go up these stairs,
you'll be back in the Castle.
When you enter the Maze from the Castle, you always start on the first level as
far South and as far West in the Maze as you can be, facing North.
You may ask, who cares? Well, in order to survive in the Maze, you must know with
reasonable certainty where you are and how you got there. The only way to know
these things it to make accurate maps and refine them every chance you get.
Mapping is indeed one of the most important skills that successful Wizardry players
possess. Without good maps, you will get hopelessly lost and eventually your character
will die! Mapping is not all that difficult, but it does take a little patience and practice.
Use graph paper to chart your progress in the Maze. Be wary of nasty tricks designed
to mislead you. Wizardry levels are constructed around the concept of a 20 x 20 grid.
The word concept is rather loosely used here because the authors have done
everything they can to misguide and misdirect you into believing that what you see on
the grid is not real.
The fundamental way to map is to stand on a square, look north, map where you see;
then turn east (don’t move off that square!), and map what you see. Do the same for
the south and west directions also. Then and only then, take a step in one of the four
directions and repeat the mapping procedures. Always map an area without going
through a door (you never know if it is a one-way door), taking a stair, or entering any
special area, like an area of all darkness. If you stumble into a special area try to leave
immediately. This may seem like very slow work, but if you follow this methodology,
you will not readily get lost.
Mapping Aids
There are several things that will aid your travels. First, and foremost, is the use of a
light spell. MILWA and its more powerful cousin, LOMILWA, perform a giant service
for you. They extend your vision several squares ahead, which is a great aid in
mapping and anticipating problems. More importantly, though, they make secret
doors visible. Without the spells, a player must try to pass through every wall segment
to see if there is a door there. The real problem with this is that quite often, you really
38
Page 37

Proving Grounds of the Mad Overlord
did not want to go through the door quite yet, but now have no choice. Also, your
characters do not appreciate you telling them to run full-tilt into stone walls!
Scrolls for these spells are quite rare. Cultivate a Priest, and aid him to advance to
higher levels, so that he will be able to cast those spells for the team.
No matter how diligently you map, occasionally you get turned around and have no
real idea where the party is at that moment. Help is available through your Mage. By
the time he is level 3 or 4, he will be able to cast a DUMAPIC spell. This spell gives
your exact spatial coordinates based on the following rule: the lower left-hand corner
of the Maze map (where the stairs to the Castle are located) is square 0 East, 0 North,
1 Down below the Castle. The spell also gives the direction your party is currently
facing. So, no matter how confusing the Maze seems to get a times, a quick
DUMAPIC spell will set you right again.
For your first few expeditions we recommend that you avoid monsters by running
away from them, whenever possible, until you have become comfortable with
mapping and with getting out of the Maze quickly when you have to.
Unlike many text adventure games, you cannot leave a trail of bird seed after you
to find your way through the Maze. Anything you DROP while in the Maze is
not visible and will be lost forever!
39
Page 38

Proving Grounds of the Mad Overlord
Combat
Without some sort of challenge, Wizardry would just be a game of mapping. You
will soon learn to be grateful to a particular group of individuals for providing this
challenge. After all, who gathers together all the loot in the Maze so that your
characters can find it in nice tidy packages? Who gives bloodthirsty adventurers
something to look forward to? Who blasts ill-prepared party members to smithereens?
This is the life-work of monsters. Mastering the fighting techniques described here
will help you make their job less rewarding.
Meet the Monsters
As your party is moving through the Maze, it will encounter many groups of monsters
guarding hoards of treasures. The monsters could be wandering around like you, or
they may be inhabitants of a room you have just entered. Although some monsters
are peace-loving vegetarians, the majority of them really do like the taste of a good
"leg of adventurer," so it is likely that a fight will take place.
When you encounter hostile monsters, your party goes on full alert. Two windows
will automatically appear. One will show you the names and numbers of the
monsters you are facing, and the other will be used to gather instructions and report
on the progress of the combat. You will also be shown pictures of the monsters.
Most of the time, you will only be told what the monsters look like, not what
they really are. You may be able to discern their true identities if your character's
I.Q. is high enough. You can also use the LATUMAPIC spell to see through their
disguises.
Combat proceeds in rounds. Each round, both you and the monsters decide what
actions to take, and then the program mediates the combat. Combat is over when
either side runs away or is totally defeated.
40
Page 39

Proving Grounds of the Mad Overlord
Each active character in your party will be presented with a list of options each round.
The possible options are:
(F)IGHT the monsters. To do this, you must be in the first, second or third position in
the party.
(P)ARRY the monsters. Generally, you only do this if there is nothing a character can
do to help. Parry reduces the chance that the monsters will be able to hit you.
(D)ISPELL the monsters. Some monsters in the Maze ("the undead") are animated
only through the power of great evil. If successful, dispell forces these monsters to
return to the Abyss from whence they came. Priests and high level bishops and lords
have the ability to dispell monsters. They do this with varying degrees of
effectiveness, depending on the power of the monsters, and on how powerful the spellcaster is.
You don't get any experience points for monsters you dispell.
Cast a (S)PELL. You will be asked which spell you want to cast. Type the first few
letters of the spell, enough to distinguish if from the names of other spells, then press
[ENTER]. If the spell requires a target, you will be asked for that as well.
(U)SE an item. You will be shown a list of all the items that you can use and be asked
to choose one.
(R)UN away. If you succeed, then the combat is over. If you don't, then the monsters
get a free round of attacks.
(T)AKE BACK lets you go back to the start of Combat option selection in case you
made a mistake.
Once you have made your selections, you will have one last chance to (T)AKE BACK
your orders. If you press [ENTER], the combat round will start.
A short-cut: If you are on one of the first three characters, you can press
[ENTER] to select (F)IGHT. If you are on one of the last three characters,
[ENTER] selects (P)ARRY.
Since only the first three characters in the party can physically attack the
monsters, by the same token, the only party members who can suffer damage
from a physical attack are those same three characters. Monsters may cast spells,
however, on any or all members of the party. Should one of your characters die
in combat, he will automatically be shifted to the "dead-last" position in the party
at the end of the round. The deceased will be hauled around by the living
adventurers until being revived or removed from the party. This will mean, of
course, that the party member previously in fourth place will move up to the
number-three slot, rendering him vulnerable to attack. This character will be able
to fight, as well, with whatever weapons come to hand. Keep this in mind when
organizing and equipping your party.
Occasionally you will surprise the monsters. If this happens, you are entitled to a
free round of attacks, with the restriction that you cannot cast spells. Needless to
say, sometimes the party will be ambushed, which has far less pleasant effects.
Certain peaceful monster types may offer your party a truce. If you agree, the
monsters will politely scram, letting you go about your business. If you refuse a truce,
however, you'll surely have a fight on your hands. Note: monsters, like adventurers,
may be inclined either toward good or evil. Strange things have been known to
happen to those who respond inappropriately to peaceful overtures in the Maze.
41
Page 40

Proving Grounds of the Mad Overlord
When a combat is over (and you have survived), you will be told how many
experience points each surviving member of the party will be awarded for his or
her brave conduct. You don't earn any points for monsters who run away or for
dispelling monsters. You'll also find out how many gold pieces each character
earns. Regrettably, some groups of monsters are security-conscious and like to
hide their money and other valuables in...
Treasure Chests
Chests usually have traps on them and this is where your thief comes in handy. When
you are confronted with a chest, you will have the following options:
(O)PEN the chest, blindly hoping that there is no trap on it.
(I)NSPECT the chest for a trap, praying that you don't set the trap off in the process.
Cast the (C)ALFO spell in order to magically inspect the chest.
(D)ISARM the trap, assuming you think you know what it is.
(L)EAVE the chest alone, and give up the goodies.
For each of these options, you will have to specify who is to perform the operation.
Normally this will be your thief (or your priest in the case of casting (CALFO). If you
attempt to (D)ISARM the trap, you will have to type in the trap's name. Spelling
counts.
Needless to say, your thief is much better at inspecting and disarming than anyone
else. Even so, when he is just starting out, he will be pretty inept and things will blow
up in his face fairly often. Fortunately, most of the traps on the first level won't kill
him unless he is already hurt.
42
Page 41

Proving Grounds of the Mad Overlord
Lowering your Insurance Premiums
The first rule of the successful Wizardry player is "He who turns and runs away, lived
to run another day." Don't be ashamed to run from encounters where the monsters
have the upper hand. When first starting out, run back to the Castle often (even after
each encounter) to rest, replenish your spells, and heal your wounded. Never go
deeper into the dungeon until you are quite comfortable on the current level. Avoid
the temptation to take on "just one more encounter." If your characters become
poisoned, and you don't have magical means to cure them, run for the Castle as
quickly as you can!
Use your spell-casting characters wisely. When you are fighting your first few
groups of monsters, cast a KATINO spell, knocking out the opposition so that
you'll have plenty of leisure time in which to eliminate them. Naturally, this will
not work against certain monsters, and you'll have to run away from these
creatures until you become more powerful.
If anyone gets poisoned, head for the castle, keeping an eye on the victim's hit
points. If they go down to 1 or 2, go to Camp and cast a healing spell (like DIOS)
if you have one. If you get any monster encounters, run away because you lose
hit points by poison much faster in combat.
Come cast a Spell with Me
Playing Wizardry for the first time is like kissing for the first time - you want to do it
right, and you're not quite sure exactly what you are supposed to do. To help you out,
we asked one of the most famous Wizardry adventurers, Hawkwind of Skara Brae, to
share some of his secrets with you. Hawkwind will show you how he would create
and equip a new party and captain them during their first adventure.
Since things happen differently each time you play Wizardry, what Hawkwind
describes may not exactly happen if you try and follow his lead to the letter.
What's important is that you understand why he does what he does.
Hawkwind will occasionally mention doing something in the game, but won't
completely explain what keys he pressed to do it. You can follow along by trying
to do what he does, or by reading the sections of the manual that describe the
areas he goes to. Hawkwind's advice will be a lot clearer if you have read the rest
of the manual first!
So, without further ado, and in his own words, we present Hawkwind!
43
Page 42

Proving Grounds of the Mad Overlord
Creating your Team
Say, you look new around here. Has anyone shown you the sights yet? No? Well,
come along with me. My name's Hawkwind and I'm just getting ready to foray again.
Is this your first time as a team leader? No problem, just do as I tell you, and if you
get back alive, you'll know I told it right.
A greenie like you, no offense now, can hardly captain experienced adventurers, so the
only place to look for a team is to go to the Training Grounds which is right here, just
outside the Castle. You tell the Trainer what sort of companions you want along, and
he will do his best to see that the new trainees meet those requirements.
First you start with a fighter. You'll need several of those. Do you want to suggest a
name? Conan? Fine, but not really original. They will be your people after all when
you do this, so give them some persona of their own. Fred the Wonder Horse, now
that's original, but a little too long a name. Derf ? Fred spelled backwards? You are
supposed to be his friend and leader. Sigh! Ok, Derf it is, and I wouldn't give him a
password. He will be among friends. Let's make him a dwarf with good alignment.
As a dwarf he has these basic statistics:
Strength 10
Intelligence 7
Wisdom 10
Vitality 10
Agility 5
Luck 6
Got your manual with you? Good. Check out the requirements for a Fighter. Needs
at least 11 strengths, right? He had 6 bonus points so let's distribute them. See, when
I add 1 to strength he becomes eligible to be a fighter. Now as to the rest of the
points, certainly agility needs to be increased so that Derf can swing well, I'll add 4 of
the points there. A fighter also can not have enough vitality, so I'll add the last point
there. Well, that's Derf. What do you think, should I use him? Ok. Now as to the
rest of the team, here's a really hot pro tip: make up your party out of two fighters, a
priest, a thief, and two mages. This mixture has the best chance for survival, and
believe me, in this madhouse, survival is everything!
Assembling your Party
Not bad, I got the trainees selected and only had to discard four failures who did not
meet the standards (their bonus points were too low to create the type of character I
wanted). I now have Derf; Thomas the Fair, a human fighter; Snatch, a hobbit thief;
Prior Sebastion, a gnome priest; and two elfin mages, Alfredo and Gabriella. I'll leave
44
Page 43

Proving Grounds of the Mad Overlord
the new characters here to be trained and returned to the Castle
Quite a Castle isn't it? You should have seen it in its heyday before Trebor went mad.
Be careful with what you say, Trebor suspects everyone! Here it is, the best place in
the Castle to find men for a dangerous foray, Gilgamesh's Tavern.
Surveying the smoky room, we see mostly green novices, fresh from their instructions
in the Training Grounds but without armor or weapons yet... The talk in the room
goes silent as we walk into the Tavern. I announce that I'm forming a team to foray
into the Maze, and ask that any who want to be added to team step forward to be
considered. Everyone who is in the Castle will respond to that call, even the dead and
disabled. I'll pick out our new team of trained novices. Now on to Boltac's Trading
Post to buy them armor and weapons.
Being a Smart Consumer
Watch me very carefully here. I am going to deliberately make a mistake in judgment.
This is one that every greenie makes, but not us old pros. See if you can spot the
problem.
I'll first send in Derf, the dwarf fighter. Let see now, he only had 105 gold pieces. He
can buy a long sword (25 gp), a small shield (20 gp) and only leather armor (50 gp)
with 10 gp left. That pretty set of chain mail over on the wall will have to wait.
Next is Thomas the Fair, the other fighter. He has 115 gp, so he has just enough to
buy a long sword (25), leather armor (50), and a large shield (40). That large shield will
give Thomas the Fair an extra AC point of protection. That may save his life on this
foray.
Third is Snatch, the hobbit thief. His 100 gp buys him a short sword for 15 (thieves
can't use long swords or maces), a small shield for 20 (neither can they use large
shields), and leather armor (50) with a nest egg of 15 gp remaining.
Prior Sebastion, the gnome priest finds that his 125 gp will buy him an anointed mace
(priests can't use edged weapons) for 30 gp, large shield (40), and leather armor (50),
and that he has 5 gp left over.
It is really easy to outfit the two mages, Alfredo and Gabriella. All they can use are
robes (15) and either a dagger (5) or staff (10). Their protection is in their magic and
being in the back of the party. They rely on the fighting types to protect them. Both
get staffs, so they each only spend 25 gp. Alfredo had started with 90 gp, so he has 65
gp left over, but Gabriella had started with a whopping 155 gp, so she has 130 gp left.
That's 195 gp combined!
Aha, the light dawns I see. Yes, a suit of chain mail cost only 90. If I pool the team's
gold together, I can buy 2 suits of chain mail for my fighters. Let's go back into
Boltac's and do that.
Why Boltac always makes a Profit
Well, first Derf needs to sell back to Boltac the leather armor he just bought. What
language, my dear friend! Yes, Boltac will only pay you half the value of the leather
armor when he buys it back. He only gave you 25 gp for it. See what you have to
learn? Now I'll Pool the gold to Derf. Neat, he has a total of 250 gp. (225 total
leftover team gp + 25 gp from the sale of leather armor to Boltac). The chain mail
costs 90 gp, so there is 160 left over. Let's see, if Derf sells back his small shield for 10,
he will have enough to also buy a large shield for 40 and still have enough gold (130) to
pass on to Thomas the Fair for his suit of chain mail. I'll do it. Now to bring Thomas
the Fair back into Boltac's. He, likewise, sells his own leather armor for 25 gp, and has
45
Page 44

Proving Grounds of the Mad Overlord
155 gp when he Pools gold. Buying the chain mail leaves the team with a balance of
65 gp. Too bad, not enough to buy better equipment for Prior Sebastion. His faith
will have to sustain him.
Oh, now you're really doing some figuring! Yep, if I had planned out our team's
purchases in advance, my people would not have squandered 60 gp (25 gp apiece for
the leather armor and 10 gp for the small shield they lost when they got sold those
items back to Boltac's). That 60 gp coupled with the team's balance of 65 gp would
yield 125 pg. If the good Prior Sebastion had not bought his leather in the first place,
there would be 175 gp available. Taking out 90 gp for his suit of chain mail, would
mean the team has a cushion of 85 gp to help heal characters who get injured, and
Prior Sebastion's AC has taken an important step downward. Yes, downward is better
when it comes to armor class.
So you see, when you get your own team, always equip the mages and thief first, then
pool the gold and outfit the other three fighting members of the team. They need all
the protection you can afford to give them. That is the mark of a good captain, and
the characters appreciate it (and live longer).
Your first steps into the Maze
Well, we're ready for the Maze. Are you ready for your first glimpse into Trebor's
Proving Grounds? Right outside the Castle wall lies the entrance. It is easy to find, just
follow the stench of the corpses and the howling of the monsters. It is quite a racket.
You wouldn’t be bored down there, that I guarantee! Here are the stairs, let's go.
Around the Campfire
All forays into the Maze begin in Camp. A wise commander takes this time to
properly order his team into the best offensive and defensive grouping. As only the
first three members of the team can use physical weapons (or suffer physical damage
from the monsters), this is where your fighting types go, and they should have the best
armor and weapons that your team can afford. The next slot is ideal for your thief. In
case one of the first three gets killed or incapacitated, such as getting hit with a
KATINO spell, then your thief will automatically move into the front. With his
leather armor and short sword, he can at least give a fair accounting of himself. You
know you're really in trouble if ever one of your mages ends up in the front line.
With only robes for armor, they will get vaporized by the first monster that glares at
them! So the line-up will be: Derf, Thomas the Fair, Prior Sebastion, Snatch, Alfredo,
and Gabriella. A very important tip at this point: If I inspect any of these characters,
I'll quickly see that none of them is equipped with any of the new goodies they
bought at Boltac's. While I can call each forth and so equip them, there is an easier
way. The main Camp menu has an overall equip option that allows me to do the
whole team at once, which I'll now do.
While your foraying, you really should periodically Camp. This gives you a better
opportunity to check on how your people are doing, and heal up anyone who is hurt.
Don't worry, the glare from the fire of your campfire will keep any monsters from
attacking you as long as you remain in Camp. Ready to break Camp now? Here we go!
Finding a Room
Now we are looking at the Maze. Each wall square you see represents one step. Right
now we are at the bottom of the stairs leading up to the Castle and facing north. Take
this on faith, for now. Soon Alfredo will learn the DUMAPIC spell and will be able to
figure this out for himself. I decide to explore to the east, so I will turn right (by
pressing the right cursor key or [D] and walk down the corridor (by pressing the up
46
Page 45

Proving Grounds of the Mad Overlord
cursor key or [W]. Look, there's a door ahead on the left, just before the corridor
ends! I'll turn the party north again (by pressing the left cursor key or [A] right in
front of the door, so they are facing the door. Now the team can go through the door.
Doors can lead to almost anything, but mostly they lead to rooms, and quite often
those rooms are used by the monsters as lairs! Keep your fingers crossed, the team is
going to kick in the door (by pressing the up cursor key or [W]...Oops, an encounter.
Get ready, everyone!
A surprising Encounter!
It's 4 Skeletons and 3 Bubbly Slimes, but we lucked out and surprised them!
When you surprise monsters, it means your party gets a free round of attacks on the
monsters before they can reply back, but since it happens so fast, your spell casters
can't get off any spells during the surprise round. So Derf, Thomas the Fair, and Prior
Sebastion will Fight, while the other three will hang back, out of the way of the
melee, and Parry.
Derf swings and hits a Skeleton for 2 hits points of damage. Thomas the Fair swings
and he misses. Prior Sebastion whollops a Bubbly Slime with his mace for 4 hit points,
and the monster dies! Terrific first round.
Round 2 - The Monsters strike Back!
Derf and Thomas the Fair will fight Skeletons again (they are tougher opponents than
the bubbly slimes). Prior Sebastion will not fight this round. As a priest, he has a
special talent that none of the other adventurers have: he can dispell the undead. If it
succeeds, then the evil bonds that bind the undead to our plane are dissolved and they
vanish. So, Prior Sebastion will try to dispell the Skeletons this round. Snatch will
parry (a purely defensive move) having nothing better to do right now. Alfredo will
47
Page 46

Proving Grounds of the Mad Overlord
cast a HALITO spell on the Skeletons, hoping to give one of them a hot time.
Gabriella will try to put the two Bubbly Slimes to sleep with a KATINO spell, so that
they can't attack the party while everyone is busy with the Skeletons. Here goes...
Rats! Derf swings and misses. Ouch! A Skeleton his Prior Sebastion for 3 hits
points. Oof! A bubbly slime hits Derf for 2 hit points. Smash! Thomas the Fair
swings and hits a skeleton for 3. Swish! A Skeleton swings at Derf and misses.
Zzzz! Gabriella casts a Katino spell on both Bubbly Slimes are slept. This means
that the second Bubbly Slime can't hit at us this round. Snatch parries. Crunch!
A skeleton hits Derf for 5 hits points. Derf is almost dead! Poof! Prior Sebastion
Dispells and 2 skeletons are dissolved!!! Crackle! Alfredo casts his Halito spell,
but does a measly 1 damage to a Skeleton.
Round 3 - Getting by with a little help from your Priest
I have to help Derf immediately or he will be burger bits! Each trainee starts into the
Proving Gruonds with 8 hit points. When they go to zero, the character dies. Much
as I hate to lose Prior Sebastion's ability to dispell, I quickly decide to have Prior
Sebastion cast one of his two DIOS spells on Derf this round. Both the mages will
cast HALITO spells on the last 2 Skeletons, now that the Bubbly Slimes are asleep.
Derf and Thomas the Fair had better go out there and hit better than they had done so
far, if they expect to survive in this place! All set with the team strategy. Everyone
knows what they are supposed to do. Yes, yes. Snatch, you still parry. I didn't forget
you. What a hyper group thieves are. Bored most of the time, can't wait to get into
the action, but when they do get a chance, watch them try to become wallpaper on
the Maze wall! Well, here goes. I'll keep my fingers crossed that Prior Sebastion can
get off that DIOS healing spell on Derf before something nails him and kills him.
Pow! Derf swings at Skeleton and connects for 2 hit points. Foom! Gabriella casts a
Halito at a Skeleton, hits for 3 and reduces it to ash! Swack! A Skeleton swings at Derf
and misses. Whew! Punt! Thomas the Fair swings at a Skeleton and misses also.
Ahhh! Prior Sebastion cast a DIOS healing spell on Derf and heals 4 points, just in
time. Snatch parries. Oh no! One of the Bubbly Slimes woke up and hit poor Derf
for 2 points! Kablam! Alfredo cast a Halito and it hits for 2, destroying the last
Skeleton.
48
Page 47

Proving Grounds of the Mad Overlord
Round 4 - Running out of Resources
Both Bubbly Slimes are awake now. That was a mighty close call for Derf. Better have
Prior Sebastion try again with his DIOS spell. The last one really had some power in
it. Not bad for a greenie. The boys will swing at the Bubbly Slimes, while Snatch
parries again. Gabriella goes to cast another KATINO spell but is out of spell points,
so she will only be able to parry. Not good news. Oops! Alfredo has the same
problem, so he will parry also. This is really getting touch and go! As soon as your
spell casters run out of spells, either offensive or healing, the sand in the hourglass of
your team's survival begins to run out quickly. Let's nail 'em this round and get home!
Twonk! Thomas the Fair swings and misses again - what kind of training are they
giving the lads these days? Snatch parries. Smack! A Bubbly Slime attackes Prior
Sebastion for 1 point. Uh, hmmm! Prior Sebastion casts his last DIOS spell on
Derf, but it only heals him 1 point! Plop! The other Bubbly Slime attacks Prior
Sebastion, but misses. Gabriella and Alfredo both parry, and Derf swings and
misses.
Round 5 - Slugging it out and praying a lot!
Oh, what to do with these novices? Nothing left but to have the front rank slug away!
Ka-thunk! Thomas the Fair connects for 3 hits and the Bubbly Slime dies! Bash!
Prior Sebastion hits the last Slime for 1, but it's still alive. Charge! Derf comes to
the assistance of his friend the Prior, swings, hits for 2 and kills the last slime!
49
Page 48

Proving Grounds of the Mad Overlord
Experience and Loot
Everyone receives 42 experience points for surviving the encounter. Ah, the monsters
were carrying a treasure chest. Well, Snatch, here's your chance to pull your weight.
Snatch examines the chest and says that he thinks it is a poison needle trap, very nasty.
Derf pushes him aside and inspects the lock. He thinks it's a crossbow bolt trap. Prior
Sebastion looks at it and says no, it's not trapped at all. When he gets more
experienced, the good prior will learn that CALFO spell, which will allow him to
magically determine the nature of a trap. Each of the others inspect the trap.
Gabriella agrees with Derf, Thomas the Fair with Prior Sebastion, while Alfredo thinks
it is a gas bomb trap. What to do? Well, I decide to trust Snatch this time, after all he
is trained (somewhat) in the nimble arts, and it is his neck when he tries to open it.
Snatch tries to Disarm the chest for a poison needle trap. No luck. He tries it again.
No luck. He tries it again. Still no luck. On the fourth try, he is a shade too clumsy
and trips the trap. Sproong! It was a poison needle, so Snatch was right after all.
Small consolation as he now shows " - " (for poison) next to his status. Well, there
were 36 gold pieces in that chest, so everyone gets 6 gold pieces, and we're all still
alive, but we better get back to the Castle real quick and unpoison Snatch! For now,
each step I take carries the real possiblity that Snatch will lose a hit point!
Running for home
Turning right around in the doorway (pressing the down cursor key or [X] to do a 180
degree turn), not even willing to risk the chance exploring the rest of the room, the
team kicks back through the door and turns right. As they trudge down the corridor, I
quickly press (S)tatus to check on Snatch. He already had lost 3 hit points from
poison. Hope he makes it. There, on the corridor floor is the special pattern that
marks the stairs (or other special areas). Snatch has only 1 hit point left. I fling the
team onto the stairs and pray...Snatch makes it! That was too close. Poison is really
nasty down there. If ever any of your people get poisoned, drop everything and run
back to the Castle. They are automatically cured when they surface from dungeon,
but oh those last few steps to the stairs can be agonizing.
50
Page 49

Proving Grounds of the Mad Overlord
R & R
After a hard day in the Proving Grounds, every adventurer looks forward to a
refreshing stay in a first-class hotel. Unfortunately, there is nothing remotely
resembling a first-class hotel in the Castle, so weary travellers have to settle for the
Adventurer's Inn. Derf stumbles in and sacks out on a cot for 10 gp a week. Oops, no
money. I'll Pool the team's gold for him. Um, 65 gp left over from out outfitting at
Boltac's plus the 36 gp we got from the monsters only yields 101 gp. Derf was hurt 4
hit points, so it takes 4 weeks and 40 gold pieces. ouch. Next is Thomas the Fair. I
see why they call him the Fair, he escaped the encounter without a scratch. He can
get some free rest in the stables. I'll have to Pool gold (61 gp) for Prior Sebastion,
though. He was so busy saving Derf's life with DIOS spells, that he could not heal
himself. He needs 4 weeks also and the Inn soaks up 40 more of our meager gold
pieces. Snatch is even in worse shape than Prior Sebastion. He is down to 1 hit point
from 8 and will take 7 weeks to heal, but the teams only got 21 gp left. Well, two
weeks worth of recuperation is better than nothing. Snatch is now healing back to 3
out of 8 of his hit points and will really have to be protected on the next foray. Let's
hope we don't come across any monsters that can cast spells into our back ranks. The
team also did a great job of protecting Alfredo and Gabriella. They emerged without
a scratch, so they will join Thomas the Fair in the stables for a quick nap.
More Tales to Tell
Ah well, look at the bright side! We're not flat broke. Why, we have this one shiny
gold piece between us! Let's all of us go to Gilgamesh's Tavern for some ale and I'll
tell you some real tall tales....
Magic
The acquisition and careful use of magic spells and items is of paramount importance
to the successful adventurer. In many situations, the right spell can mean the
difference between life and death.
Magic items range from potions and scrolls with limited effects to artifacts mentioned
in strategic arms limitation treaties. Some can actually be purchased in the Trading
Post as readily as your grocer sells you a can of cheese dip. But most of the really
important ones are found only after many hair-raising adventures in the depths of the
Maze.
Magic items may do one or more of the following:
Cast a spell or have magical abilities you may invoke.
Alter Armor Class
Change fighting ability
Protect against certain monsters or be helpful in killing them.
Be usable only by certain character classes.
When magical items are first discovered in the Maze, their true nature is not known.
Only bishops and the Trading Post can identify them. Even so, some items may have
hidden qualities that you'll have to discover for yourself.
51
Page 50

Proving Grounds of the Mad Overlord
Spells
There are a total of fifty spells divided into mage and priest categories. Each category
is divided into seven levels, with the most potent spells at the higher levels.
Following is a complete description of all the spells you can cast. For each spell, we've
given you the name, a rough translation, the power level, where it can be cast, what it
will affect and a brief description of its effects.
In some of the spell descriptions, you will see a range of damage that the spell
inflicts when it is cast, or a statement that the spell affects all the monsters in a
group. However, there are three ways in which an individual monster can avoid
some or all of the spells effects.
All monsters (and players) have a chance of dodging some or all of the effects of a
spell. If the spell is a damage spell, then the damage might be cut in half or
quartered; if an "all-or-nothing" spell, the spell might have no effect at all!
Monsters may be naturally resistant to a particular type of spell. For example,
throwing balls of fire (A MAHALITO, for example) at Fire Giants is not likely to
impress them.
A few monsters have the ability to occasionally avoid the effects of a spell
completely.
52
Page 51

Proving Grounds of the Mad Overlord
Mage Spells
Level 1 Mage spells
HALITO LITTLE FIRE Type: Combat Affects: 1 Monster
HALITO causes a flame ball about the size of a baseball to strike a monster, inflicting
from one to eight hit points of damage.
MOGREF BODY IRON Type: Combat Affects: Caster
MOGREF reduces the spell-caster's AC (Armor Class) by two points. This protection
lasts for the rest of the encounter.
KATINO BAD AIR Type: Combat Affects: 1 Group
KATINO causes most of the monsters in a group to fall asleep. KATINO only affects
normal animal or humanoid monsters, and the duraton of it's effect is inversely
proportional to the power of the monster. Sleeping monsters are easier to hit and
successful attacks do double damage!
DUMAPIC CLARITY Type: Camp Affects: Entire Party
DUMAPIC grants you insight into your party's position in the Maze: the exact
displacement from the stairs leading to the Castle (vertically, North and East), and the
direction you are currently facing.
Level 2 Mage Spells
DILTO DARKNESS Type: Combat Affect: 1 Group
DILTO causes one group of monsters to be enveloped in darkness, which reduces
their ability to defend themselves.
SOPIC GLASS Type: Combat Affects: Caster
SOPIC causes the spell-caster to become transparent. This makes him harder to see;
thus the caster's AC is effectively reduced by four points during the rest of the
encounter.
Level 3 Mage Spells
MAHALITO BIG FIRE Type: Combat Affects: 1 Group
MAHALITO causes a fiery explosion to erupt amid a monster group, doing four to
twenty-four hit points of damage.
MOLITO SPARKS Type: Combat Affects: 1 Group
MOLITO causes sparks to fly about and cause three to eighteen points of damage to
about half the monsters in a group. While inferior in many respects to MAHALITO,
MOLITO affects some monsters that are impervious to fire-based spells, and the
monters that are struck by the spell are less likely to be able to minimize it's effects.
53
Page 52

Proving Grounds of the Mad Overlord
Level 4 Mage Spells
MORLIS FEAR Type: Combat Affects: 1 Group
MORLIS causes one group of monsters to fear the party, thus reducing the
effectiveness of their attacks. The effects of MORLIS are comparable to a doublestrength DILTO spell.
DALTO BLIZZARD Type: Combat Affects: 1 Group
DALTO is a frigid version of MAHALITO, and inflicts six to thirty-six points of
damage.
LAHALITO TORCH Type: Combat Affects: 1 Group
LAHALITO is an "industrial-strength" version of MAHALITO, and inflicts six to
thirty-six points of damage.
Level 5 Mage Spells
MAMORLIS TERROR Type: Combat Affects: All Monsters
MAMORLIS is an improved version of MORLIS that makes all of the monsters in an
encounter fear the party, thus reducing the effectiveness of their attacks.
MAKANITO DEADLY AIR Type: Combat Affects: All Monsters
MAKANITO asphyxiates most air-breathing monsters with less than forty hit-points.
This is an all or nothing spell; if MAKANITO does not kill a monster, that monster is
undamaged by the spell.
MADALTO FROST KING Type: Combat Affects: 1 Group
MADALTO is a super-cooled DALTO that causes eight to sixty-four points of icy
damage.
Level 6 Mage Spells
LAKANITO VACUUM Type: Combat Affects: 1 Group
LAKANITO will kill all monsters in a group if they breath air.
ZILWAN DISPELL Type: Combat Affects: 1 Monster
ZILWAN will dispell one monster of "Undead" variety.
MASOPIC CRYSTAL Type: Combat Affects: Entire Party
MASOPIC duplicates the "transparency" effects of SOPIC, but affects the entire party.
HAMAN BEG Type: Combat Affects: Variable
HAMAN is an unusual spell. It allows the caster to beg the Gods for aid. Only
thirteenth-level or higher characters may cast HAMAN, and doing so costs them a
level of experience! If the Gods decide to answer your plea, you will be given a choice
of possible boons.
Level 7 Mage Spells
MALOR TELEPORT Type: Any time Affects: Entire Party
When cast in Combat, MALOR randomly teleports the party to another location on the
same level. When cast in Camp, the caster can select his destination precisely.
Teleporting outside the Maze, or into an area of solid rock, will have catastrophic results.
54
Page 53

Proving Grounds of the Mad Overlord
MAHAMAN BESEECH Type: Combat Affects: Variable
This more powerful version of HAMAN has the same costs and conditions of casting,
but the boons that the Gods grant are more valuable.
TILTOWAIT KA-BLAM! Type: Combat Affects: All Monsters
The effect of this spell is somewhat like the detonation of a small tactical nuclear
weapon, and causes from ten to a hundred hit points of damage to all the monsters
opposing the party!
Priest Spells
Level 1 Priest spells
KALKI BLESSINGS Type: Combat Affects: Entire Party
KALKI reduces the AC (Armor Class) of all party members by one point, and thus
makes them harder to hit.
DIOS HEAL Type: Any time Affects: 1 Person
DIOS restores from one to eight lost hit points to a party member. It will not bring
the dead back to life.
BADIOS HARM Type: Combat Affects: 1 Monster
BADIOS inflicts from one to eight hit points of damage upon a monster. It is the
inverse of DIOS.
MILWA LIGHT Type: Any time Affects: Entire Party
MILWA causes a softly glowing magical light to accompany the party, illuminating
more of the Maze and revealing all secret doors. The light lasts only a short time.
PORFIC SHIELD Type: Combat Affects: Caster
PORFIC lowers the AC of the caster by 4 points. The effects last for the rest of the
combat.
Level 2 Priest Spells
MATU ZEAL Type: Combat Affects: Entire Party
MATU reduces the AC (Armor Class) of all party members by two points, and thus is
a double strength KALKI.
CALFO X-RAY Type: Looting Affects: Caster
CALFO permits the caster to determine the nature of a trap on a chest with excellent
reliability.
MANIFO STATUE Type: Combat Affects: 1 Group
MANIFO causes some of the monsters in a group to become still as statues for one or
more melee rounds. The practical effects are similar to KATINO; the monsters cannot
attack, and physical attacks upon them are easier and do double damage.
55
Page 54

Proving Grounds of the Mad Overlord
MONTINO STILL AIR Type: Combat Affects: 1 Group
MONTINO causes the air around a group of monsters to stop transmitting sound,
thus preventing them from casting spells!
Level 3 Priest Spells
LOMILWA SUNBEAM Type: Any time Affects: Entire Party
Like MILWA, LOMILWA causes a softly glowing magical light to accompany the party,
illuminating more of the Maze and revealing all secret doors. The effects of
LOMILWA, however, last for the duration of the expedition.
DIALKO SOFTNESS Type: Any time Affects: 1 Person
DIALKO cures paralysis, and frees those under the spell of KATINO or MANIFO
LATUMAPIC IDENTIFY Type: Any time Affects: Entire Party
LATUMAPIC reveals the true names of all the monsters you meet. The effects last for
the rest of the expedition.
BAMUTU PRAYER Type: Combat Affects: Entire Party
BAMUTU is a double-strength MATU spell. It reduces the AC of each party member
by four points for the duration of the combat.
Level 4 Priest Spells
DIAL CURE Type: Any time Affects: 1 Person
DIAL is an improved DIOS spell. It restores two to sixteen hit points to a party
member.
56
Page 55

Proving Grounds of the Mad Overlord
BADIAL WOUND Type: Combat Affects: 1 Monster
BADIAL is the inverse of DIAL. It inflicts two to sixteen hit points of damage upon a
monster.
LATUMOFIS CLEANSE Type: Any time Affects: 1 Person
LATUMOFIS removes the effects of poison.
MAPORFIC BIG SHIELD Type: Any time Affects: Entire Party
MAPORFIC is an improved version of PORFIC that lasts for the duration of the
expedition. This is the best overall defensive spell.
Level 5 Priest Spells
DIALMA BIG CURE Type: Any time Affects: 1 Person
DIALMA is an improved DIAL spell. It restores three to twenty-four hit points to a
party member.
BADIALMA BIG WOUND Type: Combat Affects: 1 Monster
BADIALMA is an improved BADIAL spell. It inflicts three to twenty-four hit points of
damage upon a monster.
LITOKAN FLAMES Type: Combat Affects: 1 Group
LITOKAN causes a pillar of flame to strike a group of monsters, doing three to
twenty-four points of damage to each.
KANDI LOCATION Type: Camp Affects: Caster
KANDI allows the caster to locate the approximate position in the Maze of another
character.
DI LIFE Type: Camp Affects: 1 Person
DI attempts to resurrect a dead character. There is a chance that the spell will fail. If
successful, the restored character will have but one hit point. DI cannot resurrect a
character who is in ashes, and if it fails will turn a dead character into ashes. This spell
is not as effective as the one cast by the priests of the Temple of Cant.
BADI DEATH Type: Combat Affects: 1 Monster
BADI attempts to give the target a heart-attack. If successful (and the target must
have a heart for this to be so!) the monster dies.
Level 6 Priest Spells
LORTO BLADES Type: Combat Affects: 1 Group
LORTO causes sharp blades to slice through a group, causing six to thirty-six points of
damage to each monster in that group.
MADI RESTORE Type: Any time Affects: 1 Person
MADI totally restores the recipient to perfect health, so long as he or she is not dead
or worse. It is important to recognize that in the world of Wizardry, there are things
that are worse than death.
57
Page 56

Proving Grounds of the Mad Overlord
MABADI MAIMING Type: Combat Affects: 1 Monster
MABADI strips the target monster of all but a few of its hit points
LOKTOFEIT RECALL Type: Combat Affects: Entire Party
LOKTOFEIT causes all party members to be teleported back to the Castle, minus all
their equipment and most of their gold. There is a very good chance this spell will fizzle.
Level 7 Priest Spells
MALIKTO WRATH Type: Combat Affects: All Monsters
MALIKTO causes fiery monsters to descend upon all the monsters, inflicting from
twelve to seventy-two points of damage upon each.
KADORTO REBIRTH Type: Camp Affects: 1 Person
KADORTO restores the dead to life, even those reduced to ashes. It also restores all of
the recipient's hit points. As with DI, there is a chance that KADORTO will fail. If a
character who is in ashes fails to be resurrected by KADORTO, he or she will be lost
forever.
58
Page 57

Knight
of
Diamonds
59
Page 58

Knight of Diamonds
** Note: This game (Knight of Diamonds) uses the same characters, spells, and
basic commands as game #1 (Proving Grounds of the Mad Overlord).
The Adventure
The staff of Gnilda was the first example of its creator's forging skill. When properly
used, it rendered the City of Llylgamyn invulnerable.
The staff projected a force field totally impervious to any physical or magical attack.
Those who wanted to threaten Llylgamyn could not approach the city, while those
who came with good will could enter and leave freely. It was the perfect defense, but
it had one fatal flaw...those born in Llylgamyn were unaffected by the staff. Thus it
was possible for the evil Davalpus, aided by the lords of darkness, to seize the throne
of Llylgamyn and slay the royal family. Fortunately, the young Princess Margda and
her brother Prince Alavik survived the royal coup.
Margda and Alavik both knew that there was but one hope of defeating Davalpus.
Together they retrieved the fabled armor of the great hero, "The Knight of
Diamonds". Alavik, wearing the mystical garb, and carrying the staff, engaged
Davalpus in an epic battle in the castle of Llylgamyn. Davalpus fell, but with his dying
breath uttered a curse so unspeakable that it brought the castle down around the two
combatants. All that was left was a smoking hole in the ground. Davalpus, Alavik and
the staff were gone. If it is not returned, the city will fall!
Starting the Game
Ah, to adventure! To begin Wizardry, just follow the following instructions.
1. From the Windows START/PROGRAMS mean select Wizardry and then the
scenario you wish to play.
2. Select (S)tart Game (Press [S]).
3. Ignore the program’s insistence to insert a scenario disk and simply press
[ENTER].
Note: Since the original Wizardry games were released on floppy disks, it was
important to make copies of the original disks to play on. These copies were
called “scenario disks”. These disks are not needed any longer, as the game is
running directly off your hard drive, where the hard drive serves as the scenario
disks.
Making a Scenario Diskette
This option is a left over from the good old days of floppy disks. Since you have
already installed the game from your CD-ROM on your hard drive, the game has
automatically created a Scenario Disc for you there. Therefore you can completey
ignore this menu entry. It no longer works.
60
Page 59

Legacy
of
Llylgamyn
61
Page 60

Legacy of Llylgamyn
LEGACY OF LLYLGAMYN
The Third Wizardry Scenario
Wizardry by:
Andrew Greenberg & Robert Woodhead
Scenario Design by:
Robert Del Favero, Jr., Samuel Pottle & Joshua Mittleman
Manual by:
Roe R. Adams, III
Playtested by:
Katie Woodhead & Linda Sirotek
** Note: This game (Legacy of Llylamyn) uses the same characters, spells, and basic
commands as game #1 (Proving Grounds of the Mad Overlord).
62
Page 61

Legacy of Llylgamyn
Prelude
A generation has passed in the kindgom of Llylgamyn since an intrepid band of
adventurers regained the ancient armor of the Knight of Diamonds and restored the
Staff of Gnilda. Peace and prosperity have prevailed. Under the protection of the
Staff, Llylgamyn has become a place of light and beauty, where war and its tools are
unknown. Recently, however, the tranquility of Llylgamyn has been disturbed, not by
angry men and bloody war, but rather by unbalanced nature. For years, unsettling
accounts of freak earthquakes, sudden changes in climate, and thundering storms have
reached the ears of Llylgamyn’s people. Most have ignored them.
When the formerly gentle seas around the prosperous island colony of Arbithea rose
and swamped the island, no one could ignore the signs any longer. The tidal wave
destroyed the cities and left only barren peaks above the water. Soon after, Llylgamyn
herself was shaken by an earthquake so mighty that even the Temple of Gnilda was
damaged. Nearby volcanoes were woken from their ancient slumbers. Self-appointed
prophets cried of divine wrath, and demanded immediate repentance. Mystics
consulted the Tarot. Astrologers warned of great comets in the heavens that will
crash into the planet, bringing utter destruction. Priests of the old religions talk of the
death of the Great World Serpent and the end of existence.
Wiser heads call for a new generation of adventurers of all kinds and creeds to seek
the cause of the troubles. Like their ancestors before them, the adventurers’ quest is
to save Llylgamyn from perils that face the city. The greatest Sages and Wizards of the
kindgom have agreed - only one relic has the scrying power to reveal the source of the
danger. A mystical orb long ago taken by the great dragon L’kbreth is the only
solution. L’kbreth, one of the five children of the World Serpent, is dedicated to the
preservation of the balance of the world. She deemed that the great orb might upset
the balance if left in the hands of men. Legend says the dragon took the orb to her
mountain lair, and there invoked the powers of good and evil to protect the orb from
thieves.
The leaders of Llylgamyn now appeal to you, the descendants of the heroes and
heroines of the Knight of Diamonds, the children of the survivors of the Proving
Grounds of the Mad Overlord. Take up their memories and their skills, and seek out
the dragon L’kbreth. Win from her the mystical Orb of Earithin.
63
Page 62

Legacy of Llylgamyn
The Rite of Passage
The adventurers who will go on the quest for the orb will be chosen from this year’s
graduating apprentices. Each apprentice, at the age of 20, undergoes the ancient Rite
of Passage. After proper preparation and rituals, the apprentice will pray to the spirits
of their ancestors for guidance and assistance. These spirits are the essence of these
heroes. Such heroes defeated Werdna for his Amulet, or returned Gnilda’s Staff to
Llylgamyn. During this arcane ritual, the apprentices, if deemed worthy, will receive
the blessing of their ancestors. These new level one characters will actually inherit
some of the powers and abilities of their ancestors as their rightful heritage. Some of
the characters’ attributes will be enhanced, and they will become more adept at their
chosen craft.
The new adventurers will proudly wear the name of their forebears into battle.
Family caste and honors are also inherited during the ritual. Through heroic battles
and quests, an ancestor may have earned entrance into a high caste, such as Ninja or
Lord. Truly great heroes of old received chevrons and knighthoods. The descendants
of these heroes are entitled to bear such august titles. Such a heritage is a heavy
burden, as one must strive to uphold the family honor!
64
Page 63

Legacy of Llylgamyn
Getting Started
Starting the Game
Ah, to adventure! To begin Wizardry, just follow the following instructions.
1. From the Windows START/PROGRAMS mean select Wizardry and then the
scenario you wish to play.
2. Select (S)tart Game (Press [S]).
3. Ignore the program’s insistence to insert a scenario disk and simply press
[ENTER].
Note: Since the original Wizardry games were released on floppy disks, it was
important to make copies of the original disks to play on. These copies were
called “scenario disks”. These disks are not needed any longer, as the game is
running directly off your hard drive, where the hard drive serves as the scenario
disks.
Making a Scenario Diskette
This option is a left over from the good old days of floppy disks. Since you have
already installed the game from your CD-ROM on your hard drive, the game has
automatically created a Scenario Disc for you there. Therefore you can completey
ignore this menu entry. It does no longer work.
65
Page 64

Legacy of Llylgamyn
Entering Llylgamyn
To enter the troubled city of Llylgamyn, start the program. When the title page
appears before your eyes, invoke the (S)TART GAME spell. After performing this
sacrament, you wil appear in the city.
Summoning Ancestors
The spirits of the ancestors of the characters you wish to adventure with may be
roaming freely around the world. In order for the Rite of Passage ceremony to be
successful, they must be summoned to Llylgamyn. The ancestors can be summoned
from any Wizardry scenario diskette (except The Return of Werdna) by using the
(T)RANSFER CHARACTERS option in (U)TILITIES.
The Rite of Passage Ceremony
The coming of age ritual is performed at the Training Grounds, as a graduating
ceremony for the apprentice adventurers. Each apprentice is directly linked to their
ancestors. At the Training Grounds, invoke the spirit of each ancestor (by inspecting
him or her). When the spirit is present, start the initiation by invoking [R] for (R)ITE
OF PASSAGE.
During the initiation, the fledgling adventurer is allowed only one choice, the rest of
the ceremony being in the hands of the temple priests. Regardless of their family’s
ancestral alignment, each character may now declare their own choice of alignment
within the traditional limitations. Ethics and morals sometimes change through time,
and their viewpoint of one’s ancestors is often different from those of a descendant.
Yet, traditions are strong, and much thought should go into the alignment decision.
When the runes were cast for this quest, it was foretold that the role of each
adventurer would hindge on the alignment selected.
Then the ancestral link dissipates, and only the newly graduated character remains.
Under the rigors of the quest, the character must prove worthy of the great heritage just
bestowed. If any adventurer uses those gifts unwisely, calamity will surely be his fate!
GRADUATION DAY!
66
Page 65

Legacy of Llylgamyn
The Quest
Upon completion of the Rite of Passage, the new adventurers are gathered before the
Elders of Llylgamyn. The burden of the quest for the sacred orb is laid upon their
shoulders. The adventure party is told that the newly awakened volcano that
threatens the city is actually the legendary sanctuary of the great dragon L’kbreth,
who guards the orb from unworthy seekers.
High inside the mountain is the hidden resting place of the orb. The party must climb
the twisted passageways inside the mountain, where L’kbreth has used both good and
evil magic to safeguard the orb. Legions of monsters and nefarious troops bar the
seeker’s path. Diabolical traps and confounding riddles test the ingenuity of each
member of the party. Only the strength of an ancestor’s bequest will enable a
character to survive even the lowest level of L’kbreth’s lair.
As tradition dictates, new adventurers begin without weapons or armor. The Elders
give each adventurer a purse of up to 500 gold pieces upon graduation. Wise
outfitting at Boltac’s Trading Post is the first test of survival.
Before the eager adventurers leave on their quest, the priests from the Temple of Cant
perform one last divination. The priests use domesticated Creeping Coins to cast
hexagrams in the sands:
Murmur...Chant...Prayer...Success!
“A warning: The power of L’kbreth is the power of the planet itself ”
Somewhat shaken, the adventurers listen to the High Elder, “Whenever danger
confronts mankind, Llylgamyn ever stands in the fore, ready to lead from darkness
into light. Now you must go forth into the unknown to save your people. Such is the
Legacy of Llylgamyn. Good luck, and may Kadorto smile upon you.”
67
Page 66

Return
of
Werdna
69
Page 67

Return of Werdna
THE RETURN OF WERDNA
The Fourth Wizardry Scenario
Wizardry by:
Andrew Greenberg & Robert Woodhead
Scenario Design and Manual by:
Roe R. Adams, III
Illustrations by:
Linda Wheelin
Linda Carpenter, assistant
Title Screen Design by:
Robert Gould
Dedicated to:
This Scenario is dedicated to my wife Nan, and my children Roe and Kathleen, who
have sacrificed an entire, irreplaceable year out of our lives together, so that I might
work far from home bringing forth what you now hold in your hands. The dream
contained within is as much theirs as it is mine. May you enjoy it in the fullness of
time!
-Roe R. Adams, III, Ithaca NY, October 1987
Playtested by:
Ronald Wartow, Esq. Ray & Fran Hakim Thomas Weiner
Dr. David Granite R2A4 Scorpia
David Friedman William Harrington Charles Don Hall
Brenda Garno Tom Courtney Jonathan Feinstein
Jeff Londynsky Lewis & Jay Bernhardt Bill Griffiths
** Note: This game (The Return of Werdna) uses the same characters, spells, and
basic commands as game #1 (Proving Grounds of the Mad Overlord).
70
Page 68

Return of Werdna
The Prequel
Five years have passed since I captured the mystical amulet from the Mad Overlord
Trebor. His agents had only been a few hours ahead of me in obtaining the artifact.
The amulet had lain hanging around the neck of a forgotten god's statue in an ancient
crumbling Temple. Whose Temple it once was is now whispered faintly only in
ancient and forbidden tomes. Never is the full name used, perhaps for fear of invoking
something dreadful that might be merely slumbering.
The mist enshrouded valley that hides the Temple has been known throughout time as
the Gods' Hopyard, supposedly because of a great portal that was opened one night by
a demented archmage. It is said in arcane legends that on that night the Gods came
here and played. The world shook and mountains danced. The whole sky was afire
with shimmering colors. As dawn rose, a gigantic voice suddenly blasted out a harsh
command, and everything in the world froze in mid-stride. Then there seemed to be a
great inhaling, a loud implosion, and the world moved again. The portal was gone.
Who or what chased back the Gods and closed the portal no one knows. It was a long
while before anyone was brave enough to venture into the valley to find out what had
occurred. It was quite difficult to see, a dense mist now covering the valley edges. In
the far end of the valley there loomed a gigantic Temple of a style never before seen.
In its center was an altar room wherein stood a statue. Around the neck of the statue
hung an amulet that glowed with such magical energy that none could gaze upon it
for long.
As to what this amulet is, or to whom it might have belonged, the greatest scholars of
the last three millenia have debated. Some feel that it was the focus by which the
portal was opened, and any who possessed it could open the way for the Gods' return.
Others theorized that it was too powerful to have originated on this worldly plane,
and so must have been left behind during the retreat of the Gods. A third group
partially agreed with the second; the amulet was not of this dimension, but was used
by whatever chased away the Gods. Thus the artifact was more powerful than the
Gods themselves! Furthermore, they warned, the Temple, statue and amulet were
placed in the valley to seal the portal and prevent the Gods' return. This group was, of
course, scoffed at by other scholars, as the implications of their theory was much too
disturbing to contemplate.
Over the ages, many thieves and mages have been drawn to the amulet and the
legends that surround it. All who have sought to possess it have failed. I, Werdna, the
most powerful Wizard of this Age, was always intrigued by speculations about the
wonders of the amulet, but was much too prudent to enter the Temple without the
proper safeguards. The most infuriating thing to me was no one knew so much as a
hint of what those safeguards might be. No one had any idea why each previous
attempt into that eldritch vale had met with disaster.
Then one day I was approached by a dealer of dubious antiques. Amongst the
obvious fakes and worthless old bones was a scroll that he claimed was over a
thousand years old. He assured me that no one had ever opened it, and demanded an
outrageous 500 g.p. for the item. Intrigued, I haggled him down to a mere 80 g.p. and
took the scroll back to my study. When I attempted to break open the seal, it popped
off in my hand! The scroll had been carefully opened and then gently resealed.
Making a note to summon a demon to deal with the scurrilous knave, I settled down
to study the scroll. It actually seemed quite old and was in very poor condition. The
71
Page 69

Return of Werdna
inscriptions were faded and of a tongue quite unknown to me. It took but a few
minutes for my arts to restore the lettering to legibility, but it took almost a year's
worth of intense research to translate the message.
Wonder of all wonders, the scroll appeared to be written by the apprentice to the
wizard who opened the gate that night so long ago. His mind seemed to have been
blasted by what he had seen, for only stray bits and snatches of thought were scribbled
on the scroll. He kept repeating over and over again something about the glowing eye
of THE GOD, which I took to mean the amulet. He also ranted about losing the
Mythril Gauntlets entrusted to his care, and groveling for forgiveness from someone or
something. The last part of the scroll was filled with dire prophecies and fears for his
own eternal torment.
72
Page 70

Return of Werdna
I was filled with hope. If I could correctly follow the clues this document provided,
the amulet and all its power could be mine. Now I regretted consigning the soul of
the antique dealer to Hell. In the hope that the gauntlets mentioned in the ancient
scroll were the means by which the amulet could be handled safely, my agents went
into search of them. After many months of seeking, they were able to procure but a
single glove. In my gratitude for their obtaining half of a pair of gloves, I only had
half of them executed. Well, one gauntlet would have to suffice.
Now armed, I set off for the misty vale in search of my destiny. Alas, mere hours
ahead of me, others entered the Temple and absconded with the amulet. At first, I
was so shocked to see it gone that I just slumped to the floor. Then I noticed what
appeared to be fresh footprints in the thick dust on the floor. I followed them for a
short while, but lost them on the hard ground outside the Temple. Racing back to my
tower, I used my scrying mirror to show me what had transpired outside the valley, for
even my skills could not penetrate that mist within the valley.
73
Page 71

Return of Werdna
Four men shrouded in black robes entered the valley. Shortly, three men left. (I had
seen no body, so what happened to the fourth man?) One of the men carried
something at arm's distance. For an instant I caught a glimpse of a bluish-grey
gleaming glove on the man's hand, then the mirror was blasted into a thousand
fragments. He also had one of the fabled gauntlets. The scroll was right! Now I
understood why it had been unsealed...that old fraud had made copies of the scroll!
I conjured up two of my favorite demons and sent them to pay the antique dealer's
soul a visit. They returned shortly, having "persuaded" the shade to talk. I learned
that although the dealer had made five copies of the scroll, he had sold only one of
them prior to his demonic dismemberment. The Mad Overlord, Trebor was the
owner of this copy. I gathered my creatures about me and cast a Malor to Trebor's
Castle. While my pets were keeping the staff quite busy, I cast a Mamorlis spell on
everyone in Trebor's audience room. It was quite humorous to see Trebor frozen in
abject terror upon his throne. He wore the mystic gauntlet upon his right hand and
dangling from that glove was a captured sun, so bright was its radiance. Carefully, I
put my gauntlet and plucked the amulet from the cradle of his glove. So as not to
seem ungrateful, I did leave Trebor one of the Damien stones I usually carried around
with me. They make such fine thoughtful gifts, heh, heh, heh! Calling my servants to
me, I cast another Malor back to my tower.
74
Page 72

Return of Werdna
At last, the amulet was mine!!! The power of a universe was at my disposal. Ah, so
drunk was I with visions of great and terrible deeds. What to do first? My tower
seemed unfitting for a would-be god. Something more splendid, more spacious.
Perhaps a split level...no, many levels...ten levels, that's it! Where to put this
magnificient edifice? Well, it should be somewhere away from prying eyes and
possible thieves, yet not to far from a food source for my hungry pets. Aha, I'll put it
under Trebor's nose, literally. I'll build it under his poor excuse for a Castle!
The very next day I started the major invocation. Everything went smoothly until I
keyed in to the amulet. I only opened a tiny conduit to it in order to provide more
power for my conjuring. What I got was a blast of raw energy that almost vaporized
me on the spot. It was a good thing that I had been working behind a shield. The
ground beneath the Castle was melted, churned, and twisted out like pulled taffy.
When everything cooled, I indeed had my ten level underground fortress maze,
although it was much wilder than I had envisioned. That was good, for the backlash
of that awesome force had completely obliterated my tower! More than somewhat
shaken, I Malored down to my new abode. I had barely tapped whatever lay within
the amulet, yet it had almost destroyed me. I vowed never to invoke it again until I
could discover how to channel its power.
75
Page 73

Return of Werdna
Five years passed without the amulet yielding up any of its secrets. Oh, I did discover
a few small details, like why a gauntlet was necessary. One evening I was preoccupied
with my studies, and I asked one of my many minions to fetch the amulet from
behind its darkly smoked glass case so I could examine it. Suddenly, I heard a pop and
a thud of the amulet dropping to the floor. My servant had failed to put on the
gauntlet. When it touched the amulet, the creature had just vanished. That could
have been me! After that I kept the gauntlet on the case, so I wouldn't forget again.
Finally, tragedy did strike, but of a different form. I was entertaining a Vampire Lord
and several of his leigemen, when the door to my study was kicked open and in burst
a wild-eyed team of adventurers bent on my destruction. I was too far away from the
amulet to reach it in time, and my pentagram for summoning monster allies was on
the other side of the room. I quickly gathered up my energy and began to cast the
awesome Tiltowait spell, while my guests rushed forward to my defense. Just as I
unleased that hellish fireball, I saw the Vampire Lord dissolved by a Zilwan spell! So,
they had a high mage also. What! They still stood! That's one very tough team.
Another Tiltowait should finish them, though. Before I could cast it, the leader of the
team stepped in under my outstretched arms and delivered a critical hit to me. As my
consciousness faded, I heard one of his men say, "Hawkwind, I have the amulet!
Trebor will be pleased." I cursed Trebor with my last breath that he might endure
endless torment. My final view was of their black banner bearing both a gold and a
silver dragon in bend, and of the amulet dangling from the end of a sword. The
darkness claimed me and I slept as unto death.
76
Page 74

Return of Werdna
Starting the Game
Return of Werdna is self-contained. You will not need to transfer any characters into
this game.
Start the program and soon you will see the title page, press [S] to (S)TART GAME.
In a few moments, the Save Game page will appear.
The Save Game page gives you a brief synopsis of the awful position you are in. YOU
ARE WERDNA, the infamous evil wizard, and life is not at all a bed of roses. Trapped
at the bottom of a prison dungeon, you must fight your way out. With any luck, you
will be able to wreak your revenge upon the do-gooder adventurers who have placed
you here. Most of all, you want to get your hands on your nemesis, Trebor!
To begin playing, press [P] to (P)LAY GAME, then select the saved game you wish to
resume playing by typing a number [1 - 8]. There are 8 Save Game slots to choose
from. If you want to start from the beginning of the game, press [ENTER]. Initially,
all 8 Save Game slots are empty, so if you select one, you will start at the beginning of
the game. Whenever you begin a new game, or go between levels in the Maze, you
may be asked for your Mordor Charge Card Authorization number. Refer to the
enclosed Mordor Charge booklet for the full procedure.
When playing, all of the options familiar to you from playing previous Wizardry
Scenarios are available. Some of the options have been extended and improved to
make play easier. For example, many menus have a default option you can select by
pressing [ENTER]. The default option has a " " symbol following its first letter
instead of a ")".
The most important change is in the (Q)UIT GAME option. In The Return of
Werdna, when you (Q)UIT GAME, you will have the opportunity to save your current
position in one of the 8 Save Game slots even if you are in the Maze! Yes, that's right,
you can now save your games while trudging around in the Maze. This lets you keep
up to 8 "milestones" in your play of the game available, just in case (heh heh) you
need to backtrack.
VERY IMPORTANT: Think of utilizing Save Game as a form of meditation. Since
you are taking a pause to regroup before tackling a difficult task, the players and the
guardians also take advantage of this interval to revitalize, while you are concentrating
on "The Big Picture". If these Save Games are used wisely, your pace will be
quickened; used imprudently, a creeping coin's pace will be faster!
Caveat Werdna
Don't assume that just because you are an expert Wizardry player, you know exactly
how things work. You don't. Trust us, even the Gods don't know everything. The
only thing you can trust is that we have spent several years making The Return of
Werdna a fiendish test for expert adventurers. If you finish even one of the several
possible endings (quite a dubious possibility), you will have earned the rank of Master
Adventurer. For those few whom consider themselves The Elite gameplayers, a
challenge: Find and finish the one really special ending, and you will have earned the
exalted title of "Grand Master Adventurer."
New Features
New releases of Wizardry products have many new enhancements. If you own an
older version of Proving Grounds of the Mad Overload or Knight of Diamonds, the
new style of the Wizardry Gaming System may be a little unfamiliar at first. The user
interface now uses multiple overlapping windows. Selections are still made by pressing
keys (in most cases, the traditional keys), and all of your options are presented in
77
Page 75

Return of Werdna
menus on the screen. The new features have been added to make the Wizardry
Gaming System easier and more fun to play.
The Maze display fills the entire screen.
You can toggle the various Maze windows (O)N and (O)FF. You can also flip the
(S)TATUS window on and off separately. This lets you see more of the Maze.
Patterns are now used to identify stairs, messages, special objects and darkness on
the maze floor and walls.
You only need to type the first few letters of a spell name in order to cast it. If
what you type is ambiguous you'll be asked to select the spell you wanted from a
list.
Many menus now have default choices you can select by pressing [ENTER]. If a
menu choice is a default, instead of a ")" after the first letter in the entry, you will
see a "return key".
It is now possible to Save Game while in the dungeon. Eight slots are available.
78
Page 76

Heart
of the
Maelstrom
79
Page 77

Heart of the Maelstrom
Wizardry General Program Conventions
User Interface
As you play Wizardry, you'll come across many menus which require different input to
get the job done. Often, you'll find only one key is needed.
However, sometimes you must press more than one key. Talking to interactive
characters, solving riddles, entering spells and typing a character's name are just a few
examples. If you need to press more than one key, Wizardry will tell you to press
[ENTER] when you are finished, or will simply continue by itself. On some
computers ENTER is called RETURN, so the command is noted in general by the
symbol ( ).
If you are asked to confirm a choice, the program will ask you something like "DO
YOU WANT TO DO THIS ( Y / N ) ?". In these cases, select the option you want and
press the appropriate key. If the question or a menu contains a "#", the program
expects a number key (1, 2, 3, etc.) as the answer.
Finally, in some menus you will see a graphic symbol that looks like a " " instead of
the ")" after the first letter of one of the options. The option with this character is the
default option, which you can select by pressing [ENTER].
How to use the Wizardry Program
Start the game and the Wizardry title screen will appear with the following options:
S)TART THE GAME M)AKE A SCENARIO
In almost all cases, when Wizardry asks you what you want to do, the program will
display a menu of options like those you see on your screen. To select an option,
simply press its first letter. Remember, Wizardry will always places a ")" after the first
letter of an option to remind you that it's all you need to select.
80
Page 78

Heart of the Maelstrom
Making a Scenario Diskette
This option is a left over from the good old days of floppy disks. Since you have
already installed the game from your CD-ROM on your hard drive, the game has
automatically created a Scenario Disc for you there. Therefore you can completey
ignore this menu entry. It no longer works.
Are you with me?
Up to this point, you have learned some Wizardry basics and should have returned to
the Wizardry title page. We're on our way into the Heart of the Maelstrom.
Starting the Game
Are you still looking at the Wizardry title screen? As long as you are... go ahead... do
it. Press [S] to start the game!
Soon you'll be smack-dab in the middle of the Castle, the hub of safe activity within
the Wizardry world. Here, you'll assemble your characters for combat, adventuring
and the like. They'll buy items, help friends and rest. Indeed, there are many
interesting places in...
81
Page 79

Heart of the Maelstrom
The Castle
Your adventurers spend their time in one of two places: the Castle or the Maze. Of
course, there is the cemetery, but let's not hope for that. So, before we rush off to
create your characters, let's take a look at the world they live in.
The Castle is a safe haven where your adventurers can train, rest and lick their wounds,
buy goods from the friendly shopkeeper, Boltac, or even be resurrected from the
grave. Inside the Castle, there are five locations which provide special services to the
Wizardry player and his or her characters. These are Gilgamesh's Tavern, Boltac's
Trading Post, the Temple of Cant, the Adventurer's Inn and the Training Grounds,
which is located at the Edge of Town.
82
Page 80

Heart of the Maelstrom
G)ilgamesh's Tavern is dim and smoke-filled from the haunch of a boar roasting
slowly over the fire. Small groups of adventurers talk in low tones around deeply
scarred wooden tables. Here is where you hope to find a team capable of
surviving the rough rigors of the Maze.
The A)dventurer's Inn offers several important services which your characters
will often require. To begin with, staying at the Inn overnight or longer can help
you recuperate from rough fights with monsters by restoring some or all of the
health you've lost in combat. Secondly, your characters may gain experience
levels to reflect the experience they have earned.
The T)emple of Cant is the first stop whenever a party brings back characters
who are dead, paralyzed, or similarly distressed. If the high Priests of the Temple
can do anything to help the poor devil you've hauled in, they will tell you what
tithe, or amount of gold, is required. But since the fees expected by the Temple
Priests are rather high these days, it is likely that the afflicted person may not be
able to afford the "donation," so be prepared to help him or her out.
B)oltac's Trading Post is the commercial center of the Castle. It is owned and
operated by a friendly dwarf named Boltac. Here the spoils from a hundred
forays find their dubious way to sale. This place has all the equipment you need
to make it your one-stop shopping center, and it is open around the clock for your
adventuring convenience.
The E)dge of Town is just a short walk through the Castle doors. While in The
Edge of Town, your characters may visit the Training Grounds, enter the Maze or
return to the Castle.
Press [E] now to see what The Edge of Town has to offer.
You'll see The M)aze option. This place has been the inspiration and end of
many a character. Here, adventurers go in search of experience, loot, and clues to
assist them in their missions. They'll meet other adventurers, monsters, tricks and
traps with their demise in mind. However, throughout the Maze there are many
gratifying experiences to be had as well. In the Wizardry world, this is the one
true place where your characters polish and perfect their art.
83
Page 81

Heart of the Maelstrom
While novices, your characters can only spend short amounts of time in the Maze.
One encounter could be their ruin! Nevertheless, as they become more proficient by
gaining levels, their expeditions will grow in length and they may explore the depths of
the Dungeon with swords held high.
The T)raining Grounds, located just outside the Castle, rings with the sounds of
swords clashing and timid battle cries. A closer inspection shows youngsters
hitting pells with wooden blades, and many of the battle cries turn into yelps
when their blades bounce back and hit them! It is here that you create new,
apprentice characters, and can inspect veteran characters, who are standing
around shouting encouragement (and other things) to the novices.
Press [T] now to go to the Training Grounds. Yes, it's finally time... your
characters await!
But wait... Are you with me?
So far, we've started the game, read about the places your characters can go and now
we're on our way to create them. If you're not in the Training Grounds now, just find
your place in this list, and follow it:
1. Start the program.
2. Press [S] to start the game.
3. Press [E] to go to the Edge of Town.
4. Press [T] to go to the Training Grounds.
5. You're here.
Creating a Character
Your Wizardry characters are unique individuals with strengths, weaknesses, and
special abilities just like you. Hundreds of separate pieces of information go into their
makeup, and each is influenced by their actions. They are honored to adventure under
your command, and look forward to the quest. Now you're ready to create those
fearsome warriors!
There are 4 options in the Training Grounds:
C)REATE A CHARACTER
I)NSPECT A CHARACTER
R)OSTER OF CHARACTERS
L)EAVE
Press [C] to create a new character. Next, Wizardry wants you to choose a name for
the character. Type the name in, and press [ENTER].
Now Wizardry asks if you want to put a password on the character. Type one in if
you need one. YOU have to remember the password! Most times you wouldn't need
a password, so just press [ENTER].
Now you must choose your character's Race. Simply press the letter associated with
your choice. Wizardry characters can belong to one of five races. Each race has
different strengths and weaknesses, most visibly reflected in the minimum ability
values (statistics) for each race. Race also affects a character's ability to find secret
doors and hidden items.
84
Page 82

Heart of the Maelstrom
• Humans excel at nothing, but have no particular weaknesses, except for a
decided lack of piety.
• Elves are intelligent and pious, but not very robust. They excel at intellectual
pursuits, and are excellent spell-casters.
• Dwarfs are strong and hardy. They love fine weapons and armor and delight in
a good fight.
• Gnomes are pious and agile, probably from praying under-ground during
earthquakes. Due to their ascetic traditions, they make excellent Priests.
• Hobbits are agile and very, very lucky. They are a happy-go-lucky people, and,
with the right training, become superb thieves.
Now it's time to select your character's alignment. Alignment describes your
character's general ethical outlook, and has an impact on the classes the character may
enter. Again, just press the letter associated with your choice.
• Good characters are really good. They go out of their way to help old ladies
cross the street.
• Neutral characters take life as it comes. They would help an old lady cross the
street if they were travelling in the same direction.
• Evil characters are not really evil when compared to some of the things they
fight in the Maze. They are self-centered, and always want to know "what's in it
for them." Evil characters help old ladies cross the street for a fee.
The next selection concerns the character's statistics. Statistics are basic measures of a
character's ability to do things. The higher the statistic, the better the character's
performance.
85
Page 83

Heart of the Maelstrom
• Strength affects your skill in combat.
• I.Q. and Piety influence your ability to cast and resist spells.
• Vitality affects your ability to withstand damage.
• Agility helps you avoid attacks and open treasure chests.
• Luck comes to your aid in many mysterious ways.
Your new character will qualify for admission into one or more of the eight classes (or
professions) on the basis of these statistics. Based upon your choice for race, a profile
set of minimum statistic values will be displayed. You now have a chance to influence
the profession of your character by distributing bonus points.
Note the special line that tells you how many bonus points you have to work with.
The number of bonus points is selected randomly each time you create a character.
You'll distribute these points among the various statistics. The [ENTER] key moves a
selection arrow down the list of statistics. When you have the arrow pointing to the
statistic you want to change, press [+] or [-] to add or subtract points. If you move the
arrow off the bottom of the list of statistics, it will pop up to the top of the list.
You can change the statistics any way you like, but you must use up all the bonus
points you've been given. Also, you cannot push a statistic below its original value, or
above 18.
When you make changes in the statistics, class options will begin to show. Each class
has different minimum statistic requirements, and when you have added enough bonus
points to the right statistics to qualify for a class, it will appear in one of the windows.
A character always belongs to only one class, but under certain circumstances may
change class. Each class has special requirements as to minimum abilities (statistics),
alignment and allowed possessions of its members.
The minimum statistic scores required and a description of the classes are as follows:
86
Page 84

Heart of the Maelstrom
• Fighters need 11 strength.
• Mages need 11 I.Q.
• Priests need 11 piety and may not be of neutral alignment.
• Thieves need 11 agility and may not be good.
• Bishops need 12 I.Q. and 12 piety and may not be neutral.
• Samurai need 15 strength, 11 I.Q., 10 piety, 14 vitality and 10 agility and may
not be evil.
• Lords need 15 strength, 12 I.Q., 12 piety, 15 vitality, 14 agility and 15 luck. They
must be good.
• Ninjas need 17 in all their statistics, and can only be evil.
The four basic classes are:
Fighter: The basic person-at-arms. Fighters have high hit points, can use almost
any armor and weapon, and relish their role as shock-troops. They may be of any
alignment, but can cast no spells.
Mage: The sorcerer. Mages have poor hit points, can only use a dreadfully
limited amount of weapons, and can wear no armor except for robes! They can
cast Mage spells, including the dreaded Tiltowait, the summoning Socordi and the
unlocking Desto. They may be of any alignment.
Priest: The holy one. Priests have fairly high hit points, but cannot fight as well
as Fighters, and must use specially consecrated weapons, such as maces and flails,
and can wear only light body armor. They can cast Priest spells including the lifesaving Kadorto, the wishful Ihalon and the monster-banishing Mogato. Priests
may not be of neutral alignment.
Thief: The artful-dodger. Thieves have average hit points. Their weapons are
limited to daggers, short swords, and bows; they can wear leather armor and use a
shield. Thieves are very good at circumventing the noxious treasure chest traps
which often lie between a party of adventurers and their hard-earned loot, and
have a knack for opening the many locked doors found in the Maze. Additionally,
87
Page 85

Heart of the Maelstrom
thieves may Hide during combat, and once hidden, they may Ambush a monster
in the following round! Thieves are also specialists in the divine art of pickpocketing the many creatures to be found in the Maze. Lastly, they may not be of
good alignment.
The four elite classes are:
Bishop: A combination of Priest and Mage, with some advantages and
disadvantages of both. Bishops have average hit points, can wear chain armor,
and use Priests' weapons. They can cast both Mage and Priest spells, and are
capable of identifying unknown items the party finds in the Maze. Like Priests,
Bishops may not be neutral.
Samurai: These folk are fantastic warriors, and can use most Fighter weapons
and armor. They start out life with more hit points than Fighters, though in the
long-run, a fighter will usually end up with more hit points. At the fourth level of
ability, Samurai slowly begin to learn Mage spells. The strict code of Bushido
prevents Samurai from being of evil alignment.
Lord: A combination of Fighter and Priest. They have the hit points and abilities
of Fighters, but at the fourth level of ability they gain the ability to cast Priest
spells and to dispel. Lords must be of good alignment.
Ninja: A super-human fighting machine. Ninjas can use the same weapons and
armor as a Samurai, but work best without any! When fighting with their bare
hands they can wreak havoc and destruction, sometimes killing the strongest
opponent with a single blow. As long as they disdain armor, their great training
gives them lower and lower armor class as they reach higher and higher levels of
ability. Ninjas earn hit points as does a Thief, and learn no spells. They may Hide
during combat, disarm traps and practice all the other arts of a Thief, too. Finally,
they must be evil.
Once you've allocated all the bonus points and qualify for a class that you want, press
the [ESC] key to signal that you are done. Then, if you like the character, press [Y] to
store him or her in the roster, and you will be returned to the main Training Grounds
menu.
88
Page 86

Heart of the Maelstrom
Important Points to Consider When Creating Your Party
Before you go charging off, filling the universe with alter egos of yourself, keep in
mind some important facts:
A team can consist of up to six members, and any less increases the chances of
disaster. There are words for "Lone heroes battling against incredible odds." These
words are "rest in peace." Developing a well balanced team with diverse talents is one
of the major keys to success.
Decide which alignment you prefer your party to have before you start generating
characters. Evil cannot play with good, but neutrals may play with either. Some
character types are only available to one alignment or the other, so select the whole
makeup of your team first to avoid disappointments such as finally generating a
fantastic Lord, only to discover that he/she cannot join the rest of your evil team!
Hello again... Are you with me?
Well, you've just created your first character (maybe you've already created ten). If
not, it's easy to catch up.
1. Go to the Edge of Town from the Castle by pressing [E].
2. Go to the Training Grounds by pressing [T].
3. In the Training Grounds press [C] to create a character.
4. Enter the character's name and password if you want one.
5. Follow the on-screen menus to select your character's race and alignment.
6. Distribute your character's bonus points among the statistics.
7. When the bonus points are used up, press [ESC], and select a class for your
character.
8. You will now be asked if you want to keep the character. If you do, press [Y].
9. You're here.
Other Training Grounds Options
The R)oster of Characters option will display all of the characters available, and
show you whether they are alive or dead, and in the Castle or out on expeditions.
If you want to see your roster of characters, press [R].
The I)nspect a Character option lets you look at your character in detail, and
perform character-specific "housekeeping" actions.
The L)eave option will simply return you to the Castle.
Inspecting a Character in the Training Grounds
Press [I] at the main Training Grounds prompt to Inspect a character. Next, you
will see a list of possible things to do to your character:
I)nspect shows the character's vital statistics, weapons, armor, spell books, and
any special goodies he or she has found so far. You can also inspect your
character in Gilgamesh's Tavern. We'll cover the character's inspection in more
detail there.
D)elete allows you to retire old, world-weary adventurers, but will ask you again,
just to make sure. Retired characters pack up all their belongings, go to Club Wiz
and are deleted forever from the game.
89
Page 87

Heart of the Maelstrom
C)hange Class gives characters the option of changing their professions. When
you change class, you are entering the new class as a level one character.
Therefore, changing class has the following side-effects:
* Your characters' statistics drop to the minimum for the race.
* Your experience points drop to zero.
* All your equipment will remain in your possession, but your items will be
unequipped. Since you are changing class, you may not be able to use them
anymore.
* You will retain knowledge of any spells you already know, and you always get
one spell point per spell in your spell books. However, you lose the extra spell
points you got for being a member of your previous class. Though you may learn
new spells and get new bonuses for being a member of your new class, it is likely
that, at least at first, you will have fewer spell points to work with. If you know at
least one spell of a particular type and level, then you will eventually learn all the
spells of that type and level, even if your new class doesn't learn spells of that
type.
A)lter Password changes the character's password in case of security problems
(younger sibling, devious friends, parents who hate to be shown up). You must
know a character's current password in order to change it. There is no way to
Alter a password without knowing the current password.
L)eave will return you to the Castle, and that's where we want to go! Press
[ENTER] or [L], and we'll be on our way.
Just checking... are you here?
We've just left the Training Grounds, entered the Castle and are on our way to
Gilgamesh's Tavern to check out your character(s). If you're not already here, follow
these steps:
1. First of all, you'll need at least one character to go on this "manual
expedition." If you haven't created a character yet, return to the Training
Grounds to create one.
2. Get to the Castle. From the Training Grounds' main menu, press [ENTER] or
[L].
3. Are you in the Castle? Good. You're here.
90
Page 88

Heart of the Maelstrom
Gilgamesh's Tavern
Gilgamesh's is where you assemble your party. Press [G] now to enter the Tavern.
Gilgamesh's menu provides you with several options:
A)dd lets you add characters to your party. You will be shown a list of all the
characters compatible with the other members (if any) of your party. You can
select one by pressing the letter associated with the character. As soon as you
select someone who is not neutral, the alignment of the team is chosen, and
disappointed incompatibles will wander back to their drinks. Press [A] now and
select your party.
R)emove lets you remove a character from the party.
#)Inspect lets you look at the current status of a character.
D)ivvy Gold pools the gold belonging to the party, and then evenly splits it up
between the party members.
L)eave exits the Tavern.
If you decide to visit the Training Grounds once a party has been formed, the party
will disband (separate) automatically. You will have to go back to the Tavern and
reassemble them.
91
Page 89

Heart of the Maelstrom
Inspecting a Character
When you are in the Tavern, #)Inspect lets you inspect a character in the party by
typing the number key associated with that character. From the main menu of the
Tavern, press the [#] of the character you wish to inspect now.
You're already familiar with the five pieces of information found at the top of your
character's inspection; you selected them in the Training Grounds. Your character's
name and level appear first. Next is your character's alignment, class and race. On the
left side of the screen, under your character's name, you'll find his or her statistics, too.
So let's take a look at those other characteristics.
Levels (L). Gaining levels is perhaps one of the most wonderful and competitive
things that Wizardry characters do. Not to be confused with the levels (floors) of
the Maze, a character's level represents their total experiences within the
Dungeon. If you've just created a character, it will be a level one adventurer.
When your characters gather enough experience points, they will gain a level. It's
basically a growing process just like yours. Simply, consider it this way. If you are
18, pretend that you're level 18... you've had 18 years of experience.
Gold is simply the amount of loot your character has accumulated. When your
character begins life, you will find the satchel is empty... not a cent! As your
character explores the Maze, however, great riches in gold can be found (or
stolen). As the loot accumulates, you may use it to purchase better items,
lodging, and perhaps occasionally acquire the services of a High Priest to cure,
heal, or even resurrect a friend.
Swimming ability (SWIM) represents your character's ability to swim in the
many pools which dot the Maze. The higher the ability, the deeper your
character can swim. For example, if your character's swimming ability is 2,
he/she can swim safely to level B of a pool. Remember, at first you won't have a
party of Olympic champions... in fact they may get in over their heads!
Sometimes characters may drown if they dive too deeply.
Experience Points (E.P.) are the numerical expression of your character's past
achievements. When your characters defeat a troop of monsters in the Maze,
they will be awarded experience points to commemorate their success. As
experience points build up, your characters will gain levels.
92
Page 90

Heart of the Maelstrom
Age is simply how old your character is. After much adventure, your character
usually rests up in the Adventurer's Inn. Here, the characters may spend weeks or
even years to heal themselves! As your characters become older, they grow
feeble... this happens around 50.
Marks represent the number of monsters you have sent to the Grim Reaper.
Once again, Wizardry characters, at least the fighting ones, tend to compete for
the highest number of marks as it represents their worth to the party. It's a facet
of your characters that you'll come to take pride in, and is a sign of their
individual achievements.
RIP, of course, stands for "rest in peace," and portrays the number of times your
character has been delivered to the Grim Reaper! With the many ghoolies in the
Maze, it is unlikely that this characteristic will stay at zero, but if it does, consider
yourself a great commander!
Armor Class (AC) is a measure of how well protected your character is. Unlike
other measures in this game, the lower your character's armor class, the better.
For example, bare skin is AC 10. A Sherman tank is about AC -10. Eventually, as
your character finds or buys better equipment, the armor class will decrease.
Status describes what state your character is in. Not New York or California, but
a physical state of being. Most of the time your characters will be OK; in this
case, Wizardry will either show you the character's hit points when in full health,
or simply print "OK." However, they may be Asleep, Afraid, Paralyzed, Poisoned,
Stoned, Out, Dead, Ashes or Lost forever, to name a few.
Characters who are marked Out are lost somewhere in the Maze! Their status
may become OUT due to any of three causes: Obliteration (everyone was killed),
Starvation (Power failure or turning off the computer) or Vacation (using the
QUIT option while in the Maze.) OUT characters can be retrieved through the
"Restart an Out Party" option, explained in the Utilities section, or you may send
a rescue party in search of the character.
Hit Points (HP) show the exact amount of damage your character can endure
before death. For example, let's say your character had 10 hit points when in full
health. In the Maze, you encounter a monster who bashes the character one time
for eight points of damage! Your character's description would resemble this:
Character Name HP Status
Mr. Adventure 2 10
93
Page 91

Heart of the Maelstrom
Now your character has only two hit points left! If hit again for two or more points,
your character will die. But don't despair, death doesn't have to be final in Wizardry.
Mage and Priest (PRST) spell points are the next items in your character's inspection.
You'll see a series of seven zeros for both the Mage and Priest spells on your screen.
Your character may have higher numbers depending on his or her level and class.
Spells are magical formulas that allow the caster to bend the physical laws of the
universe. There are two basic categories of spells: Mage and Priest. Characters of the
magical variety must learn these spells through constant study and experience, and
will harvest spells as they gain levels.
Within each category, Priest and Mage, there are 7 levels of spells, from weak level 1
spells to the powerful (to put it mildly) level 7 spells. For a character to be able to cast
a particular spell, he or she needs to have that spell in the spell book, and a spell point
with which to cast it. Each number represents the amount of spell points a character
has in that level and the number of spells the character may cast.
So, in order to cast a Halito, the spell must be in the character's book and there must
be a first level spell point available. When a spell is cast, the character loses a spell
point from the appropriate category and level. Eventually, especially after a grueling
battle, the character may have no spell points left! Weak and weary, the spell-caster
must seek rest in the Castle, thereby regaining the spell points, or know the
whereabouts of a magical pool that can replenish some of the spell points with a quick
swim.
For every spell you know, you are granted at least one spell point with which to cast it.
If you are currently a member of a spell-casting class, you may gain extra points based
upon the experience level you have attained. You can never have more than 9 points in
any category and level. If you know 3 spells of a certain category and level, and have 3
points of that category and level, you could cast one spell three times, or each of the
spells once, or any combination.
If your characters later change their class, they will retain the knowledge of the spells
they have learned so far, but won't learn new spells unless their new class also teaches
spells. There is a minor exception to this rule. If a character knows at least one spell
of a particular category and level, then he or she will eventually learn all the spells of
that category and level, even if he or she changes to a class that doesn't learn spells.
Equipment, or items, refers to the helms, armor, swords and the like owned by your
characters. Fresh from their training, your characters will have only the petty weapons
and armor provided by the Training Master. Because of this, gathering and
maintaining the best possible set of items is a major pastime for Wizardry adventurers.
Good items can make the difference between life and death! The number and variety
of items found in Maze may be a little bewildering at first, but there are some
guidelines to follow...
Equipment Guidelines
First of all, not all items may be used by every character. Some items may be used
only by specific character classes. You will learn what works by practice and
experience.
Also, some items have an alignment, just as your characters do. If a character equips
an item that has a different alignment, the item may seriously impair him or her. In
addition, it will become cursed.
A cursed item is any item that cannot be voluntarily unequipped. If you equip such
an item, you will be "cursed to wear it."
94
Page 92

Heart of the Maelstrom
* Cursed items are not always bad for you. Some of the better items in the game
like to "stick around."
* One safe way to rid a character of a cursed item is to pay to have it removed at
Boltac's Trading Post.
Some items may be used to cast spells. Each time you use the item to cast a spell,
there is a chance it will break.
Items may affect a character even though they are not equipped; they can do things
just because they are being carried around. These type of items may carry certain
charms or benefits. For example, an item might offer a player spell resistance, or a
clove of garlic might fend off vampires in the maze.
Lastly, certain magic items have special powers which you can invoke. Whenever you
equip a player who is carrying an item of this type, you will be asked if you wish to
invoke its power. You do not need equip the item to invoke it.
Other Character Inspection Options
Additional options available to you in a character's inspection are located on the
bottom of the inspection's window.
R)ead offers you the chance to glance at your character's spell books. Press [R] to
read the character's books, then select the category of book you want to read. All
the spells he or she has learned so far will be displayed. Refer to the back of the
manual for detailed descriptions on what each spell is and what it does.
P)ool Gold moves all the party's gold to the character being inspected. When you
want to pool your character's gold, press [P]. If you later need to give back some
gold to other party members, choose the D)ivvy Gold option while in the main
menu of Gilgamesh's Tavern, or simply Trade while inspecting a character.
I)dentify allows Bishops to attempt to identify an unknown item. The higher the
level of the Bishop, the better the chances of identifying an item. If they touch
the item they are attempting to identify, they may become afraid depending on
certain protections on the item in question. Some unknown items will not
95
Page 93

Heart of the Maelstrom
become "known" until identified by a Bishop of a certain level. Lastly, there is a
chance they will be forced to equip it; if it is cursed, they may be in trouble!
D)rop lets you drop any item your character may be holding on to the dusty floor of
the Maze or the muddy streets of the Castle. If you need to drop and item, press [D].
Dropped items are removed from your character's possession, and can't be picked back
up. If you should later discover that you need this item, you'll have to go find another.
E)quip lets you select the items your character is to wear. For each type of item
(Weapon, Armor, Shield, etc.) you will be shown a list of what items of that type
you have and then you're invited to select the one your character will use.
Weapons and armor you possess, but have not equipped, will not be of any use to
you in combat. You can unequip an item by simply choosing no item of that type
when you equip. You do this by pressing [ENTER] instead of a number.
In your character's inspection, you will notice that there is a space between the item
number and its name. This means that you have not equipped your items. Press [E]
now to do so.
When you have finished, you will notice one of the following next to the item:
No symbol (a blank space) means that the item is not equipped.
* indicates that the item is equipped.
# reminds you that the item cannot be equipped by that class of character. For
example, Priests cannot use edged weapons, and Thieves cannot wear chain mail.
? tells you that the item is not identified, which means you don't know exactly
what it is.
- warns you that the item is cursed.
You will need to repeat the equipping process for each of your characters. You may
equip each of your characters individually while inspecting them, or you may equip
the entire party when in Camp by selecting the Equip option.
T)rade allows the characters to exchange gold and items amongst themselves. To
trade, first press the number of the character with whom you wish to trade.
Then type the amount of gold, if any, that you want to transfer. Next, if you
96
Page 94

Heart of the Maelstrom
wish to trade an item, press the number of the item you want to trade. When
you have finished trading items, press [ENTER]. If you don't wish to trade any
gold, you can press [ENTER] instead of entering "0" as the amount. An item
must be unequipped before it can be traded.
L)eave ends the inspection of your character. Press [L] now to return to
Gilgamesh's main menu, and [L] again to return to the main menu of the Castle.
While you are on a foray in the Maze, you can also inspect your characters by
going to Camp. When you do so, two extra options are available.
S)pell casts spells. The spell must be in your spell books and you must have an
appropriate spell point available in order to cast it. If the spell is one of healing,
you will be asked upon which member of the party you wish the spell cast. Some
spells can only be cast while in combat with monsters. In the list of spells at the
back of the manual, if the "CAST WHEN" category says Camp or Anytime, you
can cast it in Camp.
U)se allows you use a special item. The item may cast a spell such as a potion
bought at Boltac's, or it may have a particular function like reducing your
character's age. Anyone can use an item; you don't need to know the spell it
casts, and you don't need a spell point to cast it. This means that Fighters can
keep Dios potions around to cure themselves. As with casting spells normally,
you can't use some spells in Camp.
Each magical item has an unknown number of charges, and may break after
being used. If it does, it may appear in your list of items as a Broken Item. You
may drop these to create more room for new items you've found in the Maze.
Depending on where you were when you inspected your character, some of the
options may not be available:
From the Training Grounds, you may only R)ead your spell books or L)eave.
From Gilgamesh's Tavern, you may do everything but cast a S)pell or U)se an
item.
97
Page 95
Heart of the Maelstrom
When you are in the Maze and have Camped, you may do everything.
How are you doing?
Yes, we've covered a lot of material. Just in Gilgamesh's, you've read about your
character's traits, equipment and gold. You have also equipped a character with his or
her items. We've just left Gilgamesh's,
and are in the main menu of the Castle
on our way to Boltac's Trading Post. If
you're still in Gilgamesh's, here's what
you want to do.
1. Leave your character's inspection if
you haven't done so. Pressing [ENTER]
or [L] will get you to the main menu of
Gilgamesh's.
2. Press [ENTER] or [L] to leave
Gilgamesh's.
3. You're here.
Boltac's Trading Post
Boltac's is the Castle shop. Press [B]
now to enter the establishment.
Immediately, Boltac will ask which of
your characters wishes to be served.
Once you have selected a character, the
shopping display will appear. You can
Buy, Sell or Identify items, Uncurse
cursed items, Pool Gold from all party
members into your possession or Leave
the Shop. Your newly created
characters haven't a gold piece among
them, so you'll only be allowed to look
at Boltac's wares. Eventually, you'll accumulate some gold and get around to...
B)uying Items
To buy an item or to browse through his wares, press [B] for B)uy). Go ahead, let's
take a look. Boltac has an enviable inventory, but he may sometimes run out of
certain items. Other items won't turn up in the Trading Post unless someone brings
them back from the depths of the Maze and sells them to the proprietor. So the
inventory list may change in length and content as the game progresses. Once you
start browsing, you may press [F] for F)orward or [B] for B)ackward until you find the
screen with the item you want. You'll be told how much it costs and whether the
character can use it. If you still want it, press [P] to P)urchase, then indicate the item
you want by number.
When viewing the items Boltac has for sale, you will see the type of item being offered
(i.e. weapon, armor, gauntlets). In the case of weapons, the range of the weapon will
be shown enclosed in parentheses, where the four ranges are: Close (C), Short (S),
Medium (M), and Long (L). Range weapons are described in more detail in the
Combat section of the manual.
98
Page 96

Heart of the Maelstrom
S)elling Items
Selling off excess equipment is a good way to raise cash for poverished expeditions. Be
aware, however, that all shopkeepers must make profit on every transaction to keep
themselves in business. This means that Boltac won't buy items back at the same price
you paid for them.
To sell an item, press [S]. You will see a list of your items, along with the price Boltac
will pay. The equipment your characters start with is worthless to Boltac... less than a
gold piece for a dozen! However, when your party aquires something of worth, select
the item you wish to sell off by pressing its number. You cannot sell an item that is
cursed or which needs to be identified. If you attempt to sell an item that is equipped,
you will be asked if that's what you really want to do.
R)emoving Curses
Cursed items picked up in the Maze are very uncooperative and they stick like glue to
anyone who equips them. If you manage to get back to the Trading Post in one piece
carrying such an item, Boltac can uncurse it for you. When you require this service,
simply press [U]. You will see a display similar to the one used when you sell an item.
Select the cursed item by pressing its number, and if you have the cash, Boltac will
take it off your hands.
Note: Boltac will take the item away from you; you will not be left with an
uncursed version of it.
I)dentifying Items
When you first find certain items in the Maze you cannot be certain of their exact
properties. The names of these items describe only their appearance. Whenever
possible, have such items identified before you equip yourself with them in case they
turn out to be cursed.
One of the special powers of the Bishop is the ability to identify items. However,
there are some risks associated with having a Bishop identify an item. If the Bishop is
not very careful, he or she may touch the item by accident. This will cause the item to
be equipped, and if the item is cursed, the hapless Bishop will be forced to use it. For
this reason, Boltac has begun to perform such inspections himself. Needless to say,
99
Page 97

Heart of the Maelstrom
Boltac exacts a fee for this service. The procedure for identifying items is similar to
that of uncursing them, except that you press [I] to identify instead.
P)ooling Gold
Since few adventurers can qualify for a Dungeon Express Card, the Trading Post features a
Pool Gold option to help bring big-ticket items within reach of those on a limited budget.
This option transfers the gold possessed by party members to the person shopping.
L)eaving Boltac's
To leave any of Boltac's menus, simply press [ENTER] or [L]. Your party will then
return to the previous menu. You may continue to press these keys until you have
reached the Castle or your desired menu within Boltac's.
CAUTION: After leaving the store, you will probably be delighted with your
shiny new items. But be aware that merely owning an item does not enable you
to use it in the Maze. Only those items which you have equipped can be called
into play during combat. The process of equipping items was explained in the
section on Gilgamesh's Tavern.
The Temple of Cant
Whenever a party brings back characters who are dead, paralyzed, afraid, or similarly
distressed, they can be carried to the Temple of Cant.
Enter the Temple by pressing [T] at the main Castle menu. If you're just beginning
your adventure (your party hasn't been to the Maze yet) no one will require the
services the Temple provides... your characters aren't "distressed." However you may
still view their establishment.
When you enter, you will be shown a list of the characters the Temple can help and
two options:
H)ELP SOMEONE N)EXT PAGE
Select [H] to help a distraught character, and then press the letter associated with that
character. The Temple Priests will tell you what tithe is required. Choose which
character in the party will pay the tithe. Should that character not have enough gold,
the party's gold will be kicked into the fund. Unless the victim is dead or blown to
ashes (worse than just being merely dead), the healing arts of the Temple practitioners
are assured of success. In those other more serious cases, there is a chance that the
best efforts of the Priests will be to no avail!
A character with a good vitality rating has a good chance of being helped, but old,
infirm characters may be in big trouble. Dead characters who fail to be raised from
the dead are reduced to ashes. Even in such depressing circumstances though, there is
still hope; for a larger tithe, it is sometimes possible to resurrect a person even from an
ashen mess - but if this attempt fails, the character is lost forever and cannot be
restored by any means!
Anyone brought back from the dead will have but a single hit point and should limp
post-haste to the Adventurer's Inn. Those resurrected from their ashes will have all
their hit points restored (for all that money, you should get something free.)
The Temple also provides resurrection services for Non-Player Characters (creatures
you meet in the Maze) that you have dispatched to their ancestors. This is the price
that is paid for such acts toward characters, more often than not, necessary for
completion of the game.
100
Page 98

Heart of the Maelstrom
The Adventurer's Inn
The Inn is where characters recover lost hit points and learn whether they have made
the next level of experience. Enter the Inn by pressing [A] at the main Castle menu.
Next, select a character who needs some rest & relaxation (R&R) in the same way you
would for the Trading Post. Once you've checked a character into the Inn, you'll be
able to look over the types of rooms available. The more expensive rooms allow
faster, but less economical, healing of wounds.
Note: Age is important in Wizardry. Beyond the age of 50, you will become
more and more feeble until eventually you will not be good for much of anything
except chatting about the "good old days" before the invention of the wheel.
Therefore, you do not want to spend too many weeks in bed.
As you'll soon discover, certain spells can also be thrown on your characters which will
restore hit points without the trouble, expense and wasted time of a visit to the Inn.
But the Inn provides such medical services, even to those without spell-casting friends,
as long as you have the cash. Select one of the room types. All but the Stables restore
hit points, for a weekly fee. Need more money? You can also Pool Gold from your
party. This strips all the other party members of all their gold and gives it to the
character in the Inn. To pool your party's gold, simply press [P].
Once you have chosen a room, you will stay there until you are either fully healed or
have run out of money. A display will count up your hit points and count down your
bank balance. If the latter becomes alarming, you can check out early by pressing the
[space-bar].
101
Page 99

Heart of the Maelstrom
Making a Level in the Adventurer's Inn
After any stay at the Inn, a check will be made to see if you have made a level.
Making a level is a joyous occasion. You'll see a declaration that you have attained the
next level of experience and get all the news about any changes to your character's
statistics; spell-casting characters may learn new spells. At the end of this sequence,
you'll learn how many experience points are needed to reach the next experience level.
There's a chance you might qualify for more than one level per visit to the Inn. This
could happen if it's been a long time since you've had a good night's rest. If you
suspect this might be the case, stay an extra night in the stables. Of course, if the
character doesn't gain a level, you'll be told how many more experience points are
needed before a level is attained.
To leave the Adventurer's Inn, press [ENTER] or [L].
Are you still with me?
We're on our way out of the Castle now to The Edge of Town. So far, you have
visited the Adventurer's Inn, Gilgamesh's Tavern, The Temple of Cant and Boltac's
Trading Post. You and your party should be in the main menu of the Castle. To get
here:
1. If you're in any of the Castle businesses, press [ENTER] or [L] until you reach
the Castle menu.
2. That's all it takes!
The Edge of Town
The Edge of Town lets you go to other areas outside the central Castle: the T)raining
Grounds, the M)aze, the U)tilities, and L)eave Game. From the Castle's main menu,
press [E] to go to The Edge of Town.
From the screams of terror and loud munching noises issuing from the entrance to the
M)aze, this is undoubtedly where your party has to go when it is ready to begin
adventuring. To enter the Maze, you need only press [M].
102
Page 100

Heart of the Maelstrom
L)eave Game by pressing [L] is what you do when you are finished playing a session of
Wizardry. NEVER, EVER, turn off your computer without using the L)eave Game
option.
The U)tilities
From the Edge of Town menu, press [U] to enter the Utilities. Here, you have the
ability to do things to the characters outside of the actual adventure. The most
important option in the Utilities is Move Characters.
M)ove Characters
With this option you can move your characters to Heart Of The Maelstrom from any
other Wizardry scenario, except The Return Of Werdna. For the exact intructions,
please take a look at the enclosed reference card.
C)hange Name
If you want to give a character a new name, press [C] in the main menu of the
Utilities. Now select by letter the character whose name you wish to change. Then
type in the new name.
R)estart an Out Party
When a character or a party is Out on an expedition, you may join them in the Maze
by pressing [R]. You will see a list of characters who are currently waiting (for you) in
the Maze. Select, by letter, the name of any character that is in an Out party. This
character will become your party's leader, and a star will appear by his or her name.
Wizardry will then show you a list of characters at the same location as your leader.
Select the other members of your party in the order you wish them to appear, then
press [ENTER] to Restart the Party, or [ESC] to exit the option.
You will begin play at the same spot in the Dungeon where you left off. This option is
usually used when you Quit an expedition while still in the Maze. The Quit option is
described in the section on Adventuring.
L)eave the Utilities returns you to the Castle.
103
 Loading...