

Page 1
Instructions for useRotor FA-45-48-11, FA-45-20-17, FA-45-6-30seeon p.Fig.Tab.p.
English (EN)Instructions for use
Instructions for use
Rotor FA-45-48-11, FA-45-20-17, FA-45-6-30
English (EN)
This document supplements the operation manual Centrifuge 5804/5804 R/5810/5810 R and
does not replace it. Therefore, please also read the operating manual before starting up the
rotors for the first time. You can find the current version on the Internet at
www.eppendorf.com
.
1 Product description
The rotors FA-45-48-11, FA-45-20-17 and FA-45-6-30 are aerosol-tight fixed-angle rotors for
Centrifuge 5804/5804 R/5810/5810 R.
Rotor Maximum capacity
FA-45-48-11 48 micro test tubes with a volume of 2,0 mL
FA-45-20-17 20 micro test tubes with a volume of 5,0 mL
FA-45-6-30 6 conical tubes with a volume of 50 mL/15 mL
2Safety notes
WARNING! Risk to health due to limited aerosol tightness with incorrect rotor/
rotor lid combination.
Aerosol-tight centrifugation is guaranteed only if the rotors and rotor lids intended for
this purpose are used. The designation of aerosol-tight fixed-angle rotors always
starts with FA.The aerosol-tight rotors and rotor lids of this centrifuge are additionally
marked with a red ring on the rotor and a red rotor lid screw.
For aerosol-tight centrifugation, always simultaneously use rotors and rotor lids
which are marked as aerosol-tight in the centrifuge intended for the corresponding
purpose. The details specifying in which centrifuge you may use the aerosol-tight
rotors and rotor lids can be found on the rotor and, beginning from production
date of October 2003, on the upper side of the rotor lid.
Only use aerosol-tight rotor lids in combination with rotors which are marked on
the rotor lid.
WARNING! Damage to health as a result of limited aerosol tightness and incorrect
usage.
Autoclaving, mechanical stresses and contamination by chemicals or other aggressive
solvents can impair the aerosol-tightness of the rotors and rotor lids.
Check the integrity of the seals of the aerosol-tight rotor lids or caps before each
use.
Only use aerosol-tight rotor lids or caps if the seals are undamaged and clean.
Lightly grease the threads of the rotor lid screw with pivot grease after every
proper autoclaving (121 °C, 20 min.) (int. order no. Int. 5810 350.050, North
America 022634330).
Replace aerosol-tight rotor lids and caps after 50 autoclaving cycles.
For QuickLock rotor lids, the seal must be replaced after 50 autoclaving cycles.
Never store aerosol-tight rotors or buckets closed.
Page 2
Instructions for use
Rotor FA-45-48-11, FA-45-20-17, FA-45-6-30
2
English (EN)
NOTICE! The rotor lid screw may become loose if it is improperly handled.
The lock on aerosol-tight QuickLock rotor lids may become loose if it is used to hold
the rotor.
Never hold or transport the locked rotor on the rotor lid screw.
Always pick up the rotor using both hands.
3Operation
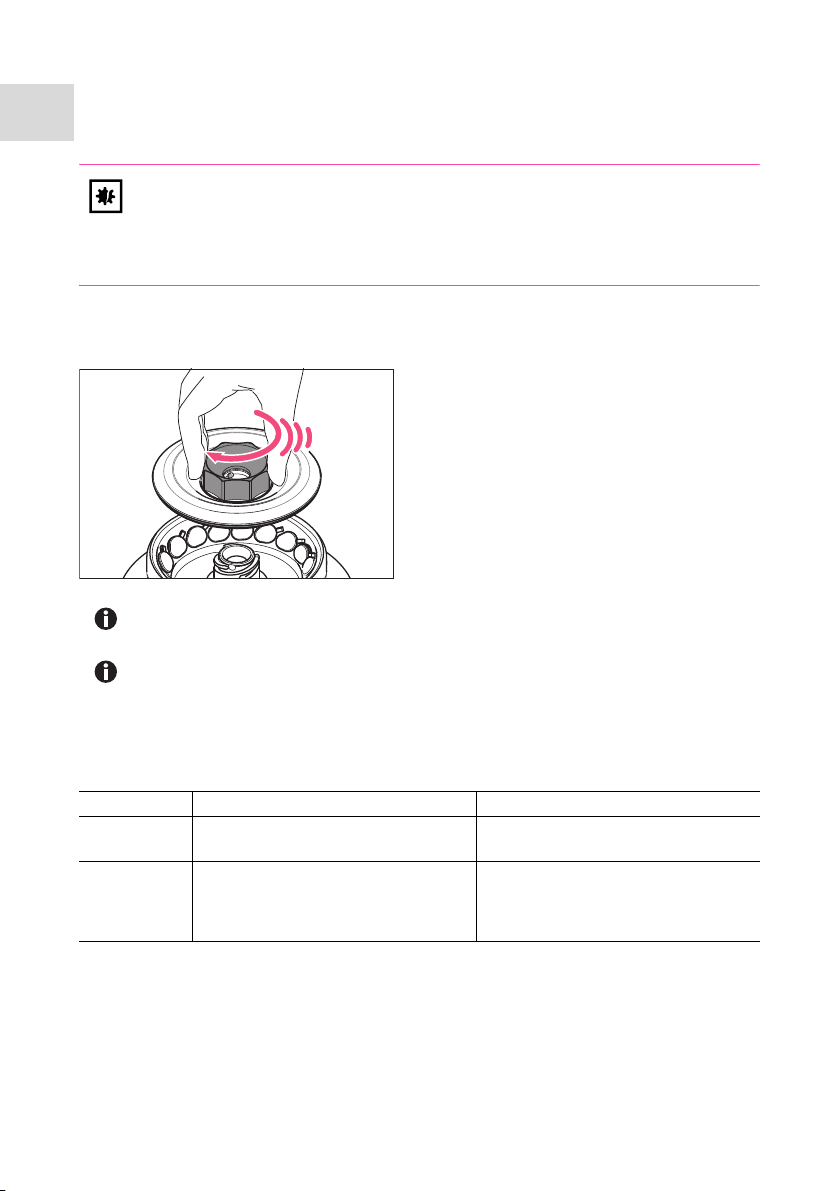
3.1 Closing the QuickLock rotor lid
1. Check that the outer sealing ring is seated
correctly in the groove.
2. Vertically fit the rotor lid on the rotor.
3. To lock the rotor, turn the red rotor lid
screw clockwise, beyond an audible click
until the stop is reached.
The rotor is not closed properly until an audible click is heard!
If the closing system is difficult to operate apply a thin layer of pivot grease to the
pins in the rotor lid screw.
3.2 Retrofitting older centrifuges You can view the software version on your device’s display shortly after switching on the
device. Retrofitting may only be carried out by a trained service technician. If you require
retrofitting, please contact your dealer.
Rotor Operation possible without retrofit Retrofit of older devices possible
FA-45-48-11
FA-45-20-17
FA-45-6-30 from serial number 60 000 onwards 5804/5804 R/5810:
from software version 8.4 onwards from software version 7.0 onwards
from serial number 10 000 onwards
5810 R:
from serial number 12 000 onwards
Page 3

Rotor FA-45-48-11, FA-45-20-17, FA-45-6-30
Instructions for use
English (EN)
4 Replacing the rotor lid seal
4.1 Removing the seal
Lift the rubber seal from the groove. If necessary, use a blunt lever, for instance the rounded
side of a paper clip.
Please take care not to damage the seal.
4.2 Inserting the seal
NOTICE! Faulty sealing when the seal is handled incorrectly.
Uniformly insert the seal.
Do not pull the seal lengthwise.
1. Check the integrity of the seal.
Do not use any damaged, discolored or dirty seals.
2. Insert the seal in one location along the groove and spread with the fingers along the outer
edge of the lid until the seal is fully seated in the groove.
3. Place the lid on the rotor and close the lid.
4. Remove the lid and check that the seal is seated correctly
If the seal is too long or too short remove it from the groove and repeat the inserting
process.
3
Page 4

Instructions for use
Rotor FA-45-48-11, FA-45-20-17, FA-45-6-30
English (EN)
5 Technical Data
Rotor FA-45-48-11
Max. g-force (rcf)/speed (rpm):
Outer ring
Inner ring
Max. load per bore:
19 083 × g/13 000 rpm
16 816 × g/13 000 rpm
3.75 g
(Adapter, tube and contents)
Max. centrifugation radius:
Outer ring
Inner ring
10.1 cm
8.9 cm
Rotor FA-45-20-17
Max. g-force (rcf)/speed (rpm): 20 913 × g/13 100 rpm
Max. load per bore:
9.5 g
(Adapter, tube and contents)
Max. centrifugation radius: 10.9 cm
Rotor FA-45-6-30
Do not use Corning
®
50 mL PET Centrifuge Tubes. After centrifugation, the tubes
may get stuck in the rotor bores.
Max. g-force (rcf)/speed (rpm):
without adapter
with adapter for conical tubes 15 mL
Max. load per bore:
5804/5804 R/5810
16 639 × g/11 000 rpm
16 233 × g/11 000 rpm
5810 R
20 133 × g/12 100 rpm
19 642 × g/12 100 rpm
75 g
(Adapter, tube and contents)
Max. centrifugation radius:
without adapter
with adapter for conical tubes 15 mL
12.3 cm
12.0 cm
More technical data and order numbers can be found in the operating manual of Centrifuge
5804/5804 R/5810/5810 R.
Corning is a registered trademark of Corning Inc., Corning, NY, USA.
Your local distributor: www.eppendorf.com/contact
Eppendorf AG · 22331 Hamburg · Germany
eppendorf@eppendorf.com · www.eppendorf.com
and the Eppendorf logo are registered trademarks of Eppendorf AG.
®
5820 715.960-02/072013
©2013 • Eppendorf
 Loading...