


Dxo OPTICS PRO V5.3 User Manual
a
10
7
6
5
4
3
2
8
9
toc
0
11
1
Introduction to DxO Optics Pro v5
A typical image enhancement session
DxO Optics Pro v5
Reference Manual
Update for DxO Optics Pro v5.3
Table of Contents
The DxO Optics Pro menus
The Prepare tab
Automating the corrections
Image processing
1
Foreword
‘Select’
Review
DxO Optics Pro plug-in for Adobe® Photoshop™
DxO Optics Pro plug-in for Adobe® Photoshop™ Lightroom 2™
Keyboard shortcuts

Table of Contents
10
7
6
5
4
3
2
8
9
toc
0
11
1
Foreword 4
4 Discovering DxO Optics Pro v5
Chapter 1 5 Introduction to DxO Optics Pro v5
5 Basic Concepts
Chapter 2 8 The DxO Optics Pro menus
8 File menu
9 Edit menu
9 Program preferences: ‘General’ tab
10 Program Preferences: ‘Module ambiguity’ tab
10 Workspace menu
11 Help menu
12 Workspace tabs
Chapter 3 13 A typical image enhancement session
13 The Photographic Workflow
13 Step 1: Select a batch of images to create a project
14 Step 2: Prepare your project
15 Step 3: Processing a batch of images
15 Step 4: Review the results
16 Suggested DxO Optics Pro Workflows
Chapter 4 17 ‘Select’
17 Adding Your Photos from Various Sources
17 Adding (importing) images
18 Import plug-ins
18 The Project window
18 Star-ranking and Stacking
18 The thumbnails and their buttons
19 Fully automatic mode
19 To take things further…
19 Select tab screen
19 File System icon
19 Windows version:
20 Macintosh version:
20 Creating a project from several folders
20 Project Database icon
20 Content window
21 Project window
21 Choosing settings for the images
22 Functions associated with projects
22 Thumbnail icons
23 Module Information icons
23 Ranking
23 Insert symbols for dots and stars
23 Stacking
24 Right Clicking on an image
Chapter 5 26 The Prepare tab
26 Adjusting the settings for each image
27 Progressive complexity
27 Control and corrections palettes
28 Palette overview
30 To take things further…
30 The Preview window
33 Correction palettes
33 Overall Correction Palette workspace
34 Move/Zoom palette
34 Histogram palette
35 Edit EXIF palette
36 Correction palettes
36 Light palette
40 Color palette
45 Geometry palette
48 Detail palette
52 My Palette
Chapter 6 53 Automating the corrections
53 Preset Editor
2

57 Process tab
10
7
6
5
4
3
2
8
9
toc
0
11
1
57 Output formats
58 Output Format window
59 Starting processing
Chapter 8 61 Review
61 Checking the results
61 Checking ‘before’ and ‘after’ correction
3Chapter 7 57 Image processing
Appendix 1 63 DxO Optics Pro plug-in for Adobe® Photoshop
63 Use
Appendix 2 64 DxO Optics Pro plug-in for Adobe® Photoshop™ Lightroom 2™
63 Installation
™
64 Pre-requisites
64 DxO Optics Pro as External Editor
64 Importing an image into DxO Optics Pro
64 DxO Optics Pro in plug-in mode
65 Importing images into DxO Optics Pro
66 Importing images into Lightroom.
Appendix 3 67 Keyboard shortcuts
▼ His togram

Foreword
10
7
6
5
4
3
2
8
9
toc
0
11
1
Discovering DxO Optics Pro v5
In order to find out all about DxO Optics Pro v 5 and understand just what it can do, please do
read this manual carefully.
For a quick overview to get you started, you can download the Visual Guide free from this
link:
http://octopus2.dxo.com/v5/Doc/en/DxO_Optics_Pro_v5_Visual_Guide.pdf
If you have any further questions, be sure to check the application’s ‘Local help’ button (‘Help’
menu) when you have an active Internet connection. The questions and answers relating to
all aspects of the software can also be accessed directly from this link:
http://help.dxo.com/faq/index.php?action=show&lang=en
You can also download additional documents (manuals for earlier versions, advice, bibliography) from this page:
http://www.dxo.com/intl/photo/support/
Note: The information documents are illustrated with screen shots. Although the commands and functions are
99% identical between the Windows and Mac versions, it’s possible that for a few commands there may be detail
differences in graphics or presentation between the reference images and the interface on your computer.
4

Chapter 1
10
7
6
5
4
3
2
8
9
toc
0
11
1
Introduction to DxO Optics Pro v5
The DxO Optics Pro software uses a system that applies customized corrections to each image,
as long as the shot has been taken using a system that is recognized by the software thanks
to the metadata (‘EXIF’) contained in the file. The accuracy of the DxO Optics Pro corrections
results from the application of unique algorithms, calculated on the basis of actual measurements carried out on dozens of camera bodies and hundreds of actual lenses. Each
lens/body combination has been the subject of thousands of test measurements that take
account of all combinations of shooting parameters, first and foremost for fine-correcting
optical imperfections.
The complete DxO Optics Pro system uses ‘correction modules’. Each module is unique and
specific to one particular lens/body combination. For this reason, if you want to develop your
RAW files and apply all the possible corrections, you’ll need to make sure you have the right
modules for the bodies and lenses you use. If this is the case, DxO Optics Pro generates
extremely accurate corrections for the measured optical defects: these are not manual adjustments that — even though they often require infinite patience — can only ever be subjective
and approximate.
From the basic corrections, you can then add your personal touch in optimizing your images,
combining the choice of automatic correction for certain images and giving free rein to your
creative spirit by carrying out manual adjustments that go beyond simple correction.
But numerous possibilities are also opened by DxO Optics Pro from JPG files coming from any
camera, indeed even from JPG or TIFF files obtained by scanning silver-halide images, since
the software will be able to apply global optimization of highlights and shadows, correct brightness, white balance, color, sharpness, and perspective — and even correct purple fringing and
chromatic aberration.
5
Basic Concepts
DxO Optics Pro forms part of a complex digital workflow
As anyone who has worked with photography over the years knows, every image is unique,
even images from the same batch. There is an almost unlimited number of factors that must be
considered when taking a picture. Factors such as type and model of camera and lens, image
content, constantly changing weather and lighting conditions, manual and automatic settings,
the photographer’s personal taste, and for what purpose the images are being taken.
With film-based photography, unless the photographer developed his or her own film and prints,
much of the post-production workflow was left to development houses or the local street-corner
vendor. Digital photography has changed this and has moved control over all aspects of the
picture creation process into the hands of the photographer. Understanding how Optics Pro

works allows you to fully utilize each of the correction and adjustment tools it offers and properly
10
7
6
5
4
3
2
8
9
toc
0
11
1
use the program within a larger workflow.
This Reference Manual will give you an overview of each tool in the program. It will also offer
recommendations, where appropriate, on how to best use these tools to achieve your desired
photographic goals.
To ensure that DxO Optics Pro fits within a larger workflow, the program outputs three popular
file formats. They are:
JPEG
•
TIFF
•
DNG
•
The DNG format produced by Optics Pro is fully compatible with the Adobe® specifications and
can be easily used in Adobe® products such as Camera RAW, Photoshop™ and Lightroom™.
DxO Optics Pro does not modify the original files and stores the corrections applied in a small
‘sidecar’ file and in its own database. Hence the DxO processing always involves generating
one or more copies — since it is possible, for example, to produce both a JPG and a DNG at
the same time.
DxO Optics Pro uses correction modules that process
each image in a unique manner.
There are several important, but related, points that make up this concept.
First, DxO Optics Pro does not work like any other post-production program you may use. Rather
than presenting you with an uncorrected image to work on and expecting you to manually
make the corrections and adjustments, DxO Optics Pro automatically determines the best set
of settings for each image you add to its Project window.
When you add an image to DxO Optics Pro, the program reads the camera and lens information stored in the EXIF data portion of your image file, as well as analyzing the image content.
If the camera and lens details match the information found in an installed correction module,
that module is chosen and optical corrections are applied to the image. Taking the information
from the image file, Optics Pro develops ‘default’ correction settings that are custom tailored
for each of your pictures. In most cases, these settings will provide you with the best possible
results and clicking on ‘Process Now’ will start the procedure to process your images immediately without further adjustments.
TIP: DxO Optics Pro reads image information that cannot be changed once
it is written by the camera. If advanced correction tools such as volume anamorphosis, distortion, lens softness, etc. are grayed out, this is a good sign
that either the correction module you need is not loaded on your system,
or the EXIF data in the file has been changed or damaged.
You may occasionally find that you want to apply additional corrections to one or more images.
By clicking on the ‘Prepare’ tab, you will have access to the full suite of Optics Pro tools. When
you make manual changes to these tool settings, you are making your changes based on the
best default values computed for that image.
TIP: Returning to these default values can be accomplished either by
rechecking the auto-mode box to the right of the tool’s input window or
slider, or using the default Presets to reset the original settings.
Second, all images that are to be processed, either singly or as a group, are placed into a
‘project’ in Optics Pro. The Project window at the bottom of your screen allows you to specify
which picture files you want to process at any given time. We will cover how to control this
processing later in this Manual.
Third, correction modules are the heart of DxO Optics Pro. They are built upon hundreds, even
thousands, of exacting measurements taken from actual photographs. These measurements
are tailored for the originating camera and lens. It is therefore vital to bear in mind that to
take full advantage of all the DxO Optics Pro features, you must use the specific camera and
lens combinations that are supported. NOTE: You can always find an up-to-date list of these
combinations on the DxO Labs website.
By treating each image individually, DxO Optics Pro allows you to mix varied images into a
project for processing. Each image can then benefit from the specific changes it needs to
produce the best results for you. This includes the adjustments you make manually, as well as
the automatic optical corrections produced by the modules.
A quick session overview
The way the DxO Optics Pro workflow is organized deserves a few words of explanation. The
first point to understand is that, contrary to traditional image editors, DxO Optics Pro works on
projects, not directly on images. This means that any setting you modify (in the Prepare tab) is
applied to the preview of the image. But your original image remains unmodified: it’s only during
the final process (activated in the Process tab) that DxO Optics Pro will apply corrections in
order to create a new file, your corrected image. So, a session with DxO Optics Pro involves two
steps: first, import the images in the Project window; second, automatically process the images.
6
In between, there may be a third one: manually modify the settings of one or more images. And
10
7
6
5
4
3
2
8
9
toc
0
11
1
at the end, there’s one more (optional) step: review the processed images.
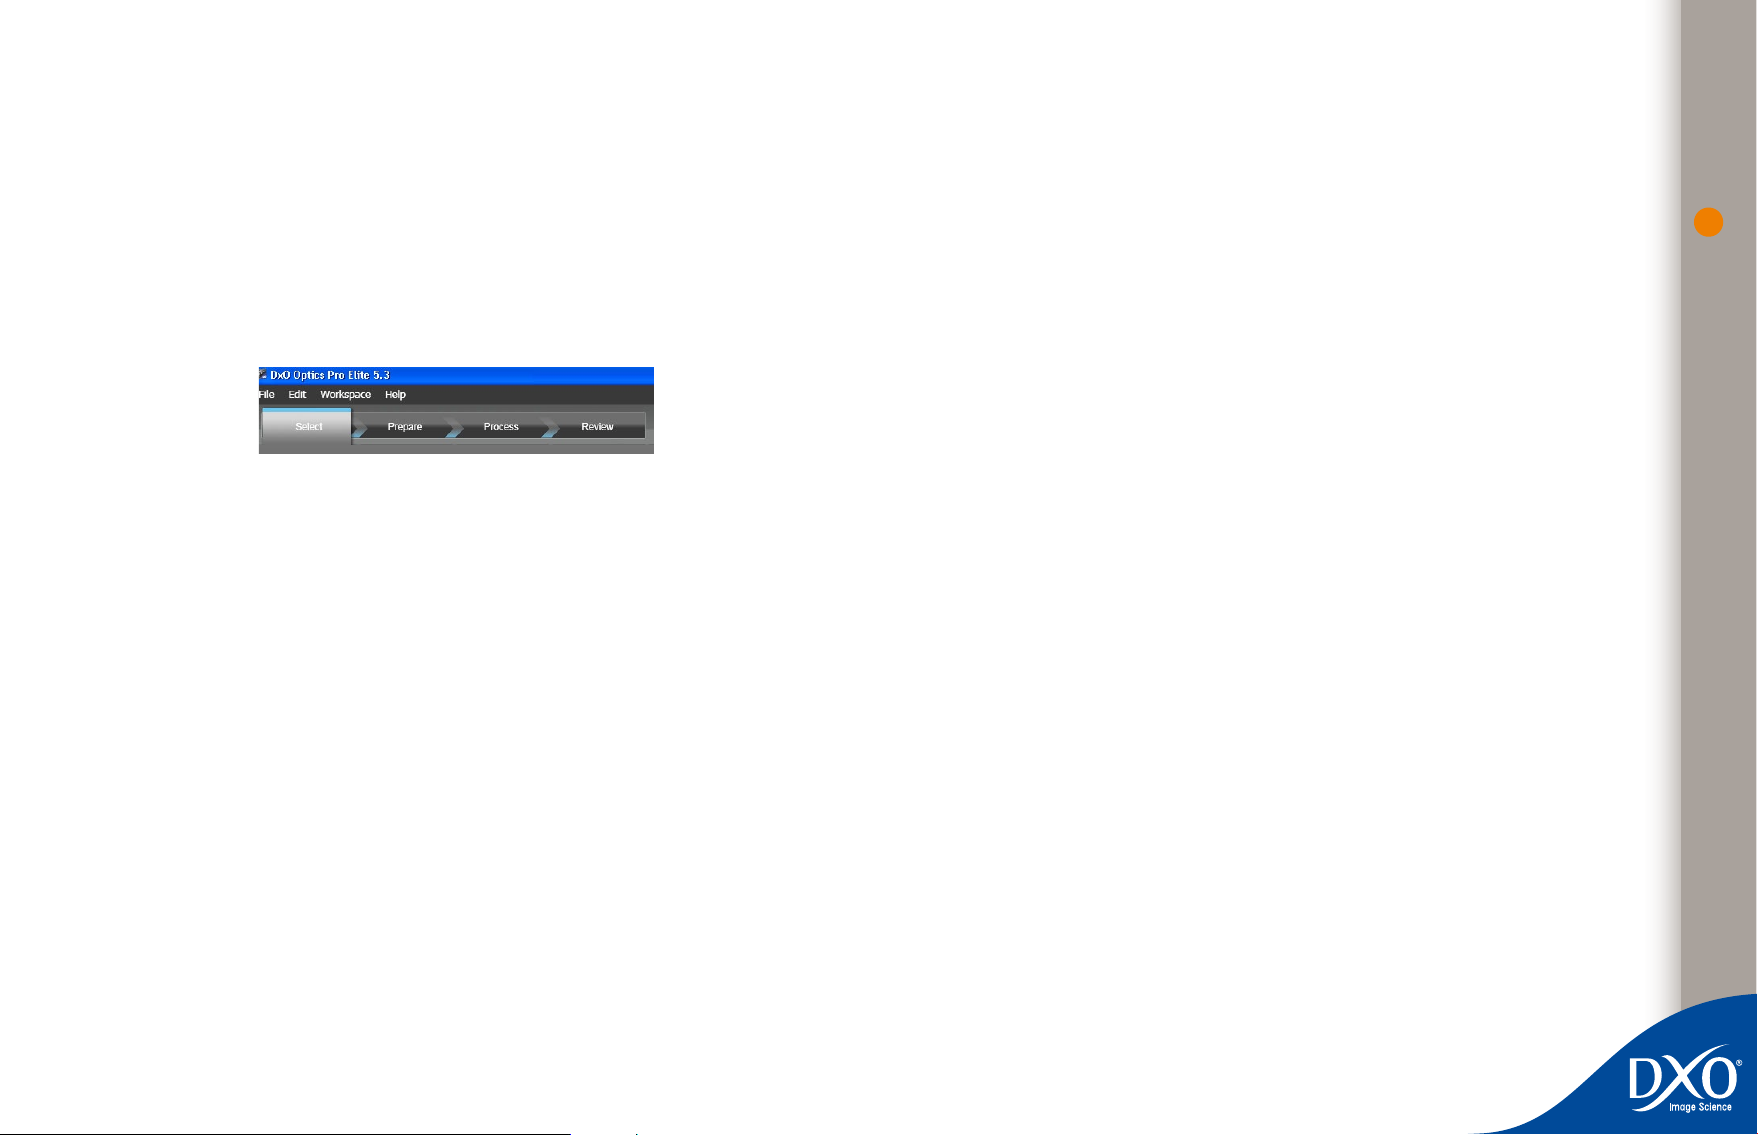
So when you open DxO Optics Pro, you’ll find these four tabs at the top left of the main window.
Under the ‘Select’ tab, you load your photos to be processed into the current project. If you
want to process your images right away, without altering the default settings, you can click the
‘Process now’ button to start the automatic program. You can also check out the effect of an
automatic correction on an image under the ‘Prepare’ tab, then define your own corrections or
adjustments. These modifications are stored as correction chain settings, which will be applied
in final image processing (under the ‘Process’ tab). If you have saved your project, but close
the program before you have processed, the corrections will be stored in memory, and the last
project you were working on will be displayed when you next open DxO Optics Pro.
What makes DxO Optics Pro even more powerful is that some or all of your personal adjustment
settings can be saved as one or more ‘Presets’. These can then be applied to any number of
images in this or other projects. And while you can easily apply your presets to images, you
can still make further manual adjustments, as needed!
Finally, processing your images is as easy as a single mouse click in the ‘Process’ tab. All the
processing for each image file is handled using a ‘hands off’ procedure. You simply designate your output file format(s) and destination(s) and click the ‘Start processing’ button, and
DxO Optics Pro does the rest. We should also note that you have the choice of three output file
formats. These are covered in more detail in the ‘Process’ chapter of this document.
ing/editing software, even after your images have been processed by DxO Optics Pro. And,
DxO Optics Pro automatically rotates your images if you use the auto-rotate facility of your
camera, therefore eliminating the need for additional software for this particular step.
As you can see, DxO Optics Pro is a powerful first step in your post-production process, enabling
you to dramatically improve your images in a standalone or highly integrated workflow. The
following chapters will offer you valuable information to help get you quickly started implementing a more effective image improvement process. We recommend that you take the time to
read this manual carefully. Doing so will answer many of your questions regarding the proper
operation of the program.
7
The first program in the workflow
Another very important point to remember is that DxO Optics Pro is designed to be the first
program in your post-production workflow, immediately after your images have been copied
from the card reader or camera. Please note that if your images have been previously processed
using any other software (including reader or cataloguing programs), or are missing important
EXIF data DxO Optics Pro needs, certain DxO corrections you want to use may be limited in
their use or not available.
Note: Please check the on-line FAQ at www.dxo.com/en/photo/support for the most recent updates regarding
this requirement.
DxO Optics Pro also strives to leave as much of the metadata (EXIF, MakerNote, IPTC, XMP) as
possible untouched. This means that you should still be able to use your other image process-

Chapter 2
10
7
6
5
4
3
2
8
9
toc
0
11
1
The DxO Optics Pro menus
When you open DxO Optics Pro, the top-most set of menus available to you is the Menu Bar
and will contain drop down menus for ‘File’, ‘Edit’, ‘Workspace’ and ‘Help’.
We will review each of these drop down menus so that you can familiarize yourself with the
operation of each menu.
File menu
The File drop-down menu includes the following commands:
New Project – creates a new DxO Optics Pro project
•
Open Project... – opens a project from the database of DxO Optics Pro projects.
•
Save Project – saves the current project in the internal project database.
•
Recent Projects – direct access to recently-opened projects.
•
8
Delete all projects – will remove all previous projects from the DxO Optics Pro
•
database.
Import v4 project – opens a project previously created in DxO Optics Pro version 4.
•
Export Image for ICC Profile – saves images with standard ‘flat’ corrections, which can
•
be used by professional calibration programs for creating ICC profiles.
Save database – lets you copy the DxO database to another hard disk so as to have
•
one or more copies of all projects processed, in the event of a problem with the
default location.
Sidecars – exports and imports the current project ‘sidecars’ (the individual settings
•
files for each image) with original images.
Exit – to exit the DxO Optics Pro program.
10
7
6
5
4
3
2
8
9
toc
0
11
1
•
It is important to note that a ‘project’ saves all the specific settings for each imported image,
along with the Output formats settings, but it does not save duplicate copies of your original
images. These will be found in the destination folder shown under the ‘process’ tab. As a result,
projects can be saved quickly and without taking up too much disk space. It’s a practical way
of saving all the settings for processing a group of images and coming back to them later.
Paste image settings – applies the settings that you placed into memory with the
•
‘Copy image settings’ command to the currently selected image. This is a quick way
to apply settings from one image to one or more other images.
Refresh – updates the content of the selected repertory.
•
Preferences lets you make adjustments to certain overall program working
•
parameters.
9
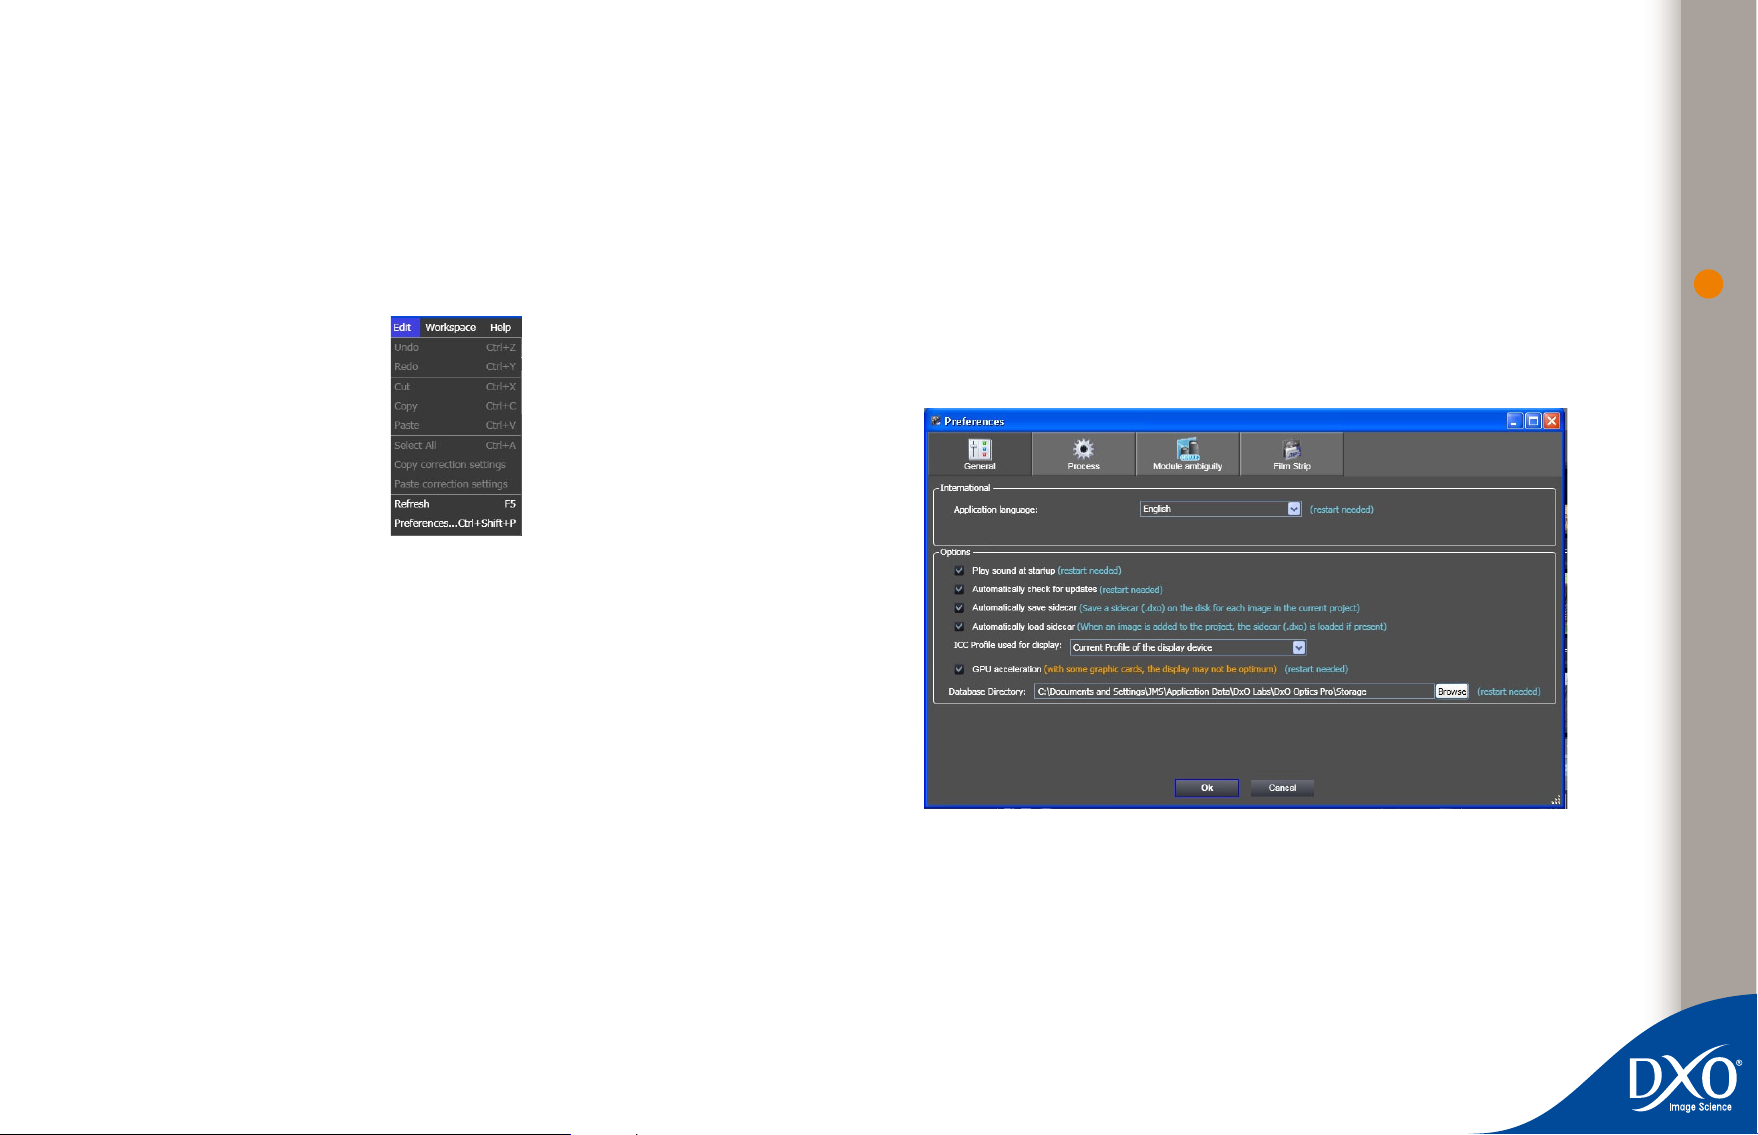
Edit menu
The Edit Menu contains several useful pairs of commands to assist you in your work.
Undo [Ctrl+Z] and Redo [Ctrl+Y] apply to the last action you have performed.
•
Cut [Ctrl + X] lets you cut selected text or objects from their current location and puts
•
them onto the Windows clipboard.
Copy [Ctrl + C] lets you copy selected text or objects from their current location and
•
puts them onto the Windows clipboard. The original text or objects remain at their
current location (for example, EXIF data).
Paste [Ctrl + V] lets you copy the contents of the Windows clipboard to the cur-
•
rent cursor position (for example, personal details to be added into the image EXIF
field).
Copy image settings – copies the settings applied to the selected image so that they
•
can be applied to other images as needed. Note: When you copy the settings of an
image with this command, those settings remain in the computer’s memory until you
do the next copy image settings (or you quit the software)
Program preferences: ‘General’ tab
These commands let you make some configuration choices, which will not be enabled until next
time the program is run. If you want to use these new settings right away, close DxO Optics Pro
and re-open it — remembering to save your current work before you do so!
In this dialogue box, you can select:
the working language, (French, English, German, Japanese)
•
select if you want the camera shutter sound effect at start-up,
•
enable or disable automatic checking for software or module updates.
•

On PCs, another useful feature on the General tab is the ability to set the ICC display profile you
10
7
6
5
4
3
2
8
9
toc
0
11
1
will use when working with your pictures in DxO Optics Pro. (There is no need for this function
on MAC, as the operating system takes care of the screen display profile). Your choices are:
Display device profile – lets you use the ICC profile specifically used by your monitor,
•
if you have calibrated it (using a Spyder probe, for example).
sRGB – allows you to work with the sRGB color profile (use this if unsure). If your
•
monitor is not calibrated, this profile is probably the most suitable, as most monitors’
factory settings behave very similarly to sRGB. This is the default setting used the first
time DxO Optics Pro is run.
Adobe RGB – lets you uses this Adobe color profile. This profile should only be used
•
with high-end monitors that specifically have an Adobe RGB Gamut available (very
unusual at the moment).
Two checkboxes activate the automatic creation of sidecars (the .dxo files that contain all
settings used to process the image) alongside each original image, and the automatic loading of the .dxo sidecar when opening the image. These functions make it possible to transfer
processed images from one computer to another.
Finally, you can enable or disable the video GPU (graphics processor unit) code within the
program. On many newer systems, this feature will help speed up the display of your images on
your computer screen. However, it should be noted that not all video cards support this code,
and this can result in less than optimal performance.
TIP: If you experience any video-related problems with the Optics Pro pro-
gram, before doing any other troubleshooting or contacting DxO technical
support, disable this feature first to see if that corrects the problem.
Under the Preferences tab, you can also choose if you want to be warned in the event of an
uncertainty about the shooting distance and/or focal length chosen: the corresponding icon
will draw your attention to it, but processing will go ahead anyway using average values closest
to those in the EXIF file.
Workspace menu
This menu presents you with a list of correction Palettes used on the Prepare tab workspace.
Your choices are:
Move/Zoom
•
Histogram
•
10
Program Preferences: ‘Module ambiguity’ tab
Under certain circumstances, it may happen that an image’s EXIF data contains insufficient
lens information for DxO Optics Pro to properly determine the right Correction Module to use
for this image. This will normally be detected at the time of adding images to your project.
When this happens, you will be asked to pick the correct lens from a list of installed Correction
Modules.
You can also resolve these ambiguities via this tab under Preferences. Where ambiguities exist,
the conflicting modules will be listed, and you can choose the lens model you are actually
using (for example, a 12–24 mm Nikkor and a Tokina of the same focal lengths may have the
same EXIF).
Edit EXIF
•
Preset Editor
•
Light
•
Geometry
•
Colors
•
Details
•
My Palette
•
By checking or un-checking each of these menu items, you can easily display and hide palettes
10
7
6
5
4
3
2
8
9
toc
0
11
1
you need and don’t need for any specific project.
TIP: You can also get the same effect by clicking on each of the palette
icons that appear in the upper right part of your monitor while in the Prepare
tab workspace.
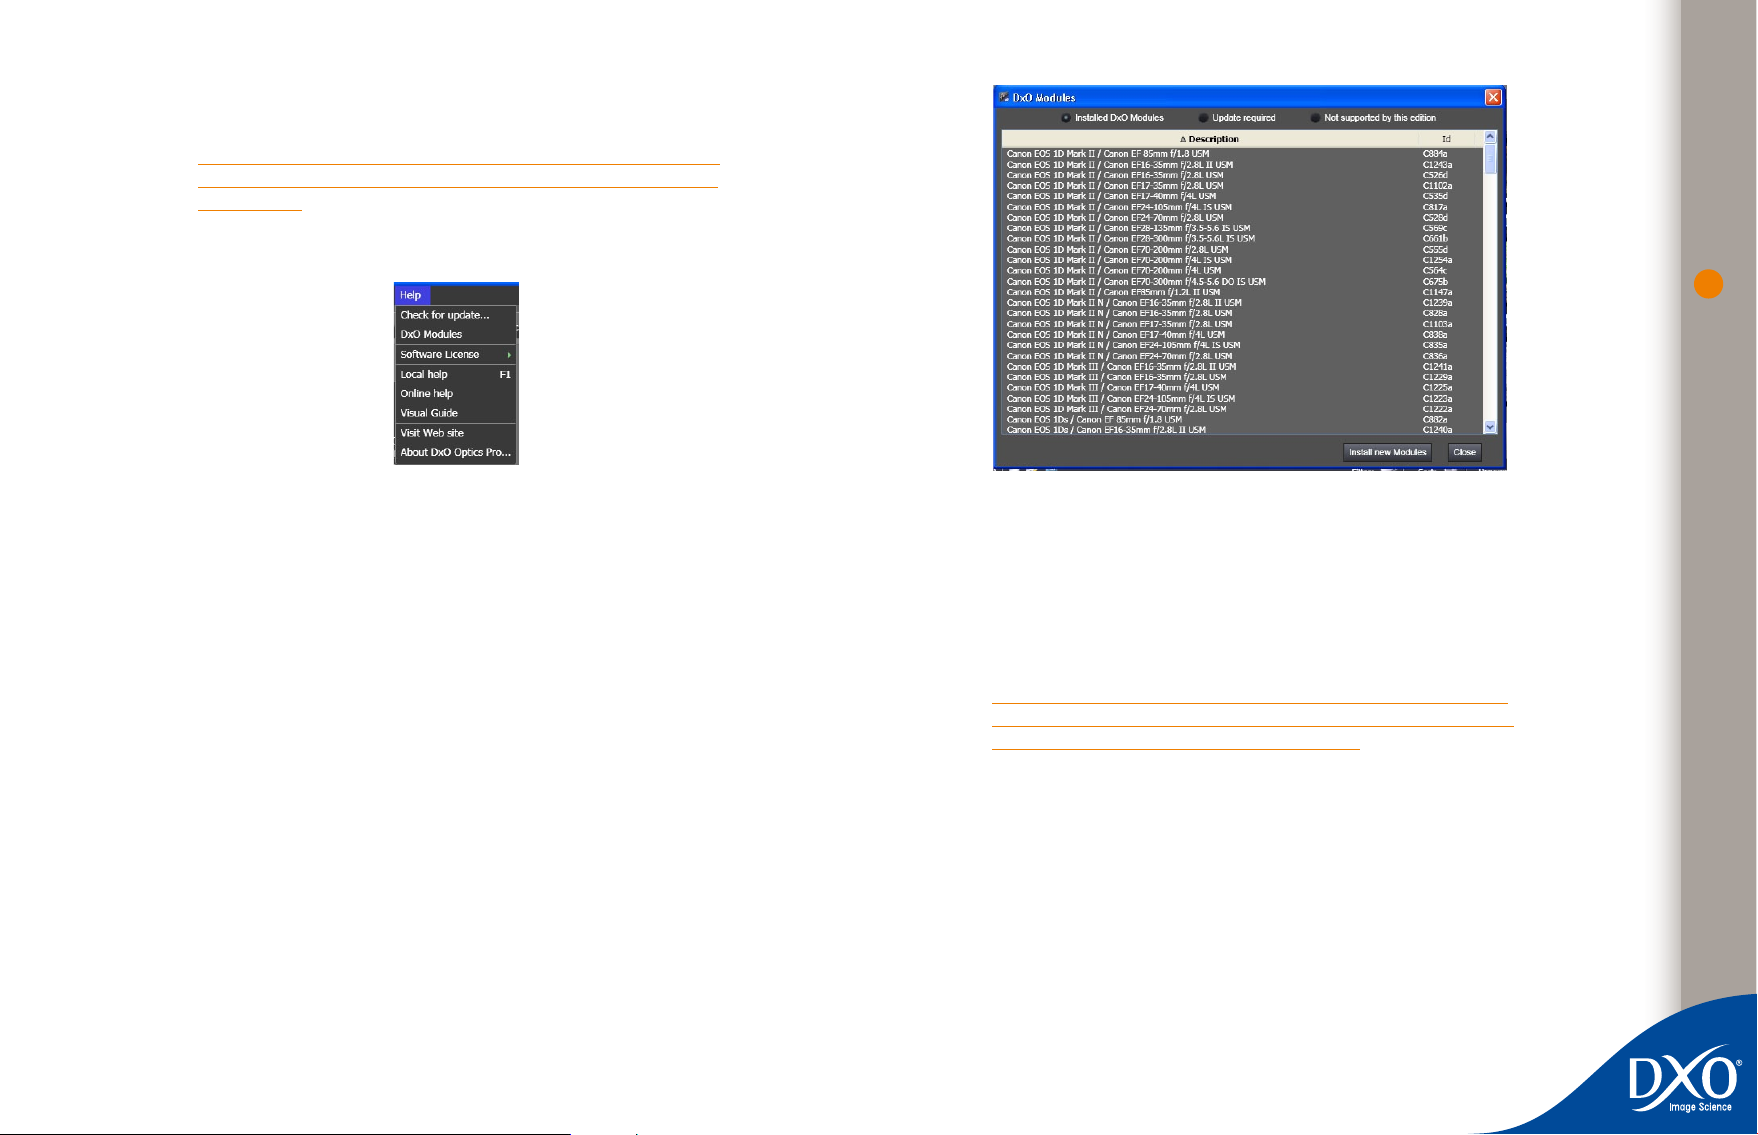
Help menu
11
The Help menu offers a number of aids for assisting in your better use of DxO Optics Pro. Your
choices are:
Check for updates – [active Internet connection required] By clicking on this menu item, the
program will contact the DxO server to determine if you have the most current version of the
program installed on your system. If you do not, you will be given the option to download and
install the latest update.
DxO Modules – This is one of the most helpful menu items available. Clicking on this item
displays a window showing you all Correction Modules currently installed on your computer.
By default, the ‘Valid DxO Modules’ window is displayed. Modules contained in this window
are properly installed and working. Notice that modules are listed by camera model AND lens
model.
If you see modules listed when you click on the ‘Update required’ radio button, this means that
a later version of these Correction Modules is available for you to install. A module update
may also be instigated if the program detects a lens on an image for processing for which
a module exists (but is not yet installed). Such images will be shown with an icon of a little
blue camera.
The warning ‘Not supported by this edition’ at the top right of the window indicates that correction modules appearing in this list are not compatible with the current installed version of
the program. These Correction Modules will not work on your system, and you should consider
updating your program version at the earliest convenient time.
[Active Internet connection required] The ‘Install’ button at the bottom right of the DxO Modules
window will start the process to add new modules, or update currently installed modules, to
the DxO Optics Pro program on your computer.
IMPORTANT: Once the modules have been downloaded to your com-
puter, you must close and restart the program to finish their installation,
just as when you make changes to your preferences.
The ‘Close’ button will close the DxO Modules window. You can also click on the ‘X’ button in
the top right corner of the window to return to the DxO Optics Pro program screen..
DxO FilmPack activation… [active Internet connection required] – If you have purchased this
product, clicking on this menu item will start the process to activate DxO FilmPack. You will be
able to enter the activation code when prompted.
Note: Though activation can be done without an Internet connection, it is highly recommended that you have your
computer connected to an active Internet connection to simplify and speed up program activation.

Transfer license – [Active Internet connection required]
10
7
6
5
4
3
2
8
9
toc
0
11
1
Note: When moving to another computer, please make sure you transfer the license off of the previous computer
first before formatting or removing the DxO programs. Under the DxO license, you are allowed two concurrent
activations per license. Failure to properly deactivate a system may lead to problems in being able to activate
your DxO product on another computer.
Clicking on this item will bring up a short menu list that allows you to transfer your DxO Optics Pro
and FilmPack licenses off of the current computer system. This will deactivate these products
on this computer once the transfer process is complete. This feature is vital when you are moving to another computer and want to free up the license on this computer for use on another
computer.
Local help – Clicking on this menu item will display the DxO Optics Pro Reference Manual.
NOTE: Your computer does not need to be connected to the Internet to use this menu item if
the Reference Manual has previously been downloaded and installed on your computer. If you
have not previously downloaded the Manual, you will need an active Internet connection to:
1. download the Manual from the Downloads page on the DxO Labs website, or
2. download the Manual the next time you download the program for an update (make
sure the “Reference guide” box is checked).
Online help – [active Internet connection required] Clicking on this menu item will open
your default web browser and take you to the DxO Labs website on-line support page, where
you will find links to Customer Service, Technical Support, Downloads, and our FAQ (Frequently
Asked Questions) section.
Tech support – [active Internet connection required] Clicking on this menu item will open
your default browser and take you directly to the DxO Technical Support web page, where you’ll
find a form for asking your questions.
Workspace tabs
At the top left of your window will be the four workspace tabs that you can use to correct,
process and check you images. The four tabs are:
Select (see page 13)
•
Prepare (see page 14)
•
Process (see page 15)
•
Review (see page 15)
•
Each of these tabs is covered by a chapter of this Manual which explains the workspaces and
the buttons and adjustment tools available in each workspace.
12
Visit Web site – [active Internet connection required] Clicking on this menu item will open
your default browser and take you to the DxO Labs home page.
About DxO Optics Pro – Clicking on this menu item will open the ‘About DxO Optics Pro’
window where you can find information on the version running and add-ins that are currently
installed. This information is particularly useful if you need to contact DxO Technical Support.
Chapter 3
10
7
6
5
4
3
2
8
9
toc
0
11
1
A typical image enhancement session The Photographic Workflow
The entire DxO Optics Pro system has been designed to be straightforward and efficient. This
is particularly important for any photographer with a lot of pictures to process. In this chapter,
we go through a typical photo correction session. Further information regarding each of these
steps can be found in the corresponding chapter located later in this document.
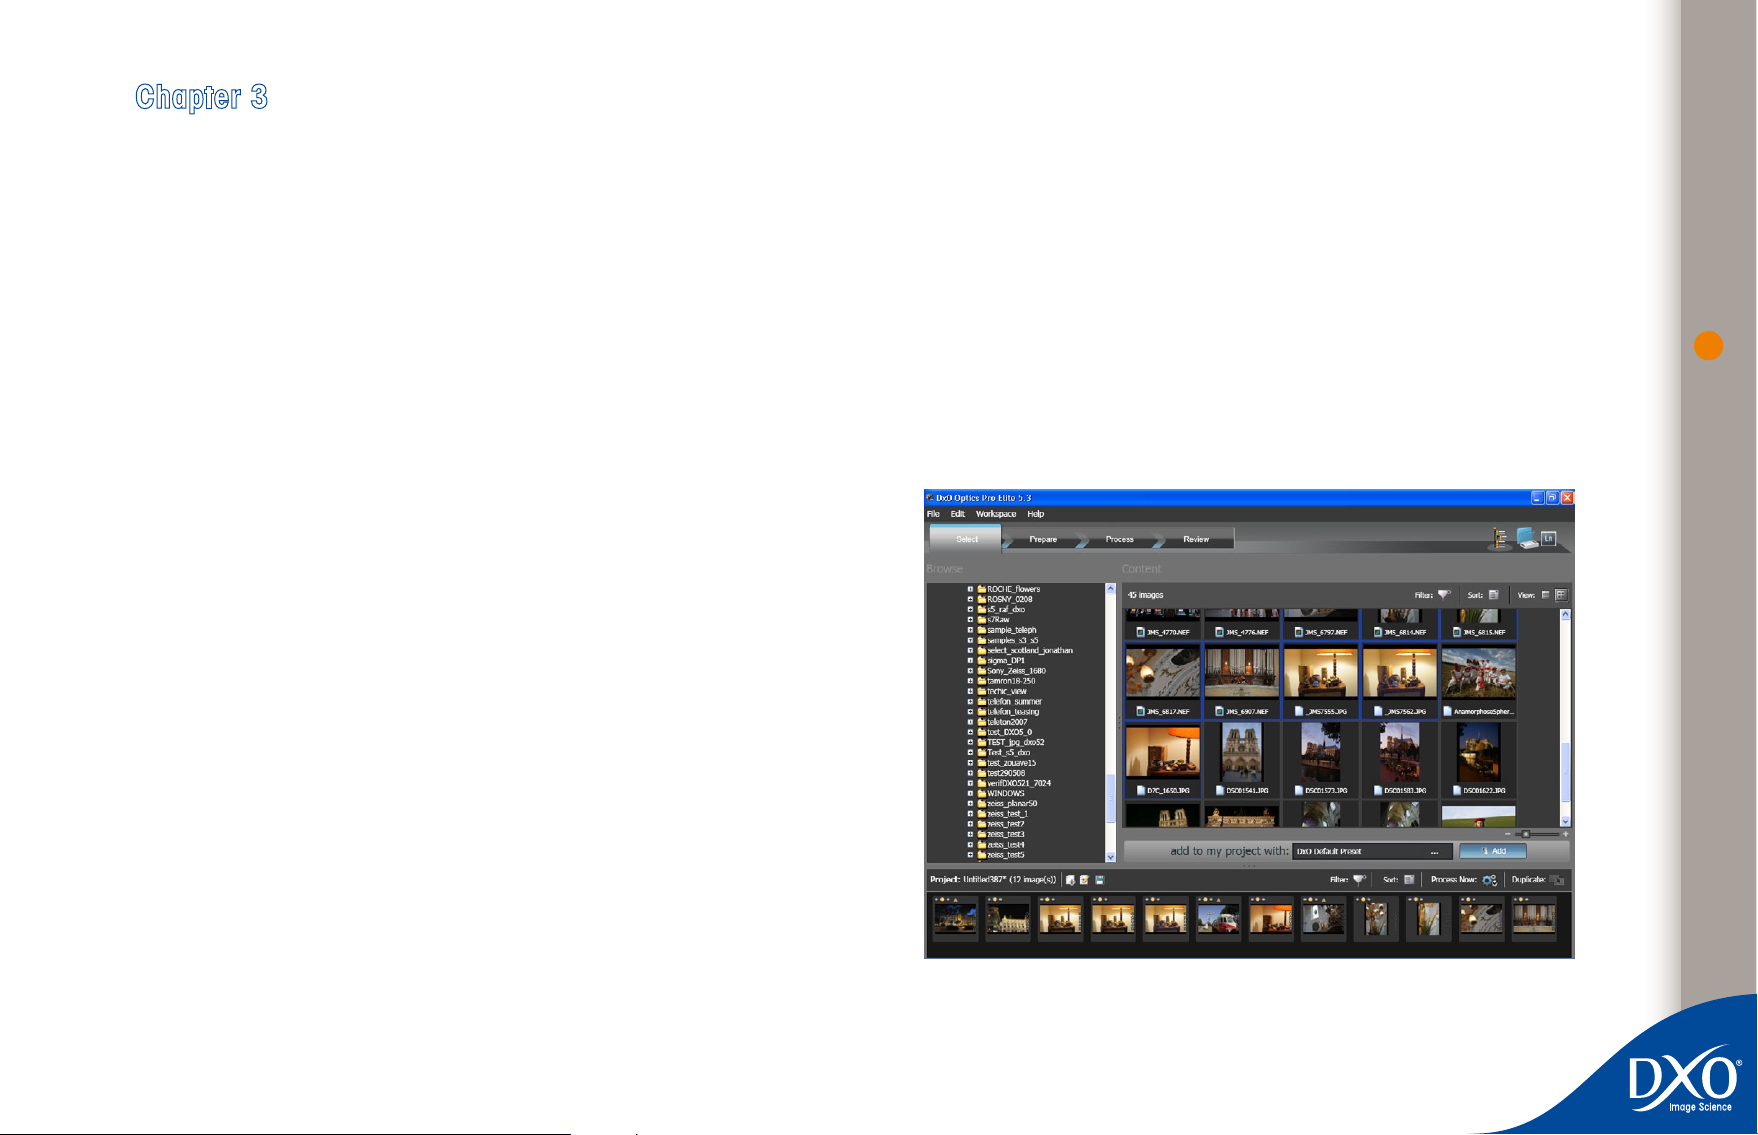
Step 1: Select a batch of images to create a project
In order to make it easy to process large numbers of images, DxO Optics Pro is designed around
the concept of ‘projects’. The first step of the workflow consists in loading a batch of — e.g.
as many as several hundred — images into a project that will be processed by applying to
each image exactly the correction you have chosen for it. You do this by ‘adding images’ to
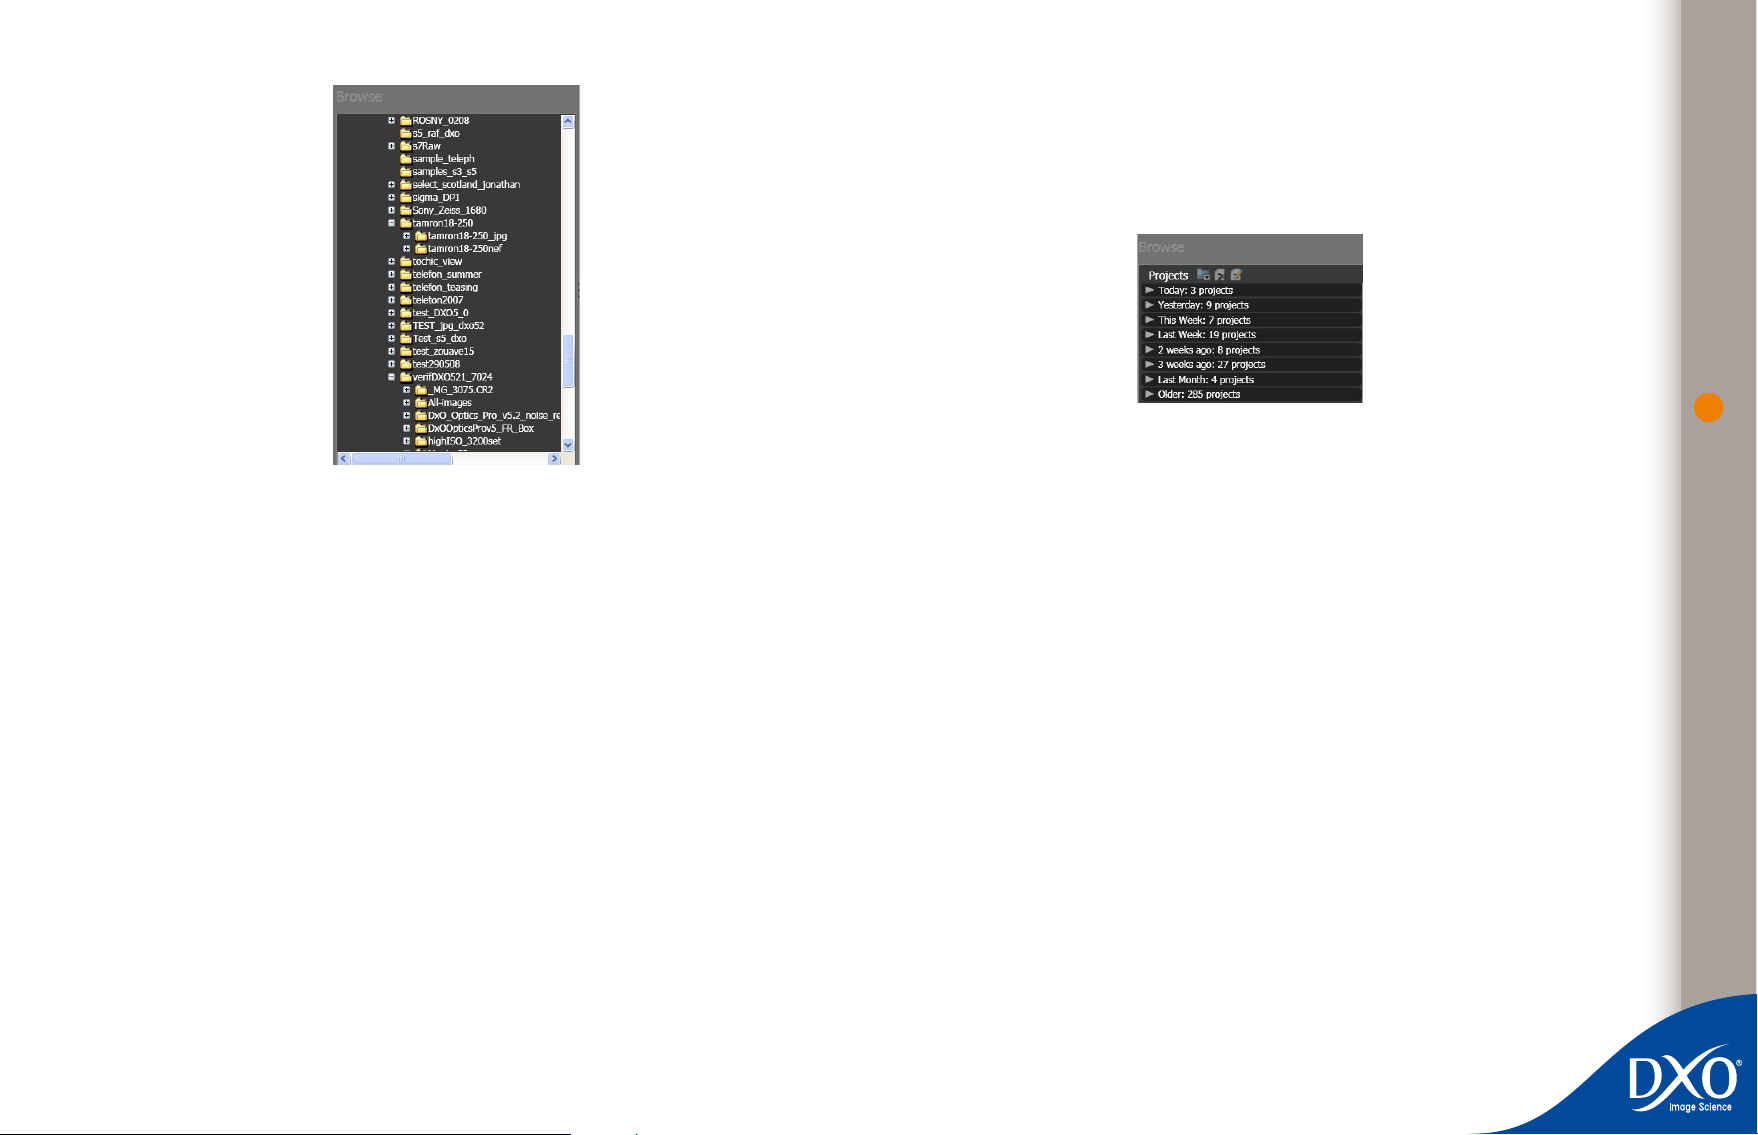
the ‘Project’ window, in the lower part of your ‘Select’ tab workspace. Click on the System icon,
on the top right of the main window: the left column will show you a browser of your hard
disk. Select the folder containing your images, and you will see their thumbnails or file names
appearing in the right pane of the main window.
13
Thumbnails under the Select tab
List under the Select tab
10
7
6
5
4
3
2
8
9
toc
0
11
1
To import one or more images, simply drag and drop your files into the Project Window. You can
also select with your mouse using Shift + Click (range select) or Ctrl + Click (multiple select).
When you add images, you are not creating additional copies of your images, but merely
recording references to them in a file that keeps track of all the details of your project. In this
way, valuable hard disk space is used efficiently and not wasted.
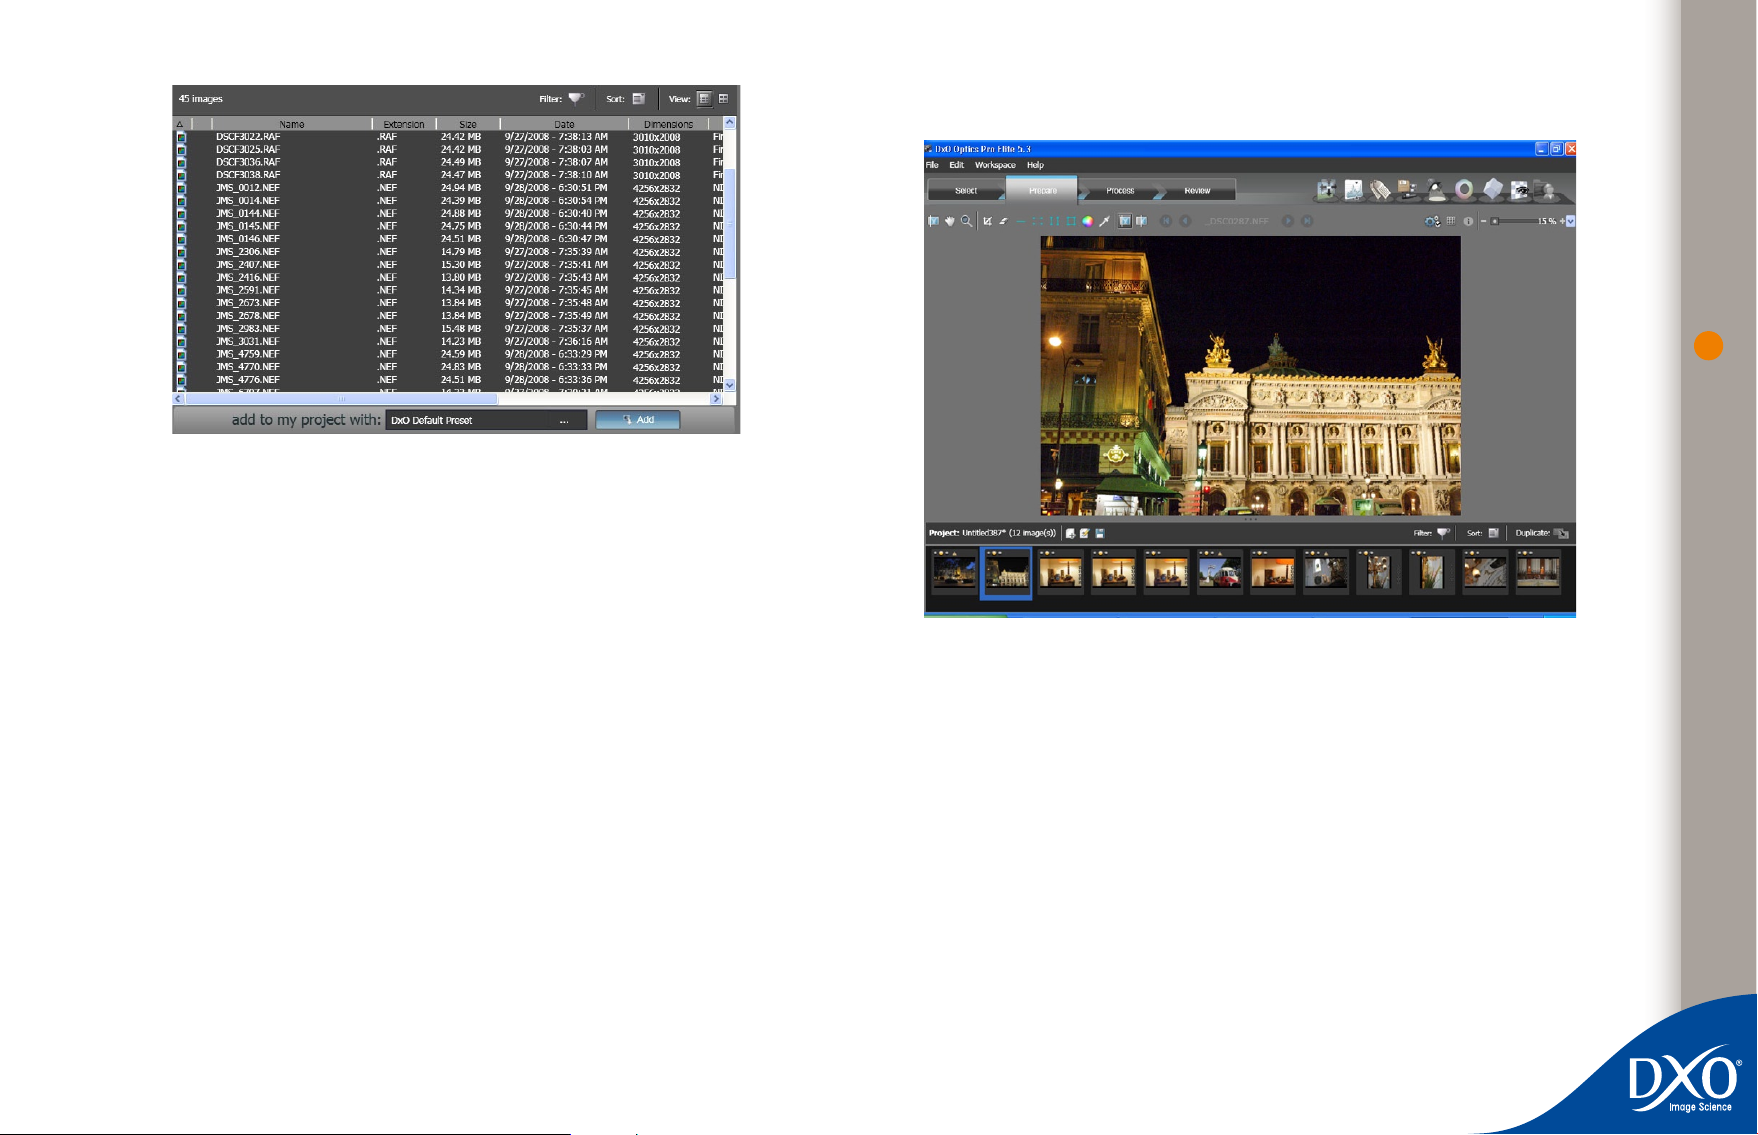
of your image; then, after a few seconds, the preview of the corrected version appears. You can
also opt to display both ‘before’ and ‘after’ correction images together.
14
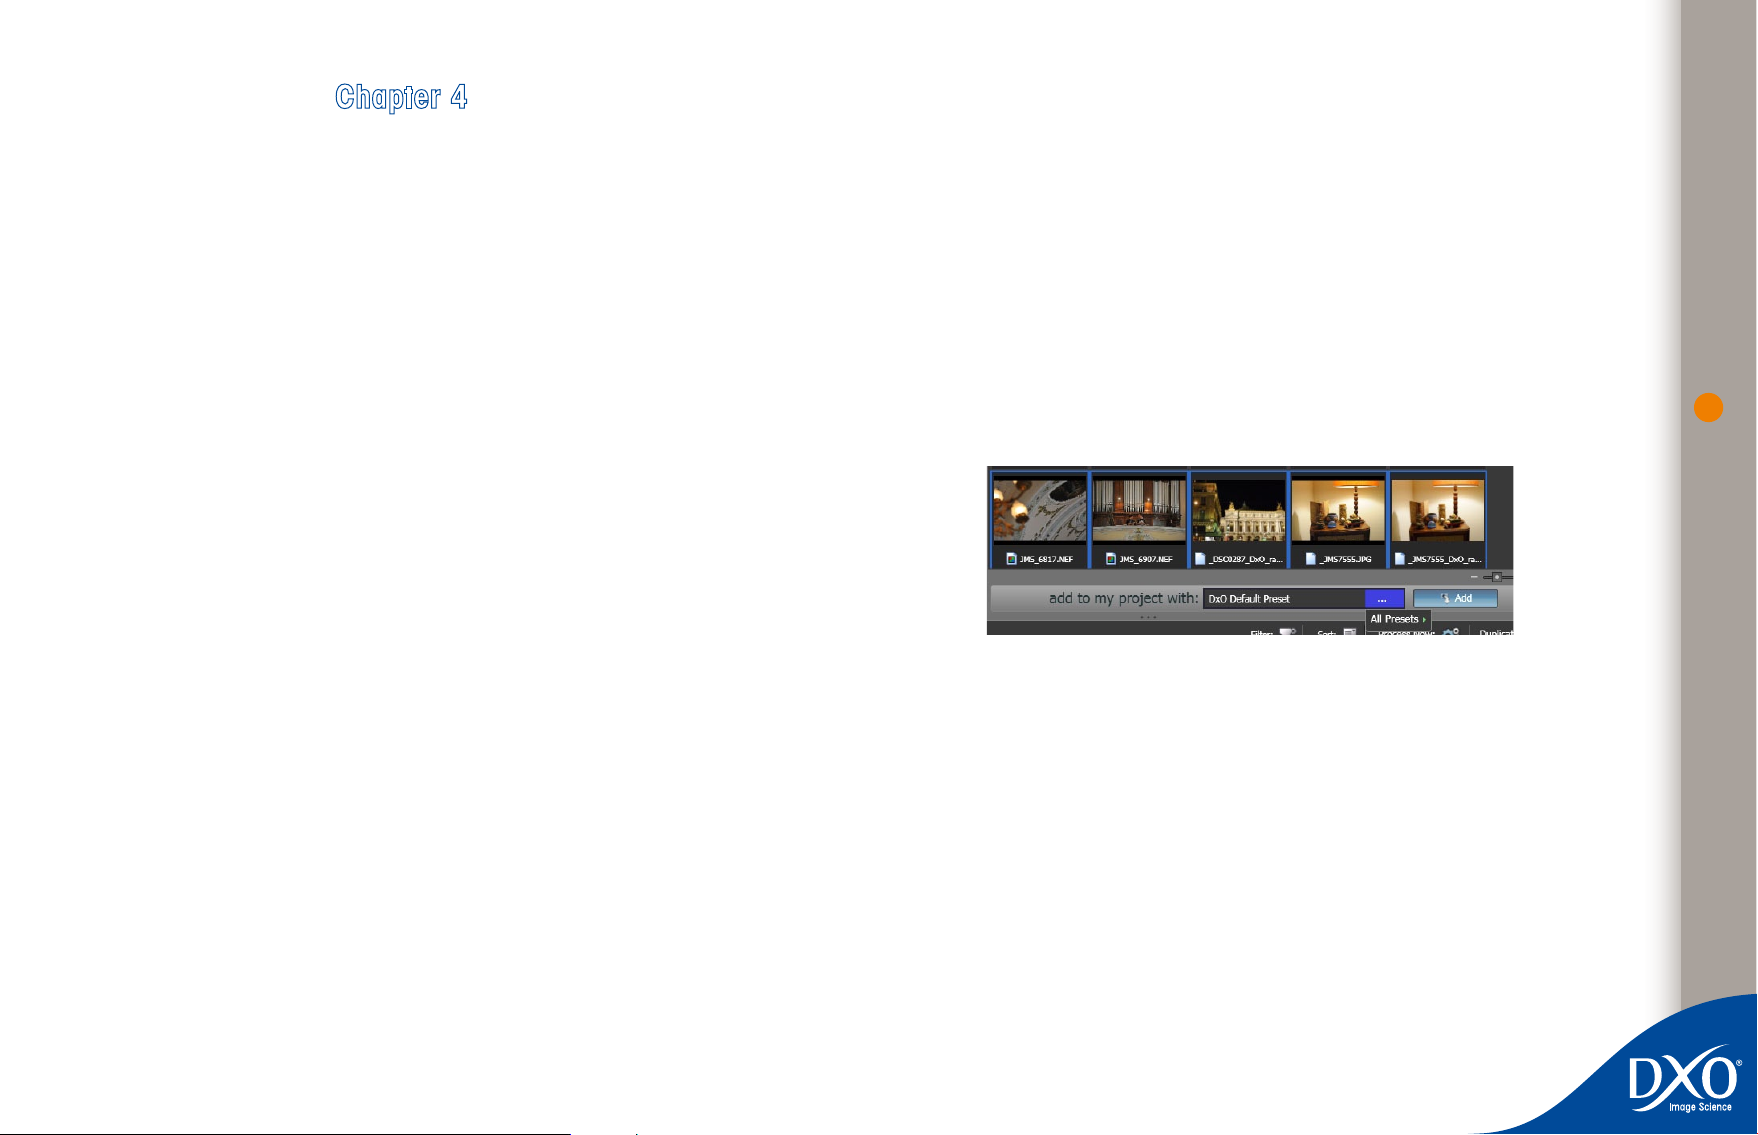
Above the Project window, you will see a drop down box labeled ‘Preset applied to images:’.
The default choice is ‘DxO Default settings.’ If left at this selection, the default correction settings will be applied to each of the images added to your project pane, as determined by the
program (but taking into account the information embedded within each image). However, if
you click on the down arrow, additional options will give you the ability to choose any standard
or custom preset and will adjust your images based on specific presets that come with the
program, or that you have created.
You can then either click the ‘Process Now’ button, which takes you to the ‘Process’ Tab where
processing of your images will start immediately, or go through the optional ‘Prepare’ Tab, to
control and adjust the specific settings of some (or all) of your images.
Step 2: Prepare your project
Under the ‘Prepare’ tab, you can see, in the lower part of the screen, the same Project pane
you just filled with images; but above it, a ‘preview’ pane allows you to visualize any image you
select in the Project. When you click on a thumbnail, you will see first a non-corrected version
‘prepare’ tab before opening correction palettes
In the event that you’re not satisfied by the default correction, you have the option to adjust your
pictures manually using the Correction Palettes. In version 5, all available settings have been
organized into four ‘photo-palettes’ that group corrections logically, according to four different
aspects of the image: Light (where you can control Exposure, Lighting, Tone Curve, …), Color
(White balance, Color profile, Vibrancy, …), Geometry (Distortion, Anamorphosis, Keystoning,
…), and Detail (Sharpness, Denoise, Anti-dust, …). You can access these by clicking on their
icons on the top right part of the main window. You can also access the more conventional
Navigation, Histogram, EXIF/IPTC, and Presets palettes.
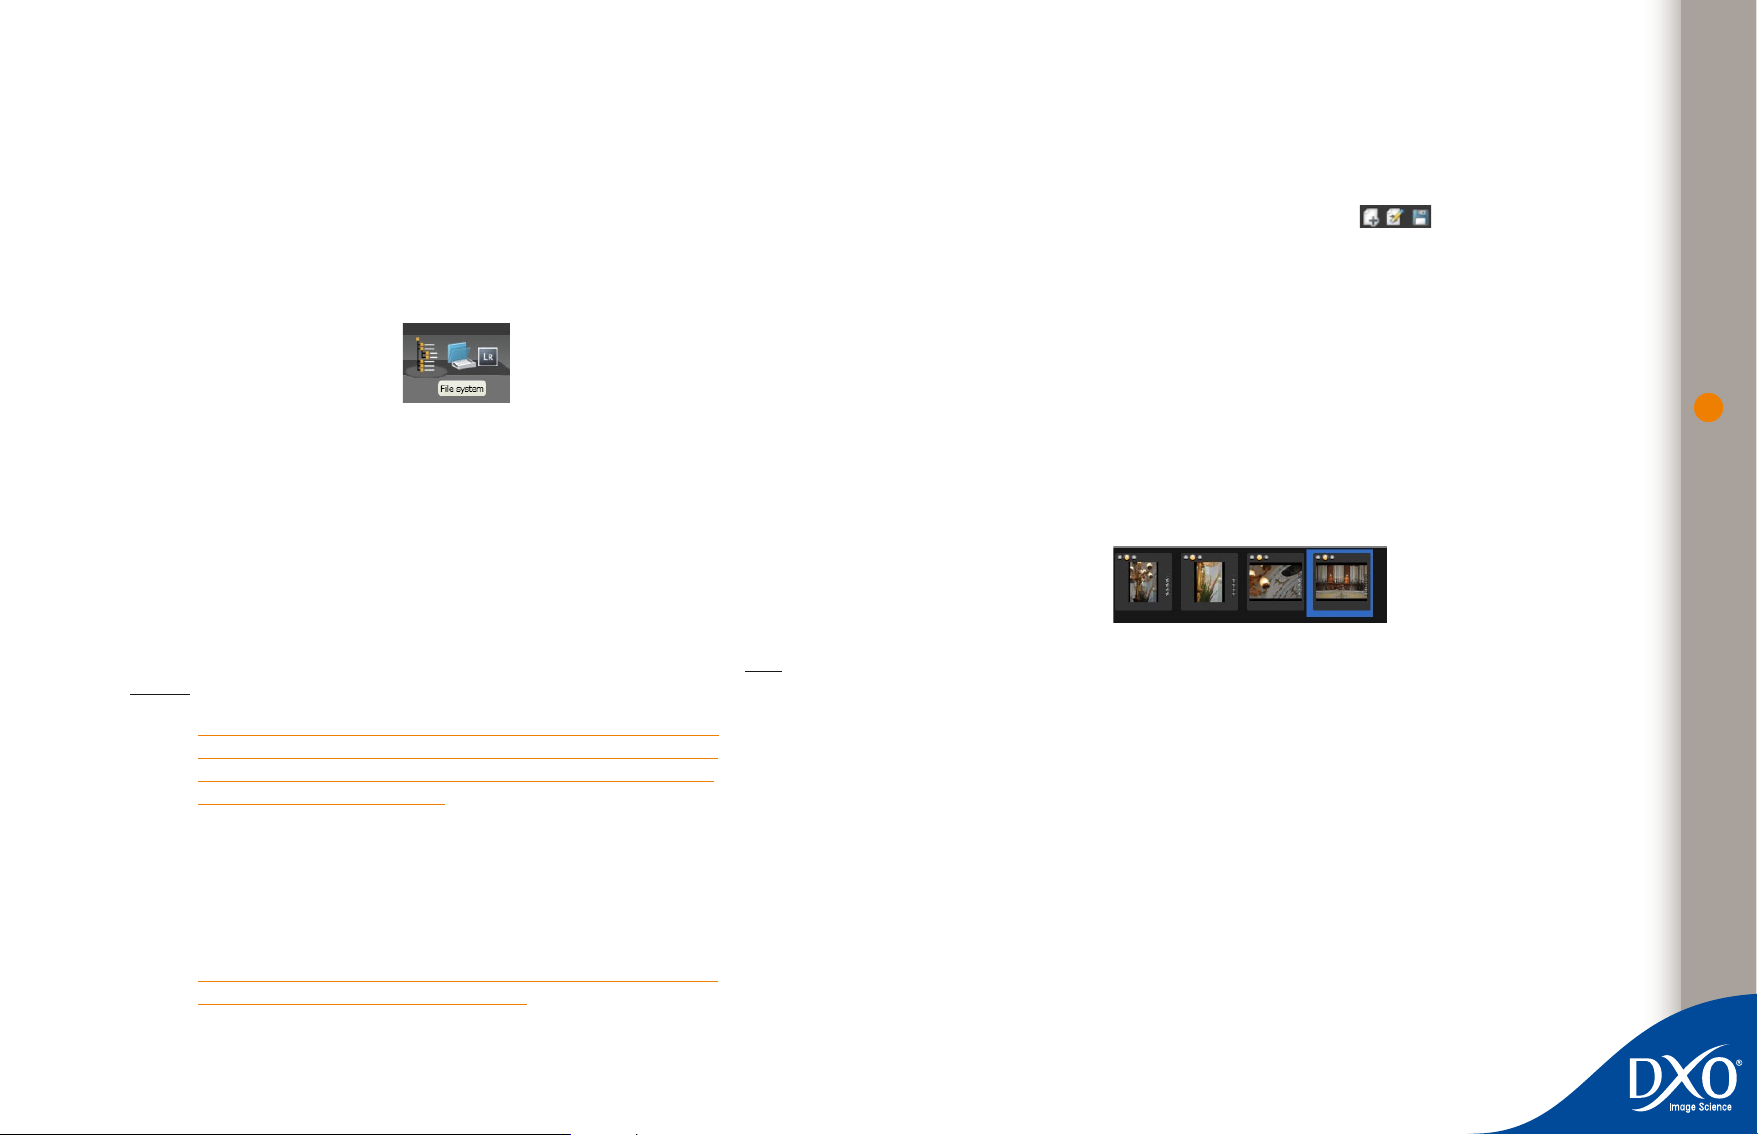
When checking and correcting your images, you may find that some of them do not merit any
further processing. This may be because you have already chosen one out of many almost
identical images from a sequence, or simply because you don’t want to process them right
now. Click the little Red light above the thumbnail, and the image will be ignored during the
final Process, though it will remain in your project. The Orange light means ‘Process status to be

defined’, but such images will still be processed by default. The green light, obviously enough,
10
7
6
5
4
3
2
8
9
toc
0
11
1
means ‘Process this image’.
Selecting images for processing
Step 3: Processing a batch of images
As soon as you are satisfied with the settings you have applied to your images, you can move
on to process them. Under the Process tab, check the output formats proposed, adding or
removing them where necessary. After clicking the Start button, feedback from the program will
keep you continually informed as to your project’s progress. Once underway, this processing
stage is self-directed and ‘hands-off’.
Step 4: Review the results
When processing is finished, you may want to control your final images, which you can do in
the ‘Review’ tab. If you think one or more of your images needs additional work, you can easily
re-process your original images to apply additional or different settings as needed.
15
Displaying the results
DxO Optics Pro has been designed so that in actual practice you can move around more or
less at will between workflow steps in any order you like.
Whether you shoot portraits, landscapes, weddings, sporting events, people, wildlife, family
pictures, a handful of images or hundreds of pictures at a time, using Optics Pro within a good
workflow tailored to your individual needs will yield the best results and reduce the amount of
time from unfinished image to a finished product, as you can adapt the workflow and correction
order to suit your needs.
Starting processing

Suggested DxO Optics Pro Workflows
10
7
6
5
4
3
2
8
9
toc
0
11
1
Always make DxO Optics Pro the first program in your post-production workflow.
Since DxO Optics Pro’s correction modules are built on original images taken with the camera
and lenses you use, if an image is pre-processed by another program so that either its EXIF or
image data is changed, DxO Optics Pro will not be able to return the results you expect from
the program.
This recommendation particularly applies to reader and cataloguing programs which should
preferably be used after processing images using DxO Optics Pro. The best first step in your
workflow is to use your operating system’s copy command to copy/paste your images directly
from the camera storage card to your hard drive. Again, do not use reader or cataloguing
programs to move your pictures from the storage card to your computer.
It is crucial to appreciate that if you once open your RAW files using Adobe® Photoshop™ or
Lightroom™ in order to convert them into TIFFs or JPGs, DxO Optics Pro will no longer be able
to process optical defects (vignetting, lack of sharpness, distortion, chromatic aberration), as
this conversion modifies the file metadata. The same applies to most manufacturers’ conversion
software, except for the later generations of Nikon Capture™.
In order to have all the DxO Optics Pro functions available, you should proceed as follows:
1. Copy the data from the camera or card using the computer’s operating system and
not an upload program, even the one provided by the manufacturer
2. Process the images in DxO Optics Pro and save the copies in the working directory
TIP: There are two forms of DNG, RAW DNG and Linear DNG. In order to
process de-mosaicing information and include all of the data produced by
Optics Pro, DxO utilizes the Linear DNG format. Please note that this format
produces larger output files than the RAW DNG format!
If you want to manage your photos in an image database manager, don’t install your original
RAW or JPG files into it, but only copies and photos already corrected in DxO Optics Pro.
Using Adobe® Photoshop Lightroom™, you can however make use of the option to select
DxO Optics Pro as external editor (see Appendix 2).
16
3. Then go on to the other steps in your post-production, for example, using the various
versions of Photoshop™ or any other post-processing software.
ATTENTION: If you are using the DxO Optics Pro plug-in for Photoshop™
(see Appendix 1) opening a JPG file and enabling the DxO corrections is
no problem. But if you select a RAW file, clicking on ‘Open’ in Photoshop™
activates the Adobe® Camera RAW™ program, which will have the effect
of converting it into a format that DxO Optics Pro will no longer be able to
use. The same applies if you convert the RAW file in Adobe® Lightroom™.
On the other hand, these applications will be able to best exploit DNG files
generated by DxO Optics Pro after processing.
The DNG file format produced by DxO Optics Pro is known as Linear DNG. This is a DNG format fully supported by Adobe® and is readable by Adobe® Camera RAW™, Lightroom™ and
Photoshop™.
Chapter 4
10
7
6
5
4
3
2
8
9
toc
0
11
1
Select Adding Your Photos from Various Sources
When you first launch the application, the ‘Select’ tab is the active (highlighted) tab. Make
sure the ‘File System’ icon (at top right of main window) is selected. When this is done, your
workspace will display a familiar Explorer-style browser where the top two panes (which are
resizable) allow you to navigate around the files on your hard drive or external media. The
header strip for the ‘Files’ pane has two buttons at the far right. These two buttons let you change
between viewing your image files as thumbnails or as a classic ‘details’ file list.
Adding (importing) images
This initial ‘Select’ stage involves adding the photos you want to process into the Project window,
which will remain in the lower part of your screen throughout all four stages (from Select to
Review). In DxO Optics Pro v5, a preset is always applied to the imported image; but you can
choose to go beyond the ‘DxO Default’ and choose another preset from the list. We will see
later how you can create your own fine-tuned presets (Chapter 6).
You can choose a preset for one image or a whole group of images
17
As you drag thumbnails from the Content folder to your project, or select them and click the
‘Add’ button (both actions are the same), the selected preset is applied to the images, and
they appear in the Project window, which you can resize to accommodate a useful number of
images. You can use the mouse to drag the dividers to resize these panes.
Of course, if you have a different set of corrections and adjustments to be applied to various
images in a project, you can import your first set of pictures with one set of adjustments, and
then highlight and apply a different set of settings to the second set. Remember, each image in
your project is treated individually, so your flexibility in processing possibilities is virtually unlimited — there’s nothing to stop you choosing a different preset for every image if you want to!
In the group of icons at the top right of the main window, next to the System icon, you will
10
7
6
5
4
3
2
8
9
toc
0
11
1
see the Project Database icon. When you click on this, the left pane updates to display a
chronological list of all the projects you already processed (the very first time you work with
DxO Optics Pro v5, this may be empty). If you click one of your previous projects, you will see
the thumbnails of all images belonging to this project. You can then import one (or more) of
them into the current project. DxO Optics Pro v5 will re-create the full configuration you had
used for this image, including the settings used in the previous project. This allows you to easily
modify some settings in order to get a different version of the image.
The Project pane header bar has two buttons on the right-hand side. These two buttons let
you change between viewing your image files as thumbnails or as a classic ‘details’ file list.
The same buttons appear in the top right corner of the files pane, in which you perform the
same functions.
On the left of the Project window title bar you can see buttons for managing your project
(The project name is displayed just to the left of them.) The buttons let you create a new project / save and/or rename a project. Every project is automatically saved in the
DxO Optics Pro internal database after image processing, but you can save a project before
completion — for instance, if you want to start a new project while saving the current one to
finish later.
Star-ranking and Stacking
18Import plug-ins
Choosing the image source
Another useful feature in version 5 is the program’s ability to use plug-ins that allow you to
access photo collections from other software packages. The installed plug-ins will appear in
the upper right of your screen, next to the System and Project Database icons.
These plug-ins control the import of ‘collections’ of your images from other software packages.
This feature allows you take full advantage of the organizational and sorting capabilities of
various professional programs you may be using, such as Apple’s Aperture, Adobe’s Lightroom,
Iview Media Pro, etc. When you click on a plug-in icon, a list of libraries (collections) associated
with the corresponding program will be displayed in the left-hand pane. Click on a collection
and you will be able to access your original images in those collections. Please check on www.
dxo.com for future availability of these plug-ins.
ATTENTION: if your images have been modified, or converted from raw
into JPG by one of the aforementioned programs, and their metadata have
been altered, DxO will no longer be able to apply the principal optical corrections for which it was designed.
The Project window
This is the place where all your images are referenced; the paths to the original and corrected
images are recorded in the Project, along with all specific settings applied to the corrected
image.
ATTENTION: if you move files once you have run a project, DxO may not
be able to find them if you want to run it again.
At the bottom right of the content pane is a small slider with a button at each end. Dragging
the slider to the right, or clicking the right-hand button, increases the thumbnail size displayed.
Dragging the slider to the left or clicking the left-hand button reduces the size of the thumbnails.
To the right of each thumbnail image, you can also choose to ‘rank’ your images, with a one
to five star system (unlike in DxO Optics Pro v4, these stars have no effect on the status of the
images in the Process tab: see the Red/Orange/Green light system below).
Star ranking
The thumbnails and their buttons
On the top left of every thumbnail imported into your project, you see a group of three dots
(by default, they show a central orange ‘light’). This group describes the Process status of the
image: a green light means you want to process the image concerned, a red light that you
reject it (but since it remains in your project, you can always change your mind later!), and an
orange light that you haven’t decided yet.
This system is designed to make it easier to select your best pictures from out of a huge number
of images. When you come back from a shoot, simply drag the whole content of your images
folder into the project window; set a red light on discarded images and a green one for those
you need to process. When there are no more orange lights to be seen, that means you have
finished choosing… but since the rejected photos remain in the project window (with a red
light), you can still change your mind.

To remove one or more images from your project, you simply click on the orange icon
10
7
6
5
4
3
2
8
9
toc
0
11
1
displayed in the top right corner of each thumbnail; if multiple images are selected, clicking the
on any one of them will delete the entire selection in one action. You can select a group of
adjacent images by dragging a ‘rubber-band’ box around them with the mouse, or by holding
down the ‘Shift’ key as you click on the first and last images in a series. Multiple non-adjacent
images can be selected by holding down the ‘Ctrl’ key while you click on them.
The buttons associated with each thumbnail offer the following functions:
removes the image(s) from the current project
rotates the image for correct viewing orientation
creates a stack (active on the last-selected image of a multiple selection)
un-stacks a stack of images (active when a stack is selected)
In addition to these buttons and ranking stars, certain icons may appear above each thumbnail
indicating the status of the image for correction. These icons give important information about
each image. A frame round a thumbnail indicates that it is the master image for a stack (the
number of images in the stack is shown in the bottom right-hand corner). Focal length or focusing distance ambiguity warning display can be enabled or disabled under the ‘Preferences’ tab
[Edit > Preferences > Module ambiguity].
Fully automatic mode
The Select workspace screen is divided into three windows. Two of the windows are in the
upper part of the screen, while the lower window (the Project window) occupies the lower
portion of the screen.
TIP: If you do not see all three windows, make sure that either the hori-
zontal or vertical divider bars have not been dragged all the way up or
down or to either side of your screen. The bars can be identified by three
dots ‘===’ appearing in the middle of the divider. Simply dragging the
bar from the edge of the monitor screen towards the middle will reinstate
the missing window.
Along the top of the main window, additional icons appear on the right hand side. Each of
these allows you to choose a different way of selecting the images you want to import. The File
System icon is the most popular. It gives you access to images via your hard drive’s folders and
subfolders. The second icon is the Project Database icon. This allows you to search previous
projects, in case you would like to create a new version of an image already processed.
Both icons work in a similar way. You pick a folder in the first case, or a project in the second,
and their contents are displayed in the content window.
Other icons may be available. These will allow access to image databases managed by other
software programs you may have installed on your system. To see these icons, you will need
to install the corresponding Import plug-in for each program. Details and availability of plug-in
modules can be found on the DxO website (www.dxo.com).
19
Once you have selected and added pictures to your project, if you don’t need to make any
manual adjustments to any of your images, you can simply click on the ‘Process now’ button to
the right of the Project pane, and processing will take place. You will only be asked for output file
type and image destination information, and to intervene manually if necessary to input data
in the event DxO does not have enough information to process certain images correctly.
To take things further…
Select tab screen
When you start DxO Optics Pro, you will see the first main screen of the program. The Select
tab workspace is your key to building projects.
A project is a container for images that are grouped into batches and processed. All images,
even a single image, need to be part of a project to be processed.
File System icon
Windows version:
The upper left window (File system window) is the main folder tree display. This display is very
similar to the system trees displayed by Windows Explorer. Clicking on a ‘+’ will reveal the next
level of the folder structure. When you navigate to the folder containing the images you want to
process and click on the folder name, the contents of that folder will be displayed in the upper
right hand window (Folder contents window), in the form of thumbnails or a list, depending on
what you select using the buttons above this window.
Navigating around within the file system
10
7
6
5
4
3
2
8
9
toc
0
11
1
Macintosh version:
The Macintosh version of the File System reproduces the various folder displays available in the
Mac OS X Finder. You can search folder content in either column view, list view, or thumbnail
view. With the latter two options, a local menu at the top of the display windows gives you the
active folder path.
Creating a project from several folders
You can build your projects within Optics Pro using the contents of one folder, or many folders.
However, only the contents of one folder can be displayed at any one time in the right hand
window. If you are creating a project from several different folders, select your images successively, first of all in the first folder, then in the second, and so on, or else in a Lightroom database;
all the images will stay in their own folders, but will be grouped together into one project.
Project Database icon
When you click this icon, the upper left window shows the contents of the internal Project
Database. This database will automatically record every project you’ve worked on, listed in
chronological order. You’ll see most recent projects first, then yesterday’s, last week’s, last
month’s, and so on.
Navigating around in the database
When you click on a project name, the right-hand window shows the images processed in
that project. If you drag some of these images into the current Project window, they will be
added, along with their respective settings. Opening a project from the database like this lets
you recover images in each original folder together with the settings used in that project. This
means that if you applied some specific settings in the original project, these same settings
will be reintroduced into the current project. This gives you the option to modify some settings
in order to obtain a different version of the same original image. On the other hand, if you just
drag images into a new project, it is the active preset (visible in the ‘Preset to be applied’ local
menu) that will be applied to them.
If an image has been moved from the original folder since the project was created, DxO will
try to find it by searching the computer. Otherwise, a thumbnail will indicate that there is an
image missing in the project.
Content window
At the top left of the right hand window, the path and name of the selected folder is displayed as
well as the number of files in the folder. In the top right-hand part of the window you’ll find two
(Windows) or three (Mac) buttons offering different ways of displaying the folder contents. The
left-most button displays the folder’s contents in a list view showing each file’s name (Photo),
file extension (Extension), file size (Size), and its creation or modification date (Date).
Note: You can re-sort the names of the files in the folder alpha-numerically, in ascending or descending order.
20
A slider bar in the lower right hand corner of the window adjusts the size of the thumbnails.
10
7
6
5
4
3
2
8
9
toc
0
11
1
Moving the slider to the left decreases the size of the thumbnails, while moving the slider to
the right increases the size of the thumbnails.
TIP: To display more thumbnails, you can adjust thumbnail size using the
slider at the bottom right of the window.
The following options are only available under Windows.
Show RAW – [Filter] When checked, RAW image files will be shown in the file list or thumbnail
images displayed. If unchecked, RAW files will be filtered out (not displayed).
Show RGB – [Filter] When checked, RGB image files (usually JPG or TIFF) will be shown in
the file list or thumbnail images displayed. If unchecked, RGB files will be filtered out (not
displayed).
Show corrected images – [Filter] When checked, images processed by DxO Optics Pro will
be shown in the file list or among the thumbnail images displayed with a warning icon. If the
option is unchecked, corrected images will be filtered out (not displayed).
ATTENTION: Remember, already-processed Optics Pro images cannot
be reprocessed by the program, as only original images can be processed.
You will need to reprocess the original images. However, keeping corrected
images displayed lets you quickly spot which images in a large folder
haven’t yet been processed by DxO.
NOTE: Active sort options will be checked on the menu list.
21
Changing thumbnail size using the ‘−/+’ slider
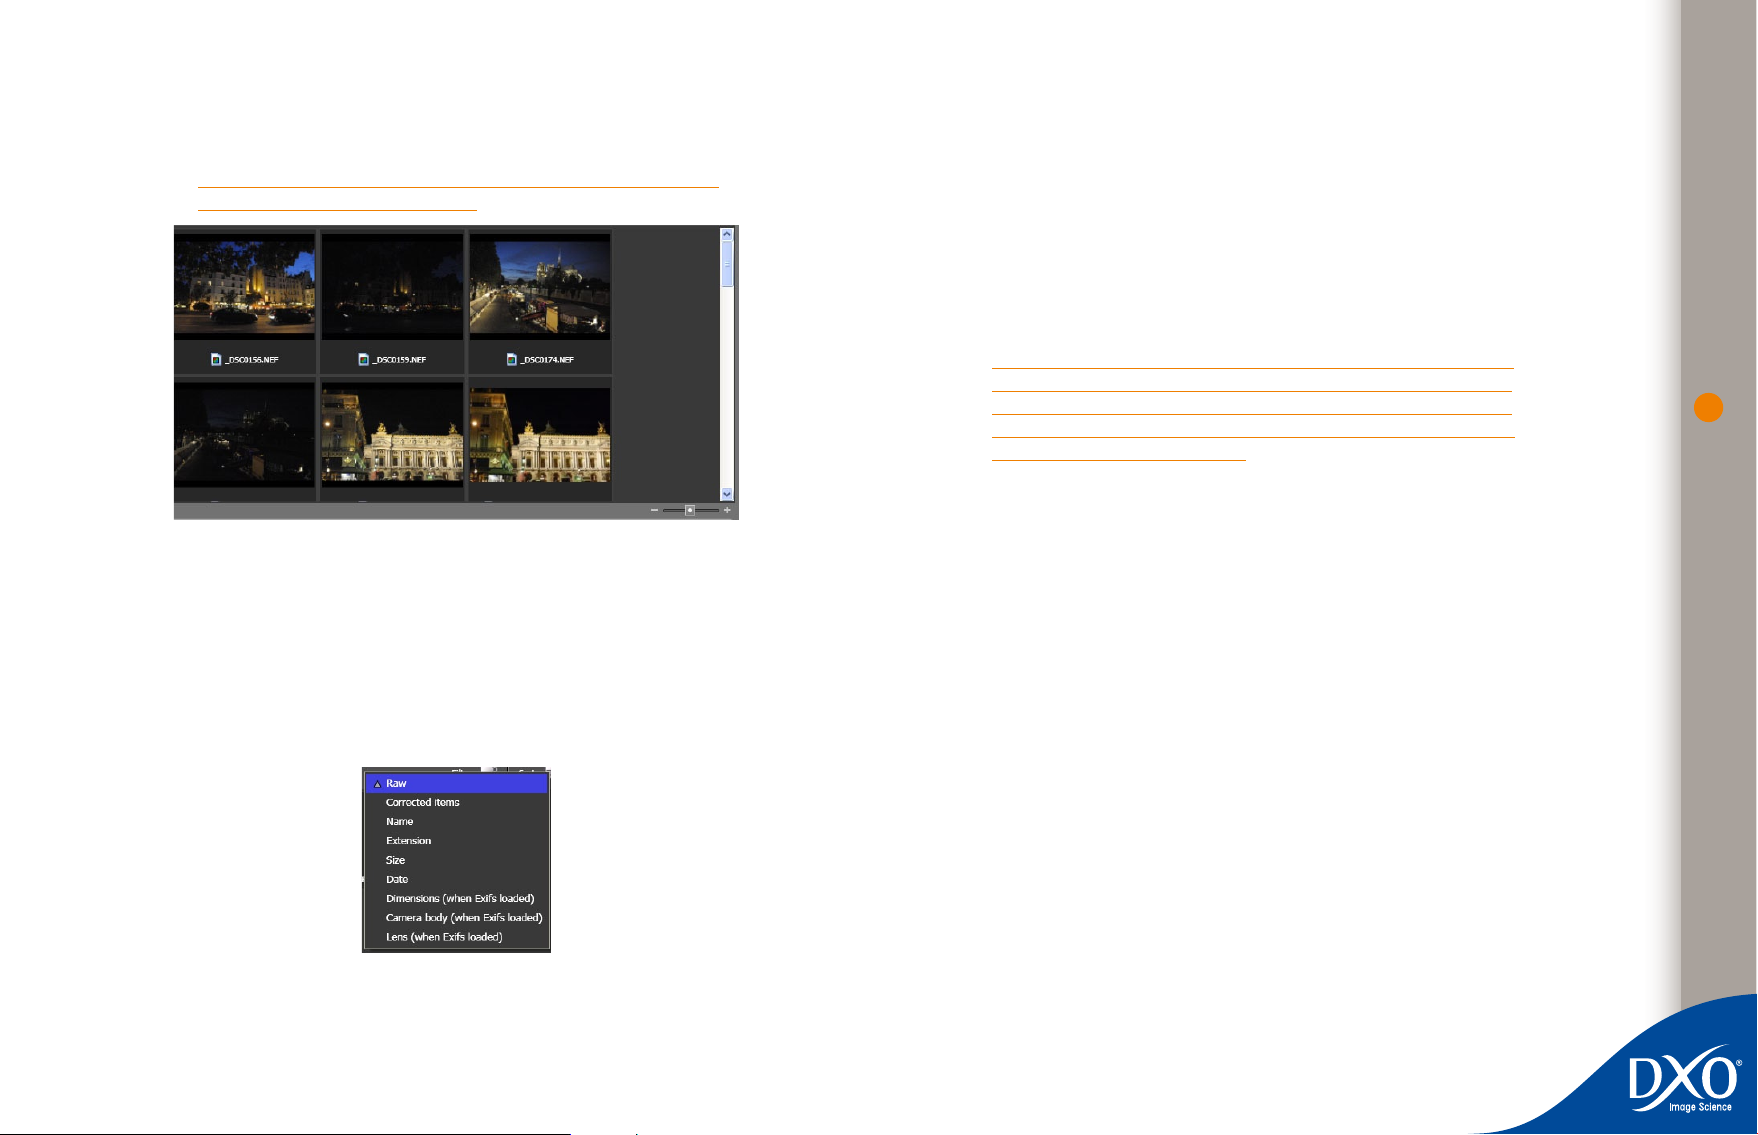
To the right of the thumbnail button is the Sort button that allows you to filter and sort the files
in the folder display. Options available to you using the Sort button are:
Name – Sorts the contents of the folder alphabetically by file name.
Size – Sorts the contents of the folder by file size.
Date – Sorts the contents of the folder by file creation/modification date. This is useful to quickly
find the most recent image files in a folder.
Sort options
Project window
The lower pane is the Project window. This is where you build your batches by adding the images
you want to process to a project. You can add your images in one of two ways:
1. You can drag-and-drop one or more images from the folder contents window to
the Project window. This is the fastest and most convenient way to add images to a
project.
2. You can also add images to the Project window by selecting them (e.g. using
Ctrl+click or Shift+click under Windows) and clicking the ‘Add’ button in the central
bar.
3. Lastly, you can import all of the images in a folder by dragging and dropping the
folder icon onto the Project window (does not apply on Mac).
Choosing settings for the images
In all cases, a preset (a group of settings for the DxO Optics Pro correction motors) is applied
to your images when they are selected, enabling you to process them right away with going
through the ‘Prepare’ step if you have no need to fine-tune the settings. By default, the ‘DxO
Default’ preset applied to images applies all the standard automatic corrections. These cor-