

Dxo FILMPACK V1.1 User Manual
DxO FilmPack v1.1 User Guide
- 1 -
User Guide
DxO FilmPack v1.1
DxO FilmPack v1.1 is available in three versions:
1. as a DxO Optics Pro v4.2 (Starter, Standard, and Elite versions)
plug-in
2. as a Photoshop plug-in (CS2 , CS3, Elements 4 and 5)
3. as a stand-alone application for Macintosh (MacOS X 10.3 and 10.4)
and Windows (2000, XP et Vista).
1. DxO Optics Pro plug-in
DxO FilmPack is a component that adds new functionalities to DxO Optics
Pro; its mission? Give your digital images the style of the most well known
film brands. The colors—(and the grain!) of Kodachrome™, Tri-X™ and
Velvia™ among more than 20 total options, which have been analyzed and
reproduced to be applied with just one click to all your images. DxO
FilmPack digitally simulates the striking colors of Kodachrome 64™, the
soft grain of Tri-X™ or the well-rounded flesh tints of Astia™. All
combinations of grain or color are therefore possible, for a maximum of
creativity…
How to use DxO Filmpack
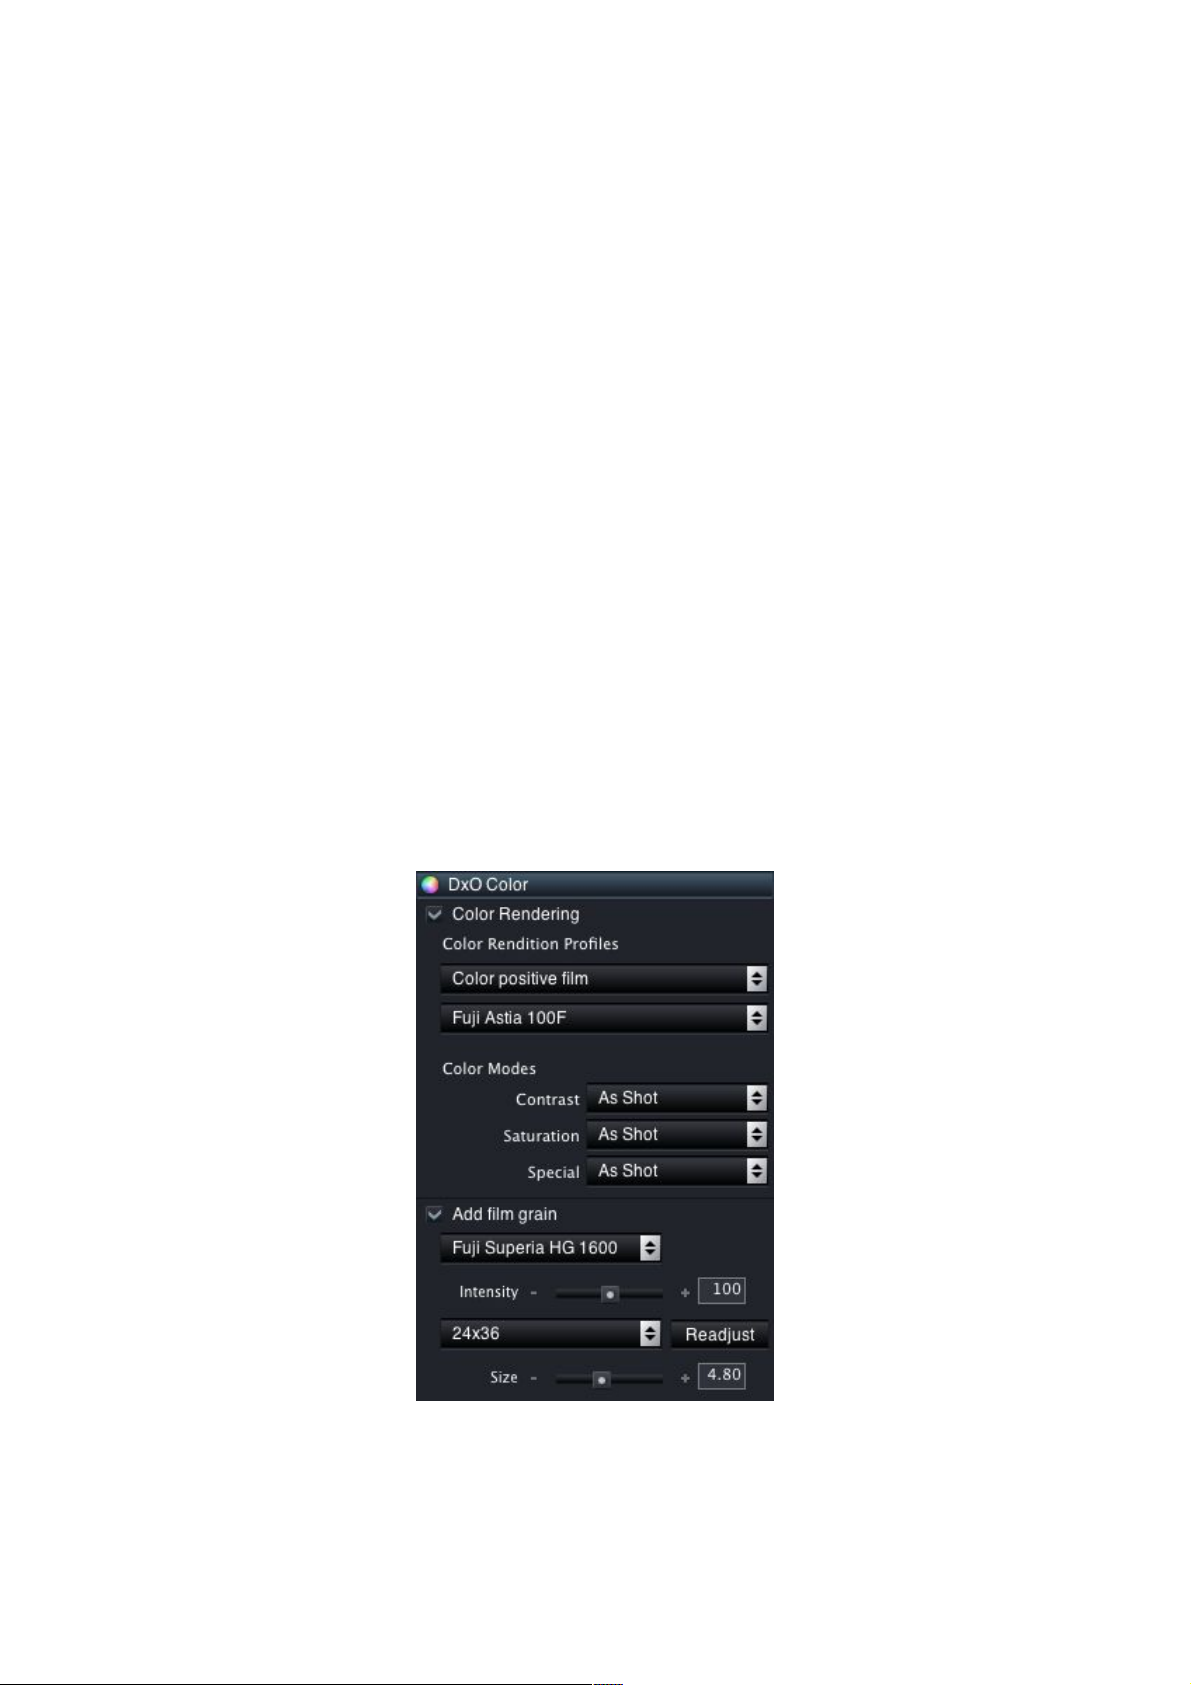
After activation, you access the functions of DxO FilmPack from the DxO
Color Tab, in Expert Mode. Begin by clicking on the “Color rendering”

DxO FilmPack v1.1 User Guide
- 2 -
checkbox if not already selected, then scroll through the menu located
just underneath “Color rendition Profiles”. The activation of the DxO
FilmPack causes several supplementary options to appear: Color positive
film, Color negative film, Black and White film and “Cross processed film”.
The choice of one of these renderings updates the second menu located
immediately underneath: you can then select the desired film.
Please note the two very special profiles provided in the DxO FilmPack:
the “Cross Processed” renderings. This indicates a specific development
mode which consists in processing slide film (such as Kodak Elite 100™)
with the treatment chain adapted to negative film; or processing a
negative (Fuji Superia 200™) in the chemicals reserved for slides! The
very specific results give to digital photographers the opportunity to be
inspired by the creative ideas of the film era.
A new option in DxO FilmPack v1.1 concerns the availability of five tonings
dedicated to monochrome images. Whatever rendering profile you may
have selected, the Color Modes “Special” combo Box brings you five digital
emulations of traditional tonings: Gold, Ferric Sulfate, Sepia Gold, Sepia
Terra and Selenium.
Grain
Note that the choice of a film triggers the application of the corresponding
color profile; the grain will only be applied if the box “Add film grain” is
checked (lower in the same palette). This command also allows you to
apply the grain, even if you haven’t chosen the color rendering of a film.
In this part of the palette, you have complete control of the grain that will
be incorporated into the image. You can either respect the grain
corresponding to the chosen film or choose that of another film. Note that
the grain is not visible below the 75% zoom level.
Next, you set the intensity of the grain, with the help of the corresponding
cursor. The value “100” corresponds to the visual presence close to that of
the original film, which can then be moderated or exaggerated. Finally,
the size of the grain can also be modified: three pre-defined positions
propose the sizes corresponding to the three classic formats of film
photography (24x36mm, medium format 6x6cm, and large format 4x5
inches). You can then manually define the size with the help of the cursor
or by entering a value in the associated field.
Obviously, all correction modules available in DxO Optics Pro can be used
to modify the impact of the DxO FilmPack. In the case of color negatives,
they will help you to finalize your own “color print”, for example by playing
with the cursors of the Lighting and White Balance palettes.
Using DxO FilmPack brings all the advantages of film simulation, while
benefiting from the legendary automatic corrections of DxO Optics Pro V4,
on either JPEG or RAW images. Note that the most outstanding results are
obtained with RAW images.
 Loading...