

Page 1
DNR-312L
mydlink™ Network Video Recorder
with HDMI Out
Quick Install Guide
Page 2
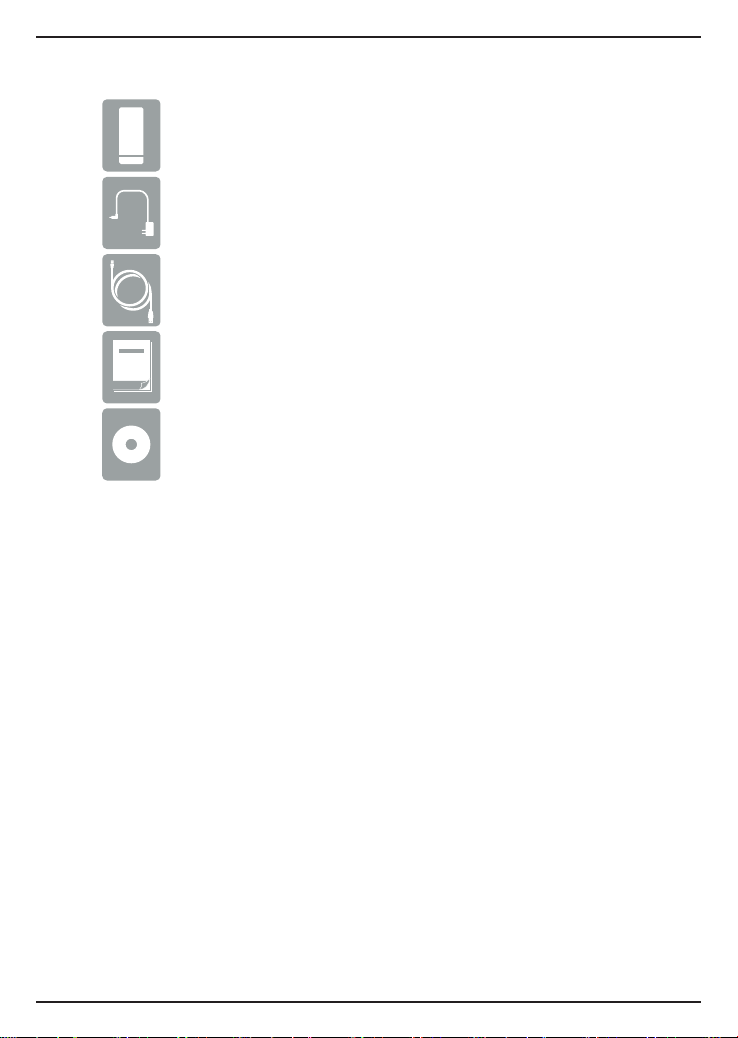
Package Contents
D-Link DNR-312L mydlink Network Video Recorder with HDMI Out
Power Adapter
Ethernet Cable
Quick Install Guide
CD-ROM
If any of the above items are missing, please contact your reseller.
Minimum Requirements
Computer with:
• Microsoft Windows® 8, 7, or Mac OS® X (10.7 or higher)
• Pentium 4 – 2.4 GHz or above; at least 512MB RAM
• Internet Explorer® 7, Firefox® 12, Chrome™ 20, or Safari® 4 or higher
• CD-ROM drive
Network/Internet Access:
• 10/100/1000 Ethernet Network
• Broadband Internet Connection (for remote access)
• Network Camera(s) - refer to D-Link's website for a list of supported cameras
For Storage:
• 3.5" SATA Hard Disk Drive
Optional:
• Television or Monitor with an HDMI Port
• USB Mouse to Control the Interface when Connected to a TV or Monitor
2
Page 3
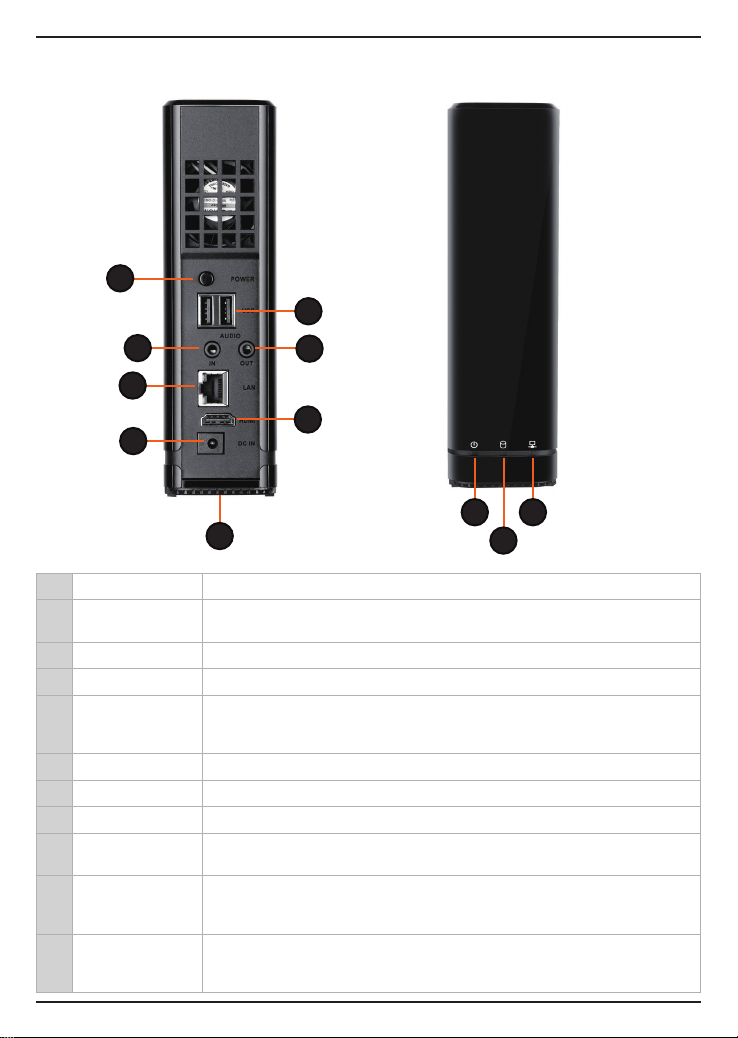
Product Overview
ENGLISH
1
5
2
6
3
7
4
9 11
8
1 Power Button Press to turn the device on or press and hold for ve seconds to turn o.
2 Audio In Port
3 Ethernet Port Connect the device to your router or switch using an Ethernet cable.
4 Power Port Connect the supplied power adapter to this port.
5 USB Ports
6 Audio Out Port Connect external speakers for audio.
7 HDMI Port Connect to your TV or monitor using an HDMI cable.
8 Reset Button Press and hold for 10 seconds to reset the device back to the factory default settings.
9 Power LED
10 HDD LED
11 Network LED
Connect a microphone to use 2-way communication with your camera(s). Note that
your camera(s) must support this feature.
Connect a USB thumb drive or external hard drive (with external power supply) for extra
storage. You can also connect a USB mouse to control the interface when connected to a
TV or monitor via HDMI.
A solid green light indicates the device is powered on. This light will blink during bootup. If the power LED is o, the device is not powered on.
A solid green light indicates that the hard drive is installed properly. This light will blink
during the read/write process. If the light is red, this indicates the hard drive is installed
but failed.
A solid green light indicates that the device is connected to your network properly.
This light will blink during data transfer. If the light is o, this indicates the device is not
connected to your network.
10
3
Page 4

Installation
The Setup Wizard will walk you through installing and conguring your DNR-312L
including installing the hard drive and connecting it to your network.
Step 1:
Windows Users - Insert the DNR-312L installation CD in the CD-ROM drive. If the
CD Autorun function does not automatically start on your computer, go to Start
> Run. In the run box type D:\autorun.exe (where D: represents the drive letter of
your CD-ROM drive) and click OK.
Mac Users - Insert the DNR-312L installation CD in the CD-ROM drive. After
you have inserted the CD into your computer, go to the CD drive directory, and
double-click the Mac Utility folder to enter. Double-click the DNR-312L Setup
Wizard le to start the Setup Wizard.
Note: If you lost or do not have the CD, you can go to http://www.mydlink.com/
support. Then, click the Storage tab and select your product to download the Setup
Wizard.
Step 2:
Click the Start button to start the wizard and follow the instructions to set up your
NVR. If you want to add cameras to your previously-configured DNR-312L, click
the Skip button.
Note: Ensure that cameras have been installed on the network before initiating the
DNR-312L setup.
4
Page 5

mydlink Portal
After registering your DNR-312L NVR with a mydlink account in the NVR Setup
Wizard, you will be able to remotely access your NVR from the www.mydlink.
com website. Make sure you have the latest version of Java and Active X.
Step 1:
Open your web browser and go to http://www.mydlink.com, then log in to
mydlink portal.
Step 2:
Select your NVR from the device list and click Connect. Enter the user name and
password of the DNR-312L that you have set up using the Setup Wizard.
Step 3:
A new window of your NVR's web interface will appear. Now you can remotely
access the live view and playback videos of the connected cameras.
Browser Requirements:
Java
Active X
ENGLISH
5
Page 6

mydlink View - NVR App (Free)
Search for “mydlink View - NVR ” to download and install the app on your smartphone
or tablet when connected to the Internet.
iOS
System Requirements: Refer to mydlink View - NVR app page on the App StoreSM and Google PlayTM.
Once the download has been completed, launch the “mydlink View - NVR” app and
log in to your mydlink account. Select your DNR-312L from the device list to access
the live video from the connected cameras.
Now you can remotely access the live video, playback recorded videos, and
manually enable or disable recording.
Android
6
Page 7

Technical Support
Having trouble installing your new product? D-Link’s website contains the latest
user documentation and software updates for D-Link products. U.S. and Canadian
customers can contact D-Link Technical Support through our website.
USA
http://support.dlink.com
Canada
http://support.dlink.ca
Version 1.00(EN)_130x183
October 16, 2014
©2014 D-Link. All Rights Reserved. D-Link, and the D-Link logo are trademarks or registered
trademarks of D-Link Corporation or its subsidiaries. All other third-party marks mentioned herein
may be trademarks of their respective owners. This publication may not be reproduced, in whole or in
part, without prior express written permission from D-Link Systems, Inc.
Page 8

Technical Support
You can nd software updates and user documentation on the D-Link website.
Tech Support for customers in
United Kingdom (Mon-Fri)
Website: http://www.dlink.com
Home Wireless/Broadband 0871 873 3000
(9.00am–06.00pm, Sat 10.00am-02.00pm)
Managed, Smart, & Wireless Switches, or
Firewalls 0871 873 0909 (09.00am- 05.30pm)
(BT 10ppm, other carriers may vary.)
Ireland (Mon-Fri)
Website: http://www.dlink.com
All Products 1890 886 899 (09.00am-06.00pm,
Sat 10.00am-02.00pm)
Phone rates: €0.05ppm peak, €0.045ppm off
peak times
Australia:
Tel: 1300-766-868
24/7 Technical Support
Web: http://www.dlink.com.au
E-mail: support@dlink.com.au
India:
Tel: +91-832-2856000
Toll Free 1800-233-0000
Web: www.dlink.co.in
E-Mail: helpdesk@dlink.co.in
Singapore, Thailand, Indonesia,
Malaysia, Philippines, Vietnam:
Singapore - www.dlink.com.sg
Thailand - www.dlink.co.th
Indonesia - www.dlink.co.id
Malaysia - www.dlink.com.my
Philippines - www.dlink.com.ph
Vietnam - www.dlink.com.vn
Korea:
Tel : +82-2-2028-1810
Monday to Friday 9:00am to 6:00pm
Web : http://d-link.co.kr
E-mail : g2b@d-link.co.kr
New Zealand:
Tel: 0800-900-900
24/7 Technical Support
Web: http://www.dlink.co.nz
E-mail: support@dlink.co.nz
South Africa and Sub Sahara
Region:
Tel: +27 12 661 2025
08600 DLINK (for South Africa only)
Monday to Friday 8:30am to 9:00pm South
Africa Time
Web: http://www.d-link.co.za
E-mail: support@d-link.co.za
Page 9

Technical Support
D-Link Middle East - Dubai, U.A.E.
Plot No. S31102,
Jebel Ali Free Zone South,
P.O.Box 18224, Dubai, U.A.E.
Tel: +971-4-8809022
Fax: +971-4-8809066 / 8809069
Technical Support: +971-4-8809033
General Inquiries: info.me@dlinkmea.com
Tech Support: support.me@dlinkmea.com
Egypt
1, Makram Ebeid Street - City Lights Building
Nasrcity - Cairo, Egypt
Floor 6, ofce C2
Tel.: +2 02 26718375 - +2 02 26717280
Technical Support: +2 02 26738470
General Inquiries: info.eg@dlinkmea.com
Tech Support: support.eg@dlinkmea.com
Kingdom of Saudi Arabia
Ofce # 84 ,
Al Khaleej Building ( Mujamathu Al-Khaleej)
Opp. King Fahd Road, Olaya
Riyadh - Saudi Arabia
Tel: +966 1121 70008
Technical Support:
+966 1121 70009
General Inquiries: info.sa@ dlinkmea.com
Tech Support: support.sa@ dlinkmea.com
Pakistan
Islamabad Ofce:
61-A, Jinnah Avenue, Blue Area,
Suite # 11, EBC, Saudi Pak Tower,
Islamabad - Pakistan
Tel.: +92-51-2800397, 2800398
Fax: +92-51-2800399
Karachi Ofce:
D-147/1, KDA Scheme # 1,
Opposite Mudassir Park, Karsaz Road,
Karachi – Pakistan
Phone: +92-21-34548158, 34326649
Fax: +92-21-4375727
Technical Support: +92-21-34548310, 34305069
General Inquiries: info.pk@dlinkmea.com
Tech Support: support.pk@dlinkmea.com
Iran
Unit 5, 5th Floor, No. 20, 17th Alley ,
Bokharest St. , Argentine Sq. ,
Tehran IRAN
Postal Code : 1513833817
Tel: +98-21-88880918,19
+98-21-88706653,54
General Inquiries: info.ir@dlinkmea.com
Tech Support: support.ir@dlinkmea.com
Morocco
M.I.T.C
Route de Nouaceur angle RS et CT 1029
Bureau N° 312 ET 337
Casablanca , Maroc
Phone : +212 663 72 73 24
Email: support.na@dlinkmea.com
Lebanon RMA center
Dbayeh/Lebanon
PO Box:901589
Tel: +961 4 54 49 71 Ext:14
Fax: +961 4 54 49 71 Ext:12
Email: taoun@dlinkmea.com
Bahrain
Technical Support: +973 1 3332904
Kuwait:
Technical Support: + 965 22453939 / +965
22453949
Türkiye
Büyükdere Cad. Ferro Plaza No:155
D: 1 K: 1 Zincirlikuyu / Istanbul
Tel: +90 (212) 289-56-59
Email: info.tr@dlink.com.tr
 Loading...