

Page 1
Before you start
Local Cable Service
Please contact your Cable Internet provider to find out the
procedure to register the modem with their network.
The Cable Internet provider will need the following modem information:
Modem Make and Model i.e. D-Link DCM-200
Modem Serial Number i.e. HQT10C000180 (normally found on the label at
the bottom of the unit.
Modem MA
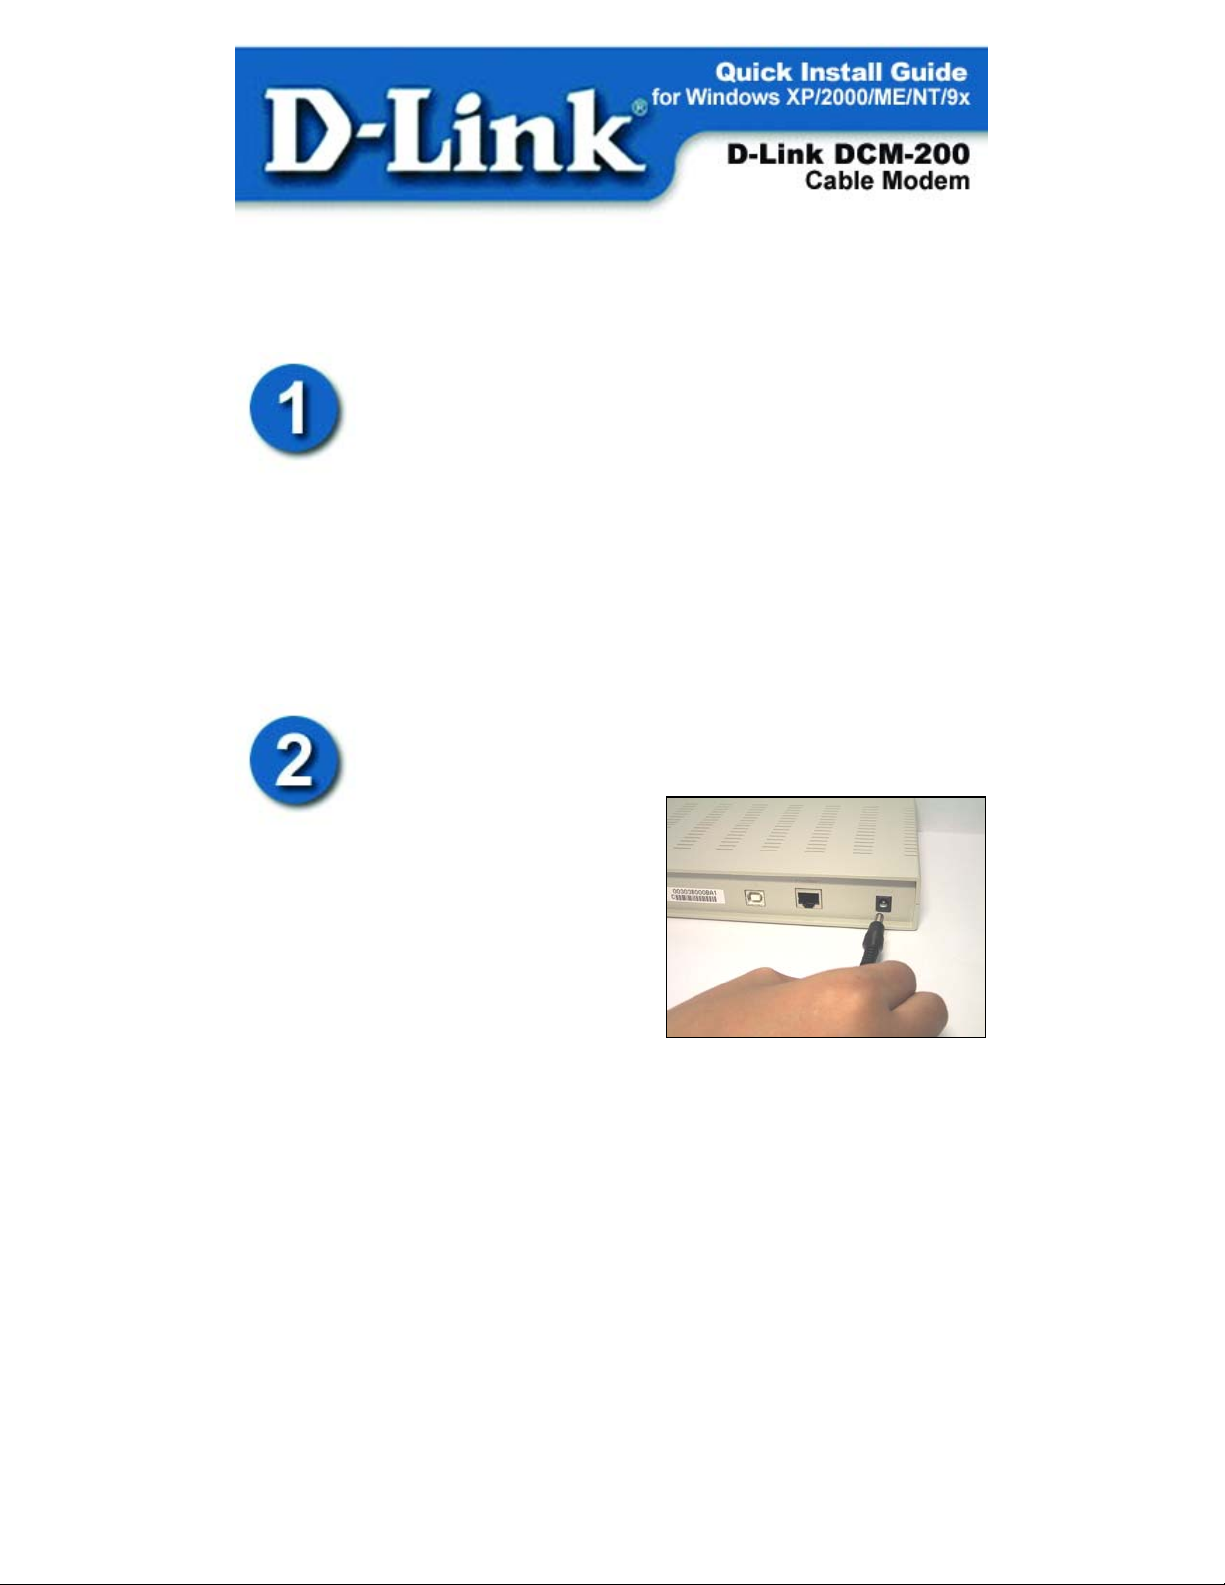
onnect the external power adapter into
C
the connector labeled “POWER” and the
other end to the electrical outlet.
*NOTE: Use only the AC power
adapter supplied with the DCM-2
Cable Modem.
C Address i.e. 0050BA2F0804 (on the back of the modem)
onnecting The Cable Modem
C
00
Page 2
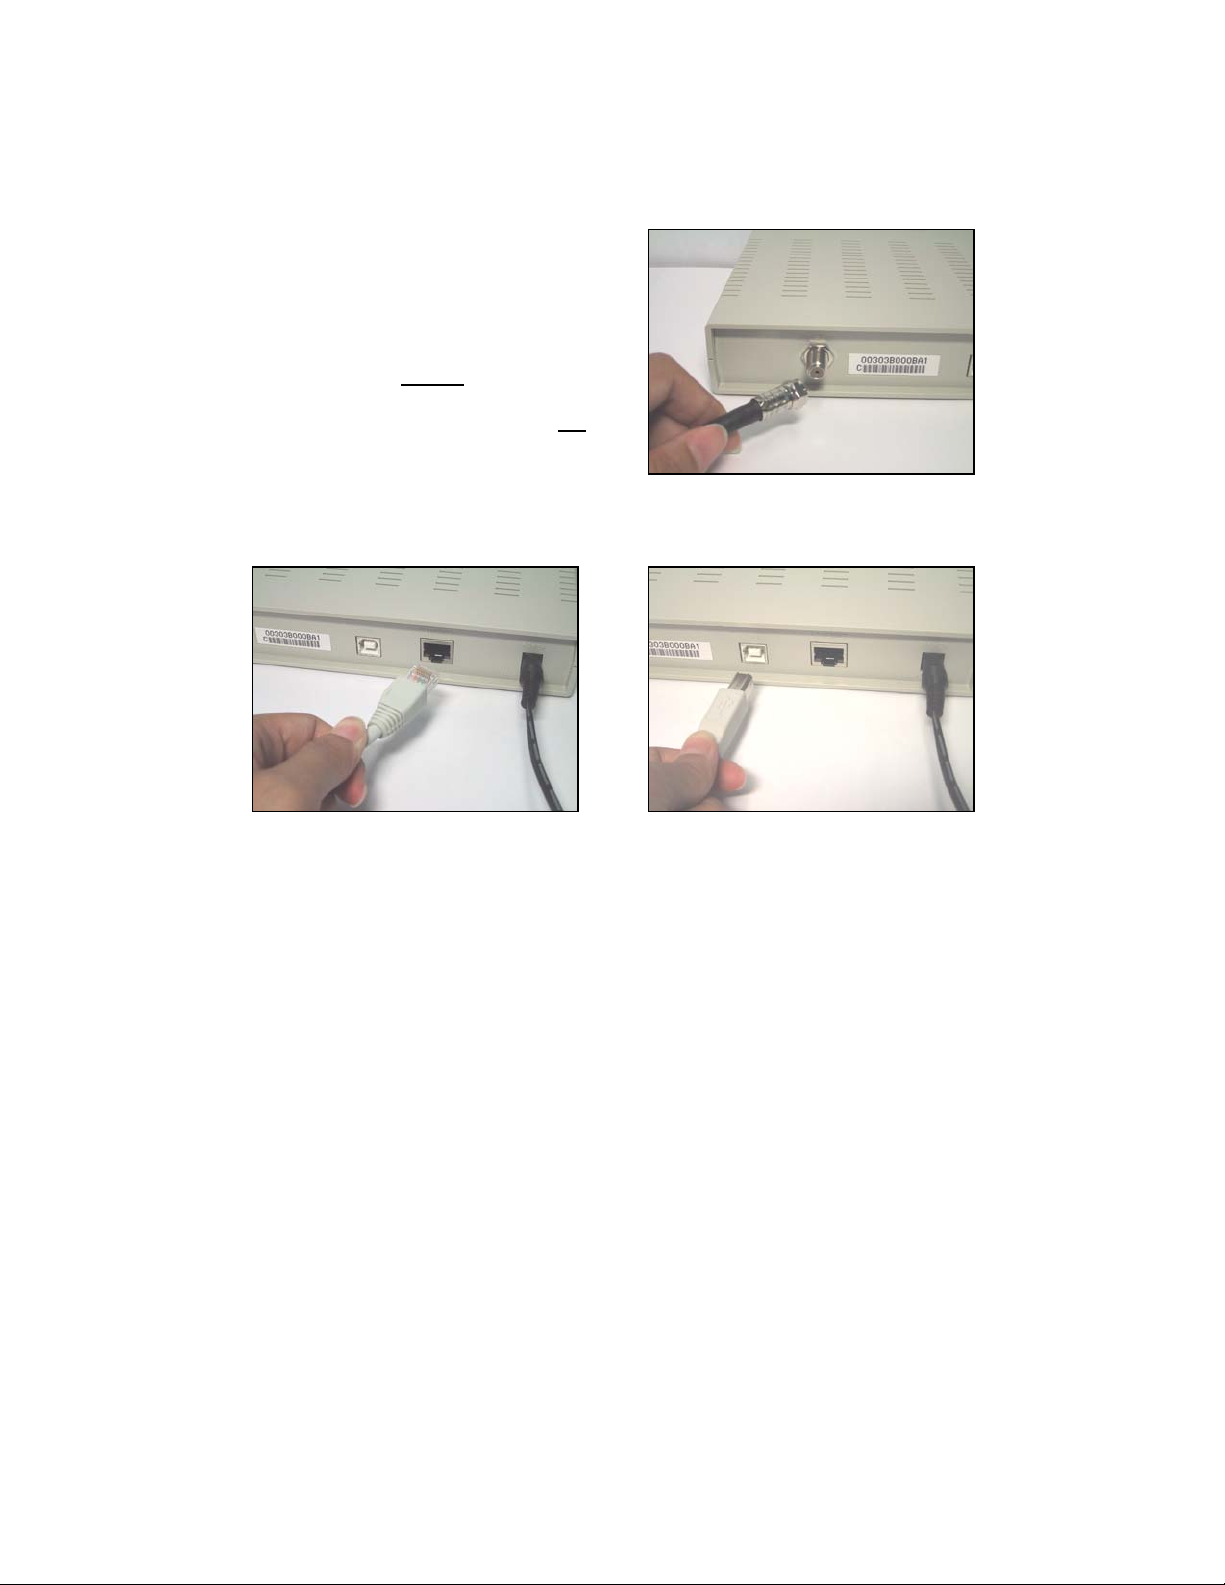
Connecting The Cable Modem Continued…
Connect the coaxial cable provided for the Internet connection to the jack
labeled “CABLE IN” in the back of the cable modem unit.
Wait 1 to 3 minutes for the status light
to illuminate. If the status LED does not
turn “ON,” please contact your
broadband cable company for further
instructions.
NOTE:
* The DCM-200 USB/Ethernet Cable Modem
will work only with the Ethernet port OR
USB port connected. BOTH PORTS
CANNOT BE CONNECTED
SIMULTANEOUSLY.
the
OR
Ethernet Cable USB Cable
A1. Connect an Ethernet cable to
the port labeled “Ethernet”
on the back of the cable
modem. Plug the other end
of the Ethernet cable into
the Ethernet adapter that is
installed in your computer.
A2. Connect a USB cable to
the “USB type B” port on
the back of the cable
modem unit. Plug the
other end of the USB
cable into the “USB type
A” outlet on your
computer.
2
Page 3
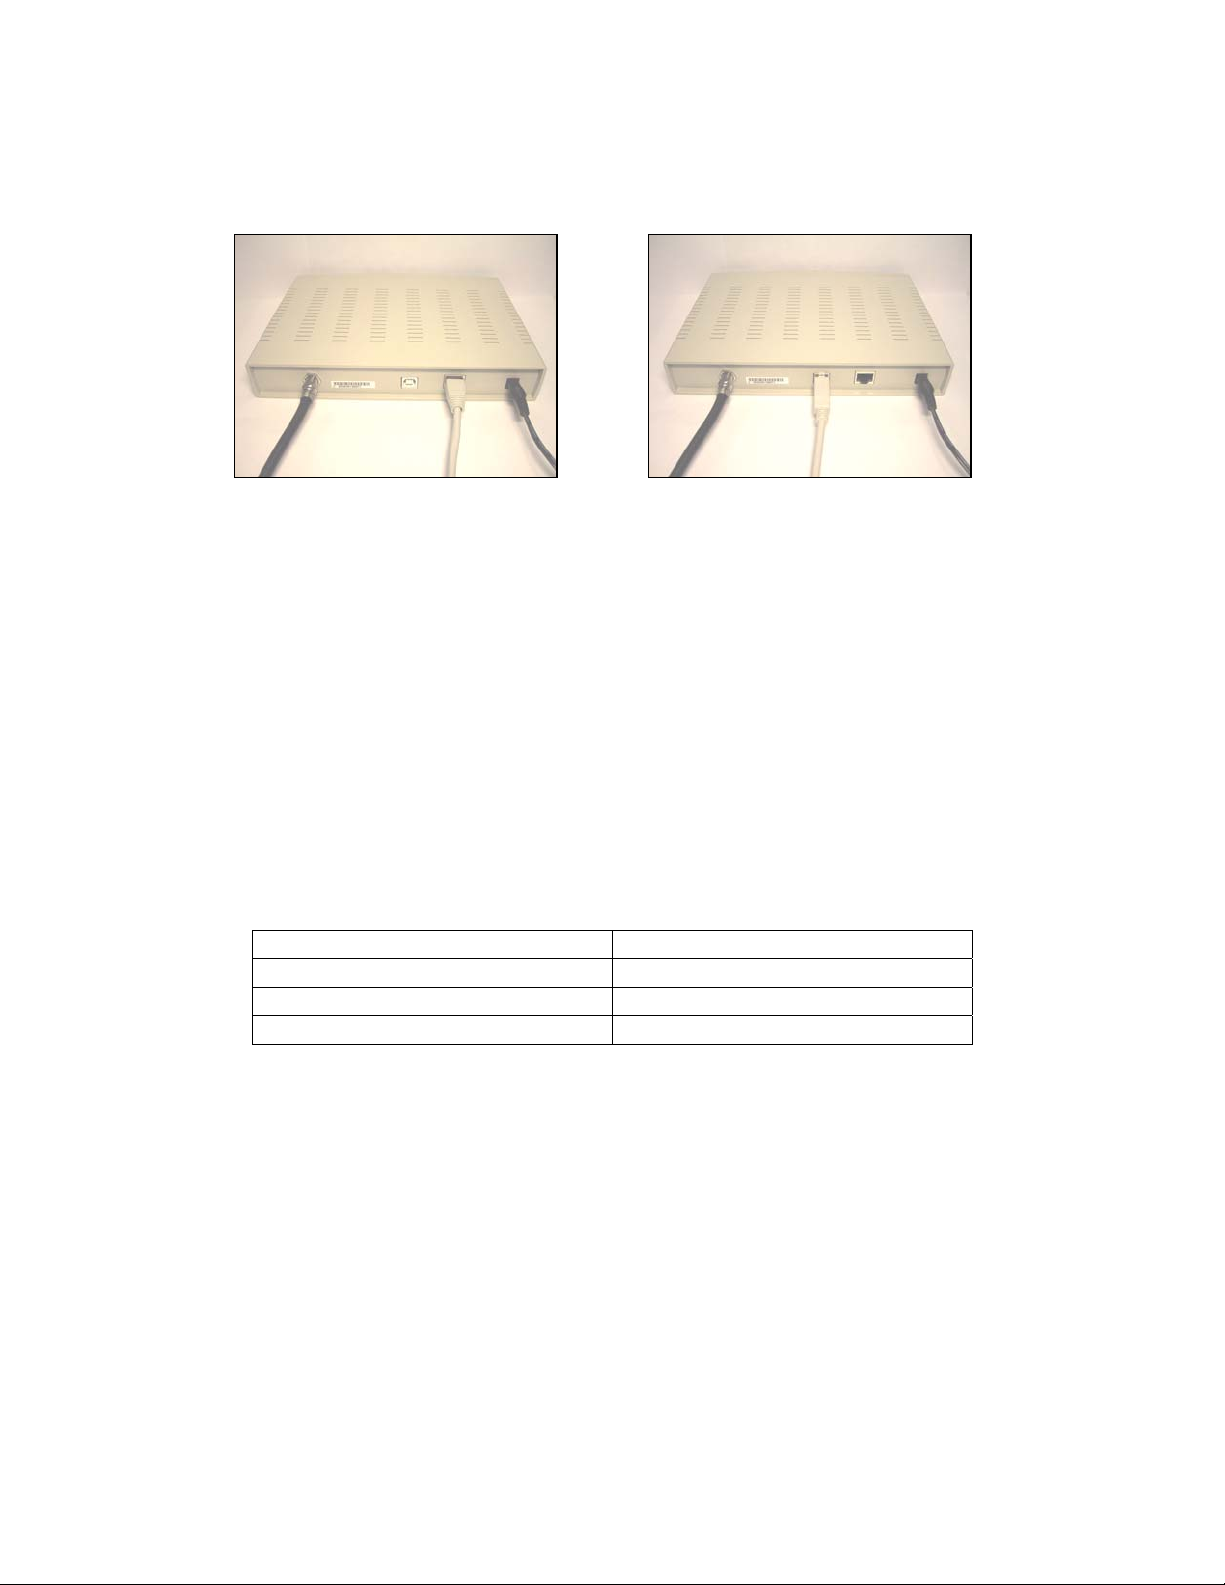
Connecting The Cable Modem Continued…
The final cable modem setup will look like the figures below:
Ethernet Cable Connection USB Cable Connection
OR
*Note: When using the USB Cable Connection, make sure the Status light
located at the front of the modem is “ON” (not blinking) before connecting
the USB cable (type A end) to your computer. DO NOT CONNECT THE
USB CABLE TO YOUR COMPUTER IF THE STATUS LED DOES
NOT SHOW A SOLID LIGHT.
If the STATUS LED continues to blink, please contact your cable provider to
ensure that your cable modem is provisioned* on their network.
* Your cable modem provider will need the model number, serial number
and MAC (Media Access Control) Address of your modem in order to
“provision” your modem on the network.
If you are using the Ethernet cable to make your connection, you have now
completed the installation. Enjoy your new cable modem!
For those using the USB cable connection, please continue with the
installation of the USB drivers, step 4.
USB Driver Installation
Windows XP Page 5
Windows 2000 Page 7
Windows ME Page 11
Windows 98/98SE Page 12
3
Page 4
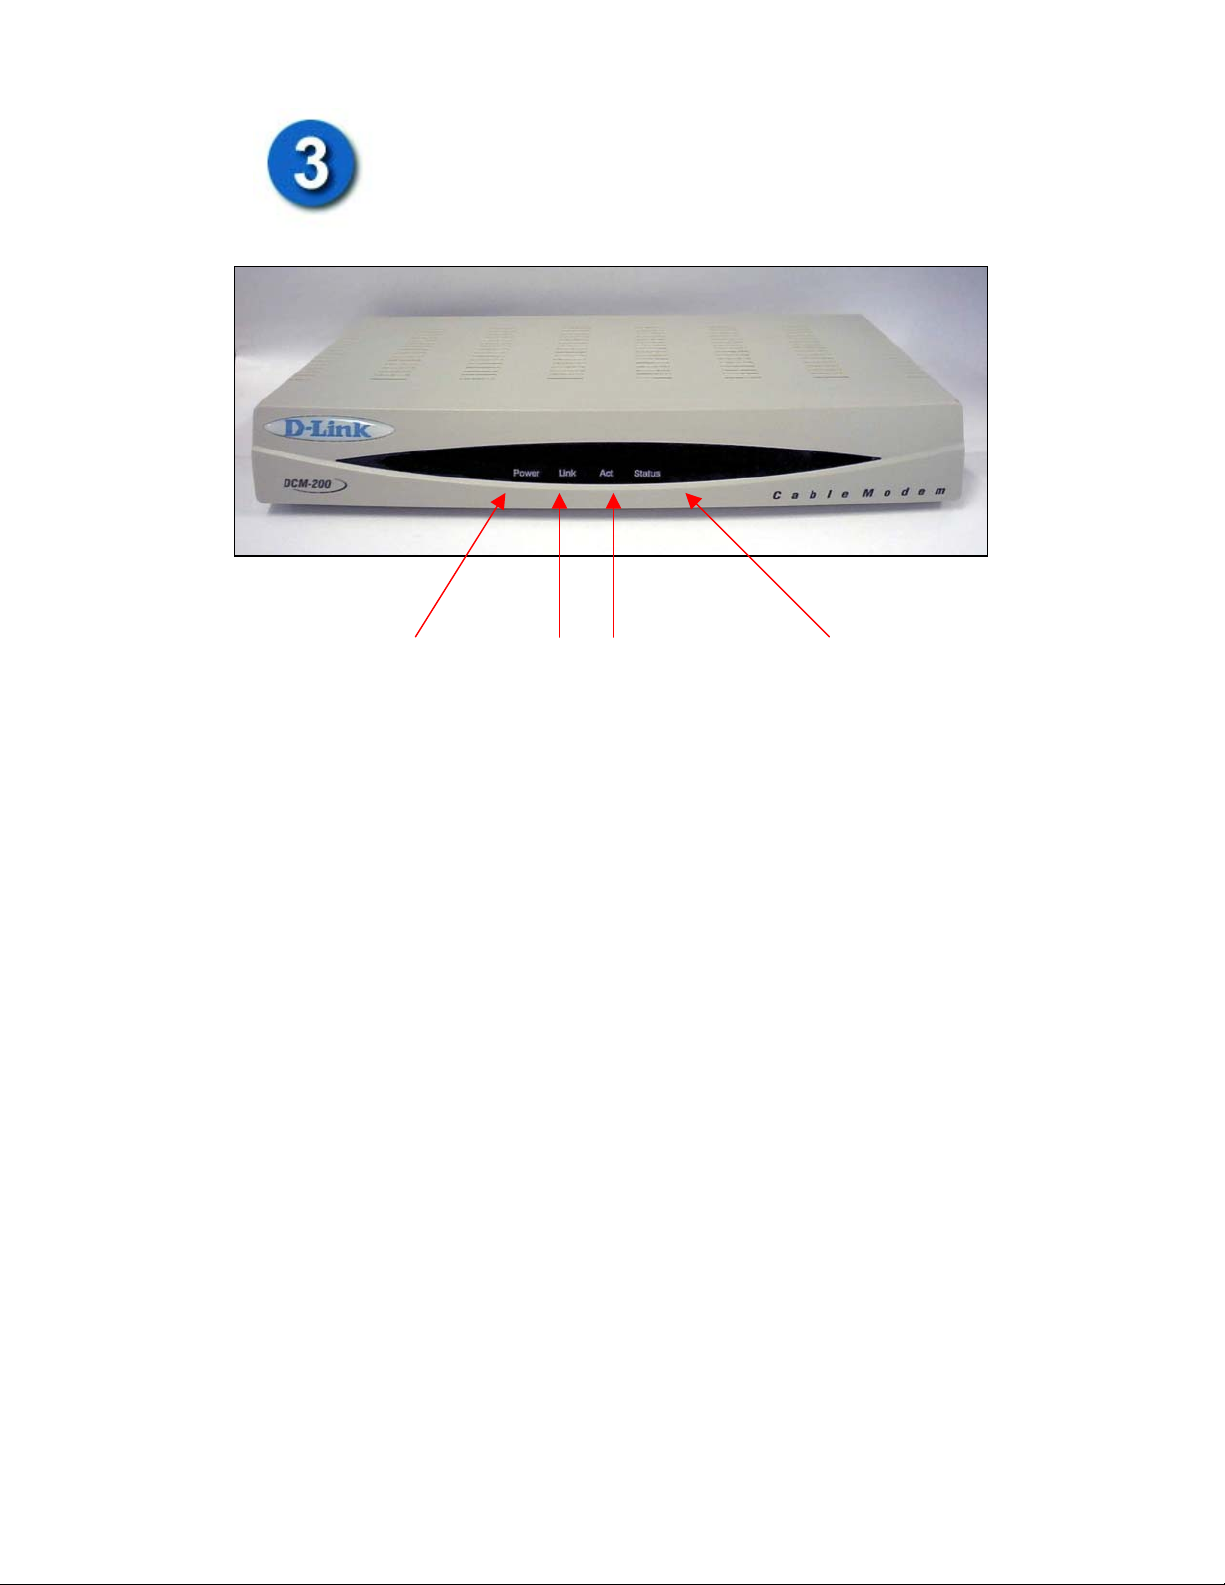
Verifying The Modem Status Lights
Power
Indicator
Link
Light
Activity
Light
Verify the Cable Modem connections using the LED indicators
Power: The Power LED will be “ON” after the modem has been
plugged into an AC power source.
Link: The Link LED will be “ON” when the connection from the
cable modem to the local network is established. The Link LED
“ON” light means that computers on the local network have access
through the cable modem.
Act (Activity): This LED indicates that there is “data traffic” activity.
This lighted LED means that data packets are being passed through
the cable modem.
Status: The Status LED will be “ON” solid when the cable modem is
properly connected to the cable network (ISP). * If your status light
continues to blink, please contact your cable operator for further
instructions.
Status
Indicator
4
Page 5
Installing the USB Drivers
*Note: This installation is only necessary if you are using the USB cable to
connect your cable modem to the computer.
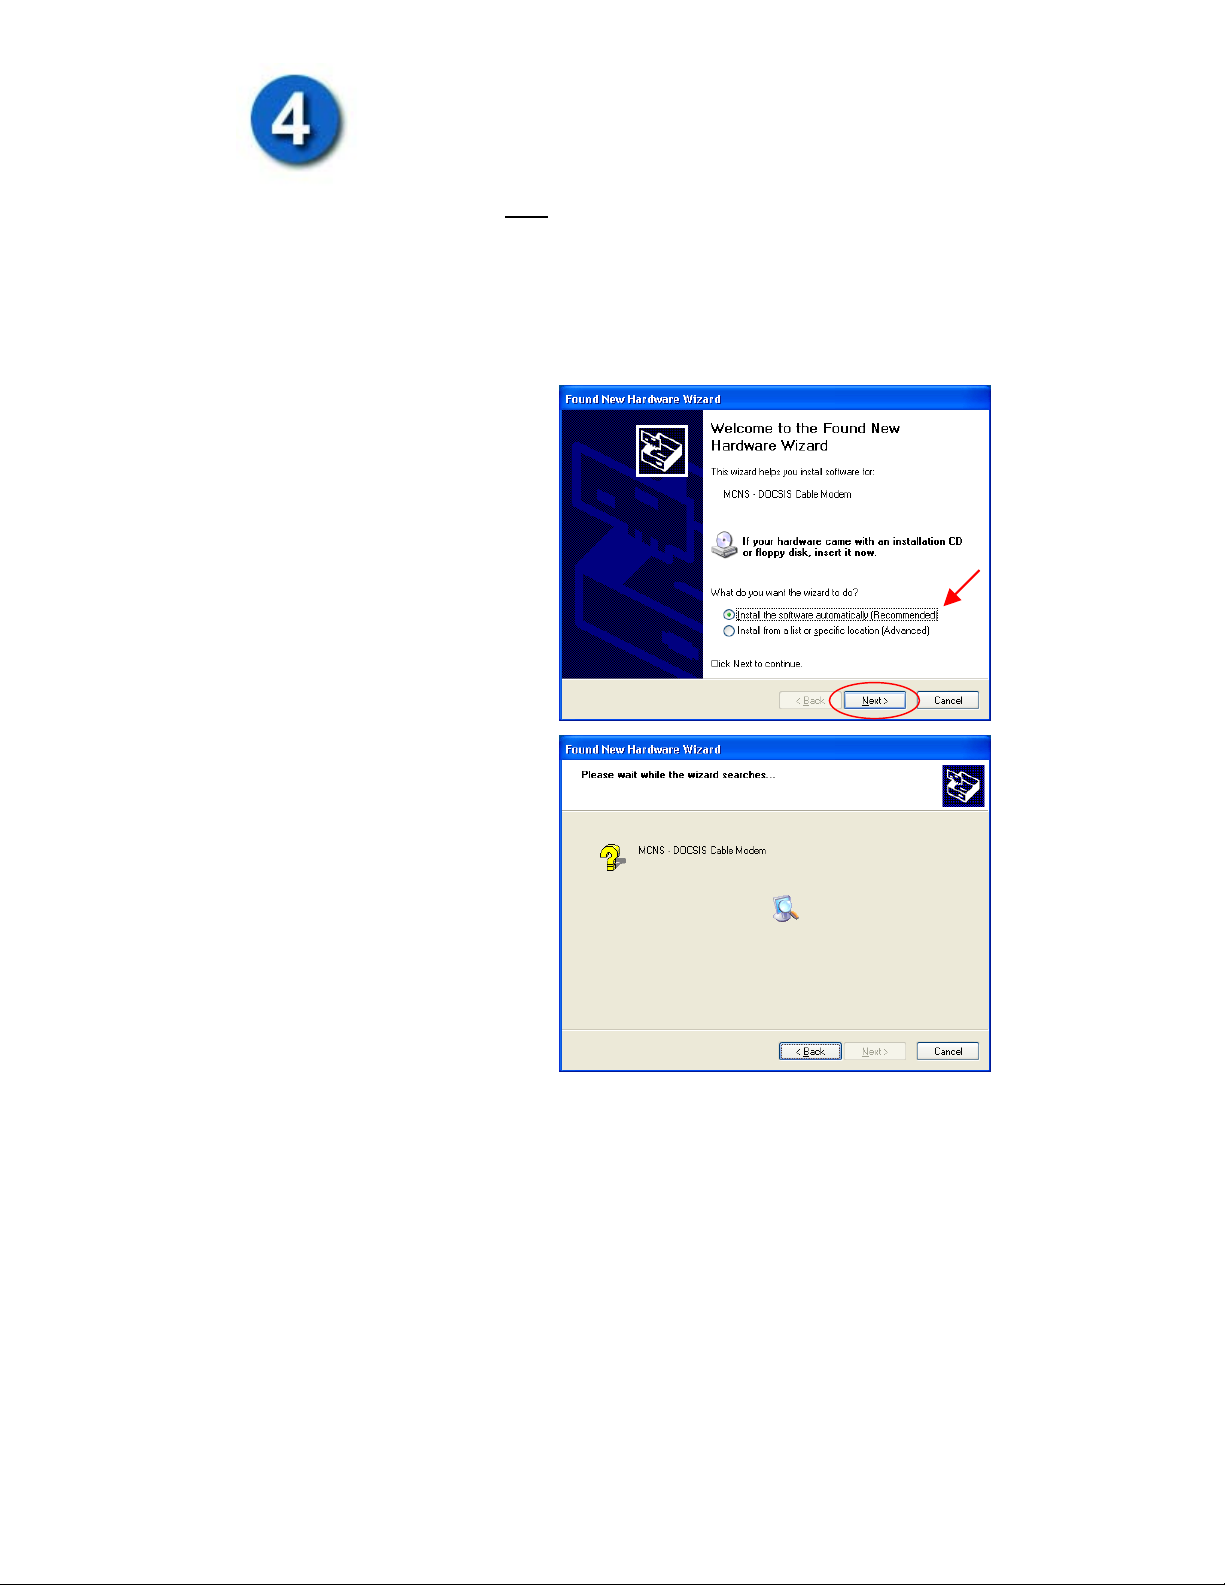
Windows XP Driver Installation
When your computer is running Windows XP, once the USB cable is
connected to the USB interface, the following window will be displayed:
(If this window does not
appear, then go to
Start>Settings>Control
Panel>Switch to Classic
view>click on Add Hardware.
This window will appear.)
Be sure to insert the driver
diskette into a floppy drive.
Click Next
Please wait while the wizard is
searching for the suitable
driver.
5
Page 6

Windows XP Continued…
If this Hardware
Installation window shows,
please note that D-Link is
in the process of obtaining
Windows Logo testing
certification.
Click on Continue
Anyway
Please wait while the
drivers are copied onto
your computer.
6
Page 7

Windows XP Continued…
Click Finish to complete
the driver installation
procedure. The DCM-200
is now installed.
Please note that before you can begin using the DCM-200 USB/Ethernet
Cable Modem, you must restart your computer.
Windows 2000 Driver Installation
If your computer is running Windows 2000, once the USB cable is connected
to the USB interface, the following window will be displayed:
If the screen above does not appear, then go to Start>Settings>Control
Panel>Add/Remove Hardware. The following window will appear.
7
Page 8

Windows 2000 Continued…
Click Next.
Select “Search for a
suitable driver for my
device (recommended)”
and then click Next.
8
Page 9

Windows 2000 Continued…
Select “Floppy disk
drive.”
Insert the “Floppy disk.”
Click Next.
Click Next to allow
Windows
to install the driver for your
DMC-200 USB/Ethernet
Cable Modem.
9
Page 10

Windows 2000 Continued…
Click Yes to continue.
D-Link USB Cable Modem
Click Finish to complete
the driver installation
D-Link USB Cable Modem
procedure. The DCM-200
is now installed.
Please note that before you can begin using the DCM-200 USB/Ethernet
Cable Modem, you must restart your computer.
10
Page 11

Windows ME Driver Installation
If your computer is running Windows ME, the following window will be
displayed after the USB cable is connected to the USB interface:
If the above window does not appear, then go to Start>Settings>Control
Panel>Add New Hardware. The following window will appear.
Select “Automatic search
for a better driver
(Recommended)” and then
click Next.
11
Page 12

Windows ME (Millennium Edition) Continued…
The following window will appear:
Once the necessary driver
files have been copied, the
following window will be
displayed. In the event of a
version conflict, we
recommend keeping all
previous versions.
Click Finish to complete
the driver installation
procedure. The DCM-200
is now installed.
Please note that before
you can begin using the
DCM-200 USB/Ethernet
Cable Modem, you must
restart your computer.
Windows 98/98 SE Installation
If your computer is running Windows 98/98 SE, the computer should detect
the new hardware automatically. However, if it does not, please follow the
steps below to install the necessary driver:
Click Start-> Settings-> Control Panel-> Add New Hardware. The
following window will open:
12
Page 13

Windows ME (Millennium Edition) Continued…
Click Next.
Select “Search for the b
driver for your devic
(Recommended).” and
then click Next.
est
e
13
Page 14

Windows 98/98 SE Continued…
Select “Floppy disk
drives.”
Insert the Driver diskette
into your floppy drive a
then click Next.
Select “The updated
driver (Recommended)
D-Link USB Cable
Modem” and then click
Next.
nd
14
Page 15

Windows 98/98 SE Continued…
Click Next.
Once the necessary driver files
have been copied, the
following window will be
displayed. In the event of a
version conflict, we
recommend keeping all
previous versions.
Click Finish to complete the
driver installation procedure.
The DCM-200 is now i
nstalled.
15
Page 16

Windows 98/98 SE Continued…
efore em, you
B you can begin using the DCM-200 USB/Ethernet Cable Mod
u
st restart your computer. Click “Yes” to complete the installation. m
Test your Internet Connection
Open the web browser to your favorite site.
* Your cable service provider will provide you with the proper instructions to
configure the cable software to use their Homepage and services.
DIGITAL HOME SOLUTIONS
Printed in Taiwa
Version 2.3
16
n
 Loading...