

Page 1
FR GUIDE D’UTILISATION
EN USER GUIDE
ES MANUAL DE UTILIZACIÓN
PT MANUAL DE UTILIZAÇÃO
DE BETRIEBSANLEITUNG
Four
Oven
Horno
Forno
Backofen
Page 2

2
Dear Customer,
When you discover De Dietrich products you experience the same feelings that only
objects of value can arouse.
You are immediately attracted as soon as you see them. The quality of the design is
illustrated by its timelessness, degree of refinement and elegance, and high standard
of finish, resulting in perfect harmony between different appliances.
Then comes the irresistible urge to touch. De Dietrich design makes the most of
sturdy and noble materials; priority is given to authenticity.
By combining the most advanced technologies with the best materials, De Dietrich
makes products of the highest quality for the benefit of all those who love cooking.
We hope you are extremely satisfied with this new appliance and will be happy to
receive your suggestions and to answer your questions. Please send them to our
customer service department or use our Internet site.
We invite you to register your product at www.de-dietrich.com to take advantage of
all the benefits the brand has to offer.
Thanking you for your confidence.
De Dietrich
Find further details on the brand at www.de-dietrich.com
Visit La Galerie De Dietrich, 6 rue de la Pépinière in Paris
Open Tuesday to Saturday 10 a.m. to 7 p.m.
Customer Service : 0892 02 88 04
As part of our commitment to constantly improve our products, we reserve the right to alter any
technical, functional and/or aesthetic features as part of their ongoing development.
Warning:
Before installing and using your appliance, please read this Installation and Use Guide
carefully, which will allow you to quickly familiarise yourself with the appliance’s operation.
Page 3

3
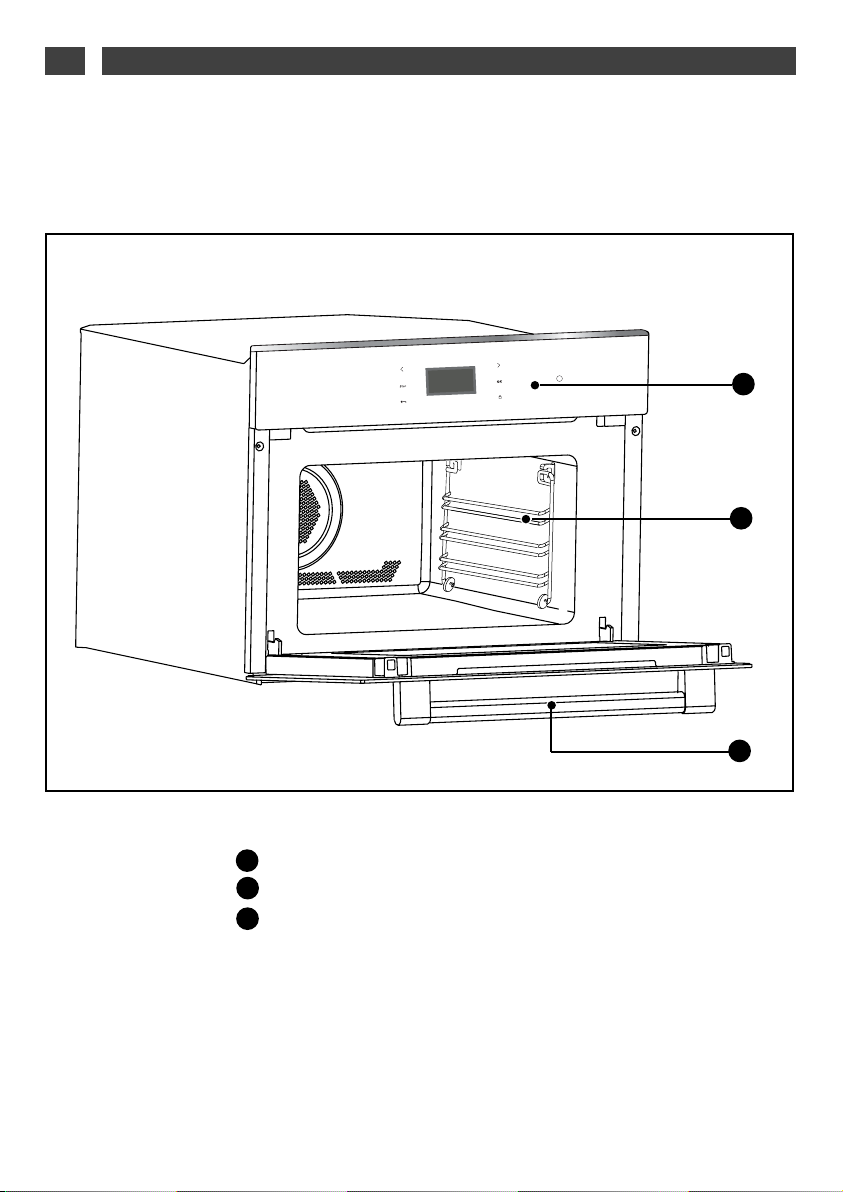
1 / DESCRIPTION OF YOUR APPLIANCE
•
Introduction to your oven
____________________________________ 4
•
Description of controls ______________________________________ 5
2 / USING YOUR APPLIANCE
•
Cooking or defrosting_______________________________________ 6
•
Settings when switching on for the first time ___________________ 7
•
Resetting the time__________________________________________ 7
•
Standby mode _____________________________________________ 8
•
“EXPERT” function (+ guides) ________________________________ 8
º Microwave cooking _____________________________________ 14
º Defrost _______________________________________________ 15
º Microwave + Fan ______________________________________ 17
º Combi Grill ____________________________________________ 18
º Keeping warm _________________________________________ 18
º Conventional Microwave_________________________________ 19
º Conventional __________________________________________ 20
º Turbo grill_____________________________________________ 20
º Grill (full and medium) ___________________________________ 20
º Combined heat ________________________________________ 20
º Fan cooking __________________________________________ 21
•
“RECIPES” function (+ guides) _______________________________ 24
• “AUTO DEFROST” function __________________________________ 29
• “SETTINGS” function
º Time
_________________________________________________ 30
º
Sound________________________________________________ 30
º
Display _______________________________________________ 30
º
Consumption __________________________________________ 31
º
Language _____________________________________________ 31
º
Services ______________________________________________ 32
• “MINUTE MINDER” function
_________________________________ 32
•
Control panel locking (child safety device)
______________________ 33
•
“DEMO” mode _____________________________________________ 33
3 / FUNCTION SUITABILITY TESTS _________________________________ 34
4 / AFTER-SALES SERVICE _______________________________________
36
CONTENTS
EN
Page 4
4
INTRODUCTION TO YOUR OVEN
•
Control panel
Cavity
Door handle
A
B
C
A
B
C
EN
1 / DESCRIPTION OF YOUR APPLIANCE
3
2
1
0
Page 5
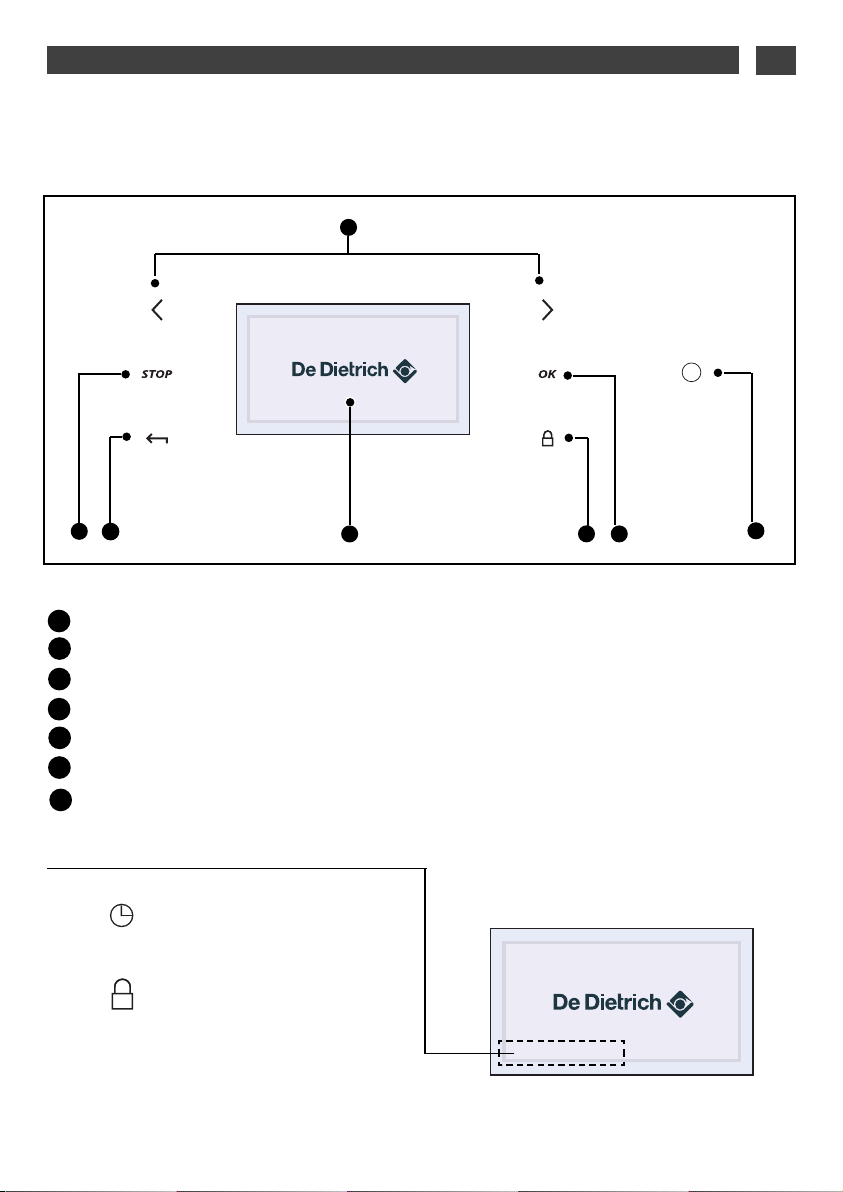
5
List of symbols:
Programming in progress
Keypad locked
Selector buttons
Switch off the oven or cooking programme
Back to the previous level
Information display
Keypad locking
Confirm button
“Wake up” button (emerge from standby)
A
B
C
D
D
E
A
B
C
E
F
F
DESCRIPTION OF CONTROLS
•
G
G
EN
1 / DESCRIPTION OF YOUR APPLIANCE
Page 6

6
COOKING OR DEFROSTING
•
This oven gives you access to three different types of programming depending on the degree of
knowledge you have about the recipe in question:
- For a recipe where you know all the settings (you choose the type of cooking, temperature and cooking time yourself): select the “EXPERT” function.
- For a recipe where you need assistance from the oven (simply choose the type of food from a list and
the weight; the oven will select the most suitable settings: temperature, cooking time, type of cooking): select the “RECIPES” function.
- Automatic defrost. You simply choose the type of food, enter the weight or a time for vegetables: Select the “AUTO DEFROST” function.
EN
2 / USING YOUR APPLIANCE
Page 7
7
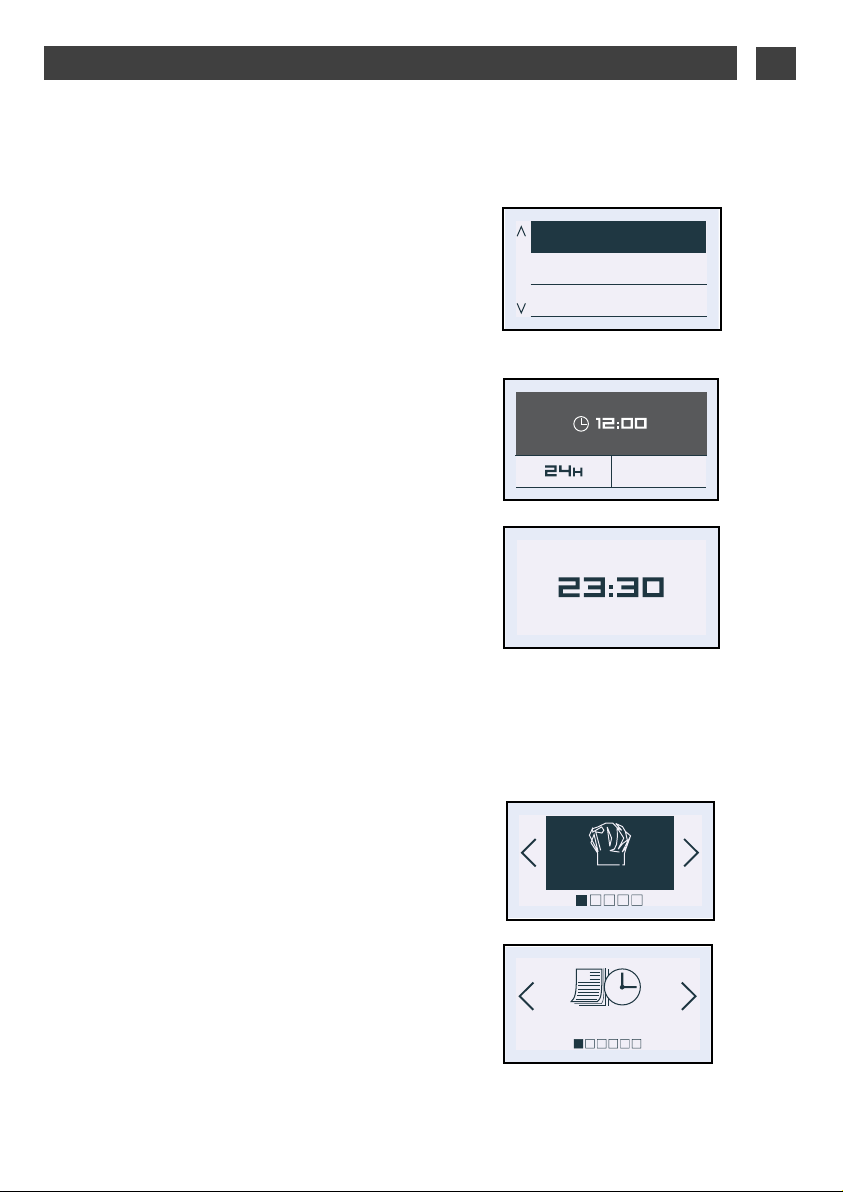
• Language
The oven automatically displays the following
screen.
It allows you to select your language by
pressing the < and > buttons.
Confirm by pressing OK.
• Time
A second screen then appears, to allow you
to set the time.
Select the time using the < and > buttons
then press OK.
The hour display flashes, you can adjust it
using the < and > buttons and confirm by
pressing OK.
Do the same for the minutes (1).
You can choose a 12-hour (am/pm) or
24-hour display (2).
Select using the < and > buttons and then
confirm by pressing OK.
Digital display
SETTINGS WHEN SWITCHING ON FOR THE FIRST TIME
•
O K
(1)
(2)
EN
2 / USING YOUR APPLIANCE
RESETTING THE TIME
- Press the OK button.
The oven displays the following screen by
default (“Expert”) function.
- Press the < and > buttons until the
“Settings” screen appears, confirm with OK.
The “Clock” screen is displayed; press OK
again to access the time data screen and
then proceed as for switching on for the first
time.
21
•
English
Francais
Deutsch
OK
EXPERT
21
Clock
Page 8
8
Example
• The “Expert” function
The Expert function allows you to set the
cooking parameters yourself: temperature,
microwave power, type of cooking, cooking
time.
- Press the OK button. The “Expert” screen is
displayed.
- Press OK again to choose the type of
cooking from the following list by pressing
the < and > buttons (to make a selection,
refer to the cooking guide on the next page):
· Microwave
· Defrost
· Microwave + Fan
· Medium power grill
· Full power grill
· Conventional Microwave
· Keep warm
·· CCoonnvveennttiioonnaall
· Turbo grill
· Full grill
· Medium grill
· Combined heat
· Fan cooking
Confirm your selection by pressing OK.
“EXPERT” FUNCTION
•
EN
2 / USING YOUR APPLIANCE
STANDBY MODE
•
After 4 minutes with no action by the user, the
display switches off to save energy (except for
a delayed start) and the button starts
flashing. The screen is then in standby mode.
To activate the oven and restore the display to
full brightness, press few seconds the “wake
up” button .
The screen shows the time again.
EXPERT
Microwave & Fan
Page 9

9
EN
2 / USING YOUR APPLIANCE
“EXPERT” COOKING GUIDE
•
MICROWAVE
(recommended power setting 1000 W min 100 W max 1000 W)
DEFROST
(fixed power setting 200 W)
MICROWAVE & FAN
(recommended temperature 200°C min 50°C max 250°C and recommended power
setting 500 W min 100 W max 500 W)
MEDIUM POWER GRILL
(recommended position 2 - min 1 - max 3 and recommended power setting 500 W min
100 W max 700 W)
FULL POWER GRILL
(recommended position 3 - min 1 - max 3 and recommended power setting 500 W min
100 W max 700 W)
CONVENTIONAL MICROWAVE
(recommended temperature 200°C min 50°C max 250°C et recommended power setting
500 W min 100 W max 700 W)
KEEP WARM
(fixed power setting 100 W)
CONVENTIONAL
(recommended temperature 200°C min 35°C max 250°C)
•
Cooking is done by the upper and lower elements.
•
Preheating recommended for red meats.
Page 10

10
TURBO GRILL
(recommended temperature 200°C min 50°C max 200°C)
•
Cooking is done by the upper element and the fan.
•
Preheating is unnecessary. Roasts and poultry are juicy and crisp all over.
•
Slide the drip tray onto the bottom shelf support.
•
Recommended for searing and cooking legs of lamb well done, beef ribs. To retain the
moist texture of fish steaks.
FULL GRILL
(recommended position 3 - min 1 - max 3)
MEDIUM GRILL
(recommended position 2 - min 1 - max 3)
•
Cooking controlled by the upper element without the fan.
•
Preheat the oven for five minutes.
•
Recommended for browning vegetable dishes, pastry, fruit, etc., placed under the
grill.
COMBINED HEAT
(recommended temperature 200°C min 50°C max 250°C)
•
Cooking done by the upper and lower heating elements and by the fan.
•
Three combined sources of heat: a lot of heat from the bottom, a little circulating heat
and a touch from the grill for browning.
•
Recommended for quiches, pies, wet fruit tarts, placed in a dish on a baking sheet
which is preferably non-stick.
FAN COOKING
(recommended temperature 200°C min 50°C max 250°C)
•
Cooking is controlled by the heating element at the bottom of the oven and by the fan.
•
Rapid temperature increase: Some dishes can be placed in the oven while it is still cold.
•
This is recommended to retain moisture in white meat, fish and vegetables.
For cooking multiple items on up to 2 levels.
EN
2 / USING YOUR APPLIANCE
“EXPERT” COOKING GUIDE
•
Page 11
11
The oven asks you to enter the following
cooking settings:
Non-microwave cooking:
Temperature
Optional cooking time
Micro-wave cooking
Power
Cooking time.
Combined cooking + microwave:
Temperature
Power
Cooking time.
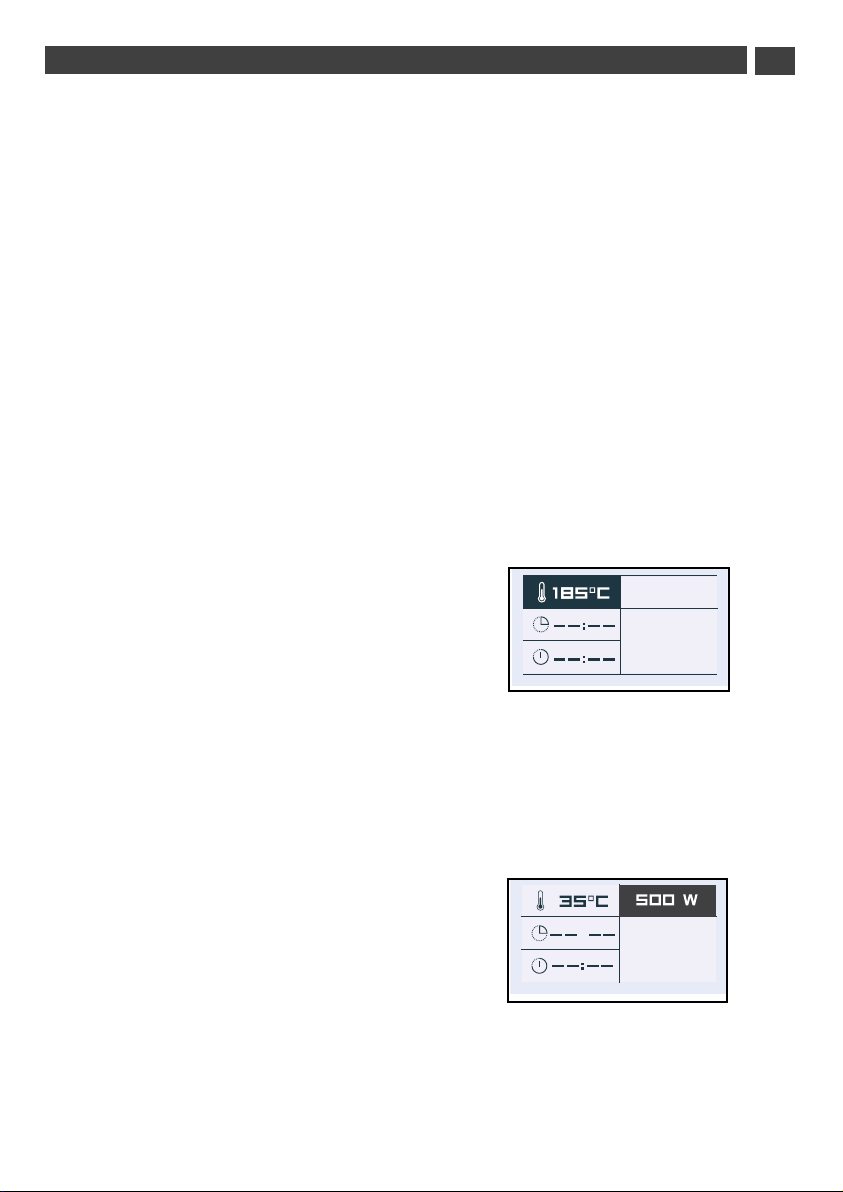
• Temperature
Based on the type of cooking you already
selected, the oven will recommend the ideal
cooking temperature. This can be adjusted
as follows:
Select the “Temperature” symbol by pressing
< or >. Confirm with the OK button and the
“Temperature” symbol flashes: choose the
desired temperature by pressing < or > and
then confirm.
In the grill position (medium or full), select
the “grill power” symbol and use the < and >
buttons to set the power to the desired level
(between 1 and 3) and then confirm.
• Power
Based on the type of cooking already
selected, the oven will recommend the ideal
power. This can be adjusted as follows:
Select the “Power” symbol by pressing
< or >. Confirm with the OK button and the
“Power” symbol flashes: choose the desired
temperature by pressing < or > and then
confirm.
O K
“EXPERT” FUNCTION
•
EN
2 / USING YOUR APPLIANCE
O K
Standard
OK
m
OK
Page 12

12
O K
• “Grill +”
Select the “Standard” symbol and then
confirm by pressing OK. “Standard” starts to
flash. You can access the “Grill+” function by
pressing the < and > buttons and confirming.
This function lets you finish your cooking
programme by browning the dish for the last
five minutes of the cooking time.
This function is represented by a flashing
grill on the screen when it is activated five
minutes before the end of cooking.
Note
: The “Grill +” option can be used only
with the following functions: TURBO GRILL,
CIRCULATING HEAT, CONVENTIONAL and
COMBINED HEAT.
EN
2 / USING YOUR APPLIANCE
• Cooking time and end of cooking
time.
Enter the cooking time for your dish by
selecting the symbol.
Press < or > and then
confirm so that the symbol flashes. Enter the
cooking time by pressing < and > and then
confirm. When you set the cooking time, the
end of cooking time ( field) automatically
adjusts.
You can change the end of cooking time, if
you want to delay the programme start.
In this case, select the symbol and
proceed as described for
setting the cooking time.
Once you have selected the cooking end
time, confirm.
Your oven will display the time and the end of
cooking time symbol until cooking starts.
O K
O K
“EXPERT” FUNCTION
•
Standard
OK
Standard
OK
Grill +
OK
Page 13

13
“EXPERT” FUNCTION
•
EN
2 / USING YOUR APPLIANCE
M o d if y
O K
• Starting a cooking programme
For cooking using circulating heat or turbo
grill:
When cooking begins, the following screen is
displayed, indicating that the oven is in rapid
heating mode (Booster). You can monitor the
progress of the temperature rise in the oven
by looking at the shading in the arrow.
The current oven temperature is indicated on
the left and the recommended temperature is
displayed on the right.
Once this temperature has been reached, the
oven goes into cooking mode.
• End of cooking:
Cooking with set cooking time:
The oven turns off automatically and beeps
for 2 minutes.
Press OK to stop the beeps.
An animated display wishes you “Bon
Appétit”!
• Cancelling during cooking
To stop cooking in progress, press and hold
the STOP button.
• Altering cooking in progress
You can change the temperature or cooking
time at any time by pressing the button.
Select the “Modify” field and change the
settings by pressing < or > then confirming.
EXPERT
BON APPETIT !
Modify
COOKING
IN PROGRESS
OK
Page 14

14
MICROWAVE COOKING
When using the 500W microwave power function, you can heat two dishes at the same time. In
this case, put one plate on the turntable and the other on the shelf on the third level.
Tips:
Cover the plates with special microwave film, a plate cover or another plate placed upside-
down on the first:
- To obtain the most even reheating.
- To avoid the food drying out.
- To reduce the reheating time.
- To prevent food spatter in the oven.
The foods keep all their flavour due to the steaming effect.
Type of food Quantity Time
Homogeneous foods like mashed
potatoes, petits pois, celery, etc.
2 x 200 g plates 4 to 6 min
Heterogeneous foods like: cassoulet,
bourguignon, ravioli, etc.
2 x 300 g plates 6 to 8 min
HEATING ON TWO LEVELS
EN
2 / USING YOUR APPLIANCE
Power Use
1000W / 900W
Quickly reheating drinks, water, dishes containing a lot of water.
Cooking foods containing a lot of water (soups, sauces, tomatoes,
etc.)
800W / 700W
Cooking fresh or frozen vegetables.
600W
Melting chocolate.
500W
Cooking fish and seafood. Heating on 2 levels. Gently simmering dry
vegetables. Reheating or cooking delicate egg-based foods.
400W / 300W
Gently simmering dairy products, jams.
200W
Manual defrost. Softening butter and ice cream.
100W
Defrosting cream-based pastries.
MICROWAVE POWER OUTPUT: 1000 W
USING THE POWER LEVELS
Page 15

15
EN
2 / USING YOUR APPLIANCE
Using your micro-wave oven to defrost frozen food saves you a lot of time.
To defrost food, use the AUTOMATIC DEFROST function or the MICROWAVE function set to
power level 200 W.
What you need to know:
Small cuts of meat or fish can be cooked immediately after defrosting. Larger pieces such as
meat joints or whole fish will still be slightly frozen after the defrost programme.
We recommend that you let the food stand for a period of time at least equal to the defrosting
time to ensure an even temperature.
Food covered with ice crystals will take longer to defrost. In this case, you should increase
the defrosting time.
A few tips:
The defrost time depends on the type of appliance. It also depends on the shape, size,
starting temperature and quality of the food.
In most cases, food must be removed from its packaging. Remember to remove any metal
staples from the packaging.
Halfway through defrosting, the pieces of food should be turned over, stirred and separated if
they were frozen together.
Defrost meat or fish by putting it on an upside-down saucer on top of a plate to let the juices
run. If they stay in contact with the food, they will overheat.
Never refreeze food before cooking it.
Defrost programme time:
Defrost programme times are calculated for food frozen at -18°C. This gives you an indication
of the required defrosting time, but the actual time may vary based on the thickness, shape,
size and packaging of the food.
DEFROST
Page 16

16
EN
2 / USING YOUR APPLIANCE
Food Quantity Time Recommendations
Flaky or short crust pastry 400 g 1 - 3 min
Place on absorbent paper and turn
over half way through.
Food Quantity Time Recommendations
Scallops 500 g 5 - 7 minutes
Place on a plate, mix midway
through programme.
Shelled prawns 100 g 1 - 2 min
Whole pink shrimp 200 g 2 - 4 min
Rock lobster/Prawns (10) 500 g
6 - 8 min
Food Quantity Time
Whole fish/darns/fillets/ steaks
100 g
200 g
400 g
500 g
750 g
1000 g
1 - 2 min
3 - 5 min
5 - 7 minutes
7 - 9 min
12 - 14 min
17 - 19 min
Turkey/Pork/Veal/Beef/Poultry
As roasts / slices / cubes / etc...
100 g
200 g
400 g
500 g
750 g
1000 g
1250 g
1500 g
1750 g
2000 g
1 - 2 min
3 - 5 min
5 - 7 min
7 - 9 min
12 - 14 min
17 - 19 min
23 - 25 min
28 - 30 min
34 - 36 min
39 - 41 min
Cauliflower / broccoli / carrots / mushrooms /
diced mixed vegetables / etc...
500 g
750 g
1000 g
7 - 9 min
12 - 14 min
17 - 19 min
Food Quantity Time
Strawberries
Raspberries/cherries
Gooseberries / blueberries /blackcurrants
250 g
250 g
250 g
7 - 9 min
6 - 8 min
5 - 7 min
DEFROST GUIDE
Page 17

17
EN
2 / USING YOUR APPLIANCE
MICROWAVE + FAN
The circulating heat + microwave function lets you combine microwave cooking with
circulating heat which saves you a lot of time. The microwave power levels available to you are
100-200-300-400-500W.
Tips
:
When using mixed microwave and circulating heat cooking, do not use a metal plate.
Cooking on two levels:
To simultaneously cook a 1 kg veal roast and 800 g of potatoes au gratin, 55 mins at 170°C with
microwave power set to 300W. We suggest placing the gratin dish on the turntable and
putting the veal joint in the drip tray on level 3.
Note:
Never preheat your oven when using the microwave + circulating heat function. It
could damage your appliance.
Food Qty
Programming
MW+ CH
Time
(min)
Tips
Shoulder of lamb on the
bone
1300 g 200W + 200 °C 32 - 37 In the drip tray, level 2
Sirloin 800 g 200W + 200 °C 23 - 28 In a dish, on the shelf, level 2
Chicken/guinea fowl 1200 g 200W + 200 °C 35 - 40 In a dish, on the shelf, level 1
Turkey roast 800 g 300W + 180°C 32 - 37 In a dish, on the shelf, level 2
Roast pork 1200 g 300W + 180°C 47 - 52 In a dish, on the shelf, level 2
Roast veal 1000 g 300W + 180°C 37 - 42 In a dish, on the shelf, level 2
Use a heat-resistant, microwave-safe dish, preferably earthenware (fewer splashes than with a
glass dish).
It is preferable to choose roasts without barding fat to limit grease spatter and smoke.
Season after cooking, let the meat rest, still covered in cooking foil, for about 10 minutes, which
allows the fibres to relax and the meat to remain tender.
Page 18

18
EN
2 / USING YOUR APPLIANCE
COMBI GRILL
This function lets you use the grill and the micro-wave simultaneously, which makes cooking
very quick.
There are two grill + microwave settings:
Full grill + microwave and low grill + microwave
You can combine them using the following seven power settings: 100 W/200 W/300 W/400 W/
500 W/ 600 W/700 W
Food Quantity Programming Time
Lamb shoulder (boned and tied) 1300 g 200 W + Full grill 40 - 45 min
Sirloin 800 g 200 W + Full grill 18 - 23 min
Chicken, guinea fowl 1200 g 500 W + Full grill 25 - 27 min
Turkey roast 800 g 300 W + Full grill 27 - 32 min
Roast pork 1000 g 300 W + Full grill 35 - 40 min
Roast veal 1200 g 300 W + Low grill 50 - 55 min
Use a heat-resistant, microwave-safe dish, preferably earthenware (fewer splashes than with a
glass dish).
Place the food in a dish placed on the rack at level 1. Turn it half-way through cooking.
It is preferable to choose roasts without barding fat to limit grease spatter and smoke.
Season after cooking, let the meat rest, still covered in cooking foil, for about 10 minutes, which
allows the fibres to relax and the meat to remain tender.
COMBI GRILL COOKING GUIDE
KEEPING WARM
This function keeps the food at the temperature it was when cooking finished.
Note:
The maximum time for a KEEP WARM programme in 90 minutes.
You can alter the KEEP WARM time at any point.
Page 19

19
EN
2 / USING YOUR APPLIANCE
CONVENTIONAL MICROWAVE
The conventional + microwave function lets you combine microwave cooking with the
“conventional” function, which saves a lot of time. The microwave power levels available are
100-200-300-400-500-600-700W.
Tips
:
When using the
“conventional”
cooking + microwave function, do not use a metal plate.
Note:
Never preheat your oven when using the microwave + conventional function. It
could damage your appliance.
Food Qty
Programming
MW + Trad
Time
(min)
Tips
Shoulder of lamb on the
bone
1300 g 200W + 200 °C 32 - 37 In the drip tray, level 2
Sirloin 800 g 200W + 200 °C 23 - 28 In a dish, on the shelf, level 2
Chicken/guinea fowl 1200 g 200W + 200 °C 35 - 40 In a dish, on the shelf, level 1
Turkey roast 800 g 300W + 180°C 32 - 37 In a dish, on the shelf, level 2
Roast pork 1200 g 300W + 180°C 47 - 52 In a dish, on the shelf, level 2
Roast veal 1000 g 300W + 180°C 37 - 42 In a dish, on the shelf, level 2
Use a heat-resistant, microwave-safe dish, preferably earthenware (fewer splashes than with a
glass dish).
It is preferable to choose roasts without barding fat to limit grease spatter and smoke.
Season after cooking, let the meat rest, still covered in cooking foil, for about 10 minutes, which
allows the fibres to relax and the meat to remain tender.
Cheesecake* 200W + 100 °C 42 - 45 In a dish, on the shelf, level 2
Pudding 200W + 200 °C 20 In a dish, on the shelf, level 2
Quiche* 200W + 200 °C 30 In a dish, on the shelf, level 2
Potatoes au gratin 300W + 200°C 30-35 In a dish, on the shelf, level 1
Yeast-risen cakes 200W + 200 °C 45 In a dish, on the shelf, level 2
* Preheat using the “conventional” sequence, then select the “conventional” + microwave
function.
Page 20

20
EN
2 / USING YOUR APPLIANCE
Cooking is done by the
grill element + the fan,
which gives even coking for thick foods..
The cooking temperature is adjustable between 50 and 200°C in increments of 5°C.
This function lets you cook and brown foods such as gratin dishes and meats.
It can be used before or after cooking, depending on the recipe.
There are two grill settings: FULL GRILL and MEDIUM GRILL.
As a general rule, use the FULL GRILL level for grilling meat and fish, and use the MEDIUM
GRILL for gratins, and also for browning more delicate foods.
Insert the accessories (grid or drip tray) at level 1, 2 or 3, based on the height of the cookware
or the food.
TURBO GRILL
GRILL (FULL AND MEDIUM)
COMBINED HEAT
“CONVENTIONAL”
Cooking done using the upper and lower heating elements without the fan.
The cooking temperature is adjustable between 35 and 250°C in increments of 5°C.
Cooking is done using the upper and lower heating elements with circulating heat from the fan.
The cooking temperature is adjustable between 50 and 250°C in increments of 5°C.
Page 21

21
EN
2 / USING YOUR APPLIANCE
FAN COOKING
The Fan Cooking function lets you cook and brown foods like in a conventional oven.
Tips:
The cooking temperature is adjustable between 50 and 250°C in increments of 5°C.
Always insert the accessories (shelf or drip tray) at level 1 or 2. This will ensure better heat
distribution and optimum cooking results.
Use cookware designed to withstand high temperatures.
If you want to do a defrost after cooking with one of the circulating heat functions, we
recommend waiting for about ten minutes to allow the oven to cool down in order to obtain the
best results.
Cooking on two levels:
Preheat the oven.
To cook two apple tarts at the same time, 1 hour at 200°C., we recommend preparing the first tart in
the glass drip tray inserted on level 1 and the second in a tart dish on the shelf on level 3. Change
the position of the two dishes half-way through cooking.
Page 22

22
EN
2 / USING YOUR APPLIANCE
CONVENTIONAL - TURBO GRILL - MEDIUM AND FULL GRILL GUIDE
* Preheat the oven to the temperature indicated before cooking.
FFoooodd
SShheellff
lleevveell
CCoonnvveennttiioonnaall TTuurrbboo ggrriillll GGrriillllss
TTiimmee iinn
mmiinnuutteess
Meats
Roast pork (1 Kg) 2 170 °C 90
Roast veal (1 Kg) 2 70-75
Roast beef (1 Kg) 2-1 * 220 °C 190 °C
Lamb (leg, shoulder, 1.5 Kg) 2-1 210 °C 55-60
Pork, lamb chops 3 * GP3
Beef rib 1 220 °C GP2-3
Poultry (1.2 Kg) 1 210 °C 50-60
Large piece of poultry 1 200 °C
Rabbit 2 40-45
Fish
Cooked (bream, salmon, hake) 2 35-45
Vegetables
Potatoes au gratin 2 55-60
Lasagne 2 40-45
Stuffed tomatoes 2 45-55
Pastries
Savoy sponge 2 35-45
Sponge cake 1 35-45
Sponge roll 2 8
Cake 1 45-60
Cookies 2 18-22
Biscuits 2 20-25
Cream (in a Bain-Marie) 2 35-40
Madeleines 2 * 170 °C 10-12
Pound cake 2 40-50
Cheesecake 1 65-75
Kouglof 1 45-50
Choux pastry 2 30-40
Shortcrust pastry tart 2 30-40
Thin flaky crust tart 2 * 220 °C 30-40
Other
Pâté (1 kg) 1 200 °C 80-90
Pie 2 40-65
Quiche 1 30-35
Covered stews (beef casserole, etc.) 1 90-180
Bread (500 g flour) 2 * 205 °C 25-40
Toast 3 GP4 1-2
Page 23

23
EN
2 / USING YOUR APPLIANCE
COMBINED HEAT - FAN COOKING GUIDE
* Preheat the oven to the temperature indicated before cooking.
FFoooodd
SShheellff
lleevveell
CCoommbbiinneedd
hheeaatt
FFaann
ccooookkiinngg
TTiimmee iinn
mmiinnuutteess
Meats
Roast pork (1 Kg) 2 160 °C 90
Roast veal (1 Kg) 2 180 °C 70-75
Roast beef (1 Kg)
Lamb (leg, shoulder, 1.5 Kg) 2-1 180 °C 55-60
Pork, lamb chops
Beef rib
Poultry (1.2 Kg) 1 180 °C 50-60
Large piece of poultry
Rabbit 2 230 °C 40-45
Fish
Cooked (bream, salmon, hake) 2 200 °C 180 °C 35-45
Vegetables
Potatoes au gratin 2 160 °C 180 °C 55-60
Lasagne 2 180 °C 40-45
Stuffed tomatoes 2 200 °C 180 °C 45-55
Pastries
Savoy sponge 2 150 °C 35-45
Sponge cake 1 150 °C 35-45
Sponge roll 2 * 220 °C 8
Cake 1 160 °C 45-60
Cookies 2 180 °C 18-22
Biscuits 2 160 °C 20-25
Cream (in a Bain-Marie) 2 160 °C 160 °C 35-40
Madeleines 2 * 170 °C 10-12
Pound cake 2 170 °C 40-50
Cheesecake 1 170 °C 170 °C 65-75
Kouglof 1 180 °C 45-50
Choux pastry 2 170 °C 30-40
Shortcrust pastry tart 2 200 °C 30-40
Thin flaky crust tart 2 * 220 °C 30-40
Other
Pâté (1 kg) 1 200 °C 80-90
Pie 2 180 °C 170 °C 40-65
Quiche 1 205 °C 30-35
Covered stews (beef casserole, etc.) 1 160 °C 90-180
Bread (500 g flour) 2 205 °C 25-40
Toast
Page 24

24
The “Recipes” function selects the
appropriate cooking parameters for you based
on the food being prepared and its weight.
1. Press the < and > buttons. Select
“Recipes” and confirm.
2. The oven gives you the option of
choosing from a list of different foods.
Press the < and > buttons to choose from the
following list:
· Pork-Veal-Turkey
· Beef
· Fish
· Poultry
· Vegetables
· Fibrous vegetables
· Fresh meals
· Frozen meals
· Frozen Pizza
· Fresh quiche
· Fresh tarts
When you have made your choice, press OK
to confirm.
3. When you have selected the food, the
oven asks you to enter its weight ( field)
except for quiches and tarts where the time is
fixed. Enter the weight and the oven will
automatically calculate and display the ideal
cooking time.
If you wish, you can change the cooking finish
time by selecting the field and selecting
the new end of cooking time.
Confirm by pressing OK.
O K
EN
2 / USING YOUR APPLIANCE
Example
“RECIPES” FUNCTION
•
RECIPES
Fish
m
OK
Page 25

25
4. Put your dish in the oven.
5. Confirm by pressing OK; the oven
switches on.
6. The oven beeps and switches off when
the cooking time has finished and and
animation wishes you “Bon appetit!”.
EN
2 / USING YOUR APPLIANCE
GUIDE TO THE “RECIPES” FUNCTION
“RECIPES” FUNCTION
•
Function
used
Min
weight/time
Max.
weight/time
PORK-VEAL-TURKEY MW & Fan 500g/25 min 2000g/75 min
BEEF MW & Fan 500g/15 min 2000g/40 min
FISH Microwave
100g/1 min 45 1000g/12 min
turn the food over when the beep sounds
(half-way through cooking)
POULTRY MW & Fan 500g/20 min 2000g/55 min
VEGETABLES Microwave
100g/3 min 10 1000g/18 min
turn the food over when the beep sounds
(half-way through cooking)
FIBROUS
VEGETABLES
Microwave
100g/4 min 1000g/21 min
turn the food over when the beep sounds
(half-way through cooking)
FRESH MEALS Grill + MW 500g/12min mini. 2000g/37min maxi.
FROZEN MEALS Grill + MW 250g/8 min 1000g/25 min
FROZEN PIZZA Fan 100g/10min mini. 750g/23min30 maxi.
FRESH QUICHE MW & Fan 35 min fixed
FRESH TARTS MW & Fan 35 min fixed
BON APPETIT !
Page 26

26
EN
2 / USING YOUR APPLIANCE
GUIDE TO THE “RECIPES” FUNCTION
Pork, veal,
turkey
&
Beef
This function is used to cook and brown turkey, pork or veal roasts from
500 g to 2000 g.
Cooking is done using the combined microwave + heat circulation function.
Use a heat-resistant, microwave-safe dish, preferably earthenware
(fewer splashes than with a glass dish).
It is preferable to choose roasts without barding fat to limit grease spatter
and smoke.
Remove the meat from the refrigerator and leave for 1 hour before
placing in the oven.
Place the dish on the rack at level 2.
After cooking, leave the roast to rest in aluminium foil for 10 minutes. This
allows the fibres to relax and the meat will remain tender.
Season when cooking is finished.
Fish
This function allows you to cook fish weighing 100 g to 1000 g. All fish are
suitable for microwave cooking. The only thing is to ensure the fish is very
fresh.
Cooking is done using the microwave function.
You can cook fish whole (in this case cut a slash in the thickest part), in
slices or fillets.
Place the fish in a round or oval glass dish suitable for microwave use,
add two to three tablespoons of water, lemon juice or white wine and
cover with the lid of the dish or stretch film; season after cooking.
Place the dish on the level 1.
Poultry
This function allows you to cook and brown a whole chicken or chicken
pieces (legs) weighing between 500 and 2000g.
Cooking is done using a combination of microwave plus heat circulation
and/or grill mode.
Use a heat-resistant, microwave-safe dish, preferably earthenware (fewer
splashes than with a glass dish). Chicken legs may be placed directly on the
glass drip tray.
Prick the skin to avoid splattering.
Add oil, salt and pepper to the poultry and sprinkle with spices of your choice.
Whole chicken: place the dish on the shelf on level 1.
Chicken thighs: Up to 900 g, put the drip-tray on level 2.
When cooking has finished, leave the poultry to rest for 5 mins in the oven
before tasting.
Page 27

27
EN
2 / USING YOUR APPLIANCE
GUIDE TO THE “RECIPES” FUNCTION
Vegetables
These functions are used to cook vegetables weighing from 100g to
1000g.
Cooking is done using the microwave function.
Select very fresh vegetables and cook them with:
- two tablespoons of water up to 200 g
- 50 ml of water up to 500 g
- 100 ml of water up to1000 g
Use cookware suited to the volume of food, cover unless cooking
mushrooms.
Place the dish on the level 1.
A beep half-way through cooking warns you it is time to stir the food. Add
fat and season if desired.
When cooking has finished, leave the vegetables to rest for a few minutes
before consuming.
Tender vegetables
containing more water:
Courgettes cut into rounds or cubes, thinly sliced leeks, potatoes whole
or cut into regular pieces, tomatoes cut into quarters, chicory cut into 4 and
sprinkled with lemon, spinach leaves, thinly sliced mushrooms, etc.
Harder and more fibrous vegetables
:
Brussels sprouts, thinly sliced white cabbage, cauliflower or broccoli cut into
small florettes, carrots sliced into rounds, cubed celeriac, etc.
Fresh meals
&
Frozen meals
This function allow you to reheat and brown prepared frozen dishes
(lasagne, gratin dauphinois, cottage pie, fish gratin, etc.) from 250g to
1,000g.
Reheating or cooking is carried out using the microwave + grill function.
Remove the product from its packaging and place it in a heat-resistant dish
suitable for use in a microwave oven. It is preferable to choose a dish with
the same dimensions as the preparation. Do not cover.
Place the dish on the level 1.
Pizza - frozen
This function lets you reheat and brown frozen pizzas weighing between 100
and 750 g.
Defrosting or cooking is carried out using the circulating heat function.
Remove the pizza from its packaging and place it on the rack at level 2.
Page 28

28
EN
2 / USING YOUR APPLIANCE
GUIDE TO THE “RECIPES” FUNCTION
Fresh quiche
and
tarts
This function allows you to cook and brown fresh quiches from 27 to 30cm
in diameter.
Cooking is done using the combined microwave + heat circulation function.
Use a heat-resistant, microwave-safe tart mould (Pyrex, porcelain, etc.).
When you use ready-made pastry, do not remove the grease-proof paper.
Cut the excess grease-proof to the dimensions of the dish.
Place the tart mould on the rack at level 2.
Tips: Do not use a metal mould.
Begin cooking the quiche as soon as the filling has been poured into the
pastry. Never let the pastry soak or it will not cook properly.
Page 29

29
The “Auto defrost” function selects the
appropriate defrost settings based on the
food and its weight.
1. Press the < and > buttons. Select
“Auto Defrost” and confirm.
2. The oven gives you the option of
choosing from a list of different foods.
Press the < and > buttons to choose from the
following list:
· Bread
· Pastries
· Vegetables
· Fish
· Pork
· Red meat
· Poultry
When you have made your choice, press OK
to confirm.
3. When you have selected the food, the
oven asks you to enter the weight
( case) except for vegetables where the
time is suggested, although this can be
changed.
Enter the weight and the oven will
automatically calculate and display the ideal
cooking time.
If you wish, you can change the cooking finish
time by selecting the field and selecting
the new end of cooking time.
Confirm by pressing OK.
EN
2 / USING YOUR APPLIANCE
Example
O K
“AUTO DEFROST” FUNCTION
•
DEFROST
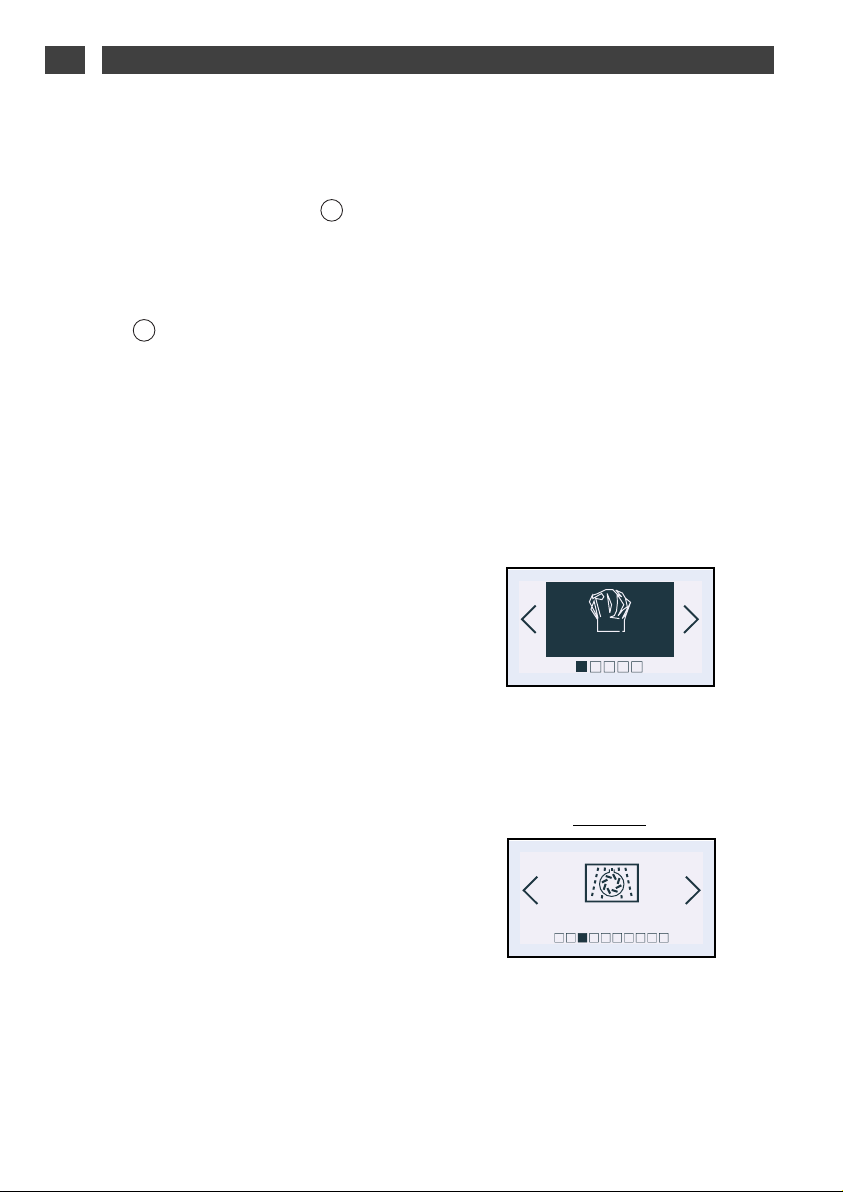
Pastries
m
OK
Page 30

30
EN
2 / USING YOUR APPLIANCE
O K
Press the < and > buttons until you reach the
“Settings” screen.
Confirm by pressing OK.
You have access to the following settings:
- Clock (see beginning of this section)
- Sound
- Display
- Consumption
- Language
- De Dietrich services
Sound:
Press the < or > buttons and until you reach
the “Sound” screen.
Adjustment of the sound emitted when
buttons are pressed:
If you wish, you can mute the beeps emitted
each time you press confirm.
To do this, go to this option and select:
Beep on (active) or Beep off (silent). Confirm.
Display:
Adjusting screen contrast:
Press the < or > buttons and until you reach
the “Display” screen. Confirm by pressing OK.
Select the contrast bar using the < or >
buttons and confirm.
Increase or decrease the contrast using the
< and > buttons then confirm by pressing OK.
•
“SETTINGS” FUNCTION
SETTINGS
Sound
BLEEP OFF
Display
CONTRAST
OK
Page 31

31
EN
2 / USING YOUR APPLIANCE
Consumption:
- Adjusting electricity consumption:
By accessing this screen, you will be able to
view the energy consumption of your oven
since the last time it was reset to zero
(RESET).
If you have an energy bill arrangement with
off-peak hours, you can consult the
corresponding time periods and obtain
detailed information about your consumption
during peak and off-peak hours.
To enter or modify this data, press OK, then
enter the times for peak and off-peak periods.
End of
“Off-peak hours”
Start of
“Off-peak hours”
You may enter up to
3 different periods
O K
Language:
- Setting the language:
By choosing the screen, you can select the
language used to communicate with your
oven.
Various languages are available:
Français
English
German
Spanish
Portuguese
Dutch
Czech
Slovak
Hungarian
Polish
Italian
Greek
Russian
Hebrew
Norwegian
Swedish
Finnish
Danish
“SETTINGS” FUNCTION
•
Consumption
OFF-PEAK HOURS
Period 1
Language
English
Francais
Deutsch
OK
Page 32

32
EN
2 / USING YOUR APPLIANCE
Select this option to access the minute
minder function.
This function is accessible, so long as the
oven is not in pyrolysis mode.
Press the < and > buttons until “Minute
minder” is displayed then confirm.
The displays flashes 00:00:00.
Enter the desired time using the < and >
buttons and confirm by pressing OK.
The minute minder starts to count down
when OK is pressed and beeps at the end.
Press the Stop button to cancel the minute
minder.
De Dietrich services
This option lets you obtain contact
information for the Customer Service and
After Sales Service departments.
“SETTINGS” FUNCTION
“MINUTE MINDER” FUNCTION
•
•
Services
GO TO:
www.de-dietrich.com
MINUTE MINDER
Page 33

33
EN
2 / USING YOUR APPLIANCE
You have the option of preventing access to
the oven controls by taking the following
steps:
When the oven is off, hold the button
pressed for a few seconds; a padlock will
then be displayed on the screen and access
to the oven controls is now blocked.
To unlock it, press the button again,
then select the “Unlock” symbol and confirm.
The oven controls are once again accessible.
Warning
You cannot lock the oven if you have programmed a cooking cycle.
CONTROL PANEL LOCKING (CHILD SAFETY DEVICE)
•
“DEMO” MODE•
To activate DEMO mode:
Set the time to 0:00 (see “Resetting the time”)
then confirm.
Press and hold the < and > buttons
simultaneously for 10 seconds until the word
“DEMO” appears in the display.
To leave DEMO mode:
Set the time to 0:00. Confirm.
Press and hold the < and > buttons
simultaneously for 10 seconds until the word
“DEMO” disappears from the display.
Warning
When your oven is in “Demo” mode, the heating elements are not operative.
demo
Page 34

34
Test Load Approx.
time
Power level
selector
Cookware/Tips
Custard
(12.3.1)
1000 g 16 - 18
minutes
500W Pyrex 227
Place in a glass dish
at level 2
Savoie cake
(12.3.2)
475 g 7 minutes 700W Pyrex 827
On the rack at level 1
Meatloaf
(12.3.3)
900 g 14 min 700W Pyrex 838
Cover with a plastic film
Defrosting
meat
(13.3)
500 g 3 min 16 AUTO
DECONGELATION
P1
On the rack at level 1
Defrosting
raspberries
(B.2.1)
250 g 6 - 7
minutes
200W
On a flat plate
Potatoes
au gratin
(12.3.4)
1100 g 23 - 25 min Fan cooking
220°C + 400 W
Pyrex 827
On the rack at level 1
Chicken
(12.3.6)
1400 g 41 min AUTO P4 In an enamelled earthenware
dish
On the rack at level 1
30 min Full grill
+ 500W
Place on the rack at level 1
with a glass dish below.
Turn midway through
Cake
(12.3.5)
700 g 20 min Fan cooking
220°C + 200 W
Pyrex 827
On the rack at level 1
Functional suitability tests in accordance with IEC/EN/NF EN 60705 standards.
The International Electrotechnical Commission, SC.59K, has established a standard for comparative
performance tests conducted on various micro-wave ovens. We recommend the following for this
appliance:
EN
3 / FUNCTION SUITABILITY TESTS
Page 35

35
EN
3 / FUNCTION SUITABILITY TESTS
Page 36

ANY REPAIR•
36
EN
4 / AFTER-SALES SERVICE
FagorBrandt SAS, tenant-manager – SAS with share capital of 20 000 000 euros RCS Nanterre 440 303 196.
CCZZ55770000775555--0011
12/11
Any repair to your appliance must be made by
a qualified professional, authorised to work on
the brand. When you call, state your appliance’s complete reference information (model,
type, serial number). This information appears
on the manufacturer’s nameplate
(Fig. 1).
ORIGINAL PARTS
During maintenance work, request the exclusive use of
certified genuine
replacement parts.
fig.1
_______________
Cl.B - Gr.2
_____ W max
220 - 240 V 50Hz
2450 MHz
TYP : _________
~
Service: ____________
Nr : AA MM 00001
PXXXXXXXX
 Loading...