


USE AND CARE MANUAL
RENAISSANCE® ELECTRIC RANGE
Model MRES30S
Ta b l e o f C o n t e n t s |
|
Important Safety Instructions |
................................................. 1 |
Oven Operation................................................................. |
4 |
Cooktop Operation........................................................... |
10 |
Care and Cleaning........................................................... |
11 |
Before You Call for Service................................................ |
15 |
Service and Warranty....................................................... |
17 |
Notes.............................................................................. |
18 |
Warranty Card..................................................... |
Back Cover |
Part No. 65167 Rev. N


Important Safety Instructions
INSTALLER: Leave this guide with this appliance.
CONSUMER: Read this use and care manual completely before using this appliance. Keep it for future reference.
For service and warranty information, see page 17.
If you have any questions, call: Dacor Customer Service
(800) 793-0093 (U.S.A. and Canada)
Monday — Friday 6:00 a.m. to 5:00 p.m. Pacific Time Web site: www.dacor.com
Have the complete model and serial number identification of your appliance ready. Record these numbers below for easy access.
Model number ___________________________________
Serial number ___________________________________
Date of purchase_________________________________
Since we continue to improve the quality and performance of our products, it may be necessary to make changes to the appliance without revising this guide. To download the latest version of this manual, visit www.dacor.com.
Important Information About Safety Instructions
The Important Safety Instructions and warnings appearing in this manual can not cover all possible conditions and situations that may occur. Common sense, caution and care must be exercised when installing, maintaining or operating an appliance.
Always contact the manufacturer about problems or conditions you do not understand.
Safety Symbols, Words and Labels
 DANGER
DANGER – Immediate hazards that WILL result in severe personal injury or death.
 wARNING
WARNING – Hazards or unsafe practices that COULD result in severe personal injury or death.
 caution
CAUTION – Hazards or unsafe practices that COULD result in minor personal injury or property damage.
 wARNING
NEVER use this appliance as a space heater to heat or warm a room. Doing so may result in overheating of the appliance.
 wARNING
NEVER cover any slots, holes or passages in the oven bottom or cover and entire rack with materials such as aluminum foil. Doing so blocks air flow through the oven and may cause overheating of the appliance. Aluminum foil linings my also trap heat, causing a fire hazard.
 wARNING
Tip-over hazard:
•A child or adult can tip the range and be killed.
•Verify that the anti-tip bracket has been properly attached to the floor or wall as directed in the installation instructions. Using a flashlight, verify that the range’s rear leg is engaged with the anti-tip bracket as shown below.
•After moving the range, be sure to re-engage the rear leg with the floor or wall mounted anti-tip bracket as shown below.
•Do not operate the range without the rear leg engaged with the anti-tip bracket.
•Failure to follow these instructions can result in death or serious burns to children and adults.
Anti-tip bracket
 Rear leg
State of California Proposition 65 Warnings:
WARNING: This product contains one or more chemicals known to the State of California to cause cancer.
WARNING: This product contains one or more chemicals known to the State of California to cause birth defects or other reproductive harm.
read and Save These Instructions
1

Important Safety Instructions
General Safety Precautions
To reduce the risk of fire, electric shock, serious injury or death when using your appliance, follow basic safety precautions, including the following:
 wARNING
•If you receive a damaged product, immediately contact your dealer or builder. Do not install or use a damaged appliance.
•This appliance must be installed by a qualified technician according to the accompanying Installation Instructions. Have the installer show you the location of the circuit breaker panel or fuse box so that you know how and where to turn off power.
•Ensure that the range is used only by those individuals who are able to operate it properly.
•Use the range only for cooking tasks expected of a home appliance as outlined in this manual.
•Properly clean and maintain the range as recommended in this manual.
•Clean only parts listed in this manual.
•Use only dry pot holders to avoid steam burns when removing hot cookware.
•Exercise caution when opening the oven door. Let hot air or steam escape before looking or reaching into the oven.
•The oven cool air intake (located at the door handle) must remain unobstructed at all times.
•Do not block or obstruct any holes or vents anywhere on the range. Blocking these holes may affect proper operation and may result in a hazard.
•Position oven racks in desired locations when the oven is cool. (If a rack must be repositioned after the oven is already hot, be certain that the pot holder does not contact a hot heating element in the oven).
•CAUTION: DO NOT LEAVE FOOD, COOKING UTENSILS, OVEN RACKS, THE CONVECTION FILTER, ETC., IN THE OVEN DURING THE SELF-CLEAN CYCLE.
•ATTENTION : NE LAISSER AUCUN ALIMENT, UTENSILE DE CUISINE, GRILLES DU FOUR, LE FILTRE DE CONVECTION, ETC., DANS LE FOUR DURANT LE CYCLE D’AUTONETTOYAGE.
•This appliance is equipped with surface units of different sizes. Select utensils having flat bottoms large enough to cover the surface unit heating element. The use of undersized utensils will expose a portion of the heating element to direct contact and may result in ignition of clothing. Proper relationship of utensil to element size will also improve efficiency.
•Select utensils of the proper size, material and construction for the particular type of cooking being done. Select utensils that are large enough to contain the desired quantity of food without boil-overs or spill-overs. Choose pans with easy to hold handles that will stay cool while cooking. Do not use utensils with loose handles. Avoid using pans that are too heavy to lift safely. Use cookware only for its intended purpose. Certain types of glass, ceramic and earthenware utensils are suitable for use only in an oven and not in cooktop applications.
•When deep fat frying, be certain that the pan is large enough to contain the desired volume of food without overflow caused by bubbling of the fat. Never leave a deep fat fryer unattended. Avoid deep fat frying of moist or frostcovered foods, as foods with high water content may cause spattering or spilling of the hot fat. Heat fat slowly, and stir together any combinations of oils and fats prior to applying heat. Utilize a deep fat frying thermometer to avoid heating the fat to temperatures above the flash point.
•Utensil handles should be turned inward and not extend over adjacent elements. To reduce the risk of burns, ignition of flammable materials and spillage due to unintentional contact with the utensil, the handle of a utensil should be positioned so that it is turned inward and does not extend over adjacent elements.
•Always check to make sure the cooktop is off when you are finished cooking.
•Always turn on each element prior to placing a utensil on the cooktop. Also, turn off the element before removing a utensil from the cooktop.
•Always clean the cooktop cautiously. If using a damp sponge or cloth, wait until the cooktop has cooled sufficiently to prevent steam burns. Also, some cleaners can produce harmful or unpleasant fumes if applied to hot surfaces.
•Keep any ventilation filters clean to avoid grease fires.
2

Important Safety Instructions
 wARNING
•Always set utensils gently onto the cooktop.
•Never leave surface units unattended at high heat settings. Boil over causes smoking and greasy spill-overs that may ignite.
•Always keep the cooktop surface clean and dry.
•Do not leave children alone or unattended in the area where the range is in use. Never allow children to sit or stand on any part of the range. Do not let children play with the range.
•CAUTION: Do not store items of interest to children in cabinets above a range. Children could be burned or seriously injured while climbing on the appliance.
•Do not wear loose or hanging apparel while using the range.
•Do not store combustible, flammable or explosive materials in the range or in adjacent cabinets.
•Do not repair or replace any part of the range unless specifically recommended in the literature accompanying this appliance. All other service should be referred to a qualified technician.
•Do not use water on grease fires. A violent steam explosion may result. Smother any flames with a lid, cookie sheet or flat tray. Flaming grease can be extinguished with baking soda or a foam extinguisher.
•Do not allow pot holders to touch hot surfaces. Do not use towels or bulky cloth as pot holders.
•Do not use commercial oven cleaners or oven liner protective coatings on any part of the oven.
•Do not clean the door gasket, because rubbing, moving or in any way damaging the gasket, may eliminate the required tight door seal.
•DO NOT TOUCH INTERIOR SURFACES OF THE OVEN. During and after use, do not touch or let clothing or other flammable materials contact the heating elements or interior surfaces of the oven until they have had sufficient time to cool.
•When using the cooktop, do not touch the areas around the elements. These areas may be hot enough to cause burns.
•If the range is near a window, do not use long curtains as window treatment. The curtains could blow over the cooktop and create a fire hazard.
•Do not cover the elements with anything except properly selected utensils. Decorative covers should not be used.
•Do not heat unopened food containers, such as baby food jars and cans. Pressure build-up may cause the container to burst and cause injury.
•Do not use abrasive or caustic cleaners or detergents on this appliance. They may cause permanent damage. Do not use aerosol cleaners. They may be flammable or cause corrosion of metal parts.
•Do not slide cookware across the grates. Sliding may damage the finish of the grates. Lift utensils to reposition them.
•Do not allow acids (citrus juices, tomato sauces, etc.) to remain on the oven cell surfaces. The porcelain finish may stain.
•Do not touch the range top or backguard with your bare hands during all cooking and self-cleaning modes. Venting from the oven may cause the cooktop and backguard to become hot.
•Do not cook on a broken cooktop. If the cooktop should break, cleaning solutions and spill-overs may penetrate the broken cooktop and create a risk of electric shock. Contact a qualified service technician immediately.
3
Oven Operation
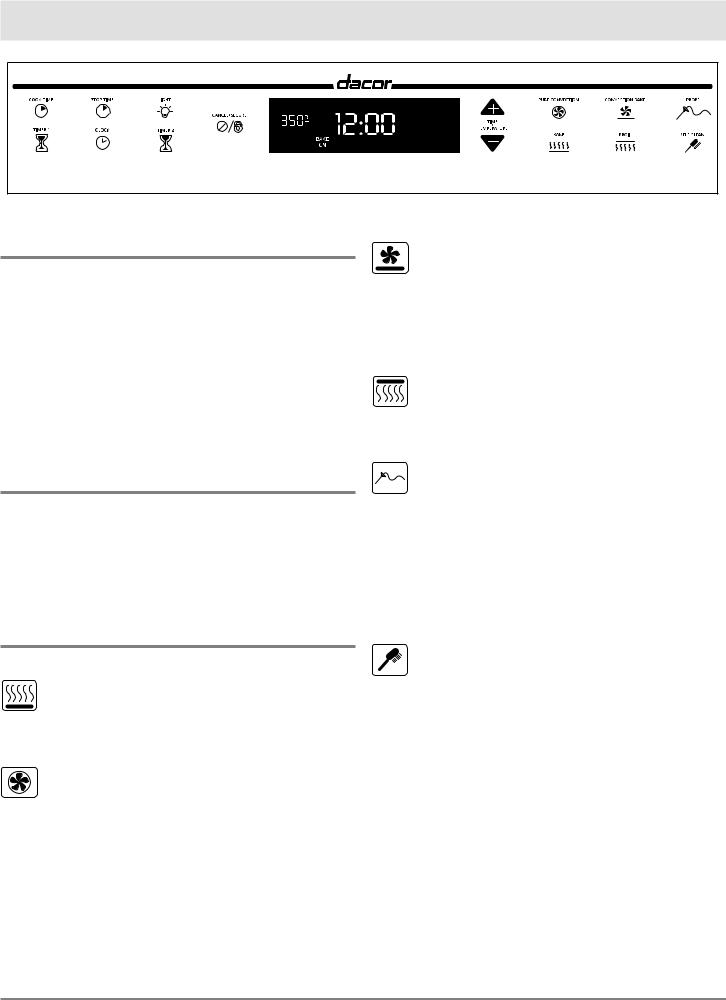
MRES Oven Features
Getting Started
Before using your range, become familiar with the features and control panel layout.
The clock, CANCEL•SECURE, LIGHT and COOKTIME touch keys are located to the left of the clock display, while the cooking function touch keys are to the right of it.
IMPORTANT: After choosing a clock function or oven mode, you have six seconds to perform the next programming step. If the next step is not completed within six seconds, the program selection displayed on the clock will disappear. Should this occur, repeat the initial function selection.
Setting the Time of Day
Follow these two steps to set the correct time of day:
1.Press the CLOCK key. The time of day will flash, “AM” or “PM” will be displayed, and “TIME” will flash in the display.
2.Press the + or – key until the correct time of day is displayed and release.
Oven Modes
All oven modes are described below:
STANDARD BAKE – In standard bake mode, the bottom heat element provides conventional baking heat. Temperatures may be set from 135˚ to 555˚F in 5˚F increments. Use Standard Bake for single rack baking and roasting.
PURE CONVECTION™ – In Pure Convection mode a third heating element, encircling the
convection fan located in the rear of the oven chamber, acts as the heat source. The convection fan draws air from the oven chamber, then forces it across the hot convection heating element. The heated air is directed back into the oven chamber through the convection baffle. The baffle distributes the heated air evenly to ensure uniform results.
Temperatures may be set from 135˚ to 555˚F in 5˚F increments. Use this mode for single rack baking, multiple rack baking, roasting and preparation of complete meals.
CONVECTION BAKE – In this combination convection-radiant mode, the lower element
provides the heat. As in Pure Convection mode, the convection fan and baffle combine to circulate heated air evenly throughout the oven chamber.
Temperatures may be set from 135˚F to 555˚F in 5˚F increments. Use this mode for single rack baking, multiple rack baking and roasting.
BROIL – The high wattage, top heating element supplies the heat in Broil mode. The broil temperature is adjustable from 135˚F, to the “HI” setting (equivalent to 555˚F) for greater cooking flexibility. Broiling is performed with the door closed.
TEMPERATURE PROBE – This oven function will allow you to plug a Dacor provided temperature
probe into the oven receptacle and measure temperatures in your food via the oven control and display. The temperature probe can be used in combination with Standard Bake, Pure Convection, or Convection Bake modes. The temperature probe takes the guesswork out of roasting by cooking food to the exact internal temperature that you desire. The temperature range that the temperature probe will read is from 100°F to 200°F.
SELF-CLEAN – In the pyrolytic self-clean mode, the oven reaches extreme high temperatures,
thereby burning off oven soil automatically. The self-clean time is adjustable up to four hours so that varying degrees of oven soil can be successfully removed. Also, the self-clean cycle can be delayed to start at a later time if desired.
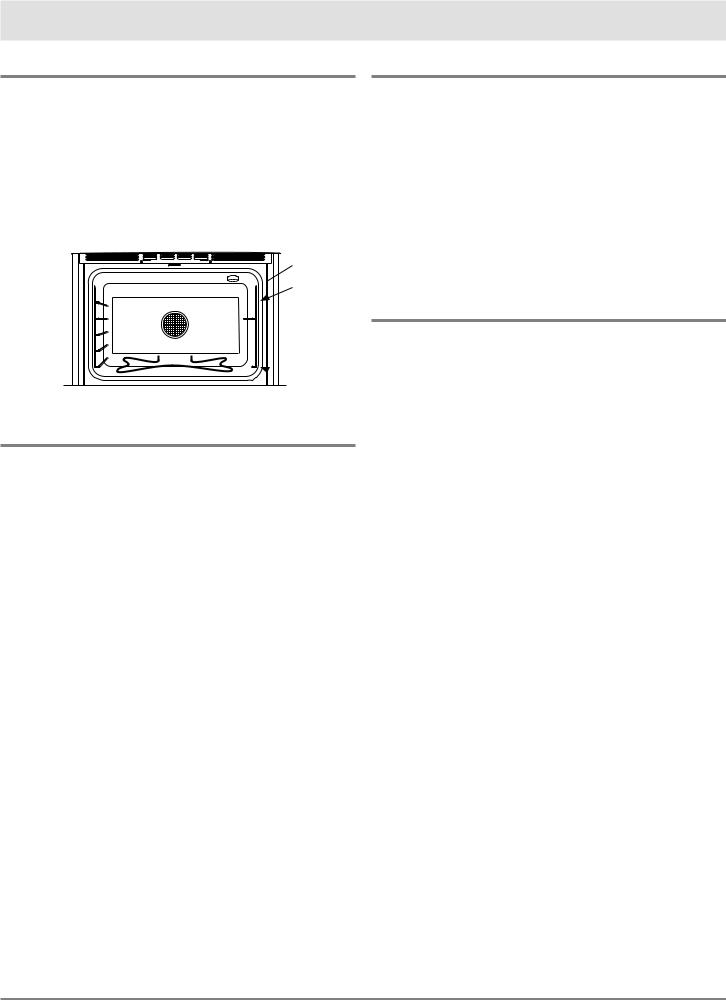
What Is Pure Convection™?
Your new oven has the best cooking system available today, Pure Convection. Pure Convection is a total system approach to cooking. The heat source is a third element outside the cooking cell behind a baffle. Not only does the baffle separate the food from the heat source, it channels the air from the convection fan evenly into the cell improving hot or cool spots in the oven. This system is what allows multi-rack cooking while achieving even results from one rack to another. The filter eliminates the transference of flavors when cooking entire meals and also keeps the oven cleaner.
4
Oven Operation
Oven Racks and Supports
Three chrome-plated oven racks are provided. Always remember to position the racks prior to heating the oven. Also, remove the oven racks prior to self-cleaning to prevent permanent damage.
The porcelain rack supports provide six (6) heights for positioning of the oven racks.
To install a rack, align the left and right edges of the rack with the horizontal guide rails of the rack supports, then slide the rack into the oven.


Oven Rack Positions
Oven Mode Selection
Follow these steps to operate the oven modes:
1.Position the oven rack(s) at the proper height(s).
2.Press the key for the modes of your choice. The oven will beep once, the selected cooking mode will flash and “– – –” will be displayed.
3.Press either the + or – key. The default temperature will be displayed.
4.To adjust the default temperature for baking, press and hold the TIME•TEMP key. Press the + key to increase the temperature setting, – to decrease. “PRE” and ON will appear in the clock display, and the oven will begin to heat. If in a convection mode, the convection fan will turn on. Also, the clock display will change from the desired cooking temperature to the actual oven temperature, starting with 135˚F. The temperature display will increase in 5˚F increments until the desired temperature is reached.
NOTE: Do not place food inside the oven until the preheat cycle is complete.
When the desired temperature is attained, the preheat cycle is complete. The clock will beep once and PRE and ON will disappear from the display. (From this time forward, the ON display will cycle on and off with the heating elements).
5.Carefully place the food onto the desired rack(s) within the preheated oven.
6.It is recommended that a minute timer be set to time the cooking process.
7.When the time expires and/or the food is done cooking, press the CANCEL•SECURE key to turn off the oven.
Preheating the Oven
The oven features an automatic preheat cycle that rapidly brings the oven chamber up to temperature. When choosing a cooking mode and setting a temperature,
the oven will automatically perform the preheat function. The preheat cycle operates in standard BAKE, PURE CONVECTION and CONVECTION BAKE modes. There is no preheat cycle for the BROIL mode.
NOTE: Allowing the oven to completely pre-heat prior to placing food in the oven will avoid excessive browning of the food. After the oven signals that the pre-heat is
complete, allow 3-5 more minutes for the heat patterns to normalize in the oven and then place your food inside.
Using the Minute Timers
The clock features two timers that may be used to time cooking or other processes up to 11 hours, 50 minutes in length.
To use the Minute Timer function, follow these steps:
1.Press the key labeled TIMER 1 or TIMER 2. The clock will display 00:00 and TIMER 1 or TIMER 2 will flash.
2.Press the + key until the desired time is displayed on the clock.
3.After timer 1 has expired, the clock will sound off with one second beeps and TIMER 1 will appear in the display. After the timer 2 minute timer has expired, the clock will sound alternating one and two second beeps and TIMER 2 will appear in the display. The beeper can be silenced by pressing the TIMER key while the beeper is sounding.
IMPORTANT: Cancellation of the minute timer does not turn off the oven if it is operating. You must manually shut the oven off by pressing the CANCEL•SECURE key.
NOTES:
•To view the current time of day, rather than the remaining time on the minute timer, press the CLOCK key. To change back to a minute timer display, press the TIMER 1 or TIMER 2 key.
•To cancel the minute timer while in progress, press the TIMER 1 or TIMER 2 key two times. The clock display will return to the time of day.
•The minute timers may be used at the same time as
Delay Timed Cooking or SELF-CLEAN.
•The minute timers will beep for 2 minutes (if not cancelled) before automatically shutting off.
•Pressing the CANCEL•SECURE key when the beeper is sounding will cancel both the beeper and the cooking function.
5

Oven Operation
Securing the Oven Controls
To avoid accidentally turning the oven on, activate the secure feature. Press and hold the CANCEL•SECURE key for approximately three seconds. Doing so will disable the control panel and allow cleaning the controls without accidentally starting any functions. Three beeps will sound and “OFF” will appear in the display when the control panel has been secured.
To re-activate the control panel, again push and hold the CANCEL•SECURE key for three seconds. Three beeps will sound and “OFF” will disappear from the display.
Baking
In addition to the conventional radiant-heat Standard Bake mode, this Dacor range offers two additional baking modes: Pure Convection and Convection Bake.
As a general rule, a convection mode will allow preparation of most foods at reduced temperatures for shorter periods of time, while also producing superior results. Typically you can reduce the standard temperature by 25˚F and cook for
10% less time. Baked goods will have golden-brown crusts with flaky textures, and meats will have crispy exteriors with succulent juices sealed inside.
Because of variations in food density, surface texture and consistency, there are a few foods that may be prepared more successfully in the Standard Bake mode. For this reason, Bake mode is recommended when preparing baked goods such as custard.
•To convert conventional bake recipes to convection recipes, reduce temperature by 25˚F and the cooking time by approximately 10%.
•Some recipes, especially those that are homemade, may require adjustment and testing when converting from standard to convection modes. If unsure how to convert a recipe, begin by preparing the recipe in Bake mode. After achieving acceptable results, follow the convection guidelines. If the food is not prepared to your satisfaction during this first convection trial, adjust only one recipe variable at a time (such as cooking time, rack position or temperature) and repeat the convection test. If necessary, continue adjusting one recipe variable at a time until satisfactory results are achieved.
•Do not open the oven door frequently during baking. Look through the door window to check the progress of baking whenever possible.
•Use the minute timers to time baking functions.
•Wait until the shortest recommended baking time before checking food. For baked goods, a wooden pick placed in the center should come clean when the food is done.
•Measure ingredients carefully and follow tested recipes for best baking results.
•Adjustments to recipe times and temperatures will need to be made when baking at high altitudes. Consult a cookbook on high-altitude cooking or contact the Home Economics Departments at your state university for specific recommendations.
Bakeware Tips:
•Use the pan size and type recommended by the recipe to ensure best results.
•Cakes, quick breads, muffins and cookies should be baked in shiny, reflective pans for light, golden crusts.
•Medium gauge aluminum sheets with low sides should be used when preparing cookies, biscuits and cream puffs.
•Bake most frozen foods in their original foil containers placed on a flat cookie sheet. Follow the package recommendations.
•When using glass bakeware, reduce the recipe temperature by 25˚F, except when baking pies or yeast breads. Follow the standard recipe baking time for pies and yeast breads.
•Avoid the use of old, darkened pans.
•Warped, dented, stainless steel and tin-coated pans heat unevenly and will not give uniform baking results.
•Place pans carefully on the oven racks. Turn pans on the racks so that the long sides run left to right, parallel to the door.
NOTE: For common baking problems refer to your Dacor cookbook. Your complimentary cookbook was packed with your range. If you did not receive your cookbook, please contact Dacor at (800) 793-0093 or at www.dacor.com.
Roasting
All baking modes can be used to successfully roast in your oven. However, the convection modes are recommended to produce meats that are deliciously seared on the outside and succulently juicy on the inside in record time. Foods that are exceptional, when prepared in a convection mode, include: beef, pork, ham, lamb, turkey, chicken and cornish hens.
•To convert conventional bake recipes to convection recipes, reduce the temperature by 25˚F and the cooking time by approximately 10%.
•When using a roasting rack, always roast meats fat side up in a shallow pan. Always use a pan that fits the size of the food being prepared. The broiler pan and grill, accompanying the oven, can be used in most cases. No basting is required when the fat side is up. Do not add water to the pan. It will cause a steamed effect. Roasting is a dry heat process.
6
 Loading...