

Page 1
User Guide
Page 2

Copyright Information
Copyright © 2004 by Jasc Software, Inc. All rights reserved. No portion of the contents of this
publication may be reproduced or transmitted in any form or by any means without the express
written permission of Jasc Software, Inc.
Trademark Information
Animation Shop, ImageCommander, Media Center Plus, Paint Shop and the Jasc orbit logo are
trademarks of Jasc Software, Inc. Jasc, Paint Shop Pro, and The Power to Create are registered
trademarks of Jasc Software, Inc. Acrobat, PostScript, Photoshop, Photoshop Elements are either
registered trademarks or trademarks of Adobe Systems Incorporated. The Postscript language is
copyrighted by Adobe Systems Incorporated. Macintosh is a registered trademark of Apple
Computer, Inc. Autodesk is a registered trademark of Autodesk, Inc. MacPaint is a product and
trademark of Claris Corporation. GIF is a service mark property and Graphic Interchange Format is
copyright property of CompuServe Inc. CorelDRAW, Ventura Publisher, WordPerfect are either
registered trademarks or trademarks of Corel Corporation. GEM, GEM Paint are either registered
trademarks or trademarks of Digital Research Inc. Digimarc is a registered trademark of
Digimarc Corporation. Deluxe Paint is a registered trademark of Electronic Arts. Kodak Photo CD
is registered trademark of Eastman Kodak Company. OS/2, Lotus 1-2-3 are registered trademarks of
International Business Machines Corporation. Dr. Halo is a registered trademark of Media
Cybernetics. Micrografx Draw is registered trademark of Micrografx, Inc. Microsoft, Windows,
Microsoft Paint, Microsoft Word, Video For Windows are either registered trademarks or
trademarks of Microsoft Corporation. CT is a registered trademark of Scitex Corporation. ZSoft
Paintbrush is a registered trademark of ZSoft Corporation. Portions copyright © 2003 Access
Softek. Portions copyright © 2004 Bengt, Inc. Portions copyright © 2001-2003 Python Software
Foundation. All rights reserved.
All other trademarks or registered trademarks are the property of their respective owners.
We have done our best to ensure that the material found in this publication is both useful and
accurate. However, please be aware that errors may exist in this publication, and that neither the
authors nor Jasc Software, Inc. make any guarantees concerning the accuracy of the information
found here or in the use to which it may be put.
Printed in the United States of America
First Printing
2004
Page 3
Contents
Chapter 1 Getting Started . . . . . . . . . . . . . . . . . . . . . . . 1
Chapter 2 Getting to Know The Program . . . . . . . . . . . 9
i
What’s New in Version 9 . . . . . . . . . . . . . . . . . . . . . . . . . . . . . . . 2
System Requirements. . . . . . . . . . . . . . . . . . . . . . . . . . . . . . . . . . 6
Installing the Software . . . . . . . . . . . . . . . . . . . . . . . . . . . . . . . . . 6
Learning Paint Shop Pro. . . . . . . . . . . . . . . . . . . . . . . . . . . . . . . . 7
Starting and Exiting Paint Shop Pro . . . . . . . . . . . . . . . . . . . . . . 10
Exploring the User Interface . . . . . . . . . . . . . . . . . . . . . . . . . . . 10
Using Shortcut and Function Keys. . . . . . . . . . . . . . . . . . . . . . . 11
Using Toolbars and Palettes . . . . . . . . . . . . . . . . . . . . . . . . . . . . 12
Working with Dialogs . . . . . . . . . . . . . . . . . . . . . . . . . . . . . . . . 19
Viewing Images . . . . . . . . . . . . . . . . . . . . . . . . . . . . . . . . . . . . . 22
Viewing Image Information . . . . . . . . . . . . . . . . . . . . . . . . . . . . 28
Chapter 3 Getting Images into Paint Shop Pro . . . . . . 29
Importing Images from Digital Cameras and Scanners. . . . . . . . 30
Opening Existing Images . . . . . . . . . . . . . . . . . . . . . . . . . . . . . . 33
Creating Images . . . . . . . . . . . . . . . . . . . . . . . . . . . . . . . . . . . . . 35
Capturing Images from the Computer Screen. . . . . . . . . . . . . . . 41
Opening Frames from Animation Shop . . . . . . . . . . . . . . . . . . . 43
Using the Paint Shop Pro Browser . . . . . . . . . . . . . . . . . . . . . . . 44
Saving Image Files. . . . . . . . . . . . . . . . . . . . . . . . . . . . . . . . . . . 49
Closing Image Files . . . . . . . . . . . . . . . . . . . . . . . . . . . . . . . . . . 52
Page 4

ii
Contents
Chapter 4 Customizing Paint Shop Pro . . . . . . . . . . . . 53
Using Custom Workspaces . . . . . . . . . . . . . . . . . . . . . . . . . . . . . 54
Customizing Toolbars and Menus. . . . . . . . . . . . . . . . . . . . . . . . 56
Setting General Program Preferences . . . . . . . . . . . . . . . . . . . . . 59
Setting Autosave Preferences . . . . . . . . . . . . . . . . . . . . . . . . . . . 67
Setting File Locations . . . . . . . . . . . . . . . . . . . . . . . . . . . . . . . . . 67
Setting File Format Preferences . . . . . . . . . . . . . . . . . . . . . . . . . 73
Setting File Format Associations. . . . . . . . . . . . . . . . . . . . . . . . . 79
Resetting Application Preferences . . . . . . . . . . . . . . . . . . . . . . . 80
Assigning and Viewing Shortcut Keys . . . . . . . . . . . . . . . . . . . . 81
Adjusting Monitor Display Options . . . . . . . . . . . . . . . . . . . . . . 84
Chapter 5 Improving Photographs. . . . . . . . . . . . . . . . 87
Basic Steps in Improving Photographs . . . . . . . . . . . . . . . . . . . . 88
Using the Digital Camera Noise Removal Filter . . . . . . . . . . . . . 89
Using the Chromatic Aberration Removal Filter. . . . . . . . . . . . . 92
Using the Fill Flash Filter . . . . . . . . . . . . . . . . . . . . . . . . . . . . . . 95
Using the Backlighting Filter . . . . . . . . . . . . . . . . . . . . . . . . . . . 96
How to Approach Color, Contrast, and Saturation Adjustments . 96
Fixing Photos in One Step. . . . . . . . . . . . . . . . . . . . . . . . . . . . . . 97
Correcting Image Distortions . . . . . . . . . . . . . . . . . . . . . . . . . . . 97
Improving Colors . . . . . . . . . . . . . . . . . . . . . . . . . . . . . . . . . . . 100
Improving Contrast . . . . . . . . . . . . . . . . . . . . . . . . . . . . . . . . . . 106
Improving Image Clarity. . . . . . . . . . . . . . . . . . . . . . . . . . . . . . 107
Improving Saturation . . . . . . . . . . . . . . . . . . . . . . . . . . . . . . . . 109
Removing Image Defects and Noise . . . . . . . . . . . . . . . . . . . . . 110
Removing Source Defects. . . . . . . . . . . . . . . . . . . . . . . . . . . . . 114
Retouching Photographs . . . . . . . . . . . . . . . . . . . . . . . . . . . . . . 117
Chapter 6 Making Color and Tonal Corrections. . . . . 125
Key Points to Know Before Making Corrections . . . . . . . . . . . 126
How Corrections Relate to Color Depth . . . . . . . . . . . . . . . . . . 127
Adjusting the Color Balance . . . . . . . . . . . . . . . . . . . . . . . . . . . 128
Adjusting Brightness and Contrast . . . . . . . . . . . . . . . . . . . . . . 134
Replacing Colors . . . . . . . . . . . . . . . . . . . . . . . . . . . . . . . . . . . . 140
Reducing or Removing Colors . . . . . . . . . . . . . . . . . . . . . . . . . 142
Using the Histogram to Analyze Images . . . . . . . . . . . . . . . . . . 145
Page 5

Contents
Chapter 7 Editing Images . . . . . . . . . . . . . . . . . . . . . 151
Adding Borders . . . . . . . . . . . . . . . . . . . . . . . . . . . . . . . . . . . . 152
Changing the Canvas Size . . . . . . . . . . . . . . . . . . . . . . . . . . . . 152
Combining Two Images . . . . . . . . . . . . . . . . . . . . . . . . . . . . . . 153
Correcting Image Perspective. . . . . . . . . . . . . . . . . . . . . . . . . . 155
Cropping Images . . . . . . . . . . . . . . . . . . . . . . . . . . . . . . . . . . . 157
Cutting, Copying, and Pasting . . . . . . . . . . . . . . . . . . . . . . . . . 160
Deleting Images . . . . . . . . . . . . . . . . . . . . . . . . . . . . . . . . . . . . 164
Flipping and Mirroring Images. . . . . . . . . . . . . . . . . . . . . . . . . 164
Repeating Commands. . . . . . . . . . . . . . . . . . . . . . . . . . . . . . . . 165
Resizing Images . . . . . . . . . . . . . . . . . . . . . . . . . . . . . . . . . . . . 166
Rotating Images . . . . . . . . . . . . . . . . . . . . . . . . . . . . . . . . . . . . 168
Scaling and Transforming Images . . . . . . . . . . . . . . . . . . . . . . 171
Using Rulers, Grids, and Guides . . . . . . . . . . . . . . . . . . . . . . . 173
Using Undo/Redo. . . . . . . . . . . . . . . . . . . . . . . . . . . . . . . . . . . 177
Warping Images Using the Mesh Warp Tool . . . . . . . . . . . . . . 178
Using the History Palette . . . . . . . . . . . . . . . . . . . . . . . . . . . . . 181
iii
Chapter 8 Making Selections in Images . . . . . . . . . . 191
Using the Selection Tools. . . . . . . . . . . . . . . . . . . . . . . . . . . . . 192
Using Edit Selection. . . . . . . . . . . . . . . . . . . . . . . . . . . . . . . . . 201
Adjusting Selection Borders. . . . . . . . . . . . . . . . . . . . . . . . . . . 202
Converting a Selection into a Layer . . . . . . . . . . . . . . . . . . . . . 204
Creating Custom Patterns from Selections . . . . . . . . . . . . . . . . 205
Modifying Selections . . . . . . . . . . . . . . . . . . . . . . . . . . . . . . . . 205
Clipping a Selection to the Canvas. . . . . . . . . . . . . . . . . . . . . . 212
Moving Selections within an Image . . . . . . . . . . . . . . . . . . . . . 213
Saving and Loading Selections. . . . . . . . . . . . . . . . . . . . . . . . . 214
Working with Standard and Floating Selections. . . . . . . . . . . . 218
Chapter 9 Applying Effects. . . . . . . . . . . . . . . . . . . . 219
Choosing Effects . . . . . . . . . . . . . . . . . . . . . . . . . . . . . . . . . . . 220
Using Effects Dialogs. . . . . . . . . . . . . . . . . . . . . . . . . . . . . . . . 220
Adding Noise . . . . . . . . . . . . . . . . . . . . . . . . . . . . . . . . . . . . . . 225
Adding Picture Frames. . . . . . . . . . . . . . . . . . . . . . . . . . . . . . . 226
Creating Your Own Effects . . . . . . . . . . . . . . . . . . . . . . . . . . . 228
Using the Displacement Map Effect. . . . . . . . . . . . . . . . . . . . . 228
Using the Radial Blur Effect . . . . . . . . . . . . . . . . . . . . . . . . . . 230
Mathematically Combining Two Images . . . . . . . . . . . . . . . . . 231
Page 6

iv
Contents
Chapter 10 Working with Colors and Materials . . . . . . 233
Basics of Using the Materials Palette . . . . . . . . . . . . . . . . . . . . 234
Using the Materials Palette . . . . . . . . . . . . . . . . . . . . . . . . . . . . 236
Choosing Colors . . . . . . . . . . . . . . . . . . . . . . . . . . . . . . . . . . . . 239
Choosing Gradients. . . . . . . . . . . . . . . . . . . . . . . . . . . . . . . . . . 244
Choosing Patterns . . . . . . . . . . . . . . . . . . . . . . . . . . . . . . . . . . . 246
Choosing Textures . . . . . . . . . . . . . . . . . . . . . . . . . . . . . . . . . . 247
Working with Swatches . . . . . . . . . . . . . . . . . . . . . . . . . . . . . . 249
Editing Gradients . . . . . . . . . . . . . . . . . . . . . . . . . . . . . . . . . . . 251
Understanding Color and Color Models . . . . . . . . . . . . . . . . . . 256
How Monitor and Print Colors Differ . . . . . . . . . . . . . . . . . . . . 258
Working with Color Channels. . . . . . . . . . . . . . . . . . . . . . . . . . 259
Understanding Color Depth. . . . . . . . . . . . . . . . . . . . . . . . . . . . 260
Working with Image Palettes . . . . . . . . . . . . . . . . . . . . . . . . . . 269
Making a Palette Color Transparent . . . . . . . . . . . . . . . . . . . . . 272
Chapter 11 Raster Painting . . . . . . . . . . . . . . . . . . . . . 275
Setting Brush and Paint Options . . . . . . . . . . . . . . . . . . . . . . . . 276
Painting with the Paint Brush or Airbrush . . . . . . . . . . . . . . . . . 278
Creating Brush Tips . . . . . . . . . . . . . . . . . . . . . . . . . . . . . . . . . 280
Using the Brush Variance Palette . . . . . . . . . . . . . . . . . . . . . . . 282
Filling Areas with Colors, Gradients, Patterns, or Textures . . . 284
Warping Images With the Warp Brush . . . . . . . . . . . . . . . . . . . 286
Erasing Parts of an Image . . . . . . . . . . . . . . . . . . . . . . . . . . . . . 287
Cloning Parts of Images . . . . . . . . . . . . . . . . . . . . . . . . . . . . . . 290
Painting with Picture Tubes . . . . . . . . . . . . . . . . . . . . . . . . . . . 290
Replacing Colors . . . . . . . . . . . . . . . . . . . . . . . . . . . . . . . . . . . . 293
Retouching Images . . . . . . . . . . . . . . . . . . . . . . . . . . . . . . . . . . 294
Page 7

Contents
Chapter 12 Art Media Tools . . . . . . . . . . . . . . . . . . . . 297
Art Media Layers . . . . . . . . . . . . . . . . . . . . . . . . . . . . . . . . . . . 298
Using the Mixer Palette . . . . . . . . . . . . . . . . . . . . . . . . . . . . . . 299
Using the Art Media Brushes . . . . . . . . . . . . . . . . . . . . . . . . . . 305
Using the Oil Brush . . . . . . . . . . . . . . . . . . . . . . . . . . . . . . . . . 308
Using the Chalk Tool . . . . . . . . . . . . . . . . . . . . . . . . . . . . . . . . 310
Using the Pastel Tool . . . . . . . . . . . . . . . . . . . . . . . . . . . . . . . . 311
Using the Crayon Tool . . . . . . . . . . . . . . . . . . . . . . . . . . . . . . . 312
Using the Colored Pencil Tool . . . . . . . . . . . . . . . . . . . . . . . . . 313
Using the Marker Tool . . . . . . . . . . . . . . . . . . . . . . . . . . . . . . . 314
Using the Palette Knife Tool . . . . . . . . . . . . . . . . . . . . . . . . . . 315
Using the Smear Tool. . . . . . . . . . . . . . . . . . . . . . . . . . . . . . . . 316
Using the Art Eraser Tool. . . . . . . . . . . . . . . . . . . . . . . . . . . . . 317
Chapter 13 Drawing and Editing Objects . . . . . . . . . . 319
Drawing Objects. . . . . . . . . . . . . . . . . . . . . . . . . . . . . . . . . . . . 320
Drawing Lines with the Pen Tool. . . . . . . . . . . . . . . . . . . . . . . 321
Drawing Bezier Curves with the Pen Tool . . . . . . . . . . . . . . . . 325
Drawing Freehand Curves with the Pen Tool. . . . . . . . . . . . . . 326
Using the Rectangle Tool. . . . . . . . . . . . . . . . . . . . . . . . . . . . . 328
Using the Ellipse Tool . . . . . . . . . . . . . . . . . . . . . . . . . . . . . . . 329
Using the Symmetric Shape Tool. . . . . . . . . . . . . . . . . . . . . . . 330
Using the Preset Shape Tool. . . . . . . . . . . . . . . . . . . . . . . . . . . 331
Creating Custom Line Styles . . . . . . . . . . . . . . . . . . . . . . . . . . 334
Editing Vector Object Properties . . . . . . . . . . . . . . . . . . . . . . . 336
Adding and Closing Contours . . . . . . . . . . . . . . . . . . . . . . . . . 338
Aligning and Arranging Vector Objects. . . . . . . . . . . . . . . . . . 343
Resizing and Reshaping Vector Objects. . . . . . . . . . . . . . . . . . 347
Editing Paths and Contours . . . . . . . . . . . . . . . . . . . . . . . . . . . 349
Editing Nodes. . . . . . . . . . . . . . . . . . . . . . . . . . . . . . . . . . . . . . 351
v
Chapter 14 Working with Layers. . . . . . . . . . . . . . . . . 359
About Layers . . . . . . . . . . . . . . . . . . . . . . . . . . . . . . . . . . . . . . 360
Adding New Layers to Images . . . . . . . . . . . . . . . . . . . . . . . . . 366
Editing Layer Properties. . . . . . . . . . . . . . . . . . . . . . . . . . . . . . 368
Modifying Layers. . . . . . . . . . . . . . . . . . . . . . . . . . . . . . . . . . . 378
Using Adjustment Layers. . . . . . . . . . . . . . . . . . . . . . . . . . . . . 382
Using the Layers palette. . . . . . . . . . . . . . . . . . . . . . . . . . . . . . 385
Page 8

vi
Contents
Chapter 15 Working with Masks . . . . . . . . . . . . . . . . . 389
About Masks. . . . . . . . . . . . . . . . . . . . . . . . . . . . . . . . . . . . . . . 390
Creating Masks . . . . . . . . . . . . . . . . . . . . . . . . . . . . . . . . . . . . . 391
Deleting Masks . . . . . . . . . . . . . . . . . . . . . . . . . . . . . . . . . . . . . 396
Editing Masks . . . . . . . . . . . . . . . . . . . . . . . . . . . . . . . . . . . . . . 397
Loading Masks . . . . . . . . . . . . . . . . . . . . . . . . . . . . . . . . . . . . . 399
Saving Masks . . . . . . . . . . . . . . . . . . . . . . . . . . . . . . . . . . . . . . 402
Chapter 16 Working with Text . . . . . . . . . . . . . . . . . . . 405
Creating Text . . . . . . . . . . . . . . . . . . . . . . . . . . . . . . . . . . . . . . 406
Formatting Text . . . . . . . . . . . . . . . . . . . . . . . . . . . . . . . . . . . . 410
Editing Text . . . . . . . . . . . . . . . . . . . . . . . . . . . . . . . . . . . . . . . 411
Moving Text . . . . . . . . . . . . . . . . . . . . . . . . . . . . . . . . . . . . . . . 412
Applying Effects to Text. . . . . . . . . . . . . . . . . . . . . . . . . . . . . . 413
Converting Text to Curves . . . . . . . . . . . . . . . . . . . . . . . . . . . . 413
Creating Text on Object Paths. . . . . . . . . . . . . . . . . . . . . . . . . . 414
Creating Text with Image Patterns . . . . . . . . . . . . . . . . . . . . . . 418
Scaling and Transforming Text. . . . . . . . . . . . . . . . . . . . . . . . . 418
Chapter 17 Automating Tasks . . . . . . . . . . . . . . . . . . . 419
Using and Creating Presets . . . . . . . . . . . . . . . . . . . . . . . . . . . . 420
Processing Multiple Files . . . . . . . . . . . . . . . . . . . . . . . . . . . . . 422
Renaming Multiple Files. . . . . . . . . . . . . . . . . . . . . . . . . . . . . . 424
Scripting Basics . . . . . . . . . . . . . . . . . . . . . . . . . . . . . . . . . . . . 425
Running a Saved Script. . . . . . . . . . . . . . . . . . . . . . . . . . . . . . . 427
Stopping or Undoing a Script . . . . . . . . . . . . . . . . . . . . . . . . . . 427
About Restricted Script Mode. . . . . . . . . . . . . . . . . . . . . . . . . . 428
Recording and Saving a Script . . . . . . . . . . . . . . . . . . . . . . . . . 429
Editing Scripts. . . . . . . . . . . . . . . . . . . . . . . . . . . . . . . . . . . . . . 430
Binding Scripts to Icons . . . . . . . . . . . . . . . . . . . . . . . . . . . . . . 433
Page 9

Contents
Chapter 18 Printing Images . . . . . . . . . . . . . . . . . . . . 435
About Printing . . . . . . . . . . . . . . . . . . . . . . . . . . . . . . . . . . . . . 436
About Printing Options . . . . . . . . . . . . . . . . . . . . . . . . . . . . . . 437
Printing Multiple Images on a Page . . . . . . . . . . . . . . . . . . . . . 439
Printing a Single Image . . . . . . . . . . . . . . . . . . . . . . . . . . . . . . 446
Printing Images from the Browser . . . . . . . . . . . . . . . . . . . . . . 446
Printing Images Using a Template . . . . . . . . . . . . . . . . . . . . . . 448
Placing Text Captions on the Layout . . . . . . . . . . . . . . . . . . . . 451
Printing with CMYK Color Separations. . . . . . . . . . . . . . . . . . 452
Saving Images for Printing. . . . . . . . . . . . . . . . . . . . . . . . . . . . 456
Chapter 19 Sharing and Creating Images for the Web 457
Sending Images via E-Mail . . . . . . . . . . . . . . . . . . . . . . . . . . . 458
Uploading Images to a Photo Sharing Service . . . . . . . . . . . . . 458
Saving Images for the Web . . . . . . . . . . . . . . . . . . . . . . . . . . . 459
Saving Images for Use In Animation Shop. . . . . . . . . . . . . . . . 470
Previewing Images in a Web Browser . . . . . . . . . . . . . . . . . . . 470
Creating Image Rollovers. . . . . . . . . . . . . . . . . . . . . . . . . . . . . 471
Mapping Images. . . . . . . . . . . . . . . . . . . . . . . . . . . . . . . . . . . . 472
Slicing Images . . . . . . . . . . . . . . . . . . . . . . . . . . . . . . . . . . . . . 476
Using Digital Watermarks . . . . . . . . . . . . . . . . . . . . . . . . . . . . 480
vii
Page 10

viii
Contents
Page 11

CHAPTER 1
Getting Started
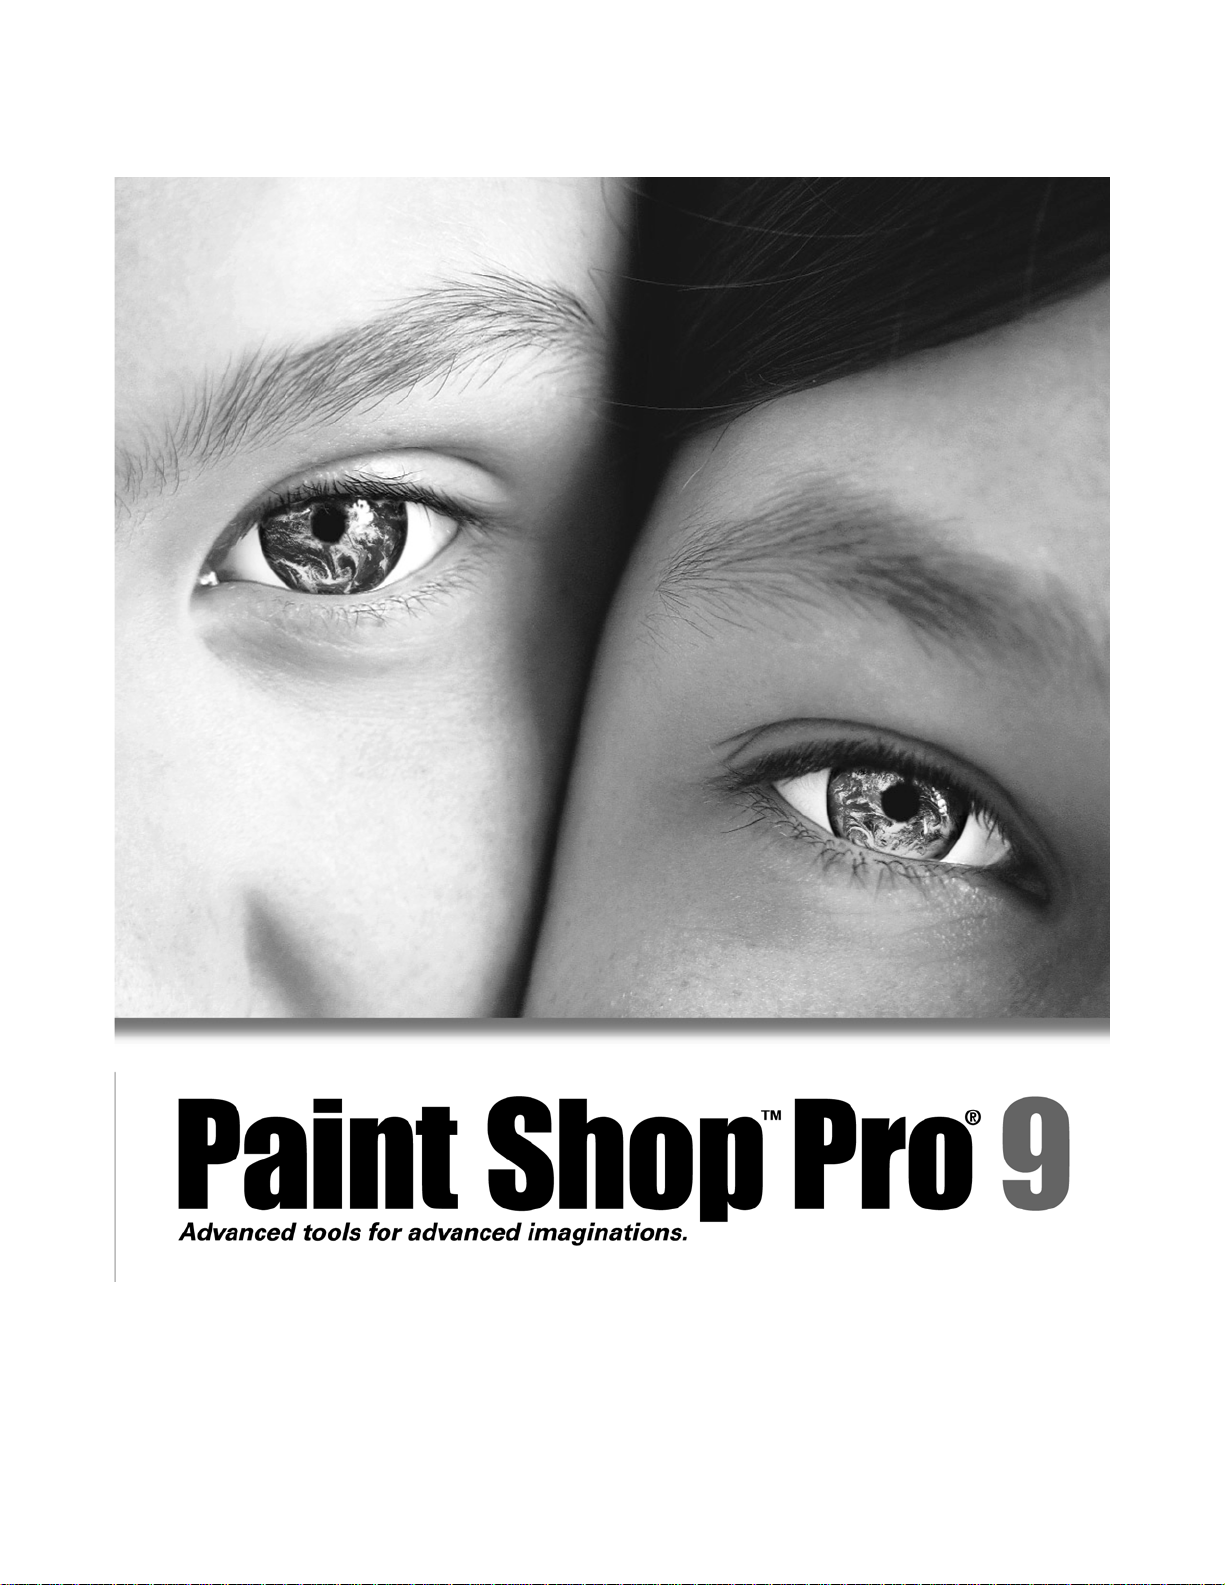
Paint Shop Pro sets the standard for affordable, professional image
editing. Version 9 builds on Paint Shop Pro’s legacy of creative
innovation with a new set of art media tools, professional photo
correction filters, and precision graphic design capabilities to offer
users limitless creativity. You can greatly reduce time spent on
production tasks with Paint Shop Pro’s streamlined production tools.
Edit photos, create graphics, draw, paint, and animate, all within a
highly customizable workspace environment. Paint Shop Pro 9
provides advanced tools for advanced imaginations.
1
Contents
What’s New in Version 9 . . . . . . . . . . . . . . . . . . . . . . . . . . . . . . . 2
System Requirements . . . . . . . . . . . . . . . . . . . . . . . . . . . . . . . . . 6
Installing the Software . . . . . . . . . . . . . . . . . . . . . . . . . . . . . . . . . 6
Learning Paint Shop Pro . . . . . . . . . . . . . . . . . . . . . . . . . . . . . . . 7
Page 12

Chapter 1: Getting Started
2
What’s New in Version 9
Briefly described below are the new features in Paint Shop Pro 9 that
will enhance your ability to work with digital photographs, create
and enhance artwork and graphics, and boost your productivity.
User Interface Enhancements
Although similar to the version 8 interface, Paint Shop Pro 9 has
been updated to include the following.
The History palette lists each command you apply to the active
image. The most recent action appears at the top of the list. The
History palette gives you the ability to quickly undo and redo
actions applied to the current image. In addition to its basic Undo
and Redo To Here functions, the History Palette also offers the
ability to save selected actions as the Quickscript, which you can
then apply to other open images. Refer to Chapter 7 for more
information.
The Mixer palette offers a more natural, intuitive way for artists
to create and pick colors. Working in conjunction with the new
Art Media brush tools and the new Art media layer, the Mixer
palette provides artists with the best way to digitally simulate
real-world painting. Refer to Chapter 12 for more information.
What was labeled the Layers palette in previous versions is now
called the Layers palette.
What was labeled the Material palette in version 8 is now called
the Materials palette. Additionally, the Materials palette now
contains the Frame tab, offering a new (and for some users a
more intuitive) method of choosing colors. Refer to Chapter 10
for more information.
Open images can optionally be displayed in a tabbed format
across the top of the workspace. To make an image active, click
the desired tab. When many images are open, use the forward and
backward buttons to scroll among the tabs. Refer to Chapter 2 for
more information.
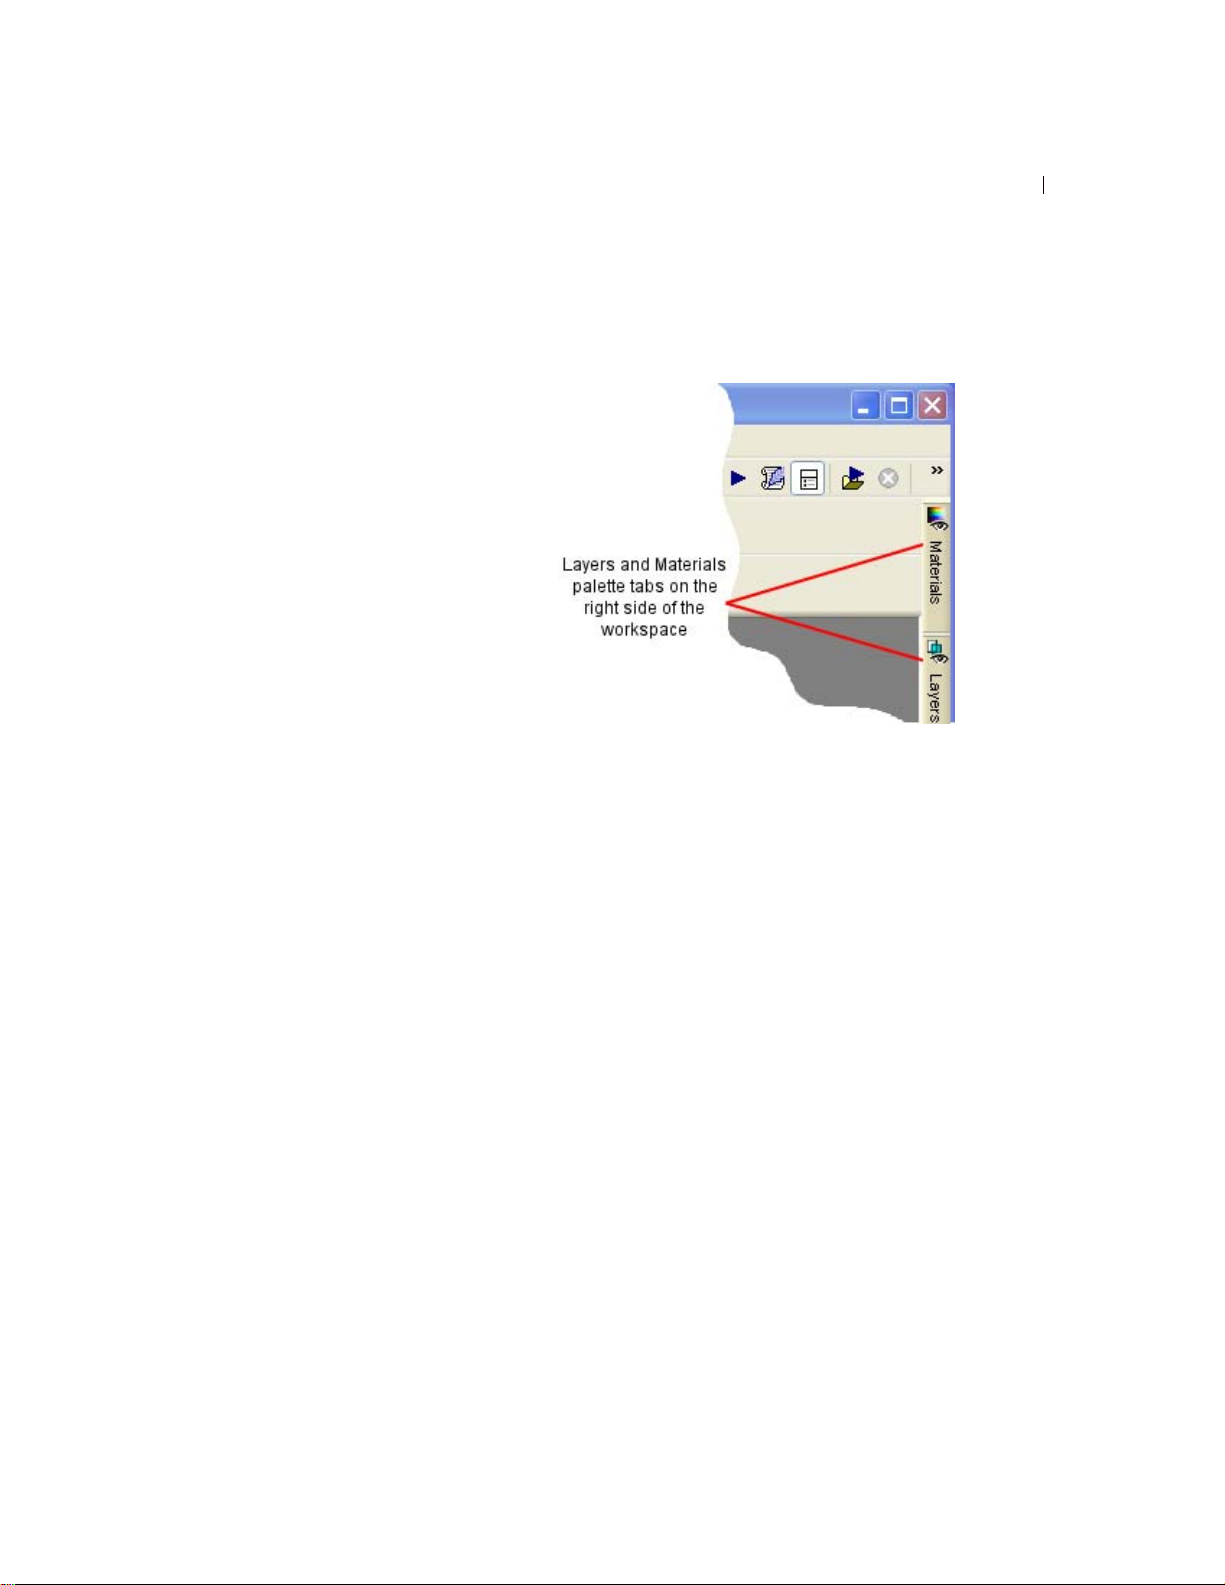
The docking behavior of palettes has been modified. Palettes can
be set to slide open and closed from a tab along the right side,
roll up at a user-selected speed, or roll up into the nearest
quadrant of the workspace. Refer to Chapter 2 for more
information.
Page 13

Chapter 1: Getting Started
The Customize dialog now contains a new tab called Scripts.
This tab lets you easily bind a script to one of 50 icons. The icon
can then be dragged onto a toolbar or into a menu. Refer to
Chapter 17 for more information.
The General Program Preferences dialog has new options for the
Crop tool's shading area, as well as the number of steps to save
for the History palette. Additionally the main workspace rightclick context menu now contains the command to access this
dialog in a single click. Refer to Chapter 4 for more information.
In the Adjust menu, the three Automatic correction commands
(Color Balance, Contrast Enhancement, and Saturation
Enhancement) have been pulled out of their former submenus
and now reside as standalone items. Additionally, the Adjust
menu contains a Photo Fix item loaded with helpful commands
geared toward quickly correcting common problems with digital
photos.
New Art Media Tools
Working in conjunction with the new Mixer palette, the new Art
Media tools let you create digital artwork that closely mimics
real-world media, pigments, paints, and artist's tools. The Oil
Brush creates realistic paint strokes, while the Chalk, Pastel,
Crayon, Colored Pencil, and Marker tools are used for making
dry-pigment works of art. Refer to Chapter 12 for more
information.
3
Page 14

Chapter 1: Getting Started
4
Image Browser Updates
The Image Browser now contains two tabs, Find and Info, in the
left side of the Browser window. The Find tab contains the
familiar Windows Explorer-like navigation view, and the Info tab
displays image information, creator data, and EXIF data.
Additionally, with the Browser active you can choose File > Sort
and use the Sorting dialog to sort images by EXIF data. Refer to
Chapter 3 for more information.
Raw Camera Image Support
You can now open Raw (unprocessed) images from high-end
digital cameras in Paint Shop Pro. Additionally, a new File
Format Preferences tab contains an option for displaying a dialog
that allows for further Raw image editing before the image opens
in Paint Shop Pro. Refer to Chapter 4 for more information.
New Digital Photo Correction Filters
Four new filters provide innovative methods of correcting common
problems with digital photos:
The Digital Camera Noise Removal filter scans your photo and
removes image noise often inherent to digital cameras while
intelligently preserving normal image textures. You can even
customize noise removal by defining specific regions or color
ranges to focus on or ignore, and then save settings as a Preset
that can be applied to photos taken from the same camera.
The Chromatic Aberration Removal filter helps eliminate the
colored glow that often appears in digital photos, especially in an
image's high contrast images.
The Fill Flash filter corrects underexposed, shadowy areas of
your photos.
The Backlighting filter corrects the opposite problem by
compensating for overexposed areas surrounding the photo's
subject.
Refer to Chapter 5 for more information on these filters.
New Effects
Two new powerful and interesting effects include:
Page 15

Chapter 1: Getting Started
The Displacement Map effect lets you create two or three-
dimensional surface effects using a different, underlying image
as the basis for the effect.
The Radial Blur effect lets you add interesting and fun spin,
twist, and zoom effects to an image.
Refer to Chapter 9 for more information on these effects.
Vector Drawing Tool Updates
Creating vector shapes has never been easier or more powerful.
The Pen tool's functionality has been simplified to offer a clearer,
more intuitive way to create and edit curves and lines.
Three new tools, Rectangle, Ellipse, and Symmetric Shape,
provide all the controls you need to create buttons, banners,
polygons, any kind of rectangle or ellipse or custom shape.
The Preset Shape tool provides you with a variety of arrows,
flowers, gears, and other miscellaneous shapes.
Refer to Chapter 13 for more information.
5
Text Tool Updates
The Text tool now provides a vertical text layout option, updates
to the text on a path feature, as well as new anti-aliasing
rendering options that generate cleaner text at smaller font sizes.
Refer to Chapter 16 for more information.
Crop Tool Updates
The Crop tool now provides the option of shading the area
outside the crop box. This option can be set in the Transparency
and Shading tab of the General Program Preferences dialog.
Refer to Chapter 7 for more information.
Print Layout Feature Updates
The Print Layout feature now lets you draw a text box on the
layout to easily add custom captions or titles to your printed
pages. Additionally, you can create elliptical cells and apply edits
to multiple cells simultaneously. Refer to Chapter 18 for more
information.
Page 16

Chapter 1: Getting Started
6
System Requirements
Before installing Paint Shop Pro, make sure that your computer
meets the minimum system requirements, or matches/exceeds the
recommended configuration:
Minimum System Requirements
Windows® 98SE / 2000 (SP4)/ ME / XP
300 MHz processor or faster
256 MB RAM
500 MB free disk space
16-bit display adapter at 800 x 600 resolution
Microsoft Internet Explorer 6.0 or later
Recommended System Configuration
Windows XP
1.0 GHz processor or faster
512 MB RAM
500 MB free disk space
32-bit display adapter at 1024 x 768 resolution
Microsoft Internet Explorer 6.0 or later
Installing the Software
Before installing Paint Shop Pro, close any programs or applications
that you have running on your computer.
To install the software:
1 Insert the Paint Shop Pro CD in your CD-ROM drive. The
installation program starts automatically.
Note: If the installation program does not start automatically, use
Windows Explorer or double-click the My Computer icon,
navigate to the contents of the Paint Shop Pro CD, and doubleclick the file Autorun.exe.
2 Follow the prompts to install the program.
Page 17

Learning Paint Shop Pro
Learn Paint Shop Pro in a variety of ways: in addition to reading this
User Guide, we encourage you to use the Help system, follow the
Quick Guides in the Learning Center palette, and visit our Web site
for even more learning resources.
Using the Quick Guides to Learn
Common Tasks
Quick Guides are short, fast tutorials that guide you through new
tasks and projects using your own image. Perform each step
yourself, or have the program show you where to find the tools
needed to complete the task.
To use Quick Guides:
1 Choose View > Palettes > Learning Center or press F10 to open the
Learning Center window.
Chapter 1: Getting Started
7
2 Click the title of a Quick Guide to view the selected topic.
Using the Help System
When you start up the Paint Shop Pro Help system (by choosing
Help > Help Topics, or by pressing the F1 key) it will open to the
Welcome to Paint Shop Pro page. The left side of the Help window
contains the Contents tab (listing all the main Help pages), the Index
tab, the Search tab, and the Favorites tab. The right side of the Help
window displays the currently selected Help topic.
Most command dialogs have a Help button located along the bottom
of the dialog. Click that button to open a Help topic associated with
the dialog.
Context-Sensitive Help Tool
To display Help about a particular user interface item, such as a tool
or button or menu item, use the Context Help button as follows:
1 Choose Help > Context Help. The cursor shape changes to:
2 Drag the cursor over the item you want to display Help for, and
then click the mouse. The Help file will open and display the
Help topic associated with what you clicked.
Page 18

Chapter 1: Getting Started
8
Using the Jasc Software Learning
Center
The Jasc Software Learning Center shows you how to use Paint
Shop Pro’s features to create amazing photograph enhancements and
sophisticated graphics. Jasc and third-party tutorials walk you
through the steps for everything from restoring old photographs to
creating metallic text.
To access the Jasc Software Learning Center, use your internet
browser to got to www.Jasc.com, and then click the Support link.
In addition to Learning Center tutorials, you'll also find Knowledge
Base articles and other helpful materials.
Using Web-Based Resources
On the Help menu of Paint Shop Pro, you can access a number of
Web site pages dedicated to support issues. In the Help menu select
one of the following Web site links:
Online Support and Resources Access the Jasc Customer Care
Center to search for answers in our Knowledge Base, submit
questions to Technical Support, or give us feedback.
Register Product Online Register your copy of Paint Shop Pro
online.
Check for Updates Check the Jasc.com Web site for updates to
Paint Shop Pro.
Contact Information Send an e-mail message to Technical
Support.
Getting in Touch with Other Paint Shop Pro Users
Millions of people use and love Paint Shop Pro. There are many
independent (non-Jasc) Paint Shop Pro communities where users
share tips and tricks, ask questions, and get answers about Paint
Shop Pro. There are Web sites, newsgroups, and chatrooms devoted
to Paint Shop Pro. As a starting point, search online for “Paint Shop
Pro.”
Popular newsgroups include forums.jasc.com as well as the Usenet
newsgroup, comp.graphics.apps.paint-shop-pro. You can access
newsgroups using your favorite news reader such as Microsoft
Outlook Express, or an on-line news reader such as Google Groups.
Page 19
CHAPTER 2
Getting to Know The Program
The Paint Shop Pro workspace includes menus, tools, toolbars, and
palettes that you use to create and edit images. Becoming familiar
with this workspace will help you accomplish your photo editing,
painting, and drawing tasks.
9
Contents
Starting and Exiting Paint Shop Pro . . . . . . . . . . . . . . . . . . . . . . 10
Exploring the User Interface . . . . . . . . . . . . . . . . . . . . . . . . . . . . 10
Using Shortcut and Function Keys . . . . . . . . . . . . . . . . . . . . . . . 11
Using Toolbars and Palettes . . . . . . . . . . . . . . . . . . . . . . . . . . . 12
Working with Dialogs . . . . . . . . . . . . . . . . . . . . . . . . . . . . . . . . . 19
Viewing Images. . . . . . . . . . . . . . . . . . . . . . . . . . . . . . . . . . . . . 22
Viewing Image Information. . . . . . . . . . . . . . . . . . . . . . . . . . . . . 28
Page 20
Chapter 2: Getting to Know The Program
10
Starting and Exiting Paint Shop Pro
To start Paint Shop Pro:
If you chose to place the Paint Shop Pro icon on your desktop
during installation, you can start the program by double-clicking
this icon.
If you chose not to place the Paint Shop Pro icon on your
desktop, start the program by clicking the Start button and
choosing All Programs > Jasc Software > Jasc Paint shop Pro 9.
The first time you start Paint Shop Pro, the program displays the File
Format Associations dialog. This dialog lets you assign file formats
to the program so that your computer always uses Paint Shop Pro to
open files in those formats. You can change associations at any time
by choosing the File > Preferences > File Format Associations menu
commands. For more information, see “Setting File Format
Associations” on page 79.
To exit paint Shop Pro:
Exit Paint Shop Pro using one of the following methods:
Choose File > Exit; or
Click the Close button in the upper right-hand corner of the
main window's title bar; or
Click the Paint Shop Pro icon in the upper left-hand corner
of the main window title bar and choose Close from its menu.
Note: Note: If there are unsaved images open in the
workspace, you'll be prompted to save them before closing the
program.
Exploring the User Interface
When you open Paint Shop Pro, it displays the main program
window. This window is your work area. It contains the commands
and tools used to create, edit, print, and export your images.
The Paint Shop Pro workspace includes the following components:
Menu bar The menu bar displays commands for performing tasks.
Menus are organized by topic. For example, the Effects menu
contains commands for applying effects to images.
Page 21

Chapter 2: Getting to Know The Program
Toolbars The toolbars display buttons for common commands. See
“Using Toolbars” on page 14.
Palettes The palettes display information and help you select tools,
modify options, manage layers, select colors, and perform other
editing tasks. See “Using Palettes” on page 15.
Status bar The Status bar displays text about the selected tool or
menu command as well as image information, including the
dimensions and color depth. See “Viewing Image Information” on
page 28.
Browser Displays thumbnail previews of image files. You can open,
delete, copy, and perform other file commands in the Browser. For
more information, see “Using the Paint Shop Pro Browser” on
page 44.
Print Layout window Displays a window on which you can arrange
and size multiple images, add text captions, apply templates, and
then print the images. For more information, see “Printing a Single
Image” on page 446.
11
Using Shortcut and Function Keys
To work quickly and easily in Paint Shop Pro, learn the shortcut and
function keys for common tasks. Key combinations like Ctrl + Z
(Undo) and Ctrl + C (Copy) become second nature as you work, and
they save time over using the mouse.
Customizing Shortcut Keys
If you don’t like the assigned
function keys, you can customize
the function keys to suit your
needs. See “Assigning and
Viewing Shortcut Keys” on
page 81.
To view all assigned keys,
including custom shortcuts, choose
Help > Keyboard Map.
Here are the ways you can use shortcut and function keys in Paint
Shop Pro:
Use shortcut keys to execute menu commands, display palettes,
edit nodes on vector objects, and execute Browser commands.
All menu commands list their shortcut keys on the menu.
Shortcut keys for palettes are listed on the View > Palettes menu.
Use shortcut keys to select tools. Move the cursor over a tool to
display a ToolTip with its shortcut key in parentheses.
Use function keys to display a menu by pressing Alt plus the
underlined letter of the menu name (for example, press Alt + F for
the File menu). Then, press the underlined letter of a menu
command or scroll through menus using the arrow keys. Press
ESC to return to your image without executing a command.
To display all default shortcut keys, choose Help > Keyboard Map.
Page 22

Chapter 2: Getting to Know The Program
12
Using Toolbars and Palettes
One aspect of customizing your workspace involves the ability to
dock, float, resize, and move the toolbars and palettes. The sections
below describe how to work with palettes and toolbars.
To allow for palette docking:
1 Choose View > Docking Options. The Palettes tab of the
Preferences dialog appears.
2 In the Allow docking of section, mark the palettes you want to be
able to dock.
Note: Even if a palette is set for docking, by holding down Ctrl and
then dragging the palette you can place it anywhere in the
workspace.
Pushpin Button in a Toolbar or Palette Title Bar
Be aware of the pushpin button in the toolbar/palette's title bar as
it relates to floating and docking:
When the toolbar/palette is floating:
When the pushpin is pointing down, the toolbar/palette will
remain fully displayed when you move the cursor away from it.
When the pushpin is pointing to the left , the toolbar/palette
will roll up so that only its title bar is visible.
When the palette is docked:
(For palettes only) When the pushpin button is pointing down,
the palette will remain fully displayed in its docked position
when you move the cursor away from it.
Page 23
Chapter 2: Getting to Know The Program
(For palettes only) When the pushpin is pointing to the left, the
palette will slide into the workspace side. You'll then see a tab
with the palette name. To display the palette again, move the
cursor over the tab.
13
The Animate Auto Hide and Quadrant Rollup
Options
The way in which floating palettes roll up can be modified by two
settings in the Options tab of the Customize dialog. (Choose View >
Customize to display this dialog.)
To set the speed in which floating palettes roll up, mark the
Animate Auto Hide check box, and then drag the Speed slider to
the desired setting.
To have the title bar of rolled up floating palettes move into the
nearest workspace quadrant, mark the Quadrant Rollup check
box. (The Quadrant Rollup check box is marked by default.)
When this box is not marked, floating palettes will roll up and
their title bar will not move.
To dock a toolbar or palette:
Double-click its title bar; or
Drag its title bar to one edge of the workspace. The toolbar or
palette snaps into place.
To float a toolbar:
Double-click its handle; or
Page 24

Chapter 2: Getting to Know The Program
14
Place the cursor over the handle (you'll get the four-sided mover
icon) and drag the handle to move the toolbar away from the
workspace edge. Note: The handle size and position will vary
depending on the toolbar's size and whether it is vertical or
horizontal.
To move an undocked toolbar or palette:
Drag its title bar to a new position.
To resize a toolbar or palette:
Click and drag the sides or corners of a toolbar or palette to change
its size.
To display all toolbars and palettes:
Press Ctrl + Shift + T.
Note: To hide a specific palette, click the Close button on its title
bar.
Status bar
The Status bar displays text about
the selected tool or menu
command, as well as image
information including the
dimensions, color depth, and
cursor position. For more
information, see “Viewing Image
Information” on page 28.
Using Toolbars
The toolbars display buttons for the most common tasks. Position the
cursor over a button to display a ToolTip with its name. The Status
bar displays more information about the command.
Display or hide toolbars, or arrange them on the workspace. Dock a
toolbar to snap it into place at an edge of a workspace, or to float it
to move it anywhere on the screen.
Paint Shop Pro contains these toolbars:
Standard toolbar Displays the most common commands, such as
saving images, undoing a command, and cutting items. Paint Shop
Pro automatically displays this toolbar when you first run the
program.
Tools toolbar Crop, paint, draw, type, and perform other image
editing tasks. See “Using the Tools” on page 17.
Browser toolbar Displays commands for using the Paint Shop Pro
Browser.
Effects toolbar Displays commands for applying effects to your
images.
Page 25
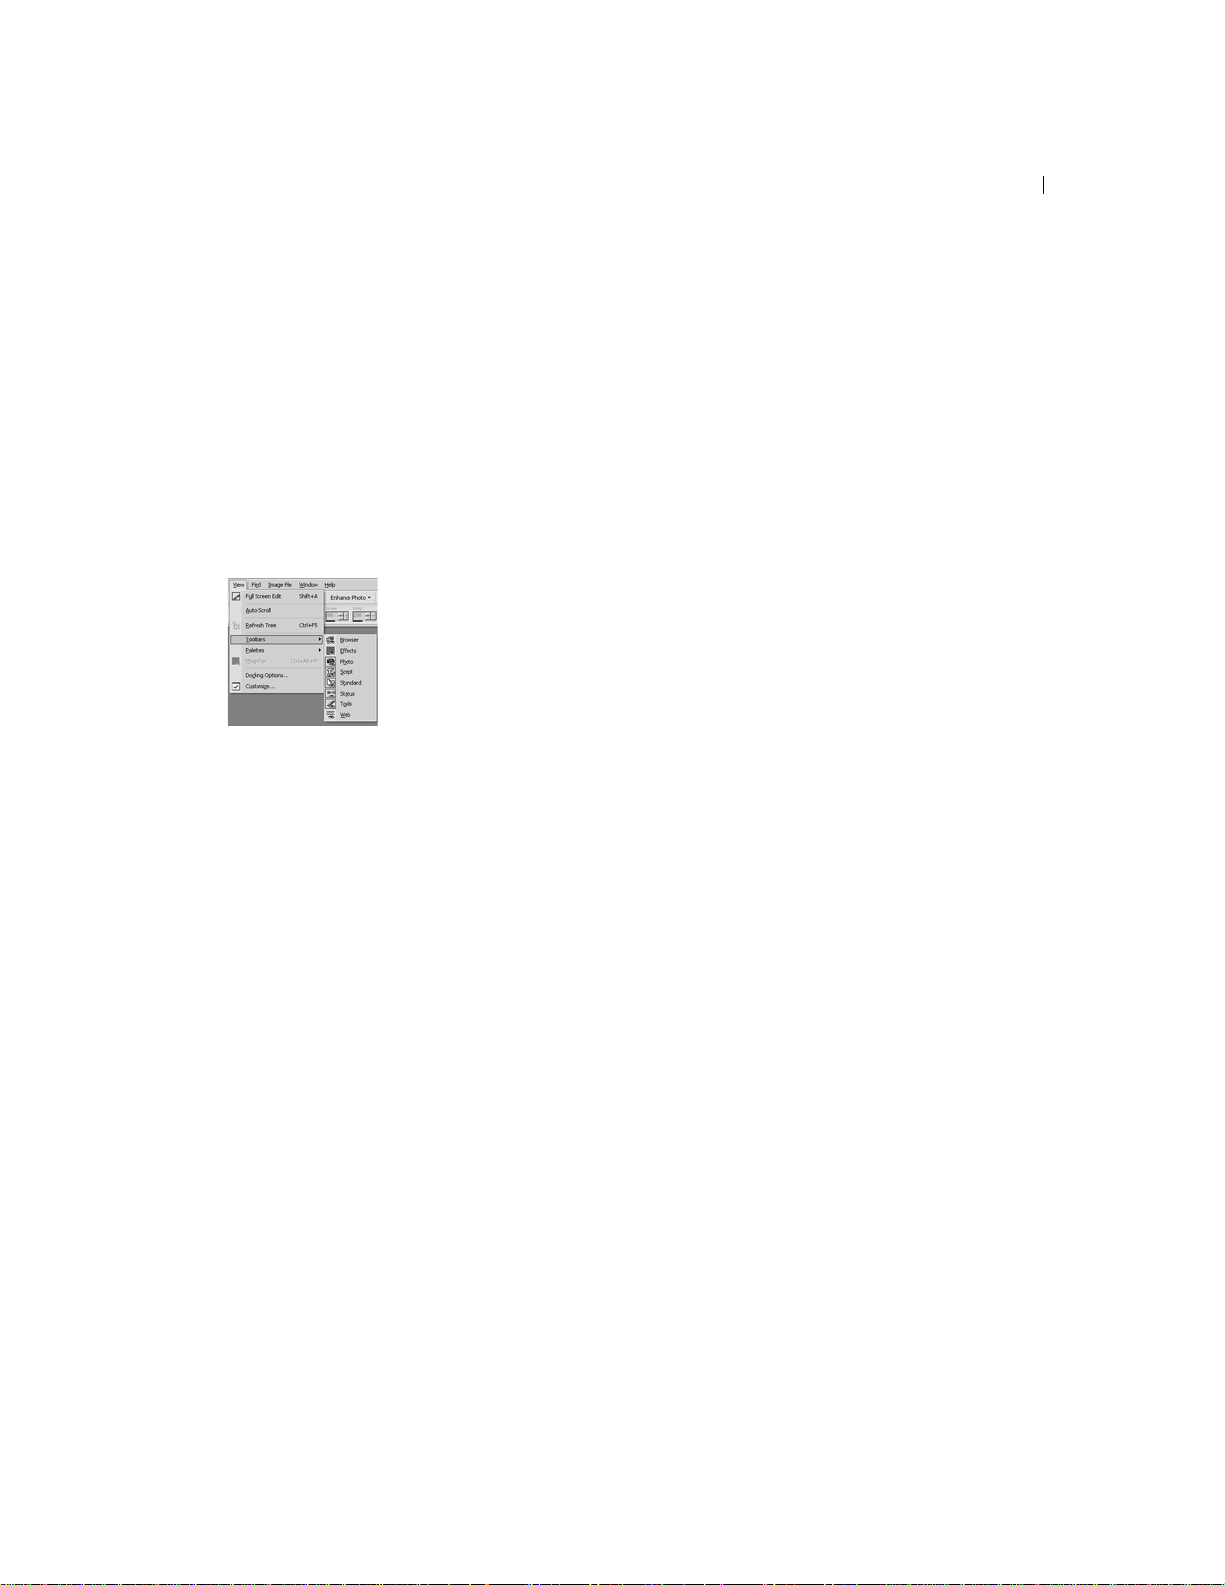
Chapter 2: Getting to Know The Program
15
Customizing toolbars
You can add and remove buttons
from toolbars and create your own
toolbars. For more information, see
“Customizing Toolbars and Menus”
on page 56.
Flyout menu displaying toolbars
Photo toolbar Displays commands for enhancing photos.
Script toolbar Displays commands for creating and running scripts.
Web toolbar Displays commands for creating and saving images for
the Web.
To execute a toolbar command:
Click the command button. If the button is greyed out, it is not
available.
To display or hide a toolbar:
Do either of the following:
Choose View > Toolbars and choose the toolbar from the menu.
Right-click any toolbar or palette, choose Toolbars, and then
choose the toolbar from the context menu.
Note: To hide a specific toolbar or the palette, click the close
button on its title bar.
Using Palettes
Use palettes to choose tools and tool options, select colors, and
manage layers. Display or hide palettes, or arrange them on the
workspace. Dock a palette to snap it into place at an edge of a
workspace, or to float it to move it anywhere on the screen.
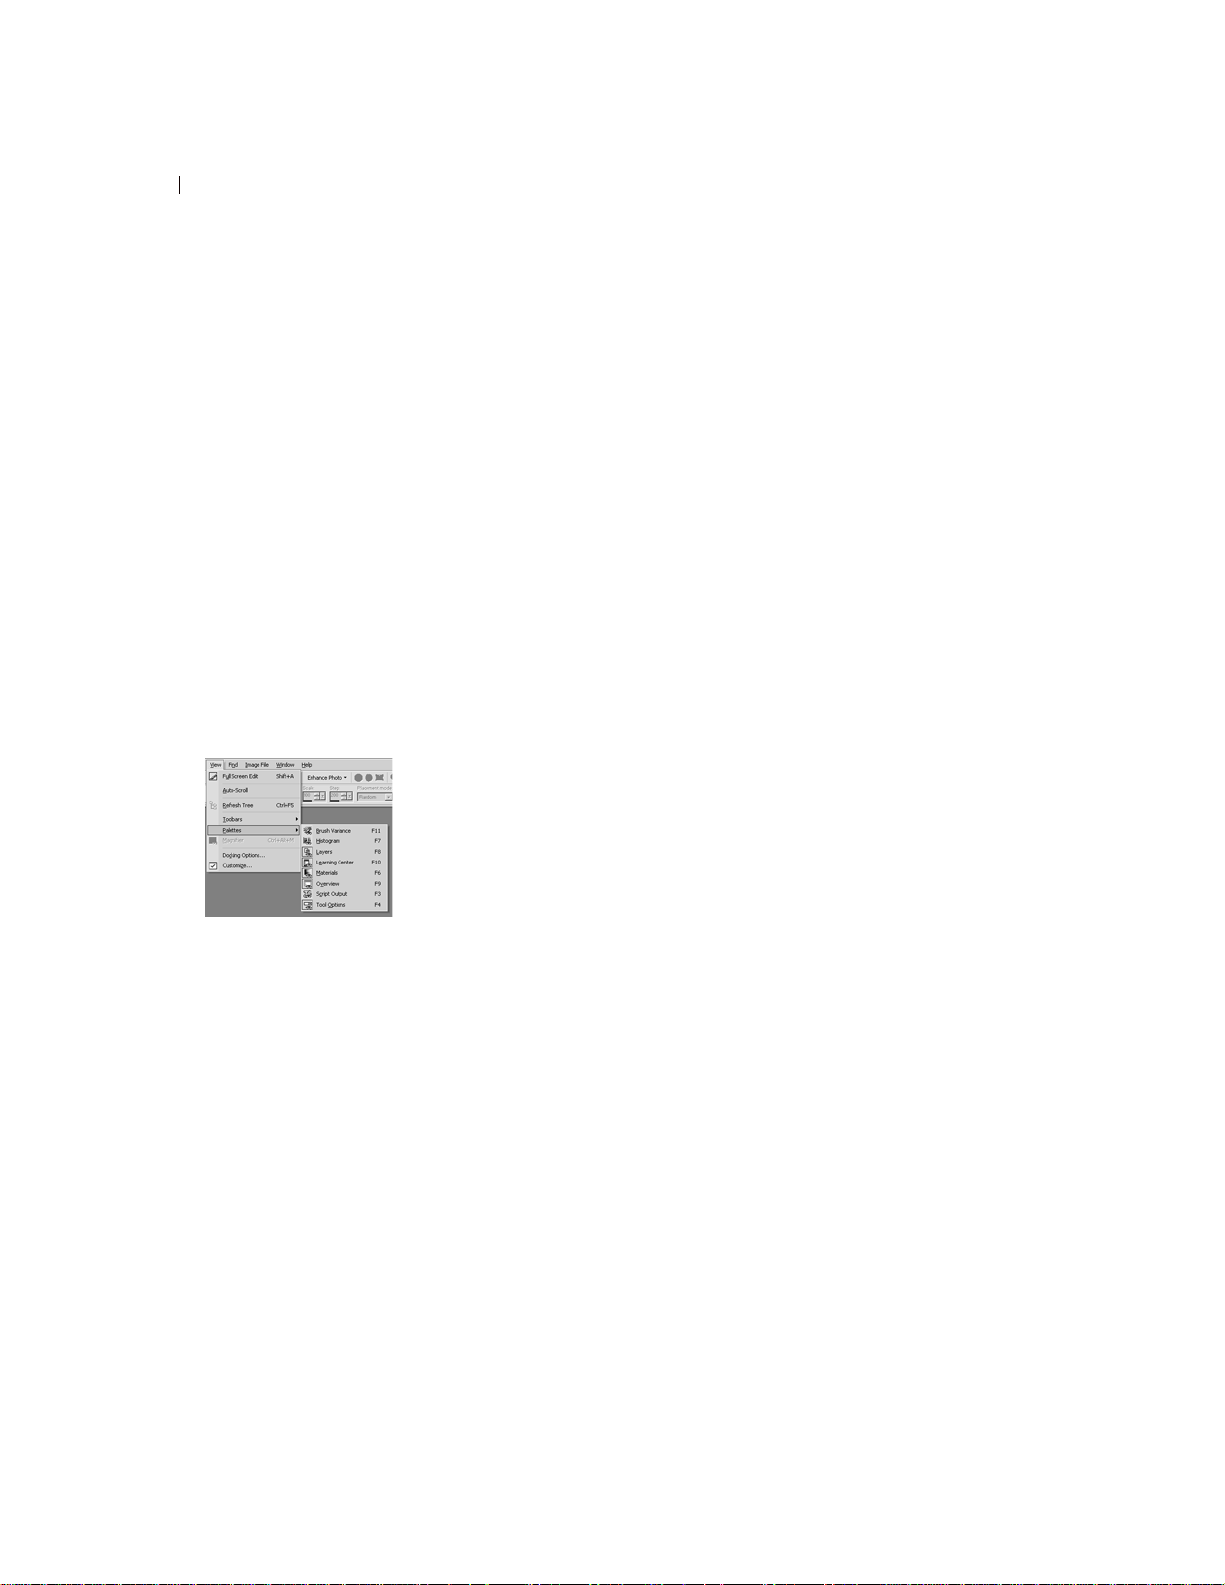
Paint Shop Pro contains these palettes:
Materials palette Select colors and materials for painting, drawing,
filling, and retouching. Refer to Chapter 10 for more information.
Tool Options palette Modify options for the currently selected tool.
See “Setting Tool Options” on page 17.
Layers palette View, organize, and edit image layers. See “About
Layers” on page 360.
History palette Lists the actions taken on the current image, allows
you to undo and redo adjacent or non-adjacent actions, and allows
you to create Quickscripts. Refer to Chapter 7 for more information.
Mixer palette Place and mix pigments for use with the Art Media
tools, allowing you to create realistic oil paint strokes, as well as
chalk, colored pencil, and marker strokes. Refer to Chapter 7 for
more information.
Learning Center palette Displays tutorials for common tasks. See
“Using the Quick Guides to Learn Common Tasks” on page 7.
Page 26
Chapter 2: Getting to Know The Program
16
Flyout menu displaying pallets
Histogram palette Displays a graph of the distribution of red, green,
blue, greyscale, hue, saturation, and lightness values in an image.
Analyze the distribution of detail in the shadows, midtones, and
highlights to decide how to make corrections. See “Using the
Histogram to Analyze Images” on page 145.
Overview palette Displays a thumbnail view of the active image, as
well as information about the image. See “Using the Overview
Palette” on page 18.
Script Output palette Displays actions you take and the results of
running scripts. See “About the Script Output Palette” on page 427.
Brush Variance palette Sets additional brush options. This palette is
particularly useful if you have a 4D mouse or a pressure-sensitive
tablet. For example, you can vary the opacity of a brush stroke by
applying pressure with the stylus. You can use some options with a
mouse.
To display or hide a palette:
Do one of the following:
Choose View > Palette and choose the palette name.
Type the palette’s shortcut key (listed to the right of the name).
Right-click any palette and choose the palette name from the
context menu.
To set the docking preference of palettes:
Choose File > Preferences > General Program Preferences and click
the Palettes tab of the dialog. In the Allow docking of group box,
mark the check boxes of the palettes you want Paint Shop Pro to
dock automatically when you drag them to the edge of the
workspace.
Note
You can also open the Palettes tab of the Paint shop Pro 9
Preferences dialog by choosing View > Docking Options.
To resize a palette:
Click and drag a corner or an edge, or use the Minimize and Maximize
buttons in the upper right corner.
Page 27
Using the Tools
Chapter 2: Getting to Know The Program
17
Flyout menu displaying tools
Why some tools are inactive
(greyed out)
Some tools work only on raster or
vector layers. For example, the
Paint Brush and Clone Brush work
only on raster layers; the Object
Selection tool works only on vector
layers.
For information on raster and
vector layers, see “About Layers”
on page 360.
Use the Paint Shop Pro tools to perform actions such as crop, paint,
draw, add text, and perform other image editing and creative tasks.
Select a tool by clicking its button on the Tools toolbar. Some tools
(for example Crop, Move, and Text) reside in their own space on the
Tools toolbar. Most other tools, however, are grouped with other
tools that perform similar tasks. A group of tools is denoted by a
small arrow on the right side; click the arrow to reveal the other
tools.
To view information about a tool, hold the cursor over it. A tool tip
displays the tool name and shortcut key, and the Status bar (located
along the bottom of the main Paint Shop Pro window) displays hints
for using the tool.
To use a tool:
1 Click its button on the Tools toolbar. For tools that share a flyout
with other tools, click the down-arrow next to the tool and select
the tool.
2 Specify options using the Tool Options palette. See “Setting Tool
Options” below.
3 Use the tool on the image.
For information on moving, hiding, and displaying the T ools toolbar ,
see “Using Toolbars” on page 14.
Resetting Tool Options to Default Values
To reset the Tool Options palette to the default values, click the
Presets drop-list and then click the Reset to default button .
Setting Tool Options
After you select a tool from the Tools toolbar, set its options in the
T ool Options palette. Options include such settings as brush size and
shape for painting tools and line width for drawing tools. By default,
the palette is below the Standard toolbar. The palette displays
options grouped into bands, which you can minimize and drag
within the palette. To display a minimized band, click its handle or
right-facing arrow.
Set the options before you use the tool. You cannot edit settings in
the Tool Options palette for brush strokes or objects you have
already created.
Page 28
Chapter 2: Getting to Know The Program
18
Although the items in the Tool Options palette depend upon the
active tool, here are features common to all or some of the tools:
Presets Scripts that load specific settings for a tool. For more
information, refer to Chapter 17.
Arrow button When more tool options are available than there
is room to show them, click these buttons to reveal the additional
options.
Apply button Some tools (Crop, for example) have this
button. Click it to apply the changes you have made or execute
the action.
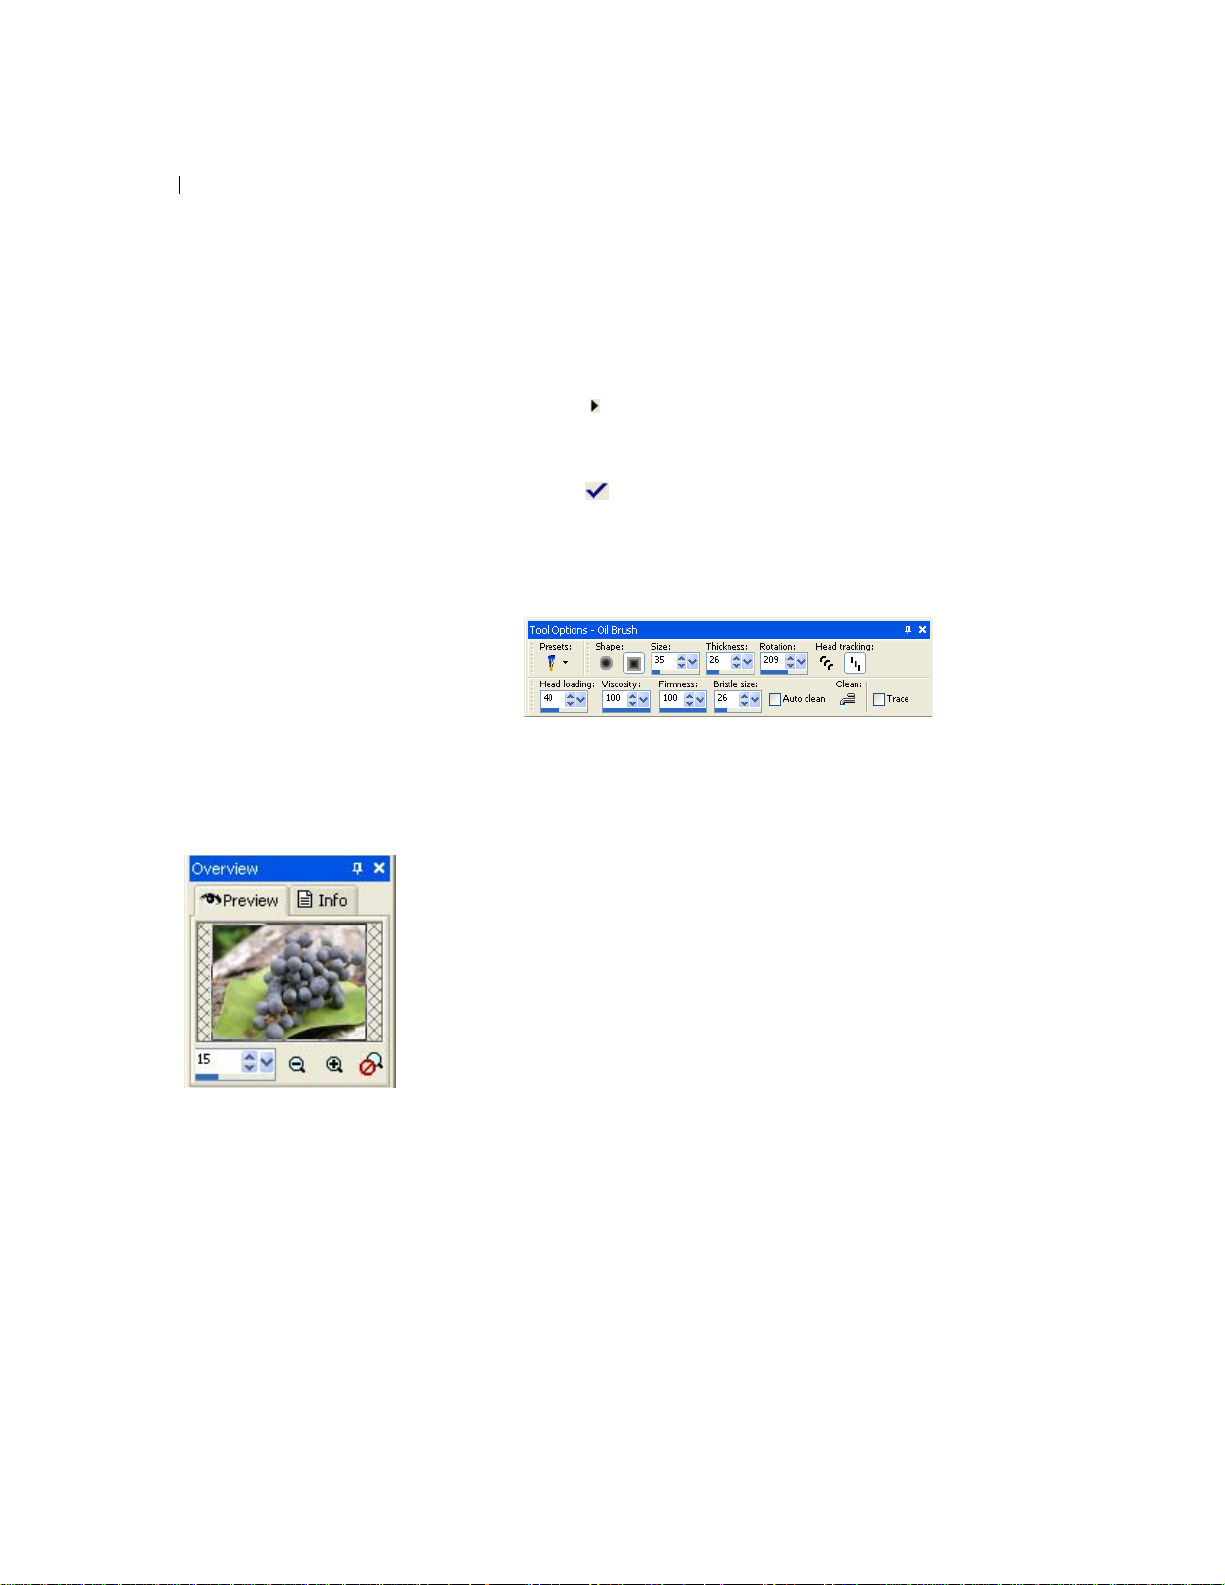
Here is an example of an un-docked Tool Options palette for the Oil
Brush tool:
The Overview palette
Using the Overview Palette
Display the Overview palette to preview the entire active image or to
view image information. The Overview palette displays a rectangle
over the part of the image visible in the image window. To show
other areas of the image, click and drag this rectangle.
The Overview palette contains two tabs:
Preview Displays the image preview. The image updates after you
complete an action. Transparent areas of the image appear as white.
Info Displays image status information including height and width,
color depth, memory used, cursor position, rotation, and other
information.
Page 29
Chapter 2: Getting to Know The Program
Using Context Menus
19
Context menu for the
Layers palette
Context menus provide quick access to commands specific to the
active tool, selection, or palette.
Note
For a complete list of Context menus, choose View > Customize to
open the Customize dialog. Click the Menu tab, and select a context
menu from the Select context menu drop-down list.
To use a context menu:
1 Position the cursor over an image, an empty area of a palette, a
layer name on the Layers palette, a thumbnail in the Browser, or a
toolbar.
2 Right-click to display the context menu.
3 Choose a command from the menu.
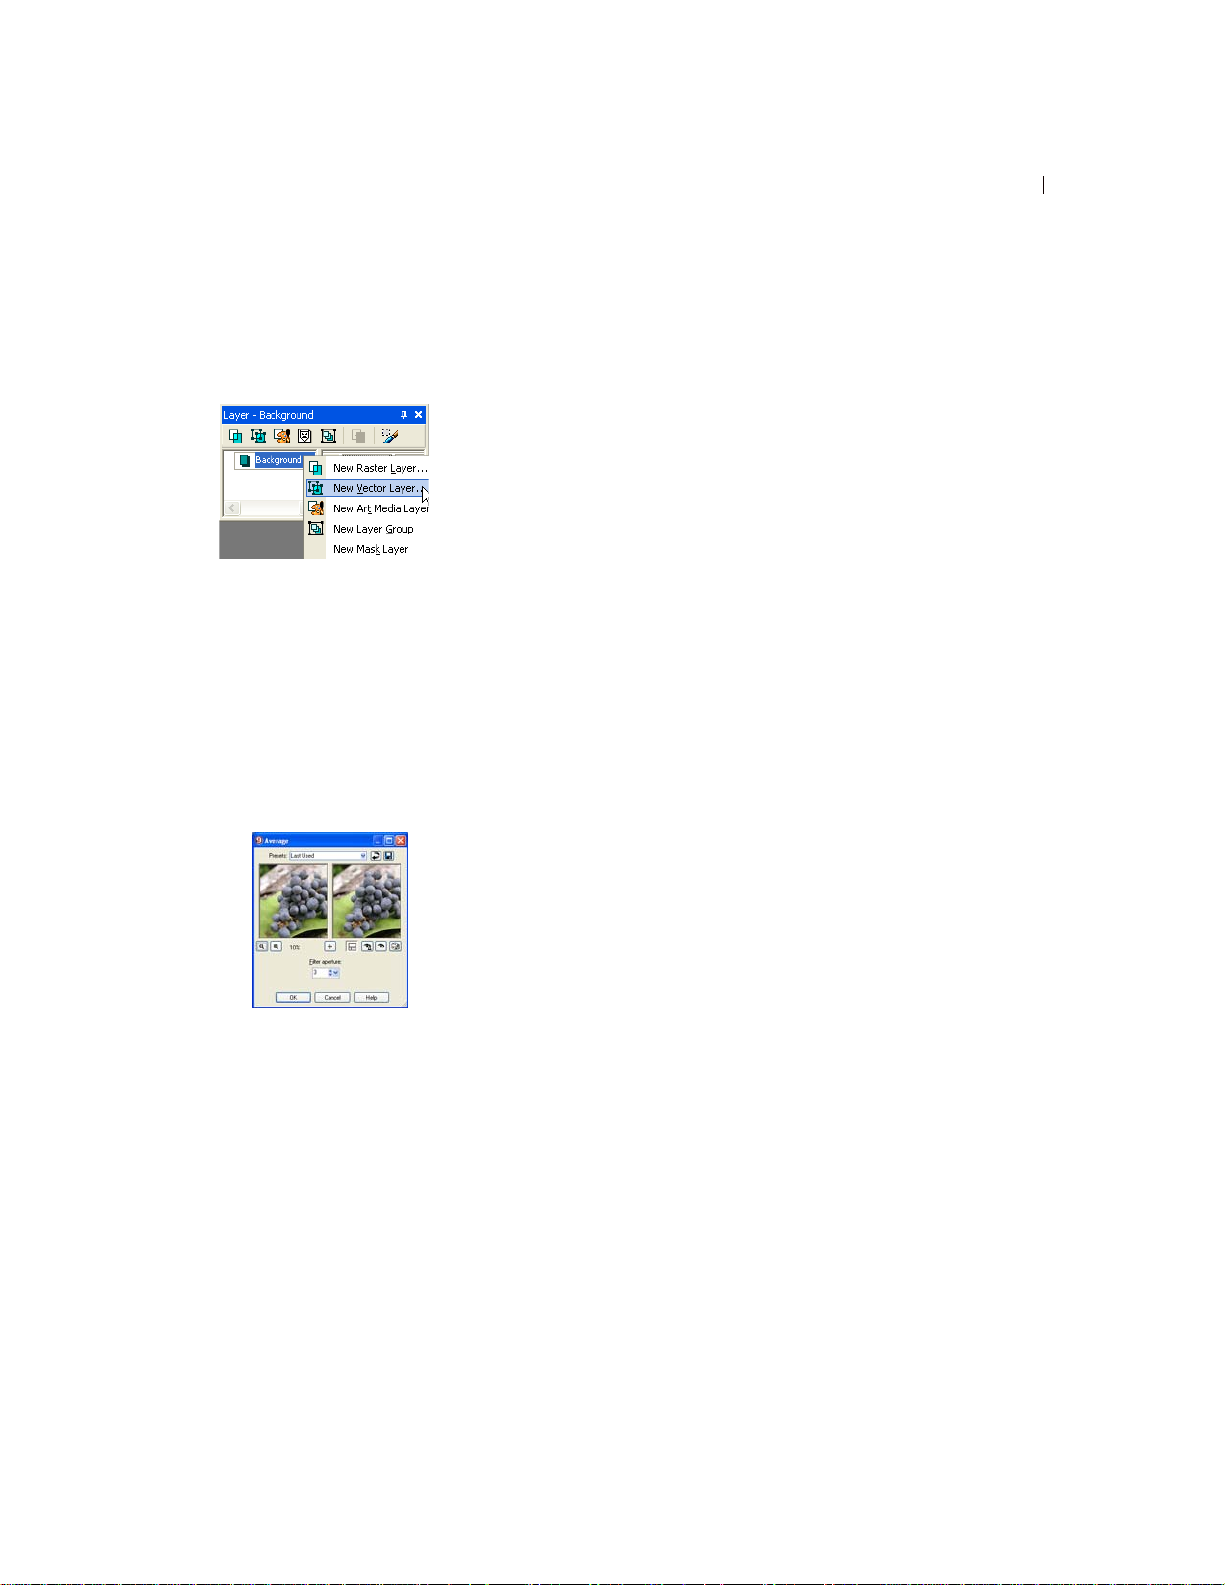
Working with Dialogs
The Average dialog
Dialogs are windows that open when you choose certain Paint Shop
Pro commands. Use them to select and preview command options.
All dialogs remember where you last positioned them on the screen
and re-open in the same location.
Most dialogs have the following features in common:
Preview windows Zoom and navigate to see before and after views
of changes.
Presets Saved settings, or scripts, that you can use to make quick
changes to images. Use the presets that come with Paint Shop Pro or
create your own. For more information on creating and using
presets, refer to chapter 17.
Numeric edit controls The controls that you use to select a value.
Color boxes The box you click to select a color.
Randomize parameters button A button you click to try out random
settings in the dialog.
Resize Handle A handle in the lower right corner of the dialog used
to change the size of the dialog.
Page 30
Chapter 2: Getting to Know The Program
20
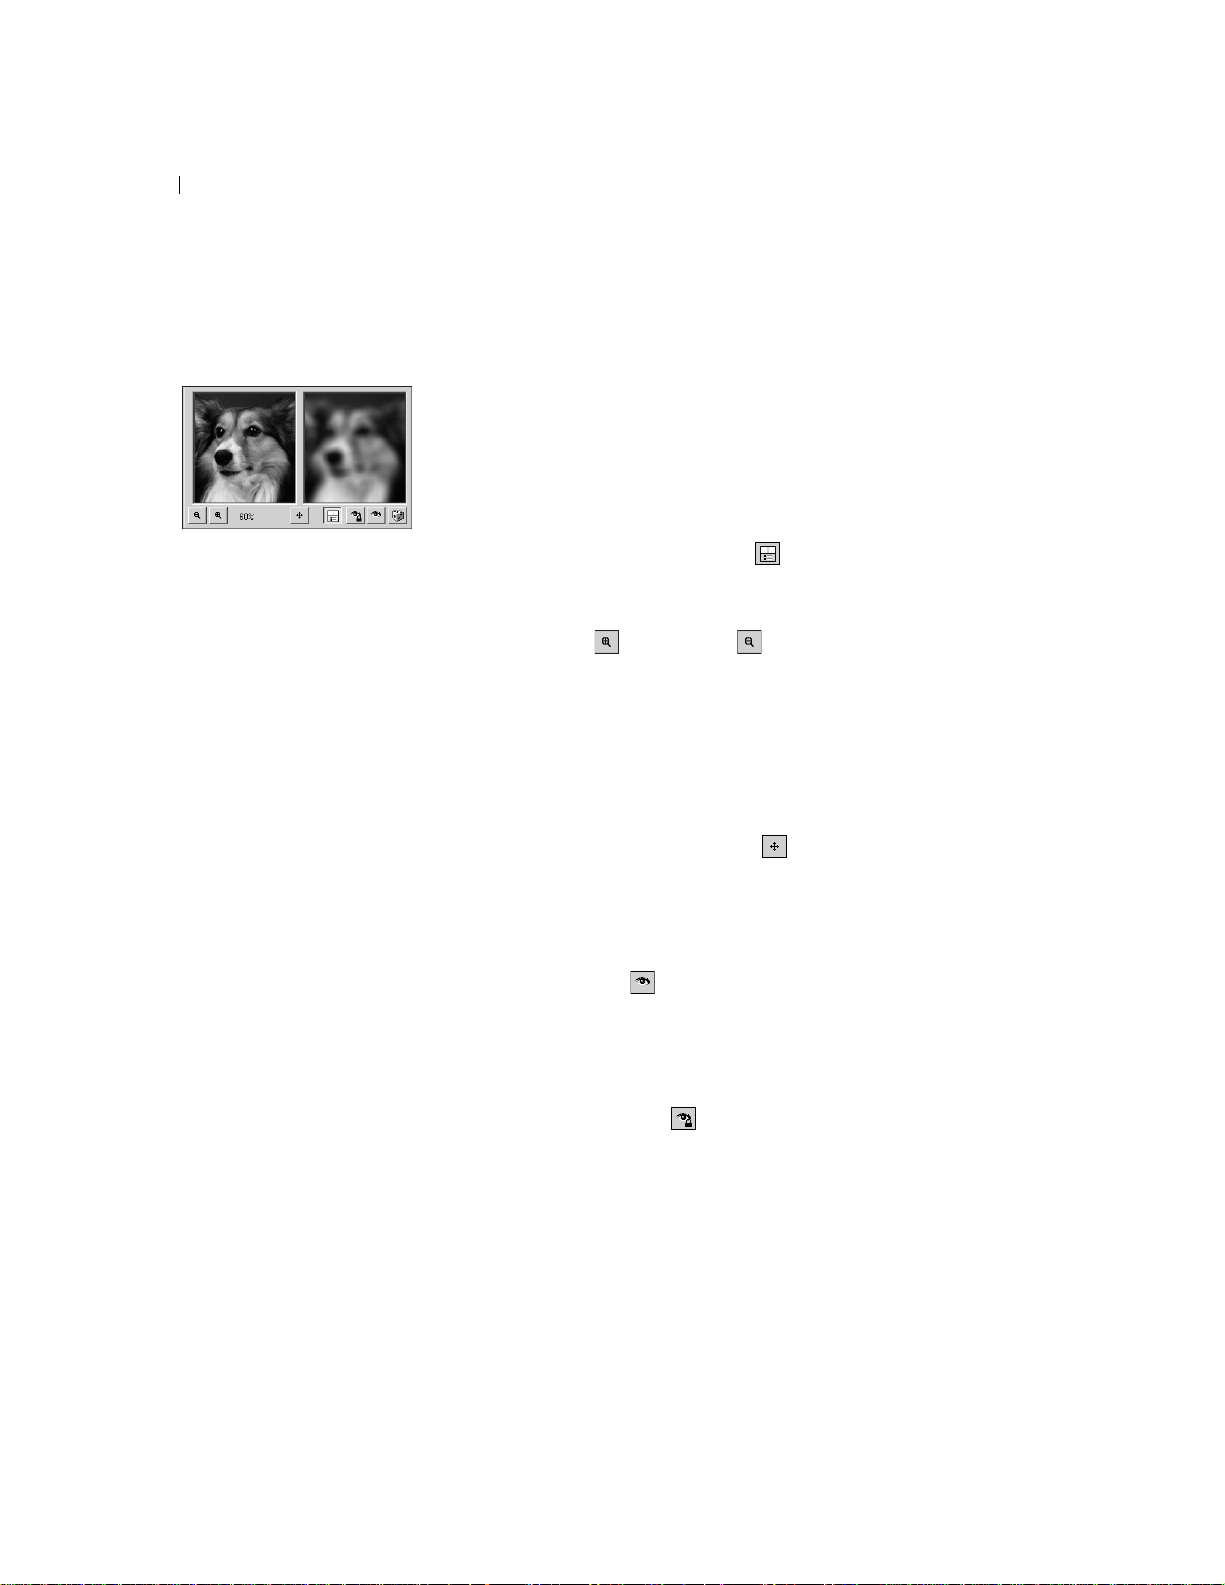
Using Preview Windows
The preview windows
Size the dialog
In each Paint Shop Pro dialog with
preview windows, you can size the
dialog by clicking and dragging a
corner. Expand a dialog when you
want the preview windows to be
large enough to see detailed
changes. You can also doubleclick the dialog title bar to
maximize the dialog.
Exceptions to panning in
the left preview window
In a few dialogs, the left preview
window is used for making
selections (such as selecting a red
eye in the Red Eye Removal
dialog). In these dialogs, the
cursor does not change to a hand
over the left preview window. Use
the right preview window for
panning instead.
Most dialogs that correct images, apply effects, or modify selections
have two preview windows that show the image before and after
changes are applied. Use the window controls to zoom the preview
in or out, pan it, or proof changes on the actual image.
You can show or hide the prev iew windows. When you hide
previews, use the main image window to proof changes.
To display or hide preview windows:
Click the Show/Hide Previews button .
To zoom the image preview:
Click the Zoom In or Zoom Out buttons. The zoom
percentage displays next to the Zoom buttons.
To pan the image:
Do either of the following:
Move the cursor over either preview window (the cursor changes
to a hand), and then click and drag the image.
Click and hold the Navigate button , and then center the
selection rectangle over the part of the image you want to
display.
To proof changes in the main image window:
Click the Proof button . All settings in the dialog are applied to
the main image window. Each time you change settings, click the
Proof button to view the changes in the main image window.
To set automatic proofing:
Click the Autoproof button .
Paint Shop Pro automatically applies all dialog settings to the main
image window each time you change a setting.
Page 31
Chapter 2: Getting to Know The Program
Using Preset Settings
21
Presets in a dialog
Numeric edit controls
Edit
box
Meter bar
Using sliders to select values
Spin controls
Slider button
Presets are saved settings, or scripts, that you can use to make quick
changes to images. Use the presets that come with Paint Shop Pro or
create your own. For more information on creating and using
presets, refer to Chapter 17.
Editing Numerical Values
To edit numbers in Paint Shop Pro dialogs, you use the Jasc numeric
edit controls, which provide an easy way to edit numbers and change
settings.
To edit numbers:
Do one of the following:
To enter a specific value, click the edit box, use the Delete or
Backspace key to delete the number as needed, and then type a
new value. You can also double-click the number to highlight it,
and then type a new value.
Note: If you type a value in the edit box that is out of range for
the control, the box turns red.
To increase or decrease the number by one, click the up or down
arrow of the spin controls.
To choose an approximate value, click once at a position on the
meter bar.
The color box in the New Image
dialog.
To choose from the range of possible settings, click and hold the
mouse button down on the meter bar or the slider button, drag to
select a desired setting, and release the mouse.
Using Color Boxes
In some dialogs, a color box displays the currently selected color.
When you move the cursor over the color box, the cursor changes to
a dropper and displays the RGB values. Click the color box to select
another color:
Left-click the color box to select from the Color dialog.
Right-click the color box to select from recently used colors.
Page 32

Chapter 2: Getting to Know The Program
22
Viewing Images
Randomizing Parameters
Many correction and effect dialogs have a Randomize parameters
button. Click this button to update all dialog settings with random
values. To try out a variety of settings, click the button multiple
times.
To randomize settings within a dialog:
Click the Randomize parameters button .
Resizing a Dialog
All dialogs contain a Resize Handle in the lower right corner of
the dialog. Click and drag the handle to resize the dialog.
An image window
Does the image have a
watermark?
If the image has an embedded
watermark, a copyright symbol is
displayed in front of its name. For
more information on watermarks,
see “Using Digital Watermarks” on
page 480.
The image window displays your image. You can move or size the
image window or open the same image in multiple image windows
(for example, to see the image at different magnifications).
The title bar at the top of the image window shows the file name and
the magnification percentage. An asterisk after the filename
indicates the image has been modified since you last saved it.
To see a thumbnail of the entire image, display the Overview palette.
To move an image window:
Click and drag the title bar to move an image to a new position in the
workspace.
To resize an image window:
Click an edge or a corner of the image window and drag it to a new
position.
If the image is larger than the window, use the scrollbars to view
another area of the image.
To minimize or maximize an image window:
T o minimize an image window so that only its title bar appears, click
the Minimize button located in the upper right corner of the image's
title bar. Click the Restore button to display the image window at its
previous size.
Page 33

Chapter 2: Getting to Know The Program
To maximize an image window that it fills the Paint Shop Pro
workspace, click the Maximize button located in the upper right
corner of the image's title bar.
To close an image window:
Click the Close button located in the upper right corner of the
image's title bar. If you have unsaved changes to the image, you'll be
prompted to save the changes.
23
Save time by saving
workspaces
Did you know that you can save
entire workspaces, not just
images? The workspace includes
open images, their magnifications
and screen positions, as well as
the positions of palettes, toolbars,
and windows.
For more information, see “Using
Custom Workspaces” on page 54.
To open multiple views of the same image:
Choose Window > New Window or press Shift + W.
A new window opens with another view of the active image. When
you make changes in one window, the other is updated.
To make a copy of the active image:
Choose Window > Duplicate or press Shift + D.
A copy of the active image opens and can be edited independent
from the original image.
To arrange multiple windows:
Do either of the following:
Choose Window > Cascade to display windows stacked and
cascading from the upper left to the lower right of the workspace.
Choose Window > Tile Vertically or Window > Tile Horizontally to
display windows side by side vertically or horizontally. Windows
are resized to fit within the workspace.
To close an image window:
Do either of the following:
T o close an active window, choose File > Close or click the Close
button on the title bar of the image.
To close all windows, choose Window > Close All.
If there are any unsaved changes in the images, you will be
prompted to save the files.
Page 34
Chapter 2: Getting to Know The Program
24
To see a list of all open images:
At the bottom of the Window menu the file names for all open
images appear. The file names are listed in the order they were
opened in Paint Shop Pro.
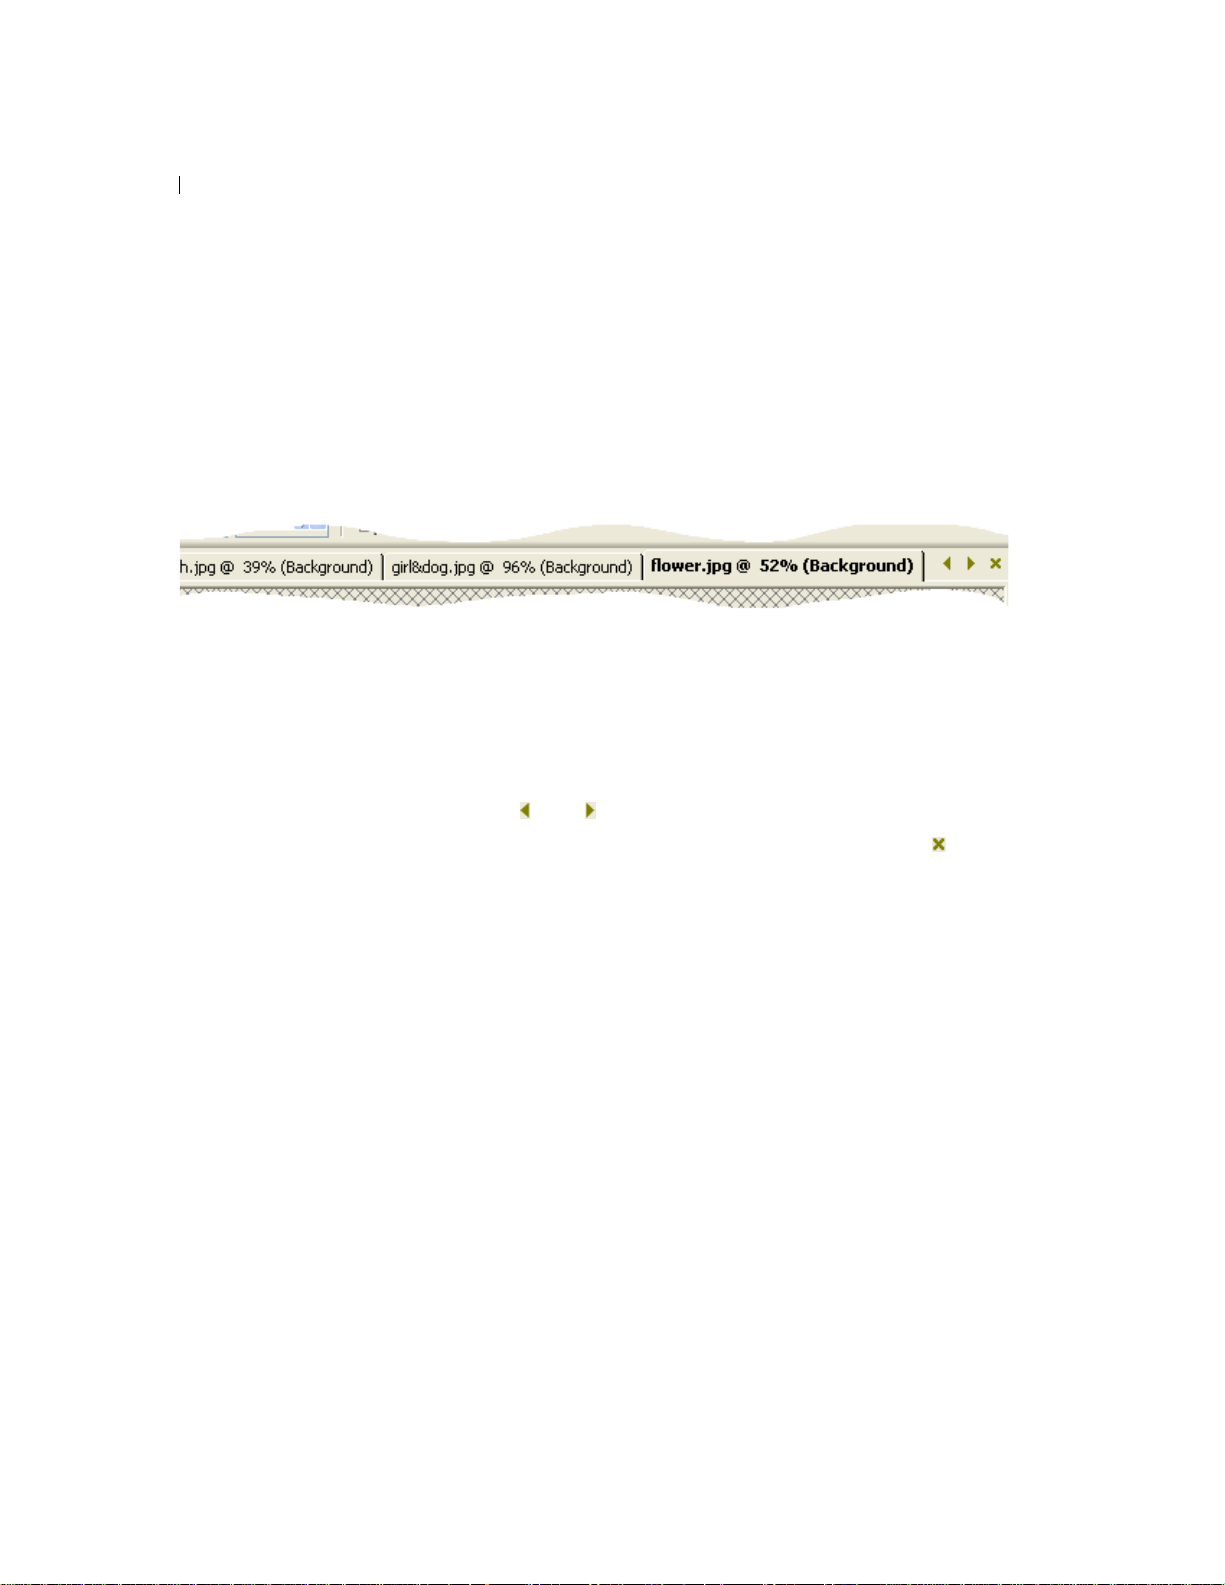
Tabbed Image Windows
Paint Shop Pro 9 gives you the option of displaying open images in a
tabbed format.
To set this option, choose Window > Tabbed Documents. To turn off
this feature and go back to the floating image windows, choose this
option again.
When this option is on, the active image covers the entire
workspace, and its bolded file name appears in a tab across the top of
the workspace. Each open image has a separate tab. To view another
image, click its tab. To access an image tab not in the current view,
click the and buttons.
To close an image in tabbed format, click the Close button .
Note: When the Tabbed Document option is on, the concept of
minimizing and maximizing the image window no longer applies.
Page 35

Chapter 2: Getting to Know The Program
Navigating the View Area
When an image is too large to fit within its window, scroll bars
appear on the bottom and right sides of the image.
To view another area of the image:
Do one of the following:
On the Tools toolbar, choose the Pan tool , and then click and
drag in the image.
Click and drag the horizontal or vertical scroll bar.
Press the arrow keys to move the image by small increments.
Display the Overview palette (choose View > Palettes >
Overview), and then drag the preview rectangle to a new position.
To fit the window to the image:
Choose Window > Fit to Image or press Ctrl + W.
25
Zooming in and out
Automatic resizing
By default, when you zoom in or
out the image window is
automatically resized to fit the
image. To change this preference
setting, see “View Preferences” on
page 60.
Magnifying and Reducing the View
Magnify the view of an image (zoom in) to view and edit image
details or reduce the view (zoom out) to see the overall image. The
title bar of the image window displays the zoom percentage.
To zoom in:
Do one of the following:
Zoom with the mouse wheel, roll the optional wheel on your
mouse to zoom in or out quickly.
On the T ools toolbar choose the Zoom tool (if necessary, click
the down-arrow next to the Pan tool), and then left-click the area
you want to magnify. The view magnifies to the next preset
percentage with each click, up to the maximum magnification of
5000%.
Choose the Zoom tool or the Pan tool, and then in the Tool
Options palette select a zoom percentage or click the Zoom In or
Zoom In More buttons.
Choose View > Zoom > Zoom In to magnify the view to the next
preset percentage.
Choose View > Zoom > Zoom In More to magnify the view by five
preset percentages.
Page 36

Chapter 2: Getting to Know The Program
26
To zoom out:
Do one of the following:
On the T ools toolbar, select the Zoom tool (if necessary, click
the down-arrow next to the Pan tool) and then right-click the area
you want to reduce. The view reduces to the previous preset
percentage with each click, down to a minimum magnification of
1%.
Choose the Zoom tool or the Pan tool, and then in the Tool
Options palette select a zoom percentage or click the Zoom Out
or Zoom Out More buttons.
Choose View > Zoom > Zoom Out to reduce the view to the next
preset percentage.
Choose View > Zoom > Zoom Out More to reduce the view by five
preset percentages.
To magnify a specific area:
1 Choose View > Magnifier. This puts the cursor in magnifier mode.
2 Place the cursor over the part of the image you want to magnify.
The selected area is displayed at the highest percentage that will
fit within the window.
3 To turn off magnifier mode, choose View > Magnifier again.
Page 37

Chapter 2: Getting to Know The Program
Previewing and Editing Using the
Full Screen
27
Previewing on the full screen
Editing using the full screen
Use the Full Screen Preview command to preview an image without
any of the menus, toolbars, or palettes visible.
Use the Full Screen Edit command to expand the entire workspace,
giving you the largest possible space for displaying and editing
images. The palettes and toolbars are visible but the menus, Paint
Shop Pro title bar, and Status bar are hidden.
To preview an image on the full screen:
1 Choose View > Full Screen Preview or press Ctrl + Shift +A. The
workspace disappears and the image displays at its current
magnification.
2 To return to the Paint Shop Pro workspace, press any key.
To edit using the full screen:
1 Choose View > Full Screen Edit or press Shift + A. The menu bar
and status bar disappear.
To select from a menu when using the full screen, move the
cursor to the top of the screen and left-click. The menus appear
as you move the mouse along the top.
2 To return the window to its previous size, press Shift + A.
Page 38

Chapter 2: Getting to Know The Program
28
Viewing Image Information
As you work with an image, you may want to view information
about it. There are several ways to do this, as described in the
sections below.
To view general image information:
Look at the Status bar (along the bottom of the main Paint Shop
Pro window) to see the cursor position, image height and width
in pixels, and the color depth.
Display the Info tab of the Overview palette to view information
about the image. Choose View > Palettes > Overview, and then
click the Info tab. The information displayed depends on what
tool is selected.
To view image color information:
Choose Image > Count Image Colors to display the number of unique
colors in the image.
To view detailed image information:
1 Choose Image > Image Information, or press Shift + I.
2 Do one of the following:
Click the Image Information tab to view the file name and
format, image dimensions, resolution, and color depth,
modification status, number of layers and alpha channels, and
the amount of RAM and disk space used for the image as well
as its selections, masks, alpha channels, and undo storage.
Click the Creator Information tab to view or edit the image
title, artist name, copyright, description, date created, and date
modified.
Click the Watermark Information tab to view and enter
information on Digimarc watermarking.
Click the EXIF Information tab to view information for images
taken with digital cameras. In the Section group box, mark the
check boxes for the information you want to display: Input
Device, Artist, Date, Image, Shot Conditions, and GPS.
Page 39

CHAPTER 3
Getting Images into Paint Shop Pro
You can get images into Paint Shop Pro in a variety of ways: import
images (from a digital camera, card reader, or scanner), capture
images from the computer screen, duplicate an existing image or
layer, or create a new image.
29
Contents
Importing Images from Digital Cameras and Scanners. . . . . . . . . 30
Opening Existing Images . . . . . . . . . . . . . . . . . . . . . . . . . . . . . . 33
Creating Images . . . . . . . . . . . . . . . . . . . . . . . . . . . . . . . . . . . . 35
Capturing Images from the Computer Screen . . . . . . . . . . . . . . . 41
Opening Frames from Animation Shop . . . . . . . . . . . . . . . . . . . . 43
Using the Paint Shop Pro Browser . . . . . . . . . . . . . . . . . . . . . . . 44
Saving Image Files . . . . . . . . . . . . . . . . . . . . . . . . . . . . . . . . . . 49
Closing Image Files. . . . . . . . . . . . . . . . . . . . . . . . . . . . . . . . . . 52
Page 40

Chapter 3: Getting Images into Paint Shop Pro
30
Importing Images from Digital Cameras and
Scanners
Running scanning software
In addition to running the scanning
software from Paint Shop Pro, you
can also run the software from the
Windows Start menu. After you
perform the scan, you then need to
run Paint Shop Pro.
With Paint Shop Pro you can access and manage your images while
they are in your digital camera. You can also load the images directly
into Paint Shop Pro.
Before you can view and download images from a digital camera,
card reader, or scanner you must install the special software (called
drivers) that enables your computer to connect to the camera, card
reader, or scanner. You must install this software before connecting
the camera, card reader, or scanner to the computer. Refer to the
documentation supplied with your camera, card reader, or scanner
for more information about this software.
Determine which type of connection your camera, card reader, or
scanner uses:
WIA The default for WIA compatible computers running the
Windows XP and ME operating systems. Your camera, card
reader, or scanner must support WIA.
Mounted Drive The default for non-WIA computers, and the most
common type of connection. Some cameras and scanners, and
most card readers are viewed as an additional disk drive when
they are connected to the USB port of your computer.
TWAIN Most cameras and scanners are TWAIN-compliant. Use
this setting if your camera, scanner, or card reader is TWAINcompliant.
Page 41

Chapter 3: Getting Images into Paint Shop Pro
Downloading Images Using
Windows XP, ME and a USB Cable
Paint Shop Pro supports the WIA connection protocol. If your
computer has the Windows XP or ME operating system, your camera
or scanner uses the WIA connection system, and you connect your
camera or scanner to the computer using a USB cable, then Paint
Shop Pro and Windows XP or ME will automatically detect when
you have connected your camera to your computer.
To download from a WIA camera or scanner with Windows XP or
ME:
1 Connect the camera, card reader, or scanner to the computer using
the USB cable.
2 Choose File > Import > From Scanner or Camera to download the
images to your computer.
Downloading Images From a Mounted
31
Viewing EXIF Data
EXIF stands for Exchangeable
Image File Format. If your camera
supports this standard, it will record
the time & date the image was
taken, exposure information (ISO,
shutter, aperture) and other camera
details in the header of each image
file. To view EXIF data, choose
Image > Image Information to
open the Current Image
Information dialog, and then click
the EXIF Information tab.
Drive
Some cameras, card readers, and scanners display as a separate drive
(assigned a drive letter) on your computer. For example, your
camera may display as My Computer\Removable Disk (G:).
To download from a camera, card reader, or scanner that appears
as a mounted drive:
1 Choose File > Open to open the Open dialog. Or choose File >
Browse and use the browser to locate the images on the mounted
drive.
2 Navigate to the drive for your camera, card reader, or scanner.
3 Locate the images that you want to download in a folder or sub-
folder of that drive.
4 Select the images that you want to download and click Open to
open the images in Paint Shop Pro.
Page 42

Chapter 3: Getting Images into Paint Shop Pro
32
Importing Images Using the TWAIN
Interface
To import images using the TWAIN interface:
1 Choose File > Import > TWAIN > Select Source. The Select Source
dialog lists the TWAIN-compliant devices connected to your
computer.
What does your image
need?
Here are some edits your digital
photograph may need:
Crop the image. Cropping
reduces the amount of memory
the image uses and eliminates
extra areas of color, which may
allow you to make better color
corrections.
Correct colors or retouch parts of
the image.
Note: You only need to select the source the first time you
connect to the camera, card reader, or scanner.
2 Click the name of the device, then click Select.
3 Choose File > Import > TWAIN > Acquire to run the device’s
software.
4 Do one of the following:
For scanners, perform the scan using the device’s software.
(Refer to the scanner manufacturer’s documentation for
details.)
For digital cameras, an Import dialog displays. Select the
images that you want to download, and then click Download.
When the device and software finish processing the image, the
image is sent to Paint Shop Pro and placed in an image window.
The software remains open so you can continue to acquire
images or close the software.
5 Click the Paint Shop Pro icon in the Windows task bar to display
Paint Shop Pro and your image.
6 Choose File > Save As to save the image.
Page 43

Opening Existing Images
You can open images in a variety of file formats. The list of formats
you can open in Paint Shop Pro appears in the Open dialog.
You can select which formats Paint Shop Pro displays as available to
open.
You can open a file using the Open dialog or the Browser or by
choosing a recently used file from the File > Recent Files menu.
With the Open dialog, you can view a preview of each image file
that you select. With the Browser, you can view previews of all
image files within a folder. When you open a file via the Browser,
the Browser window stays open until you close it.
To open an image file using the Open dialog:
1 Do one of the following:
Choose File > Open.
Click the Open button .
Chapter 3: Getting Images into Paint Shop Pro
33
From open to browse
While opening a file from the Open
dialog, you may decide you want to
preview all files in a folder. Click
the Browse button to open the
Browser.
Press Ctrl + O.
2 In the Look in drop-down list, select the folder where the file is
stored.
3 Click the name of the file you want to open. To select multiple
files, press Ctrl and click each name.
4 To view information or a preview of the image, choose an option:
Details Click this button to open a pop-up that displays
information about the selected image. Click OK to close this popup.
Show preview Mark this check box to display the selected image
in the preview area. If you have selected multiple files, no
preview is displayed; use the Browse window instead.
5 Click Open.
To open an image file using the Browser:
1 Do one of the following:
Choose File > Browse; or
Click the Browse button ; or
Press Ctrl + B.
Page 44

Chapter 3: Getting Images into Paint Shop Pro
34
The Browse window opens. Note that the Paint Shop Pro menu
bar displays commands specific to when the Browse window is
active. The Browse menu is active until you open a new file or
click an open image.
2 In the left side of the Browse window you’ll see the Find and
Info tabs. Use the Find tab like you would Windows Explorer to
navigate and then select the folder that contains the file you want
to open. Use the Info tab to display image information on a
selected image. The right side of the Browse window displays
thumbnails of image files located in the selected folder.
Explore the Browser
For more information on using the
Browser, see “Using the Paint Shop
Pro Browser” on page 44.
3 Select files using one of these methods:
Click a thumbnail image; or
To select non-adjacent files, hold down Ctrl and click each
file; or
To select adjacent files, click the first file, hold down Shift,
and click the last file.
Note: To deselect a file, press Ctrl and click its thumbnail.
4 Open the selected file(s) using one of these methods:
Double-click a single file’s thumbnail or Ctrl + double-click
one thumbnail when multiple files are selected; or
Select a file or multiple files and then drag them onto a blank
part of the work space; or
Press Enter; or
Right-click and select Open from the context menu; or
Choose Image File > Open.
After the file or files open, you can close the Browse window by
clicking its Close button. You may also want to leave the Browse
window open in the workspace.
To open a recently used file:
Choose File > Recent Files and then choose the file name.
By default, the Recent Files menu lists four recently used files. You
can include up to 10 files. For more information, refer to the
Miscellaneous Preferences details in Chapter 4.
Page 45

Creating Images
Chapter 3: Getting Images into Paint Shop Pro
About Raster and Vector Graphics
Computer graphics are of two types: raster (also called bitmap) or
vector. With Paint Shop Pro, you create both raster and vector
images, as well as images with Art Media content. You can also
create an image with both raster and vector layers (or Art Media
layers). It’s important to understand the differences between the two
data types.
Raster Images
Raster images are composed of individual elements, called pixels,
arranged in a grid. Each pixel has a specific location and color. If
you magnify raster data, you can see the individual pixels as squares
of colors.
An object in a raster image is defined by its pixels. For example, the
front door in an image of a house is made up of a mosaic of pixels at
certain locations in the image. In bitmap images you edit pixels
rather than objects or shapes.
35
Raster images can display subtle changes in tones and colors, so they
are most often used for images like photographs and digital artwork.
Raster images contain a fixed number of pixels, so when you
magnify the image you are magnifying the display size of the pixels.
As a result, raster images can display jagged rather than smooth
edges if magnified on screen or printed at a large magnification.
Vector Graphics
Vector graphics or images use geometric characteristics—lines,
curves, and their locations—to define objects. For example, a door
in a graphic of a house is made up of a rectangle with a certain width
and height at a specific location and filled with a certain color. In
vector images you edit objects or shapes rather than pixels.
Vector graphics do not lose clarity or detail when scaled to any size
or printed at any resolution. They work well for technical
illustrations or corporate logos.
Page 46

Chapter 3: Getting Images into Paint Shop Pro
36
Choosing Raster or Vector
In Paint Shop Pro, you create and edit raster and vector data on
separate layers. With some tools you create raster data (like brush
strokes with the Paint tool) and with other tools (like the Text and
Preset Shapes tools) you can choose whether you want to create
raster or vector data.
In general, use vector objects when you’ll need to edit the object as
an element separate from other parts of the image. For example, if
you add a star to an image, you may want to change its size, color or
location. This is easier if the star is a vector object. You can create
raster data on separate layers so you can easily edit or move them.
To apply tools or commands to vector objects that work only on
raster data (such as the painting tools or the effects commands), you
can create a raster selection of a vector object. Then, paste the
selection to a new raster layer.
About Image Size, Resolution, and Color
Depth
Before you create a new image, think about how you will use it. For
example, will you display the image on a Web site, send it as an email attachment, or print it? How you use the image helps you
determine the image’s size, resolution, and color depth. All three
elements also contribute to the file size of the image.
Image Size The physical dimensions of the image. In Paint Shop Pro
you define image height and width in pixels, inches, centimeters, or
millimeters.
For printed images for which you know the size you need, use
inches, centimeters, or millimeters. By starting with the final
image dimensions, you can produce an image that will fit the
page.
For printed images that you will import into another software
package (such as a word processor) and resize as needed, use
whichever unit is easiest for you.
For images to be displayed on screen, use pixels.
You can resize an image after you have created it, but doing so may
result in loss of image data. For more information, refer to the
Resizing Images details in Chapter 7.
Page 47

Chapter 3: Getting Images into Paint Shop Pro
Image Resolution The number of pixels per inch (ppi) or pixels per
centimeter in images. It is important to select an appropriate
resolution. Too low a resolution causes pixelation, or large pixels
that produce coarse output. Too high a resolution adds to an image’s
memory requirements without producing a proportional increase in
its quality.
Typical image resolutions are as follows:
For images displayed on Web pages, use 72 or 96 ppi.
For images printed to a high-quality printer, set the image
resolution to one-half to one-quarter of the actual printer
resolution. For example, for a laser printer with a resolution of
600 dots per inch (dpi), use an image resolution of 150 to 300
ppi.
Color Depth The number of colors that a pixel can display. Each
pixel’s color information is stored in a certain number of computer
bits—from 1 bit to 24 bits. In a 1-bit image, each pixel can display
only one of two colors (black or white). In a 24-bit image, each pixel
can display one of 16 million colors. Images with a color depth of 16
million colors look best because they contain the most colors, but
they also require the most memory to store and edit. Not all
computer monitors can display 16 million colors, so some file
formats limit the number of supported colors. For example, GIF
images, a popular format for the W eb, contain up to 256 colors (8-bit
depth).
37
Many of Paint Shop Pro’s effect and correction commands work on
16 million color images only. Therefore, its best to create most
images using 16 million colors. When you have finished working on
the image, you can decrease its color depth and save it in another
format.
For more information, see “Understanding Color Depth” on
page 260.
Page 48

Chapter 3: Getting Images into Paint Shop Pro
38
Creating an Image
You can create a new image by creating a blank image or by using
another image as a starting point.
For information on using other images, see “Creating New Images
from Existing Images” on page 39.
When you create a new blank image, you select the image size and
resolution, along with the color depth and background color and
material. It’s important to choose a size and resolution that fits with
your desired output type and output quality. For more information,
see “About Image Size, Resolution, and Color Depth” on page 36.
To create a new image:
1 Do one of the following to open the New Image dialog:
Choose File > New; or
Press Ctrl + N; or
Click the New Image button on the toolbar.
2 Choose the image dimensions:
To select a preset size for the new image, in the Presets drop-
list choose a standard size for print materials (such as 4” x 6”
or letter) or computer screens (such as 640 x 480 pixels).
The Presets list defaults to the Last Used option, which
specifies the settings that were used the last time you created a
new image.
To create an image using specific dimensions, in the Image
Dimensions group box, set the following options:
Units The units of the dimensions (pixels, inches, centimeters,
or millimeters).
Width The width of the new image.
Height The height of the new image.
Resolution The resolution of the new image. Specify the
resolution units (pixels/inch or pixels/cm) in the drop-down
list.
3 In the Image Characteristics group box, select from these
options:
Page 49

Chapter 3: Getting Images into Paint Shop Pro
Raster Background, Vector Background, or Art Media
Background The type of the bottommost layer. Choose a raster
background for most photographic applications. Choose a vector
layer if you are creating vector graphics. Choose an Art Media
layer if you are creating an image with the Art Media tools.
Color Click in the Color box and set the background color or
material.
For raster images, click the color box to select from the
Material dialog (for 16 million color images) or the image
palette (for images of all other color depths). To choose a
transparent background (for greyscale or 16 million color
images only), mark the Transparent check box. For more
information on choosing colors or materials, refer to Chapter
10.
For vector images, you only need to choose the color depth.
Vector images start with a transparent vector layer.
Note: The Memory Required field displays the amount of
memory required for the image. Your computer should have at
least two to three times this amount of RAM. To reduce the
memory requirement, reduce the resolution or the dimensions
of the image.
39
Canvas texture This is available only when Art Media
Background is selected. Select a canvas texture from the droplist, and then a fill color for the texture. (Uncheck the Enable fill
color option if you do not want a fill the chosen texture with a
color.) Art Media tool strokes applied to the texture will take on
the properties (bumpy, smooth, etc.) of the texture you choose.
4 Click OK. The new image opens in the work space.
Creating New Images from Existing
Images
You can use a copy of an existing image or a layer to create a new
image. You can also create an image from any graphic data copied to
the Windows clipboard from Paint Shop Pro.
To duplicate an entire image:
1 Open the image you want to duplicate.
2 Choose Window > Duplicate or press Shift + D. A new window
containing the image opens in the work space.
Page 50

Chapter 3: Getting Images into Paint Shop Pro
40
To create a new image from a layer of another image:
1 On the Layers palette, click the layer you want to copy.
2 Choose Edit > Copy.
Note: If you use the Cut or Copy commands, the current selection
or layer is placed on the clipboard.
3 Choose Edit > Paste > As New Image. A new image window
opens in the work space. The layer you copied is now the
background of the new image.
To create a new image from a layered image:
1 On the Layers palette, click a layer.
2 Choose Edit > Copy Merged.
Note: All layers are merged into one layer and placed on the
clipboard.
3 Choose Edit > Paste > As New Image. A new image window
opens in the work space. The new image contains all layers
merged into one raster layer.
To create a new image from clipboard data:
1 Cut or copy a selection or layer of an image, or an item from
another program.
2 Choose Edit > Paste > As New Image. The clipboard data is
pasted as a new image. If this command is greyed out, then the
data you have copied to the clipboard cannot be pasted as a Paint
Shop Pro image.
Note: A dialog may appear requesting additional information
such as width and height of the new image window. You can
change your preferences so that Paint Shop Pro does not prompt
for size and options when you paste data. Refer to the
preferences information in Chapter 4.
Page 51

Chapter 3: Getting Images into Paint Shop Pro
Capturing Images from the Computer Screen
You can take a picture, called a screen capture, of all or part of the
computer screen. You can then edit and save the screen capture in
Paint Shop Pro. Before you capture screens you should configure the
screen capture options.
Setting Screen Capture Options
Use the Capture Setup dialog to select how you want to capture, how
Add the capture icons to a
toolbar
If you frequently capture screens,
you may want to create a new
toolbar containing the icons for the
screen capture command. Refer to
Chapter 4 for details.
you activate the screen capture, and to set other options.
To set screen capture options:
1 Choose File > Import > Screen Capture > Setup to open the
Capture Setup dialog.
2 In the Capture group box, select the type of capture:
Area Captures an area of the screen that you select by clicking
once at one corner of the area and clicking again at the opposite
corner.
41
Full screen Captures the entire computer screen.
Client area Captures the contents of the active program.
Window Captures the active window. If a dialog is open, this
option captures the dialog. If no dialog is open, this option
captures the active application.
Object Captures an object within a program, such as a menu bar,
toolbar, icon, or a document window. When you initiate the
capture, you move the cursor over an object and it is highlighted
with a rectangle.
3 In the Activate capture using group box, select the method for
activating the screen capture:
Right mouse click A right mouse click activates a capture.
Hot key A key (such as F11) or key combination (such as Shift +
F1) activates a capture. Select the option, then click the dropdown list to select a key or key combination.
Delay timer The screen capture is taken a certain number of
seconds after you start the screen capture.
Page 52

Chapter 3: Getting Images into Paint Shop Pro
42
Note: These options select the method for activating the capture
after you have started the screen capture feature. To start the
screen capture, you click the Capture Now button on this dialog,
or at the Paint Shop Pro work space press Shift + C or choose
File > Import > Screen Capture > Start.
4 In the Options group box, select from the following options:
Include cursor Mark this check box to include the cursor in
screen captures. This check box is not available for area captures.
Multiple captures Mark this check box when you want to take
multiple captures one after the other. S tart the screen capture, and
then press the hot key to activate it multiple times. Clear this
check box to have Paint Shop Pro display after you take one
screen capture.
5 Do one of the following:
To start the screen capture feature immediately, click Capture
Now. Screen capture settings are saved and Paint Shop Pro
minimizes to the task bar. Use the hot key to activate the
screen capture. See “Capturing Images from the Computer
Screen” on page 41.
How do I capture a
Paint Shop Pro screen?
Open two copies of Paint Shop Pro.
In one copy, set up the screen
capture options and start the
capture feature (press Shift + C),
which minimizes the software.
Display the other Paint Shop Pro
and press the hot key to activate
the capture.
To save the settings, click OK.
Capturing a Screen
Once you have configured the screen capture settings, you can begin
capturing screens.
When you are finished, you can edit the screen captures as needed
and save the image in Paint Shop Pro. For information about saving
images, see “Saving Image Files” on page 49.
To capture a screen:
1 Open or display Paint Shop Pro.
2 To start the screen capture feature, do one of the following:
Choose File > Import > Screen Capture > Start.
Press Shift + C.
Paint Shop Pro minimizes to the Windows task bar.
3 Open or display the image or window that you want to capture.
Page 53

Chapter 3: Getting Images into Paint Shop Pro
4 To activate the screen capture, right-click or press the hot key
(such as F10) you chose during setup.
If you chose Full Screen, Client Area, or Window during setup,
the screen, area, or window is captured.
5 For Area and Object captures, select the area or object to capture:
For Area captures, click at the top corner of the area you want
to capture, then move the cursor to the bottom corner and
click again. As you move the cursor a rectangle displays the
selection area.
For Object captures, move the cursor until the area you want
is highlighted (with a black rectangle around it), then click to
activate the capture.
6 If you selected to take multiple captures during setup, you can
now take another capture. Right-click or press the hot key for
each screen capture. When you are finished, click the Paint Shop
Pro button in the Windows task bar.
43
Opening Frames from Animation Shop
Paint Shop Pro allows you to bring in selected frames from Jasc
Animation Shop. After exporting the frames, you can use Paint Shop
Pro's image editing arsenal to modify the frames before sending
them back to Animation Shop.
Before opening Animation Shop frames in Paint Shop Pro, be aware
of the Export option in the Animation Shop Preferences (this option
affects how selected animation frames open in Paint Shop Pro).
To set the export options in Animation Shop:
1 In Animation Shop, choose File > Preferences > General Program
Preferences, and choose the Layered Files tab. The first option is a
check box labeled "Export frames to Paint Shop Pro as layered
images."
2 Your choices are:
If you mark this check box, when you subsequently select
multiple animation frames for export to Paint Shop Pro, the
frames will be contained as individual layers within one Paint
Shop Pro image.
If you do NOT mark this check box, when you subsequently
select multiple animation frames for export to Paint Shop Pro,
each frame will open as its own Paint Shop Pro image file.
Page 54

Chapter 3: Getting Images into Paint Shop Pro
44
To open frames from Animation Shop:
1 In Animation Shop, select the frames you want to export to Paint
Shop Pro. Only selected frames will be exported.
2 Choose File > Export Frames > To Paint Shop Pro.
If Paint Shop Pro is already open, it will become the active
application, and the selected frame(s) will appear. If Paint Shop Pro
was not open, it will start up, and the selected frame(s) will appear.
Important Notes about Interactivity
While animation frames are open in Paint Shop Pro, the two
programs are “linked,” meaning that modifications made on the
frames in Paint Shop Pro can be automatically updated to the
associated animation in Animation Shop. (To do so, in Paint
Shop Pro, choose Edit > Update Back to Animation Shop). You
can, however, break this link. To do so, in Animation Shop,
choose File > Export Frames > Break Link with Exported Frames.
You can also break the link by closing the images in Paint Shop
Pro without saving changes.
If you also have an older version of Paint Shop Pro, be aware that
Animation Shop will export selected frames to the most recently
used version of Paint Shop Pro.
Using the Paint Shop Pro Browser
With the Paint Shop Pro Browser, you can view, open, sort, and
manage your files.
When you open the Browser window (or when the Browser is the
active window), you'll notice that the menu bar instantly changes
into Browser mode. This provides a variety of options for selecting
files to open and for renaming, moving, copying, and deleting files.
The Image Browser contains two tabs, Find and Info, in the left side
of the Browser window. The Find tab contains the familiar Windows
Explorer-like navigation view, and the Info tab displays image
information, creator data, and EXIF data. Additionally, with the
Browser active you can choose File > Sort and use the Sorting dialog
to sort images by EXIF data.
Page 55

Chapter 3: Getting Images into Paint Shop Pro
To open the Browser:
Choose File > Browse, or press Ctrl + B, or press the Browse button
on the Standard toolbar.
To select all files in a folder:
On the Browser menu, choose Edit > Select All or press Ctrl + A.
To deselect all files in a folder:
On the Browser menu, choose Edit > Select None or press Ctrl + D .
To select files by file characteristics:
1 On the Browser menu, choose File > Select.
In the Select dialog, you can select files that have specific file or
image attributes, such as name, file extension, size, width, bits
per pixel, and date.
2 Select the file and image attributes, then click OK.
45
To change the order of thumbnails:
Click the file’s thumbnail and drag it to a new position within the
same folder.
To sort thumbnails by file characteristics:
While in Browser mode, the Sorting dialog contains options for
sorting images via their EXIF data.
1 Choose File > Sort to open the Thumbnail Sort dialog.
2 In the Sort condition drop-list of either the Primary sort order or
the Secondary sort order sections, choose the desired options to
sort by (for example, you can sort by EXIF data), and then click
OK.
Note: Sorting thumbnails is a one-time operation. The thumbnails
will not remain sorted if you add new images or change the
properties of the existing files. New images are always added to the
end of the list.
To invert which files are selected:
Choose Edit > Invert Selection. All selected thumbnails are
deselected and all unselected thumbnails are selected.
Page 56

Chapter 3: Getting Images into Paint Shop Pro
46
To rename files:
1 Press Ctrl + R or right-click the thumbnail and select Rename from
the context menu.
2 Type the new filename. The Browser does not automatically add
an extension.
3 Click OK.
To copy files:
1 Press Ctrl + Y or right-click the thumbnail and select Copy To from
the context menu.
2 Select the folder to copy the file to.
3 Click OK.
Copying one image into
another image
You can copy the layers of one
image into another image. See
“Cutting, Copying, and Pasting” on
page 160.
To paste files to other applications that support OLE functions:
Press Alt and click the file’s thumbnail, drag it to the application’s
button in the Window task bar until the application opens, then move
the cursor to the application and release the mouse button.
You can paste images into any applications that support meta files,
DIBs, and BMPs, such as Microsoft Word. If the image has more
than one layer, all layers are automatically merged.
To move files:
Do one of the following:
Click the file’s thumbnail and drag it to a different folder in the
left pane of the Browse window. You can also select several
thumbnails and drag them to a new folder.
Select the file or files, then press Ctrl + M or right-click the
thumbnail and choose Move To from the context menu. At the
Browse for Folder dialog, select the desired folder and click OK.
To delete files:
1 Select the file or files you want to delete.
2 Press Ctrl + Delete or right-click the file’s thumbnail and select
Delete from the context menu.
To find files:
1 Choose File > Find Name to open the Find dialog.
Page 57

Chapter 3: Getting Images into Paint Shop Pro
2 Enter the search criteria and click Find Next or Find All to display
the search results in the Browser window.
To rotate files:
1 Select the files that you want to rotate.
2 Choose ImageFile > JPEG Lossless Rotation, and then choose an
option to rotate the selected files.
Using the Find Tab in the Browser
The Image Browser includes two tabbed panes on the left side, the
Find tab (for navigation) and the Info tab (for displaying image
information).
Use the Find tab's familiar Windows Explorer-like controls to
navigate to the folder containing the desired images. To use the tab:
1 If it is not already open, start up the Image Browser. The Find tab
will be the active tab.
47
2 Using the Windows Explorer-like interface, navigate to the folder
containing the desired images. Thumbnails of the folder's images
will appear on the right side of the window.
Note: To modify how the thumbnails are displayed, choose File >
Preferences > General Program Preferences (or right-click in the
workspace and choose General Program Preferences from the
context menu) and then choose the Browser tab. Make the desired
settings in this tab to affect the Image Browser.
Using the Info Tab in the Browser
Use the Info tab to display pertinent image information, such as
creator details as well as EXIF details for digital photos. To use the
tab:
Page 58
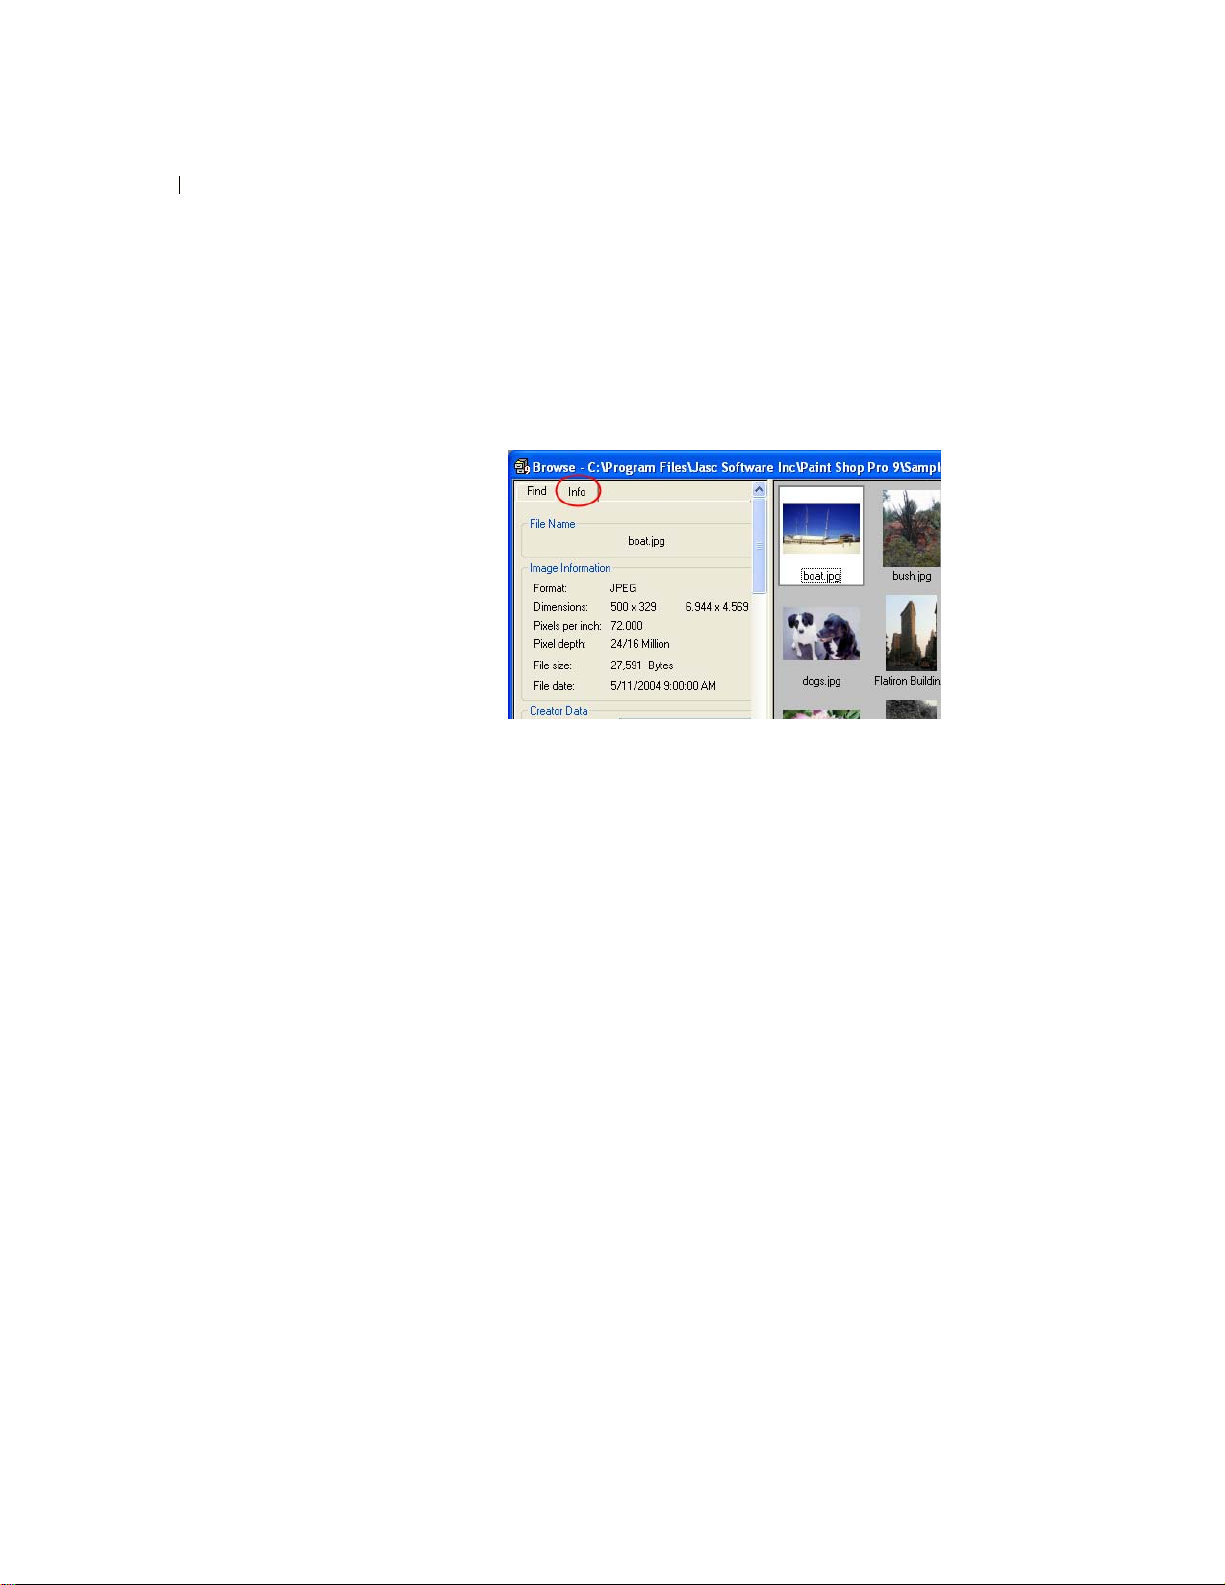
Chapter 3: Getting Images into Paint Shop Pro
48
1 If it is not already open, start up the Image Browser.
2 Click the Info tab located in the upper left portion of the Browser
window.
3 Click an image thumbnail to view its details in the Info tab. If
you're browsing digital camera images, the EXIF data associated
with the image will appear in the Details section of this tab.
Updating Thumbnails
When you open a folder in the Browser, Paint Shop Pro creates
thumbnails for all supported graphic images and stores them in a file
called PspBrwse.jbf. Every folder you have opened in the Browser
has a copy of this thumbnail file. Paint Shop Pro uses this file to
display thumbnails more quickly each time you open a folder.
The default preference setting is to have the thumbnails file update
automatically every time you open the folder. To change this
preference, use the Browser tab in the General Program Preferences
dialog.
Occasionally you may want to update the thumbnails with the
Update Thumbnails command. For example, if you have used
Windows Explorer to delete or add a file in a folder, you can choose
File > Update Thumbnails, or press F5 to update the thumbnails file.
(You can also open the folder again in the Browser for Paint Shop
Pro to update it automatically.)
After a thumbnail file is created, new files are appended to the end of
the thumbnails list. To sort the list alphabetically or by other
characteristics, choose File > Sort.
Page 59

Saving Image Files
Paint Shop Pro has a native .PspImage format that supports layers,
alpha channels, and other features you use to create images. You will
find it convenient to save an image in this format while you are
working on it and then convert it to a different format after you have
finished.
Using Autosave
You can use the Autosave feature to save your files automatically at
specified intervals. This can prevent you from losing your work if
your computer shuts down unexpectedly. For more information,
please refer to “Setting Autosave Preferences” on page 67.
Compressing a .PspImage File
Chapter 3: Getting Images into Paint Shop Pro
49
Always save a .PspImage
version of your file
To be able to use all Paint Shop
Pro features, we recommend you
save and edit your files in
.PspImage format with a color
depth of 16 million colors. You can
then use the Save As or Export
command to save a copy of the file
in the desired output format. Your
original image stays intact in case
you need to make changes to it
later.
An image file in the .PspImage format can be saved without
compression, or it can be compressed to save space. Both of the
compression methods that Paint Shop Pro uses are lossless, and
reduce the file size without losing any image information. Saving a
file without compressing it is the quicker method, but it requires
more hard disk space.
Paint Shop Pro uses two compression methods:
Run length encoding (RLE), which is fast and compresses most
multi-layered images to about 75% of their original sizes. It
works well with images that contain large areas of the same
color.
LZ77 compression, which is slower than RLE, but can compress
an image to a smaller size than RLE. It works well with photorealistic images.
Choose a compression option by clicking the Options button in the
various save dialogs.
Saving an Image
You can easily save an image with the same file name and location.
Note that this will overwrite the original image with the modified
image. To save the image using a different name or file format,
choose File > Save As.
Page 60

Chapter 3: Getting Images into Paint Shop Pro
50
To save an image:
To automatically save the image with the same file name and
location (overwriting the original image with the modified image):
Choose File > Save.
Press Ctrl + S .
Click the Save button on the toolbar.
Saving a New Image File
The first time you save an image, Paint Shop Pro automatically
opens the Save As dialog, where you select a location, name, and
format for the image. After this, Paint Shop Pro saves changes to the
original image without opening the dialog.
To save a new image:
1 Choose File > Save, press Ctrl + S, or click the Save button on
the toolbar to open the Save As dialog.
2 Use the Save In drop-down list to navigate to the folder in which
you want to save the image file. If you frequently save files to the
same folder, click the Favorites folder and select a folder
from the list.
3 In the File Name field, type a name for the file.
4 To save the file in a new format, select the format from the Save
As Type list.
5 If the file format has save options, click the Options button to
open the Save Options dialog. Select new settings, if appropriate.
If you are unsure of the settings, use the default values. Click OK
to return to the Save As dialog.
6 Click Save to close the dialog and save the file.
You can have Paint Shop Pro display the last used file type when
opening this dialog. Select this option in the Dialogs and Palettes
Preferences tab of the General Program Preferences dialog.
Page 61

Chapter 3: Getting Images into Paint Shop Pro
Saving an Image File in its Original
Format
When you save an image and then edit it, the image title bar displays
a Modified tag (an asterisk) after the file’s name to indicate the file
has been modified. This tag disappears each time you save the file; it
reappears when you again edit the image.
Saving an Image in a New File Format
If you want to save a file in another format, use the Save As
command.
To save a file:
1 Choose File > Save As or press F12 to open the Save As dialog.
2 Navigate to and open the folder in which you want to save the
image file.
3 To rename the image file, type a new name in the File name field.
51
4 In the Save as type drop-down list, select a new format.
5 If the file format has save options, click the Options button to
open the Save Options dialog. Select new settings, if appropriate.
If you are unsure of the settings, use the default values. Click OK
to return to the Save As dialog.
6 Click Save to save the image file and close the dialog.
Saving a Copy of an Image
When you save an image using the Save Copy As command, you are
copying the original file, not saving it. Use this command to save a
version of a file without affecting the original. The dialog contains
all the same features as the Save As dialog.
Note
When using the Save Copy As command:
The modifier tag is not affected. It does not disappear from the
title bar.
The file name does not change. The copy is titled “Image Name.”
Paint Shop Pro saves the copy to the same directory and in the
same format that was last used with the Save Copy As command
(not the Save As command).
Page 62

Chapter 3: Getting Images into Paint Shop Pro
52
To save a copy of an image:
1 Choose the File > Save Copy As or press Ctrl + F12 to open the
Save Copy As dialog.
2 Use the Save In drop-down list to navigate to a new folder if you
want to save the copy in a different folder. If necessary, use the
Up One Level button to help navigate, or the Create New Folder
button to create a new folder.
3 In the File Name box, type a name for the file.
4 To save the file in a different format, select the format from the
Save As Type drop-down list.
5 If the file format has save options, click the Options button to
open the Save Options dialog. Select new settings, if appropriate.
If you are unsure of the settings, use the default values. Click OK
to return to the Save As dialog.
6 Click Save to save a copy of the file.
Note
For information about saving several images in a new file format,
refer to Chapter 17.
For information about optimizing images for the Web, refer to
Chapter 19.
Closing Image Files
To close an Image, choose File > Close, or click the Close button
on the image window's title bar. If you haven't saved changes to the
image, you'll be prompted to do so.
Page 63

CHAPTER 4
Customizing Paint Shop Pro
By setting up Paint Shop Pro to appear and respond in ways that
best suit your work, you’ll not only create a better user experience,
but you’ll likely find yourself working faster and more efficiently.
This chapter describes the various ways you can customize Paint
Shop Pro.
53
Contents
Note
CMYK Conversion Preferences are covered in Chapter 16, Printing
Images.
Using Custom Workspaces. . . . . . . . . . . . . . . . . . . . . . . . . . . . . 54
Customizing Toolbars and Menus. . . . . . . . . . . . . . . . . . . . . . . . 56
Setting General Program Preferences . . . . . . . . . . . . . . . . . . . . . 59
Setting Autosave Preferences . . . . . . . . . . . . . . . . . . . . . . . . . . 67
Setting File Locations . . . . . . . . . . . . . . . . . . . . . . . . . . . . . . . . 67
Setting File Format Preferences. . . . . . . . . . . . . . . . . . . . . . . . . 73
Setting File Format Associations . . . . . . . . . . . . . . . . . . . . . . . . 79
Resetting Application Preferences . . . . . . . . . . . . . . . . . . . . . . . 80
Assigning and Viewing Shortcut Keys . . . . . . . . . . . . . . . . . . . . . 81
Adjusting Monitor Display Options . . . . . . . . . . . . . . . . . . . . . . . 84
Page 64

Chapter 4: Customizing Paint Shop Pro
54
Using Custom Workspaces
The Paint Shop Pro workspace is made up of all the program’s
palettes, toolbars, and open images. You may find that the way you
arrange the workspace while editing photos may differ from your
arrangement for using the Web tools. Fortunately, Paint Shop Pro
allows you to save any number of workspace arrangements, allowing
you to load the specific workspace that best suits the work you
intend to do.
Saving Workspaces
When you save a workspace, Paint Shop Pro saves the information
in a .PspWorkspace file. The following information is stored:
Ruler, grid, and guide information
Menu, palette, and toolbar settings, locations, and docking status
Browser window position (if open)
Full screen edit mode status
Open images, including the images zoom levels and scroll bar
locations
Note: Workspace files do not include an actual copy of any open
images. Workspace files only reference the name and location of
an image. If you delete an image from your computer, it will not
display in a workspace.
To save the current workspace:
1 Choose File > Workspace > Save or press Shift + Alt + S to open
the Save Workspace dialog.
2 To save the workspace in a folder other than the program default
folder, click the File Locations button.
3 In the New Workspace Name field, type a name for the new
workspace.
4 Click Save.
If your workspace contains any modified images that you have not
saved, you will be prompted to save the changes to your image.
Choose from these options:
Yes Saves the image changes and saves the workspace.
Page 65

Chapter 4: Customizing Paint Shop Pro
No Saves the workspace, but does not save the changes to your
image.
Cancel The workspace is not saved.
Loading Workspaces
55
Quick Access to
Workspaces
Load a recently used workspace by
choosing it from the list of recent
workspaces located at the bottom
of the File > Workspace menu.
To load a workspace:
1 Choose File > Workspace > Load or press Shift + Alt + L to open
the Load Workspace dialog.
2 Select the workspace file you want to load.
Note: To load a workspace not displayed in the dialog, click the
File Locations button and use the File Locations dialog to make
the desired workspace folder the active directory.
3 Click Load.
Workspace files do not include an actual copy of any open images.
W orkspace files only reference the name and location of an image. If
you delete an image from your computer, it will not display in a
workspace.
If you had two windows open for the same image when you saved
the workspace, they both open again.
If an image from the workspace is already open, Paint Shop Pro
applies the workspace settings to the open image.
Deleting Saved Workspaces
To delete a saved workspace:
1 Choose File > Workspace > Delete or press Shift + Alt + D to open
the Workspace dialog.
2 Select the workspace file you want to delete.
3 Click Delete.
Page 66

Chapter 4: Customizing Paint Shop Pro
56
Customizing Toolbars and Menus
Paint shop Pro 9 gives you almost total control over the program’s
toolbars, allowing you to:
Move commands from toolbar to toolbar.
Add almost any command to any toolbar.
Add your own custom scripts to toolbars (Refer to Chapter 17).
Create your own custom toolbar.
Customizing Toolbars
When you display the Customize dialog, the entire Paint Shop Pro
workspace transforms into customize mode. You can click and drag
almost any menu command or tool to any other menu or toolbar. You
can add or delete commands from the menus on the Menu Bar. All
this can be done with the Commands and Toolbars tabs of the
Customize dialog.
Right-click access to
Customize dialog
Another way to access the
Customize dialog is to right-click in
the Menu bar, Tool palette, or Tool
Options palette, and then choose
Customize from the context menu.
To access the toolbar customize mode:
1 To open the Customize dialog, choose View > Customize. You can
click back and forth between tabs to access the controls you need.
2 After making your changes, click Close.
To select which toolbars are displayed:
Choose View > Toolbars, and select the toolbar that you want to
display; or
Choose View > Customize to open the Customize dialog. Click
the T oolbars tab, and mark the checkbox for the toolbars that you
want to display, and then click Close.
To select which Menu Bar is displayed:
1 Click the Menu tab.
2 In the Application Frame Menus group box, select an option from
the Show Menus for drop down list:
Default This set of commands displays when no images are open.
Image This set of commands displays when images are open.
Browser This set of commands displays when the Browser is the
active window.
Page 67

Chapter 4: Customizing Paint Shop Pro
To reset a Menu Bar:
1 Click the Menu tab.
2 In the Application Frame Menus group box, select the menu you
want to reset from the Show Menus for drop-down list.
3 Click the Reset button.
To move a command button or tool:
While in Customize mode, drag the item to another palette or
toolbar.
To add commands or tools to a toolbar:
1 Click the Commands tab of the Customize dialog.
2 From the Categories list, select a category. Paint Shop Pro groups
related commands into categories. For example, click the File
category to display all File menu commands. To list all Paint
Shop Pro commands at once, choose All Commands.
3 From the Commands list, click and drag a command to a toolbar.
57
To remove commands or tools from a toolbar
Drag the item to an empty workspace area or an empty area
outside a toolbar. Release the mouse button when you see the
cursor change to this shape: ; or
Right-click on the item and choose Delete from the context
menu.
To reset all toolbars:
1 Click the Toolbars tab.
2 Click the Reset All button. All toolbars will revert to the
program’s default settings.
To reset a specific toolbar:
1 Click the Toolbars tab.
2 In the Toolbars list, select the name of the toolbar to reset.
3 Click the Reset button. The selected toolbar will revert to the
program’s default settings.
Page 68

Chapter 4: Customizing Paint Shop Pro
58
To add a separator to a toolbar:
1 Choose View > Customize to display the Customize dialog.
2 Right-click a button in the toolbar to which you’ll be adding the
separator, and then choose Include Separator from the context
menu that appears. This adds a separator to the left of the button
you clicked.
Note: To rearrange a button relation to the separator, hold down
Alt and drag the button to the desired location.
To delete a separator from a toolbar:
1 Choose View > Customize to display the Customize dialog.
2 Right-click the toolbar button directly to the right of the
separator. This displays the context menu. Notice the check mark
next to the Start Group item.
3 Select the Include Separator item to remove the check mark and
the separator.
Creating a New Toolbar
You can create a custom tool bar with your favorite commands and
tools.
To create a new toolbar:
1 Choose View > Customize to open the Customize dialog.
2 Click the Toolbars tab.
3 Click New to open the Toolbar name dialog.
4 Type a name for the new toolbar and click OK. You’ll see a small,
empty toolbar.
5 Drag this new toolbar off to the side of the Customize dialog so
you can see it better.
6 To add commands to it, choose the Commands tab in the
Customize dialog.
7 Under Categories, choose the menu containing commands you
want to load onto your custom toolbar.
8 Drag command icons into the new toolbar. Add separator bars, if
necessary, as described above.
9 When you’re done adding commands, click Close. Your custom
toolbar is now listed when you choose View > Toolbars.
Page 69

Chapter 4: Customizing Paint Shop Pro
To delete a custom toolbar:
1 Choose View > Customize to open the Customize dialog.
2 Click the Toolbars tab.
3 In the Toolbars list, select the name of the custom toolbar you
want to delete.
4 Click Delete.
5 Click Close.
Customizing Context Menus
Context menus open when you right-click with a certain tool or
right-click over a certain area of the workspace.
To customize a context menu
1 Choose View > Customize to open the Customize dialog.
2 Click the Menu tab.
59
3 From the Select context menu drop-down list, choose a context
menu. The context menu will display in the workspace. Edit the
menu just like any other toolbar. For instructions see,
“Customizing Toolbars” on page 56.
Setting General Program Preferences
General Program Preferences define the behavior of various
features.
To set General Program Preferences:
1 Choose File > Preferences > General Program Preferences to
open the Paint Shop Pro Preferences dialog.
2 Click the tab containing the preference information you want to
change.
3 Modify the desired settings, and then click OK.
Undo Preferences
The Undo tab controls some settings of the Undo and Redo
commands, as well as one setting for the History palette
Page 70

Chapter 4: Customizing Paint Shop Pro
60
Undo and Redo Settings
To enable Paint Shop Pro to undo actions, mark the Enable the undo
system check box. This enables you to set all the items in this area of
the Undo tab.
When the undo system is active, you can set the following options:
Limit undo/redo disk usage to n MBytes of storage per open
image Sets the maximum amount of disk space each images
undo/redo steps can use.
Limit undo/redo to n steps per open image Sets the number of
undoable/redoable steps in each open image. The default value is
250. Steps older than 250 will become undoable steps, only 10 of
which will be retained as defined by the Non-undoable steps after
last undoable step setting.
Compress undo/redo information Marking this check box saves
disk space, but slows down undo and redo operations.
Enable the redo system Activates the Redo command, allowing
you to redo actions you have undone.
History Palette Setting
n Non-undoable steps after last undoable step Sets the number
of non-undoable steps that will be retained after the last nonundoable step limit has been reached. The default value is 10.
View Preferences
The View tab controls some image window behaviors.
Zooming
These options determine if Paint Shop Pro automatically resizes an
image window when you zoom in or zoom out. A window is resized
to include as much of the image as will fit.
New Images
Auto size With this check box marked, Paint Shop Pro automatically
zooms out to fit the entire image in the window if you open an image
that is too large to fit in its image window.
Page 71

Chapter 4: Customizing Paint Shop Pro
After Changing Size
Fit window to image check box is selected, Paint Shop Pro
automatically resizes the image window whenever you resize an
image.
Auto Size With this check box marked, if you increase an image’s
size to more than can fit in its window, Paint Shop Pro reduces the
image’s magnification accordingly.
Display and Caching Preferences
61
About color pickers
In previous versions of Paint Shop
Pro, you could use the Jasc Color
Picker or the Windows Color
Picker. In Paint shop Pro 9, the
Windows Color Picker is not
available.
The Display and Caching tab controls presentation and caching.
Presentation Options
Re-use last type in save-as dialog When you mark this check
box, the last file format used to save an image automatically
appears in the Save as type field.
Display all color dropper ToolTips Clear this box to hide the
color information that appears next to the dropper tool when it is
positioned over a color.
Use precise cursors Mark this check box to use a cross hair for
tool cursors instead of the tool’s icon.
Show brush outlines Clear this check box to hide the outline
(shape, size) of the current brush as the cursor moves over an
image.
Thumbnail/Preview Enter a size for the thumbnails in the Effects
Browser and the preview images that display in the Layers
palette.
Zoom/Rescaling Quality Adjust the slider between Faster and
Better. Faster will zoom images faster, but will display less fine
detail. Better will zoom images more slowly, but display more
fine detail.
Caching Options
These options allow for faster image redraws after you make
changes. By default, they are all marked. Turning these options off
will likely slow image redraws.
In the Image group box:
Merged Image Clear this check box to stop saving an image cache
of your entire merged image.
Page 72

Chapter 4: Customizing Paint Shop Pro
62
Merged Below Active Layer Clear this check box to stop saving
an image cache of all the layers below the active one.
Group Layers Op ti o ns
Merged Group Clear this check box to stop saving an image
cache of the merged image for each group.
Merged Below Active Layer Clear this check box to stop saving
an image cache of all the group layers below the active one.
Palettes Preferences
The Palettes tab controls behaviors of the materials palette as well as
how palettes dock.
Materials Palette Options
Display colors in RGB format or Display colors in HSL format
This option controls the color information that appears in the
materials palette and with the dropper tool.
Why use hexadecimal?
Web browsers use the
hexadecimal format to specify
colors.
Decimal display or Hexadecimal display
This option controls how color values will display throughout the
program.
Show rainbow picker or Show document palette
For images with limited palettes (8-bit, 256 color), the document
palette shows only colors that are actually in the image.
Docking Options
Clear the check box beside each palette to prevent the palette
from docking. This will allow you to drag the palette anywhere in
the workspace.
Browser Preferences
The Browser tab controls the appearance and operation of the
Browser.
Thumbnail Size
Enter values (in pixels) for the thumbnail size the Browser
displays. The size range is from 50 to 150 pixels. Clear the
Symmetric check box to adjust thumbnail width and height
independently.
Page 73

Color choice tip:
Right-click the Selection color
box to pick from the Recent
Colors dialog.
Chapter 4: Customizing Paint Shop Pro
Appearance
Choose Use Windows colors to highlight thumbnails with the
current Windows selection color. Or, choose Use classic colors
and choose a thumbnail highlight color form the Selection color
box.
Clear the Display flat style thumbnails check box to display
thumbnails that look like raised button bars.
Other Options
Display tooltips over thumbnails Clear this check box to hide the
image information that appears when the cursor is over
thumbnails.
Save browser files to disk Clear this check box to stop the
Browser from creating a cache file in folders you browse. By
default, when you view a folder using the Browser, Paint Shop
Pro saves a file called pspbrwse.jbf in that folder. This cache file
allows you to view the thumbnails more quickly the next time
you browse the folder.
63
Grid Preferences
To set grid preferences, see
Chapter 6, Editing Images.
Automatically update the thumbnails Mark this check box to
automatically update a folder’s cache file every time the folder is
browsed. When you view a folder with the Browser, the Browser
displays the contents of the folder’s cache file. If you make
changes to the images in the folder, the thumbnails will not show
the results unless the cache file is updated.
File Format Exclusions Click this button (located in the lower
right corner of the Browser preferences tab) to display a dialog
allowing you to exclude selected file formats from appearing in
the browser.
Units Preferences
The Units tab controls ruler options and the default resolutions for
new images.
Rulers
Choose a measurement system for the rulers from the Display
units drop-down list.
Choose Toolbar colors to have the ruler color match
Paint Shop Pro’s toolbars or choose Black on White rulers.
Page 74

Chapter 4: Customizing Paint Shop Pro
64
Default Resolution
Choose a measurement system from the drop-down list and enter
the default resolution for new images. You can override this
resolution on an image-by-image basis by modifying the settings
in the New Image dialog.
Vector Coordinates
When this check box is marked, objects will snap to the center of
pixels while they’re moving. You will have to zoom in very far to
see this.
Transparency and Shading Preferences
Color choice tip:
Right-click the Selection color
box to pick from the Recent
Colors dialog.
The Transparency and Shading tab controls the grid size and color
representing transparent backgrounds and transparent areas of
layers. Additionally, this is where you set the color and opacity of
the Crop shading area.
Setting Transparency Options
Grid size Chose one of the four grid sizes from the drop-down
list.
Grid Colors Choose a color scheme from the Scheme drop-down
list. To customize the grid colors, click inside the Color 1 or
Color 2 boxes and select new colors.
Preview displays your proposed changes to the transparency grid.
Setting Crop Shading Options
Enable crop shading area Mark this check box to activate
shading outside the crop rectangle.
Color Click inside the Color box to choose a shading area color.
Opacity Use the Opacity setting to control how opaque the
shading area color will be.
Warning: When crop shading is enabled and you attempt to crop an
8-bit (256 colors) or less image, the area outside the crop rectangle
will be black. Thus when cropping these types of images, you may
want to disable this option.
Page 75

Chapter 4: Customizing Paint Shop Pro
Warnings Preferences
The Warnings tab controls how warning dialogs will display.
By default, Paint Shop Pro displays a warning dialog whenever you
are about to perform an operation that will result in lost information
or one that can not be applied to the image in its current state.
To prevent a warning from appearing, clear the check box in
front of its description.
Click the Enable All button to mark all the check boxes in the list.
Click the Disable All button to clear all the check boxes in the
list.
Photo Sharing Preferences
The current photo sharing service provider is shown in the Select a
photo sharing service list. When you choose File > Export >
PhotoSharing, that provider’s site will be accessed via your Web
browser.
65
Auto Action Preferences
Common actions that need to be performed in order to further edit an
image can be automated.
For example, you can only apply effects to 24-bit images. However,
most of the Effects menu items are active even if the active image is
8-bit. When you select an effect in an 8-bit image, the Auto Actions
dialog opens telling you Paint Shop Pro must convert the image to
24-bit to proceed with the effect.
To set the preferences for an Auto Action:
1 Select an Auto Action from the Auto Action Prompt list.
2 Choose one of these options for each action:
Never Prevents the action from happening. Choosing Never will
make certain menu commands inactive if an Auto Action is
required to complete the command. Note that some items in the
list do not have this option available.
Always Performs the action silently (without prompting you).
Prompt Asks if you want to perform the action.
Page 76

Chapter 4: Customizing Paint Shop Pro
66
Set all the actions in the list to a certain option by clicking
Always All, Never All, or Prompt All.
Reset all the actions in the list to the program’s default settings by
clicking Reset.
Miscellaneous Preferences
The Miscellaneous tab controls a variety of preferences.
Recently used file list Set the maximum number of files that will
appear when you choose File > Recent Files. For example, if the
value is set to four, only the last four saved files will appear on
the list.
Note: You must restart Paint Shop Pro before the new settings
will take effect.
Tolerance to background color when pasting a transparent
selection When you paste data as a transparent selection, Paint
Shop Pro adds it to the current image, defines it as a selection,
and then deselects all the pixels that match the current
background color. The tolerance value you enter determines how
closely the background color must match the transparent color
for it to become transparent. The tolerance scale is 0% to 200%.
Zero percent indicates that only image pixels with a perfect
match to the current background color are made transparent.
200 percent indicates that all image pixels are made
transparent.
Clipboard Data on Exit Choose how Paint Shop Pro will handle
any clipboard data when you exit the program.
Ask Whenever you exit, Paint Shop Pro will ask you what to
do with the clipboard data.
Delete Clipboard data will be deleted on exit.
Leave Data will remain in the clipboard on exit.
Force full window redraw when positioning image elements
Mark this check box to redraw the information in the active
window whenever you move objects in the image.
Show splash screen when application starts Clear this option to
hide the Jasc Software, Inc. splash screen which appears at
program startup.
Page 77

Disable pressure support for puck-type pointing devices Mark
this check box to turn off the pressure sensitive features of pucktype pointing devices included with graphics tablets.
Setting Autosave Preferences
Paint Shop Pro can automatically save all open images on a set
schedule. These autosaved files can help you recover your work if
your computer crashes. When Paint Shop Pro starts after a crash, it
will open any autosaved files it finds.
Note
To find where Paint Shop Pro saves the autosaved files, select
File > Preferences > File Locations and select the
Undo/Temporary Files folder from the File Type list.
To set the autosave preferences:
1 Choose File > Preferences > Autosave Settings to open the
Autosave dialog.
Chapter 4: Customizing Paint Shop Pro
67
2 Set the options:
Enable autosave Mark this check box to activate the autosave
feature.
Minutes Set the number of minutes between each autosave.
Setting File Locations
Paint Shop Pro resources include such items as scripts, picture tubes,
patterns, gradients, displacement maps, and workspaces. The full
listing of resources displays along the left side of the File Locations
dialog. Paint Shop Pro saves and searches for resources in several
default folders on your computer. By changing File Locations
preferences, you can change where Paint Shop Pro looks for and
saves these resources. You can also control how plug-ins are used
and which Web browsers are used to preview your images.
Note: By default, all new files you create are saved in the
appropriate folder of the ...My Documents\My PSP Files folder.
Most default program resources are stored in the appropriate folder
in the path ...\Program Files\Jasc Software Inc\Paint Shop Pro 9.
Page 78

Chapter 4: Customizing Paint Shop Pro
68
Editing File Locations
Edit Paths: another way to
view file locations
You can open the File Locations
dialog by clicking the Edit Paths
button which appears in many
Paint Shop Pro dialogs.
The File Locations dialog controls where Paint Shop Pro looks for
and saves important files.
Changing File Locations
You can change where Paint Shop Pro to stores and retrieves specific
resources.
To change file locations:
1 Choose File > Preferences > File Locations to open the File
Locations dialog.
2 From the File types list on the left side, select the resource that
you want to change file locations for.
3 At the top of the dialog's right side you'll see the default folders
where the specified resource can be saved to.
Add Select a listed folder and then click this button (or click the
Browse for Folder button at the end of the selected folder) to add
another folder to the list. This will display the Browser for Folder
dialog, allowing you to navigate to and select another folder. To
create a new resource folder, click the Browse for Folder dialog's
Create New Folder button and then enter the folder name.
Remove Select a listed folder and then click this button to
remove the folder for the current resource category.
Select a folder and then click this button to move the folder
up the list.
Select a folder and then click this button to move the folder
down the list.
4 Use the options in the Folder options section to enable the folder
system as well as the subfolders. When these items are
unchecked, Paint Shop Pro will not be able to search for folders
and their subfolders.
5 In the Save to field, click the drop list and then click on the folder
where you want the current resource saved to.
6 Click OK to save your settings and return to Paint Shop Pro.
Important: To create a custom category for a particular resource,
Refer to the Creating a Custom Category section in this chapter.
Page 79

Chapter 4: Customizing Paint Shop Pro
Using the Resource Manager Dialog
Paint Shop Pro resources include such items as scripts, picture tubes,
patterns, gradients, displacement maps, and workspaces. The full
listing of resources displays along the left side of the File Locations
dialog. Using a consistent method for managing these resources can
make your workflow easier. This is where the Resource Manager
dialog comes in.
Accessing the Resource Manager Dialog
Wherever you find a Presets control (such as in the Tool Options
palette's Presets drop list for any tool, or in the Presets drop list for a
dialog), or the visual resource drop-list for resources such as Preset
Shapes, Gradients, etc., you'll find the Resource Manager button
. Click this button to access the Resource Manager dialog.
Deleting a Resource
1 If necessary , from the Category drop-list choose the category where
the resource resides.
69
2 Click the resource from the list.
3 Click the Delete button. You'll be prompted to verify that you
wish to proceed.
4 Click Yes to delete the resource.
Renaming a Resource
1 If necessary , from the Category drop-list choose the category where
the resource resides.
2 Click the resource from the list.
3 Click the Rename button. The Rename Resource dialog appears.
4 Enter the new name for the resource and then click OK.
Copying a Resource to Another Location
1 If necessary , from the Category drop-list choose the category where
the resource resides.
2 Click the resource from the list.
3 Click the Copy button. The Save As dialog appears.
Note: At this point, you could also rename the file via the Save
As dialog's File Name field.
Page 80

Chapter 4: Customizing Paint Shop Pro
70
4 Navigate to the folder where you want to move the resource, and
then click Save.
Moving a Resource to Another Location
1 If necessary, from the Category drop-list choose the category where
the resource resides.
2 Click the resource from the list.
3 Click the Move button. The Browse for Folder dialog appears.
4 Navigate to the folder where you want to move the resource, and
then click OK.
Note: If you move the resource to a location not currently listed in
the File Locations dialog, you won't see the resource in the visual
resource drop-list, nor in the Resource Manager dialog.
Creating a Custom Category
Create your own categories that will appear for a given resource as
follows:
1 Access the File Locations dialog using one of the following
methods:
Choose File > Preferences > File Locations; or
From the Presets area of a dialog, or Presets area of the Tool
Options palette, or from a resource's visual drop-list, click the
File Locations button.
2 In the File types list on the left side of the dialog, click the
resource for which you wish to create a new category folder.
3 In the File folders list, click once on the folder under which the
sub folder will reside.
4 In the Folder Options area of the File Locations dialog, make
sure the Enable and Use sub folders check boxes are marked, and
then click the Create Sub Folder button. This displays the Enter
Name dialog.
5 Enter a name for the sub folder, and then click OK to close the
Enter Name dialog.
6 (In the Save to field toward the bottom of the File Locations
dialog, note that the category you created automatically becomes
the folder where new resources of that type will be saved.) Click
OK to close the File Locations dialog.
Page 81

Chapter 4: Customizing Paint Shop Pro
To have the new category appear in the Categories drop-list, you
must first save a resource in the folder you just created, or use the
Copy or Move buttons described above to place a resource file in the
new folder.
Setting Plug-in Locations
Paint Shop Pro allows you to use Adobe compatible plug-ins. Use
the File Locations dialog to choose folders containing plug-ins and
control how plug-ins are used.
To control plug-in functions:
1 Choose File > Preferences > File Locations to open the File
Locations dialog.
2 From the File types list, select Plug-ins.
3 Set these options:
Enable plug-ins Mark this box to allow Paint Shop Pro to use
plug-ins.
71
Limit Loaded plug-in files to those with an .8B* extension
The .8B* extension is the most common plug-in extension. Clear
this check box to load plug-ins with other extensions.
Allow file format plug-ins to request pre-filtering of support file
types Some plug-ins can open files that Paint Shop Pro also
supports. Mark this check box to allow a plug-in to try to open
(pre-filter) the file before it opens in Paint Shop Pro.
To add plug-in locations:
1 Choose File > Preferences > File Locations to open the File
Locations dialog.
2 From the File types list, select Plug-ins.
3 Click the Add button. The Browse for Folder dialog appears.
4 Type the full path name of the folder you want to add and click
OK. This takes you back to the File Locations dialog.
5 Make sure the Enable option is checked in the Folder Options
section of the File Locations dialog, and then click OK.
Page 82

Chapter 4: Customizing Paint Shop Pro
72
Selecting a Web Browser
Paint Shop Pro allows you to preview your images with Web
browsers. Use the File Locations dialog to select which browser(s)
to use.
Another way to select Web
browsers:
Select View > Preview in Web
Browser to open the Preview in
Web Browser dialog. Click the Edit
Web Browser button.
To delete or edit Web browsers:
1 Choose File > Preferences > File Locations to open the File
Locations dialog.
2 From the File types list, select Web Browsers.
3 Select a browser from the list.
4 Click Edit to change the browsers location or Delete to remove
the browser from the list.
5 Click OK.
To add Web browsers:
1 Choose File > Preferences > File Locations to open the File
Locations dialog.
2 From the File types list, select Web Browsers.
3 Click Add to open the Browser Information dialog.
4 Type the full path name of the Web browser you want to add or
click the Browse button to find and select the program.
Type a different name in the Web Browser Name field if desired
and Click OK.
5 Click OK.
Page 83

Setting File Format Preferences
With File Format Preferences, you can specify how Paint Shop Pro
handles images in the following formats: Windows Metafile, Kodak
PhotoCD, PNG, PostScript, RAW Graphics, and Raw Camera Data.
Setting Raw Camera Data Preferences
To better support the prosumer digital camera user, Paint Shop Pro 9
now supports Raw camera data images. These images contain
unprocessed sensor data captured by high-end digital cameras from
Canon, Fuji, Kodak, Minolta, Nikon, Olympus, and Pentax.
Raw Camera Data Images vs. RAW (Graphics) File
Format Images
In order to avoid confusion, be aware that there is quite a difference
between Raw (unprocessed) camera data images and images in the
RAW graphics file format.
Chapter 4: Customizing Paint Shop Pro
73
Raw Camera Data Images
This help topic focuses on Raw camera data images produced by
high-end digital cameras. The data from these images in no way
resembles or responds like RAW graphics image data.
RAW (Graphics) File Format Images
RAW graphics images are basic raster data format images with no
compression, and may include an optional non-standard header
which is not supported by Paint Shop Pro. These graphics images are
used primarily by game developers and by the scientific community.
Game developers use RAW graphics images for custom image
texturing, bumpmapping, and shading. The scientific community
uses these images for custom application-based image analysis.
Paint Shop Pro is used not only to create and edit RAW graphics
images, but also to provide conversion from standard formats (such
as TIF, JPEG, or TGA) into the RAW graphics format.
Page 84

Chapter 4: Customizing Paint Shop Pro
74
Opening Raw Camera Data Images and RAW
Graphics Images
When you choose File > Open, and then check the options in the
Open dialog's Files of type field, you'll notice that RAW graphics
files are differentiated from Raw camera data images as shown here.
Setting Raw File Format Options
You may want the option of displaying a separate dialog for setting
sharpening, white balance, and exposure levels before the Raw
camera images open in Paint Shop Pro. Do this in the Raw Camera
Data tab of the File Format Preferences dialog.
1 Choose File > Preferences > File Format Preferences.
2 Click the Raw Camera Data tab.
3 Make sure the Prompt for override settings each time a raw
camera format is opened check box is marked.
4 Click OK to close the File Format Preferences dialog.
Now when you now attempt to open a Raw camera data image, the
Raw Camera Data dialog will appear, allowing you to override the
camera settings.
If this check box is not marked, the Raw Camera Dialog will not
appear prior to opening a Raw camera image.
Page 85

Chapter 4: Customizing Paint Shop Pro
Using the Raw Camera Data Dialog
1 If necessary, use the zoom in and zoom out buttons to modify the
image preview, and use the Pan button to determine what portion of
the image is shown in the preview area. You can also use one of the
Zoom level presets from the drop-list. To set the image zoom level
to 100 percent, click the button.
2 If you want to rotate the image, use the Rotate Left and Rotate
Right buttons to rotate in 90-degree increments.
3 If you expand the size of the dialog, click the button to
proportionally scale the image to fit the new window size.
4 The Sharpen Mode setting controls the contrast between adjacent
image pixels. Be aware that applying sharpening may introduce
noise in the image. Click the Sharpen Mode drop list and choose
a setting:
Low: applies a minor level of sharpening.
Normal: applies a moderate level of sharpening -- in some case
this may introduce image noise.
75
High: applies a high level of sharpening -- may introduce image
noise.
Standard: this is the camera-specific default level of sharpening.
Off: no sharpening will be applied.
5 The White Balance settings provide options for correcting the
color cast certain types of lighting may cause. If the photo was
shot indoors in fluorescent lighting, for example, and the camera
was set for outdoor lighting conditions, the photo may have a
green color cast. In this case, you could choose Fluorescent to
correct this problem. Click the White Balance drop list and
choose a setting:
As Shot: uses the camera settings enabled when the photo was
taken.
Incandescent: applies correction for a photo taken in
incandescent light.
Fluorescent: applies correction for a photo taken in fluorescent
light.
Sunny: applies correction for a photo taken in sunlight.
Cloudy: applies correction for a photo taken in cloudy conditions.
Shade: applies correction for a photo taken in the shade.
Flash: applies correction for a photo taken with camera flash.
Page 86

Chapter 4: Customizing Paint Shop Pro
76
6 Use the Exposure compensation numeric edit control to set an
exposure value. (The default value is 1.0.) The values range from
-2.0 to 2.0; lower values will darken the image, while higher
values will lighten the image.
7 When you're satisfied with the settings, click OK to open the Raw
camera image into the Paint Shop Pro workspace.
Setting Kodak PhotoCD Preferences
The Kodak PhotoCD format (PCD) is used by many photo
developers. This format can provide multiple image resolutions in
one file.
To set PCD file format preferences:
1 Choose File > Preferences > File Format Preferences to open the
File Format Preferences dialog.
2 Click the PCD tab.
3 Choose:
A default resolution setting. For example, 1536 x 1204 pixels.
Ask when loading each file PSP will ask you to pick a default
resolution each time you open a PCD file.
4 Click OK.
Setting Postscript File Preferences
Paint Shop Pro can read PostScript files (including multi-page files)
through level 2 and open them as raster images. When converting,
Paint Shop Pro can anti-alias objects and retain transparency
information.
To set PostScript file import preferences:
1 Choose File > Preferences > File Format Preferences to open the
File Format Preferences dialog.
2 Click the PostScript tab.
3 Choose a prompt setting:
Page 87

Chapter 4: Customizing Paint Shop Pro
Prompt for size and options each time a PostScript file is opened
When you mark this check box, Paint Shop Pro will ask you to
choose settings for each PostScript file you open. Clear this
check box to use the Size and Options when not prompting
settings for all opened PostScript files.
4 If necessary, choose non-prompting options:
Resolution Set the resolution for the converted raster image
Image mode Select a mode from the drop-down list.
Page Size Select a page size from the drop-down list.
By default, if a PostScript file has a bounding box, the program
will match the canvas size to the bounding box.
Landscape Mark this check box to switch the page orientation to
landscape. The default is portrait. This option does not rotate
your images; only use this option for landscape PostScript files.
Anti-aliasing Mark this box to anti-alias PostScript objects as
they are converted to raster images.
Render transparency Clear this check box to use a white
background instead of the default transparent background.
77
Setting RAW Graphics File Preferences
Paint Shop Pro can read and save RA W graphics image formats. This
format (which is not to be confused with Raw Camera Data images)
is commonly used in graphics images in the scientific and computer
gaming industries.
To set RAW graphics file preferences:
1 Choose File > Preferences > File Format Preferences to open the
File Format Preferences dialog.
2 Click the RAW (Graphics) tab.
3 Set the Save options:
Header size Sets header size of the file.
Flip top and bottom Mark this box to flip the image upside down.
4 Set the 24 bit options:
RGB order or BGR order Choose the color order.
Planar mode Clear this box to turn off planar mode.
Page 88

Chapter 4: Customizing Paint Shop Pro
78
Setting Metafile Preferences
Windows Meta File (WMF) is the Microsoft Windows native vector
format.
To set WMF image preferences:
1 Choose File > Preferences > File Format Preferences to open the
File Format Preferences dialog.
2 Click the Metafile / Import tab.
3 Choose from the two Load options:
Prompt for size and options each time a file is opened When you
choose this option, Paint Shop Pro will ask you to choose settings
for each WMF image you open.
Use file header information when available Some WMF files
have a file header containing default size information. Choose
this option to use the file header default size (if available). If you
open a file without a header, the size defaults to the values you
type in the Default size when file header is not available group
box.
4 Choose the following options:
Import vector data Mark this check box to import WMF vector
data as objects you can edit with vector tools. Clear this check
box to convert all vector objects to raster images.
Apply smoothing Mark this check box to smooth curved
polylines (vector data only).
Setting PNG Preferences
Set preferences for opening and saving PNG files as described
below.
1 Choose File > Preferences > File Format Preferences. The File
Format Preferences dialog appears.
2 Click the PNG tab.
3 Mark the Load and Save transparency to/from Alpha channel
option to enable feature for PNG files.
Page 89

Setting File Format Associations
File format associations control how Paint Shop Pro will interact
with many types of file formats.
Adding and Removing Associations
Chapter 4: Customizing Paint Shop Pro
79
What if I want to open a file
in another program?
When you associate a file format
with Paint Shop Pro, you can still
open that format in other
programs. Just use the other
program’s Open command.
You can have certain file formats automatically open in Paint Shop
Pro. For example, when you associate the JPEG file format with
Paint Shop Pro, all JPEG files will open in Paint Shop Pro when you
double-click them from the Windows desktop. The associated JPEG
files will also display Paint Shop Pro icons.
To associate a file with Paint Shop Pro:
1 Choose File > Preferences > File Format Associations to open the
File Format Associations dialog. Do any of the following:
To associate a specific file format, mark the format’s check
box.
To associate all listed formats, click the Select All button.
To associate all listed formats that are not already associated
with other applications, click the Select Unused button.
To associate no file formats with Paint Shop Pro, click the
Remove All button.
2 Click OK.
Note
To add or remove file extensions you want associated with the
selected format, see “Changing File Format Extensions” below.
Changing File Format Extensions
Note
File format extension changes will not take effect until the next time
you start Paint Shop Pro.
To set file extensions:
1 Choose File > Preferences > File Format Associations to open the
File Format Associations dialog.
2 Select the file format that contains the extensions you want to
set.
Page 90

Chapter 4: Customizing Paint Shop Pro
80
3 Click the Extensions button to open the Extensions dialog. The
preferred extension (the extension that Paint Shop Pro will use to
save files) is at the top of the list.
4 Do one of the following:
To add a file extension, click the Add button. Type in the new
extension and click OK.
Note: File extensions that have been associated with Paint
Shop Pro will have an asterisk (*) after the name.
To delete a file extension, select the extension from the list
and click Delete.
To reset a format to its default extension(s), select the
extension from the list and click Reset.
To make an extension the preferred choice, select the
extension and click Preferred. The extension will move to the
top of the list.
5 Click OK.
Resetting Application Preferences
Various program preferences can be reverted back to their defaults.
To reset application preferences:
1 Choose File > Preferences > Reset Preferences to open the Reset
Application dialog.
2 Select from these choices:
Reset general preferences Mark this check box to reset all
general program preference settings to the program defaults.
Reset file locations Mark this check box to reset all file location
settings to the program defaults.
Reset workspace to default configuration Mark this check box to
reset the current workspace to the program defaults.
Reset dialog positions and last used settings When you mark
this check box, any dialogs that open will appear in their default
locations. Also, Paint Shop Pro will forget the last settings you
used in all dialogs.
Page 91

Chapter 4: Customizing Paint Shop Pro
Delete all cache files Mark this check box to delete (reset) all
existing cache files. Paint Shop Pro saves cache files on your
computer to improve program performance. Cache files can
become corrupted by computer errors.
Make all toolbars/palettes visible and on screen Mark this check
box to view all toolbars and palettes.
3 Click OK.
Assigning and Viewing Shortcut Keys
You can view existing keyboard shortcuts, assign a keyboard
shortcut to menu commands, bound scripts, and tools, and even
modify keyboard shortcuts.
To assign shortcut keys to commands and tools:
1 Choose View > Customize to open the Customize dialog.
2 Click the Keyboard tab.
81
3 In the Set Accelerator for drop-list, pick which application’s
shortcuts you want to assign. Choose Default (for Paint Shop
Pro’s main workspace) or Browser (for when the Image Browser
is active)
4 In the Category drop-list, select a category. Paint Shop Pro
groups related commands into categories. For example, if you
pick the File category, all the commands in the file menu are
displayed. To list all commands at once, choose All Commands.
5 In the Command list, select a command name.
6 The description of the command and any assigned shortcut keys
are displayed.
7 Click in the Press New Shortcut Key field.
8 Press the new keyboard shortcut you want to assign to the
command. The shortcut will appear in the Press New Shortcut
Key field. If the shortcut is already assigned to another
command, this will display above the field.
9 Click Assign to assign the new shortcut to the selected command.
10 Assign more shortcut keys, or click Close.
To assign a shortcut key to a bound script:
1 Choose View > Customize to open the Customize dialog.
Page 92

Chapter 4: Customizing Paint Shop Pro
82
2 Click the Keyboard tab.
3 In the Set Accelerator for drop-down list, pick which
application’s shortcuts you want to assign. Choose Default (for
Paint Shop Pro’s main workspace) or Browser (for when the
Image Browser is active).
4 In the Category drop-list, select Bound Script. (Note that the
Bound Scripts that appear in the Commands list match what
appears in the Bound Scripts list of the Scripts tab.)
5 In the Commands list, select the bound script to which you want
to assign a keyboard shortcut.
6 Click in the Press New Shortcut Key field.
7 Press the new keyboard shortcut you want to assign to the bound
script. The shortcut will appear in the Press New Shortcut Key
field. If the shortcut is already assigned to another command, this
will display above the field.
8 Click Assign to assign the new shortcut to the selected bound
script.
9 Assign more shortcut keys as described above, or click Close.
To view all shortcut keys:
1 Choose Help > Keyboard Map to open the Help Keyboard dialog.
2 In the Show Accelerator for drop-down list, pick which
application’s shortcuts you want to view. Choose Default (for
Paint Shop Pro’s main workspace) or Browser (for when the
Image Browser is active)
3 In the Category drop-down list, select a category. Paint Shop Pro
groups related commands into categories. For example, if you
pick the File category, all the commands in the file menu are
displayed. To list all commands at once, choose All Commands.
The commands and their shortcut keys are displayed in the list,
sorted by command name. Click any column heading (Command,
Keys, or Description) to sort alphabetically by that column.
Note: T o print the list of the current category of shortcut keys,
click Print in the Keyboard Map dialog’s toolbar. To select
commands and copy their information to the clipboard, click
Copy .
4 When you are finished viewing keys, click the Close button in
the upper right corner of the dialog’s title bar.
Page 93

Chapter 4: Customizing Paint Shop Pro
To modify a keyboard shortcut:
1 Choose View > Customize to open the Customize dialog.
2 Click the Keyboard tab.
3 In the Category drop-list, choose the menu associated with the
command, script, or tool for which you want to modify the
keyboard shortcut.
4 In the Commands list, click the item for which you want to
modify the keyboard shortcut.
5 In the Current Keys field, click once on the shortcut to highlight
it, then click the Remove button located along the bottom of the
dialog.
6 Click inside the Press New Shortcut Key field so the cursor is
blinking, and then press the desired keyboard keys you wish to
assign as the new shortcut. (For example, hold down the Alt key
and press Q; you'll then see Alt + Q in the Press New Shortcut
Key field.) If the keyboard combination you entered is already
assigned, this will be displayed above this field. If the keyboard
combination is not assigned, you'll see "Assigned to: " above this
field. If you make a mistake entering the keyboard combination,
just start over with the correct key since pressing Delete or
Backspace will not erase what you entered.
7 When you're ready to assign the keyboard combination, click
Assign.
83
8 Click Close to close the Customize dialog.
Adjusting General View Options
The Menu and Options tabs of the Customize dialog control a
variety of general menu and toolbar features.
Menu Tab
Menu animations Choose an animation style for menu opening
and closing from the drop-down list.
Menu icons Clear this check box to hide the Menu Bar icons.
Page 94

Chapter 4: Customizing Paint Shop Pro
84
Options Tab
Toolbars and Palettes
Show Screen Tips on toolbars Clear this check box to hide the
ToolTips that appear over tools and buttons.
Show shortcut keys in Screen Tips Clear this check box to hide
the shortcut key (if available) that appear in ToolTips.
Large icons Mark this check box to display larger toolbar icons.
Use Quadrant Rollups Mark this check box to have floating
palettes roll up toward the nearest quadrant of the workspace.
Personalized Menus and Toolbars
Menus show recently used commands first Mark this check box
to have Paint Shop Pro simplify its menus to show only recently
used commands. You can expand the menus by clicking the
expansion button.
Show full menus after a short delay If menus are only showing
the most recent items, all items will appear in a moment.
Reset my usage data Click this button to erase the memory of
your recently used menu commands.
Adjusting Monitor Display Options
Calibrating Your Monitor
To get the best results when working with Paint Shop Pro, you need
to properly calibrate your monitor. Calibrating the monitor improves
image quality and allows others to view your images as you intend.
How often should I calibrate
my monitor?
Monitor performance can change
over time, so it’s best to calibrate
your monitor every few months.
To calibrate your monitor, you need an on-screen aid that helps you
adjust the monitor’s brightness and contrast. The Jasc Web site
provides an on-screen aid as well as detailed instructions for
calibration. Go to the Support section of www.jasc.com.
Page 95

Chapter 4: Customizing Paint Shop Pro
Adjusting the Monitor Gamma Setting
85
Note about Color
Management
If you enable Windows Color
Management, Paint Shop Pro
ignores the monitor gamma
preference setting.
Paint Shop Pro’s monitor gamma setting adjusts how colors display
in Paint Shop Pro. This setting does not affect how your monitor
displays colors in other applications.
Most users should not adjust the monitor gamma setting. If you
make color corrections after you change the monitor gamma, the
colors may look distorted on other monitors or in applications other
than Paint Shop Pro.
To adjust the monitor gamma:
1 Choose File > Preferences > Monitor Gamma to open the Monitor
Gamma Adjustment dialog.
2 Lean away from your monitor and look at the red, green, blue,
and grey rectangles. Each color contains an inner, solid color
rectangle and outer, patterned rectangles. On a correctly adjusted
monitor, the inner rectangles are difficult to distinguish from the
outer rectangles.
3 Do one of the following:
To adjust the red, green, and blue values in unison, mark the
Link channels check box.
To adjust the values individually, clear the Link channels
check box.
4 For each color (or for all colors if they are linked), drag the slider
until the inner rectangle seems to blend into the outer rectangle.
Note: If you have difficulty getting the inner rectangle to blend
into the outer rectangle, your monitor may be too old and faded.
5 Click OK.
Note: Click Reset to return no gamma adjustment (1.00).
Using Windows Color Management
Color Management is a feature in Windows 98 or later that improves
color consistency and accuracy between images displayed on
monitors and printed on paper. Color Management also allows you
to preview how images will look when printed on a specific color
printer. Color Management is generally not used for Web images
because most Web browsers don’t use Color Management.
Page 96

Chapter 4: Customizing Paint Shop Pro
86
When to use Color
Management
You need to use Color
Management if any of the following
are true:
Your pre-press provider requires
specific color values for a known
set of printing conditions.
You are using the same color
graphics for printing on a printer
and displaying on a monitor.
You plan to use international and
domestic printing presses.
In order for Windows Color Management to work effectively, you
must have proper color profiles for all the devices you are using.
To create proper monitor and printer profiles, you must use thirdparty color profiling tools that include software or hardware for
determining how your monitor and printer produce color. If you do
not have custom monitor and printer profiles, using Color
Management is not recommend. For more information on Color
Management, please refer to your Windows documentation.
To use Color Management:
1 Choose File > Preferences > Color Management.
2 Mark the Enable Color Management check box.
3 Choose an option:
Basic color management Adjusts how the monitor displays
colors and how the printer produces colors. Most users should
choose this option.
Proofing Previews on the monitor how colors will appear on a
particular device. This option is best at representing the
limitations of a particular output device, such as a printer.
4 Select the printer and monitor profiles for your devices in the
drop-down lists.
5 For Rendering Intent, select the approach used to map image
colors to the color gamut of your monitor or printer. The
available options depend upon your Windows system. For
detailed descriptions, see your Windows documentation.
6 If you selected the Proofing option, select the Emulated device
profile (the profile of the output device) and the Rendering
Intent.
7 Click OK.
Page 97

CHAPTER 5
Improving Photographs
Once you have photos in Paint Shop Pro, the next step is to correct
any problems with the images. Sometimes the problems are obvious,
such as when the subject is too dark. Sometimes, you know that the
picture could look better, but you don’t know what to fix. This
chapter will help you determine what needs improvement in a photo
and show you how to improve it.
87
Contents
Note
All commands mentioned in this chapter work on 16 million color
and greyscale images only. To increase the color depth of an image,
see “Increasing the Color Depth of an Image” on page 261.
Basic Steps in Improving Photographs . . . . . . . . . . . . . . . . . . . . 88
Using the Digital Camera Noise Removal Filter . . . . . . . . . . . . . . 89
Using the Chromatic Aberration Removal Filter . . . . . . . . . . . . . . 92
Using the Fill Flash Filter. . . . . . . . . . . . . . . . . . . . . . . . . . . . . . 95
Using the Backlighting Filter . . . . . . . . . . . . . . . . . . . . . . . . . . . 96
How to Approach Color, Contrast, and Saturation Adjustments . . 96
Fixing Photos in One Step . . . . . . . . . . . . . . . . . . . . . . . . . . . . . 97
Correcting Image Distortions . . . . . . . . . . . . . . . . . . . . . . . . . . . 97
Improving Colors. . . . . . . . . . . . . . . . . . . . . . . . . . . . . . . . . . . 100
Improving Contrast . . . . . . . . . . . . . . . . . . . . . . . . . . . . . . . . . 106
Improving Image Clarity. . . . . . . . . . . . . . . . . . . . . . . . . . . . . . 107
Improving Saturation . . . . . . . . . . . . . . . . . . . . . . . . . . . . . . . . 109
Removing Image Defects and Noise . . . . . . . . . . . . . . . . . . . . . 110
Removing Source Defects . . . . . . . . . . . . . . . . . . . . . . . . . . . . 114
Retouching Photographs . . . . . . . . . . . . . . . . . . . . . . . . . . . . . 117
Page 98

Chapter 5: Improving Photographs
88
Basic Steps in Improving Photographs
Paint Shop Pro contains many features you can use to enhance your
photos. Whenever you work on photos, you should follow the same
basic steps in a specific order to get the best results. This is
necessary because some later actions remove image data that is
needed to successfully complete earlier steps.
Improving Photographs
Identify the steps you may need to take to improve your photos.
1 Calibrate your monitor to ensure that screen and print images
match as closely as possible and that colors are consistent from
image to image. For more information, refer to Calibrating Your
Monitor in Chapter 4.
Analyzing images using the
histogram
For image editing professionals,
the histogram and its
accompanying adjustment features
are powerful tools for
understanding and correcting
images—especially those with
contrast or brightness problems.
For casual users, getting familiar
with the histogram may not be
necessary because Paint Shop Pro
offers many simpler ways to adjust
images. For information about
using the histogram to analyze
your photos, see “Using the
Histogram to Analyze Images” on
page 145.
2 Improve colors, contrast, and saturation. Use Paint Shop Pro’s
automatic adjustment commands or use the manual adjustments
to make initial corrections to your images. Refer to How to
Approach Color, Contrast and Saturation Adjustments later in
this chapter.
3 Remove "noise" image artifacts often present in digital photos.
Refer to Using the Digital Camera Noise Removal Filter later in
this chapter.
4 Remove color aberrations often present in digital photos. Refer to
Using the Chromatic Aberration Removal Filter later in this
chapter.
5 Quickly correct problems caused by too much flash or not
enough flash. Refer to Using the Fill Flash Filter and Using the
Backlighting Filter later in this chapter.
6 Correct defects caused by the image source, including unwanted
patterns on scanned images and undesirable lines on video
frames. Refer to Removing Source Defects later in this chapter.
7 Correct image defects, such as black or white specks, and image
distortions caused by camera lenses. Refer to Removing Image
Defects and Noise later in this chapter.
8 Retouch photos, including removing scratches and red-eye
effects on people and animals. During this step you can also
remove unwanted highlights and objects from your photos. Refer
to Retouching Photographs later in this chapter.
Page 99

Chapter 5: Improving Photographs
9 Clarify and sharpen images. Refer to Improving Image Clarity
later in this chapter.
10 Remove red eye from your photo. Refer to Removing Red Eyes
later in this chapter.
Using the Digital Camera Noise Removal Filter
The tiny, non-uniform speckles that can sometimes appear in digital
photos are referred to as "noise." These unwanted image artifacts
usually derive from inevitable sources such as JPEG file
compression, or even as a result of electronic fluctuations inside a
digital camera. A good example would be a photo of a clear blue sky.
Zooming in may reveal tiny specks of color that you know are not
present in the sky. You can use this filter to identify and remove
noise while preserving detail smaller than the noise itself.
In addition to scanning and identifying three potential noise regions
(in the highlight, midtone, and shadow regions of the image), the
Digital Camera Noise Removal filter lets you target additional image
areas for noise removal. This filter works on the entire image, or on
a selection.
89
Camera Presets and Standard Presets
This filter gives you the option of creating a Camera preset. When a
Camera preset option is checked, the Presets drop-list will only
display these special types of presets. When you load a camera
preset, the image is not sampled at all, but instead the camera preset
settings are applied. You can still create additional sampling regions,
however. Using a camera preset is recommended when your camera
produces consistent noise patterns across each image. Camera
presets tend to work well on similar photos, such as photos of
people.
When you do not use a camera preset, the filter will scan your image
(or selection) and determine potential areas needing correction by
placing sampling regions in the highlight, midtone, and shadow
regions.
Like other dialogs and tools, you can also save and load standard
presets for this filter. When you load a standard preset, the filter will
use the preset's dialog settings, but will still scan the image and place
the three sampling regions.
Page 100

Chapter 5: Improving Photographs
90
Typical Uses for this Filter
Here are some scenarios in which this filter could be an ideal
solution:
For photos you know are going to contain excessive noise (such
as a video whiteboard capture), use the filter with low settings to
help make the overall image clearer without excessive blurring.
For photos taken with normal settings yet still having image
artifacts surrounding the subject area, use this filter to target just
these key areas needing correction.
For photos taken with the same camera that tend to have noise in
the same area, use this filter to create a camera preset that can be
applied to all images from the camera.
For higher-end photography, use the options in the filter's Protect
Image tab to specify the color ranges to preserve or discard.
Lower-end cameras tend to produce more noise than higher-end
cameras.
Note that in some cases, using the JPEG Artifact Removal filter
before using this filter (or instead of using this filter) can yield
good results. Be aware also that the Digital Camera Noise
Removal filter is not designed to remove moire patterns.
Accessing and Using the Filter
1 Choose Adjust > Photo Fix > Digital Camera Noise Removal.
2 Note the three crosshairs placed on the image preview in the
Remove Noise tab (not in the normal preview area in the top half
of the dialog). These represent noise samples (as determined by
the filter) located in the image's light, midtone, and dark areas.
Click a crosshair to view its sampling region in the upper left
preview window.
To move a crosshair, hold down the right mouse button and
drag the crosshair to a new position. The sampling region will
move accordingly.
 Loading...