Page 1

Paint Shop Pro 9 Reviewer’s Guide
Paint Shop Pro 9
™®
Reviewer’s Guide
Page 2

Paint Shop Pro 9 Reviewer’s Guide
Introduction
New Paint Shop Pro 9 challenges users to stretch the limits of their imagination. These users
know what they want – whether it’s a photo, graphic, or digital art; Paint Shop Pro 9 is going to
help them get that vision they have in mind out of their head and onto the screen.
Regardless of what kind of pictures they are taking, photographers all have one thing in common
and that’s a desire for tools that give them the best results possible. Paint Shop Pro 9 provides
these precise tools. It offers infinite editing possibilities for photos that will pop.
But Paint Shop Pro 9 isn’t just for digital photographers. With it’s sophisticated graphic design
and art media tools, it appeals to graphic artists, business professionals, digital artists, and Web
designers alike. With Paint Shop Pro, these users get the tools they need to push their
imagination and express them selves through any medium they choose.
Let us introduce the newest advanced tools for advanced imaginations.
New Features
· Digital Camera Noise Removal Filter
· Raw Camera Image Support
· Chromatic Aberration Removal Filter
· Fill Flash Filter
· Backlighting Filter
· Art Media
· Tools
· Materials
· Mixer Palettes
· Symmetric Shape Tool
· History Palette
· Selective Undo
· Resource Categorization
· Vertical Text
· Radial Blur filter
· Add captions in print layout
Page 3

Paint Shop Pro 9 Reviewer’s Guide
New Feature Highlights
Everything users need is right here. There’s a lot packed into this program but we know their
imaginations are ready for the challenge.
Photo
Unlimited: Infinite editing possibilities help users create photos that pop
New, in Version 9 are professional-strength photo editing filters that will reduce the time spent
producing the results photographers demand in their photos. These tools include the Chromatic
Aberration Removal Filter, Noise Rem oval Filter, and the Fill Flash and Backlighting Filters.
Version 9 also supports RAW camera images, allowing you to set custom white balance,
exposure, and sharpening levels when converting raw camera images.
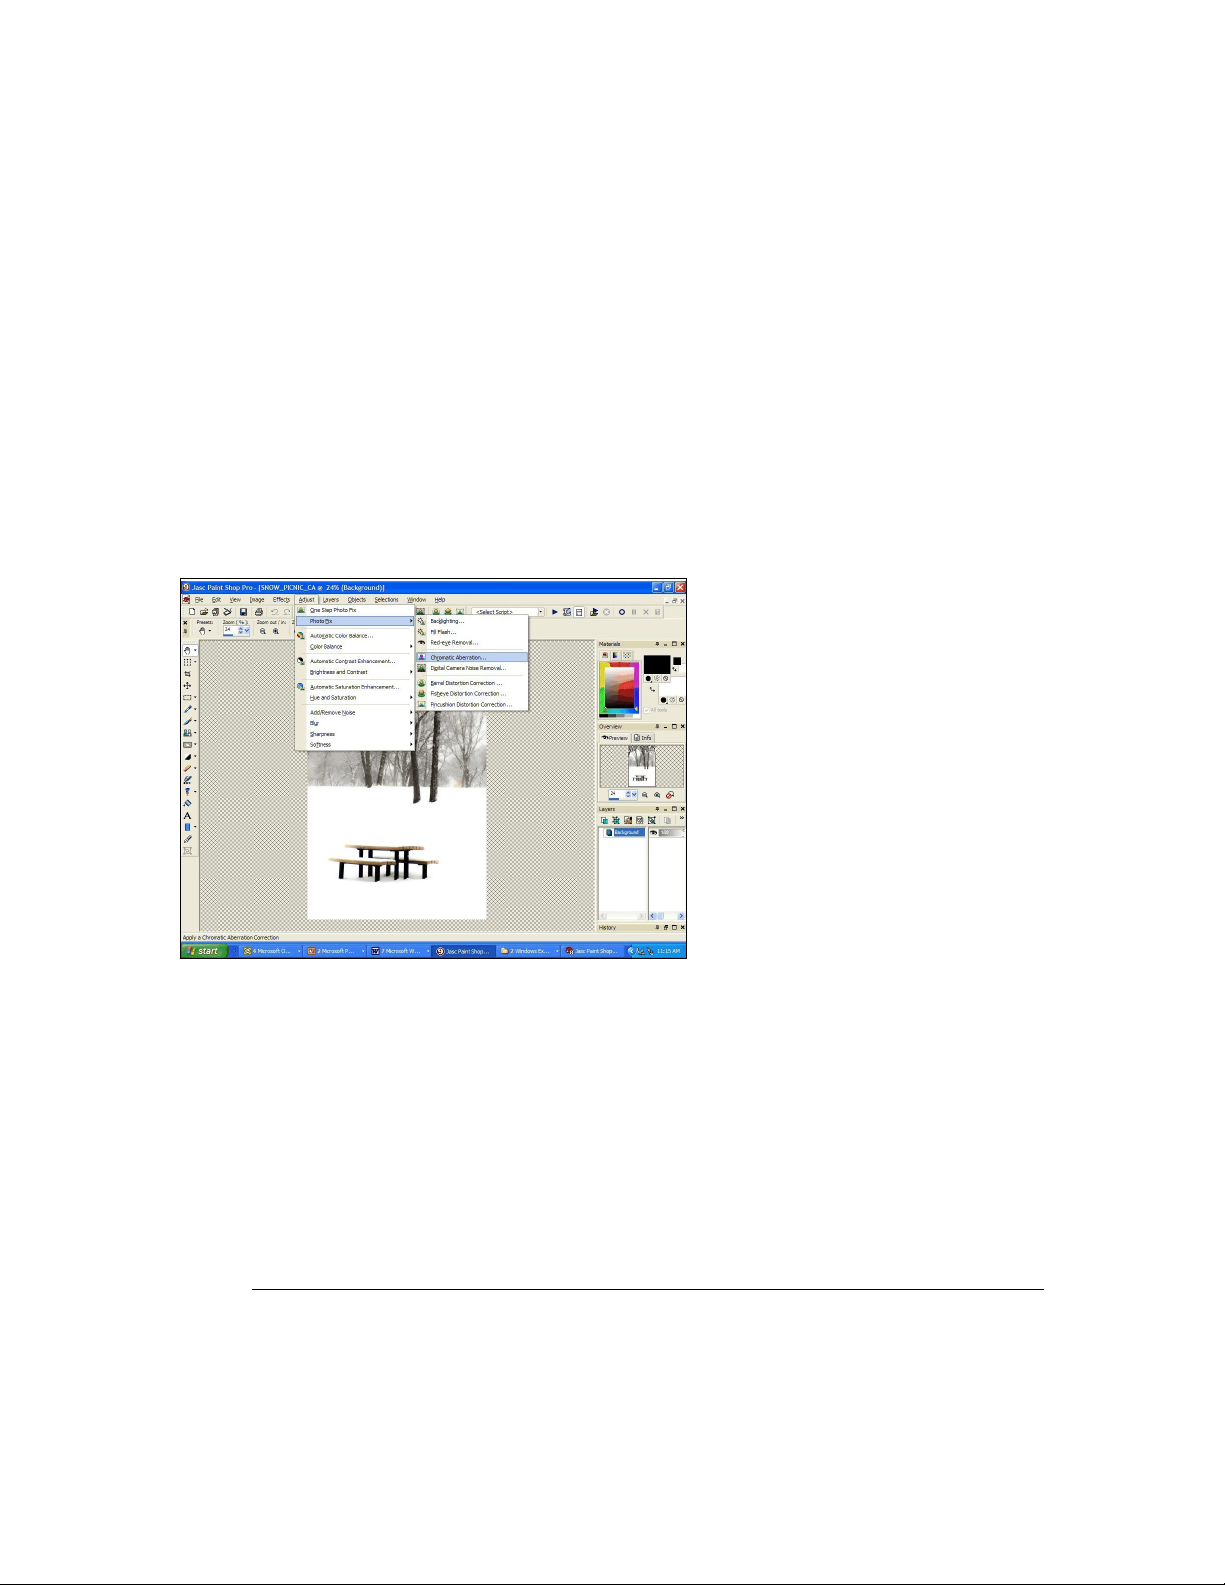
· The Chromatic Aberration Removal Filter eliminates the colored glow that often appears in
the high-contrast areas of digital photos.
To use this filter choose Adjust >
Photo Fix > Chrom atic
Aberration.
Note: It's critical in using this
dialog that the preview windows
are shown. Make sure the
Show/Hide Previews button is
active.
Use the Zoom in, Zoom out, or
navigate buttons to zero in on the
problem area. In the left preview
window define the range by
dragging the cursor to enclose
problem area(s). Mark the Show
Differences check box to show
which image areas will be affected. The affected areas will appear in the right preview
window as white areas on black. The brighter (whiter) the area, the higher the degree of
correction that will be applied.
Note: If Show Differences is marked, click the Auto Proof or the Proof button to
preview the results on the image itself.
Set the Radius (located to the left of the List of Samples area). The default value is 10.
Usually values in the range of 4 to 20 produce the m ost acceptable results.
Mark the Result on New Layer box if you would like to automatically create a new
raster layer and protect your original. Click OK to apply the corrections.
Page 4

Paint Shop Pro 9 Reviewer’s Guide
The tiny, non-uniform speckles that sometimes appear in digital photos are referred to as "noise."
The Digital Camera Noise Removal Filter scans photos and removes noise while intelligently
preserving the photo’s textures. The noise removal can be customized by defining specific regions
or color ranges, and the results can be saved to use later on other photos.
To use this filter choose Adjust > Photo Fix
> Digital Camera Noise Removal.
Define your sample areas by moving the
correction boxes and/or creating new ones in
the left preview pane. Adjustments can be
made on the Remove Noise tab. Use the
Sharpening setting to sharpen the image after
the noise reduction is applied.
To save the current settings as a preset specific
to this image and camera, mark the Camera
preset check box, and then click the Save
button found in the Presets drop-down at the
top of the dialog.
The Backlighting Filter allows you to darken the bright, overexposed areas of a photo. To use
this choose Adjust > Fix Photo > Backlighting Filter. If you have a photo that has just
enough of a problem with too-light areas as well as too-dark areas, try running the Backlighting
Filter on the photo, followed by the Fill Flash Filter. The lighter areas will be darkened. Use
the Strength value to determine how much backlight or fill flash to add.
Page 5

Paint Shop Pro 9 Reviewer’s Guide
Art
Unleashed: Art tools that will push imaginations to their limit
Create digital works of art with brush tips and tools that accurately emulate real-world media and
painting styles. To use the new art media tools open a new image, then choose the art media
tool you want to use from the Tools Toolbar. Once you select a tool, adjust the appropriate
options on the Tool Options palette.
Working in conjunction with the Mixer palette, the Art Media tools let
you create digital artwork that closely mimics real-world media,
pigments, paints, and artist's
tools. The Oil Brush creates
realistic paint strokes, while
the Chalk, Pastel, Crayon,
Colored Pencil, and Marker
tools are used for making drypigment art.
Realistically mix paints using
the Palette Knife and Smear
Tool on many different canvas
textures. You can even define
the paint wetness and dry
time.
The Mixer Palette allows you to mix any number of colors into a single paint swatch in a
manner similar to a traditional artist's palette. With this off-canvas palette, you can mix and
experiment with colors just like a real palette, and then use your art media brushes to make
realistic strokes simulating the results you get with paint, pastel, pencil, and chalk.
Artists can also use the Image Tracing option as an easy way to paint a photograph or other
image using realistic brush strokes.
Page 6

Paint Shop Pro 9 Reviewer’s Guide
The new Materials Palette provides a more intuitive method of setting color.
Graphics
Unconfined: Sophisticated graphic design tools help users express themselves.
Creating vector shapes has never been easier or more powerful. Paint Shop Pro 9 has added new
functionality to our precision graphic design capabilities. Three new tools, the Rectangle, Ellipse,
and Symmetric Shape, provide all of the controls you need to create buttons, banners, polygons,
or any other kind of rectangle or ellipse custom shape.
The Text tool now provides a vertical text layout option, updates to the text on a path feature, as
well as new anti-alias rendering options that generate cleaner text at smaller font sizes.
The new Rectangle Tool – let’s you design
buttons, banners and other custom graphics
with rounded corners you control.
To use this tool, select the Rectangle Tool
from the Tools toolbar. Set your
Foreground/Stroke and Background/Fill
properties in the Materials palette.
In the Tool Options palette's Mode section,
choose either Draw Rectangle or Draw
Square
Drag the cursor to draw the shape. To edit,
simply click the Edit button.
The Sym m etric Shape Tool lets you create regular polygons that can be turned into custom
sh a p es.
To use this tool, choose either
Draw Polygon or Draw
Stellated. Set your
Foreground/Stroke and
Background/Fill properties in
the Materials palette.
Drag the cursor to draw the
symmetric object. To edit the
object click, the Edit button.
Page 7

Paint Shop Pro 9 Reviewer’s Guide
Text in Paint Shop Pro 9 now includes the option to use vertical text. To use add text, select the
Text Tool on the Materials palette and make the desired Foreground/Stroke property and
Background/Fill property settings. Then choose the type and direction of text on the Tool
Options Palette.
The Displacement Map allows you to warp or displace an image based on the contents of
another image.
To use this tool, Choose Effects > Distortion Effects > Displacement Map. Choose an
image to use as the displacement m ap, stretch or tile
to cover the image and set the blur.
Page 8

Paint Shop Pro 9 Reviewer’s Guide
Productivity
Unrestrained: Flexible, customizable, intuitive tools help users work smarter
Along with Paint Shop Pro’s existing time savers, Version 9 features several industry innovations
that greatly reduce time spent on production tasks. These include the History Palette and
Selective Undo, which when used together help you manage and save time on complex editing
projects.
The History Palette lists each
command you apply to the active
image. The most recent action
appears at the top of the list. You
can then selectively undo any
command without affecting
subsequent commands.
With the History Palette you can
select any number of steps (even
non-sequential steps) and save
them to the clipboard, as a
Quickscript.
Paint Shop Pro 9 includes Resource Categorization, which lets users organize their Paint Shop Pro
resource files by projects or subjects in flexible resource categories.
Adding Text Options in print layout makes it easier than ever to add captions and titles to photo
layouts. Or add Image Information and EXIF data to describe photos and graphics. To use this
tool, open the image(s) that you would like to print. Then choose File > Print Layout.
Drag the images into the layout area on the right, or load an existing template and drag your
images into the template's cells. In the Print Layout toolbar, click the Text Tool, or choose
Image > Text Field. Drag the cursor to create the text box. When you release the mouse, the
Text Field dialog will appear. Enter the text you want to appear on the printed page.
The Im age Browser now contains two tabs, Find and Info, in the left side of the Browser
window. The Find tab contains the familiar Windows Explorer-like navigation view, and the Info
tab displays image information, creator data, and EXIF data. Additionally, with the Browser
active you can choose File > Sort and use the Sorting dialog to sort images by EXIF data.
Page 9

Paint Shop Pro 9 Reviewer’s Guide
MINIMUM SYSTEM REQUIREMENTS
- 300 MHz processor or faster
- Microsoft Windows 98SE, 2000 (SP4), ME, XP
- 256 MB of RAM
- 500 MB of free hard drive space
- 16-bit color display adapter at 800x600 resolution
- Microsoft Internet Explorer 6.0 or later
RECOMMENDED SYSTEM CONFIGURATION
- 1.0 GHz processor or faster
- Microsoft Windows XP
- 512 MB of RAM
- 500 MB of free hard drive space
- 32-bit color display adapter at 1024x768 resolution
- Microsoft Internet Explorer 6.0 or later
About Corel
Corel Corporation provides innovative software solutions that help millions of value-conscious
businesses and consumers in over 75 countries improve their productivity. The Company is
renowned for its powerful software portfolio that combines innovative photo editing and graphics
creation, vector-illustration and technical-graphics applications along with office and personal
productivity solutions. Corel's flagship products include the CorelDRAW® Graphics Suite, the
WordPerfect® Office Suite, the Corel Painter Natural-Media® painting and illustration software
and the Paint Shop™ Family of digital photography and image-editing software.
Corel was acquired by San Francisco-based Vector Capital in August 2003, and since that time,
has re-established growth for its flagship product lines and achieved multiple consecutive
quarters of corporate profitability. Founded in 1985, Corel is headquartered in Ottawa, Canada.
For more information, please visit www.corel.com.
Media Contact:
Catherine Hughes
Paint Shop Public Relations
Corel Corporation
1600 Carling Avenue
Ottawa, Ontario
Canada
K1Z 8R7
Phone: 613-728-0826 x 1659
Email: catherine.hughes@corel.com
 Loading...