

Page 1
The ultimate digital sketching and painting tool
™
USER MANUAL
Page 2

Copyright 1991–2003 Corel Corporation. All rights reserved.
Corel® Painter™ 8 User Guide
The contents of this user guide and the associated Corel Painter software are the property of Corel Corporation and its respective l ice nso r s ,
and are protected by copyright. For more complete copyright information about Corel Painter, please refer to the About Corel Painter secti on
in the Help menu of the software.
Corel, the Corel logo, Corel Painter, CorelDRAW, and Natural-M ed ia are trademarks or registered trademarks of Corel Corporation and/or its
subsidiaries in Canada, the U.S. and/or other countries. Adobe, Illustrator, Photoshop, Premiere, and PostScript are trademarks of Adobe
Systems Incorporated in the United States and/or other countries. Canon is a registered trademark of Canon Inc. Cinepak is a registered
trademark of Radius, Inc. EPSON Stylus is a registered t rademark of Seiko Epson Corporation. Hewlett-Packard and DeskJet are registered
trademarks of Hewlett Packard. Indeo is a registered trademark of Intel Corporation. JavaScript is a trademark of Sun Microsystems, Inc. Kodak
is a registered trademark of Eastman Kodak Company. Mac OS, Quick Dra w, and Finder are registered trademarks of Apple Computer, Inc.,
registered in the United States and other countries. QuickTime is a trademark used under license. QuickTime is a registered trademark of
Apple Computer , Inc. in the United States and other countries. M icrosoft and W indows are registered trademarks of Microsoft Corporation in
the United States and/or other countries. Minolta QMS is a trademark of Minolta Co., Ltd. Netscape Navigator is a registered trademark of
Netscape Communications Corporation. PANTONE® and other Pantone, Inc. trademarks are the property of Panton e, Inc. PowerPC is a
registered trademark of IBM Corporation. TARGA is a registered trademark of Pinnacle Systems, Inc., registered in the U.S. and other c ou nt r ie s .
Tektronix is a registered trademark of Tek tr onix, Inc. Wacom, Intuos, and ToolID are trademarks or registered trademarks of Wacom Company,
Ltd. Other product, font, and company names and logos may be trademarks or registered trademarks of their respective companies.
Page 3

Page 4

Contents
Welcome to Corel Painter 8
What’s New in Corel Painter 8? . . . . . . . 1
Redesigned User Interface . . . . . . . . . . . 1
About Your User Guide . . . . . . . . . . . . . 4
Corel Support Services . . . . . . . . . . . . . 5
The Workspace
Using the Menus and Document
Window . . . . . . . . . . . . . . . . . . . . . . . . 7
Workspace Tour . . . . . . . . . . . . . . . . . .8
Using the Toolbox . . . . . . . . . . . . . . . .9
Using Selectors . . . . . . . . . . . . . . . . . . 13
Using the Property Bar . . . . . . . . . . . . 14
Using the Brush Selector Bar . . . . . . . .15
The Brush Creator . . . . . . . . . . . . . . . . 16
Working with Palettes . . . . . . . . . . . . . 16
Exploring the Palettes . . . . . . . . . . . . . 17
Setting Palette Layout . . . . . . . . . . . . . 21
Libraries and Movers . . . . . . . . . . . . . . 23
Modifying a Library . . . . . . . . . . . . . . . 26
Customizing Palettes . . . . . . . . . . . . . .27
Creating Custom Palettes . . . . . . . . . . 28
Basics
Opening Documents . . . . . . . . . . . . . .33
Working with Documents . . . . . . . . . .37
Saving Files . . . . . . . . . . . . . . . . . . . . . 46
Closing Documents and Quitting
the Application . . . . . . . . . . . . . . . . . .50
Setting Preferences . . . . . . . . . . . . . . .5 0
Using Plug-ins . . . . . . . . . . . . . . . . . . .57
Wacom Intuos Support . . . . . . . . . . . . 59
Using Textures, Patter ns, an d
Weaves
Using Paper Texture . . . . . . . . . . . . . .61
Using Patterns . . . . . . . . . . . . . . . . . .66
Using Weaves . . . . . . . . . . . . . . . . . . .72
Color
Working with Color . . . . . . . . . . . . . .77
Changing Paper Color . . . . . . . . . . . . .77
The Mixer Palette . . . . . . . . . . . . . . . .82
Using Color Sets . . . . . . . . . . . . . . . . .85
Color Information . . . . . . . . . . . . . . . . 89
Color Variability . . . . . . . . . . . . . . . . .89
Color Expression . . . . . . . . . . . . . . . . .91
Annotating Colors . . . . . . . . . . . . . . . 91
Using Gradients . . . . . . . . . . . . . . . . .93
Painting
Exploring Painting . . . . . . . . . . . . . . . .99
Understanding Brushes . . . . . . . . . . .100
Page 5

Using a Stylus or Mouse . . . . . . . . . 102
Selecting a Brush . . . . . . . . . . . . . . . 103
Brush Settings . . . . . . . . . . . . . . . . . 104
Where You Can Paint . . . . . . . . . . . . 106
Marking the Canvas . . . . . . . . . . . . . 106
Painting with Color . . . . . . . . . . . . . 108
Painting with Gradients and Patterns 112
Painting with Airbrushes . . . . . . . . . 114
Recording and Playing Back Strokes . 117
Filling Techniques . . . . . . . . . . . . . . 118
Using Water Color
The Water Color Layer . . . . . . . . . . . 125
Working with Water Color Variants . 126
Water Controls . . . . . . . . . . . . . . . . 126
Digital Water Color . . . . . . . . . . . . . 127
Using Liquid Ink
The Liquid Ink Layer . . . . . . . . . . . . . 131
Impasto
The Impasto Layer . . . . . . . . . . . . . . 135
Creating an Impasto Effect . . . . . . . . 136
Adjusting Impasto Depth . . . . . . . . . 136
Adjusting Surface Lighting . . . . . . . . 137
Creating Custom Impasto Brushes . . 138
Blending Impasto with Other Layers . 141
The Brush Creator
Customizing Brushes . . . . . . . . . . . . 143
Using the Brush Creator . . . . . . . . . . 143
The Main Window . . . . . . . . . . . . . . 144
Using the Randomizer . . . . . . . . . . . 146
Using the Transposer . . . . . . . . . . . . 147
Using the Stroke Designer . . . . . . . . 147
Setting Size Controls . . . . . . . . . . . . 155
Setting Spacing Controls . . . . . . . . . 158
Setting Angle Controls . . . . . . . . . . . 160
Setting Bristle Controls . . . . . . . . . . . 162
Expression Settings . . . . . . . . . . . . . 164
Setting Well Controls . . . . . . . . . . . . 165
Setting Rake Controls . . . . . . . . . . . . 167
Setting Random Controls . . . . . . . . . 169
Setting Mouse Controls . . . . . . . . . . 172
Setting Cloning Controls . . . . . . . . . 172
Setting Impasto Controls . . . . . . . . . 173
Setting Image Hose Controls . . . . . . 1 7 5
Setting Airbrush Controls . . . . . . . . . 175
Setting Water Controls . . . . . . . . . . 176
Setting Liquid Ink Controls . . . . . . . . 179
Setting Digital Water Color Controls . 182
Managing Brushes . . . . . . . . . . . . . . 183
Cloning and Tracing
Cloning Imagery . . . . . . . . . . . . . . . 18 7
Cloning a Document . . . . . . . . . . . . 188
Using Tracing Paper . . . . . . . . . . . . . 188
Changing Clone Source . . . . . . . . . . 190
Painting in the Clone . . . . . . . . . . . . 190
Using Auto Clone . . . . . . . . . . . . . . 191
Using Auto Van Gogh . . . . . . . . . . . 192
Point-to-Point Cloning . . . . . . . . . . . 192
Multi-Point Cloning . . . . . . . . . . . . . 193
Turning Other Brushes into Cloners . 197
Using a Selection while Cloning . . . . 199
Repeating Source Imagery . . . . . . . . 201
Filling with Transformed Cloning . . . 201
Using Selections
Working with Selections . . . . . . . . . 203
Creating Selections . . . . . . . . . . . . . 206
Converting Selections to and from
Shapes . . . . . . . . . . . . . . . . . . . . . . 210
Saving Selections . . . . . . . . . . . . . . . 210
Loading Selections . . . . . . . . . . . . . . 211
Combining Selections Using
Boolean Operations . . . . . . . . . . . . . 212
Transforming Selections . . . . . . . . . . 214
Editing Path-Based Selections . . . . . . 214
Using the Selection Portfolio . . . . . . 217
Using Alpha Channels
Understanding Alpha Channels . . . . 219
Creating Channels . . . . . . . . . . . . . . 220
Managing Channels . . . . . . . . . . . . . 222
Editing Channels . . . . . . . . . . . . . . . 225
Using Layers and Layer Masks
Layer Basics . . . . . . . . . . . . . . . . . . . 230
Working with Layers . . . . . . . . . . . . 231
Creating Layers . . . . . . . . . . . . . . . . 23 2
Saving Files Containing Layers . . . . . 234
Deleting Layers . . . . . . . . . . . . . . . . 235
Managing Layers . . . . . . . . . . . . . . . 235
Editing Layers . . . . . . . . . . . . . . . . . 240
Table of contentsii
Page 6

Changing Layer Characteristics . . . . . 248
Using the Image Portfolio . . . . . . . . . 254
Working with Layer Masks . . . . . . . . 255
Using Image Effects
Basics of Applying Effects . . . . . . . . . 259
Third-party Plug-ins . . . . . . . . . . . . . 261
Orientation Effects . . . . . . . . . . . . . . 262
Correct Colors . . . . . . . . . . . . . . . . . 264
Other Tonal Control Effects . . . . . . . 268
Apply Lighting . . . . . . . . . . . . . . . . . 274
Apply Surface Texture . . . . . . . . . . . . 277
Other Surface Control Effects . . . . . . 286
Focus Effects . . . . . . . . . . . . . . . . . . 294
Esoterica Effects . . . . . . . . . . . . . . . . 299
Objects Effects . . . . . . . . . . . . . . . . . 312
Using Dynamic Plug-ins
Dynamic Plug-in Basics . . . . . . . . . . . 313
Brightness/Contrast . . . . . . . . . . . . . 315
Burn . . . . . . . . . . . . . . . . . . . . . . . . . 316
Tear . . . . . . . . . . . . . . . . . . . . . . . . . 317
Bevel World . . . . . . . . . . . . . . . . . . . 317
Equalize . . . . . . . . . . . . . . . . . . . . . . 319
Glass Distortion . . . . . . . . . . . . . . . . 320
Kaleidoscope . . . . . . . . . . . . . . . . . . 321
Liquid Lens . . . . . . . . . . . . . . . . . . . . 322
Liquid Metal . . . . . . . . . . . . . . . . . . . 326
Posterize . . . . . . . . . . . . . . . . . . . . . 331
The Image Hose
How it Works . . . . . . . . . . . . . . . . . . 334
Using the Image Hose . . . . . . . . . . . 334
Controlling the Image Hose . . . . . . . 336
Indexing . . . . . . . . . . . . . . . . . . . . . . 337
Creating Nozzles for the Image Hose 340
Nozzle Libraries . . . . . . . . . . . . . . . . 347
Creating a Nozzle from a Movie . . . . 347
Mosaics
Getting Started with Mosaics . . . . . . 351
Tile Settings . . . . . . . . . . . . . . . . . . . 354
Working with Mosaics . . . . . . . . . . . 356
Mosaic Commands . . . . . . . . . . . . . . 357
Working with Tessellati on Mosaics . . 360
Using Shapes
About Shapes . . . . . . . . . . . . . . . . . . 365
Creating Shapes . . . . . . . . . . . . . . . . 368
Setting Shape Attributes . . . . . . . . . . 372
Editing Shapes . . . . . . . . . . . . . . . . . 373
Working with Shapes . . . . . . . . . . . . 378
Working with Text
The Text Layer . . . . . . . . . . . . . . . . . 385
Applying Effects to Text . . . . . . . . . . 386
Exporting Text . . . . . . . . . . . . . . . . . 390
The Web
Features for the Web . . . . . . . . . . . . 393
Creating Web Page Backgrounds . . . 393
Creating Web Buttons . . . . . . . . . . . 396
Using the Image Slicer . . . . . . . . . . . 397
Creating Rollovers . . . . . . . . . . . . . . . 403
Image Maps . . . . . . . . . . . . . . . . . . . 406
Creating GIF Files . . . . . . . . . . . . . . . 409
Using Web-Safe Colors . . . . . . . . . . . 411
Brushes for the Web . . . . . . . . . . . . . 412
Scripting
Understanding Scripting . . . . . . . . . . 415
How Scripts Work . . . . . . . . . . . . . . . 416
The Scripts Palette . . . . . . . . . . . . . . 416
Recording Scripts . . . . . . . . . . . . . . . 417
Playing Scripts . . . . . . . . . . . . . . . . . 418
Editing Scripts . . . . . . . . . . . . . . . . . 419
Scripts and Movies . . . . . . . . . . . . . . 420
Animation and Video
Creating Animations and Video . . . . 423
The Frame Stacks Palette . . . . . . . . . 424
Creating a Movie . . . . . . . . . . . . . . . 425
Modifying a Movie . . . . . . . . . . . . . . 429
Animation Considerations . . . . . . . . . 430
Combining Movies . . . . . . . . . . . . . . 431
Rotoscoping . . . . . . . . . . . . . . . . . . . 432
Saving and Exporting Movies . . . . . . 438
Animations for the World Wide Web 442
Printing
Understanding Printing . . . . . . . . . . . 445
Setting Up Printing . . . . . . . . . . . . . . 446
Printing an Image . . . . . . . . . . . . . . . 447
Color Management . . . . . . . . . . . . . 447
The Color Management Dialog Box . . 4 4 8
Options for Files Saved asEncapsulated
iii Corel Painter
Page 7

PostScript (EPS) . . . . . . . . . . . . . . . . 454
Keyboard Shortcuts
Toolbox Commands . . . . . . . . . . . . . 456
Palette Commands . . . . . . . . . . . . . 457
File Menu Commands . . . . . . . . . . . 457
Edit Menu Commands . . . . . . . . . . . 457
Canvas Menu Commands . . . . . . . . 458
Effects Menu Commands . . . . . . . . . 458
Select Menu Commands . . . . . . . . . 458
Shapes Menu Commands . . . . . . . . 458
Window Menu Commands . . . . . . . 459
Screen Navigation . . . . . . . . . . . . . . 459
Palette Navigation . . . . . . . . . . . . . . 459
Brush Tools . . . . . . . . . . . . . . . . . . . 459
Selection Tools . . . . . . . . . . . . . . . . 460
Adjuster Tools . . . . . . . . . . . . . . . . . 461
Shape Tools . . . . . . . . . . . . . . . . . . . 462
Animation . . . . . . . . . . . . . . . . . . . . 463
Lighting . . . . . . . . . . . . . . . . . . . . . . 463
Layer Section Tools . . . . . . . . . . . . . 463
Mosaics . . . . . . . . . . . . . . . . . . . . . . 464
Table of contentsiv
Page 8

1
W elcome to Corel Painter 8
Corel® Painter™ 8 is the leading
Natural-Media® painting
application. Corel Painter lets you
simulate a wide range of art tools,
from felt pens, charcoal, and colored
pencils to water color and oils.
What’s New in Corel Painter 8?
Corel Painter lets you experiment with
the widest range of Natural-Media
tools. You can expand your digital
drawing and painting techniques with
a portfolio of new features.
Corel Painter features a redesigned
user interface, including a new
toolb ox, Brush se l e ct or ba r, prop e rt y
bar, Info palette, and new palette
design and behavior.
Corel Painter also includes a Mixer
pal e tt e that r e al i stic ally mi m i c s th e
traditional paint mixing experience.
Digital water color, a new Sketch
effect, and more than 400 new brushes
all expand your creative potential.
You can create custom brush variants
using the new Brush Creator, which
includes the Randomizer, Transposer,
and Stroke Designer. Corel Painter
also includes redesigned layer masks
and channels that provide a smoother
workflow and greater compatibility
with Ad obe® Photoshop® .
Redesigned User Interface
Corel Painter features a redesigned
user interface, which is based on the
following new elements.
Toolbox
The toolbox has been redesigned
vertically and, by default, is docked to
the top-left corner of the document
window. The toolbox lets you access
the tools in Corel Painter, as well as
Page 9

the primary and secondary colors, and
provides easy access to the Paper,
Pattern, Gra d i en t , N ozz l e, Weave ,
and Brush Look libraries.
The toolbox can be undocked and
moved anywhere inside the
application window, or it can be
turned off.
Property Bar
The property bar replaces the
Controls palette. The property bar is
context-sensitive depending on which
tool is selected, providing commonly
used controls for each tool.
The property bar is docked below the
menu bar by default, but it can be
undocked and moved to any location
in the document window, or tu rned
off.
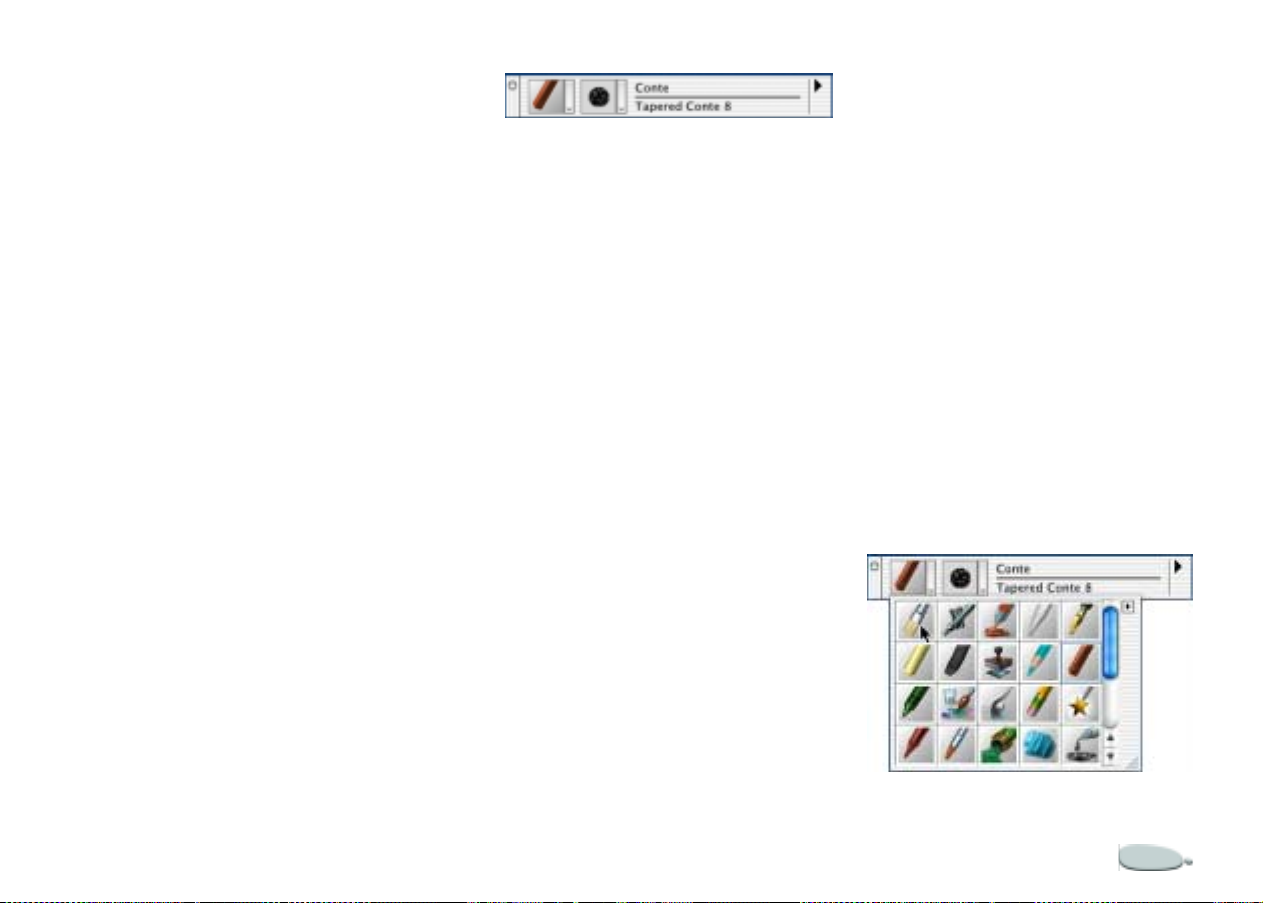
Brush Selector
The Brush Selector lets you choose a
brush category, using the Brush
Category picker, and a brush variant,
using the Brush Variant picker. The
name of the selected brush category
and variant is displayed on the right
side of the Brush Selec tor. You have
the option to view the categories and
variants by a thumbnail or list view.
The Brush Selector is docked, by
default, to the top-right corner of the
document window, beside the
property bar. It can be undocked and
moved to any location in the
document window, or it can be turned
off.
Palettes
The palettes have been redesigned for
this version of Corel Painter, and they
include the following new features:
• Group/Ungroup — You can g rou p
and ungroup palettes by dragging
them together or apart to create
any combination of palettes.
• Resizeable — You can increase or
decrease the size of list palettes,
such as the Layers, Channels, and
Scripts palettes.
Info Palette
The new Info palette provides access
to the following information:
•Image size preview
• Document information, such as
width and height
• X and Y coordinates and the
cursor posi tion
• Context-sensitive information
based on the selected tool. For
example, if the Eyedropper tool is
selected, the HSV and RGB
information is displayed.
• Unit information, such as pixels,
inches, and resolution
Mixer Palette
The new Mixer palette lets you mix
colors interactively. The Mixer palette
contains a Brush tool and a Palette
Knife tool for applying and mixing
colors, mimicking the traditional
experience of mixing two or more
colors on a palette.
Welcome to Corel Painter 82
Page 10

The Mixer palette also includes an
Eyedropper tool for sampling specially
mixed colors from imagery, as well as
Zoom and Pan tools for easy
navigation in the palette. You can
choose to save your Mixer palette
settings for future use, and you can
create a custom color set from the
colors in the Mixer palette.
Digital Water Co lor
Digital Water Color is a simple,
transparent medium that is ideal for
hand painting line drawings, touching
up photographs, or creating simple
water color washes.
Sketch Effect
The new Sketch effect in Corel
Painter lets you convert images or
photographs to simple pencil
drawings, while providing controls for
the amount of paper grain being
applied, the heaviness of the pencil
line, and the desired level of detail.
New Brush Variants
Corel Painter includes over 400 new
Brush variants. New brushes are
included in the following categories:
•Acrylics
•Airbrushes
•Artists
•Blenders
• Calligraphy Pens
•Chalks
•Charcoals
•Colored Pencils
•Conte
•Crayons
• Digital Water Color
• Distortion
• Erasers
•Felt Pens
•F-X
•Gouache
•Image Hose
•Liquid Ink
•Oil Pastels
•Oils
• Palette Knives
•Pastels
•Pattern Pens
•Pencils
•Pens
•Photo
•Sponges
•Sumi-e
•Tinting
•Water Colors
Brush Creator
Corel Painter features a Brush
Creator, which is designed to make
the brush variant creation proces s e asy
and fun. The Brush Creator includes
three key features:
• Randomizer — The Randomizer
lets you choose an existing brush
variant and randomize its
properties to create a new variant.
You can set the amount of
randomization to determine how
much of the origi nal brush’s
Core l Pain t e r 3
Page 11

properties remain—a low amount
will r e sult i n va rian t s that are very
similar to the original, while a high
amount will result in variants that
are radically different. To help you
visualize how the new brush
variants will look, the Randomizer
provides a brush stroke preview of
each new variant.
• Tra nspose r — The Transposer lets
you change the properties of one
brush variant using the properties
of another. For example, you can
choose the 2B Pencil and create
brush variants that are mutated
toward another variant, such as
Charcoal. To help you visualize
how the new brush variants will
look, t he Transposer provides a
brush stroke preview of each new
variant.
• Stroke Designer — The Stroke
Desi g n e r lets you mo dify the
properties of brush variants using
advanced controls. The Stroke
Designer has 16 different sets of
controls: General, Size, Spacing,
Angle, Bristle, Well, Rake,
Random, Mous e, Cloning,
Impasto, Image Hose, Airbrush,
Water, Digital Water, and Liquid
Ink. To make the brush creation
process more visual and
interactive, the Stroke Designer
includes a live preview that
updates each time you make
changes to the brush variant.
Industry-Standard Masks,
Layer Masks, and Cha nnels
Layer Masks: The redesigned layer
masks let you hide and reveal areas of
lay ers wi thou t maki ng pe rman e n t
changes to an image.
Channels: The Channels palette lets
you use alpha channels to create and
store masks to modify, separate, and
preserve specific areas of an image.
And So Much More...
• Thumbnail previews for Layers,
Layer Masks, and Channels
•Brush cursor preview that lets you
see the size of th e br ush you’re
painting with
• Enhanced keyboard shortcuts to
make it easier to transition
between Corel Painter and other
applications
• Enhanced file compatibility with
Adobe Photoshop
• New paper textures, patterns,
Image Hose nozzles, brush looks,
gradients, and more!
• Extra content CD, including 100
pictures from
http://www.brandxpictures.com,
hundreds of brushes, paper
textures, and more!
About Your User Guide
You can find answers to most of your
questions in the Corel
Guide. It provides information you
need to get the most out of Corel
Painter.
The Corel Painter User Guide is for
both the Mac OS® and Windows®
platforms. As a convention, Mac OS
commands precede Windows
commands in the text.
®
Painter™User
Welcome to Corel Painter 84
Page 12

When a modifier key differs between
the Mac OS and Windows, the Mac
OS modifier is listed first, followed by
the Windows modifier. For example,
Command + I (Ma c O S) or Ctrl + I
(Windows) means that Mac OS users
would press Command + I and
Windows users would press Ctrl + I.
Choosing a menu item from a menu
follows the convention “Choose menu
name > menu it em.” For simplicity,
the term “folder” refers to directories
as well as folders. The Corel Painter
interface for Mac OS and Windows
platforms is identical, unless
otherwise specified.
Registering Products
Registering products is important.
Registration provides you with timely
access to the latest product updates,
valuable information ab out product
releases, and access to free downloads,
articles, tips and tricks, and special
offers.
• by mail—send the product
registration card to the Corel
Customer Service Center nearest
you
• during installation—follow the
instructions provided by the
product setup
Corel Support Services
Corel Support Services can provide
you with prompt and accurate
information about product features,
specifications, pricing, availability,
services, and technical support. For
the most current information on
support services available for your
Corel product, please visit
www.corel.com/support .
You can register a Corel product
• online—follow the instructions
provided on the Corel Web site
Core l Pain t e r 5
Page 13

Page 14

The Workspace
2
The Corel Painter workspace has been
designed to give you easy access to
tools, effects, commands, and features.
The workspace is organized across a
series of menus, selectors, and
interactive palettes. Some features are
also available in the frame of the
document window.
Using the Menus and Document Window
Using the commands on the Corel
Painter menu bar, you can:
• work with files and editing
commands
• adjust and apply effects
• perform selection operations, work
with shapes, and create ani mati ons
• control the document window or
the Corel Pa inter workspace
The document window lets you access
the following features with the click of
a button:
• tracing paper
•grid
• color correction
•impasto effect
•drawing mode
• navigation
Page 15
Workspace Tour
Menu bar
Property
bar
Toolbox
Color
Selection box
Content
selectors
Canvas
Document
window
Drawing
mode icon
Brush
selector
Colors
palette
Layers
palette
Navigation
icon
The Workspace8
Zoom slider
Page 16
Using the Toolbox
In the toolbox, there are tools to make
marks, draw shapes, fill shapes with
col o r, view and navigate, and make
selections. The re are also six selectors
that let you choose papers, gradients,
patterns, weaves, looks, and nozzles.
The toolbox.
Some tool s of similar function share a
space in the toolbox. The button for
only one of these tools is displayed at a
time. Any tool that has a triangle in
the bottom-right corner has one or
more tools underneath it in a flyout
menu.
The toolbox is open by default;
however, it can be closed. You can
move the toolbox around the
document window, and you can dock
the toolbox to the document window
or to other palettes.
The current tool can be modified by
option s on the pro p e r ty b ar, which
change as you change tools. For more
information, see “Using the Property
Bar” on page 14.
To access tools grouped in flyout
menus:
1 In the toolbox, hold down the tool
icon whose flyout menu you want
to open.
2 Choose th e tool you want to use.
Some tools sh are a space in the toolbox . Hold
down the tool button that’s displayed to open
the flyout menu.
To close the toolbox
• Do one of the following:
• Click the Close button in the
top corner of the toolbox.
•Choose Window menu >
Hide Toolbox.
To open the toolbox, choose
Window menu > Show Toolbox.
To move the toolbox
1 Place the cursor over the title bar of
the toolbox.
Core l Pain t e r 9
Page 17
2 Drag the toolbox to a new location
in the document window.
The Grabber Tool
The Crop Tool
To dock the toolbox
1 Place the cursor over the title bar of
the toolbox.
2 Drag the toolbox to the edge of the
document wind ow or a palette.
3 When the toolbox lines up with
the edge of the document window
or palette, release the mouse
button.
The toolbox will snap into place.
Navigat io n a nd Utili ty To ol s
The Magnifier Tool
You can use the Magnifier tool to
magnify areas of an image when you
are performing detailed work, or to
reduce areas to get an overall view of
an image. For more information, see
“Zooming” on page37.
The Grabber tool gives you a quick
way to scroll an image. For more
information, see “Repositioning
Documents” on page 39.
The Rotate Page Tool
The Rotate Page tool lets y ou rotate an
image window to accommodate the
way you draw naturally. Refer to
“Rotating Documents” on page39 for
more information.
The Perspective Grid Adjuster Tool
The Perspective Grid Adjuster tool
lets you select and move the location
of the perspective grid lines, the
vanishing point, the horizon line, the
ground line, and the picture plane.
See “Using the Perspective Grid” on
page 45 for more information.
The Crop tool l e ts you remove
unwanted edges from the image. For
more information, see “Cropping
Images” on page40.
Tools that Apply Color
The Brush Tool
You use the Brush tool to make marks
on the Canv a s or a layer. The Brush
tool represents a category of marking
tools. Within the Brush category are
pencils, pens, chalk, an airbrush, oil
paints, water colors and more.
When the Brush tool is selected, you
can choose specific brushes from the
Brush selector bar. For more
information about selecting brushes
and tools, refer to “Selecting a Brush”
on page103.
The Workspace10
Page 18
You can set opacity, grain, and
drawing style (freehand stroke s or
straight line strokes) on the property
bar.
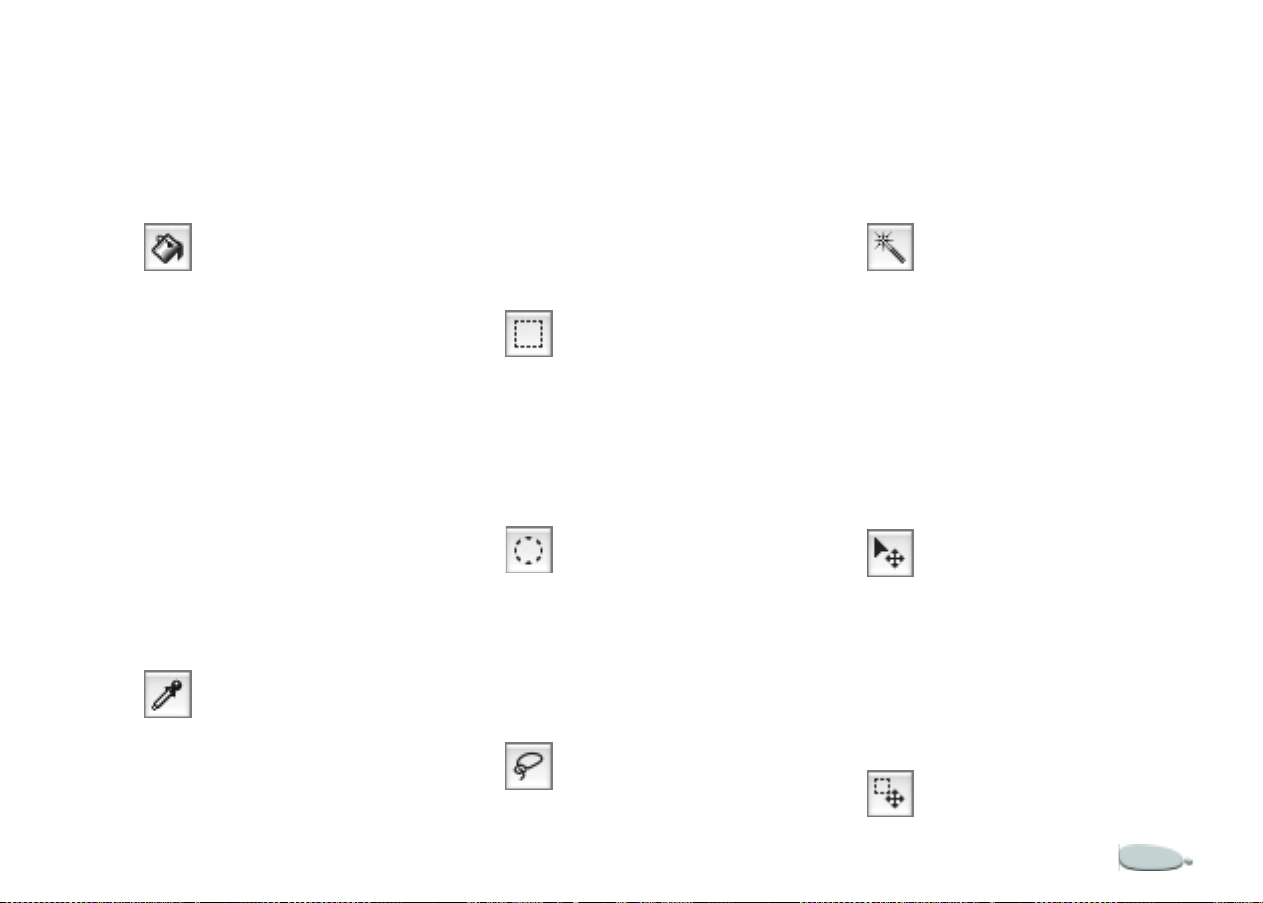
The Paint Bucket Tool
color . When you select a color with the
Dropper tool, that color becomes the
current color on the Colors palette.
F or more information, see “Sampling
Colors from Imagery” on page80.
The Selection Tools
The Lasso tool lets you draw a
freehand selection. Refer to “Using
Selectio n Tools” on page 206 for more
information.
The Magic Wand Tool
The Paint Bucket tool lets you fill an
area. The property bar shows choices
for what area to fill and what to fill it
with. The Color Tolerance and Color
Feat her values let you c o n t r ol th e
extent of fill and opacity in
neighboring areas. You can also
choose to anti-alias a fill.
Double-click the Paint Bucket tool to
specify what color in the image to lock
out of your fill. For more information
on the Paint Bucket tool, refer to
“Filling Techniques” on page 118.
The Dropper Tool
The Dropper tool lets you pick up a
color from an existing image. The
property bar shows you values for the
The Rectangular Selection Tool
You use the Rectangular Selection tool
to create rectangular selections. Refer
to “Using Selection Tools” on
page206 for more information.
The Oval Selection Tool
You use the Oval Selection tool to
create oval selections. Refer to “Using
Selection Tools” on page206 for more
information.
The Lasso Tool
The Magic Wand tool lets you click or
drag in the image to select an area of
similar color. Refer to “Using the
Magic Wand” on page 207 for more
information.
The Ad juster Tools
The Layer Adjuster Tool
The Layer Adjuster tool is used to
select, move and manipulate layers.
Refer to “Using Layers and Layer
Masks” on page229 for more
information.
The Selection Adjuster Tool
Core l Pain t e r 11
Page 19
The Selection Adjuster tool lets you
select , m ove, and m a n i p ul a t e
selections created with the
Rectangular , Oval, and Lasso selection
tools and those converted from
Shapes.
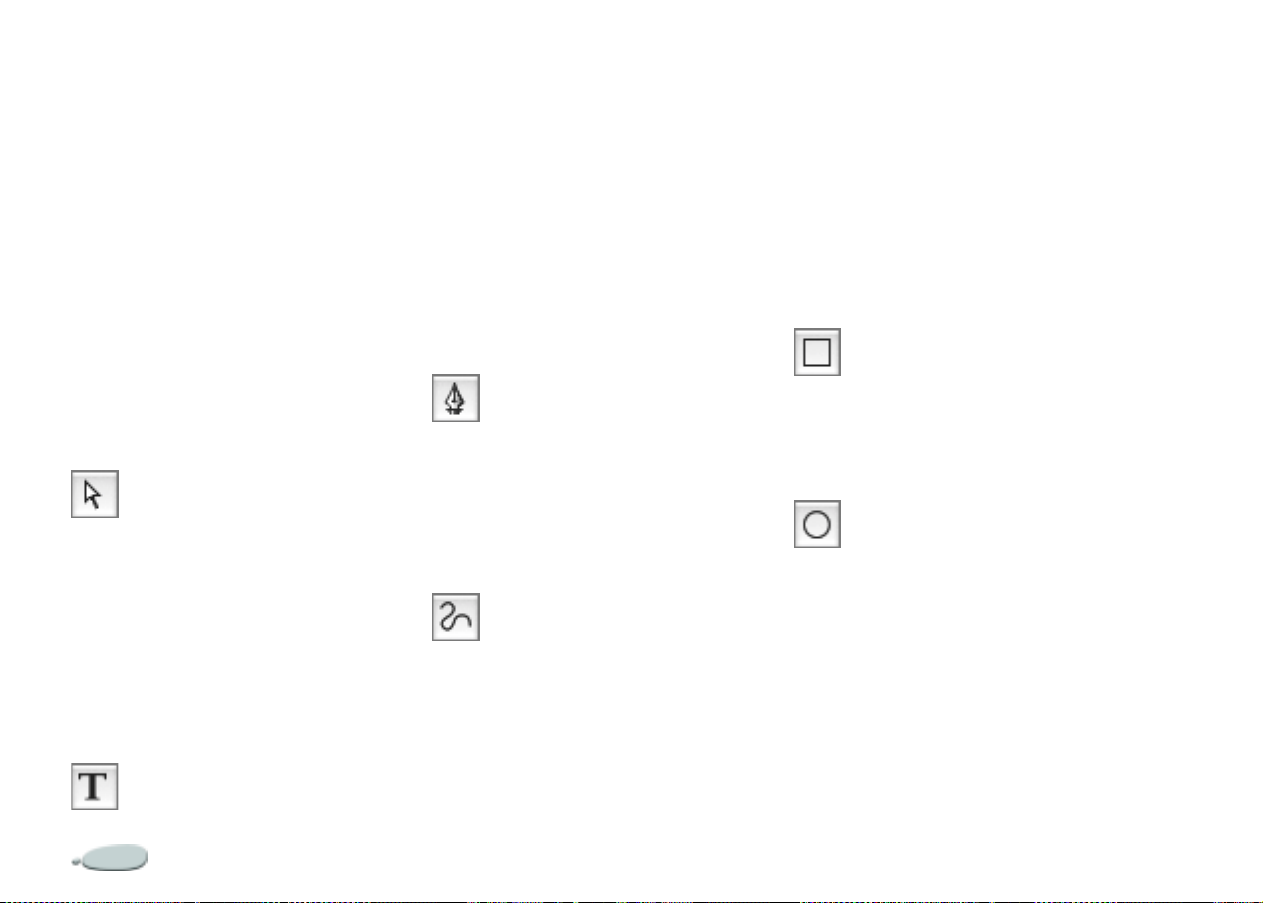
The Shape Tools
Corel Painter creates all shapes by
using Bézier curves. Every shape you
create automatically becomes a
separate layer in the document.
Shapes are listed on the Layers palette.
The Shape Selection Tool
The Shape Selection tool is for editing
Bézier curves (shape paths). You use
the Shape Selection tool to select and
move anchor points and to a djust their
control handles. Refer to “Working
with Shapes” on page378 for more
information.
Th e Text To o l
The Text tool creates text shapes. Use
the Text palette to set the font, point
size, and tracking. For more
information, see “Wor king with Text”
on page385.
The Shape Design Tools
You use the Pen tool and the Quick
Curve tool to draw shapes.
The Pen Tool
The Pen tool lets you create straight
lines and curves in shape objects. For
more information, see “Using Shapes”
on page365.
The Quick Curve Tool
The Quick Curve tool lets you create
shape paths by drawing freehand
cur v es. For more information, see
“Using Shapes” on page365.
The Shape Objects Tools
The Shapes Objects tools create
rectangular or oval shapes. When you
create a shape, the details are
displayed on the property bar.
For more information, see “Creating
Shapes” on page368.
The Rectangular Shape Tool
You use the Rectangular Shape tool to
create rectangular shape objects.
The Oval Shape Tool
Yo u use the Oval Shape tool to create
oval shape objects.
The Shape Edit Tools
The Shape Edit tools allow you to
manipulate existing shapes. For more
information, see “Editing Shapes” on
page 373.
The Workspace12
Page 20
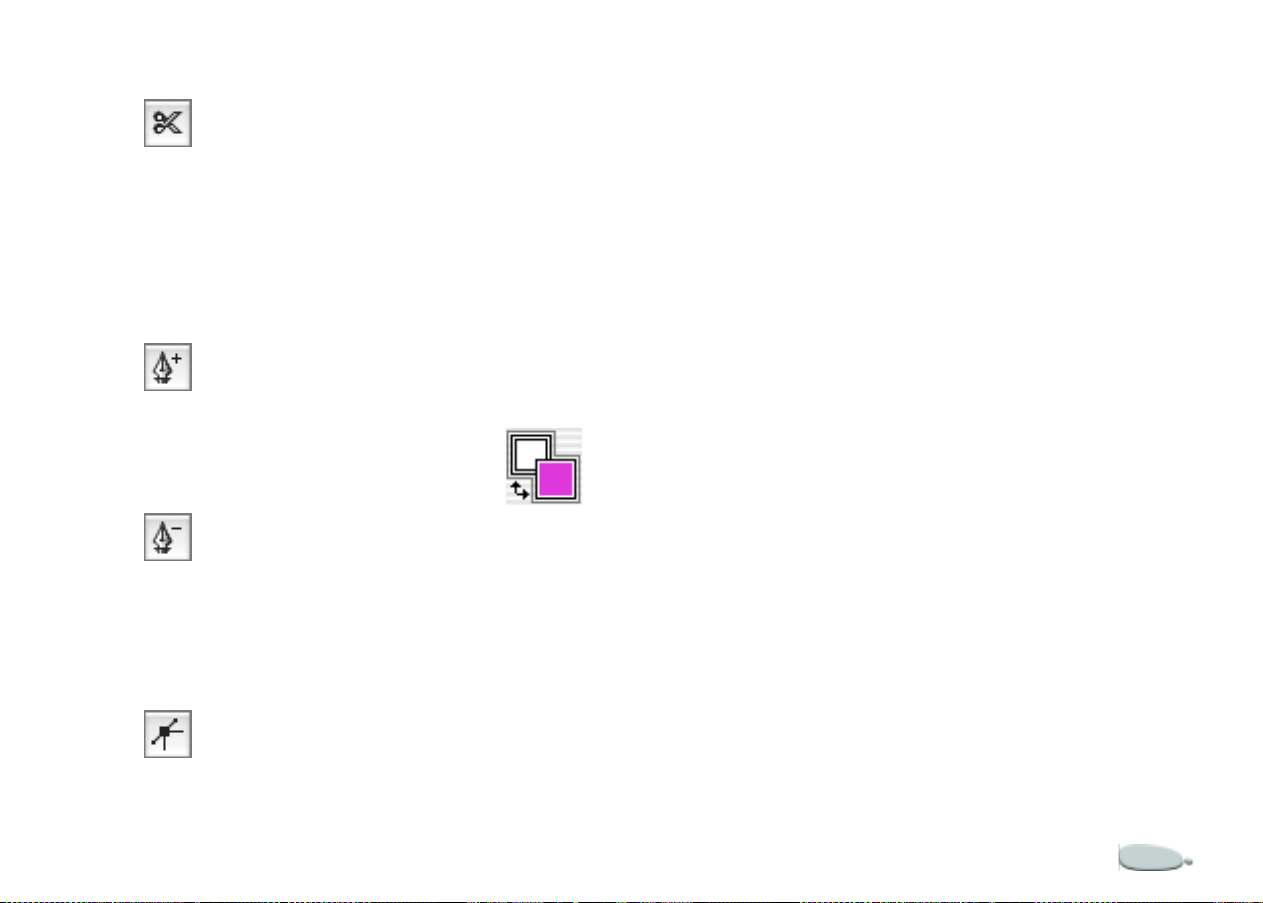
The Scissors Tool
You use the Scissors tool to cut an
open or closed segment. If the
segment is closed, once you click on a
line or point to cut the shape path, the
shape path becomes o pen.
The Add Point Tool
You use the Add Point tool to create a
new anchor point on a shape path.
The Remove Point Tool
You use the Remove Point tool to
remove an anchor point from a shape
path.
The Convert Point Tool
The Convert Point tool is used to
convert between smooth and corner
anchor points.
The Co lor Selection Box
The Color Selection box lets you
choose primar y and secondary colors.
The front rectangle displays the
primary color, and the back rectangle
displays the se condary color . For more
information, refer to “Understanding
Prima ry and Se c ondary Colors” on
page79.
The Color Sele ction box.
To change the primary or
secondary color:
1 Doubl e-click th e pri m a ry or
secondary color rectangle.
2 Choose a col or from the Color
dialog box.
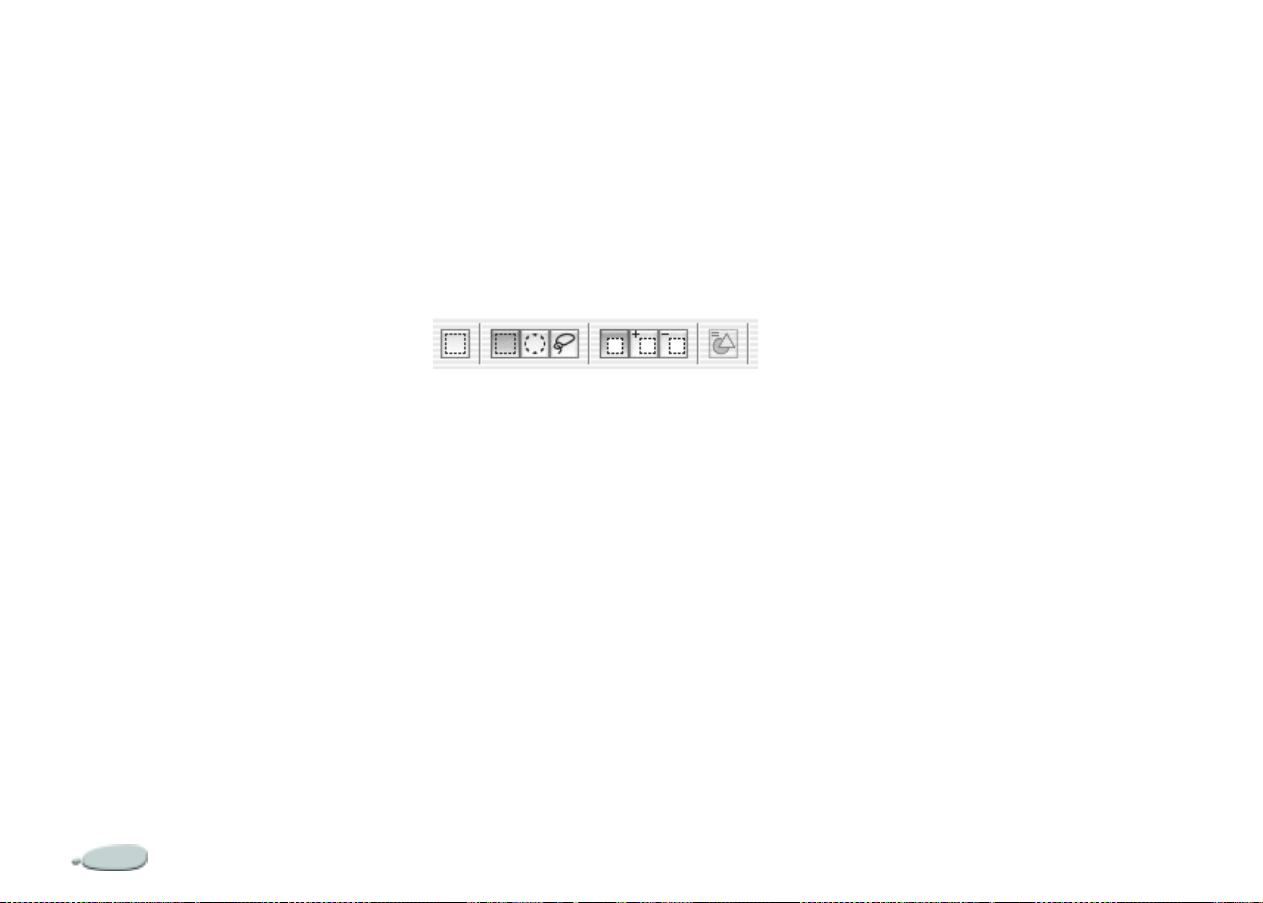
Using Selectors
The selectors in the toolbox give you
quick access to the libraries for the
following Corel Painter elements:
papers, gradients, patterns, weaves,
looks, and nozzles.
You can display items in selectors as
thumbnails or in a list. You can also
access commands from each selector
men u. If the com m and you w a n t is
not available, you can display the
entire palette that corresponds to the
selector.
To open a selector:
1 Click the flyout menu arrow on
the bottom-right corner of the
selec t or you want to open .
2 Choo s e an ite m fr om t he lis t .
To display items as thumbnails or
in a list:
1 Click the flyout menu arrow on
the bottom-right corner of the
selec t or you want to open .
2 Cli ck the selector menu arrow, and
choose List or Thumbnails.
Core l Pain t e r 13
Page 21
To access selector menu
commands:
1 Click the flyout menu arrow on
the bottom-right corner of the
selector you want to open.
2 Click the selector menu arrow , and
choose a command.
To display a selector’s palette
1 Click the flyout menu arrow on
the bottom-right corner of the
selector you want to open.
2 Click the selector menu arrow , and
choose Launch Palette.
Note
This command is not available from
•
the Look and Nozzle selector s.
Using the Property Bar
The property bar in Corel Painter is
context-sensitive — it changes
according to the tool you are using.
You can access settings and o ptions fo r
each tool, and you can change them
according to your preferences using
the boxes or pop-up sliders. Tool
settings are retained when you switch
from one tool to another. You can also
use the property bar to restore the
default settings of the selected tool.
The property bar is docked
horizontally to the menu bar by
default. You can move the property bar
anywhere i n the document wind ow,
dock it under the menu bar again, or
close it.
The property bar for the Rectangular Selection
tool.
To access tool settings on the
property bar:
• Choose a tool from the toolbox.
Tool settings are display ed on the
property bar.
To change tool settings on the
property bar:
1 Choose a tool from the toolbox.
2 Do any of the following:
• Type a value in the box next to
the control, or click the arrow
next to the control and adjust
the pop-up slider.
• Enable or disable the check box
next to the option you want to
use.
Note
Not all of these options are available
•
for every tool. The settings change
depending on t he tool selected.
To reset the default tool settings:
• Click the Reset Tool button on the
property bar.
Note
The Reset Tool button on the property
•
bar has the same icon as the selected tool
in the toolbox.
To move the property bar:
• Point to the bar on the right side of
the property bar, and drag it to its
new location.
To dock the property bar:
• Point to the title bar of the property
bar, and drag it under the menu
bar.
The property bar snaps into place.
The Workspace14
Page 22
To close the property bar:
• Do one of the follo wing:
•Choose Window menu >
Hide Property Bar.
• If the property bar is undocked,
click the close button on the
title bar.
Tip
To show the property bar, choose
•
Window menu > Show Property Bar.
Using the Brush Selector Bar
The Brush selector bar lets you choose
from a variety of brush categories and
variants. Brush categories are groups
of similar brushes and media. Brush
variants ar e specific brushes and brush
settings within a brush category.
The name of the selected brush
category appears at the top of the
Brush selector bar. The name of the
selected brush variant appears under
the brush category name.
The Brush selec tor bar.
To display the Brush selector bar:
• Choose Window menu > Show
Brus h S ele c tor Bar.
To choose a brush from the Brush
sele c t or bar:
1 On the Brush selector bar , click the
Brush Category arrow and choose
a brush ca t egory.
2 Click the Brush Variant arrow, and
choose a variant.
Previewing Brushes
The Brush Category selector shows
you a preview of the currently selected
bru sh ca tego ry and le ts you ch o ose a
new brush category. The Brush
Variant selector does the same for
bru s h v a r i a n t s .
You can prev iew brush cat egories and
variants as thumbnails or in list
format. Brush variants can also be
previewed as brush strokes. The
Stroke view shows you both th e dab
type and brush stroke of the selected
brush variant.
To display brush categories and
variants as thumbnails or lists:
1 On the Brush selector bar, clic k the
Brush Category or Brush Variant
arrow.
2 Cli ck the selector menu arrow, and
choose List or Thumbnails.
If you’re displaying brush variants,
you can also choose the Stroke
view.
Note
The Stroke view is available only on
•
the Brush Variant selector menu.
Items in the Brush selec tor bar can be di splaye d
as thumbnails.
Core l Pain t e r 15
Page 23
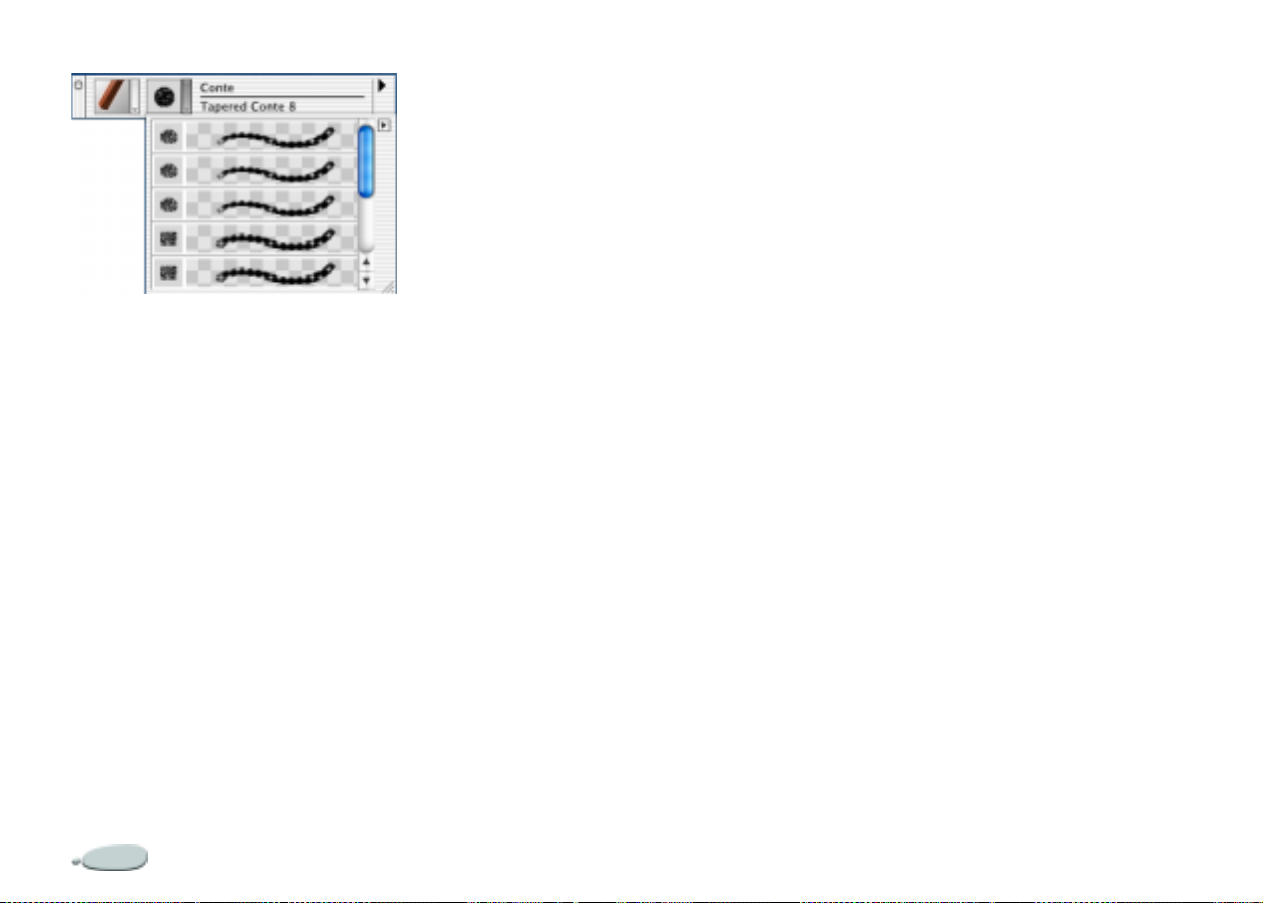
The Stroke view is available for brush variants.
Brush Selector Bar Menu
Commands
The Brush selector bar menu
commands are used for creating and
loading brushes, working with brush
variants, and manipulating brush
strokes. For more information, see
“M anaging Brushes” on p ag e 18 3 .
Moving and Docking the
Brush Selector Bar
The Brush selector bar is displayed at
the top-right of the property bar by
default. It can be moved to a new
location in the document window, or
it can be docked to the edge of the
document window or other palettes.
To move the Brush selector bar
• Point to the title bar of the Brush
selector bar, and drag it to its new
location.
To dock the Brush selector bar
1 Point to the title bar of the Brush
selector bar, and drag it to the edge
of the document window or a
palette.
2 When the Brush selector bar is
lined up with the edge of the
document window or palette,
release the mouse button.
The Brush selector bar snaps into
place.
Closing the Brush Selector
Bar
You can close the Brush selector bar to
hid e it from view.
To close the Brush selector bar
• Do one of the following:
•Choose Window menu >
Hide Brush Selector Bar.
• If the Brush selector bar is
undocked, click the close button on the title bar.
The Brush Creator
The Brush Creator is designed to
make the brush variant creation
process easy and fun. You can use the
Randomizer to create random brush
variants, the Transposer to blend two
brush variants, a nd the Stroke
Designer to adjust the sett i ngs of
brush variants. For more information,
see “The Brush Creator” on page 143.
To open the Brush Creator
• Do one of the following:
•Choose Window menu >
Brush Creator.
•Press Command + B (Ma c
OS) or Ctrl + B (Windows).
Working with Palettes
The interactive palettes in Corel
Painter let you access the commands,
controls, and settings available when
creating documents.
The Workspace16
Page 24

Showing and Hiding Palettes
You can show or hide a palette by
choosing its name from the Window
menu, from a selector, or by using the
key combination shown on the
Window menu.
To show or hide a palette:
• Do one of the follo wing:
•Choose Window menu, and
choose the palette you want to
show or hi d e .
• Choose a selector from the
too lb ox, cl ic k the se le ct or me nu
arrow, and choose Launch Palette.
• Use the ke yb oar d s h ortcut for
the palette you want to show or
hide:
Press Command (Mac OS) or Ctrl
(Windows) +
1 = Colors
2 = Mixer
3 = Color Sets
4 = Layers
5 = Channels
6 = Text
7 = Info
8 = Gra di e nts
9 = Patter ns
Tip
You can also hide a palette by clicking
•
the close box on t he palette title bar.
To show or hide all palettes:
• Choose Window menu > Show/
Hide Palettes.
Exploring the Palettes
As you work with Corel P a inter, y ou’l l
use the following groups of palettes.
The Color Palettes
•The Colors palette lets you choose
primary and secondary colors for
painting in Corel Painter
doc uments. You can also use the
Clone Col or option on the Colors
palette. For more information, see
“Working with Color” on page 77.
•The Mixer palette lets you mix and
blend colors as you would on an
artist’s palette. It contains its own
set of tools. For more information,
see “The Mixer Palette” on
page 82.
•The Color Sets palette displays the
colors in the current color set. You
use color sets to organize groups of
colors. Some color sets are
organized by both name and color
relationship. For more
information, refer to “Using Color
Sets” on page 85.
•The Color Info palette contains
color information for the selected
color, in HSV or RGB values. You
can also use the Clone Color
option with this palette. F or more
information, see “Color
Information” on page89.
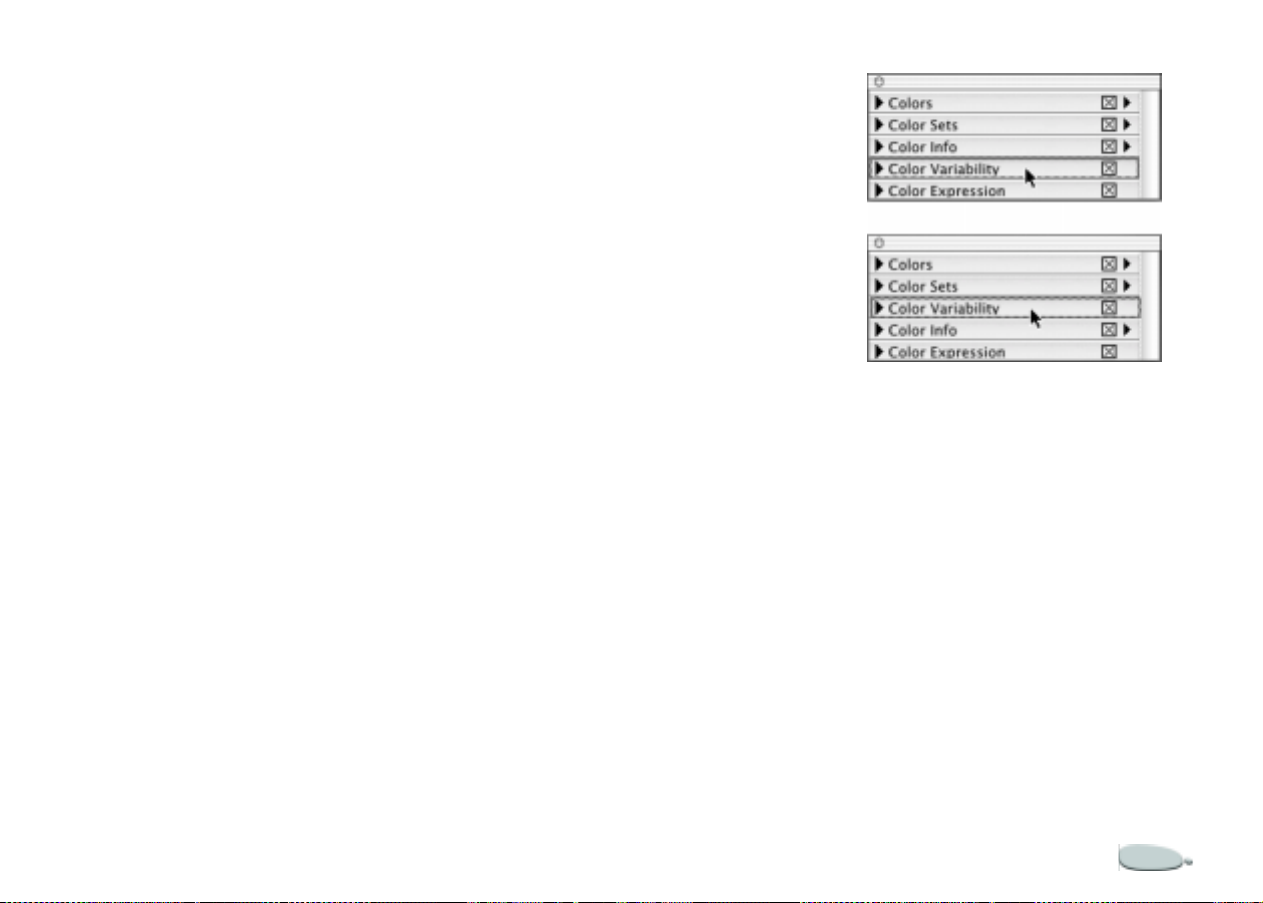
•The Color Variability palette
contains sliders to adjust color
variability values. For more
information, see “Color
Variability” on page 89.
•The Color Expression palette lets
you determine how colors are
expressed in Corel Painter
documents. For more information,
refer to “Color Expression” on
page 91.
Core l Pain t e r 17
Page 25

The Papers, Gradients,
Patterns, and Weav es
Palettes
•The Papers palette lets you choose
and edit paper textures for your
document. You can preview paper
textures as thumbnails or in a list,
and see a thumbnail preview of the
selected paper. For more
information, see “Using Paper
Texture” on page61 and
“Choosing Paper Textures” on
page63.
•The Gradients palette lets you
choose and edit gradients th at c an
be applied to Corel Painter
doc uments. You can preview
gradients as thumbnails or in a list,
and see a thumbnail preview of the
selected gradient. For more
information, see “Using
Gradients” on page 93.
•The Patterns palette lets you
choose and edit patterns. You can
preview patterns as thumbnails or
in a list, and see a thumbnail
preview of the selected p attern. For
more information, ref er to “Using
Patter ns ” on page66.
•The Weaves palette lets you choose
and edit weaves. You can preview
weaves as thumbnails or in a list,
and see a thumbnail preview of the
selected weave. For more
information, see “Using Weaves”
on page72.
The Layers and Channels
Palettes
•The Layers palette contains
thumbnail previews of all the
layers in a Corel Painter
document. You can use the buttons
on the Layers palette to arrange
layers, use plug-ins, add new layers
(including Water Color and
Liquid Ink layers), create lay e r
masks, and delete layers. You can
also set the composite method and
depth, adjust the opacity, and lock
and unlock layers. For more
information, see “Using Layers
and Layer Masks” on page229.
•The Channels palette contains
thumbnail previews of all the
channels in a Corel Painter
document, including RGB
composite channels, layer masks,
and Alpha channels. The buttons
on the palette can be used to load,
save, and invert existing channels,
and to create new channels. F or
more information, see “Using
Alpha Channels” on page219.
The Text and Scripts Palettes
•The Text palette lets you perform
all tasks relating to text in a Corel
Painter document, such as
choosing fonts, adjusting opacity,
and applying drop shadows. For
more information, refer to
“Wo rk in g wit h Text” on page 385.
•The Scripts palette gives you
access to all commands and
settings relating to scripts. For
example, you can open, close, play,
and re cord scripts from t he Scripts
palette. For more information, see
“Scripting” on page 415.
The Workspace18
Page 26
The Image Portfolio and
Selection Portfolio Palettes
•The Image Portfolio contains all
of the images in the current image
library. You can view the images as
thumbnails or in a list, as well as a
thumbnail preview of the current
image. For more information, see
“Using the Image Portfolio” on
page 254.
•The Selection Portfolio contains
all of the selectio ns in the current
selection library. You can view the
images as thumbnails or in a list,
as we ll as a thu m bnai l preview of
the current selection. For more
information, see “Using the
Selection Portfolio” on page 217.
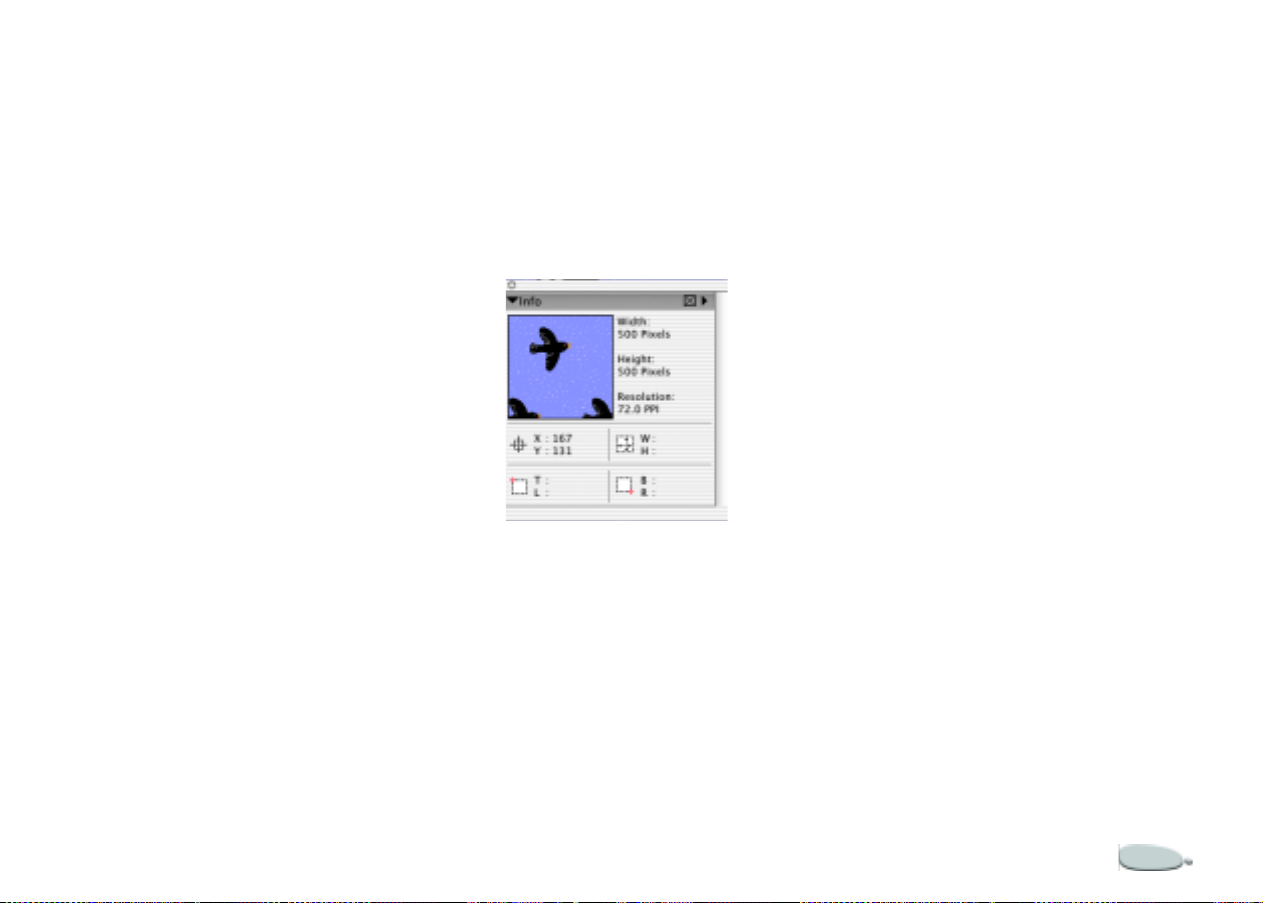
The Info Palette
The new Info palette provides you
with an image preview; document
information, such as width and
height; X and Y coordinates and the
cursor position; context-sensitive
information based on the selected
tool; and unit information, such as
pixels , in c he s , and r es ol u t io n .
You can choose to view a canvas
preview , which shows you the contents
of the canvas, or a page layout preview,
which shows you the entire document.
You can also choose how RGB values
will display on the Info palette — as
actual values, a percentage of the
values, or as hexadecimal values.
The Info palette.
To choose an image preview style
on the In f o p al e tt e :
• On the Info palette, click the
palette menu arrow, and choose
Canvas Preview or Page Layout
Preview.
To choose how RGB values will
display on the Info palette:
1 On the Info palette, click the
palette menu arrow, and choose
Display RGB Values As.
2 Choose an option from the list.
The Tracker Palette
The Tracker palette temporarily st ores
brush categories, variants, and dab
types when you apply brush str okes to
the canvas. Each time you use a new
brush, the variant is saved in the
Tracker palette. You can return to a
brush varia nt you like by choosing it
from the Tracker palette.
You can view the brush variants stored
in the Tracker palette as thumbnail
images, in a list, or as strokes. The
Tracker palette can be resized to
display more or fewer brush variants;
however, it will only store up to 25
var i ants at a t i me.
You can clear selected brush variants,
clear all brush variants, and save
brush variants using the Tracker
Core l Pain t e r 19
Page 27

palette. Brush variants are stored ev en
after the document you were working
on has been closed.
The Tracker pal ette.
To choose a brush variant from
the Tracker palette:
• Click the brush variant you want
to use.
To view brush variants in the
Tr acker palette :
• On the Tracker palette, click the
palette menu arrow, and choose
List, T hu m b na i l s , or S troke.
To resize the Tracker palette:
• Point to the resize handle in the
bottom-right corner of the palette,
and drag to make the palette lar ger
or smaller.
The number of variant s displayed
varies according to the size of the
palette.
To clear a selected brush variant
from the Tracker palette:
1 On the Tracker palette, click the
brush variant you want to remove.
2 Click the palette menu arrow, and
choose Clear Selected.
To clear all brush variants from
the Tracker palette:
• On the Tracker palette, click the
palette menu arrow, and choose
Clear All.
To save a brush variant on the
Tracker palette:
1 On the Tracker palette, click the
brush variant you want to save.
2 Click the palette menu arrow, and
choose Save Variant.
3 In the Save Variant dialog box, type
a name in the Save As box.
Enable the Save Current Colors
check box to retain current color
settings.
Navigating Palettes
When a palette is display ed, it must be
expanded for you to access its settings.
You can collapse palettes to save screen
real estate, while keeping them
displayed in the applicati on.
If you have many palettes displayed
and expanded, the view of other
palettes can be obscured. You can
scroll through palettes to locate the
elements you want to work with.
To expand or collapse a palette:
• Click the palette arrow in the top
corner of the palette.
When the triangle points down,
the palette is expanded. When it
points to the right, the palette is
collapsed.
To scroll through a palette:
• Do one of the following:
The Workspace20
Page 28
• Use the scrollbar on the right
side of the palette to scroll
through the palette.
• Press Option + click (Mac OS)
or Alt + click (Windows), and
drag vertically inside the
palette. The cursor changes to a
hand and the palette scrolls as
you drag.
give you easy access to the tools and
controls you use most often, and to
maximize screen real estate.
You can also group and reposition
palettes according to your preferences,
and you can dock them to the edges of
the document window or other
palettes.
Using Palette Men us
Most palettes in Corel Painter contain
menus from which you can access a
series of palette-specific commands.
F or example, you can use the palette
menu on the Pa pers pa lette to capture ,
make, and invert paper textures, and
to open the Paper Mover and library.
To access the commands on a
palette menu:
• Click the palette menu arrow.
Setting Palette Layout
You can set up the palette layout in
Core l Painter to best su i t your
working style. Palettes can be
arranged in the document window to
Arranging Palette s
You can drag a palette to any location
that’s convenient for your work. Corel
Painter save s palette arrangements so
that the ne x t tim e yo u s tart the
program, the wo rkspace appears as
you left it.
You can save several different palette
layouts for future use, and you can
later delete layouts. You can also
return the palette layout to the Corel
Painter default.
Arrange palettes to create a la you t that is
convenient for you.
To save a layout:
1 Arrange your palettes the way you
want them sav ed.
2 Choose Wi ndow menu > Arrange
Palettes > Save Layout.
3 In the Palette Layout dialog box,
type a name in the New Palette
Layout box.
To use a saved layout:
• Choose Wi ndow menu > Arrange
Palettes > Name of Layout.
Corel Painter restores the saved
palette layout.
Core l Pain t e r 21
Page 29
To delete a saved layout:
1 Choose Window menu > Arrang e
Palettes > Delete Layout.
Corel Painter opens a dialog box
listing all saved layo u t s.
2 From the list, select the layout you
want to delete.
3 Click Delete.
To return to the default palette
layout:
• Choose Window menu > Arrang e
Palettes > Default.
To resize palettes
• Drag the resize handle in the
bottom-right corner of the open
palette.
Grouping and Repositioning
Palettes
In Corel Painter, palettes appear by
default in small, intuitive groupings.
You can customize these groupings by
moving palettes from one group to
another. You can include as many or as
few palettes as you want in a group.
You can also reposition items to a new
loc a ti on w i thin a group.
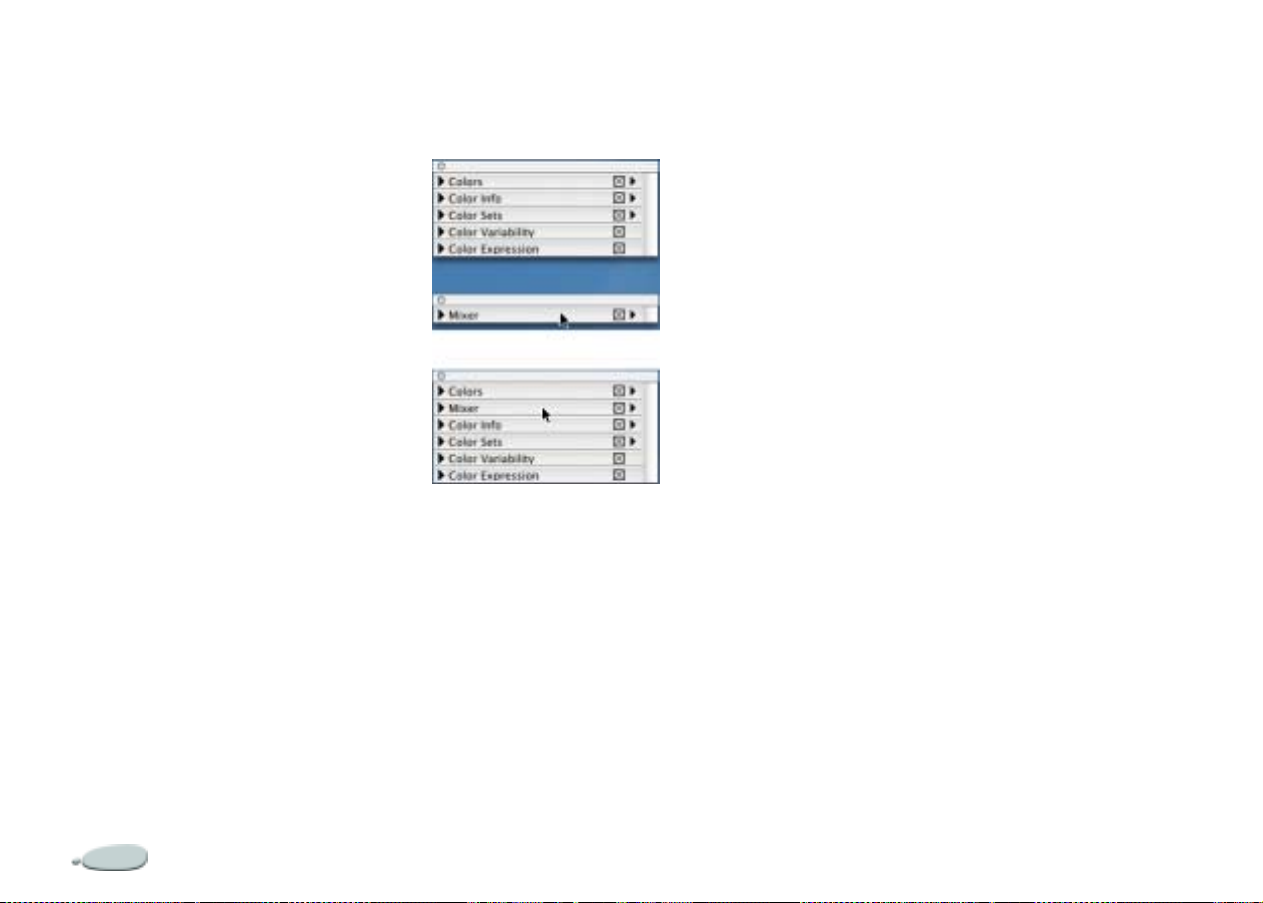
Customized palette groupings. In this example,
the Mixer palette has been grouped with the
othe r color palettes.
To group palettes
1 Place the cursor over the palette
bar.
The cursor displays as a hand.
2 Drag the palette bar, and place it
on top of the palette with which
you want to create a group.
3 Release the mouse button.
A new group of palettes is formed.
4 Repeat steps 1 to 3 for each palette
you want to add to the group.
To ungroup palettes
1 Place the cursor over the palette
bar.
The c u r s or d i sp l ays as a h a n d .
2 Drag the palette bar away from the
group.
3 Release the mouse button.
The palette is removed from the
group.
4 Repeat steps 1 to 3 for each palette
you want to ungroup.
To reposition items in grouped
palettes:
1 Place the cursor over the palette
bar.
The c u r s or d i sp l ays as a h a n d .
2 Drag the palette to a new location
in the group.
3 Release the mouse button.
The Workspace22
Page 30

Docking Palettes
If you n eed some room on your
screen, but don’t want to collapse or
group palettes, you can save valuable
screen real estate by docking palettes.
This handy feature of Corel Painter
lets them be docked into place when
they get close to the top or bottom
edge of another palette. In addition to
tidying up your workspace, this
feature can help keep a palette from
being covered u p by another palette.
To do ck palette s:
1 Place the cursor over the title bar of
the palette you want to dock.
2 Drag the palette to the top or
bottom of a second palette.
3 When the first palette lines up
with the second palette, release the
mouse button.
The palette will snap into place.
4 Repeat steps 1 to 3 for each set of
palettes you want to dock.
To undock palettes:
1 Place the cursor over the title bar of
the palette you want to undock.
2 Drag the palette to another
loca tion in th e wor kspa c e .
3 Repeat steps 1 and 2 for each
palette you want to undock.
Libraries and Movers
What are Libraries?
A library is a saved collection of
similar items that can be loaded into a
selector. For example, the built-in
brushes (and their variants) are
contained in the default brushes
library, which is loaded when you
open Corel Painter. You can find more
brush libraries in the Corel Painter
folder. As you customize brushes and
other resources, you can save them
int o y our o wn l i b rar i e s .
Libraries are available for paper
textur es , pa t t e rn s , g ra di e n t s, weave s ,
brus h e s , l oo k s, nozzl e s , layers,
selections, lighting, and scripts. You
can have any number of libraries, but
only one of each type can be open at a
time.
When you want other items, you can
load alternate libraries . Librari es allow
you to extend the Corel Painter tools
and resources, without overloading a
selector.
The methods for working with all
libraries are the same, except for
brushes . You can create new libraries,
add items, or move items between
libraries.
The methods for working with the
libraries for Brushes, their categories,
and variants are different. Brushes are
loaded into memory when you open
Corel Painter, so adding brush es to
the default brush library increases the
need for RAM. If you’re working close
to the memory threshold, you’ll want
to organize new brushes into
secondary libraries. When you want a
diff e r e nt bru s h se t , just sw i t ch
libraries. This helps Corel Painter be
more efficient with memory usage.
See “Using Brush Libraries” on
page 26 for more information.
It is a good idea to limit the number of
resources in each librar y. This makes
it easier to find a particular tool and
helps Corel Painter manage memory.
Core l Pain t e r 23
Page 31

What are Movers?
The tools for creating libraries and
mana gi ng t he ir co nt en ts ar e c ont ai ned
in the Movers. A Mover is provided on
the selector menu and/or the palette
menu for each resource supported by
libraries. Selectors and/or palettes
with Movers are: Papers, Gradients,
Pat t erns, Weaves, Nozzles, L ooks,
Scripts, Imag e Portfolio, and Selec tion
Portfolio.
Use the Paper Mover command to customize
your paper libraries. Each resource type has a
mover. Most movers are located on a palette
menu or selector.
Adding Resources to the
Current Library
As you work with Corel Painter and
create new resources, y ou can sav e
them to the current library.
To add resources to the current
library:
1 Click the selector menu arrow or
palette menu arrow for the
resource you want to add to the
library.
2 Choose Save [Resource Name].
3 In the Save dialog box, type a
name in the Save As box.
Note
Over time, with additions an d
•
deletions, library file sizes are
compounded. For best results, save new
items into new libraries.
Loadin g Alternate Libraries
To load an alternate library:
1 Open the selector or display the
palette from which you want to
load an alternate library.
2 Click the sel e ctor menu arrow or
the palette menu arrow, and
choose Load Library.
3 In the Load Library dialog box,
locate and choose the library you
want to open.
Corel Painter loads the resources
from that library into the selector
and palette.
Tip
When you save an item, Co rel Painter
•
puts it in the current library. If this is not
where you want it, be sure to switch
libraries before saving the resource. You
can move items between libraries, but
switching libraries before saving the
resource will spare you that ext ra step.
Creating a Library
When you want to use the items of a
different library, you must load the
alternate library.
To create a new library:
1 Click the sel e ctor menu arrow or
pal e tt e men u arrow for the
The Workspace24
Page 32

resource you want to use to create
the new library.
2 Choose [Res ource Name] Mover.
3 In the Mover dialog box, click
New.
4 In the New Library dialog box,
browse to the location where you
want to save the new library.
5 Type a descriptive name in the File
Name box, and click Sav e.
The new library’s name appears
on the right side of the Mover
window. The area above the name
is blank becaus e th i s new library is
empty. To put items in it, you can
move them from other libraries.
Tip
It’s a good idea to save libraries in the
•
same place. This makes them easy to
locate and load when yo u want them.
Customizing Libraries
The tools for creating libraries and
managing their contents are contained
in the Movers. A Mover is provided on
the selector menu and/or palette
menu for each resource suppo rted by
libraries.
Brush libraries are created and
managed differently. See “Using
Brush Libraries” on page 26 for
procedures.
Moving Items Between
Libraries
Movers copy resources from the
library on one side of the Mover
window to the library on the other
side of the Mover window.
When you open a Mover, the
resources of the current library are
listed on the left. This is the library
you’ll move items “from.” If this is not
what you want, you can open a
different library as the source.
When the source library is open on
the left side and the destina tion library
is open on the right, you are ready to
move resources.
To open a new library as the
source:
1 Click th e se l e ct or m en u a r row or
palette menu arrow for the
resource you want to use.
2 Choose [Resource Name] Mover.
3 In the Mover dialog box, cli c k
Close to close the current library.
4 Click Open.
5 In the Open Library File dialog
box, choose a library to use as the
source library.
To open a new destination library:
1 Click the selector menu arrow or
palette menu arrow for the
resource you want to use.
2 Choose [Resource Name] Mover.
3 In the Mover dialog box, cli c k
Open.
4 In the Open Library File dialog
box, choose a library file to use as
the destination library.
To move an item from one library
to another:
• In the Mover dialog box, drag the
ite m fr om the sou rce li b r ary to the
destination librar y.
Core l Pain t e r 25
Page 33

Modifying a Library
You can modify a library by renaming
items, deleting items, and deleting
entire libraries.
Renaming Items
You can rename items in libraries to
suit your preference.
To change the na me of an it em :
1 Open the Mover for the item y ou
want to modify.
2 Do one of the follo w i ng :
• Double-click the icon of the
item.
• Choose the item and click
Change Name.
3 In the Change Name dialog box,
type the new name in the Change
To box.
Deleting Items from Libraries
If you want to delete a resource from a
library, you can—but be careful. Once
you remove one of the default brushes
(even if it’s by mistake), the onl y way
to retrieve it is to reinstall Corel
Painter. If you must reinstall Corel
Painter, you’ll lose any of the custom
resources you’ve created and saved
into the d e fault lib r a r i e s.
To delete an item from a library:
1 Open the Mover for the item you
want to delete.
2 Choose the item you want delete.
3 Click the Delete button in the
Mover dial og box.
To avoid deleting items from
libraries when reinstalling:
• Move saved items to a location
other than the default libraries.
Deleting a Library
To delete an entire library, delete the
file from the Corel Painter directory.
Be careful not to delete the Corel
Painter default libraries. Corel P aint er
needs them to start properly.
To delete a library on the Ma c OS:
1 Use the Finder™ to open the
folder.
2 Drag the library file to the Trash.
To delete a library on Windows:
1 Use the Windows Explorer to open
the folder .
2 Select the file.
3 Press Delete, or drag the file to the
Recycle Bin.
Using Brush Libraries
In Corel Painter, users work with
brush libraries in the Brushes folder.
The Painter Brushes folder is the
default library that loads when you
open Corel Painter.
Each folder within the Painter
Brushes default library folder is a
brush category. In each category
folder, there is a JPEG graphic, which
is the icon seen on the Brush selector
bar.
In each category folder are XML files,
which are the brush variants available
for that brush category.
The Workspace26
Page 34

Creating and Importing Brush
Libraries
You may want to create a library of
your favorite brush variants to have
them all in one category. You can also
import brush libraries and access
them through the Brush selector bar.
To creat e a bru sh libr ar y
1 In the Brushes folder, create and
name a new folder for your library.
2 In the new folder you just created,
create and name a new folder for
your br ush cat ego ry.
3 In the brush category folder you
created in step 2, copy XML files
from other existing fo lders.
4 In Corel Painter, click the selector
menu arrow on the Brush selector
bar, and choose Load Library.
5 In the Brush Libraries dialog box,
choose the brush categor y folder
you created in step 2, and click
Import.
Notes:
This procedure works only for brushes
•
created in version 7 and late r of Corel
Painter. To use brushes created in version
6 or earlier of Corel Painte r, y ou must
first import them, and then load them.
F or information about importing brushes,
see “To import a brush library” on
page 27.
If you w ant an icon to appear on the
•
Brush selector bar, you must create a
JPEG and save it with the same name as
the library. Save it at the same level as the
brush category folder.
To import a brush library
1 On the Brush selector bar , click the
selector menu arrow, and choose
Import Brush Library.
2 In the Select Brush Library dialog
box, choose a librar y, and click
Open.
The brush library is imported into
Corel Painter and can be accessed
through the Brush selector bar.
Note
Brushes libraries create d in version 6
•
or earlier of Corel Painter are imported as
.BRS files.
Deleting a Brush Library
To delete a brush library, delete the
folder from the Brushes folder.
Be c a r e ful no t to de l e te the Corel
Painter default libraries, which are
stored in the Painter Br ushes folder.
Corel Painter needs them to start
properly.
To delete a library on Mac OS:
1 Use the Finder to find the library
folder.
2 Drag the library folder to the
Trash.
To delete a library on Windows:
1 Use the Windows Explorer to find
the library folder.
2 Select the folder .
3 Press Delete, or drag the folder to
the Recycle Bin.
Customizing Palettes
To give everyone the freedom to work
in their own style, Corel Painter
supports custom palettes that contain
exactly the features you want. Since
Core l Pain t e r 27
Page 35

the features on a custom palette are
immediately avai lable, y ou can cho ose
them with a single click.
Custom pale t tes h e lp y ou o rganize material for
specific needs.
You can put items from any of the six
content palettes—papers, patterns,
looks, weaves, nozzles, or gradients—
on a custom palette. You can also add
any Menu command, such as File >
New, to a custom palette.
You might want to create special
palettes for a particular project or
method of working that you use
frequently. You can create a whole
series of palettes and switch between
them as you change projects or work
methods.
You can create as many custom
palettes as you like. Corel Painter
saves them from session to session, so
it’s easy to get right to work.
Items that appear on a custom palette
are references (aliases) to the original.
This means that if you change the
original—for example, by modifying
and saving a brush variant—the
custom palette button loads the
newest version. On the other hand, if
you delete the original, Corel Painter
won't be able to find it to load it again.
Creating Custom Palettes
Tearing Off to Create a New
Palette
If the item you want is represented in
a palette with an icon, you can cr eate a
new palette by just dragging the icon
out of the palette. This works for art
materials (P aper Textures, Gradients,
Patterns, and Weaves), nozzles, and
looks.
To create a custom palette by
dragging:
1 Drag an icon or bu tton out of its
palette.
When you release the mouse
button, Corel Painter creates the
custom palette. It contains an icon
for the item you dragged out.
Drag a tool out of a palette to create a custom
palette.
To enable Tool Tips for a custom
palette:
• Enable Tool Tips by choosing
Help menu> Show Tool Tips. All
you have to do is move your mouse
over a feature and the tip appears.
You mig ht create a Water Color palette with
the brush variants you use often and your
favorite paper textures.
The Workspace28
Page 36

Tool Tips identify an item by name.
Adding to a Custom Palette
You'll want to add items to the palettes
you create.
To add items to a custom palette:
1 Locate the next item you want to
add.
2 Drag the item’s icon to the location
you want in the custom palette.
When you drop an icon on top of
an existing icon, the palette
automatically expands to the right.
Note
Corel P ainter
•
from the main Tools palette to be added to
custom palettes.
does not perm it tools
Tip
To keep the p a lette across the edge of
•
your screen, you can arrange icons
vertically or horizontally. To do th is, drag
the bottom right corner of th e palette to
make more r oom.
To rearrange the layout in a
custom palette:
• Hold down the Shift key, and
move the icon or button to where
you want it.
To delete an item from a custom
palette:
• Hold down the Shift key, and drag
the icon or button out of the
palette.
Placing Menu Commands on
a Palet te
You can add a button for any of the
menu commands to a custom palette.
You can add commands from the
main menus or from the palette
menus.
To place menu commands on a
custom palette:
1 Choose Window menu> Custom
Palette> Add Command.
Corel Painter displays the Add
Command dialog that lets you
choose whether you want to create
a custom palette or add a menu
item to an existing palette.
2 With the Add Command dialog
open, choose the menu item you
want. The Add Command dialog
displays the command as a Menu
Item.
Core l Pain t e r 29
Page 37

Using Custom Palettes
Custom palettes beha ve very much
like the standard palettes. You can
move them around by dragging the
title bar. You can resize them, but not
smaller than the contents require.
You can create as many custom
palettes as you like. However, since
you probably won't want to use them
all at once, you can close a palette to
keep your workspace uncluttered.
To show a hidden custom palette:
• Choose Window menu> Custom
Palett e> your palette name.
Corel Painter keeps your custom
palettes from one session to the next.
If you like creating custom palettes,
the list might get unwieldy. You might
want to remove obsolete custom
palettes or those you don't use very
often.
You can also save a custom palette to a
file. If you save it to a file, you can
remove it from Corel Painter, and
then load it again later.
3 Click OK to close the Add
Command dialog.
The custom palette now contains a
button fo r the ch osen menu
command.
The Workspace30
To hide a custom palette:
• On the custom palette, click the
Clos e box.
Managing Custom Palettes
The Custom Palette Organizer is the
tool for managing your custom
palettes. Corel Painter provides names
for custom palettes; you’ll probably
want to rename the palettes you
create.
You can use the Custom Palette Organizer to
organize your custom palet t es.
Note
Corel Pa in ter
•
files created only with version 8. Custom
palettes created with earlier versions of
Corel Painter
supports custom pa lette
will not load.
Page 38

To use the Custom Palette
Organizer:
1 Choose Window menu> Custom
Palette> Organizer.
2 Use the Organizer to rename, save
(expo rt), load (import), and delet e
custom palettes. Each operation is
described below.
3 When you are finished with the
organizer, click Done.
To load a custom palette:
1 From the Custom Palette
Organizer, click Import.
2 Corel Painter displays an Open
dialog so you can choose the file
where the custom palette is saved.
To save a custom palette:
1 From the list, select the palette you
want, and click Export.
2 Corel Painter displays a Save
dialog so you can name the file and
choose a location. It's a good idea
to keep all your saved palettes in
the same place.
To rename a custom palette:
1 From the list, select the palette you
want, an d c li ck Ren a m e .
2 Corel Painter prompts you for the
new name. Enter a name and click
OK.
To remove a custom palette:
• From the list, select the palette you
want, an d c li ck Dele t e .
Setting Palette Layout
When you quit Corel Painter, the
program saves the palette
arrangement. The next time you run
the program, Corel Painter restores
the palettes as they were when you
quit.
You can open and close palettes
individually. You can also control the
display of the palette layout with
Window menu> Hide/Show
Palettes.
Corel Painter offers some supporting
features that can help with palette
display .
Arranging Palettes
You can save a customized palette
layout. This makes it easy to return to
this particular layout. You can save
several different layouts.
To save a layout:
1 Arrange your palettes the way you
want them sav ed.
2 Choose Window menu> Arrange
Palettes> Save Layout.
3 Corel Painter prompts you to
name the new palette layout. Enter
a name and click OK.
To use a saved layout:
• Choose Window menu> Arrange
Palettes> name of layout. Corel
Painter restores the saved palet te
layout.
For example, Wind ow menu>
Arrange Palettes> Default
immediately returns palettes to the
default palette layout.
To delet e a save d layout :
1 Choose Window menu> Arrange
Palettes> Delete Layout.
Core l Pain t e r 31
Page 39

Corel Painter opens a dialog listing
all saved layouts.
2 From the list, select the layout you
want to delete. Click Delete.
The Workspace32
Page 40

3
Basics
The Corel Painter application
provides a digital workspace in which
you can create new imagery or alter
existing imagery using the Corel
Painter Natural-Media tools and
effects. Your working image is known
as a document and is displayed in a
document window—this document
window includes navigation and
productivity features to help you work
efficiently.
As you create an image, you can save
your document in a number of
different file formats: RIFF (Corel
Painter native format), JPEG, TIFF,
and Photoshop (PSD), to name a few.
Corel Painter also lets you open/
import images in many file formats.
Every artist works in a unique way,
and every computer system has its
own configuration of memory, disks,
printers, and accessories. Corel
Painter preferences let you customize
the program for your own work style
and optimum performance on yo ur
particular system. You can also
optimize the features of your tablet
and pens in Corel Painter.
Opening Documents
The first step to creating an image in
Corel Painter is opening a document.
You can open a blank Canvas by
creating a new document, work with
an existing image by opening a file,
place a file into a document, or
acquire an image from a scanner or
digital camera to place directly into a
document.
Creating New Documents
The New command creates a blank,
untitled document based on the
specifications you set in the New
dialog box.
• Canvas Size shows the RAM
requirement for creating the
document at the specified width,
Page 41

height, and resolution. This
number does not reflect the file
size for the saved document. A
saved Corel Pain ter file is usually
25% to 50% of the size of the
working document, depending on
the number of colors it contains.
• Width and Height determine the
dimensions o f t h e C a nv as . You ca n
change the unit of measurement
using the me nu. Choose from
pixels (the default), inches,
centimeters, points, picas, and
colum ns (2" wide ).
• Resolution is the number of pixels
per inch (ppi) or centi meter that
make up an image. In the New
dialog, setting the document’s
pixels per inch is the same as
setting its dpi. Refer to
“Understanding Resolution” on
page36 for detailed information
about document, screen, and prin t
resolutions.
• Paper Color lets you select a
background paper color—or
Canvas color—when you create a
new document. The default is
white.
• Picture Type lets you set up a
document to contain a single
image frame or multiple frames for
a movie. The default is single
frame.
To create a new document:
1 Choose File menu > New.
2 In the New dialog box, enter
values for the wi d t h , h e i ght, an d
resolution of the document.
Change the unit of measurement
by choosing an option from the
menu.
3 Click in the Paper Color box to set
the document’s background to a
color other than white.
Choose a color from the system
color picker that appears.
4 Choose a picture type.
5 Click OK.
A new document appears in the
workspace.
Open ing Existing Documents
You can op e n d oc umen t s f rom ot h e r
graphics applications and use Corel
Painter to add brush strokes, tints, or
paper textures. Or, you can clone a
document to re-create it in a different
medium.
Corel Painter lets you open the
following file formats:
• RIFF—Corel Pa inte r native
form at (RIF )
• TIFF (TIF)
• CMYK TIF (TIF)
• Photoshop formats (PSD)—Corel
Painter preserves layers and alpha
channels. Layer effects and
adjustment layers are not
supported and should be merged
or flattened in Adobe Photo s hop.
•Windows Bitmap (BMP)
•PC Paintbrush (PCX)
•TARGA® (TGA)
• GIF—Corel Painter does not
convert GIF animations to frame
stacks.
• JPEG (JPG)
Basics34
Page 42

• Frame stacks (FRM)—Corel
Painter animation files.
•QuickTime™ (MOV), Video for
Windows (AV I) , and num bered
files. For more information, refer
to “Opening a Movie” on page 426
or “Working with Numbered
Files” on page 441.
Note
Corel Painter doe s not support LZW
•
compressed TIFF file format. Only
uncompressed TIFF f iles open into Corel
Painter.
To open an existing document:
1 Choose File me nu > Open.
2 In the Select Image dialog box, use
the dialog controls to locate the file
you wan t to op e n.
Corel Painter lists every image’s
file size, file format, and
dimensions in pixels. In additi on,
files saved in Corel Painter include
a thumbnail image for browsing
purposes.
3 Click Browse.
The Browse dialog box sh ows
thumbnails for all the RIFF files in
a fold e r.
4 Double-click the file name, or
select a file and click Open.
Tip
The File menu also offers you a
•
shortcut to previously o pen ed documents.
Before choosing Open in the File menu,
check the recently op ened files list at the
bottom of the File menu.
The Browse dialog box displays a thumbnail
image of files.
Placing Files
Placing a file lets you import an image
into an existing Corel Painter
document. The placed image becomes
a new reference layer in the
document—you can transform
(resize, rotate, slant) it on screen by
dragging its handles. A placed file
maintains its link to the source file
until you commit it to standard layer
format.
Refer to “Working with Reference
Layers” on page246 for general
information about working with
reference layers.
To place a file:
1 Choose File menu > Place.
2 Select an image file and click
Open.
3 In the Place dialog box, set the
options:
• Horizontal and Vertical Scal-
ing suggests a scale to fit the
image in the current document.
To change the size, enter a scaling percentage in the Horizontal Scale and Vertical Scale
fields.
• Constrain Aspect Ratio maintains the proportions of the
image. Disable this option to
distort the image.
• Retain Alpha retains the f i l e’s
mask. When the image is
placed, the image mask
Core l Pain t e r 35
Page 43

becomes the layer mask. Disable this option to discard the
mask.
4 Do one of the follo w i ng :
• To place the image in a particular location, click on that location i n th e d o c u m e nt.
• To place the image in the center of the document, click OK.
Acquiring Imag es
You can acquire images for Corel
Painter direct ly from an external
device—such as a scanner or digital
camera—if the device provides a:
• Photoshop-compatible plug-in
module (Mac OS)
• TWAIN driver (Windows)
Before acquiring images:
• Install the device plug-in module
on your com p uter.
This plug-in module is provided
by the manufacturer of your
scanner or digital camera. Refer to
the device documentation for
installation instructions.
Corel Painter can access plug-ins
from any single folder on your
computer. This location can be
inside the Corel Painter fol der , in a
generic plug-ins folder on your
hard drive, or in the Photoshop
Plug-Ins folder.
• Make sure your TWAIN driver is
properly installed.
Understanding Resolution
When working with images in a
digital workspace, it is helpful to
understand the concept and
applications of resolution. Resol ut i on
refers to how Corel Painter measures,
displays, saves, and pri n ts images—
either as small squares of color known
as pixels or as mathematical objects
known as vectors.
A document’s resolution affects both
its appearance on your computer
screen and its print quality. You can
specify a document’s resolution when
you create a new document, acquir e
an image, and save/export a file.
Resolution and Screen
Appearance
Most monitors have a resolution of 72
dpi (dots per inch). Because of this,
the Corel Painter display default is 72
ppi (pixels per inch). This means that
each pixel in the Corel Painter image
occupies one pixel on your monitor.
The display resolution does not affect
the document’s actual ppi—only how
the image is displ ayed on the monitor.
For example, a 300 ppi document
displays at approximately four times
its actual size. This happen s because
each pixel in the Corel Painter image
occupies one pixel on your monitor,
and the monitor’s pixels ar e four times
the size of the image’s pixels. Put
another way, at 300 pixels per inch,
your document will be approximately
a quarter of its on-screen size when
printed. In this example, if you want
to view the image at actual size, set the
zoom level to 25%.
Keep in mind that if you leave the
dimensions in pixels and then change
the pixels per inch (resolution), the
actual printed size will be affected by
the change. Ifyou set your document
Basics36
Page 44

size in inches, centimeters, points, or
picas and change resolution, the
dimensions will not be affected by the
change.
Resolution and Print Quality
The res o lution of ou tp u t d e vi c es
(printers) is measured in dpi and, in
the case of halftones, lines per inch
(lpi). Output device resolutions vary
depending on the type of press and
paper you’re printing on. Generally, a
photograph will be output at a crisp
150 lpi if printed on glossy magazine
stock and at 85 lpi for more porous,
and therefore more forgiving,
newspaper stock.
If you are using a personal laser
printer or inkjet printer, set your
document size in inches, centimeters,
points, or picas at the dpi specific to
your printer. Most printers will
produce excellent output from images
set to 300 ppi. Your file will be output
correctly, at the best resolution for
your laser printer and at the proper
size. Incr easi ng the file’s ppi setti ng
does not necessarily improve the
output, and can make for a larger and
sometime unwieldy file.
If you are using a commercial printer
or a more sophisticated output device,
the dimensions of the image should
always be set to the actual siz e it will
appear in the printed piece. For the
resolution, a good rule of thumb is to
set your document’s pixels per inch to
twice the desired lpi. So, when lpi is
150, the pixels per inch should be
twice that, or 300; if the lpi is 85, the
pixels per inch should be 170. It’s a
good idea to check with your service
bureau if you have questions about
output device res ol ution.
Working with Documents
Viewi ng Do cu m en ts
You can change your view of an image
by changing its level of magnification
(zooming in or ou t) , rep osit ion ing the
document in the Corel Painter
workspace, or rotating the document.
You can also change th e charact eris tics
of the document window by changing
the screen mode, an d by selecting
option s f r om t he C an v a s m e nu .
Zooming
By default, Corel Painter opens a
document at 100% magnification, but
you can change the level of
magnification by zooming. You can
zoom in and out using the Magnifier
tool, reset magnification and zoom to
fit the screen. You can even zoom in
and out while working with other
tools.
The Magnifier tool lets you zoom in and out by
clicking in the document window.
To zoom in:
1 Do one of the following:
Core l Pain t e r 37
Page 45

• Choose the Magnifier tool
in the toolbox.
• Hold down Command + Spa-
cebar (Mac OS) or Ctrl + Spacebar (Windows).
The Magnifier cursor shows a plus
sign (+) — indicating you are
increasing magnification
(zooming in).
2 Click or drag in the document
window.
• Clicking magnifies the image
to the next level, as defined in
the Zoom Level menu on the
property bar.
• When you drag, Corel Painter
chooses the magnification level
that most closely conforms to
the selected area and centers
the screen view on that area.
The percentage the document is
magnified appears in the
document window’s title bar.
To zoom out:
1 Do one of the follo w i ng :
• Choose the Magnifier tool and
hold down Option (Mac OS)
or Alt + Ctrl (Windows).
•Hold down Option +Com-
mand +Spacebar (Mac O S) or
Alt + Ctrl + Spaceb ar (Win-
dows).
The Magnifier cursor shows a
minus sign (-) — indicati ng you
are decreasing magnification
(zooming out).
2 Click in the document window.
Each click reduces the
magnification to the next level, as
defined in the Zoom Level menu
on the prope rty bar.
Tip
You can also zoom in or out by
•
moving the Scale slider, t yp ing a value in
the bottom left corne r of the image
window, or choosing an option from the
Zoom Level pop-up menu on the property
bar.
To zoom using the Magnifier tool
1 In the toolbox, click the Magnifier
tool.
2 Choose a zoom leve l f rom the
Zoom Level pop-up menu on the
property bar.
To reset magnifi cation to 100%:
• Double-click the Magnifier tool.
To zoom to fit the screen:
Do one of the following:
• Choose Window menu > Zoom
to Fit Screen.
• Double-click the Grabber tool in
the toolbox .
Corel Painter generates a view of
the entire document to fit the size
of your screen.
T o access the Magnifier tool while
any other tool is selected:
• Press Comman d + Sp ace bar (Mac
OS) or Ctrl + Spacebar
(Windows) and click to zoom in;
press Command + Option +
Spacebar (Mac OS) or Ctrl + Alt
+ Spacebar (Windows) and click
to zoom out.
Basics38
Page 46

Repositioning Documents
The Grabber tool allows you to
reposition a document in the Corel
Painter workspace and view different
areas of an image.
To use the Grabber tool:
1 Activate the Grabber tool by:
• Choosing the Gr abber tool .
• Holding down the Spacebar.
The cursor changes to the Grabber
tool and th e propert y bar shows the
zoom level. You can change the
zoom level from the property bar.
2 Do one of the follo wing:
• Drag in the document window
to scroll through your image.
• Click once in the document
window to center the image.
To access the Grabber tool from
any tool:
• Hold down the Spacebar.
To size your image window to fit
the screen area:
• Do one of the follo wing:
• Double-click the Grabber tool.
•Choose Window menu >
Zoom to Fit.
• Click Fit on Screen on the
prop e rty ba r.
Tip
To return the image window to center ,
•
click once with the Grabber tool or click
Center Image on the proper ty bar.
Rotating Documents
The Rotate Page t ool lets y ou rotate a n
image on the screen to accommodate
the way you draw naturally.
To rotate the page:
1 Activate the Rotate Page tool by:
• Clicking it in the toolbox
.
• Holding down Option + Spa-
cebar (Mac OS) or Alt + S pacebar (Windows).
The cursor changes to a hand with
a pointing finger.
2 Drag in the document window to
rotate the image.
Move the cursor clockwise to rotate
the image clockwise. Move the
cursor counter-clockwise to rotate
the image counter-clockwise.
The new rotation angle appears on
the property bar.
Tip
You can also rotate an image by
•
specifying a rotation angle on the property
bar.
Core l Pain t e r 39
Page 47

2 Do one of the following:
• Click once in the document
window.
• Double-click th e Rotate Page
tool.
• Click the Reset Tool button on
the property bar.
To constrain rotation to 90°
increments:
• Hold down the Shift key while
rotating.
Cropping Images
You can remove unwanted edges from
the image with the Crop tool. You can
adjust the ratio of the cropped image,
and choose to maintain the aspect
ratio.
Yo u can adjust the rectangle by
dragging a corner or any of its
edges.
3 When you’re ready to execute the
crop, click inside the rectangle.
To constrain cropping to a square:
• Press Shift + drag while defin i n g
the rectangular area with the Crop
tool.
To adjust the ratio of the cropped
image:
1 Click the Cr op t ool in the toolbox.
2 On the property bar, type ratio
values in the boxes.
3 If necessary , enable the Ratio check
box to maintain aspect ratio when
cropping the image.
Rotate a document to acc ommodate the way
you naturally dra w.
To return an image to its original
orientation:
1 Activate the Rotate Page tool .
Basics40
To crop an image:
1 Click the Crop tool in the
toolbox.
2 Drag inside the image to define the
rectangular area you want to keep.
Using Full Screen Mode
Full screen mode allows you to hide
your computer’s desktop and view the
document window with out scr oll bars.
When full screen mode is on, the
document window is centered over a
solid background. All Corel Painter
Page 48

features—except the button s on the
document window—work when
using full screen mode.
To toggle the full screen mode on
and off:
• Press Command + M (Mac OS)
or Ctrl + M (Windows), or choose
Window menu > Screen Mode
Toggle.
Tip
You can position the im age window
•
anywhere on the screen by holding down
the Spacebar and dragging with your
mouse or stylus.
Image Size In formation
You can use the Info palette to check
image size. For more information, see
“The Info Palette” on page 19.
Resizing the Canvas
If you want the same image at a
different scale, you can resize the
canvas. You can also change the size of
the drawing area, and you can crop
the canvas.
To res ize the canvas:
1 Choose Canvas menu > Resize.
Corel Painter displays the Resize
dialog box, which shows the
current and new si ze by width,
height, and resolution.
2 Enter a new value for width,
height or resolution.
For more information on these
values, refer to “Creating New
Documents” on page33.
3 The Constrain File Size option lets
you choose how to deal with
dimensions relative to resolution.
When Constrain File Size is
enabled, you can change the
height and width of the image
together. The resolution will
change accordingly.
When Constrain File Size is
disabled, you can change the
height and width independently of
the resolution, and vic e versa .
If you choose Pixels or Percent as
the unit and enter a value, Corel
Painter aut omatically disables the
Constrain option.
4 Click OK.
To resize the drawing area:
1 Choose Canvas menu > Canvas
Size.
2 In the Canvas Size dialog box,
specify the number of pixels you
want to add to any side of the
canvas.
Enter negative values to reduce the
canvas size.
To crop the canvas:
1 Display the image at a scale where
you can see all of it.
2 In the toolbox, choose the Crop
tool .
3 Drag in the image to describe the
rectangular area you want to keep.
4 Adjust the rectangle by draggin g a
corner or any of its edges.
The property bar shows the size
and location of the cropping
rectangle.
To constrain the cropping
rectangle to a certain aspect ratio,
enter values for the width and
height aspect, and enable the Ratio
option on the property bar.
Core l Pain t e r 41
Page 49

5 Click inside the rectangle to
perfor m the cropping operation.
Using R ul er s
Corel Painter lets you show or hide
rulers along the top and left sides of
the document window . Each mark on
a ru l e r is kn o wn as a tick a n d
represents the unit of measurement.
You can set the unit of measurement
to pixels, inches, centimeters, points,
or picas.
As you drag an image around the
document window, the rulers scroll to
show the p osit ion of th e Canv as in the
document window. The origin of the
document is the intersection of the
zero (0) ticks on eac h ruler. By
default, the origin is the upper left
corner of the Canvas. Changing the
orig i n r e s ets the loc a tio n of the 0 ti c k s
on the r u l e rs .
To display or hide rulers:
• Choose Canvas menu > Rulers >
Show Rulers or Hide Rulers.
To set the ruler units:
1 Choose Canvas menu > Rulers >
Ruler Options, or hold down
Option (Mac OS) or Alt
(Windows) and click in the ruler.
2 In the Ruler Options dialo g box,
choo se a un i t of m e as u reme nt
from the Ruler Unit pop-up menu.
To change the origin:
1 Click the box at the intersection of
the rulers (upper left corner of the
document window) .
2 Drag diagonally into the
document window.
Crosshairs disp lay to mar k the new
origin point.
3 Position the crosshairs and release
the mouse button.
The ruler numbers update to show
the new origin as 0, 0.
To restore the origin:
• Double-click the box at the
intersection of the rulers (upper
left corner of the document
window).
Using Guides
Guides are non-printing lines that
appear over the image in the
document window. They are very
helpful in aligning image elements.
You can place guides at any position in
the document window and easily
reposition and remove them.
The Snap to Ruler Ticks option
enables the guides you create to land
precisely on the tick marks.
Each g u i d e also has op t ions tha t l e t
you change its color and lock it so that
it can’t be dragged.
To display or hide guides:
• Choose Canvas menu > Guides
> Show Guides or Hide Guides.
To create a guide:
1 Show the rulers and the guides.
2 Click in a ruler at the position
where you want to place the guide.
A guide appears in the document
window and a triangular marker
appears in the ruler.
Basics42
Page 50

To set a guide’s color:
1 Double-click the guide’s marker.
2 In the Guide Options dialog box,
click the Guide Color color chip
and choose a color.
To change the color of all guides,
enable the Same Color for All
Guides option.
Setting the Snap to Guides
Option
The Snap to Guides option enables
selections and tool operations to
“snap” to a guide within 6 pixels of the
cursor (or edge).
The following operations respect Snap
to Guides:
A black triangle marks the guide’s position in
the ruler.
To reposition a guide:
Do one of the follo wing:
• Drag the guide’s marker to any
point of the ruler.
• Double-click the guide’s marker to
display the Guide Options dialog
box and enter a value in the Guide
Position field.
To enable the Snap to Ruler Ticks
option:
• Choose Canvas menu > Rulers >
Snap to Ruler Ticks.
To lock or unlock a guide:
1 Double-click the guide’s marker to
display the Guide Options dialog
box.
2 Enable or disable the Lock Guide
option.
To rem ove a guide:
• Drag the guide’s mar ker off the
edge of the document window.
To remove all guides:
1 Double-click the guide’s marker to
display the Guide Options dialog
box.
2 Click the Delete All Guides
button.
• Dragging with the Rect angular
and Oval Selection tools.
• Dragging with the Crop tool .
• Drawing straight lines with the
Brush tool .
• Clicks made with the Pen tool .
• Clicking with the Text tool to
create a text entry point.
• Clicking and dragging with the
Paint Bucket tool and
Magnifier tool .
• Dragging shapes and selections.
The edges of the content and the
selection rectangle for the shapes
and selections snap to the guides.
The cursor—wherever it might be
Core l Pain t e r 43
Page 51

in the object—also snaps to the
guide.
• Dragging the handles of reference
layers, shapes, and selections to
transform them.
• Dragging with the Selection
Adjuster tool or Layer Adjuster
tool .
To enable Snap to Guides:
• Choose Canvas menu > Guides
> Snap to Guides .
The option is enabled when the
menu item has a check beside it.
Using the Grid
Corel Painter provides a grid to help
you in laying down brush strokes or
creating shapes. You can set the types,
size, line thickness, color, and
transparency of the grid. You can also
print grid lines.
The Grid Options dialog box.
To activate the grid:
Do one of the following:
• Choose Canvas menu > Grid >
Show Grid.
• Click the Toggle Grid button on
the right side of your image
window.
Your image now has a
non-printing grid.
To set grid options:
1 Choose Canvas menu > Grid >
Grid Options.
2 In the Grid Options dialog box,
choose a grid type fr om the Grid
Type pop-up menu.
3 Enter values for Horizontal
Spacing (the distance between
horizontal lines), Vertical Spacing
(the distance between vertic al
lines), and Line Thickness.
The unit of measure can be in
pixe ls, i nc h es , c e n ti m e t er s, po i nt s ,
picas, columns (2" wide), or
percent.
4 Click in the Grid Color color chip
to set the color of the grid lines.
5 Click in the Background color chip
to set the grid’s background color.
To print grid lines
•Choose Effects menu > Esoterica
> Grid Paper.
Setting the Snap to Grid
Option
The Snap to Grid option enables
certain tool operations to “snap” to a
grid within 6 pixels of the cursor.
Basics44
Page 52

The following tools respect Snap to
Grid:
•Pen tool
•Shape Selection tool
• Convert Point tool
• Text tool
To enable Snap to Grid:
• Choose Canvas menu > Grid >
Snap to Grid.
The option is enabled when the
menu item has a check beside it.
Using th e Perspective Grid
Corel Painter provides perspective
grids as a guide to help you create
three-dimensional images. P erspective
grids are a non-printing array of lines
that converge at a single vanishing
point. In Corel Painter you can set the
type, line color, and spacing of the
perspective grid. You can modify the
location of the vertical plane and
horizon line by using the Perspective
Grid Adjuster tool. Any perspective
grid options that you create or modify
can also be opened for use in another
drawing.
Use perspe ctive gri d lines to he lp you create 3D images.
To activate or hide the default
perspect ive gri d:
• With an image open, choose
Canvas menu > P erspe ctive Grids
> Show Grid or Hide Grid.
To create a new per s pect i ve grid :
1 In the toolbox, click the
P erspective Grid Adjuster tool .
2 On the property bar, click the Add
Preset button beside the Presets
pop-up menu.
3 In the Save Preset dialog box, enter
a name in the Save As box.
4 Enable the check boxes
corresponding to the grids you
want to see.
5 Choose a color for the horizontal
and vertical grid lines in the Color
boxes.
6 Enter a value in the Spacing box.
Tip
To reset the perspective grid defaults at
•
any time, click the Reset Tool button on
the property bar.
To open a perspective grid:
1 In the toolbox, click the
Perspective Grid Adjuster tool.
2 On the property bar, choose a grid
from the Presets pop-up menu.
To remove a grid preset:
1 In the toolbox, click the
Perspective Grid Adjuster tool.
Core l Pain t e r 45
Page 53

2 On th e prop e rty ba r, ch o o se an
option from the Grid Type pop-up
menu.
3 Click the Delete Preset button.
The grid type disappears.
To adjust the per s pec tiv e gr id
lines:
1 Choose Canvas > Perspe ctive
Grids > Show Grid.
2 Click the Perspective Grid
Adjuster tool in the toolbox.
3 To move the horizontal plane grid,
hold the cursor over the nearest
edge of the horizontal plane grid.
The cursor becomes a doublepointed arrow.
4 Drag to move the horizontal plane
grid u p or down.
5 To move the vertical plane grid,
hold the cursor over the nearest
edge of the vertical plane grid.
The cursor becomes a doublepointed arrow.
6 Drag to move the vertical plane
grid left or right.
Drag-and-Drop Features
Dragging Between Documents
You can copy selections and layers
between Corel Painter documents by
dragging from one window to the
other. When you drag a selection to a
new document window, Corel Painter
automatically turns the selection into
a layer. When you drag a layer to a
new document, the layer keeps its
original properties.
Dragging Between Programs
(Mac OS)
Corel Painter supports drag-and-drop
functionality between applications on
Mac OS. This can be a quick,
convenient way to acquire or export
imagery.
On th e Mac OS, you can drag files
from Photoshop direct l y into Corel
Painter.
Raster imagery that you drag into a
Corel Painter document window
becomes a layer. You can drag a PICT
file from the Finder to a Corel Painter
document. The PICT image becomes
a layer.
Yo u can also drag layers out of Corel
Painter to another application or to
the Finder; the exported imagery is in
PICT format, supported by most
applications. When you drag out one
of these objects, it will automatically
rasterize a shape or dynamic layer (at
its current settings) to become a PICT.
Note
Though dragging and dropping
•
between programs is not supported on the
Windows platform, computers running on
either Mac OS or Windows platforms
support copying and pasting between
Corel Pa int er and othe r pro gr ams.
Saving Files
Corel Painter provides several options
for saving files.
To save a file in its current format:
• Choose File menu > Save.
Basics46
Page 54

To save a file with a different
name or format:
1 Choose File me nu > Save As.
2 In the Save Image As dialog box,
use the controls to specify a file
name, lo ca t i on, and form a t .
Saving RIF Files
RIF is the Corel P ainter native fo rmat,
which retains special information
about your document. For example, a
RIF file maintains layers so you can
return to the file to re-access them.
It’s a good idea to always save files in
RIF format first. Think of RIF files as
“work in progress” files. When a file is
ready for production, then save it to
GIF , JPEG, CMYK, TIF, or another
file format.
Corel Painter lets you compress files
and save disk space with a lossless
compression method.
When saving in RIF format, leave the
Uncompre sse d op tion disabled to
minimize file size on your hard disk.
Saving JPEG Files
Corel Painter su pports the JPEG file
format. Because of its small file size
and high quality, JPEG is commonly
used to tra nsmit file s thro u gh a
modem. Unlike GIF, JPEG displays a
full range of colors.
JPEG allows you to compress your file
on a scale of Fair to Excellent, where
quality is directly proportional to file
size. These quality settings will let you
achieve compression ratios of less than
10:1 to greater than 100:1. JPEG is a
“lossy ” f i l e f or mat, mea n i ng that a
decompressed JPEG file will not be
identical pixel-for-pixel to the
original. However, because the JPEG
algorithm takes into account the
sensitivity of the eye to different
colors, the higher quality settings
should achieve visually satisfying
results.
You can assign a URL to layers and
placed images and then save the file in
GIF or JPEG format to produce an
image map. For more information,
refer to “Client-Side Image Mapping”
on page406.
When you save a file in JPEG format,
Corel Painter displays the JPEG
dialog box, with the following options:
• The JPEG Encoding Quality
options—Excellent, High, Good,
and Fair—let you set file
compression on a scale of
Excellent to Fair.
The Excellent option compresses
the least, but retains the most da ta.
Fair compresses the most, but loses
the most data.
• The Quality slider adjusts the
quality.
• The Smoothness slider appl ies
smoothing to the entire image.
This is useful when using the Fair
option, to blur the edges of JPEG
artifacts. The default is 0. Keep in
mind that using a high smoo thness
setting can cause blurring.
• The JPEG preview window
displays any changes you make to
the image as you work.
• The Progressive JPEG option
creates a progressive JPEG file.
Progressive format is useful when
using a file on the Web. As the
Core l Pain t e r 47
Page 55

name implies, progressive format
displays an image in stages —as a
series of scans—while the file
downloads. The fi rst scan is a low
quality image; the following scans
improve in quality. This allows the
user to see the whole image very
quickly.
• The HTML Map Options—
National Center for
Supercomputing Applications
(NCSA) Map Fi le, Conseil
Europeén pour la Recherche
Nucléaire (CERN) Map File, and
Client Side Map File—let you
generate an image map. Use the
NCSA Map File or CERN Map
File option to generate a serverside image map. Use the Client
Side Map File option to generate a
client-side image map.
Refer to “Image Maps” on
page406 for more information
about image map types.
It is best not to decompress and
recompress a file multiple times.
Although JPEG can compress and
discard data not visible or obvious, the
degradation of the data can affect the
condition of your file.
When a file has lost a significant
amount of data, block patterns can
appear in areas of the image. If y ou try
to use the Apply Surface Texture
feature on a JPEG file, you may find it
will accent the block patterns.
Saving GIF Files
Corel Painter allows you to save
documents in GIF file format. GIF is
an 8-bit (or less) fi le format commonly
used to display graphics on the Web.
When you save a file as a GIF, you can
choose from 4 up to 256 colors. You
can choose how your colors will be
displayed and what part of your i mage
will be transparent.
You can use the Color Set option to
force all colors to match the colors in
the current color set. This option uses
the colors in the color set for the color
table in the GIF file. This can be
useful when doing Web work,
especially if you want to constrain
colors to a specific color set or control
the number of colors in a Web page,
thus controlling image file size. The
default color set in Corel Painter is a
“Web safe” color set, mapping to the
default Netscape Navigator® color
set.
An Imaging Method determines how
your 24-bit Corel Painter document
will be converted to the limited
number of colo rs that GI F uses. If yo u
choose Quantize to Nearest Color,
Corel Painter picks the colo r nearest to
that of each pixel. If you choose
Dither Colors, Corel Painter will
apply a pattern to the colors chosen to
generate a more accurate, less banded
result.
Corel Painter can also save a frame
stack as a GIF animation file. Fo r
more information, refer to “Creating
Animated GIFs” on page 410.
If you want your image to have
transparency, click the checkbox for
Output Transparency. Most progr ams
that display GIF files support
transparency, but for those that don’t,
you should specify the color of the
“transparent” area. If your image will
be displayed on the World Wide Web,
Basics48
Page 56

click the Background is WWW Gray
option. You can also choose to use the
background colo r of your Web page by
clicking the option button for
Background is BG Color.
For programs tha t support
transparency, your selection will
determine which areas are transparent
and which are not. The Threshold
slider determines what selection
(loaded mask) value becomes
transparent. You can see how the
Threshold slider is affecting the
transparency of your image in the
preview window in the dialog box.
Transparency is displayed in the
preview window by a rectangular
lattice. You can toggle between the
Preview window and your Save As
GIF options to get exactly what you
want. Enable the checkbox for
Interlace GIF File if your image will
be displayed on a Web page.
For information on creating masks,
refer to “Using Selections” on
page 203.
Saving RGB TIF and CMYK TIF
Files
TIFF facilitates exchange between
applications and computer platforms.
It’s a widely supported bitmap image
format, allowing you to save with
either CMYK or RGB color space
information. When you save a file as
CMYK TIF , Corel Painter creates a
color separation, which can then be
used for four-color process printing.
Saving Adobe Photoshop
Files
Corel Painter can save files in Adobe
Photoshop format. For optimum
compatibility, shapes are rasterized
and masks are placed in channels.
When you save, you have RGB and
CMYK options as you do when saving
TIFF files.
Saving Encapsulated
PostScript (EPS) Files
The encapsulated PostScript® (EPS)
files in Corel Painter conform to the
Desktop Color Separatio n (DCS) 2.0
format (EPS-DCS 5 file format).
Although Corel Painter saves files in
EPS-DCS, it can’t read EPS-DCS. If
you plan to save an image in
EPS-DCS, it’s a good idea to save it in
another format first so you’ll have a
copy of it that you can reopen in Corel
Painter.
When you save an image as EPSDCS with Output Preview turned on,
Corel Painter uses the loaded
International Color Consortium
(ICC) profile to prepare the
separation files. If you’re using the
Hexachrome® ICC profile, Corel
Painter prepares six separ ation files—
Cyan, Magenta, Yellow, Green,
Orange, and Black. For more
information on Output Preview and
color management, refer to “Printing”
on page445.
Although you can save your images as
CMYK EPS separations, Corel
Painter can’t open or edit CMYK files.
When you save a file in EPS-DCS,
Corel Painter opens the EPS Options
dialog box, with these options:
• Hex (ASC II) Pictu re Data
provides a nother way of storin g
Core l Pain t e r 49
Page 57

P ostScript information. Some page
design programs require that this
option be checked. The file sizes
will be appr oximately twice as
large when saved with this option.
• Preview Options—No preview,
Black and white preview, and
Color preview—specify whether to
save preview data and in what
format. The resulting preview file
is a low-resolution (72 ppi) file.
If you have an older laser printer,
you have to use the black and
white preview to print these files.
Although the preview or display is
black and white, the color
information remains intact.
Recovering Lost Work
How can you recover work lost in a
corrupt image file? When you work
with computers, sometimes
uncontrollable events cause files to
become corrupt. No backup? Lost all
your work? Do you have to create the
whole image again?
Maybe not. There’s one way to try
recovering lost work. Corel Painter
records all actions into the Current
Script. If Corel Painter is stopped and
restarted within 24 hour s, th e old
current script is still available, saved a s
“{date}{time}” and a new current
script is started. By default, th e dat ed
scripts are saved for one day, but you
can reset this to a longer time in
General Preferences.
The dated scri pts can b e used to r epl ay
actions for recovering lost work or
creating scripts for movies. Also, you
can use the Script List t o cut and pas te
portions of the dated script th at are
useful. Just open the dated script and
delete the last few commands, then
play the script to re-create the work
and try saving the file again.
For more information, see “Scripting”
on page415.
Closing Documents and Quitting the Application
To close a document:
• Do one of the following:
• Click the current window’s
close box.
•Choose File menu > Close.
•Press Command + W (Mac
OS) or Ctrl + W (Windows).
To quit Corel Painter:
• Do one of the following:
• (Mac OS) Choose Corel
Painter 8 menu > Quit Corel
Painter 8.
• (Wind ows) Choose File menu
> Quit.
Tip
You can also qu it Corel Painter by
•
pressing Command + Q (Mac OS) or
Ctrl + Q (Windows).
Setting Preferences
Corel Painter has several different
preference dialog boxes: General,
Brush Tracking, Custom ize Keys,
Undo, Shapes, Internet, Save,
Operating System, and Palettes.
Basics50
Page 58

Use the General Preferences dialog box to
customize your application.
General Preferences
To access General preferences:
• Do one of the follo wing:
• (Mac OS) Choo se Corel
Painter 8 menu > Preferences
> General.
• (Windows) Choose Edit menu
> Preferences > General.
Tip
To make changes to other preferences
•
before closing the Preferences dialog box,
choose another preference type from the
pop-up men u.
Cursor Setup
Corel Painter gives you several choice s
for the appearance of your cursor.
• To choose whether the cursor will
be a brush or a single pixel, check
an opti on in the Drawing Cursor
area.
• To determine the direction the
cursor will point (dependin g on
your design and your preferences),
click the appropriate option in the
Orientation area. This option is
only available with the Brush
cursor type.
• To set the cursor to show the brush
size and shape, enable the Brush
Ghosting option. Brush Ghosting
gives you immediate visual
feedback on the cursor, showing
you the shape and size of the
selected brush.
When you use a brush with “Enable Brush
Ghosting” e nabled, the cursor shows the shape
of the brush.
Setting the Default Libraries
Corel Painter provides standard
libraries that contain brushes, paper
grains , s e lec t io n s , layers, and c olor
sets. The Libraries section of the
General Preferences dialog box lets
you designate which librarie s appear
by default.
To set default librarie s :
• Enter library file names in the
Br us h e s , Paper s , S elec t ions,
Layers, and Color Set text fields.
Core l Pain t e r 51
Page 59

Note
The default libraries must reside in the
•
Corel Painter folder.
Auto-Save Scripts
When you create an image, Corel
Painter records all the operations you
perform. This recording is known as a
background script and is sav ed on the
Scripts palette.
The Auto-Save Scripts preference
governs how long Corel Painter saves
background scripts befo re deleting
them. In the text field, enter the
number of days for which you want
Corel Painter to save background
scripts.
For more information about creating
and using scripts, refer to “Scripting”
on page415.
Brush Size Increment
The Brush Size Increment preference
lets you set the increment value in
pixels.
Magnifier Increment
The Magnifier Increment preference
lets you set the percentage of
magnification the magnifier will
increment by.
Temp File Volume
Choosing the temp file volume selects
the disk volume that Corel Painter
wil l put its temp o r ary fi l e on a n d use
to access virtual memory. Choose the
volume name (Mac OS) or letter
(Windows) from the Temp File
Volume pop-up menu.
Units
The Units preference lets you choose
units of measurement used by the
application’s various sliders and other
measurement options.
Cloning Preference
When you clone an image, Corel
Painter uses the color information
from the original as you fill in your
clone. If you would like Corel Pa inter
to display what part of the original
you’re cloning, check the box next to
Indicate Clone Source With
Crosshairs While Cloning.
Draw Zoomed-out Views Using
Area-Averaging
When looking at an image at under
100% magnification, screen draw is
faster if you leave this option
unchecked, and slower but more
accurate if checked.
Display Warning When Drawing
Outside Selection
Checking this box enables the
warning that appears when you draw
outside a selection.
Show Commit Dia log When
Converting to a Layer
Enable this checkbox if you want to
reinstate the Commit dialog after you
have selected the Don’t Ask Again
button in the Commit dialog.
Basics52
Page 60

Brush Tracking Preferences
When you draw with traditional
media, the amount of pressure you use
with a tool determin es h ow dense and
how wide your strokes are. Using a
pressure-sensitive stylus with Corel
Painter gives you this same kind of
control. Each artist has a different
strength or pressure level in a stroke.
The Brush Tracking preference lets
you adjust Corel Painter to match
your stroke strength. This is
particularly useful for artists wi th a
light touch. If a light stroke leaves no
color on the Canvas, you should use
Brush Tracking to increase sensitivity.
You might also change brush tracking
between phases of a project. You could
use a light touch when sketching with
a pencil brush variant, then set
tracking for more pressure when you
switch to an oil paint variant.
Corel Painter saves Brush Tracking
between sessions, so whatev er tracking
sensitivity you set will be the default
next time you open the application.
To set Brush Tr acking:
1 Do one of the follo wing:
• (Mac OS) Cho ose Corel
Painter 8 menu > Preferences
> Brush Tracking.
• (Windows) Choose Editmenu
> Preferences > Brush Tracking.
2 Drag in the scratch pad in a
“normal” stroke.
Use the pressure and speed you
prefer when drawing or painting.
For specific adjustments, yo u can
move the sliders.
Use the Brush Tracking dialog to customize
how Corel Painter responds to your stylus
pressure and speed.
Custom ize Keys Prefere nces
Corel Painter lets you assign
commands to your keyboard function
keys (the F-keys). This saves you time
by giving you immediate keyboard
access to your favorite c ommands.
Using the Shift key with the function
keys le ts you double the number of
commands you can use.
To assign commands to function
keys:
1 Do one of the following:
• (Mac OS) Choose Corel
Painter 8 menu > Preferences
> Customize Keys.
• (Windows) Choose Edit menu
> Preferences > Customize
Keys.
2 Choose the function key you want
to use from the menu.
3 If you want to use the Shift key in
combination, enable the Shift
checkbox.
Current Function shows the
command now assigned to this key.
Core l Pain t e r 53
Page 61

4 Choose the command you want,
either from a main menu or a
palette menu.
New Function shows the
command you’ve chosen.
5 Click Set to assign this command
to the selected key.
6 Repeat steps two through six for
each key you want to set.
7 When you’re finished, click OK.
Tip
Click Summa ry for a list of the
•
function keys that have been assigned.
Undo Preferences
Multiple Undo allows you to undo
and redo up to 32 levels of changes.
Corel Painter sets 32 levels as the
default.
Undo levels apply across open
documents. With five levels set, if you
have two documents open and you
have “undone” three operations on
the first document, you can undo only
two operations on the second
document.
Multiple Undo can use a significant
amount of disk space. If you perform
multiple operations on the entire
image, the whole image must be saved
for each undo step.
To set undo levels
1 Do one of the following:
• (Mac OS) Choose Corel
Painter 8 menu > Pr eferenc es
> Undo.
• (Windows) Choose Editmenu
> Preferences > Undo.
2 Enter a number between 1 and 32
in the box.
Shape Preferences
You can set the default fill and stroke
in the Shape Preferences dialog box.
These settings apply to new shapes
you crea te.
If you enable Big Handles, the Bézier
curv e control handles will appear
larger. You may find it easier to work
with them in the larger size.
You can also specify colors for the
wing color, point color, and outline
color.
To change shape preferences:
1 Do one of the following:
• (Mac OS) Choose Corel
Painter 8 menu > Pr eferenc es
> Shapes.
•(Windows) Choose Editmenu
> Preferences > Shapes.
2 Select your preferences from the
following options:
• Drawing Options — Controls
how Corel Painter displays
shapes as you create them (On
Draw) and when a shape path
is closed (On Close). The
default setting is Stroke On
Draw and Fi ll On Close.
• Big Handles
—
Controls the
size of the anchor points and
direction wing handles. This
can make them easier to grab
and drag. If you want big
points, enable this option.
Basics54
Page 62

• Outline Color — Controls the
color for the shape outline
paths. Double-click the color
chip to change the color.
• Selected Point Color
—
Controls the color for selected
anchor points (unselected
anchor points appear
“hollow”). Double-click the
color chip to change the color.
• Wing Color
—
Controls the
color for the control wings and
handles. Double-click the color
chip to change the color.
Internet Prefere nc es
Corel Painter works closely with your
Internet b r owser t o h e l p y o u ta k e
advantage of resources on the
Internet. Whether you use Netscape
Navigat or, Microsoft ® In t e rnet
Explore r, or another browser, you can
launch your browser from within
Corel Painter.
The browser will take you directly to
the URL specified in the Internet
Preferences dialog box. This
streamlines your access to program
help, technical support, additional art
materials, and librari e s.
The level of memory in your system
can limit your ability to run Co rel
Painter and your browser application
at the same time. For more
information, refer to “Physical
Memory Usage” on page 56.
The Corel Painter installer should be
able to locate and link to your browser
automatically. In some cases, though,
you will need to manually select the
browser. For example, you’d need to
do this if you have more than one
browser.
To change the d efaul t URL:
1 Do one of the following:
• (Mac OS) Cho ose Corel
Painter 8 menu > Preferences
> Internet.
• (Windows) Choose Editmenu
> Preferences > Internet.
2 Type a new URL in the Default
Libra ry Brow si ng UR L fi e l d .
Save Preferences
You can set color space prompt
preferences automatically when
saving files, so that you do n ot need to
choose a color space every time you
save.
F or Mac OS o nly, Corel Painter allows
you to select file extension preferences.
To set color space prompt
preferences
1 Do one of the following:
• (Mac OS) Choose Corel
Painter 8 menu > Preferences
> Save.
• (Windows) Choose Edit menu
> Preferences > Save.
2 Choose one of th e following
options from the TIFF and PSD
pop-up menus:
• RGB — automatically saves
the file as RGB
• CMYK — automatically saves
the file as CMYK
• Prompt on Save — prompts
you to choose a color space
every time you save a file
Core l Pain t e r 55
Page 63

To set file extension preferences
(Mac OS)
1 Choose Corel Painter 8 menu >
Preferences > Save.
2 Choose one of the following
option s f r om t he A ppe nd pop-up
menu:
• Always — always adds the
appropriate file extension when
saving
• Never — never adds a file
extension when saving
• Ask When Saving — prompts
you to choose whether or not to
add a file extension when saving
Operatin g System
Preferences (Windows)
Computers running Windows have
some additional options.
To access Operating System
preferences:
• Choose Edit menu > Preferences
> Operating System.
Configuring Your Browser to
Recognize S oftware Resource s
Your brows e r must be se t to rec og n i z e
Corel Painter files and instructed
what to do with them.
This is something you’ll do in your
browser. Consult your browser
documentation for more information.
Physical Memory Usa ge
For best performance, choose
Maximum Memory for Pai nter on the
Operating System Preferences page,
and run Cor el Painter with no other
programs running in the background.
Choos in g Ha lf Memo ry for P ai nte r on
the Operating System Preferences
page allows Corel Painter to run more
efficiently while other Windows
applications are running.
Printing Options
Free Memory for Printing will
increase printing speed by writing the
active image to disk, increasing the
amount of memory available for the
print manager and the printer driver.
No Print Banding disables print
banding for devices that support it.
Disabling print banding can help
some P ostScript printers, but will hurt
the performance of some bitmap
printers, such as the
Hewlett-Packard® DeskJet®
printers. Most dot matrix printers will
be faster with No Print Banding left
unchecked. If you experience
problems printing in landscape
orientation, you may have to turn off
banding by checking the option
button in the dialog box.
Display Options
If your video d isplay driver is set to 16bit colors, you can experience some
color irregularities on your screen
when using Corel Painter. Checking
the No Device Dependent Bitmaps
option will correct this problem with
most 16-bit color video displays. If you
are not using 16-bit colors, this
checkbox will have no effect on your
system.
Basics56
Page 64

Palettes
Using Two Monitors
Using Plug-ins
Palettes have been redesigned fo r
Corel Painter, allowing you to have
more control over snapping and
grouping them.
To chang e pa let te beha v ior
1 Do one of the follo wing:
• (Mac OS) Choose Corel
Painter 8 menu > Preferences
> Pale tt e s.
• (Windows) Choose Edit menu
> Preferences > Palettes.
2 Choose your preferences from the
following options:
• Autoscroll — lets you scroll
through a palette with many
elements automatically.
• Snapping Behavior — determines where palettes are
docked in relation to other elements on the user interface
• Snapping Tolerance — determines the minimum distance,
in pixels, between the palette
and other elements on the user
interface before docking
The Corel Painter user interface can
be displayed across two or more
monitors. You can drag any of the
Corel Painter palettes, the property
bar, and the toolbox to any monitor;
however, each palette must be
displayed entirely on one monitor at a
time.
If a palette straddles two monitors , it
will automatically snap to the nearest
vertical edge of the monitor with the
largest portion of the palette. If the
palette is displayed equally on both
monitors, it will snap to the vertical
edge of the left monitor.
For best performanc e, make sure both
monitors are set to the same
resol ut i on. In Wind o ws, you must
stretch the application window to
straddle both mon itors, then redesign
your workspace.
For information on configuring your
system to display across two or more
monitors, refer to your operating
syste m d oc u men t at i o n .
Plug-ins are sof tware modules that
extend Corel Painter capabilities.
Many plug-ins come with Corel
Painter and ar e automatically install ed
in the Corel Painter > Plug-ins
folder. Other special effects plug-ins
are available for purchase from th irdparty software developers.
Corel Painter uses the following types
of plug-ins:
• Effects filters offer special effects
for raster images. You can access
available filters at the bottom of the
Effects menu, below standard
effects.
Most Photoshop-compatible filters
run on Corel Painter; however,
there are some exceptions. For
example, because Corel Painter is
an RGB-based program, it cannot
run filters that are specific to
CMYK or Grayscale modes. Check
with the manufacturer to
determine if a filter is compatible
with Corel Painter.
• Plug-in brushes extend the power
of the Brush tool.
Core l Pain t e r 57
Page 65

• Dynamic plug-ins are different
from other effects plug-ins because
you can re-access their controls
and change the characteristics of
the effect at any time.
• Acq u i re p l u g- ins support
acquisition of images through
external devices (such as scan ners
and digital cameras) and fi le
formats not built into the
application.
• Export plug-ins export image data
and support special output dev ices.
F or example, many photo-realistic
dye-sublimation printers include
export modules to provide better
control over output quality than
the standard print interface.
Note
Mac OS: Thi rd- part y plug- in s t hat ar e
•
not designed for native PowerPC®
architecture will not work in C ore l
Painter.
Installing P lug-ins
Where you install a plug-in module
depends on its type.
Plug-in brushes and dynamic plug-ins
are specific to Corel Painter and must
reside in a specific location in the
Corel Painter > Plug-ins folder. The
Corel Painter standard plug-in
brushes and dynamic plug-ins are
automatically installed in the correct
location. However, if you want to
install new plug-in brush and
dynamic plug-in modules, you must
manually place them in the correct
location.
Other plug-in modules are used by
multiple software applications and
can reside anywhere on your
computer. Fo r Corel Painter to access
such plug-ins, you must place an alias
(Mac OS) or shortcut (Windows) to
the source folder in the Corel Painter
> Plug-ins folder. During st a rt - u p ,
Corel Painter uses the alias or shortcut
to load the plug-ins.
To install a new plug-in brush:
1 Drag the plug-in brush module
into the Corel Painter > Plug-ins
folder.
2 If Corel Painter is running, restart
it to activate the new plug-in.
To install a new dynamic plug-in:
1 Drag the dynamic plug-in module
into the Corel Painter > Plug-ins
folder.
2 If Corel Painter is running, restart
it to activate the new plug-in.
To install an effect s, acquire, or
export plug-in:
1 F ollow the installation instructions
provided by the plug-in
manufacturer.
You can install plug-ins anywhere
on your computer—inside the
Corel Painter folder, in a generic
plug-ins folder on your hard drive,
or in anot her location.
2 If you installed the plug-in in the
Corel Painter > Plug-ins folder,
Corel Painter automatically loads
the plug-in during startup.
3 If you installed the plug-in in
another location:
• (Mac OS) Select the folder containing the plug-in. Choose
Make Alias from the File men u .
• (Windows) Select the folder
containing the plug-in in My
Computer or Windows
Basics58
Page 66

Explore r. Choose Create Shortcut (or New > Shortcut) from
the File menu.
4 Move the alias/shortcut into the
Corel Painter > Plug-ins folde r.
5 If Corel Painter is running, restart
it to a c ti vate t h e ne w plu g-in.
Note
To access all Photoshop plug-ins, make
•
an alias (Mac OS) or shortcut (Windows)
to the Photoshop Plu g -ins folder.
Wacom Intuos Support
Corel Painter supports the Wacom®
Intuos™ tablet, pen, and airbrush
technology.
Painting with an Intuos
Tablet and Pen
The Intuos tablet p rovides 1,024 levels
of pressure sensitivity to help you
create smooth curves, gradual
transitions, and precise brush strokes.
Corel Painter allows you to take
advantage of tilt and bearing input
from an Intuos pen in new and
exciting ways.
Note
The mouse mode option in the W acom
•
controls panel—which causes a st ylus t o
behave like a mouse— is not compatible
with Corel Painter. Always use pen mode
when painti ng with an Intuos tablet and
pen.
Brush Tracking
Every artist uses a different pressure
when drawing on an Intuos tablet.
The Corel Painter Brush Tracking
preference helps you customize your
Intuos tablet to meet your pressure
sensitivity needs. Refer to “Brush
Tr acking Preferences” on page53 for
more information.
Expressions Setting s
Settings you make in the Expressions
area of the Brush Creator allow you to
tie brush features like Opacity, Grain,
Angle, Size, Jitter , Resaturation,
Bleed, Flow, and Depth to stylus data,
such as Velocity, Direction, Pressure,
Wheel, Ti lt, and Bearing. F or more
information about using the
Expressions section in the Brush
Creator, refer to “Expression Settings”
on page164.
Minimum Size Settings
In Corel Painter, the Minimum Size
setting lets you take even further
advantage of stylus input dat a. When
Size is set in the Expressions area of
the Brush Creator to respond to styl us
pressure, and a Min Size setting is set
to a small percentage of the brush
Size, the strokes you make with the
styl u s c r e at e amazi ngly re a l i s tic
results. Responding to the elegance of
subtle movements, as your stylus
pressure eases, brush strokes taper. As
pressure increase s, brush strokes
widen, just as they would with a real
brush.
Using the Intuos Airbrush
Wheel
The Intuos Airbrush—the first true
computer airbrush—provides
fingertip media flow control. Corel
Painter airbrushes respond to angle
(tilt), bearing (direction), and flow
(wheel setting) data from the Intuos
Core l Pain t e r 59
Page 67

stylus, allowing for a truly realistic
brush stroke. For example, as you tilt
your stylus, specks of media land on
the paper in a w ay th at r e fl e c ts that
tilt. Corel Painter airbrushes create
conic-sections that mirror your stylus
movements. Corel Painter airbrushes
take advantage of the Intuos airbrush
stylus wheel control. Like the needle
control on a real airbrush, the Intuo s
wheel control adjust s ai rbrush flow, or
how much medium is applied. For
more information about using the
new airbrushes, refer to “Painting
with Airbrushes” on page 114.
Using Multiple Intuos Pens
All Intuos pens—both standard and
airbrush—feature ToolID™, which
allows you to co nfigu re and wor k wit h
multiple pens during a Corel Painter
session.
F or example, let’s assume you have
two Intuos pens: Pen 1 and Pen 2. Pen
1 is set to an Oil brush variant; Pen 2
is set to an Artists variant.
brush to the Oil brush. Every time
you bring Pen 2 into the tablet’s
proximity, Corel Painter switches to
the Artists brush. If you’ve adjusted
the tool assigned to a pen’s size or
other settings, Corel Painter
remembers those changes for the next
time you use that pen.
Every time yo u br i ng Pen 1 into the
tablet’s proximity, Corel Painter
automatically changes the active
Basics60
Page 68

4
Using Textures, Patterns, and Weaves
In Corel Painter, paper textures,
gradients, patte rns, and weav es can all
be applied to your image. You can
brush some of them on, get them to
interact with each other, spray them,
smear them, and even create your
own. Best of all, you never have to run
to the store in the middl e of cr eating to
get a new tube of paint or the right
kind of paper.
You’ll use these items in several ways:
• to load a Brush tool with medi a for
painting
• to fill selections with the Effects
menu > Fill command or the
Pain t B u c ket tool
• to control certain image effects,
like Apply Surface Texture
This chapter explains how to sele c t,
customize, and create textures,
patterns, and weaves, as well as how to
save them to a library for future use.
Papers, patterns, and weaves all use
libraries. The default libraries offer
sample materials. You’ll find more
libraries, with addit ional materi als, on
the Corel Painter CD and on the
Corel Web site. For more information
about libraries, including how to load
alternate libraries, create your own
libraries, and manage library content,
refer to “What are Libraries?” on
page 23.
Using Paper Texture
In the real world, a marking tool has
different results when applied to
surfaces with different textures. Corel
Painter allows you to control the
texture of the canvas to achieve the
results you’d expect from NaturalMedia on a given surface—pencil on
Water Color paper, felt pens on cotton
paper, chalk on the sidewalk, and so
on.
Page 69

Of cours e , some brus he s , li k e the
Airbrush, don’t reveal paper textur e in
their strokes. This follows the
behav i or of the natu r a l to ol .
Most of the brushes interact with the current
paper texture.
Paper text ures are useful in many
ways. The brushes interact with paper
“grain,” just as natural tools react with
the texture of th e surfaces beneath
them. Paper grains are useful in
applying Surface Texture and other
Effects, like Glass Distortion. You can
select different paper textures, modify
them, organize them in libraries, and
even create your own custom textures.
In Corel Painter, brushes that react
with paper texture have a “grainy
method.” For more information about
brush methods, refer to “Methods and
Subcategories” on page152.
Note
The terms “paper grain” and “paper
•
texture” ar e u sed here synonymously.
Adjusting the Grain
When you choose a br ush that
interacts with paper grain, you see the
results with each stroke. When you
find a brush and paper combination
that you really like, yo u can save i t as a
Look.
If you have a sty lus and ta blet, you can
adjust paper grain by changing the
stroke of the stylus on a pressuresensitive tablet. In most cases, a light
stroke colors only the peaks and ridg es
of the grain. A heavy stroke fills color
deep into the pockets and valleys. You
can also affect paper grain by using
the Grain settings on the Stroke
Designer tab of the Brush Creator .
When you want paper grain to appear
uniformly across an image, create your
artwork first and then apply the grain
as a surface texture. If you apply pap er
texture when you create an image, the
texture is erasable.
With erasable texture, you won’t be
able to erase brush strokes without
erasing paper texture a t the same time.
You’ll find that adding paper textur e
as the last step, not the first step, in
developing your image often works
best.
To save a Look:
1 In the toolbox, click the
Rectangular Selection tool .
2 Drag in the image to make a
selection of the look you want to
save.
3 In the toolbox, open the Look
selector and click the selector
menu arrow.
4 Choose New Look.
Using Textures, Patterns, and Weaves62
Page 70

5 In the New Look dialog box , type a
name in the Save As box.
Choosing Paper Textures
The Papers palette is where all paper
textures are stored. In addition to
using it to select papers, you can use
this palette to invert, resize, or
randomize paper grain; control
brightness and contrast; or to open
other paper libraries. For more
information on working with libraries,
refer to “Loading Alternate Libraries”
on page 24.
To choose a paper texture:
1 Choose Window menu > Show
Papers to display the Papers
palette.
If the Papers palette is not
expanded, click the palette arrow.
2 Click the Paper selector arrow to
display the available paper
textures.
3 Cho os e a pap e r te xtur e from the
Paper selector.
The Papers palette sho ws the
dimensions of the selected paper
(in pixels). Corel Painter tiles the
paper to cover as much canvas as
needed.
Tips
You can also choose a paper texture
•
from the Paper selector in the toolbox.
Corel Pa inter uses the currently
•
selected texture, so you can mak e a few
strokes, then change the paper and make a
few more strokes with different results.
Invert ing and Scaling Paper
Textures
You can think of paper texture as a
three-dimensional landscape. Usually,
brushes react to paper texture by
coloring peaks and ignoring valleys.
Enabling the Invert Paper option
makes color fill th e valleys, instead of
the peaks.
You can adjust the paper texture scale
to resize the paper texture. Scaling
paper grain affects how the grain
appears in brush strokes and images.
To inver t paper grain:
1 Choose Window menu > Show
Papers.
2 On the Papers palette, do one of
the following:
• Click the palette menu ar row,
and choose Invert Paper.
• Click the Invert Paper button
.
The Paper selector on the Papers palette.
Core l Pain t e r 63
Page 71

Tip
You can also use the Paper selector in
•
the toolbox to inver t pa per grain. Click
the Paper selector, click the selecto r m enu
arrow, and choose Invert Paper.
Note
Scaling larg e textures can use a great
•
deal of RAM. Most textures in Corel
Painter are from 50 to 400 pixels square at
100% scaling.
Brush strokes on paper grains with different
scale values.
Controlling Paper Texture
Brightness and Contrast
Brightness can be thought of as
controlling the depth of the paper
grain. P aper that is less bright acts as i f
the grain is shallow.
Contr a s t ca n be t h ou ght of as
controlling the steepness of the paper
grain. The grain in higher contrast
paper goes from high to low more
quickly and with fewer intermediate
levels.
Two brush strokes overlapping. The green one
was painted with the grain inverted .
To change pa pe r tex tur e scale :
1 Choose Window menu > Show
Papers.
2 On the Papers palette, use the
Paper Scale slider to resize the
pape r grai n .
As you move the slider, the texture
preview updates to displ ay t he new
grain size. You can scale texture
down to 25% or up to 400%.
Using Textures, Patterns, and Weaves64
Randomizing Paper Grain
Normally, paper grain is fixed, which
means the texture is in the same
position each time you apply a brush
stroke. You can change this when you
want grain to be applied randomly.
To randomize pape r grain:
1 Choose Window menu > Show
Brush Creator .
2 Click the Stroke Designer tab, and
choo se Rand om .
3 Enable the Random Brush Stroke
Grai n option.
To change paper texture
brightness:
1 Choose Window menu > Show
Papers.
2 Adjust the Paper Brightness slider
to modify the brightness of the
grain.
To change paper texture contrast:
1 Choose Window menu > Show
Papers.
2 On the Papers palette, use the
Paper Contrast slider to modify the
contrast of the grain.
Page 72

Creating Paper Textures
The Make Paper command lets you
make your own paper textures.
To creat e a paper t ex tur e:
1 Choose Window menu > Show
Papers.
2 On the Papers palette, click the
palette menu arrow and choose
Make Paper.
3 In the Make Paper dialog box,
choose a pattern from the Pattern
pop-up menu to use as the basis of
your paper texture.
4 Adjust the Spacing slider.
Moving the Spacing slider to the
right opens up space between rows
and columns in the selected
pattern.
5 Adjust the Angle slider.
Moving the Angle slider changes
the direction in which the pattern’s
rows are lined up.
6 When you like the look of the
texture, enter a name.
Your new texture appears as the
last item in the Paper selector.
Tip
You can also use the Pa per selector in
•
the toolbox to create paper. Click the
Paper selector, click the selector men u
arrow, and cho ose Make Paper.
The Make Paper dialog box allows you to
create your own textures based on patterns in
the Pattern pop-up menu.
Capturing Paper Textures
The Capture Paper command let s you
turn a section of an i mage into a paper
texture. Once you save textures, they
are available from the Papers palette.
To capture paper texture:
1 Open or create an image.
2 Select all or a piece of your source
image.
3 On the Papers palette, click the
palette menu arrow and choose
Capture Paper.
If you want to blend the distinction
between tile borders, move the
Crossfade slider in the Save Paper
dialog box to the right.
4 Type the name of your new
texture.
Your texture now appears in the
Paper selec tor and is added to the
current library .
Tips
You can also use the Paper selector in
•
the toolbo x to capt ure pap er te xture . Clic k
the Pa per selector, click the selector menu
arrow, and choose Capture Paper.
The Make Fractal Pattern feature
•
creates excellent textures. Som e wea ves
also produce good textures. For more
information, see “Turning a Fractal
Pattern into a Paper Texture” on page69.
Core l Pain t e r 65
Page 73

Using Patterns
A pattern is a repeating design. The
smallest unit of a pattern is known as
a “tile.” When you fill an area with a
pattern, the tile is repeated across the
selected area.
With patterns, you can:
• fill selections with imagery
• paint patterns directly onto your
image, with computed brushes
that use rendered dab types
• paint using a cloni ng brush
• control image effects
You’ll find a sampling of patterns in
the default Pattern libr ary. You’ll find
other pattern libraries on the Corel
Painter CD.
The Patterns palette shows a preview
of the pattern, gives tile image
dimensions, and gives you op tions for
scaling and arranging the tile when
used in fills.
The Pattern selector on the Patterns palette.
Patterns are created by repeating a
rectangular image tile across an area.
Ideally, images intended to be tiled are
created so that they tile seamlessly.
Corel Painter provides ways to help
you generate seamless tiles.
You can capture a pattern after you
create it and manipulate it to be a halfdrop design, traditionally used in
wallpaper designs. Your patterns can
be added to the Pattern library.
Fractal patterns can be used to create
interesting landscapes in Corel
Painter.
To choose a pattern:
1 Choose Window menu > Show
Patterns.
If the Patterns palette is not
expanded, click the palette arrow.
2 On the Patterns palette, click the
Pattern selector.
3 Choose a pattern from the Pattern
selector.
Tip
You can also choose a pattern from the
•
Pattern selector in the too l box .
To adjust the appearance of a
pattern
1 Choose Window menu > Show
Patterns.
2 Choose a pattern from the Pattern
selector.
3 Enable one of the following
options:
• Rectangular places the tile in a
regular grid for fills. The Offset
slider does not apply.
• Horizontal offsets the tiles in
subsequent rows. The Offset
slider controls the amount of
offset.
Using Textures, Patterns, and Weaves66
Page 74

• Vertical offsets the tiles in subsequent columns. The Offset
slider controls the amount of
offset.
4 Adjust the Pattern Scale slider to
control the dimensions of the
pattern.
After setting these options, the
pattern is ready to use.
To fi ll an im a g e wi th patt e r n ti l es :
1 On the Patterns palette, choose a
pattern.
2 Choose Effects menu > Fill.
3 In the Fill dialog box , choose
Pattern.
Note
To see tiling in an image, the image
•
must be larger than the t ile.
To paint with a pattern:
1 Fr om t h e Brus h se le c t or, choos e a
brush that applies media to a
document.
2 On the Stroke Designer page of
the Brush Creator, choose
General.
3 From the Source pop-up menu,
choose one of the followi ng:
• Pattern — paints with a pattern containing no mask information.
• Pattern with Mas k — paints
using mask data contained in
the p a tt ern .
• Pattern As Opacity — paints
with the pattern at a reduced
opacity.
4 Choose Window menu > Show
Patterns.
5 Choose a pattern from the Pattern
selector.
6 Paint in the image.
Notes:
If you have not set a clone source,
•
Corel Painter uses the current pattern in
any operation referring to clone source
colors or luminance. Th is means you can
paint with a pattern using a Cloner brush.
If the Source option is not available
•
(grayed out), the selec ted brush can apply
color only. In that case, select a rende red
brush, or choose Rendered from the Dab
Type pop-up menu.
When painting with a pattern, keep in
•
mind that direction ma tters. Corel
Painter flips the pattern you’re pain tin g
when you change directions, so apply
strokes in the same direction for a uniform
effect.
Editing a Pattern Tile
If a pattern preview isn’t detailed
enough or you want to edit an existing
pattern, you can open the pattern tile
in its own window. By loading a
pattern as a file, you can view the
pattern closely and modify it.
Once a pattern becomes a tile, you can
paint off one side of the Canvas and
watch your stroke appear on the
opposite side of the Canvas,
automatically wrapping to the other
side.
Refer to “Creating Seamless Tiles” on
page 68 for more information about
editing pattern tiles.
To edit a pattern tile:
1 On the Patterns palette, choose a
pattern from the Pattern selector.
Core l Pain t e r 67
Page 75

2 Click the palette menu arrow, and
choose Check Out Pattern.
Corel Painter opens the selected
pattern tile in its own document
window.
You can now edit the pattern tile as
you would any image. To put the
modified pattern back in the palette,
you must save it to the Pattern librar y.
For more information about saving
patterns to a library, refer to “Adding
Patterns to the Pattern Library” on
page70.
Creating Seamless Tiles
Pattern s ar e c reated by repeating a
rectangular image tile across an area.
When you develop patterns, you’re
creating images th at will be tiled.
Ideally, those images must tile
seamlessly. That is, the eye should not
be able to distinguish tile edges. Corel
Painter provides ways to help you
generate i mag es that will ti l e e asily.
The wrap-around colors feature lets you paint
off one side of an image and onto the other side.
To help in making seamless tiles,
Corel Painter gives documents
defined as pattern tiles two special
characteristics: wrap-around colors
and wrap-around seams.
• With wrap-around colors, a bru sh
stroke dragged off one edge of an
image appears on the other side.
This makes it easier to paint
seamless, self-tiling patterns.
• The wrap-around seams feature
lets you move the edges of pattern
tiles to the center of the image,
where their tonal differences are
more apparent an d easier to
correct.
To minimize seams:
1 On the Patterns palette, click the
pal e tt e menu arrow and choose
Define Pattern.
2 In the toolbox, choose the Grabber
tool .
3 Hold down the Shift key and drag
inside the image.
You’ll see a horizontal and vertical
line where image edges meet.
4 When the crossing lines are
centered, release the mouse button.
The wrap-around seams feature lets you move
the pattern tile edges to the mi ddle so you can
edit them.
Using Textures, Patterns, and Weaves68
Page 76

To rem ove edge lines
• Do one of the follo wing:
• Set the Straight Cloner brush
to clone from somewhere
inside the image to preserve
detailed imagery. Refer to
“Painting in the Clone” on
page 190 for more information
about cloning.
• Paint out edge lines using any
color brush.
• Smear across edge lines with a
Water or Drip brush.
• Copy a selection to a layer and
move it over the line. Feather
the layer and reduce opacity to
help produce clean transitions.
Drop the layer when you’re satisfied. Refer to “Using Layers
and Layer Masks” on page229
for more information about
working with layers.
Turning a Fractal Pattern into
a Paper Texture
You can turn a fractal pattern into a
paper texture that will be saved to the
Paper library.
To convert a fractal pattern to a
texture:
1 On the Patterns palette, click the
palette menu arrow and choose
Check Out Pattern.
The pattern displays in a new
image window.
2 Choose Effects menu > Tonal
Control to adjust image elements
such as brightness, contrast, and
luminance.
3 When you’re satisfied with the
tonal balance, choose Select menu
> All.
4 Choose Window menu > Show
Papers
to display the Papers
palette.
5 Click the palette menu arrow and
choose Capture Paper.
6 In the Save Paper dialog box, set
the crossfade to 0.00.
7 Name the paper texture.
Creating and Capturing
Patterns
Corel Painter offers three ways to
create patterns:
• Define the current image as a
pattern, then add it to the Pattern
library.
• Create a rectangular selection,
then capture it as a pattern. For
more information about creating
selections, see “Creating
Selections” on page206.
• Make a Fractal pattern, then add it
to the library . For more
information on creating fractal
patterns, see “Creating Fractal
Patter ns” on page 71.
After creating a pattern tile, you’ll
probably want to refine it, so that it
tiles seamlessly. Refer to “Creating
Seamless Tiles” on page 68.
Images that you tur n into pa tterns a nd
save in RIF format maintain their
pattern characteristics even after being
saved and reopened.
Creating patterns can become
addictive. It’s a good idea to keep
libraries small. Use the Patt er ns
Mover to create new libraries and
delete unwanted patterns. You can
switch libraries whenever you want to
use a different set of patterns. Fo r
Core l Pain t e r 69
Page 77

more information about move rs, refe r
to “Moving Items Between Libraries”
on page 25.
To create a pattern:
1 Open the image file you want to
create a pattern from.
2 Choose Window menu > Show
Patterns
to display th e Patterns
palette.
3 Click the palette menu arrow, and
choose Define Pattern.
Tip
With the Grabber tool selected, you
•
can hold dow n the Shift key a nd drag the
seams to the center o f the image. For best
results, do this at 100% scale, not zoomed
in.
To capture a pattern:
1 Using the Rectangular Selection
tool , select the area of the
image you want to use as a pattern .
Remember, selection edges meet
when the image is tiled, so select
carefully.
2 Choose Window menu > Show
Patterns
to display the Pattern s
palette.
3 Click the palette menu arrow and
choose Capture Pattern.
4 Enable one of the following
options:
• Rectangular Tile — places the
tile in a regular grid for fills.
The Bias slider does n ot apply.
• Horizontal Shift — offsets the
tiles in subsequent rows. The
Bias slider controls the amount
of offset .
• Vertical Shift — of fsets the tiles
in subsequent columns. The
Bias slider controls the amount
of offset .
As you try different tile
arrangements and Bias settings,
the Preview window shows the
result.
5 Enter a descriptive name for the
pattern.
Corel Painter captures the pattern
and saves it to the current library.
Once saved, you can find the
captured pattern on the Patterns
palette. If you want to edit it, you
can check it back out of the library.
The Capture Pattern dialog box lets you decide
how much to offset pattern tiles and in which
direction.
Adding Patterns to the
Pattern Library
You can add any image as a pat ter n tile
to the current Pattern library.
To add a pat te rn to the lib ra ry:
1 On the Patterns palette, click the
pal e tt e menu arrow and choose
Add Image to Library.
2 In the Save Image dialog box, give
it a descriptive name.
Using Textures, Patterns, and Weaves70
Page 78

If a pattern with that name already
exists in this library, you are
prompted to replace it. If you don’t
want to replace the existing
pattern, click No to try again with
a different name.
Creating Fractal Patterns
The Make F ractal Patt ern command is
a pattern generator that creates
interesting landscapes. These
topographic patterns can be filled with
color and even embossed using a
paper texture.
When you create fractal patterns, the
following options allow you to finetune your creation:
• Size sets the exact size of the tile
you are creating. If your computer
has a lot of memory , you can make
a large file with a high resolu tion.
Depending on h ow mu ch memory
your computer has available to
Corel Painter, some of the size
options may not be available.
• Power controls the intricacy of the
pattern’s definition, as if you were
“zooming” in and out on a
textured surface with a
microscope. Move the Power slider
to the right to zoom out and see
many small patterns. Move the
Power slider to the left to zoom in
and see fewer large patterns.
The Power slider determines the degree
of detail. Top=-200%, bottom=0%.
• Feature Size defines the number of
prominent features within the tile.
Moving the slider to the left
increases the number of repetitions
per tile.
The Feature Size slide r determines the number
of repetitions per tile. Top=90%,
bottom=20%.
• Softness adjusts the edge softness
of the pattern.
• Angle chan ges the direction from
which you view the fractal.
• Thinness emphasizes the
direction suggested by the lines of
the fractal pattern. Thinner lines
produce a more linear look.
Core l Pain t e r 71
Page 79

Low Thinness settings show the fractal as
streaks. Use th e Angle slider t o change the
direction of streaking.
Corel Painter uses four channels to
store graphic information: Red ,
Green, Blue, and Alpha.
You can place information other than
color values in these channels.
Channel options allow you to
visualize this information in new and
different ways.
• Height as Luminance displays
pseudo-height information as
luminance. Images generated with
this option are useful in
conjunction with the Apply
Surface Texture effect. White areas
are represented as peaks, and dark
areas become depressions.
• Gradient Bearing uses the Red
channel to display the bearing of
the down angle of a height field.
• Surface Normal uses the Green
and Blue channels to represent the
X and Y components of the surface
normal (angle perpendicular to the
surface at a given point) of the
height field (Green=X, Blue=Y).
These two latter options for viewing a
fractal texture are offered for purely
aesthetic reasons. One way to take
advantage of them is to create color
variations of the texture with the
Adjust Colors feature.
To create fractal patterns:
1 On the Patterns palette, click the
palette menu arrow and choose
Make Fractal Pattern.
2 In the Make Fractal Pattern dialog
box, adjust the fractal options.
Changes you make appear in the
Preview window.
3 When you are satisfied with your
selections, click OK.
Give Corel Painter a little time to
create your new pattern file. When
Corel Painter is finished, your
pattern file is displayed in its own
document window.
Tips
To colorize a fractal pattern, choose an
•
appropriate gradient and use the Express
in Image feature.
You can also create interesting patterns
•
by choosing a colorful gradient and using
the Express in Image command on the
Gradients palette.
Using Weaves
The Weaves palette is, in effect, a
virtual loom that you can use to create
weaves to use as fill patterns.
Libraries of weaves are included with
Corel Painter. You can modify a weave
by chang i ng th e wa y i t di spl a ys the
scaling and thickness of its threads, or
its color. You can also create and save
weaves of your own. You can preview
your changes before you apply them.
Using Textures, Patterns, and Weaves72
Page 80

The Weave selector on the Weaves palette.
Changing Weave Display
Corel Painter can display a weave as
two-di me nsional or show the
interwoven threads threedimensionally, complete with
shadows.
The button changes to show either
a two-dimensional (Blocks) or
three-dimensional (Fibers) weave.
Note
Depending on wh ich weave is
•
selected, you might o r m ight not see a
change in the Preview w indow. For
diff e r e nt two- and three-dimensional
effects, you can adjust the scaling and
thickness sliders at the bottom of the
Weaves palette.
To choose a weave:
1 Choose Window menu > Show
Weaves.
If the Weaves palette is not
expanded, click the palette arrow.
2 On the Weaves palette, click the
Weave selector.
3 Choose a weave from the Weave
selector.
Tip
You can a lso choose a weave f rom the
•
Weave selector in the toolbox.
A weave can appear differently when displayed
either as two-dimensional or threedimensional.
To change how a weave is
displayed:
1 Choose Window menu > Show
Weaves to display the Weaves
palette.
2 Click the Two-Dimensional Weave
or the Three-Dimensional
Weave icon.
Adjusting Scaling and
Thickness
The four sliders at the bottom of the
Weaves palette control the thickness of
threads and the spacing between
them. The top two sliders control
horizontal dimensions; the bottom
two control vertical dimensions. By
adjusting these sliders, you can create
a wide variety of weaves with any one
of the patterns supplied.
To adjust scaling and thickness:
1 On the Weaves palette, choose a
weave from the Weave selector.
Core l Pain t e r 73
Page 81

The weave displays in the Preview
window.
2 Click the Three-Dimensional
Weave icon to show a threedimensional weave.
F or most weaves, you won’t see a
change in the preview until you
adjust the scale and thick nes s
values.
3 Adjust the horiz ontal and vertical
scale sliders to increase the scale,
thus enlarging the weave.
4 Adjust the horizontal and vertical
thickness slider s to reduce the
thickness.
You should begin to see a change
in the weave preview.
Note
Thickness sliders affe ct the three-
•
dimensional display. When you select a
two-dimensional display, the thickness
sliders have no effect.
Editing Weave Colors
Each weave uses its own Color Set.
You can display the Color Set used for
a weave, change the color s in the set,
and apply them to the weave.
Remember that you can open several
palettes and rearrange them to make it
easier to see the controls you need.
For more information about Color
Sets, see “Using Color Sets” on
page 85.
To display the color set for a
weave:
1 On the Weaves palette, choose a
weave from the Weave selector.
2 Click the palette menu arrow, and
choose Get Color Set.
The Color Set for the selected
weave appears.
To change weave colors:
1 Choose a new color from the
Colors palette or a color set, or
sample a color with the Dropper
tool .
2 Choose Window menu > Show
Weaves to display the Weaves
palette.
3 Hold down Option (Mac OS) or
Alt (Windows), and double-click
the color swatch on the weave
Color Set that you want to replace.
The new color replaces the old
one.
4 Click the palette menu arrow, and
choose Put Color Set.
The Preview window shows the
weave with the new colors. If you
fill an image with the weave
pattern, Corel P ainter now uses the
new color set.
Saving Weaves
After altering the scaling, thickness, or
color of a weave, you can save your
changes as a new weave.
To save a weave :
1 On the Weaves palette, click the
pal e tt e menu arrow and choose
Save Weave.
2 In the Save Weave dialog box, type
a name for the weave.
If you don’t type a new name,
Corel Painter replaces the existing
weave with the changed weave.
The new weave pattern appears in
the current weaves library.
Using Textures, Patterns, and Weaves74
Page 82

Advanced Weaving
Corel Painter lets you create woven
fabr ics of virtually any description.
You can create fabrics for wallpapers,
carpets, clothes, and furniture.
To create your own weaves:
1 On the Weaves palette, click the
palette menu arrow and choose
Edit Weave.
2 In the Edit Weave dialog box,
adjust the controls for drafting a
weave on the 8-harness, 8-treadle
loom.
Core l Pain t e r 75
Page 83

Page 84

Color
5
Corel Painter offers many ways to
apply color to your image, from
changing the paper color, to choosing
colors for your brush strokes, to
applying gradients to an entire image
or selection.
Working with Color
You can select colors in several ways.
You can use:
• the Color pickers on the Colors
palette
• the Dropper tool, which samples
color from the image
• the Use Clone Color setting,
which pulls color from a source
• the Mixer palette
• the Color Sets palette
The Colors palette is one place you can select a
color to add to your image.
To display the Colors palette:
• Choose Window menu > Show
Colors.
Changing Paper Color
You can change a document’s paper
color—the color of the background
Canvas—at any time. This color
appears when you delete a filled area
or use the eraser to remove color.
Page 85

To ch ange the ex istin g paper
color:
1 Choose a primary color from the
Colors palette.
2 Choose Canvas menu > Set Paper
Color.
3 To expose the new paper color, do
one of th e fol lowing :
• Make a selection, and cut or
delete it.
• Use the eraser brush to erase
part of your image.
If you c h a n ge t he existing p ape r c o lo r, you m ust
delete an area to view the change.
The small Color picker.
The standard Color picker has a hue
ring and a color triangle. Within the
triangle, colors are organized by value
and saturation.
Note
Do not use a bleach varian t to expose
•
the new paper color, un less the paper color
is white. Bleach variants will e rase to
white, regardless of the paper color.
For more information about choosing
colors, see “Using the Color Pickers”
on page 78.
Color78
Using the Color Pickers
Corel Painter provides two Color
pickers: standard and small. The
Colors palette menu lets you select
between the two pickers.
The standard Color picker.
• Values span the triangle fr om top
to bottom, with the top of the
triangle being the highest value
(white), the bottom th e lowest
value (black).
• Saturation levels go from left to
right. Dragging or clicking to the
right produces the purest color
within the predominant hue.
Dragging or clicking to the left
reduces the level of color
sat uration, giving “muddier” or
grayer colors.
Page 86

The small Color picker displays a
color triangle, with the hue ring as a
sing le bar.
To choose a hue and color from
the standard Colo r pi ck er:
1 Choose Window menu > Show
Colors
to display the Colors
palette.
If the Colors palette is not
expanded, click the palette arrow.
2 Click the palette menu arrow, and
choose Standard Colors.
3 Drag the circle on the color ring to
select the predominant hue.
You can also select a hue by
clicking once anywhere on the
ring.
The triangle displays all the
available colors within that
selected hue.
4 Select a color on the tria ngle by
dragging the circle or click the
color you want.
To choose a hue and color from
the small Color picker:
1 Choose Window menu > Show
Colors
to display the Colors
palette.
2 Click the palette menu arrow, and
choose Small Colors.
3 Drag the slider on the color bar to
select the predominant hue.
You can also select a hue by
clicking once anywhere on the bar.
The triangle displays all the
available colors within that
selected hue.
4 Select a color on the triangle by
dragging the circle or click the
color you want.
Understanding Primary and
Secondary Colors
The color you select appears in one of
two overlapping rectan gles di splayed
on the Colors palette. The front
rectangle represents the selected
primary color. The back rectangle
shows the selec ted sec ondary color . By
default, black is the primary color and
white is the secondary color. Most of
the time you’ll work with the primary
color.
Overlapping rectangles display the current
primary and secondary colors.
Don’t confuse the secondary color
with what other graphics programs
call “the background color.” In Corel
Painter, the “background color” is the
paper color.
The secondary color is for multicolor
brush strokes, two-point gradients,
and Im age H o se effec t s . It ’s use d
when more than one color is applied.
To choose the primary color:
1 Choose Window menu > Show
Colors
to display the Colors
palette.
2 Click the front rectangle.
3 Choose a color using the Color
picker.
Core l Pain t e r 79
Page 87

Click the front rectangle to set the primary
color.
To choose the secondary color:
1 On the Colors palette, click the
back rectangle.
2 Choose a color using the Color
picker.
If you usually work with the
Primary color, you might want to
re-click the front rectangle so that
it will be selected the next time you
go to the color picker.
Click the back rectangle to set the secondary
color.
To swap pr ima ry an d se co nda ry
colors:
• Click the swap icon .
Sampling Colors from
Imagery
In addition to choosing colors on the
Colors palette, you can use the
Dropper tool to select, or “pick up,” a
color from an existing image.
To use the Dropper tool:
1 Click the front or back rectangle to
select a primary or secondary color.
2 Click the Dropper tool in the
toolbox.
3 Move the cursor to the color you
want to pic k up , an d c li c k it.
The color picker updates to display
the color you’ve selected.
Note
The Dropper to ol picks up visible
•
color only. You can’t select a hidden color
with the Dropp e r tool.
Tip
You can qu ickly get the Drop per tool
•
by pressing D on the keyboard.
To access the Dropper tool from
other tools:
• Press Option (Mac OS) or Alt
(Windows).
Note
The Droppe r tool doesn’t work with
•
all tools.
Cloning Color
The Clone Color option is another
way to choose color. This feature lets
the brush pick up color from an
original (source) image. Brushes
using dab-based Dab Types take an
average based on samples of color
from the clone source, resulting in an
approximation of the original color.
Brushes using rendered Dab Types
sample several colors, loading each
into individual bristles of the brush,
allowing for startlingly realistic
results. For more information about
cloning, refer to “Cloning Imagery”
on page187.
Color80
Page 88

To set up a clone source
1 Choose File me nu > Open, and
choose the file you want to use as a
clone source.
2 Choose File me nu > Clone.
3 Choose Select menu > All, and
press Delete (Mac OS ) or
Backspace (Windows).
Now y ou can work in the new file,
taking data from the original
sourc e f i l e.
Tip
You can also use this feature when
•
creating a mosaic. For more information,
see “Mosaics” on page 34 9.
To use clone colors:
1 Set up a clone source.
If you don’t set a file as the source,
Corel Painter uses the current
Pattern.
2 Choose a brush from the Brush
selector bar.
3 Choose Window menu > Show
Colors
to display the Colors
palette.
4 Do one of the follo wing:
• Click the palette menu arrow,
and choose Use Clone Color.
• Click the Clone Color button
on the Colors palette.
Enabling the Clone Color option
disables the color picker. This is a
reminder that your color
information is coming from the
clone source.
5 When you paint in the clone file,
Corel Painter uses colors from the
clone source image.
Note
When you change the brush or
•
variant, Corel Pain ter tur ns Use Clone
Color off. Be sure to turn it back on to
continue working with t he clone color.
Using Two Colors at Once
Usually, you’ll work with only the
primary color—the front rectangle of
the two overlapping rectangles on the
Colors palette. Using one color
produces a solid-color brush stroke.
By selecting a secondary color, you
can determine the colors for
multicolored brush strokes. Many
brush variants are able to paint with a
variable range of colors.
The settings on the Color Expression
palette determine when Corel Painter
uses one color or the other. For more
information about using color
expression, see “Color Expres sion” on
page 91.
You can use two colors at once in a brush
stroke.
To set up a two-color brush
stroke:
1 Choose a brush from the Brush
selector bar.
Core l Pain t e r 81
Page 89

2 Choose Window menu > Show
Colors
to display the Colors
palette.
3 Choose a primary and secondary
color from the standard or small
Color Picker.
Refer to “Understanding Primary
and Secondary Colors” on page 79
for more information about setting
primary and secondary colors.
4 Choose Window menu > Show
Color Expression
to display the
Color Expression palette.
5 Cho ose Di recti on from the
Controller pop-up menu.
6 Paint in the document.
The primary color is used in one
direction and the secondary color
is used in the other.
The Mixer Palette
The Mixer palette mimics the
traditional experience of mixing colors
on an artist’s palette. You can apply
two or more colors to the Mixer Pad,
blending them together to get the
color you want.
Colors can be saved, loaded, and reset
on the Mixer palette, saved as color
swatches, and saved to color sets.
To change the Mixer Pad
background
1 Choose Window menu > Show
Mixer.
2 Click the palette menu arrow, and
choose Change Mixer
Background.
3 In the Color dialog box, choose a
background color.
The Mixer Palette Tools
The tools on the M ixer palette are
used to apply, mix, sample, and clear
color on the Mixer Pad.
The Mixer pale tte tools.
Note
You can also choose a color from a
•
color set.
Tip
You might want to try a different
•
setting from the Controller pop-up menu
on the Color Expression palette. Try
setting it to Pressure instead of Direction.
Color82
The Mixer pa lette.
To display the Mixer palette
• Choose Window menu > Show
Mixer.
The Brush Tool
The Brush tool acts as a loaded paint
source, applying color to the Mixer
Pad. Color loaded on it also blends
with color already on the Mixer Pad.
Page 90

The Palette Knife Tool
The Palette Knife mixes colors already
on the Mixer Pad. It does not add new
colors to the Mixer Pad.
The Eyedropper Tool
The Eyedropper tool samples color on
the Mixer Pad for use on the canvas.
The sampled color becomes the
primary color on the Colors palette.
The Zoom Tool
The Zoom tool lets you zoom in and
out of ar eas on t he M ixe r Pad.
The Pan Tool
The Pan tool lets you scroll through
the Mixer Pad.
The Clear and Reset Canvas Tool
The Clear and Reset Canvas tool
erases the contents of the Mixer Pad
and re sets the zo o m l evel to 100% .
The Brush Size Slider
The Brush Size slider lets you
increase or decrease the size of the
Brush tool and the Palette Knife tool.
If you adjust the Brush Size slider , the
new value is retained when you
reopen the application.
The Mixer Palette Colors
Color wells at the top of the Mixer
palette store commonly used colors
you can use on the Mixer Pad. A series
of colors appears by default; however,
these colors can be changed to s uit the
individual preferences of the artist.
Mixer colors can be saved, loaded, and
reset to the default.
To chang e M i xer pa le t t e col ors
1 Choose Window menu > Show
Mixer to display the Mixer palette.
If the Mixer palette is no t
expanded, click the palette arrow.
2 Choose Window menu > Show
Colors to display the Colors
palette.
3 On the Colors palette, choose a
color from the standard or small
Color Picker.
4 On the Mixer Color palette, choose
the color well you want to change
on the Mixer Color selector.
5 In the co lo r well , pr ess Command
+ click (Mac OS) or Ctrl + click
(Windows).
The new color appears in the color
well.
To save Mixer palette colors
1 Choose Window menu > Show
Mixer to display the Mixer palette.
2 Click the palette menu arrow, and
choose Save Mixer Colors.
3 In the Save Mixe r Colors dialog
box, type a name for the mixer
colors and choose where you want
to save the Mixer swatches (MSW)
file.
4 Click Save.
Core l Pain t e r 83
Page 91

To load Mixer palette colors
1 Choose Window menu > Show
Mixer to display the Mixer palette.
2 Click the palette menu arrow, and
choose Load Mixer Colors.
3 In the Load Mixer dialog box,
choose the Mixer swa tches ( MSW)
file you want to load.
4 Click Open.
To reset the Mixer palette colors
1 Choose Window menu > Show
Mixer to display the Mixer palette.
2 Click the palette menu arrow, and
choose Reset Mixer Colors.
Mixing Colors
Usin g the Mi xer Pad, th e c olor we l ls,
and the Brush and Palette Knife tools,
you can create new colors for use in
your images.
When you have finished mixing and
sampling colors, you can clear the
Mixer Pad, or save it as a Mixer Pad
(MX S) fi l e that y o u ca n open a nd use
later.
To mix colors
1 Choose Window menu > Show
Mixer to display the Mixer palette.
2 Click the Brush tool .
3 Choose a color from the color well,
and paint on the Mixer Pad.
4 Choose a second color from the
color well, and paint on the Mixer
Pad.
5 Do one of the following:
• Use the Brush tool to add to
and blend the colors.
• Use the Pa lette Knife to ol to
blend the colors.
To sample a color from the Mixer
Pad
1 Choose Window menu > Show
Mixer to display the Mixer palette.
2 Click the Eyedropper tool .
3 On the Mixer Pad, click the color
you want t o sample.
The sampled color becomes the
primar y co lor in the image.
To clear the Mixer Pad
1 Choose Window menu > Show
Mixer to display the Mixer palette.
2 Do one of the following:
• Click the palette menu arrow,
and choose Clear Mixer Pad.
• On the Mixer palette, click the
Clear and Reset Canvas
button .
To save a Mi xer Pad
1 Choose Window menu > Show
Mixer to display the Mixer palette.
2 Click the palette menu arrow, and
choose Save Mixer Pad.
3 In the Save Mixer Pad dialog box,
type a name for the mixer colors
and choose where you want to sav e
the Mixer Pads (MXS) fi le.
4 Click Save.
To load a Mi xe r Pad
1 Choose Window menu > Show
Mixer to display the Mixer palette.
2 Click the palette menu arrow, and
choose Open Mixer Pad.
Color84
Page 92

3 In the Open Mixer Pad dialog box,
choose the Mixer Pads (MXS) file
you wan t to op e n.
4 Click Open.
Creating Color Swatches
If you have mixed colors that you are
particularly happy with, you can save
them as color swatches and add them
to color sets. Fo r more infor m ation
about color sets , see “Using Color
Sets” on page 85.
Color swatches that you create on the Mix er
palette can be saved.
To add a color swatch to the color
set
1 On the Mixer palette, click the
Eyedropper tool , and choose
the color you want to save as a
color swatch.
2 Click the palette menu arrow, and
choose Add Swatch to Color Set.
The selected color is added to the
current color set.
To create a color set from the
Mixer Pad
1 Choose Window menu > Show
Mixer to display the Mixer palette.
2 Click the palette menu arrow, and
choose New Color Set from Mixer
Pad.
Using Color Sets
Corel Painter uses color sets to
organize groups of colors. Some color
sets are organiz e d by both name and
color relationship.
Corel Painter provides sev eral color
sets—Corel Painter Colors, Mac OS
and Windows system palettes, and the
PANTONE MATCHING
SYSTEM® are a few. Only one color
set can be open at a time, but you can
easily load a different set.
The Color Sets palette.
To display the Color Sets palette:
• Choose Window menu > Show
Color Sets.
To choose a color from a color set:
• On the Color Sets palette, click a
color.
To open a different color set:
1 On the Color Sets palette, click the
palette menu arrow or the Library
Access button , and choose
Open Color Set.
2 In the Select Color dialog box,
choose a color set and click Open.
Core l Pain t e r 85
Page 93

You can set a default color set in
the Preferences dialog box. For
more information, refer to “Setting
Preferences” on page50.
To save a color set
1 On the Color Sets palette, click the
palette menu arrow or the Library
Access button, and choose Save
Color Set.
2 In the Ent er Color Set Name
dialog b ox, ch oose wher e yo u wa nt
to sav e the fi le.
3 Type a name for the color set in the
File Name box.
4 Click Save.
Finding Colors in a Color Set
There are two ways to find a particular
color in a color set. You can search for
the color by name or have Corel
Painter fin d the color that comes
closest to matching the current color.
To find a color:
1 On the Color Sets palette, do one
of the following:
• Click the Find Color button
.
• Click the palette menu arrow,
and choose Fin d Swatc h.
2 In the Find Color dialog box, do
one of the following:
• Enable the By Name option,
and type a name in the box.
• Enable Closest to Current
Color.
3 Click Begin.
4 Click OK when the desired color is
found.
If the color set i s visible , Corel
Painter surrounds t he found color
with a selection frame.
If you search for a color by name,
but a color with that name is not
found, the OK button is not
available (grayed out).
Customizing Colo r Set
Layouts
You can arrange colors in a color set in
a variety of ways. You can sort by hue,
luminance, and saturation; determine
the size of color swatches; decide
whether to have grid lines; and
indicate whether the colors in the set
are named. You can change a color set
until it’s exactly the way you want it.
To change how colors are sorted:
1 On the Color Sets palette, click the
pal e tt e menu arrow and choose
Sort Order.
2 Choose one of the followin g
options:
• Saved — sorts colors in the
order they were originally
entered.
• HLS — sorts colors by hue,
luminance, and sat uration.
• LHS — sorts colors by luminance, hue, and saturation.
• SHL — sorts colors by saturation, hue, and luminance.
To adjust color swatch size:
1 On the Color Sets palette, click the
palette menu arrow, and choose
Swatch Size.
2 Do one of the following:
• Choose a pixel value.
• Choose Customize.
Color86
Page 94

3 If you choose Custo mize, move the
Width and Height sliders in the
Customize dialog box, or type
values in the Width and Height
boxes.
To turn the grid on or off:
• On the Color Sets palette, click the
palette menu arrow, and choose
Show Grid to toggle the display of
the grid on and off.
Turning the grid off eliminates
lines between colors. You can see
more colors, but the separations
between colors are not as distinct
as when the grid is on.
To turn color names on or off:
• Click the palette menu arrow, and
choose Display Name to toggle the
displa y of c ol o r n am e s on or off.
Creating Color Sets
You can create your own color sets to
control the colors in particular projects
or to create groups of favorite painting
colors. Creating clearly named color
sets can be very useful. For example,
you could call a color set Shades of
Purple, Hero Image, My Crayons, or
Rollover Buttons—all offering you
easy access to recognizable color sets.
You can create color sets from:
• the Color pickers on the Colors
palette
•an image
• a selection on an image
•a layer
• the Mixer palette
Before you create a new color set, you
may be prompted to save the current
color set. For more information, see
“To save a color set” on page86.
To create a new color set using
the Color pickers
1 On the Color Sets palette, click the
palette menu arrow, and choose
New Em p t y C o lo r Se t .
2 On the Colors palettes, choose a
color from the standard or small
Color picker.
3 On the Color Sets palette, click the
Add Color to Color Set button .
Notes:
For information about adding colors
•
to a color set, see “Editing Color Sets” on
page 88.
For more information about selecting
•
colors, refer to “Using the Color Pickers”
on page 78.
To create a color se t from an
image, selection, layer, or the
Mixer palette
• On the Color Sets palette, click the
palette menu arrow or the Library
Access button , and choose one
of the following:
• New Color Set from Image —
This option is available only if
you have an image open. A
color set appears, containing all
the colors in the image.
• New Color Set from Layer —
This option is available only if
an active layer is selected in
your image. A color set appears,
containing all the colors in the
active layer.
• New Color Set from Selection
— This option is active only if
you have an active selection on
Core l Pain t e r 87
Page 95

your image. A color set appears,
containing all the colors in the
selected area of the image.
• New Color Set from Mixer —
A color set appears, conta ining
all of the colors used in the
Mixer palette.
Tip
When working on Web pages, you can
•
keep the number of colors used in an
image (and subsequent image size) low by
creating a color set and using only colors
in that set.
Editing Color Sets
You can customize color sets by
adding, deleting, or replac i ng colors.
You can also name or rename
individual colors in a color set.
Naming colors in a color set can be
useful. You can then search for a color
by name or annotate the colors you
use, right in the document window.
Fo r more information on searching for
a color, refe r to “Finding Colors in a
Color Set” on page 86. For more
information about annotating colors,
refer to “Annotating Co lors” on
page 91.
To add a color:
1 Choose the color you want to add
from the Colors palette, from a
color set, or from an existing
image.
2 On the Color Sets palette, click the
Add Color to Color Set button .
The color is added to the current
color set.
3 If you like, double-click the color
swatch to enter a name for the
color.
You can change the name later by
double-clicking on the swatch
again and entering a new name.
4 Repeat this procedure for all the
colors you want to add.
Note
Because Corel Pa inter closes the
•
current color set bef ore displaying a new
one, if you want to add a color from an
existing color set, select the color in the
existing color set bef ore you open the
destination set.
To delete a color:
1 Choose Window menu > Show
Color Sets.
2 On the Color Sets palette, click the
Delete Color from Color Set
button .
3 In the warning dialog box, click
Yes.
Corel Painter deletes the chosen
color from the color set window.
To replace a colo r:
1 Choose the color you want to add
from the Colors palette, from a
color set, or from an existing
image.
2 Hold down Command (Mac OS)
or Ctrl (Windows), and cli c k th e
color you want to replace.
The new color replaces the old one
in the color set.
To name or rename a color:
1 Choose Window menu > Show
Color Sets.
2 Double-click a color swatch on the
Color Sets palette.
Color88
Page 96

3 Type a color name in the Set Color
Name dialog box .
Color names can be up to 31
characters long.
Color Information
Color information for a selected co lor
is available on the Color Info palette.
The Color Info Palette
The Color Info palette shows the
HSV and RGB values for the selected
color. Corel Painter gives RGB values
in decimal format. These values can
be adjusted by moving the sl i ders, or
by typing new values in the
corresponding boxes.
You can also use the Color Info palette
to enable the Clone Color option. For
more information on clone color, see
“Using Clone Color” on page198.
The Color Info p alette.
To display the Color Info palette
• Choose Window menu > Show
Color Info.
To set RGB o r HSV values
1 On the Color Info palette, click t he
palette menu arrow and choose
one of th e fol lowing :
•Display as RGB.
•Display as HSV.
2 Move the sliders to adjust the
values, or type new values in the
boxes.
You can preview the new color in
the primary and secondary color
rectangles on the Color Info
palette.
Tip
You can d isplay hexadecimal RGB
•
values on the C olors palette by pressing
Shift + click in the HSV/ RGB square.
Hexadecimal RGB values can be useful
when authoring for the Web.
Color Variability
Color variability allows you to create
brush strokes of more than one color .
Variability can be used to enhance the
Natural-Media appeara nce of your
work.
The Color Variability Palette
The Color Variability palette contains
sliders to adjust color vari abi l i ty
values.
The Color Variability p alette.
Core l Pain t e r 89
Page 97

To display the Color Variability
palette
• Choose Window menu > Show
Color Variability.
Setting Colo r Variabi lit y
Color variability can be set according
to HSV or RGB mode, and it can be
based on the current gradient or color
set.
To set co lo r va ri ab i l it y :
1 On the Colors palette, ch oose a
primary color from the standard or
small Color picker.
2 Choose Window menu > Show
Color Variability
to display the
Color Variability palette.
3 Choose In HSV from the pop-up
menu.
4 Adjust the Hue, Saturation, and
Value sliders to control hue,
saturation, and value ranges for
color variability.
• Move the ±Hue slider to the
right to increase the number of
hues in the resulting brush
stroke. These colors are the
ones adjacent to the selected
color on the color wheel.
• Move the ±Saturation slider to
the right to increase variability
in the color intensity of the
brush stroke.
• Move the ±Value slider to the
right to increase variability in
the brightness of the brush
stroke.
You can try different ±HSV
settings with any of the brushes to
get interesting results.
Note
When you save a brush variant, the
•
current color variability setting is also
saved.
Tip
When working with brushes like the
•
Loaded O ils brush or the Van Gogh and
Seurat variants of the Artists brush,
moving these sliders to the right can add
natural, almost 3D-looking effects to your
Web page images.
To set color variability in RGB
mode:
1 On the Colors palette, choose a
primary color from the standard or
small Color picker.
2 Choose Window menu > Show
Color Variability
to display the
Color Variability palette.
3 Choose In RGB from the pop-up
menu.
4 Move the R, G, and B sliders to
control color variability of red,
green, and blue values.
To set color variability based on
the current gradient:
1 On the Colors palette, choose a
primary color from the standard or
small Color picker.
2 Choose Window menu > Show
Color Variability
to display the
Color Variability palette.
3 Choose From Gradient from the
pop-up menu.
From Gradie nt cause s r an do m
colors from the current gradient to
be chosen for color variability.
Color90
Page 98

To set co l or va ri ab il it y base d on
the current co lor set:
1 On the Colors palette, choose a
primary color from the standard or
small Color picker.
2 Choose Window menu > Show
Color Variability
to display th e
Color Variability palette.
3 Choose From Color Set from the
pop-up menu.
From Co lor Set causes random
colors from the current color set to
be chosen for color variability.
Color Expression
Color expression determines where
Corel Painter should use the primary
or secondary color in an image.
The Color Expression Palette
The Color Expression palette lets you
introduce input, such as direction,
that controls output when applying
two-color brush strokes.
The Color Expression palette.
To display the Color Expression
palette
• Choose Window menu > Show
Color Expression.
To set Color Expression contr ols
1 Choose Window menu > Show
Color Expression to display the
Color Expression pale tte.
2 F rom the Controller pop-up menu,
choose one of the followi ng:
• None — applies no adjustment
to the color expression
• Velocity — adjusts the co lor
expression based on the dragging speed
• Direction — adjusts the color
expression based on the direction of the st roke, and according to the value you s et wi th the
slider or in the box
• Pressure — adjusts the color
expression based on sty lus pressure
• Wheel — adjusts the color
expression based on the wheel
settings on an airbrush stylus,
specifically the Wacom Intuos
Airbrush stylus
• Tilt — adjusts the color expression based on the angle of the
styl u s fro m the ta blet
• Bearing — adju sts the color
expression based on the direction in which the stylus points
• Source — adjusts the color
expression based on the luminance of the clone source
• Random — adjusts the col or
expression at random
3 If you want to switch the primary
and secondary colors, enable the
Invert check box to invert the color
expression.
Annotating Colors
The Annotation feature uses color
names as labels for the colors in your
images. Labels are small text boxes
Core l Pain t e r 91
Page 99

connected to lines that point to an
individual color in your on-scr een or
printed image. Annotating colors in
an image can help you track, and
limit, which colors are used, which
can help you control image size. After
you create annotations, you can hide
or show them, or delete them.
You must name color swatches in the
active color set to generate useful
annotations. You can change color
names after you have added them as
annotations. For information about
naming color sets, see “To name or
rename a color:” on pag e88.
Create lab el s, or annotations, for individ ual
colors in your image.
Annotations are kept in a separate
layer on top of the image and can be
saved in the RIF format with your
image. Annotations are included
when you record a script, and are
properly scaled when you play back at
a different resolution.
When you move a layer, its
annotations go with it. If you move an
annotated layer on top of another , the
visible annotation might actually
belong to the underlying layer, even
though it appears to be labeling the
top one.
When you annotate a color that
doesn’t exactly match a color in the
active color set—for example, when
you’re annotating brush strok es
applied at less than 100% opacity—
Corel Painter approximates the color,
displays the name of the nearest
match, and adds an asterisk after the
color name to indicate a near match.
When you refill an annotated area, the
annotation is updated to reflect the
new color. Refer to “Filling
Techniques” on page 118 for more
information.
To create annotations:
1 Use a color set th at inclu des na mes
for the colors.
2 Choose Canvas menu >
Annotations > Annotate.
3 Position the cursor on the color
you wish to annotate and drag to
an area outside the color’s
boundaries.
When you release the mouse or
stylus button, a color name
appears, attached to a line that
points to the annotated color.
4 After annotating as many colors as
needed, click Done in the
Annotati on dialog box.
To delete an annotation:
1 Choose Canvas menu >
Annotations > Annotate.
2 Click the annotation tag (name) to
select it.
3 Press Delete (Mac OS) or
Backspace (Windows ).
Color92
Page 100

To show or hide annotations:
1 Choose Canvas menu >
Annotations > Show
Annotations.
The annotations appear.
2 Choose Canvas menu >
Annotations > Hide Annotations
to hide the annotations.
To change color names after
annotating an image:
1 Choose the annotation you want to
rename.
2 Press Delete (Mac OS) or
Backspace (Windows).
3 On the Color Sets palette, double-
click the color swatch of the color
you want to rename.
4 Type a new name in the Set Color
Name dialog box .
5 Choose Canvas menu >
Annotations > Annotate.
6 Re-c reat e the de l e ted anno ta t i on.
7 Repeat the procedure for each
annotation you want to rename.
Using Gradients
A gradient is a gradual transfor mation
from on e col o r into a noth e r.
Sometimes they are called blends or
fountains. Corel Painter provides
several different types of gradients:
linear, radial, circular, and spiral.
Examples of gradie nt types, from top to
bottom: linear, radial, circular, and spiral.
You can use gradients to:
• Fill an image selection, layer, or
channel. For more information,
see “Using Selections” on
page 203, “Using Layer s and Layer
Masks” on page229, and “Using
Alpha Channels” on page219.
• Control a Pop-Art Fill effect.
(Other effects work best when you
use a filled mask.) For more
information, see “Pop Art Fill” on
page 311.
• Express the gradient in an existing
image by mapping gradient colors
to image luminance. For more
information, see “Creating T exture
Usin g Image Lum inance” on
page 280.
• Brush with a gradient with one of
the computed brushes (using one
of these dab types: line airbrush,
projected, or rendered). For more
information, see “Dab Types” on
page 148.
Although Corel Painter comes with
libraries full of gradients, you’ll
invariably want to create some of your
Core l Pain t e r 93
 Loading...