

Page 1

Easy VHS to DVD 3
&
Easy VHS to DVD 3 Plus
Getting Started Guide
Page 2

Roxio Easy VHS to DVD Getting Started Guide
ii
www.roxio.com
Page 3

Get Started with
Roxio Easy VHS to DVD
In this guide
Welcome to Roxio Easy VHS to DVD . . . . . . . . . . . . . . . . . . . . . . . . . . . . . . . . . . . . . . . . . . . . . . . 5
Minimum system requirements . . . . . . . . . . . . . . . . . . . . . . . . . . . . . . . . . . . . . . . . . . . . . . . . . . . . 6
Install Easy VHS to DVD . . . . . . . . . . . . . . . . . . . . . . . . . . . . . . . . . . . . . . . . . . . . . . . . . . . . . . . . . . 7
What you get: Software . . . . . . . . . . . . . . . . . . . . . . . . . . . . . . . . . . . . . . . . . . . . . . . . . . . . . . . . . 8
What you get: Hardware . . . . . . . . . . . . . . . . . . . . . . . . . . . . . . . . . . . . . . . . . . . . . . . . . . . . . . . 10
Upgrade to Easy VHS to DVD Plus . . . . . . . . . . . . . . . . . . . . . . . . . . . . . . . . . . . . . . . . . . . . . . . . 11
Connect a VHS player to your computer . . . . . . . . . . . . . . . . . . . . . . . . . . . . . . . . . . . . . . . . . . 12
Convert VHS tapes with Easy VHS to DVD. . . . . . . . . . . . . . . . . . . . . . . . . . . . . . . . . . . . . . . . . . 15
3
Page 4

Roxio Easy VHS to DVD Getting Started Guide
4
www.roxio.com
Transfer a single VHS tape to a DVD . . . . . . . . . . . . . . . . . . . . . . . . . . . . . . . . . . . . . . . . . . . . . . 16
Transfer multiple video clips to one DVD and create a menu . . . . . . . . . . . . . . . . . . . . . . . . . 19
Convert LPs or audio tapes with Sound Editor . . . . . . . . . . . . . . . . . . . . . . . . . . . . . . . . . . . . . . 23
Enhance audio with Sound Editor . . . . . . . . . . . . . . . . . . . . . . . . . . . . . . . . . . . . . . . . . . . . . . . . 25
Create an audio CD with Sound Editor. . . . . . . . . . . . . . . . . . . . . . . . . . . . . . . . . . . . . . . . . . . . 27
Legal Information
Copyright © 1994-2012 Corel Corporation or its subsidiaries. All rights reserved. Roxio and Roxio Easy VHS to DVD are
trademarks or registered trademarks of Corel Corporation or its subsidiaries in the USA and other countries. All other names
and logos are the respective property of their owners. This software is protected by copyright law and international treaties.
Unauthorized reproduction or distribution of any portion is prohibited by law.
Page 5

Get Started with Roxio Easy VHS to DVD
Welcome to Roxio Easy VHS to DVD
Welcome to Roxio Easy VHS to DVD
Roxio Easy VHS to DVD and Roxio Easy VHS to DVD Plus are two of the best solutions yet for preserving your cherished VHS
recordings. Both products help you easily transfer video from VHS or other analog tape to your computer, where you can
burn it directly to a DVD or reformat it for playback on a wide range of hand-held devices.
We’ve also included software to help you digitize your LP collection and create disc labels.
About this guide
This guide provides an overview of both Easy VHS to DVD and Easy VHS to DVD Plus to help you get started. It explains how
to connect your VCR to your computer, how to use the included capture device, and how to burn VHS video onto a DVD.
Unless otherwise noted, references to Easy VHS to DVD also apply to Easy VHS to DVD Plus.
For more detailed information, click one of the many Help buttons available within your application.
5
Page 6

Roxio Easy VHS to DVD Getting Started Guide
6
www.roxio.com
Minimum system requirements
■
Microsoft® Windows 7 Home Premium, Windows Vista® Home Basic (SP1), Windows® XP (SP3 for 32-bit, SP2 for 64-bit)
■
1.6 GHz processor and 512 MB RAM, or the minimum requirements of your computer’s operating system, whichever is
higher
■
DirectX 9 compatible graphics card or higher, sound card, DVD-ROM drive
■
2 GB of free hard drive space for installation
■
Windows Media Player 10, 11 or 12
■
DVD writer to burn DVDs
■
Internet Explorer 7, 8 or 9
■
One available USB 2.0 port
■
Minimum screen resolution of 1024-by-768
Page 7
Get Started with Roxio Easy VHS to DVD
Install Easy VHS to DVD
Install Easy VHS to DVD
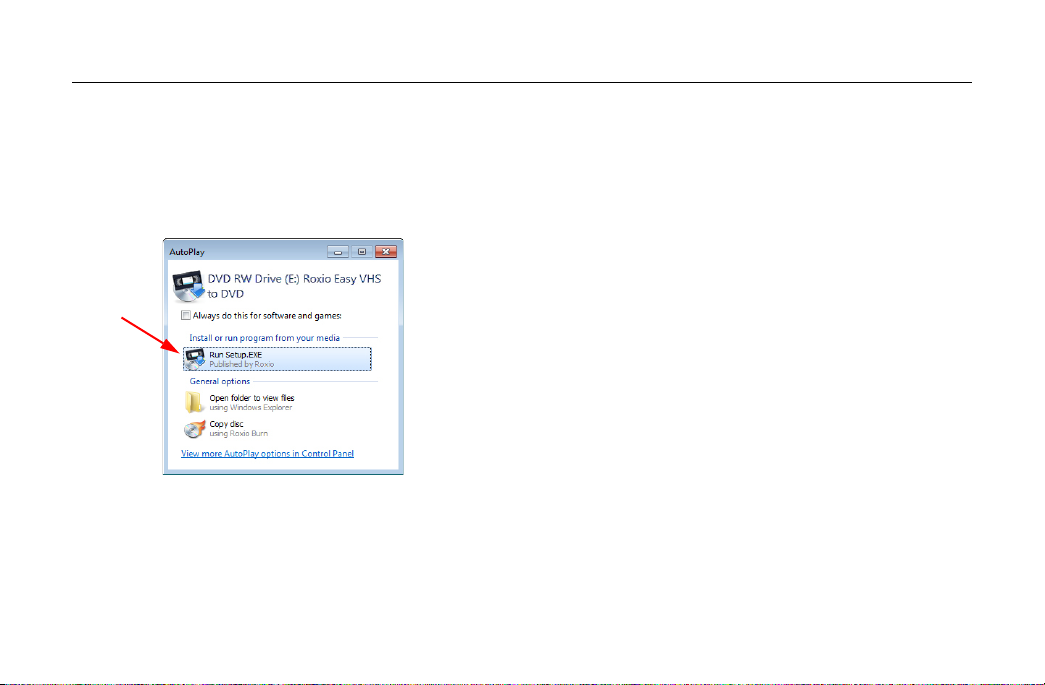
1 Insert the installation disc.
2 If a Windows Autoplay dialog appears, click Run Setup.exe (as shown below).
3 If a Windows Autoplay dialog does not appear, navigate to the Easy VHS to DVD folder on the disc, and double-click the
Setup.exe file.
4 Follow the on-screen instructions to complete the installation and, if desired, upgrade to Easy VHS to DVD Plus,
7
Page 8
Roxio Easy VHS to DVD Getting Started Guide
8
www.roxio.com
What you get: Software
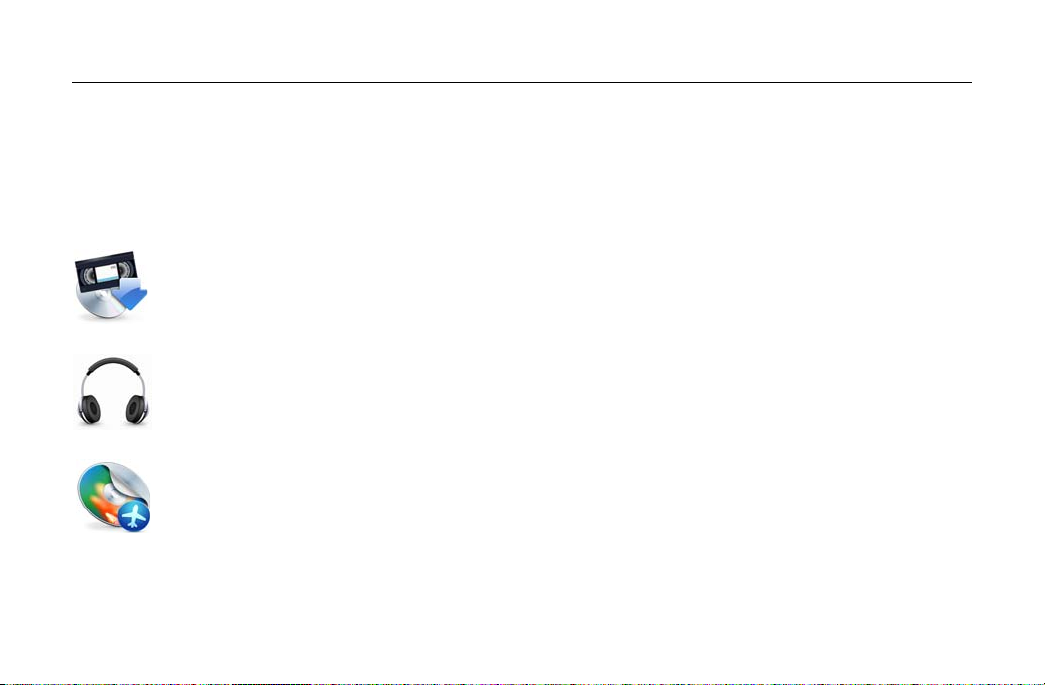
Easy VHS to DVD and Easy VHS to DVD Plus come with three great Roxio applications:
Easy VHS to DVD — Use this application to transfer video from VHS tape directly to a DVD. It also converts
tapes to digital files that can be exported to formats compatible with iPhone, iPad, and other portable devices.
To launch Easy VHS to DVD, double-click its desktop icon (shown at left).
Sound Editor — Sound Editor is the go-to application for converting your vinyl LPs to digital music files. Sound
Editor enhances recordings and saves them in many of the most popular music formats. To launch Sound Editor,
double-click its desktop icon (shown at left).
Roxio Express Labeler — Create professional quality disc labels using standard paper labels or the laserwriting capabilities of your disc drive. Roxio Express Labeler supports both LightScribe and LabelFlash drives. To
launch Roxio Express Labeler, click the Windows Start button, open the programs list, and navigate to the Roxio
program group.
Page 9
Get Started with Roxio Easy VHS to DVD
Easy VHS to DVD
Sound Editor
Roxio Express
Labeler
What you get: Software
9
Page 10

Roxio Easy VHS to DVD Getting Started Guide
The Roxio Video
Capture USB
device.
SCART
adaptor.
10
www.roxio.com
What you get: Hardware
Easy VHS to DVD includes the USB device you’ll need to
convert VHS tapes to DVD.
Roxio Video Capture USB — Plug this device into a
USB 2.0 port on your computer.
SCART adaptor (Europe only) — This adaptor
converts the SCART out connection on the VCR to
standard RCA audio and composite video.
Page 11

Get Started with Roxio Easy VHS to DVD
Upgrade to Easy VHS to DVD Plus
Upgrade to Easy VHS to DVD Plus
Easy VHS to DVD Plus includes these additional features:
■
Video noise reduction
■
Basic and advanced video stabilization
■
Basic and advanced color correction
■
Transitions and rolling credits
■
Split movies too big to fit on one DVD
How to upgrade
When you purchase an upgrade, a product key is emailed to you. Enter the key to unlock all the features of
Easy VHS to DVD Plus. To upgrade, select Support > Upgrade to Easy VHS to DVD Plus. If a User Account Control
message appears, click Yes to continue.
11
Page 12

Roxio Easy VHS to DVD Getting Started Guide
12
www.roxio.com
Connect a VHS player to your computer
1
Page 13

2
Tip: Which video connector
should I use? Depending on
the VCR, you’ll have a choice
of using either the Composite
video connector (the yellow
plug) or the higher quality SVideo connector (the single,
black plug). Whenever
possible, we recommend
using S-Video.
Get Started with Roxio Easy VHS to DVD
Connect a VHS player to your computer
13
Page 14

Roxio Easy VHS to DVD Getting Started Guide
14
www.roxio.com
3
Page 15

Get Started with Roxio Easy VHS to DVD
Convert VHS tapes with Easy VHS to DVD
Convert VHS tapes with Easy VHS to DVD
Easy VHS to DVD can be used to convert VHS or other analog tapes directly to DVDs. You can also use it to create video clips
from one or more VHS tapes and burn those clips to a DVD. This section of the guide describes the steps to accomplish these
typical tasks:
■
Project 1: Transfer a single VHS tape to a DVD.
■
Project 2: Burn multiple video clips to a DVD and create a menu.
Let’s get started.
15
Page 16

Roxio Easy VHS to DVD Getting Started Guide
16
www.roxio.com
Transfer a single VHS tape to a DVD
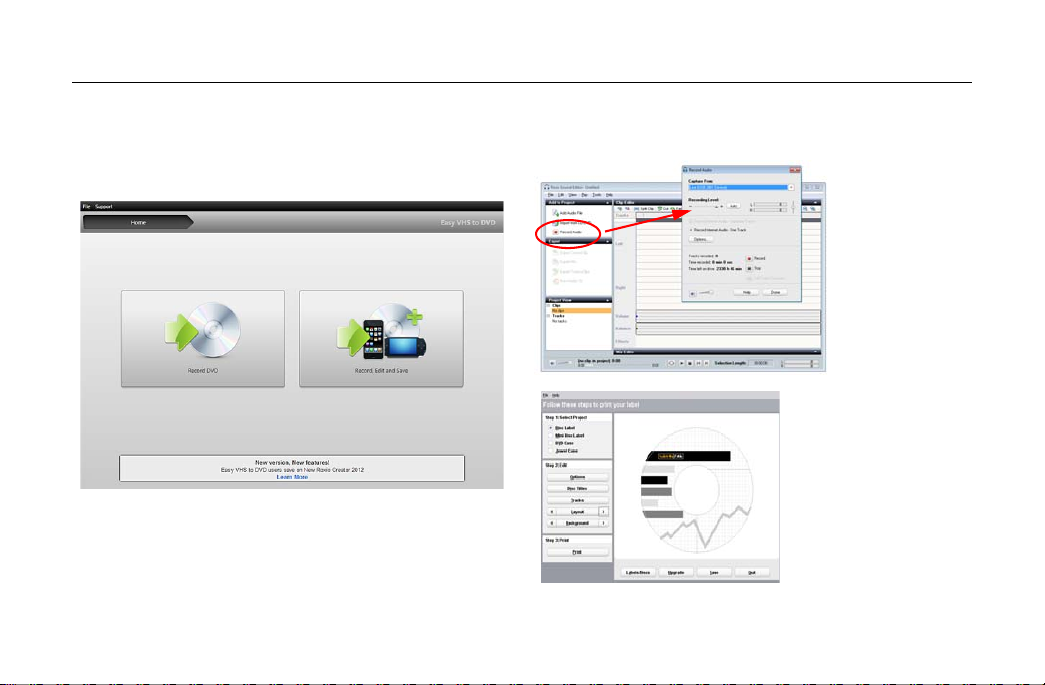
1 Start Easy VHS to DVD by double-clicking the Easy VHS to DVD icon on your computer desktop.
2 Click Record DVD.
3 Insert your VHS tape.
4 Fast-forward or rewind the tape to the position where you want to begin recording.
5 Press the Play button on your VCR.
The video appears in the Easy VHS to DVD preview window.
Page 17

Get Started with Roxio Easy VHS to DVD
Transfer a single VHS tape to a DVD
6 Adjust the volume, if necessary, using the Playback Level control.
7 Adjust the audio recording level, if necessary, by moving the Adjust Recording Level slider left or right. The
recording meter should barely reach the red area when the loudest portion of the tape is played.
8 Give your DVD a title.
9 Select the disc drive you will use to burn the DVD.
10 Insert a blank disc into the drive you selected in the previous step.
11 Select a Quality level. Choose a setting that accommodates the total amount of video you plan to record on this disc.
17
Page 18

Roxio Easy VHS to DVD Getting Started Guide
18
www.roxio.com
12 Optional: Set the recording duration. If you know the exact duration of the current video, just type it in. If not, enter an
approximate value that you know to be slightly longer than the video duration.
13 Use the controls on your VCR to return the tape to the correct starting position.
14 Click the Start Recording button on Easy VHS to DVD.
15 If you set a recording duration, Easy VHS to DVD will stop recording automatically. If not, click the Stop recording
button when you reach the end of your tape.
16 When the recording process is complete, eject your new video disc if it does not eject automatically.
Page 19
Get Started with Roxio Easy VHS to DVD
Transfer multiple video clips to one DVD and create a menu
Transfer multiple video clips to one DVD and create a menu
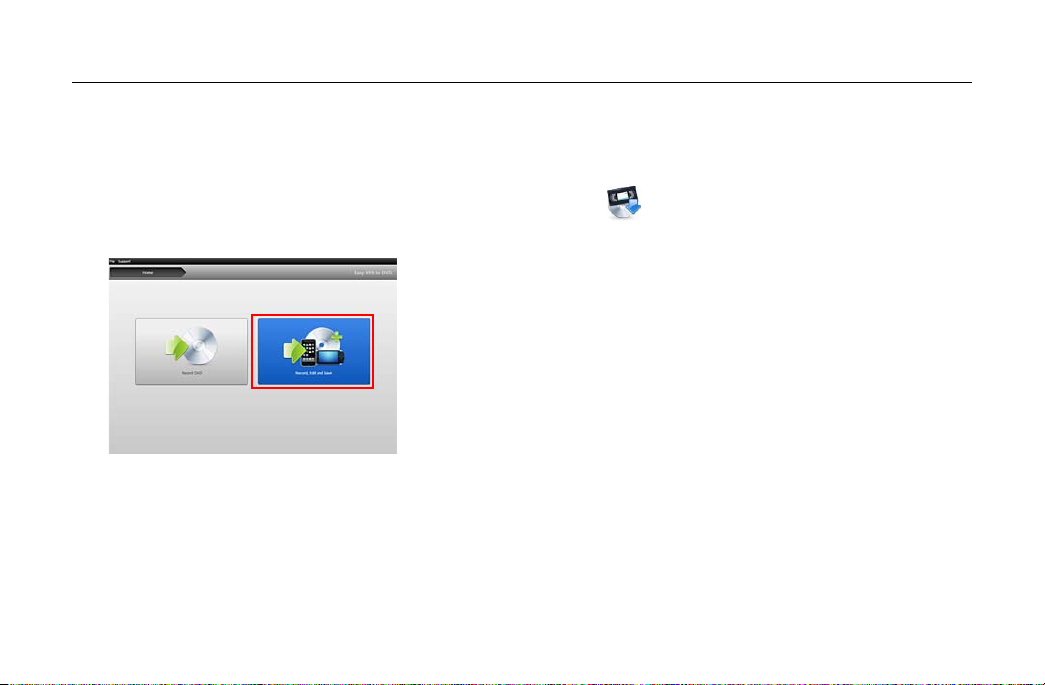
1 Start Easy VHS to DVD by double-clicking the Easy VHS to DVD icon on your computer desktop.
2 Click Record, Edit and Save.
3 Click Start a new project.
4 Insert your first VHS tape. Fast-forward or rewind the tape to the position where you want to begin recording.
5 Give your recording a title.
6 Optional: Set the recording duration. If you know the exact duration of the current video, just type it in. If not, enter an
approximate value that you know to be slightly longer than the video duration.
19
Page 20

Roxio Easy VHS to DVD Getting Started Guide
20
www.roxio.com
7 Press the Play button on your VCR.
The video appears in the Easy VHS to DVD preview window.
8 Click the Record button.
9 If you set a recording duration, Easy VHS to DVD will stop recording automatically. If not, click the Stop button when
you are done recording.
Your video appears in the video list. Now you are ready to record the next clip.
10 Click Record Video.
11 Insert the next tape in your VCR, or reset the current tape to the desired starting position.
12 Give this recording a title.
13 Optional: Set the recording duration.
14 Click the Record button.
15 If you set a recording duration, Easy VHS to DVD will stop recording automatically. If not, click the Stop button when
you reach the end of your recording.
Page 21

Get Started with Roxio Easy VHS to DVD
Transfer multiple video clips to one DVD and create a menu
Each clip you record appears in the video list. Now you are ready to record the next clip.
16 Repeat Step 10 to Step 15 for each clip you wish to record.
17 After recording your final clip, review the video list. Use the Remove buttons to delete any clips you do not want to
keep.
18 Click the Ready to Export button.
A list of devices and settings appears.
21
Page 22

Roxio Easy VHS to DVD Getting Started Guide
22
www.roxio.com
19 Select DVD from the list of devices.
20 Select a Destination Drive, and insert a blank
DVD.
21 Enter a DVD Title.
22 Select Add Menu.
23 Click Change Menu to choose a menu style.
24 Optional: You may change the menu’s aspect-
ratio to widescreen (16:9) by selecting
File > Preferences.
25 Optional (in Easy VHS to DVD Plus only):
Click the Link buttons between clips to link
several videos into a single video. Add transition
effects such as wipes and dissolves.
26 Optional (in Easy VHS to DVD Plus only):
Click the Split Movie button to split a video that
is too long to fit on a single disc into two parts.
Each part will be burned to a separate disc.
27 Click the Burn button.
Page 23
Convert LPs or audio tapes with Sound Editor
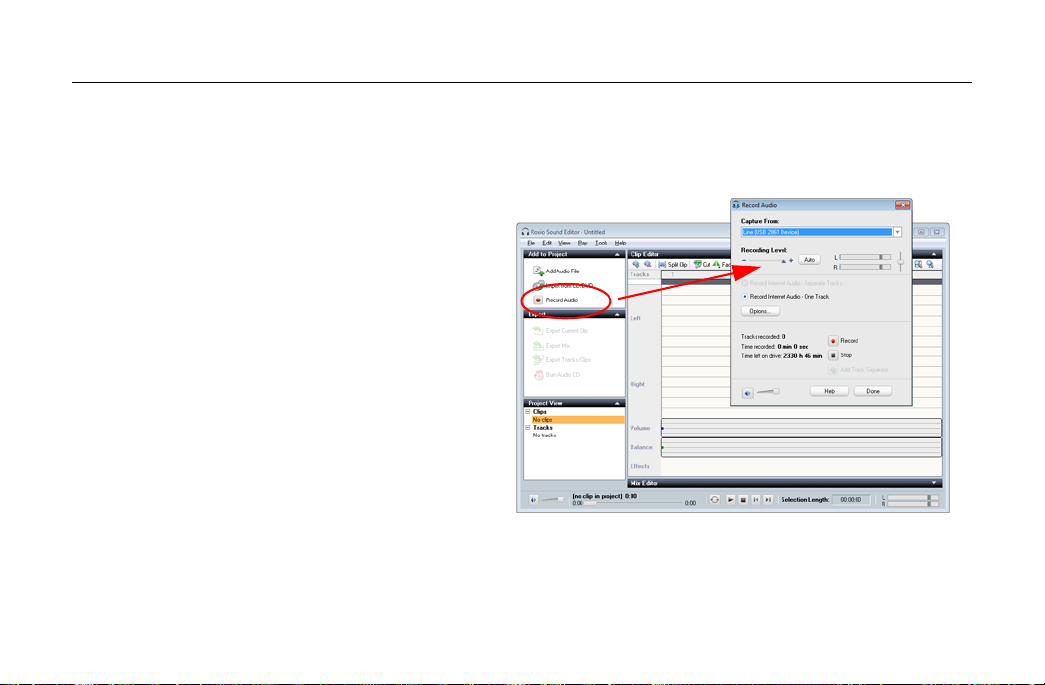
Convert LPs or audio tapes with Sound Editor
To convert LPs or audio tapes to digital music
files:
1 Connect a stereo receiver to your computer using
the Roxio Video Capture USB device.
2 Launch Sound Editor by double-clicking its
desktop icon.
3 Once Sound Editor opens, click Record Audio.
The Record Audio dialog opens.
Get Started with Roxio Easy VHS to DVD
23
Page 24

Roxio Easy VHS to DVD Getting Started Guide
24
www.roxio.com
4 In the Capture From drop-down menu, select
Line (Roxio Video Capture USB).
5 To optimize the recording volume, play a loud
portion of your LP or tape and click Auto.
6 If this is your first time converting an LP or tape,
we suggest that you click Options. Here you can
select:
■
a destination for your files
■
file format and quality settings
■
the length of silence needed before a new
clip is created
7 Reset your LP or tape to the desired starting
position.
8 Start playing the LP or tape.
9 On the Record Audio dialog, click Record.
10 When you are done recording, click Stop.
Page 25

Enhance audio with Sound Editor
1 If your project is already open in Sound Editor,
skip to Step 3. If not, click Add Audio File.
Media Selector opens.
2 Use Media Selector to navigate to the audio file
you want to enhance. Click OK to open the
project in Sound Editor.
3 Under Project View, select the clip you would like
to enhance.
4 Click Clean up Audio.
Get Started with Roxio Easy VHS to DVD
Enhance audio with Sound Editor
25
Page 26

Roxio Easy VHS to DVD Getting Started Guide
26
www.roxio.com
5 Choose one of the following tools and adjust the
settings as desired:
■
Clean: Helps remove noise typically found
in recordings from vinyl records. Apply
settings in any one or more of the following
areas:
■
Enhancer: Lets you enhance the bass and
brighten the sound.
■
Equalizer: Lets you boost or cut the
amplitude (volume) for 10 bands of sound
frequencies. You can also choose from one
of several presets.
Page 27

Create an audio CD with Sound Editor
Once you have recorded an LP or tape and enhanced the
sound, you can use Sound Editor to add audio tags and
burn an audio CD. Here’s how:
1 Open your recording project in Sound Editor.
2 Click Burn Audio CD.
The Burn Audio CD dialog opens.
Get Started with Roxio Easy VHS to DVD
Create an audio CD with Sound Editor
27
Page 28

Roxio Easy VHS to DVD Getting Started Guide
28
www.roxio.com
3 Insert a blank disc into your disc burner and
select the corresponding capacity from the Disc
Size drop-down menu.
4 Click the Audio CD Settings button to give the
disc a title.
5 Click the Edit Audio Tags button to enter song
and artist information for your tracks.
6 Click Burn.
The Burn Setup dialog opens.
7 Select your disc burner.
8 Click OK.
 Loading...