


 Loading...
Cover
CT-S300
USER’S GUIDE
EN
|
|
|
|
|
|
|
|
|
|
|
|
|
|
Preparing a Power Supply |
Turning Power On or Off |
Connecting Headphones |
Connecting a Pedal |
||||||||||
|
|
|
|
(Sold Separately) |
(Sold Separately) |
||||||||
|
|
|
|
|
|
|
|
|
|
|
|
|
|
|
|
|
|
|
|
|
|
|
|
|
|
|
|
|
|
|
|
|
|
|
|
|
|
|
|
|
|
|
|
|
|
|
|
|
|
|
|
|
|
|
|
|
|
|
|
|
|
|
|
|
|
|
|
|
|
|
|
|
|
|
|
|
|
|
|
|
|
|
|
|
|
|
|
|
|
|
|
|
|
|
|
|
|
|
|
|
|
|
|
|
|
|
|
|
|
|
|
|
|
|
|
|
|
|
|
|
|
|
|
|
|
|
|
|
|
|
|
|
|
|
|
|
|
|
|
|
|
|
|
|
|
|
|
|
|
|
|
|
|
|
|
|
|
|
|
|
|
|
|
|
|
|
|
Selecting a Musical |
Changing the Pitch in |
Fine Tuning Pitch (Tuning) |
Using the SUSTAIN Button |
Instrument Tone |
Semitone Steps (Transpose) |
|
|
Saving and Loading |
Playing a Built-in Song |
Playing in the Dance Music |
Using a Dance Music Voice |
||
Instrument Settings |
|
Mode |
|
||
(MY SETUP) |
|
|
|
||
|
|
|
|
|
|
|
|
|
|
|
|
Playing with a Rhythm |
Linking with a Smart Device |
Configuring Function Settings |
Backing |
(APP Function) |
|
CTS300-E-2B
Included and Optional Accessories
Use only accessories that are specified for use with this Digital Keyboard.
Use of unauthorized accessories creates the risk of fire, electric shock, and personal injury.
•You can get information about accessories that are sold separately for this product from the CASIO catalog available from your retailer, and from the CASIO website at the URL or QR code below. https://support.casio.com/global/en/emi/manual/CT-S300/
About Music Score data
You can download music score data as a PDF file from the CASIO website, which you can access using the URL or QR code below. You will then be able to view music scores on your smart device. You can jump from the PDF file table of contents directly to the music score you want, and you can print out scores as needed.
https://support.casio.com/global/en/emi/manual/CT-S300/
•Any reproduction of the contents of this manual, either in part or its entirety, is prohibited. Except for your own, personal use, any other use of the contents of this manual without the consent of CASIO is prohibited under copyright laws.
•IN NO EVENT SHALL CASIO BE LIABLE FOR ANY DAMAGES WHATSOEVER (INCLUDING, WITHOUT LIMITATION, DAMAGES FOR LOSS OF PROFITS, BUSINESS INTERRUPTION, LOSS OF INFORMATION) ARISING OUT OF THE USE OF OR INABILITY TO USE THIS MANUAL OR PRODUCT, EVEN IF CASIO HAS BEEN ADVISED OF THE POSSIBILITY OF SUCH DAMAGES.
•The contents of this manual are subject to change without notice.
•The actual appearance of the product may be different from that shown in the illustrations in this User’s Guide.
•Company and product names used in this manual may be registered trademarks of others.
EN-1

Contents
General Guide |
EN-3 |
Getting Ready to Play |
EN-4 |
Preparing a Power Supply . . . . . . . . . . . . . . . . . . . EN-4
Preparing the Music Stand . . . . . . . . . . . . . . . . . . . EN-5
Connecting Headphones (Sold Separately) . . . . . . EN-6
Connecting a Pedal (Sold Separately) . . . . . . . . . . EN-6
Playing with a Rhythm Backing |
EN-24 |
Rhythm . . . . . . . . . . . . . . . . . . . . . . . . . . . . . . . . . .EN-24 Playing a Rhythm . . . . . . . . . . . . . . . . . . . . . . . . . .EN-24 Using Recommended Rhythm Settings . . . . . . . . .EN-26 Changing the Rhythm Pattern . . . . . . . . . . . . . . . .EN-26 Inserting a Fill-in Phrase. . . . . . . . . . . . . . . . . . . . .EN-27
Fingering a Chord to Play a Rhythm
Accompaniment. . . . . . . . . . . . . . . . . . . . . . . . . .EN-27 Inserting an Intro or an Ending . . . . . . . . . . . . . . . .EN-29
Operations Common to All Modes |
EN-6 |
|
Connecting with External Devices |
EN-30 |
Display Screen Contents. . . . . . . . . . . . . . . . . . . . . EN-6
HOME Button . . . . . . . . . . . . . . . . . . . . . . . . . . . . . EN-6
3 Buttons. . . . . . . . . . . . . . . . . . . . . . . . . . . . . . . . . EN-7
Dial Operations . . . . . . . . . . . . . . . . . . . . . . . . . . . . EN-7
Playing on the Keyboard |
EN-7 |
Turning Power On or Off. . . . . . . . . . . . . . . . . . . . . EN-7 Adjusting the Volume Level. . . . . . . . . . . . . . . . . . . EN-8 Using the Metronome . . . . . . . . . . . . . . . . . . . . . . . EN-9 Listening to Demo Play. . . . . . . . . . . . . . . . . . . . . EN-10
Controlling the Sound of a Performance |
EN-10 |
Selecting a Musical Instrument Tone . . . . . . . . . . EN-10
Changing Keyboard Response to Touch
Pressure (Touch Response) . . . . . . . . . . . . . . . EN-11 Using a Pedal . . . . . . . . . . . . . . . . . . . . . . . . . . . . EN-11 Using the Pitch Bend Wheel . . . . . . . . . . . . . . . . . EN-12 Using the SUSTAIN Button. . . . . . . . . . . . . . . . . . EN-12 Adding Reverb to Notes . . . . . . . . . . . . . . . . . . . . EN-12
Changing the Pitch in Semitone Steps
(Transpose) . . . . . . . . . . . . . . . . . . . . . . . . . . . . EN-13 Fine Tuning Pitch (Tuning) . . . . . . . . . . . . . . . . . . EN-13
Linking with a Smart Device (APP Function) . . . . .EN-30 Connecting to a computer and Using MIDI. . . . . . .EN-31 Connecting with Audio Equipment . . . . . . . . . . . . .EN-32
Configuring Function Settings |
EN-33 |
Configuring Settings . . . . . . . . . . . . . . . . . . . . . . . |
.EN-33 |
Setting Item List . . . . . . . . . . . . . . . . . . . . . . . . . . |
.EN-33 |
Reference |
EN-36 |
Troubleshooting . . . . . . . . . . . . . . . . . . . . . . . . . . .EN-36
Product Specifications . . . . . . . . . . . . . . . . . . . . . .EN-37
Tone List. . . . . . . . . . . . . . . . . . . . . . . . . . . . . . . . .EN-40
Drum Assignment List. . . . . . . . . . . . . . . . . . . . . . .EN-43
Song List. . . . . . . . . . . . . . . . . . . . . . . . . . . . . . . . .EN-44
Dance Music Mode List . . . . . . . . . . . . . . . . . . . . .EN-44
Rhythm List. . . . . . . . . . . . . . . . . . . . . . . . . . . . . . .EN-45
Fingering Guide . . . . . . . . . . . . . . . . . . . . . . . . . . .EN-46
Chord Example List . . . . . . . . . . . . . . . . . . . . . . . .EN-47
MIDI Implementation Chart
Saving and Loading Instrument Settings |
|
(MY SETUP) |
EN-14 |
Saving to MY SETUP . . . . . . . . . . . . . . . . . . . . . . |
EN-14 |
Recalling From MY SETUP. . . . . . . . . . . . . . . . . . |
EN-15 |
Playing a Built-in Song |
EN-16 |
Songs . . . . . . . . . . . . . . . . . . . . . . . . . . . . . . . . . . EN-16 Selecting a Song to Play. . . . . . . . . . . . . . . . . . . . EN-16
Assigning the Song Tone to the Keyboard
(Tone Sync) . . . . . . . . . . . . . . . . . . . . . . . . . . . . EN-18 Practicing a Song Part . . . . . . . . . . . . . . . . . . . . . EN-18 Sounding a Count in Time with a Song. . . . . . . . . EN-19
Playing in the Dance Music Mode |
EN-20 |
Dance Music Mode . . . . . . . . . . . . . . . . . . . . . . . . EN-20
Playing Dance Music. . . . . . . . . . . . . . . . . . . . . . . EN-21
Using the Recommended Tone . . . . . . . . . . . . . . EN-23
Using a Dance Music Voice . . . . . . . . . . . . . . . . . EN-23
Using Effects. . . . . . . . . . . . . . . . . . . . . . . . . . . . . EN-23
Building Performance Tension . . . . . . . . . . . . . . . EN-24
EN-2

General Guide
■Front Panel
|
|
|
|
|
|
|
|
|
|
|
|
|
|
|
|
|
|
|
|
|
|
|
|
|
|
|
|
|
|
|
|
|
|
|
|
|
|
|
|
|
|
|
|
|
|
|
|
|
|
|
|
|
|
|
|
|
|
|
|
|
|
|
|
|
|
|
|
|
|
|
|
|
|
|
|
|
|
|
|
|
|
|
|
|
|
|
|
|
|
|
|
|
|
|
|
|
|
|
|
|
|
|
Dial EN-7 |
|
|
|
|
|
|
|
|
|
|
|
|
|
|
|
|
|
|
|
|
|
3 buttons EN-7 |
|
HOME button EN-6 |
|
|
||
|
|
|
|
|
|
|
|
|
|
|
|
|
VOLUME buttons EN-8 |
a (Start/Stop) button EN-9, 16, 24 |
|||||||||
|
|
|
|
|
|
|
|
|
|
|
|
P(Power) button EN-7
TEMPO button EN-9, 17, 22, 25 SUSTAIN button EN-12
MY SETUP button EN-14 FUNCTION button EN-33
■Back
|
|
|
|
DC 9.5V terminal EN-4 |
PEDAL jack EN-6 |
||||||||
PHONES/OUTPUT jack EN-6, 32 |
|
|
|
|
|
|
|
||||||
|
|
|
|
|
|
||||||||
AUDIO IN jack EN-32 |
|
|
|
|
USB port EN-31 |
|
|||||||
|
|||||||||||||
|
|
|
|
|
|
|
|
|
|
|
|
|
|
|
|
|
|
|
|
|
|
|
|
|
|
|
|
|
|
|
|
|
|
|
|
|
|
|
|
|
|
|
|
|
|
|
|
|
|
|
|
|
|
|
|
|
|
|
|
|
|
|
|
|
|
|
|
|
|
|
|
|
|
|
|
|
|
|
|
|
|
|
|
Pitch bend wheel EN-12
• The numbers to the right of the symbol are reference page numbers.
EN-3
Getting Ready to Play
Preparing a Power Supply
Though either an AC adaptor or batteries can be used for power, use of AC adaptor power is normally recommended.
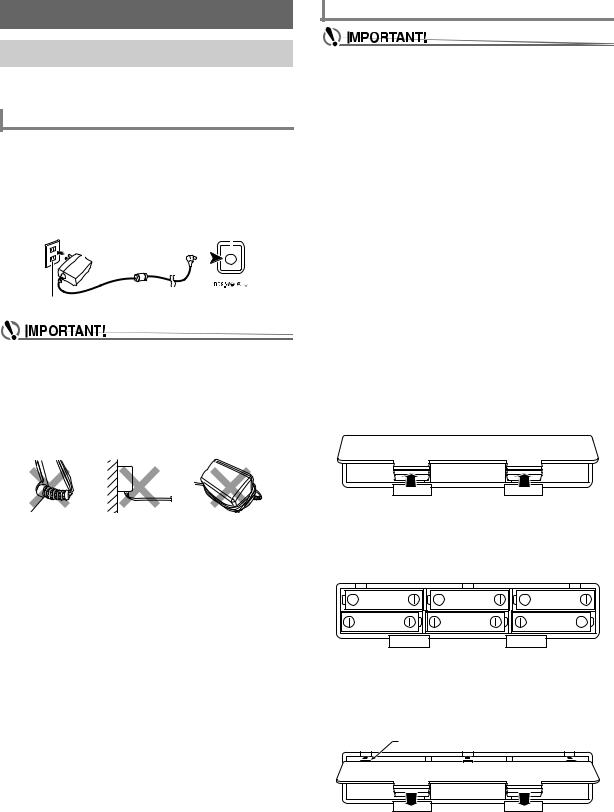
Using the AC Adaptor
Use only the AC adaptor (JEITA Standard with unified polarity plug) specified for this Digital Keyboard. Use of a different type of AC adaptor can cause malfunction.
AC Adaptor Type: AD-E95100L
(JEITA Standard plug)
AC adaptor |
DC 9.5V terminal |
||||||
|
|
|
|
|
|
|
|
|
|
|
|
|
|
|
|
|
|
|
|
|
|
|
|
Household power outlet
•Be sure to turn off Digital Keyboard power before connecting or disconnecting the AC adaptor.
•The AC adaptor becomes warm to the touch after very long use. This is normal and does not indicate malfunction.
•To prevent breaking of the wire, take care to avoid putting any type of load on the power cord.
No twisting |
No pulling |
No wrapping |
•Never insert metal, pencils, or any other objects into the DC 9.5V terminal. Doing so creates the risk of accident.
Using Batteries for Power
•Be sure to turn off power before loading batteries.
•Use commercially available AA-size alkaline batteries or AA-size rechargeable nickel metal hydride batteries.
•Low battery power can cause abnormal operation. If this happens, replace batteries with new ones. If you are using rechargeable batteries, charge them.
■ Batteries
Note the precautions below when using rechargeable batteries.
•Use Panasonic Group AA-size eneloop rechargeable batteries.
Do not use any other type of batteries.
•Use only the specified charger to charge batteries.
•Rechargeable batteries must be removed from the product for charging.
•For information about using eneloop batteries or their specified charger, be sure to read the user documentation and precautions that come with each item, and use them
only as directed.
Be sure to replace batteries at least once a year, even if there is no indication of low battery power. Dead rechargeable batteries (eneloop) in particular may deteriorate if they are left in the product. Remove rechargeable batteries from the product as soon as possible after they go dead.
1.Open the battery cover on the back of the Digital Keyboard.
2.Load six AA-size batteries into the battery compartment.
Load batteries with their positive (+) and negative (–) ends facing correctly.
3.Insert the tabs of the battery cover into the holes, and close the cover.
•Configure the setting below to specify the type of batteries you loaded.
Tab
EN-4

Getting Ready to Play
■ Configuring the Battery Type Setting
1.Press FUNCTION.
This displays the [FUNCTION] screen.
2.Use the U and I buttons to select “Battery”.
•To go back to the previous screen, press the EXIT button.
■ Battery Level Indicator
A battery icon appears on the display as shown below to let you know when battery power is getting low.
Low Battery Power
Battery icon (not flashing)
Battery Replacement Required
Battery icon (flashing)
3.Rotate the dial to select “Alkaline” (alkaline batteries) or “Ni-MH” (rechargeable nickel metal hydride batteries).
•After you rotate the dial once to select an option, you also will be able to change the selection using the – and + buttons.
•To go back to the previous screen, press the BACK button.
4.Press FUNCTION to exit the setting screen.
•Low battery power may cause notes to become distorted, or other problems.
•You can conserve battery power by using headphones and by reducing the volume level.
Preparing the Music Stand
Insert the music stand into the handle of the Digital Keyboard.

 Music stand
EN-5
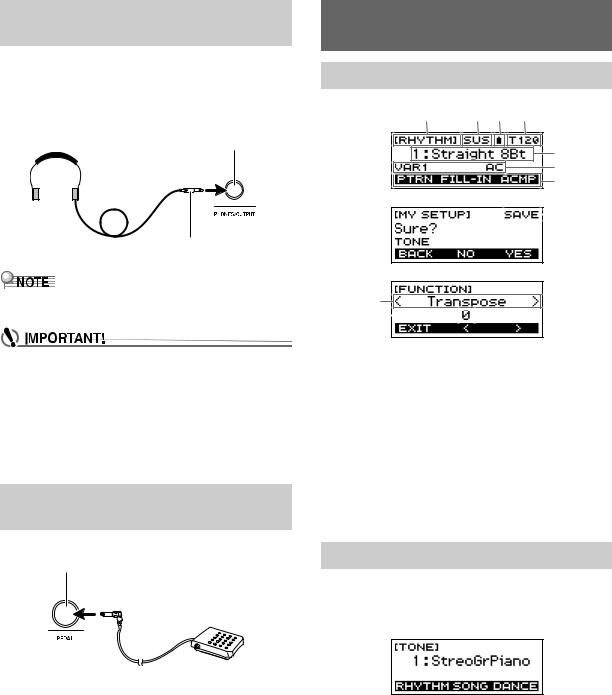
Connecting Headphones (Sold
Separately)
Plugging in headphones cuts off output from the built-in speakers, which means you can practice playing even late at night without disturbing others.
•Be sure to turn down the Digital Keyboard volume level before connecting headphones.
PHONES/OUTPUT jack (3.5mm stereo mini jack)
Stereo mini plug
•Headphones do not come with the Digital Keyboard.
•Use separately sold or commercially available headphones.
•Do not listen to output over headphones at very high volume levels for long periods. Doing so creates the risk of hearing damage.
•If the plug of the headphones does not match the PHONES/OUTPUT jack, use a commercially available adapter plug.
•If you are using headphones that require an adapter plug, make sure you do not leave the adapter plugged in when removing the headphones.
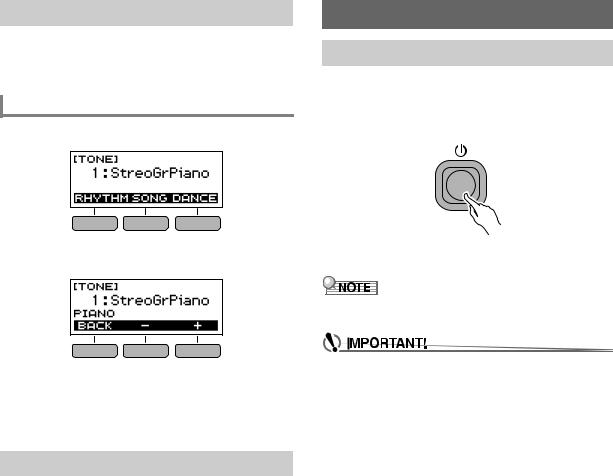
Connecting a Pedal (Sold
Separately)
To use a pedal, connect it to the PEDAL jack.
PEDAL jack (6.3mm standard jack)
Pedal (sold separately)
Operations Common to All Modes
Display Screen Contents


Function nameSustain
Battery iconTempo
Current settingStatus
3 button functionsSub-function nameSetting item
Current setting
For information about how to adjust display contrast, see “Configuring Function Settings” (page EN-33).
HOME Button
Pressing HOME will display the [TONE] screen, which you can use to select a tone. This is the home screen. You can use the home screen to select the instrument type and to configure various settings.
EN-6
3 Buttons
Operations assigned to the three buttons along the bottom of the display change according to the setting you are configuring. Operations currently assigned to the three buttons are indicated by labels above the buttons.
3 Button Examples
■ Home Screen (Tone Selection Screen)
■ Setting Screen
Playing on the Keyboard
Turning Power On or Off
1.Press P (Power).
This turns on power.
•To turn off power, hold down P (Power) until the display goes blank.
2.Play something on the keyboard.
•Do not touch the pitch bend wheel as you turn on the keyboard.
•Holding down the – or + button when selecting a number or value will scroll through settings at high speed.
•To return a number or value to its initial default or recommended setting, press the – and + buttons at the same time.
Dial Operations
Rotate the dial to change a number (tone number, etc.) or value (tempo value, etc.)
•Turning off power normally causes the tone and rhythm number and other settings to return to their initial defaults. However, the settings below are remembered.
−MIDI Out Channel
−MIDI Out Octave Shift
−MIDI Out Velocity
−Startup volume level
−MY SETUP Startup
−Auto Power Off
−Battery type
−LCD contrast
EN-7
Playing on the Keyboard
Auto Power Off
While Auto Power Off is enabled, Digital Keyboard power will turn off automatically after about 30 minutes of non-operation.
•Auto Power Off is disabled while a song is playing and while the APP function is being used.
■ Disabling Auto Power Off
You can disable Auto Power Off to ensure that power does not turn off automatically during a concert, etc.
1.Press FUNCTION.
This displays the [FUNCTION] screen.
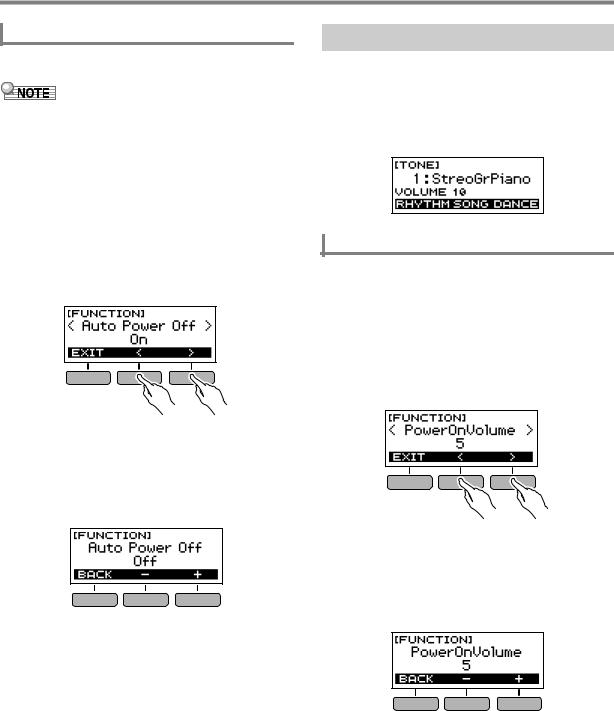
2.Use the U and I buttons to select “Auto Power
Off”.
•To go back to the previous screen, press the EXIT button.
3.Rotate the dial to the left to select “Off”.
•After you rotate the dial once to select an option, you also will be able to change the selection using the – and + buttons.
•To go back to the previous screen, press the BACK button.
4.Press FUNCTION to exit the setting screen.
Adjusting the Volume Level
1.Use the VOLUME + and – buttons to adjust the volume level.
This will change the volume level and cause the current volume level value to appear momentarily on the display.
•The setting range is 0 to 10.
•Holding down either button scrolls the setting value.
Specifying the Power On Volume Level
You can use the procedure below to specify the volume level that is applied when the Digital Keyboard is turned on.
1.Press FUNCTION.
This displays the [FUNCTION] screen.
2.Use the U and I buttons to select
“PowerOnVolume”.
•To go back to the previous screen, press the EXIT button.
3.Rotate the dial to select the volume level.
•After you rotate the dial once to select an option, you also will be able to change the selection using the – and + buttons.
•To go back to the previous screen, press the BACK button.
4.Press FUNCTION to exit the setting screen.
EN-8
Playing on the Keyboard
Using the Metronome
The metronome lets you play and practice along with a steady beat to help keep you on tempo. You can also set a tempo that is suitable for your practice.
Start/Stop
1.Press HOME.
This displays the home screen.
2.Press a.
This starts the metronome.
3.Press a again to stop the metronome and return to the home screen.
Changing the Metronome Tempo
Use the procedure below to change the tempo of the metronome.
1.Start the metronome.
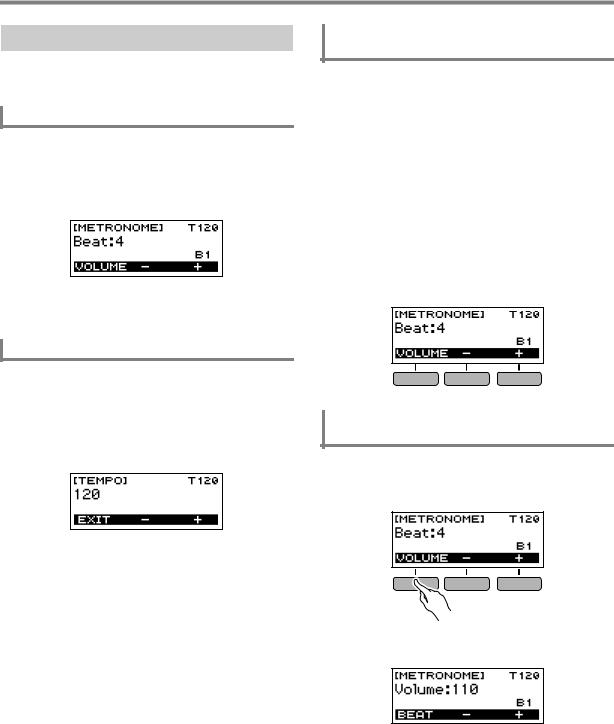
2.Press TEMPO.
This displays the [TEMPO] screen.
3.Rotate the dial or use the – and + buttons to change the tempo value.
•You can specify a tempo value in the range of 20 to 255.
•To return the setting to its initial default, press the – and + buttons at the same time.
•To return to the [METRONOME] screen, press the EXIT button.
Specifying the Metronome Sound and Beats
Per Measure
You can use the procedure below to configure a setting that sounds a chime on the first beat of each measure, and a click for the remaining beats.
• Available settings are Off, or a value of 1 to 16 beats.
1.Start the metronome.
2.Rotate the dial or use the – and + buttons to specify the number of beats per measure.
•Selecting “Off” disables the chime and sounds a click for all beats. Use this setting when you want to practice without worrying about the first beat of each measure.
•To return the setting to its initial default, press the – and + buttons at the same time.
•To display the metronome volume level setting screen, press VOLUME (3 buttons).
Changing the Metronome Sound Volume
Level
1.Start the metronome.
2.Press VOLUME (3 buttons).
This displays the metronome volume level setting screen.
3.Rotate the dial or use the – and + buttons to change the volume value.
•You can specify a volume value from 0 to 127.
•To return the setting to its initial default, press the – and + buttons at the same time.
•To display the beat setting screen, press the BEAT button.
EN-9
Listening to Demo Play
You can use Demo Play to play built-in songs in sequence.
1.While holding down TEMPO, press a.
This displays the [DEMO] screen and starts song number “1”.
•The display shows the number and name of the current song.
•For a list of song titles, see the “Song List” (page EN-44).
•To return to the home screen, press the EXIT button.
2.To change from the current song to another one, rotate the dial.
This starts Demo Play of the song you selected.
•After you rotate the dial once to select an option, you also will be able to change the selection using the – and + buttons.
•To go back to the previous screen, press the BACK button.
3.To exit Demo Play, press the EXIT button or a.
Controlling the Sound of a
Performance
Selecting a Musical Instrument
Tone
Your Digital Keyboard lets you select tones for a wide variety of musical instrument sounds, including violin, flute, orchestra, and more. Even the same song sounds different when the instrument type is changed.
Selecting an Instrument Tone for Keyboard Play
1.Press HOME.
This displays the home screen.
2.Rotate the dial to select a tone.
The selected tone number and instrument name will appear on the display.
•For tone information, see the “Tone List” (page EN-40).
•After you rotate the dial once to select an option, you also will be able to change the selection using the – and + buttons.
•To return to the first tone in the tone list, press – and + at the same time.
•To go back to the previous screen, press the BACK button.
•Selecting a drum set tone causes various percussion instruments to be assigned to keyboard keys.
EN-10
Controlling the Sound of a Performance
Changing Keyboard Response to Touch Pressure (Touch Response)
Touch Response alters tone volume in accordance with keyboard pressure (press velocity). This provides you some of the same expression capabilities you get on an acoustic piano.
Changing Touch Response Sensitivity
1.Press FUNCTION.
This displays the [FUNCTION] screen.
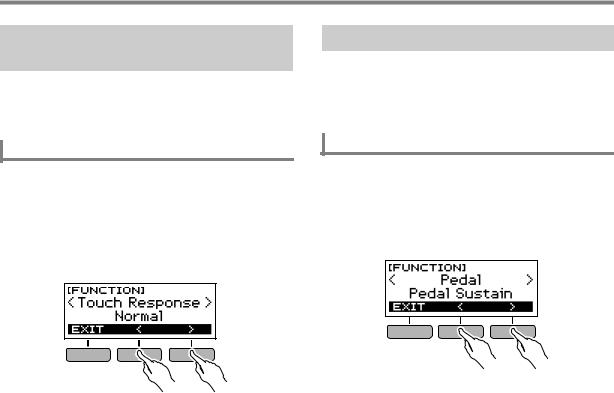
2.Use the U and I buttons to select “Touch
Response”.
•To go back to the previous screen, press the EXIT button.
3.Rotate the dial to change the setting.
Touch Response settings are described in the table below.
Setting |
Description |
(Display Text) |
|
Off (Off) |
Touch Response disabled. Sound |
|
volume is fixed, regardless of key press |
|
velocity. |
|
|
Light (Light) |
Strong sound even with light pressure. |
|
|
Normal (Normal) |
Normal Touch Response. |
|
|
•After you rotate the dial once to select an option, you also will be able to change the selection using the – and + buttons.
•To return the setting to its initial default, press the – and + buttons at the same time.
•To go back to the previous screen, press the BACK button.
4.Press FUNCTION to exit the setting screen.
Using a Pedal
A pedal can be used to change notes while playing. Under initial default settings, sustain is assigned to the pedal, so it can be used as a damper pedal.
•A pedal unit does not come with the Digital Keyboard. Purchase one separately from your retailer.
Selecting the Pedal Effect
1.Press FUNCTION.
This displays the [FUNCTION] screen.
2.Use the U and I buttons to select “Pedal”.
•To go back to the previous screen, press the EXIT button.
3.Rotate the dial to select a pedal effect type.
The following shows the available pedal effects.
Setting |
Description |
|
(Display Text) |
||
|
||
Pedal Sustain |
Playing notes while the pedal is |
|
(Pedal Sustain) |
depressed causes the notes to be |
|
|
sustained, even if the keyboard keys |
|
|
are released. |
|
|
|
|
Sostenuto |
Playing notes and then pressing the |
|
(Sostenuto) |
pedal before the keyboard keys are |
|
|
released causes the notes to be |
|
|
sustained. |
|
|
|
|
Soft (Soft) |
Pressing the pedal and playing notes |
|
|
causes the notes to be slightly softened. |
|
|
|
|
Start/Stop |
The pedal has the same functions as |
|
(Start/Stop) |
the a button. It can be used to start |
|
|
and stop the metronome or rhythm play. |
|
|
|
•After you rotate the dial once to select an option, you also will be able to change the selection using the – and + buttons.
•To return the setting to its initial default, press the – and + buttons at the same time.
•To go back to the previous screen, press the BACK button.
EN-11
Controlling the Sound of a Performance
Using the Pitch Bend Wheel
You can use the pitch bend wheel to smoothly slide the pitch of notes you are playing upwards and downwards. This capability makes it possible to reproduce electric guitar choking and saxophone note bending effects.
1.While playing a note on the
keyboard with your right hand, rotate the pitch bend wheel upwards or downwards with your
left hand.
The amount the note bends depends on how much you rotate the pitch bend wheel.
Specifying the Pitch Bend Range
You can specify, in semitone units, how much the pitch changes when the pitch bend wheel is at maximum rotation in either direction.
1.Press FUNCTION.
This displays the [FUNCTION] screen.
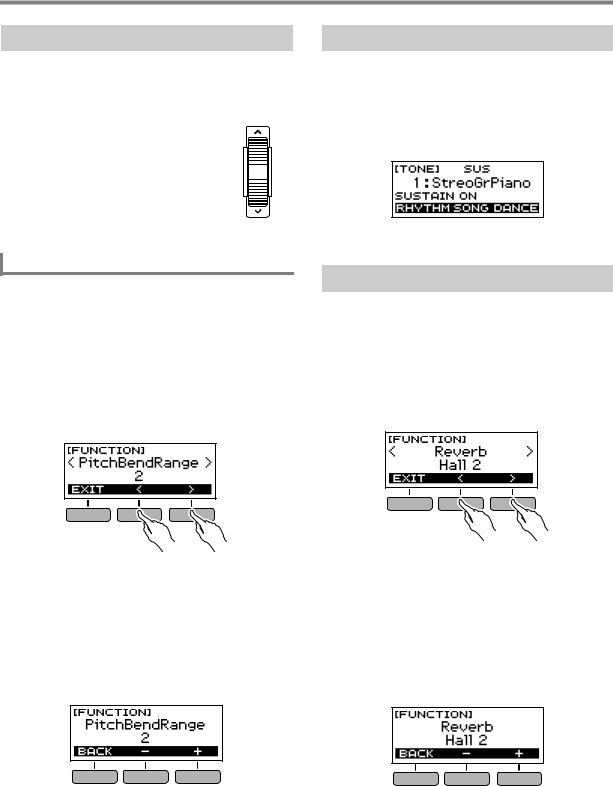
2.Use the U and I buttons to select
“PitchBendRange”.
•To go back to the previous screen, press the EXIT button.
3.Rotate the dial to set the pitch bend range.
•You can specify a pitch bend range of 0 to 12.
•After you rotate the dial once to select an option, you also will be able to change the selection using the – and + buttons.
•To return the setting to its initial default, press the – and + buttons at the same time.
•To go back to the previous screen, press the BACK button.
Using the SUSTAIN Button
While sustain is enabled, notes are sustained longer when keyboard keys are released.
1.Press SUSTAIN.
This momentarily displays “SUSTAIN ON”.
•“SUS” at the top of the display indicates that sustain is enabled.
2.To disable sustain, press SUSTAIN again.
Adding Reverb to Notes
You can use the procedure below to add reverb to the notes you play.
1.Press FUNCTION.
This displays the [FUNCTION] screen.
2.Use the U and I buttons to select “Reverb”.
•To go back to the previous screen, press the EXIT button.
3.Rotate the dial to select the reverb type.
Available reverb type settings are: Off, Room 1 to 4, Hall 1 to 4, and Stadium 1 and 2.
•After you rotate the dial once to select an option, you also will be able to change the selection using the – and + buttons.
•To return the setting to its initial default, press the – and + buttons at the same time.
•To go back to the previous screen, press the BACK button.
4.Press FUNCTION to exit the setting screen.
EN-12
Controlling the Sound of a Performance
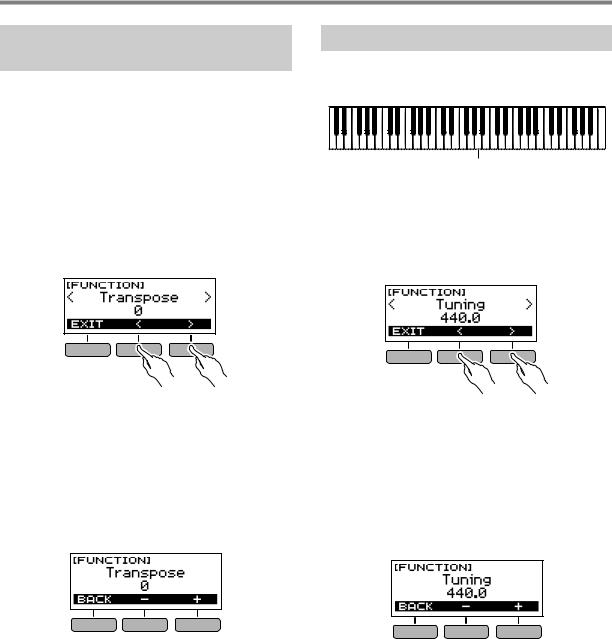
Changing the Pitch in Semitone
Steps (Transpose)
Transpose lets you raise or lower the overall pitch of the Digital Keyboard in semitone steps. You can use this feature to raise or lower the Digital Keyboard’s key to make it easier to play a piece written in a difficult key, or to adjust to a key that better matches a vocalist, another musical instrument, etc.
1.Press FUNCTION.
This displays the [FUNCTION] screen.
2.Use the U and I buttons to select
“Transpose”.
•To go back to the previous screen, press the EXIT button.
3.Rotate the dial to change the transpose value.
•The setting range is one octave up (+12 semitones) and down (–12 semitones).
•After you rotate the dial once to select an option, you also will be able to change the selection using the – and + buttons.
•To return the setting to its initial default, press the – and + buttons at the same time.
•To go back to the previous screen, press the BACK button.
Fine Tuning Pitch (Tuning)
You can use the procedure below to adjust the overall pitch of the Digital Keyboard by changing the frequency of A4 in 0.1Hz units.
A4
1.Press FUNCTION.
This displays the [FUNCTION] screen.
2.Use the U and I buttons to select “Tuning”.
•To go back to the previous screen, press the EXIT button.
3.Rotate the dial to fine tune the pitch.
•You can specify a frequency in the range of 415.5 to 465.9 Hz.
•After you rotate the dial once to select an option, you also will be able to change the selection using the – and + buttons.
•To return the setting to its initial default, press the – and + buttons at the same time.
•To go back to the previous screen, press the BACK button.
EN-13
Saving and Loading
Instrument Settings (MY
SETUP)
You can use MY SETUP to save the setup (tone, rhythm, and other settings) of the Digital Keyboard. You can recall a saved setup when you need it to perform a particular song, etc.
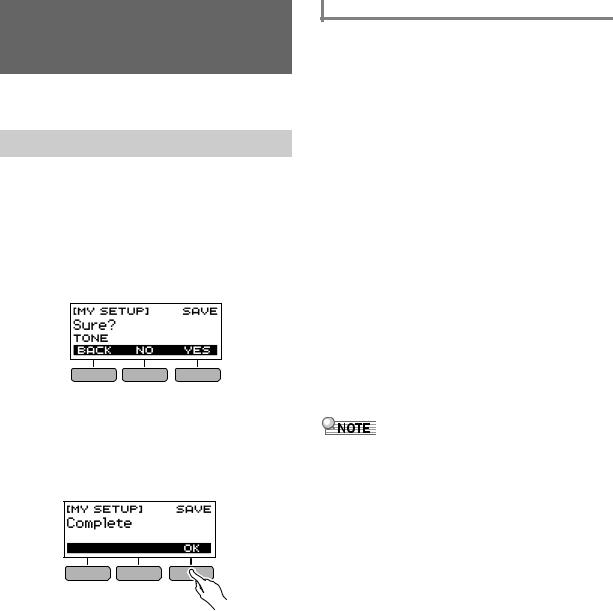
Saving to MY SETUP
1.Press MY SETUP.
This displays the [MY SETUP] screen.
2.Press the SAVE button.
This causes “Sure?” to appear on the display. The name of the main setting (TONE, RHYTHM, SONG, DANCE MUSIC) also appears.
•To go back to the previous screen, press the BACK button.
3.Press the YES button.
This saves the current setup to MY SETUP.
4.When “Complete” appears on the display, press the OK button.
This completes the save operation.
Savable Settings
You can use MY SETUP to save the items below.
•The function you are using (Tone, Rhythm, Song, Dance Music)
•Tempo
•Tone number
•Metronome beat
•Metronome volume level
•Sustain
•Rhythm number
•Patterns
•FILL-IN
•Accomp
•Song number
•Practice part
•Count
•Tone sync
•Dance Music number
•Dance Music voice
•Transpose
•Touch Response
•Reverb
•Pedal
•Pitch bend range
•Intro/Ending
•Chord fingering mode
•Rhythm volume level
•Song volume level
•Dance Music volume level
•Tuning
•If tone sync is enabled when you save settings with MY SETUP, recalling from MY SETUP will apply the tone sync reverb setting, even if you changed the reverb setting to something else before saving to MY SETUP.
EN-14

Saving and Loading Instrument Settings (MY SETUP)
Recalling From MY SETUP
1.
2.Press the LOAD button.
This causes “Sure?” to appear on the display. The name of the main setting (TONE, RHYTHM, SONG, DANCE MUSIC) also appears.
•To go back to the previous screen, press the BACK button.
3.Press the YES button.
This recalls the saved settings.
4.When “Complete” appears on the display, press the OK button.
This completes the recall operation.
Enabling MY SETUP Power On
Use the procedure below to enable MY SETUP power on, which causes the MY SETUP settings to be applied whenever the Digital Keyboard is turned on.
1.Press FUNCTION.
This displays the [FUNCTION] screen.
2.Use the U and I buttons to select
“PowerOnMySetup”.
•To go back to the previous screen, press the EXIT button.
3.Rotate the dial to the right to select “On”.
•After you rotate the dial once to select an option, you also will be able to change the selection using the – and + buttons.
•To go back to the previous screen, press the BACK button.
4.Press FUNCTION to exit the setting screen.
EN-15
Loading...