


Series 3
Type 5411, 5412
Modèle 5411, 5412
Modelo 5411, 5412
91630074/IX-17
3090cc
3070cc
www.braun.com |
3050cc |
|
|
Braun Infolines |
|
|
|
Lignes d’assistance Braun |
|
|
|
Líneas de información de Braun |
|
English |
6 |
Thank you for purchasing a Braun product. |
|
|
|
||
Français |
18 |
We hope you are completely satisfied with |
|
|
|
your new Braun product. |
|
Español |
28 |
If you have any questions, please visit |
|
|
|
www.service.braun.com or call: |
|
|
|
US residents |
1-800-BRAUN-11 |
|
|
|
1-800-272-8611 |
|
|
Canadian residents 1-800-387-6657 |
|
|
|
Merci d’avoir fait l’achat d’un produit Braun. |
|
|
|
Nous espérons que vous serez entièrement |
|
|
|
satisfait de votre nouveau produit Braun. |
|
|
|
Si vous avez des questions, veuillez visiter |
|
|
|
www.service.braun.com ou appeler |
|
|
|
Braun Canada : |
1-800-387-6657 |
Gracias por haber comprado un producto Braun. Esperamos que quede completamente satisfecho con su nuevo producto Braun.
EN/FR/ES

1 
2
3090cc 3070cc
3050cc
3
4 |
3090cc |
3070cc |
|
3050cc |
|||
|
|
||
|
S3 |
S3 |
|
|
S3 |
|
5 
6
7
3090cc
3070cc
8
3090cc
11 
9
S
3
3 090c
c
 10
10 
3050cc
12 


3
A |
S3 |
B |
4 |
C |
1 |
|
|
|
2 |
3 |
|
4 |
|
5 |
|
|
3S |
1


 2
2 
a |
••• |
b |
••• |
c |
s0603
3S
s0603
3S
3S
5
 3S
3S
English
IMPORTANT SAFETY INSTRUCTIONS
When using an electrical appliance, basic precautions should always be followed, including the following:
Read all instructions before using this appliance.
When disconnected, the hand-held part of this shaving appliance may be cleaned under water.
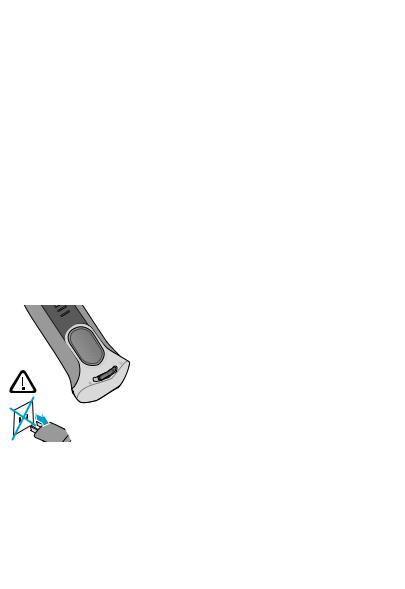
DANGER
To reduce the risk of electric shock:
1.Use only in dry condition.
2.Do not submerge in water.
3.Do not reach for an appliance that has fallen into water. Unplug immediately.
4.Do not use while bathing or in a shower.
5.Do not place, store or charge the appliance where it can fall or be pulled into a tub or sink. Do not place in or drop into water or other liquid.
6.Except when charging, always unplug this appliance from the electrical outlet immediately after using.
7.Unplug this appliance before cleaning.
8.This appliance is provided with a special cord set with integrated Safety Extra Low Voltage power supply. Do not exchange or manipulate any part of it.
9.Do not use an extension cord with this appliance.
6

WARNING
To reduce the risk of burns, fire, electric shock, or injury to persons:
1.Close supervision is necessary when this appliance is used by, on, or near children or persons with disabilities.
2.Use this appliance only for its intended use as described in this manual. Do not use attachments not recommended by the manufacturer.
3.Never operate this appliance if it has a damaged cord or plug, if it is not working properly, if it has been dropped or damaged, or if the power supply has been dropped into water. Return the appliance to a service center for examination and repair.
4.Keep the cord away from heated surfaces.
5.Never drop or insert any object into any opening of the appliance.
6.Do not use outdoors or operate where aerosol (spray) products are being used or where oxygen is being administered.
7.Do not use this appliance with a damaged or broken foil, as serious skin injuries may occur.
8.Always attach plug to appliance first, then to outlet. To disconnect, turn all controls off, then remove plug from outlet.
9.When plugging to an electrical outlet outside North America, use a plug adapter to match the outlet’s pin configuration.
10.Caution: The battery used in this device may present a fire or chemical burn hazard if mistreated. Do not disassemble, heat above 100 °C (212 °F), or incinerate.
11.To recharge the battery, only use the detachable power supply provided with this appliance. If the appliance is marked 

 492-XXXX, only use Braun power supplies coded 492-XXXX.
SAVE THESE INSTRUCTIONS
7
This appliance is designed for household use only.
Description
1 Foil & Cutter cassette
2 Long hair trimmer
3 Precision mode switch* 
4 On/off switch
5 Charging lights (green)
6 Low-charge light (red)
7 Cleaning light (yellow)
8 Replacement light for shaving parts
9 Shaver power socket
10Special cord set (design can differ)
11Travel pouch*
12Protection cap*
* not with all models
Charging
Recommended ambient temperature for charging is 41 °F to 95 °F / 5 °C to 35 °C. The battery may not charge properly or at all under extreme low or high temperatures. Recommended ambient temperature for shaving is 60 °F to 95 °F / 15 °C to 35 °C. Do not expose the shaver to temperatures higher than 122 °F / 50 °C for extended periods of time.
•Using the special cord set (10), connect the shaver to an electrical outlet with the motor switched off.
•When charging for the first time or when the shaver is not used for a few months, leave the shaver to charge continuously for 4 hours.
•A full charge provides up to 45 minutes of cordless shaving time depending on your beard growth.
•Shave without the cord. With normal use the shaver will be charged automatically after every cleaning in the Clean&Charge Station (see «Clean&Charge Station (C)»).
•Maximum battery capacity will only be reached after several charging/ discharging cycles.
•5-minute quick charge is sufficient for a cordless shave. You can also shave by connecting the shaver to an electrical outlet via the special cord set.
Charging lights (5)
The green charging lights show the charge status of the batteries. The green charging light blinks when the shaver is being charged or switched on. When the battery is fully charged, all green charging lights shine permanently, provided the shaver is connected to an electrical outlet.
Low-charge light (6)
The red low-charge light flashes when the battery is running low. You should be able to finish your shave.
8

Shaving (A)
Press the on/off switch (4) to operate the shaver. The flexible shaving foils automatically adjust to every contour of your face.
Long hair trimmer (2)
To trim sideburns, moustache or beard, slide the long hair trimmer upwards.
Precision mode switch  (3)
(3)
For precise handling in hard to shave areas (e.g. under the nose) slide the switch (3) to the right position. One foil will be lowered.
Tips for a perfect dry shave
For best results, Braun recommends that you follow 3 simple steps:
1.Always shave before washing your face.
2.At all times, hold the shaver at right angles (90°) to your skin.
3.Stretch your skin and shave against the direction of your beard growth.
Cleaning (B)
Regular cleaning ensures better shaving performance.
Cleaning indicator
The latest when the yellow cleaning light (7) shines constantly the shaver should be cleaned in the Clean&Charge Station. During the cleaning process the yellow light will flash. It will go off when cleaning is finished. If automatic cleaning is not done, the yellow light will go off after some time. It will be reset as manual cleaning is assumed.
Automatic cleaning
Once the shaver is put into the Clean&Charge Station, it is cleaned automatically (see «Clean&Charge Station (C)»).
Manual cleaning
Cleaning under running water:
•Switch the shaver on (cordless). Rinse the shaver head and the precision mode switch under hot running water until all residues have been removed. You may use liquid soap without abrasive substances. Rinse off all foam and let the shaver run for a few more seconds.
•Next, switch off the shaver, remove the Foil & Cutter cassette (1) and let it dry.
•If you regularly clean the shaver under water, then once a week apply a drop of light machine oil (not included) onto the long hair trimmer (2) and Foil & Cutter cassette
(1).
Cleaning with a brush:
•Switch off the shaver. Remove the Foil & Cutter cassette and tap it out on a flat surface.
•Using a brush, clean the inner area of the shaver head. However, do not clean the Foil & Cutter cassette with a brush as this may damage it.
9

Keeping your shaver in top shape
Replacement light for shaving parts / Reset
•To maintain 100% shaving performance, replace the Foil & Cutter cassette (1), when the replacement light for shaving parts (8) comes on after about 18 months or when worn.
•The replacement light will remind you during the next 7 shaves to replace the Foil & Cutter cassette. Then the shaver will automatically reset.
•After you have replaced the Foil & Cutter cassette (1), press the on/off switch (4) for at least 5 seconds to reset the counter.
•While doing so, the replacement light blinks and goes off when the reset is complete. The manual reset can be done at any time.
Preserving the batteries
In order to maintain the optimum capacity of the rechargeable batteries, the shaver has to be fully discharged by shaving every 6 months approximately. Then recharge the shaver to full capacity.
Battery removal
This appliance contains rechargeable batteries. Before disposing of the appliance, disassemble the housing as shown, remove the rechargeable batteries and recycle or dispose of properly, according to local guidelines.
Caution: Disassembling the appliance will destroy it and invalidate the warranty.
1. |
2. |
3. |
4. |
5. |
|
|
S3 |
|
|
|
|
|
|
Ni-MH |
Clean&Charge Station (C)
The Clean&Charge Station has been developed for cleaning, charging, lubricating, disinfecting, drying and storing your Braun shaver.
Important
•Only use the power supply special electric cord set supplied with the shaver.
•Do not place the appliance in a mirror cabinet, nor store it over radiators, nor place it on polished or lacquered surfaces. Do not expose to direct sunlight.
•In order to avoid any leakage of the cleaning fluid, place the appliance on a flat, stable surface. Do not tip, move suddenly or transport in any way if a cleaning cartridge is installed.
10
•The appliance contains flammable liquid. Keep it away from sources of ignition. No smoking.
•Do not refill cartridge. Use only original Braun refill cartridge.
DANGER: FLAMMABLE. CONTENTS MAY CATCH FIRE. Do not smoke. Use only in well-ventilated areas. Keep away from flames such as pilot light, and any object that sparks such as electric motor. Keep locked up. KEEP OUT OF REACH OF CHILDREN. CAUTION: MAY IRRITATE EYES. Do not get in eyes.
FIRST AID TREATMENT: Contains ethanol. If swallowed, call a Poison Control Centre or doctor immediately. Do not induce vomiting. If in eyes, rinse with water for
15 minutes.
Description
1 Start/release button
2 Contact bow
3 Lift button for cartridge exchange
4 Level indicator
5 Cleaning cartridge (not with all models)
Before using the Clean&Charge Station
Installing the cartridge
•Press the lift button (3) to open the housing.
•Hold the cartridge down on a flat, stable surface (e.g. table). Carefully remove the lid from the cartridge. Slide the cartridge into the base as far as it will go.
•Slowly close the housing by pushing it down until it locks.
Replacing the cartridge
•After having pressed the lift button to open the housing, wait for a few seconds before removing the used cartridge.
•Before discarding the used cartridge, make sure to close the openings using the lid of the new cartridge, since the used cartridge will contain contaminated cleaning solution.
•The used cartridge can be disposed of in the household waste.
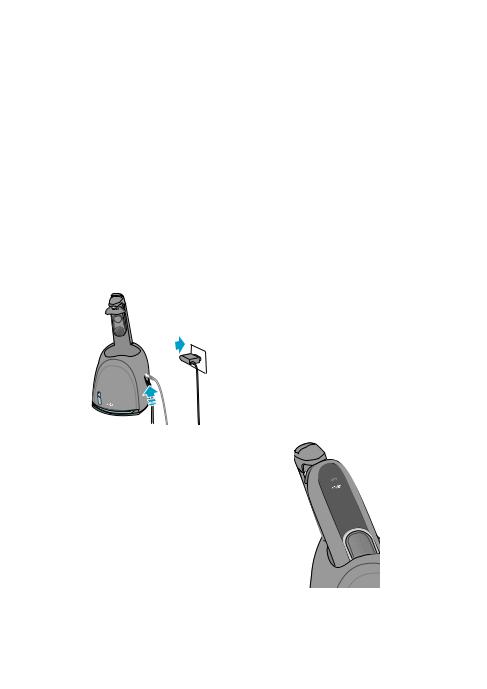
Operating your Clean&Charge Station
•Connect your Clean&Charge Station with the cord set to the mains electricity supply. The special socket at the back is adjustable to save space. After each shave, switch the shaver off and put it into the Clean&Charge Station, upside down and with the front showing.
•Push the start/release button (1) to lock and connect the shaver. The cleaning process will start. The yellow light on the shaver will flash during the complete process (approx. 2 minutes cleaning, min. 4 hours drying).
•Do not interrupt the cleaning process, as it leaves the shaver wet and not fit for use. If interruption is needed nonetheless, press the start/release button (1).
11
 Loading...