

Bosch MUMXX Operating Instructions Manual
MaxxiMUM
MUMXX...
en Operating instructions
fr Notice d’utilisation
it Istruzioni per l’uso
nl Gebruiksaanwijzing
da Brugsanvisning
no Bruksanvisning
sv Bruksanvisning
fi Käyttöohje
MUMXX_en-fi.book Seite 2 Montag, 8. September 2014 3:05 15
en English . . . . . . . . . . . . . . . . . . . . . . . . . . . . . . . . . . . . . . . . . . . . . . . . . . . . . . . . . . .3
fr Français . . . . . . . . . . . . . . . . . . . . . . . . . . . . . . . . . . . . . . . . . . . . . . . . . . . . . . . . .18
it Italiano . . . . . . . . . . . . . . . . . . . . . . . . . . . . . . . . . . . . . . . . . . . . . . . . . . . . . . . . . .35
nl Nederlands . . . . . . . . . . . . . . . . . . . . . . . . . . . . . . . . . . . . . . . . . . . . . . . . . . . . . .50
da Dansk . . . . . . . . . . . . . . . . . . . . . . . . . . . . . . . . . . . . . . . . . . . . . . . . . . . . . . . . . .66
no Norsk . . . . . . . . . . . . . . . . . . . . . . . . . . . . . . . . . . . . . . . . . . . . . . . . . . . . . . . . . . .81
sv Svenska . . . . . . . . . . . . . . . . . . . . . . . . . . . . . . . . . . . . . . . . . . . . . . . . . . . . . . . . .96
fi Suomi . . . . . . . . . . . . . . . . . . . . . . . . . . . . . . . . . . . . . . . . . . . . . . . . . . . . . . . . .111
. . . . . . . . . . . . . . . . . . . . . . . . . . . . . . . . . . . . . . . . . . . . . . . . .

en
MUMXX_en-fi.book Seite 3 Montag, 8. September 2014 3:05 15
Congratulations on the purchase of your
new BOSCH appliance.
In doing so, you have opted for a modern,
high-quality domestic appliance.
You can find further information about
our products on our web page.
Contents
For your safety . . . . . . . . . . . . . . . . . . . 3
Overview . . . . . . . . . . . . . . . . . . . . . . . 5
Operating positions . . . . . . . . . . . . . . . 6
Operation . . . . . . . . . . . . . . . . . . . . . . . 7
Cleaning and servicing . . . . . . . . . . . . . 10
Troubleshooting . . . . . . . . . . . . . . . . . . 11
Application examples . . . . . . . . . . . . . . 12
Optional accessories . . . . . . . . . . . . . . 14
Disposal . . . . . . . . . . . . . . . . . . . . . . . . 17
Warranty conditions . . . . . . . . . . . . . . . 17
For your safety
Before use, read these instructions carefully in order to become familiar
with important safety and operating instructions for this appliance.
If the instructions for correct use of the appliance are not observed,
the manufacturer’s liability for any resulting damage will be excluded.
This appliance is designed for processing normal household quantities
in the home or similar quantities in non-industrial applications.
Non-industrial applications include e.g. use in employee kitchens
in shops, offices, agricultural and other commercial businesses,
as well as use by guests in boarding houses, small hotels and similar
dwellings. Use the appliance for processing normal quantities of food
for domestic use. Do not exceed permitted maximum quantities
(see “Application examples”).
This appliance is suitable for mixing, kneading, beating and cutting
food. It must not be used for processing other objects or substances.
Other applications are possible if the accessories approved
by the manufacturer are used.
Use the appliance with original accessories only.
When using the accessories, follow the enclosed operating instructions. Please keep the operating instructions in a safe place.
If passing on the appliance to a third party, always include
the operating instructions.
, General safety instructions
Electric shock risk
The appliance must not be used by children.
The appliance and its power cord must be kept away from children.
Appliances can be used by persons with reduced physical, sensory
or mental capabilities or lack of experience and knowledge if they have
been given supervision or instruction concerning use of the appliance
in a safe way and if they understand the hazards involved.
Children shall not play with the appliance.
Robert Bosch Hausgeräte GmbH 3

en
MUMXX_en-fi.book Seite 4 Montag, 8. September 2014 3:05 15
Connect and operate the appliance only in accordance with the specifications on the rating plate. Only use indoors. Do not use the appliance if the power cord and/or appliance are damaged.
Before replacing accessories or additional parts, which move during
operation, switch off the appliance and disconnect from the power
supply. Always disconnect the appliance from the supply if it is left
unattended and before assembling, disassembling or cleaning.
Do not place the power cord over sharp edges or hot surfaces.
To prevent injury, a damaged power cord must be replaced
by the manufacturer or his customer service or a similarly qualified
person. Only our customer service may repair the appliance.
, Safety instructions for this appliance
Risk of injury
Risk of electric shock!
Do not insert mains plug until all preparations for working with
the appliance are complete. Never immerse the base unit in liquid
or hold under running water. Do not use a steam cleaner.
Do not adjust swivel multi-function arm while the appliance is switched
on. Wait until the drive has come to a standstill.
Do not change tool/accessory until the drive is at a standstill – when
the appliance is switched off, the drive continues running briefly.
Use only the rotary switch to switch the appliance on or off.
When the appliance is not in use, pull out the mains plug.
Before eliminating a fault, pull out the mains plug.
Risk of injury from the rotating tools!
While the appliance is operating, never place fingers in the mixing
bowl. Attach the cover (12) before operating the appliance!
Keep hands clear of rotating parts.
Do not change tools until the drive has come to a standstill – when
the appliance is switched off, the drive continues running briefly and
stops in the tool change position/“Easy fill”-position.
Do not move multi-function arm until the tool is at a standstill.
Do not switch on the appliance until the blender has been screwed
in all the way and the tool drive cover (7) has been attached.
Cover unused drives with drive covers.
Risk of injury from sharp blades!
Do not touch blender blades with bare hands.
Clean them with a brush.
Risk of injury from sharp blades/rotating drive!
Never place fingers in the attached blender!
Do not remove/attach the blender until the drive is at a standstill!
Operate the assembled blender only and with the lid attached.
4 Robert Bosch Hausgeräte GmbH
en
MUMXX_en-fi.book Seite 5 Montag, 8. September 2014 3:05 15
Risk of scalding!
If processing hot liquids, steam escapes through the funnel in the lid.
Add a max. 0.75 litres of hot or frothing liquid.
Important!
Use the appliance with original accessories only.
When using the accessories, follow the enclosed operating
instructions. Attach and use only one tool or accessory.
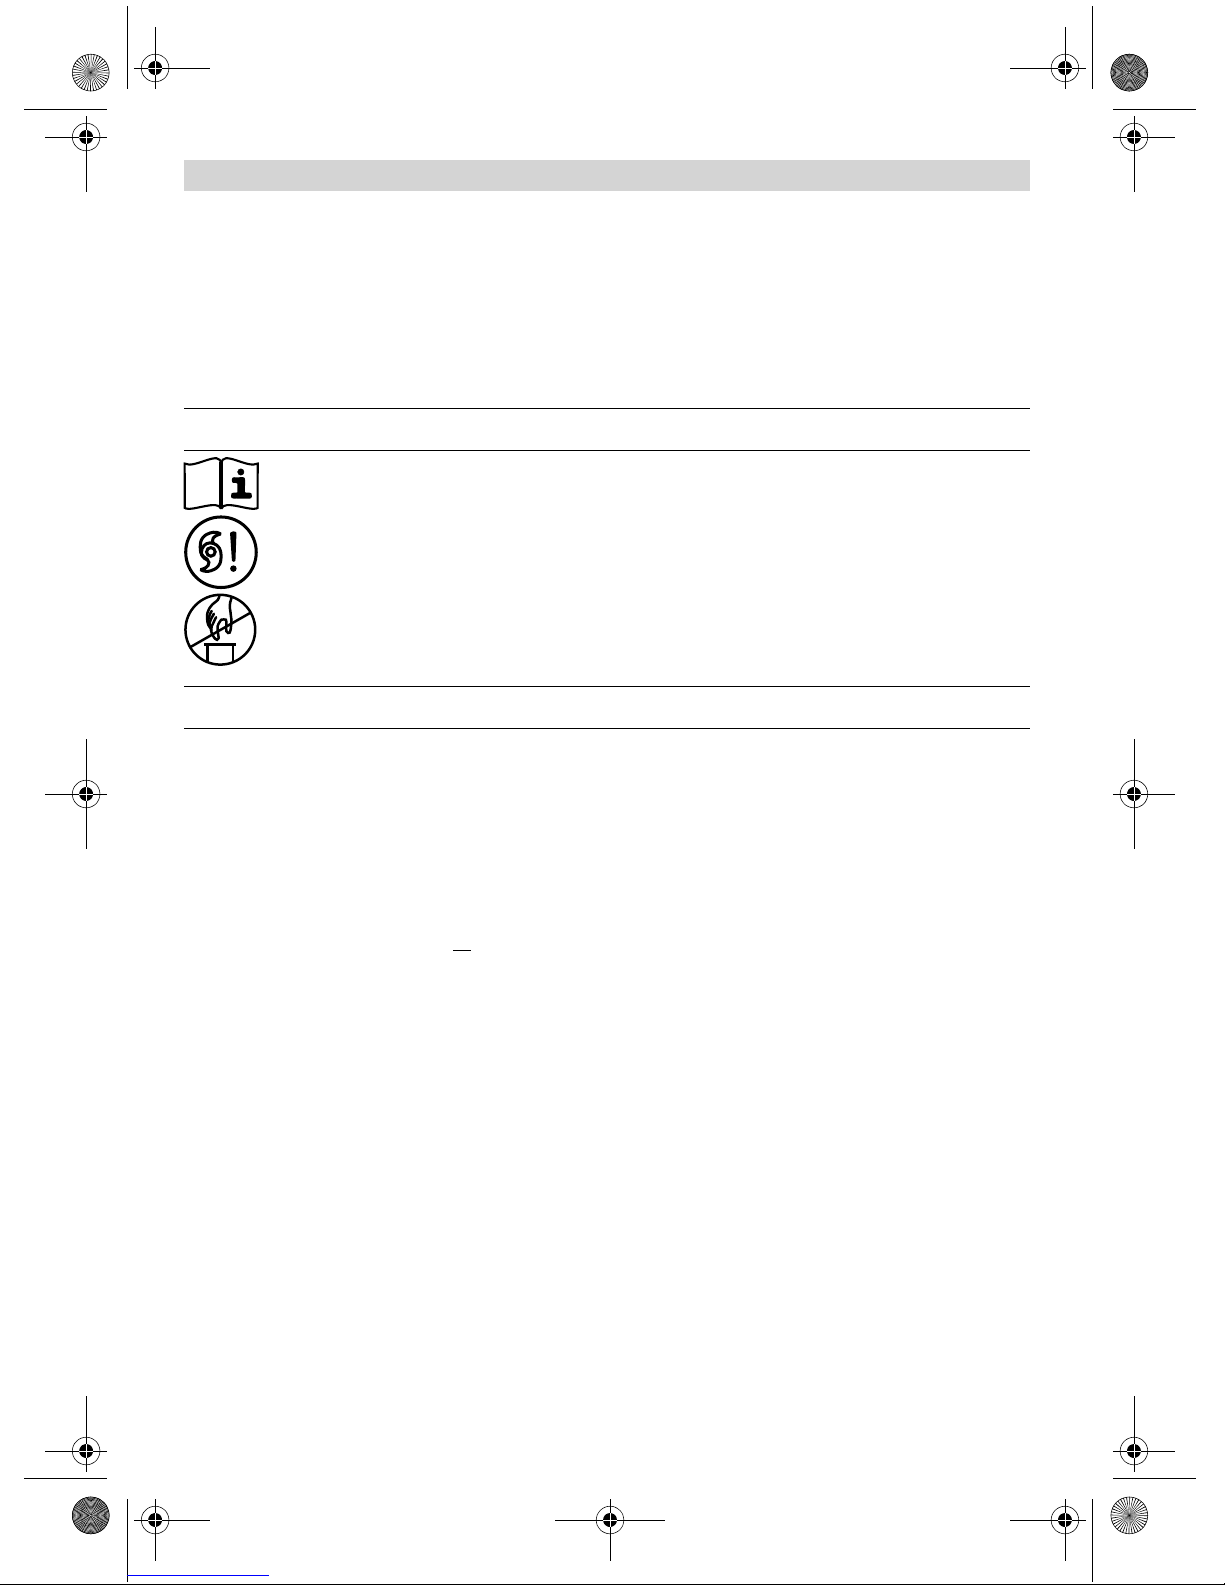
, Explanation of the symbols on the appliance or accessory
Follow the instructions in the operating instructions.
Caution! Rotating blades.
Caution! Rotating tools.
Do not place fingers in the feed tube.
, Safety systems
Start lock-out
See “Overview of the operating positions”
table.
In pos. 1 the appliance cannot be switched
on.
The appliance can be switched
on in pos. 2–4 only:
– when the bowl has been inserted and
rotated as far as possible or
– the tool drive cover (7) has been
attached.
In Pos. 5 the appliance can only be switched
on when the tool drive cover (7) has been
attached. The blender must be screwed
in all the way.
In pos. 6 the appliance cannot be switched
on unless the mincer and adapter have been
attached correctly (see mincer operating
instructions).
Restart lock-out
If the power is interrupted, the appliance
remains switched on but the motor does
not start running again when the power
is restored. To restart the appliance, turn
the rotary switch (3) to 0/off, then switch
on the required setting.
Overload protection
If the motor switches itself off while
the appliance is being used, the overload
protection feature has been activated.
Possible causes:
– very large amounts of ingredients,
– appliance operated too long.
If a safety system is activated, see
“Troubleshooting”.
Overview
The operating instructions describe several
models, see also overview of models
(Fig. ).
Please fold out the illustrated
pages. Fig.
Base unit
1 Release button
2 Multi-function arm
“Easy Armlift” – supports the simple and
effortless operation of the multi-function
arm (see “Operating positions”).
Robert Bosch Hausgeräte GmbH 5
en
MUMXX_en-fi.book Seite 6 Montag, 8. September 2014 3:05 15
3 Rotary switch
When the appliance has been switched
off (0/off position), it automatically runs
to the optimum position for changing
the tools (tool change position).
This position also facilitates filling the
bowl with ingredients, as no ingredients
can stick to the tools (“Easy fill” position).
0/off = Stop
M/S = M stands for the pulse switch
at maximum speed, hold down switch
for required blending duration.
S stands for automatic SensorControl.
When the SensorControl (4) is activated,
the appliance automatically switches
off when the optimum result is obtained.
Settings 1–7, Operating speed:
1 = low speed – slow,
7 = high speed – fast.
4 Operating buttons on the automatic
SensorControl
See Section “Working with SensorControl”.
5 Drive cover
To remove the drive cover, press
on the front area and remove cover.
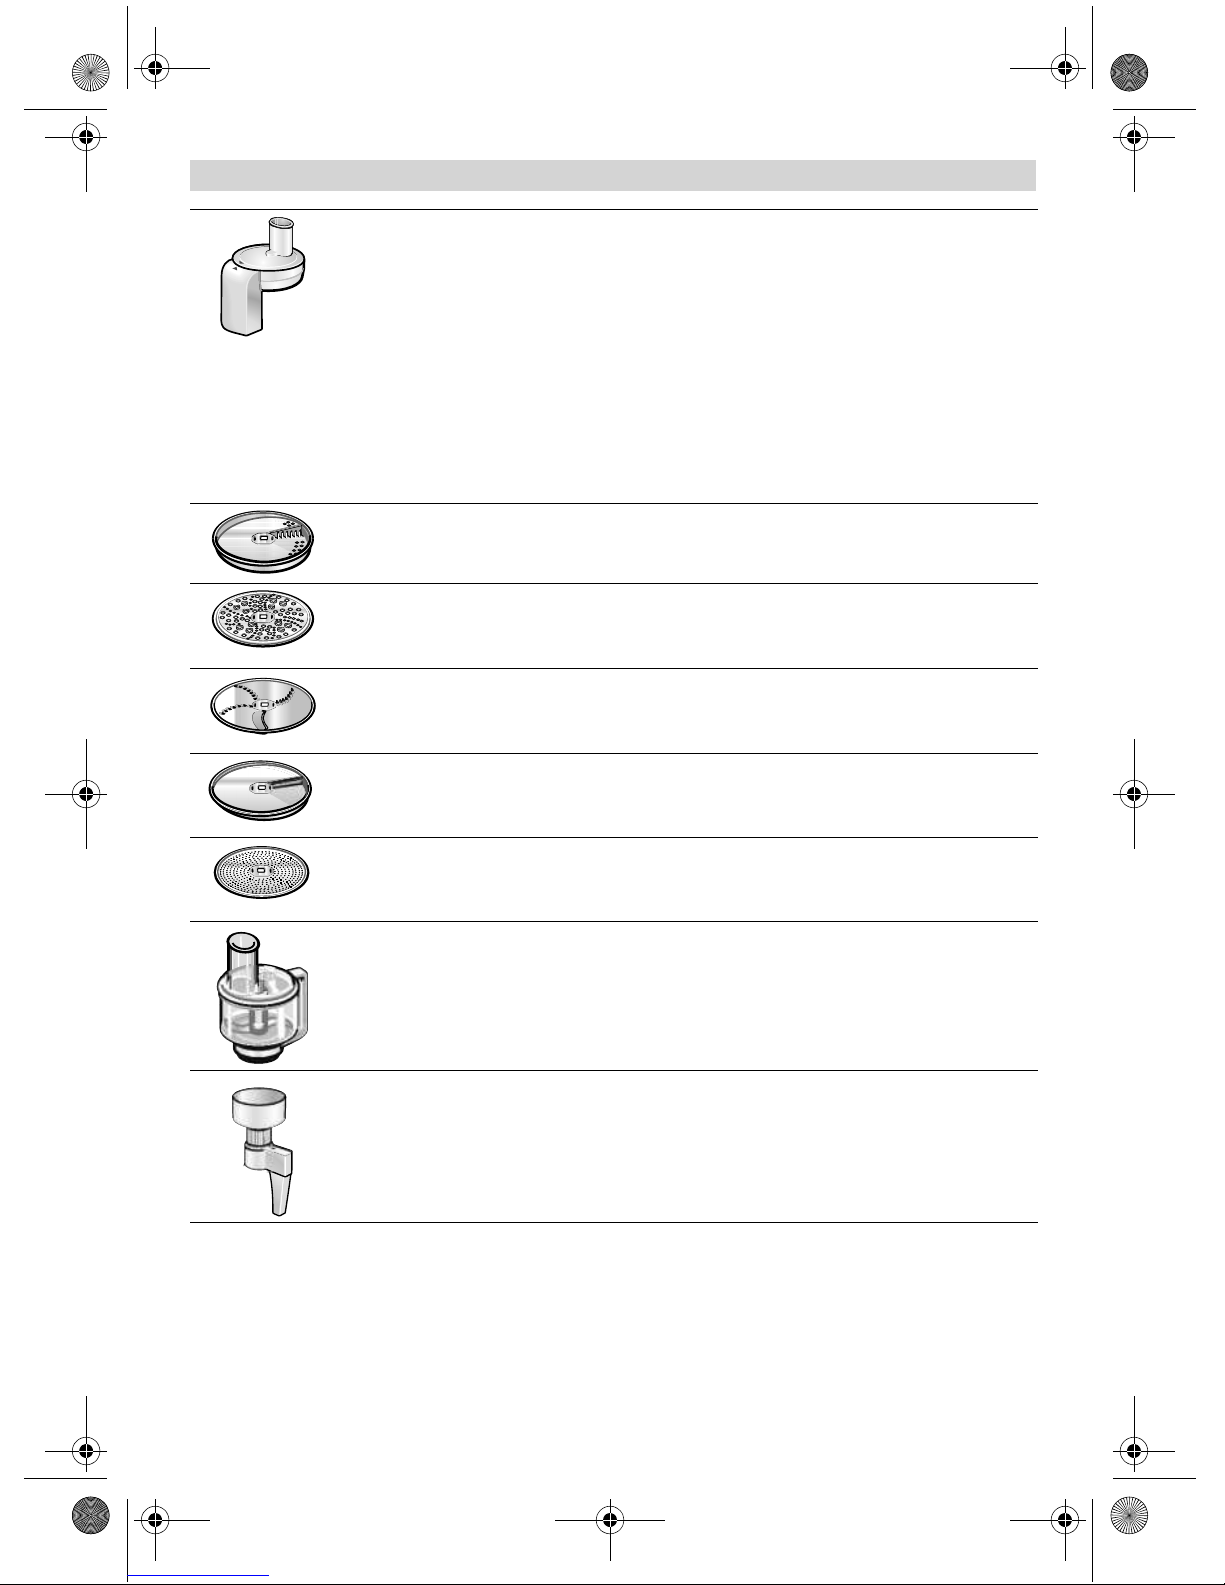
6 Drive for
– continuous-feed shredder *,
– citrus press * and
– grain mill *.
When not in use, attach the drive cover.
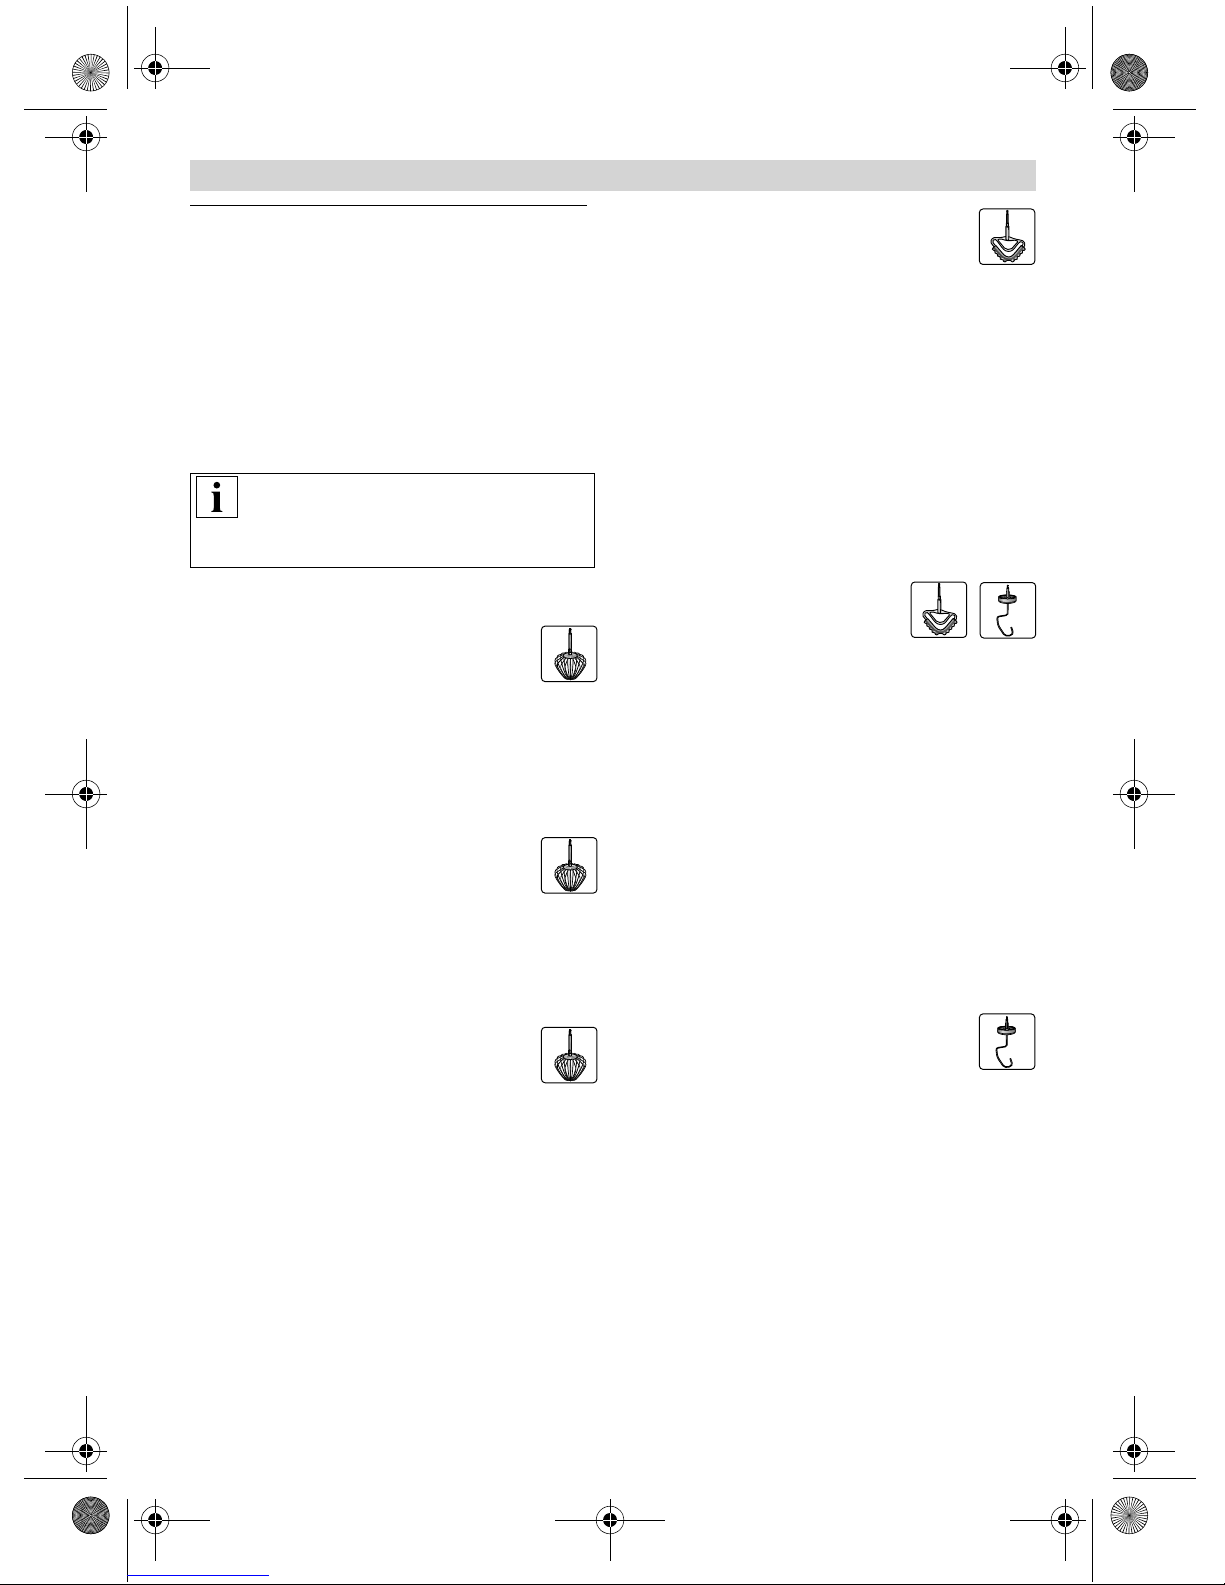
7 Drive for tools (stirrer, whisk, kneading
hook) and mincer *
8 Drive cover
9 Drive for blender
When not in use, attach the blender
drive cover.
10 Blender drive cover
11 Cord store
Cord store or automatic cord winder
(depending on model)
Bowl with accessories
12 Stainless steel stirring bowl
13 Lid
14 Funnel
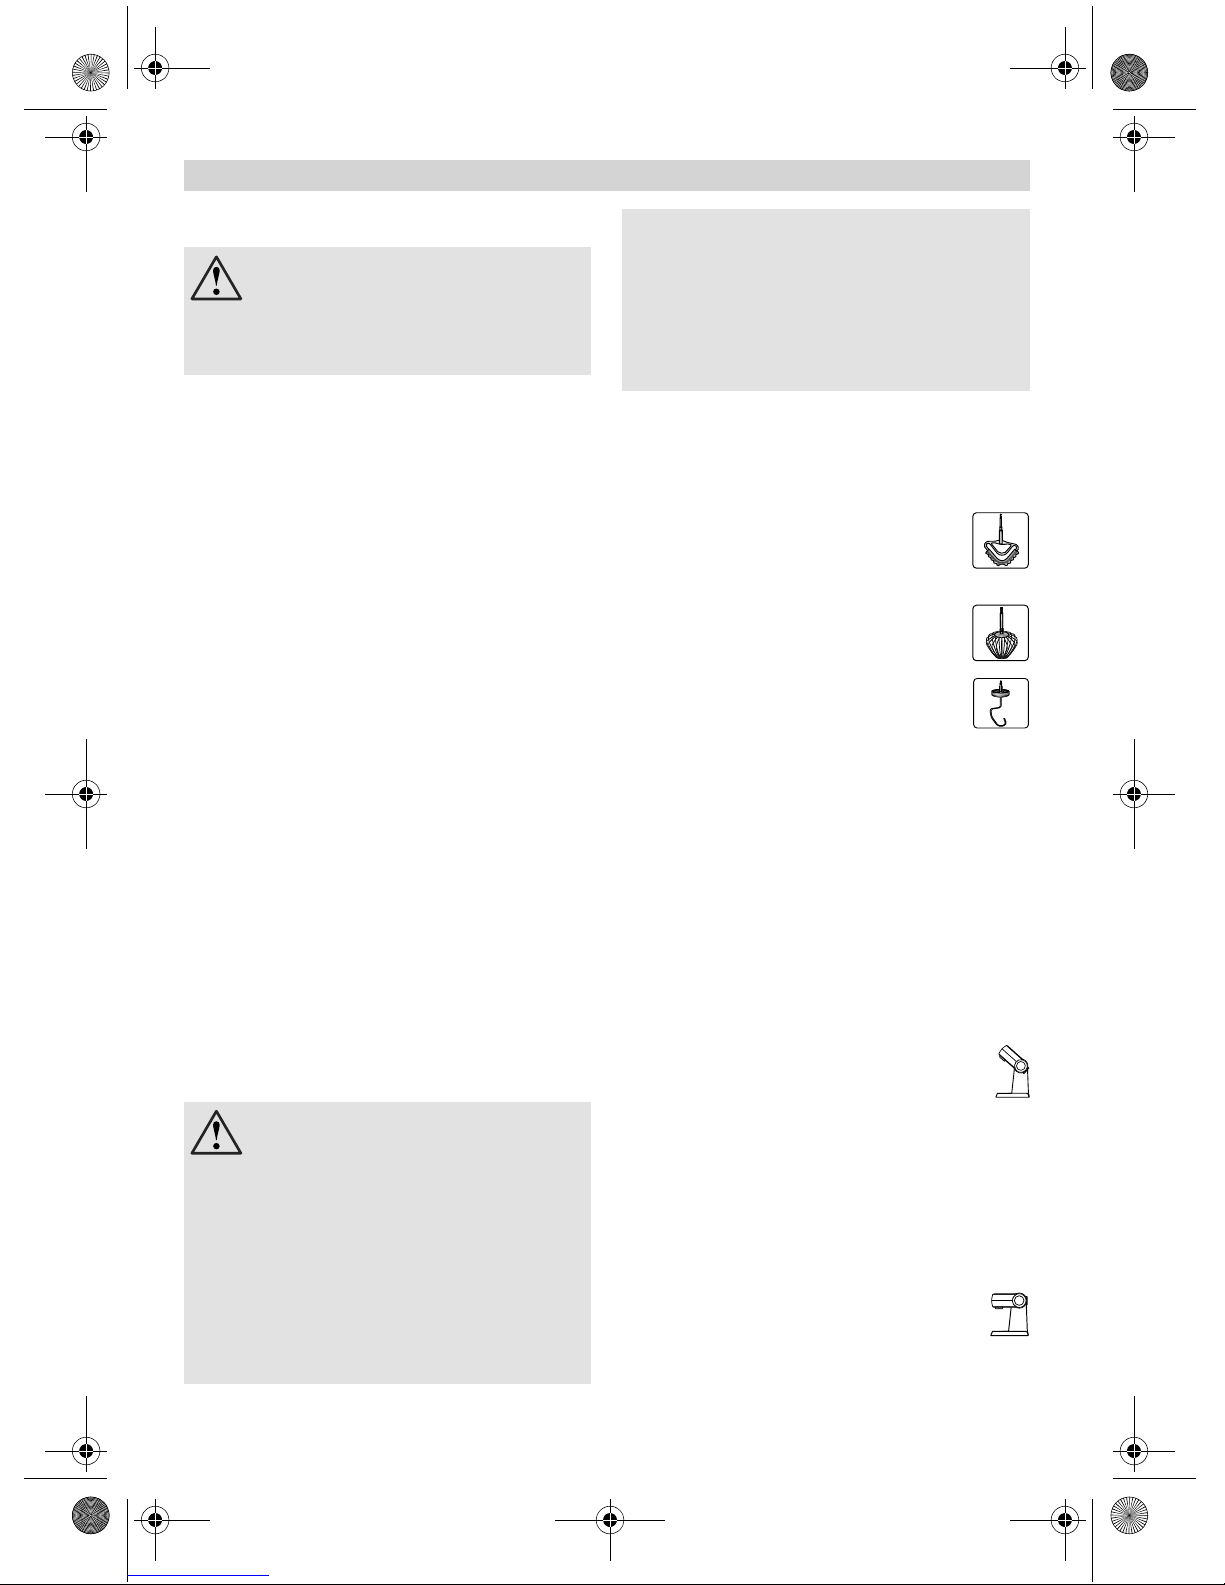
Tools
15 “Absolute” stirrer
16 Solid metal whisk
17 Kneading hook “High performance”
with dough deflector
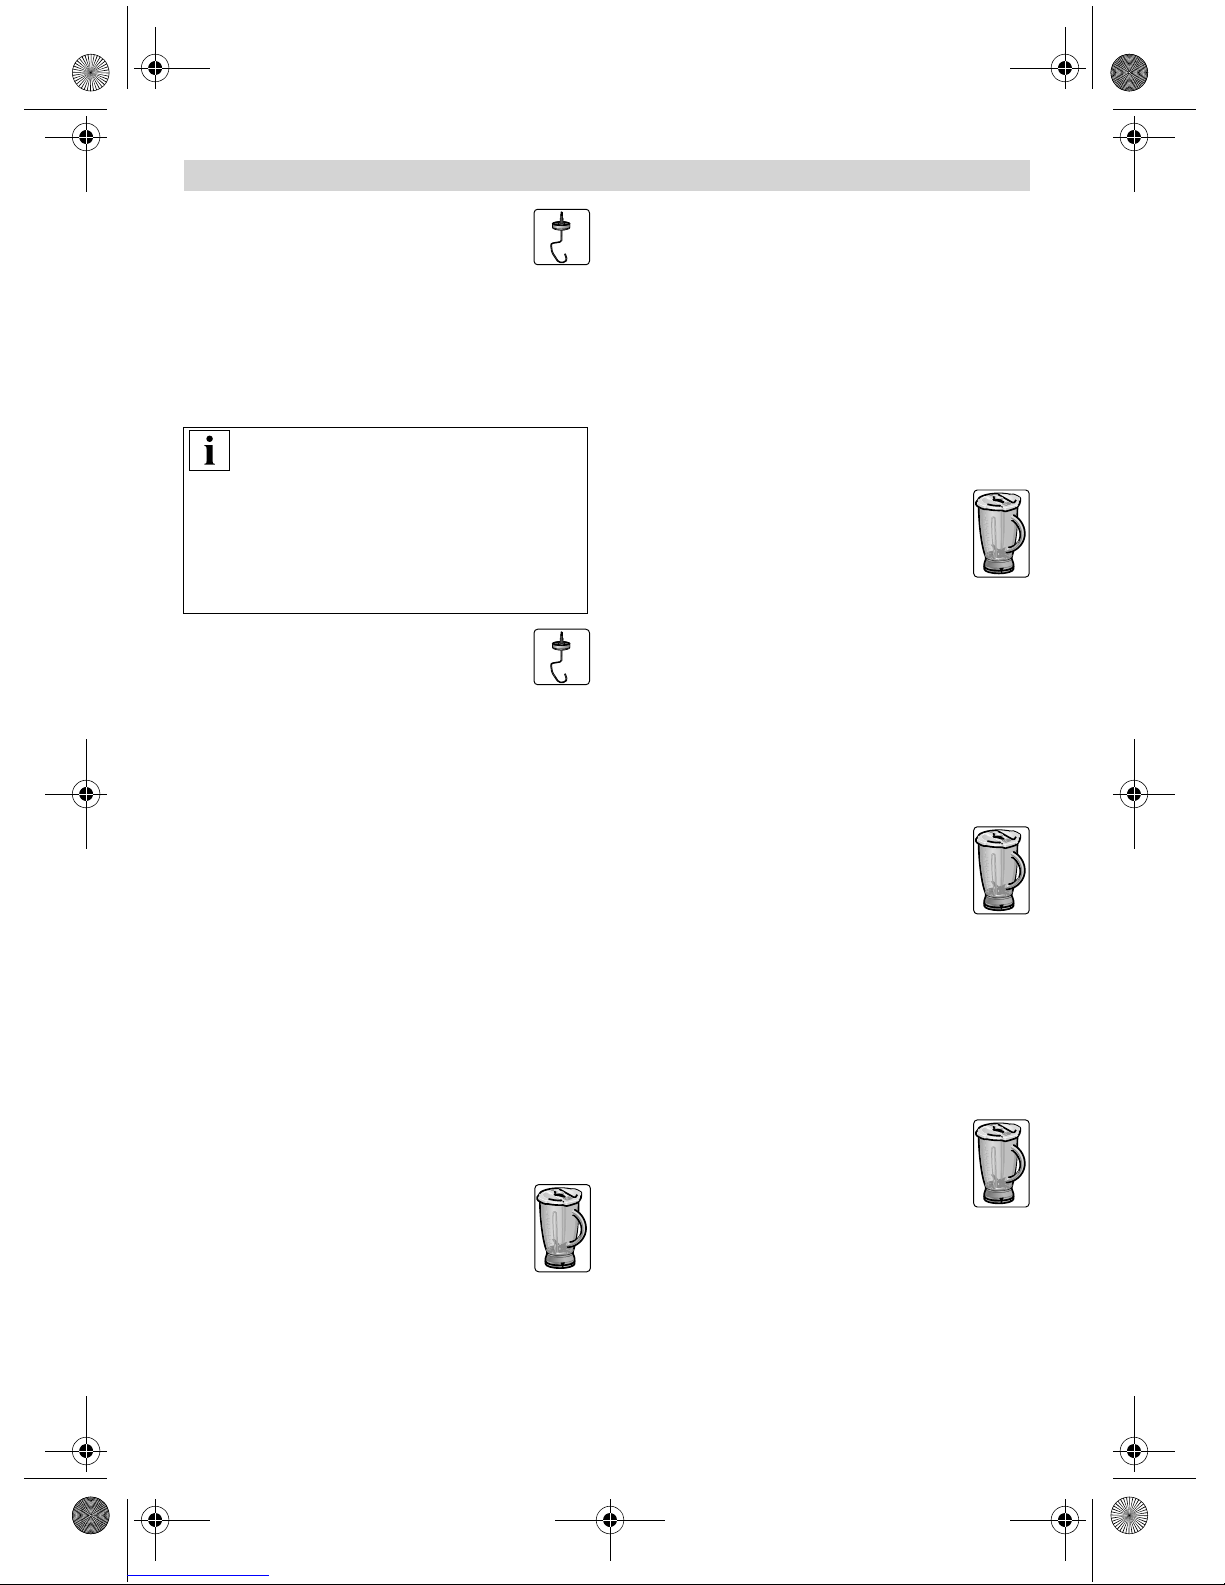
Blender *
18 Blender holder with blade
19 Blender jug (glass)
20 Lid with feed tube
21 Funnel
* If an accessory is not included in the pro-
duct package, it can be purchased
via the trade or customer service.
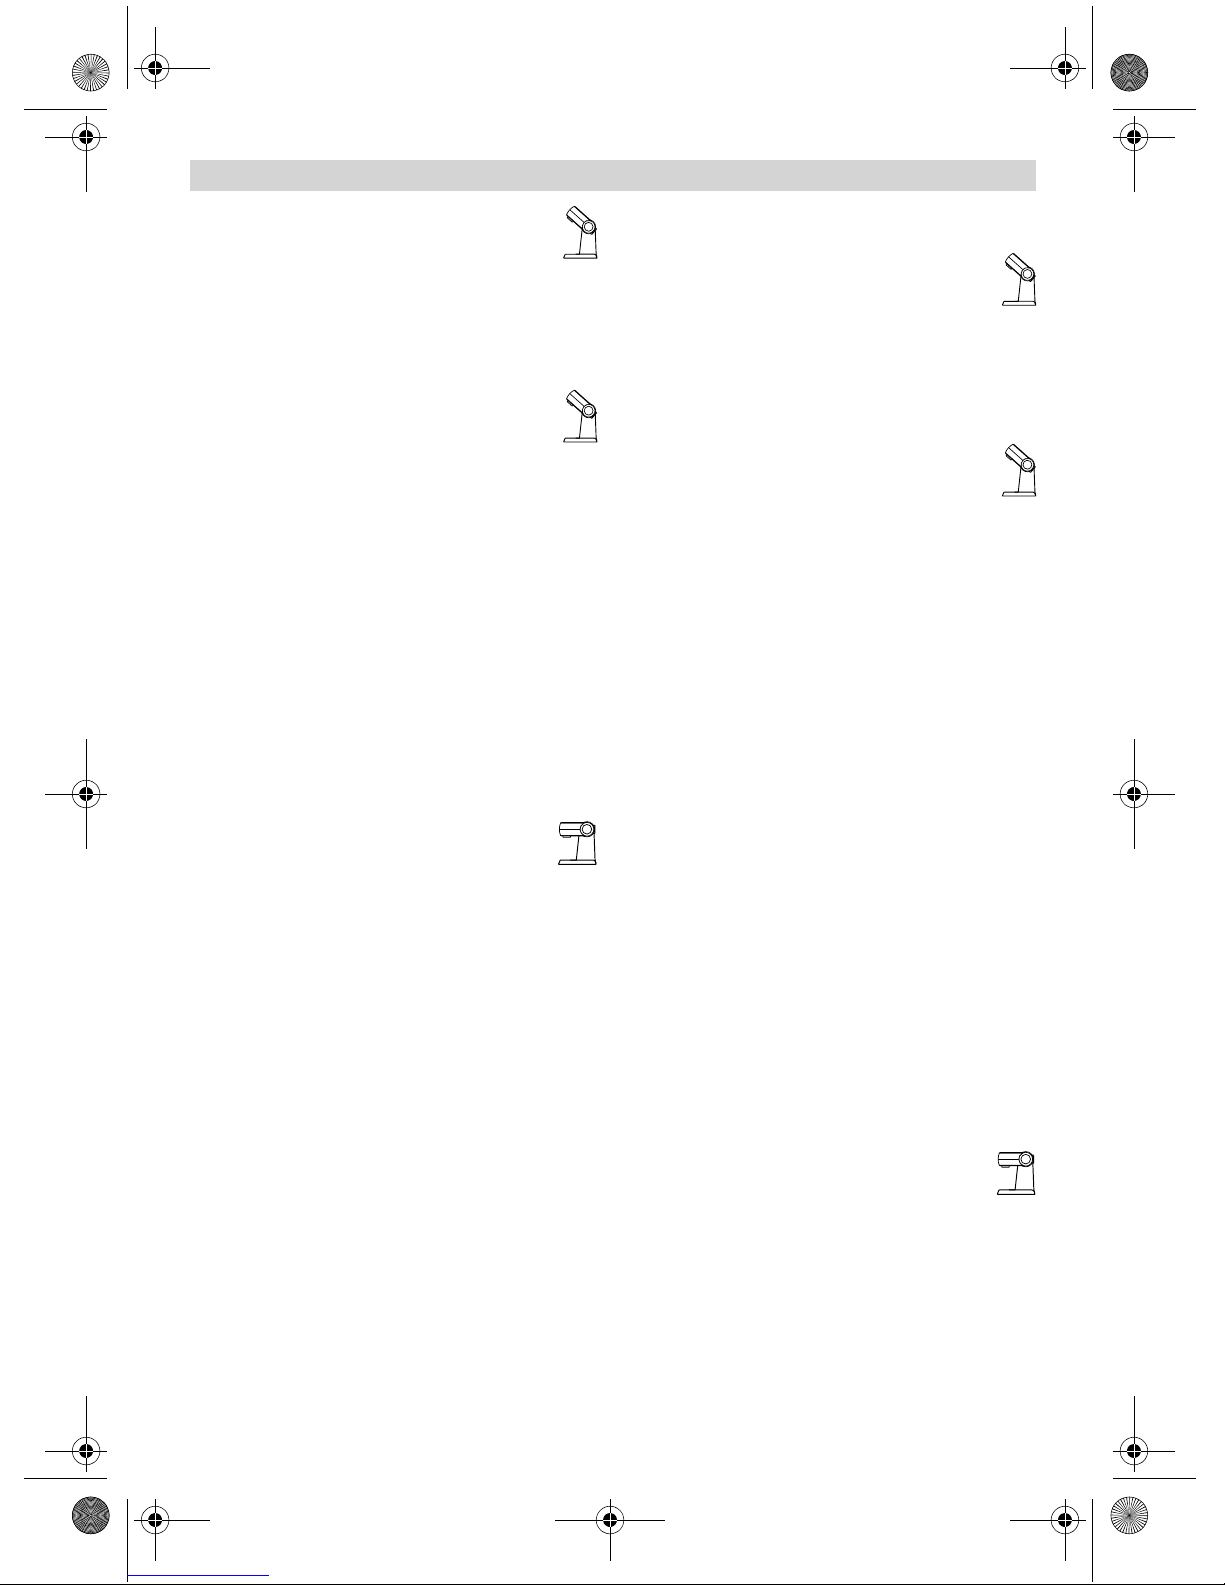
Operating positions
Warning!
Before operating the appliance, attach
the tool/accessory to the correct drive
and in the correct position and place
in the operating position according
to this table.The multi-function arm must
be engaged in each operating position.
Note:
The multi-function arm features the
Armlift”
and effortless operation of the multifunction arm.
function which supports the simple
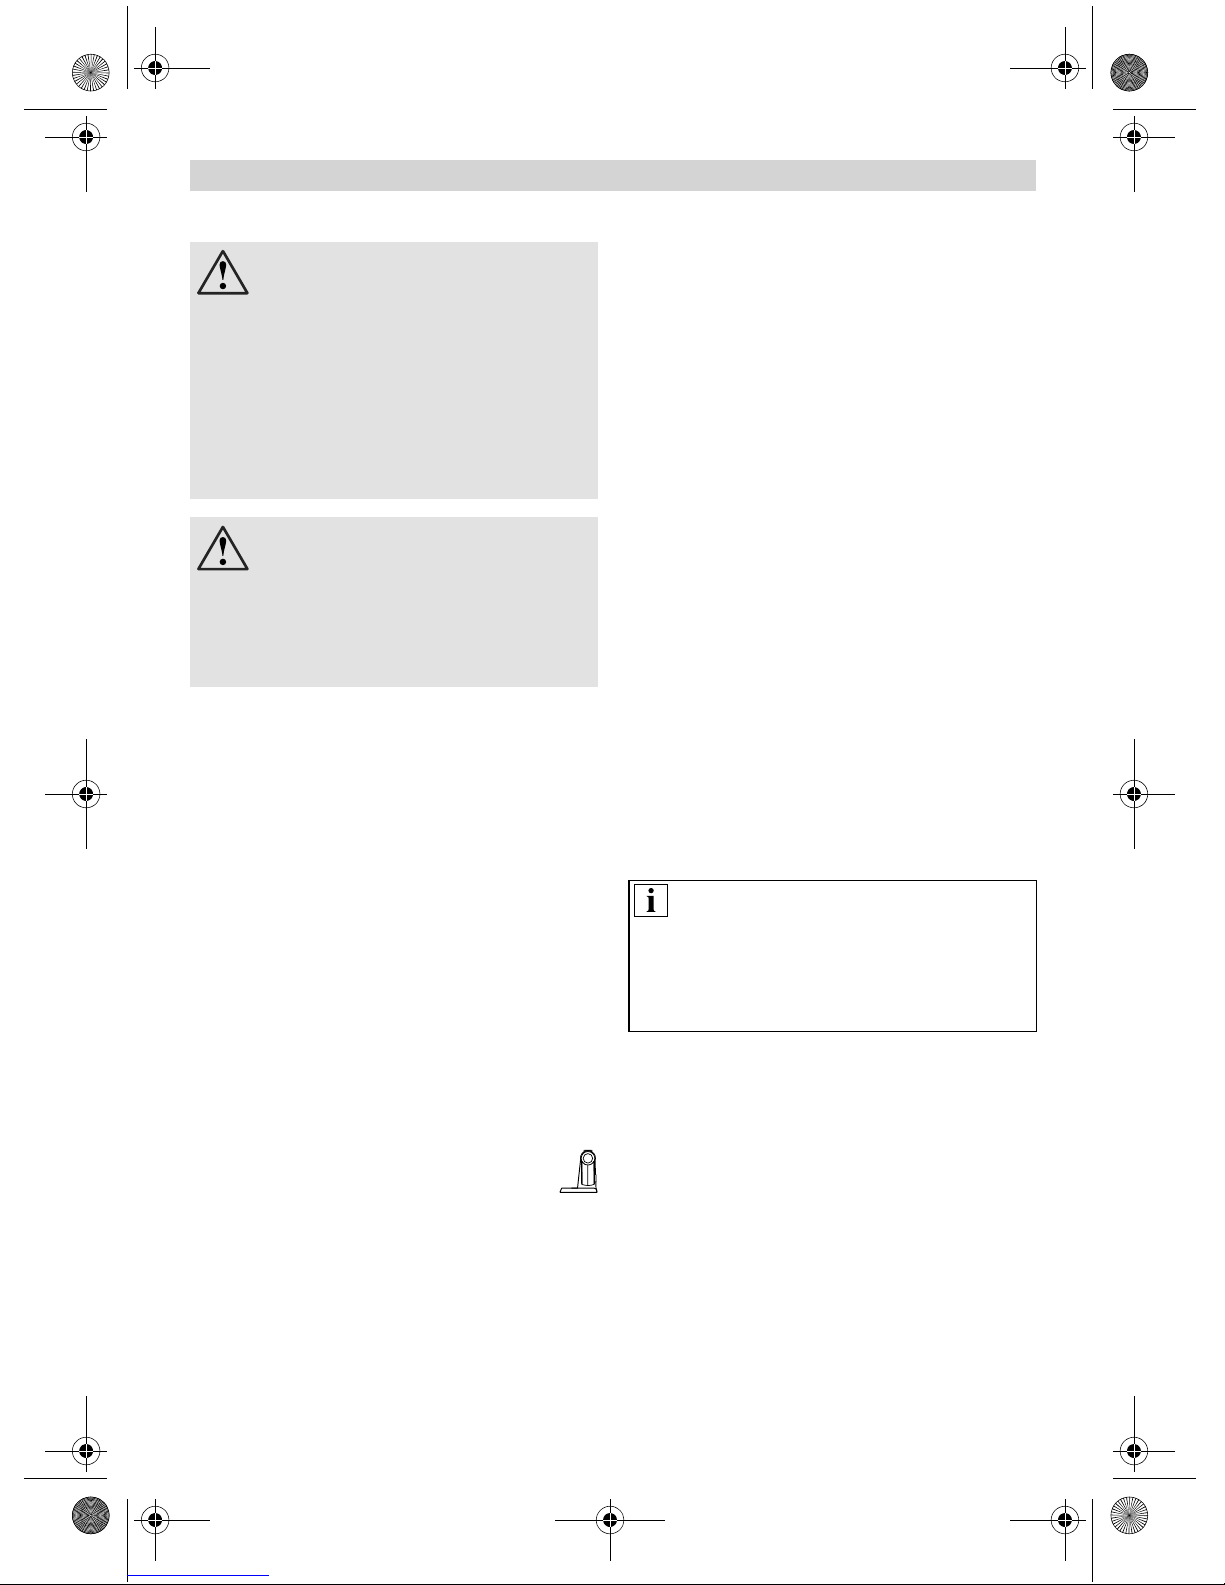
Setting the operating
position Fig.
Press release button and move multi-
function arm.
Support movement with your hand.
Move multi-function arm until it engages
in the required position.
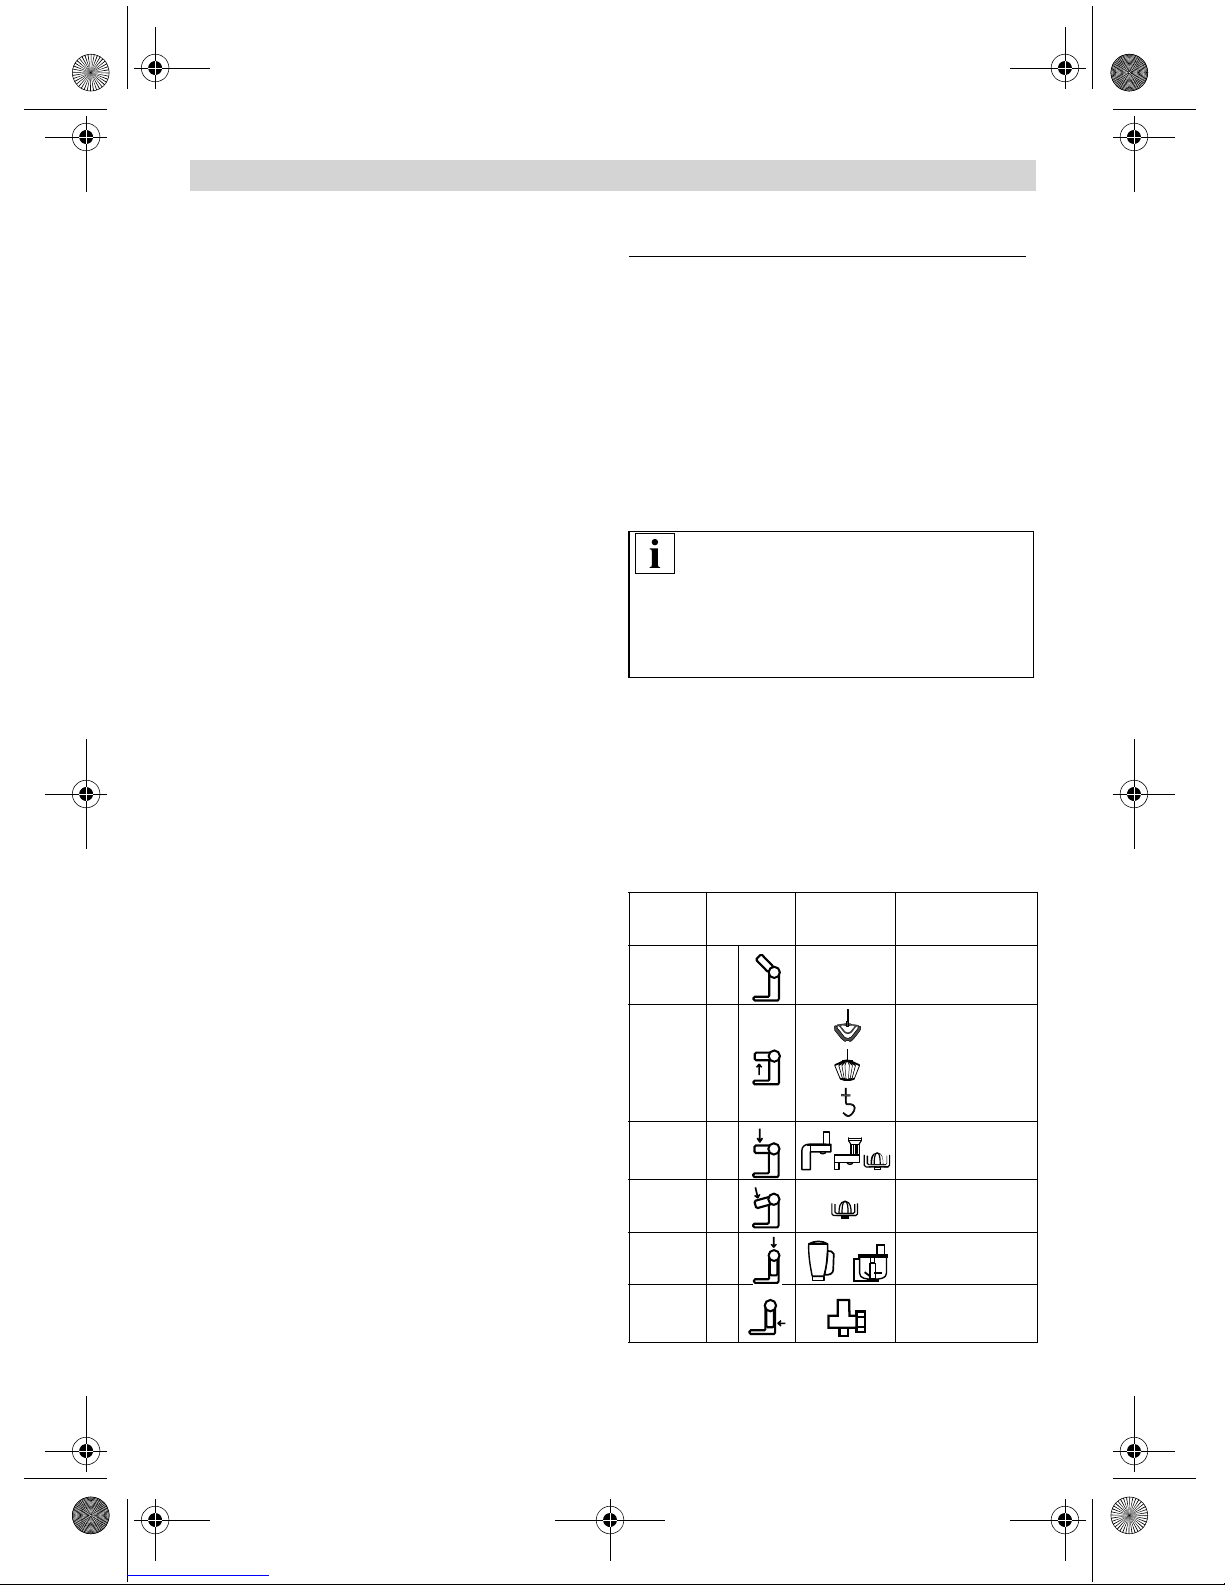
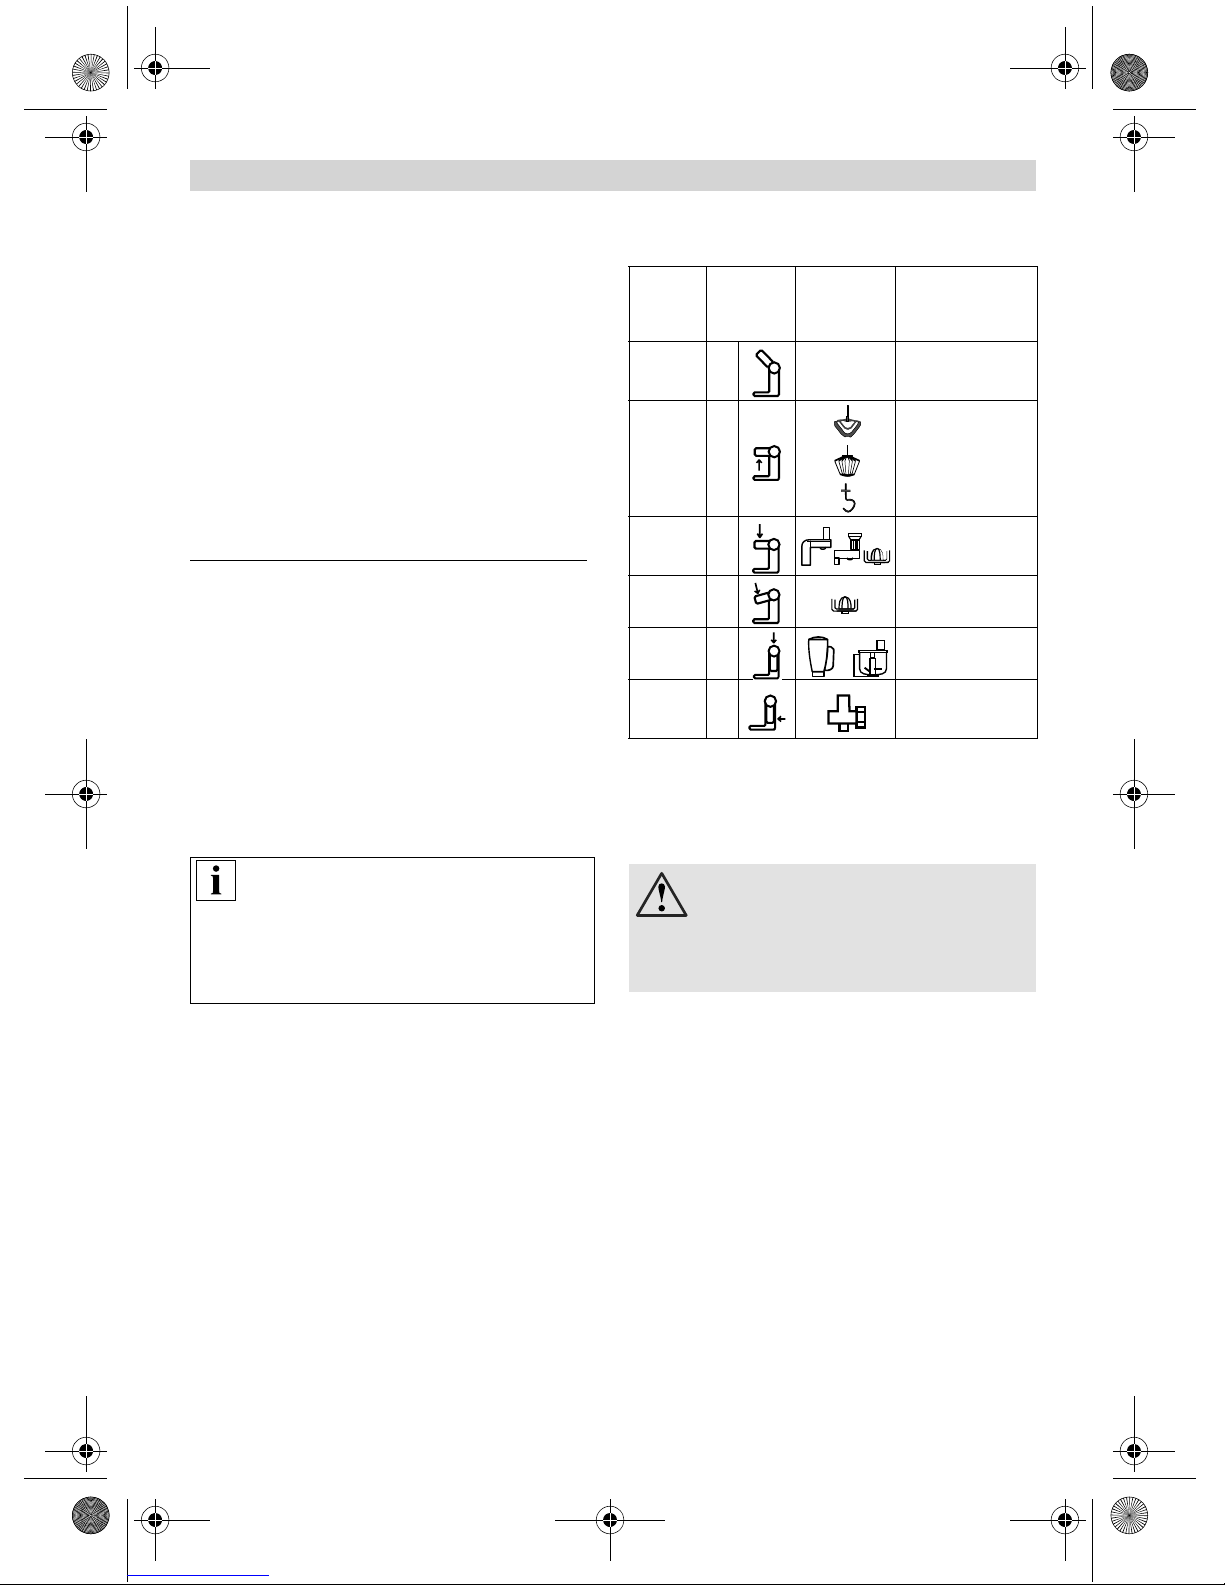
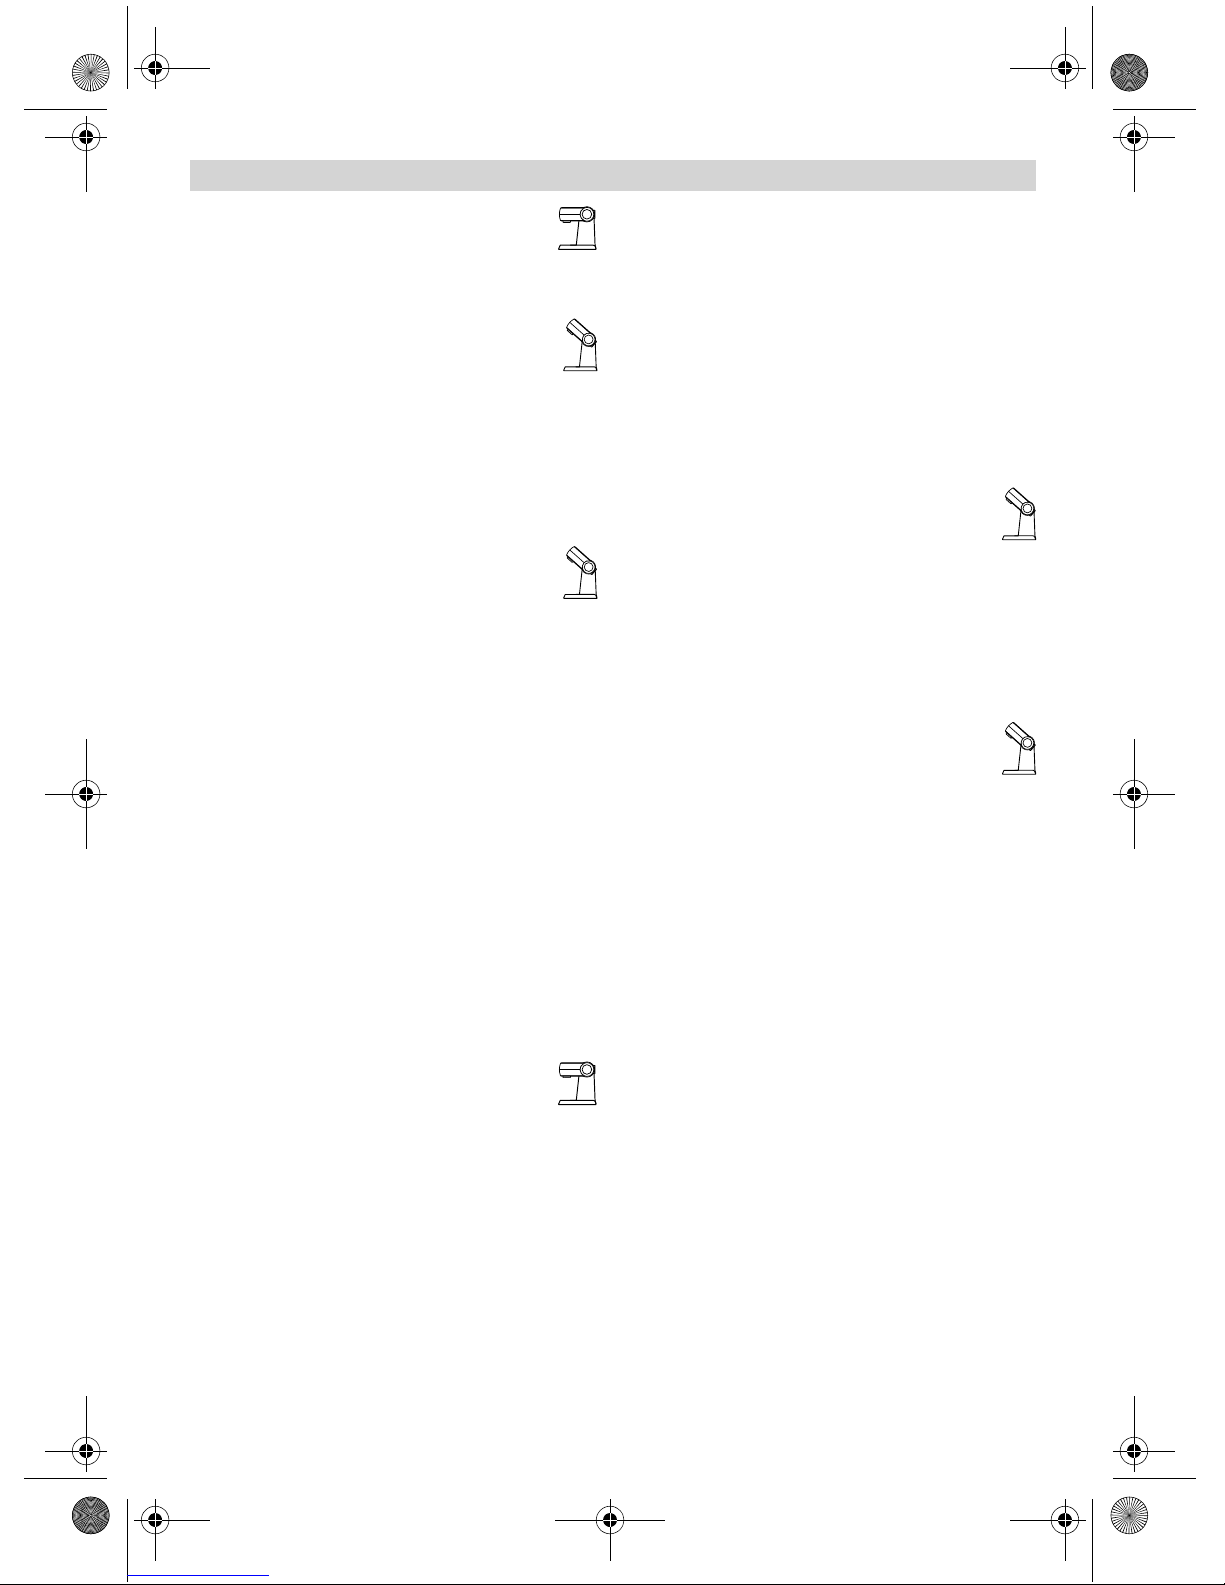
Overview of the operating positions
Position Drive Tool/
Accessory
1*–
26
35 3–7
45 3
58 5
66 5
* Insert/remove whisk, stirrer or kneading
hook. Add large quantities of ingredients.
“Easy
Operating
speed
1
–5
1–7
1–3
–5
–7
–7
6 Robert Bosch Hausgeräte GmbH
en
MUMXX_en-fi.book Seite 7 Montag, 8. September 2014 3:05 15
Operation
Risk of injury!
Do not insert mains plug until all preparations for working with the appliance
are complete.
Warning!
Do not operate the appliance without
an accessory/tool in the operating position.
Do not expose appliance or accessories to
heat sources. Parts are not microwave-safe.
Before operating the appliance and
accessories for the first time, clean
thoroughly; see “Cleaning and servicing”.
Preparation
Place the base unit on a smooth, clean
surface.
Prepare cable (Fig. ).
a) Appliances with cord store:
Pull out cable to the required length.
b) Appliances with automatic cord winder:
Pull out the cord in one go to the required
length (max. 100 cm) and slowly release;
the cord is locked.
Reducing the cord length:
Pull gently on the cord and allow
it to roll up to the required length.
Then gently pull the cord again and
slowly release; the cable is locked.
Warning!
Do not twist the cord when inserting it.
If the appliance features an automatic
cord winder, do not insert the cord manually.
If the cord jams, pull out the cord all the way
and then allow it to wind up.
Bowl and tools
Risk of injury from rotating tools
While the appliance is operating, never
place fingers in the mixing bowl.
Attach the cover (12) before operating
the appliance!
Keep hands clear of rotating parts.
Do not change tools until the drive has
come to a standstill – when the appliance
is switched off, the drive continues running
briefly and stops in the tool change
position.
Do not move multi-function arm until
the tool is at a standstill.
Do not move multi-function arm until
the tool is at a standstill.
For safety reasons the appliance cannot
be operated in Pos. 2–4 until the bowl has
been inserted and turned all the way or the
tool drive cover (8) has been attached.
Warning!
Use bowl with this appliance only.
Insert tools firmly into the drive until they lock
into position.
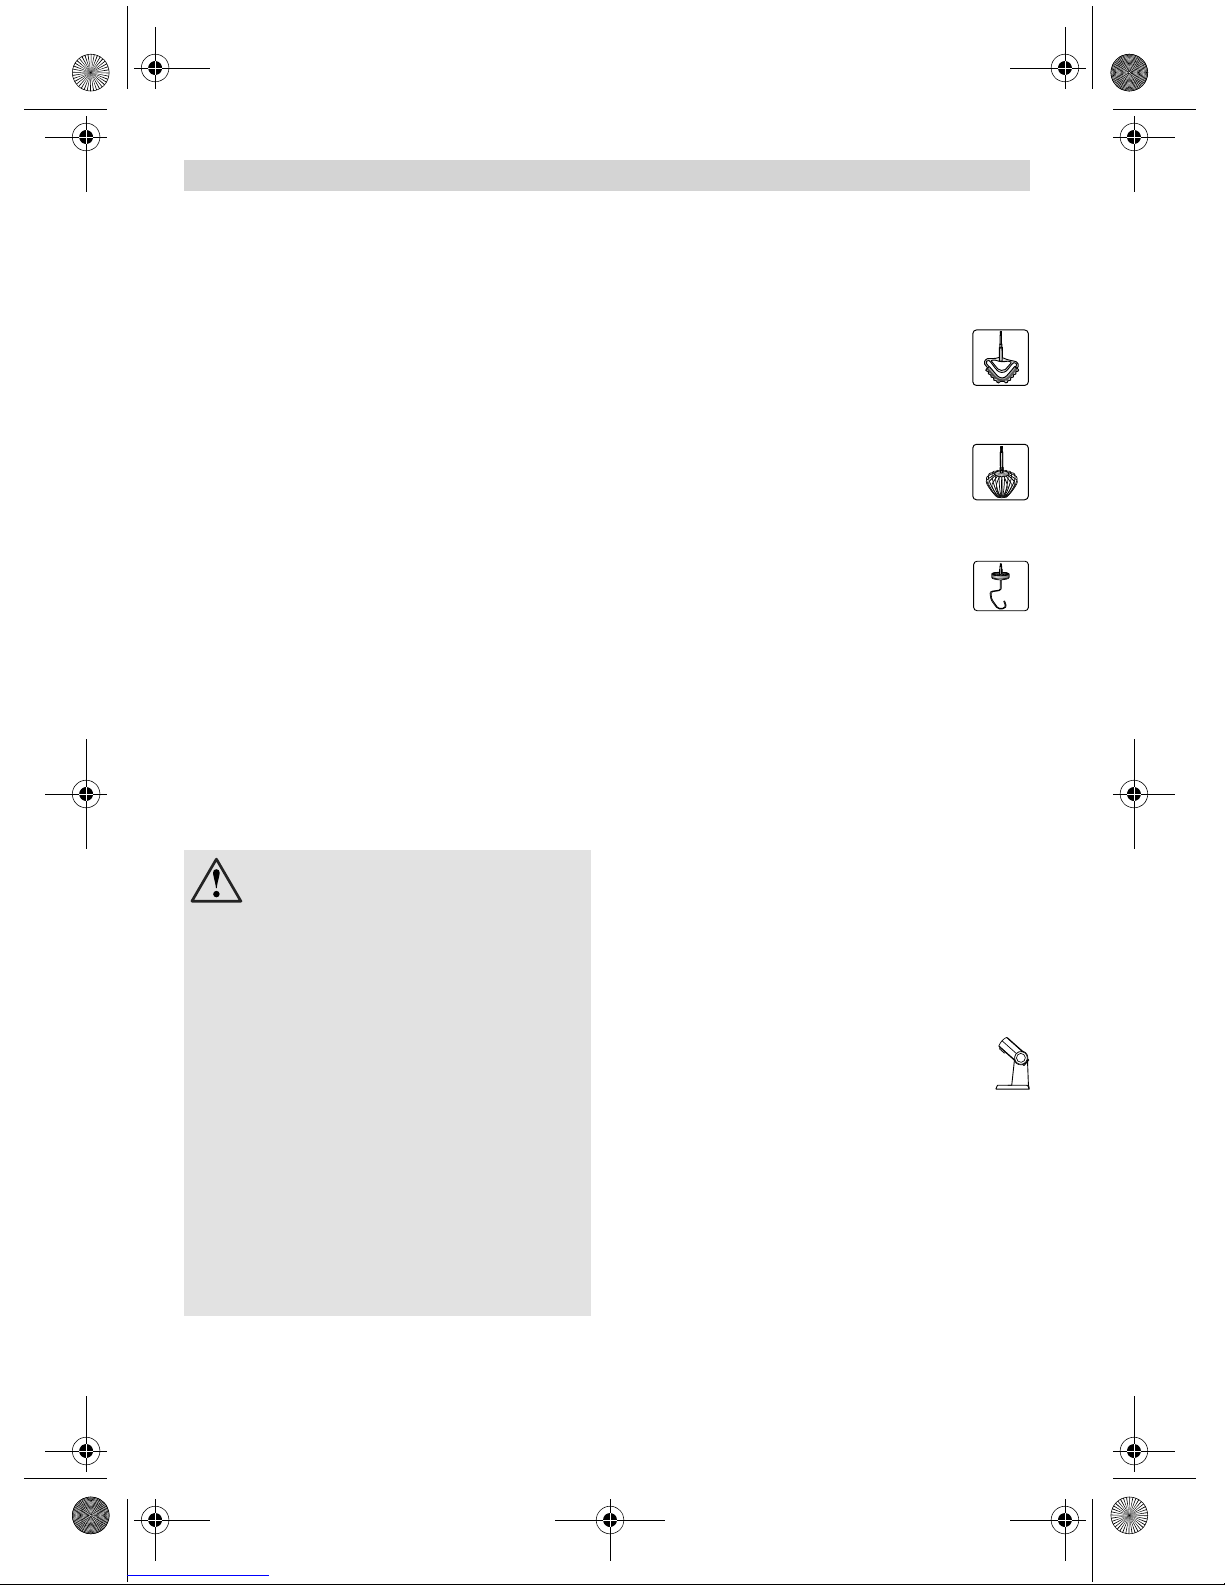
“Absolute” stirrer (15)
for stirring dough, e.g. sponge mixture
or mousse, and for folding in beaten
egg whites or cream.
Solid metal whisk (16)
for whisking egg whites, cream and
light dough, e.g. sponge mixture
Kneading hook “High performance”
with dough deflector (17)
for kneading heavy dough and mixingin ingredients that ought not be cut
(e.g. raisins and chocolate chips).
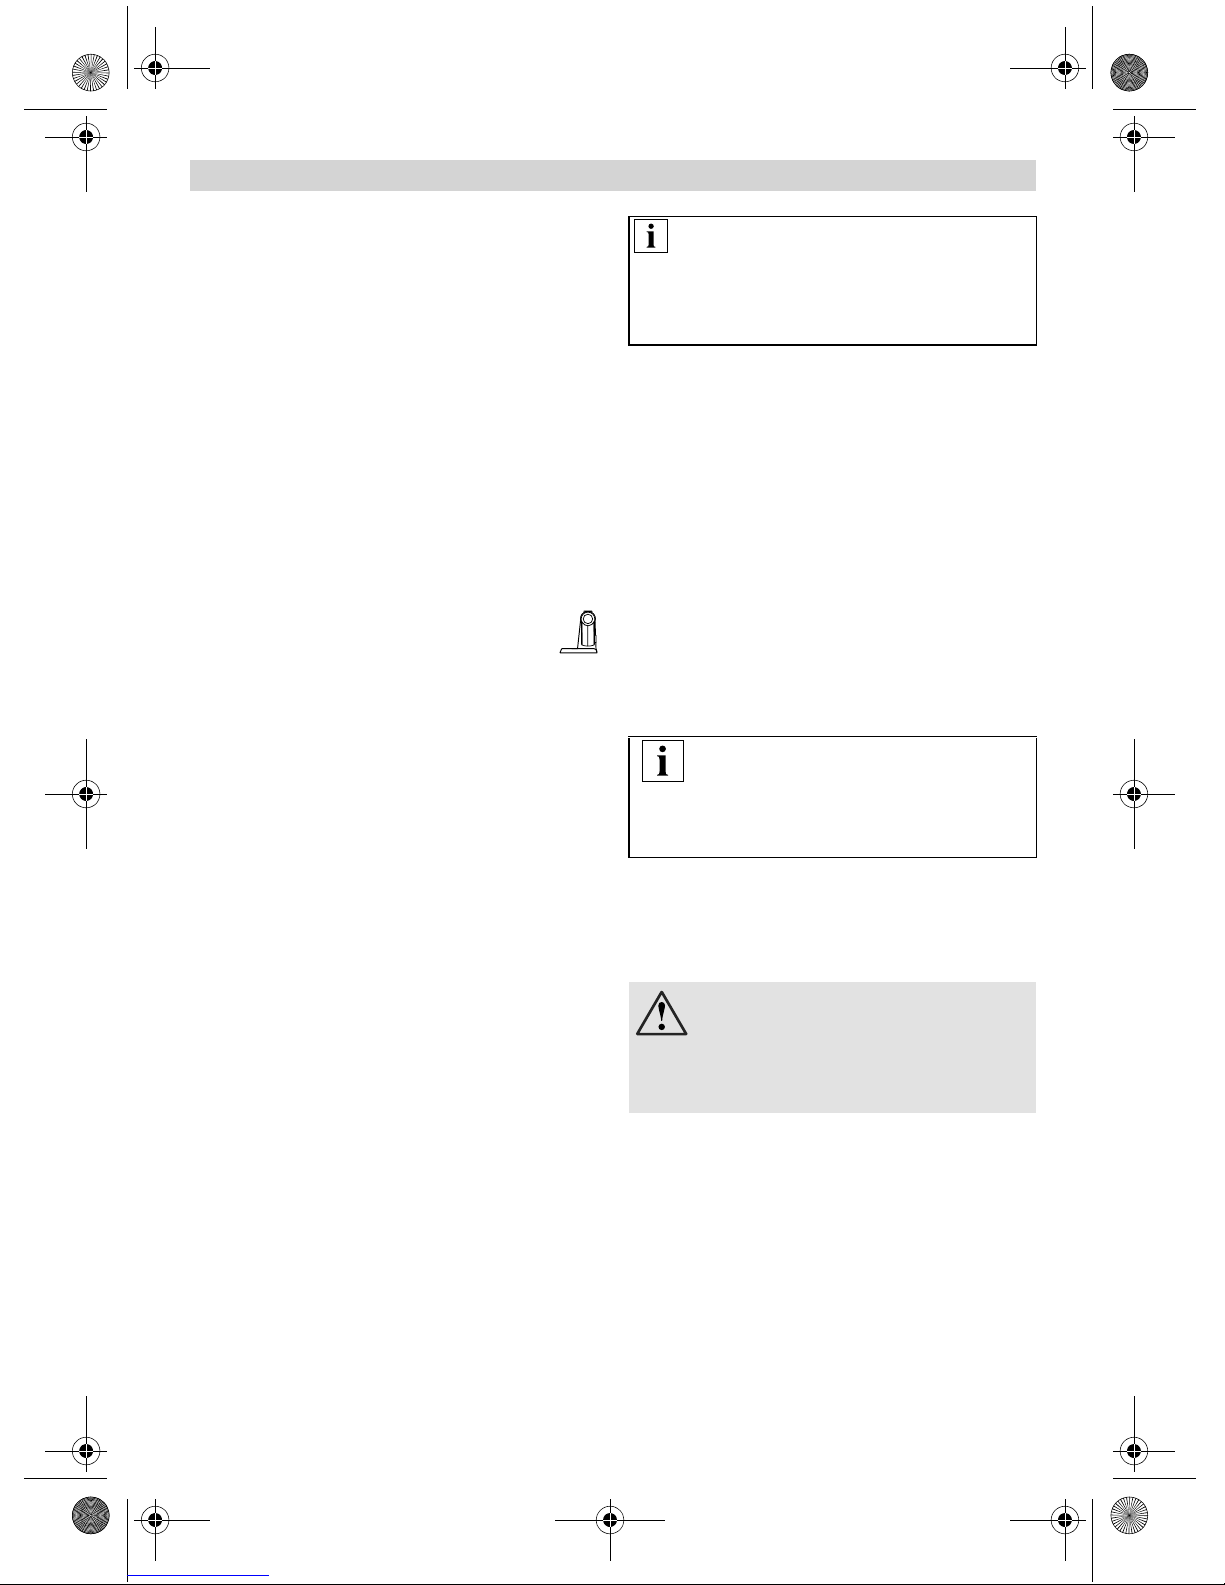
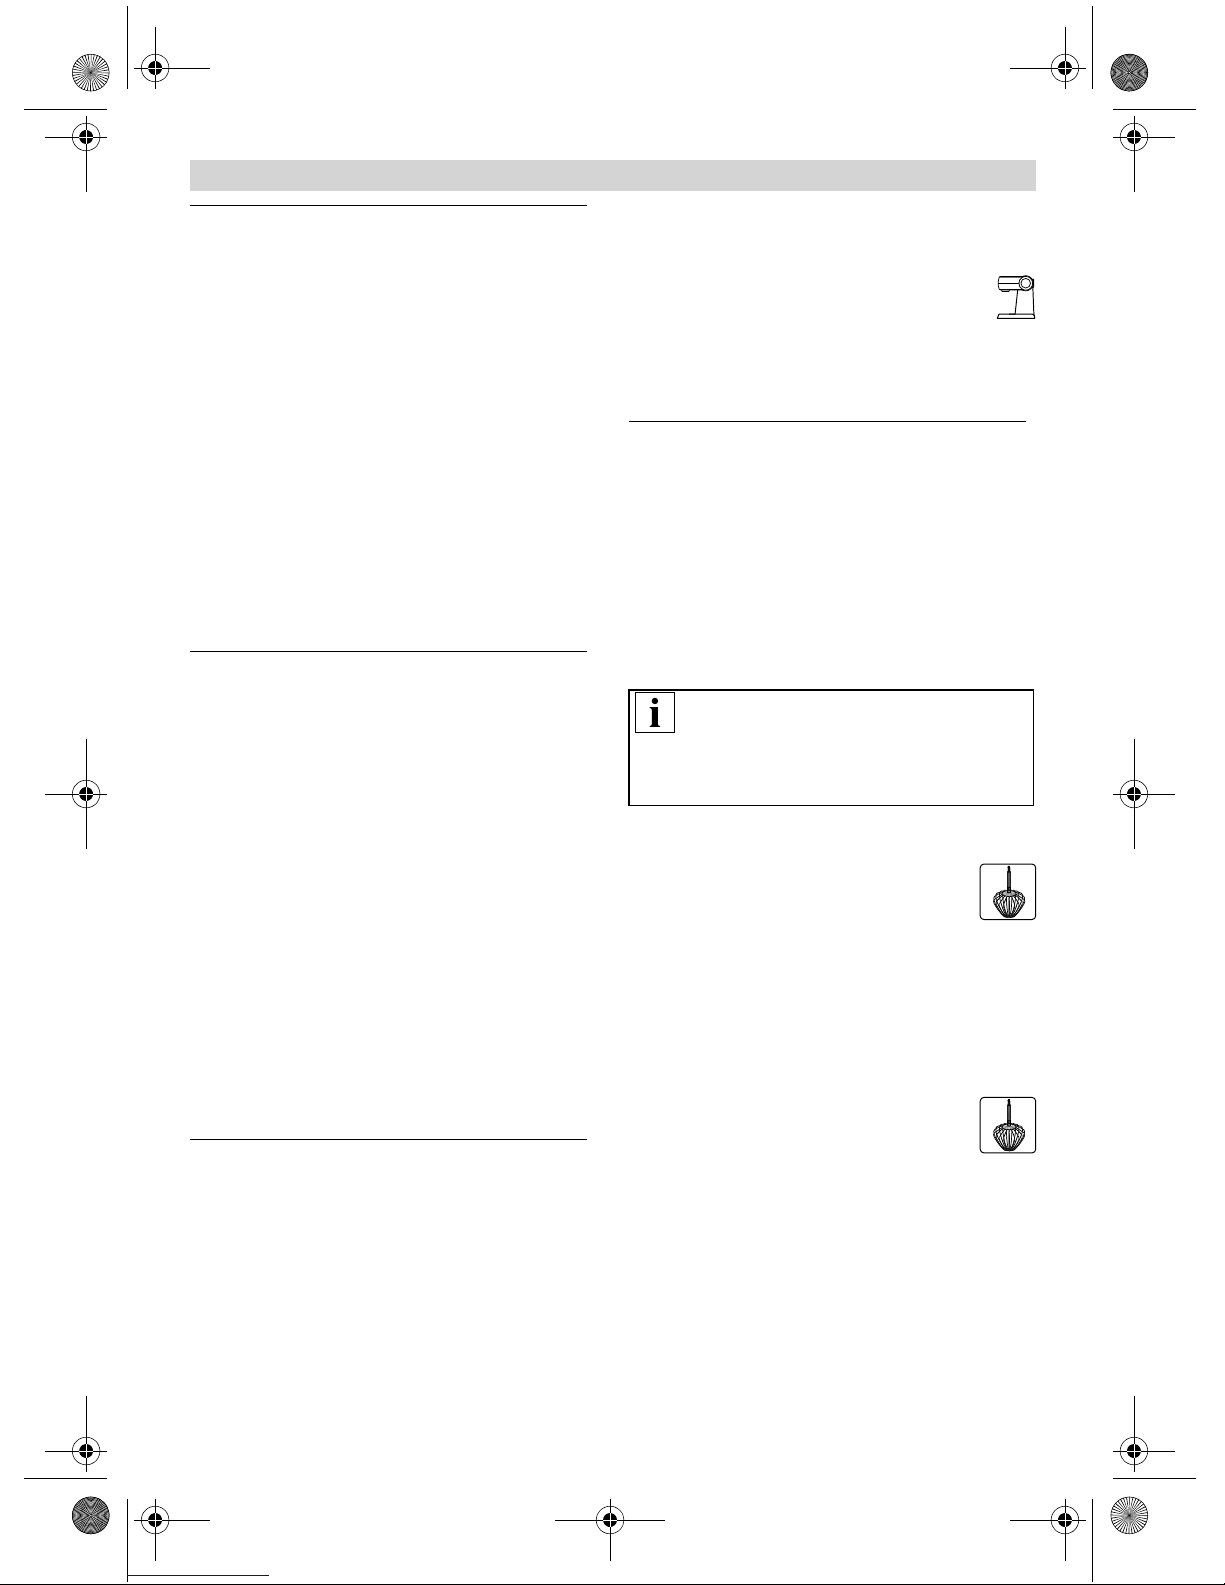
Important information
concerning the use
of the whisk Fig.
The whisk should just touch the bottom of the
bowl in order to mix the ingredients thoroughly.
This is also important to ensure that the
automatic SensorControl functions. The whisk
can be positioned higher for large quantities.
Adjust the height of the whisk as follows:
Remove mains plug.
Press release button and move multi-
function arm to position 1.
Insert the whisk into the drive until
the whisk locks into position.
Hold whisk in place and loosen
nut clockwise using enclosed key
(on the base of the appliance).
Set the whisk to the optimum height
by rotating the whisk:
– Turn clockwise: Raise
– Turn anti-clockwise: Lower
Press release button and move
multi-function arm to position 2.
Check the height of the whisk and,
if required, correct.
Robert Bosch Hausgeräte GmbH 7
en
MUMXX_en-fi.book Seite 8 Montag, 8. September 2014 3:05 15
When the height has been set
correctly, press the release button
and move the multi-function arm
to position 1.
Hold whisk in place and tighten
nut anti-clockwise using enclosed key.
Working with the bowl
and the tools Fig.
Press release button and move
multi-function arm to position 1.
Cover unused drives with drive
covers.
Insert the bowl:
– Tilt the bowl forwards and then
set it down.
– Turn anti-clockwise until it locks into
place.
Depending on the process task, insert
stirrer, whisk or kneading hook firmly into
the drive until it locks into position.
Note:
If using the kneading hook, first insert
dough deflector, then the kneading
hook (Fig. –4b).
Note shape and position of the parts.
Put the ingredients to be processed
into the bowl.
Press release button and move
multi-function arm to position 2.
Attach the cover.
Insert the mains plug.
Set the rotary switch to the desired
setting.
Our recommendation:
– Stirrer:
First mix at setting 1–2, then setting
3–7 as required
– Whisk:
setting 7, mix in at setting 1
– Kneading hook:
first stir in at setting 1, knead at setting 3
Adding more ingredients
Switch off the appliance with the rotary
switch.
Attach funnel (Fig. –7).
Top up ingredients through the funnel.
or
Remove lid.
Press release button and move
multi-function arm to position 1.
Add ingredients.
After using the appliance
Switch off the appliance with the rotary
switch.
Remove mains plug.
Remove lid.
Press release button and move multi-
function arm to position 1.
Take the tool out of the drive.
Remove the bowl.
Clean all parts, see “Cleaning and
servicing”.
Working with SensorControl
Your appliance features automatic
SensorControl.
When you are making whipped cream and
egg whites using the whisk, sensors monitor
the beating process and automatically switch
the appliance off when a defined consistency
is reached. The age, the temperature and the
contents of the cream affect the time required
and the result.
Note:
Before using the automatic SensorControl for
the first time, the food processor must have
been running for at least two minutes to ensure
that the sensors function correctly.
Fig.
Prepare the appliance as described
above.
Insert the whisk into the drive until
the whisk locks into position.
Adjust the whisk until it just touches
the bottom of the bowl.
see section “Important information
on using the whisk”.
Press release button and move
multi-function arm to position 2.
Attach the cover.
Attach funnel (Fig. –3).
Insert the mains plug.
8 Robert Bosch Hausgeräte GmbH

en
MUMXX_en-fi.book Seite 9 Montag, 8. September 2014 3:05 15
Note:
When the whisk has been inserted, the automatic SensorControl is initialised and
the symbols flash.
The appliance is ready to use when
all 3 symbols are lit evenly.
Put cream or egg whites in the bowl.
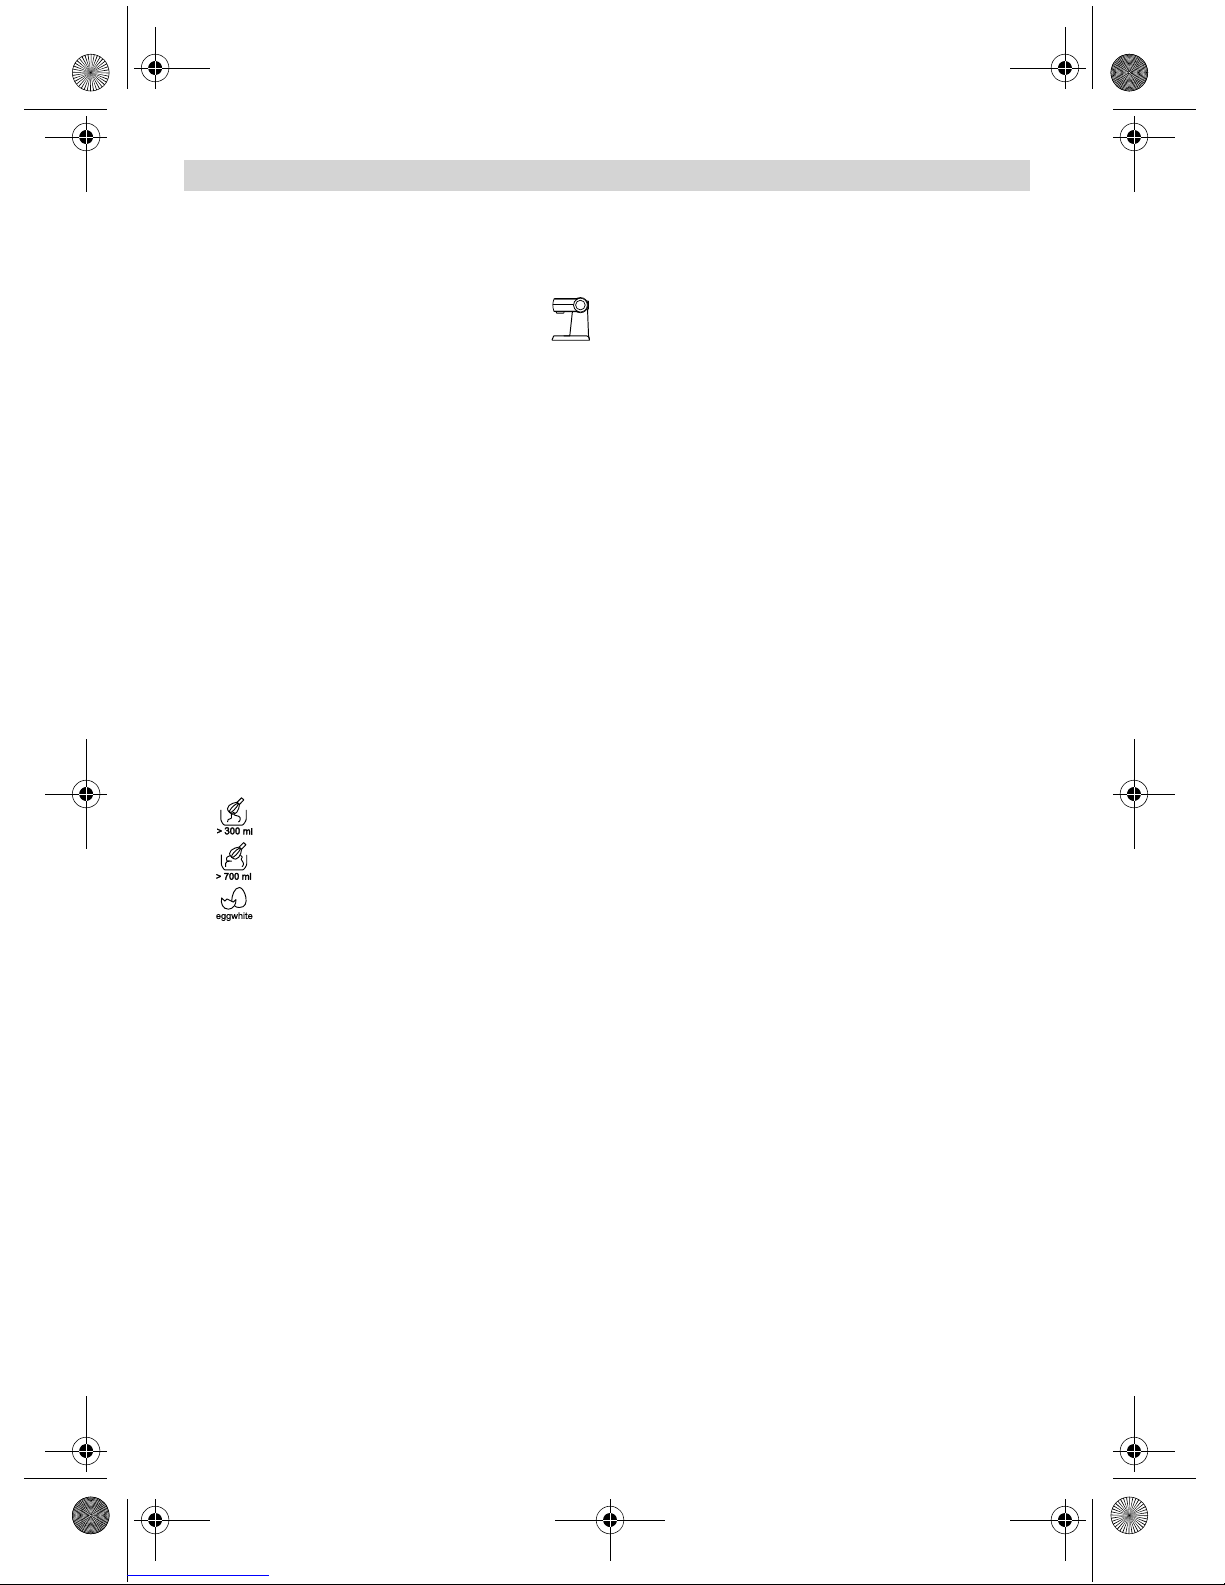
Processing quantities:
– Whipped cream, 300–1500 ml
Best results are obtained with fresh
cream at 6 °C.
– Egg whites: 2 to 12 x
Press the corresponding button
on the automatic SensorControl.
Whipped cream, initial quantity
300 to 700 ml
Whipped cream, initial quantity
700 to 1500 ml
Beaten egg white
The symbol of the selected automatic
SensorControl is lit, the other symbols
go out.
Correction if a wrong button was selected:
Press the relevant button.
Turn rotary switch to setting M/S and hold
for 2 seconds. When released, the rotary
switch stops in this position!
Note: If the rotary switch is not actuated
within 30 seconds, the selected
SensorControl is deactivated!
All 3 symbols are lit again.
Correction if a wrong button was selected:
Set rotary switch to 0/off; in doing
so you have to overcome a small
resistance.
Press the relevant button.
Set rotary knob to setting M/S.
The appliance starts operating.
As long as the process is running, the buttons
on the SensorControl are locked.
Note: While the appliance is running,
do not add more ingredients!
When the whipped cream/egg whites
have reached the optimum consistency,
the drive automatically switches off.
The rotary switch moves to the 0/off position.
The symbols are lit.
Important information:
– The automatic SensorControl cannot
produce optimum results unless the eggs
are fresh or the cream has been cooled
(approx. 6 °C).
– Cream which was previously frozen
can never be whipped.
– Cream which contains additives
or lactose-free cream will not produce
ideal results.
– Do not add sugar, flavours or other
additives until the automatic sequence
is complete. To do this, move the rotary
switch to setting 5.
– If the result is not the one required when
the appliance has automatically switched
off, move the rotary switch to setting 7
until the result is as expected.
Do not activate the automatic
SensorControl a second time!
– The automatic SensorControl can
be interrupted at any time (rotary switch
to 0/off; in doing so you have to overcome
a small resistance).
– After a maximum of 6 minutes the drive
will always switch off, even if the defined
result was not obtained.
The symbols flash.
See “Troubleshooting”.
– The automatic SensorControl has no
effect at settings 1–7 or when working
with the other drives.
– If a button on the SensorControl
is accidentally pressed while working
with other accessories, simply press
the button again. The symbol goes out.
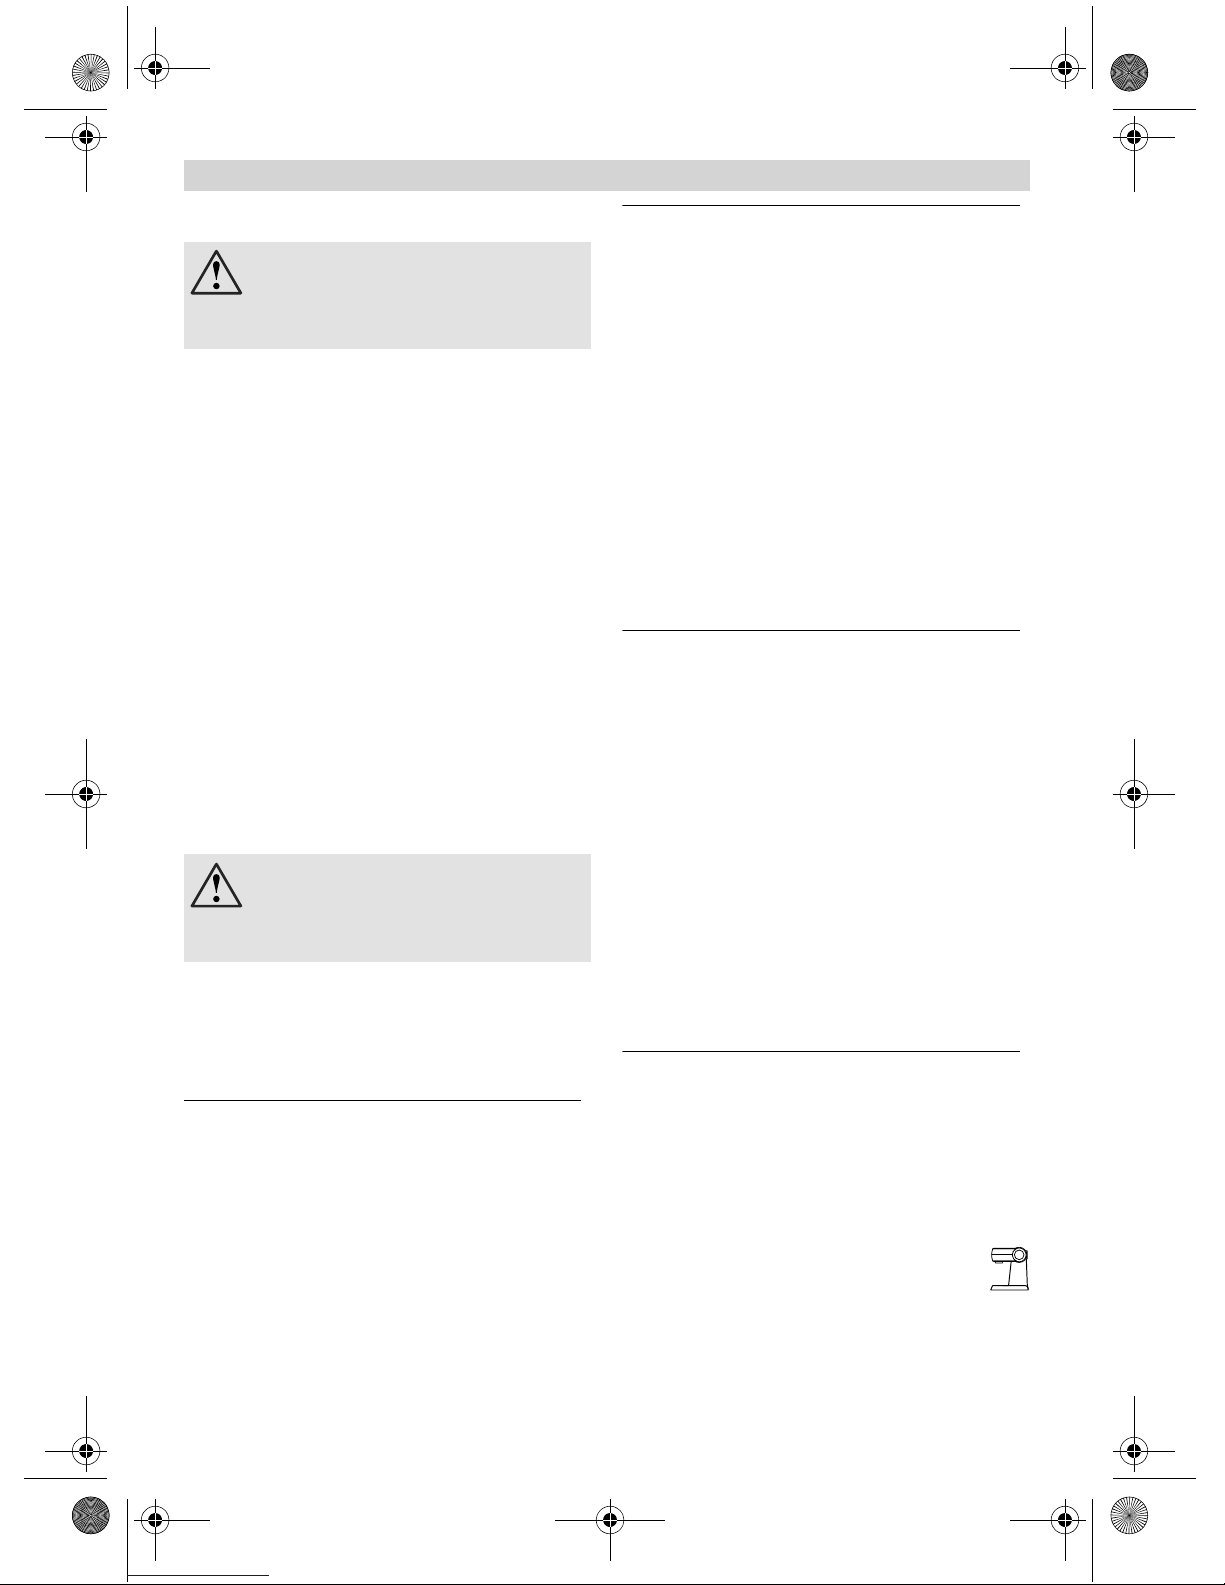
Blender
Risk of injury from sharp
blades/rotating drive!
Never place fingers in the attached
blender! Do not remove/attach the blender
until the drive is at a standstill!
Do not switch on the appliance until
the blender has been screwed in all the
way and the tool drive cover (7) has been
attached.
Risk of scalding!
If processing hot liquids, steam escapes
through the funnel in the lid.
Add a max. 0.75 litres of hot or frothing
liquid.
Robert Bosch Hausgeräte GmbH 9
en
MUMXX_en-fi.book Seite 10 Montag, 8. September 2014 3:05 15
Warning!
Operate the blender in the indicated
operating position only.
Operate the assembled blender only and with
the lid attached. Lid must be locked correctly.
Do not operate blender when empty.
Preparation Fig.
Warning!
Never assemble the blender without
the seal on the blender holder.
Putting the blender together:
Insert blender holder with seal into
the blender jug, ensuring that the line
is under the arrow.
Attach blender holder by rotating
it as far as possible to the right.
Working with the blender Fig.
Press release button and move
multi-function arm to position 5.
Cover unused drives with drive
covers.
Remove the blender drive cover.
Attach blender jug (mark on the handle
on mark on the base unit) and turn
all the way in an anti-clockwise direction.
Add ingredients.
– Maximum amount of liquid
ingredients = 1,75 litres;
– Maximum amount of frothing
or hot liquids = 0,75 litres;
– Optimum processing amount
of solid ingredients = 100 grams.
Attach the cover and turn anti-clockwise
all the way into the blender handle.
The cover must be locked in position.
Set the rotary switch to the desired
setting.
Adding more ingredients (Fig.
Switch off the appliance with the rotary
–8)
switch.
Remove the lid and add ingredients
or
remove the funnel and gradually add
solid ingredients through the refill
opening
or
pour liquid ingredients through the funnel.
Important information
When processing liquids/liquid ingredients,
slowly increase the speed of the appliance
in stages to prevent the food from shooting
out.
After using the appliance
Switch off the appliance with the rotary
switch. Wait until the blade has come
to a standstill.
Remove mains plug.
Rotate the blender in a clockwise
direction and remove.
Take the lid off the blender jug.
Rotate the lid in an anti-clockwise
direction and remove.
Clean all parts, see “Cleaning and
servicing”.
Tip: It is recommended to clean the blender
immediately after use.
Cleaning and servicing
Important information
The appliance requires no maintenance.
Thorough cleaning protects the appliance
from damage and keeps it functional.
Warning!
Do not use abrasive cleaning agents.
Surfaces may be damaged.
Cleaning the base unit
Risk of electric shock!
Never immerse the base unit in water
or place under running water.
Do not use a steam cleaner.
Remove mains plug.
Wipe the base unit and drive cover
with a damp cloth. If required, use
a little detergent.
Then dry the base unit.
Cleaning the bowl and tools
The bowl and tools are dishwasher-proof.
Do not wedge plastic parts in the dishwasher,
as they could be permanently deformed
during the washing process!
10 Robert Bosch Hausgeräte GmbH
en
MUMXX_en-fi.book Seite 11 Montag, 8. September 2014 3:05 15
Cleaning the blender
Risk of injury from sharp blades!
Do not touch blender blades with bare
hands. Clean them with a brush.
Warning!
Do not wash blender holder in the dish-
washer or leave it in water.
Clean blender holder under running
water.
Lid, funnel and blender jug can
be washed in the dishwasher.
Note:
Lid can be disassembled for cleaning.
Fig.
Pull funnel upwards out of the lid.
Press insert downwards out of the lid.
Tip: After processing liquids, it is often sufficient to clean the blender without removing
it from the appliance. Pour a little water and
washing-up liquid into the attached blender.
Switch on the blender for several seconds
(setting M). Pour out the water and rinse
out the blender with clear water.
Troubleshooting
Risk of injury!
Before eliminating a fault, pull out the
mains plug.
The multi-function arm must be engaged
in each operating position.
Initially try to eliminate the problem which
has occurred with the help of the following
information.
Fault
Appliance does not start.
Remedial action
Check the power supply.
Check the mains plug.
Check multi-function arm.
Correct position? Engaged?
Screw on bowl all the way.
Attach drive cover to unused drives.
The safety lock is active.
Switch appliance to 0/off and then back
to the required setting.
Fault
Appliance switches off during use.
The overload protection feature has been
activated. Too much food was processed
at one time.
Remedial action
Switch off the appliance and pull
out the mains plug.
Leave the appliance to cool down
for 15 minutes in order to deactivate
the overload protection.
Reduce processing quantity.
Do not exceed permitted maximum
quantities (see “Application examples”).
Switch on appliance again.
If the motor still does not start, leave
the appliance to cool down for a longer
period (at least 1 hour).
Fault
The symbols on the automatic SensorControl
flash.
The automatic SensorControl could not
produce the defined result.
The appliance automatically switches off,
the rotary switch stops at 0/off.
Remedial action
Press any button on the automatic
SensorControl. The automatic system
is re-initialised. The appliance is ready
to use when all 3 symbols are lit evenly.
Move the rotary switch briefly to setting 7
until the result is as expected.
Check beforehand whether the cream
meets requirements (quantity, condition,
freshness, temperature) and the whisk
has been set to the correct height.
Fault
While the drive was running, the release
button was inadvertently pressed.
The multi-function arm moves up.
The drive switches off, but does not stop
in the tool change position.
Remedial action
Set the rotary switch to 0/off.
Move multi-function arm
to position 2.
Switch on appliance (setting 1).
Switch off appliance again.
Tool stops in tool change position.
Robert Bosch Hausgeräte GmbH 11
en
MUMXX_en-fi.book Seite 12 Montag, 8. September 2014 3:05 15
Fault
Blender does not start working or stops
during use, the drive is “humming”.
Blade is blocked.
Remedial action
Switch off the appliance and pull
out the mains plug.
Detach the blender and remove
the obstruction.
Re-attach the blender.
Switch on the appliance.
Important information
If the fault cannot be eliminated, please
contact customer service.
Application examples
Whipped cream
200 g–1500 g (whip up to 300 g
without SensorControl)
Follow the instructions in section
“Working with SensorControl”.
Follow instructions in the section
“Important information for using
the whisk” for adjusting the appliance
to the amounts to be processed!
Egg white
2 to 12 egg whites
Follow the instructions in section
“Working with SensorControl”.
Follow instructions in the section
“Important information for using
the whisk” for adjusting the appliance
to the amounts to be processed!
Sponge mixture
Basic recipe
3 eggs
3–4 tbs. hot water
150 g sugar
1 packet of vanilla sugar
150 g flour
50 g cornflour
Baking powder if required
Beat the ingredients (except flour and
cornflour) with the whisk for approx.
4–6 minutes at setting 7 until frothy.
Rotate switch to setting 1 and spoon
in the sifted flour and cornflour within
approx. ½ to 1 minute.
Maximum quantity: 2 x basic recipe
Cake mixture
Basic recipe
3–4 eggs
200–250 g sugar
1 pinch of salt
1 packet of vanilla sugar or peel from
½ lemon
200–250 g butter or margarine
(room temperature)
500 g flour
1 packet of baking powder
150 ml of milk
Mix all ingredients with the stirrer
for approx. ½ minute at setting 1, then
for approx. 3–4 minutes at setting 5.
Maximum quantity: 2½ x basic recipe
Short pastry
Basic recipe
125 g butter (room temperature)
100–125 g sugar
1 egg
1 pinch of salt
A little lemon peel or vanilla sugar
250 g flour
Baking powder if required
Mix all ingredients with the stirrer
for approx. ½ minute at setting 1, then
for approx. 2–3 minutes at setting 5.
From 500 g flour:
Knead the ingredients with the kneading
hook for approx. ½ minute at setting 1,
then for approx. 3–4 minutes at setting 3.
Maximum quantity: 4 x basic recipe
Yeast dough
Basic recipe
500 g flour
1 egg
80 g fat (room temperature)
80 g sugar
200–250 ml lukewarm milk
25 g fresh yeast or 1 packet of dried yeast
Peel of ½ lemon
1 pinch of salt
Mix all ingredients with the kneading hook
for approx. ½ minute at setting 1, then
for approx. 3–6 minutes at setting 3.
Maximum quantity: 3 x basic recipe
12 Robert Bosch Hausgeräte GmbH
en
MUMXX_en-fi.book Seite 13 Montag, 8. September 2014 3:05 15
Pasta dough
Basic recipe
500 g flour
250 g eggs (approx. 5x)
2–3 tbs. (20–30 g) cold water as required
Process all ingredients for approx.
3–5 minutes at setting 3 until a dough
forms.
Maximum quantity: 1,5 x basic recipe
Important information
When processing this dough with
the original accessory for this appliance,
use the accessory MUZ8NV1/2/3 only.
This dough is not suitable for the accessory MUZ8NS1. Use a special dough
for noodle presses.
Wholemeal mixed
wheat bread
Basic recipe
325 g freshly ground wholemeal flour
325 g white flour Type 405
100 g rye flour Type 630
75 g liquid fermented dough
½ tbs. caraway
½ tbs. bread seasoning
½ tbs salt
1½ packets of dry yeast
450–500 ml warm water
Process all ingredients into a dough
for approx. ½ minute at setting 1,
then for approx. 3 minutes at setting 3.
Leave the dough to prove until it is double
the size and knead again for approx.
1 min. at setting 3.
Place dough in a greased loaf tin and
leave to prove again, then bake.
Tip: Instead of freshly ground wholemeal
flour, freshly ground spelt flour can be used.
Maximum quantity: 2 x basic recipe
Mayonnaise
Note: Mayonnaise can be prepared
in the blender with whole eggs
(egg white and egg yolk) only.
Basic recipe:
1 egg
1 heaped tsp. mustard
1 tbs. vinegar or lemon juice
1 pinch of salt
1 pinch of sugar
200–250 ml oil
Ingredients must be at the same
temperature.
Mix ingredients (except oil) for several
seconds at setting 3.
Switch the appliance to the highest
setting, pour the oil through the funnel
and blend until the mayonnaise emulsifies.
Maximum quantity: Double the quantity
of the basic recipe.
Hot chocolate
50–75 g cooled cooking chocolate
½ l hot milk
Whipped cream and grated chocolate
as required
Cut cooking chocolate into pieces
(approx. 1 cm) and chop up completely
in the blender on setting 7.
Switch off appliance and add the milk
through the funnel. Mix for approx.
30 seconds at setting 7.
Pour the hot chocolate into glasses
and serve with whipped cream and
grated chocolate as required.
Banana ice shake
2–3 bananas
2–3 heaped tbs. vanilla or lemon
ice cream
2 packet of vanilla sugar
½ l milk
Cut bananas into pieces and chop
up in the blender for 5–10 seconds.
When the appliance has come to stand-
still, add milk and ingredients and blend
for approx. 1 minute until the mixture
is frothy.
Fruit sundae
250 g fruit (e.g. strawberries,
banana, orange, apple)
50–100 g sugar
500 ml cold water
Ice as required
Peel fruit and cut into pieces
Put all ingredients (except ice)
in the blender and blend on setting 7
for approx. 1 minute.
Serve with the ice cream
Robert Bosch Hausgeräte GmbH 13
en
MUMXX_en-fi.book Seite 14 Montag, 8. September 2014 3:05 15
Sportsman’s cocktail
2–3 oranges
1 lemon
½–1 tbs. sugar or honey
¼ l apple juice
¼ l mineral water and ice cube if required
Peel oranges and lemon, cut into pieces.
Blend ingredients (except apple juice and
mineral water) for approx. 30 seconds
on setting 7.
Add the apple juice and mineral water
Blend briefly until the drink is frothy.
Pour the cocktail into glasses and serve
as required with ice cubes
Red fruit pudding
400 g fruit (pitted sour cherries,
raspberries, black/red currants,
strawberries, blackberries)
100 ml sour cherry juice
100 ml red wine
80 g sugar
1 packet of vanilla sugar
2 tbs. lemon juice
1 pinch of cloves (ground)
1 pinch of cinnamon (ground)
8 gelatine leaves
Soak the gelatine in cold water
for approx. 10 minutes
Bring all the ingredients
(except the gelatine) to the boil
Dry the gelatine and melt in the micro-
wave, but do not cook
Blend hot fruit and gelatine on setting 5
for approx. 1 minute.
Pour the red fruit pudding into small bowls
rinsed out with cold water and refrigerate
Tip: Red fruit pudding tastes good with
whipped cream or vanilla sauce
Sports drink
200 g honey (from refrigerator)
5 g cinnamon
200 g milk (from refrigerator)
Put honey and cinnamon in the blender
and blend at setting M.
After 5 seconds add the milk and blend
for 3 seconds.
Honey bread spread
50 g butter (from refrigerator)
200 g honey (from refrigerator)
Cut butter into small pieces and
put into the blender.
Add honey and blend for 8 seconds
at setting M.
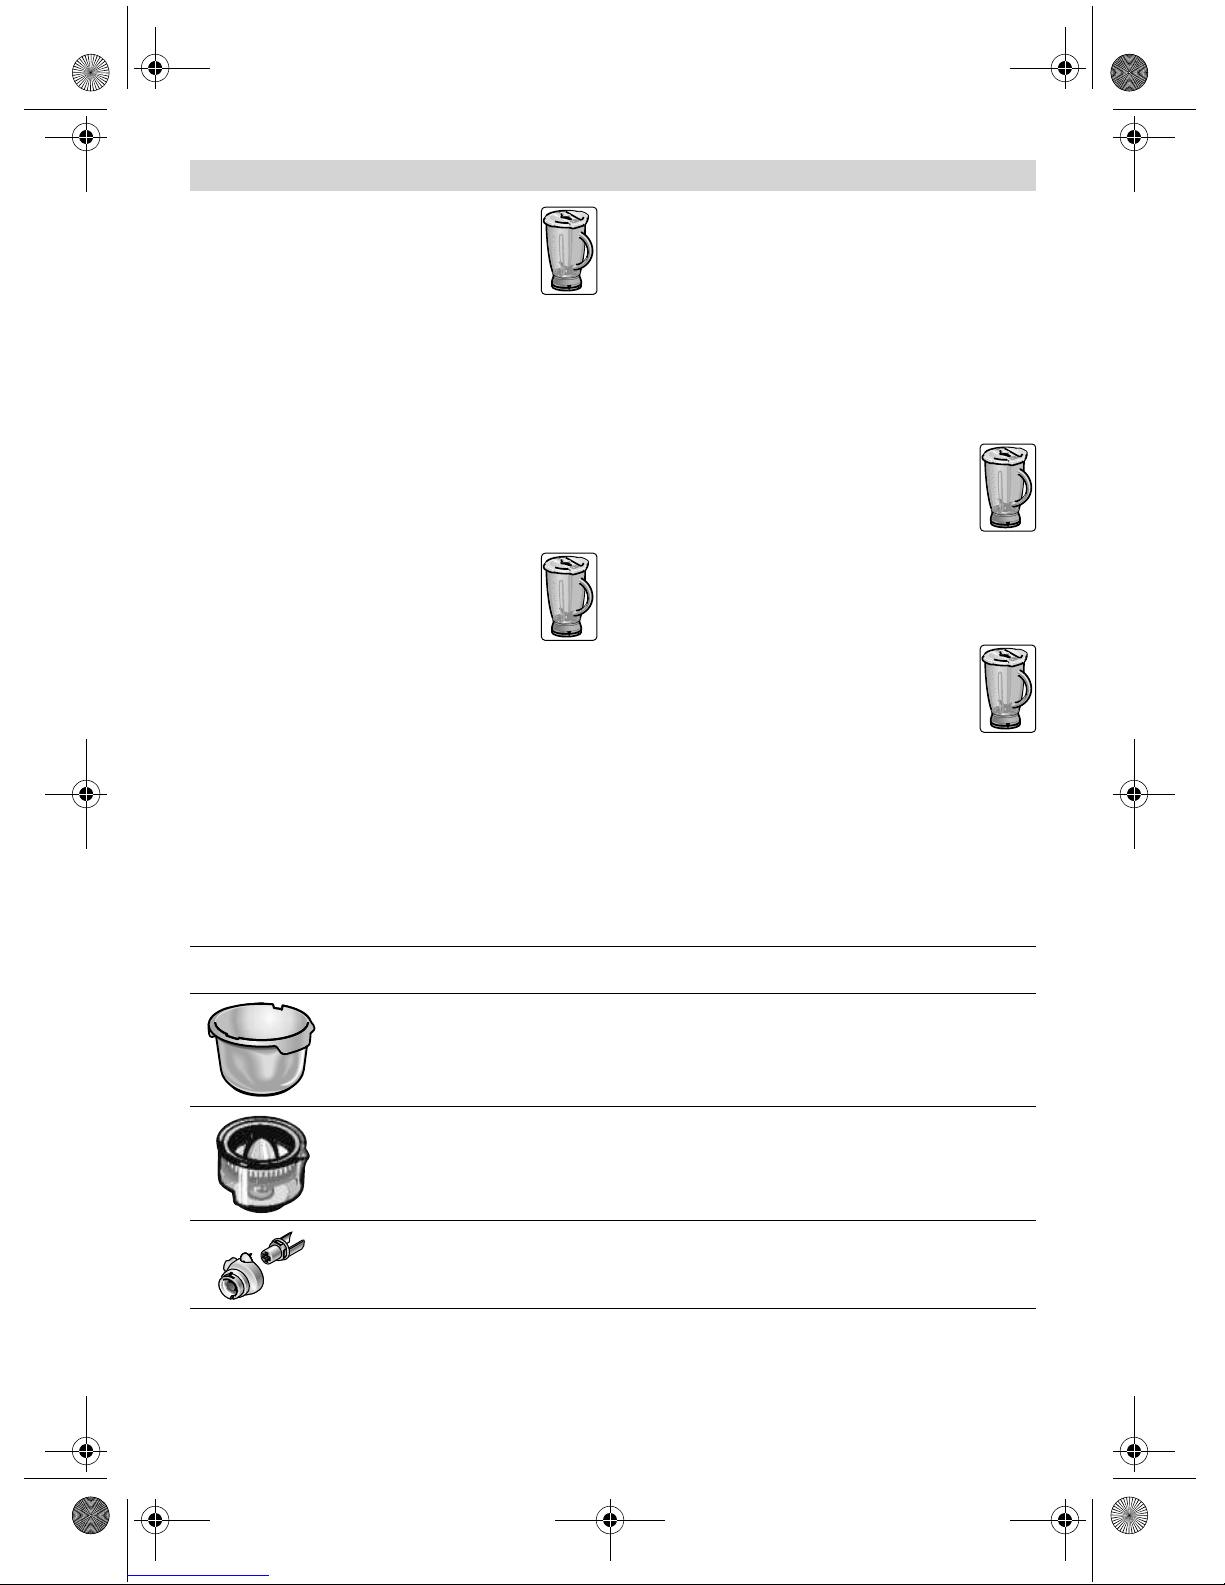
Optional accessories
MUZ8ER3
Stainless steel
stirring bowl
MUZ8ZP1
Citrus press
MUZ8AD1
Adapter
14 Robert Bosch Hausgeräte GmbH
Up to 3 kg of yeast dough or 3.5 kg of sponge
mixture can be processed in the bowl.
For squeezing oranges, lemons and grapefruits.
For attaching the mincer MUZ8FW1 and the pasta
attachments MUZ8NV1/NV2 and NV3.
en
MUMXX_en-fi.book Seite 15 Montag, 8. September 2014 3:05 15
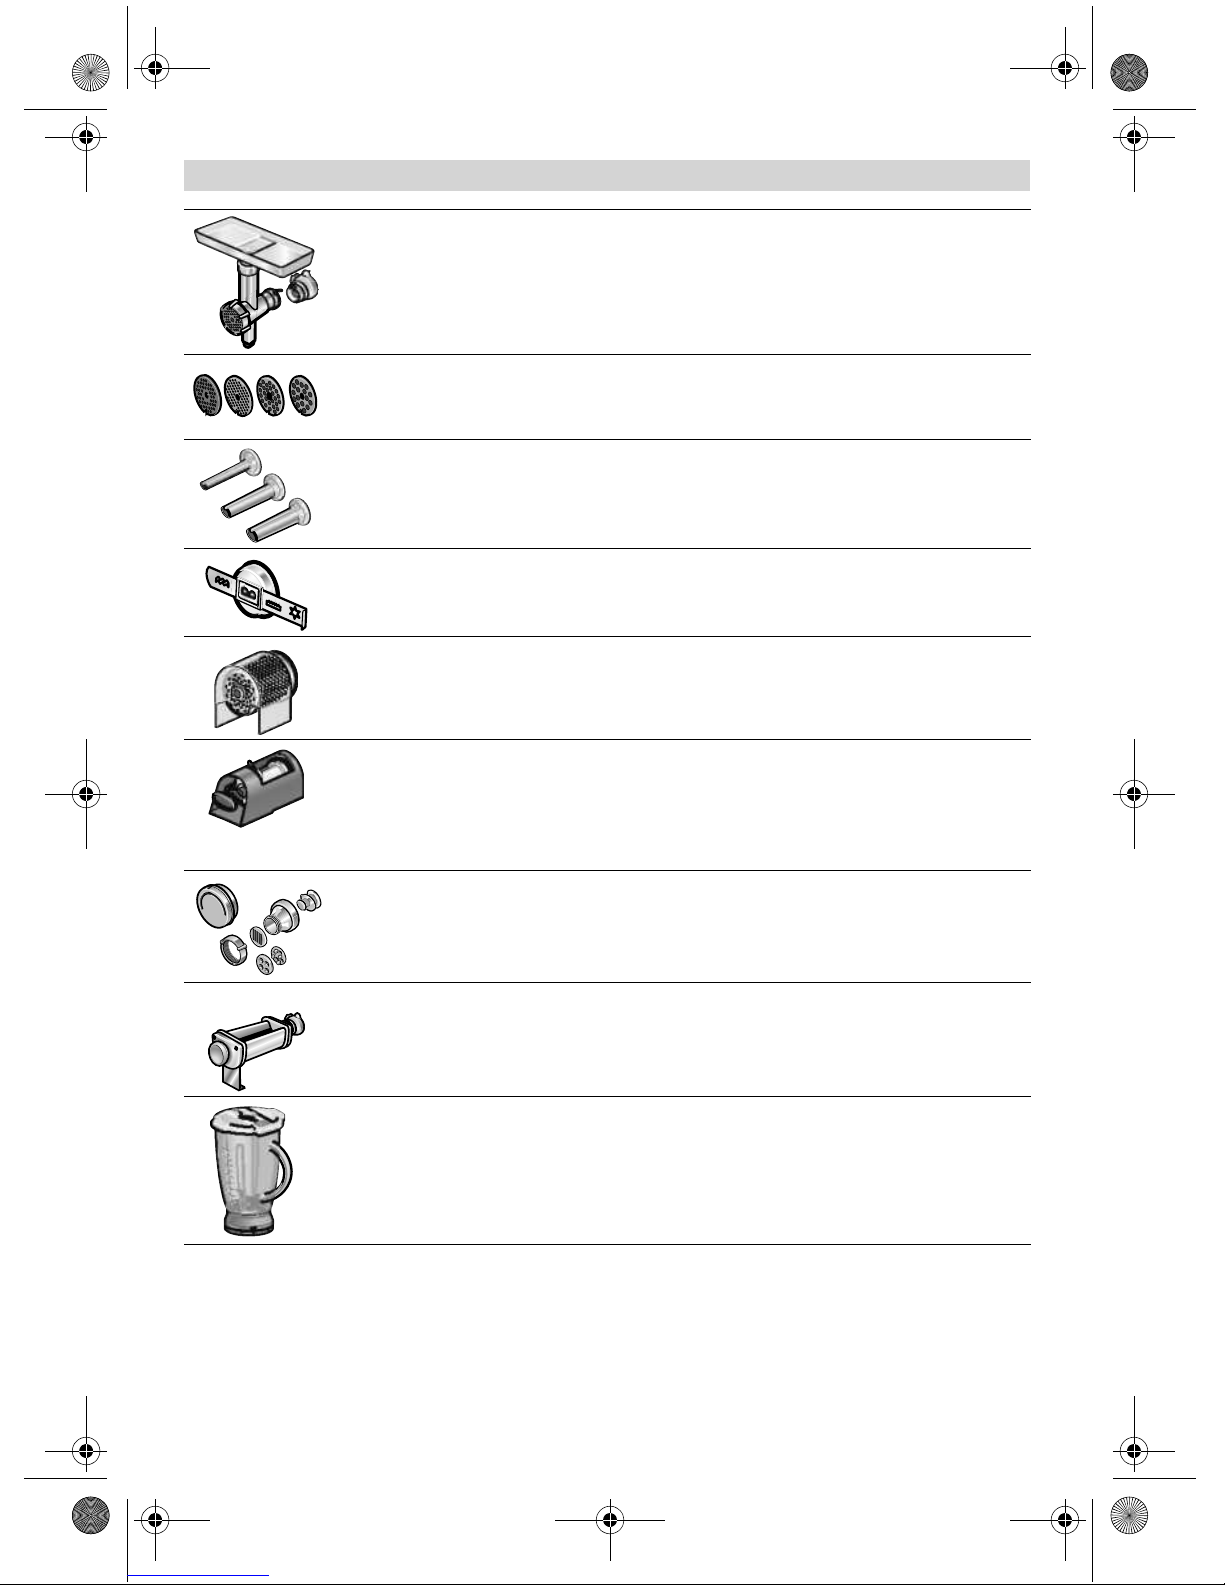
MUZ8FW1
Mincer
MUZ8LS4/5
Perforated disc sets
MUZ8WS2
Sausage attachment
MUZ8SV1
Viennese whirl
attachment
MUZ8RV1
Grater attachment
MUZ8FV1
Juicer attachment
For cutting fresh meat for steak tartare or meat loaf.
For the mincer MUZ8FW1.
Fine disc for pasties and spreads, coarse disc
for sausages and bacon.
For the mincer MUZ8FW1.
For filling artificial or natural casings with sausage
meat.
For the mincer MUZ8FW1.
With metal template for 4 different pastry moulds.
For the mincer MUZ8FW1.
For grating nuts, almonds, chocolate and dried
bread rolls.
For the mincer MUZ8FW1.
For pressing soft fruit, except raspberries, tomatoes
and rose hips, to a pulp.
At the same time e.g. currants are automatically
stemmed and pitted.
MUZ8NS1
Noodle attachment
For the mincer MUZ8FW1.
For making macaroni, rigatoni, vermicelli, ribbon
noodles and dough sheets, e.g. for lasagne
or Swabian ravioli.
MUZ8NV1/2/3
Noodle attachment
MUZ8MX2
“ThermoSafe”
Blender (glass)
Robert Bosch Hausgeräte GmbH 15
For making ribbon noodles and dough sheets,
e.g. for lasagne or Swabian ravioli.
For mixing liquid or semi-solid food, for cutting/
mincing raw fruit and vegetables and for puréeing
food, e.g. hot soups.
en
MUMXX_en-fi.book Seite 16 Montag, 8. September 2014 3:05 15
MUZXL...
MUZXLVL1
Continuous-feed
shredder
MUZ8PS1
Chipper disc
MUZ8RS1
Grating disc coarse
MUZ8KP1
Potato fritter disc
MUZ8AG1
Asiatic vegetables
disc
For slicing cucumbers, cabbage, kohlrabi, radish;
for shredding carrots, apples and celery, red
cabbage, cheese and nuts; for grating hard cheese,
chocolate and nuts.
Set MUZXL... contains Profi Supercut reversible
disc – coarse/fine, Asiatic vegetables disc, reversible
shredding disc – coarse/fine, grating disc –
medium-fine.
Set MUZXLVL1 contains reversible slicing disc –
coarse/fine, reversible shredding disc – coarse/fine,
grating disc – medium-fine, Asiatic vegetables disc,
potato pancake disc.
For the continuous-feed shredder MUZXLVL1.
For slicing raw potatoes for chips.
For the continuous-feed shredder MUZXLVL1.
For grating raw potatoes, e.g. for potato pancakes
or dumplings.
For the continuous-feed shredder MUZXLVL1.
For grating raw potatoes for rostis and potato fritters,
for cutting fruit and vegetables into thick slices.
Slices fruit and vegetables into fine strips for Asian
vegetable dishes.
MUZ8KS1
for grating hard cheese (e.g. Parmesan).
Gratering disc,
fine
MUZ8MM1
Multi-mixer
For chopping herbs, vegetables, apples and meat,
for shredding carrots, radishes and cheese,
for grating nuts and cooled chocolate.
MUZ8GM1
Grain mill
For grinding all types of grain (except maize),
poppy seeds, linseeds, sesame, buckwheat, etc.
Even herbs, spices and coffee can be ground.
If an accessory is not included in the product package, it can be purchased via the trade
or from customer service.
16 Robert Bosch Hausgeräte GmbH

en
Subject to alterations.
MUMXX_en-fi.book Seite 17 Montag, 8. September 2014 3:05 15
Disposal
This appliance is identified according
to the European guideline 2012/19/EU
on waste electrical and electronic
equipment – WEEE.
The guideline specifies the framework
for an EU-wide valid return and re-use
of old appliances.
Please ask your dealer or inquire at your local
authority about current means of disposal.
Warranty conditions
The guarantee conditions for this appliance are
as defined by our representative in the country
in which it is sold.
Details regarding these conditions can be
obtained from the dealer from whom the
appliance was purchased.
The bill of sale or receipt must be produced
when making any claim under the terms
of this guarantee.
Robert Bosch Hausgeräte GmbH 17

fr
MUMXX_en-fi.book Seite 18 Montag, 8. September 2014 3:05 15
Vous venez d’acheter ce nouvel appareil
BOSCH et nous vous en félicitons
cordialement.
Vous venez ainsi d’opter pour un appareil
électroménager moderne et de haute
qualité.
Sur notre site Web, vous trouverez des
informations avancées sur nos produits.
Sommaire
Pour votre sécurité . . . . . . . . . . . . . . . . 18
Vue d’ensemble . . . . . . . . . . . . . . . . . . 21
Positions de travail . . . . . . . . . . . . . . . . 22
Utilisation . . . . . . . . . . . . . . . . . . . . . . . . 22
Nettoyage et entretien . . . . . . . . . . . . . . 27
Dérangements et remèdes . . . . . . . . . . 27
Exemples d’utilisation . . . . . . . . . . . . . . 28
Accessoires en option . . . . . . . . . . . . . . 31
Mise au rebut . . . . . . . . . . . . . . . . . . . . 34
Conditions de garantie . . . . . . . . . . . . . 34
Pour votre sécurité
Veuillez lire la présente notice attentivement avant utilisation pour
connaître les consignes de sécurité et d’utilisation importantes visant
cet appareil.
Le non-respect des instructions permettant d’utiliser correctement
l’appareil dégage le fabricant de toute responsabilité envers les
dommages qui pourraient en résulter.
Cet appareil est destiné à la préparation de quantités habituellement
nécessaires dans un foyer, ou dans des applications non professionnelles similaires à celles d’un foyer. Les applications similaires à celles
d’un foyer comprennent par exemple l’utilisation dans les coins-cuisine
du personnel de magasins, de bureaux, d’entreprises agricoles
et autres entreprises commerciales et industrielles, ainsi que l’utilisation par les clients de pensions, petits hôtels et immeubles d’habitation
similaire. Utilisez cet appareil uniquement pour des quantités de préparations culinaires courantes et pour des durées de service normales. Ne dépassez pas les quantités maximales admissibles (voir
« Exemples d’utilisation ») !
Cet appareil convient pour mélanger, pétrir, fouetter et broyer des
produits alimentaires. Il ne doit pas servir à transformer d’autres objets
ou substances. D’autres applications sont possible à condition
d’utiliser les accessoires homologués par le fabricant.
N’utilisez l’appareil qu’avec des accessoires d’origine.
Lorsque vous utilisez les accessoires, respectez les notices
d’utilisation ci-jointes. Rangez soigneusement la notice d’instructions.
Si vous remettez l’appareil à un tiers, joignez sa notice d’utilisation.
, Consignes générales de sécurité
Risque d’électrocution
L’utilisation de l’appareil par les enfants est interdite.
Des enfants, éloignez l’appareil et son cordon de raccordement.
18 Robert Bosch Hausgeräte GmbH

fr
MUMXX_en-fi.book Seite 19 Montag, 8. September 2014 3:05 15
Les personnes souffrant d’un handicap physique, sensoriel ou mental
ou ne détenant pas l’expérience et / ou les connaissances nécessaires
pourront utiliser les appareils à condition de le faire sous surveillance,
ou que son utilisation sûre leur ait été enseignée et qu’elles aient
compris les dangers qui en émanent.
Ne permettez jamais aux enfants de jouer avec l’appareil.
Ne branchez et faites marcher l’appareil que conformément aux
indications figurant sur la plaque signalétique. N’utilisez cet appareil
que dans des locaux fermés. N’utilisez l’appareil que si son cordon
d’alimentation et l’appareil lui-même ne présentent aucun dommage.
Avant de remplacer des accessoires ou des pièces supplémentaires
déplacées en service, il faut éteindre l'appareil et le débrancher
du secteur. Débranchez toujours l’appareil du secteur s’il doit se trouver sans surveillance, avant de l’assembler, de le démonter ou de
le nettoyer.
Veillez à ce que le cordon de branchement ne frotte pas sur des arêtes
vives ou des surfaces très chaudes. Afin d’écarter tout danger, seul
le fabricant ou son service après-vente ou une personne détenant
une qualification équivalente est habilité à remplacer un cordon
de branchement endommagé. Les réparations sur l’appareil sont
réservées à notre service après-vente.
, Consignes de sécurité pour cet appareil
Risque de blessure
Risque d’électrocution !
Ne branchez la fiche mâle dans la prise de courant qu’une fois tous
les préparatifs sur l’appareil achevés.
Ne plongez jamais l’appareil de base dans l’eau, ne le maintenez
jamais sous l’eau du robinet. Ne le nettoyez jamais avec un nettoyeur
à vapeur. Ne déplacez pas le bras multifonction pendant que l’appareil
est allumé. Attendez jusqu’à l’arrêt complet de l’entraînement.
Ne changez l’accessoire qu’après que le mécanisme d’entraînement
se soit immobilisé ; il continue de tourner quelques instants après
avoir éteint l’appareil. Allumez et éteignez l’appareil uniquement
par le sélecteur rotatif. Si l’appareil ne sert pas, débranchez sa fiche
mâle de la prise de courant.
Avant de supprimer tout dérangement, débranchez la fiche mâle
de la prise à courant.
Risque de blessures avec les accessoires en rotation !
Pendant le fonctionnement, n’introduisez jamais les doigts dans le bol
mélangeur. Utilisez-le uniquement avec le couvercle (12) en place !
Ne touchez pas les pièces en rotation.
Robert Bosch Hausgeräte GmbH 19
fr
MUMXX_en-fi.book Seite 20 Montag, 8. September 2014 3:05 15
Ne changez l’accessoire qu’après que l’entraînement se soit immobilisé ; en effet, l’entraînement continue de tourner brièvement puis
s’immobilise sur la position de changement d’accessoire / « Easy
Fill ». Ne déplacez le bras multifonctions qu’après l’immobilisation
de l’outil.
N’allumez l’appareil qu’après avoir tourné le mixeur à fond jusqu’à
la butée et mis en place le couvercle (7) protégeant l’entraînement
d’accessoire. Recouvrez les entraînements qui ne servent pas avec
des couvercles de protection.
Risque de blessures avec les lames tranchantes !
Ne touchez pas les lames du mixeur avec les mains nues.
Pour les nettoyer, utilisez une brosse.
Risque de blessures avec les lames tranchantes / l’entraînement
en rotation !
N’introduisez jamais les doigts dans le mixeur en place !
Ne retirez / posez le mixeur qu’après avoir arrêté l’entraînement !
N’utilisez le mixeur qu’une fois assemblé et avec son couvercle
en place.
Risque de brûlure !
Lorsque vous traitez des aliments mélangés très chauds, de la vapeur
traverse l’entonnoir ménagé dans le couvercle.
Versez au maximum 0,75 litre de liquide très chaud ou moussant.
Important !
N’utilisez l’appareil qu’avec des accessoires d’origine.
Lorsque vous utilisez les accessoires, respectez les notices
d’utilisation ci-jointes.
Ne montez et n’utilisez qu’un outil ou accessoire à la fois.
, Explication des symboles sur l’appareil et les accessoires
Respectez les instructions figurant dans la notice
d’utilisation.
Prudence ! Lames rotatives.
Prudence ! Accessoires rotatifs.
N’introduisez pas les doigts dans l’orifice d’ajout.
20 Robert Bosch Hausgeräte GmbH

fr
MUMXX_en-fi.book Seite 21 Montag, 8. September 2014 3:05 15
, Systèmes de sécurité
Sécurité anti-enclenchement
Voir le tableau « Vue d’ensemble des
positions de travail »
L’appareil refuse de s’allumer en position 1.
L’appareil se met en marche sur les positions
2 à 4 uniquement :
– après avoir mis le bol en place et l’avoir
tourné jusqu’à la butée ou
– après avoir monté le couvercle (7) proté-
geant l’entraînement des accessoires.
Sur la position 5, il n’est possible d’allumer
l’appareil que si le couvercle (7) protégeant
l’entraînement a été mis en place.
Il faut visser le mixeur à fond jusqu’à la butée.
L’appareil se met en marche en position 6
uniquement lorsque le hachoir à viande avec
adaptateur est correctement placé (voir la
notice d’utilisation du hachoir à viande).
Sécurité anti-réenclenchement
En cas de coupure de courant, l’appareil
reste en position allumée mais le moteur
ne redémarre pas une fois le courant revenu.
Pour l’utiliser à nouveau, amenez le sélecteur rotatif (3) sur 0/off), puis enclenchez
le niveau voulu.
Sécurité anti-surcharge
Si le moteur s’éteint tout seul pendant l’utilisation, ceci signifie que la protection antisurcharge s’est activée. Causes possibles :
– Trop fortes quantités d’aliments,
– Trop longue durée d’utilisation.
Pour savoir comment procéder si le système
de sécurité s’active, voir « Dérangements
et remèdes ».
Vue d’ensemble
La notice d’utilisation vaut pour différents
modèles (voir également la vue d’ensemble
des modèles, Figure ).
Veuillez déplier
les volets illustrés. Figure
Appareil de base
1 Touche de déverrouillage
2 Bras multifonctions
« Easy Armlift » – permet d’utiliser
le bras multifonctions de manière
simple et en économisant des forces
(voir « Positions de travail »).
3 Interrupteur rotatif
Après l’extinction (position 0/off),
l’appareil se rend automatiquement sur
la position optimale pour changer les
accessoires (position de changement
d’accessoires). Sur cette position, il est
plus facile de verser des ingrédients dans
le bol vu qu’ils ne peuvent pas rester sur
les outils (position « Easy fill »).
0/off = Arrêt
M/S = M représente la marche momentanée à la plus haute vitesse ; il faut retenir
le sélecteur pendant la durée de mixtion
voulue. S représente le mode
SensorControl automatique.
Lorsque le SensorControl (4) a été activé,
l’appareil s’éteint automatiquement une
fois atteint le résultat optimal.
Positions 1–7, vitesse de travail :
1 = vitesse basse – marche lente,
7 = vitesse élevée – marche rapide.
4 Touche de commande du mode
SensorControl automatique
Voir la section « Travailler avec le
SensorControl ».
5 Couvercle protégeant le mécanisme
d’entraînement
Pour retirer le couvercle protégeant
l’entraînement, appuyez sur la zone
avant puis retirez le couvercle.
6 Entraînement pour
– accessoire râpeur / éminceur *,
– presse-agrumes * et
– moulin à céréales *.
Lorsque vous n’utilisez pas l’entraînement, protégez-le avec son couvercle.
7 Entraînement pour les accessoires
(fouet mélangeur, fouet batteur, crochet
pétrisseur) et hachoir à viande *
8 Couvercle protégeant le mécanisme
d’entraînement
9 Entraînement du bol mixeur
Lorsque vous n’utilisez pas l’entraînement, protégez-le avec son couvercle.
10 Couvercle protégeant l’entraînement
du mixeur
11 Rangement du cordon
Compartiment de rangement du cordon
ou enroulement automatique du câble
(selon le modèle)
Robert Bosch Hausgeräte GmbH 21
fr
MUMXX_en-fi.book Seite 22 Montag, 8. September 2014 3:05 15
Bol mélangeur avec accessoires
12 Bol mélangeur en acier inoxydable
13 Couvercle
14 Entonnoir de remplissage
Accessoires
15 Fouet mixeur « absolu »
16 Fouet batteur entièrement métallique
17 Crochet à pétrir « haute performance »
avec déflecteur de pâte
Mixeur *
18 Support du mixeur avec lame
19 Verseuse du mixer (verre)
20 Couvercle avec orifice d’ajout
21 Entonnoir
* Si un accessoire n’a pas été livré
d’origine, vous pouvez vous le procurer
dans le commerce et auprès du service
après-vente.
Positions de travail
Attention !
Ne faites fonctionner l’appareil que si les
accessoires se trouvent sur l’entraînement
correct, sur la position correcte et en position
de travail.
Le bras multifonction doit avoir encranté
dans chaque position de travail.
Vue d’ensemble des positions
de travail
Position Entraî-
nement
1*–
26
35 3–7
45 3
58 5
66 5
* Mise en place / retrait du fouet batteur, fouet
mixeur et crochet à pétrir ; ajout de grandes
quantités à traiter.
Outils /
Acces-
soires
Vitesse
de travail
1
–5
1–7
1–3
–5
–7
–7
Utilisation
Remarque :
Le bras multifonctions est doté de la fonction
« Easy Armlift »
lisation simple du bras multifonctions
et économiseuse de force.
qui facilite une uti-
Réglage de la position
de travail Figure
Appuyez sur la touche de déverrouillage
et déplacez le bras multifonctions.
Aidez le mouvement d’une main.
Déplacez le bras multifonctions jusqu’à
ce qu’il encrante sur la position
souhaitée.
22 Robert Bosch Hausgeräte GmbH
Ne branchez la fiche mâle dans la prise
de courant qu’une fois tous les préparatifs
sur l’appareil achevés.
Attention !
Ne faites fonctionner l’appareil qu’avec les
accessoires / outils en position de travail.
N’exposez pas l’appareil et ses accessoires
à des sources de chaleur. Les pièces ne vont
pas au four à micro-ondes.
Avant de les utiliser pour la première fois,
Risque de blessures !
nettoyez soigneusement l’appareil et ses
accessoires, voir le chapitre intitulé
« Nettoyage et entretien ».
fr
MUMXX_en-fi.book Seite 23 Montag, 8. September 2014 3:05 15
Préparatifs
Posez l’appareil de base sur une surface
lisse et propre.
Préparer le cordon (Figure ).
a) Appareils avec compartiment de rangement du cordon :
Sortez la longueur de cordon voulue.
b) Appareils avec enroulement automatique du cordon :
Tirez continuellement le cordon jusqu’à
sortir la longueur voulue (1,00 mètre
maxi.) puis relâchez-le lentement.
Le cordon s’immobilise sur la longueur
voulue. Pour réduire la longueur du
cordon : Tirez légèrement sur le cordon,
puis laissez-en la longueur voulue
s’enrouler. Ensuite, tirez à nouveau
légèrement sur le cordon, puis relâchezle lentement. Le cordon s’immobilise sur
la longueur voulue.
Attention !
Ne tordez pas le cordon, lorsque vous
le rentrez. Sur les modèles à enrouleur
automatique, ne rentrez pas le cordon
à la main. Si le cordon se coince en route,
sortez-en la longueur maximum puis laissezle à nouveau s’enrouler.
Bol et accessoires
Risque de blessure avec
les pièces en rotation !
Pendant le fonctionnement, n’introduisez
jamais les doigts dans le bol mélangeur.
Utilisez-le uniquement avec le couvercle
(12) en place !
Ne touchez pas les pièces en rotation.
Changez les accessoires uniquement
lorsque l’appareil est au repos – une
fois l’appareil éteint, le mécanisme
d’entraînement continue de tourner un
certain temps puis s’immobilise sur la
position de changement des accessoires.
Ne déplacez le bras multifonctions
qu’après l’immobilisation de l’outil.
Pour des raisons de sécurité, l’appareil
ne peut fonctionner sur les positions
2 à 4 que si le bol a été mis en place
et tourné jusqu’à la butée ou que si le
couvercle protégeant l’entraînement
d’accessoire (8) a été mis en place.
Attention !
Utilisez le bol uniquement en fonctionnement
sur cet appareil. Enfoncez fermement les
accessoires dans l'entraînement jusqu'à ce
qu'ils encrantent.
Fouet mixeur « absolu » (15)
Pour mélanger des pâtes, par
exemple de la pâte brisée ou de la
mousse, et pour incorporer des blancs
montés en neige ou de la crème.
Fouet batteur entièrement
métallique (16)
Pour monter les œufs en neige, battre
la crème et les pâtes liquides, par exemple
la pâte à biscuits.
Crochet à pétrir « haute performance »
avec déflecteur de pâte (17)
pour pétrir les pâtes épaisses et incorporer des ingrédients qu’il ne faut pas broyer
(par exemple les raisins secs, les plaquettes
de chocolat).
Information importante
sur l’utilisation du fouet
batteur Figure
Le fouet batteur devrait toucher légèrement le
fond du bol afin de mélanger complètement les
ingrédients. C'est important aussi pour garantir
le bon fonctionnement du mode SensorControl
automatique. En présence de grandes
quantités, il est possible de placer le fouet
batteur plus haut.
Adaptez comme suit le réglage en hauteur
du fouet batteur :
Débranchez la fiche mâle de la prise
de courant.
Appuyez sur la touche de déverrouil-
lage et amenez le bras multifonctions
sur la position 1.
Enfoncez le fouet batteur jusqu’à
ce qu’il encrante dans l’entraînement.
Tenez fermement le fouet batteur
et desserrez l’écrou en tournant
la clé ci-jointe (au bas de l’appareil) dans
le sens des aiguilles d’une montre.
Réglez la hauteur du fouet batteur
en tournant ce dernier jusqu’à parvenir
sur une hauteur optimale.
– Tournez dans le sens des aiguilles
d’une montre : Soulever
– Tournez dans le sens inverse des
aiguilles d’une montre : Abaisser
Robert Bosch Hausgeräte GmbH 23
fr
MUMXX_en-fi.book Seite 24 Montag, 8. September 2014 3:05 15
Appuyez sur la touche de déver-
rouillage et amenez le bras multifonctions sur la position 2.
Vérifiez la hauteur du fouet batteur
et corrigez-la si nécessaire.
Si la hauteur est correctement
réglée, appuyez sur la touche
de déverrouillage puis amenez
le bras multifonctions sur la position 1.
Tenez fermement le fouet batteur
et serrez l’écrou à fond en tournant
la clé ci-jointe en sens inverse des
aiguilles d’une montre.
Travailler avec le bol
et les outils Figure
Appuyez sur la touche de déver-
rouillage et amenez le bras multifonctions sur la position 1.
Recouvrez les entraînements qui
ne servent pas avec des couvercles
de protection.
Mise en place du bol :
– Présentez le bol incliné vers l’avant
puis posez-le.
– Tournez en sens inverse des aiguilles
d’une montre jusqu’à l’encrantement.
Suivant la préparation à effectuer,
enfoncez fermement le fouet mixeur,
le fouet batteur ou le crochet à pétrir dans
l'entraînement jusqu'à ce qu'il encrante.
Remarque :
Avec le crochet pétrisseur mettez d’abord
en place le déviateur de pâte et ensuite
le crochet à pétrir (figure –4b).
Tenez compte de la forme et de la position
des pièces.
Versez les ingrédients à préparer
dans le bol.
Appuyez sur la touche de déver-
rouillage et amenez le bras multifonctions sur la position 2.
Mettez le couvercle en place.
Introduisez la fiche dans la prise
de courant.
Réglez l’interrupteur rotatif sur la position
voulue.
Recommandation :
– Fouet mélangeur :
commencez par mélanger au niveau
1–2 puis au niveau 3–7 suivant besoin
– Fouet batteur :
vitesse 7, incorporation d’ingrédients
à la vitesse 1
– Crochet pétrisseur :
commencez par incorporer les ingrédients à la vitesse 1, puis malaxez
à la vitesse 3.
Rajouter des ingrédients
Éteignez l’appareil par l’interrupteur
rotatif.
Mettez l’entonnoir en place (figure –7).
Rajoutez les ingrédients par l’entonnoir
de remplissage.
ou
Enlevez le couvercle.
Appuyez sur la touche de déver-
rouillage et amenez le bras multifonctions sur la position 1.
Ajoutez des ingrédients.
Après le travail
Éteignez l’appareil par l’interrupteur
rotatif.
Débranchez la fiche mâle de la prise
de courant.
Enlevez le couvercle.
Appuyez sur la touche de déver-
rouillage et amenez le bras multifonctions sur la position 1.
Détachez l’accessoire de l’entraînement.
Retirez le bol.
Nettoyez toutes les pièces, voir
« Nettoyage et entretien ».
Travailler avec le SensorControl
Cet appareil est équipé du mode
SensorControl automatique.
Pendant la préparation de crème fouettée
et d’œufs en neige avec le fouet, des
capteurs surveillent la montée du produit
et éteignent automatiquement l’appareil
une fois atteinte une consistance définie.
La fraîcheur, la température et les contenus
de la crème utilisés influent sur le temps
nécessaire et sur le résultat.
Remarque :
Avant la première utilisation du mode
SensorControl automatique, il faut que le robot
ménager ait fonctionné pendant au moins
deux minutes pour garantir que le circuit de
détection fonctionne correctement.
Figure
Préparation de l’appareil comme décrit
précédemment.
Enfoncez le fouet batteur jusqu’à ce qu’il
encrante dans l’entraînement.
24 Robert Bosch Hausgeräte GmbH
fr
MUMXX_en-fi.book Seite 25 Montag, 8. September 2014 3:05 15
Réglez le fouet batteur de sorte qu'il
touche légèrement le fond du bol.
Voir la rubrique « Remarque importante
sur l’utilisation du fouet ».
Appuyez sur la touche de déver-
rouillage et amenez le bras multifonctions sur la position 2.
Mettez le couvercle en place.
Mettez l’entonnoir en place (figure –3).
Introduisez la fiche dans la prise
de courant.
Remarque :
Après l’enfoncement, le mode SensorControl
automatique s’initialise, les symboles clignotent. L’appareil est prêt à fonctionner une fois
que les 3 symboles sont uniformément
allumés.
Versez la crème ou les blancs dans
le bol.
Quantités à traiter :
– Crème Chantilly : 300–1500 ml
Les meilleurs résultats s’obtiennent
avec de la crème fraîche à 6 °C.
– Blancs d’œufs : 2 à 12
Actionnez la touche correspondante
du mode SensorControl automatique
Crème fouettée, quantité de départ
300 à 700 ml
Crème fouettée, quantité de départ
700 à 1500 ml
Œufs en neige
Le symbole du mode SensorControl
automatique s’allume, les autres
symboles s’éteignent.
Correction si une touche a été choisie
par erreur :
Appuyez sur la touche pertinente.
Amenez le sélecteur rotatif sur la position
M/S et maintenez-le dessus 2 secondes.
Lâchez ensuite le sélecteur rotatif :
il reste sur cette position !
Remarque : Si le sélecteur rotatif n’est
pas actionné dans les 30 secondes,
le mode SensorControl choisi se dés-
active ! Les 3 symboles s’allument à nou-
veau tous les trois.
Correction si une touche a été choisie
par erreur :
Réglez le sélecteur sur 0/off ; il faut ce
faisant franchir un petit cran mécanique.
Appuyez sur la touche pertinente.
Ramenez l’interrupteur rotatif sur
la position M/S.
L’appareil commence à fonctionner.
Aussi longtemps que le processus fonctionne, les touches du SensorControl
sont bloquées.
Remarque : Ne rajoutez aucun ingrédient
pendant que l’appareil fonctionne !
Une fois que la crème fouettée / les œufs
en neige ont atteint la consistance optimale,
l’entraînement s’éteint automatiquement.
Le sélecteur se rend en position 0/off.
Les symboles s’allument.
Consignes importantes :
– Le mode SensorControl automatique
ne peut obtenir de résultats optimaux que
si les œufs sont frais et si la crème se
trouve à basse température (env. 6°C).
– Une crème qui a été congelée ne peut
jamais monter.
– L’utilisation de crème avec additifs
ou de crème sans lactose peut donner
des résultat non optimaux.
– N’ajoutez du sucre, des arômes
et d’autres ingrédients qu’après la fin
du mode Automatique. A cette fin,
réglez le sélecteur sur la position 5.
– Si après l’extinction automatique le résul-
tat ne devait pas être celui souhaité,
amenez le sélecteur rotatif brièvement
sur la position 7 jusqu’à ce que le résultat
corresponde à celui souhaité.
N'activez pas le mode SensorControl
automatique une deuxième fois !
– Il est possible d’interrompre le mode
SensorControl automatique à tout
moment (sélecteur sur 0/off ; ce faisant,
il faut franchir un petit cran mécanique)
– L’entraînement s’éteint toujours au bout
de 6 minutes maximum, même si le résul-
tat défini n’a pas été atteint.
Les symboles clignotent.
Voir « Dérangements et remèdes ».
– Le mode SensorControl automatique
est inopérant sur les positions 1 à 7 ou
pendant les travaux avec d’autres entraî-
nements.
– Si pendant le travail avec d’autres
accessoires une touche du mode
SensorControl a été actionnée,
appuyez simplement à nouveau
sur cette touche. Le symbole s’éteint.
Robert Bosch Hausgeräte GmbH 25
fr
MUMXX_en-fi.book Seite 26 Montag, 8. September 2014 3:05 15
Mixeur
Risque de blessures avec les lames
tranchantes / l’entraînement en
rotation !
N’introduisez jamais les doigts dans
le mixeur en place ! Ne retirez / posez
le mixeur qu’après avoir arrêté l’entraînement !
N’allumez l’appareil qu’après avoir tourné
le mixeur à fond jusqu’à la butée et mis
en place le couvercle (7) protégeant
l’entraînement d’accessoire.
Risque de brûlure !
Lorsque vous traitez des aliments mélangés très chauds, de la vapeur traverse
l’entonnoir ménagé dans le couvercle.
Versez au maximum 0,75 litre de liquide
très chaud ou moussant.
Attention !
Ne faites marcher l’accessoire que dans
la position de service indiquée.
N’utilisez le mixeur qu’une fois assemblé
et avec son couvercle en place.
Le couvercle doit être entièrement verrouillé.
Ne faites pas tourner le mixeur à vide.
Préparatifs Figure
Attention !
N’assemblez jamais le mixeur sans le joint
situé contre le support du mixeur.
Assembler le mixeur :
Placez le support de mixeur dans
la verseuse, avec le joint en place,
de sorte que le trait se trouve sous
le marquage fléché.
Tournez le support de mixeur à droite
jusqu’à la butée pour le fixer.
Utilisation du mixeur Figure
Appuyez sur le bouton de déver-
rouillage et amenez le bras multifonctions sur la position 5.
Recouvrez les entraînements qui
ne servent pas avec des couvercles
de protection.
Retirez le couvercle protégeant l’entraî-
nement du mixeur.
Mettez le bol mixeur en place (le repère
sur la poignée et celui sur l’appareil
de base doivent coïncider) puis tournez
en sens inverse des aiguilles d’une
montre jusqu’à la butée.
Ajoutez des ingrédients.
– Quantité maximum d’ingrédients
liquides = 1,75 litre ;
– Quantité maximum de liquides
chauds ou moussants = 0,75 litre ;
– Quantité optimale préparable d’ingré-
dients fermes = 100 grammes.
Posez le couvercle et tournez-le en sens
inverse des aiguilles d’une montre
jusqu’à la butée dans la poignée du
mixeur. Le couvercle doit avoir encranté.
Réglez l’interrupteur rotatif sur la position
voulue.
Rajouter des ingrédients (figure
Éteignez l’appareil par l’interrupteur
–8)
rotatif.
Retirez le couvercle et ajoutez les ingré-
dients
ou
retirez l’entonnoir et rajoutez progressi-
vement les ingrédients fermes par
l’ouverture
ou
versez les ingrédients liquides par
l’entonnoir.
Remarque importante
Lorsque vous traitez des liquides / ingrédients liquides, haussez lentement
la vitesse de l’appareil, par étapes, pour
empêcher les ingrédients à mélanger
de jaillir et d’éclabousser.
Après le travail
Éteignez l’appareil par l’interrupteur
rotatif. Attendez que la lame se soit
immobilisée.
Débranchez la fiche mâle de la prise
de courant.
Tournez le mixeur dans le sens des
aiguilles d’une montre puis retirez-le.
Retirez le couvercle du bol mixeur.
Pour ce faire, tournez le couvercle
en sens inverse des aiguilles d’une
montre et détachez-le.
Nettoyez toutes les pièces, voir « Netto-
yage et entretien ».
Un conseil : il est préférable de nettoyer
le mixeur immédiatement après utilisation.
26 Robert Bosch Hausgeräte GmbH
fr
MUMXX_en-fi.book Seite 27 Montag, 8. September 2014 3:05 15
Nettoyage et entretien
Remarque importante
L’appareil ne nécessite aucun entretien.
Un nettoyage soigné protège l’appareil
contre les dégâts et le maintient fonctionnel.
Attention !
N’utilisez pas de détergent abrasif.
Vous risquez d’endommager les surfaces.
Nettoyage de l’appareil de base
Risque d’électrocution !
Ne plongez jamais l’appareil de base dans
l’eau et ne le tenez jamais sous l’eau
du robinet ! Ne le nettoyez jamais avec
un nettoyeur à vapeur.
Débranchez la fiche mâle de la prise
de courant.
Essuyez l’appareil de base et les cou-
vercles de protection du mécanisme
d’entraînement avec un chiffon humide.
Si nécessaire, ajoutez un peu de produit
à vaisselle.
Ensuite, essuyez l’appareil avec
un essuie-tout sec.
Nettoyage du bol mélangeur
et des accessoires
Le bol mélangeur et les accessoires peuvent
aller au lave-vaisselle.
Ne coincez pas les pièces en matière plastique dans le lave-vaisselle car elles risqueraient de se déformer de façon irréversible
pendant le lavage !
Nettoyer le mixeur
Risque de blessures avec
les lames tranchantes !
Ne touchez pas les lames du mixeur avec
les mains nues. Pour les nettoyer, utilisez
une brosse.
Attention !
Ne mettez pas le support de mixeur au lave-
vaisselle et ne le laissez pas immergé dans
l’eau.
Nettoyez le support de mixeur sous l’eau
du robinet.
Il est possible de nettoyer le couvercle,
l’entonnoir et la verseuse au lave-
vaisselle.
Remarque :
Le couvercle peut se démonter pour
le nettoyer.
Figure
Sortez l’entonnoir par le haut
du couvercle.
Poussez l’insert pour le sortir
par le bas du couvercle.
Un conseil : Après le traitement de liquide,
il suffit souvent de nettoyer le mixeur sans
le détacher de l’appareil.
Pour cela, versez un peu d’eau additionnée
de produit à vaisselle dans le mixeur
en place. Faites fonctionner le mixeur
pendant quelques secondes (position M).
Jetez l’eau de nettoyage puis rincez
le mixeur à l’eau claire.
Dérangements et remèdes
Risque de blessures !
Avant de supprimer tout dérangement,
débranchez la fiche mâle de la prise
à courant.
Le bras multifonction doit avoir encranté dans
chaque position de travail.
Commencez par supprimer le problème
à l’aide des consignes qui suivent.
Dérangement
L’appareil ne démarre pas.
Remède
Vérifiez l’alimentation électrique.
Vérifiez la fiche mâle.
Contrôlez le bras multifonctions.
Position correcte ? Encranté ?
Tournez le bol mixeur à fond jusqu’à
la butée.
Posez les couvercles de protection
sur les entraînements non utilisés.
La sécurité anti-réenclenchement
est active. Amenez l’appareil sur
la position 0/off et puis ramenez-le
sur la position souhaitée.
Robert Bosch Hausgeräte GmbH 27
fr
MUMXX_en-fi.book Seite 28 Montag, 8. September 2014 3:05 15
Dérangement
L’appareil s’éteint pendant son utilisation.
La protection anti-surcharge est activée.
Trop grande quantité de produits alimentaires traitée en même temps.
Remède
Éteignez l’appareil et débranchez la fiche
mâle de la prise de courant.
Laissez l’appareil refroidir 15 minutes
pour que la protection anti-surcharge
se désactive à nouveau.
Réduisez la quantité à traiter.
Ne dépassez pas les quantités maximales admissibles (voir « Exemples
d’utilisation ») !
Rallumez l’appareil. Si ensuite le moteur
devait ne pas redémarrer, laissez-le
refroidir plus longtemps (environ 1
heure).
Dérangement
Les symboles du mode SensorControl
automatique clignotent.
Le mode SensorControl automatique n’a pas
pu obtenir le résultat défini.
L’appareil s’éteint automatiquement,
le sélecteur se trouve sur 0/off.
Remède
Appuyez sur une touche quelconque
du mode SensorControl automatique.
Le mode Automatique se réinitialise.
L’appareil est prêt à fonctionner une fois
que les 3 symboles sont uniformément
allumés.
Réglez le sélecteur brièvement sur
la position 7 jusqu’à ce que le résultat
corresponde aux attentes.
Vérifiez auparavant si la crème se conforme aux critères mentionnés (quantité,
état, fraîcheur, température) et si le fouet
est réglé sur la bonne hauteur.
Dérangement
La touche de déverrouillage a été actionnée
par mégarde pendant que le mécanisme
d’entraînement tournait.
Le bras multifonctions se déplace vers
le haut. Le mécanisme d’entraînement
s’éteint mais ne demeure pas dans
la position de changement d’outil.
Remède
Amenez l’interrupteur rotatif sur la posi-
tion 0/off.
Amenez le bras multifonctions
sur la position 2.
Allumez l’appareil (niveau 1).
Éteignez à nouveau l’appareil.
L’appareil s’immobilise en position
de changement d’accessoire.
Dérangement
Le mixeur ne démarre pas ou s’arrête
pendant l’utilisation.
Le moteur « bourdonne ». Les lames sont
bloquées.
Remède
Éteignez l’appareil et débranchez la fiche
mâle de la prise de courant.
Enlevez le mixeur et retirez l’obstacle.
Remettez le mixeur en place.
Allumez l’appareil.
Remarque importante
Si vous n’arrivez pas à résoudre
le dérangement, veuillez s.v.p. vous
adresser à notre service après-vente.
Exemples d’utilisation
Crème chantilly
200 g –1500 g (fouettez jusqu’à 300 g
sans le mode SensorControl)
Respectez les instructions figurant
à la rubrique « Travailler avec le
SensorControl ».
Respectez les consignes figurant
à la section « Remarque importante
sur l’utilisation du fouet batteur » pour
adapter l’appareil aux quantités à traiter !
Blanc d’œuf
2 à 12 blancs d’œufs
Respectez les instructions figurant
à la rubrique « Travailler avec le
SensorControl ».
Respectez les consignes figurant
à la section « Remarque importante
sur l’utilisation du fouet batteur » pour
adapter l’appareil aux quantités à traiter !
28 Robert Bosch Hausgeräte GmbH
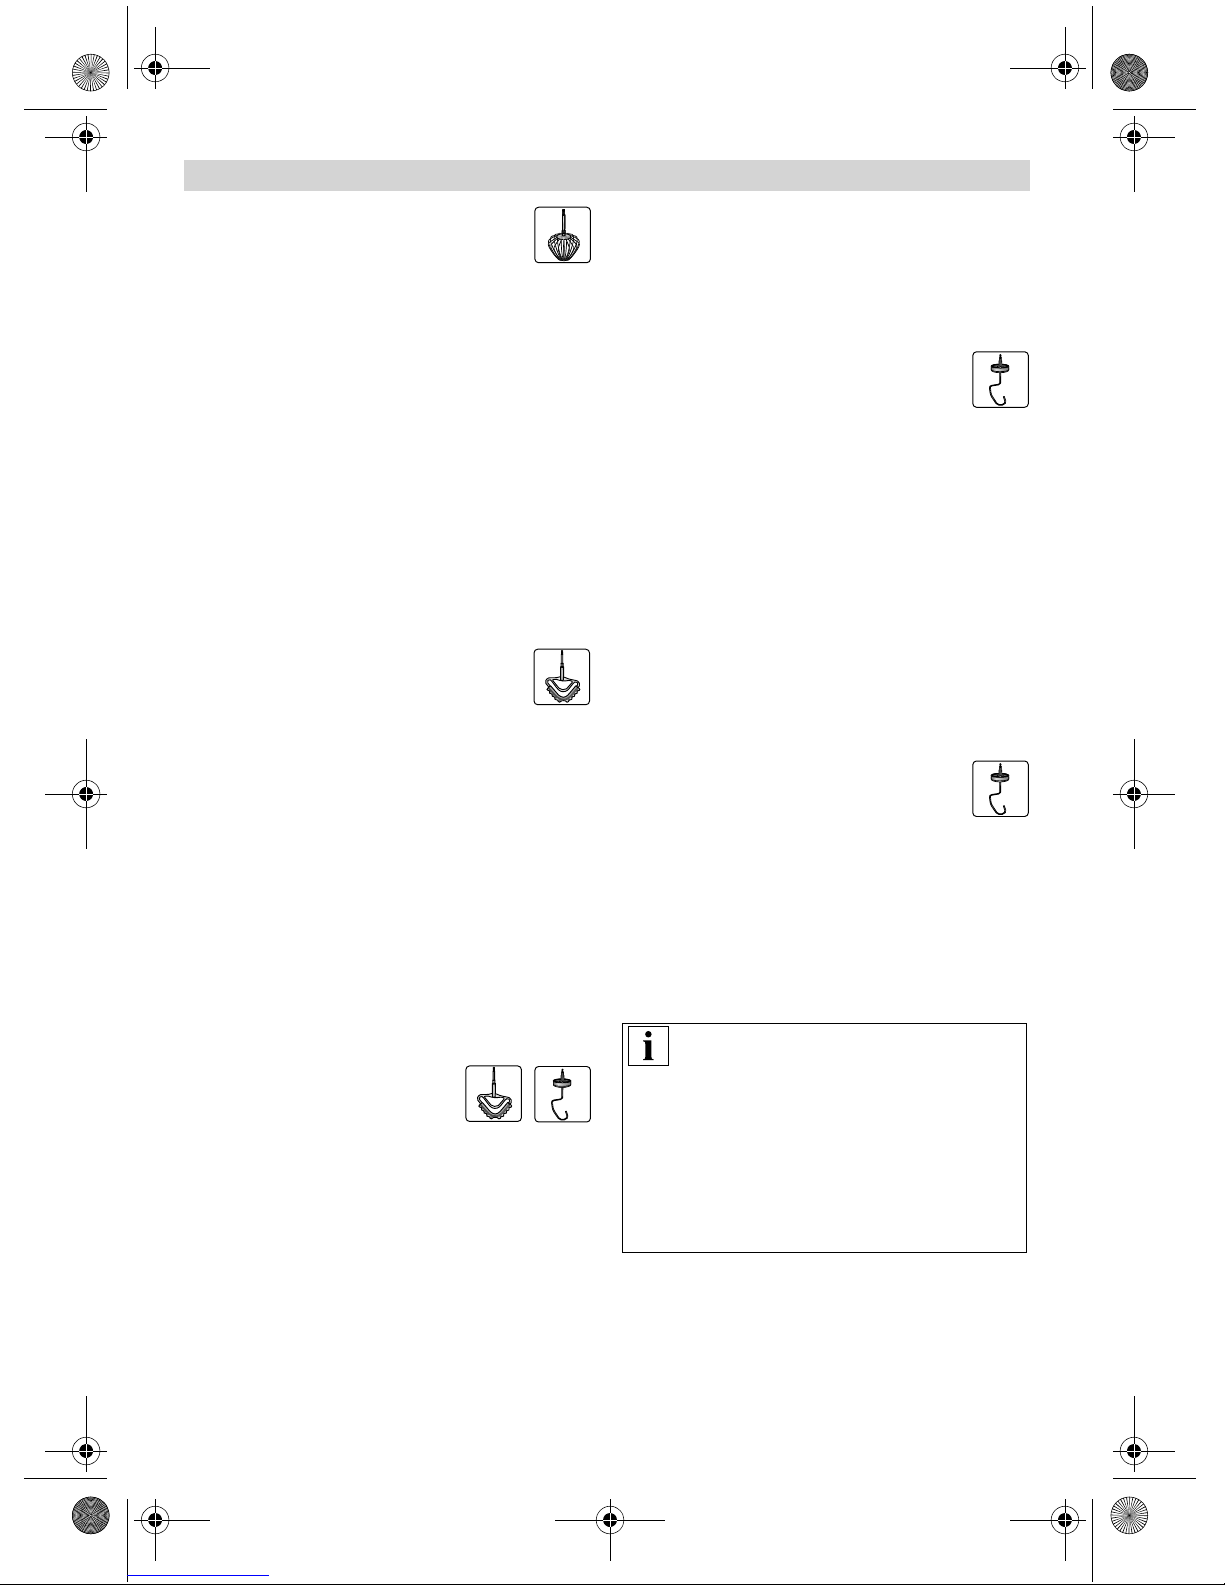
fr
MUMXX_en-fi.book Seite 29 Montag, 8. September 2014 3:05 15
Pâte à biscuits
Recette de base
3 œufs
3–4 cuillères à soupe d’eau très chaude
150 g de sucre
1 sachet de sucre vanillé
150 g de farine
50 g de fécule
éventuellement de la levure chimique
Battez les ingrédients (sauf la farine
et la fécule) env. 4 à 6 minutes avec
le fouet batteur sur la position 7, jusqu’à
ce que vous obteniez une mousse ferme.
Réglez l’interrupteur rotatif sur la position
1 et, en ½ à 1 minute environ, incorporez
par cuillerées la farine et la fécule que
vous aurez préalablement passées
au tamis.
Quantité maximale : 2 fois la recette de base
Pâte levée
Recette de base
3 à 4 œufs
200 à 250 g de sucre
1 pincée de sel
1 sachet de sucre vanillé ou le zeste
d’un demi-citron
200 à 250 g de beurre ou de margarine
(à la température ambiante)
500 g de farine
1 sachet de levure chimique
150 ml de lait
Mélangez tous les ingrédients avec
le fouet mélangeur pendant env.
½ minute sur la position 1, puis env.
3 à 4 minutes sur la position 5.
Quantité maximale : 2 fois et demie la recette
de base.
Pâte brisée
Recette de base
125 g de beurre (à la température ambiante)
100 à 125 g de sucre
1 œuf
1 pincée de sel
un peu de zeste de citron ou du sucre vanillé
250 g de farine
éventuellement de la levure chimique
Travaillez tous les ingrédients avec
le fouet mélangeur pendant env.
½ minute sur la position 1, puis env.
2 à 3 minutes sur la position 5.
A partir de 500 g de farine :
Pétrissez les ingrédients avec le crochet
pétrisseur pendant env. ½ minute sur
la position 1, puis env. 3 à 4 minutes
sur la position 3.
Quantité maximale : 4 fois la recette de base
Pâte à la levure de boulanger
Recette de base
500 g de farine
1 œuf
80 g de matière grasse
(à la température ambiante)
80 g de sucre
200 à 250 ml de lait tiède
25 g de levure de boulanger fraîche
ou 1 sachet de levure.
Le zeste d’un demi-citron
1 pincée de sel
Travaillez tous les ingrédients avec
le crochet pétrisseur pendant env.
½ minute sur la position 1, puis env.
3 à 6 minutes sur la position 3.
Quantité maximale : 3 fois la recette de base
Pâte à pâtes
Recette de base
500 g de farine
250 g d’œufs (5 œufs environ)
2 à 3 cuillères à soupe (20 à 30 g) d’eau
froide, selon le besoin
Travaillez tous les ingrédients pendant
3 à 5 minutes environ sur la position
3 jusqu’à obtention d’une pâte.
Quantité maximale : 1,5 fois la recette
de base
Remarque importante
Lorsque vous poursuivez la transformation de cette pâte avec l’accessoire
d’origine de cet appareil, il ne faut utiliser
que l’accessoire MUZ8NV1 / 2 / 3.
Le fouet n’est pas adapté à l’accessoire
MUZ8NS1. Utilisez à cette fin une pâte
spéciale destinée aux extrudeuses
àpâtes.
Robert Bosch Hausgeräte GmbH 29
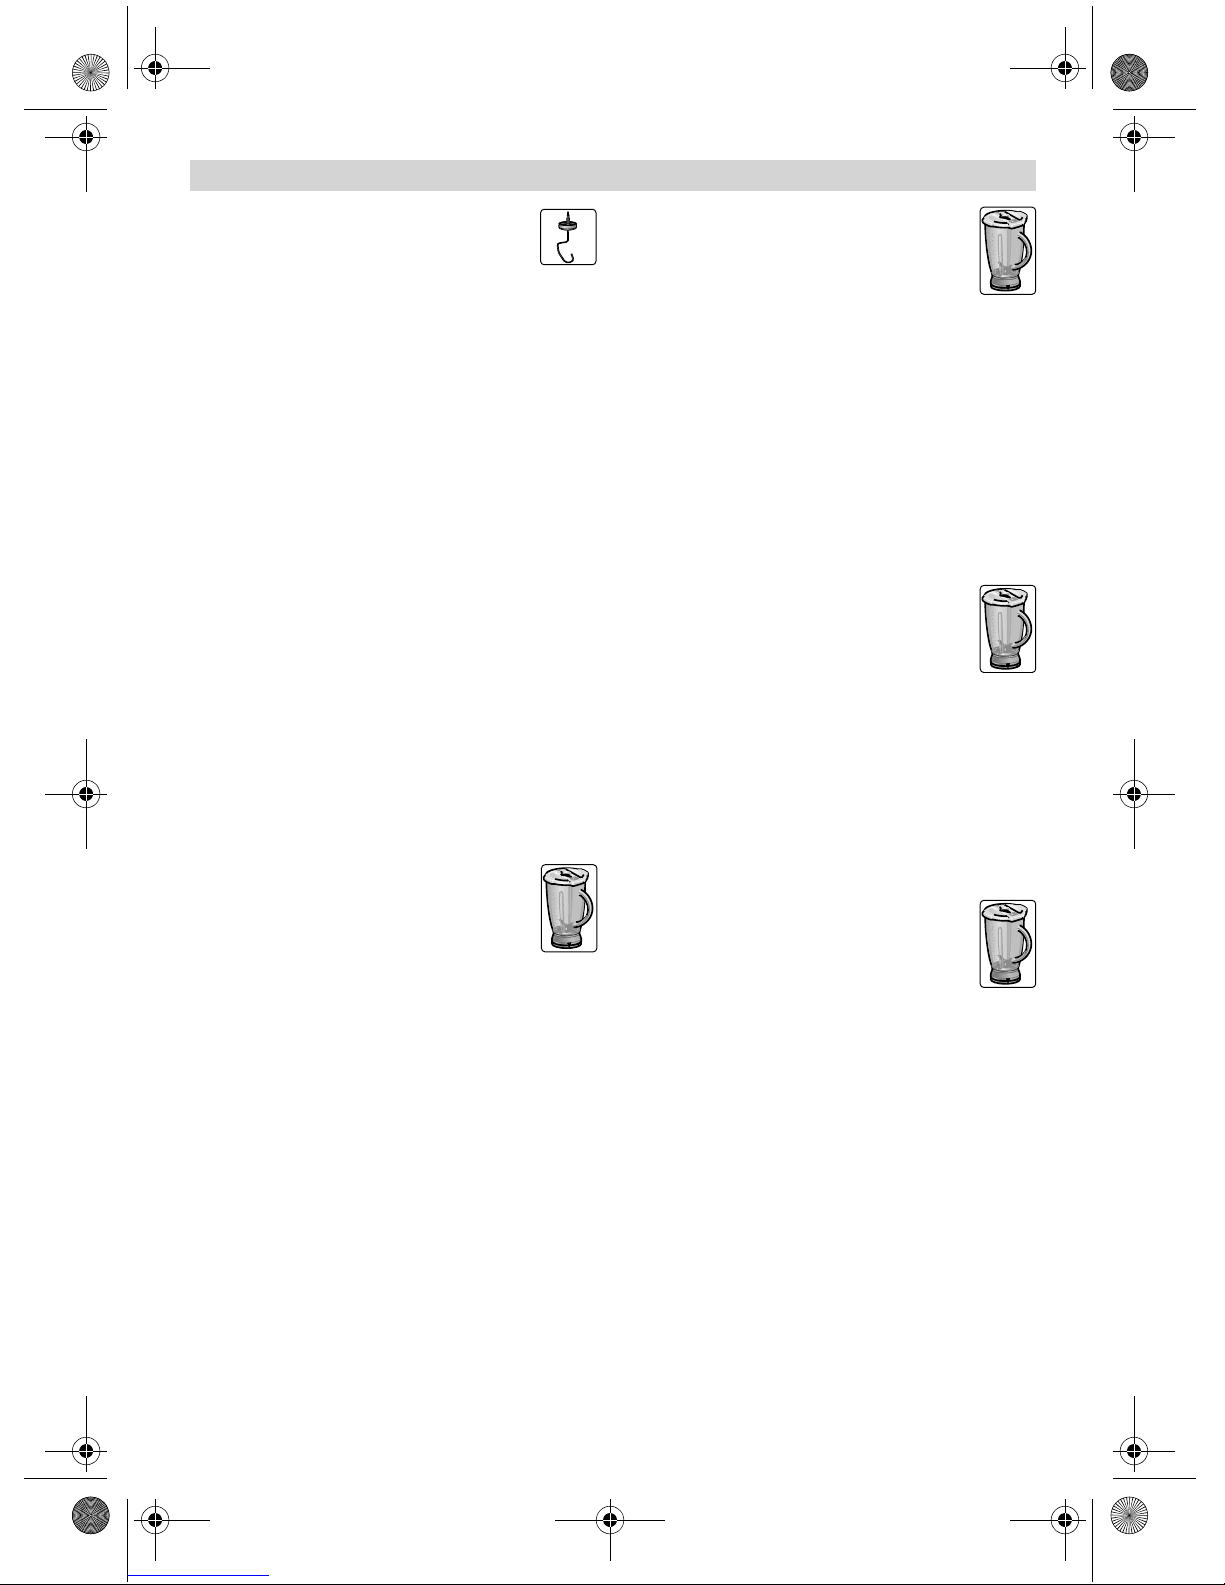
fr
MUMXX_en-fi.book Seite 30 Montag, 8. September 2014 3:05 15
Pain complet à la farine
de froment mélangée
Recette de base
325 g de farine de blé complet fraîchement
moulue
325 g de farine blanche, type 405
100 g de farine de seigle, type 630
75 de levain naturel liquide
½ cuillère à soupe de cumin
½ cuillère à soupe d’épices à pain
½ cuillère à soupe de sel
1½ sachet de levure
450–500 ml d’eau chaude
Travaillez tous les ingrédients environ
½ minute au niveau 1, puis environ
3 minutes au niveau 3 pour former
une pâte.
Laissez la pâte gonfler jusqu’à doubler
de volume puis pétrissez encore une fois
env. 1 minute à la vitesse 3.
Versez la pâte dans un moule à cake
préalablement graissé, laissez la pâte
lever à nouveau puis mettez-la au four.
Un conseil : A la place d’une farine de blé
entier fraîchement moulue, vous pouvez
également utiliser de la farine d’épeautre
fraîchement moulue.
Quantité maximale : 2 fois la recette de base
Mayonnaise
Remarque : avec le mixeur, vous
pouvez préparer la mayonnaise
uniquement avec des œufs entiers
(le blanc et le jaune).
Recette de base :
1 œuf
1 cuillère à café bombée de moutarde
1 cuillère à soupe de vinaigre ou de jus
de citron
1 pincée de sel
1 pincée de sucre
200 à 250 ml d’huile
Les ingrédients doivent tous être à la même
température.
Mélangez les ingrédients (sauf l’huile)
pendant quelques secondes, avec
le robot réglé sur le niveau 3.
Réglez l’appareil sur la vitesse la plus
élevée. Versez l’huile par l’entonnoir
et mélangez jusqu’à ce que la mayon-
naise s’émulsionne.
Quantité maximale : doublez les quantités
de la recette de base.
Chocolat chaud
50 à 75 g de chocolat froid en tablette
½ l de lait très chaud
Crème fouettée et copeaux de chocolat selon le goût
Partagez le chocolat de ménage
en morceaux d’env. 1 cm et broyez-les
complètement dans le mixeur réglé
sur le niveau 7.
Éteignez l’appareil et versez le lait par
l’entonnoir. Mélangez env. 30 secondes
au niveau 7.
Versez le chocolat chaud dans des
verres, puis servez avec de la crème
fouettée et des copeaux de chocolat,
selon le goût.
Milk-shake à la banane
2 ou 3 bananes
2 ou 3 cuillères à soupe bombées de
glace à la vanille ou au citron
2 sachet de sucre vanillé
½ l de lait
Découpez les bananes en morceaux
et broyez pendant 5–10 secondes
au mixeur.
Après que le mixeur s’est immobilisé,
ajoutez le lait et les ingrédients, puis
mixez pendant env. 1 minute jusqu’à
faire mousser le mélange.
Cocktail de fruits
250 g de fruits (par exemple
des fraises, bananes,
oranges, pommes)
50 à 100 g de sucre
500 ml d’eau froide
Glace selon le goût
Pelez les fruits puis coupez-les
en morceaux.
Versez tous les ingrédients (sauf
la glace) dans le mixeur, réglez sur
le niveau 7 et mixez pendant env.
1 minute.
Servez, en accompagnant éventuelle-
ment de glace.
30 Robert Bosch Hausgeräte GmbH
 Loading...