

Page 1
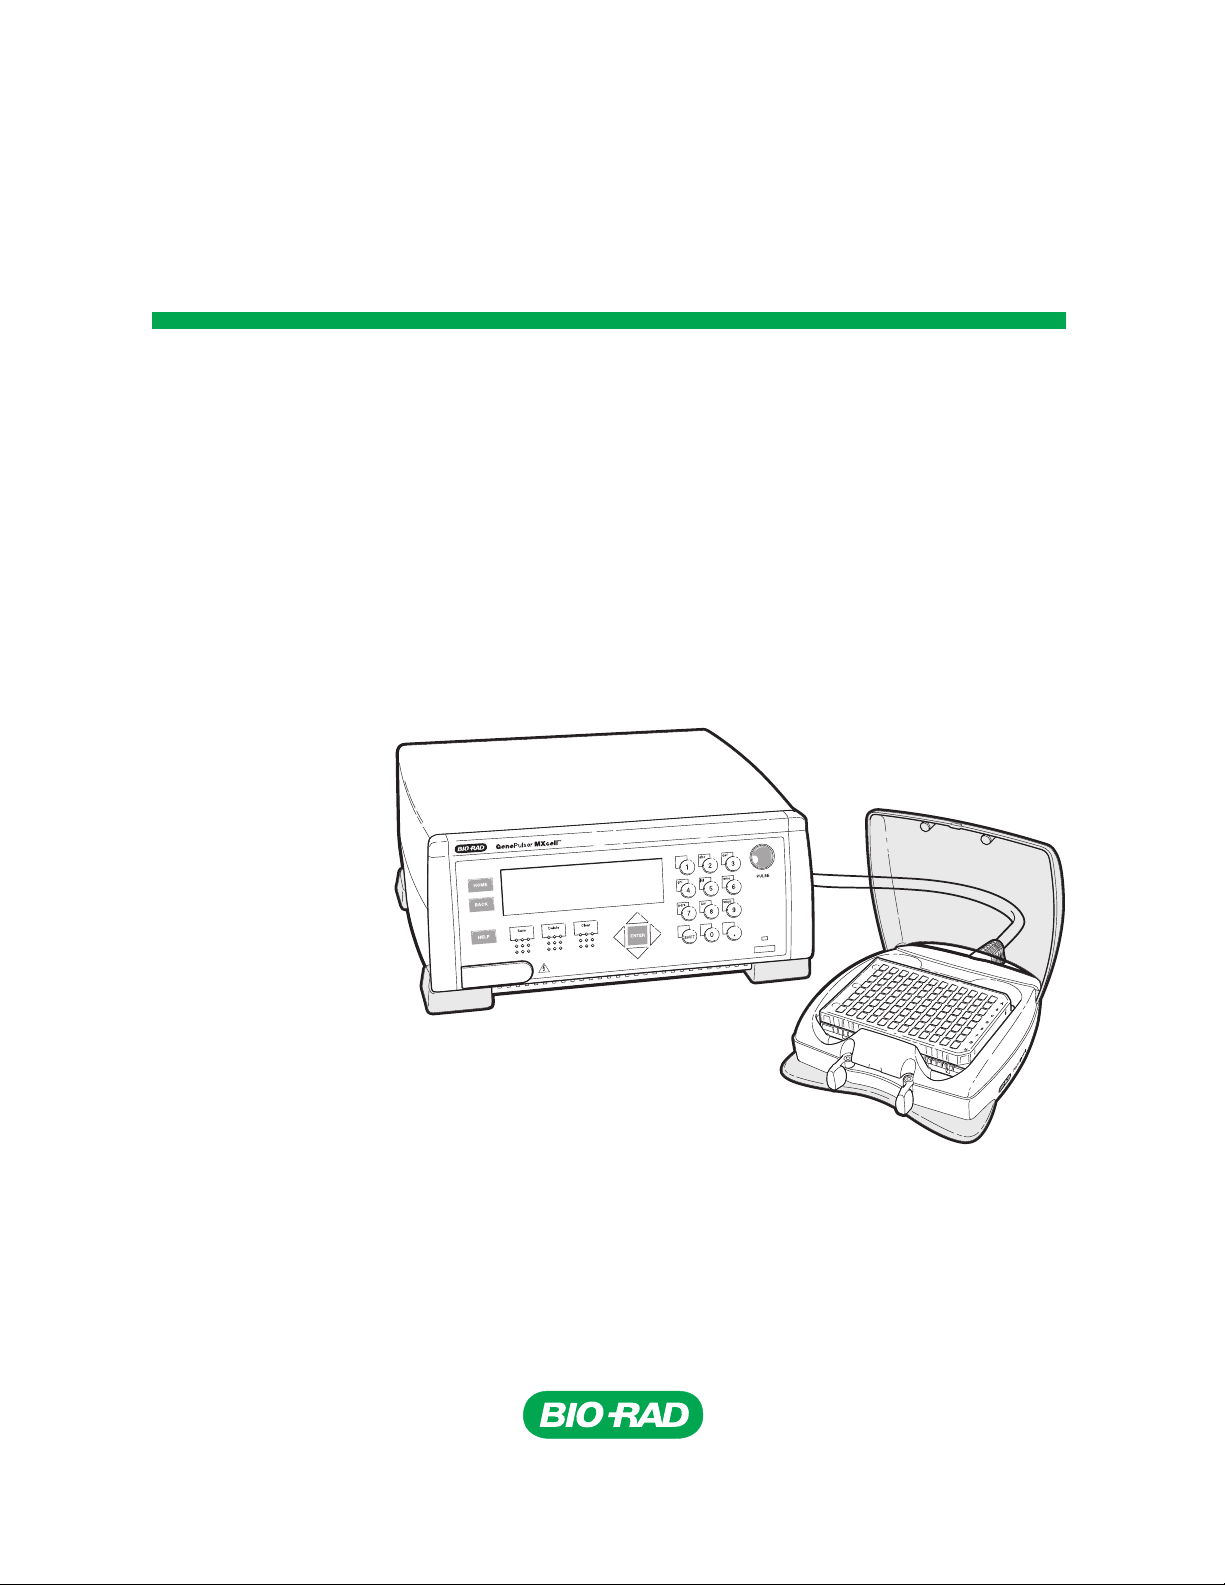
Gene Pulser MXcell™
Electroporation System
Instruction Manual
Catalog #165-2670
Page 2

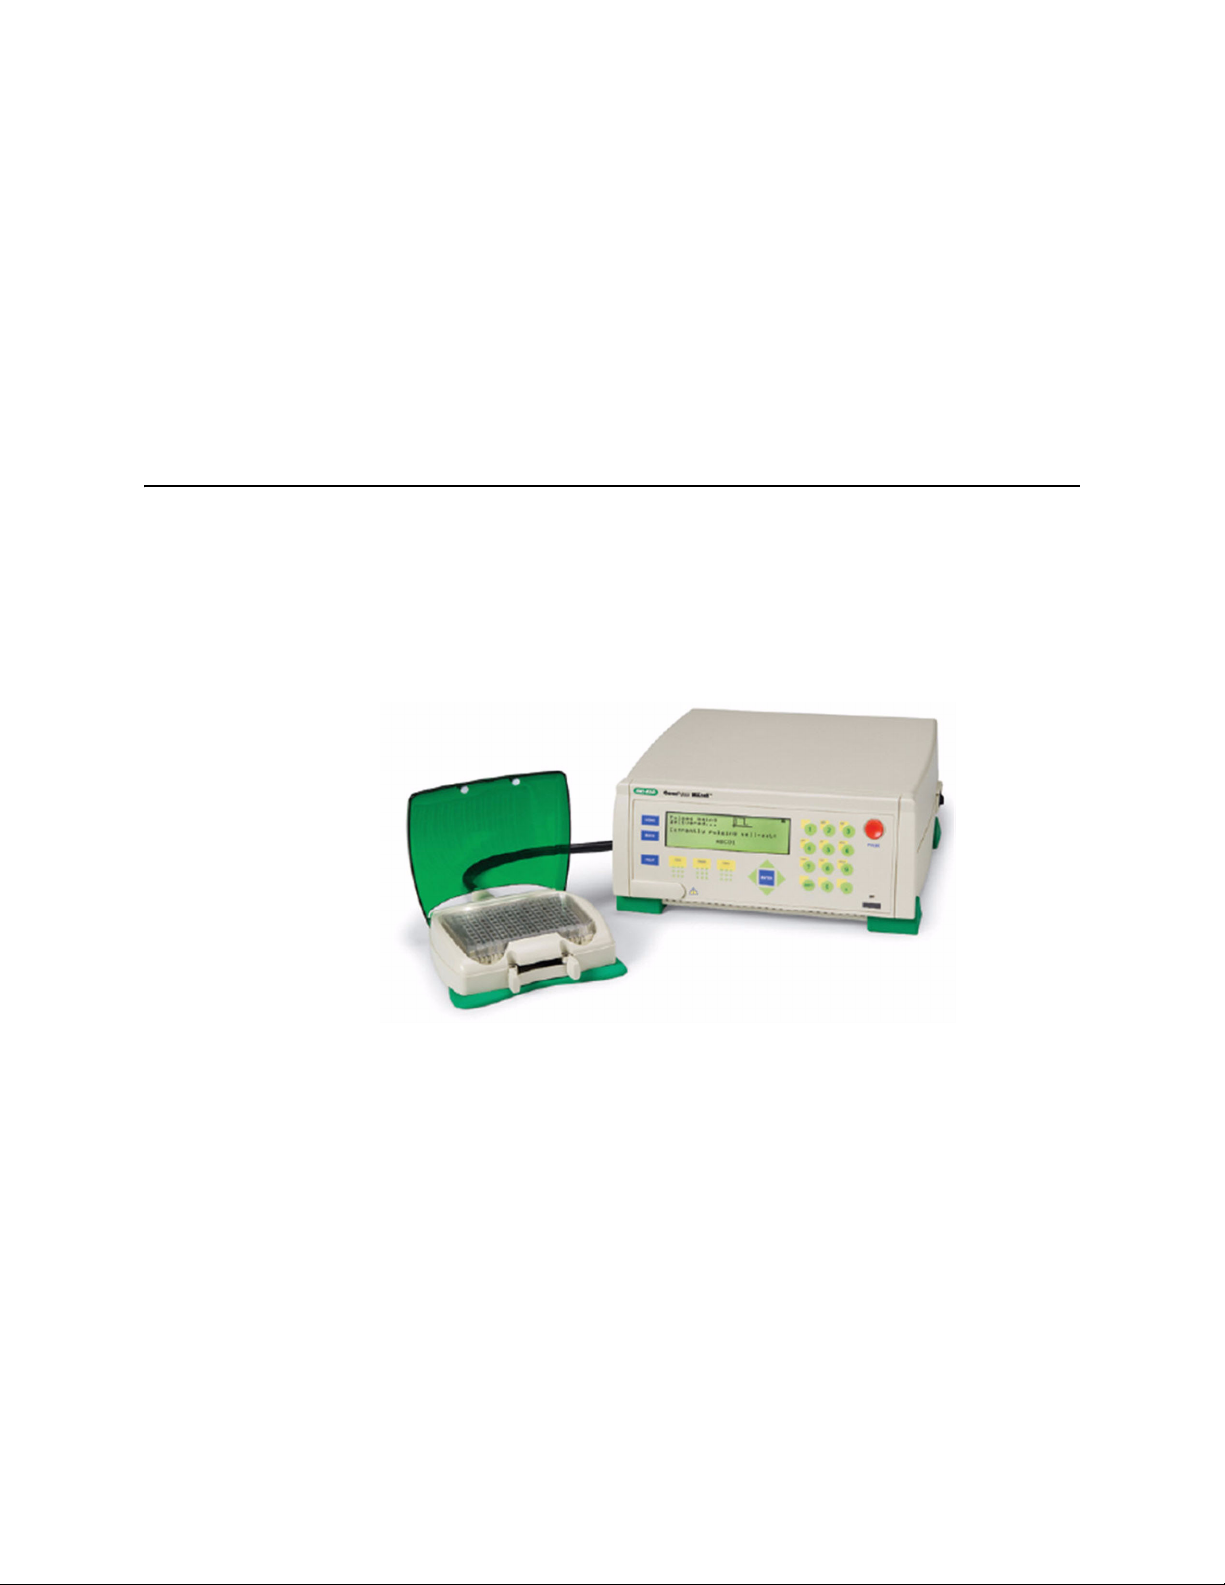
Gene Pulser MXcell
Electroporation System
Instruction Manual
Bio-Rad Laboratories, Inc., 2000 Alfred Nobel Drive, Hercules, CA 94547 · 800-424-6723
10010739
Page 3

Copyright ©2007 Bio-Rad Laboratories, Inc. Reproduction in any form, either print or electronic, is
prohibited without written permission of Bio-Rad Laboratories, Inc.
Gene Pulser MXcell™ is a trademark belonging to Bio-Rad Laboratories, Inc.
Other brands or product names are trademarks of their respective holders.
ii
Page 4

Safety and Regulatory Compliance
The Gene Pulser MXcell™ electroporation system is designed to run safely. Please read the following
sections to learn about the safe use of this system and regulatory requirements.
General Safety Information
This Bio-Rad instrument is designed and certified to meet the safety requirements of EN61010 and the
EMC requirements of EN61326 (for Class A) and conforms to the “Class A” standards for electromagnetic
emissions intended for laboratory equipment applications. This instrument is intended for laboratory
application only. It is possible that emissions from this product may interfere with some sensitive
appliances when placed nearby or in the same circuit as those appliances. The user should be aware of
this potential and take appropriate measures to avoid interference.
No part of the Gene Pulser MXcell system should be used if obvious external case damage has occurred
or the electronic displays are not functioning as described in the manual. This instrument is only to be
used with the components provided (or their authorized additions or replacements) including, but not
limited to, supplied cables and plate chamber. The operating temperature range for the Gene Pulser
MXcell system and its associated components is 18–35°C.
There are no user serviceable parts within the unit. The operator should make no attempt to open any
case cover or defeat any safety interlock. This instrument must not be altered or modified in any way.
Alteration of this instrument will result in the following:
• Void the manufacturer’s warranty
• Void the IEC 1010 safety certification
• Create a potential safety hazard
Bio-Rad is not responsible for any injury or damage caused by the use of this instrument for purposes
other than those for which it is intended or by modification of the instrument not performed by Bio-Rad or
an authorized agent.
Electrical Hazards
The Gene Pulser MXcell system produces voltages up to 500 V and is capable of passing very high
currents. When charged to maximum voltage, the instrument stores about 210 J. A certain degree of
respect is required for energy levels of this order. System safety features prevent operator access to the
high voltage and to the recessed electrode contacts inside the sample chamber. These mechanical
interlocks should never be circumvented.
The PULSE button is active whenever the character space in the lower right corner appears. There is high
voltage present whenever the PULSE button is depressed and “pulse being delivered” is shown on the
LCD display on the front of the instrument. Because of the built-in safety interlock in the Gene Pulser
MXcell plate chamber, no pulse is delivered to the electroporation plate when the plate chamber lid is
opened. If the capacitor has been partially charged but not fired (for example, when the charging cycle
has been interrupted before the pulse is delivered), some charge may remain on the internal capacitor.
This charge will dissipate over 1–2 minutes. However, the user cannot make contact with any charged
electrical components due to the system safety features.
iii
Page 5

Gene Pulser MXcell™ System Manual | Operating Conditions
Mechanical Hazards
The Gene Pulser MXcell system contains a patented arc-protection circuit that dramatically reduces the
incidence of arcing in the cuvette when high voltage is delivered into the sample. The unit incorporates a
circuit that senses the beginning of an arc and diverts current from the sample within <2 μs, preventing or
greatly reducing mechanical, visual, and auditory phenomena at the plate chamber. Should an arc occur,
the sample chamber is effective in containing these small discharges. If you prefer you can wear safety
glasses as additional protection when using the instrument.
Other Safety Precautions
Avoid spilling any liquids onto the apparatus. Use only a paper towel or a cloth wetted with either water or
alcohol to clean the outside surfaces of the Gene Pulser MXcell electroporation system.
Use only the Bio-Rad cables supplied with the Gene Pulser MXcell electroporation system
Use the Gene Pulser MXcell plate chamber only in the assembled condition. Do not attempt to
circumvent the protection of the plate chamber or use it while disassembled.
Read the instruction manual before using the Gene Pulser MXcell electroporation system. For technical
assistance contact your local Bio-Rad office, or in the US call 1-800-4BIORAD (1-800-424-6723).
WARNING! The Gene Pulser MXcell electroporation system generates, uses, and radiates
radio frequency energy. If it is not used in accordance with the instructions given in this
manual, it may cause interference with radio communications. The Gene Pulser MXcell has
been tested and found to comply with the limits for Class A computing devices (pursuant to
Subpart J of Part 15 of FCC Rules) which provide reasonable protection against such
interference when operated in a commercial environment. Operation of this equipment in a
residential area is likely to cause interference. In this case the user will be required, at his/her
expense, to take whatever measure may be required to correct the interference.
Operating Conditions
To safely operate the Gene Pulser MXcell electroporation system, keep environmental conditions within
the following limits:
• Operate between 18
•Store between -40
• Mains voltage is 90-132 VRMS and 198-264 VRMS at 47-63 Hz; auto-select
• Maximum Input Power is 600 VA
o
C and 35oC at 90% maximum humidity
o
C and +65oC
iv
Page 6

Warranty
The Gene Pulser MXcell electroporation system is warranted against defects in materials and
workmanship for 1 year from date of purchase. If any defects occur in the instruments or accessories
during this warranty period, Bio-Rad Laboratories will repair or replace the defective parts at its discretion
without charge. This warranty does not apply to the fuses and the following items are specifically
excluded:
1. Defects caused by improper operation.
2. Repair or modification done by anyone other than Bio-Rad Laboratories or an authorized agent.
3. Damage caused by substituting alternative parts.
4. Use of fittings or spare parts supplied by anyone other than Bio-Rad Laboratories.
5. Damage caused by accident or misuse.
6. Damage caused by disaster.
7. Corrosion caused by improper solvent or sample.
For any inquiry or request for repair service, contact Bio-Rad Laboratories and tell us the model and serial
number of your instrument.
IMPORTANT: This Bio-Rad instrument is designed and certified to meet EN61010* and the EMC
requirements of EN61326 (for Class A) safety standards. Certified products are safe to use when operated
in accordance with the instruction manual. This instrument should not be modified or altered in any way.
Alteration of this instrument will cause the following results:
• Void the manufacturer's warranty
• Void the EN61010 safety certification
• Create a potential safety hazard
Bio-Rad Laboratories is not responsible for any injury or damage caused by the use of this instrument for
purposes other than those for which it is intended, or by modifications of the instrument not performed by
Bio-Rad Laboratories or an authorized agent.
*EN61010 is an internationally accepted electrical safety standard for laboratory instruments.
v
Page 7

Gene Pulser MXcell™ System Manual | Warranty vi Gene Pulser MXcell™ System Manual
Page 8

Table of Contents
Chapter 1. Introduction . . . . . . . . . . . . . . . . . . . . . . . . . . . . . . . . . . . . . . . . . 1
Overview of the Gene Pulser MXcell™ Electroporation System. . . . . . . . . . . . . 1
Bio-Rad Resources and References . . . . . . . . . . . . . . . . . . . . . . . . . . . . . . . . . . 2
Writing Conventions Used in This Manual . . . . . . . . . . . . . . . . . . . . . . . . . . . . . 3
Chapter 2. Get Started . . . . . . . . . . . . . . . . . . . . . . . . . . . . . . . . . . . . . . . . . . 5
Unpacking and Setting Up the System . . . . . . . . . . . . . . . . . . . . . . . . . . . . . . . . 5
Setting Up the Gene Pulser MXcell System . . . . . . . . . . . . . . . . . . . . . . . . . . . . 6
Introduction to the System . . . . . . . . . . . . . . . . . . . . . . . . . . . . . . . . . . . . . . . . . 8
Well Sets and Quadrants in Electroporation Plates . . . . . . . . . . . . . . . . . . . . . 12
Chapter 3. Prepare Mammalian Cells . . . . . . . . . . . . . . . . . . . . . . . . . . . . . 15
Preparation of Mammalian Cells . . . . . . . . . . . . . . . . . . . . . . . . . . . . . . . . . . . . 15
Reagents and Solutions for Electroporation . . . . . . . . . . . . . . . . . . . . . . . . . . . 17
Chapter 4. Program and Run the System . . . . . . . . . . . . . . . . . . . . . . . . . . 19
Turning on the System . . . . . . . . . . . . . . . . . . . . . . . . . . . . . . . . . . . . . . . . . . . 20
Protocol Set-Up Option. . . . . . . . . . . . . . . . . . . . . . . . . . . . . . . . . . . . . . . . . . . 20
Gradient Protocol Option . . . . . . . . . . . . . . . . . . . . . . . . . . . . . . . . . . . . . . . . . 22
User Protocols Option . . . . . . . . . . . . . . . . . . . . . . . . . . . . . . . . . . . . . . . . . . . . 24
Pre-Set Protocols Option . . . . . . . . . . . . . . . . . . . . . . . . . . . . . . . . . . . . . . . . . 25
Last Pulse Option . . . . . . . . . . . . . . . . . . . . . . . . . . . . . . . . . . . . . . . . . . . . . . . 26
Data Management Option . . . . . . . . . . . . . . . . . . . . . . . . . . . . . . . . . . . . . . . . . 26
Screen Intensity Option . . . . . . . . . . . . . . . . . . . . . . . . . . . . . . . . . . . . . . . . . . . 27
Measurements Option . . . . . . . . . . . . . . . . . . . . . . . . . . . . . . . . . . . . . . . . . . . . 27
Saving Protocols . . . . . . . . . . . . . . . . . . . . . . . . . . . . . . . . . . . . . . . . . . . . . . . . 28
Adding and Deleting the Users and Protocols . . . . . . . . . . . . . . . . . . . . . . . . . 29
Chapter 5. Pre-Set Protocols . . . . . . . . . . . . . . . . . . . . . . . . . . . . . . . . . . . . 31
Mini-Optimization Protocols . . . . . . . . . . . . . . . . . . . . . . . . . . . . . . . . . . . . . . . 34
Whole Plate Protocols . . . . . . . . . . . . . . . . . . . . . . . . . . . . . . . . . . . . . . . . . . . . 36
Well Set Protocols . . . . . . . . . . . . . . . . . . . . . . . . . . . . . . . . . . . . . . . . . . . . . . . 37
Mixed Protocols . . . . . . . . . . . . . . . . . . . . . . . . . . . . . . . . . . . . . . . . . . . . . . . . 38
vii
Page 9

Gene Pulser MXcell™ System Manual | Table of Contents
Chapter 6. Factors Affecting Electroporation . . . . . . . . . . . . . . . . . . . . . . 41
Factors Affecting Electroporation . . . . . . . . . . . . . . . . . . . . . . . . . . . . . . . . . . . 41
Electroporation Theory . . . . . . . . . . . . . . . . . . . . . . . . . . . . . . . . . . . . . . . . . . . 45
Appendix A: PulseTrac™ System. . . . . . . . . . . . . . . . . . . . . . . . . . . . . . . . . 49
PulseTrac System Description . . . . . . . . . . . . . . . . . . . . . . . . . . . . . . . . . . . . . 49
PulseTrac Diagnostic Algorithm . . . . . . . . . . . . . . . . . . . . . . . . . . . . . . . . . . . . 50
Appendix B: Troubleshooting . . . . . . . . . . . . . . . . . . . . . . . . . . . . . . . . . . . . 51
Appendix C: References . . . . . . . . . . . . . . . . . . . . . . . . . . . . . . . . . . . . . . . . 53
Appendix D: Product Specifications and Information . . . . . . . . . . . . . . . . 55
Product Specifications . . . . . . . . . . . . . . . . . . . . . . . . . . . . . . . . . . . . . . . . . . . 55
Product Information. . . . . . . . . . . . . . . . . . . . . . . . . . . . . . . . . . . . . . . . . . . . . . 56
viii
Page 10
1 Introduction
Congratulations on the purchase of a Gene Pulser MXcell™ electroporation system! This
instrument is the newest addition to Bio-Rad Laboratories’ powerful electroporation line.
This system is filled with features that will enable you to quickly optimize conditions for
efficient delivery of molecules into most eukaryotic cells, including mammalian cells and
plant protoplasts.
The Gene Pulser MXcell electroporation system is designed to electroporate cells in 96-, 24and 12-well electroporation plates.
Gene Pulser MXcell™ System Manual
Overview of the Gene Pulser MXcell™ Electroporation System
The system includes three components:
• Power module: The power module produces controlled exponential or square
waveform pulses. The unit is capable of producing pulses of up to 500 V in a selfcontained unit requiring no peripheral modules. This ensures delivery of highly
reproducible electroporation conditions to multiwell plates. The system is designed to
allow you to vary any of the following parameters: waveform, resistance, voltage,
capacitance, pulse duration, and number of pulses.
•Plate chamber: The plate chamber holds a variety of multi-well electroporation plates
to provide maximum flexibility.
• Multi-well electroporation plates: The electroporation plates come in three formats:
12, 24, and 96-well. When using the 96-well plate or 24-well plates, 24 different
1
Page 11

Gene Pulser MXcell™ System Manual | Introduction
conditions can be programmed for use each time; the 12-well plate, 12 conditions.
You can use the 96-well plate to optimize conditions, and then perform laboratory
scale experiments in the 24- or 12-well plates. Pre-set optimization protocols assist
you in selecting initial starting conditions, even when cell lines are new to your
laboratory.
Bio-Rad Resources and References
Bio-Rad Laboratories provides many resources for scientists. The following web sites
contain useful information about running electroporation experiments:
• Gene Expression Gateway (www.bio-rad.com/genomics/)
This site provides rich technical resources on a wide variety of methods and
applications related to electroporation and gene expression. This site also features
tools, citations, technical support, and troubleshooting resources.
• Life Science Research web site (discover.bio-rad.com)
This site includes links to technical notes, manuals, product information, and technical
support.
Click the following links to download or request a copy of this manual or other Bio-Rad
Laboratories literature:
• Click the PDF icon to download a portable document format copy and open it
using Adobe Acrobat Reader software (www.adobe.com).
• Click the folder icon and order a printed copy.
• Click the FAX icon to request a FAX copy.
• Phone your local Bio-Rad Laboratories office to request a printed copy. In the
United States and Canada, call 1-800-424-6723 (toll-free phone), and select
the Literature option.
Use the following resources to locate what you need:
Table 1. Bio-Rad resources.
Resource How to contact
Local Bio-Rad Laboratories
representatives
Technical notes and literature Go to the Gene Expression Gateway (www.bio-rad.com/
Technical specialists Bio-Rad Laboratories provides quality technical support.
Find local information and contacts on the Bio-Rad
Laboratories web site by selecting your country on the
home page (www.bio-rad.com). Also find the nearest
international office listed on the back of this manual.
genomics/) and locate the Search box in the upper, right
corner of the web page. Type a search term in the box to
find links to products, technical notes, and manuals.
We staff our Technical Support department with
experienced scientists to provide our customers with
practical and expert solutions. To find technical support on
the web, go to the Gene Expression Gateway
(www.bio-rad.com/genomics).
To find local technical support, contact your nearest
Bio-Rad Laboratories office. For technical support in the
United States and Canada, call 1-800-424-6723 (toll-free
phone), and select the technical support option.
2
Page 12

Writing Conventions Used in This Manual
Writing Conventions Used in This Manual
This manual is for scientists and technicians who run the Gene Pulser MXcell
electroporation system and accessories. It explains how to safely set up and operate the
Gene Pulser MXcell system. This manual also contains important tips about how to
successfully run electroporation experiments on the Gene Pulser MXcell electroporation
system.
This manual uses the writing conventions shown in Table 2 to quickly provide relevant
information.
Table 2. Conventions used in this manual.
Convention Meaning
TIP: Provides helpful information and instructions
NOTE: Provides important information, including information explained in
further detail elsewhere in this manual
WARNING! Explains very important information about something that might
damage the researcher, an instrument, or cause data loss
Screen message Indicates an LCD screen message or a command that you select
Protocol Set-up
Protocol Set-up
in the next screen. In general, the
” means press the arrow keys to
on the screen
key on the control panel”
NAME
of control panel
key
Select
Select
Press
X
X > Y
X
or type. For example, “select
screen” means highlight the word “
the list in the home screen
A word in capital letters and Courier font indicates the name of a
key on the Gene Pulser MXcell electroporation system control
panel. For example, these keys have the following names:
ENTER
•The
panel
•The
right
Select X by pressing the arrow keys. The word “select” means to
press the arrow keys to highlight the word. For example, “select
Protocol Set-up
Protocol Set-up
From menu X, select Y. For example, “Select
>
WHOLE PLATE
and then select
word “select” means to highlight the word on the screen. For
example, “Select
highlight the word
Press X key on the control panel. For example, “press
means “Press the
key is the key named ENTER on the control
RIGHT
arrow key is the arrow key that points to the
” means “use the arrow keys to highlight the
option on the LCD screen”
” means highlight the
WHOLE PLATE
WHOLE PLATE
WHOLE PLATE
ENTER
in the home
located in
Protocol Set-up
Protocol Set-up
ENTER
option
”
For information about safety labels used in this manual and on the Gene Pulser MXcell
electroporation system, see “Safety and Regulatory Compliance” on page iii.
3
Page 13

Gene Pulser MXcell™ System Manual | Introduction 4 Gene Pulser MXcell™ System Manual
Page 14

2 Get Started
The Gene Pulser MXcell™ electroporation system ships as complete system that is ready to
setup and start. This chapter provides two sections with information about getting started
with this electroporation system:
• Unpacking the Gene Pulser MXcell system (page 5)
• Setting up the system (page 6)
• Introduction to the Gene Pulser MXcell electroporation system (page 8)
• Well sets and quadrants in Gene Pulser electroporation plates (page 12)
For more information about programming and running electroporation experiments on the
Gene Pulser MXcell system, see “Program and Run the System” on page 19.
Unpacking and Setting Up the System
Your Gene Pulser MXcell system shipment includes these components in the package:
• Gene Pulser MXcell power module
• Plate chamber
• Gene Pulser electroporation plate (1 x 96-well)
• Gene Pulser MXcell electroporation system manual
• Protocol quick guide
• Optimization quick guide
Remove all packing material and place components on a flat, dry surface near an
appropriate electrical outlet. Please check that all items were shipped. If any items are
missing or damaged, contact your local Bio-Rad Laboratories office (page 2).
5
Page 15
Gene Pulser MXcell™ System Manual | Get Started
Setting Up the Gene Pulser MXcell System
To set up the Gene Pulser MXcell power module, follow these instructions:
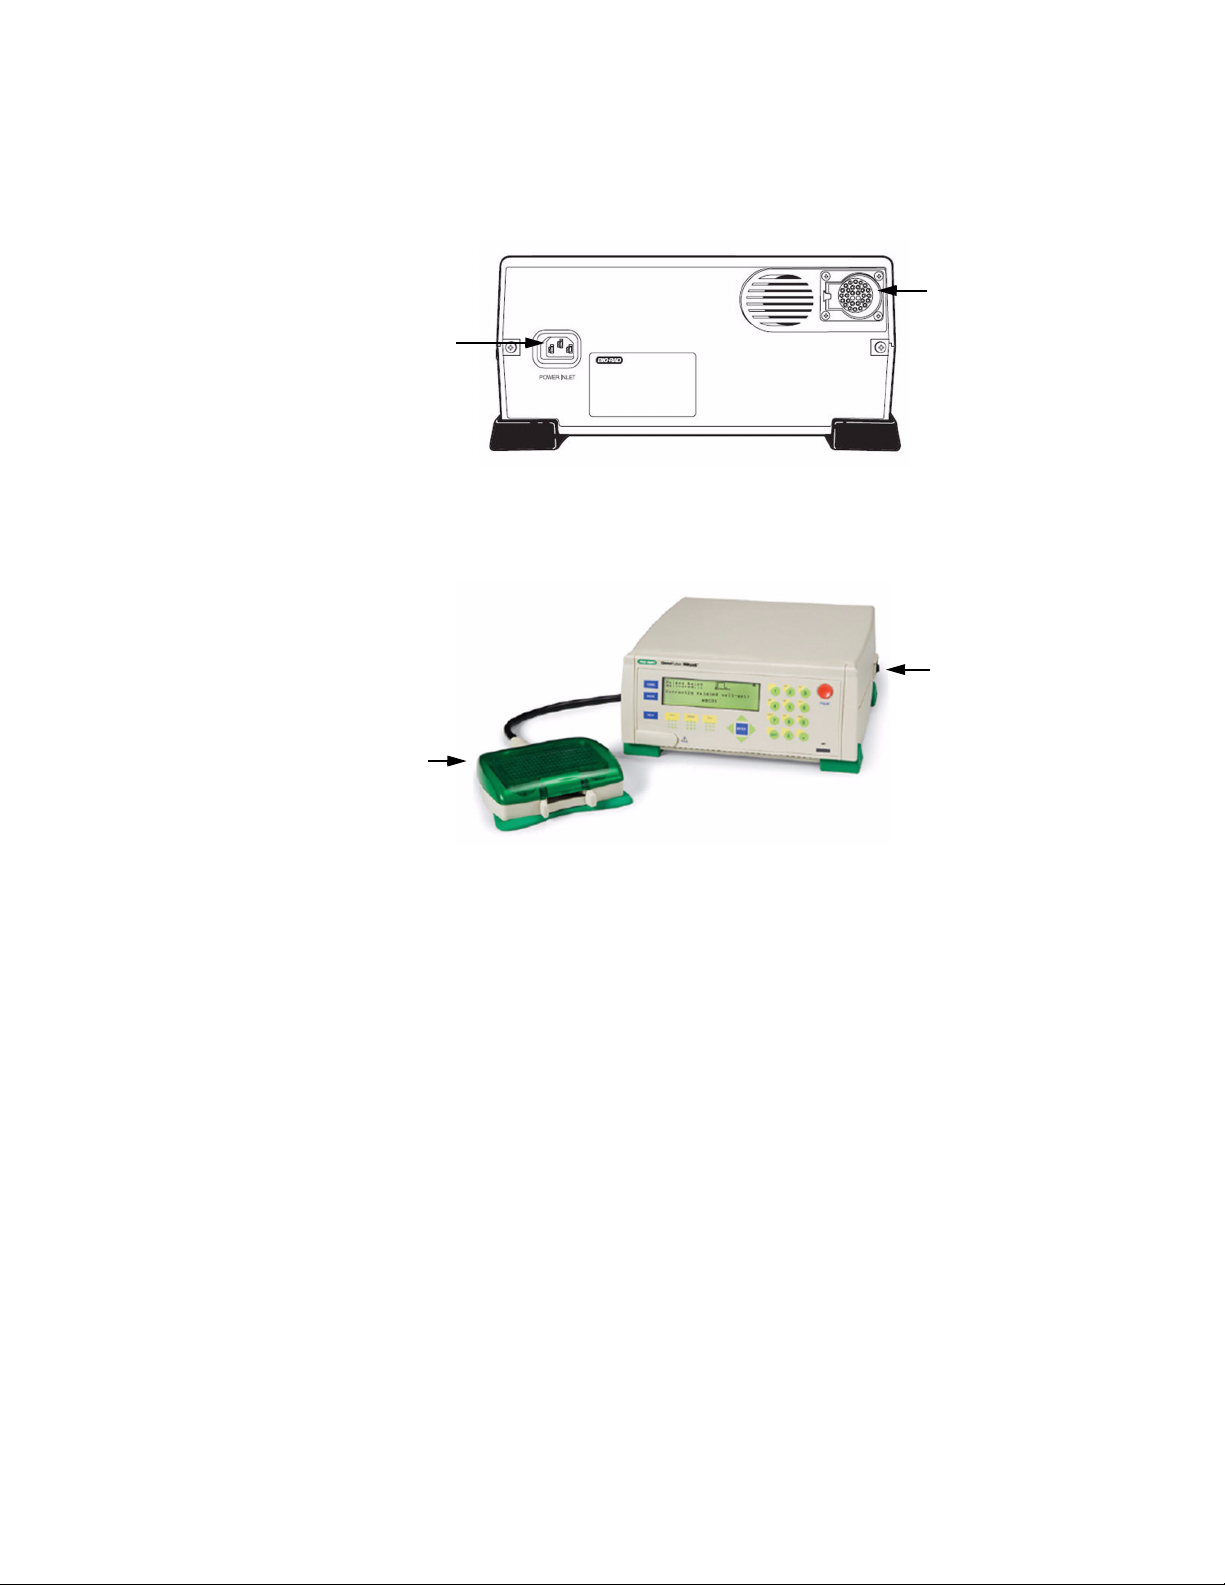
1. Attach the power cord to the back of the Gene Pulser MXcell power module (Figure 1):
Power input
Figure 1. Rear panel of Gene Pulser MXcell power module.
2. Connect the plate chamber by plugging the black connector into the back of the
power module:
Plate chamber
connection
Power switch
Plate chamber
Figure 2. Front of power module with plate chamber and power switch.
3. Plug the unit into an appropriate electrical outlet.
4. Turn on the Gene Pulser MXcell system, by pressing the power switch on the right
side of the power module (Figure 2).
TIP: Change the angle of the LCD screen by pulling down the foot under the
front of the Gene Pulser MXcell system.
5. Begin any operation by selecting an option in the list on the home screen (Figure 3)
1. Protocol Set-up
2. Gradient Protocol
3. User Protocols
4. Pre-set Protocols
5. Last Pulse
6. Data Management
7. Screen Intensity
8. Measurements
Figure 3. Home screen options.
For more information about the options listed in the home screen, see page 19.
6
Page 16
Setting Up the Gene Pulser MXcell System
The plate chamber holds the Gene Pulser electroporation plates. The top lid of the chamber
must be closed to use the plate chamber to deliver a pulse. The safety design of the system
requires that the top be closed before a pulse is applied. No pulse is delivered to the
electroporation plate when the chamber lid is open.
NOTE: The electroporation plate slot will only accept the Gene Pulser MXcell
electroporation plates designed specifically for this instrument.
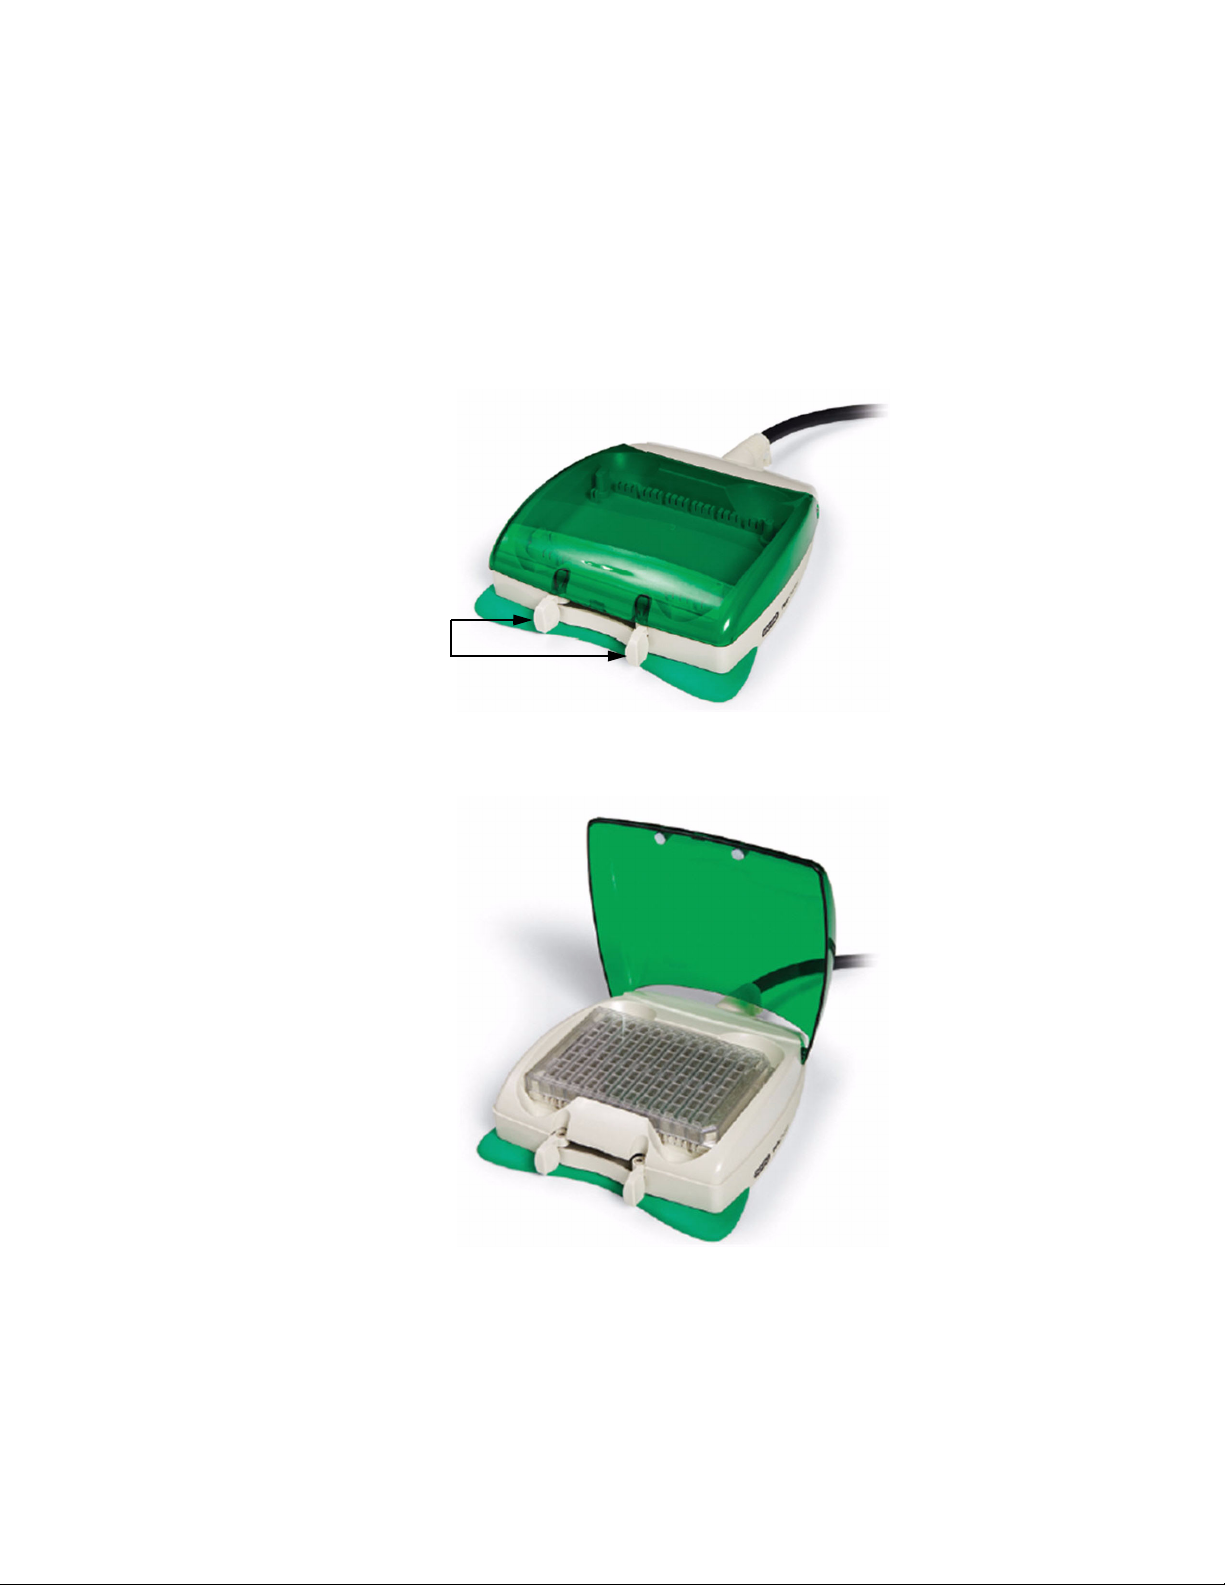
Follow these steps to operate the plate chamber:
1. Squeeze the tabs on the front of the plate chamber to release the latch and to open
the top.
Squeeze tabs
to open
Figure 4. Opening the plate chamber.
2. Insert a 96-, 24- or 12-well plate, line up the pins, and push down firmly.
Figure 5. Plate chamber with inserted 96-well electroporation plate.
3. To close the chamber, gently push the top down.
NOTE: Use only low-resistance media such as GPEB (<1000 ohms) with the
Gene Pulser MXcell system.
7
Page 17

Gene Pulser MXcell™ System Manual | Get Started
Introduction to the System
Your Gene Pulser MXcell electroporation system is designed for ease of use and intuitive
programming. This section provides an overview of how to operate the system:
• Overview of Gene Pulser MXcell system (page 8)
• Using the control panel and keys (page 9)
• Selecting operations in the home screen (page 10)
Overview of the Gene Pulser MXcell Electroporation
System
The Gene Pulser MXcell power module provides one of two distinct waveforms in a pulse:
• Exponential waveform (EXP)
• Square waveform (SQR)
To deliver a waveform, the power module contains a set of capacitors with a functional
range between 25 and 2475 μF that is selected in 25 μF increments. For square wave
pulses, the power module provides the large capacitance (2,475 μF) necessary for
delivering the pulse into low resistance media.
The power module selects an electronically controlled resistance of 50 to 1500 Ω. The
module controls the resistance of the circuit by placing resistors in parallel with the sample,
thereby providing a means of reducing the time constant of an exponential decay pulse.
This method provides an effective means of controlling the time constant when using
higher-resistance media, but has little effect on the time constant when using lowresistance media.
NOTE: Only use low-resistance media such as GPEB (<1000 W) with the Gene
Pulser MXcell system.
The Gene Pulser MXcell electroporation system uses Gene Pulser electroporation plates in
12-, 24-, and 96-well formats that are specially designed for use with this system (see “Well
Sets and Quadrants in Electroporation Plates” on page 12).
Following a pulse, the results for each plate or well set display on the screen.
TIP: Visit the Gene Expression Gateway tools web page (www.bio-rad.com/
genomics/) to download a template to records your results.
When the Gene Pulser MXcell system delivers a pulse, it can use the following parameters:
• Voltage in volts (V)
• Current in microfarads (μF)
• Resistance in ohms (Ω)
• Duration in milliseconds (ms)
• Number of pulse is the number of individual pulses (NP)
• Pulse interval is the time between each pulse
8
Page 18
Introduction to the System
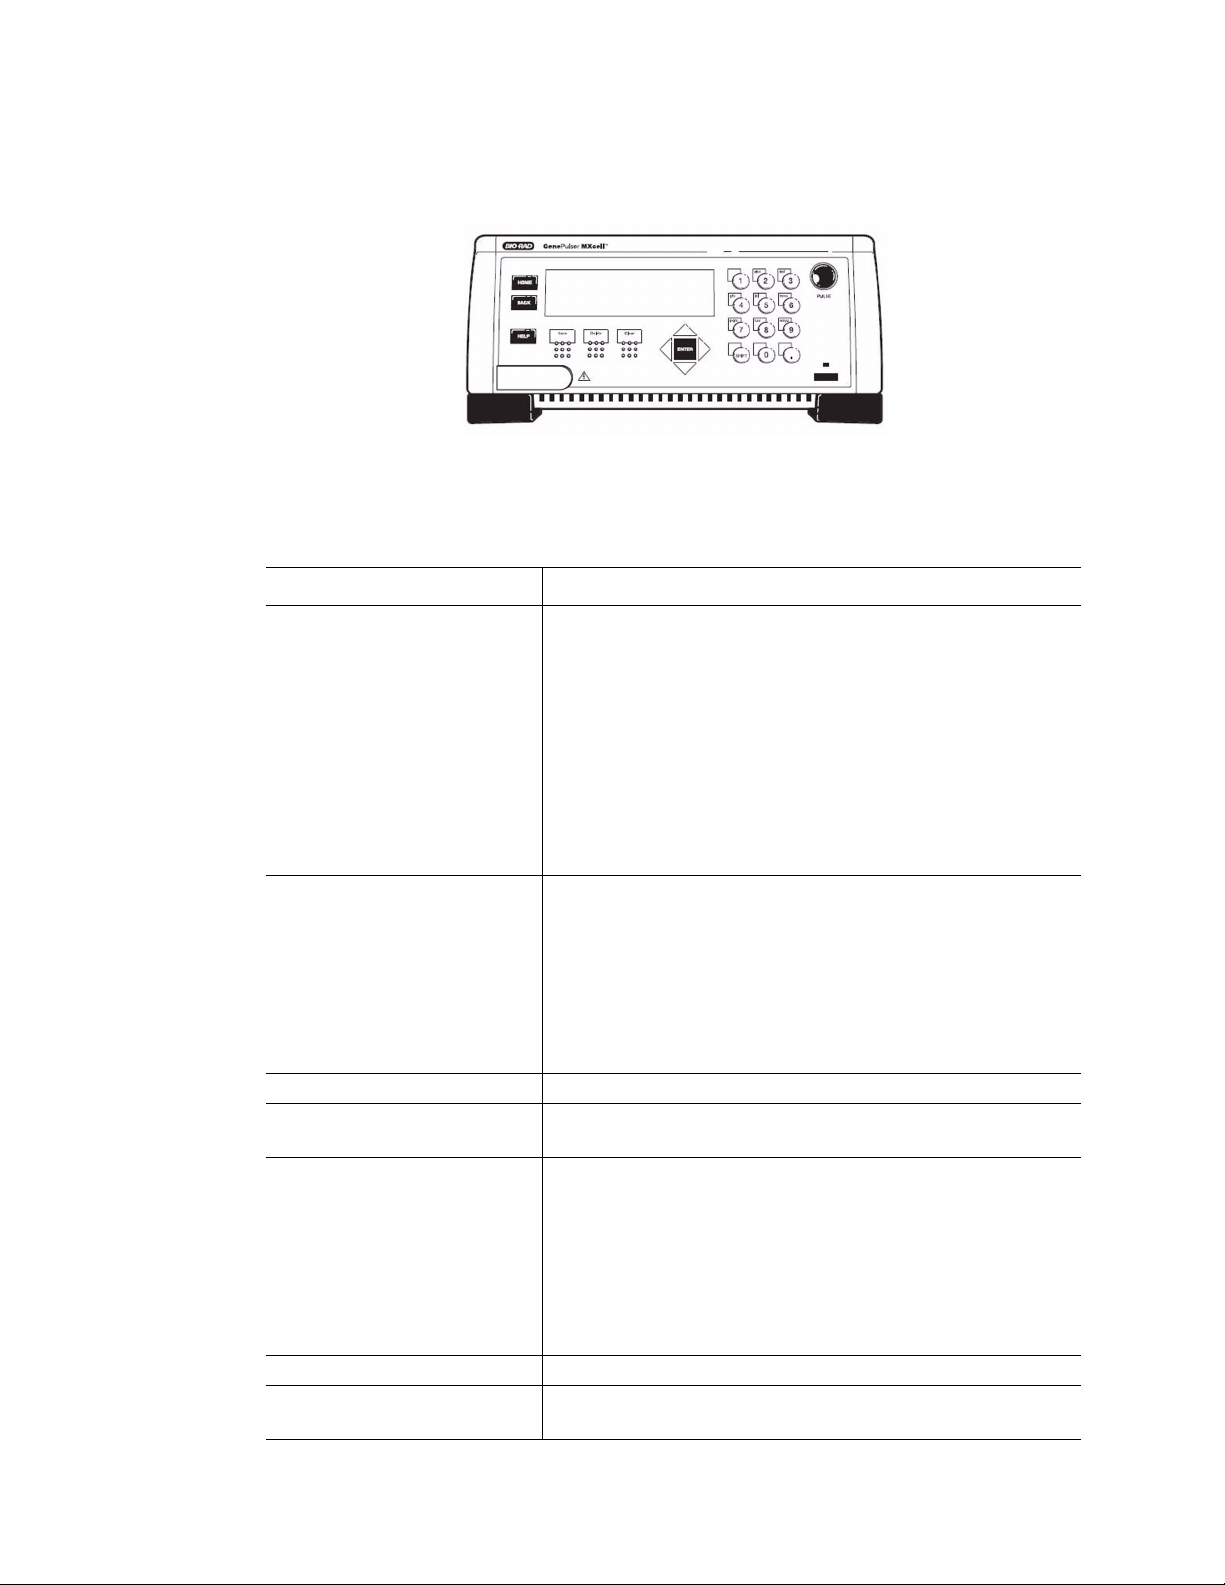
Using the Control Panel
The control panel includes an LCD screen and a keypad:
Figure 6. Gene Pulser MXcell system control panel with keypad.
Use the keys the Gene Pulser MXcell control panel to enter all parameters for an
electroporation experiment. Table 3 describes the function of each key on the control panel:
Table 3. Function of the keys on the control panel.
Keys Function
Alphanumeric Press these keys to enter letters or numbers when
programming the Gene Pulser MXcell system. Press the
Shift
key to toggle between alphabetic and numeric
entries. To enter the same key twice, advance the cursor
using the right arrow key. For example to type “a” and then
ENTER
“b”, press the “abc” key, press
“abc” key twice.
NOTE: The second digit in a two-digit number must be
entered within 2 seconds after the first digit. If the second
digit is entered too late the power module will enter a
single-digit number rather than a two-digit number.
Shift
HOME
Return to the home screen from anywhere in the program
BACK
HELP
Toggle between alphabetic and numeric entries. For
example, to type an alphabetic character, press the
key to enter alpha mode, then press the key with the
appropriate letter. To type an “a”, press the 2 key once, and
to type a “b”, press the 2 key twice, to type a c, press the 2
key three times. In general, the Gene Pulser MXcell system
automatically changes between alphabetic and numeric
input if only one type of input is needed.
Return one level back in toward the home screen within any
operation.
Displays context-sensitive help for each operation screen.
To open the help screen, press the
help screen and return to the current operation, press the
HELP
key again.
, and then press the
HELP
key. To leave the
Shift
Save
Delete
Each help screen describes the keys you press to enter the
next function, and continue the current operation. Press the
up and down arrow keys to scroll through the help screens.
Saves user names and user protocols.
Removes only the last entry in the field; also used to
remove User Name and User Protocol files
9
Page 19

Gene Pulser MXcell™ System Manual | Get Started
Table 3. Function of the keys on the control panel.
Keys Function
Clear
ENTER
Arrow Press one of the four arrow keys to move the cursor in the
PULSE
Remove the entire line of the field.
Press this key to confirm a selection or to move the cursor
to the next location.
direction of the arrow. Up and down Arrow keys move the
cursor up or down one row at a time. Depending on the
screen and location of the cursor, the right and left Arrows
will move the cursor to the right or left one space at a time,
toggle forward and backward one screen when there are
multiple screens for the same menu, or increase or
decrease numerical input values.
Pressing this red key initiates an electric pulse. When a
pulse is delivered to the plate, the screen displays
and the system emits a sound. When the system delivers
multiple pulses, a sound emits after the last pulse is
delivered.
Pulsing
Overview of Options in the Home Screen
The Gene Pulser MXcell system home screen includes all the options you need:
• Program and run protocols: Define the parameters of your electroporation
experiment.
• System functions: View data, test your buffer, or adjust the screen.
The home screen provides access to all the operations in the system, including options to
program protocols:
1. Protocol Set-up
Program and run protocols
System functions
Figure 7. The home screen options.
TIP: To return to the home screen from anywhere in the program, press the
key on the control panel.
The options include two types of operations:
•Protocols: Use one of the four protocol options to create, store, or open protocols to
run with any of the Gene Pulser electroporation plates. Within a plate, well sets and
quadrants can be programmed to run separate protocols. Within each protocol the
parameters can vary for each individual well, each well set, or each quadrant.
• System functions: Use one of four functions to access data or adjust system
parameters.
2. Gradient Protocol
3. User Protocols
4. Pre-set Protocols
5. Last Pulse
6. Data Management
7. Screen Intensity
8. Measurements
S
HOME
10
Page 20

Introduction to the System
To begin an operation on the Gene Pulser MXcell system, select one of the options in the
home screen. Table 4 lists all the options and the associated operations.
Table 4. Options listed in the home screen.
Option Operation
PROTOCOLS
Protocol Set-up
Gradient Protocol
User Protocols
Pre-Set Protocols
SYSTEM FUNCTIONS
Last Pulse
Data Management
Screen Intensity
Measurements
Manually program the parameters that will be delivered
to the plate.
Specify initial values that will be used to automatically
generate a gradient of settings across all the wells on
the plate.
Access all protocols within the directory of each
system user and create new user directories.
Open one of eighteen pre-set protocols designed for
easy optimization of parameters to deliver to the plate
during a pulse. These protocols can be modified and
saved with a different name.
Recall the electroporation parameters for the last pulse
and to deliver a pulse using the same conditions.
View pulse parameters and results for the last 100
pulses logged by date and time.
Adjust the contrast intensity of the LCD display.
Measure the resistance or capacitance of any well on
this device.
11
Page 21
Gene Pulser MXcell™ System Manual | Get Started
Well Sets and Quadrants in Electroporation Plates
The Gene Pulser electroporation plates are available in three different formats: 96-well, 24well and 12-well. Table 5 shows the recommended cell concentration and volume for each
well in a plate:
Table 5. Electroporator plate formats.
Plate format Cell concentration Volume Number of well sets
96-well
24-well
12-well
1 x 10
5 x 10
1 x 10
5
to 2 x 10
5
to 8 x 10
6
to 1.5 x 10
For more information about how to electroporate mammalian cells, see “Preparation of
Mammalian Cells” on page 15.
Well sets and quadrants divide the electroporation plates into functional units. You have the
option of running a different protocol in each different well set or quadrant. Each plate
format is divided according to these definitions:
• Well set: A group of wells within a plate
•Quadrant: All the wells or well sets in one quarter of a plate
6
100-200 ul 24
6
500-800 ul 24
7
1.0-1.5 ml 12
Well sets
A well set is a group of four wells in a column of a 96-well plate in which programmed
electroporation conditions are delivered simultaneously. Well sets can assist you in
performing the following:
• Replicating experiments by using the same type of cells and same protocol
• Testing different variables under identical electroporation conditions by putting
different experiments (molecules or cells) in different well sets. For example,
deliver different siRNAs into the same cell line.
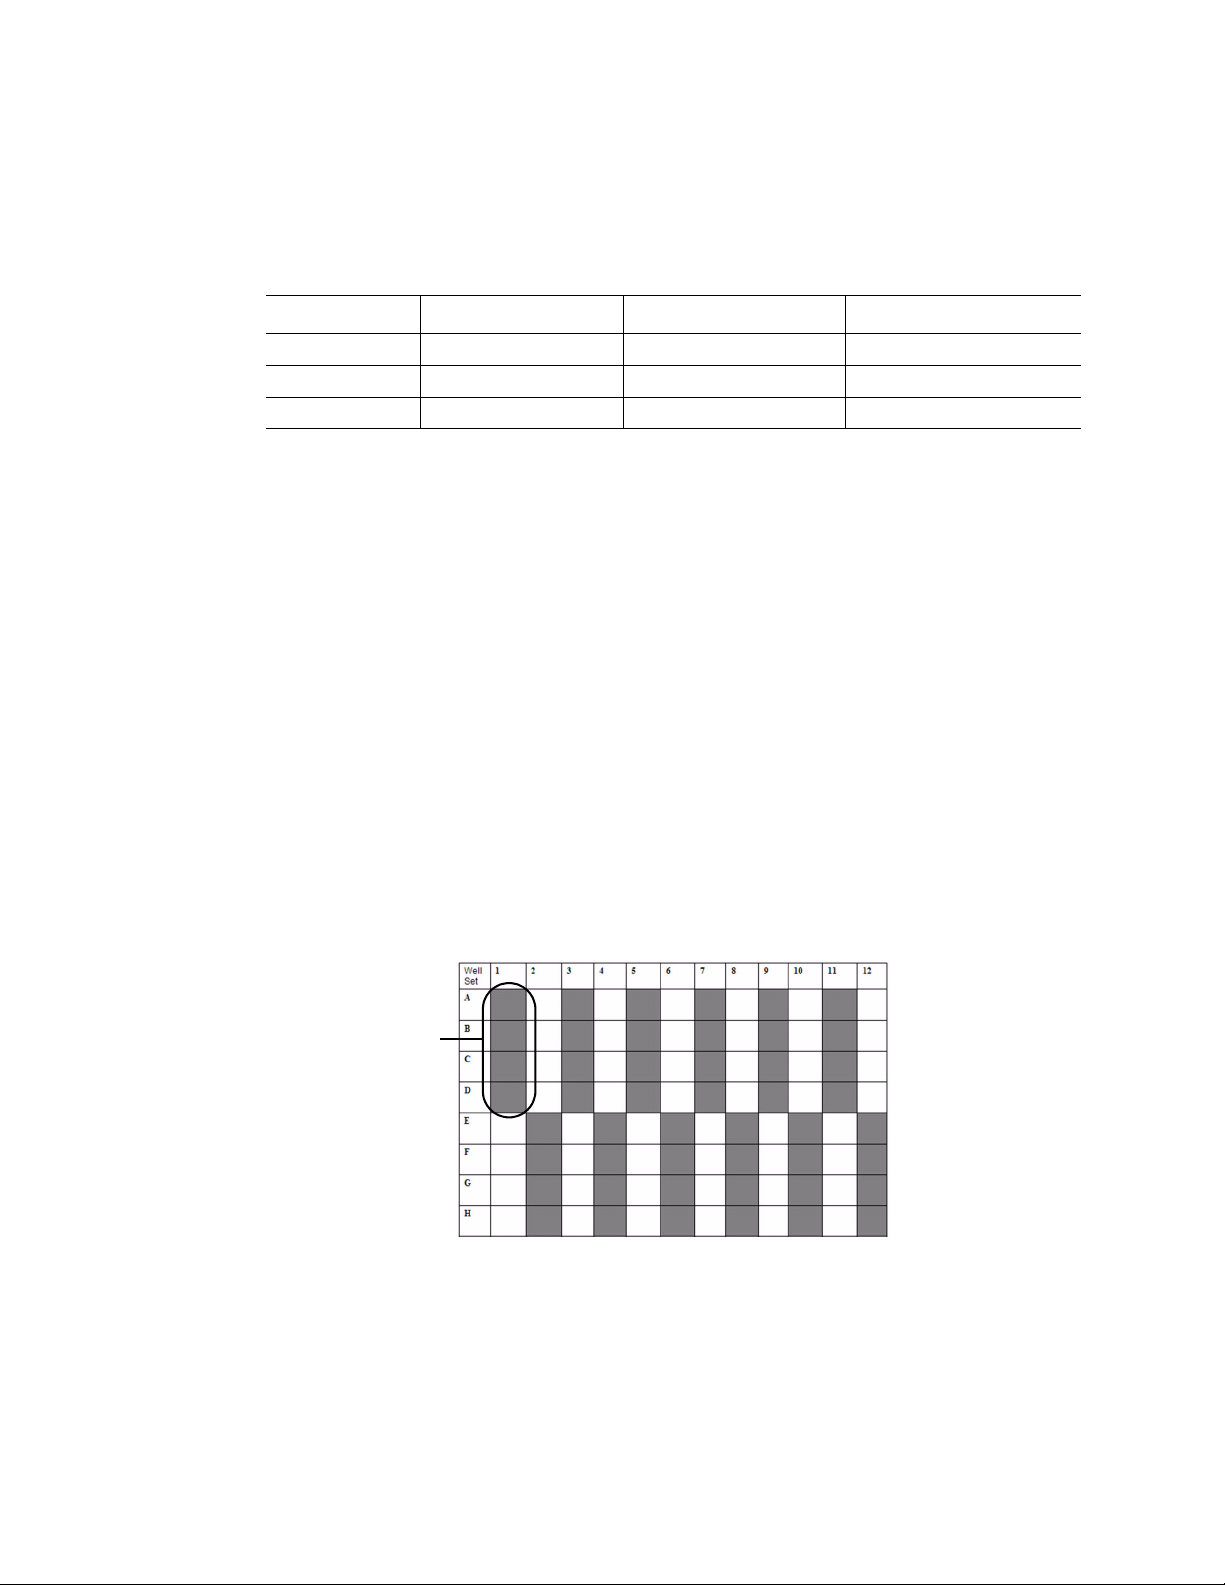
In a 96-well plate, each well set is composed of 4 adjacent wells in a column. For example
column 1 with rows A, B, C, and D is one well set (Figure 8):
One well set
12
Figure 8. Well sets in a 96-well plate.
In Figure 8, the shaded and unshaded areas represent sets of wells that are grouped
together in a well set. During a run, the parameters entered for each well set are
simultaneously delivered to all the wells in that set.
Page 22

Well Sets and Quadrants in Electroporation Plates
When programming a protocol, the well set appears with the letters of the rows, followed by
the column number. For example the well set “ABCD1” includes wells A, B, C, and D in
column 1 (Figure 8).
WARNING! All wells in a well set must be filled with either sample or sample
buffer. For example, if you want to electroporate six wells, fill a complete well set
(such as ABCD1) with sample and fill two wells in a second well set (such as
AB2) with sample. Finally, be sure to fill the remaining two wells in the second
well set (such as CD2) with the sample buffer.
Quadrants
The 24- and 96-well plates can be programmed in quadrants. A quadrant in a 96-well
electroporation plate includes a group of six well sets. In a 24-well plate each quadrant
consists of six groups of wells. Programming quadrants is an easy way to replicate gradient
experiments. Figure 9 shows the quadrants in both the 96-well and 24-well electroporation
plates.
96-well plate
One well set One well
Figure 9. Quadrants in 96- and 24-well plates.
24-well plate
13
Page 23

Gene Pulser MXcell™ System Manual | Get Started14 Gene Pulser MXcell™ System Manual
Page 24

3 Prepare Mammalian Cells
Preparation of cells is critical to the success of any electroporation experiment. This chapter
contains important information about how to run a successful experiment on the Gene
Pulser MXcell™ electroporation system. Refer to the following sections:
• Electroporation of Mammalian cells (page 15)
• Reagents and Solutions for Electroporation (page 17)
Preparation of Mammalian Cells
This section describes techniques for preparing electrocompetent mammalian cells, and
how to manipulate them after electroporation. Many of these techniques have been tested at
Bio-Rad Laboratories. The following list provides an overview of the major steps to run an
electroporation experiment using the Gene Pulser MXcell™ electroporation system system.
Refer to the pages listed to obtain more information.
• Harvest and count the cells (“Harvesting and Counting the Cells” on page 16).
• Prepare the cells for electroporation (“Preparing the Cells for Electroporation” on
page 16).
• Resuspend cells in Gene Pulser electroporation buffer and transfer them to the
electroporation plate (“Electroporation” on page 16)
• Insert electroporation plate into plate chamber (figure 5 on page 7)
• Create a new protocol, or select an existing protocol from the home screen and
PULSE
press the
page 20)
• Remove the electroporation plate and plate the cells in fresh cell culture plates. If
needed, combine the cells from different wells into the same culture plate. Assess
the transfection efficiency. (“Assessing Transfection Efficiency” on page 17)
button to electroporate the cells (“Protocol Set-Up Option” on
For information about the factors that affect electroporation conditions, see page 41.
15
Page 25

Gene Pulser MXcell™ System Manual | Prepare Mammalian Cells
Harvesting and Counting the Cells
To harvest and count cells, follow these instructions:
1. Passaged the cells the day before electroporation. All cell types should be harvested
when they are actively growing. If working with adherent cells, trypsinize the cells to
detach them. Add growth media and then pellet the cells. If working with suspension
cells, pellet the cells.
2. After pelleting the cells, remove the media and wash the cells once with PBS by gently
pipeting them.
3. Remove an aliquot from the washed cells and count the cells.
Preparing the Cells for Electroporation
To prepare the cells for electroporation, follow these instructions:
1. Aliquot the number of cells needed to perform the experiment. For adherent cells, we
recommend using 1 x 10
For suspension cells we recommend 2-3 x 10
used 1-5 x 10
6
cells/ml.
6
cells/ml, but we have successfully used 0.5-5 x 10⁶ cells/ml.
6
cells/ml, but we have successfully
2. Pellet the cells. Aspirate the PBS and resuspend the cells in the appropriate volume of
Gene Pulser electroporation buffer reagent (1 ml per 1 x 10
ml per 2-3 x 10
6
of suspension cells).
6
of adherent cells, and 1
3. Add the nucleic acid or other molecule. For siRNA electroporation, use 10-100 nM of
siRNA. For plasmid DNA electroporation, use 5-40 μg/ml.
Electroporation
To electroporate cells, follow these instructions:
1. Use 100-200 μl of mixture (cells in electroporation buffer reagent with nucleic acid) per
well of a 96-well electroporation plate. Use 500-800 μl of mixture per well of a 24-well
electroporation plate. Use 1-1.5 ml of mixture per well of a 12-well electroporation
plate.
WARNING! All wells in a well set must be filled with either sample or sample
buffer. For example, if you want to electroporate six wells, fill a complete well set
(such as ABCD1) with sample and fill two wells in a second well set (such as
AB2) with sample. Finally, be sure to fill the remaining two wells in the second
well set (such as CD2) with the sample buffer.
2. Rock the plate to wet the electrode and distribute the cells evenly
3. Transfer cells to tissue culture dishes containing growth media.
4. Incubate cells at 37 °C in a humidified CO
incubator until ready to be assayed.
2
16
5. After incubating 24 hours change the growth media.
Page 26

Reagents and Solutions for Electroporation
Assessing Transfection Efficiency
To assess the efficiency of a transfection experiment, several techniques can be used:
Fluorescently labeled siRNAs can be used to determine the transfection efficiency for siRNA
delivery. Transfection efficiency can be measured by fluorescence microscopy or by flow
cytometry. For plasmid delivery the transfection efficiency can be determined by
electroporating plasmids expressing reporter genes such as GFP or β-galactosidase.
If you electroporate a mammalian cell line for the first time, choose growth conditions
following the electroporation that are based on other experiments with those cells or with
other similar cells. Reagents and Solutions for Electroporation
This list includes recommended reagents and solutions for running an electroporation
experiment:
• Gene Pulser electroporation buffer (catalog #165-2676 and 165-2677)
• Growth medium with FBS and necessary additives
•Trypsin-EDTA
• Sterile PBS: 137 mM NaCl, 2.7 mM KCl, 9.5 mM sodium phosphate, pH 7.3
Reagents and Solutions for Electroporation
This list includes recommended reagents and solutions for running an electroporation
experiment:
• Gene Pulser electroporation buffer (catalog #165-2676 and 165-2677)
• Growth medium with FBS and necessary additives
•Trypsin-EDTA
Sterile PBS: 137 mM NaCl, 2.7 mM KCl, 9.5 mM sodium phosphate, pH 7.3
17
Page 27

Gene Pulser MXcell™ System Manual | Prepare Mammalian Cells
18
Page 28

Gene Pulser MXcell™ System Manual
4 Program and Run the System
The Gene Pulser MXcell™ electroporation system runs experiments with Pre-Set protocols,
or with protocols that you create. To run an electroporation experiment, you can either
program a new protocol or select an existing protocol.
This chapter includes instructions for programming protocols, running protocols, or using
other system functions:
• Turn on the Gene Pulser MXcell system (page 20)
• Select the
or in well sets (page 20)
• Select the
whole plate or in quadrants (page 22)
• Select the
•Select
•Open the
•Open the
• Select the
• Select the
(page 27)
• Save a new protocol or an edited protocol (page 28)
• Add a new user with the
Protocol Set-up
Gradient Protocol
User Protocols
Pre-Set Protocols
Last Pulse
Data Management
Screen Intensity
Measurements
option to view the last pulse that was delivered (page 26)
option to program new protocols in the whole plate
option to program a new gradient protocol in the
option to open user protocols (page 24)
option to open pre-set protocols (page 25)
option to view data from delivered protocols (page 26)
option to change the LCD brightness (page 27)
option to check buffer resistance and capacitance
User Protocols
option (page 29)
19
Page 29

Gene Pulser MXcell™ System Manual | Program and Run the System
Turning on the System
To turn on the Gene Pulser MXcell system, press the power button on the right side of the
power module (Figure 2 on page 6).
Once initiated, the Gene Pulser MXcell system runs a series of tests. These test verify that
the system is running within specifications. The tests check the PulseTrac™ system
(page 49) and the firmware. During the tests the system displays the Bio-Rad Laboratories
logo, the Gene Pulser MXcell system name, and the firmware version.
After initialization, the home screen displays (page 10). From this screen it is easy to access
all options, including the first four options for programming and running protocols. To select
an option in the home screen, press the up and down arrow keys to select an option, and
ENTER
press
to confirm the selection.
TIP: To return to the home screen from anywhere in the program, press the
key on the control panel.
Protocol Set-Up Option
The Protocol Set-up option allows you to program protocols for the plate as follows:
• Whole plate (WHOLE PLATE): Apply the same pulse parameters to the entire
electroporation plate (page 20).
• Well set (WELL SET): Apply parameters to one well set within the electroporation
plate (page 21).
HOME
WHOLE PLATE PROGRAMMING
To program a whole plate, follow these instructions:
1. Select
Then press
2. Select a plate size.
Use the arrow keys to select the
selection.
3. Select
Press
4. Select a waveform.
Press the arrow keys to select the waveform (
the selection.
5. Enter the parameters.
Enter the required parameter values for the pulse units.
NOTE: If the values you enter for a parameter is outside the limits of the Gene
Pulser MXcell system, the value will change to the closest permitted value.
Protocol Set-up
ENTER
to confirm the selection.
WHOLE PLATE
ENTER
to confirm the selection:
.
Plate:
96 24 12
Program:
WHOLE PLATE WELL SET
in the home screen.
Plate (96, 24
EXP
or 12), and press
or
SQR
), and press
ENTER
to confirm the
ENTER
to confirm
20
Page 30

Protocol Set-Up Option
Press the arrow keys to select a parameter, then press the alphanumeric keys to enter
ENTER
a new value. Press
to confirm the entry.
96-Well Whole Plate
Edit well Set? (press ENTER)
Waveform: EXP – SQR
V: --C: ----
R: ?
TIP: Press
Clear
to delete the value.
This example shows some values for each parameter in the pulse with a square
SQR
waveform (
NOTE: The
complete, and the
TIP: You can also edit a well set by selecting
):
96-Well Whole Plate
Edit well Set? (press ENTER)
Waveform: EXP – SQR
P
in the lower right corner indicates that the required parameters are
PULSE
V: 500
C: 500
R: ?
D: 5.500
#. 3 S: 10.0 P
button is ready.
Edit well Set?
using the arrow
keys to move the cursor. Press ENTER to begin editing. For more information
EXP
or
about well set programming, see Step 5 "Select a waveform (
SQR
page 22.
Save
6. (Optional) Press
7. Press the
PULSE
to save the changes in the protocol (page 28).
button to electroporate the sample.
TIP: Once you start a protocol, you can stop the experiment if needed. To stop a
PULSE
protocol, press and hold the
button. When the protocol stops, the screen
displays the last pulse (see “Last Pulse Option” on page 26).
)." on
WELL SET PROGRAMMING
To program a plate with well sets that run different protocols, follow these instructions:
1. Select
Press
2. Select a plate size.
Press the arrow keys to select a plate size, then press
3. Select
Select
4. Select a well set in the plate.
Use the left and right arrow keys to select the well set, or to move through parameter.
Press
Protocol Set-up
ENTER
to confirm the selection.
WELL SET
WELL SET
ENTER
.
, then press ENTER to accept the selection.
Plate:
96 24 12
Program:
WHOLE PLATE WELL SET
to confirm the parameter entry.
in the home screen.
ENTER
to accept the selection.
21
Page 31

Gene Pulser MXcell™ System Manual | Program and Run the System
EXP
or
SQR
5. Select a waveform (
Press the arrow keys to select a waveform. Then enter the values for each parameter.
Once entered, press
NOTE: The
complete, and the
6. (Optional) Select another well set.
Press, and hold the up and down arrow keys to select another well set in the plate.
Enter all the parameters for each well set in the run.
7. (Optional) Press the
TIP: Once you start a protocol, you can stop the experiment if needed. To stop a
protocol, press and hold the
displays the last pulse (see “Last Pulse Option” on page 26).
P
in the lower right corner indicates that the required parameters are
ENTER
PULSE
button is ready.
PULSE
).
to confirm the selection.
button to electroporate the sample.
PULSE
button. When the protocol stops, the screen
Gradient Protocol Option
The Gradient Protocol allows you to specify values that will be used to automatically
generate a gradient of settings across all the wells of a plate. This protocol is a quick way to
optimize conditions for your specific cell type.
NOTE: Gradient protocols run only on 24- and 96-well electroporation plates.
To set up a gradient protocol, first select the part of the plate to apply the gradient. Follow
the instructions in the following sections to set up a gradient protocol in a plate:
• GRADIENT:
• QUADRANT:
Figure 10. Quadrants in 96-well and 24-well plates. A quadrant is one quarter of the
The median voltage entered is applied to the mid point of the well set. In a whole plate, this
corresponds to well set EFGH1, in a quadrant, it is either ABCD4, ABCD10, EFGH4, or
EFGH10. Wells to the left of the percent value entered decrease by the percentage entered,
while wells to the right of the percentvalue entered increase by the percent. Upon
completion of the run, values for each parameter can be obtained by using the right arrow
key.
Run a gradient protocol through a well set or the whole plate (page 23)
Run a gradient protocol through a quarter of the wells in a plate (page 23).
96-well plate
wells in the plate.
24-well plate
22
Page 32

Gradient Protocol Option
GRADIENT PROGRAMMING
To program a gradient protocol, follow these instructions:
1. Select
Press
2. Select a plate size.
Press the arrow keys to select the
selection.
Gradient Protocol
ENTER
to confirm the selection.
in the home screen.
Plate (96
or 24) and press
ENTER
to confirm the
3. Select
Select
4. Select a waveform (
Press the arrow keys to select a waveform, then enter the values for each parameter.
Once entered, press
NOTE: The
complete, and the
5. Press the
TIP: Once you start a protocol, you can stop the experiment if needed. To stop a
protocol, press and hold the
displays the last pulse (see “Last Pulse Option” on page 26).
GRADIENT
GRADIENT
.
, and then press
Plate:
Program:
GRADIENT QUADRANT
EXP
or
ENTER
P
in the lower right corner indicates that the required parameters are
PULSE
button is ready
PULSE
button to electroporate the sample.
ENTER
to confirm the selection:
96 24
SQR
).
to confirm the selection.
PULSE
button. When the protocol stops, the screen
QUADRANT PROGRAMMING
To program a quadrant program, follow these instructions:
1. Select
Press
Gradient Protocol
ENTER
to confirm the selection.
in the home screen.
2. Select a plate size.
Press the arrow keys to select the
selection.
3. Select
Press the arrow keys to select
4. Select a waveform (
Press the arrow keys to enter the values for each parameter. Once entered, press
ENTER
NOTE: The
complete, and the
QUADRANT.
Plate:
Program:
GRADIENT QUADRANT
EXP
or
to confirm the selection.
P
in the lower right corner indicates that the required parameters are
PULSE
button is ready.
QUADRANT
96 24
SQR
).
Plate (96
and press
or 24) and press
ENTER
to confirm the selection.
ENTER
to confirm the
23
Page 33

Gene Pulser MXcell™ System Manual | Program and Run the System
y
5. (Optional) Select another quadrant.
Press and release the up and down arrow keys to move through parameters within a
quadrant. Press and hold the up and down arrow keys to select another quadrant.
PULSE
6. Press the
TIP: Once you start a protocol, you can stop the experiment if needed. To stop a
protocol, press and hold the
displays the last pulse (“Last Pulse Option” on page 26).
button to electroporate the sample.
PULSE
button. When the protocol stops, the screen
User Protocols Option
Choose an existing protocol to run, or create, open, rename, or delete a protocol from the
User Protocol
protocol, or edit it and then run it.
To select and run a user protocol, follow these instructions:
1. Select
Press
list. Save any protocol as a user protocol for future experiments. Run the
User Protocols
ENTER
to confirm the selection:
in the home screen.
User Director
User Protocols
NOTE: This opens the directory for the current user. To select a different user
directory, select User Directory instead. Press ENTER to confirm selection.
2. Select for a protocol from the list in the user protocol.
Press the up and down arrow keys to select a protocol. Then Press ENTER to confirm
selection.
Protocols for user:
Mike16
1. - (E.coli)
2. - (empty protocol)
3. - (empty protocol)
4. - (empty protocol)
5. - (empty protocol)
(more?)
3. (Optional) To view another protocol from another user’s directory, press the
key.
Press and release the up and down arrow keys to move from one protocol to the next.
Press and hold the up and down arrow keys to scroll from screen to screen.
Registered Users:
1. -(no user registered)
2. -(no user registered)
3. - (no user registered)
4. - (no user registered)
5. - (no user registered)
(more…
)
?
Back
24
Page 34

Pre-Set Protocols Option
4. Edit a selected protocol.
Save
Enter the changes and press the
key to save the changes:
• To rename a protocol, press the CLEAR key to delete it, type in the new name.
press ENTER to confirm change.
• Change parameters of the protocol by selecting the desired parameters and
typing new parameters
• Press ENTER to confirm the selection
5. Delete a selected protocol. Press the DELETE key. At the screen prompt, press the
DELETE key again.
Save
6. Press
to save the changes in the protocol (page 28).
7. Press the
PULSE
button to electroporate the sample.
TIP: Once you start a protocol, you can stop the experiment if needed. To stop a
protocol, press and hold the
displays the last pulse (see “Last Pulse Option” on page 26).
Pre-Set Protocols Option
Choose an existing protocol to run from the
a user protocol for future experiments. Run the protocol, or edit it and then run it.
Bio-Rad Laboratories scientists have developed twenty-one optimized pre-set protocols so
you can quickly run an experiment. These protocols optimize typical electroporation
conditions, starting with known parameters or starting with unknown parameters.
To run a pre-set protocol, follow these instructions:
1. Select
Press
2. Select for a pre-set protocol from the list.
Press and release the up and down keys to move from one protocol to the next. Press
and hold the arrow keys scroll from screen to screen. Press
selection.
Pre-Set Protocol
ENTER
to confirm the selection.
PULSE
button. When the protocol stops, the screen
Pre-Set Protocols
in the home screen.
Pre-Set Protocols:
1. Opt mini 96 well/ Sqr.Exp
2. Opt mini 96 well/ Sqr
3. - Opt mini 96 well/ Exp
4. - Opt 96 well/ Sqr, NP, D
5. - 96 well/ Exp
6. 24 well/ Exp
(more…
)
?
list. Save any protocol as
ENTER
to confirm the
NOTE: For detailed information about the parameters and plate setup for each
pre-set protocol, see “Program and Run the System” on page 19.
25
Page 35

Gene Pulser MXcell™ System Manual | Program and Run the System
3. (Optional) Change the values of the parameters.
Press the arrow keys to select the parameter and press the alphanumeric keys to
enter a new value. To save the changes and create a new protocol, press the
(page 28).
NOTE: You must change the name of the protocol before saving. Press the
CLEAR key to delete the Pre-set protocol name, and use the alphanumeric keys
to type a new name. (page 28).
Save
4. (Optional) Press
to save the changes in the protocol (page 28).
Save
key
5. Press the
TIP: Once you start a protocol, you can stop the experiment if needed. To stop a
protocol, press and hold the
displays the last pulse (see “Last Pulse Option” on page 26).
PULSE
button to electroporate the sample.
Last Pulse Option
Once a pulse is completed, the screen displays the last pulse data. You can alsto view the
data by selecting the
TIP: This function allows you to proceed from the last pulse the system
delivered before a power failure.
To open the
1. Select Last Pulse from the HOME screen
2. Press
Last Pulse
ENTER
Last Pulse
option, follow these instructions:
to confirm the selection.
Data Management Option
The data management function stores a list of the last 100 protocols that were run, starting
from the most recent and ending with the oldest. Use this list to view the exact parameters
of an experiment.
NOTE: When the maximum number of files is reached, the oldest protocol file is
deleted.
PULSE
button. When the protocol stops, the screen
function.
26
When you run a protocol, the data management lists the experimental results with the
parameters used in that experiment. The name displayed in this list is the name of the
protocol used when you ran the experiment.
To view the experiments listed in the data management operation, follow these instructions.
HOME
1. Select Data Management from the
Press the up and down keys to select
accept the selection.
2. Press the up and down arrow keys to select a protocol in the list.
TIP: To change the name of the experiment in the data management list, enter a
new name when the experiment is selected. Then press
name. At the screen prompt, pres Yes to save or No to return to the previous
screen.
3. Press one of these keys to open or delete the selected experiment:
ENTER
• Press
to view the selected protocol.
screen
Data Management
option. Then press
ENTER
to save the new
ENTER
to
Page 36

Screen Intensity Option
• Press
• At the screen prompt, press Yes to delete or No to return to the previous
Delete
screen.
to remove the selected protocol from the list.
Screen Intensity Option
Adjust the screen intensity when you cannot clearly see the screen. To change the screen
intensity, follow these instructions:
1. Select
2. Adjust the screen intensity.
Press the up and down arrow keys to change the intensity of the screen and view the
results of the change:
Screen Intensity from the HOME screen
Measurements Option
Open the Measurements screen to measure the sample resistance of the buffer in your
plate. Use this function to verify a buffer, or troubleshoot experimental results.
Use ? to raise intensity
Use ? to lower intensity
.
NOTE: To select the plate size rof measuring buffer resistance, you must access the
HOME
protocol set-up. Select the plate size, return to the
instructions:
1. Select the Measurements option from the HOME screen.
2. Enter a well ID to measure the resistance of the sample in that well.
Press the left and right arrow keys to select a well to measurement. Then press
ENTER
to accept the selection, press
Measurements
Well ABCD4
Sample Resistance 150
Capacitance (
to obtain the measurement.
µ
F) ----
screen and follow these
ENTER
27
Page 37

Gene Pulser MXcell™ System Manual | Program and Run the System
Saving Protocols
Once a protocol is programmed or a pre-set protocol is changed, you have the option to
save the protocol as new user protocol.
To save a protocol as a file, follow these instructions:
1. After programming or editing a protocol, press the
protocol.
2. Type in a user name by pressing the alphanumeric keys.
TIP: Press the alphanumeric keys to enter new characters. Press the
to toggle between letters and numbers. Then press the
Clear
name. To erase, press the
In this example the user name is
User Name:
_____Mike 15
Protocol:
Press ENTER to continue...
Press BACK to return...
3. (Optional) If the user does not exist, then create a new user.
Enter the new user name and press
key.
Mike 15
ENTER
:
to accept the name.
Save
key to start saving the
Shift
ENTER
key to save the
key
User does not exist
Create this new User?
Press SAVE if Yes…
Press BACK if No…
4. Enter the name of the Protocol using the alphanumeric keys.
TIP: Press the alphanumeric keys to enter new characters. Press the
ENTER
to toggle between letters and numbers. Then press the
Clear
save the name. To erase press the
5. Press the
Save
key to save the protocol.
key.
or
A screen briefly appears verifying the new protocol name:
Protocol has been saved under:
Mike 15
CHO
Save
Shift
key to
key
28
Page 38

Adding and Deleting the Users and Protocols
SAVE
6. Press the
Tip: If a protocol is not saved and you proceed to program another protocol or
perform other functions in the system, you will be asked if the protocol should be
saved or deleted.
key to continue of the
User Name:
Mike 15
Protocol:
CHO
Press SAVE to continue
Press BACK to return
BACK
key to the protocol.
Adding and Deleting the Users and Protocols
The Gene Pulser MXcell system stores user protocol files in a directory with the user name.
Add a new user before saving a protocol, or automatically add the user while saving a
protocol. Users can also be deleted
NOTE: The user directory holds up to 15 protocols under 20 user names for a
total of 300 entries.
To add a user name, follow these instructions:
1. Select User Protocols from the home screen.
ENTER
Press
to confirm the selection.
2. Select
Press the arrow keys and the
displays a list of registered users:
NOTE: Up to 20 users can be registered; the screen display 5 at a time.
TIP: Press and release the up and down arrow deys to move from one user
name to the next. Press and hold the up and down arrow keys to scroll from
screen to screen.
3. Select a number that lists “no user registered.”; press
selection.
4. Type the name using the alpha-numeric keypad.
To change from letters to numbers press and release the
new user name press the
5. Press
User Directories
Save
to save the user in the next screen.
.
ENTER
key to select
Registered Users:
1. -(no user registered)
2. -(no user registered)
3. - (no user registered)
4. - (no user registered)
5. - (no user registered)
(more…
ENTER
key.
User Directories
)
?
ENTER
Shift
to confirm
key. To confirm the
. The screen
To delete a user name, follow these instructions:
1. Select User Directory and press the
2. At the screen prompt, press Yes to delete or No to return to the previous screen.
DELETE
key.
29
Page 39

Gene Pulser MXcell™ System Manual | Program and Run the System
30
Page 40

Gene Pulser MXcell™ System Manual
5 Pre-Set Protocols
The Gene Pulser MXcell™ electroporation system provides a large set of pre-set protocols
developed by scientists at Bio-Rad Laboratories. Use these protocols to quickly run an
optimization experiment.
The pre-set protocols have been named using these rules: Each begins with a three to eight
letter description and type of electroporation plate (12, 24, or 96-well), followed by a forward
EXP
or
SQR
slash and the type of waveform (
parameter values with the abbreviated names.
). The end of the name lists the specific
The lists and tables in this chapter use abbreviations for the protocol names and
parameters:
• Voltage in volts (V)
• Current in microfarads (μF)
• Resistance in ohms (Ω)
• Duration in milliseconds (ms)
• Number of pulse is the number of individual pulses (NP)
• Pulse interval is the time between each pulse (s)
•
Grad
is a gradient
•
Exp
is exponential waveform
•
Sqr
is square waveform
31
Page 41

Gene Pulser MXcell™ System Manual | Pre-Set Protocols
Refer to the page numbers listed in Table 6 (starting on page 32) for more information about
each set of protocols.
Table 6. List of pre-set protocols and their uses.
Protocol name
Protocols for well sets with four or six wells (page 34)
1. Opt mini 96 well/ Sqr.Exp 24 Use to rapidly determine optimal waveform
2. Opt mini 96 well/ Sqr 24 Use to rapidly to determine optimal conditions
3. Opt mini 96 well/ Exp 24 Use to rapidly determine optimal conditions
4. Opt 96 well/ Sqr, NP, D 16 Use after optimal square-wave conditions
Whole plate protocols (page 36)
5. 96 well/ Exp 96 Use for initial protocol set-up for many cell
6. 2 4well/ Exp 24 Use for initial protocol set-up for many cell
7. 12 well/ Exp 12 Use for initial protocol set-up for many cell
8. 96 well/ Sqr 96 Use for initial protocol set-up for many cell
9. 24 well/ Sqr 24 Use for initial protocol set-up for many cell
10. 12 well/ Sqr 12 Use for initial protocol set-up for many cell
Number
of wells
When to use this protocol
and conditions.
for square-wave protocols
for exponential protocols.
have been determined to enhance specifically
cell viability and improve efficiency.
types.
types.
types.
types.
types.
types.
32
Well set protocols (page 37)
11. 96 well/ Exp,Vgrad/ Cgrad 96 Use when working with new cells lines that
traditionally apply exponential waveforms.
This protocol fine tunes conditions and
includes replicates.
12. 96 well/ Sqr,Vgrad/ Dgrad 96 Use when working with new cells lines or
when square-waveform protocols are normally
applied. This protocol fine tunes conditions
and includes replicates.
Page 42

Table 6. List of pre-set protocols and their uses.
Protocol name
Mixed protocols (page 38)
13. Opt 96 well/ Exp,Sqr 96 Use with cell lines with no protocol reference.
14. Opt 24 well/ Exp,Sqr 24 Use with cell lines with no protocol reference.
15. Opt 12 well/ Exp,Sqr 12 Use with cell lines with no protocol reference.
16. Uniform 96 well/ Exp,Sqr 96 Use with a set of defined conditions to
17. Uniform 24 well/ Exp,Sqr 24 Use with a set of defined conditions to
18. Uniform 12 well/ Exp,Sqr 12 Use with a set of defined conditions to
19. Mixed 96 96
20. Mixed 24 24
21. Mixed 12 12
Number
of wells
When to use this protocol
This protocol includes a range of average
starting conditions.
This protocol includes a range of average
starting conditions.
This protocol includes a range of average
starting conditions.
compare different cell lines and
electroporation of different molecules within
the same or different cell lines.
compare different cell lines and
electroporation of different molecules within
the same or different cell lines.
compare different cell lines and
electroporation of different molecules within
the same or different cell lines.
Use for mixing different waveforms.
Alternating rows of exponential (250 V/350 uf)
and square waves (250 V/20 ms).
Use for mixing different waveforms.
Alternating rows of exponential (250 V/350 uf)
and square waves (250 V/20 ms).
Use for mixing different waveforms.
Alternating rows of exponential (250 V/350 uf)
and square waves (250 V/20 ms).
33
Page 43

Gene Pulser MXcell™ System Manual | Pre-Set Protocols
Mini-Optimization Protocols
The following pre-set protocols use four or six well sets in the electroporation plate.
Opt mini 96 well/ Sqr.Exp
Table 7 shows the parameters that vary in each well set in a 96-well plate. The protocol
includes the following well sets:
• Well set ABCD 1-3: Square wave, 200 V, 2,000 μF, 1,000 Ω, and 20 ms
• Well set ABCD 4-6: Exponential wave, 250 V, 350–750 μF, and 1000 Ω
Table 7. Opt. mini 96/ Sqr.Exp conditions that vary across the plate.
Square wave Exponential wave
123456789101112
A
B
C
D
E
F
G
H
200 V
2,000 μF
20 ms
250 V
2,000 μF
20 ms
300 V
2,000 μF
20 ms
250 V
350 μF
1000 Ω
250 V
500 μF
1000 Ω
250 V
750 μF
1000 Ω
34
Page 44

Mini-Optimization Protocols
Opt mini 96 well/ Sqr
Table 8 shows the parameters that vary in each well of a 96-well plate. The protocol
includes the following well sets:
• Well set ABCD 1-3: Square wave, 200–300 V, 2000 μF, 1000 Ω, 20 ms
• Well set ABCD 4-6: Square wave, 250V, 2000 μF, 1000 Ω, 15-25 ms
Table 8. Opt mini 96well/sqr conditions that vary across the plate.
Square wave
123456789101112
A
B
C
D
E
F
200 V
20 ms
250 V
20 ms
300 V
20 ms
250 V
15 ms
250 V
20 ms
250 V
25 ms
G
H
Opt mini 96 well/ Exp
Table 9 shows the parameters that vary in each well of a 96-well plate. The protocol
includes the following well sets:
• Well set 1-3: 200–300 V, 350 μF, and 1000 Ω
• Well set 4-6: 250V, 200–500 μF, 1000 Ω
Table 9. Opt mini 96 well/exp conditions that vary across the plate.
1 2 3 4 5 6 789101112
A
B
C
D
E
F
G
H
200 V
350 μF
250 V
350 μF
300 V
350 μF
250 V
200 μF
250 V
350 μF
250 V
500 μF
35
Page 45

Gene Pulser MXcell™ System Manual | Pre-Set Protocols
Opt 96 well/ Sqr, NP, D
Table 10 shows the parameters that vary in each well of a 96-well plate. The protocol
includes well sets 1–4 with these parameters: Square Wave, 250 V, 2,000 μF, 1000 Ω, 7–20
ms, and 1–3 pulses (NP).
Table 10. Opt 96well/ Sqr, NP, D conditions that vary across the plate.
123456789101112
A
B
C
D
E
F
G
H
20 ms
1 NP
15 ms
2 NP
10 ms
2 NP
7 ms
3 NP
Whole Plate Protocols
Whole plate protocols program all the wells in an electroporation plate with the same
conditions. The following is a list of the protocol names and conditions for each of the
whole plate protocols:
• 96 wells/ xp: Exponential wave, 250 V, 350 μF, and 1,000 Ω
• 24 wells/ Exp: Exponential wave, 250 V, 350 μF, and 1,000 Ω
• 12 well/ Exp: Exponential wave, 250 V, 350 μF, and 1,000 Ω
• 96 well/ Sqr: Square wave, 250 V, 2,000 μF, 1,000 Ω, and 20 ms
• 24 well / Sqr: Square wave, 250 V, 2,000 μF, 1,000 Ω, and 20 ms
• 12 well/ Sqr: Square wave, 250 V, 2,000 μF, 1,000 Ω, and 20 ms
36
Page 46

Well Set Protocols
Well set protocols include parameters that vary in each well of a 96-well plate. The protocol
includes the following well sets.
96 well/ Exp,Vgrad/ Cgrad
Table 10 shows the parameters that vary in each well of a 96-well plate. The protocol
includes the following well sets:
• Well sets ABCD 1–12: Exponential wave, voltage gradient (ΔV), 350 μF, 1000 Ω
• Well sets EFGH 1-12: Exponential wave, current gradient (ΔC), 250 V, 1000 Ω
Table 11. 96well/ Exp, Vgrad/Cgrad conditions that vary across the plate.
123456789101112
A
B
C
D
E
F
G
H
100 100 100 200 200 200 300 300 300 400 400 400
ΔV
(V)
200 200 200 350 350 350 500 500 500 1000 1000 1000
ΔC
(μF)
Well Set Protocols
96 well/ Sqr,Vgrad, Dgrad
Table 10 shows the parameters that vary in each well set of a 96-well plate. The protocol
includes the following well sets:
• Well sets ABCD 1–12: Square wave, voltage gradient (ΔV), 2000 μF, 1000 Ω, 20 ms
• Well sets EFGH 1-12: Square wave, pulse duration gradient (ΔD) , 250 V, 2000 μF,
1000 Ω
Table 12. 96 well/ Sqr,VgradDgrad conditions that vary across the plate.
123456789101112
A
B
C
D
E
F
G
H
100 100 100 200 200 200 300 300 300 400 400 400
ΔV
(V)
10 10 10 15 15 15 20 20 20 30 30 30
ΔD
(ms)
37
Page 47

Gene Pulser MXcell™ System Manual | Pre-Set Protocols
Mixed Protocols
The following protocols include a mix of protocols with a variety of well sets, waveforms,
and plate sizes.
Opt 96 well/ Exp,Sqr
Table 13 shows the parameters that vary in well sets for a 96-well plate. The protocol varies
in a wide range of starting conditions for exponential and square waveforms.
Table 13. Opt 96 well/ Exp, Sqr conditions that vary across the plate.
123456789101112
150 V
A
350
E
μF
X
B
P
C
D
150 V
E
20 ms
S
F
Q
R
G
H
200 V
350
μF
200 V
20 ms
250 V
350
μF
250 V
20 ms
300 V
350
μF
300 V
20 ms
350 V
350
μF
350 V
20 ms
450 V
350
μF
450 V
20 ms
250 V
200
μF
250 V
5 ms
250 V
250
μF
250 V
10 ms
250 V
350
μF
250 V
15 ms
250 V
500
μF
250 V
20 ms
250 V
750
μF
250 V
25 ms
250 V
1000
μF
250 V
30 ms
Opt 24 well/ Exp,Sqr
These are parameters that vary in each well for a 24-well plate. Except for the larger well
size, the protocol is the same as “Opt 96 well/ Exp,Sqr” on page 38.
38
Page 48

Mixed Protocols
Opt 12 well/ Exp,Sqr
Table 14 shows the parameters that vary in each well for a 12-well plate. The protocol varies
in a wide range of starting condition for exponential and square waveforms in well sets.
Table 14. Opt 12 well/ Exp, Sqr conditions that vary across the plate.
Exponential wave Square wave
1 2 3 4 5 6 789101112
A
B
C
D
E
F
G
H
200 V
350 μF
300 V
350 μF
400 V
350 μF
250 V
200 μF
250 V
350 μF
250 V
500 μF
200 V
20
ms
250 V
20
ms
300 V
20
ms
250 V
15
ms
250 V
20
ms
250 V
25
ms
Uniform 96 well/ Exp, Sqr
Table 15 shows the parameters that vary in each well for a 96-well plate. The protocol varies
the starting conditions for exponential and square waveforms in well sets:
• Well sets ABCD 1-6 and EFGH 1-6: Exponential, 250 V, 350 μF, 1000 Ω
• Well sets ABCD 7-12 and EFGH 7-12: Square wave, 250 V, 20 ms, 1000 μF, 1000 Ω
Table 15. Uniform 96 well/ Exp conditions that vary across the plate.
Exponential wave Square wave
123456789101112
A
B
C
D
E
F
G
H
250 V
350
μF
250 V
20ms
Uniform 24 well/ Exp,Sqr
These are parameters that vary in each well for a 24-well plate. Except for the larger well
size, the protocol is the same as “Uniform 96 well/ Exp, Sqr” on page 39.
39
Page 49

Gene Pulser MXcell™ System Manual | Pre-Set Protocols
Uniform 12 well/ Exp,Sqr
These are parameters that vary in each well for a 12-well plate. Except for the larger well
size, the protocol is the same as “Uniform 96 well/ Exp, Sqr” on page 39.Mixed 96 well/
Exp,Sqr
Table 16 shows the parameters that vary in well sets for a 96-well plate. The protocol varies
in a wide range of starting condition for exponential and square waveforms in well sets with
alternating rows of exponential (250 V, 350 μF) and square waves (250 V, 20 ms).
Table 16. Mixed 96well/Exp, Sqr conditions that vary across the plate.
Exp Sqr Exp Sqr Exp Sqr Exp Sqr Exp Sqr Exp Sqr
123456789101112
A
B
C
D
E
F
G
H
250 V
350 μF
250
V
20ms
250 V
350 μF
250 V
20 ms
250 V
350 μF
250 V
20 ms
250 V
350 μF
250 V
20 ms
250 V
350 μF
250 V
20
ms
250 V
350 μF
250 V
20
ms
Mixed 24 well/ Exp,Sqr
These are parameters that vary in each well for a 24-well plate. Except for the larger plate
size, the protocol is the same as “These are parameters that vary in each well for a 12-well
plate. Except for the larger well size, the protocol is the same as “Uniform 96 well/ Exp, Sqr”
on page 39.Mixed 96 well/ Exp,Sqr” on page 40.
Mixed 12 well/ Exp,Sqr
These are parameters that vary in each well for a 12-well plate. Except for the larger plate
size, the protocol is the same as “These are parameters that vary in each well for a 12-well
plate. Except for the larger well size, the protocol is the same as “Uniform 96 well/ Exp, Sqr”
on page 39.Mixed 96 well/ Exp,Sqr” on page 40.
40
Page 50

Gene Pulser MXcell™ System Manual
6 Factors Affecting
Electroporation
The Gene Pulser MXcell™ electroporation system can help you design successful
electroporation experiments. Read the sections in this chapter for information that can assist
you in designing your electroporation experiments:
• Factors affecting electroporation (page 41)
• Electroporation Theory (page 45)
Factors Affecting Electroporation
When considering electroporation of an unfamiliar cell line, we generally recommend
reviewing the protocols from several references and making a consensus starting protocol. If
no references exist for your particular cell line of interest, then we suggest using references
for a similar cell type as a starting point. Alternatively, select the Opt mini 96-well/ Sqr, Exp
pre-set protocol (page 34) to find initial conditions, then fine tune the conditions.
The following sections discuss different factors that affect the success of an electroporation
experiment:
• Waveform (page 41)
• Duration and number of pulses (page 42)
• Cell growth (page 42)
• Nucleic acids and biomolecules (page 42)
• Electroporation buffer (page 43)
• Temperature (page 44)
Waveforms
The two most common waveforms used in electroporation today are the square wave and
exponential. The square wave relies on a charge being applied to the cells for a set time. The
exponential waveform builds up a charge in a capacitor, and when applied to the sample,
the voltage delivered decays exponentially, until the charge remaining is about 37% of the
original pulse. The time over which this decay occurs is known as the time constant and is
equal to (RxC) where the resistance of the sample and system is R and the capacitance set
on the instrument is C.
41
Page 51

Gene Pulser MXcell™ System Manual | Factors Affecting Electroporation
Time Constant and Number of Pulses
While square waves do not report a time constant, they instead are determined by the pulse
duration (or pulse length), which is a time in milliseconds that is programmed into the
instrument being used. It is possible to use shorter or longer pulse durations when
optimizing square wave electroporation. Generally small increments are used. You may
want to test 5 msec lower and higher than the original pulse duration Additionally, it has
been observed that with square wave electroporation, cells might benefit from multiple,
shorter pulses. For example, if the optimal pulse duration is 20 msec, it may be possible to
further optimize by giving two pulses of 10 msec duration each.
The time constant in exponential waveforms is directly related to the resistance of the
sample and the resistance setting used on the electroporator, as well as the capacitance
setting on the electroporator. Resistance of the sample can be affected by either changing
the sample volume or using an electroporation buffer with a higher or lower ionic strength.
Decreasing the sample volume leads to an approximately proportional increase in sample
resistance, thus nearly doubling the time constant.
Cell Growth
For mammalian cells, the highest expression following electroporation is obtained when
cells are in mid-log phase growth (Anderson et al.,1991). Healthy cells transfect better than
poorly maintained cells. Routinely subculturing cells before they become overcrowded or
unhealthy will minimize experimental variability in continuous cell lines. Since cells may
gradually change in culture, using cells within a defined passage number and adhering to
strict protocols, including parameters for intervals between plating and transfecting cells,
will improve experimental reproducibility. It is also important that the cells be healthy and
not contaminated with mycoplasma.
The highest gene expression following electroporation is obtained using cells which are
actively growing and dividing rather than in stationary growth phase. For optimum cell
recovery, the cell density in each well should be in the range of 10
concentrations may result in undesirable cell fusion.
6
-107 cells/ml; higher cell
Nucleic Acid and Biomolecules
The transfection efficiency of electroporation can be affected by the concentration, the
purity, and size of the molecules used.
While the majority of electroporation applications involve delivery of plasmid DNA and
siRNAs to cells, nearly any type of molecule can be introduced into cells by electroporation,
including RNA, proteins, carbohydrates, and small molecules, such as nucleoside
triphosphates and fluorescent dyes.
DNA
With few exceptions, when delivering autonomously replicating plasmids, the highest
transformation efficiencies are obtained when electroporating supercoiled plasmid.
However, integration of electroporated plasmid into the host genome is usually most
efficient using linearized plasmid, such as when isolating stable transformants of
mammalian cells (Barsoum 1995), Addition of a carrier, such as salmon sperm DNA or
plasmid, has also been shown to increase gene expression in some cell lines (Chu, et
al.1987; Showe, et al. 1990).
42
Page 52

Factors Affecting Electroporation
Although transformation of most cell types has been accomplished using plasmid DNA
isolated by a variety of methods, the sample purity has an effect on transformation
efficiency. Significantly lower transformation efficiencies are generated with unpurified
plasmid DNA than with purified plasmid DNA. Plasmid produced using the Bio-Rad Aurum
matrix is as efficient as CsCl-purified plasmid for transformation of mammalian cells.
However, as long as plasmids used for electroporation are all prepared in the same manner,
changes in expression levels are due to differences in transcription or translation of the
gene of interest. The concentration range for plasmid DNA electroporation is typically 5 to
40 μg/ml, and is dependent of the cell type used.
SIRNA
The quality of siRNAs can significantly influence the outcome of siRNA transfections and
RNAi experiments. The siRNAs should be free of reagents carried over from synthesis. Also,
dsRNA contaminants larger than approximately 30 bp cause cytotoxicity. In addition,
undesired off-target effects can be avoided by using highly purified siRNAs.
The optimal siRNA concentration and its capacity for gene silencing are influenced in part
by properties of the target gene including the following: mRNA localization, stability, and
abundance; and target protein stability and abundance. If too much siRNA is used in
electroporation, it may be toxic. Conversely, if too little siRNA is transfected, reduction of
target gene expression may be undetectable. The optimal amount must be determined
empirically by varying the siRNA amount within a limited range. We recommend using
siRNAs at concentrations of 10 to 100 nM.
Experiments involving siRNAs have been mostly limited to immortalized cell lines, because
these cells are relatively easy to grow, maintain, and transfect. However, primary cells are
often a preferable model for studying gene function because they are more similar to their in
vivo counterparts than immortalized cell lines. Electroporation provides a highly efficient
method for direct transfer of siRNAs into primary cells.
Impurities in siRNA oligonucleotide preparations can reduce the potency and delivery
efficiency of siRNAs, and can increase the risk of toxicity in gene silencing experiments.
Using high quality duplex siRNA, siLentMer™ Dicer-Substrate siRNA duplexes will lead to
improved success rates and reproducibility of gene silencing experiments.
Electroporation Buffer
The electroporation medium influences cell viability and transfection efficiency in several
ways. The osmotic balance of the electroporation buffer, the choice of salt, and the
requirements of specific ions all play a role in electroporation. In general, a media that will
mimic the natural cytoplasmic composition of the cell, such as Gene Pulser electroporation
buffer is recommended.
The buffer used to electroporate mammalian cells has a direct effect on the time constant,
since the sample resistance (R) is mainly due to the buffer ionic strength. The buffer
components also influence transfection efficiency and cell viability. Traditionally, a buffer
with high ionic strength (low resistance) such as PBS is used when electroporating
mammalian cells at a high capacitance. Serum-free growth medium has also been routinely
used in electroporation. The volume of liquid/buffer in the electroporation well has a
significant effect on sample resistance, and is inversely proportional to the volume of the
buffer used.
43
Page 53

Gene Pulser MXcell™ System Manual | Factors Affecting Electroporation
Gene Pulser electroporation buffer is universal and can be used with most cell lines
including primary cells. The buffer works well with both siRNA and plasmid DNA, and
contains components that enhance transfection efficiency and maintain overall cell health
and viability.
Gene Pulser Electroporation Buffer is lower in ionic strength than PBS (it has higher
resistance), thus adjustments need to be made when switching from a protocol using a
traditional low resistance buffer. The recommended starting point from which to optimize is
to decrease the specified capacitance by 50%. Alternatively, the resistance setting on the
electroporator may be reduced to 20% of the original protocol, while maintaining all other
parameters constant.
Temperature
Electroporation of some cell types has been reported to be more efficient at 0-4oC, in other
cases, room temperatures yields better results. Temperature may affect physical properties
of the membrane, and influences the rate of the duration of the permeabilized state.
Electroporated cells may remain permeable for several hours if low temperatures are
maintained. Loss of permeability is retarded when cells are maintained at 0
within a matter of minutes when cells electroporated at 0
o
37
C.
o
o
C, but occurs
C are subsequently incubated at
The temperature at which cells are maintained during electroporation is expected to have a
role in the efficiency of the electroporation process for several reasons:
• Since passing an electric pulse through the cells results in heating, keeping the
cells at a low temperature during the pulse might reduce heating and therefore
increase cell viability
• Electroporation involves the transient formation of pores in the cell membrane,
keeping cells at a low temperature after the pulse might allow the pores to remain
open longer, giving the DNA in the medium more time to enter the cells.
Alternatively, a higher temperature may speed pore closure and increase cell
viability
• Changing the temperature of a solution changes its conductivity. The conductivity
of the medium increases with increasing temperature, resulting in a decrease in
the medium resistance and a decrease in the time constant
• Diffusion rate is highly dependent on temperature therefore keeping cells at a low
temperature would be expected to reduce the diffusion of molecules across the
cell membrane. In practice, the most efficient temperature at which to
electroporate cells must be determined empirically
For most mammalian cells, electroporation is most efficient when cells are maintained at
room temperature before and after the pulse (Chu, et al. 1987), although some cell types are
more efficiently transformed at low temperature (Potter, et al. 1984).
NOTE: When using Gene Pulser electroporation buffer, electroporation should
be performed at room temperature.
44
Page 54

Electroporation Theory
Electroporation is a physical process in which cells are exposed to a high-voltage electric
field resulting in a temporary rearrangement of the cell membrane. As a result, the cells
become permeable and may take up solutes from their surrounding environment, including
nucleic acids, proteins, carbohydrates, and small molecules. While much work has been
done to determine how cells become permeabilized during the process of electroporation,
the membrane changes that occur are still largely hypothetical (Chang et al., 1992).
There are two instrument parameters that describe the changes that cells experience upon
electroporation. The first of these, the electric field strength, E, measured in V/cm, describes
the electrical environment in the electroporation chamber (plate chamber). Standard
electrodes used in electroporation consist of two parallel plates separated by a distance d
(cm); therefore, E = V / d, where V is the applied voltage and d is the distance between the
electrodes. In practical terms, the field strength is manipulated by altering the voltage of the
instrument or by changing the distance between the electrodes. Because the electric
conductance of the cell cytoplasm is much higher than that of the cell membrane, placing
the cell in an electric field creates a voltage potential across the cell membrane. As the field
strength increases, the transmembrane voltage experienced by the cell increases, as does
the likelihood that a pore will form in the membrane due to breakdown of the lipid bilayer,
allowing molecules to enter the cell from the outside (Hui 1995; Neumann, et al. 2000).
The second parameter that affects the cell membrane is the length of time that it is exposed
to the electric field. For exponential decay pulses, this is controlled by the capacitance of
the instrument and the resistance within the circuit. For square wave pulses the pulse length
is controlled directly by setting the time that the cells are exposed to the electric field. These
are discussed for each pulse type below.
Electroporation Theory
The Gene Pulser MXcell system is the only electroporation instrument capable of delivering
both exponential decay (page 45) and square wave pulses (page 46) with different protocols
to 24 well sets in a single plate. The system consists of a pulse generator system (the power
module), a plate chamber and electroporation plate with incorporated electrodes (page 5).
Activating the PULSE button on the Gene Pulser MXcell system charges the capacitors in
the unit to a high voltage. Then the system causes current flow from the capacitor into the
sample in the electroporation plate. Discharging the charged capacitor into the sample
generates either the exponential decay or the square wave pulse.
Exponential Decay Pulses
The exponential decay circuit of the Gene Pulser MXcell electroporation system generates
an electrical pulse by discharging a capacitor. When a capacitor is discharged into the
sample, the voltage across the electrodes rises rapidly to the peak voltage then declines
over time t, with an exponential decay waveform (Figure 11 on page 47) according to the
following equation:
[e -(t/RC)]
= Vo
V
t
where Vo is the initial voltage in the capacitor, Vt is the voltage at time = t (expressed in ms)
after the pulse, e is the base of the natural logarithm, R is the resistance of the circuit
(expressed in Ω), and C is the capacitance (expressed in μF). The time required for the initial
voltage to drop to V
pulse length (expressed in msec). When t = Τ = R x C, the voltage has declined to 1/e
(~37%) of the initial value, V
/e is referred to as the time constant, Τ, a convenient expression of the
o
(VΤ = Vo / e).
o
45
Page 55

Gene Pulser MXcell™ System Manual | Factors Affecting Electroporation
By changing the capacitor of the instrument or by changing the resistance of the circuit, the
time constant may be readily changed. For resistors connected in parallel, the total
resistance of the circuit is given by the following equation:
= (R
R
Τ
sample
* RPC) / (R
sample
+ RPC)
When the sample resistance is much greater than the parallel resistor in the PC module
(R
R
>> RPC), the latter is the primary determinant of the resistance of the circuit, and
sample
≅ RPC. Therefore, the parallel resistance reduces the resistance of the circuit thereby
Τ
reducing the time constant of the circuit.
When low-resistance media are used (e.g., high ionic-strength media such as PBS or
growth media used for most mammalian cells), the time constant is most easily manipulated
by selecting the proper capacitor in the Gene Pulser MXcell system. Additionally, changing
the volume of low-resistance media in the cuvette will alter the resistance of the circuit
(resistance is inversely proportional to volume).
Square Wave Pulses
Truncating the pulse from a capacitor after discharging it into the sample generates square
wave pulses. The ideal square wave pulse has the same voltage at the end as at the
beginning of the pulse (Figure 11 on page 47). However, when using a charged capacitor to
produce this waveform (as is done in all commercially available electroporation
instruments), the voltage at the end of the pulse, V
beginning of the pulse, V
. This is because when the switch is closed across a charged
o
capacitor, maximum current instantaneously flows through the circuit and gradually falls to
zero. To produce a square wave, the pulse is terminated at some time t, following discharge
of the capacitor. This time (t) is termed the pulse length. The longer the pulse length, the
greater is the difference in voltage between the beginning and the end of the pulse. This
voltage decay may be determined from the following equation:
, is always less than the voltage at the
t
/ Vt) = t / (R C)
ln (V
o
The decrease in voltage that occurs with a square wave pulse is inversely related to both
the capacitance of the instrument and the resistance of the sample. The decrease in voltage
at the end of the pulse is termed droop. The fractional decrease in voltage is determined by
the following equation:
Fractional Voltage Decrease (% droop) = (V
- Vt) / V
o
o
Combining two equations the previous two equations results in the following equation:
ln [1 / (1 - % droop)] = t / (R C)
In order for the pulse to most closely approximate a true square wave, droop must be
minimized (i.e., V
= Vo and Vo - Vt = 0). Experimentally, this is achieved by choosing the
t
highest values for R and C. For any given sample, R may be considered a constant. For
each selected protocol, C may also be considered a constant. Therefore, for the same
sample, as pulse length increases, droop also increases. However, increasing sample
resistance reduces the droop at any given pulse length. Increasing the sample resistance
may be accomplished by the following conditions:
• Reducing the temperature of the sample
• Reducing the ionic concentration of the solution
• Reducing the volume of liquid in the electroporation cuvette in the case of lowresistance media.
46
Page 56

Electroporation Theory
Table 17 lists the fractional voltage decrease (% droop) associated with pulse length at
various sample resistances for the high-voltage and low-voltage ranges on the Gene Pulser
MXcell system. For example, pulsing into a 200-Ω load, the pulse length will be 33.4 msec
with a 5% fractional voltage decrease in the low-voltage range.
Table 17. Fractional voltage decrease (% droop) associated with pulse length.
Low-Voltage Circuit
Fractional voltage
10 20 5
decrease
(% droop)
Sample
Resistance (Ω) Pulse length (ms)
20 3.34 7.14 14.6
200 33.4 71.4 146
1000 167 357 730
3500 585 1249 2556
Figure 11 shows an exponential decay pulse from a capacitance discharge system. When a
capacitor, charged to an initial voltage V
, is discharged into cells, the voltage applied to the
o
cells decreases over time in an exponential curve such that the voltage V at any given time t
is given by V = V
e
o
. In the special case where t = CR then Vo/e the value CR is known
-(t/RC)
as the time constant of the voltage decay. The shorter the time constant the faster the
decay.
Figure 11. Exponential decay pulse and square wave pulse.
Figure 11 also shows a square wave pulse from a capacitance discharge system. The pulse
length is the time the cells are subjected to the discharge. During the pulse the voltage
again decays in an exponentially so that at the end of the pulse the voltage is lower than at
the beginning. We call this drop in voltage the pulse “droop” and measure it as a percentage
of the initial voltage.
47
Page 57

Gene Pulser MXcell™ System Manual | Factors Affecting Electroporation
Resistor Pulse Modulation
The Gene Pulser MXcell electroporation system uses a new system for controlling parallel
resistance. This new system incorporates the function provided by the Gene Pulser MXcell
CE Module, but within the smaller space available in the Gene Pulser MXcell power module.
The new system (called RPM for “resistor pulse modulation”) varies at high frequency the
time a parallel resistance is connected to the output of the Gene Pulser MXcell system. By
changing the duty cycle of this connection time, the effective value of the parallel resistance
can be varied. The selected Gene Pulser MXcell system capacitance averages the resulting
pulse-modulated resistance. This approach requires fewer components, uses less space,
provides a wider resistance range (50-1,500 Ω), and increases flexibility of the Gene Pulser
MXcell system.
48
Page 58

Gene Pulser MXcell™ System Manual
Appendix A: PulseTrac™ System
The Gene Pulser MXcell™ electroporation system uses the PulseTrac waveform delivery
system to generate the most accurate exponential decay pulses possible for optimal cell
transformation. PulseTrac accurately calculates the time constant and amplitude of each
pulse based on what is actually delivered to the sample. More importantly, the PulseTrac
system compensates for amplitude changes caused by varying sample resistances and
improves the accuracy of the low voltage capacitors. This provides:
• Sample conductivity measurement integrated with pulse output for true waveform
delivery for samples with resistance in the 10–1000 ohm range
• Internal calibration and circuit monitoring program for accurate pulse delivery
throughout the lifetime of the unit
• Time constant and voltage amplitude measurements to allow pulse delivery
verification
The PulseTrac test algorithm is activated upon startup of the Gene Pulser MXcell system.
PulseTrac System Description
The PulseTrac system monitors and adjusts for the internal system resistance used to limit
current and the sample resistance in the well. Sample resistance depends on its
conductivity, the distance between the electrodes in the well, and the volume of media
within the well. PulseTrac circuitry monitors the resistance of the sample and delivers the
desired voltage regardless of sample volume or conductivity. When you are optimizing
electroporation with the PulseTrac system, the electrical variables are controlled with
exacting precision so that your results reflect only the biological variables in your
experimental design. This PulseTrac diagnostic algorithm examines the complete electrical
circuit and electronically selects the right combination of capacitors to deliver the most
accurate and reproducible pulse for optimal and consistent electroporation over the lifetime
of the unit.
49
Page 59

Gene Pulser MXcell™ System Manual | Appendix A: PulseTrac™ System
PulseTrac Diagnostic Algorithm
The PulseTrac diagnostic algorithm tests and selects the optimal capacitor circuit of the
Gene Pulser MXcell power module in the range of 25–2,475 μF. This is the key bank of
capacitors used in low-voltage/high-capacitance precision pulse delivery. The diagnostic
algorithm tightens the already rigorous capacitor tolerance from ±20% to ±10% (other unit
designs can have a capacitor variance as high as ±40%) in the 200–1,075 μF range. The
high voltage capacitors in the Gene Pulser MXcell unit are not part of this system, they are
preselected to the same 10% tolerance that the diagnostic algorithm provides
50
Page 60

Gene Pulser MXcell™ System Manual
Appendix B: Troubleshooting
Follow these troubleshooting options:
1. Little or no transfection or cell viability.
• Check well sets. All wells in a well set must be filled with either sample or sample
buffer. For example, if you want to electroporate six wells, fill a complete well set
(such as ABCD1) with sample and fill two wells in a second well set (such as AB2)
with sample. Finally, be sure to fill the remaining two wells in the second well set
(such as CD2) with the sample buffer.
• Check capacitance (for Square wave form protocol). A square waveform may
require higher capacitance values. Use 2000 μf if you are experiencing no
transfection when using a square wave form protocol.
• Check sample volume. If you are working with the lower limit such as 100 μl in a
96-well plate, increase the sample volume. Increasing sample volume will tend to
increase cell viability and transfection efficiency.
2. Gene Pulser MXcell™ electroporation system stalls or hangs.
• Check sample volume. If your wells contain too little volume the Gene Pulser
MXcell electroporation system will not detect an arc. The instrument will stall and
will not produce a report. In this case, the Gene Pulser MXcell electroporator must
be reset by turning the unit off and on again.
NOTE: Before resetting the unit, determine at which well set the instrument
stalled. Failure to do so will result in loss of the data report once the Gene Pulser
MXcell is reset. All wells before the stall occurred should be correctly
electroporated, and all wells after the stall are not correctly electroporated.
• Check your settings. Arcing can occur when using upper limit settings. For
example, 3 pulses and duration (>20 ms) is one upper limit.
51
Page 61

Gene Pulser MXcell™ System Manual | Appendix B: Troubleshooting
52
Page 62

Gene Pulser MXcell™ System Manual
Appendix C: References
Anderson, M.L.M., Spandidos, D.A., and Coggins, J.R., Electroporation of lymphoid cells:
factors affecting the efficiency of transfection, J. Biochem. Biophys. Meth., 22, 207 (1991)
Barsoum, J., “Stable integration of vectors at high copy number for high-level expression in
animal cells,” in Methods in Molecular Biology, vol. 48, Nickoloff, J.A. (ed.), Humana Press,
Totowa, NJ, 225 (1995)
Change, D.C., Chassy, B.M., Saunders, J.A., and Sowers, A.E. (eds.) Guide to
Electroporation and Electrofusion, Academic Press, Inc., San Diego (1992)
Chu, G., Hayakawa, H., and Berg, P., Electroporation for the efficient transfection of
mammalian cells with DNA, Nuc. Acids Res. 15, 1311 (1987)
Cregg, J.M. and Russell, K.A., “Transformation,” in Methods in Molecular Biology, vol. 103,
Higgins, D.R. and Cregg, J.M. (eds.), Humana Press, Totowa, NJ, 27 (1998)
Hui, S.W., “Effects of pulse length and strength on electroporation efficiency,” in Methods in
Molecular Biology, vol. 48, Nickoloff, J.A. (ed.), Humana Press, Totowa, NJ, 195 (1995)
Neumann, E., Kakorin, S., and Toensing, K., “Principles of membrane electroporation and
transport of macromolecules,” in Methods in Molecular Medicine vol 37, Jaroszeski, M.J.,
Heller, R., and Gilbert, R. (eds.), Humana Press, Totowa, NJ, 1 (2000)
53
Page 63

Gene Pulser MXcell™ System Manual | Appendix C: References
54
Page 64

Gene Pulser MXcell™ System Manual
Appendix D: Product Specifications and Information
The following tables provide product specifications and information about the Gene Pulser
MXcell™ electroporation system, including operating specifications and catalog numbers.
Product Specifications
Table 18 lists specifications for the entire system, including the power module and plate
chamber:
Table 18. System specifications for Gene Pulser MXcell electroporation system
Waveform Exponential decay or Square wave
Voltage 10–500 V in 2 V increments
Capacitance 25–2475 μF in 25 μF increments
Resistance
(Parallel)
Sample
Resistance
Square Wave
Timing
Table 19 lists the general specifications for the entire system:
Table 19. General specifications for Gene Pulser MXcell electroporation system
Type Specification
Input Voltage 100–120 VAC or 220–240 VAC, 50/60 Hz
Power Max 240 W (During short charging periods)
Operating environment
Regulatory Safety EN 61010, EMC EN61326 Class A
Dimensions Power Module 31 x 30 x 14 cm, weight 6.62 kg
50–1,500 Ω in 50 Ω increments plus infinity
10 Ω minimum at 10–500 V; 125 Ω with Gene Pulser electroporation buffer
10–500 V: 0.05–9999.95 ms pulse length, 1–3 pulses
0.1–10 sec pulse interval
Temperature 0–35
o
C, Humidity 0–95%, (non-condensing)
55
Page 65

Gene Pulser MXcell™ System Manual | Appendix D: Product Specifications and Information
Product Information
Table 20 lists catalog numbers and descriptions for the system and accessories:
Table 20. Catalog numbers for Gene Pulse MXcell system
Catalogue no. Description
165-2670 Gene Pulser MXcell electroporation system100–240 V, 50/60 Hz,
exponential decay and square wave delivery, includes power module,
plate chamber, and 1 x 96-well electroporation plate, instruction manuals
165-2671 MXcell Power Module
165-2672 Plate Chamber
165-2681 1 x 96-well Electroporation Plate
165-2682 1 x 24-well Electroporation Plate
165-2683 1 x 12-well Electroporation Plate
165-2094 Gene Pulser Electroprotocols
165-2676 Gene Pulser Electroporation Buffer, 1.8 ml x 10
165-2677 Gene Pulser Electroporation Buffer, 30 ml
56
Page 66

Life Science
Group
Bio-Rad
Laboratories, Inc.
Web site www.bio-rad.com USA 800 4BIORAD Australia 61 02 9914 2800 Austria 01 877 89 01 Belgium 09 385 55 11 Brazil 55 21 3237 9400
Canada 905 712 2771 China 86 21 6426 0808 Czech Republic 420 241 430 532 Denmark 44 52 10 00 Finland 09 804 22 00 France 01 47 95 69 65
Germany 089 318 84 0 Greece 30 210 777 4396 Hong Kong 852 2789 3300 Hungary 36 1 455 8800 India 91 124 4029300 Israel 03 963 6050
Italy 39 02 216091 Japan 03 5811 6270 Korea 82 2 3473 4460 Mexico 52 555 488 7670 The Netherlands 0318 540666 New Zealand 0508 805 500
Norway 23 38 41 30 Poland 48 22 331 99 99 Portugal 351 21 472 7700 Russia 7 495 721 14 04 Singapore 65 6415 3188 South Africa 27 861 246 723
Spain 34 91 590 5200 Sweden 08 555 12700 Switzerland 061 717 95 55 Taiwan 886 2 2578 7189 United Kingdom 020 8328 2000
10010739 US/EG Rev B
07-0545 0807 Sig 1106
 Loading...