

Bang & Olufsen BeoVision 14-40, BeoVision 14-55, BeoVision 14-50 User Manual

Contents
Version 1.1 - 1607
Dear customer 4
Remote control 5
How to use your remote control 5
BeoRemote App
6
Basic operation 7
Guides 7
Menu operation
Remote control operation 7
How to navigate in menus 8
Personalise the TV experience 8
Home menu 9
Indicator light
7
10
Set up your television 11
Set up your television - introduction 11
Placement 11
Handling
Stands and wall brackets 11
Overview 12
Run cables 12
Fasten the speaker cover
11
12
Maintenance 14
Connections 15
Connection of products 15
Connection panels 16
Connect digital sources
Connect a computer
Connect an analogue audio source
IR-transmitters 18
Smart Card for digital channels
Connect speakers to the television
17
18
18
19
19
Set up connected products 21
Set up a source
Products connected to HDMI IN
Sound mode
Speaker group
Picture off
Picture mode
Picture format
Picture corrections
Auto selection
Audio level 24
Blanking 24
BeoRemote lists
Reset all settings for a source
21
21
22
23
23
23
23
24
24
24
24
Stand settings 25
Set up the stand
Set a stand position 25
Adjust the stand
25
25
Daily use 27
37
27
30
33
38
43
45
46
Watch television
Turn the television 30
Use channels and lists
Pause and play back a programme 32
Record a programme
Play a recording 35
Daily use of sound modes and speaker groups 36
See two sources at the same time 37
Teletext
Operate connected products
Apps 39
Music and video services 41
Games
Internet 41
Voice and search 42
Bluetooth headphones 42
HomeMedia
Smartphones and tablets
Digital Text
41
Settings menu 47
Picture settings 48
50
49
48
49
50
Adjust picture settings
Picture modes 48
Judder cancellation
Room adaptation
Viewing distance
Video signal information 50
Reset picture settings
Sound settings 51
Loudspeaker setup – surround sound
Sound modes
Speaker groups
Volume 56
Bass and treble 57
Activate loudness
Sound information
Eco mode
Speaker connections 57
51
54
57
57
57
51
General settings 59
Make general settings 59
USB hard drive
Set up a USB keyboard
Pin code system
Switch Off Timer 61
59
60
60
2

Advanced settings
Factory settings 62
Reinstall your television 63
61
Region and language 64
Make region and language settings
Languages
Time and date 65
64
64
Universal access 67
Universal access – introduction
Universal access 67
Hearing impaired
Audio description 67
67
67
Child lock 68
Set up a child lock 68
Parental rating
App lock 68
Set an access code
Change your access code
68
68
69
Network and Bluetooth settings 70
Make network and Bluetooth settings
Wired or wireless 70
Configure your network 72
Configure the static IP 73
Switch on with your network 73
Digital Media Renderer 73
Wireless On/Off 73
TV network name 73
Clear Internet memory 74
Bluetooth 74
70
Android settings 75
Re-tune channels 76
76
76
Re-tune channels – introduction
Antenna and cable installation
Satellite installation
79
Integrate your product in a system 84
Integrate your product – introduction 84
Link to other products
Distribute sound from video sources
HDMI Matrix
86
85
86
Service and software update 87
Service and software update – introduction
See software information
Update software
PUC tables
User system feedback
87
88
87
90
87
Open Source License 91
Index 119
3

Dear customer
This guide contains additional information about the daily use of your Bang & Olufsen
product and connected products, and describes the features and functions of your
product in more detail. Among other things you can find information about settings,
how to operate your product with a Bang & Olufsen remote control, and how to set up
a wired or wireless connection. We expect your retailer to deliver, install and set up
your product.
This guide will be updated on a regular basis to make it reflect, for example, new
features and functions introduced with software updates.
You can find additional information if you look up your product in the Frequently Asked
Questions (FAQ) section on www.bang-olufsen.com/faq.
Your Bang & Olufsen retailer is your first stop for all your service queries.
To find your nearest retailer, visit our website …
www.bang-olufsen.com
4
Remote control
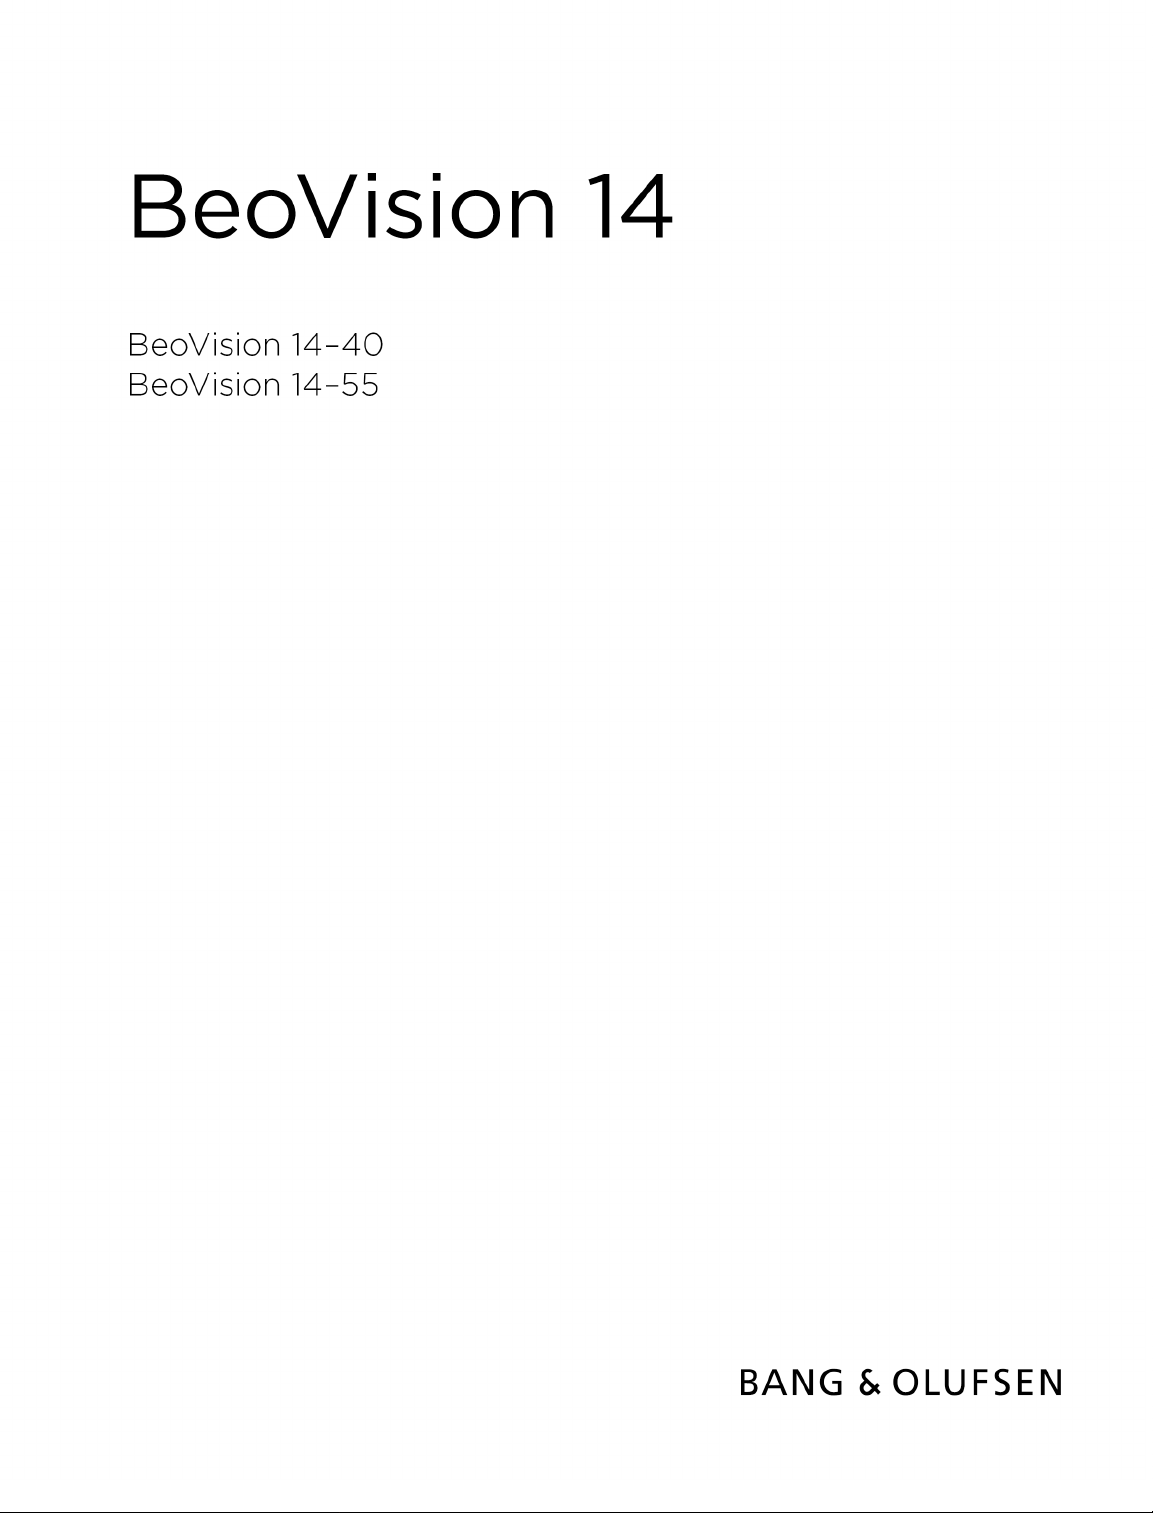
How to use your remote control
In this guide, operation is described with BeoRemote One. Note that to operate your
television, it must first be paired with BeoRemote One. Your television enters pairing
mode as soon as you connect it to the mains. For information on how to enable pairing
of BeoRemote One, see the guide for your remote control, www.bang-
olufsen.com/guides/beoremoteonebt. Also, press the red button in the on-screen help
and find 'Bluetooth' for more about pairing.
Display
The display shows you a list of sources or functions when it is switched on.
TV
Display available television sources in the display for you to switch on. Use or
step in the list*.
MUSIC
Display available music sources in the display for you to switch on. Use or
in the list*.
, , , (MyButtons)
Long press to save the current setup, such as sound settings and stand positions, short
press to activate it.
to
to step
0-9
Select channels and enter information in on-screen menus.
LIST
Display extra functions in the display. Use or
GUIDE
Bring up the TV Programme Guide.
(Back button)
Leave or move backwards through TV menus and the BeoRemote One lists.
INFO
Bring up information on a menu or function.
(Home button)
Bring up the Home menu, from where you can access different apps, among other a
setup app, a TV app and MUSIC app.
to step in the list.
5
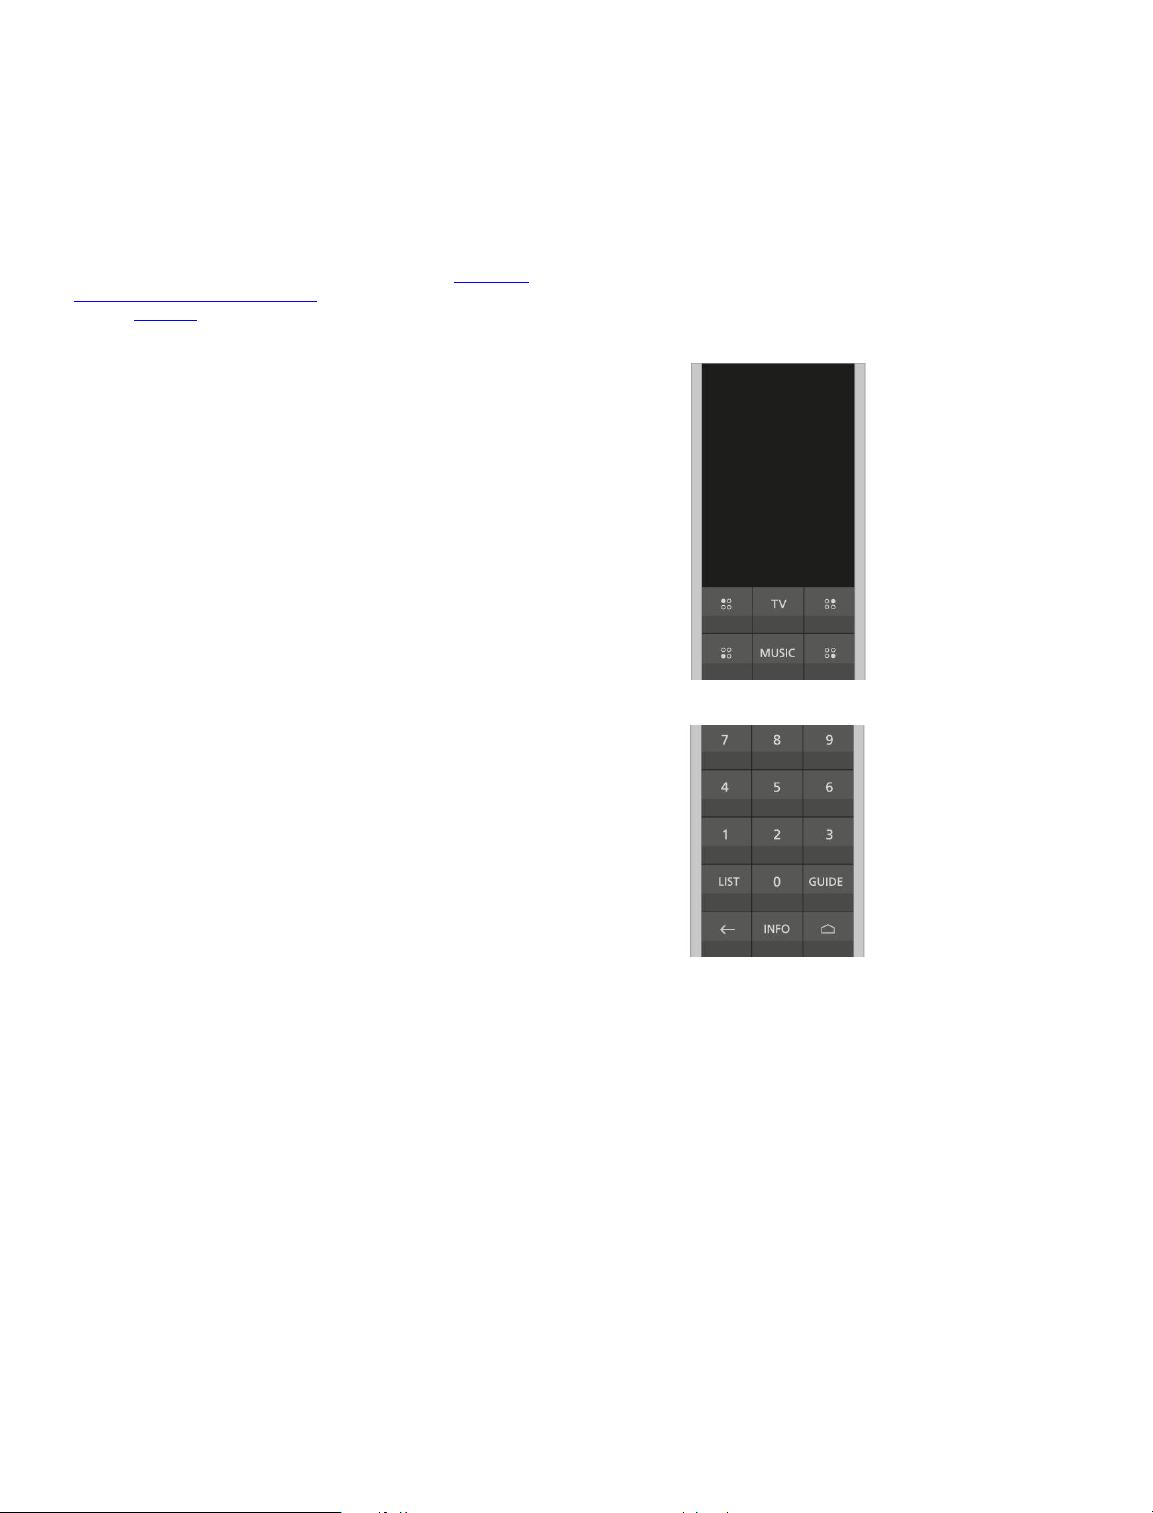
, , and
Arrow buttons left, right, up and down. Move in menus and in the BeoRemote One
display.
(Centre button)
For selecting and activating, for example, settings.
, , and (Colour buttons)
Select colour specific functions.
Start playback of a track, file or recording or start replay.
and
Search backwards or forwards step by step.
and
Step through channels and stations.
Pause playback of a programme or recording.
and
Adjust volume. To mute, press the middle of the button.
(Standby button)
Switch to standby.
*Some sources in the display can be reconfigured during the setup process. To learn
more, press the red button in the on-screen help and find 'Set up connected products'.
For general information about remote control operation, see the guide for your remote
control, www.bang-olufsen.com/guides/beoremoteonebt.
Some countries and CA Modules require activation of Digital Text/MHEG. Consequently,
some differences apply for BeoRemote One. For more information, press the red button
in the on-screen help and find 'Digital Text'.
BeoRemote App
Operation of your television with the BeoRemote App may not be available in the current
software version.
You can download the BeoRemote App through the illustrated QR code.*
Your device and your television must be on the same network to use the BeoRemote
App.
BeoRemote App allows you to operate your television with a smartphone or iOS tablet
and is especially useful for navigating in web pages or applications.* Both your television
and device must be on the same network and Wake on WLAN must be set to On, see the
television Wireless and networks menu. This allows you to switch on your television from
standby mode. Note that the standby power consumption will increase slightly.
*BeoRemote App supports smartphones with most recent iOS version or Android
(version 4.0 or higher) and tablets with iOS (most recent iOS version).
BeoRemote App integrates with your television. However, it does not support all
BeoRemote One functions.
Note that first-time setup must be performed using BeoRemote One. BeoRemote App
requires that your television is set up in a network.
6
Basic operation
Guides
Together with your television you have received a printed Quick guide introducing you to
the television.
The present guide found on-screen and online provides you with a deeper knowledge
about the television and its many features and functions. It is also referred to as onscreen help.
Menu operation
The below shows an example of a menu operation.
Settings
Sound
...
This menu hierarchy illustrates the path into a menu where you can make different
settings. Press on your remote control and use the arrow buttons,
then the centre button to select and open, for example, the Settings app. Use the arrow
buttons and to select and open a desired menu. When available, you can also press
the blue button to bring up this guide.
Remote control operation
The below shows an example of remote control operation.
To activate picture modes directly…
1. Press LIST, then or to bring up PICTURE in the BeoRemote One display
and press the centre button.
2. Use and to step between modes and press the centre button to select a
mode.
3. Press to remove PICTURE from the display.
Where relevant, the remote control operation is shown. Remote control buttons are
marked and indicate either a physical button you must press or a BeoRemote One
display text. Press LIST, TV or MUSIC on BeoRemote One to bring up text in the
BeoRemote One display. The text in LIST, TV and MUSIC can be renamed and you can
hide text you have no need for and show text you need. For more information, see your
BeoRemote One guide, www.bang-olufsen.com/guides/beoremoteonebt
7

To bring up a list of options related to the active source, you can press LIST,
then or to bring up Options in the BeoRemote One display and press the centre
button.
How to navigate in menus
Navigate in menus and select settings using your remote control. Pressing brings up
a Home menu, which gives an overview of available apps and different features.
Navigate in menus...
When a menu is on the screen, you can move between menu options, reveal settings or
enter data.
1. Use the arrow buttons to highlight a menu, bring up a submenu, go back a menu
level or change a setting.
2. Use the number buttons to enter data.
3. Press the centre button to save a setting.
4. Use the coloured buttons to select an option.
5. Press to leave the menu.
Step between menu pages...
Some menus take up more space than available on the TV screen. You can then scroll
through these menus.
1. Press or to step in pages.
2. Press or to scroll through menu items.
Select source...
You can bring up a source by pressing the TV or MUSIC button and select a source in the
remote control display, or you can select a source via the TV menu.
1. Press to bring up the Home menu.
2. Use the arrow buttons to highlight TV or MUSIC and press the centre button.
3. Press or , then the centre button to select a source.
Bring up on-screen help...
You can press the blue button to bring up on-screen help with explanations of features
and functions when available in menus and submenus.
Personalise the TV experience
You can personalise your BeoRemote One, using the MyButtons and the TV and MUSIC
buttons.* You can save a “snapshot” of a current viewing and listening experience and
thereby personalise that experience to restore it quickly with just one touch of a button.
A snapshot can include the settings made for the selected source, for example, stand
positions, sound mode and speaker group. You can also simply use it to activate a
specific source with a MyButton.
*The TV and MUSIC buttons can be personalised the same way as the MyButtons and
you will still be able to select sources from the lists brought up in the remote control
display.
8
For information on how to activate a source directly with the TV or MUSIC button, see
the guide for BeoRemote One.
Save a snapshot
You can save snapshots which can be activated by the MyButtons, the TV button and
the MUSIC button. Your television must be switched on and a source must be selected.
1. Press and hold one of the MyButtons, the TV or the MUSIC button to bring up a
list of items you can include in the snapshot.
2. Highlight the different items and press the centre button to enable or disable
them.
3. Highlight Save and press the centre button to save the settings.
If all items are unchecked, you can select Clear to remove the snapshot from the button.
If you save a snapshot with a button where a snapshot has already been saved, the
existing snapshot will be replaced by the new one.
Use a snapshot
Use a desired snapshot when you watch television.
1. Press the button dedicated for the desired snapshot.
When you activate a saved snapshot, the settings are temporary and will be in effect
until you adjust the settings, select another source, or switch the television to standby.
If the item saved as a snapshot is no longer available, the snapshot will still be activated,
but the item played will follow normal source behaviour for the selected source.
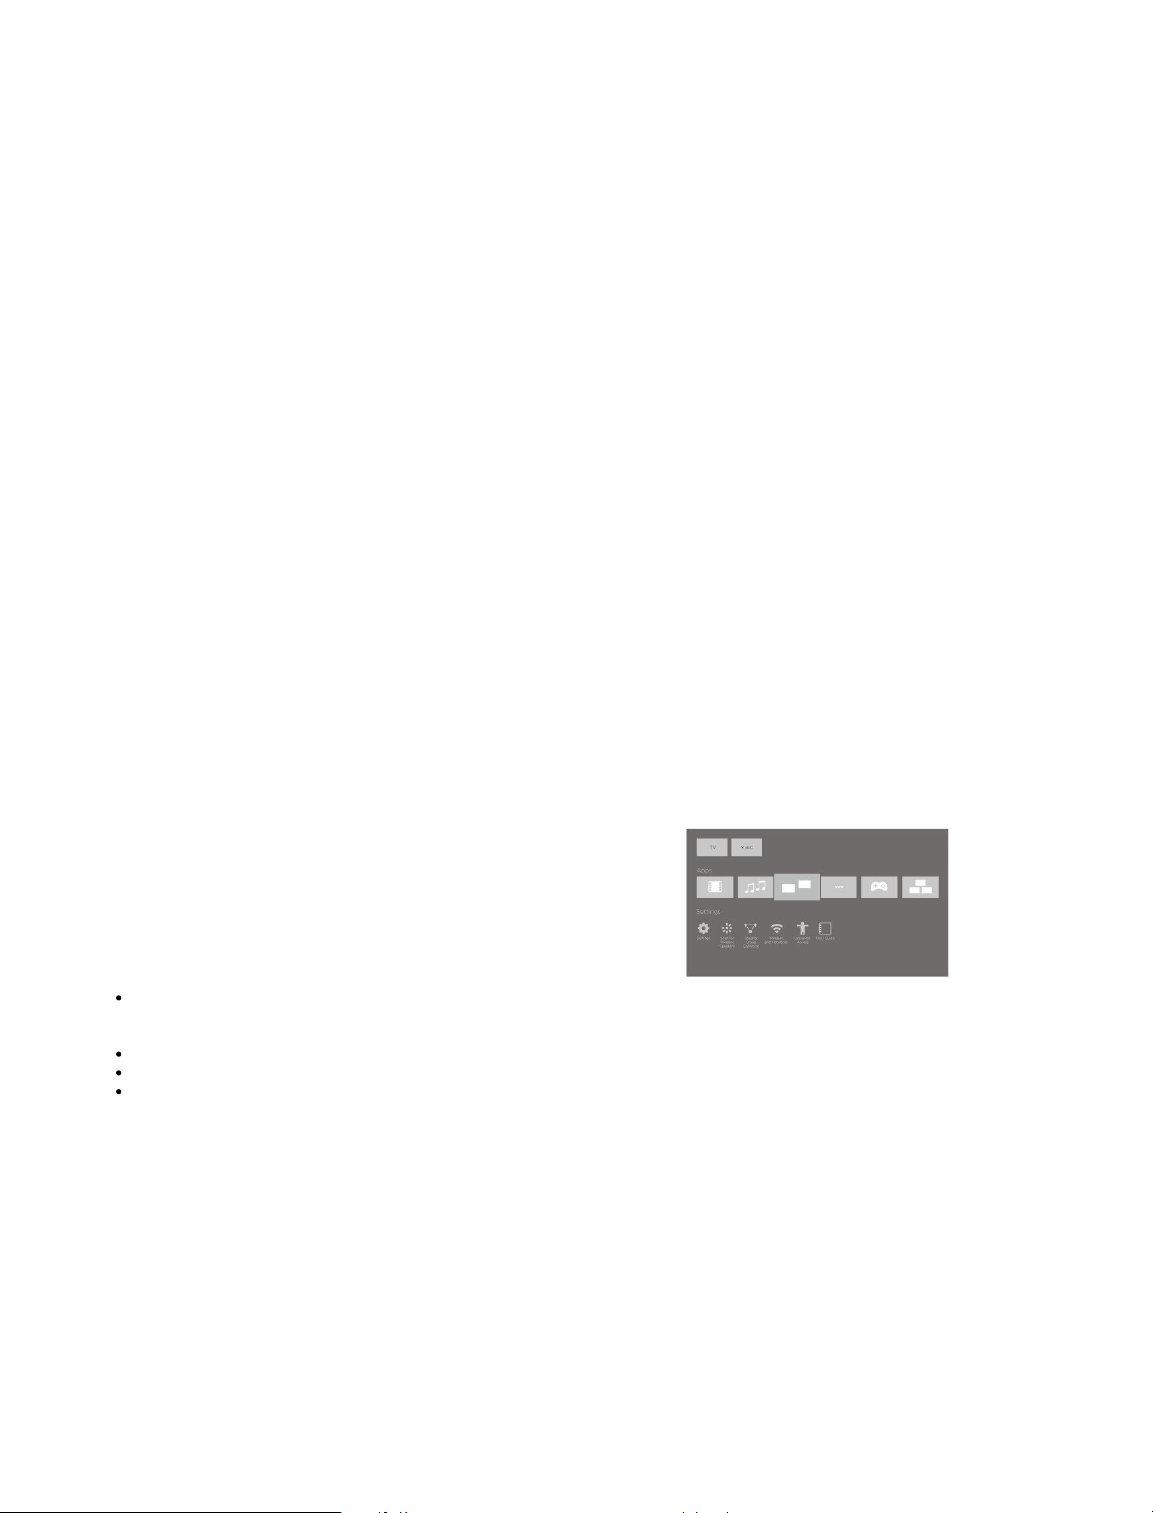
Home menu
Example of a Home menu.
In the Home menu, you find a number of shelves and a variety of different apps allowing
you, for example, to start an application, switch to a TV channel or switch to a connected
device. Here, you also find Settings.
Overview of the shelves
Recommendations show recommended apps based on recent and frequent use
and content preferences.
Apps show the default apps and all apps you choose to install.
Games show the games you choose to install.
Settings show the different options for making settings such as Settings, Scan
for wireless speakers, Speaker group setup, Wireless and networks, Universal
access and User guide.
Basic navigation
1. Press to bring up the Home menu.
2. Use the arrow buttons to move around in the Home menu.
3. Press the centre button to select an app or a specific function.
Search
9

If the television is connected to the Internet, you can use the search field in the
Home menu. You can enter text for a precise search for a song, a TV programme, a
YouTube video or anything you like on the Internet. Use to move to the microphone
icon and press to move to the search field. Use the on-screen keyboard to enter text
and the centre button. The results of your search appear after a few seconds. Move or
to view the different types of content you found.
Voice search and personalised recommendations mean more time being entertained and
less time hunting for something good. Voice search requires that you download
the Android TV Remote Control app from Google Play Store and pair it with your
television.
For more about search and voice search, press the red button in the on-screen help and
find 'Voice and search'.
Options
You can bring up a list of options for a specific function if you press LIST,
then or to bring up Options and press the centre button.
Indicator light
The standby indicator placed on the right on top of the television will provide you with
information about the television state.
(Solid green)
The television is switched on, but there is no picture on the screen.
(Slowly flashing red)
The television has been disconnected from the mains supply. It has then been
reconnected and you must enter the pin code. For information about the pin code, press
the red button in the on-screen help and find 'Pin code system'.
(Quickly flashing red)
Do not disconnect the television from the mains supply. Could be due to new software
being activated or too many failed pin code attempts.
10
Set up your television
Set up your television - introduction
The television has several placement options. Guidelines for placement and connection
must be followed.
To ensure proper ventilation, allow enough space around the screen. At overheating
(flashing standby indicator and an on-screen warning), switch the television to standby,
do not disconnect from the mains, in order for the television to cool down. You cannot
operate the television during this time.
If the front screen glass should crack or chip, or if it should be damaged in any way, it
must be replaced immediately, as it could otherwise cause injury. You can order
replacement front screen glass from your Bang & Olufsen retailer.
Placement
The television has several placement options.
Refer to www.bang-olufsen.com for available stands and wall brackets or contact your
Bang & Olufsen retailer. Due to the weight of the television, any moving or lifting of the
television should be performed by qualified personnel – using the proper equipment.
Handling
The television is not designed to stand on its own. It must be supported by the packaging
until mounted. To prevent injury, use Bang & Olufsen approved brackets or stands only!
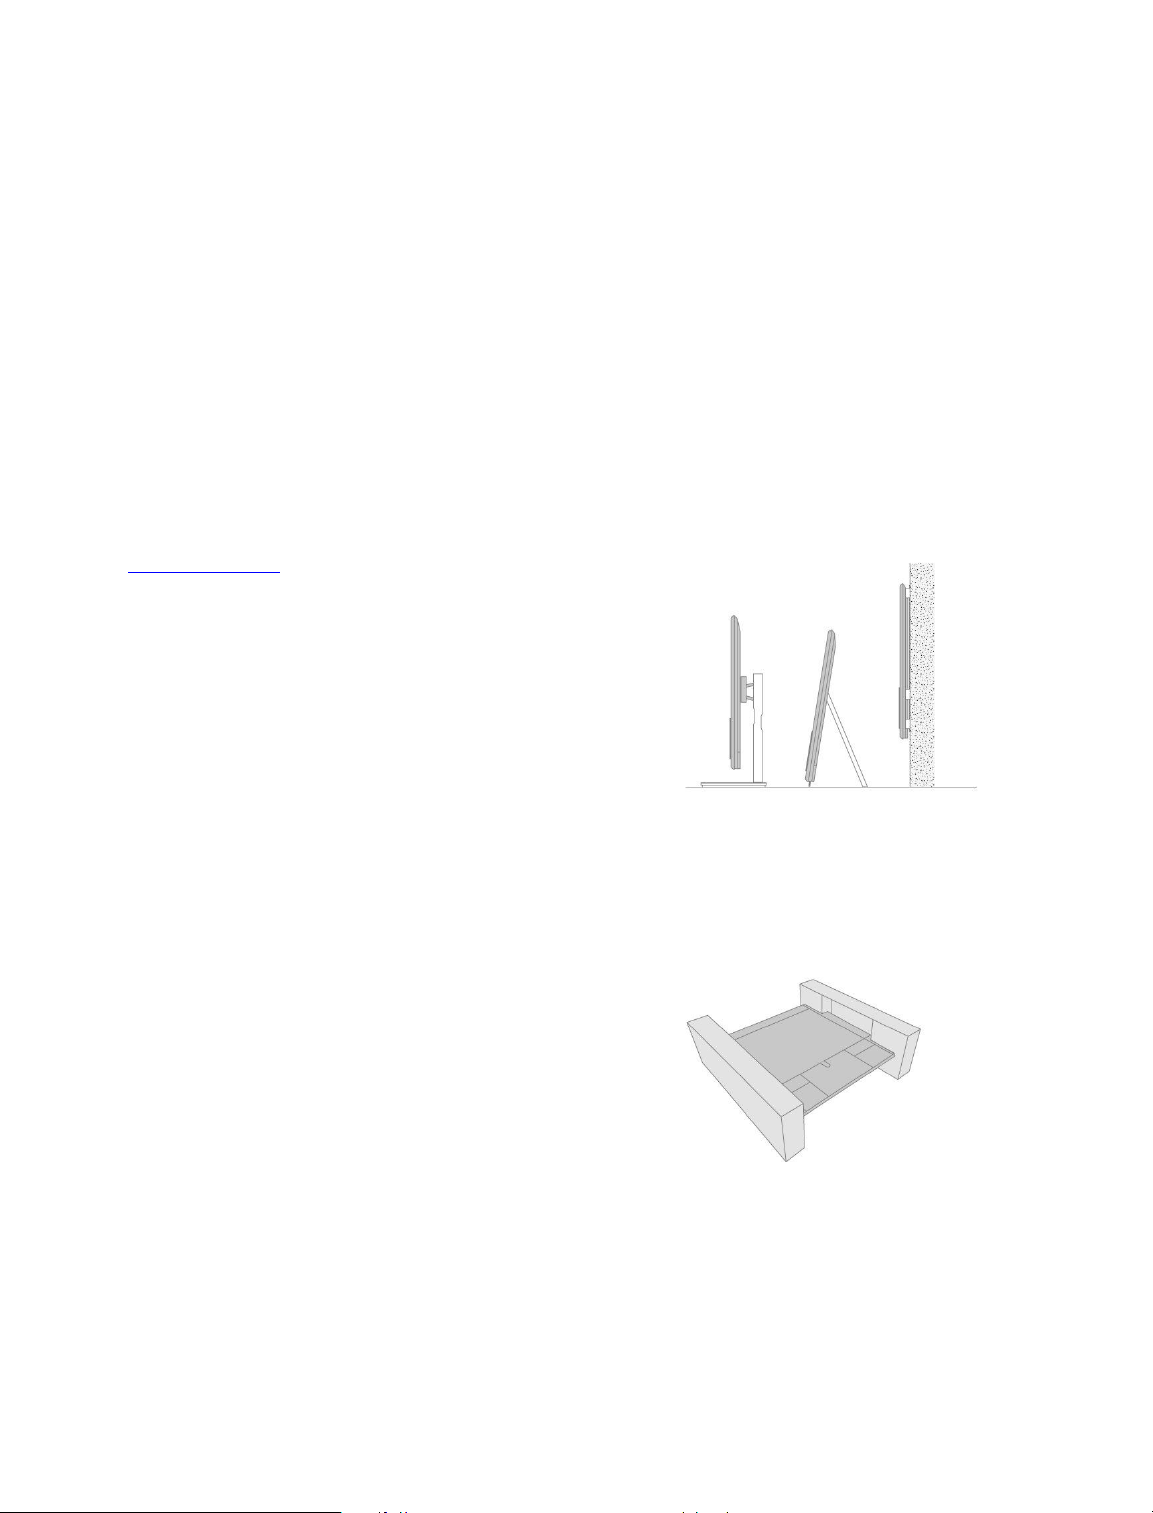
Stands and wall brackets
11
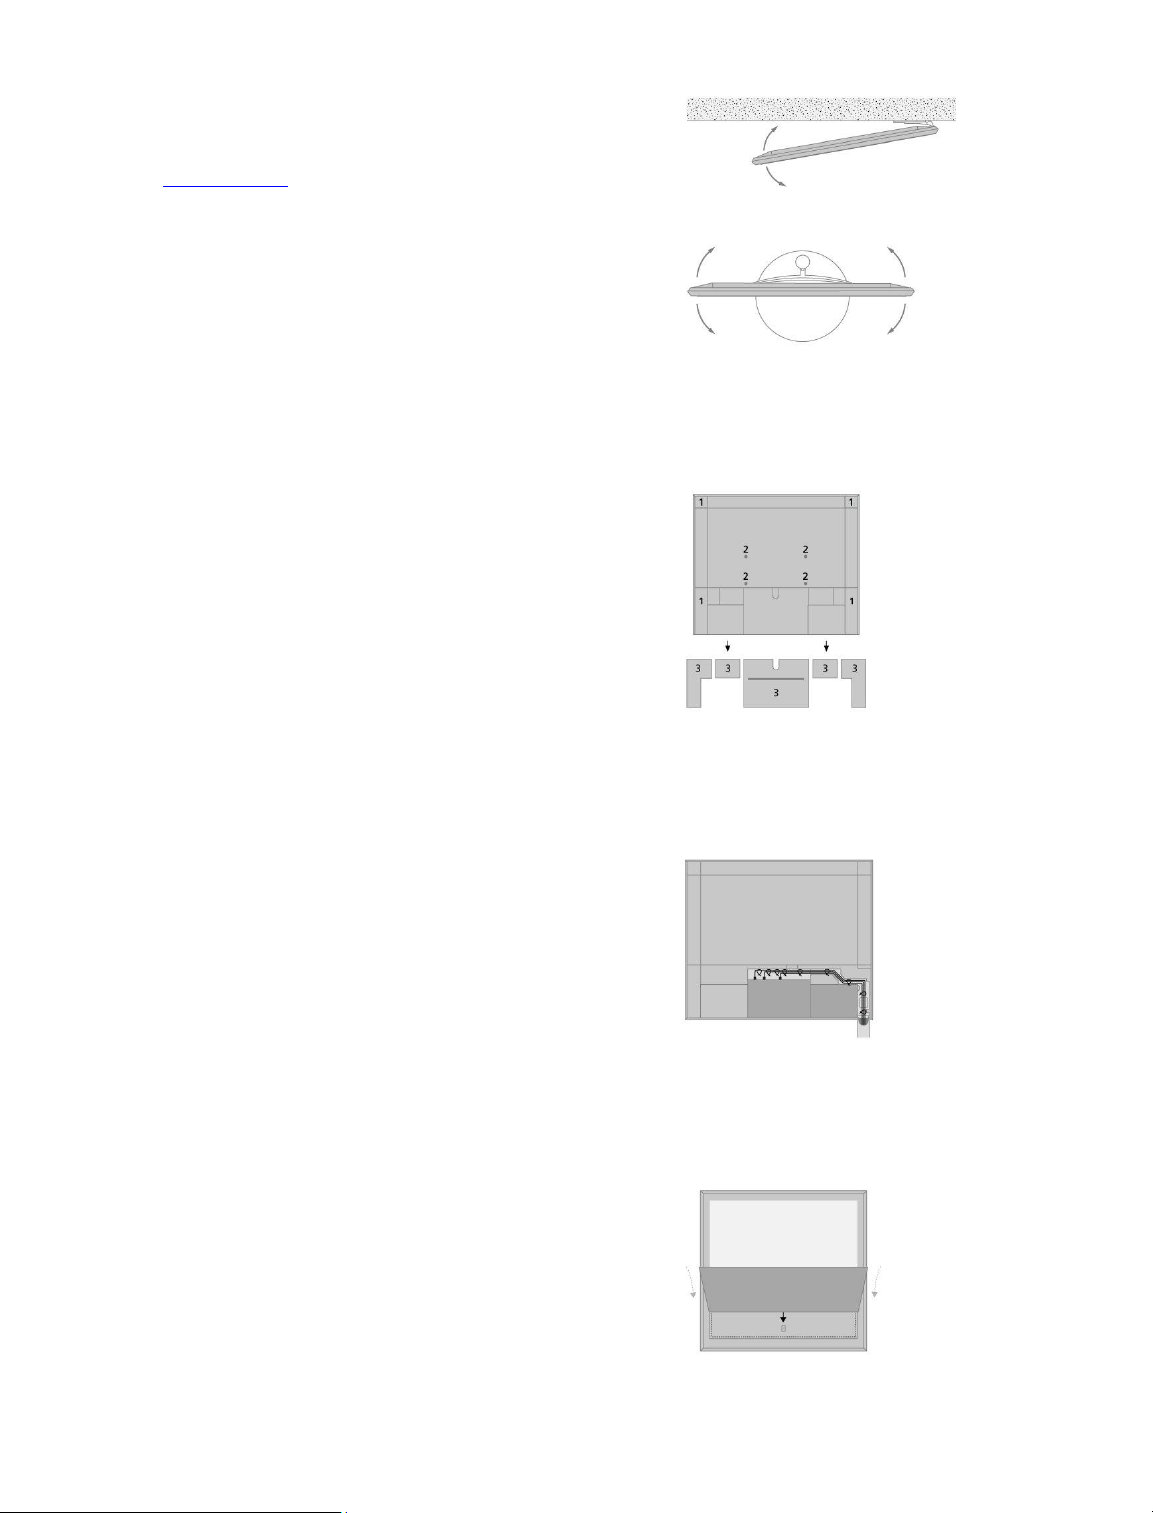
Set the maximum angle the television will turn on the motorised floor stand or wall
bracket. The wall bracket without a motor can manually be turned 90˚ left or right
depending on your setup. Remember to leave enough space around the television to
allow it to turn freely. For more information, press the red button in the on-screen
help and find 'Set a stand position'.
Overview
Locate the connection panel and other important items:
1. Holes for mounting of a wall bracket.
2. Holes for mounting of a stand.
3. Covers for the connection panel. Pull out at the bottom to remove the cover
parts.
Depending on your setup, lead the cables through the hole in the middle or either sides
of the connection panel cover.
Run cables
Gather the cables from each side, make the bundles cross each other, and fasten them to
either side or in the middle, depending on wall bracket or stand placement.
If you have a motorised stand or wall bracket, make sure that there is enough slack in the
cables to allow the television to turn to either side or tilt before you fasten the cables
with cable ties to make a neat bundle.
Fasten the speaker cover
When the television is placed on a wall bracket or stand you can attach the speaker
cover. Hold the speaker cover with both hands and attach it at the bottom first. Then
carefully attach it to the top and adjust its position before letting go.
During cleaning it is recommended to remove the speaker cover. Avoid spraying liquid
directly on the screen as this may damage the speakers, use a soft cloth
instead. Carefully remove the speaker cover by supporting it in the side and at the
bottom.
If you have a wooden speaker cover, note that wood is a living and natural material and
12

therefore colour and form may change over time.
Also, note that cloth covers of bright colours may be discoloured over time.
13

Maintenance
Regular maintenance, such as cleaning, is the responsibility of the user.
Never use alcohol or other solvents to clean any parts of the television.
Screen
Use a mild window cleaning fluid and lightly clean the screen without leaving streaks or
traces. Some micro-fibre cloths may harm the optical coating due to their strong abrasive
effect.
Cabinet and controls
Wipe dust off the surfaces using a dry, soft cloth. To remove stains or dirt, use a soft,
damp cloth and a solution of water and mild detergent, such as washing-up liquid.
14
Connections
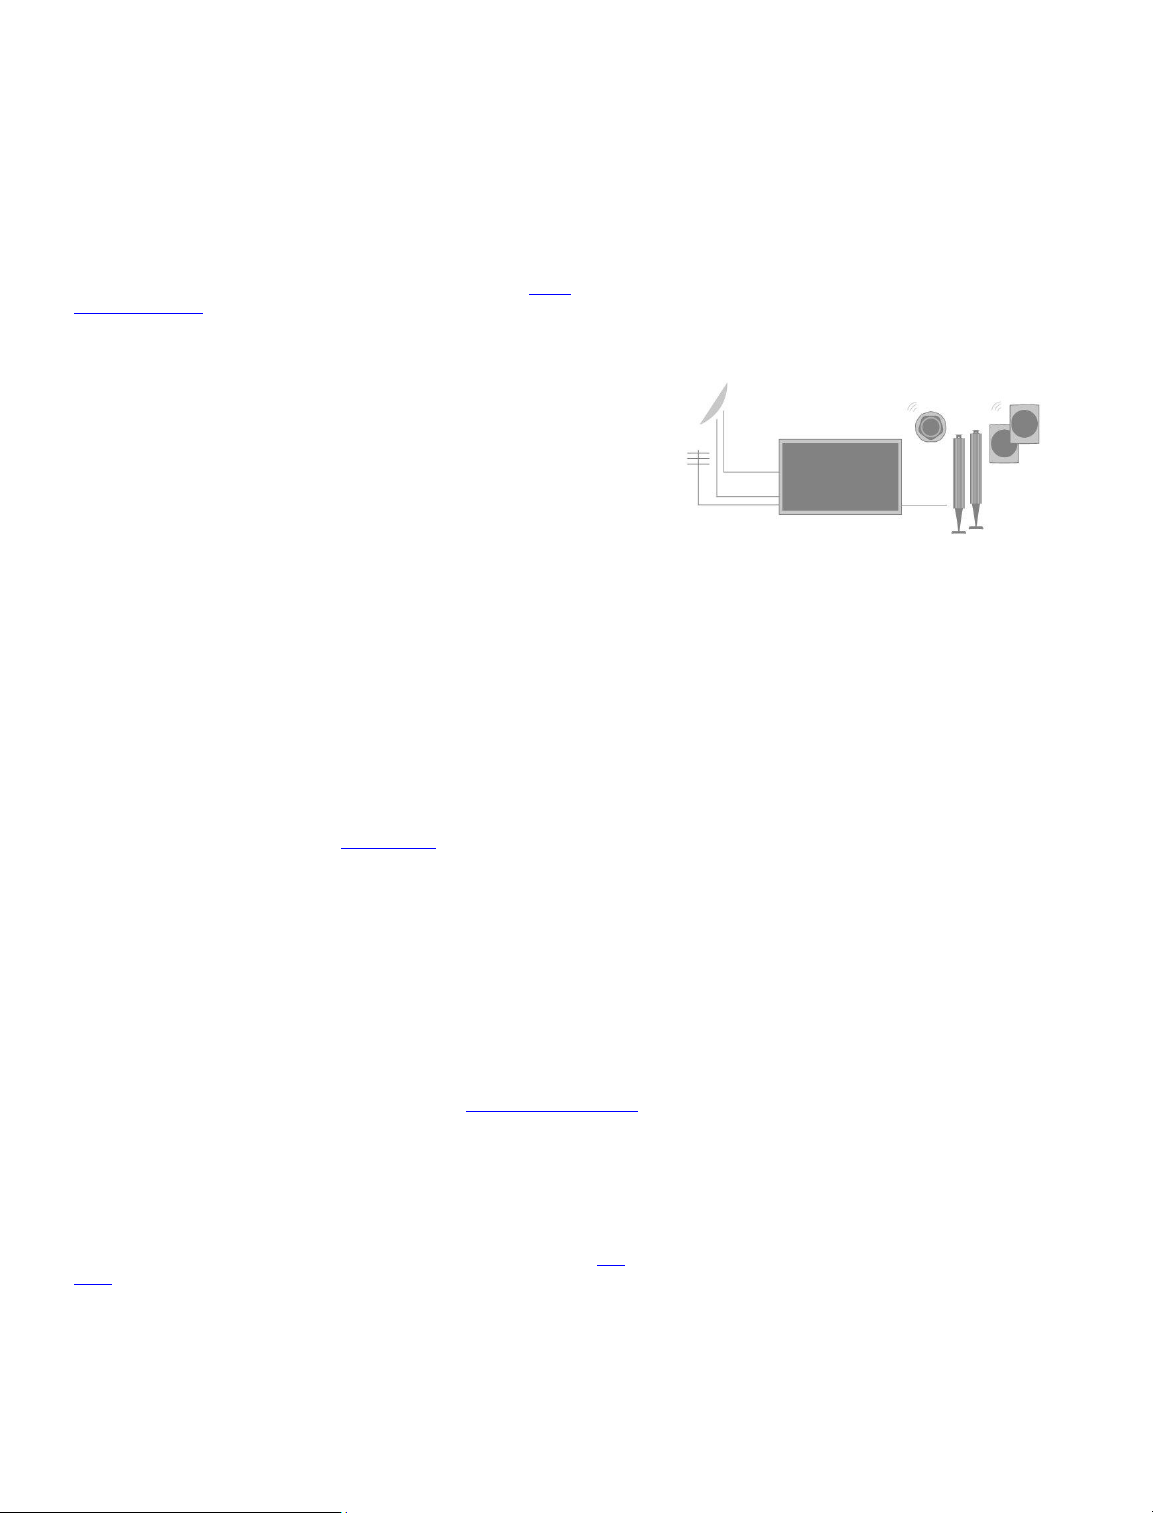
Connection of products
The connection panel on your television allows you to connect signal input cables as
well as a variety of extra products, such as a Blu-ray player or a music system.
Products you connect to these sockets can be registered in the Source list menu. For
more information, press the red button in the on-screen help and find 'Set up
connected products'.
The illustration shows an example of connections to the AERIAL, SAT 1-2 and
PL1-4 sockets.
Before you connect any products to your television, remember to disconnect the
television from the mains. Except when connecting a source to an HDMI IN or USB
socket.
Depending on the type of product you connect to the television, different cables and
maybe also adaptors are needed. Cables and adaptors are available from your Bang &
Olufsen retailer.
Tuner
If you use the hard disk recorder functions in connection with a satellite dish, you must
use an LNB head with two outputs. If you have more than one satellite dish, you must
also use a multi DISEqC switch. For more information, contact your Bang & Olufsen
retailer.
Loudspeakers
Use Bang & Olufsen BeoLab speakers. Cables are available from your Bang & Olufsen
retailer.
You can also connect up to eight speakers wirelessly. For more information, press the
red button in the on-screen help and find 'Sound settings'.
To obtain the best possible wireless connection, it is recommended to place all wireless
speakers within a range of approximately 9 metres (29.5 ft) from the television.
Do not place any obstacles in front of the television or wireless speakers as this may
interfere with the wireless connection. The wireless speakers should be placed in one
room and be visible from the television. See the guide for your speaker for information
about whether or not your speaker can be connected wirelessly.
Products with HDMI™ output
Products with HDMI output such as a set-top box can be connected to any available
HDMI IN socket in the television. For more information on how to set up connected
products, press the red button in the on-screen help and find 'Set up connected products
'.
A configured source can be selected on the BeoRemote One or via TV in the Home
menu.
Connected products can be operated with its own remote control or you may download
a Peripheral Unit Controller (PUC) table, if available, to use the Bang & Olufsen remote
control. For more information, press the red button in the on-screen help and find 'PUC
tables'.
15
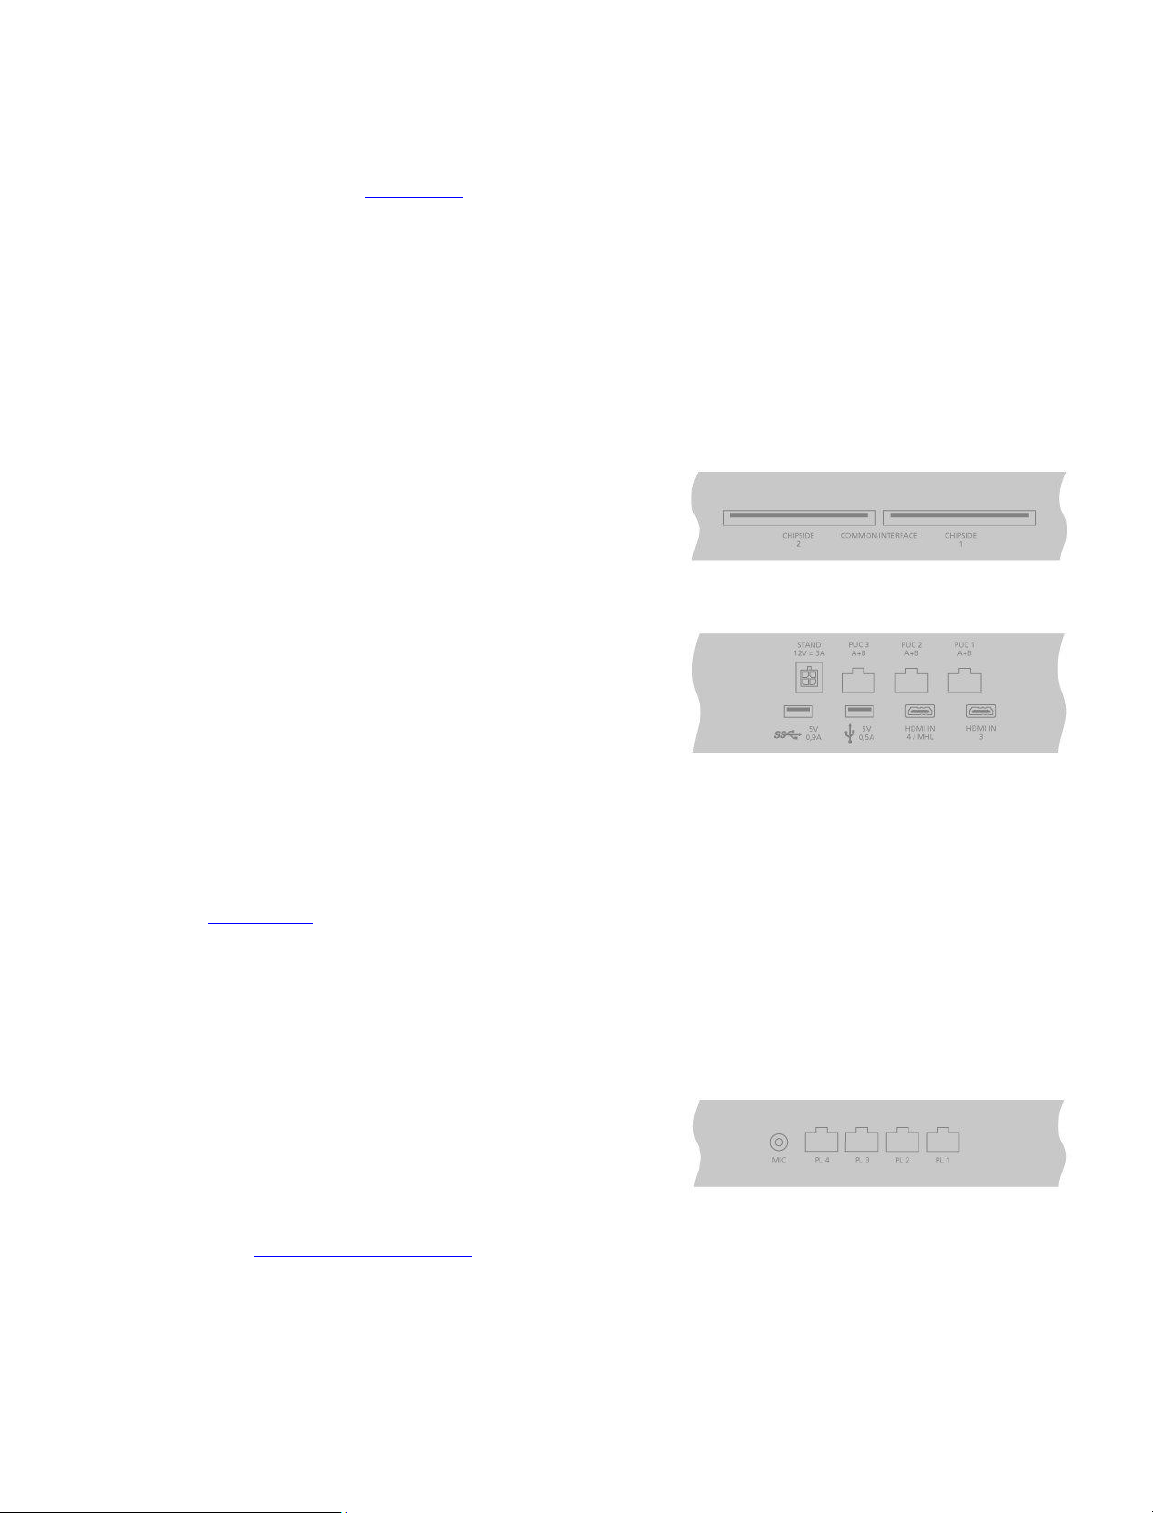
Connection panels
Products you connect permanently to the connection panel can be registered in
the Source list menu by pressing for each source. For more information, press
the red button in the on-screen help and find 'Set up a source'.
We recommend that you connect the television to the Internet to use Smart TV
functions, receive software updates and to download Peripheral Unit Controller (PUC)
tables. PUC tables enable you to operate connected non-Bang & Olufsen products with
your Bang & Olufsen remote control.
Connect the mains socket () on the connection panel of your television to the wall
outlet.
The supplied plug and mains cord are specially designed for the product. Do not change
the plug, and if the mains cord is damaged, you must buy a new one from your Bang &
Olufsen retailer.
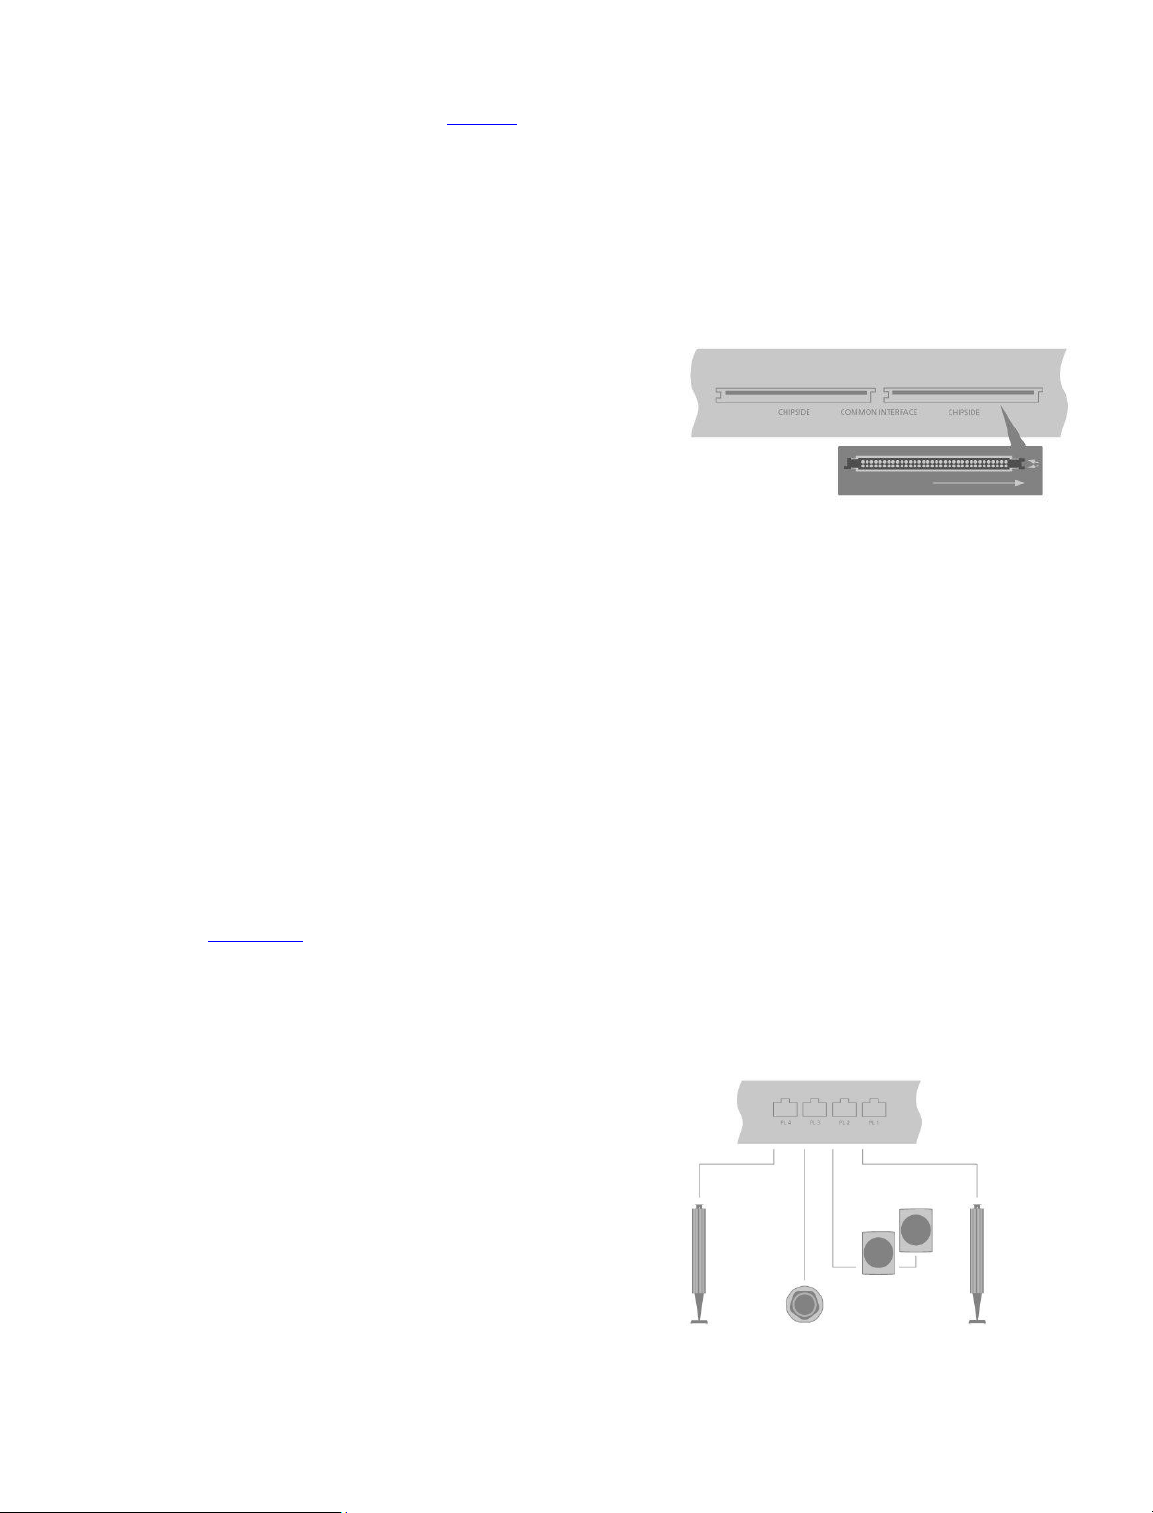
COMMON INTERFACE x 2
For insertion of a CA Module and card for access to coded digital channels. For more
information about compatible card and module combinations, contact your Bang &
Olufsen retailer.
USB x 2 ()
For connection of a USB device to browse digital photos, video or music files. If you
connect a USB HDD or SSD, you can use it as an external hard disk recorder.
HDMI IN 3-4
The High Definition Multimedia Interface allows you to connect many different sources,
such as set-top boxes, multimedia players, Blu-ray players, or a PC. HDMI IN 4 is for
connection of MHL compliant devices.
STAND
For connection of a motorised stand or wall bracket. Press the red button in the onscreen help and find 'Adjust the stand' for information on how to calibrate a floor stand
or wall bracket.
PUC 1-3 (A+B)
For IR control signals to external products connected to an HDMI IN socket. Allows you
to control non-Bang & Olufsen products with your Bang & Olufsen remote control.
MIC
For connection of a calibration microphone only, to be able to calibrate connected
speakers automatically.
PL1-4 (Power Link)
For connection of external speakers in a surround sound setup. Press the red button in
the on-screen help and find 'Connect speakers to the television' for more information.
16
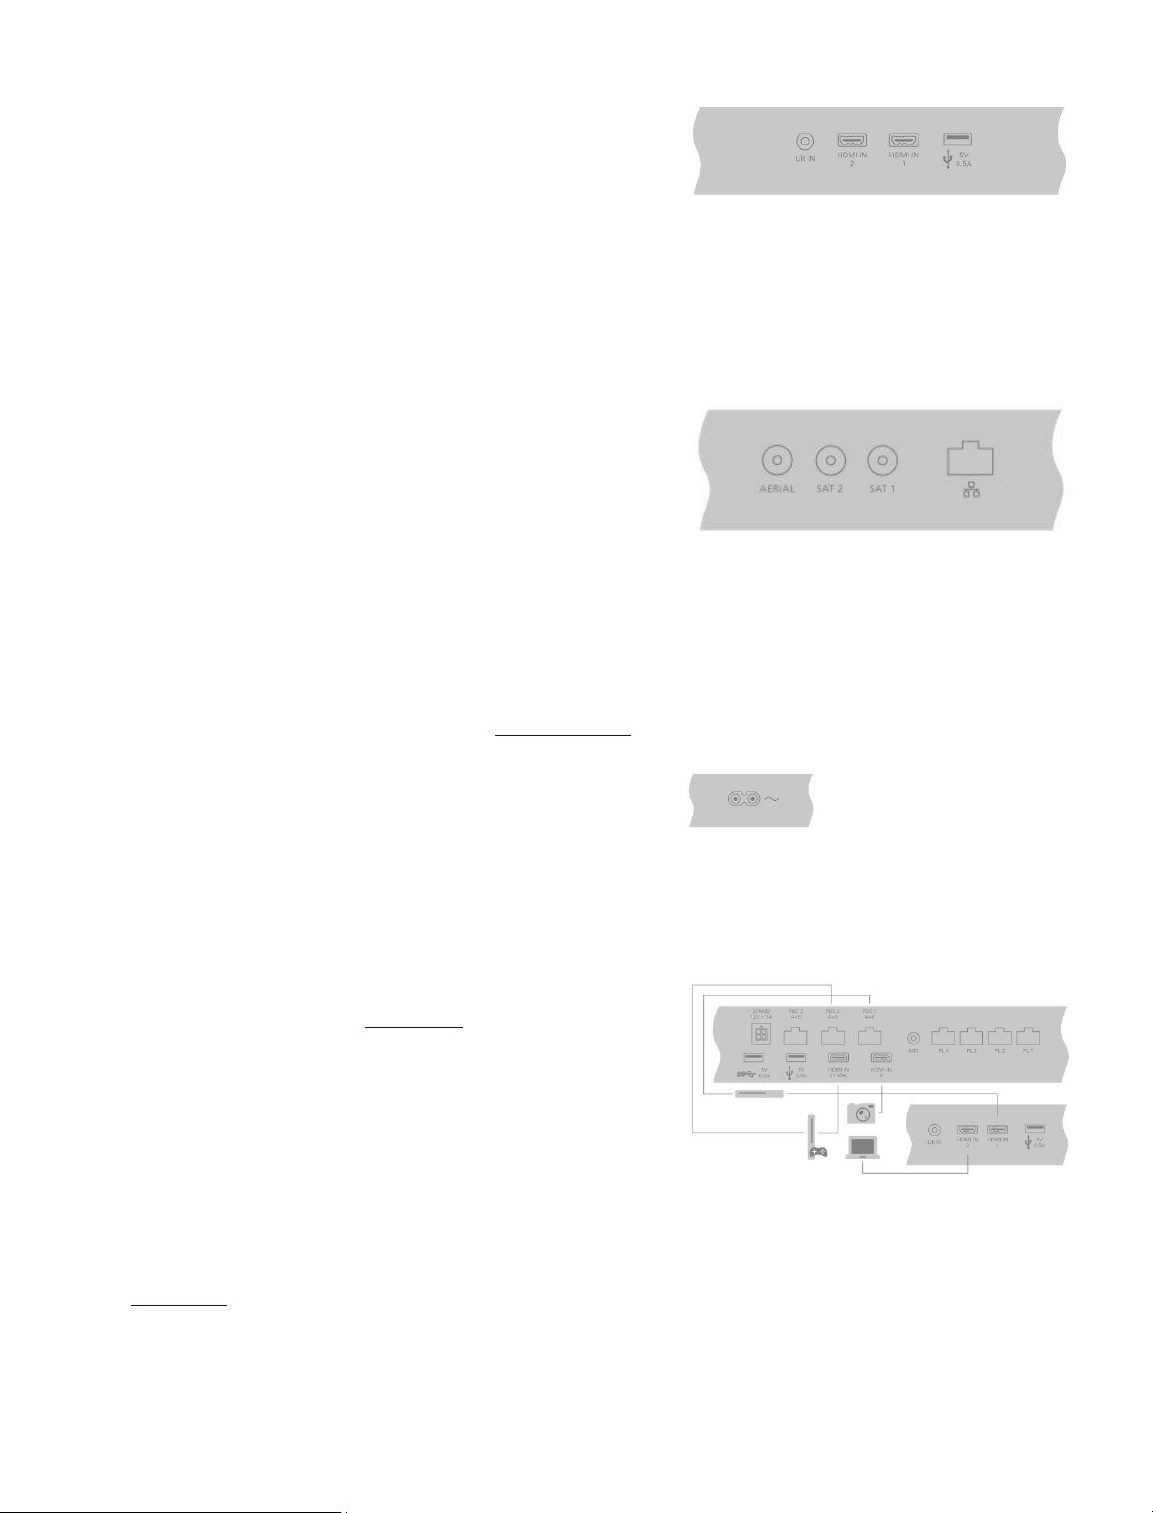
L/R IN
Left and right line input.
HDMI IN 1-2
The High Definition Multimedia Interface allows you to connect many different sources,
such as set-top boxes, multimedia players, Blu-ray players, or a PC.
USB ()
For connection of a USB device to browse digital photos, video or music files. If you
connect a USB HDD or SSD, you can use it as an external hard disk recorder.
AERIAL
Aerial input socket for a digital aerial/cable TV network or for an analogue TV signal.
SAT 1-2 (Satellite)
Aerial input sockets for a digital satellite signal.
Ethernet
For connection to the Internet. For access to the Internet, Smart TV, software updates
and PUC and app downloads.
Make sure the cable connection between the product and the router does not exit the
building to avoid contact with high voltage.
It is strongly recommended that you set your television to update system software
automatically, press the red button in the on-screen help and find 'Auto system updates'.
Mains supply
Connection to the mains supply.
Connect digital sources
Connect external HDMI sources, such as a set-top box, computer or game console. All
products connected to the television can be configured. For more information, press
the red button in the on-screen help and find 'Set up a source'.
Depending on the product you connect to the television, different cables and maybe also
adaptors are needed. If you have more than one type of products that need a PUC
socket, you must buy an extra PUC cable. Cables and adaptors are available from your
Bang & Olufsen retailer.
Connect a digital source
1. Connect the cable to the appropriate socket on the digital product.
2. Run the cable to an HDMI IN socket on the television.
3. To enable operation of the digital product with your Bang & Olufsen remote
control, connect an IR-transmitter to one of the PUC sockets and attach it to the
IR-receiver of digital product. Press the red button in the on-screen help and find
'IR-transmitters' for more information.
4. Follow on-screen instructions to configure the source.*
*When selecting Game console as source, the picture mode Game is activated as default
17

setting. You can change this setting temporarily in the Picture menu. Press
the red button in the on-screen help and find 'Picture settings' for more information.
Connect a camera
1. Connect the cable to the appropriate socket on the camera.
2. Run the cable to an HDMI IN socket on the television.
3. Follow on-screen instructions to configure the source.
Connect a computer
Before you connect a computer, you must disconnect the television, the computer and all
connected products from the mains supply.
1. Using the appropriate type of cable, connect one end to the DVI or HDMI output
socket on your computer, and the other end to an HDMI IN socket on the
television.
2. If you use the DVI output socket on the computer, use the appropriate cable and
connect the sound output on the computer to the L/R IN socket on the
television to hear sound from the computer in the speakers connected to the
television.
3. Reconnect the television, the computer, and all connected products to the
mains. Remember, the computer must be connected to a grounded wall outlet
as specified in its setting-up instructions.
4. Follow on-screen instructions to configure the source.
Connect an analogue audio source
You can connect one analogue audio source, such as an Mp3 player. To configure
products connected to the television, press the red button in the on-screen help and find
'Set up connected products'.
Disconnect all systems from the mains before you connect additional products.
1. Connect the cable to the appropriate socket on the product you wish to
connect.
2. Run the cable to the L/R IN socket on the television.
3. Reconnect the television and the connected products to the mains.
4. Follow on-screen instructions to configure the source.
Different adaptors and possibly also cables are needed. Cables and adaptors are
available from your Bang & Olufsen retailer.
IR-transmitters
To operate non-Bang & Olufsen products with a BeoRemote One or the BeoRemote App,
attach a Bang & Olufsen IR-transmitter on your non-Bang & Olufsen product and then
connect it to one of the sockets marked PUC on the connection panel. Attach the
transmitter near the IR-receiver on the connected product to ensure remote control
operation. Before attaching the transmitter permanently, check that you can operate the
product menus on the TV screen using BeoRemote One or BeoRemote App. Operation
of your television with the BeoRemote App may not be available in the current software
version.
When you set up the transmitter to a selected PUC socket in the Source list menu,
settings for the IR-transmitter are made automatically. However, it is possible to perform
a manual setup of the socket if alternative settings are required.
For an extra PUC cable, contact your Bang & Olufsen retailer.
18
For information about download of Peripheral Unit Controller (PUC) tables for set-top
boxes, press the red button in the on-screen help and find 'PUC tables'.
Smart Card for digital channels
If you want to watch coded channels, contact your service provider. The service provider
will register you as an authorised viewer, usually requiring payment. You will then be
provided with a Smart Card and a CA Module. Note that these will only be valid for one
service provider and therefore only work with certain channels.
The CA Module is a ‘card reader’ for your Smart Card which decodes the coded signals
sent out by the service provider. Only uncoded digital channels, also known as ‘free-toair’ channels, are available without Smart Cards and CA Modules.
Contact your Bang & Olufsen retailer for information about compatible CA Modules.
The Smart Cards must remain in the CA Modules, unless your service provider asks you
to remove it. This is important in case your service provider wishes to send new
information to your Smart Card.
Insert a Smart Card carefully into a CA Module. The CA Module has one protruding edge
on one side and two protruding edges on the other side. If the television does not receive
any signal, check that the Smart Card and CA Modules are inserted correctly.
Smart Cards and CA Modules may also give access to special menus which are not
described here. If this is the case, follow the instructions from your service provider. You
can access a Common interface menu when the TV tuner is the current source if you
press LIST and bring up Options.
When operating your television, you may need to use different pin codes other than a pin
code for your Smart Card. Pin codes are used for protective reasons, due to mandatory
requirement from providers and by external equipment. It may be easier for you if you
choose the same code for different systems when possible.
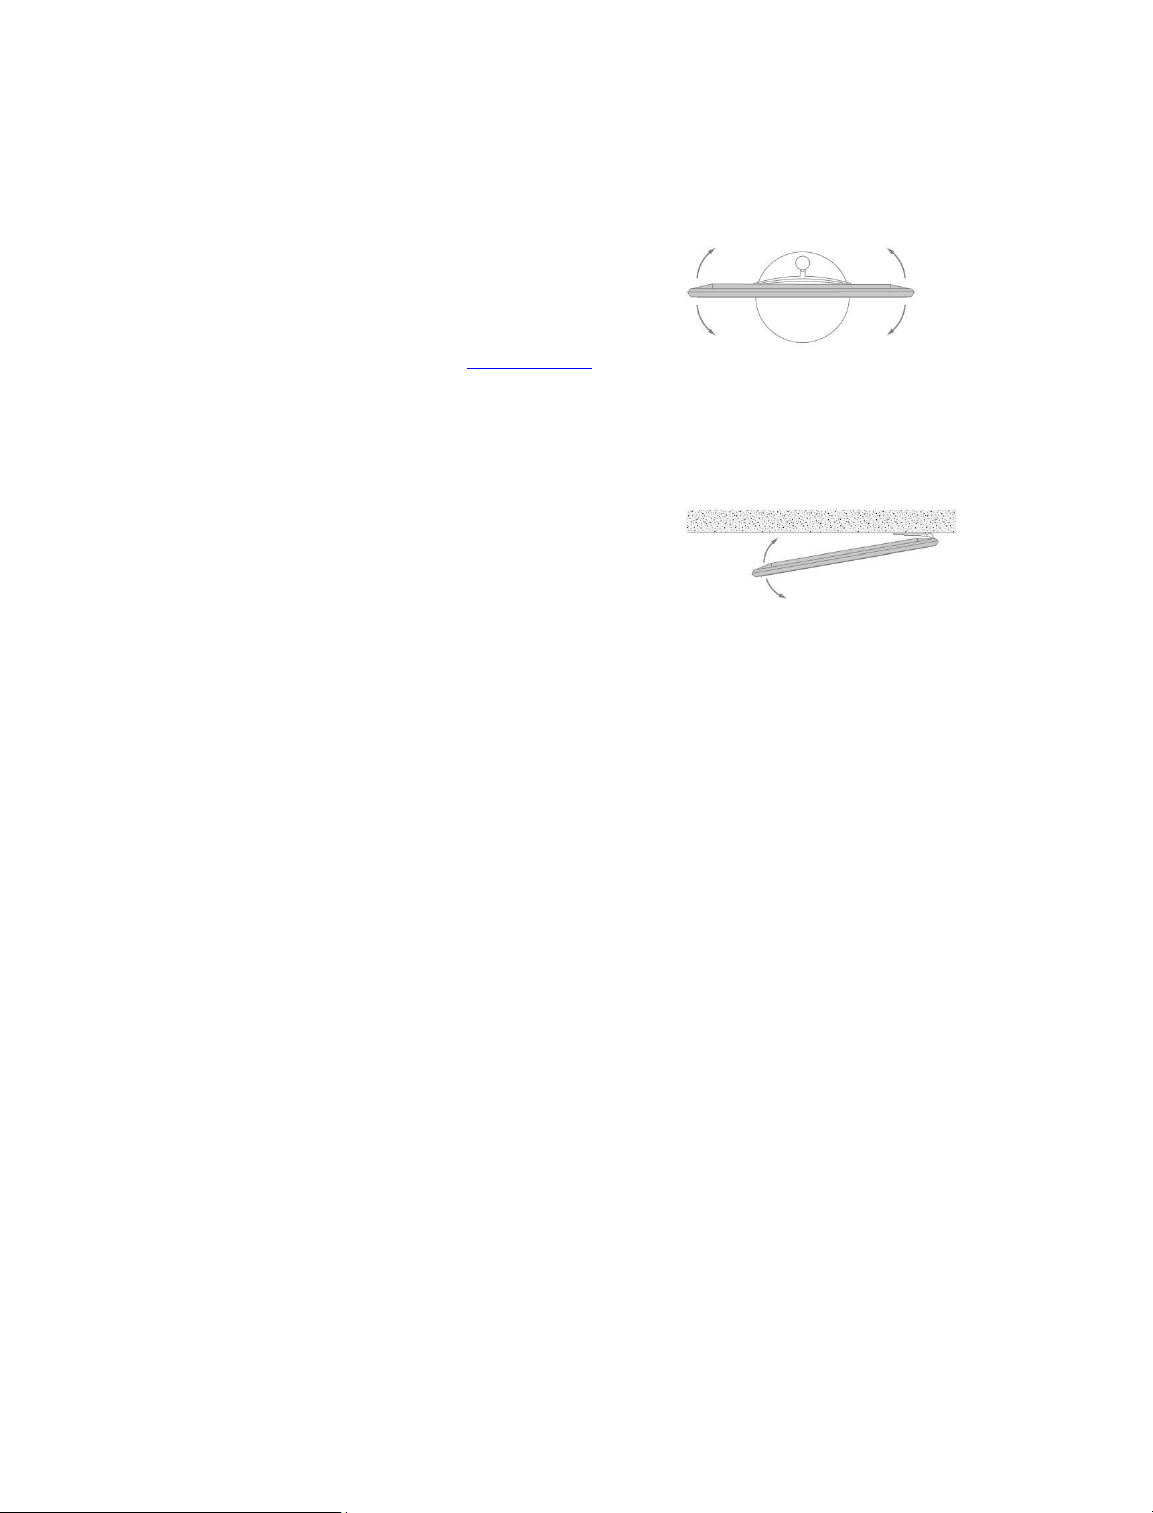
Connect speakers to the television
You can connect up to eight wired speakers and subwoofers to the television using
Power Link cables.
In addition, you can connect up to eight speakers wirelessly, including subwoofers. For
more information about setting up wireless speakers, press the red button in the onscreen help and find 'Sound settings'.
Disconnect all systems from the mains before you connect additional products.
Depending on the type of speakers you connect to the television, different cables and
maybe also adaptors are needed. Cables and adaptors are available from your Bang &
Olufsen retailer.
The illustration shows an example of a speaker setup with two front speakers, two daisychained rear speakers and a subwoofer.
Connect speakers
1. Connect a Power Link cable to the appropriate socket on the speakers you wish
to connect to the television.*
2. Run the cables to available sockets marked PL 1–4 on the television.
3. Connect a Power Link cable to the appropriate sockets on a subwoofer.
4. Run the cable to an available socket marked PL 1–4 on the television.
5. Reconnect the television and the connected speakers to the mains.
*Remember to set the switch for left and right position on the speakers depending on
whether your speaker is positioned on the left or right of your listening position.
19

If you want to connect two speakers to one PL socket on the television and it is not
possible to loop the cable between the speakers, an extra splitter is needed, contact your
Bang & Olufsen retailer for more information.
20

Set up connected products
Set up a source
If you connect additional video products to your television, you can set up the
products in the Source list menu via the Settings option when you find the source and
press .
When the television is switched on and you connect additional products to an HDMI
IN socket, the television will detect an unconfigured source. A message appears on the
screen and you can follow on-screen instructions to configure the source. This function
may not be available in the current software version.
Registering the products connected to the television enables you to operate it with
your BeoRemote One.
Sources have default settings, for example, sound and picture that suit most situations
but you can change these settings if you wish.
Settings
Source list
...
Select the source in Source list and press .
You can give the source the name you want to appear in the source list by pressing
the yellow button and follow on-screen instructions.
You can also set a speaker group to be activated when you select the source.
Products connected to HDMI IN
You can register the connected products in the television.
With an Internet connection, you can download Peripheral Unit Controller (PUC) tables
enabling you to operate connected products, such as a set-top box, with
BeoRemote One. PUC tables are available for many other brand products, such as
projectors, Blu-ray players, set-top boxes, and game consoles. The list of PUC tables on
the Internet is updated and expanded on a regular basis.
PUC table
Select a PUC table in the list brought up. If the peripheral unit is not present in the list,
select Search to download a table suitable for the connected product.
You can also select From USB to download a table from a connected USB key.
For more information, press the red button in the on-screen help and find 'Download
PUC tables'.
PUC socket
When you have found the wanted peripheral unit, you must select the socket to connect
and configure the product to. Settings for the PUC socket are made automatically upon
selecting Next. However, if you need to set up the control type and modulation mode
manually, you must select Manual setup and follow on-screen instructions instead.
Control type
21

If you have selected Manual setup, you must select a control type.
To operate non-Bang & Olufsen products with a Bang & Olufsen remote control, attach a
Bang & Olufsen IR-transmitter to the products. Select IR-blaster if the IR-transmission
takes place via an IR-blaster. Select Plug if the IR-transmission takes place via a cable
plugged into the product.
Modulation mode
If you have selected Manual setup, and set the control type to Plug, you must select a
modulation mode. Select Modulation on if the connected product requires a modulated
signal. Select Modulation off if the connected product requires an un-modulated signal.
For more information, contact your Bang & Olufsen retailer.
Standby options
Set up when the product should switch off.
Off at TV standby: The connected product should switch off when you switch
off the television.
Off at source change: The connected product should switch off when you select
a different source available in your system.
Always on: The connected product should remain on at all times. This is useful if
the product has a very long start-up time.
Manual control: Switch the connected product on and off manually.
The connected product is now ready for use and you must select Finish.
Sound mode
Set a sound mode for the source. The television has several sound modes optimised for
different types of programmes and sources. However, if you wish, you can adjust the
values in the sound modes to your liking.
Automatic: Adapts to the selected source or the input received. If, for example,
you are watching a movie, the sound mode for movie will be used. This also
means that if you have adjusted the Movie sound mode, your adjustments are
included.
Movie: For use when watching movies, either from DVD or Blu-ray, streaming
sources or television broadcasts.
Game: For use for audio with game consoles.
Speech: For signals where increased speech intelligibility is wanted, for example,
television news programmes.
Drama: Primarily, for use when watching television broadcasts. Timbre settings
are flat and bass management is active.
Sports: For use when watching broadcasts of sports events.
Music: For use with music sources, either with or without accompanying video.
Night listening: For situations where it is desirable to hear all components of the
audio signal without large jumps in dynamics or bass.
Custom: Make your own specific sound mode with the sound adjustments you
prefer. This sound mode can also be renamed.
For more information about setting up sound modes, press the red button in the onscreen help and find 'Sound settings'.
22

Speaker group
Select the speaker group to be used with this source.
For more information about setting up speaker groups, press the red button in the onscreen help and find 'Sound settings'.
Picture off
Select whether the picture on the TV screen should switch off when you select an audio
source. Options are Timeout for the picture to switch off when a source has not been
operated for a while, Never for the picture to remain on and Always for the picture to be
switched off as soon as you select the source.
When the picture is switched off, you can still hear the sound of the source. If you have
selected Timeout and the picture has faded out, you can activate the picture again if you
press INFO or the centre button.
Picture mode
Select a picture mode to be used for the selected source.
General: Continuously and automatically adjusts the picture to the signal and the
viewing conditions.
Movie: Continuously and automatically adjusts the picture to the signal and the
viewing conditions. The colour temperature is set to 6500 K.
Game: Adjusts the picture to use the screen as a monitor for a connected game
console or PC. It minimises the video delay and add signal processing for optimal
picture.
Monitor: Adjusts the picture to use the screen as a monitor for PC application. It
minimises the video delay and neutralises all signal processing for unaltered
picture. The colour temperature is set to 6500 K.
Picture format
Set up a picture format to be used each time you activate the source.
Auto: Reduces black bars at the top and bottom. The picture is scaled without
changing the picture geometry. However, if a 4:3 source signals a wrong aspect
ratio, the picture will be stretched horizontally.
Auto wide: Reduces black bars at the top and bottom. Furthermore, the picture
is scaled and stretched horizontally to reduce black bars on the left and right
and to fill out as much of the screen as possible.
Note, that you can select additional picture formats in the Options menu found in LIST on
your remote control.
If Auto or Auto wide do not give a satisfactory result due to incorrect format information
from the source, you can select additional picture formats in the Options menu found in
LIST on your remote control. Select one of the formats Fixed A – Fixed D until you obtain
the optimum picture format. When you have selected Fixed C or Fixed D, you can
use and to move the picture up and down.
23

Picture corrections
You can make brightness and contrast corrections as well as shift and zoom the picture
horizontally and vertically on the TV screen to avoid any unwanted areas being visible on
the screen. The options available depends on the source selected.
Auto selection
If available for the connected source, select if the source should be selected
automatically as soon as the television detects a signal, provided the television is on at
the time.
Audio level
Set the audio level of the connected source. This also enables you to align the audio level
of the different products connected to the television.
Blanking
If available for the connected source, select for how long the TV screen should display a
blank screen before it displays the signal of the connected product. If, for example, a
connected set-top box requires some time to start up, you can set the 'blanking' time to
ensure that the picture is ready before it is displayed on the television.
BeoRemote lists
Select if a source should be present in the list of video sources in your remote control
display when you press TV, in the list of music sources when you press MUSIC, in both
lists or in none of them.
Note that if you select None, the selected source will not be visible in the TV and Music
lists on your remote control.
Reset all settings for a source
If you have connected and configured a source to a specific socket on the television and
then disconnect the source permanently, you must reset the source settings. Highlight
the source in the Source list menu, press and select Reset to default. When you select
Yes, the source is no longer configured to this socket. Next time you connect a source to
the socket, you are asked to configure the source.
Under Service you can remove unused PUC tables. For more information, press the red
button in the on-screen help and find 'Service and software update'.
24

Stand settings
Set up the stand
If your television is equipped with the optional motorised floor stand or wall bracket,
you can turn it using the remote control.
Furthermore, you can set the television to turn automatically to face your favourite
viewing position when you switch it on. It can turn to a different position when you
listen to, for example, a connected radio, and turn away to a standby position when
you switch it off. You can also set up other stand positions for other listening or
viewing positions.
If your television is equipped with the motorised stand, you can also turn and tilt it by
hand.
Settings
Stand
...
Set a stand position
Set a stand position – introduction
If your television is equipped with a motorised floor stand or wall bracket, choose one
position for start-up and one for standby. You can also preset stand positions of your
own choice, for example, when you sit in an armchair reading or when you sit at the
dining table. Bring up the Stand positions menu to store, name or delete a stand position.
You cannot rename or delete the Start-up and Standby stand positions.
Create a new stand position
In the Stand positions menu, set Start-up to the position you want your television to turn
to when it is switched on. Set Standby to the position you want your television to turn to
when it is switched off. You can also make a new stand position.
1. In the Stand positions menu, press the green button to make a new stand
position.
2. Use the arrow buttons to move the television to the desired position.
3. Press the centre button to save.
To delete an existing stand position, press the red button in the menu and follow onscreen instructions. To rename a stand position, press the yellow button and follow onscreen instructions. The pre-named stand positions can be changed but not renamed or
deleted.
Adjust the stand
If your setup includes a motorised floor stand or wall bracket, you will during first-time
setup be prompted to calibrate the outer positions of the motorised movement. For the
floor stand, this is done by entering the distance from the stand to the wall, follow onscreen instructions. The motorised movement of the television will not work until the
calibration process has been completed.
Depending on your setup, you can bring up a Stand adjustment menu for stand positions
or wall bracket positions.
25
The calibration process allows you to set the maximum angle the television will turn – left
and right.
Set up the television with a motorised floor stand
1. In the Stand adjustment menu, use and to turn the television to the leftmost
position.
2. Press the centre button to proceed to the next step.
3. Use and to turn the television to the rightmost position.
4. Highlight Save and press the centre button.
If your television has just been moved, you will also be asked to set up new stand
positions. Press the red button in the on-screen help and find 'Set a stand position' for
more information.
Set up the television with a motorised wall bracket
1. In the Stand adjustment menu, select if your wall bracket is placed on the left or
the right.
2. Highlight Next and press the centre button to proceed to the next step.
3. Press or to turn the television to the preferred position when fully closed.
4. Press the centre button to proceed to the next step.
5. Press or to turn the television to the preferred position when fully opened.
6. Press the centre button to save.
26

Daily use
Watch television
Watch analogue and digital terrestrial, cable and satellite channels depending on your
tuner options. See programme information and turn the television. Make a recording if
you have connected a correctly formatted USB HDD or SSD.
Learn more about programme information and TV guide in this chapter.
To bring up a favourite source quickly, you can save the source on one of the MyButtons
on BeoRemote One. For more information, press the red button in the on-screen
help and find 'Personalise the TV experience'.
Select a source
1. Press TV, then or to bring up the desired source in the BeoRemote One
display and press the centre button, or ...
2. ... press to bring up the Home menu.
3. Use the arrow buttons to highlight TV and press the centre button.
4. Press or to highlight the desired source and press the centre button.*
*You can set a video source to be activated directly with the BeoRemote One TV
button from standby. See the guide for your BeoRemote One.
Select a channel
1. Press and or use the number buttons to select a channel, or ...
2. ... press to select the previous channel.
Bring up and use source specific functions
1. Press LIST, then or to switch between source specific functions in the
BeoRemote One display.
2. Highlight a desired function and press the centre button.
Record here and now
To record the programme you are watching right now, press INFO and then the red
button on the remote control. The recording will start immediately and a recording icon
appears in the top right corner of the screen. It is only possible to record from digital
channels.
To stop the recording, press .
When TV guide information is available, the programme you are watching will be
recorded from the moment you start the recording until the programme ends. If no TV
guide information is available, the recording will only last 30 minutes. You can adjust the
end time of the recording in the list of Recordings.
For more information about recording, press the red button in the on-screen help and
find 'Record a programme'.
Use teletext
If available from your programme provider, you can bring up teletext for the selected
channel.
1. Press LIST, then or to bring up Text in the BeoRemote One display and
27
press the centre button.
2. Press or to step up or down in pages.
3. Use the number buttons to enter a page number.
4. Use the arrow buttons to navigate.
5. Press to leave teletext.
For more information about teletext, press the red button in the on-screen help and find
'Teletext'.
Programme information
You can bring up information on the current programme, or bring up a TV guide. You can
also change audio and subtitle language or bring up interactive information via HbbTV.**
An information display appears briefly on the screen every time you change channel or
station. You can also bring up a display manually by pressing INFO to see programme
information. When information is on-screen, you can press or to view information
for other channels without switching channel. Press to leave programme
information.
In the information display, you find information such as channel name and number, the
name of the current and following programme, programme start and stop time,
programme information and a preview.
**HbbTV may not be available on all markets.
Maturity rating is only visible if available from your service provider.
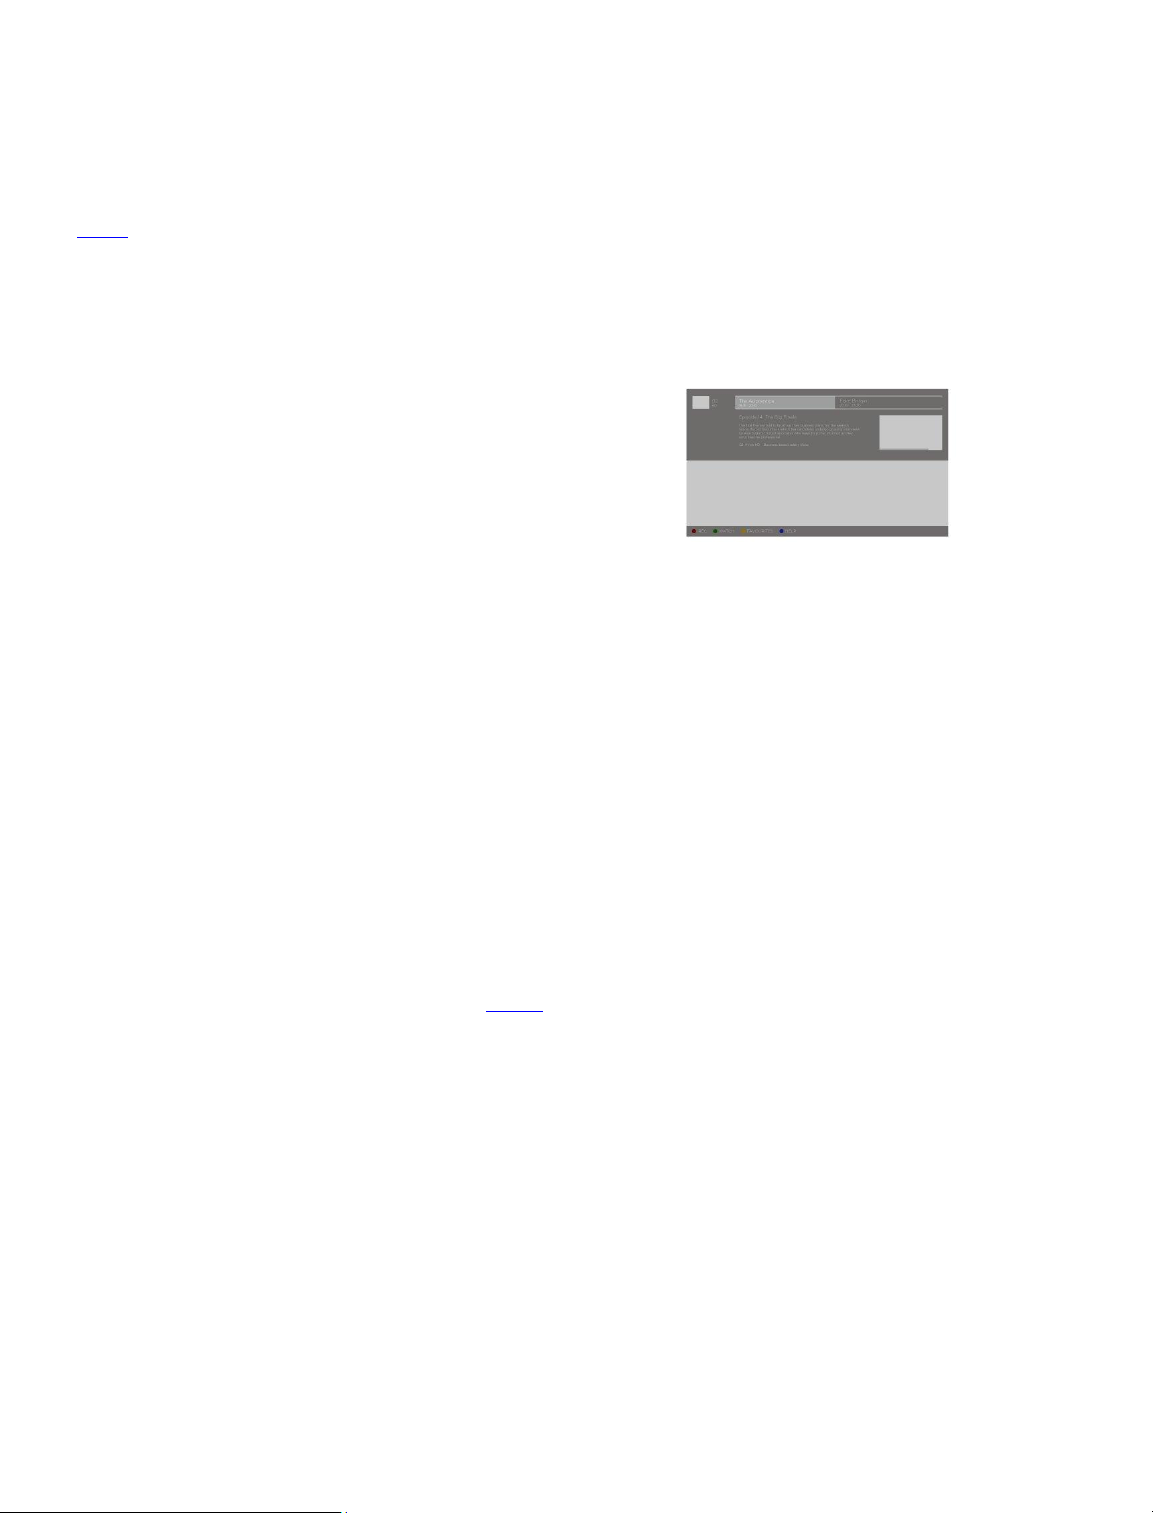
TV guide
You can bring up a TV guide and view a list of the current and coming TV programmes of
your channels. Depending on where the TV guide information is coming from, analogue
and digital channels or only digital channels are shown.
In some regions and for some channels, TV guide information may not be available.
1. Press GUIDE on your remote control to bring up the TV guide. Press again to
leave the TV guide.
The TV guide shows the channels of the selected tuner. The first time you open the TV
guide, the television may scan all TV channels for programme information. This may take
several minutes.
The television can collect TV guide information for the channels that are installed on the
television. The television cannot collect the TV guide information for channels viewed
from an external digital receiver or decoder.
For information on how to set the TV guide information to come from the Internet or the
broadcaster, press the red button in the on-screen help and find 'TV guide'.
From the TV guide...
1. To switch to a programme, highlight the programme and press the centre
button.
2. To bring up details of the selected programme, press INFO. Press again or
press to remove the details.
3. Press the yellow button to show the scheduled programmes for the upcoming
days and select a day. You can see up to eight days ahead.
4. Press the green button to view recordings and reminders.
Search by genre
If the information is available, you can look up scheduled programmes by genre like
movies, sports, etc. When the TV guide is on-screen you can search by genre via the
Options menu found under LIST on your remote control. In the list of found programmes,
28

you can set reminders or schedule a recording on a selected programme.
For more information on recording, press the red button in the on-screen help and find
'Record a programme'.
Set a reminder
You can set a reminder for a programme. A message will alert you at the start of the
programme. You can switch to this channel immediately. In the TV guide, a programme
with a reminder is marked with a icon.
When the TV guide is on-screen select an upcoming programme. You can set a reminder
via the Options menu found under LIST on your remote control. Here, you can also clear
a reminder.***
***If you have not connected a USB hard drive, you can simply press the red button to
set or clear a reminder when you have selected an upcoming programme.
List of reminders
You can view a list of the reminders you have set.
1. Press GUIDE to bring up the TV guide.
2. Press the green button to bring up a list of reminders and recordings.
3. At the top of the screen, select Scheduled and press the centre button.
4. In the list of scheduled recordings and reminders, select the tab Reminders and
press the centre button to view the reminders only.
5. Press the red button to remove the selected reminder. Press the yellow button
to record the selected programme.
6. Press to leave the menu.
Set a recording
You can set a recording in the TV guide.****
1. Press GUIDE and select a future or ongoing programme.
2. Press the red button to set a recording.
3. Press to leave the menu.
To cancel a recording…
1. Press GUIDE and select the programme set for recording.
2. Press the red button to clear the scheduled recording.
3. Press to leave the menu.
****For more information, press the red button in the on-screen help and find 'Record a
programme'.
Subtitles and audio options
If available, you can enable subtitles and select audio and subtitles language via the
Options menu found under LIST on your remote control. Here, you can also make
settings for visually and hearing impaired.
Subtitles from teletext...
If you switch to an analogue channel, you need to make the subtitles available for each
channel manually.
1. Switch to a channel and press LIST, then or to bring up Text and press
the centre button.
2. Enter the page number for subtitles.
3. Press to leave teletext.
29

Turn the television
Turn your television.
1. Press LIST, then or to bring up STAND in the BeoRemote One display
and press the centre button.
2. Press or to turn the television, or ...
3. ... press or to highlight a position for the television to turn to and press
the centre button.
To use the motorised floor stand or wall bracket function, you have to calibrate the floor
stand or wall bracket first. For more, press the red button in the on-screen help and find
'Stand settings'.
Use channels and lists
You can make, edit and use groups to make it easier to find your favourite TV channels
and radio stations.
If automatic tuning of all channels and stations has not stored the channels and stations
in your preferred order, you can rearrange the order in which they appear in a channel
or station list. You can also remove or delete channels and stations you no longer wish
to have or restore channels and stations you wish to have anyway.
Note, that some channels may show a loading symbol for a while before displaying
content. These channels may behave differently and have some limitations regarding
recording than otherwise described in this guide.
Channel and station lists
After a channel installation, all channels appear in the channel list. Channels are shown
with their name. The channel logo is shown if the television is connected to the Internet
and this information is available.
For each type of tuner - antenna/cable (DVB-T/C) or satellite (DVB-S) - there is a
channel list with all installed channels. You can filter this list to show only TV channels or
radio stations. Or, when you have several satellites installed, you can filter the channels
per satellite.
For each type of tuner, you can create four different lists of favourite channels. You can
name each of these favourite lists individually. Only in these favourite lists can you
reorder channels.
With a channel list selected, you switch to the channels in that list when pressing
or .
Channel icons
After an automatic channel update of the channel list, newly found channels are marked
with a icon. If you lock a channel, it will be marked with a icon. The three most
popular channels being watched by others currently are marked with 1, 2 or 3.
Radio stations
If digital broadcasting is available, digital radio stations are installed during installation.
Switch to a radio station just like you switch to a TV channel. A cable (DVB-C) channel
installation usually places radio stations from channel number 1001 onwards.
Open a channel list
30
 Loading...