


BUTTON MANAGER
Table of contents
 Loading...
User’s Manual

Copyright
Copyright 2006 Avision Inc. All rights reserved.
Information in this document is subject to change without notice.
The software described in this document is furnished under a
license agreement or nondisclosure agreement. The software
may be used or copied only in accordance with the terms of
those agreements. No part of this publication can be
reproduced in any form or by any means without prior written
permission of Avision Inc.
Trademark
Avision is the trademarks of Avision Inc.
DjVu is a registered trademark of LizardTech Inc.
DjVu technology is protected by U.S. patent No. 6,058,214 and patent
pending.
Adobe, the Adobe logo, Adobe PDF Scan Technology and Adobe PDF
Signature are either registered trademarks or trademarks of Adobe
Systems Inc. Optical character recognition (OCR) capabilities
are provided by Image Recognition Integrated Systems.
Microsoft and Windows are registered trademarks of Microsoft
Corporation.
Other names and products mentioned in this document may be
trademarks or registered trademarks of their respective
companies.
ii

Table of Contents
1. Installing the Button Manager .................1
2. Scanning From the Button .......................4
2.1. Checking the Button Configurations Before
Scanning...................................................... 4
2.2. The Default Button Settings ............................ 6
2.3. Scanning From A Simple Touch of the Button..... 7
2.3.1. Use of the Button Panel........................ 8
2.4 Performing Continuous Scan From the Flatbed..10
3. Configuring the Buttons.........................12
3.1. A Glance of the Button Properties Window........12
3.2. Choosing New Settings For A Button................13
3.3. Choosing a Proper File Format........................16
3.4 Adding A New Destination Application..............19
3.5 Deleting A Current Destination Application .......22
3.6 Creating A New Scan Configuration.................23
3.6.1 The Scan Settings Tab.........................23
3.6.2 The Color Dropout Tab.........................30
3.6.3 The Color Adjust Tab ...........................32
3.7 Deleting A Current Scan Configuration.............35
3.8 Selecting Options For a Button........................36
3.9 Removing a Blank Page .................................39
3.10 Setting the Power Saving Mode.......................40
3.11 Saving and Loading Profiles............................41
3.12 Solving A Problem ........................................43
Index............................................................45
iii

1. Installing the Button Manager
System Requirements
• IBM compatible PC 586, Pentium or higher
• Microsoft Windows 2000/XP
• USB port 2.0 (compatible with USB 1.1)
• At least 100 MB of free hard disk space
• At least 128 MB of system memory
• A CD-ROM drive
Button Manager provides you an easy way to scan your
document and then link the scanned image to your designated
software application. All this can be done with a simple touch
of the button on the scanner. Installing the Button Manager is
easy. Please follow these steps:
Note:
To ensure the Button Manager work properly, please install the
Button Manager FIRST before installing the scanner driver.
1. Insert the supplied CD into your CD-ROM drive. The
following installation graphic appears. If not, please
choose the Button Manager folder and double click
“Setup.exe”.
1
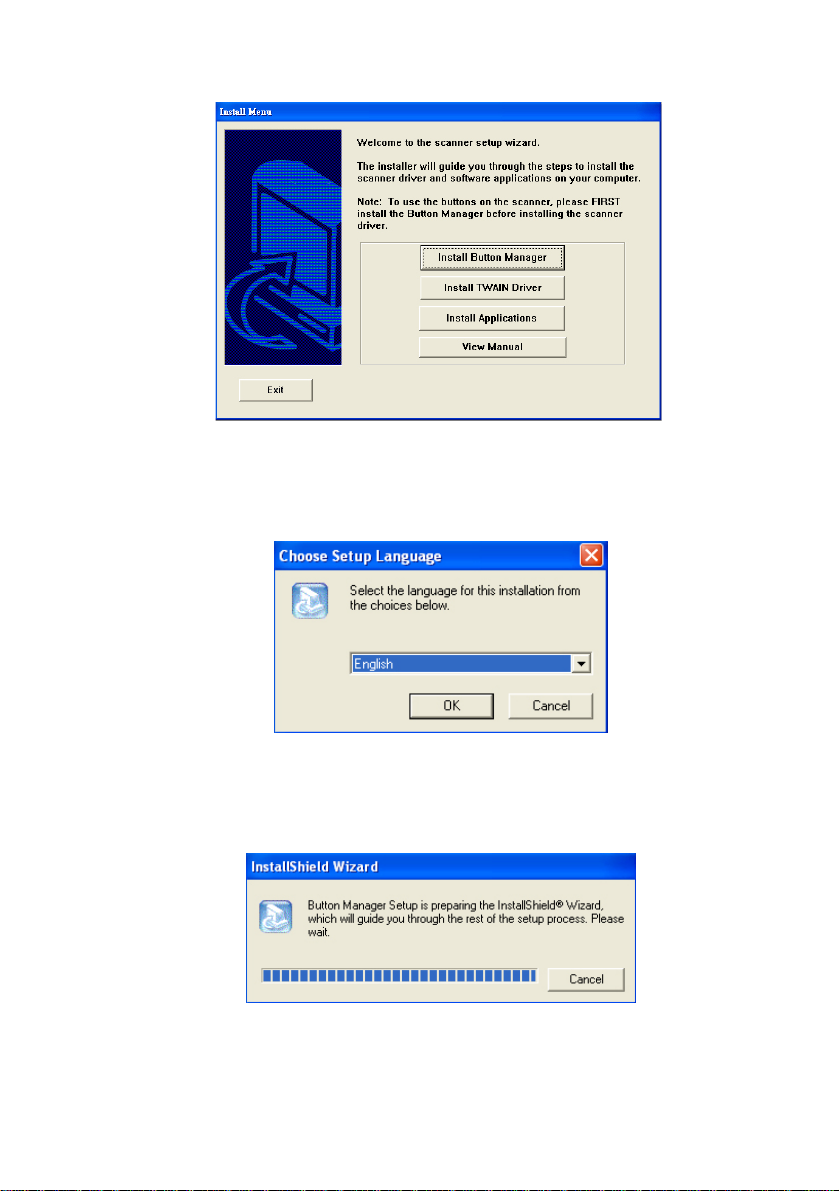
2. Click “Install Button Manager”. A language selection
window appears.
3. Choose the language you wish to install. The InstallShield
wizard appears to guide you through the rest of the
installation.
2
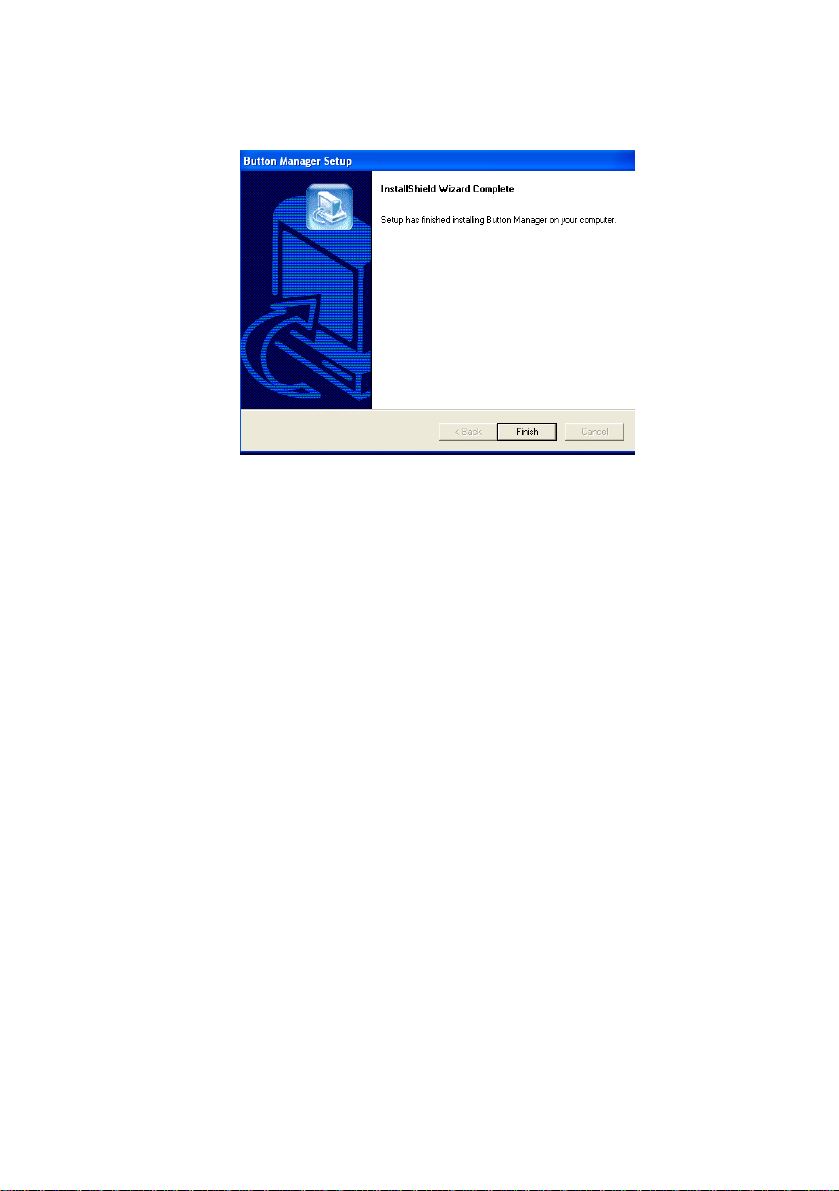
4. Click “Finish” to complete the installation.
3
2. Scanning From the Button
T
T
Simply pressing the Scan button on the scanner, the scanned
document will be sent to your designated destination application.
Yet, before you scan, it is recommended to check the button
configurations first to ensure a proper file format and a
destination application.
2.1. Checking the Button Configurations Before
Scanning
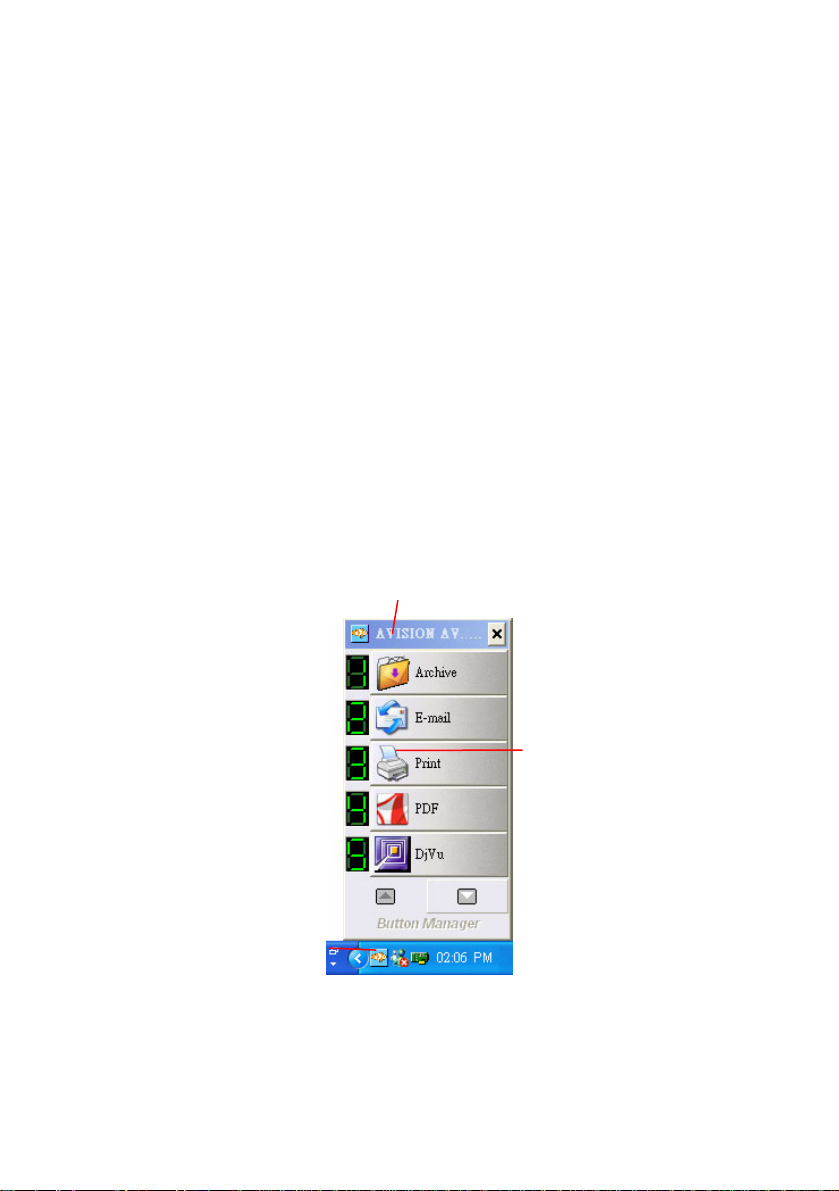
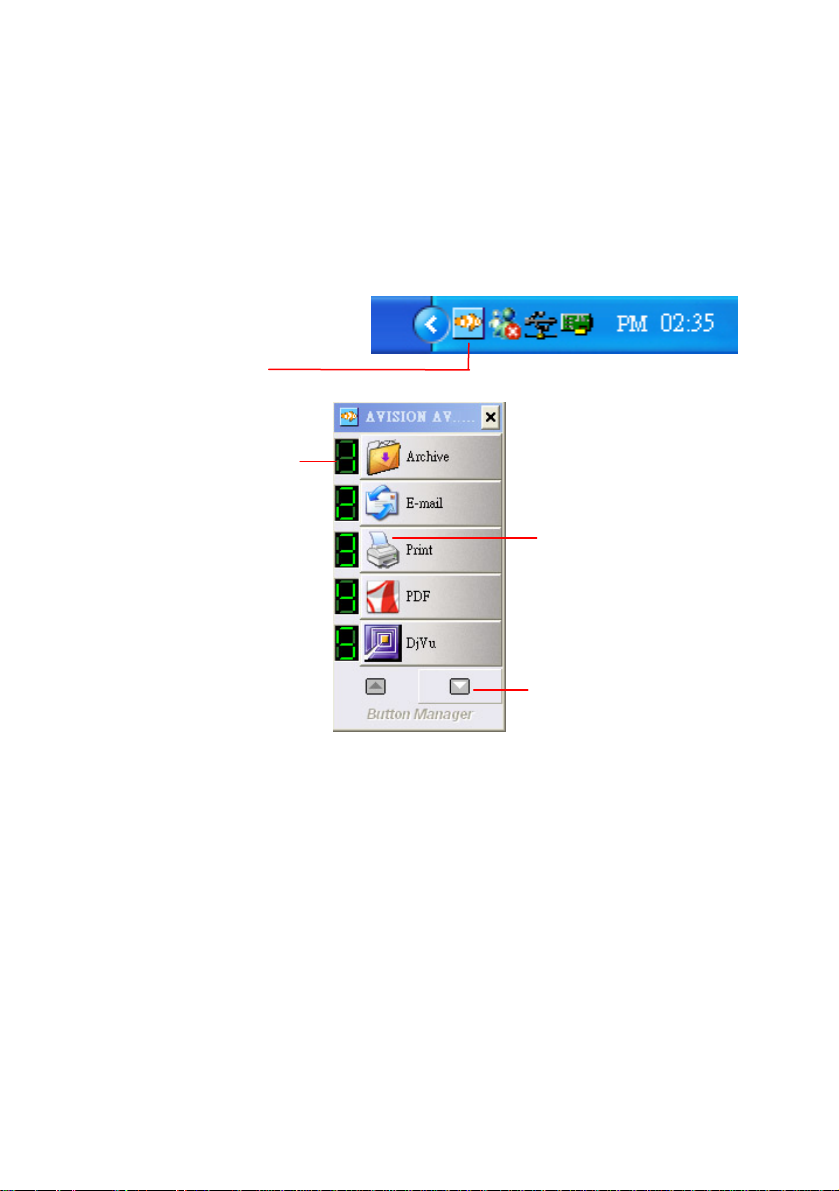
1. After the Button Manager and the scanner driver have been
successfully installed on your computer, the Button Panel
will be displayed in the Windows System Tray at the bottom
right corner of your computer screen.
his indicates the scanner model
he Function Icon
The Button
Icon
The Button Panel
4
2. The Button Panel shows the first five scanning buttons.
Right-click the button (function) you wish to check, the
Button Properties window appears.
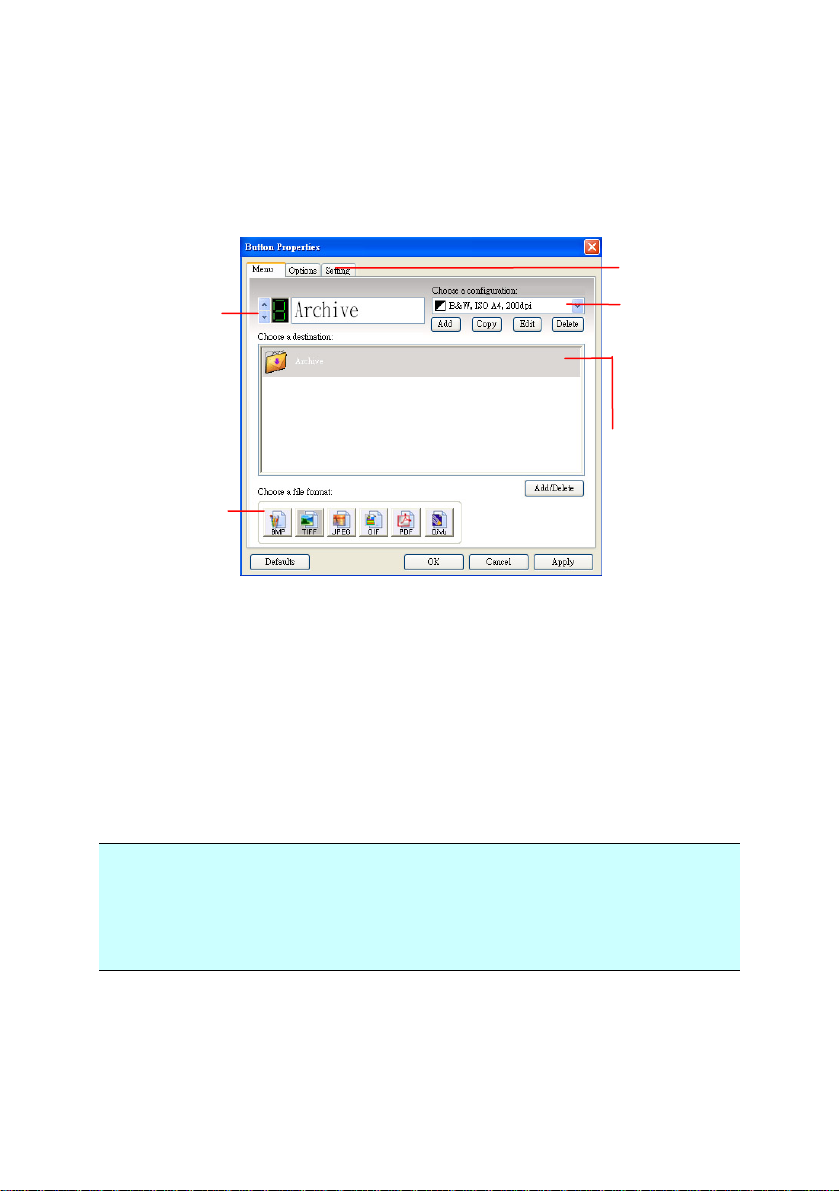
The button
number and
name.
The file format of
the scanned
image.
Click to select
options or
setting.
The scan
settings for the
selected button.
(in this case
button #1).
The destination
application. (This
is the application
that opens after
you have finished
scanning.)
The default setting is indicated in highlighted color. If you
wish to change the setting, use this window to reset the
setting for the file format, destination application, or other
scan settings. See “Configuring the Button” in the
subsequent section to reset the settings.
3. Click the OK button to leave the window.
Note:
If the Button Panel has not been displayed in the Windows
System Tra y after restarting your computer, please just turn off
and on your scanner. The Button icon will then be displayed on
the right corner of the Windows System Tray.
5
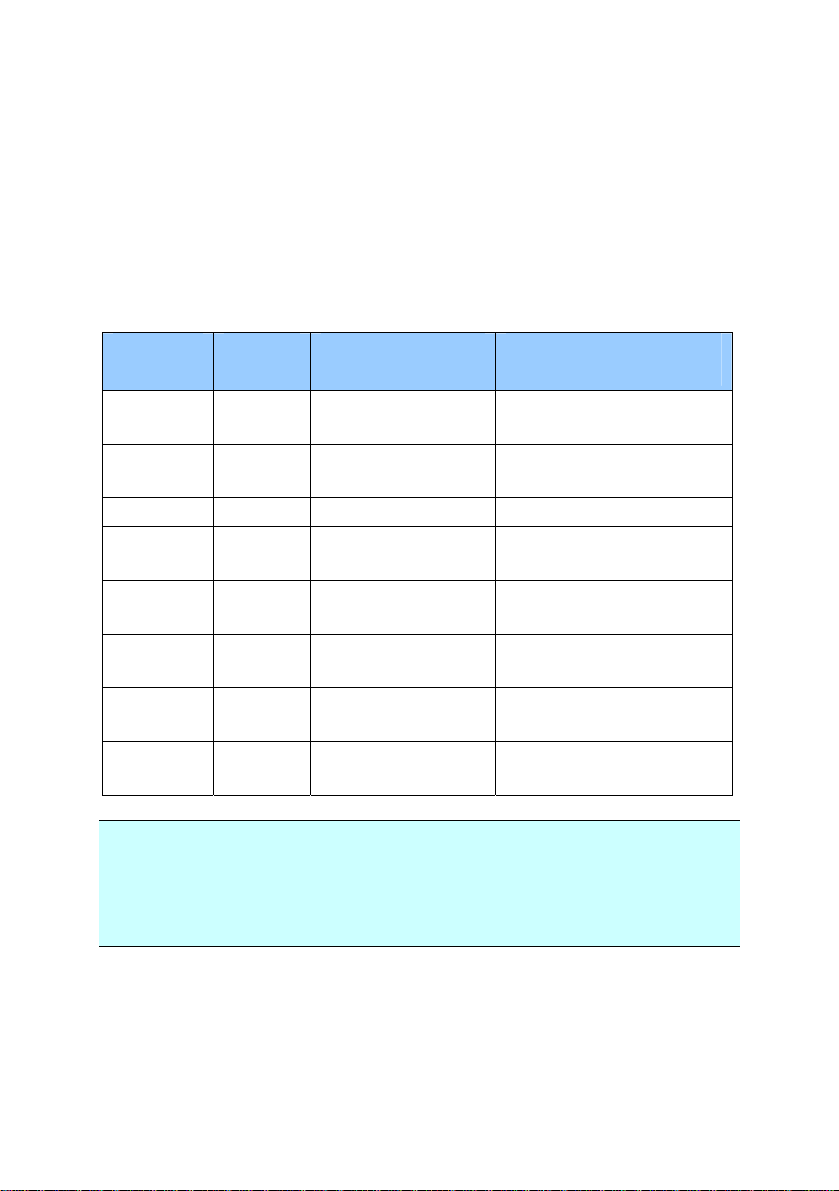
2.2. The Default Button Settings
The scanner is shipped with preconfigured button settings for
your basic scanning tasks such as scan-to-folder, scan-to-email,
and scan-to-printer. The following table shows these factory
default settings. You can change any of these settings.
Button
Number
Name Destination
Application
Preset Scan
Settings
1 Archive Folder B&W@200 dpi, A4,
TIFF
2 E-mail Microsoft
Outlook Express
Gray@200 dpi, A4,
JPEG
3 Print Printer B&W@300 dpi, A4
4 PDF Acrobat Reader B&W@200 dpi, A4,
PDF
5 DjVu Document
Express
6 Scan roxio
PhotoSuite
B&W@300dpi, A4,
DjVu
Color@100 dpi, A4,
JPEG
7 Paint Microsoft Paint Color@100 dpi, A4,
BMP
8 OCR Document
Express
B&W@300dpi, A4,
TIFF
Note:
To accurately use the default settings, you need to install the
necessary software applications such as roxio PhotoSuite or
Document Express, or Adobe Acrobat Reader before installing
the scanner driver.
6
2.3. Scanning From A Simple Touch of the Button
1. Adjust the paper guide for the width of paper and load the
document with their tops into the automatic document
feeder.
2. Check the number on the LED screen to ensure if you are
selecting the proper scan settings and destination
application. (For example, if you want to scan with button
#4, which open roxio PhotoSuite and display the scanned
image in the main window of roxio PhotoSuite, the LED
screen should show 4).
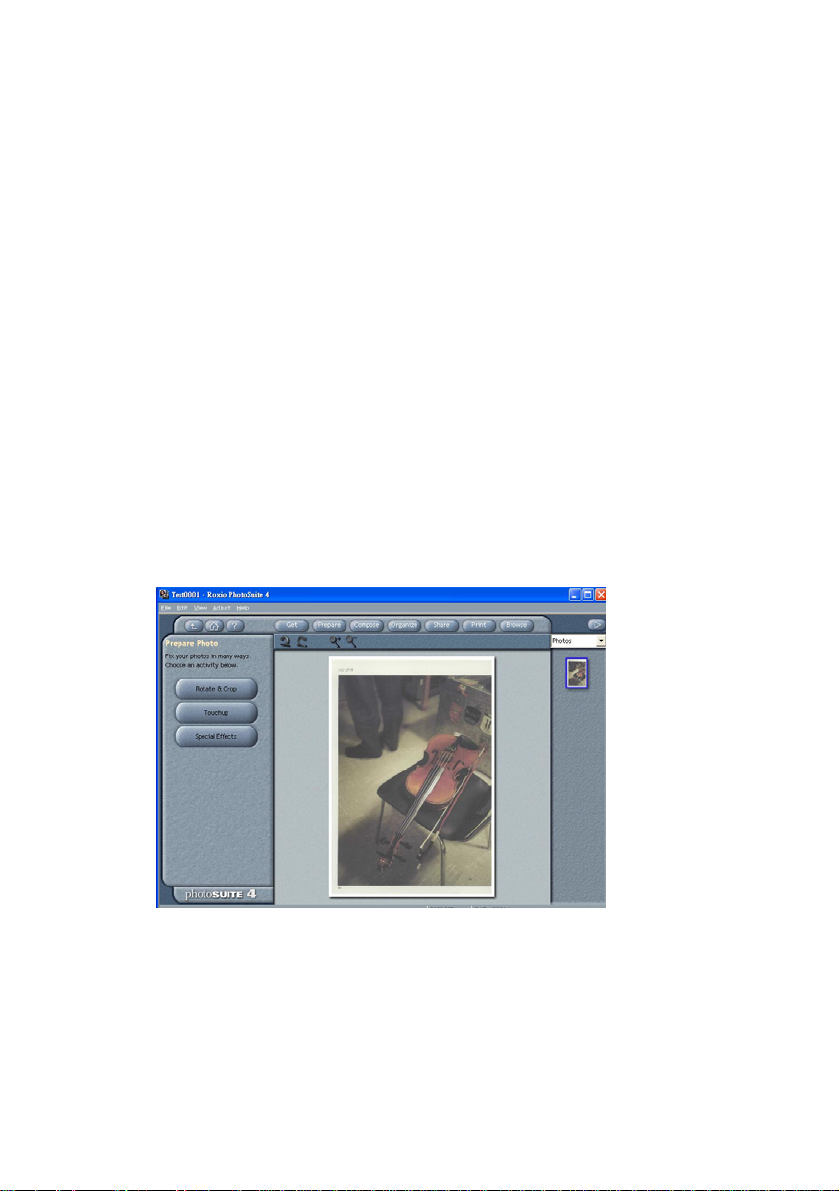
3. Press the Scan button on scanner.
4. After the scanning is finished, the roxio PhotoSuite will be
launched and the scanned image appears in the main
window of roxio PhotoSuite as below.
7
T
2.3.1. Use of the Button Panel
Double click the Button icon in the Windows System Tra y at the
bottom right corner of the screen. This will prompt the Button
Panel.
The Button Icon
The Button
Number
This number
corresponds to
the number
shown in the
LCD screen on
the scanner.
he Function Icon
Click the arrows to
cycle through the
9 buttons.
The Button Panel
From this panel, you can check the scan configuration, start a
scan, and change the scan configuration.
1. To check the scan configuration, right click the function icon
you wish to check. This will prompt the Button Properties
window which shows the preset scan configuration.
2. To start a scan, left click the function icon you wish to scan.
The scanner begins to scan and deliver the scanned
document to your selected destination application.
8
3. To change the scan configuration, right click the function
icon you wish to check. This will prompt the Button
Properties window which allows you to customize button
function and its configurations.
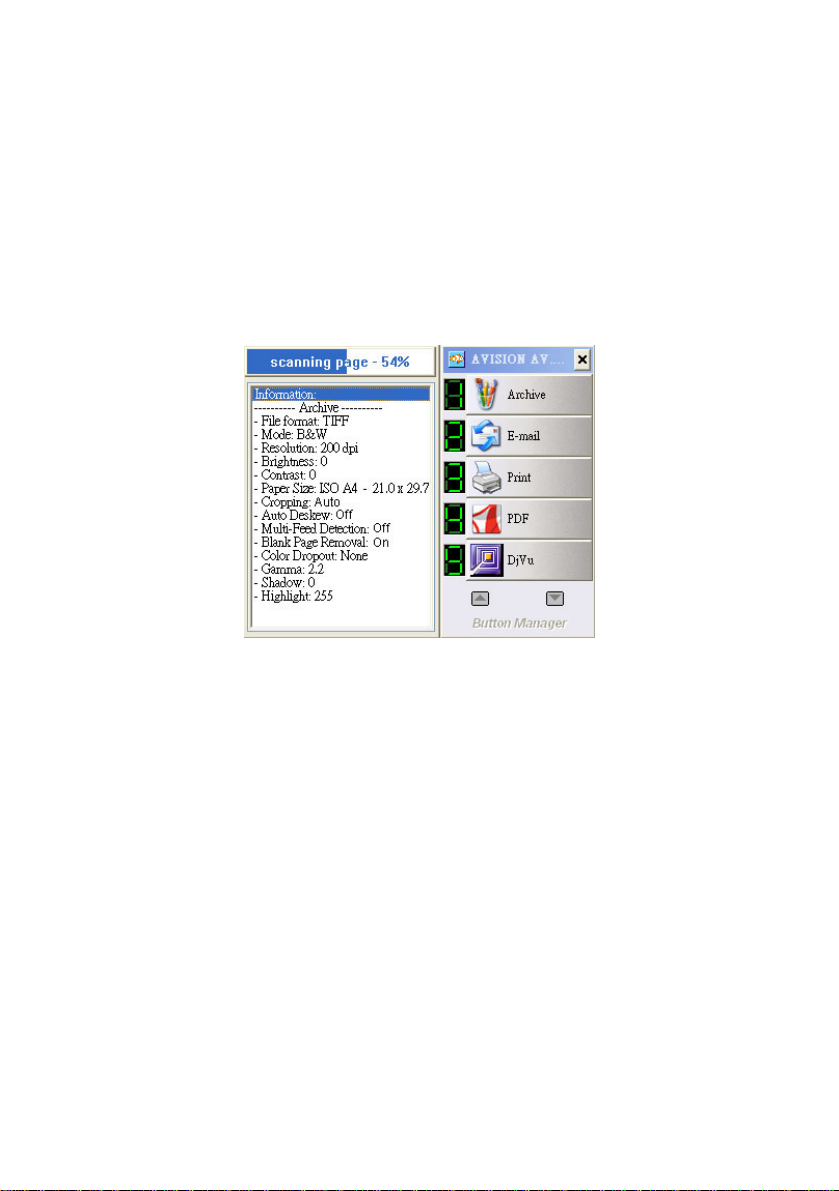
4. To see the detail s for a button, press the Scan button on the
scanner or left click the function icon. The scanning
progress bar and the details for the button appear.
The Detailed View
5. To cycle through all 9 buttons, click the arrow key to
navigate through all 9 buttons.
6. To close the Button Panel, click the close button in the
Button Panel.
9
2.4 Performing Continuous Scan From the Flatbed
If your scanner comes with a flatbed module, Button Manager
provides you a convenient feature to perform continuous
(multi-page) scan from the flatbed. Simply inserting next page
of your document and then pressing the Scan button, your
multi-page scan from the flatbed can be completed. This
feature is particularly useful when you need to scan inside pages
of a book.
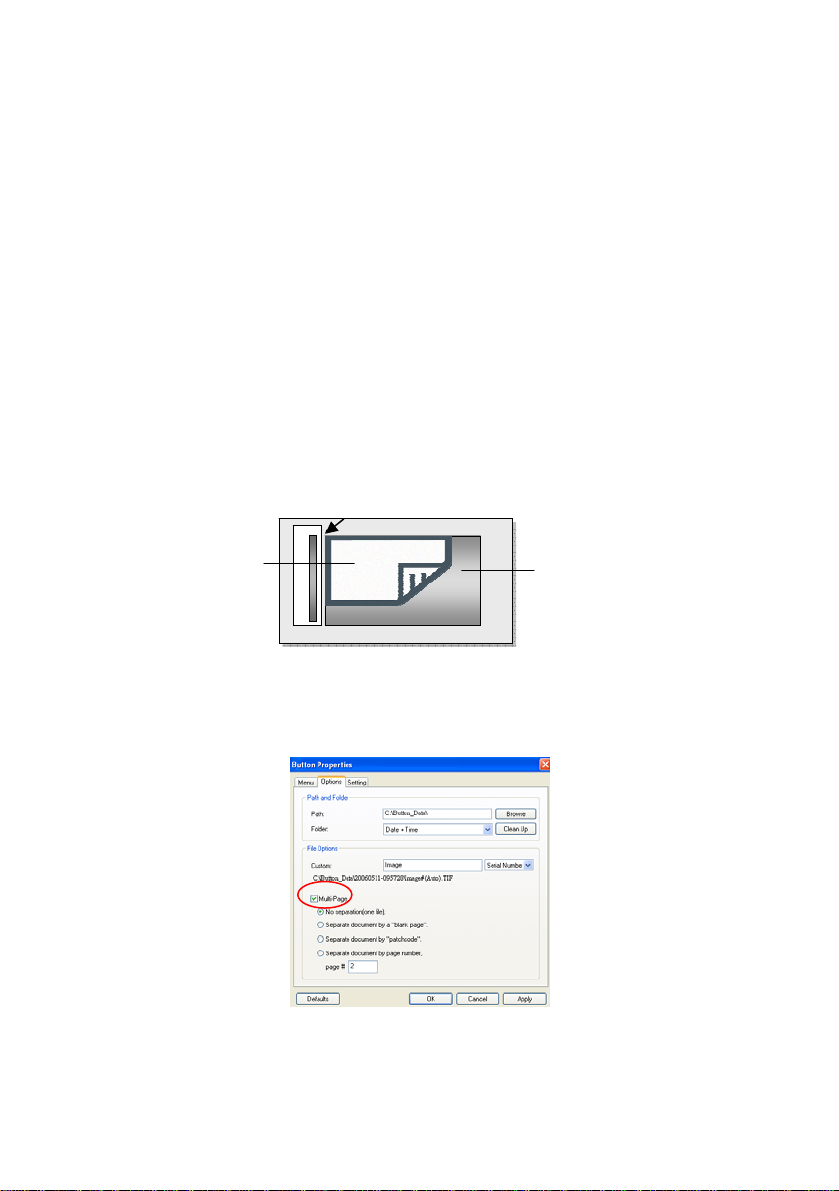
To perform continuous scan from the flatbed,
1. Open the document cover.
2. Place your document with the text facing down on the glass.
Make sure that the upper left corner of your document is
near the home position as marked by arrow.
Document
3. From the Button Properties window, choose your file
format to be PDF, TIFF, or DjVu.
4. From the Options tab in the Button Properties window,
choose “Multi-Page”.
Document
Glass
10
5. Check if the number displayed in the LCD screen is your
favorable setting for the scanned image.
6. Press the Scan button on the scanner.
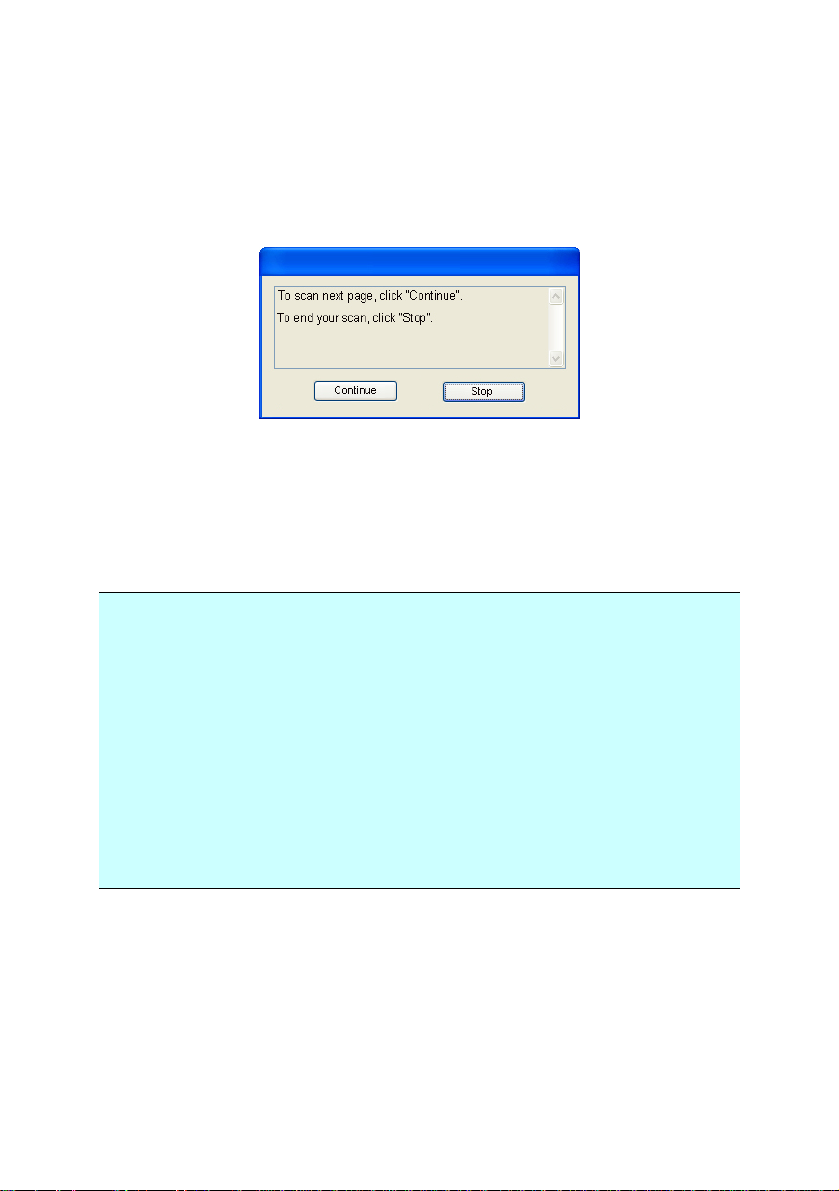
7. When the scanner completes first-page scan, a “Continue
or stop” dialog box appears.
8. Place next page of your document on the glass.
9. Choose “Continue” or simply press the Scan button on the
scanner to scan next page.
10. If your scan is completed, click “Stop” to close the dialog
box.
Note:
1. The scanner is designed to automatically set your scan
source. If your scanner is equipped with both the auto
document feeder and the flatbed, the scanner can
automatically set your scan source whenever there is
paper on the source. However, if there is paper on both
the auto document feeder and the flatbed, the scanner will
set auto document feeder to be the scan source.
2. If you choose to perform flatbed scan, the scanner can still
perform “automatic crop” and “deskew” for the scanned
image. However, the “Multi-feed Detection” and “Duplex”
functions will be disabled.
11
3. Configuring the Buttons
The Button Manager allows you to change current button
configurations, rename destination application, or change your
destination application. The scanned image is either shown in
the main window of the specific destination application or served
as an attachment to the application.
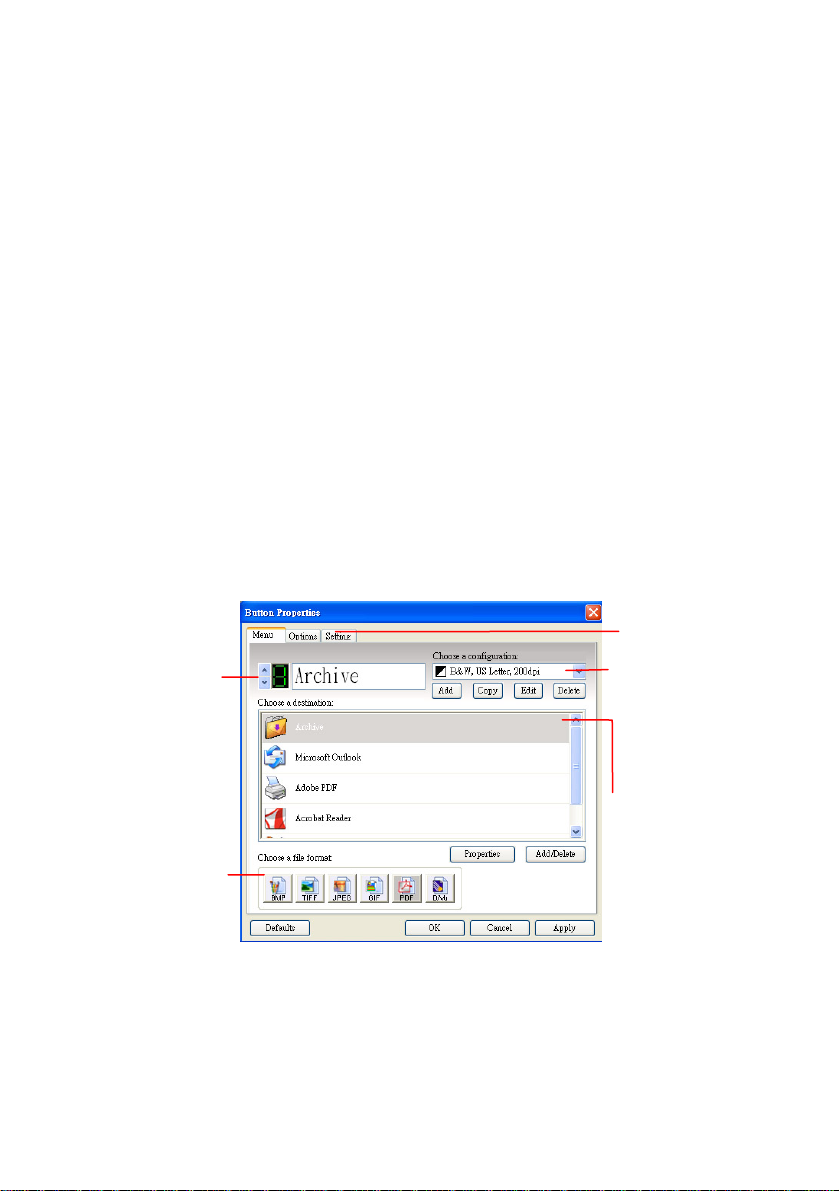
3.1. A Glance of the Button Properties Window
The Button Properties window allows you to choose new settings
for the buttons. The Button Properties window lets you select a
File Format, a Scan Configuration, a Destination Application,
and change other scan settings.
The button
number and
name.
Click to select
options or
setting.
The scan
settings for the
selected button.
(in this case
button #1).
The file format of
the scanned
image.
The destination
application. (This
is the application
that opens after
you have finished
scanning.)
12
Loading...