


®
AVerTV PLUG & WATCH
A820
English
Deutsch
Francais
Italiano
Espanol
Portugue
Quick Guide

European Community Compliance Statement
Class B
This product is herewith confirmed to comply with the requirements set out in the Council Directives on the Approximation of the laws of the Member States relating to Electromagnetic Compatibility Directive 2004/108/EC.
Disclaimer
All the screen shots in this documentation are only example images. The images may vary depending on the product and software version. Information presented in this documentation has been carefully checked for reliability; however, no responsibility is assumed for inaccuracies. The information contained in this documentation is subject to change without notice.
Copyright
©2010 by AVerMedia Technologies, Inc. All right reserved.
No part of this document may be reproduced or transmitted in any form, or by any means without the prior written permission of AVerMedia Technologies Inc. AVerMedia Technologies Inc. reserves the right to modify its models, including their characteristics, specifications, accessories and any other information stated herein without notice. The official printout of any information shall prevail should there be any discrepancy between the information contained herein and the information contained in that printout.
"AVerMedia" is a trademark (or registered trademark) of AVerMedia Technologies, Inc. Other trademarks used herein for description purpose only belong to each of their companies.
The mark of Crossed-out wheeled bin indicates that this product must not be disposed of with your other household waste. Instead, you need to dispose of the waste equipment by handing it over to a designated collection point for the recycling of waste electrical and electronic equipment. For more information about where to drop off your waste equipment for recycling, please contact your household waste disposal service or the
shop where you purchased the product.

IMPORTANT SAFETY INSTRUCTIONS
zRead Instructions - Read all the safety and operating instructions before connecting and operating your TV tuner to help ensure your own personal safety and to protect your product from potential damage.
zRetain Instructions - Retain all the safety and operating instructions for future reference.
zHeed Warnings - Adhere to all warnings on the product and the operating instructions.
zGrounding - For continued protection against risk of electric shock and fire, this accessory should be installed/connected only to the products, such as a computer, equipped with a three-wire grounding plug, a plug having a third (grounding) pin. This plug will only fit into a grounding-type power outlet. This is a safety feature. If you are unable to insert the plug into the outlet, contact your electrician to replace the obsolete outlet. Do not defeat the safety purpose of the grounding-type plug.
zLightning - For added protection and to prevent damage due to lightning and power-line surges, unplug the host system, such as a computer, from the wall power outlet and disconnect the antenna or cable system. Unplug the host system from the wall power outlet when left unattended or unused for long periods of time.
zNever insert anything metallic into the TV tuner openings. Doing so may create the danger of electric shock.
zOpenings in the TV tuner cabinet are provided for ventilation. To prevent overheating, these openings should not be blocked or covered. Avoid using the TV tuner on a bed, sofa, rug, or other soft surface, as doing so may block the ventilation openings in the cabinet. If you place the TV tuner in a bookcase or an enclosed space, be sure to provide adequate ventilation and air flow.
zPower Lines - An outside antenna system should not be located in the vicinity of overhead power lines or other light or power circuits, or where it can fall into such power lines or circuits.
zAntenna Installation - When installing an outside antenna system, extreme care should be taken to prevent it from touching such power lines or circuits, as contact with them may be fatal.
zOutdoor Antenna Grounding - If an outside antenna is connected to the product, ensure that the antenna system is grounded so as to provide some protection against voltage surges and built up static charges. Article 810.21 of the National Electric Code, ANSI/NFPA No.70, provides information with regard to proper grounding of the mast and supporting structure, grounding of the lead-in wire to the antenna discharge unit, size of grounding conductors, location of antenna-discharge unit, connection of grounding electrodes, and requirements for the grounding electrode.
(for CATV system installer) This reminder is provided to call the CATV systems installer's attention to Section 820.93 of the National Electric Code, ANSI/NFPA 70:2005 (for US/Canada) and/or EN60728-11:2005 standard (for Europe), which provide guidelines for proper grounding and, in particular, specify that the coaxial cable shield shall be connected to the grounding system of the building, as close to the point of cable entry as practical.

Quick Installation Guide
Table of Contents |
|
Package Contents..................................................................................... |
2 |
Making Connections................................................................................. |
3 |
Installation ~ For Windows®..................................................................... |
5 |
English....................................................................................................................................... |
5 |
Deutsch...................................................................................................................................... |
7 |
Français ..................................................................................................................................... |
9 |
Italiano ..................................................................................................................................... |
11 |
Español.................................................................................................................................... |
13 |
Português ................................................................................................................................ |
15 |
Installation ~ For Mac® ........................................................................... |
17 |
English..................................................................................................................................... |
17 |
Deutsch.................................................................................................................................... |
19 |
Français ................................................................................................................................... |
21 |
Italiano ..................................................................................................................................... |
23 |
Español.................................................................................................................................... |
25 |
Português ................................................................................................................................ |
27 |
Remote Control (for Windows).............................................................. |
29 |
1

Quick Installation Guide
1 Package Contents
|
|
A |
|
B |
|
|
|
|
|
|
|
A |
|
B |
English |
|
Quick Installation Guide |
|
Mini Antenna |
|
|
|
|
|
Deutsch |
|
Schnellinstallationsanleitung |
|
Mini-Antenne |
|
|
|
|
|
Français |
|
Guide d’installation rapide |
|
Mini Antenne |
|
|
|
|
|
Italiano |
|
Guida di installazione rapida |
|
Mini Antenna |
|
|
|
|
|
Español |
|
Guía de instalación rápida |
|
Miniantena |
|
|
|
|
|
Português |
|
Guia de instalação rápida |
|
Mini-antena |
|
|
|
|
|
C
C
Remote control (Batteries included)
Fernbedienung
(einschließlich Batterien)
Télécommande
(Piles incluses)
Telecomando (Batterie incluse)
Mando a Distancia
(Pilas incluidas)
Controle remoto (Pilhas incluídas)
2

Quick Installation Guide
2 Making Connections
3
Quick Installation Guide
|
|
|
|
|
|
|
|
|
|
|
|
|
English |
|
|
PC |
|
|
Notebook |
|
|
USB Port |
|
|
|
|
|
|
|
|
|
|
|
|
|
|
Deutsch |
|
|
PC |
|
|
Notebook |
|
|
USB-Anschluß |
|
|
Français |
|
|
Ordinateur de |
|
|
Ordinateur portable |
|
|
Port USB |
|
|
|
|
bureau |
|
|
|
|
|
|||
|
|
|
|
|
|
|
|
|
|
|
|
|
|
|
|
|
|
|
|
|
|
|
|
|
Italiano |
|
|
PC |
|
|
Notebook |
|
|
Porta USB |
|
|
Español |
|
|
PC |
|
|
Ordenador Portátil |
|
|
Puerto USB |
|
|
|
|
|
|
|
|
|
|
|
|
|
|
Português |
|
|
PC |
|
|
Portátil |
|
|
Porto USB |
|
|
|
|
|
|
|
|
|
|
|
|
|
|
|
|
|
|
|
|
|
|
|
|
|
English |
|
OR |
|
Mini Antenna |
|
TV Antenna (75Ω) |
Deutsch |
|
ODER |
|
Mini-Antenne |
|
TV-Antenne (75Ω) |
Français |
|
OU |
|
Mini Antenne |
|
Antenne TV (75Ω) |
|
|
|
|
|
|
|
Italiano |
|
O |
|
Mini Antenna |
|
Antenna TV (75Ω) |
Español |
|
O |
|
Miniantena |
|
Antena de TV (75Ω) |
|
|
|
|
|
|
|
Português |
|
OU |
|
Mini-antena |
|
Antena de TV (75Ω) |
4

Quick Installation Guide
3 Installation ~ For Windows®
English
Installing Drivers and the TV Software Utility
1.Plug in the device.
2.The “Found New Hardware Wizard” dialog box appears. Just click Cancel to skip it.
3.In the “AutoPlay” dialog box entitled “CD Drive” (AVerTV), select Run Autorun.exe. (for
Windows 7 / Vista only)
4.If the “User Account Control” dialog box appears, select Allow/Yes to continue the
process. (for Windows 7 / Vista only)
5

Quick Installation Guide
5.Follow the on-screen instructions to complete the software utility installation.
1.If DirectX 9.0c or above is not installed in your system, usually the device will automatically install it during the process of installation. Make sure your system has DirectX 9.0c or above installed so that the TV software utility can function properly (This may occur on Windows XP below Service Pack 2).
2.If your system is not equipped with Acrobat Reader, the installation wizard will automatically be called up during the process of installation. The Acrobat Reader of English version will be installed.
3.The product does not come with a software DVD decoder. If users can playback DVD or MPEG-2
video files on the computer, there is no need to install a DVD decoder. However, if the Decoded Error message appears on the screen, please install the compatible DVD decoder via the Windows® XP Media Center Edition Partners site.
Activating the AVerTV Application
zPlug in the device to activate the AVerTV application.
zTo run the application from the Programs menu, choose Start ÆPrograms/All Programs
Æ AVerMedia Æ AVerTV 6 Æ AVerTV 6.
*Please refer to the User’s Manual in the installation CD for more information on operation instructions.
Uninstalling Application and Drivers
Choose Start Æ Programs/All Programs Æ AVerMedia Æ AVerTV 6 Æ Uninstaller Æ OK Æ (Allow/Yes) Æ OK Æ NextÆ OK Æ Finish.
6
Quick Installation Guide
Deutsch
Installieren von Treibern und dem TV-Anwenderprogramm
1.Stecken Sie den A820 an den USB-Port.
2.Die Dialogbox “Assistent für das Suchen neuer Hardware” erscheint. Klicken Sie auf „Abbrechen“, um den Installationsassistenten zu beenden.
3.Im „AutoPlay“ Modus erscheint ein „Laufwerk“ (AVerTV), wählen Sie hier die „Autorun.exe“ aus. (nur für
Microsoft Vista / Windows 7)
4.Wenn das Fenster
“Benutzerdefiniert” erscheint, wählen Sie „Zulassen“ und klicken „Ja“ um fortzufahren. (nur
für Microsoft Vista / Windows 7)
7
Quick Installation Guide
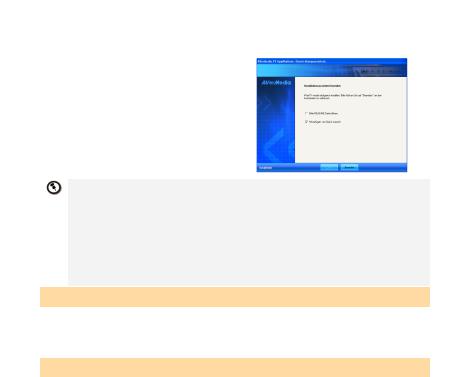
5.Folgen Sie den Informationen für die Installation der TV-Applikation.
1.Falls DirectX 9.0c oder eine neuere Version nicht auf Ihrem System installiert ist, wird dieses Programm in der Regel während des Installationsvorgangs automatisch von der Installations-CD aus installiert. Stellen Sie sicher, dass in Ihrem System DirectX 9.0c oder eine neuere Version installiert ist, sodass das TV-Software-Utility korrekt funktionieren kann. (Voraussetzung für die Installation ist ein Windows XP SP 2)
2.Wenn kein Acrobat Reader installiert ist, werden Sie während der Installation gefragt, ob dieser automatisch installiert werden soll. Es wird der Acrobat Reader in englischer Sprache installiert.
3.Dieses Produkt wird ohne DVD Decoder geliefert. Wenn Sie DVD oder MPEG-2 Filme auf Ihrem Rechner abspielen können, müssen Sie keinen DVD Decoder installieren. Wenn jedoch ein Decoder Fehler in der Windows® Media Center Edition erscheint, dann überprüfen Sie bitte auf der MCE Partnerseite, ob Ihr DVD Decoder Windows® Media Center Edition kompatibel ist.
Aufrufen des AVerTV-Anwenderprogramms
zStecken Sie den A820 an den Computer um die AVerTV Applikation zu starten.
zUm die TV-Applikation aus dem Programm Menü heraus zu starten, klicken Sie auf Start
Æ Programme Æ AVerMedia Æ AVerTV 6 Æ AVerTV 6.
*Bitte beachten Sie die Bedienungsanleitung auf der Installations-CD, um weitere Informationen zu erhalten.
Deinstallation von Anwendung und Treibern
Um das installierte Programm von Ihrem System zu entfernen, wählen Sie Start ÆProgramme Æ AVerMedia ÆAVerTV 6 ÆUninstaller ÆOK Æ( Zulassen /Ja)ÆOK ÆWeiter ÆOK ÆBeenden.
8
 Loading...