

ATL Berkshire 200 User Manual
Berkshire 200
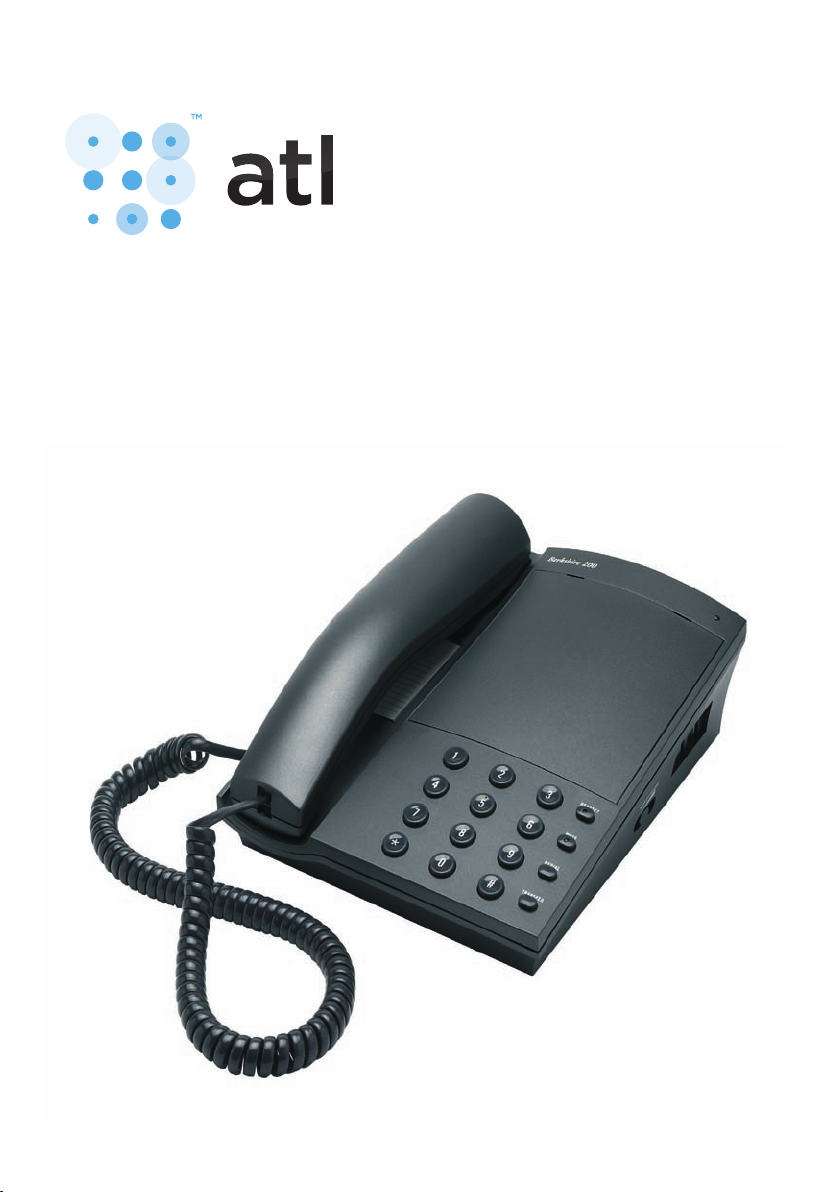
Thank you for choosing a Berkshire 200 telephone. You have selected
a carefully designed telephone that incorporates the very latest
technology, offering a stylish instrument and providing many years of
excellent service.
This booklet will ensure you obtain the best use of your telephone.
User Guide

Preparing to use your
Berkshire 200
INITIAL CHECK
Our telephones are checked, tested and leave us
in perfect condition. If yours is damaged, please
return it to your supplier with proof of purchase, for
a replacement.
TELEPHONE NUMBER LABEL
The telephone incorporates a label underneath the
handset for recording frequently used telephone
numbers. To remove the plastic cover, operate the
release clip with your thumb nail and hinge upward.
CONNECTION
The Berkshire 200 telephone can be connected
either to a Direct Exchange Line, or as an extension
to a compatible company exchange (PABX).
ADJUSTING YOUR RINGER VOLUME
The ringer volume is controlled by a 3 position switch
located at the rear of the telephone and indicated
by the word ‘RINGER’. Moving through the settings
from left to right they are ‘HIGH’, ‘MED’ and ‘LOW’.
ADJUSTING YOUR RINGER PITCH
The ringer pitch control is also a 3 position switch
located at the rear of the telephone and indicated
by the words ‘RINGER PITCH’. Settings from left to
right are ‘HIGH’, ‘MED’ and ‘LOW’.
MAKING A CALL VIA THE HANDSET
• Pick up the handset and listen for dial tone
• Dial the required telephone number
(Note: making external calls from a company
exchange (PABX) requires the number to be prexed
by an access digit, normally ‘9’)
Using your Berkshire 200
HANDSET CORD
This cord will require connection between the
telephone and handset. Take any end of the handset
cord, locate the port marked ‘HANDSET’ on the left
hand side of the Berkshire 200 and simply push to
locate. Connect the other end to the base of the
handset to complete.
LINECORDS
The Berkshire 200 arrives with two line cords for
customer selection. Select your required linecord
(standard BS6312 BT-socket, or RJ45 socket for
category 5 installations). The rear of the telephone
has a port marked ‘LINE’, plug your selected linecord
into this port rst and the other end to your telephone
line termination point. An RJ11 line cord is available
as an option, ask your supplier for details.
WALL AND DESK MOUNTING KITS
A wall or desk mounting kit is available as an option,
please contact your supplier for further information.
Using your Berkshire 200
with the Handset
RECEIVING CALLS
Incoming calls will be announced by the audible
ringer and ashing LED. To answer the call, simply
lift the handset.
with Headset
CONNECTING THE HEADSET
To connect the headset, insert the plug on the
headset cord into the socket marked ‘HEADSET’ on
the left hand side of the telephone.
NOTE: Headsets used with this telephone must
comply with the standard EN6095.
RECEIVING CALLS
When your telephone rings, the default path for the
call is to the handset. To receive it on the headset,
press ‘HEADSET’ button once and the call is switched
to the headset. This action will be conrmed by LED
indication within the headset button. At the end of
the call, press the ‘HEADSET’ button a second time
to turn the headset off.
MAKING CALLS
Press the ‘HEADSET’ button to turn the headset
on and dial as normal. When you have nished the
call, press ‘HEADSET’ to turn the headset off.
Whether making or receiving calls the LED will
ash if the ‘HEADSET’ button is pressed and no
headset is connected.
ADJUSTING THE VOLUME
You can adjust the volume to the headset, by
moving the sliding switch on the right hand side of
the telephone.
TRANSFERRING CALLS
• FROM HANDSET TO HEADSET
If you have taken a call on the handset and wish
to transfer it to your headset, press ‘HEADSET’
 Loading...