

ATL Berkshire 10k User Manual

Berkshire 10K
Quick Start Guide
Please follow the steps that are listed here to get started with your
Berkshire 10K ipPBX telephone system.
Step 1
Power-up and log into your PC. Unplug any existing ethernet cable from your PC.
Step 2
Access the IP network settings control panel for your PC. The way to access this
control panel may differ by operating system type and version so refer to the
documentation for your PC if necessary.
1 of 42
Berkshire 10K Quick Start Guide
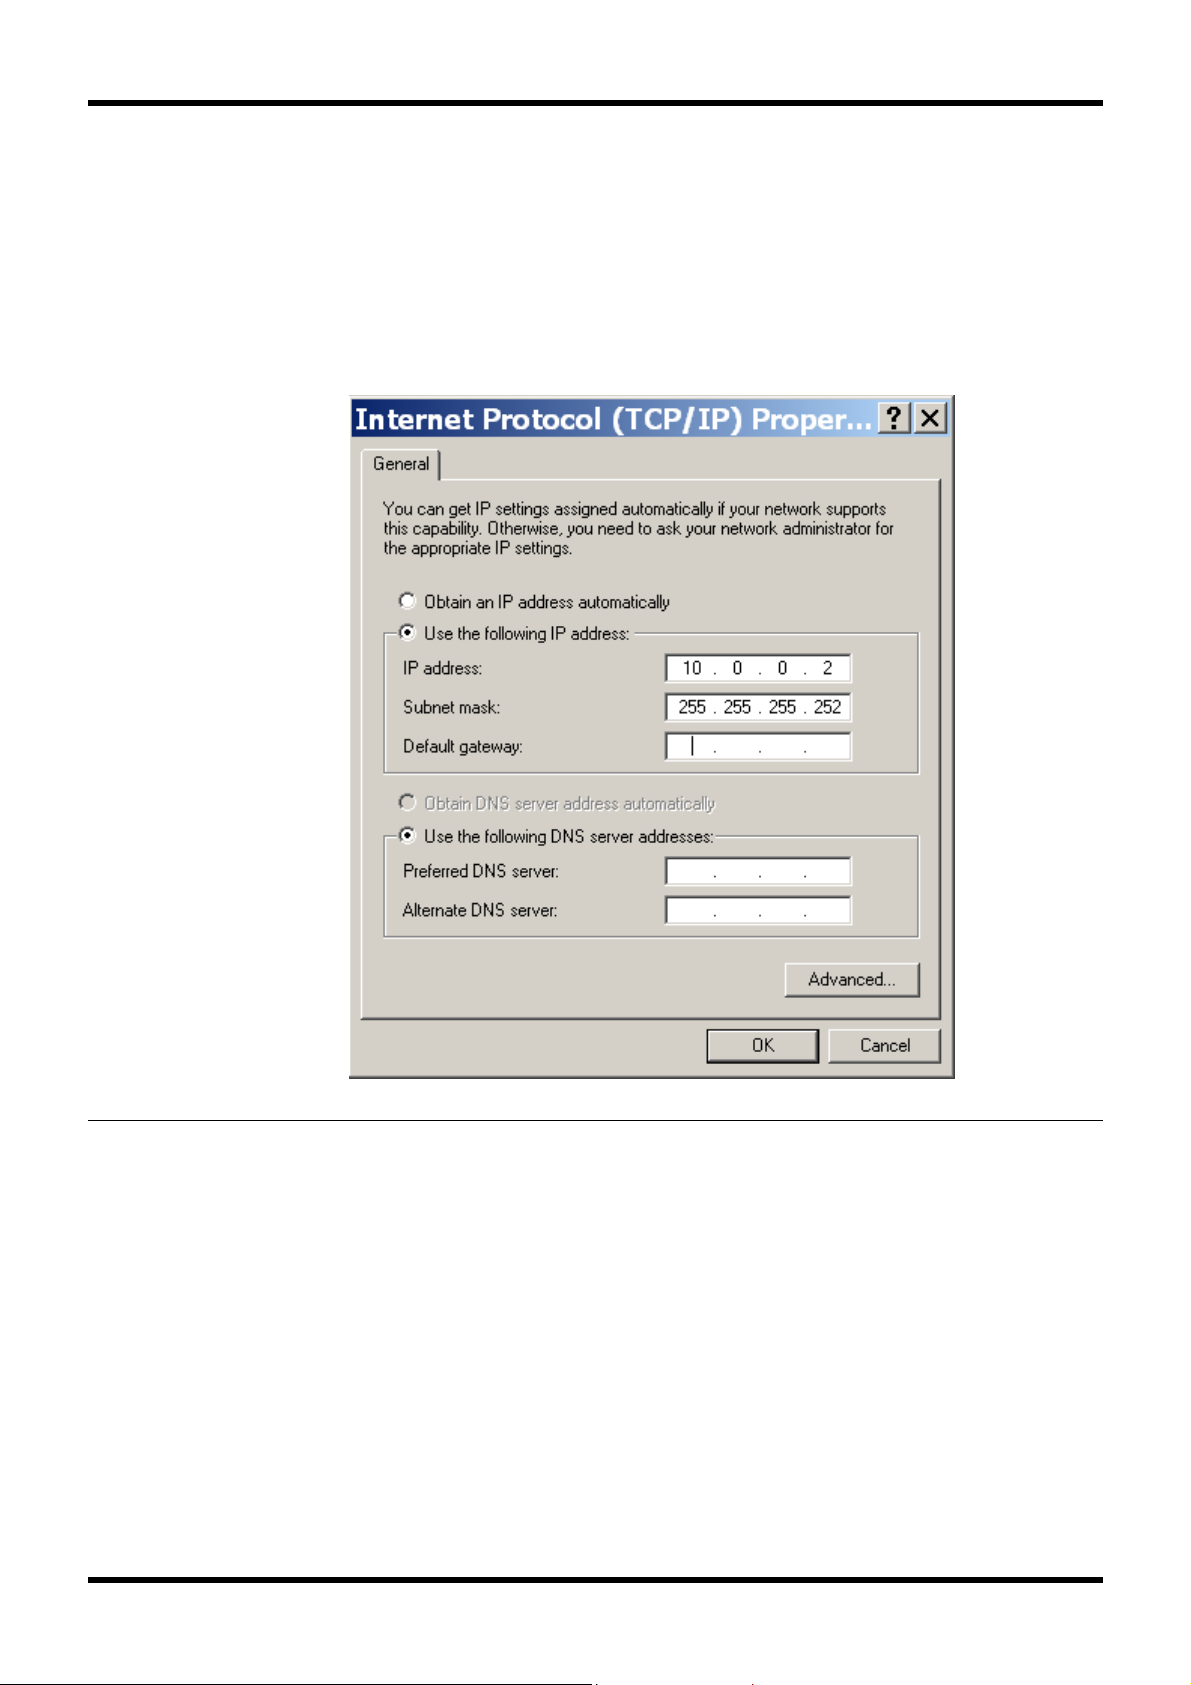
Step 3
Make a record of the current PC network configuration so that they can be returned
to later. Configure your PC to have the following network settings:
• IP address = 10.0.0.2
• Subnet mask = 255.255.255.252
and click ok to save the network settings.
2 of 42
Berkshire 10K Quick Start Guide
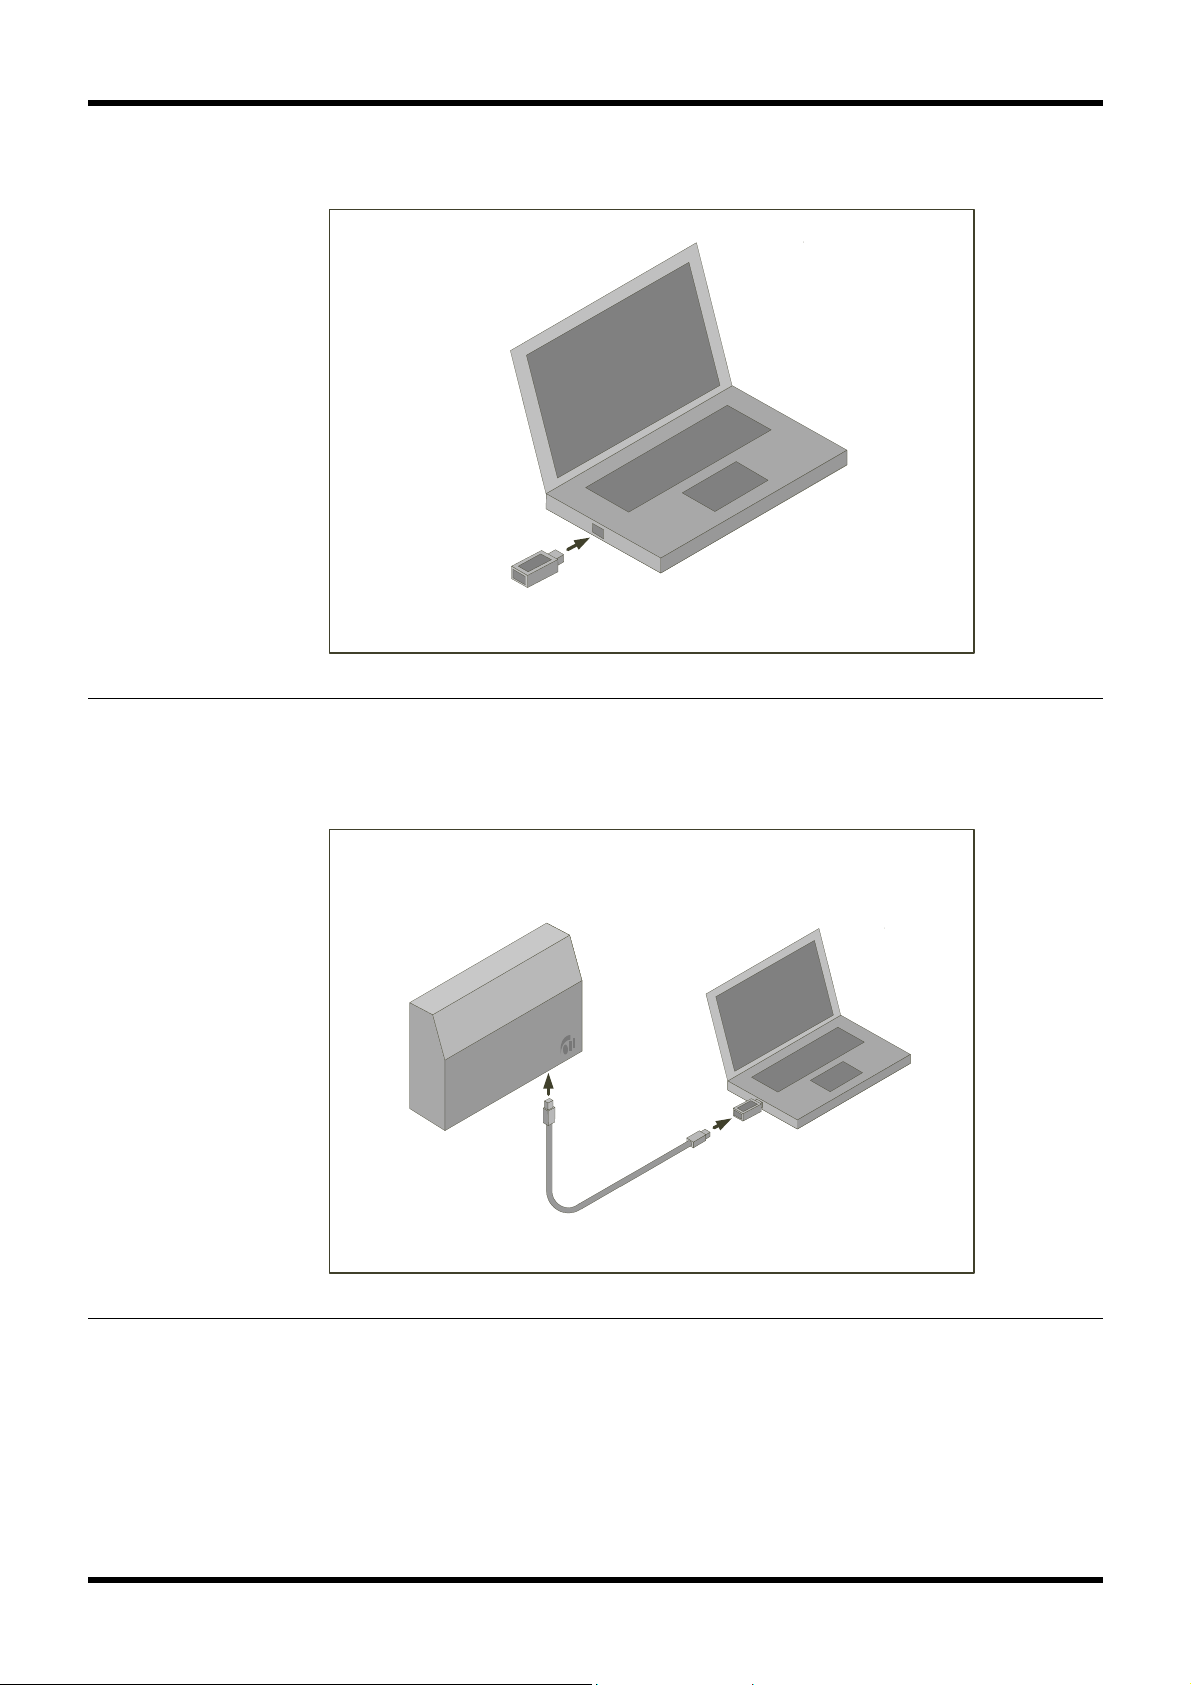
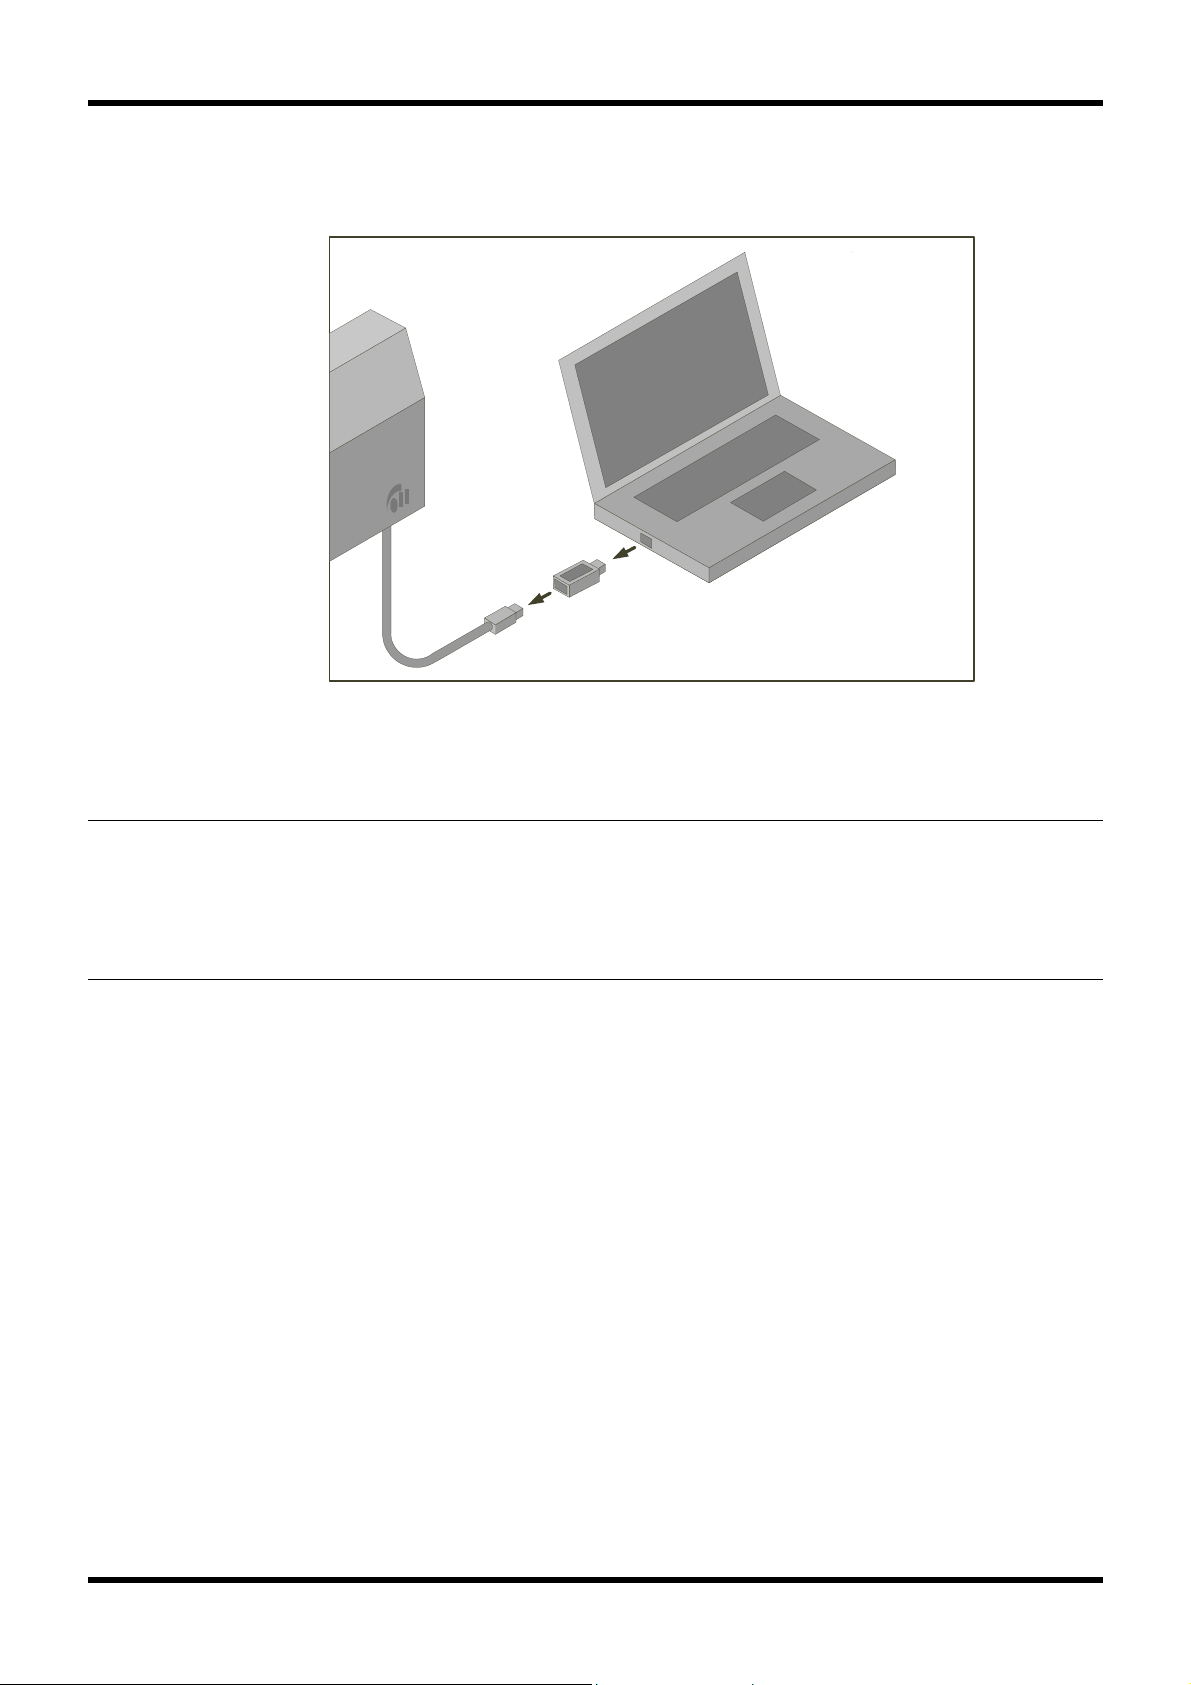
Step 4
Connect the supplied ethernet crossover adaptor to the PC ethernet port.
Step 5
Connect the supplied ethernet cable between Berkshire 10K ipPBX and the
crossover adaptor in the PC.
3 of 42
Berkshire 10K Quick Start Guide
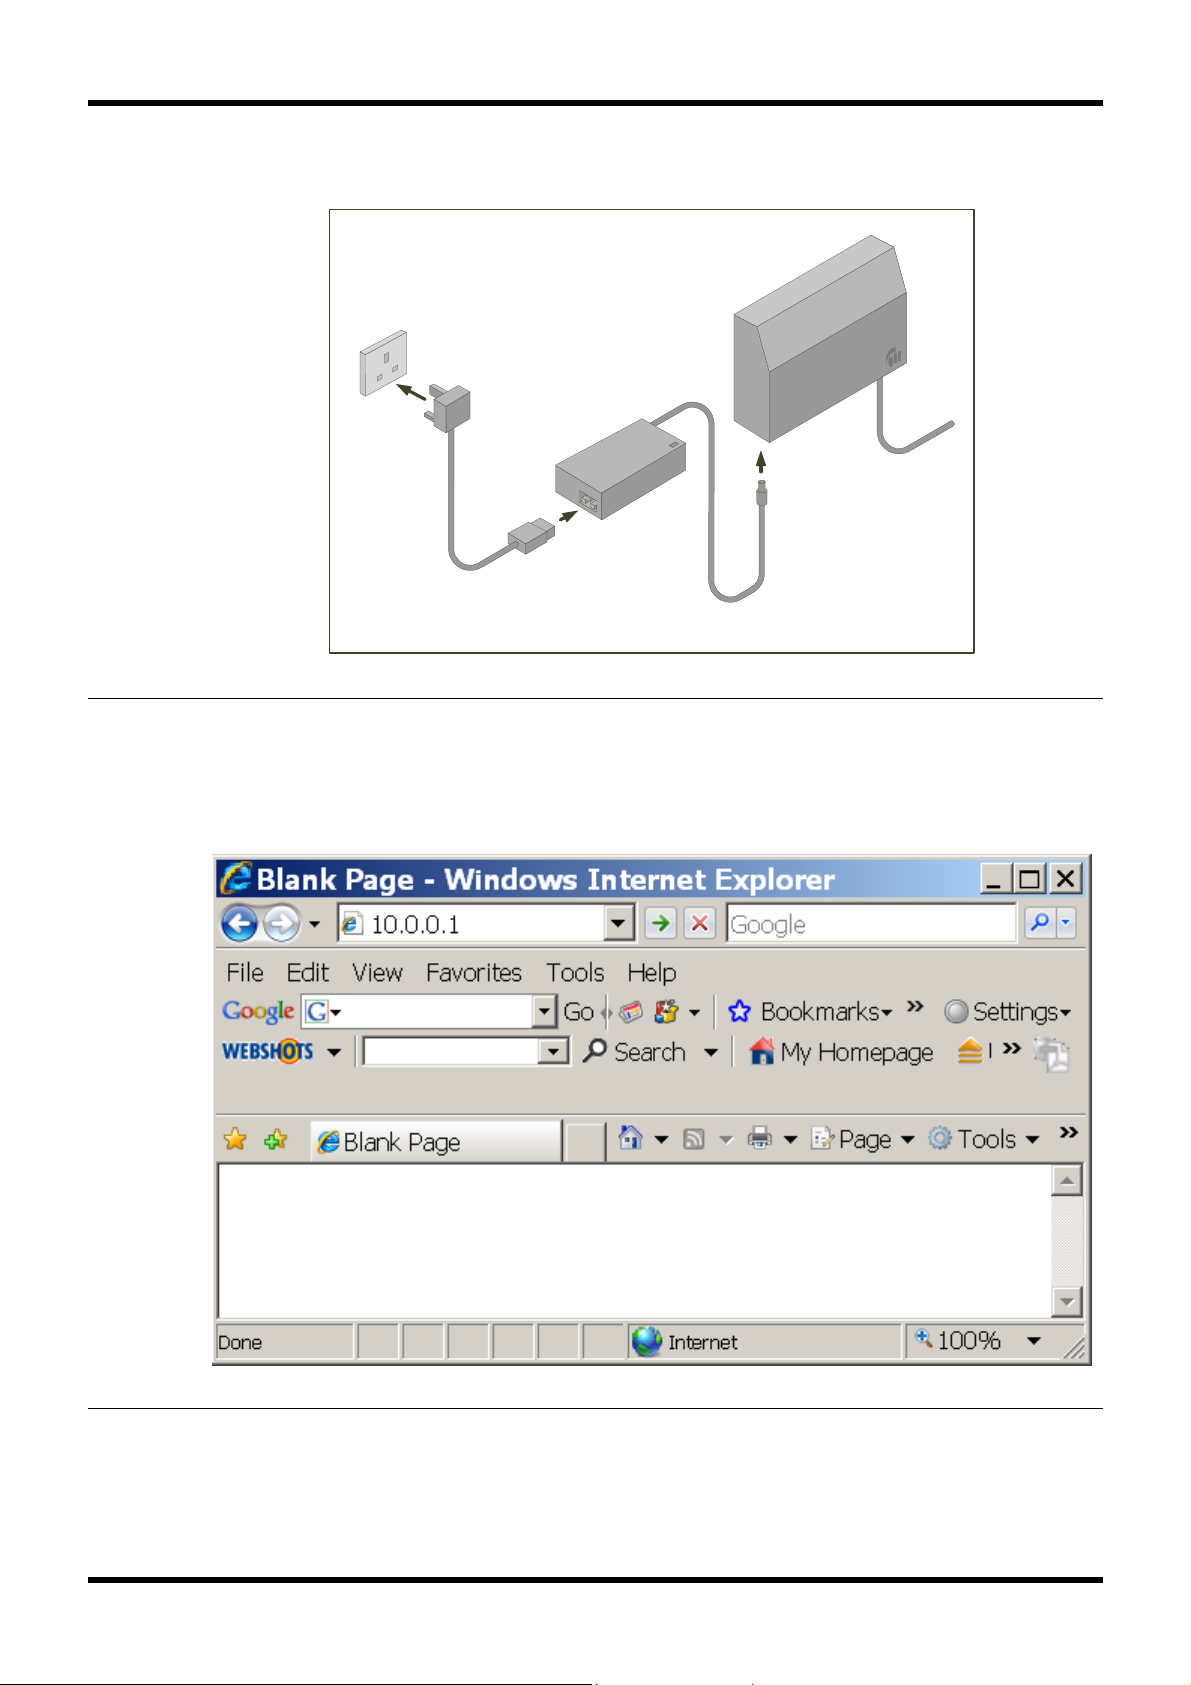
Step 6
Connect power to Berkshire 10K ipPBX and wait for 5 minutes for it to finish booting.
Step 7
Launch a browser on the PC (such as Firefox or Microsoft IE7 - IE6 is not
supported).and in the address bar enter 10.0.0.1 to access the management pages
of the Berkshire 10K ipPBX.
4 of 42
Berkshire 10K Quick Start Guide
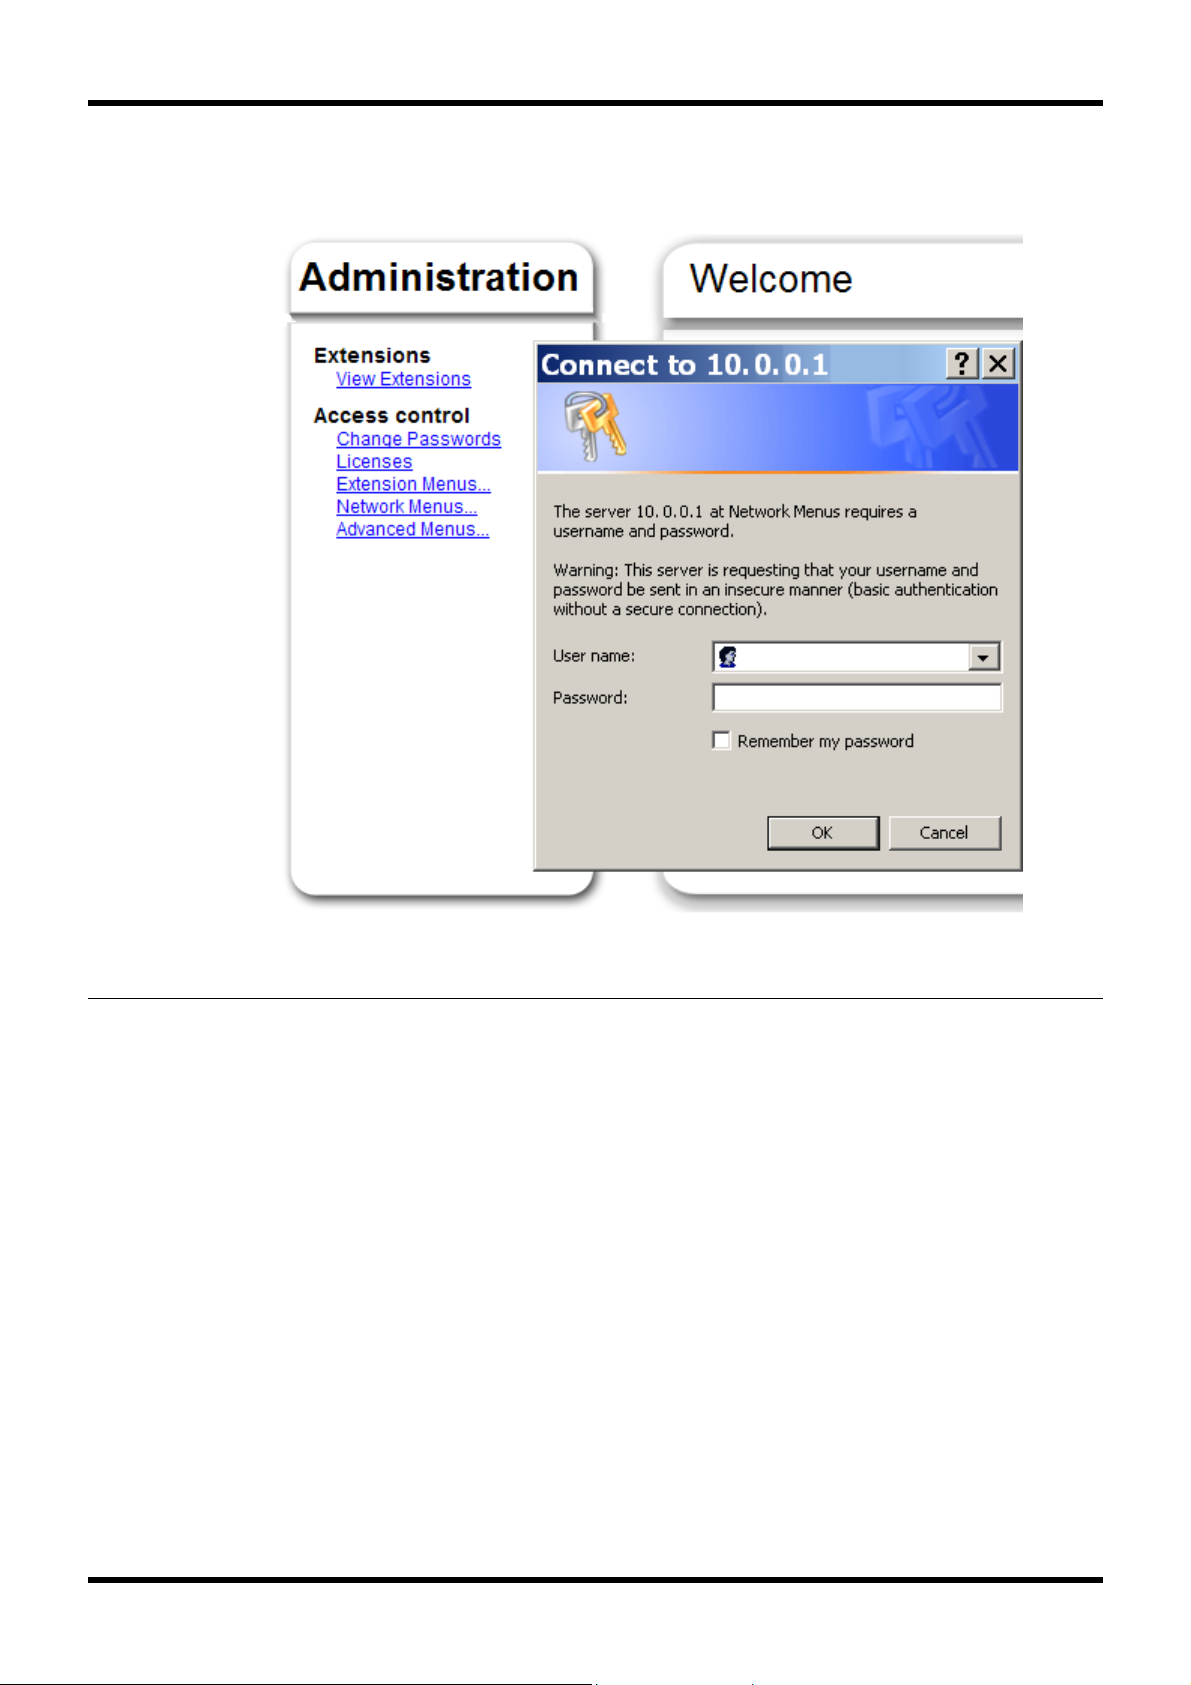
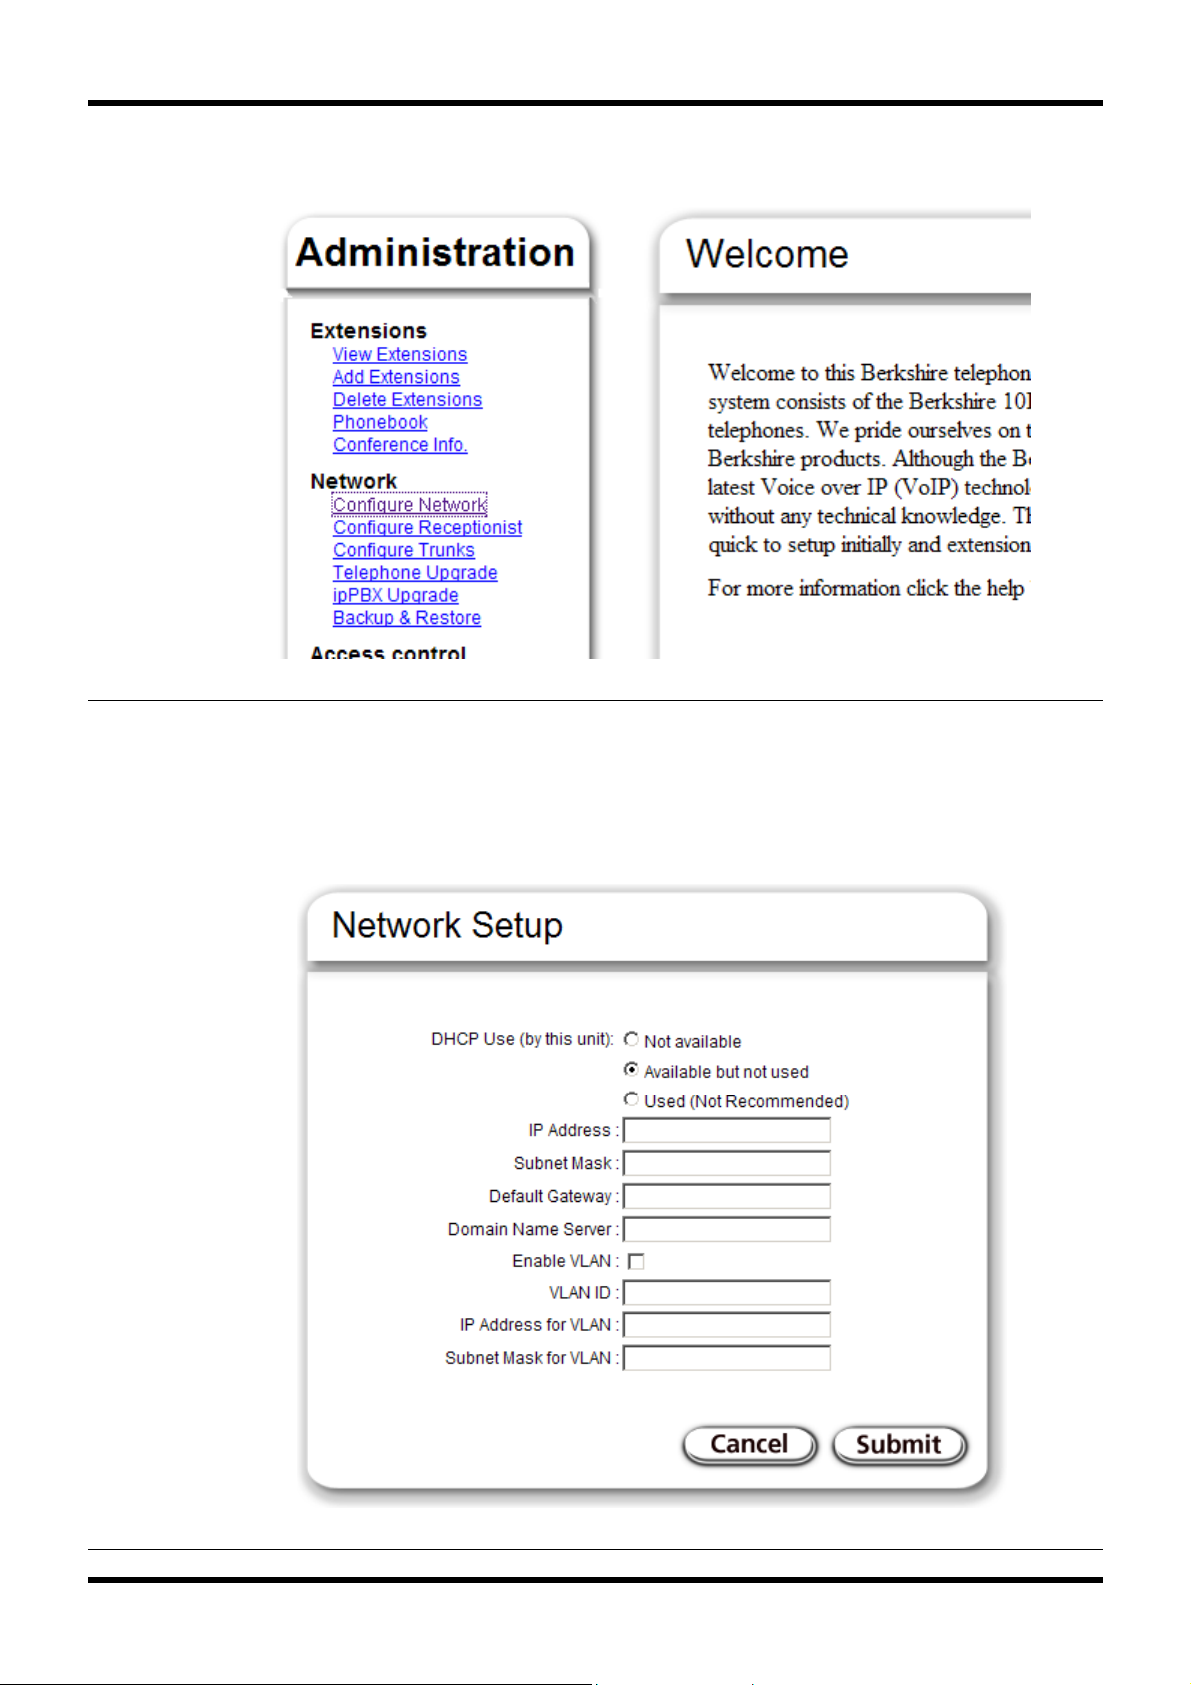
Step 8
Click on "Network Menus…" and enter the network manager's username and
password (the defaults are network/netpassword).
This will display the network menu items.
5 of 42
Berkshire 10K Quick Start Guide
Step 9
Select “Configure Network” from the network menu items to display the settings.
Step 10
Select the appropriate DHCP setting. If there is DHCP available on the network
then select "Available but not used". This will ensure that the IP address of the
ipPBX is fixed while still permitting the auto provisioning of telephones with dynamic
IP addresses.
6 of 42
Berkshire 10K Quick Start Guide
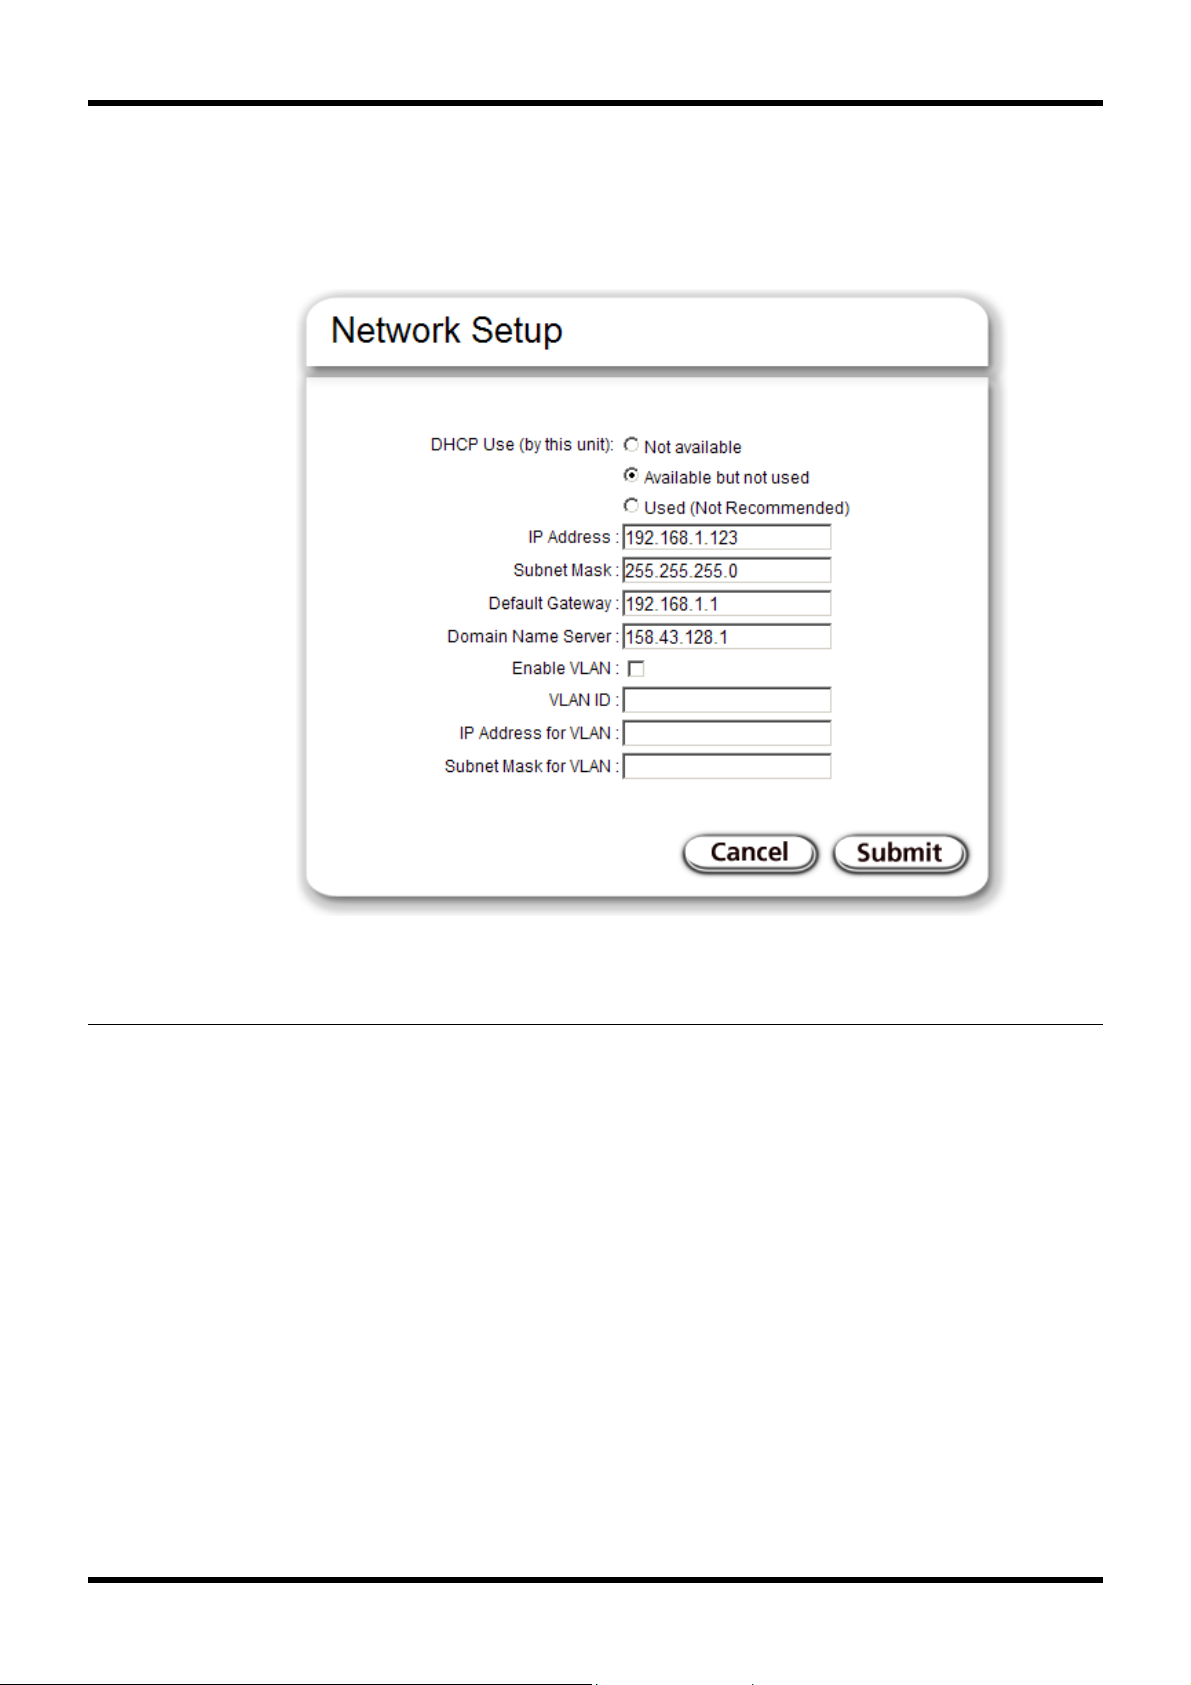
Step 11
Enter suitable network settings for your network and make a record of the new IP
address so that you may access it later. Please note that the address information in
the screenshot below is for example only. You will need to contact the person
responsible for your network for your settings.
Click on the “Submit Button”. The network settings will be changed and you will lose
connection from the PC.
7 of 42
Berkshire 10K Quick Start Guide
Step 12
Unplug the ethernet cable from the crossover adaptor and remove the crossover
adaptor from the PC.
Step 13
The crossover adaptor is not required by the Berkshire 10K ipPBX during normal
operation but it should be retained in case you wish to setup the unit from defaults
again.
In the IP Network control panel of the PC, restore the settings to those used
previously with your network.
8 of 42
Berkshire 10K Quick Start Guide
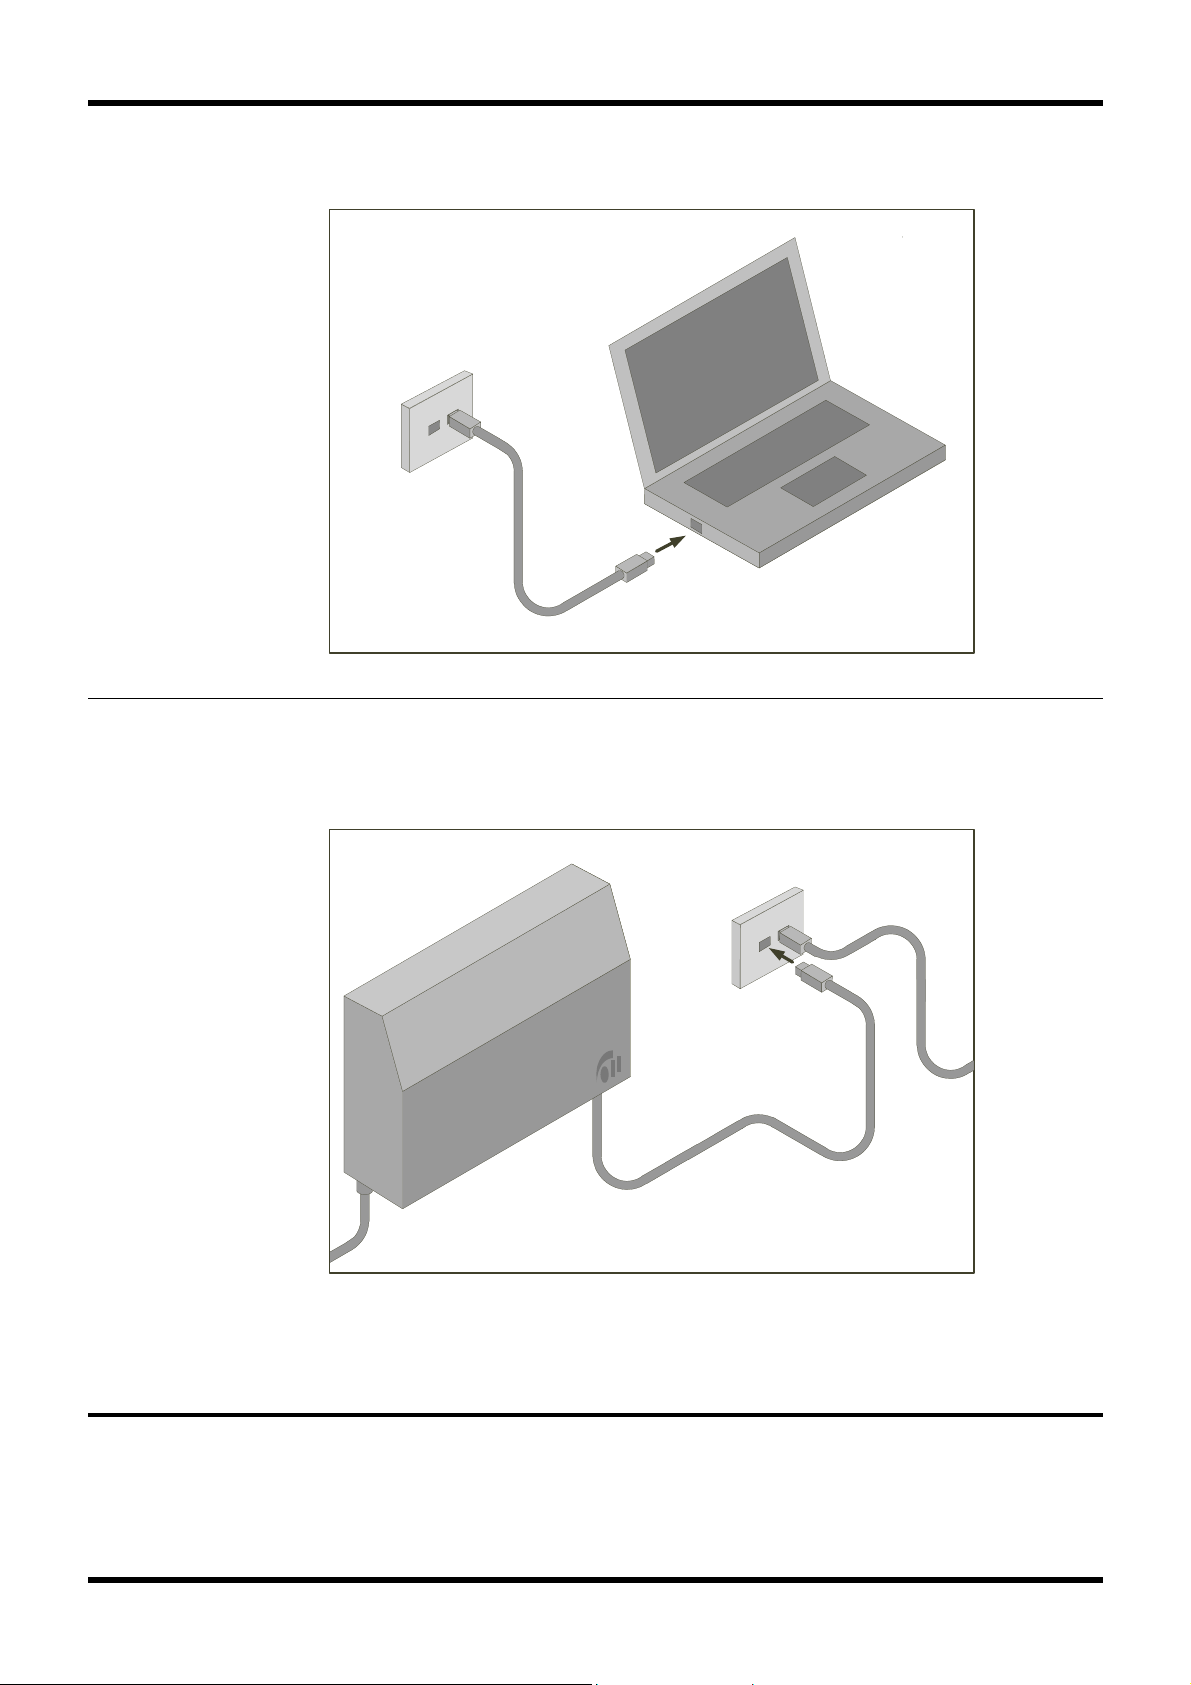
Step 14
Replace any previously connected ethernet cable to the PC.
Step 15
Keeping one end of the supplied ethernet cable connected to the Berkshire 10K
ipPBX, connect the other end to the network.
The Berkshire 10K ipPBX is now connected and operating on your network. The unit
can be accessed from a web browser on a PC using the newly configured IP
address.
9 of 42
Berkshire 10K Quick Start Guide
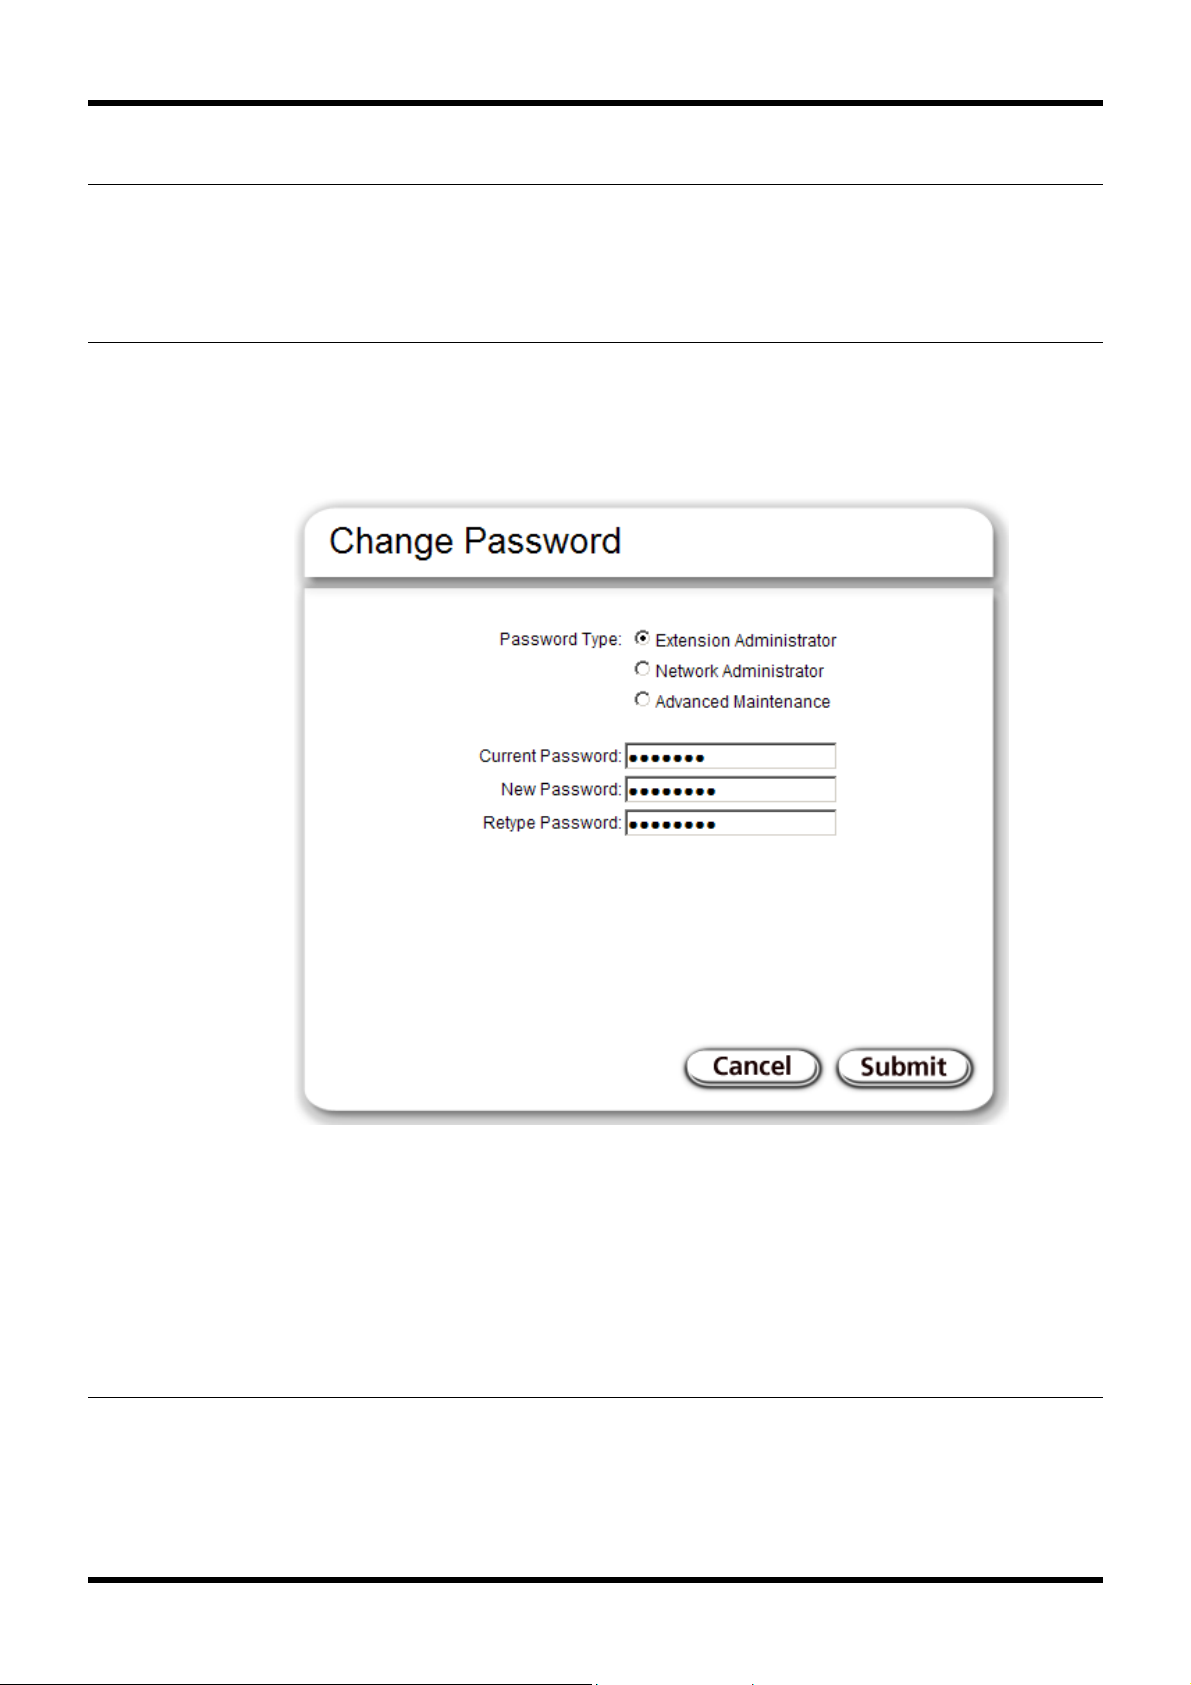
Setup Passwords (Critical Security)
Step A1
In the address bar of the web browser on the PC, type-in the IP address of the
Berkshire 10K ipPBX to access its management pages.
Step A2
Click on "Change Passwords" and change all the passwords that are still s et to the
default values. (Only the first eight characters of the passwords are checked so
ensure that these characters differ from the default passwords).
The default username/password settings are as follows:
• extension/extpassword
• network/netpassword
• advanced/advpassword
Some of these passwords are restricted to the supplier, installer or maintainer of the
equipment. The usernames cannot be changed.
10 of 42
Berkshire 10K Quick Start Guide
Step A3
If you are logged in to the extension menus, network menus or advanced menus
then it is necessary to log out for the new passwords to fully take effect. Click on
“Logout extension user”, “Logout network user” or “Logout advanced user” as
necessary.
Setup Trunks
Step B1
Decide what types of trunks you require. Trunks may be conventional analogue
lines or voice over IP trunks or both. In this quick setup guide it is assumed that
analogue lines are being used as the trunk connections.
Step B2
Have between 1 and 4 analogue lines installed to the location of the Berkshire 10K
ipPBX. These analogue lines should be specified to provide “k-break” disconnection
indication. It is recommended that they also support Caller ID. The analogue lines
should all share the same public telephone number.
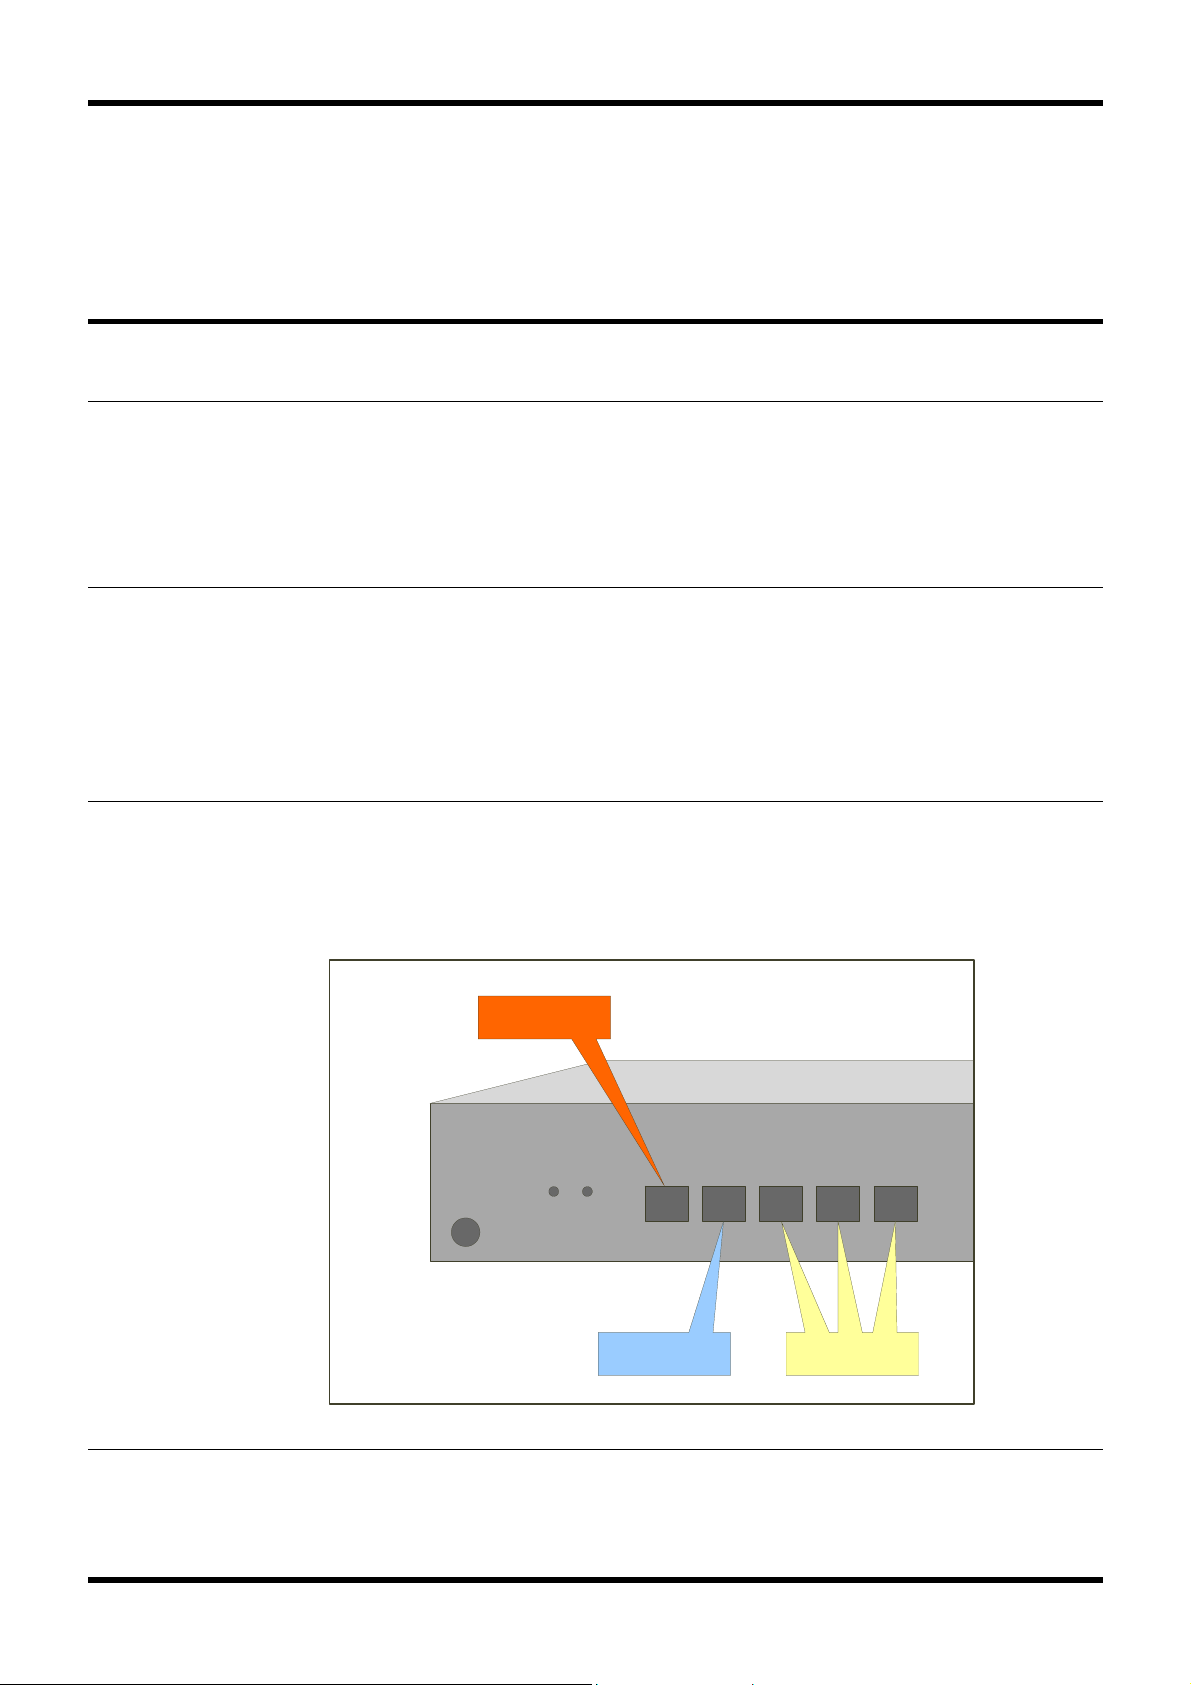
Step B3
Connect a conventional analogue telephone such as a Berkshire 200 to the
telephone socket on the Berkshire 10K ipPBX that is closest to the power input. This
socket provides a life-line connection in case of a power cut.
Life-Line Phone
Connection
Primary Analogue
Line Connection
Other Analogue
Line Connections
11 of 42

Berkshire 10K Quick Start Guide
Step B4
Using the supplied telephone cables connect the required number analogue lines to
the Berkshire 10K ipPBX. Ensure that the telephone socket on the Berkshire 10K
ipPBX that is closest to the life-line connection is always used irrespective of how
many analogue lines are being connected.
Step B5
The trunk setup is complete. Outgoing calls will be routed over the analogue lines if
the number is prefixed with the digit “9”. Incoming calls will be answered with an
announcement requesting that the caller enter the extension number of the person
they wish to speak to.
Setup Telephone Users
Step C1
In the address bar of the web browser on the PC, type-in the IP address of the
Berkshire 10K ipPBX to access its management pages.
12 of 42
Berkshire 10K Quick Start Guide
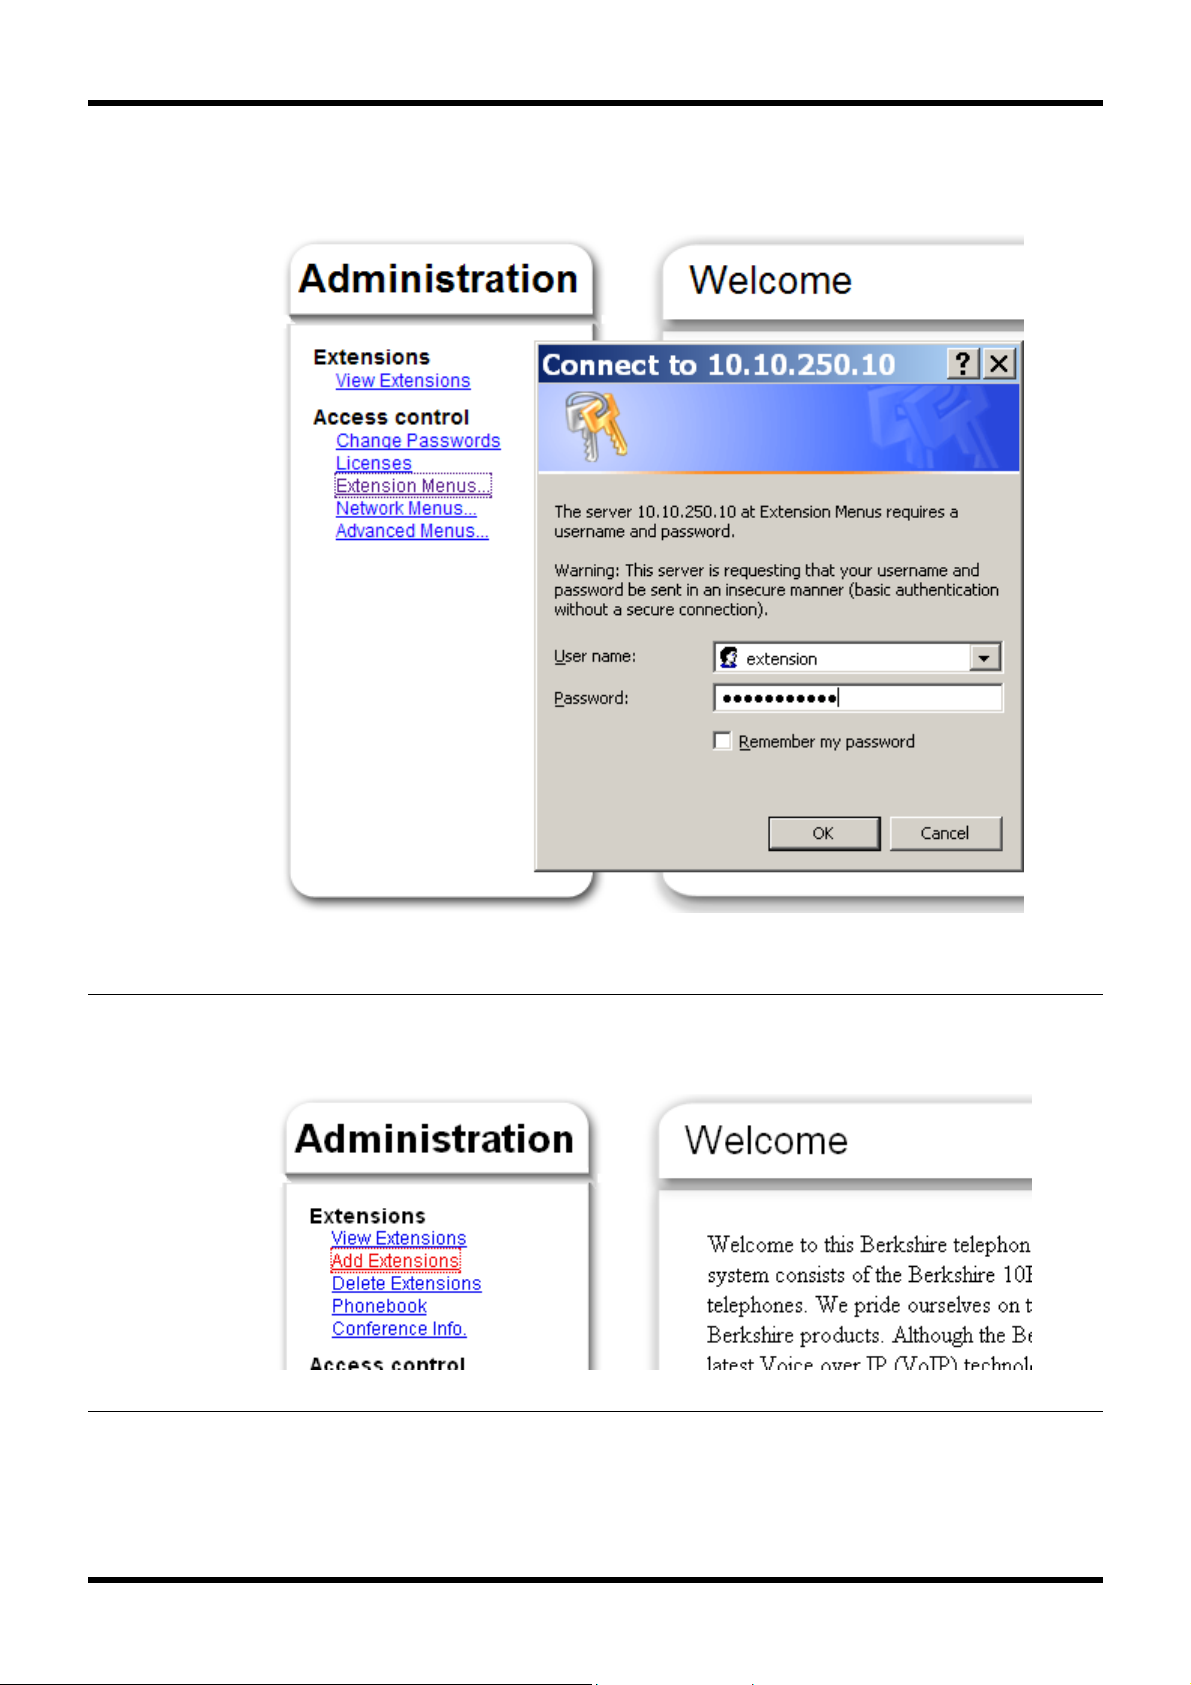
Step C2
Click on "Extension Menus…" and enter the extension manager's username and
password (the defaults are extension/extpassword)
Step C3
This will display the extension menu items.
Click on "Add Extensions" in the extensions menu to add telephone users
13 of 42
 Loading...