

Page 1

Corrections to your Power Macintosh 9600 User’s Manual
Please note the following corrections to your user’s manual.
Page 178: Installing system softw are
The steps to install system software are now different from those presented in
the us er’s ma nual. Consult the information in this section if you need to
reinstall system software.
Note: Your Macintosh came with all the n ecessary system software installed
on its internal hard disk, so you don’t need to install system software on that
disk unless you want to upgrade to a more recent version of system software
or you encounter software problems.
m If you want to upgrade to a more recent version of system software, follow
the installation instructions that came with your system software upgrade.
m If you’re having a problem with your computer, reinstalli ng system
software may not be the right way to correct the problem. Before
reinstalling system software, refer to the detailed troubleshooting
information in Chapter 10, “Solutions to Common Problems” in your
Power Macintosh 9600 user’s manual. If the troubleshooti ng information
instructs you to reinstall system software, refer to this section for
installation instructions.
1
Page 2
To install system software, follow these steps:
1 Start up your computer from the system software CD-ROM disc that came with your
computer.
Instructions are available on page 176 of your user’s manual.
2Locate the Install Mac OS icon and double-click it.
A screen appears describing the four steps in the installation process.
3Complete the first three steps that appear in the screen.
The first three steps are
m Read important information
m Update your hard disk driver
m Choose a disk for installation
4Click the fourth button to begin installing the software.
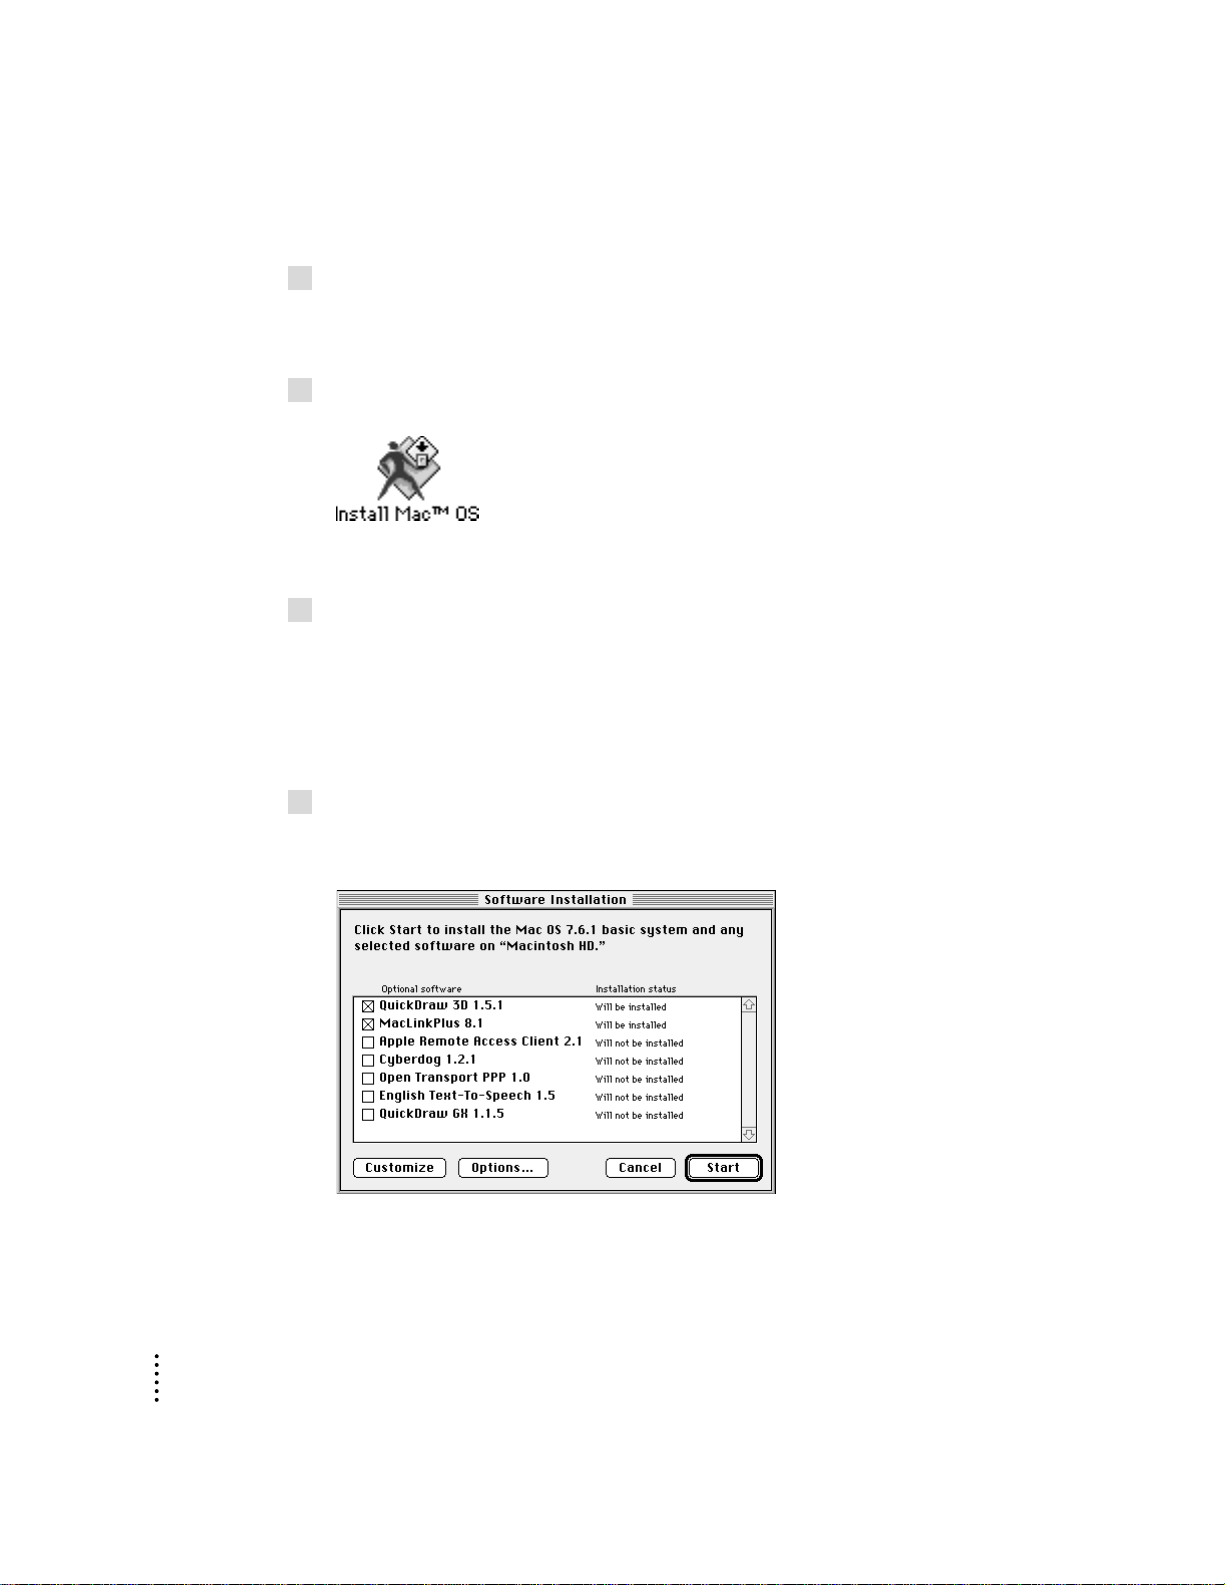
The Software Installation dialog box appears.
2
Page 3

5Select the software you want to install from the list in the dialog box.
In addition to the optional software you choose in the list, the Installer is
preset to install the Mac OS 7.6.1 basic system, which includes these items:
m Mac OS 7.6.1 system software
m OpenDoc software
m OpenDoc Essentials software
If you do not want to install one or more of these items, click th e Customize
button; these items will then app ear in the list, and you can turn them off
individually.
6 To perform a “clean” installation of system software, click Options. In the screen that
appears, click the checkbox next to “Create additional System Folder,” then click OK.
Usua lly, you should not perform a “clean” installation, but if you are
experiencing problems or your computer seems slow, performing a clean
installation may help.
These are the differences between a normal and a clean installation of system
software:
m A normal installation modifies your existing System Folder. It replaces
cha nged system files and adds new ones, but leaves alon e other files (such
as fonts, extensions, and control panels that you have added).
m A clean installation creates a completely new System Folder on your hard
disk. The old System Folder is renamed Previous System Folder. Because a
clea n installation creates a new System Folder, you must reinstall any
fonts, extensions, and control panels that you added or that came with
utility or application programs. This can be a complicated procedure.
7Click Start to begin installing the software you selected.
Foll o w the onscreen instr uctions to complete the installation process.
8When the installation is complete, restart your computer.
3
Page 4

Page 190: Rebuilding your desktop
Becaus e of changes to t he Extensions Manager control pa nel, the steps to
rebuild th e desktop are now different from those presented in the user’s
manual. Here are the correct steps.
1 Open the Extensions Manager control panel.
To open the Extensions Manager control panel, choose Control Pan els from
the Appl e (K) menu. When the Control Panels window appears, double-click
the Extensions Manager icon.
2 In the Extensions Manager window, note the name of the set that is currently listed in the
Selected Set pop-up menu.
This name indicates the active set of installed extensions. You will need to
know this name later in the instructions so that you can restore the active set.
3Choose New Set from the File menu.
The New Set dialog box appears.
4Type
Only Easy Open
and click OK.
The selected set changes to Only Easy O pen.
5Choose All Off from the Edit menu to turn off all the items in the list.
4
Page 5

6Scroll through the list until you see the “Mac OS Easy Open” item. Then click the
Click to put an X
in this box.
checkbox next to “Mac OS Easy Open” to turn it on.
7While holding down the Command (
restart your computer.
x
) and Option keys, click the Restart button to
Continue to hold down the x and Option keys during the startup process until
you see the dialog box that asks if you’re sure you want to rebuild your
desktop file. When the dialog box appears, you ca n release the keys.
8Click OK.
The computer rebuilds the desktop. This can take several minutes.
IMPORTANT
Do not stop the desktop-rebuilding process. Doing so could
damage your system files.
9 Open the Extensions Manager control panel again.
10 From the Selected Set pop-up menu, choose the name of the set that you noted in step 2.
This turns your original set of extensions back on.
11 Click the Restart button to restart your computer and activate the extensions.
5
Page 6

©
1997 Apple Computer, Inc. All rights reserved. Apple, the Apple logo, Mac, Macintosh, OpenDoc, and
Power Macintosh are trademarks of Apple Computer, Inc., registered in the U.S. and other countries.
Extensions Manager is a trademark of Apple Computer, Inc. PowerPC is a trademark of International Business
Machines Corporation, used under license therefrom.
033-0523-A
 Loading...