

Page 1

Mac Pro
Hard Drive Carrier
Replacement Instructions
Follow the instructions in this document carefully. Failure to follow these instructions could
damage your equipment and void its warranty.
Tools Required
The only tool required for this procedure is a Phillips #1 screwdriver.
Opening the Computer
Shut down the computer.
1.
Warning: Always shut down the computer before opening it to avoid damaging its
internal components or the components you are installing. Do not open the computer
or attempt to install items inside it while it is on.
Wait 5 to 10 minutes to allow the computer’s internal components to cool.
2.
Warning: After you shut down the system, the internal components can be very hot. You
must let the computer cool down before continuing.
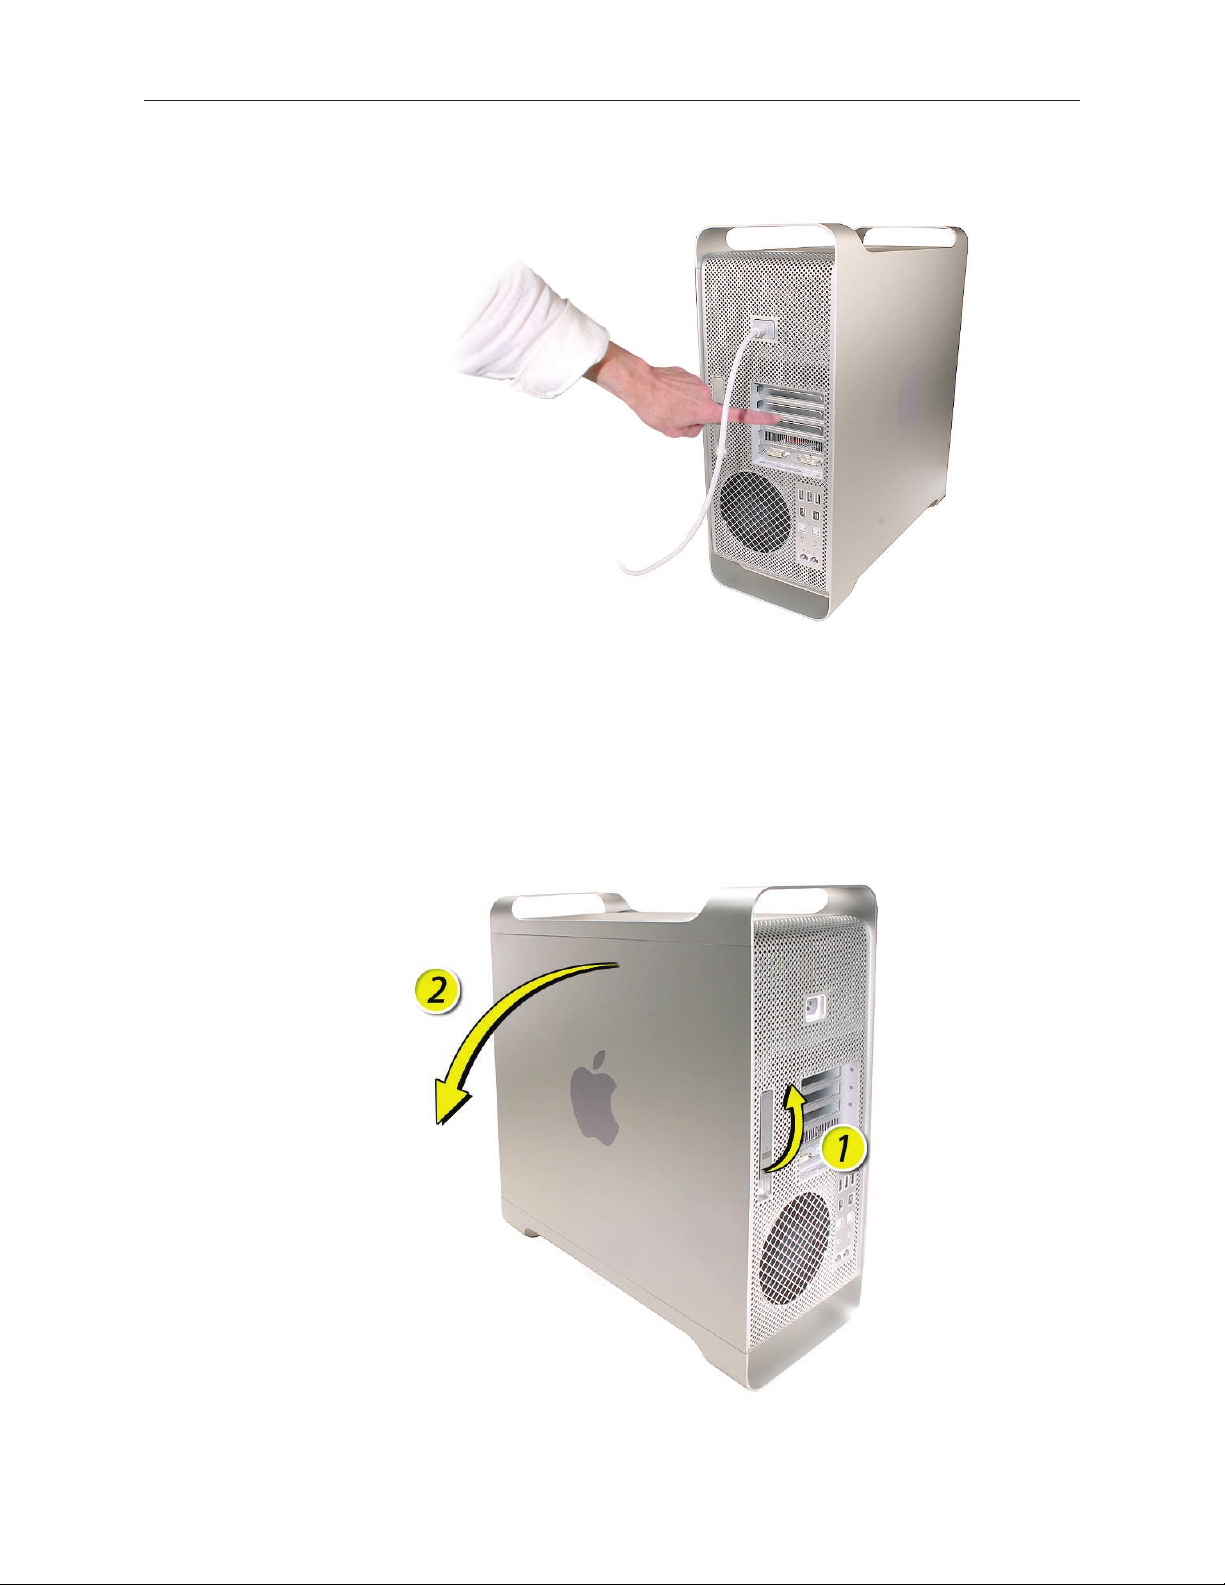
Unplug all external cables from the computer except the power cord.
3.
Touch the metal PCI access covers on the back of the computer to discharge any static
4.
electricity from your body.
Important: Always discharge static before you touch any parts or install any
components inside the computer. To avoid generating static electricity, do not walk
around the room until you have nished working and closed the computer.
073-1059 Rev. A
Page 2
Unplug the power cord.
5.
Hold the side access panel and lift the latch on the back of the computer.
6.
Warning: The edges of the access panel and the enclosure can be sharp. Be very careful
when handling them.
Remove the access panel and place it on a at surface covered by a soft, clean cloth.
7.
Mac Pro Hard Drive Carrier 2
Page 3

Removing the Installed Hard Drive Carrier
Carefully lay the computer on its side so that the open side faces up.
1.
Important: Make sure the latch on the back panel is in the up position. When the latch is
down, the hard drives and carriers are locked in place and you will not be able to remove
them.
Locate the hard drives.
2.
Pull the hard drive out of the drive bay.
3.
Mac Pro Hard Drive Carrier 3
Page 4

Remove the four screws that mount the drive to the carrier and remove the drive from the
4.
carrier.
Important: When removing or installing a hard drive, hold the drive by its sides. Be careful not to
touch the printed circuit board on the bottom of the drive.
Installing the Replacement Hard Drive Carrier
Position the replacement hard drive carrier on the hard drive and secure it with the four
1.
mounting screws.
Slide the carrier and drive over the guides and into the drive bay, until you feel the drive
2.
snap into place.
Closing the Computer
Replace the access panel.
1.
Note: Make sure the latch is in the up position before replacing the access panel. If the latch
is down, the access panel will not seat correctly in the enclosure.
Push the latch down to close and secure the access panel.
2.
Warning: Never turn on the computer unless all of its internal and external parts are
in place and it is closed. Operating the computer when it is open or missing parts can
damage it or cause injury.
Mac Pro Hard Drive Carrier 4
Page 5

Apple Computer, Inc.
© 2006 Apple Computer, Inc. All rights reserved.
Under the copyright laws, this document may not be copied, in whole or in part, without the
written consent of Apple.
Every eort has been made to ensure that the information in this document is accurate. Apple is
not responsible for printing or clerical errors.
Apple
1 Innite Loop
Cupertino, CA 95014-2084
USA
+ 1 408 996 1010
http://www.apple.com
Apple, the Apple logo, Mac, Macintosh, and Mac Pro are trademarks of Apple Computer, Inc.,
registered in the U.S. and other countries.
Mac Pro Hard Drive Carrier 5
 Loading...