


CONTROLLER RECALIBRATION PROCEDURE
WARNING!
!
Please follow these procedures exactly as they are written. If you do not, you could
PERMANENTLY DISABLE YOUR PHOTON X25. Whenever you see text in B OLD CAPS,
those are warnings of THINGS YOU SHOULD NOT DO.
IMPORTANT!
!
Please read through these instructions carefully. If you do not understand them completely,
PLEASE DO NOT PROCEED.
We recommend that you follow the two procedures described in the “Quick Recalibration”
section of this document to recalibrate the controllers on your Photon X25. If you would like to
learn about the Test Mode in depth, you may wish to read the section titled “Detailed
Description” – it is supplemental and not required reading. As long as you follow the simple
instructions in “Quick Recalibration,” you will ensure the proper recalibration of the Photon
X25’s controllers.
QUICK RECALIBRATION
PROBLEM
: My Pitch and/or Mod Wheels aren’t working properly; I need to recalibrate them.
SOLUTION
: Procedure 1 (required):
1. Hold down both Octave buttons and power on the Phot o n X2 5. Kee p pressing them
down until you see something like “QP1-v1.01a1” in the display, and then let go. DO NOT
PRESS ANY OTHER BUTTONS until you proceed to step 2.
We repeat: DO NOT PRESS THE OCTAVE BUTTONS AGAIN while on this
page, and DO NOT PRESS THE GLOBAL AND OCTAVE DOWN BUTTONS
!
AT THE SAME TIME. You will destroy your Photon X25 if you do.
2. Hit Page Right one time, until you see the words “P2 Set Defaults?”
4. Turn the unit off and back on. The wheels should work fine now.
3. Press both Octave keys to lock in the default values for all controllers.
5. We highly recommend that you perform the “Set P/M Low” and “Set P/M High” procedures
SOLUTION: Procedure 2 (optional, but highly recommended after following “Procedure 1”):
listed in “Procedure 2” after performing Procedure 1.
1. Hold down both Octave buttons and power on the Phot o n X2 5. Kee p pressing them
down until you see something like “QP1-v1.01a1” in the display, and then let go. DO NOT
PRESS ANY OTHER BUTTONS until you proceed to step 2.
We repeat: DO NOT PRESS THE OCTAVE BUTTONS AGAIN while on this
page, and DO NOT PRESS THE GLOBAL AND OCTAVE DOWN BUTTONS
!
AT THE SAME TIME. You will destroy your Photon X25 if you do.
2. Hit Page Right four times, until you see the words “P5 Set P/M Low”.
3. Move the Pitch and Mod wheels all the way down (toward you) and hold the Pitch wheel
there (it’s spring-loaded).
4. Press both Octave keys to lock in the “Low” values for these wheels.
6. Bring the Pitch wheel to center (its resting position) and bring the Mod Wheel all the way up
(away from you, as far as it will go).
5. Hit Page Right one time, until you see the words “P6 Set P/M High”.
7. Press both Octave keys to lock in the current values for these wheels.
8. Turn the unit off and back on. The wheels should work fine now.
DETAILED DESCRIPTION
To recalibrate the controllers on the Photon X25, the unit must be in “Test Mo de.” This is a special mode
we have “hidden” so you won’t accidentally recalibrate the controllers during normal operation.
ENTERING TEST MODE
To enter Test Mode:
1. Turn off the Photon X25.
2. Press and hold down the
Octave Up and Octave Down buttons.
3. Turn on the Photon X25. At first you will see the familiar start-up screen. But after holding
down the Octave buttons for about three seconds, you should see a display that looks like this:
QP1-v1.01a1
QPXusb-v1.02a
4. As soon as this screen appears, release the buttons y o u hav e been holding down. Do not
press any others until you have read the following sections.
WARNING: DO NOT TRY ANY BUTTON COMBINATIONS WHILE ON THIS PAGE!
We repeat: DO NOT PRESS THE OCTAVE BUTTONS AGAIN while on this
page, and DO NOT PRESS THE GLOBAL AND OCTAVE DOWN BUTTONS
!
AT THE SAME TIME. You will destroy your Photon X25 if you do.
TEST MODE SPECIAL KEYS
There are several key presses that perform particular functions in Test Mode.
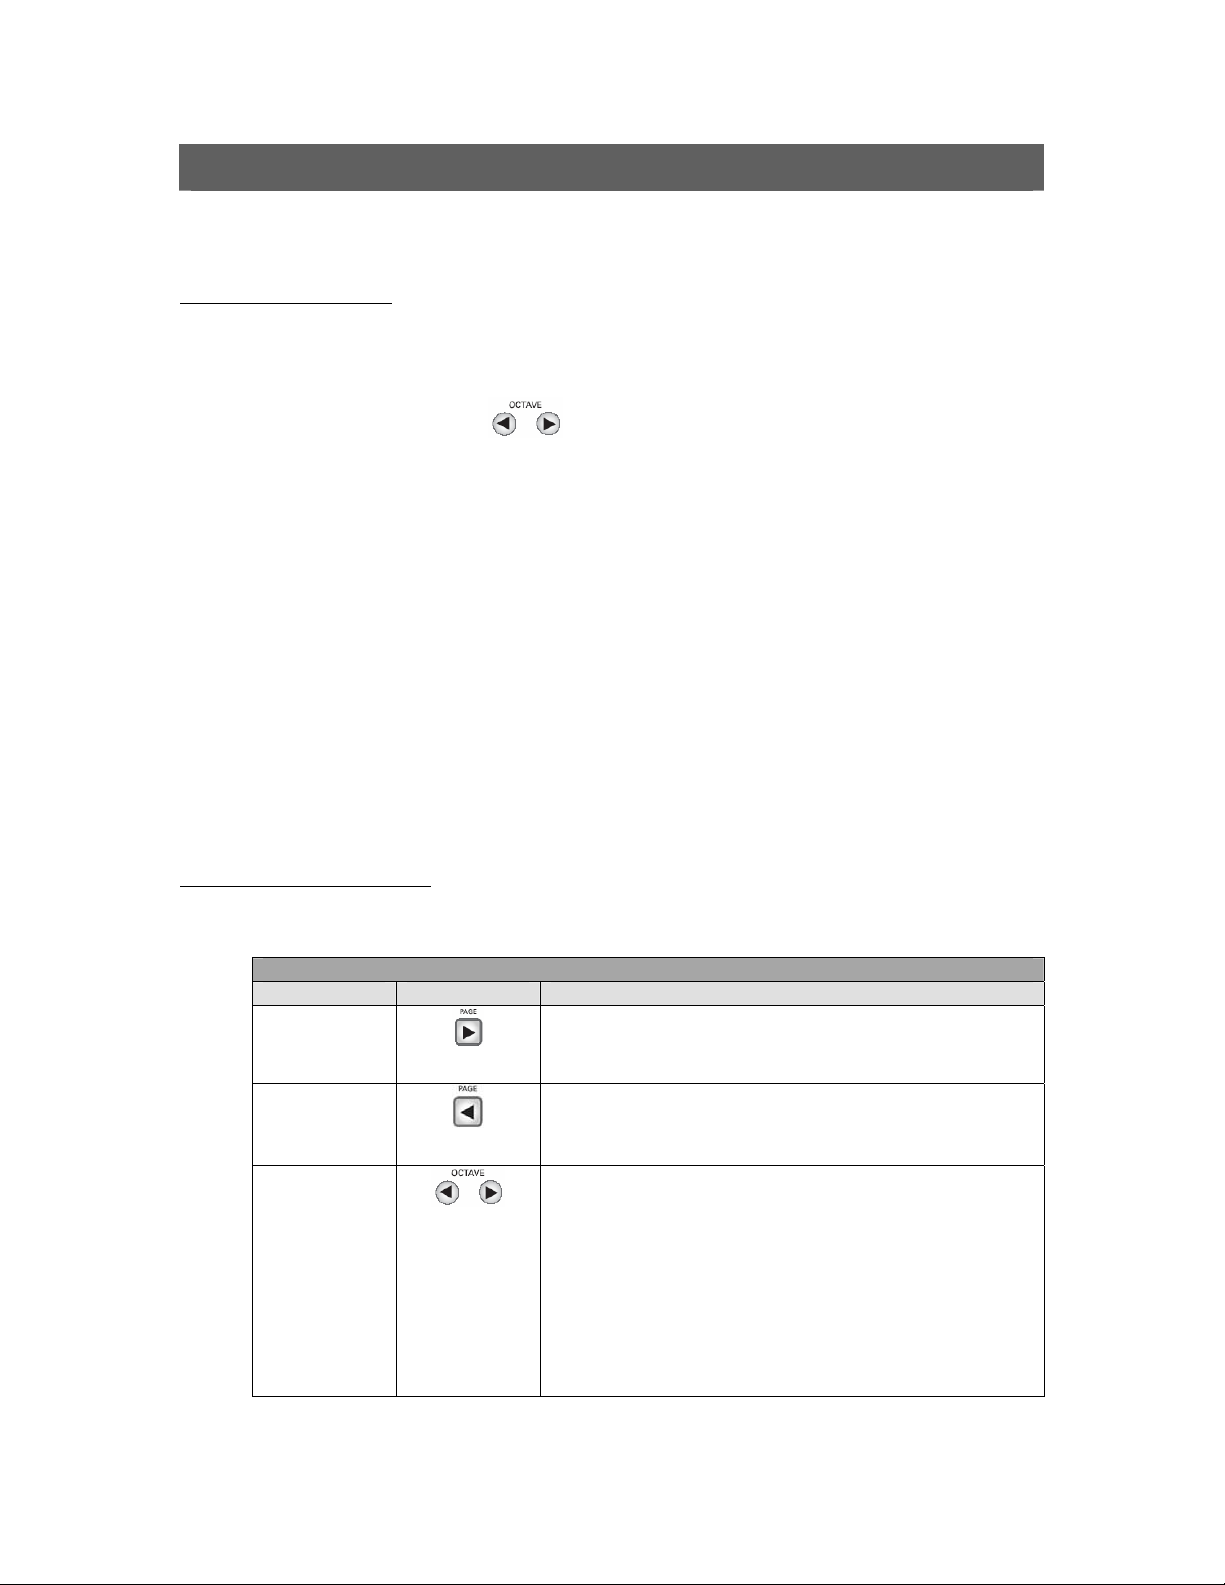
TEST MODE KEY FUNCTIONS
Key Name Keys Description
Next Page
Previous Page
Reset
(page Right)
(Page Left)
(Octave Up &
Octave Down)
This key moves to the next test.
This key moves to the previous test.
These keys, pressed simultaneously, perform a different
function in each test. Please see the next section,
“Navigating Test Mode,” for the specific function of Reset
in each test page.
WARNING! Pressing the Reset key combination (Octave
Up and Octave Down) can erase important configuration
data or even the firmware. DO NOT PRESS THESE
BUTTONS if you are not sure what will happen when
you do.
NAVIGATING TEST MODE
Each page of Test Mode shows a menu title on the LCD screen. The tests can be navigated using
Page Left and Page Right to go to the previous or next m enu respect ively.
The tests are as follows:
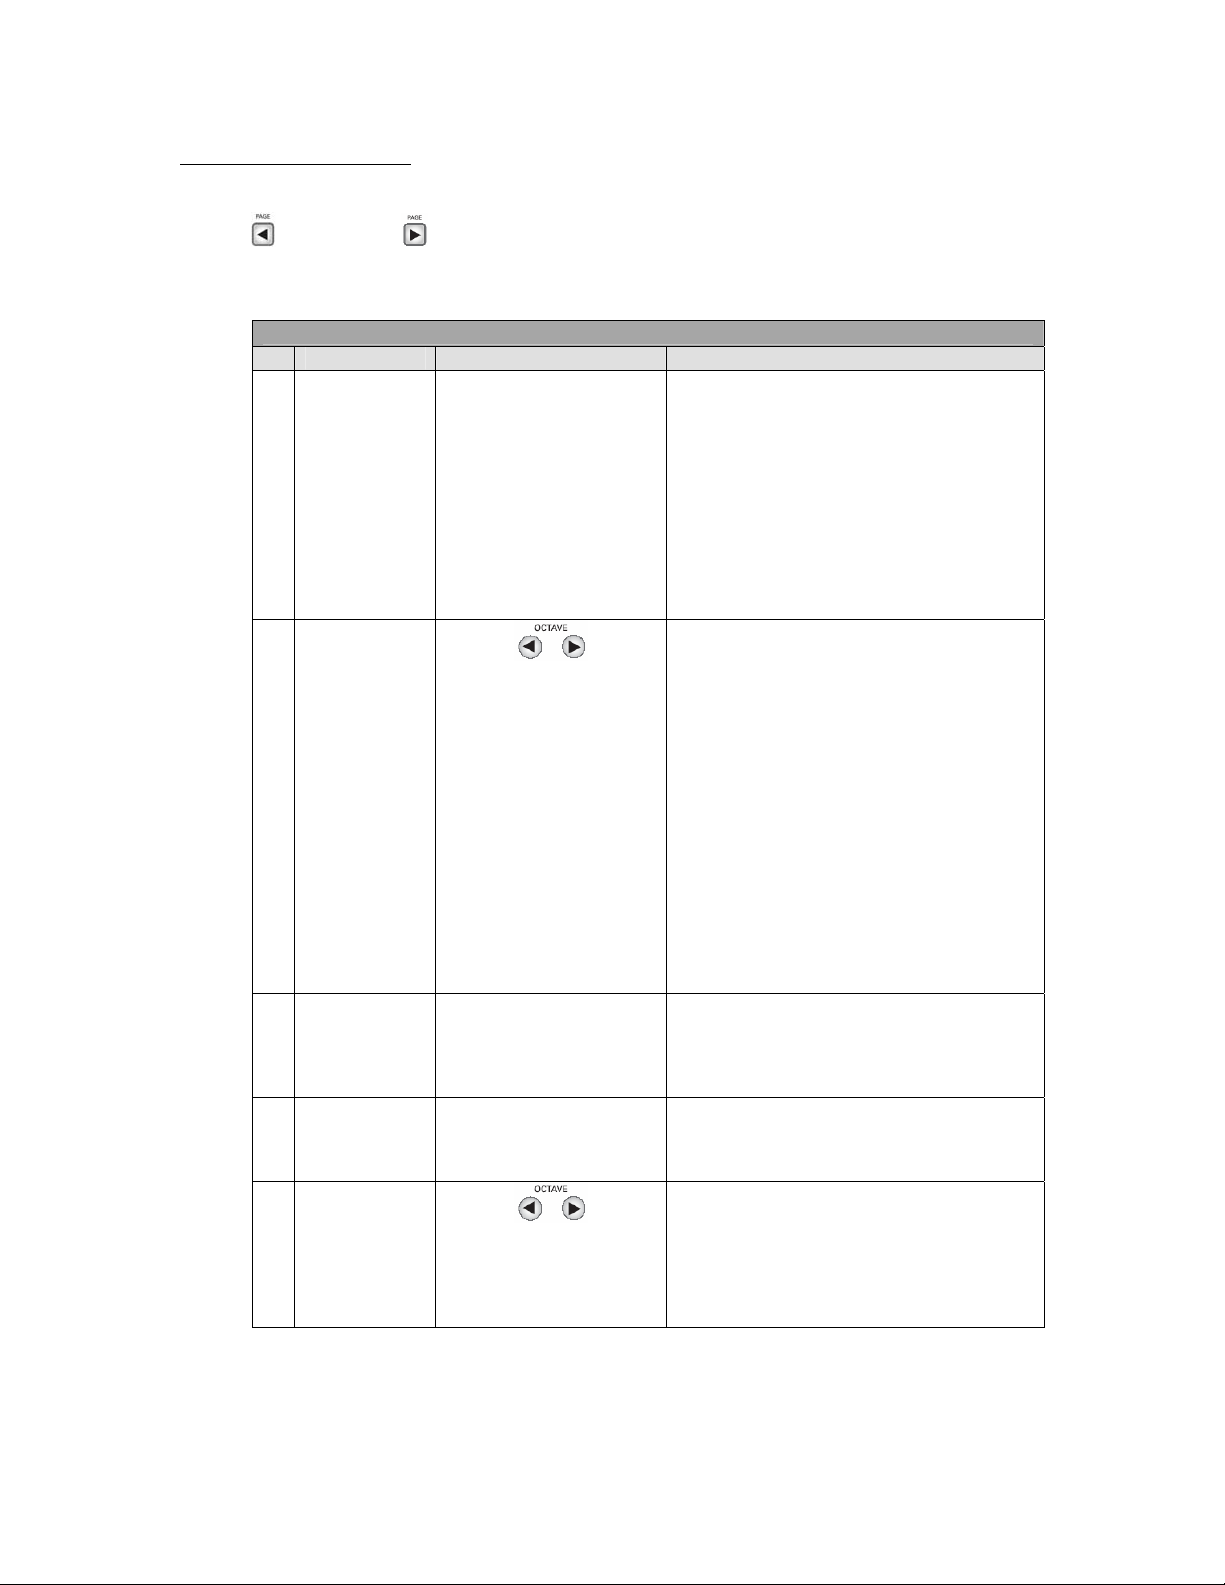
TEST MODE MENU PAGES
ID Title Available Keys Description
01
02
<VER> <none>
Restore
Defaults
03
04
05
KEY <none>
LED <none>
Set P/M Low
(Octave Up & Octave Down)
(Octave Up & Octave Down)
Gives version number.
WARNING: DO NOT TRY ANY BUTTON
COMBINATIONS WHILE ON THIS PAGE.
We repeat: DO NOT PRESS THE OCTAVE
BUTTONS AGAIN while on this page, and
DO NOT PRESS THE GLOBAL AND
OCTAVE DOWN BUTTONS AT THE
SAME TIME. You will destroy your Photon
X25 if you do.
This menu will configure the global settings to
default. It does not erase any user programs, but
does reset global parameters such as the
controller calibration values.
Pressing the Reset key combination (Octave Up
and Octave Down) while on this page will reset
global settings. After this is done, the LCD
display will show the word “Stored.” This
indicates that the defaults have been restored and
saved to the Photon’s memory.
Note that resetting the defaults will erase the
controller calibration data. It is generally a good
idea to perform the re-calibration routines
outlined in Menu 05 and Menu 06 below after
resetting the defaults.
This menu displays velocity and note
information for the piano keyboard.
Note: no calibration occurs on this page.
This menu simply turns on all the LEDs.
Note: no calibration occurs on this page.
This menu allows the user to calibrate the Pitch
Wheel and Mod Wheel. Move both wheels to
their minimum position (closest to user).
Pressing the Reset key combination (Octave Up
and Octave Down) will store the minimum
values of these controllers so they will work
accurately.

TEST MODE MENU PAGES (continued)
ID Title Available Keys Description
Set P/M High
06
07
08
09
(Octave Up & Octave Down)
POTS <none>
AXYZ <none>
SWITCH
<all>
This menu allows the user to calibrate the Pitch
Wheel and Mod Wheel. Be careful here! The
procedure to follow for each wheel is different:
1. Move the Pitch Wheel to CENTER (its
resting position).
2. Move the Mod Wheel to MAXIMUM
(farthest away from user).
If the above instructions have been followed
properly, pressing the Reset key combination
(Octave Up and Octave Down) will store the
values of these controllers so they will work
accurately.
This menu identifies and shows data for all top
panel pots, the pitch and mod wheels, and the
rear panel expression pedal.
Note: no calibration occurs on this page.
This menu displays real-time AXYZ controller
information using the 3 coordinates.
Note: no calibration occurs on this page.
This menu identifies the top panel switches as
they are pressed. It also displays information
when the footswitch is pressed/released and
when the encoder is turned or pressed.
Note: no calibration occurs on this page.
 Loading...