

Page 1

USB MIDI Controller and Stereo Audio Interface
Driver Installation Guide
Page 2
Plug-and-Play Connection to a Computer
Driver installation is not required on Windows XP since the Photon is supported
by the default audio drivers, but we highly recommend installing the Alesis audio
drivers. Our drivers will yield significantly lower latency and better performance.
.
Check http://www.Alesis.com for driver updates and up-to-date information on
operating system compatibility.
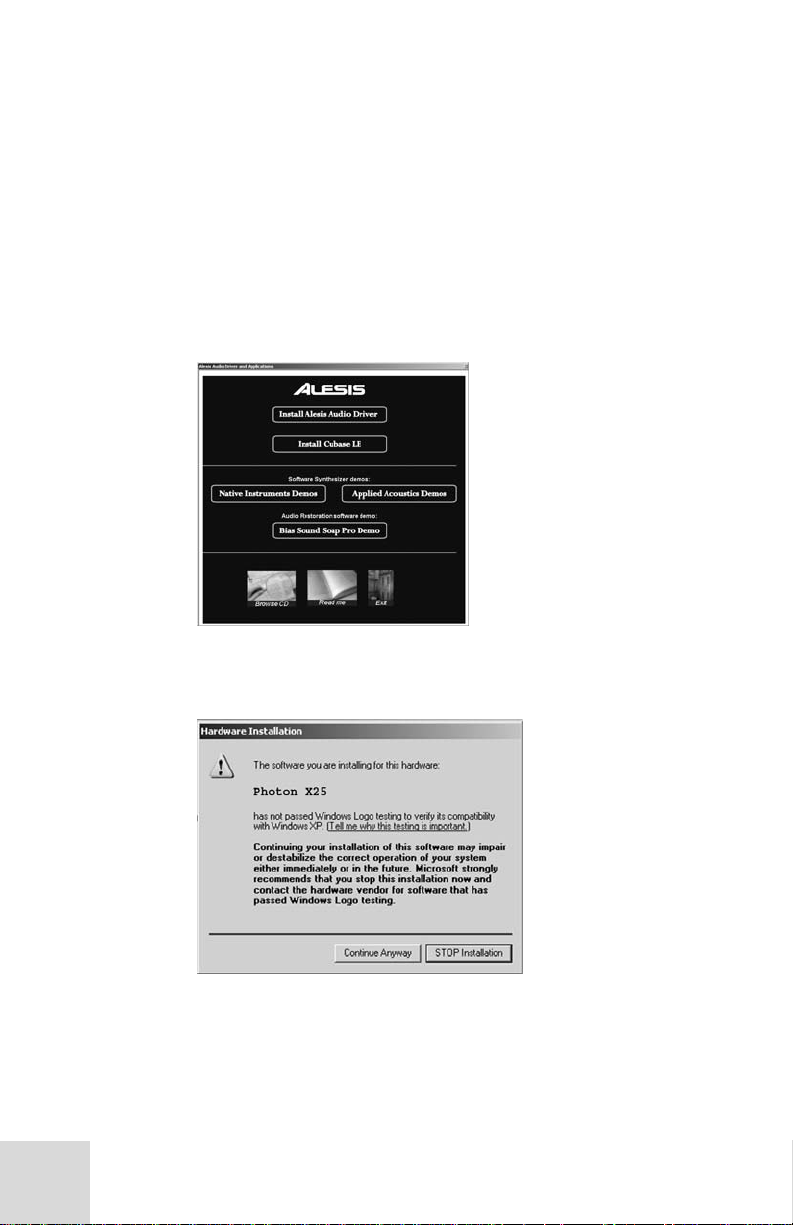
Click “Install Alesis Audio Driver,” to proceed with the driver installation.
During the installation process, Windows XP will prompt you with the following
warning:
Press “Continue Anyway,” to finish the installation. Restart the machine as the
software recommends. Once your computer is restarted, your Photon X25 is
ready to record.
2
Page 3

Operation:
1. Using the Keyboard with your MIDI
software
Start off simply. Once you’re plugged in and powered up, go to your sound
module or software application and set the incoming MIDI channel.
If you’re using software, you will probably need to configure it to use the Photon
or “USB” device. Look for the MIDI device setup menu in your application and
ensure that the Photon is designated as an active MIDI device before proceeding.
On the Photon, press EDIT PRESET. Then, press the PAGE RIGHT button
to see the Common MIDI setting. This is the channel on which the Photon X 25
will send it’s MIDI information. Turn the VALUE/ENTER encoder to change
this setting if needed.
Play the keyboard. Your sound module or software should respond to the Photon
X 25’s MIDI data. If not, refer to the troubleshooting instructions later in this
guide.
Experiment with the Photon X 25’s OCTAVE buttons and pitch and modulation
wheels. Since the two wheels are mapped to MIDI’s standard pitch and
modulation commands, they should work for you in most cases right off the bat.
2. Using the Knobs with the Supplied
Controller Templates
If one of the supplied template sets matches your MIDI software, lift the plastic
template covers with your fingernail, position the templates, and then replace the
covers.
Press the RECALL PRESET button and turn the clear
cursor knob to reach the program number indicated on
the templates. Press the cursor knob to enter this
program. You should now be able to control the
software according to the templates.
Press the LAYER button to cycle through the three
knob layers. Each layer is independent (though a knob
can be assigned to the same controller value on two or three
of the layers).
The row-selection lights on
the top and bottom always
move together. It’s not
possible to select, say, Layer
1 on the top row of knobs and
Layer 2 on the bottom row.
3
Page 4

3. Audio Recording and Playback
To record, connect the OUTPUT from an audio device to the
AUDIO IN jacks of the Photon X 25. Use balanced (TRS)
or unbalanced (TS) ¼” cables. In your audio software, enable
input from the Photon X 25.
If your software allows it, adjust the sample rate. The Photon
X 25 will “slave” to this setting (so long as it is not out of the
Photon X 25’s range).
Adjust the gain of the incoming audio signal using the Photon
X 25’s INPUT knob. Send the loudest signal you can to your
recording application before your application indicates
clipping.
For playback, connect a pair of headphones to the Photon X
25’s HEADPHONE OUT jack and/or connect your audio
playback device’s IN jacks to the Photon X 25’s AUDIO
OUT jacks. Adjust the level using the OUTPUT knob.
CAUTION: To protect both your hearing and your
equipment, turn the OUTPUT down to its lowest setting
before connecting gear and before turning on the unit.
Maximizing Your Gain
Staging
For the best recorded sound,
adjust each of your audio
devices for maximum fidelity
with minimum noise.
Start by turning UP
keyboards, sound modules
and mixer channels to
between fifty and seventy-five
percent of maximum.
If you hear dist ort io n, fi rst
turn DOWN the preamp trim
controls on your mixer (if
you’re using one). Then,
turn DOWN the Photon’s
OUTPUT knob.
Listen for audible
improvements as you adjust
your devices’ volume controls
relative to one another.
A little time spent
experimenting with these
settings can yield big
improvements in sound
quality.
24-bit audio output to 16-bit
recording programs
The Photon X 25 always
sends audio to the computer
at 24 bits (high resolution).
Some recording programs
will only record the 16 most
significant bi ts (com p act dis c
resolution), ignoring the eight
additional bits sent by the
Photon X 25. This is not a
problem.
4
 Loading...