

Page 1

ADOBE® AUDITION® 3
USER GUIDE
Page 2

Copyright
© 2007 Adobe Systems Incorporated. All rights reserved.
Adobe® Audition® 3.0 User Guide for Windows®
If this guide is distributed with software that includes an end user agreement, this guide, as well as the software described in it, is furnished under license and may be used or
copied only in accordance with the terms of such license. Except as permitted by any such license, no part of this guide may be reproduced, stored in a retrieval system, or transmitted, in any form or by any means, electronic, mechanical, recording, or other wise, without the prior written permission of Adobe Systems Incorporated.Pleasenotethatthe
content in this guide is protected under copyright law even if it is not distributed with software that includes an end user license agreement.
Thecontentofthisguideisfurnishedforinformationaluseonly,issubjecttochangewithoutnotice,andshouldnotbeconstruedasacommitmentbyAdobe Systems Incorporated. Adobe Systems Incorporated assumes no responsibility or liability for any errors or inaccuracies that may appear in the informational content contained in this guide.
Please remember that existing artwork or images that you may want to include in your project may be protected under copyright law. The unauthorized incorporation of such
material into your new work could be a violation of the rights of the copyright owner. Please be sure to obtain any permission required from the copyright owner.
Any references to company names in sample templates are for demonstration purposes only and are not intended to refer to any actual organization.
Adobe, the Adobe logo, Adobe Audition, Adobe Premiere, After Effects, Creative Suite, and Photoshop are either registered trademarks or trademarks of Adobe Systems Incorporated in the United States and/or other countries.
Dolby is a trademark of Dolby Laboratories. Microsoft and Windows are either registered trademarks or trademarks of Microsoft Corporation in the United States and/or other
countries. Apple, Mac OS,and Macintosh aretrademarks of Apple Inc.,registered in theUnitedStates andother countries. DECis atrademark ofDigitalEquipmentCorporation.
Sun is a trademark or registered trademark of Sun Microsystems, Inc. in the United States and other countries. All other trademarks are the property of their respective owners.
MPEG Layer 3 audio compression technology is licensed by Fraunhofer IIS and Thomson.
mp3PRO audio coding technologies licensed from Coding Technologies, Fraunhofer IIS and Thomson Multimedia.
ReWire is a Propellerhead product.
Notice toU.S. Governmentend users:The Software and Documentationare “Commercial Items,” as thatterm is defined at 48C.F.R. §2.101,consisting of“C ommer cial C omputer
Software” and “Commercial Computer Software Documentation,” as such terms are used in 48 C.F.R. §12.212 or 48 C.F.R. §227.7202, as applicable. Consistent with 48 C.F.R.
§12.212 or 48 C.F.R. §§227.7202-1 through 227.7202-4, as applicable, the Commercial Computer Software and Commercial Computer Software Documentation are being
licensed to U.S. Government end users (a) only as Commercial Items and (b) with only those rights as are granted to all other end users pursuant to the terms and conditions
herein. Unpublished-rights reserved under the copyright laws of the United States. Adobe agrees to comply with all applicable equal opportunity laws including, if appropriate,
the provisions of Executive Order 11246, as amended, Section 402 of the Vietnam Era Veterans Readjustment Assistance Act of 1974 (38 USC 4212), and Section 503 of the
Rehabilitation Act of 1973, as amended, and the regulations at 41 CFR Parts 60-1 through 60-60, 60-250, and60-741. The affirmative action clause andregulations contained in
the preceding sentence shall be incorporated by reference.
Adobe Systems Incorporated, 345 Park Avenue, San Jose, California 95110, USA.
Page 3

Contents
Chapter 1: Getting started
Installation . . . . . . . . . . . . . . . . . . . . . . . . . . . . . . . . . . . . . . . . . . . . . . . . . . . . . . . . . . . . . . . . . . . . . . . . . . . . . . . 1
Resources . . . . . . . . . . . . . . . . . . . . . . . . . . . . . . . . . . . . . . . . . . . . . . . . . . . . . . . . . . . . . . . . . . . . . . . . . . . . . . . . 2
New features . . . . . . . . . . . . . . . . . . . . . . . . . . . . . . . . . . . . . . . . . . . . . . . . . . . . . . . . . . . . . . . . . . . . . . . . . . . . . 5
Chapter 2: Digital audio fundamentals
Understanding sound . . . . . . . . . . . . . . . . . . . . . . . . . . . . . . . . . . . . . . . . . . . . . . . . . . . . . . . . . . . . . . . . . . . . . 8
Digitizing audio . . . . . . . . . . . . . . . . . . . . . . . . . . . . . . . . . . . . . . . . . . . . . . . . . . . . . . . . . . . . . . . . . . . . . . . . . . 10
Chapter 3: Workflow and workspace
Workflow . . . . . . . . . . . . . . . . . . . . . . . . . . . . . . . . . . . . . . . . . . . . . . . . . . . . . . . . . . . . . . . . . . . . . . . . . . . . . . . . 13
Viewing, zooming, and navigating audio . . . . . . . . . . . . . . . . . . . . . . . . . . . . . . . . . . . . . . . . . . . . . . . . . . 19
Customizing workspaces . . . . . . . . . . . . . . . . . . . . . . . . . . . . . . . . . . . . . . . . . . . . . . . . . . . . . . . . . . . . . . . . . 23
Managing workspaces . . . . . . . . . . . . . . . . . . . . . . . . . . . . . . . . . . . . . . . . . . . . . . . . . . . . . . . . . . . . . . . . . . . 29
Chapter 4: Setting up Adobe Audition
Connecting to inputs and outputs . . . . . . . . . . . . . . . . . . . . . . . . . . . . . . . . . . . . . . . . . . . . . . . . . . . . . . . . 31
Setting Adobe Audition preferences . . . . . . . . . . . . . . . . . . . . . . . . . . . . . . . . . . . . . . . . . . . . . . . . . . . . . . 33
Managing temporary files . . . . . . . . . . . . . . . . . . . . . . . . . . . . . . . . . . . . . . . . . . . . . . . . . . . . . . . . . . . . . . . . 41
iii
Chapter 5: Importing, recording, and playing audio
Opening audio files in Edit View . . . . . . . . . . . . . . . . . . . . . . . . . . . . . . . . . . . . . . . . . . . . . . . . . . . . . . . . . . 43
Opening and adding to sessions in Multitrack View . . . . . . . . . . . . . . . . . . . . . . . . . . . . . . . . . . . . . . . 46
Importing with the Files panel . . . . . . . . . . . . . . . . . . . . . . . . . . . . . . . . . . . . . . . . . . . . . . . . . . . . . . . . . . . . 48
Importing with Adobe Bridge . . . . . . . . . . . . . . . . . . . . . . . . . . . . . . . . . . . . . . . . . . . . . . . . . . . . . . . . . . . . 50
Importing audio from CDs . . . . . . . . . . . . . . . . . . . . . . . . . . . . . . . . . . . . . . . . . . . . . . . . . . . . . . . . . . . . . . . 50
Getting ready for recording and playback . . . . . . . . . . . . . . . . . . . . . . . . . . . . . . . . . . . . . . . . . . . . . . . . . 53
Recording audio . . . . . . . . . . . . . . . . . . . . . . . . . . . . . . . . . . . . . . . . . . . . . . . . . . . . . . . . . . . . . . . . . . . . . . . . . 56
Playing audio . . . . . . . . . . . . . . . . . . . . . . . . . . . . . . . . . . . . . . . . . . . . . . . . . . . . . . . . . . . . . . . . . . . . . . . . . . . . 60
Monitoring recording and playback levels . . . . . . . . . . . . . . . . . . . . . . . . . . . . . . . . . . . . . . . . . . . . . . . . 62
Chapter 6: Editing audio files
Displaying audio in Edit View . . . . . . . . . . . . . . . . . . . . . . . . . . . . . . . . . . . . . . . . . . . . . . . . . . . . . . . . . . . . . 65
Selecting audio . . . . . . . . . . . . . . . . . . . . . . . . . . . . . . . . . . . . . . . . . . . . . . . . . . . . . . . . . . . . . . . . . . . . . . . . . . 72
Copying, cutting, pasting, and deleting audio . . . . . . . . . . . . . . . . . . . . . . . . . . . . . . . . . . . . . . . . . . . . . 76
Visually fading and changing amplitude . . . . . . . . . . . . . . . . . . . . . . . . . . . . . . . . . . . . . . . . . . . . . . . . . . 78
Working with markers . . . . . . . . . . . . . . . . . . . . . . . . . . . . . . . . . . . . . . . . . . . . . . . . . . . . . . . . . . . . . . . . . . . . 80
Creating and deleting silence . . . . . . . . . . . . . . . . . . . . . . . . . . . . . . . . . . . . . . . . . . . . . . . . . . . . . . . . . . . . 86
Inverting and reversing audio . . . . . . . . . . . . . . . . . . . . . . . . . . . . . . . . . . . . . . . . . . . . . . . . . . . . . . . . . . . . 87
Generating audio . . . . . . . . . . . . . . . . . . . . . . . . . . . . . . . . . . . . . . . . . . . . . . . . . . . . . . . . . . . . . . . . . . . . . . . . 88
Analyzing phase, frequency, and amplitude . . . . . . . . . . . . . . . . . . . . . . . . . . . . . . . . . . . . . . . . . . . . . . . 91
Converting sample types . . . . . . . . . . . . . . . . . . . . . . . . . . . . . . . . . . . . . . . . . . . . . . . . . . . . . . . . . . . . . . . . . 98
Recovery and undo . . . . . . . . . . . . . . . . . . . . . . . . . . . . . . . . . . . . . . . . . . . . . . . . . . . . . . . . . . . . . . . . . . . . . 101
Page 4

Chapter 7: Applying effects
Shared effects controls . . . . . . . . . . . . . . . . . . . . . . . . . . . . . . . . . . . . . . . . . . . . . . . . . . . . . . . . . . . . . . . . . . 102
Applying effects in Edit View . . . . . . . . . . . . . . . . . . . . . . . . . . . . . . . . . . . . . . . . . . . . . . . . . . . . . . . . . . . . 106
Applying effects in Multitrack View . . . . . . . . . . . . . . . . . . . . . . . . . . . . . . . . . . . . . . . . . . . . . . . . . . . . . . 107
Adding third-party plug-ins . . . . . . . . . . . . . . . . . . . . . . . . . . . . . . . . . . . . . . . . . . . . . . . . . . . . . . . . . . . . . 110
Chapter 8: Effects reference
Amplitude and compression effects . . . . . . . . . . . . . . . . . . . . . . . . . . . . . . . . . . . . . . . . . . . . . . . . . . . . . 112
Delay and echo effects . . . . . . . . . . . . . . . . . . . . . . . . . . . . . . . . . . . . . . . . . . . . . . . . . . . . . . . . . . . . . . . . . . 122
Filter and equalizer effects . . . . . . . . . . . . . . . . . . . . . . . . . . . . . . . . . . . . . . . . . . . . . . . . . . . . . . . . . . . . . . 128
Modulation effects . . . . . . . . . . . . . . . . . . . . . . . . . . . . . . . . . . . . . . . . . . . . . . . . . . . . . . . . . . . . . . . . . . . . . . 137
Restoration effects . . . . . . . . . . . . . . . . . . . . . . . . . . . . . . . . . . . . . . . . . . . . . . . . . . . . . . . . . . . . . . . . . . . . . . 141
Reverb effects . . . . . . . . . . . . . . . . . . . . . . . . . . . . . . . . . . . . . . . . . . . . . . . . . . . . . . . . . . . . . . . . . . . . . . . . . . 152
Special effects . . . . . . . . . . . . . . . . . . . . . . . . . . . . . . . . . . . . . . . . . . . . . . . . . . . . . . . . . . . . . . . . . . . . . . . . . . 158
Stereo imagery effects . . . . . . . . . . . . . . . . . . . . . . . . . . . . . . . . . . . . . . . . . . . . . . . . . . . . . . . . . . . . . . . . . . 162
Time and pitch manipulation effects . . . . . . . . . . . . . . . . . . . . . . . . . . . . . . . . . . . . . . . . . . . . . . . . . . . . . 169
Multitrack effects . . . . . . . . . . . . . . . . . . . . . . . . . . . . . . . . . . . . . . . . . . . . . . . . . . . . . . . . . . . . . . . . . . . . . . . 174
Chapter 9: Mixing multitrack sessions
Multitrack View overview . . . . . . . . . . . . . . . . . . . . . . . . . . . . . . . . . . . . . . . . . . . . . . . . . . . . . . . . . . . . . . . 179
Basic track controls . . . . . . . . . . . . . . . . . . . . . . . . . . . . . . . . . . . . . . . . . . . . . . . . . . . . . . . . . . . . . . . . . . . . . 182
Track routing and EQ controls . . . . . . . . . . . . . . . . . . . . . . . . . . . . . . . . . . . . . . . . . . . . . . . . . . . . . . . . . . . 185
Arranging clips . . . . . . . . . . . . . . . . . . . . . . . . . . . . . . . . . . . . . . . . . . . . . . . . . . . . . . . . . . . . . . . . . . . . . . . . . 191
Editing clips . . . . . . . . . . . . . . . . . . . . . . . . . . . . . . . . . . . . . . . . . . . . . . . . . . . . . . . . . . . . . . . . . . . . . . . . . . . . 195
Automating mixes . . . . . . . . . . . . . . . . . . . . . . . . . . . . . . . . . . . . . . . . . . . . . . . . . . . . . . . . . . . . . . . . . . . . . . 203
Synchronizing sessions with ReWire and SMPTE . . . . . . . . . . . . . . . . . . . . . . . . . . . . . . . . . . . . . . . . . . 208
Setting advanced session properties . . . . . . . . . . . . . . . . . . . . . . . . . . . . . . . . . . . . . . . . . . . . . . . . . . . . . 210
iv
Chapter 10: Composing with MIDI
MIDI sequencing basics . . . . . . . . . . . . . . . . . . . . . . . . . . . . . . . . . . . . . . . . . . . . . . . . . . . . . . . . . . . . . . . . . 213
Importing, recording, and outputting MIDI . . . . . . . . . . . . . . . . . . . . . . . . . . . . . . . . . . . . . . . . . . . . . . 215
Displaying and editing MIDI . . . . . . . . . . . . . . . . . . . . . . . . . . . . . . . . . . . . . . . . . . . . . . . . . . . . . . . . . . . . . 217
Chapter 11: Loops
Using loops in Multitrack View . . . . . . . . . . . . . . . . . . . . . . . . . . . . . . . . . . . . . . . . . . . . . . . . . . . . . . . . . . 221
Creating loops in Edit View . . . . . . . . . . . . . . . . . . . . . . . . . . . . . . . . . . . . . . . . . . . . . . . . . . . . . . . . . . . . . . 224
Chapter 12: Working with video
Working with video applications . . . . . . . . . . . . . . . . . . . . . . . . . . . . . . . . . . . . . . . . . . . . . . . . . . . . . . . . 227
Importing video and working with video clips . . . . . . . . . . . . . . . . . . . . . . . . . . . . . . . . . . . . . . . . . . . 228
Previewing video . . . . . . . . . . . . . . . . . . . . . . . . . . . . . . . . . . . . . . . . . . . . . . . . . . . . . . . . . . . . . . . . . . . . . . . 229
Chapter 13: Creating surround sound
Surround sound basics . . . . . . . . . . . . . . . . . . . . . . . . . . . . . . . . . . . . . . . . . . . . . . . . . . . . . . . . . . . . . . . . . . 232
Setting track pan and volume for surround mixes . . . . . . . . . . . . . . . . . . . . . . . . . . . . . . . . . . . . . . . . 233
Previewing and exporting surround mixes . . . . . . . . . . . . . . . . . . . . . . . . . . . . . . . . . . . . . . . . . . . . . . . 236
Page 5

Chapter 14: Saving and exporting
Saving and exporting files . . . . . . . . . . . . . . . . . . . . . . . . . . . . . . . . . . . . . . . . . . . . . . . . . . . . . . . . . . . . . . . 240
Audio file formats . . . . . . . . . . . . . . . . . . . . . . . . . . . . . . . . . . . . . . . . . . . . . . . . . . . . . . . . . . . . . . . . . . . . . . . 244
Video file formats . . . . . . . . . . . . . . . . . . . . . . . . . . . . . . . . . . . . . . . . . . . . . . . . . . . . . . . . . . . . . . . . . . . . . . . 252
Adding file information . . . . . . . . . . . . . . . . . . . . . . . . . . . . . . . . . . . . . . . . . . . . . . . . . . . . . . . . . . . . . . . . . 253
Chapter 15: Automating tasks
Favorites . . . . . . . . . . . . . . . . . . . . . . . . . . . . . . . . . . . . . . . . . . . . . . . . . . . . . . . . . . . . . . . . . . . . . . . . . . . . . . . . 256
Normalizing groups of files . . . . . . . . . . . . . . . . . . . . . . . . . . . . . . . . . . . . . . . . . . . . . . . . . . . . . . . . . . . . . . 258
Batch processing files . . . . . . . . . . . . . . . . . . . . . . . . . . . . . . . . . . . . . . . . . . . . . . . . . . . . . . . . . . . . . . . . . . . 259
Scripts . . . . . . . . . . . . . . . . . . . . . . . . . . . . . . . . . . . . . . . . . . . . . . . . . . . . . . . . . . . . . . . . . . . . . . . . . . . . . . . . . . 261
Chapter 16: Building audio CDs
Assembling CDs . . . . . . . . . . . . . . . . . . . . . . . . . . . . . . . . . . . . . . . . . . . . . . . . . . . . . . . . . . . . . . . . . . . . . . . . 264
Writing CDs . . . . . . . . . . . . . . . . . . . . . . . . . . . . . . . . . . . . . . . . . . . . . . . . . . . . . . . . . . . . . . . . . . . . . . . . . . . . . 267
Chapter 17: Keyboard shortcuts
Finding and customizing shortcuts . . . . . . . . . . . . . . . . . . . . . . . . . . . . . . . . . . . . . . . . . . . . . . . . . . . . . . 269
Default keyboard shortcuts . . . . . . . . . . . . . . . . . . . . . . . . . . . . . . . . . . . . . . . . . . . . . . . . . . . . . . . . . . . . . 270
v
Chapter 18: Digital audio glossary
Common audio terms . . . . . . . . . . . . . . . . . . . . . . . . . . . . . . . . . . . . . . . . . . . . . . . . . . . . . . . . . . . . . . . . . . . 273
Index . . . . . . . . . . . . . . . . . . . . . . . . . . . . . . . . . . . . . . . . . . . . . . . . . . . . . . . . . . . . . . . . . . . . . . . . . . . . . . . . . . 280
Page 6

Chapter 1: Getting started
Before you begin working with your software, take a few moments to read an overview of installation, online Help,
and the many resources available to users. You have access to instructional videos, plug-ins, templates, user communities, and much more.
Installation
Requirements
❖ To review complete system requirements and recommendations for your Adobe® software, see the Read Me file
on the installation disc.
Install the software
1 Close any other Adobe applications open on your computer.
2 Insert the installation disc into the disc drive, and follow the on-screen instructions.
1
Note: For more information, see the Read Me file on the installation disc.
Activate the software
Ifyouhaveasingle-userretaillicenseforyourAdobesoftware,youwillbeaskedtoactivateyoursoftware;thisisa
simple, anonymous process that you must complete within 30 days of starting the software.
For more informationon product activation, see the Read Me file onyour installationdisc, or visitthe Adobe website
at www.adobe.com/go/activation.
1 If the Activation dialog box isn’t already open, choose Help > Activate.
2 Follow the on-screen instructions.
Note: If you want to install the software on a different computer, you must first deactivate it on your computer. Choose
Help > Deactivate.
Register
Register your product to receive complimentary installation support, notifications of updates, and other services.
❖ To register, follow the on-screen instructions in the Registration dialog box, which appears after you install and
activate the software.
If you postpone registration, you can register at any time by choosing Help > Registration.
Read Me
The installation disc contains the Read Me file for your software. (This file is also copied to the application folder
during product installation.) Open the file to read important information about topics such as the following:
• System requirements
Page 7

ADOBE AUDITION 3.0
User Guide
• Installation (including uninstalling the software)
• Activation and registration
• Font installation
• Troubleshooting
• Customer support
• Legal notices
Resources
Adobe Help resources
Documentation for your Adobe software is available in a variety of formats.
In-product and LiveDocs Help
In-product Help provides access to all documentation and instructional content available at the time the software
ships. It is available through the Help menu in your Adobe software.
2
LiveDocs Help includes all the content from in-product Help, plus updates and links to additional instructional
content available on the web. Find LiveDocs Help for your product in the Adobe Help Resource Center, at
www.adobe.com/go/documentation.
Think of Help, both in the product and on the web, as a hub for accessing additional content and communities of
users. The most complete and up-to-date version of Help is always on the web.
Adobe PDF documentation
The in-product Help is also available as a PDF that is optimized for printing. Other documents, such as installation
guides and white papers, may also be provided as PDFs.
All PDF documentation is available through the Adobe Help Resource Center, at www.adobe.com/go/documen-
tation.Tosee the PDF documentation included withyour software,look in the Documents folder on theinstallation
or content DVD.
Printed documentation
Printed user guides are available for purchase in the Adobe Store at www.adobe.com/go/store, where you can also
find books published by Adobe publishing partners.
Extras
You have access to a wide variety of resources that help you make the most of your Adobe software. Some of these
resources are installed on your computer during the setup process; additional helpful samples and documents are
included on the installation or content disc. Unique extras are also offered online by the Adobe Exchange
community.
Page 8
ADOBE AUDITION 3.0
User Guide
Installed resources
During software installation, a number of plug-ins and presets are added to the application folder. Plug-ins provide
effects for audio processing andVST instruments for MIDI sequencing. Presets include a collection of effect settings
optimized for specific sonic results. If you don’t want to create an effect from scratch, start with presets for inspiration.
Content on CD and DVD
On theinstallation disc, the Documentation folder contains aPDF version of Help, technical information, and other
documents such as reference guides and specialized feature information.
In addition to the installation disc, Adobe Audition® includes the Loopology DVD. This disc provides thousands of
royalty-free loops, plus ready-made music beds and professional sample sessions.
Adobe Exchange
For more free content, visit www.adobe.com/go/exchange, an online community where users download and share
thousands of free actions, extensions, plug-ins, and other content for use with Adobe products.
Adobe Design Center
Adobe Design Center offers articles, inspiration, and instruction from industry experts, top designers, and Adobe
publishing partners. New content is added monthly.
3
You can find hundreds of tutorials for design products and learn tips and techniques through videos, HTML
tutorials, and sample book chapters.
New ideas are the heart of Think Tank, Dialog Box, and Gallery:
• ThinkTankarticlesconsiderhowtoday’sdesignersengagewithtechnologyandwhattheirexperiencesmeanfor
design, design tools, and society.
• In Dialog Box, experts share new ideas in motion graphics and digital design.
• The Gallery showcases how artists communicate design in motion.
Page 9
ADOBE AUDITION 3.0
User Guide
Visit Adobe Design Center at www.adobe.com/designcenter.
Adobe Developer Center
Adobe Developer Center provides samples, tutorials, articles, and community resources for developers who build
rich Internet applications,websites, mobile content, and other projects using Adobe products. TheDeveloper Center
also contains resources for developers who develop plug-ins for Adobe products.
4
In addition to sample code and tutorials, you'll find RSS feeds, online seminars, SDKs, scripting guides, and other
technical resources.
Visit Adobe Developer Center at www.adobe.com/go/developer.
Customer support
VisittheAdobeSupportwebsite,atwww.adobe.com/support, to find troubleshooting information for your product
and to learn about free and paid technical support options. Click the Training link for access to Adobe Press books,
a variety of training resources, Adobe software certification programs, and more.
Downloads
Visit www.adobe.com/go/downloads to find free updates, tryouts, and other useful software. In addition, the Adobe
Store (at www.adobe.com/go/store) provides access to thousands of plug-ins from third-party developers, helping
you to automate tasks, customize workflows, create specialized professional effects, and more.
Adobe Labs
Adobe Labs gives youthe opportunity toexperience andevaluate new and emerging technologies and products from
Adobe.
At Adobe Labs, you have access to resources such as these:
• Prerelease software and technologies
Page 10

ADOBE AUDITION 3.0
User Guide
• Code samples and best practices to accelerate your learning
• Early versions of product and technical documentation
• Forums, wiki-based content, and other collaborative resources to help you interact with like-minded developers
Adobe Labs fosters a collaborative software development process. In this environment, customers quickly become
productive with new products and technologies. Adobe Labs is also a forum for early feedback, which the Adobe
development teams use to create software that meets the needs and expectations of the community.
Visit Adobe Labs at www.adobe.com/go/labs.
User communities
User communities feature forums, blogs, and other avenues for users to share technologies, tools, and information.
Users can ask questions and find out how others are getting the most out of their software. User-to-user forums are
available in English, French, German, and Japanese; blogs are posted in a wide range of languages.
To participate in forums or blogs, visit www.adobe.com/communities.
New features
5
What’s new
Record and mix
Adobe Audition 3.0 is a powerful tracking and mixing application. Mix faster with new automatic crossfades, clip
fade handles, and automation-editing improvements. Take full advantage of the latest hardware with multicore
processor support and an optimized mixing engine.
VST plug-in manager Quickly enable or disable specific VST plug-ins, optimizing performance. (See “Enable VST
effects” on page 110.)
Auto crossfades and clip fade handles Simply overlap clips to crossfade them, and adjust fade curves with on-clip
handles. (See “Fade or crossfade clips in a track” on page 197.)
Improved multitrack editing Efficiently edit sessions with these key enhancements:
• Collectively trim and fade grouped clips. (See “Grouping clips” on page 192.)
• Ripple-delete ranges of clips, instantly removing time gaps. (See “Trimming and extending clips” on page 195.)
• Adjust selected ranges of automation points. (See “Edit automation envelopes” on page 207.)
• Duplicate the contents of entire tracks, including clips, effects, and automation. (See “Duplicate a track” on
page 184.)
• Simultaneously view all input and output levels to comprehensively monitor a mix. (See “Monitor levels” on
page 63.)
XML session support Save sessions to XML format and other shared standards for multitrack applications. (See
“Save multitrack sessions” on page 241.)
Mix down directly to Edit View Quickly output a session directly to Edit View, without first exporting a file. (See
“Create a single audio clip from multiple clips” on page 201.)
Page 11

ADOBE AUDITION 3.0
User Guide
Video previews for surround mixes Watch a preview in the Video panel while adjusting mixes in the Surround
Encoder. (See “Previewing video” on page 229.)
Create and arrange
Adobe Audition 3.0 offers powerful and extensive looping capabilities, as well as support for VST instruments,
making it easy to create and arrange great-sounding music. Improved processing, including the high-quality Radius
time-stretching engine from iZotope and numerous new effects, gives you infinite creative options.
MIDI tracks and piano-roll editor Import, record, and edit MIDI, and output it through VST instruments or
hardware synthesizers. (See Composing with MIDI.)
New effects Explore creative sonic possibilities with Convolution Reverb, Analog Delay, Guitar Suite, and other new
effects. (See Effects reference.)
Radius time-stretching from iZotope Access industry-standard algorithms in the updated Stretch effect, as well as
the File Info and Audio Clip Looping dialog boxes.
Bitmap audio images Export spectral graphs for detailed editing in an image-editor like Adobe Photoshop®. Or,
import visually-oriented graphics as source material for experimental sound designs. (See “Spectral Bitmap Image
(.bmp)” on page 250 and “Import a bitmap image as audio” on page 44.)
Improved CD ripping Automatically import track information from your favorite CD database. (See “Extract CD
tracks with the Extract Audio From CD command” on page 51.)
6
Enhanced file sorting Sort files by track number, or by the date they were opened or created. (See “Change how files
appear in the Files panel” on page 49.)
Customizable workspaces Tint panels and dialog boxes to suit your working style. Add favorite commands to the
shortcut bar. (See “Change interface brightness or tint” on page 29 and “Display the shortcut bar” on page 27.)
Edit and master
Adobe Audition 3.0 includes a full set of editing, restoration, and mastering tools that give you unprecedented flexibility and control. Comprehensive waveform-editing tools combined with innovative spectral frequency brushes let
you editwith power andprecision. The new Mastering effect, phase correction tools, and Top/Tail view make Adobe
Audition 3.0 the ideal audio editing and mastering environment.
Spot Healing Brush Quickly brush over artifacts to seamlessly remove them. (See “Select artifacts and repair them
automatically” on page 74.)
Effects Paintbrush Create free-form selections, and layer brush strokes to determine the intensity of effects. (See
“Select spectral ranges” on page 73.)
Marquee pan and phase selections Process discretestereo information such as center-panned vocals in Spectral Pan
Display or out-of-phase audio in Spectral Phase Display. (See “Select spectral ranges” on page 73.)
Play spectral selections Play back selected frequency, pan, and phase ranges to precisely restore and process audio.
(See “Play audio linearly” on page 60.)
On-clip fade and gain controls Visually adjust selections or entire files. (See “Visually fading and changing
amplitude” on page 78.)
Top/Tail View Fine-tune loop transitions by simultaneously viewing the beginning and end of files. (See “View the
top and tail of an audio file” on page 71.)
Mastering effect Optimize audio for maximum impact with a series of professional processors. (See “Mastering
effect” on page 161.)
Page 12

ADOBE AUDITION 3.0
User Guide
Adaptive noise reduction Quickly correct a wide range of variable broadband noise. (See “Adaptive Noise Reduction
effect” on page 141.)
Graphic Panner Visually adjust the stereo field to enhance spatial perception. (See “Graphic Panner effect” on
page 165.)
Play lists Organize and play marker ranges for live performance and broadcast. (See “Creating play lists” on
page 85.)
Efficient file opening and saving Specify default formats for Open and Save As dialog boxes, and quickly save groups
of files to one format. (See “System preferences” on page 34 and “Save a group of audio files to one format” on
page 240.)
7
Page 13
Chapter 2: Digital audio fundamentals
Understanding sound
Sound fundamentals
Sound starts with vibrations in the air, like those produced by guitar strings, vocal cords, or speaker cones. These
vibrations push nearby air molecules together, raising the airpressure slightly. Theair molecules under pressure then
push on the air molecules surrounding them, which push on the next set of molecules, and so on. As high-pressure
areas move through the air, they leave low-pressure areas behindthem. Whenthese waves of pressure changesreach
us, they vibrate the receptors in our ears, and we hear the vibrations as sound.
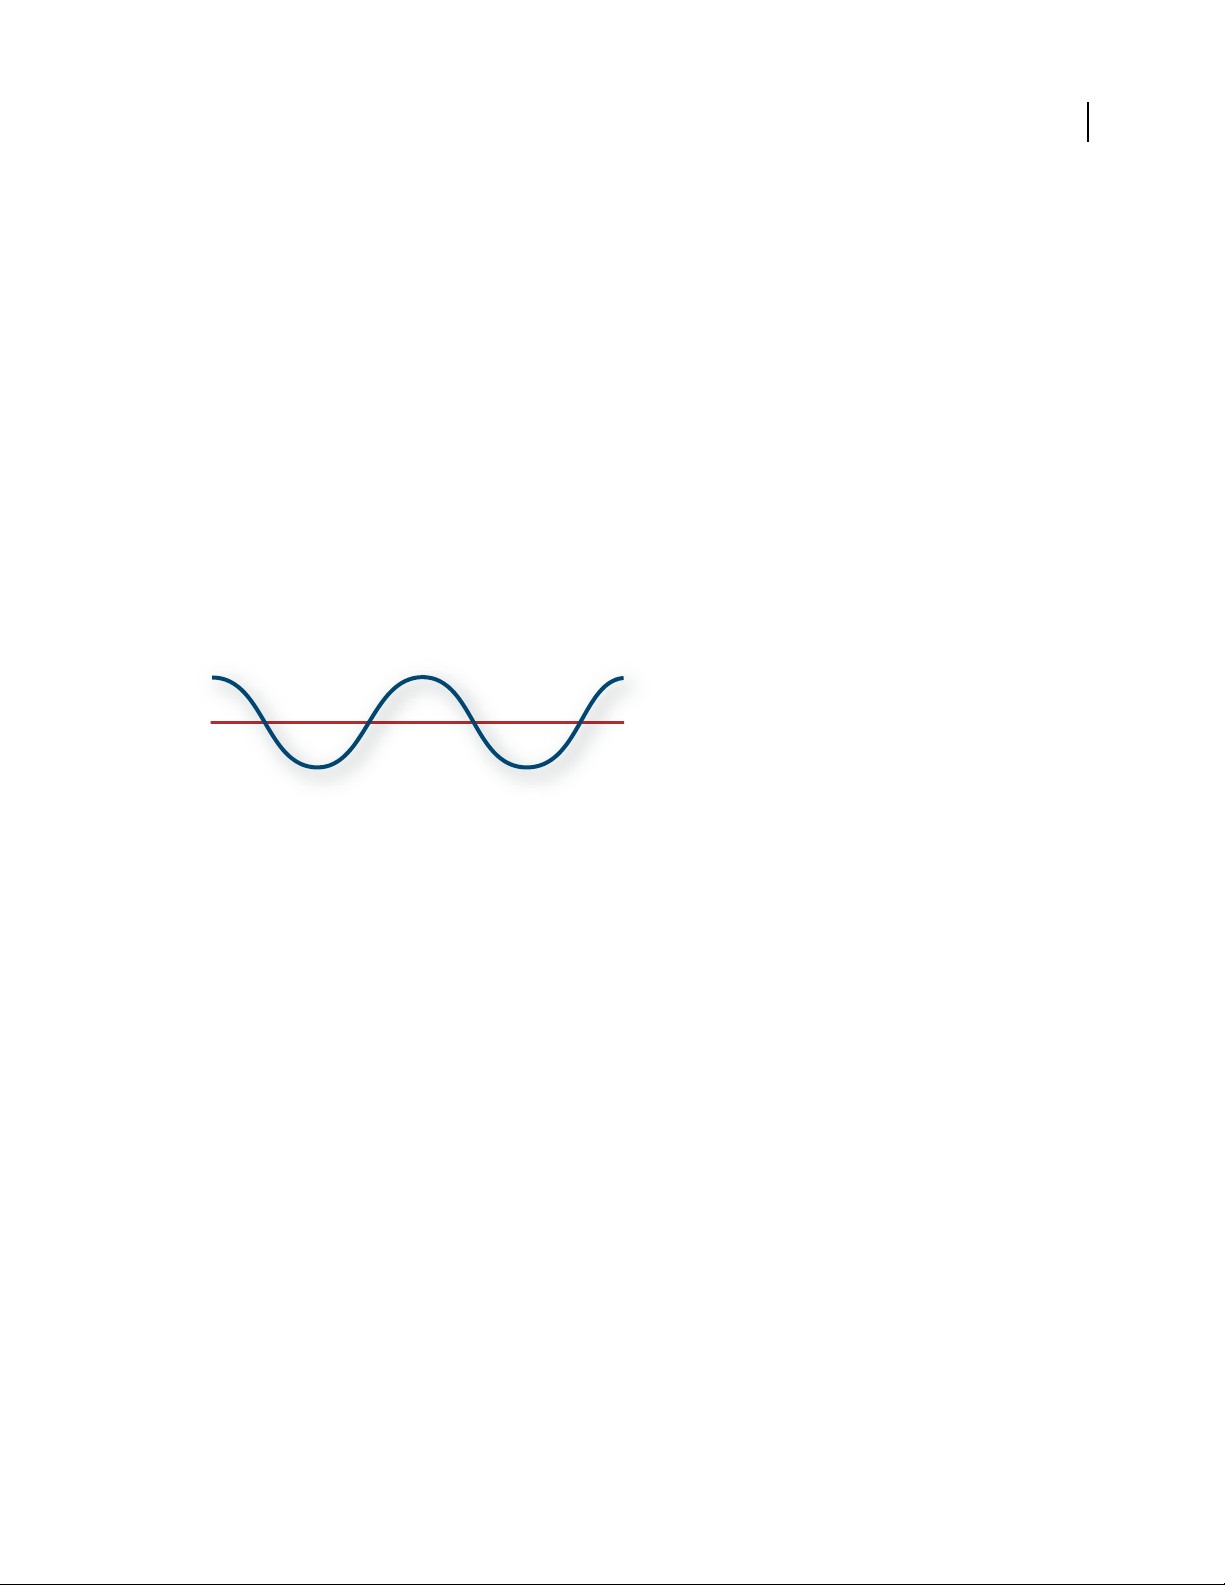
When you see a visual waveform that represents audio, it reflects these waves of air pressure. The zero line in the
waveform is the pressureof air at rest. Whenthe line swings up to a peak, it represents higher pressure; when the line
swings down to a trough, it represents lower pressure.
C
8
A
B
A sound wave represented as a visual waveform
A. Zero line B. Low-pressure area C. High-pressure area
0
Waveform measurements
Several measurements describe waveforms:
Amplitude Reflects the change in pressure from the peak of the waveform to the trough. High-amplitude waveforms
are loud; low-amplitude waveforms are quiet.
Cycle Describes a single, repeated sequence of pressure changes, from zero pressure, to high pressure, to low
pressure, and back to zero.
Frequency Measured in hertz (Hz), describes the number of cycles per second. (For example, a 1000-Hz waveform
has 1000 cycles per second.) The higher the frequency, the higher the musical pitch.
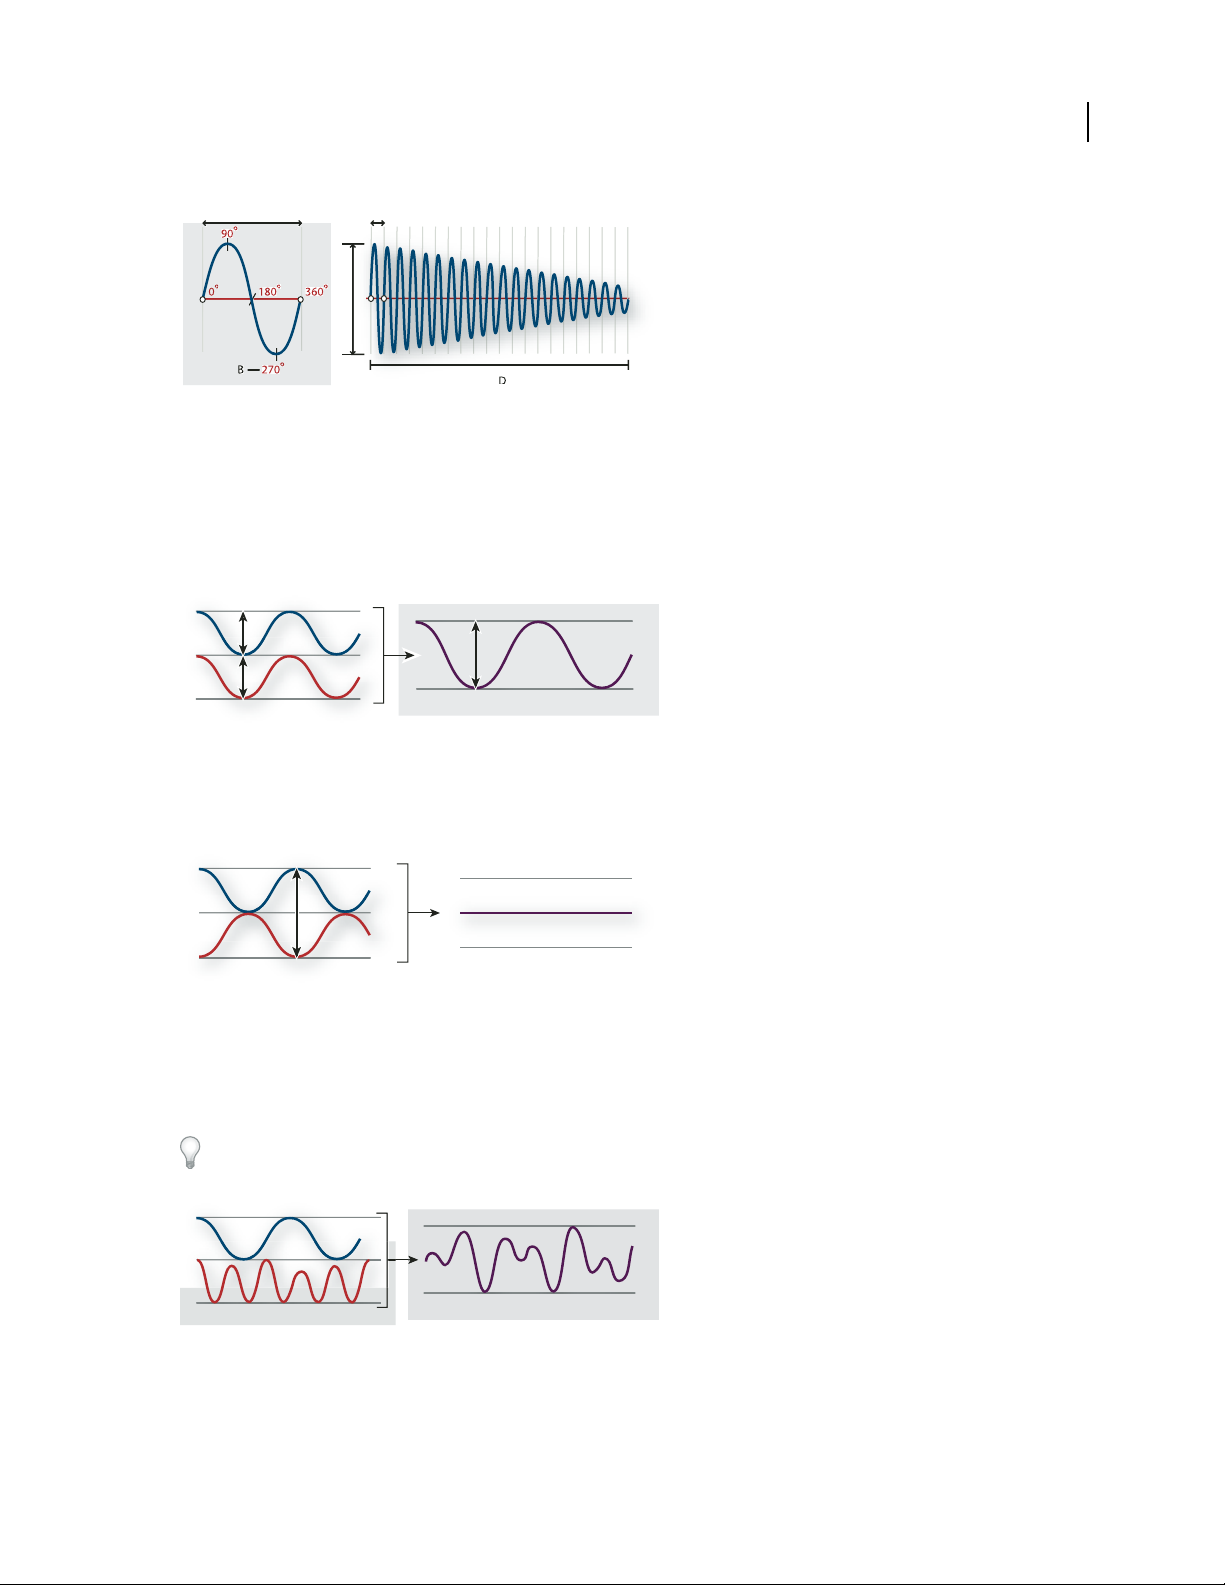
Phase Measured in 360 degrees, indicates the position of a waveform in a cycle. Zero degrees is the start point,
followed by 90º at high pressure, 180º at the halfway point, 270º at low pressure, and 360º at the end point.
Wavelength Measured in units such as inches or centimeters, is the distance between two points with the same
degree of phase. As frequency increases, wavelength decreases.
Page 14
ADOBE AUDITION 3.0
User Guide
9
A
º
90
º
0
180º360
º
B
270
A
º
C
D
A single cycle at left; a complete, 20-Hz waveform at right
A. Wav e le n gt h B. Degree of phase C. Amplitude D. One second
How sound waves interact
When two or more sound waves meet, they add to and subtract from each other. If their peaks and troughs are
perfectly in phase, they reinforce each other,resulting in a waveform that hashigher amplitudethan either individual
waveform.
In-phase waves reinforce each other.
If the peaks and troughs of two waveforms are perfectly out of phase, they cancel each other out, resulting in no
waveform at all.
Out-of-phase waves cancel each other out.
In most cases, however, waves are out of phase in varying amounts, resulting in a combined waveform that is more
complex than individual waveforms. A complex waveform that represents music, voice, noise, and other sounds, for
example, combines the waveforms from each sound together.
Because of its unique physical structure, a single instrument can create extremely complex waves. That’s why a violin
and a trumpet sound different even when playing the same note.
Two simple waves combine to create a complex wave.
Page 15
ADOBE AUDITION 3.0
User Guide
Digitizing audio
Comparing analog and digital audio
In analog and digital audio, sound is transmitted and stored very differently.
Analog audio: positive and negative voltage
A microphone converts the pressure waves of sound into voltage changes in a wire: high pressure becomes positive
voltage, and low pressure becomes negative voltage. When these voltage changes travel down a microphone wire,
they can be recorded onto tape as changes in magnetic strength or onto vinyl records as changes in groove size. A
speaker works like a microphone in reverse, taking the voltage signals from an audio recording and vibrating to recreate the pressure wave.
Digital audio: zeroes and ones
Unlike analog storage media such as magnetic tape or vinyl records, computers store audio information digitally as
a series of zeroes and ones. In digital storage, the original waveform is broken up into individual snapshots called
samples. This process is typically known as digitizing or sampling the audio, but it is sometimes called analog-to-
digital conversion.
When you record from a microphone into a computer, for example, analog-to-digital converters transform the
analog signal into digital samples that computers can store and process.
10
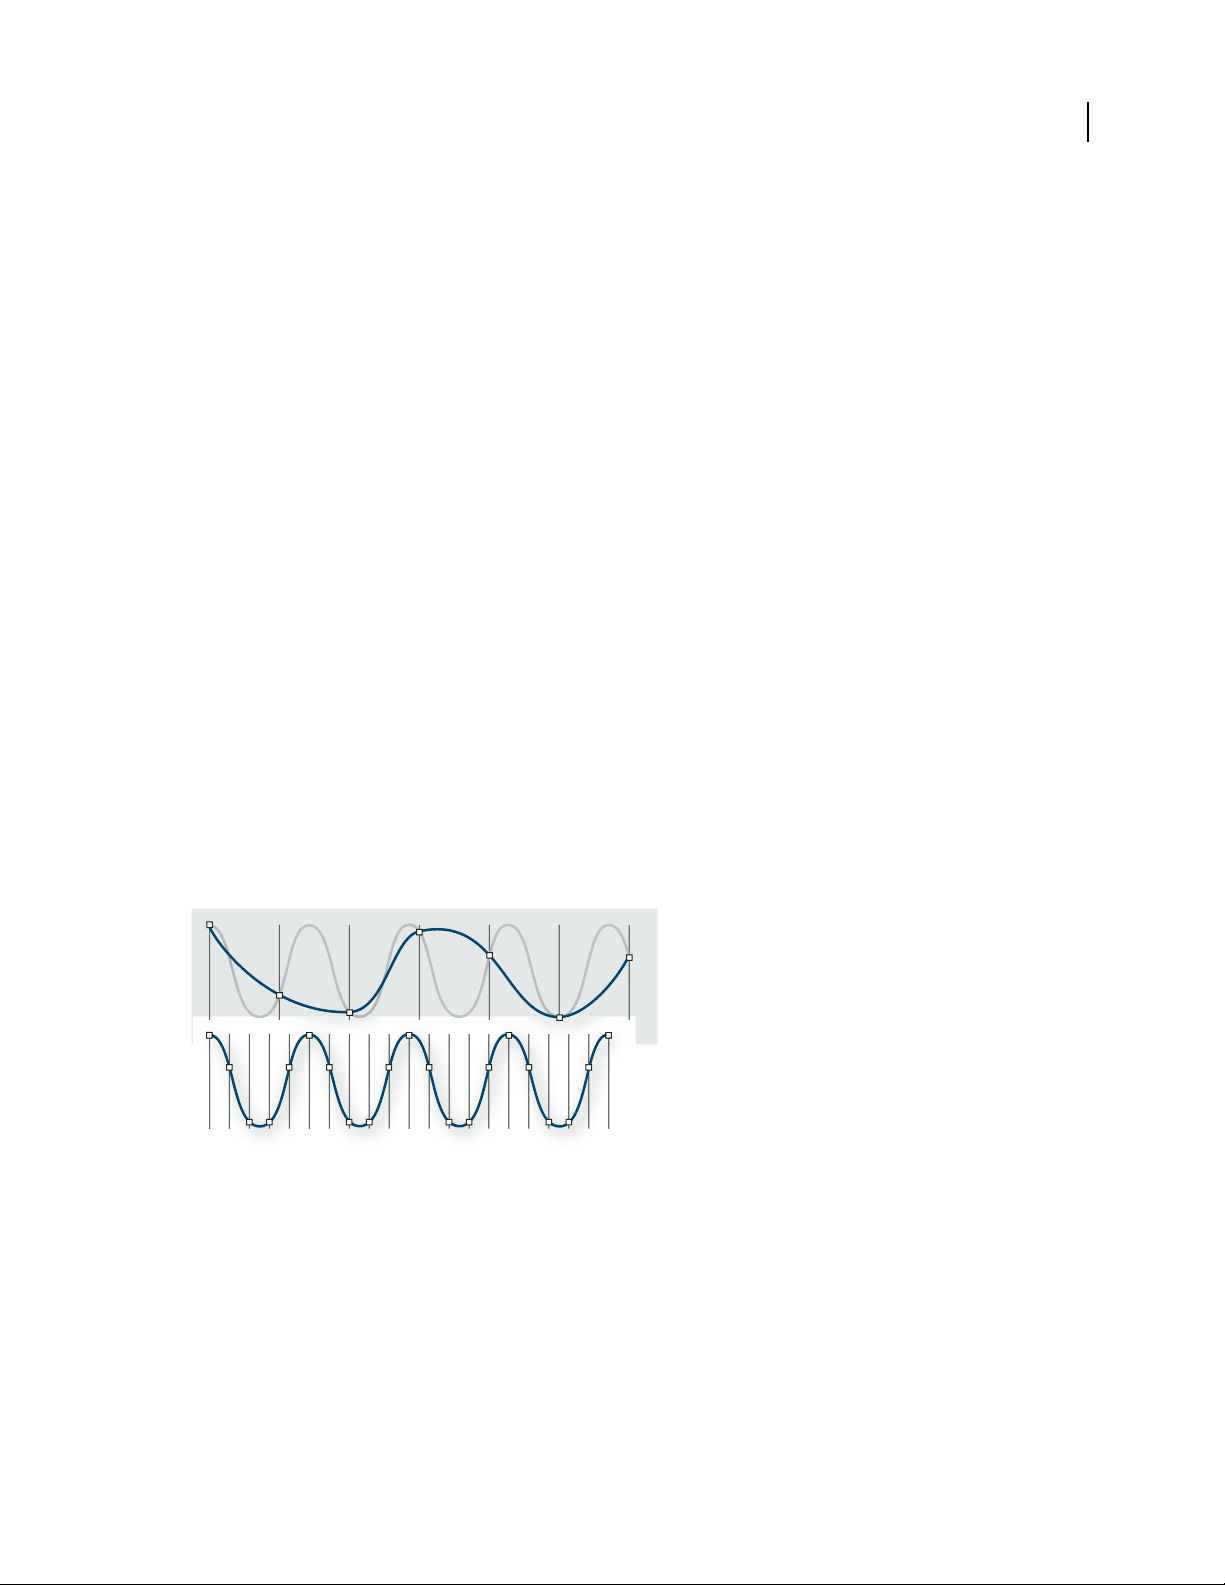
Sample rate
Sample rate indicates the number of digital snapshots taken of an audio signal each second. This rate determines the
frequency range of an audio file. The higher the sample rate, the closer the shape of the digital waveform is to that of
theoriginalanalogwaveform.Lowsamplerateslimittherangeoffrequenciesthatcanberecorded,whichcanresult
in a recording that poorly represents the original sound.
A
B
Two sample rates
A. Low sample rate that distorts the original sound wave. B. High sample rate that perfectly reproduces the original sound wave.
To reproduce a given frequency, the sample rate must be at least twice that frequency. (See “Nyquist frequency” on
page 277.) For example, CDs have a sample rate of 44,100 samples per second, so they can reproduce frequencies up
to 22,050 Hz, which is beyond the limit of human hearing, 20,000 Hz.
Here are the most common sample rates for digital audio:
Page 16
ADOBE AUDITION 3.0
User Guide
Sample rate Quality level Frequency range
11,025 Hz Poor AM radio (low-end multimedia) 0–5,512 Hz
22,050 Hz Near FM radio (high-end multimedia) 0–11,025 Hz
32,000 Hz Better than FM radio (standard broadcast rate) 0–16,000 Hz
44,100 Hz CD 0–22,050 Hz
48,000 Hz Standard DVD 0–24,000 Hz
96,000 Hz High-end DVD 0–48,000 Hz
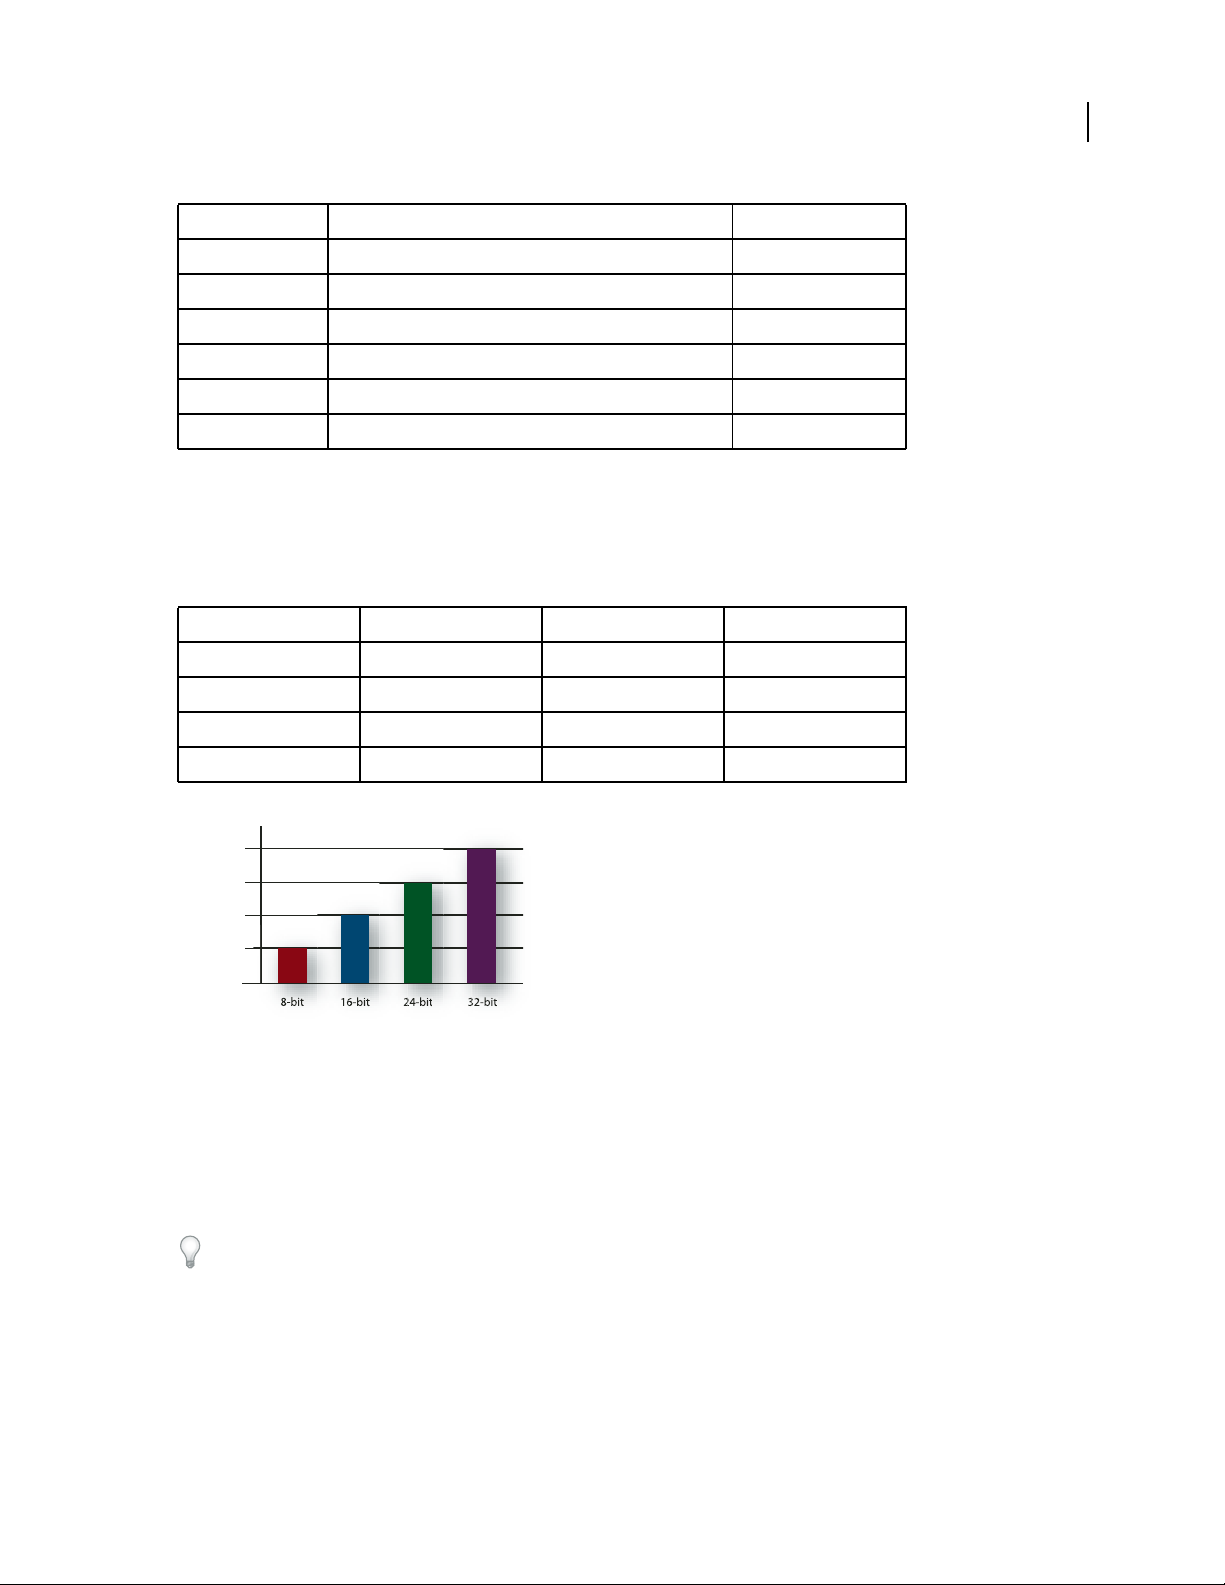
Bit depth
Just as sample rate determines frequency range, bit depth determines dynamic range. When a sound wave is sampled,
each sample is assigned the amplitude value closest to the original wave’s amplitude. Higher bit depth provides more
possible amplitude values, producing greater dynamic range, a lower noise floor, and higher fidelity:
Bit depth Quality level Amplitude values Dynamic range
8-bit Telephony 256 48 dB
11
16-bit CD 65,536 96 dB
24-bit DVD 16,777,216 144 dB
32-bit Best 4,294,967,296 192 dB
192 dB
144 dB
96 dB
48 dB
0 dB
Higher bit depths provide greater dynamic range.
8-bit
16-bit 24-bit 32-bit
Audio file contents and size
An audio file on your hard drive, such as a WAV file, consists of a small header indicating sample rate and bit depth,
and then a long series of numbers, one for each sample. These files can be very large. For example, at 44,100 samples
per second and 16 bits per sample, a file requires 86 KB per second—about 5 MB per minute. That figure doubles to
10 MB per minute for a stereo CD, which has two channels.
In contrast to a digital audio file, a MIDI file might be as small as 10 KB per minute, so you can store up to 100
minutes of MIDI per megabyte. For more information, see “Understanding MIDI data and VST instruments” on
page 213.
Page 17

ADOBE AUDITION 3.0
User Guide
How Adobe Audition digitizes audio
When you record audio in Adobe Audition, the sound card starts the recording process and specifies what sample
rate and bit depth touse. Through Line In or Microphone In ports, thesound card receives analog audio and digitally
samples it at the specified rate. Adobe Audition stores each sample in sequence until you stop recording.
When you play a file in Adobe Audition, the process happens in reverse. Adobe Audition sends a series of digital
samples to the sound card. The card reconstructs theoriginal waveform and sends it asan analog signal through Line
Out ports to your speakers.
To summarize, the process of digitizing audio starts with a pressure wave in the air. A microphone converts this
pressure wave into voltage changes. A sound card converts these voltage changes into digital samples. After analog
sound becomes digital audio, Adobe Auditioncan record, edit, process, andmix it—the possibilities arelimited only
by your imagination.
12
Page 18
Chapter 3: Workflow and workspace
Workflow
Workflow overview
Adobe Audition provides three distinct views, each optimized for unique audio workflows:
• In Edit View, you modify individual audio files, optimizing them for radio broadcast, the Internet, and audioCDs.
• In Multitrack View, you layer multiple audio files, mixing them together to create sophisticated musical composi-
tions and video soundtracks.
• In CD View, you assemble audio files and convert them into tracks on audio CDs.
With the integrated environment of Adobe Audition, you can move seamlessly between these views, simultaneously
editing and mixing files to create polished, professional audio. This integrated environment extends to Adobe video
applications, where you can easily incorporate Adobe Audition into comprehensive video-editing workflows.
13
See also
“Comparing Edit View and Multitrack View” on page 20
Editing workflow
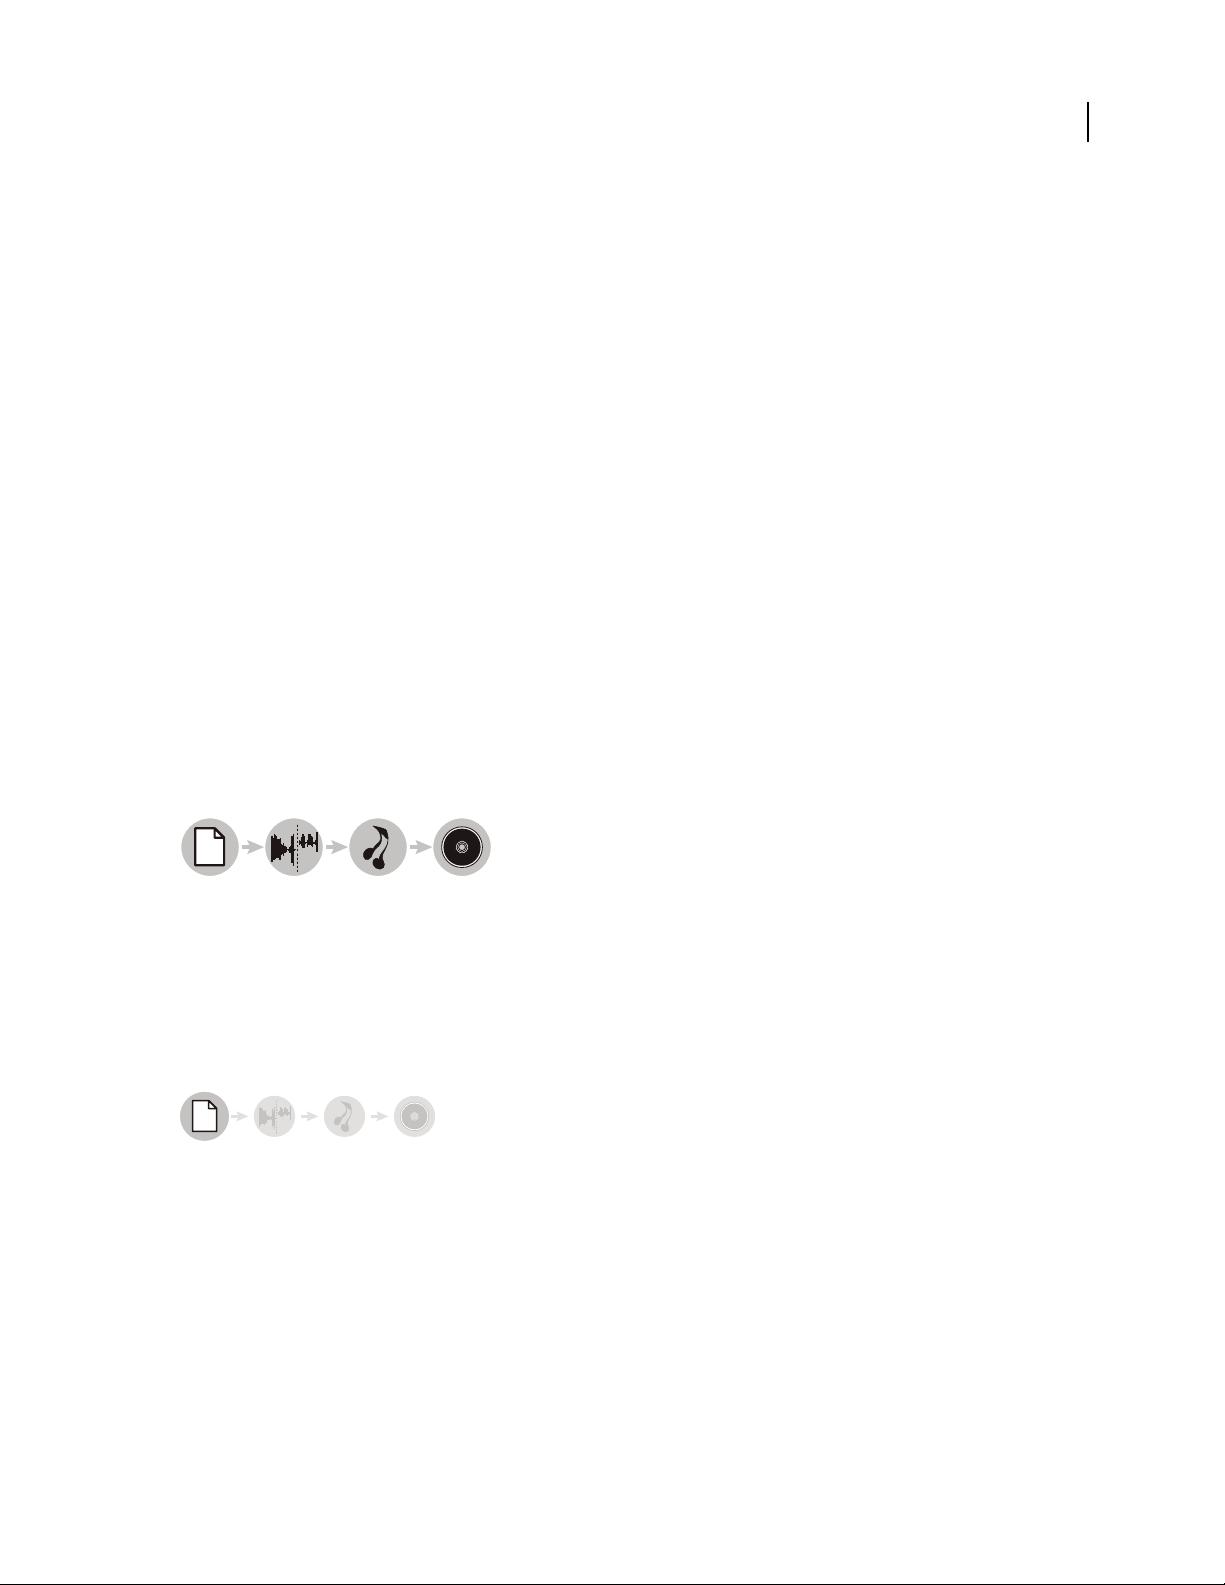
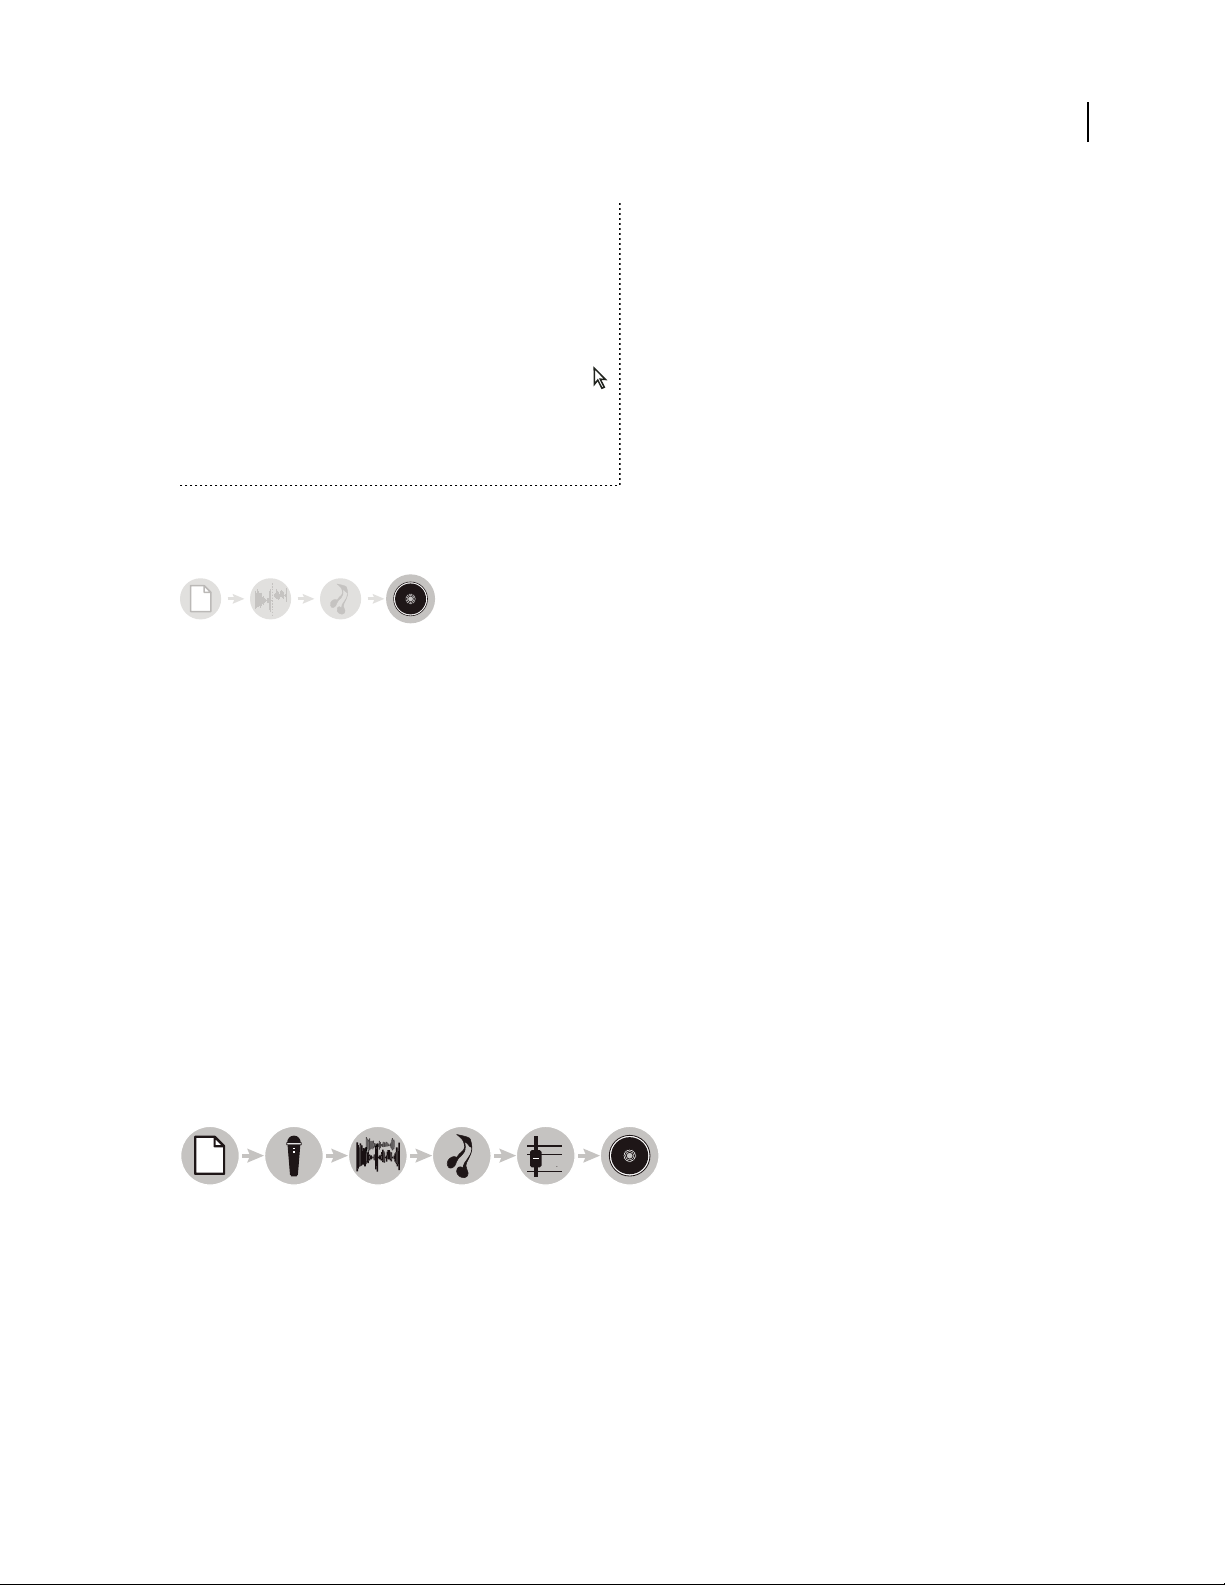
1234
1. Open file 2. Edit audio 3. Apply effects 4. Save changes
In EditView,you edit, restore, and enhance individual audio files, such as voiceovers, old vinyl recordings,and more.
Any saved changes are permanent, making Edit View a great choice for mastering and finalizing files. (See “Editing
audio files” on page 65.)
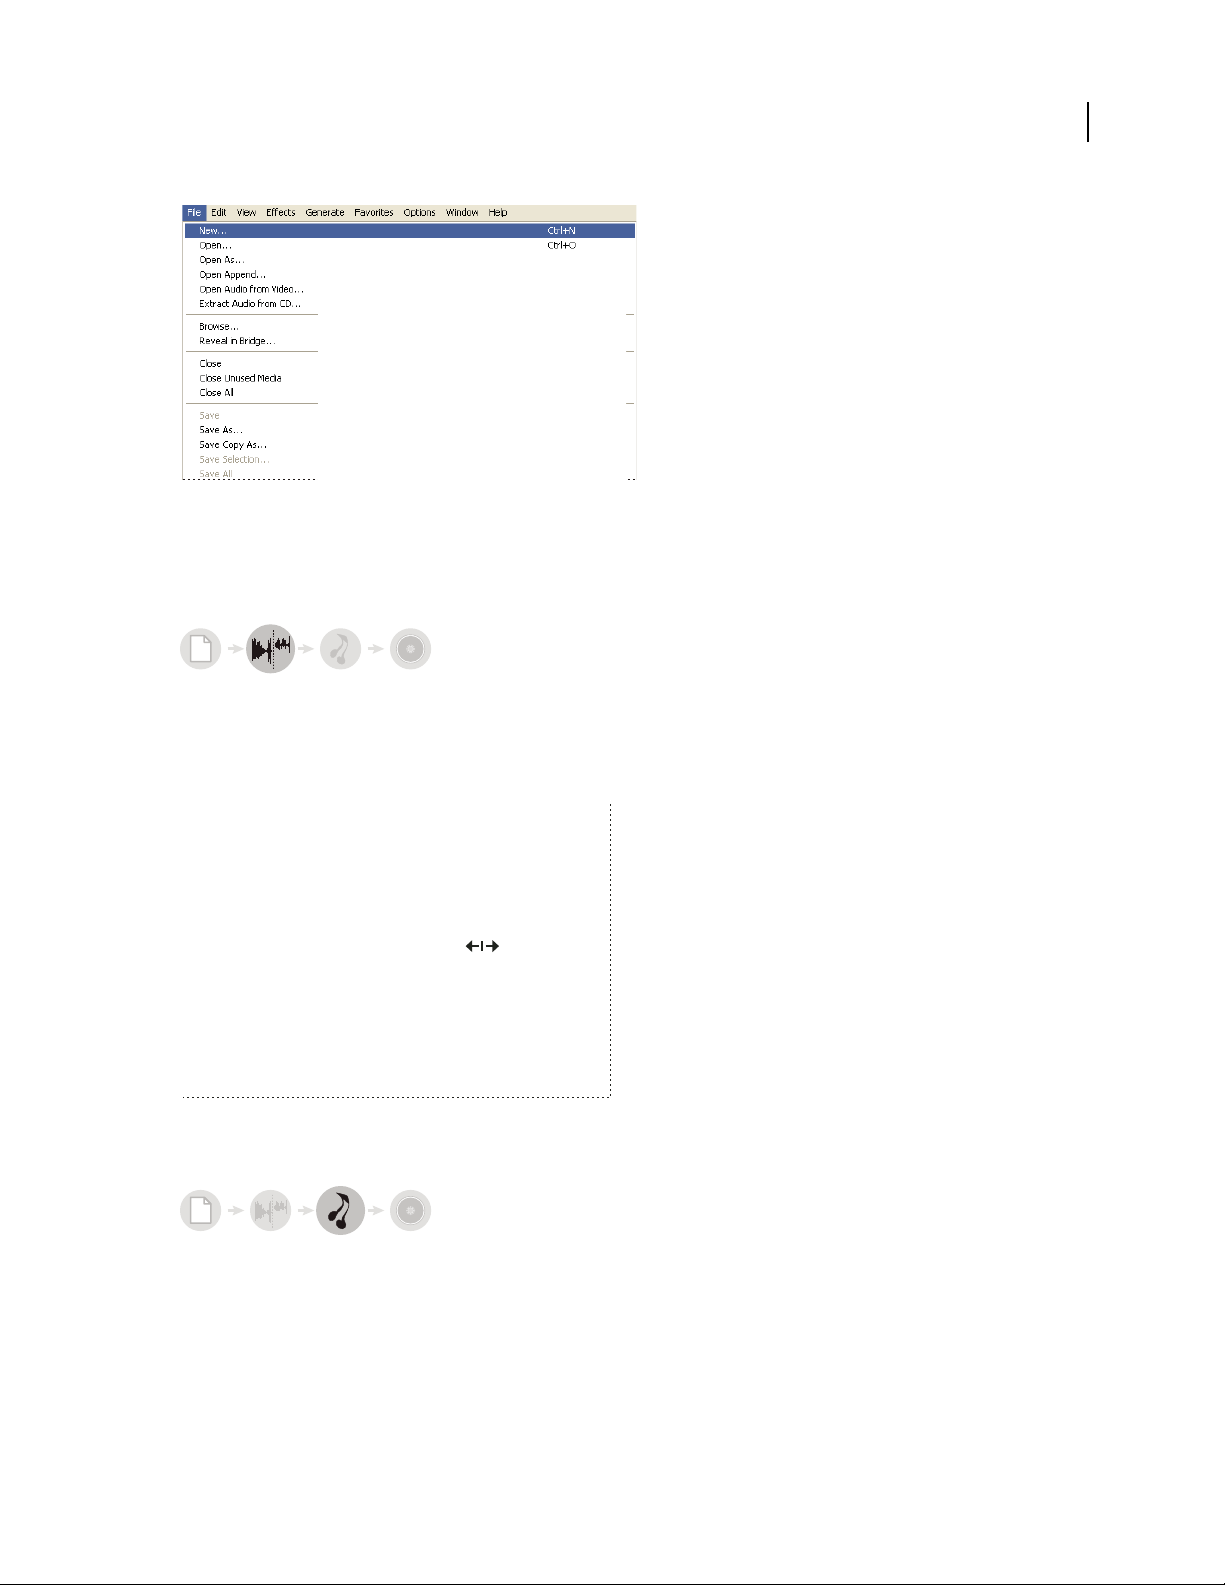
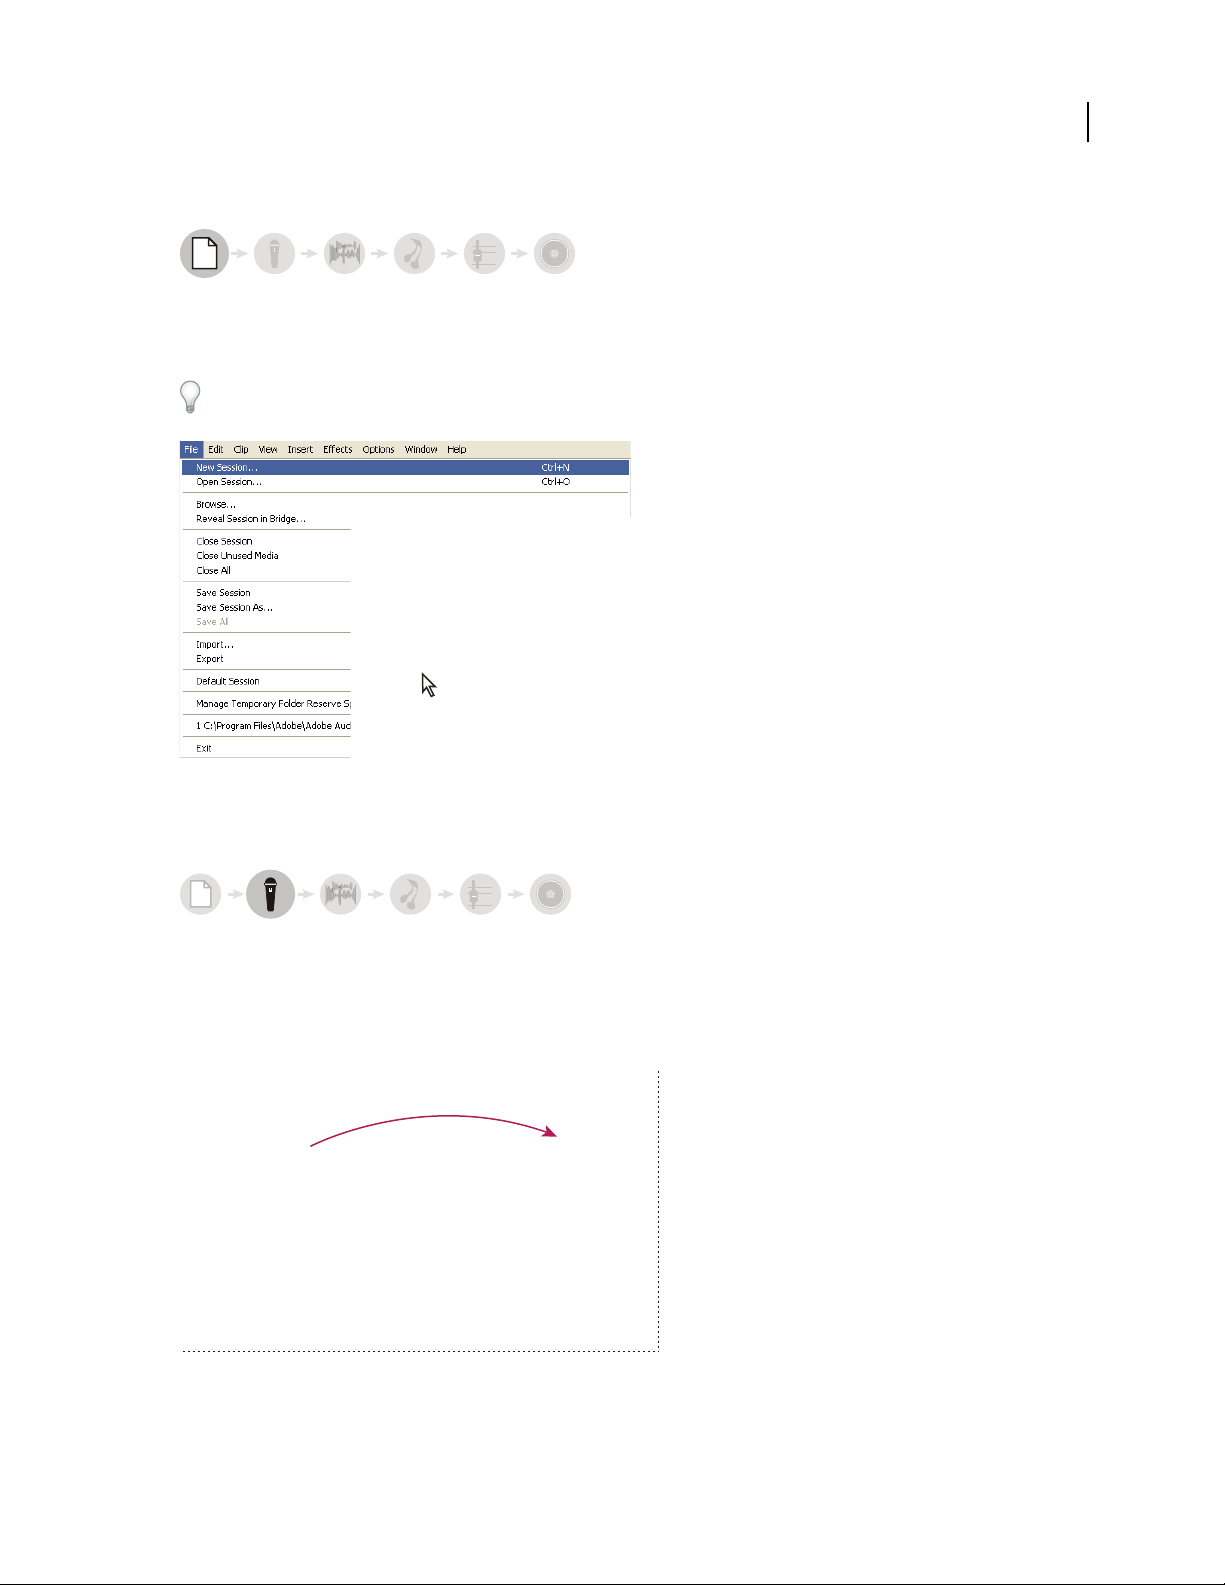
Open or create a file
Open an existing audio file that you want to modify. Alternatively, create ablank file that you’ll record or paste audio
into. (See “Opening audio files in Edit View” on page 43.)
Page 19
Creating a new file
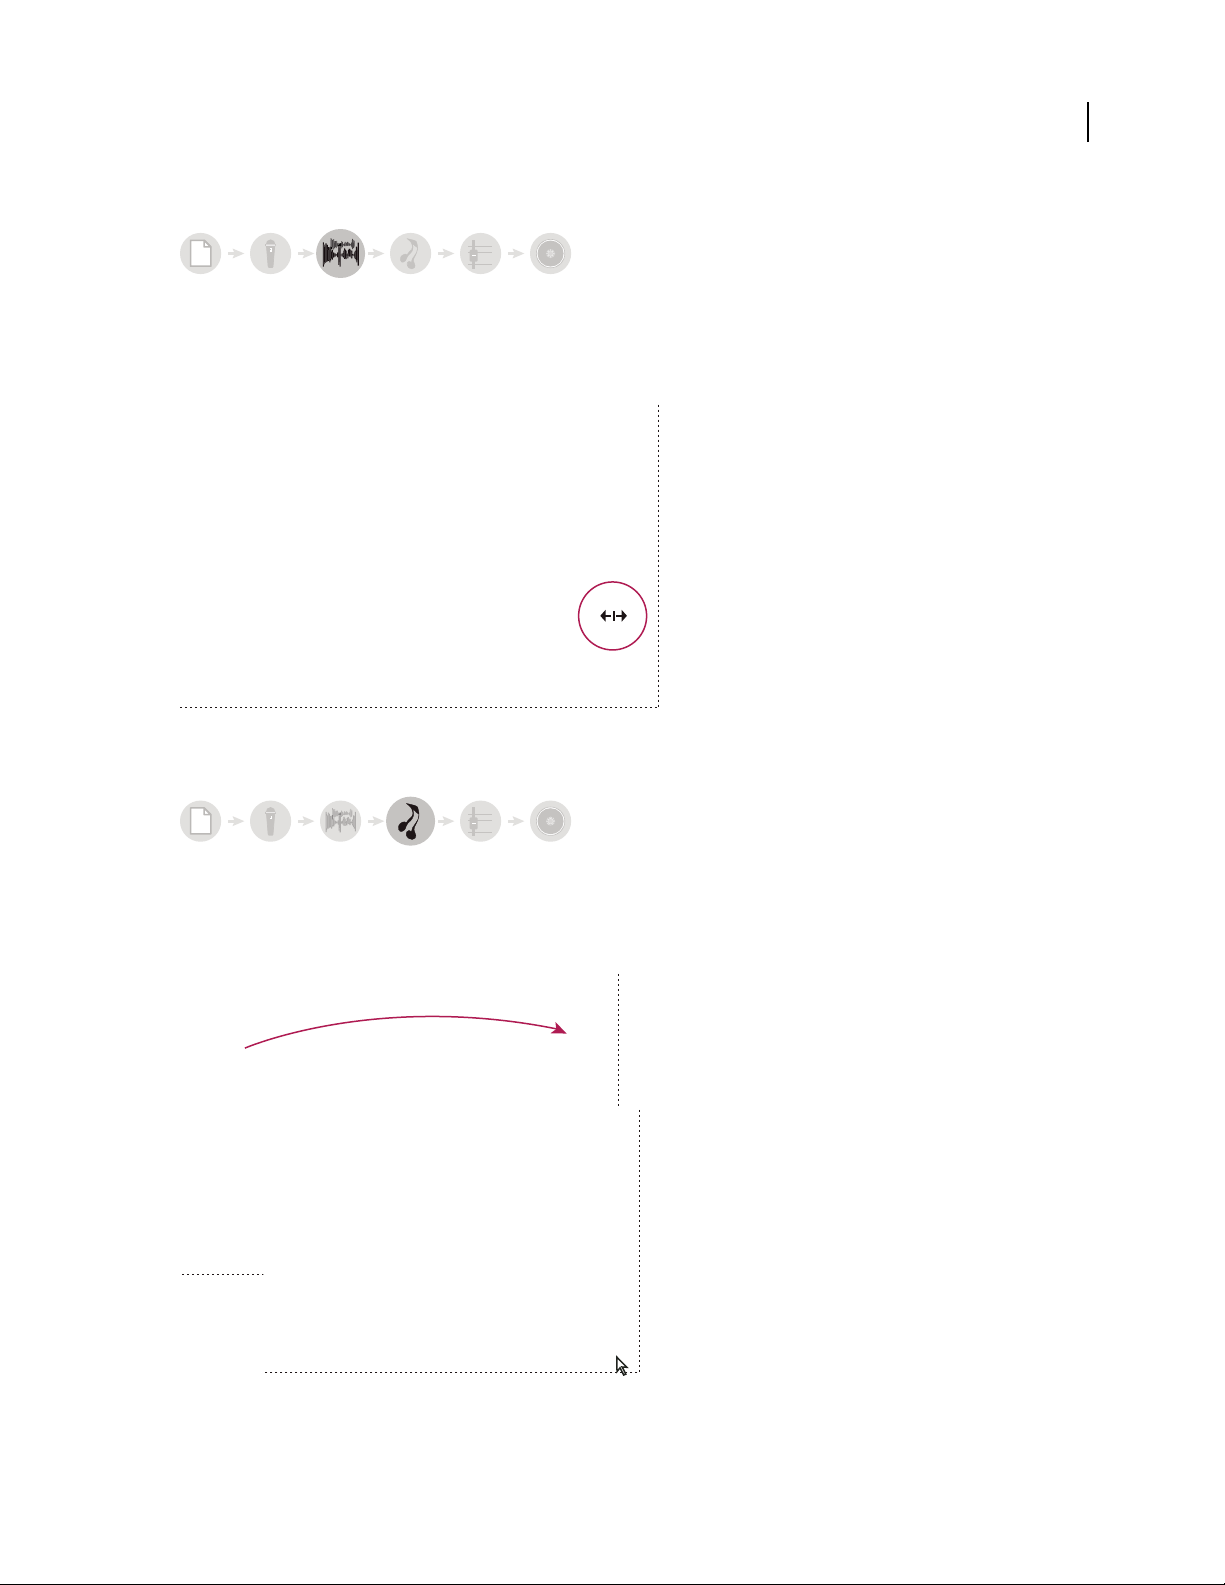
Edit audio
ADOBE AUDITION 3.0
User Guide
14
In the Main panel, trim or extend a file by deleting or generating audio. To create a sonic collage, combine pasted
audio from multiple files. Then, select noise or other audio you want to process with effects. (See “Selecting audio”
on page 72.)
Editing audio in the Main panel
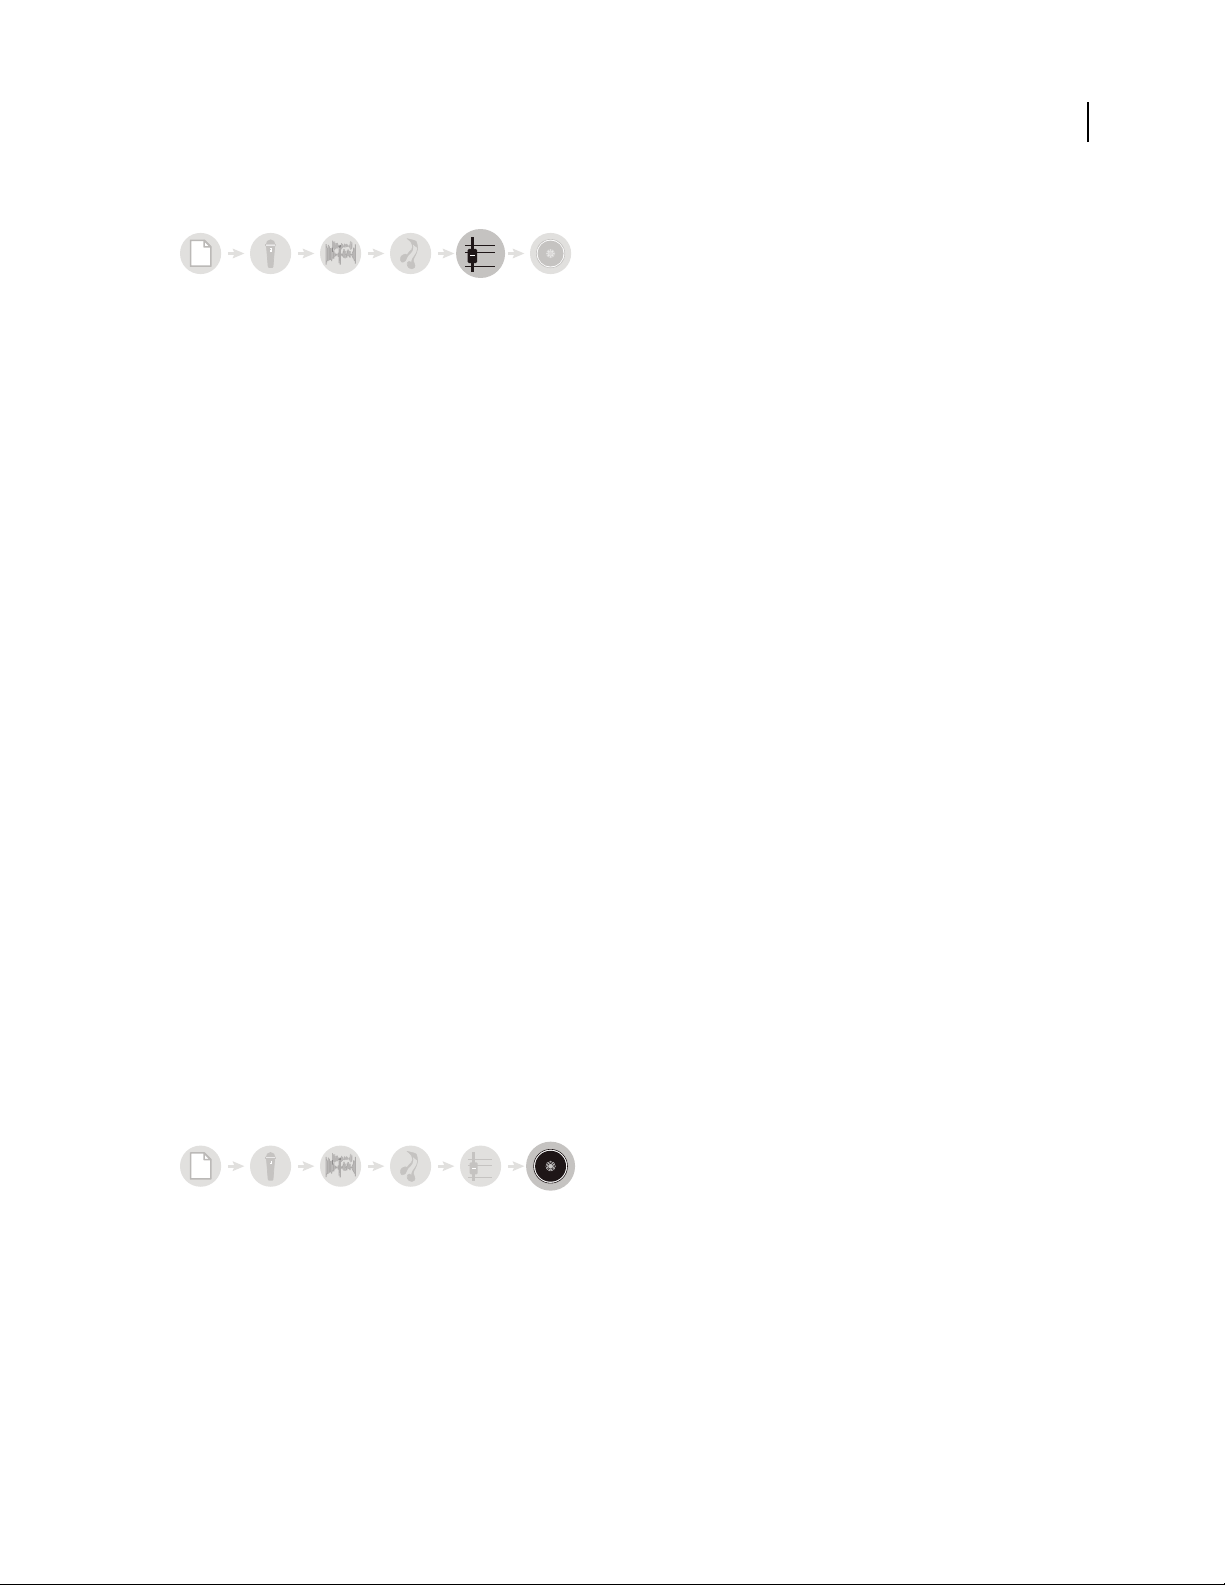
Apply effects
Applyprocess effects individually, or apply groups of VST effects in the Mastering Rack. In the rack, you can edit and
reorder effects until you achieve the perfect results. (See “Applying effects in Edit View” on page 106.)
Page 20
ADOBE AUDITION 3.0
0+3
6
User Guide
Applying groups of effects in the Mastering Rack
Save your changes
Save the polished, final file to disk, or automatically insert it in CD View or a multitrack session. (See “Saving and
exporting files” on page 240 and Building audio CDs.)
15
Saving a file to disk
Multitrack workflow
123456
1. Open session 2. Insert or record files 3. Arrange clips 4. Apply effects 5. Mix tracks 6. Export
In Multitrack View,you layermultiple audio files to create stereoor surround-soundmixes. The edits and effects you
apply aren’t permanent; if a mix doesn’t sound good next week, or even next year, simply change mix settings. (See
“About multitrack sessions” on page 179.)
Page 21
ADOBE AUDITION 3.0
0
+
3
6
0
+
3
6
User Guide
Open or create a session
-
From the File menu, choose Open Session or New Session. When you create a new session, you specify the sample
rate for audio clips the session will contain. (See “Opening and adding to sessions in Multitrack View” on page 46.)
To see how professional sessions are structured, open one of the sample sessions on the Adobe Audition Loopology
DVD.
16
Creating a new session
Insert or record files
-
Insert audio, video, and MIDI files into tracks, or record new audio and MIDI while playing along with existing
tracks. To build a particularly flexible session, insert audio loops—you can choose from over 5000 on the Adobe
Audition Loopology DVD. ( See “Insert an audio fileinto a session” on page 47 and “Record audio clipsin Multitrack
View” on page 57.)
Inserting from the Files panel
Page 22
ADOBE AUDITION 3.0
0
+
3
6
0
+
3
6
User Guide
Arrange clips in the timeline
-
In the Main panel, arrange and edit clips in the timeline. In Multitrack View, edits are impermanent for maximum
flexibility. But if you want to permanently edit a clip, simply double-click it to enterEdit View. (See “Arranging clips”
on page 191 and “Editing clips” on page 195.)
17
Arranging and editing clips in the Main panel
Apply effects
-
Apply effects in the Effects Rack, where you can edit, group, and reorder effects on each track. At any future time,
you can update or remove effects toaddress the needs of different audio projects. (See “Applying effects inMultitrack
View” on page 107.)
Applying effects in the Effects Rack
Page 23
ADOBE AUDITION 3.0
0
+
3
0
+
3
6
User Guide
Route and mix tracks
6
In the Mixer or Main panel, output audio tracks directly to the Master track for standard mixes. As you build more
complex mixes, combine related tracks in buses, and use sends to output individual tracks to multiple destinations.
Then automate effect and mix settings over time, creating a dynamic, evolving mix that highlights different musical
passages. (See “Track routing and EQ controls” on page 185 and “Automating track settings” on page 204.)
18
Routing and mixing tracks in the Mixer
Export
-
Export your finished mix to a file, which you can automatically insert in Edit View for mastering or CD View for
archiving and distributing. (See “Export a session to an audio file” on page 242 and Building audio CDs.)
Page 24
Exporting a mix to an audio file
ADOBE AUDITION 3.0
User Guide
19
Viewing, zooming, and navigating audio
Basic components of Edit, Multitrack, and CD View
The workspace differs in Edit View, Multitrack View, and CD View. However, all three views have similar basic
components, such as view buttons, the Main panel, and the status bar.
A
B
C
D
E
F
Basic components of Edit, Multitrack, and CD View (Multitrack View shown)
A. View buttons B. Menu bar C. Too l ba r D. Shortcut bar E. Main panel F. Various other panels G. Status bar
G
Page 25

ADOBE AUDITION 3.0
User Guide
See also
“Comparing Edit View and Multitrack View” on page 20
“About CD View” on page 264
Comparing Edit View and Multitrack View
Adobe Audition provides different views for editing audio files and creating multitrack mixes. To edit individual
files, use Edit View. To mix multiple files and integrate them with MIDI and video, use Multitrack View.
Edit View and Multitrack View use different editing methods, and each has unique advantages. Edit View uses a
destructive method, which changes audio data, permanently altering saved files. Such permanent changes are
preferable when converting sample rate and bit depth, mastering, or batch processing. Multitrack View uses a nonde-
structive method, which is impermanent and instantaneous, requiring more processing power, but increasing flexibility. This flexibility is preferable when gradually building and reevaluating a multilayered musical composition or
video soundtrack.
You can combine destructive and nondestructive editing to suit the needs of a project. If a multitrack clip requires
destructive editing, for example, simply double-click it to enter Edit View. Likewise, if an edited waveform contains
recent changes that you dislike, use the Undo command to revert to previous states—destructive edits aren’t applied
until you save a file.
20
For more information about Edit View, see “Editing audio files” on page 65; for more information about Multitrack
View, see Mixing multitrack sessions.
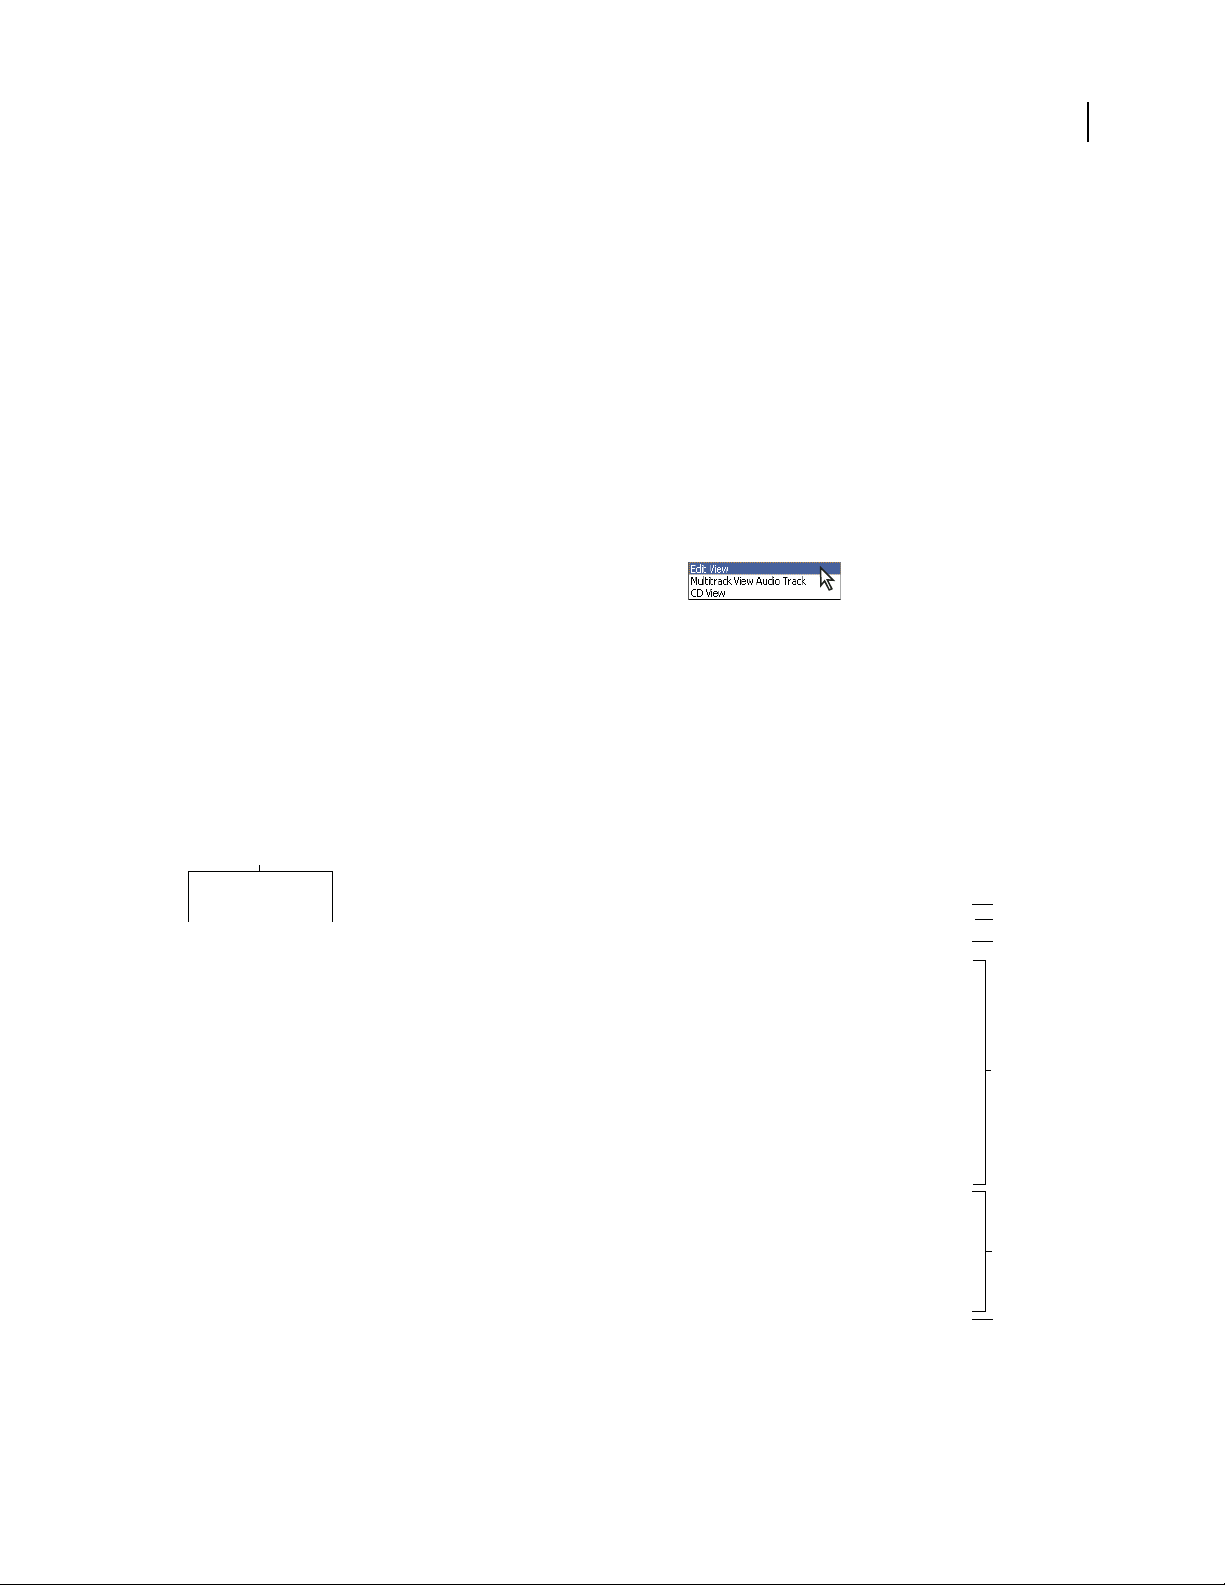
Switch views
❖ Do one of the following:
• From the View menu, choose Edit View, Multitrack View, or CD View.
• Click the Edit View , Multitrack View , or CD View button in the toolbar.
• In Multitrack View, double-click an audio clip to open it in Edit View. Alternatively, double-click a file in the Files
panel. Or, select an audio clip in either the Files panel or the Main panel, and then click the Edit File button
in the Files panel.
See also
“Comparing Edit View and Multitrack View” on page 20
“Keys for opening views” on page 270
Zooming audio
Zooming adjusts the view of the timeline display in the Main panel. The ideal zoom level depends on your current
task. For example, you can zoom in to see details in an audio file or multitrack session, or you can zoom out to get
an overview.
AdobeAuditionprovidesseveralwaystozoom.YoucaneitherclickbuttonsintheZoompanel,ordragscrollbars
and rulers.
Page 26

ADOBE AUDITION 3.0
B
A
C
Zooming methods
A. Click buttons in Zoom panel B. Drag scroll bars C. Right-click and drag rulers
User Guide
See also
“Keys for playing and zooming audio” on page 270
Zoom with the Zoom panel
1
To display the Zoom panel, choose Window > Zoom Controls.
2 Do any of the following:
• Click the Zoom In Vertically button to increase the vertical resolution in Edit View or show fewer tracks in
Multitrack View.
• Click the Zoom In Horizontally button to zoom in on the center of the visible waveform or session.
• Click the Zoom To Selection button to zoom in on the currently selected range.
• Click the Zoom In To Right Edge Of Selection button to zoom in on the right boundary of the currently
selected range.
• Click the Zoom In To Left Edge Of Selection button to zoom in on the left boundary of the currently selected
range.
• Click the Zoom Out Horizontally button to zoom out from the center of the visible waveform or session.
•
ClicktheZoomOutFullBothAxesbutton todisplaytheentireaudiofileinEditVieworsessioninMultitrackView.
• Click the Zoom Out Vertically button to decrease the vertical resolution in Edit View or show more tracks in
Multitrack View.
21
Zoom with a scroll bar or ruler
❖ In the Main panel, do any of the following
• Move the pointer to either edge of a horizontal or vertical scroll bar. When the pointer becomes a magnifying glass
with arrows , drag left or right, or up or down.
• Right-click and drag in the horizontal ruler to zoom intoa specific time range. The magnifying glass iconappears,
creating a selection that shows you the range that will fill the Main panel.
• (Edit View only) Right-click and drag in thevertical ruler to zoom into a specific amplitude range. The magnifying
glass icon appears, creating a selection of the range that will fill the Main panel.
To zoom with the mouse wheel, place the pointer over the appropriate scroll bar or ruler, and roll the wheel. (In Edit
View, this zoom method also works when the pointer is over the waveform.) You can set the percentage of this zoom
on the General tab of the Preferences dialog box. (See “General preferences” on page 33.)
Navigate with a scroll bar or ruler
At higher zoom levels, you may need to scroll to see different audio content in the Main panel.
Page 27

ADOBE AUDITION 3.0
To change the placement of a horizontal scroll bar, right-click it, and choose Above Display or Below Display. This
sets the position of the scroll bar for only the current view (Edit View or Multitrack View).
A
B
C
D
Scrolling devices
A. Horizontal scroll bar B. Vertical scroll bar (Multitrack View only) C. Vertical ruler (Edit View only) D. Horizontal ruler
• To scroll through time, drag the horizontal scroll bar, or drag left or right in the horizontal ruler.
• To scroll through audio amplitudes in Edit View, drag up or down in the vertical ruler.
• To scroll through tracks in Multitrack View, drag the vertical scroll bar.
User Guide
22
To scroll through tracks with the mouse wheel, place the pointer over the track display, and roll the wheel.
See also
“Navigate with the Selection/View panel” on page 22
Navigate with the Selection/View panel
The Selection/View panel shows the start, end, and length of the current selection and view in the Main panel. The
panel displays this information in the current time format, such as Decimal or Bars And Beats. (See “To change the
time display format” on page 55.)
Selection/View Controls panel
1 To display the Selection/View panel, choose Window > Selection/View Controls.
2 (Optional) Enter new values into the Begin, End, or Length boxes to change the selection or view.
See also
“Monitoring time during recording and playback” on page 54
“Dock, group, or float panels” on page 23
Page 28

ADOBE AUDITION 3.0
User Guide
Customizing workspaces
About workspaces
Adobe video and audio applications provide a consistent, customizable workspace. Although each application has its
own set of panels (such asTools, Properties, Timeline, and soon), you move and group panels inthe same way across
products.
The main window of a program is the application window. Panels are organized in this window in an arrangement
called a workspace. The default workspace contains groups of panels as well as panels that stand alone.
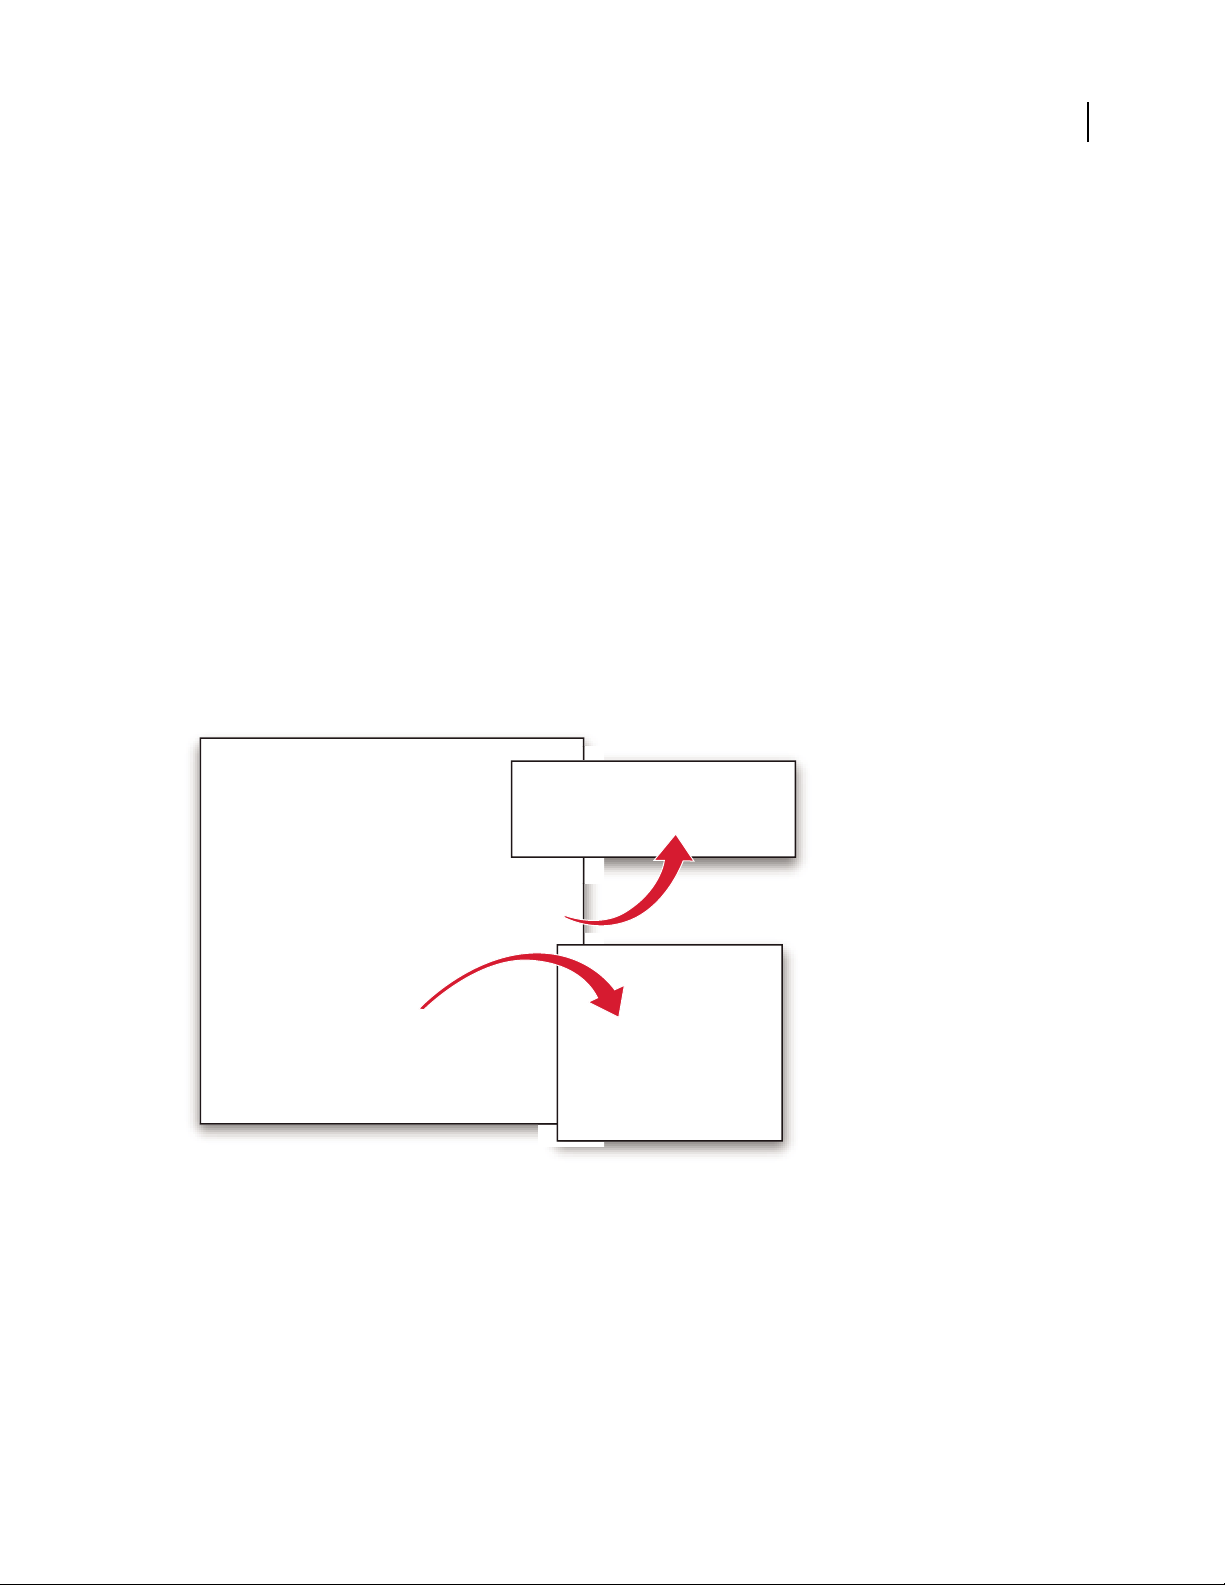
You customize a workspace by arranging panels in the layout that best suits your working style. You can create and
save several custom workspaces for different tasks—for example, one for editing and one for previewing.
You can drag panels to new locations, move panels into or out of a group, place panels alongside each other, and
undock a panel so that it floats in a new window above the application window. As you rearrange panels, the other
panels resize automatically to fit the window.
YoucanusefloatingwindowstocreateaworkspacemorelikethoseinpreviousversionsofAdobeapplications,orto
place panels on multiple monitors.
BC
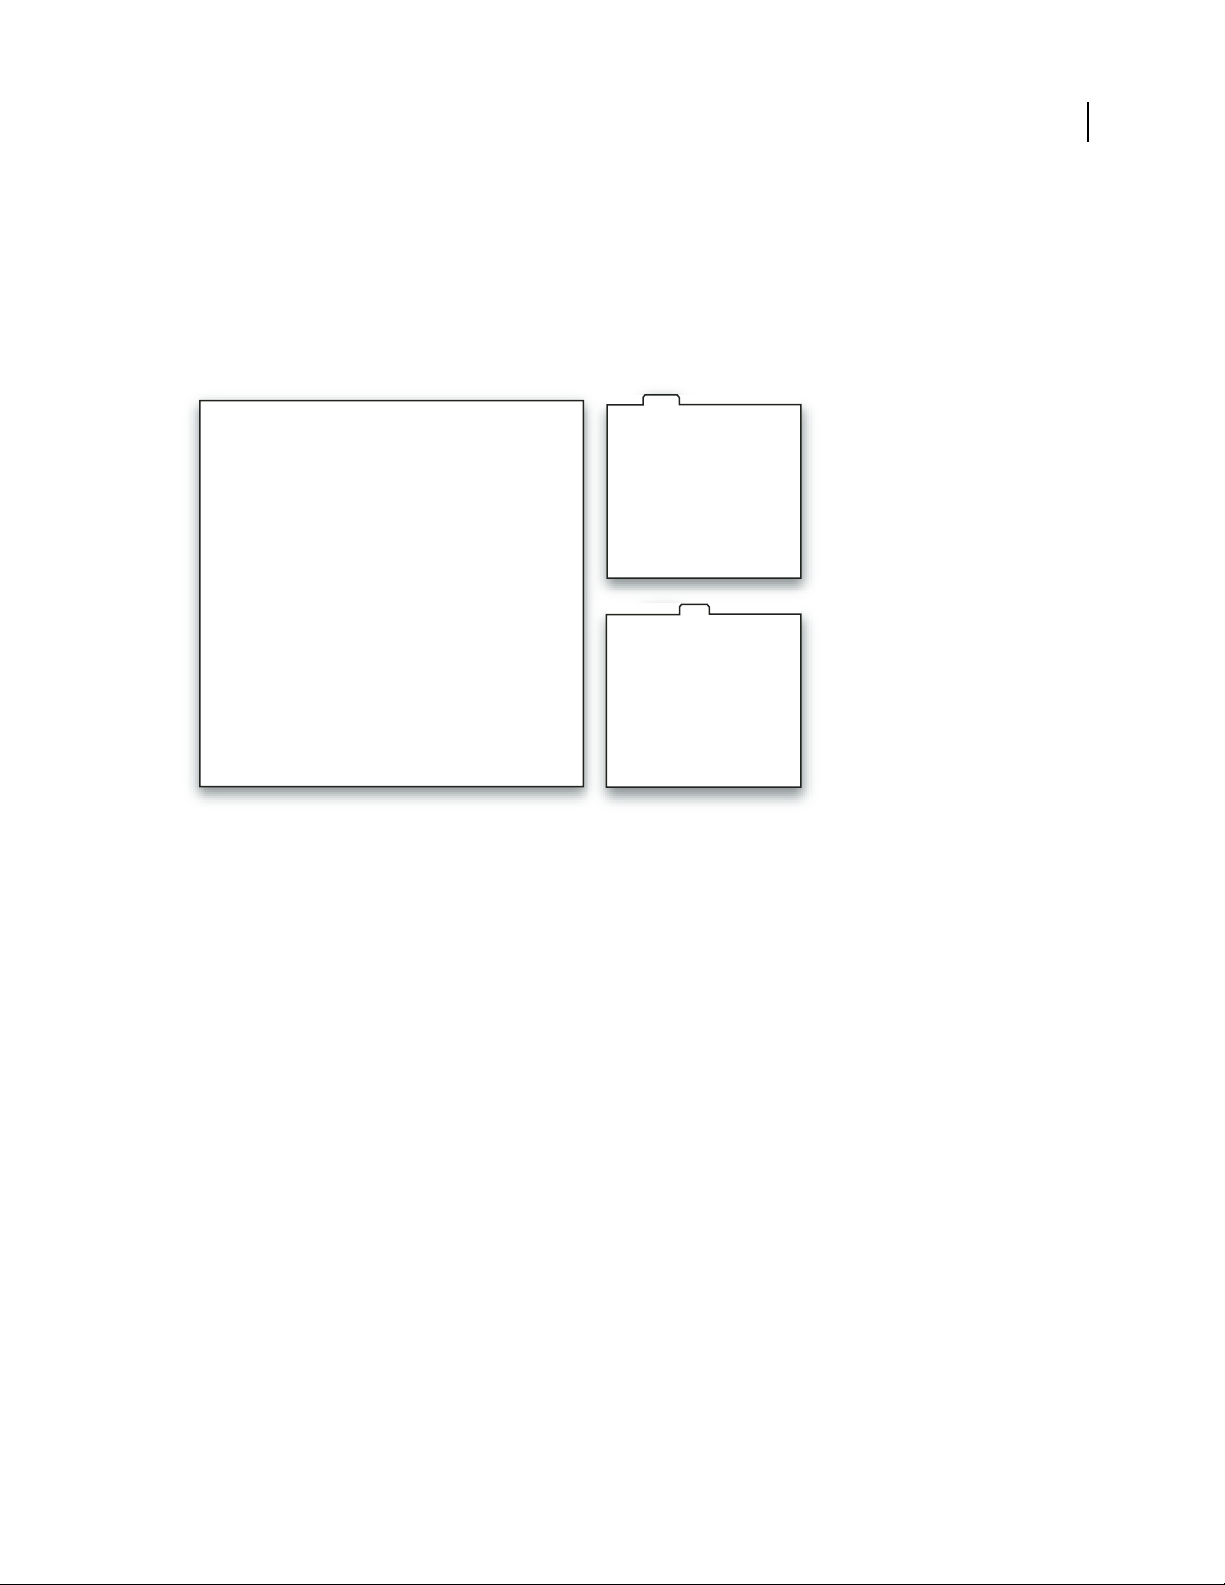
A
23
Example workspace
A. Application window B. Grouped panels C. Individual panel
For a video about the Adobe workspace, see www.adobe.com/go/vid0249.
Dock, group, or float panels
You can dock panels together, move panels into or out of a group, and undock a panel so that it floats in a new
window above the application window. As you drag a panel, drop zones—areas onto which youcan move the panel—
become highlighted. The drop zone you choose determines where the panel is inserted, and whether it docks or
groups with other panels.
Page 29

ADOBE AUDITION 3.0
User Guide
Docking zones
Docking zones exist along the edges of a panel, group, or window. Docking a panel places it adjacent to the existing
group, resizing all groups to accommodate the new panel.
A
B
C
Dragging panel (A) onto docking zone (B) to dock it (C)
24
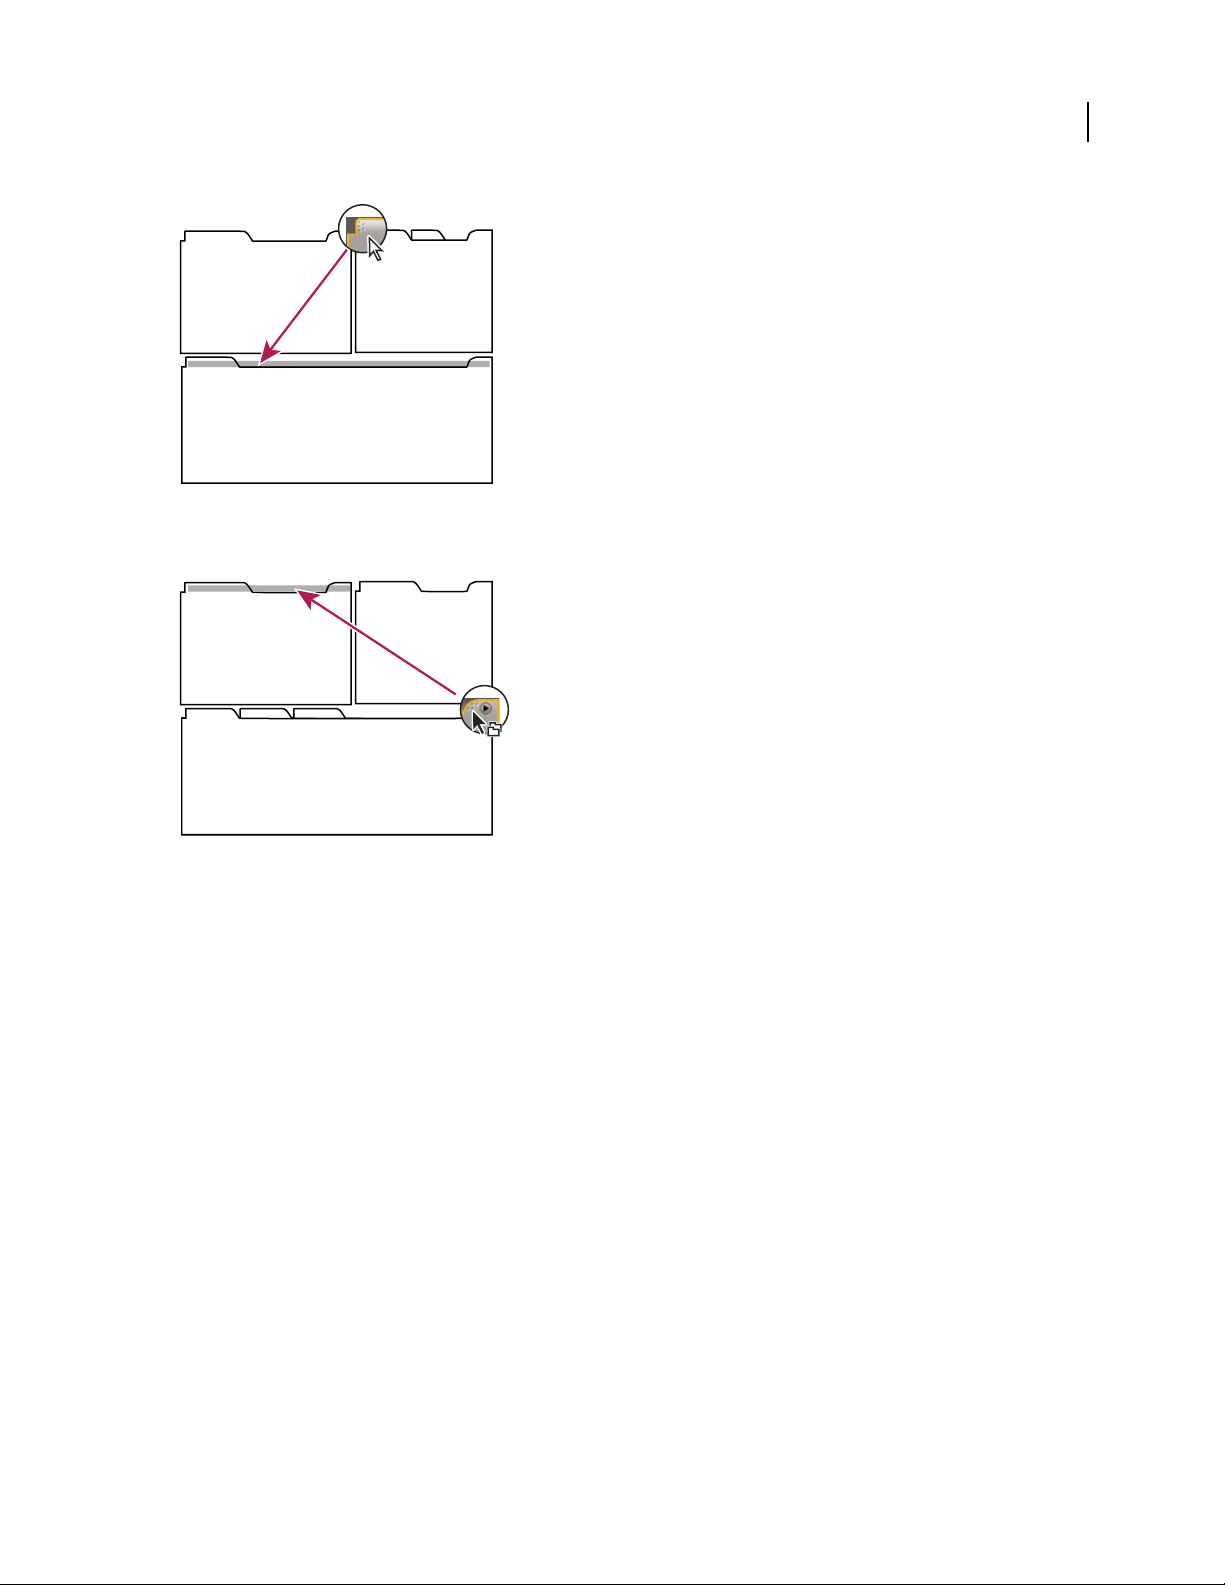
Grouping zones
Groupingzonesexistinthemiddleofapanelorgroup,andalongthetabareaofpanels.Groupingapanelstacksit
with other panels.
A
B
C
Dragging panel (A) onto grouping zone (B) to group it with existing panels (C)
Dock or group panels
1
If the panel you want to dock or group is not visible, choose it from the Window menu.
2 Do one of the following:
•
To move an individual panel, drag the gripper area in the upper-left corner of a panel’s tab onto the desired drop zone.
Page 30
ADOBE AUDITION 3.0
Drag panel gripper to move one panel
• To move an entire group, drag the group gripper at the upper-right corner onto the desired drop zone.
User Guide
25
Drag group gripper to move entire group
The application docks or groups the panel, according to the type of drop zone.
Undock a panel in a floating window
When you undock a panel in a floating window, you can add panels to the window or otherwise modify it,as you do
the application window. You can use floating windows to make use of a secondary monitor, or to create a workspace
like those in earlier versions of Adobe applications.
❖ Select the panel you want to undock (if it’s not visible, choose it from the Window menu), and then do one of the
following:
• Choose Undock Panel or Undock Frame from the panel menu. Undock Frame undocks the panel group.
• Hold down Ctrl (Windows®) or Command (Mac OS®), and drag the panel or group from its current location.
When you release the mouse button, the panel or group appears in a new floating window.
• Drag the panel or group outside the application window. (If the application window is maximized, drag the panel
to the Windows task bar.)
Resize panel groups
When you position the pointer over dividers between panel groups, resize icons appear. When you drag these icons,
all groups that share the divider are resized. For example, suppose your workspace contains three panel groups
stacked vertically. If you drag the divider between the bottom two groups, they are resized, but the topmost group
doesn’t change.
Page 31

ADOBE AUDITION 3.0
User Guide
To quickly maximize a panel beneath the pointer, press the tilde (~) key. (Do not press Shift.)Press the tilde key again
to return the panel to its original size.
1 Do either of the following:
• To resize either horizontally or vertically, position the pointer between two panel groups. The pointer becomes a
double-arrow .
• To resize in both directions at once, position the pointer at the intersection between three or more panel groups.
The pointer becomes a four-way arrow .
2 Hold down the mouse button, and drag to resize the panel groups.
A
26
B
Dragging divider between panel groups to resize them horizontally
A. Original group with resize icon B. Resized groups
Open and close panels and windows
Even if a panel is open, it may be out of sight, beneath other panels. Choosing a panel from the Window menu opens
it and brings it to the front.
Whenyoucloseapanelgroupintheapplicationwindow,theothergroupsresizetomakeuseofthenewlyavailable
space. When you close a floating window, the panels within it close, too.
• To open or close a panel, choose the panel from the Window menu.
• To close a panel or window, click its Close button .
Working with multiple monitors
To increase the available screen space, use multiple monitors. When you work with multiple monitors, the application window appears on the main monitor, and you place floating windows on the second monitor. Monitor
configurations are stored in the workspace.
See also
“Dock, group, or float panels” on page 23
Page 32

ADOBE AUDITION 3.0
User Guide
Display the toolbar
The toolbar provides quick access to tools, the Workspace menu, and buttons that toggle between Edit, Multitrack,
and CD View. Some tools are unique to each view. Likewise, some Edit View tools are available only in spectral
displays.
Bydefault,thetoolbarisdockedimmediatelybelowthemenubar.However,youcanundockthetoolbar,converting
it to the Tools panel, which you can manipulate like any other panel.
• To show or hide the toolbar, choose Window > Tools. A check mark by the Tools command indicates that it is
shown.
• To undock the toolbar from its default location, drag the handle at the left edge to another location in the work
area.
• To redock the Tools panel in its default location, drag the Tools panel tab to the drop zone that spans the entire
width of the Adobe Audition window, just under the menu bar.
A
B
Available toolbar buttons differ in each view.
A. Edit View toolbar in Spectral Frequency Display B. Multitrack View toolbar
27
See also
“Dock, group, or float panels” on page 23
“Basic components of Edit, Multitrack, and CD View” on page 19
Display the shortcut bar
Theshortcutbardisplaysbuttonsthatprovidequickaccesstocommonlyusedfunctions.Theshortcutbarappears
in the upper part of the application window, below the menu bar and the default location of the toolbar.
The buttons contained in each shortcut group differ in Edit View, Multitrack View, and CD View. To identify a
button, place the pointer over the button until a tool tip appears.
• To show or hide the shortcut bar, choose View > Shortcut Bar > Show.
• To show or hide shortcut groups, choose View > Shortcut Bar > Groups > [group name].
• To show or hide individual shortcuts, choose View > Shortcut Bar > [command type] > [command name].
You can display different shortcuts in Edit, Multitrack, and CD View.
See also
“Basic components of Edit, Multitrack, and CD View” on page 19
Display the status bar
The status bar runs across the bottom of the Adobe Audition work area. You can show or hide the status bar and
select which types of information appear there.
Page 33

ADOBE AUDITION 3.0
User Guide
A B C D E
F H IG
Status bar
A. Data Under Cursor B. Sample Format C. File Size D. File Size (Time) E. Free Space F. Free Space (Time) G. Keyboard Modifiers
H. SMPTE/MTC Slave Stability I. Display Mode
• To show or hide the status bar, choose View > Status Bar > Show. A check mark indicates that the status bar is
visible.
• To change the type of information that the status bar displays, choose View > Status Bar or right-click the status
bar, and select from the following options:
Data Under Cursor Shows information such as channel (for stereo files), amplitude (measured in decibels), and time
(hours:minutes:seconds:hundredthsof seconds) from the beginning of the audio file. This data changes dynamically
when you move the pointer. For example, if you see R: –15.2 dB @ 0:00:242 when in Edit View, your pointer is over
the right channel at 0.242 seconds, and the amplitude at that precise point is –15.2 dB.
In Multitrack View, you’ll see even more data, such as envelope positions, dynamic effect settings, and the current
position of clips as you drag them.
28
Sample Format Displays sample information about the currently opened waveform (Edit View) or session file
(Multitrack View). For example, a 44,100 kHz 16-bit stereo file is displayed as 44100 – 16-bit – stereo.
File Size Representshowlargetheactiveaudiofileis,measuredinkilobytes.Ifyousee308Kinthestatusbar,then
the current waveform or session is 308 kilobytes (KB) in size.
File Size (time) Shows you the length (measured in time) of the current waveform or session. For example, 0:01:247
means the waveform or session is 1.247 seconds long.
Free Space In Edit View and Multitrack View, shows how much space is available on your hard drive. In CD View,
shows how much space remains on a CD based on which View menu item is selected: 74 min. CD or 80 min. CD.
Free Space (time) In Edit View and Multitrack View, displays the time remaining for recording, based upon the
currently selected sample rate. This value is shown as minutes, seconds, and thousandths of seconds. For example, if
Adobe Audition is set to record 8-bit mono audio at 11,025 kHz, the time remaining might read 4399:15.527 free.
Change the recording options to 16-bit stereo at 44,100 kHz, and the time remaining becomes 680:44.736 free.
In CD View, shows how much space remains on a CD based on which View menu item is selected: 74 min. CD or
80 min. CD.
Keyboard Modifiers Displays the status of your keyboard’s Ctrl, Shift, and Alt keys, helping you determine if these
keys are fully pressed.
SMPTE/MTC Slave Stability Indicates the stability of incoming timecode compared to Adobe Audition’s internal
clock. For example, 95.0% SMPTE/MTC indicates avery strong SMPTE/MTC signal. Percentagesabove 80% should
be stable enough to maintain sync. For more information, see “Synchronizing with SMTPE” on page 209.
Display Mode Indicates the current contents of the Main panel: Waveform, Spectral Frequency, Spectral Pan, or
Spectral Phase Display in Edit View; Timeline in Multitrack View; CD List in CD View.
See also
“Basic components of Edit, Multitrack, and CD View” on page 19
Page 34

ADOBE AUDITION 3.0
User Guide
Change interface brightness or tint
1 Choose Edit > Preferences, and click the Colors tab.
2 Do either of the following:
• To lighten or darken panels and dialog boxes, drag the UI Brightness slider. (To return to the original setting, click
Reset UI.)
• To colorize panels and dialog boxes, click Tint, select or customize a color, and then click OK.
See also
“Colors preferences” on page 35
Managing workspaces
Choose a workspace
Each Adobe video and audio application includes several predefined workspaces that optimize the layout of panels
for specific tasks. When you choose one of these workspaces, or any custom workspaces you’ve saved, the current
workspace is redrawn accordingly.
29
❖ Open the project you want to work on, choose Window > Workspace, and select the desired workspace.
Predefined workspaces in Adobe Audition
Adobe Audition provides several predefined workspaces in the Window > Workspace submenu. These workspaces
optimize the arrangement of panels for specific tasks.
You can customize any predefined workspace. (See “Save a custom workspace” on page 30.)
Edit View (Default) Arranges panels in the default positions for Edit View, and presents Waveform Display in the
Main panel.
Multitrack View (Default) Arranges panels in the default positions for Multitrack View.
CD View (Default) Arranges panels in the default positions for CD View.
Frequency Space Editing Reflects the default arrangementfor Edit View, but presents Spectral Frequency Displayin
the Main panel.
Mastering And Analysis Adds the Frequency and Phase Analysis panels to the default Edit View workspace.
Maximum Session (Dual Monitor) Arranges the Multitrack View work area for a two-monitor setup, displaying the
Main panel and application window on one monitor and other panels on the second monitor, providing maximum
view of the Main panel display.
Maximum Waveform Editing (Dual Monitor) Arranges the Edit View work area for a two-monitor setup, displaying
the Main panel and application window on one monitor and other panels on the second monitor, providing
maximum view of the Main panel display.
Session Mixing Adds the Mixer panel to the default Multitrack View workspace.
Video + Audio Session Adds the Video panel to the default Multitrack View workspace.
Page 35

ADOBE AUDITION 3.0
User Guide
Save a custom workspace
As you customize aworkspace, the application tracks your changes, storing the most recent layout. To store a specific
layout more permanently, save a custom workspace. Saved custom workspaces appear in the Workspace menu,
where you can return to and reset them.
❖ Arrange the frames and panels as desired, then choose Window > Workspace > New Workspace. Type a name for
the workspace, and click OK.
Note: If a project saved with a custom workspace is opened on another system, the application looks for a workspace with
a matching name. If it can’t find a match (or the monitor configuration doesn’t match), it uses the current local
workspace.
Reset a workspace
Reset a workspace to return to its original, saved layout of panels.
❖ With the workspace you want to reset active, choose Window > Workspace > Reset workspace name.
Delete a workspace
1 Choose Window > Workspace > Delete Workspace.
2 Choose the workspace you want to delete, and then click OK.
30
Note: You cannot delete the currently active workspace.
Page 36

Chapter 4: Setting up Adobe Audition
Connecting to inputs and outputs
About hardware inputs and outputs
You can use a wide range of hardware inputs and outputs with Adobe Audition. Sound card inputs let you bring in
audio from sources such as microphones, tape decks, and digital effects units. Sound card outputs let you monitor
audio through sources such as speakers and headphones. MIDI ports let you synchronize Adobe Audition with
MIDI devices and applications.
AB
31
C
A. Sound card inputs connect to sources such as microphones and tape decks. B. Sound card outputs connect to speakers and headphones.
C. MIDI ports connect to MIDI devices and applications.
See also
“Synchronizing with ReWire” on page 208
Set audio inputs and outputs
When you set inputs and outputs for recording and playback, Adobe Audition can use two kinds of sound card
drivers: Audio Stream In/Out (ASIO) and DirectSound. Some cards support both types of drivers.
ASIO drivers are preferable because they provide better performance and lower latency. You can also monitor audio
as you record it and instantly hear volume, pan, and effects changes during playback. The main advantage of DirectSound is that you can access one card from multiple applications simultaneously.
1 Choose Edit > Audio Hardware Setup.
2 Click the Edit View, Multitrack View, or Surround Encoder tab.
3 For Audio Driver, choose a driver for the sound card you want to use. (Choose an ASIO driver if one is available;
otherwise, choose the DirectSound driver, Audition Windows Sound.)
4 (Optional) Click Control Panel, set driver properties, and then click OK. For more information, see “Set driver
properties for a sound card” on page 32.
Page 37

ADOBE AUDITION 3.0
User Guide
5 Do any of the following:
• Under Edit View, choose stereo ports from the Default Input and Default Output menus.
• Under Multitrack View, choose stereo or mono ports from the Default Input and Default Output menus.
In a multitrack session, you can override the defaults for a particular track. (See “Assign audio inputs and outputs
to tracks” on page 186.)
• Under Surround Encoder, choose output ports for each surround channel in the Output Channel Mapping area.
(For information about device requirements, see “Set the preview device for surround mixes” on page 237.)
Set driver properties for a sound card
To improve the performance of ASIO and DirectSound cards, optimize driver properties.
1 Choose Edit > Audio Hardware Setup, and click Control Panel.
2 Do one of the following, and then click OK.
• In an ASIO control panel provided by the sound card manufacturer, set driver options.(The options available will
be different than those described below. For more information, consult the documentation for the sound card.)
Note: By default, Adobe Audition controls the ASIO sound card while playing or monitoring audio. If you want to access
the card in another application, select Release ASIO Driver In Background.
32
• In the DirectSound Full Duplex Setup control panel, set the following options:
Device check boxes
Use the check boxes under Direct Sound Output Ports and Direct Sound Input Ports to turn
devicesonoroff.Whenaportisdeselected,itisnotavailableasaportoptionintheAudioHardwareSetupdialogbox.
Buffer Size (Samples) Usually, the default settings work well for both playback (DirectSound Output Ports) and
recording (DirectSound Input Ports), but some sound cards may require different settings. If you hear skips or
dropouts in playback, you can adjust buffer size: Double-click the Buffer Size numerical entry for an input or output
device, and type a new value.
Port Order If the selected device includes more than one port, click the Move Up or Move Down button to change
the order of the ports for that device.
Sync Reference Specify whether you want the DirectSound Input orthe DirectSound Output to set the master clock.
Full Duplex SelectthistoenableAdobeAuditiontorecordanaudiotrackwhileanotheroneplaysback,ifthesound
card is capable of doing so.
Start Input First This determines the order in which Adobe Audition starts the sound card playback (in) and record
(out) ports in a multitrack environment. Select this option only if you have an older sound card that doesn’t support
full duplexing.
Connecting to MIDI devices and applications
Musical Instrument Digital Interface (MIDI) is a standard for communicating performance information from one
piece of software or hardware to another. In Windows, you can transmit MIDI data internally between applications, or
externally to andfrom devices such as MIDI keyboards.In AdobeAudition, you can utilize MIDIin the following ways:
• Using the MIDI sequencer, you can import, record, and edit MIDI data, and you can output it through VSTi
virtual instruments or hardware synthesizers. (See Composing with MIDI.)
Page 38

ADOBE AUDITION 3.0
User Guide
• Using aMIDI device connected to a MIDI input, you can trigger commands in Adobe Audition. For example, you
can assign the Play command in Adobe Audition to the C4 note on your MIDI keyboard. (See “Enable MIDItriggered shortcuts” on page 270.)
• Using MIDI outputs and inputs, you can send and receive SMPTE/MIDI timecode (MTC), synchronizing multi-
track playback and recording with other hardware or software. (See “Synchronizing with SMTPE” on page 209.)
See also
“Synchronizing with ReWire” on page 208
Setting Adobe Audition preferences
Set Adobe Audition preferences
The Preferences dialog box lets you customize Adobe Audition’s display, editing behavior, use of memory and hard
disk space, and other miscellaneous settings.
1 Choose Edit > Preferences.
2 Click a tab at the top of the dialog box to view a set of options.
3 When you finish settingoptions, click OK. To close the Preferences dialog box without changing anyoptions, click
Cancel.
33
When you click OK, most changes take effect immediately. If a change requires you to quit and restart Adobe
Audition, you are prompted to do so. For example, you need to quit and restart Adobe Audition when you set up a
different temporary folder.
See also
“General preferences” on page 33
“System preferences” on page 34
“Colors preferences” on page 35
“Display preferences” on page 36
“Data preferences” on page 37
“Multitrack preferences” on page 38
“SMPTE/MTC preferences” on page 40
“External Controllers preferences” on page 40
General preferences
In the Preferences dialog box, click the General tab to access the following options:
Force Spacebar To Always Trigger Play Plays a file when the spacebar is pressed, regardless of which dockable
window has focus.
Auto-Play External Launch Lets you start Adobe Audition and play an audio file from the command line. (See “Play
audio from the command line” on page 62.)
Page 39

ADOBE AUDITION 3.0
User Guide
Auto-Scroll During Playback And Recording Scrolls the waveform display in sync with playback. Auto-scrolling
takes effect only when you zoom in on a portion of a waveform and play past the viewed portion.
Upon A Manual Scroll/Zoom/Selection Change Determines auto-scrolling behavior when a manual scroll, zoom, or
selection change occurs:
• Abort Auto-Scrolling Until Next Play/Record Stops auto-scrolling during the remainder of the current playback.
• Resume Auto-Scrolling Only After Playback Cursor Enters View Keeps the current portion of the track or
waveform in view until the playback cursor reaches that point inthe timeline, andthen begins auto-scrolling to keep
pace with the playback.
• Resume Auto-Scrolling Immediately Continues auto-scrolling whether or not the playback cursor is in view.
Edit View Right-Clicks Determines right-click behavior in the Main panel.
• Popup Menu Displays a menu. (To extend a selection, Shift-left-click.)
• Extend Selection Extends selected ranges instead of displaying the pop-up menu. (To see the pop-up menu,
Ctrl-right-click.)
Mouse Wheel Zoom Factor Determines zoom behavior when you turn the mouse wheel on Intellipoint-compatible
pointing devices. Values from 10% to 80% work well. The higher the value, the further you’ll zoom in when you turn
the mouse wheel.
34
Custom Time Code Display Defines the number of frames per second (FPS) assigned to the Custom time format in
the View > Display Time Format menu.
Edit View Selections Determines the amount of waveform data that is automatically selected (if nothing is already
highlighted) when you apply an effect.
• View Automatically selects only the area of the audio file that you can currently see on-screen.
• Entire File Automatically selects the entire waveform, even if you’re only viewing a portion of it.
Double-clicking always selects the current view. Triple-clicking always selects the entire waveform.
• Select Audio After Paste Automatically selects the inserted audio after a paste operation. Deselect this option to
place the cursor at the end of the inserted audio instead.
Deselect this option to quickly append multiple segments of pasted audio.
Default Fade Curve Type Determines whether the default curve in Edit View is Linear/Logarithmic or Cosine. To
enable the non-default curve, hold down Ctrl when dragging on-clip fade icons in the Main panel. (See “Visually
fade in or out” on page 79.)
System preferences
In the Preferences dialog box, click the System tab to configure how Adobe Audition interacts with your system:
Cache Size Determines the amount of memory that Adobe Audition reserves for processing data. Recommended
cache sizes range from 8 to 32 MB (32 MB is the default).
Undo Specifies behavior for the Edit > Undo command.
• Enable Undo Activates the undo function. Because undo requires extra disk space for temporary files and extra
processing time, you may want to turn this feature off.
Page 40

ADOBE AUDITION 3.0
User Guide
• Levels (minimum) Specifies the number of recent actions to keep when you purge undo. Lower this number to
free up more memory but lose more actions.
• Purge Undo Deletes undo actions older than the minimum specified by the Levels setting, freeing up disk space
but preventing you from reverting to previous edits.
Temporary Folders Lets you change the location of folders for temporary files, which Adobe Audition creates when
you edit audio. (See “About temporary files” on page 41.) All temporary files begin with AUD and have a .tmp
extension. Adobe Audition normally deletes temporary files when it exits. For the options below, click the Browse
button to navigate to a new folder location.
• Primary Temp Specifies the main folder for temporary files. Ideally, it should be on your fastest hard drive.
• Secondary Temp Specifies the secondary folder for temporary files. For best results, specify a different physical
hard drive than the primary temp folder.
Note: If you have enough free space for temporary files on the drive that holds the primary temporary folder, you don’t
have to designate a secondary temporary folder.
CD Device Options Specifies the interface Adobe Audition uses to communicate with your CD drive: ASPI
(Advanced SCSI Programming Interface) or SPTI (SCSI Pass Through Interface). Most CD drives support SPTI.
Auto-Save For Recovery Backs up files more frequently than needed for basic crash recovery. In Adobe Audition,
basic crash recovery is onat all times. This option expands thatfeature, saving backups more frequently. Because this
preference can affect performance, select it only if you experience frequent power failures or system crashes.
35
Delete Clipboard Files On Exit Deletes Adobe Audition clipboard files when you exit. In general, leave this option
selected. Usually, after you finish with an Adobe Audition session, these clipboard files are no longer needed and just
take up space.
Force Complete Flush Before Saving Disables the quick save feature, which lets Adobe Audition quickly save files
that contain only minor modifications. If you select this option, Adobe Audition saves an internal backup copy of
entire files, considerably increasing the save timefor largefiles. Select this option only if you have trouble saving back
to the same filename or you have a problem with the Adobe Audition quick save feature.
Replace Invalid Filename Characters With This Character Replaces invalid filename characters in imported CD
tracks. To delete invalid characters without replacing them, leave this box blank.
Default File Filter When Opening WAV Files Determines the variant of the WAV format used to open *.wav files. In
most cases, Windows PCM is the best choice, as the vast majority of WAV files are stored in this format. Specify a
different option only if you commonly open WAV files in a more unusual format.
Default Format For Open Dialogs
Determines the default format for opening files. If you typically open files in one
format, this optionhelps you narrowthe displayed list offiles. You can overridethe default formatin the Open dialog box.
Default Format For Save As Dialogs Determines the default file format for saving files. If you typically save files in
oneformat,thisoptionmakesthesavingprocessmoreefficient.YoucanoverridethedefaultformatintheSaveAs
dialog box.
Colors preferences
In the Preferences dialog box, click the Colors tab to change the Adobe Audition color scheme:
Waveform Lists all elements to which youcan assign custom colors. To change the color ofan element, select it from
the list and click the Change Color button below the Example display.
To change clip color in Multitrack View, see “Set audio clip properties” on page 202.
Page 41

ADOBE AUDITION 3.0
User Guide
Color Presets Lists color scheme presets that come with the program as well as those you’ve created yourself. To
choose one, select it from the pop-up menu.
Save As Saves the currently selected color scheme as a preset.
Delete Deletes the currently selected color scheme preset.
Example Displays the currently selected color scheme preset or customized color scheme.
Change Color Opens the Color Picker, inwhich you can select a new colorfor the element selected under Waveform.
(The current color is shown in the color swatch to the left of the Change Color button.)
Selection Lets you adjust the appearance of a selected range. Preview your changes in the Example area.
• Invert Completely reverses the color of selected ranges relative to unselected audio. Deselect this option if you
want to set transparency for selected ranges instead of reversing the colors.
• Transparency Drag the slider or enter a value to adjust the transparent value (in percentage) of a selection; 0 is no
transparency, and 100 is maximum transparency. (This option is not available when Invert is selected.)
UI Brightness Drag the slider, click the arrows at either end of the brightness scale, or type in a percentage to change
the overall brightness of the work area.
Tint Colors all panels and dialog boxes with a tint you specify.
Reset UI Returns UI Brightness and Tint to the default settings.
36
Display preferences
In the Preferences dialog box, click the Display tab to adjust the Spectral and Waveform Display modes:
Windowing Function Determines which method Adobe Audition uses to segment the spectral data before
displaying it. The segments (windows) are listed in order from the narrowest frequency band/most noise to the
widest frequency band/least noise. Blackmann or Blackmann-Harris are usually good choices.
Resolution Specifies the number of vertical bands used in drawing frequencies. The larger this number, the longer
it takes for Adobe Audition to render the spectral display. Performance varies according to the speed of your
computer.
Window Width Specifies the window width (FFT frame size) used to plot spectral data, where 100% is a full frame.
The default setting is 75%. If you want to increase time resolution and determine exactly where frequencies start,
decrease the window width (50% to 75% works best). This makes the display more accurate along the timeline (left
and right), but less accurate along the frequency scale (up and down).
Decibel Range Adjusts the visible amplitude range for Spectral Frequency Display.
Initial Viewing Range Determines the default length of audio that the Top/Tail Views option displays.
Link Top/Tail Zoom Levels Automatically matches zoom levels in each view.
Show Marker And Range Lines Displays marker and range lines in the waveform display. Marker and range entries
listed in the Marker List appear in the waveform as vertical dotted lines overlaying the audio, connecting the arrows
from the top to the bottom of the display.
Show Grid Lines Displays grid lines in the waveform display. The grid lines mark off time on the horizontal x-axis
and amplitude on the vertical y-axis.
Show Center Lines Displays center lines in the waveform display. The center lines represent zero amplitude of the
waveform’s right and left channels.
Page 42

ADOBE AUDITION 3.0
User Guide
Show Boundary Lines Displays boundary lines in the waveform display. Boundary lines are the horizontal lines that
visually indicate where the waveform’s amplitude approaches or exceeds the clipping level. The value in the Display
Lines At option specifies the amplitude at which the boundary lines appear.
Peak Files Specifies options for peak (.pk) files, in which Adobe Audition stores information about how to display
WAV files. Peak files make file opening almost instantaneous by greatly reducing the time it takes to draw the
waveform (especially with larger files).
• Peaks Cache Determines the number of samples per block to use when storing peak files. Larger values reduce
the RAM requirement for large files atthe expense of slightly slower drawing at some zoom levels. IfRAM is an issue
on your system, and you’re working with very large files (several hundred megabytes or more in size), consider
increasing the Peaks Cache to 1024 or even 1536 or 2048.
• Save Peak Cache Files Saves peak (.pk) files in the same folder as all WAV files. You can safely delete peak files or
deselect this option; however, without peak cache files, larger audio files reopen more slowly.
• Rebuild Wave Display Now Rescans the current file for sample amplitudes and redraws the waveform.
Show On-Clip Gain Control When There Is No Selection Range Always shows the on-clip control, so you can adjust
the amplitude of an entire file without first making a selection.
Data preferences
In the Preferences dialog box, click the Data tab to control how Adobe Audition handles audio data:
37
Auto-Convert All Data To 32-Bit Upon Opening Converts all 8-bit and 16-bit data to 32-bit when a file is opened. All
subsequent operations occur in the 32-bit realm.
Interpret 32-Bit PCM .wav Files As 16.8 Float Makes this version of Adobe Audition compatible with previous
versions when handling 32-bit PCM WAV files.
Dither Transform Results Enables dithering when processing effects such as FFT Filter or Amplify. Adobe Audition
does most processing using arithmetic greater than 16-bit, with the results converted back to 16-bit when complete.
During this conversion, dithering provides a higher dynamic range and cleaner results, with fewer distortions and
negative artifacts.
With this option enabled, you can approximate 24-bit performance with 16-bit data, because dithering increases
dynamic range by about 10 dB. If this option is disabled, audio data is truncated to 16-bit during reconversion, and
more subtle information is lost.
The drawback of dithering is that each operation adds a small amount of noise at the quietest volume levels.
However, the trade-off between dithering (adding noise) and truncating the data (creating artifacts and limiting
dynamic range) generally favors dithering, so it’s best to select this option.
Use Symmetric Dithering Enables symmetric dithering. In most cases, it’s best to select this option. If it is not
selected, a DC offset of one-half sample is added each time data is dithered. Symmetric dithering has just as many
samples added above zero as below zero. By contrast, nonsymmetric dithering just toggles between 0 and 1.
Sometimes in a final dither, this maybe desired toreduce the bit range of the dither. However, both methods produce
identical audible results in every respect.
Smooth Delete And Cut Boundaries Over
Smooths cutand delete operations at the splicingpoint, preventingaudible
clicks at these locations. Applies only the boundaries over the number of milliseconds specified in the edit box.
Smooth All Edit Boundaries By Crossfading Automatically applies acrossfade to the starting and ending boundaries
of the selection. This option smooths any abrupt transitions at these end points, thus preventing audible clicks when
Page 43

ADOBE AUDITION 3.0
User Guide
filtering small portions of audio. You can enter a value (in milliseconds) in the crossfade time box to specify the
crossfade duration.
Auto-Convert Settings For Paste When pasting different sample formats, Adobe Audition uses these settings when
auto-converting the clipboard to the current sample format.
• Downsampling Quality Level Enter a valuefrom 30to 1000. Higher values retain more high frequencies whilestill
preventing the aliasing ofhigher frequencies to lower ones. Alower setting results in shorter processing time butalso
in theroll-off ofcertain high frequencies, leadingto muffled-soundingaudio. Becausethe filter’s cutoff slope is much
steeper at higher quality settings, the chance of ringing at high frequencies is greater. Usually values between 80 and
400 are fully satisfactory for most conversion needs. The default value is 80.
• Prefilter Prevents aliasing at downsampling. The prefilter removes all frequencies above the Nyquist limit, thus
keeping them from generating alias frequencies at the low end of the spectrum. In general, select this option for best
results.
• Upsampling Quality Level Enter a value from 30 to 1000. Higher values retain more high frequencies while still
preventing the aliasing ofhigher frequencies to lower ones. Alower setting results in shorter processing time butalso
rolls off certain high frequencies, leading to muffled-sounding audio. Because the filter’scutoff slope is much steeper
at higher quality settings, the chance of ringing at high frequencies is greater. Values between 100 and 400 address
most conversion needs. The default value is 120.
UseahigherUpsamplingQualityLevelvaluewheneveryoudownsamplefromahighsampleratetoalowrate.For
upsampling, a lower value produces quality almost identical to a higher value. The difference lies in the larger phase
shift that exists at higher frequencies, but since the phase shift is completely linear, it’s very difficult to notice. Downsampling, at even the lowest values, generally doesn't introduce any undesired noisy artifacts. Instead, the sound might be
slightly muffled because of increased high-end filtering.
38
• Postfilter Prevents aliasing at upsampling. The postfilter removes all frequencies above the Nyquist limit, thus
keeping them from generating false frequencies at the low end of the spectrum. In general, select this option for best
results.
Dither Amount For Saving 32-Bit Data To 16-Bit Files Enables dithering when pasting 32-bit audio to 16-bit audio.
The default value of 1 (bit) enables dithering, while a value of 0 disables dithering. For semidithering, choose a value
of 0.5.
Withdithering, youcan approximate24-bit performancewith 16-bit data, becausedynamic rangeincreases byabout
10 dB. This allows signals as quiet as –105 dB.
With this option enabled, you can approximate 24-bit performance with 16-bit data, because dithering increases
dynamic range by about 10 dB.
Allow For Partially Processed Data After Canceling Effect Determines what happens after you click the Cancel
button while in the middle of applying an effect to a waveform. When selected, Adobe Audition leaves the effect
applied to all data processed up until the point you clicked Cancel. When deselected, Adobe Audition automatically
removes the effect on already processed data when you click Cancel.
Multitrack preferences
In the Preferences dialog box, click the Multitrack tab to optimize recording, playback, and mix down:
Defaults Specifies recording and panning settings for multitrack sessions.
• Recording Bit Depth Select 16-bit or 32-bit.
Page 44

ADOBE AUDITION 3.0
User Guide
• Stereo Panning Mode Select Left/Right Cut (logarithmic) to pan left by reducing the volume of the right channel,
and pan right by reducing the left channel volume. The channel being panned to doesn’t increase in volume as
panning gets closer to 100%. Or select Equal-Power Sinusoidal to pan left and right channels with equal power, so
that a hard pan left has the same loudness as both channels together. This results in an increase of 3 dB RMS on the
channel being panned to when at 100%.
To override the default panning mode for a specific session, see “Mixing properties for sessions” on page 210.
Note: Because Equal-Power Sinusoidal panning can make one channel louder than the original waveform, audible
clipping can occur in 16-bit sessions. To avoid this, work in the 32-bit realm.
Audio Mix Down Contains options governing the resolution and dithering of multitrack sessions.
• Bounce Bit Depth Determines the bit resolution for the Edit > Bounce To Track command. Regardless of the
session format (16-bit or 32-bit), you can bounce audio at either 16-bitor 32-bit quality with this option. The default
is 16-bit.
• Enable Dither Select this option if the bit depth for mix down is lower than the bit depth of the session audio.
• Dither Settings Opens another dialog box with three options for dithering 16-bit mix downs: Dither Depth (in
bits), Probability Distribution Function, and Noise Shaping. For more information, see “Change the bit depth of a
file” on page 99.
Automation Optimizations Contains options that determine how automated mix parameters are recorded. (See
“Techniques for automating mixes” on page 203.)
39
• Automatch Time Determines how fast parameters return to original values in the Touch or Latch modes. You can
set values from 0.00 to 5.00 seconds; the default value is 1.00 second.
• Linear Edit Point Thinning Removes any edit points that represent static, unchanging parameter settings.
• Minimum Time Interval Thinning Creates edit points with intervals larger than the specified time value. Enter an
interval between 1 and 2000 milliseconds in the Minimum Time field.
Auto Zero-Cross Edits Automatically adjusts the beginning and end points of all Cut, Copy, and Paste operations to
thenearestplacewherethewaveformcrossesthecenterline(zeroamplitudepoint).Iftheamplitudesaren’tlinedup
on both sides of the selection, the end points are at different amplitudes. This often results in an audible pop or click
at that point.
Smooth Auto-Scrolling During Playback Enables smooth scrolling when playing back audio in Multitrack View. By
default, Adobe Audition uses a paging method of scrolling in Multitrack View instead of the smooth scrolling
technique used in Edit View. This saves on system resources.
Use BWF Time Reference As Insert Start Time UsesthetimestampembeddedinaBroadcastWavefile(BWF)when
inserting files. (See “Spot insert a Broadcast Wave file into a session” on page 47.)
Save Frozen Track Audio Files With Session Saves the temporary files associated with frozen tracks. When you
reopen the session, Adobe Audition uses the temporary file instead of refreezing the tracks.
Play Audio While Scrubbing With The Start Time Indicator Plays back audio whenever you drag one of the yellow
trianglesfortheStartTimeIndicator,regardlessofwhichtoolisselectedintheToolspanel.(Seealso“Playaudioby
scrubbing” on page 61.)
Crossfade Time Determines the crossfade duration for overlapping clips.
Page 45

ADOBE AUDITION 3.0
User Guide
SMPTE/MTC preferences
You can use SMPTE (Society ofMotion Picture and Television Engineers) timecode to synchronize Adobe Audition’s
transport controls with a MIDI sequencing application or an external hardware device,such as avideotape machine.
(See “Synchronizing with SMTPE” on page 209.)
Adobe Audition sends and receives SMPTE timecode via MIDI timecode (MTC), which Windows transmits
through your system’s MIDI Out and MIDI In ports. MTC is a digital signal; to convert analog SMPTE timecode
from a video or audio tape deck to digital MTC, you must use an appropriate MIDI interface.
In the Preferences dialog box, click the SMTPE/MTC tab to access options for timecode ports and synchronization.
SMPTE/MTC Output And Input The following options configure input and output ports for timecode:
• MIDI Output Device (Send MTC To This Port) Specifies the device to which Adobe Audition sends MIDI timecode.
• MIDI Input Device (Receive MTC From This Port) Specifies the device from which Adobe Audition receives MIDI
timecode.
• Use Internal Timestamps Stamps incoming MIDI messages based on their arrival time in Adobe Audition,
ignoring timestamps provided by Windows. (Some Windows systems provide uneven timestamps, causing
imprecise synchronization.)
SMPTE/MTC Synchronization The following options apply only to incoming timecode.
40
• Lead Time (To Prepare Audio Driver) Specifies the amount of time (in milliseconds) in which Adobe Audition
establishes synchronization with incoming timecode. Lower settings (200 and lower) result in faster transport
response but may prevent Adobe Audition from establishing synchronization. Settings of 500 to 1000 are sufficient
on most systems.
• Stopping Time (Freewheel - Audio Stops After No Input Detected For This Time) Specifies the amount of time (in
milliseconds) that Adobe Audition continues playing if it encounters a dropout in timecode.
• Lag Time (Constant Time Difference Between Sound Card Driver’s Reported Position And Actual) Specifies the
number of samples between incoming timecode and outgoing audio data. This value accounts for discrepancies
introduced by sound card buffers. The default value is 10 samples.
• Slack (Time Error Allowable Before Repositioning Play Cursor) Specifiesthenumberofframesthatcanfalloutof
sync with timecode before either repositioning the start-time indicator to match the code or performing a full resynchronization. A setting of up to 2.5 frames is recommended, because faulty timecode isusually corrected on the next
frame sent. The default value is one-quarter (.25) of a frame.
• Clock Drift Correction Time (Crossfade Length To Use When Adjusting Playback Position) Specifies thenumber of
samples to crossfade when making time corrections to chase audio to timecode. The default value is 250 samples.
• Reposition Playback Cursor When Shuttling Readjusts the playback position if synchronization is off by the Slack
value.
• Full Re-Sync When Shuttling Performs a full re-synchronization if synchronization is off by the Slack value.
External Controllers preferences
You can use external controllers, such as the Mackie Control, when recording and mixing in Adobe Audition. These
devices let you edit audio tracks using real knobs and automated faders, instead of your mouse and computer
keyboard. With an external controller, you can automate settings for several tracks at once. (See “Automating track
settings” on page 204.)
Page 46

ADOBE AUDITION 3.0
User Guide
In the Preferences dialog box, click the External Controllers tab to access the following options:
External Control Device Specifies the controller you want to use.
Volume Increment Sets the minimum volume change for the data-entry knob on the controller.
Configure Accesses additional options provided by the controller software. Refer to your controller documentation
for more information.
Managing temporary files
About temporary files
When you edit a file, Adobe Audition copies the audio data into a temporary file for internal use. This process allows
for quicker editing, better handling of large files, and the ability to undo changes.
When specifying folders for temporary files, you should use hard disks with plenty of free space. (To specify these
folders, see “System preferences” on page 34.) If free disk space reaches 45 MB, the Manage Temporary Folder
Reserve Space dialog box appears. You can use this dialog box to delete temporary files and clear undo items.
Use the status bar to monitor the amount of free disk space. (See “Display the status bar” on page 27.)
41
A
Manage Temporary Folder Reserve Space dialog box
A. Open waveforms B. Undo items for the selected waveform C. Location of primary and secondary temporary folders
B
C
Manage temporary folder space
1 Choose File > Manage Temporary Folder Reserve Space.
2 Do any of the following:
• To close a temporary file you’re no longer using, select the file in the Waveform list and click Close File. (The
currently active waveform can’t be closed this way, however.)
• To clear Undo items for a file, select the file in the Waveform list. The Undo History list displays the actions that
are currently being retained on your system and the amount of hard drive space each instance consumes. Select
an item and click Clear Undo(s). All items at the selected level and below are removed.
Page 47

ADOBE AUDITION 3.0
User Guide
• To stop any action in progress, such as the application of an effect or any other edit, click Cancel Last Operation.
This option is useful only if the dialog box automatically appeared because you ran out of storage space.
If Adobe Audition crashes, there may be a temp file (audxxxx.tmp) in your temporary folder that you should
manually delete.
See also
“System preferences” on page 34
Access an open file in another application
If an open Windows PCM (.wav) file hasn’t yet been edited, and you need to access it in another application, flush a
virtual version of the file. Flushing copies audio data from the file to atemporary folder.(This happens automatically
if you alter the entire audio file.)
❖ In Edit View, choose File > Flush Virtual File.
42
Page 48

Chapter 5: Importing, recording, and playing audio
Opening audio files in Edit View
Create a new, blank audio file
The File > New command creates blank audio files, which are perfect for recording new audio or combining pasted
audio.
1 In Edit View, choose File > New.
Toquicklycreateanewfilefromselectedaudioinanopenfile,chooseEdit>CopyToNew.(See“Copyorcutaudio
data” on page 76.)
2 In the New Waveform dialog box, set the following options, and click OK:
Sample Rate Determines the range of frequencies that can be reproduced. To reproduce a given frequency, the
sample rate must be at least twice that frequency. (See “Sample rate” on page 10.)
43
Channels Determines if the waveform is mono or stereo.
• Mono Creates a waveform with just one channel of audio information. This option works well for a voice-only
recording.
• Stereo Creates a two-channel waveform with separate right and left channels. This option is usually best for a
music recording. However, because stereo waveforms contain twice as much data, they consume twice the storage
space of mono waveforms.
Resolution Determinestherangeofamplitudelevelsthatcanbereproduced.The32-bitlevelisbestwhileyouwork
in Adobe Audition. You can convert down for output later, if necessary. (See “Change the bit depth of a file” on
page 99.)
Note: If you have an older sound card that can’t play 32-bit files properly, you can use a lower bit depth for playback,
without lowering the bit depth of a file. To check the capabilities of your sound card, choose Edit > Audio Hardware
Setup, select the sound card under Audio Driver, and click Control Panel. For information about the available options,
see your sound card documentation.
Open existing audio files
In Edit View, you can open audio from a variety of audio file formats, including MP3, WAV, and AIFF. You can also
open the audio portion of video files in AVI, MPEG, MOV, or WMV format.
1 InEditView,chooseFile>Opentoopenanaudiofile,orchooseFile>OpenAudioFromVideotoopenavideofile.
2 Locate and select the file you want to open. To select multiple, adjacent files, click the first file and Shift-click the
last. To select multiple, nonadjacent files, Ctrl-click them.
Note: Ifyoudon’tseethenameofthefileyouwant,chooseAllSupportedMediafromtheFilesOfTypemenu.Ifyoustill
don’t see the file, it might be stored in a format that Adobe Audition can’t read.
Page 49

ADOBE AUDITION 3.0
User Guide
3 (Optional) To preview the contentsof a selected audio file, clickPlay to listen to the file once, select Loop torepeat
the file until you click Stop, or select Auto Play to play files automatically when you select them.
4 Click Open.
See also
“About audio file formats” on page 244
“About video file formats” on page 252
Append one or more audio files to another
1 In Edit View, open the audio file that you want to add on to.
2 Choose File > Open Append.
3 IntheOpenAppenddialogbox,selectoneormorefiles.(Toselectmultiple,adjacentfiles,clickthefirstfileand
then Shift-click the last. To select multiple, nonadjacent files, Ctrl-click them.)
Note: If the selected audio files have a different sample rate, resolution, or channel type than the open audio file, Adobe
Auditionconvertstheselectedfilestomatchtheopenfile.Forthebestresults,appendfileswiththesamesampletypeas
the original audio file.
44
4 Click Append.
Import a bitmap image as audio
In Edit View, you can import bitmap image (BMP) files created by any application. For the most predictable sonic
results, import images of spectral graphs you saved from Adobe Audition and modified in an image-editing application. For sonic experimentation, import photographs, logos, and other visually-oriented files.
Whenimportingasavedspectralgraph,makesuretherelatedphasefileisinthesamefolder.Formoreinformation
about saving spectral graphs, see “Spectral Bitmap Image (.bmp)” on page 250.
Bitmap image imported into spectral frequency selection
1 (Optional) Open an audio file you want to incorporate an image into. Then, in Spectral Frequency Display ,
select a time or frequency range.
2 Choose File > Import Bitmap.
Page 50

ADOBE AUDITION 3.0
User Guide
3 Select an image file in BMP format, and click Open.
4 Select one of the following import options:
Carve/Modulate Into Selection Applies the imported image as a mask, which filters existing spectral data.
Direct Paste Into Selection Completely replaces existing spectral data with the imported image.
Overlap Paste Into Selection Addstheimportedimagetoexistingspectraldata,producingresultssimilartotheMix
Paste command. (See “Mix audio data when pasting” on page 77.)
Full Import To New Waveform Creates a new audio file from the imported image. When you click OK, this option
displays the New Waveform dialog box, where you specify sample rate, channels, and bit resolution. For more information about these options, see “Create a new, blank audio file” on page 43.
5 In the Advanced Options section, adjust the following settings if needed, and then click OK.
Note: Some options below are available only when specific import options are selected above.
White, Black Determine the decibel values that the brightest highlights and darkest shadows correspond to. Specify
a small range to produce compressed audio or a large range to produce more dynamic audio.
Gamma Adjusts the midtone point, determining the relative amount of highlights and shadows. The standard
gamma for Windows is 2.2. If the imported image was created in Mac OS, however, specify the standard gamma for
that platform, 1.8. Or, specify more extreme gamma settings to produce experimental results.
45
If you set Black to a high amplitude value (such as -20 dB) and White to a low one (such as -100 dB), invert the
gamma for better results. For example, instead of 2.0, use 0.5.
Frequency Spacing Available only with the Direct Paste and Overlap Paste options above, this setting determines
how colors are distributed across the frequencyspectrum. Lowervalues space colors moredensely but require longer
processing. Higher valuesprovide quicker processing but reduce image detail.The default setting is 100 Hz for linear
frequency display mode, or 100 Cents for logarithmic display mode. With cents, large values (50 or more) provide
more musical results, particularly in Pure Tones mode.
Pure Tones Produces spectral lines at specific frequencies that vary in amplitude based on the image data. In
logarithmic mode, harmonic results are easily achieved. In linear frequency display mode, results are very robotic
and buzzy.
Random Noise Bands Adds a random frequency to each spectral line, smoothing out the harshness of pure tones.
Solid color patches play as smoother noise, hiss, or rumble.
Track Spectral Features Achieves higher detail with fewer spectral lines. The results are less buzzy than with Pure
Tones mode, with the ability to simulate noise cleanly as well. Individual lines in the source image are translated to
individual frequency harmonics that follow the contour of the original image. Grass, whiskers, branches, and other
features with lines are reproduced as spectral lines, providing a pen-and-ink or woodblock-print effect. Subtle
patterns in the image are also preserved and audible. (By contrast, the two other modes above lose pattern detail.)
Log Amplitude or Linear Transfer Converts brightness values into audio amplitude either logarithmically (inter-
preting color data as decibels) or linearly (interpreting color data as amplitude percentages).
High Resolution AvailableonlywhenCarve/ModulateorFullImportisselectedabove,thisoptionincreasesimage
detail, requiring longer processing. High resolution is recommended if the bitmap image is an exported spectral
graph that you modified in an image-editing application such as Adobe Photoshop.
Reset Returns all settings to the defaults, which are best for importing to a new file.
Page 51

ADOBE AUDITION 3.0
User Guide
See also
“Saving and exporting files” on page 240
Convert audio to a different sample type when opening
1 In Edit View, choose File > Open As.
2 Locate and select the file you want to open, and click Open.
3 Set the desired Sample Rate, Channels, andResolution options inthe Open Asdialog box, and click OK. For more
information, see “Create a new, blank audio file” on page 43.
Opening and adding to sessions in Multitrack View
Create a new session
Session files contain no audio data themselves. Instead, they are small files that point to other audio files on the hard
drive. A session file keeps track of which files are a part of the session, where they are inserted, which envelopes and
effects are applied, and so on.
46
1 Choose File > New Session.
2 Select a sample rate that your sound card supports. (To determine supported sample rates, consult the documen-
tation for the card.)
Note: All files added to a session must share the sample rate. If you attempt to import files with different sample rates,
Adobe Audition prompts you to resample them, which may lower audio quality.
3 (Optional) Select Use Default Session to use that session as a template. (See “Set or clear a default session” on
page 47.)
4 Click OK.
See also
“About multitrack sessions” on page 179
“Sample rate” on page 10
“Save multitrack sessions” on page 241
Open an existing session
1 In Multitrack View, choose File > Open Session.
2 Locate and select the session (.ses) file, and click Open.
Note: Only one session can be open at a time.
See also
“Convert the sample rate of a session” on page 242
Page 52

ADOBE AUDITION 3.0
User Guide
Set or clear a default session
After you set a default session, it opens whenever you start Adobe Audition. This default can also serve as a template
for new sessions, letting you share settings, such as track inputs and volume levels, across multiple sessions.
Clearing a default session does not affect the session files themselves. It simply prevents Adobe Audition from
automatically opening a specific session each time you start the application.
❖ In Multitrack View, do one of the following:
• To set a session as the default, open it, and choose File > Default Session > Set Current Session As Default. If the
session contains clips, click Yes in the dialog box that appears.
• To specify no default session, choose File > Default Session > Clear Default Session.
Insert an audio file into a session
When you insert an audio file in Multitrack View, the file becomes an audio clip on the selected track. If you insert
several files at once, or a single file that’s longer thanthe space available on the selected track, Adobe Audition inserts
new clips on the nearest empty tracks.
Note: ForBroadcastWavefiles,AdobeAuditioncanusetheembeddedtimestamptoplacefilesattheproperstarttimes.
(See “Spot insert a Broadcast Wave file into a session” on page 47.)
47
1 In Multitrack View, select a track, and then place the start-time indicator at the desired time position.
2 Do one of the following:
• To insert one or more audio files, choose Insert > Audio, select the files, and click Open. (To preview the contents
of selected files, click Play or select Auto Play. Select Loop to repeat previews and Stop to end them.)
• To insert the audio portion of a video file in AVI, MOV, MPEG, or WMV format, choose Insert > Audio From
Video, select a file, and click Open.
• To insert a currently open audio file, choose Insert > [file name].
• To insert a marker range from an open audio file, choose Insert > File/Marker List. In the window that appears,
click the plus sign (+) to list a file’s marker ranges, and select the range you want to add.
• ToinsertfilesfromtheFilespanel,selectthem,andclicktheInsertIntoMultitrackbutton ,orpresstheInsertkey.
See also
“About clips” on page 191
“Insert MIDI into a session and access the Sequencer” on page 214
“Insert a video file into a session” on page 228
“Use files in the Files panel” on page 49
Spot insert a Broadcast Wave file into a session
When you insert a Broadcast Wave (BWF) file into a multitrack session, Adobe Audition can use the embedded
timestamp to insert the file at a specific time. This is commonly called spot inserting.
1 In Multitrack View, do any of the following to use embedded timestamps:
• Choose Insert > Insert Using BWF Timestamp.
• Right-click in the Files panel, and choose Use BWF Time Reference Offset.
Page 53

ADOBE AUDITION 3.0
User Guide
• Click the Multitrack tab in the Preferences dialog box, and select Use BWF Time Reference As Insert Start Time.
2 In the Main panel, select a track.
3 Choose Insert > Audio, and select a BWF file.
Adobe Audition inserts an audio clip at the designated start time.
To view or edit the timestamp for a BWF clip, open the clip in Edit View, and then choose File > File Info. Click the
Broadcast Wave tab. The timestamp value appears as the Time Reference.
See also
“Add audio file information” on page 253
Importing with the Files panel
Files panel overview
The Files panel displays a list of open waveforms, MIDI files, and video files for easy access. The Files panel also
provides a variety of advanced options that let you show and hide markers, change the sort order of files, and play
individual files. You can show or hide advanced options by clicking the Show Options button in the upper right
corner of the panel.
48
Files panel
See also
“Preview audio in the Files panel” on page 49
Import files into the Files panel
1 In the Files panel, click the Import File button .
2 IntheImportdialogbox,locateandselectthefileorfilesyouwanttoimport,andclickOpen.(Youcanselectany
audio, MIDI, or video files available on your computer or network.)
Note: For video files, the Files panel creates two clips: a video-only clip with the original file name (such as “clock.avi”)
and an audio-only clip named “Audio for” followed by the original file name (such as “Audio for clock”).
Page 54

ADOBE AUDITION 3.0
See also
“Preview audio in the Files panel” on page 49
Use files in the Files panel
1 In the Files panel, select the files you want to work with:
• To select a single file, click it.
• To select adjacent files, click the first file in the desired range, and then Shift-click the last.
• To select nonadjacent files, Ctrl-click them.
2 At the top of the Files panel, do any of the following:
• To open a selected file in Edit View, click the Edit File button .
Note: If you select multiple files, only the last file you click opens in Edit View.
• To simultaneously insert each selected file into an individual track of the current session, click the Insert Into
Multitrack button . (See “Insert an audio file into a session” on page 47.)
• To insert all selected files into CD View, click the Insert Into CD List button . (See “Insert CD tracks” on
page 264.)
• To close all selected files, click the Close File button .
User Guide
49
See also
“Preview audio in the Files panel” on page 49
Change how files appear in the Files panel
1 Click the Show Options button at the top of the Files panel to display option buttons at the bottom of the
panel.
2 Use the option buttons to do any of the following:
• To change the sort order of files, choose an option from the Sort By pop-up menu.
• To show or hide files according to type, select one or more of the following buttons: Show Audio Files , Show
Loop Files , Show Video Files , and Show MIDI Files .
• To show or hide markers, click Show Markers . When Show Markers is selected, a plus-sign (+) appears next
to any files that contain markers. Click the plus-sign to display the marker names. For more information, see
“About markers” on page 80.
• To display the full path [drive, folder(s), filename] to each file, select the Full Path button .
Preview audio in the Files panel
The Files panel provides several play options that make it easy to preview loops and other files. These options are
particularly handy when you work in Multitrack View because they let you preview loops at the session tempo.
1 Click the Show Options button at the top of the Files panel to display option buttons at the bottom of the
panel.
Page 55

ADOBE AUDITION 3.0
User Guide
2 Do any of the following:
• Selectthefileyouwanttopreview,andthenclickthePlaybutton .ClicktheStopbutton tostopthepreview.
Use the volume knob to adjust the volume of the preview.
• To automatically preview a file when you select it, click the Auto Play button .
• To enable continuous-loop preview, click the Loop Play button .
• (Multitrack View only) To preview loop-enabled files at the session tempo, select Follow Session Tempo.
Loop-enabled files are identified with a loop icon .
See also
“Files panel overview” on page 48
Importing with Adobe Bridge
When you install Adobe Audition, you can optionally install Adobe® Bridge. Adobe Bridge is a cross-platform application that helps you locate, organize, and browse the assets you need to create audio, video, and web content.
50
From Adobe Bridge, you can:
• Preview, search, and sort audio and video files.
• Edit metadata for files.
• Place files into your audio projects.
• Perform automated tasks, such as batch commands.
• Start a real-time web conference to share your desktop and review documents.
For more details, either choose Help > Bridge Help in Adobe Bridge, or go to www.adobe.com/go/documentation.
Importing audio from CDs
About importing audio from CDs
If you want to import audio into Adobe Audition from a CD, you can digitally extract it or record it internally.
Digital extraction (also known as ripping) is the recommended method because it produces higher-quality audio
than internal recording. Adobe Audition provides two methods for ripping tracks from CDs: the Open command
andtheExtractAudioFromCDcommand.TheOpencommandisthequickestmethodandispreferredforripping
entire tracks. The Extract Audio From CD command gives you more control, including the ability to rip partial
tracks, access online CD databases, and customize the ripping process.
If you have an older CD-ROM drive that doesn’t support digital extraction, or if you have problems ripping a track
into Adobe Audition, then you can record from a CD in real-time through the sound card on your computer. This
method is called internal recording. Keep in mind that not all PCs have an analog cable from a CD drive, and not all
computers react the same way when recording from CD internally. As a result, this method is never preferable to
extracting digitally from CD.
Page 56

ADOBE AUDITION 3.0
User Guide
Extract CD tracks with the Open command
1 Place an audio CD in the computer’s CD-ROM drive.
2 In Edit View, choose File > Open.
3 Choose CD Digital Audio (*.cda) as the file type, and navigate to the CD-ROM drive.
4 Select the tracks you want to rip, and click Open.
Extract CD tracks with the Extract Audio From CD command
1 Place an audio CD in the computer’s CD-ROM drive.
2 In Edit View or CD View, choose File > Extract Audio From CD.
3 UnderDevice Interface Options, choose the drive that contains the audio CD. If necessary,set remaininginterface
options.
4 For Selection, do one of the following:
• Select Absolute Block Selection to extract part of a track or a segment of audio that spans multiple tracks. In the
Start box, enter the beginning frame. In the Length box, enter the total number of frames you wish to extract.
(Each second of CD audio has 75 frames.) The resulting start and length times appear in Min:Sec:Frame format
to the left of their respective boxes. The range bar provides a graphical representation of how much audio will be
extracted and where the audio appears within the CD.
51
TheoptionaboveisgreatforpullinghiddentracksfromCDs,orforjoiningtracksthathavebeenbrokenupbytrack
indexes (such as live performances).
• Select Track to extract one or more complete CD tracks. A list of all tracks on the CD appears, along with their
lengths stated in Min:Sec:Frame format. Select the desired tracks, and then set any of the following options:
Extract To Single Waveform Creates one audio file from all selected tracks.
Artist, Album, Genre, Year Adds track information you either manually enter or acquire automatically from a CD
database.
To rename a track, double-click it.
Get Titles Acquires track information from a CD database you specify by clicking Configure.
Clear Removes all existing track information.
Configure Opens the Configure Titles dialog box, where you specify an online CD database and determine title
format.
5 To listen to the selected tracks before extracting them, click Preview.
6 To save the settings for future use, save a preset. (See “Use effect presets” on page 104.)
7 After you finish setting options, click OK.
Configure track information from a CD database
1
In the Extract Audio From CD dialog box, click Configure.
2 In the HTTP Titles Database box, enter the domain name or IP address for your favorite CD database.
3 Enter your e-mail address. (Adobe Audition doesn’t use this information, but many CD databases require it.)
Page 57

ADOBE AUDITION 3.0
4 In the Parse Song Title and Filename Template boxes, specify the information you want to include in the title and
User Guide
filename. Symbols correspond to information such as Artist (%a), Song Title (%s), Year (%y), and so on.
5 To capitalize first letters in words and trim spaces atthe beginning andend of track titles, select the corresponding
options.
6 Click OK.
Set Device Interface options
1
In the Extract Audio From CD dialog box, select Generic Win32 or ASPI/SPTI. In most cases, ASPI/SPTI is the
best choice. Select Generic Win32 only if the ASPI/SPTI option doesn’t produce satisfactory results. (The Generic
Win32 option uses Input/Output control codes instead of SCSI commands.)
If you select ASPI/SPTI, set the following options:
Read Method Determines how Adobe Audition reads CD audio. Several methods are provided, many of them
developed before the SCSI 3 specifications were published. (The SCSI 2 specs don’t accommodate CD ripping.)
• MMC – Read CD A SCSI 3-specific setting that works with mostnewer drives. If you have anewer CD-ROMdrive,
try this setting first.
• SBC – Read(10) A standard SCSI read setting that uses a 10-byte SRB (SCSI Request Block). All SCSI devices are
required to support this setting.
52
• SBC – Read(6) A standard SCSI read setting that uses a 6-byte SRB (SCSI Request Block). Many SCSI devices
support this setting, but because it’s optional, not all do.
• Plextor (D8) Sends the D8 SCSI Op Code to the CD-ROM drive. Use this setting with older Plextor CD-ROM
drives.
• NEC (D4) Works with older NEC CD-ROM drives.
CD Speed Lists all extraction speeds that the selected CD-ROM drive supports and lets you specify the speed you
want to use. The Max (Maximum) Speed option usually produces satisfactory results, but if it produces errors,
specify a slower speed.
Buffer Size Specifies how much data Adobe Audition calls into the CD Extraction module to fetch, therefore deter-
mining how much data is pulled from the CD in each call to the read command. The default is 16 KB, but you can
experiment with other sizes (which range all the way to the highest buffer size the CD-ROM drive supports).
Although higher sizes mean faster ripping, they could introduce errors into the ripped file.
Swap Byte Order Changes the byte order from Little Endian to Big Endian, or vice versa. Some CD-ROM drives
designed to work only with other types of computers (like DEC and Macintosh® systems) report data by using the
Little Endian byte order, while PCs use the Big Endian method. Normally, you should leave this option deselected;
select it only if the extraction process seems to work fine but the audio results contain only digital noise.
Swap Channels Places the left channel of CD audio in the right channel of the Main panel, and places the right
channel of CD audio in the left channel of the panel.
Spin Up Before Extraction Causes the CD-ROM drive to start spinning before Adobe Audition extracts the data.
Some CD-ROM drives have better accuracy if they first read the CD after the drive is spinning. Selecting this option
for other drives, however, doesn’t provide any advantage.
2 For Error Correction, CDDA Accurate is automatically selected if the CD-ROM drive has built-in ripping error
correction. If your drive isn’t CDDA Accurate, select either No Correction or Jitter Correction. (The latter compensates for data reading problems that older drives might have.)
Page 58

ADOBE AUDITION 3.0
User Guide
Record from a CD internally
1 Preview the CD Audio input level to make sure that clipping won’t occur. (See “Preview the CD Audio input level”
on page 53.)
2 In Edit View, create a new file.
3 In the Transport panel, click the Record button .
4 Start the desired track in your CD player application.
5 When desired, stop recording in both Adobe Audition and the CD player application.
Preview the CD Audio input level
1 Open your favorite third-party CD player application (such as Windows Media Player).
2 Start playing the loudest part of the CD. Then, switch to Edit View in Adobe Audition, and choose Options >
Metering > Monitor Record Level.
3 Use the Levels panel to monitor the amplitude of the incoming signal. You want the input level to be as loud as
possible without exceeding 0 dB. If the input level exceeds 0 dB, clipping occurs. (See “Level meters overview” on
page 62.)
4 If you need to adjust the CD Player input level, choose Options > Windows Recording Mixer to open the
Windows Recording Control mixer. Adjust the CD Player input level as desired.
5 In Adobe Audition, deselect Options > Metering > Monitor Record Level.
53
Getting ready for recording and playback
Transport panel overview
Just like many hardware-based audio recording and playback devices, Adobe Audition provides transport controls
for playing, recording, stopping, pausing, fast forwarding, and rewinding waveforms and sessions. Choose
Window > Transport Controls to show or hide the Transport panel.
Right-click buttons in the panel to set options for playing, recording, fast forwarding, and rewinding audio.
Transport panel
See also
“Playing audio” on page 60
Page 59

ADOBE AUDITION 3.0
User Guide
Monitoring time during recording and playback
Adobe Audition provides several features to help you monitor time during recording and playback:
• The start-time indicator is a vertical, dotted yellow line in the Main panel. You set the start-time indicator to start
playback or recording at a specific point in a waveform.
• The playback cursor appears as a vertical, solid white line in the Main panel. As you listen to audio files, the
playback cursor moves, showing you the current time in the waveform.
• The Time panel shows the current time in numerical format. The default time format is Bars and Beats, but you
can easily change it. The same format is used by the timeline along the bottom of the Main panel.
A
B
C
D
54
Features that help you monitor time
A. Start-time indicator B. Playback cursor C. Timeline D. Time panel
Set the start-time indicator
❖ Do one of the following:
• In the Main panel, click to move the start-time indicator to a new timeline position. (To perform this technique
in Multitrack View, use any tool other than the Move/Copy tool.)
• In the Main panel, drag the handle (the yellow triangle) above or below the start-time indicator to a new timeline
position.
• In the Selection/View panel, type a precise time in the Selection option under Begin, and press Enter.
After you set the start-time indicator, you can save it as a marker for later reference. See “About markers” on page 80.
Synchronize the start-time indicator across files or views
In Edit View, you can maintain the position of the start-time indicator when you switch between files—a useful
technique when editing different versions of the same waveform. In Multitrack View, you can maintain the position
of the start-time indicator when you switch to Edit View, a useful technique when applying edits and effects in both
views.
• To synchronize the start-time indicator between waveforms in Edit View, choose Options > Synchronize Cursor
Across Windows.
• To synchronize the start-time indicator between Multitrack View and Edit View, choose Options > Synchronize
Clips With Edit View in Multitrack View.
Page 60

ADOBE AUDITION 3.0
User Guide
Adjust the playback cursor
❖ Click one of the following buttons in the Transport panel:
Pause Temporarily stops the playback cursor. Click the Pause button again to resume playback or recording.
Go To Beginning Or Previous Marker Places the playback cursor at the beginning of the next marker. If there are
no markers, the playback cursor moves to the beginning of the waveform or session.
Rewind Shuttles the playback cursorbackward intime. This function supports scrubbing, meaningthat onsome
sound cards,the audio file plays back at a lower volume as the playback cursor shuttles over the waveform or session.
Right-click the Rewind button to set the rate at which the cursor moves.
Fast Forward Shuttles the playback cursor forward in time. This function supports scrubbing, meaning that on
some sound cards, the audio file plays back at a lower volume as the playback cursor shuttles over the waveform or
session.
Right-clicktheFastForwardbuttontosettherateatwhichthecursormoves.
Go To End Or Next Marker Moves the playback cursor to the next marker. If there are no markers, the playback
cursor moves to the end of the waveform or session.
55
To change the time display format
❖ Choose View > Display Time Format, and choose the desired option:
Decimal (mm:ss.ddd) Displays time in minutes, seconds, and thousandths of a second.
Compact Disc 75 fps Displays timein the same format utilized by audiocompact discs, whereeach second equals 75
frames.
SMPTE 30 fps Displays time in the SMPTE format, where each second equals 30 frames.
SMPTE Drop (29.97 fps) Displays time in the SMPTE drop-frame format, where each second equals 29.97 frames.
SMPTE 29.97 fps Displays time in the SMPTE non-drop-frame format, where each second equals 29.97 frames.
SMPTE 25 fps (EBU) Displays time using the standard European frame rate, where each second equals 25 frames.
SMPTE 24 fps (Film) Displays time in a format where each second equals 24 frames, suitable for film.
Samples Displays time numerically, using as a reference the actual number of samples that have passed since the
beginning of the edited file.
Bars and Beats Displays time in a musical measures format of bars:beats:ticks. To adjust the settings, choose Edit
Tempo. For more information, see “Calculate the tempo of a selected range” on page 225.
Custom (X frames/sec) Displays time in a custom format. To modify a custom format, choose Edit Custom Time
Format, enter a number of frames per second for Custom Time Code Display, and click OK.
Page 61

ADOBE AUDITION 3.0
User Guide
Recording audio
Record audio in Edit View
You can record audio from a microphone or any device you can plug into the Line In port of a sound card. Before
recording, you may need to adjust the input signal to optimize signal-to-noise levels. (See either “Adjust levels for a
consumer sound card” on page 64 or the documentation for a professional card.)
1 Set audio inputs for Edit View. (See “Set audio inputs and outputs” on page 31.)
2 Do one of the following:
• Create a new file.
• Open an existing file to overwrite or append new audio, and place the start-time indicator whereyou want to start
recording.
3 In the Transport panel, click the Record button to begin recording. When you finish, click the Stop button .
To disable the Record button so that you don’t start recording accidentally, right-click the Record button, and choose
Disable Record Button. Repeat to reenable the button.
See also
“Create a new, blank audio file” on page 43
56
“Set the start-time indicator” on page 54
“Record from a CD internally” on page 53
“Monitoring recording and playback levels” on page 62
Use timed record mode in Edit View
1 Choose Options > Timed Record Mode. Alternatively, right-click the Record button in the Transport panel, and
choose Timed Record Mode. A check mark indicates that Timed Record Mode is enabled.
2 In the Transport panel, click the Record button .
3 Select the maximum recording time:
No Time Limit Records until you click the Stop button (or until disk space runs out).
Recording Length Records for a limited period of time, which you type into the box, using the same display time
format (such as Decimal or Bars And Beats) as the Main panel time display.
4 Select when to start recording:
Right Away Begins recording as soon as you click OK.
Time/Date Begins recording at a time you specify (for example, to have Adobe Audition capture a radio broadcast
at a certain time). Enter the starting time and date in the appropriate text boxes, and set the desired time and date
options.
5 Click OK.
See also
“Transport panel overview” on page 53
Page 62

ADOBE AUDITION 3.0
User Guide
Direct-to-file recording in Multitrack View
In Multitrack View, Adobe Audition automatically saves each recorded clip directly to a WAV file. Direct-to-file
recording lets you quickly record and save multiple clips, providing tremendous flexibility.
Priortorecordinginasession,youmustsaveitsothatAdobeAuditioncanstorerecordedclipsinthesessionfolder.
Insidethatfolder,you’llfindeachrecordedclipinthe[session name]_recorded folder. Clip file names begin with the
track name, followed by the take number (for example, Track 1_003.wav).
After recording, you can edit takes to produce a polished final mix. For example, if you create multiple takes of a
guitar solo, you can combine the best sections of each solo. Or, you can use one version of the solo for a video
soundtrack, and another version for an audio CD.
See also
“Trimming and extending clips” on page 195
“Loop while recording in Multitrack View” on page 58
“Punch into a selected range in Multitrack View” on page 58
Record audio clips in Multitrack View
In Multitrack View, you can record audio on multiple tracks by overdubbing. When you overdub tracks, you listen
to previously recorded tracks and play along with them to create sophisticated,layered compositions.Each recording
becomes a new audio clip on a track.
57
1 In the Inputs/Outputs area of the Main panel, choose a source from a track’s Input menu.
Note: If you have a consumer sound card, you must also select the proper source in the Windows Recording Control
mixer. (See “Adjust levels for a consumer sound card” on page 64.)
2 Click the Arm For Record button for the track.
If you enable a track for recording in an unsaved session, the Save Session As dialog box appears. Specify a name and
location, and click Save. (For more information, see “Direct-to-file recording in Multitrack View” on page 57.)
3 (Optional) To simultaneously record on multiple tracks, repeat steps 1-2 for each track.
4 In the Main panel, position the start-time indicator at the desired starting point, or select a range for the new clip.
5 In the Transport panel, click the Record button to begin recording. When you finish, click the Stop button .
See also
“Set audio inputs and outputs” on page 31
“Monitoring recording and playback levels” on page 62
Hear inputs with effects applied to tracks
In Multitrack View, you can hear inputs with effects and sends that you’ve applied to a track, giving you an accurate
preview of how recorded material will sound in the final mix. You can choose whether to hear an input all the time,
or only when you reach a recordable portion of a track, such as a blank area or a punch-in range.
Page 63

ADOBE AUDITION 3.0
User Guide
Note: ASIO sound cards are highly recommended for this feature. DirectSound cards increase latency (an audible delay)
that disrupts timing for musicians. To reduce latency, see “Set driver properties for a sound card” on page 32.
1 Choose Options > Monitoring > Audition Mix, and then select one of the following:
Smart Input Monitors the input only when recording a track. When playing back, monitors only the clips on the
track, not the input.
Always Input Monitors the input at all times during playback and recording. Any existing clips on the input track
are not played.
2 To start monitoring an input, click an Arm For Record button in the track controls.
3 To begin recording, click the Record button in the Transport panel.
Hear inputs without effects applied to tracks
To avoid latency (an audible delay) when recording in Multitrack View, you may prefer to hear inputs directly from
the sound card, without routing them through effects and sends in Adobe Audition.
1 Choose Options > Monitoring > External.
2 To set monitoring options, do one of the following:
• For a consumer sound card, use the Windows Volume Control mixer.
• For a professional sound card, see the card’s documentation.
58
Loop while recording in Multitrack View
If you loop while recording, Adobe Audition saves a new clip for each take. This feature is ideal for difficult musical
passages. Simply loop while recording until the performer produces the perfect take. Or combine the best parts of
each take to create a new clip. For more information, see “Display, remove, or play hidden clips” on page 195.
1 Set up one or more tracks for recording. (See “Record audio clips in Multitrack View” on page 57.)
2 In the Transport panel, right-click the Record button , and choose one of the following options:
• Loop While Recording (View or Sel) to loop when the cursor reaches the end of the viewable range of track. If a
range is selected, looping occurs when the cursor reaches the end of the range.
• Loop While Recording (Entire or Sel) to loop when the cursor reaches the end of the track. If a range is selected,
looping occurs when the cursor reaches the end of the range.
3 Click the Loop While Recording button to begin recording. When you finish, click the Stop button .
See also
“Transport panel overview” on page 53
“Direct-to-file recording in Multitrack View” on page 57
Punch into a selected range in Multitrack View
If you’re dissatisfied with a time range of a recorded clip, you can select that range and punch in a new recording,
leaving the original clip intact. Though you can record into a specific range without punching in, punching in lets
you hear audio immediately before and after a range; that audio provides vital context for creating natural musical
transitions.
Page 64

ADOBE AUDITION 3.0
User Guide
For particularly important or difficult sections, you can punch in multiple takes, and then select or edit takes to
create the best performance. Adobe Audition saves two seconds of audio on either side of a punch-in range, so you
can seamlessly edit and crossfade takes. (See “Display, remove, or play hidden clips” on page 195.)
Note: You can't punch into a loop-enabled clip. For information about disabling loops, see “Override original loop
properties” on page 222.
A take created with the Punch In command
1 In the Main panel, drag the Time Selection tool in the appropriate track to select a time range for the clip.
2 Make sure that the correct track input is selected. (See “Assign audio inputs and outputs to tracks” on page 186.)
3 Choose Clip > Punch In.
4 Position the start-time indicator a few seconds before the selected range.
59
The Arm For Record button for the track is now activated in the Main panel.
5 In the Transport panel, do one of the following:
• To punch in a single take, click the Record button .
• To punch in multiple takes, right-click the Record button, choose a Loop While Recording option, and then click
the Loop While Recording button .
See also
“Transport panel overview” on page 53
“Direct-to-file recording in Multitrack View” on page 57
Punch in during playback in Multitrack View
If you don’t need to punch into a specific range, you can quickly punch into a general area during playback.
1 Enable one or more tracks for recording. (See “Record audio clips in Multitrack View” on page 57.)
2 In the Transport panel, click the Play button .
3 When you reach an area where you want to begin recording, click the Record button . When you finish
recording, click the button again.
Page 65

ADOBE AUDITION 3.0
User Guide
Playing audio
Play audio linearly
The Transport panelprovides several options forplaying audio linearly, fromone time point to another. For example,
youcanplaythevisibleportionofafile,theareafromthestart-timeindicatortotheendofthefile,ortheentirefile.
TostartplaybackwithoutusingtheTransportpanel,pressthespacebar.Pressthespacebaragaintostopplayback.
1 In the Main panel, do either of the following:
• Set the start-time indicator.
• Select a range.
2 In the Transport panel, right-click the standard or circled Play button, and select one of the following
options:
Play View Plays the visible portion of the file.
Play From Cursor To End Of View Plays from thestart-time indicatorto the end of thevisible portion of the file.(This
option is the default for the circled Play button.)
60
Play From Cursor to End Of File Plays from the start-time indicator to the end of the file. (This option is the default
for the standard Play button.)
To restrict playback to a selected time range, select one of the Play From Cursor options above.
Play Entire File Plays the complete file.
Play Spectral Selection Plays only frequencies you’ve selected with the Marquee , Lasso , or Effects
Paintbrush tool.
3 To start playback, click the Play button you customized.
Note: Bydefault,theMainpanelscrollsinsyncwithplaybackthatextendsbeyondthevisiblesectionofawaveform.In
the General tab of the Preferences dialog box, you can customize auto-scrolling options or disable this feature. (See “Set
Adobe Audition preferences” on page 33.)
See also
“Transport panel overview” on page 53
“View the top and tail of an audio file” on page 71
“Play selections with preroll and postroll” on page 61
Play selections or files in a loop
If you need to fine-tune a selected range or experiment with different effects processing, loop playback.
1 If you want to loop a specific time range, select it in the Main panel.
2 In the Transport panel, right-click the Play Looped button , and choose either of the following:
Loop View (Or Selection) Plays the currently visible audio or selected range in a continuous loop.
Loop Entire (Or Selection) Plays the entire file or selected range in a loop.
Page 66

ADOBE AUDITION 3.0
User Guide
3 To start playback, click the Play Looped button.
See also
“View the top and tail of an audio file” on page 71
Play selections with preroll and postroll
You can play selected ranges with preroll and postroll (short segments of audio immediately preceding and following
the selection). Playing preroll and postroll lets you hear transitions so that you can fine-tune a selection.
1 In the Transport panel, right-click the standard Play button or the circled Play button , and choose any of
the following:
• Play Preroll And Postroll (Skip Selection)
• Play Preroll And Selection
• Play Postroll
• Play Preroll, Postroll, And Selection
2 To start playback in the selected preroll and postroll mode, click the Play button you customized.
3 (Optional) To deactivate preroll and postroll, right-click the standard or circled Play button, and choose any of
the first four playback options.
61
See also
“Play audio linearly” on page 60
“Play selections or files in a loop” on page 60
Change preroll and postroll durations
By default, the duration of preroll and postroll is one second, but you can change these settings.
1 In Edit View, choose Options > Preroll And Postroll Options.
2 Under Edit View - Play, enter preroll and postroll durations for selected ranges in the Main panel.
3 Under Effects Preview, enter preroll and postroll durations for previews in effects dialog boxes.
Play audio by scrubbing
The term scrubbing comes from the process of manually rotating the reels of analog audio tape to play back audio.
In Edit View and Multitrack View, you can use the Scrub tool to achieve a similar result. Dragging this tool slowly
plays audio at a slower rate; dragging it quickly increases playback speed up to the regular rate.
In Multitrack View, the Scrub tool scrubs individual tracks. To scrub all tracks, drag the start-time indicator.
1 In the toolbar, select the Scrub tool .
2 In the Main panel, do one of the following:
• In Edit View, drag forwards or backwards over audio. (To scrub only one channel, drag at the top or bottom of the
panel.)
• In Multitrack View, drag forwards or backwards over the track that you want to hear.
Page 67

ADOBE AUDITION 3.0
User Guide
3 (Optional) Do any of the following:
• To create a selection while scrubbing, click to set the start-time indicator where you want the selection to begin,
and then Shift-drag the Scrub tool.
• To simultaneously hear audio and move either edge of an existing selection, Shift-drag the Scrub tool.
• To play audio at the exact location of the pointer, Ctrl-drag the Scrub tool, or drag the start-time indicator.
• To play audio at a higher or lower speed than normal, Alt-drag the Scrub tool a short distance. Do not release the
mouse button. The remaining audio plays at a speed comparable to the rate at which you dragged.
See also
“Select time ranges” on page 72
Play audio from the command line
By using the Run command in Windows, you can start Adobe Audition and begin playing a file in Edit View.
1 Choose Edit > Preferences, and select Auto Play On External Launch. Click OK.
2 In Windows, choose Start > Run.
3 Type the following text (including the quotation marks), and then click OK:
62
"[drive]:\Program Files\Adobe\Audition 2.0\Audition.exe" "[path to file]"
For example, to play the sound that Windows XP uses when you empty the Recycle Bin, type the following:
"c:\Program Files\Adobe\Adobe Audition 2.0\Audition.exe" "c:\Windows\Media\Windows XP Recycle.wav"
Note: Be sure to include one space between “. . . Audition.exe” and the next quotation mark.
Monitoring recording and playback levels
Level meters overview
To monitor the amplitude of incoming and outgoing signals during recording and playback, you use level meters.
Edit View provides these meters only in the Levels panel. Multitrack View provides them in both the Levels panel,
which shows the amplitude of an entire session, and track meters, which show the amplitude of individual tracks.
You can dock the Levels panel horizontally or vertically. When the panel is docked horizontally, the upper meter
represents the left channel, and the lower meter represents the right channel.
To show or hide the panel, choose Window > Level Meters.
A
B
C
D
Levels panel, docked horizontally
A. Left channel B. Right channel C. Peak indicators D. Clip indicators
Page 68

ADOBE AUDITION 3.0
User Guide
The meters show signal levels in dBFS (decibels below full scale), where a level of 0 dB is the maximum amplitude
possiblebeforeclippingoccurs.Yellowpeakindicatorsremainfor1.5secondssothatyoucaneasilydeterminepeak
amplitude.
If amplitude is too low, sound quality is reduced; if amplitude is too high, clipping occurs and produces distortion.
The red clip-indicator to the right of the meters lights up when levels exceed the maximum of 0 dB.
To clear clip indicators, either click them individually or choose Options > Metering > Reset All Indicators.
Monitor levels
Monitoring options differ in Multitrack View and Edit View. In both views, however, you can access these options
from either the Options > Metering menu or the context menu that appears when you right-click meters.
Monitor levels in Multitrack View
Choose any of the following metering options:
Monitor Input Level Monitors audio inputs.
Meter Inputs Only Restricts monitoring toinputs. (By default, multitrackmeters show both input and output levels.)
Show All Meters Displays input andoutput meters for all audio ports inthe Levels panel. This option lets you quickly
evaluate all levels in one place.
63
If your system has a large number of audio ports, you may need to resize the Levels panel to reveal meters for all of
them.
Monitor levels in Edit View
Choose any of the following metering options:
Monitor Record Level Monitors audio inputs. (To quickly enable or disable this option, double-click the meters.)
Show Levels On Play And Record Enables the meters. (Disabling them improves performance on slower computers.)
Customize level meters
Either choose Options > Metering or right-click the meters. Then select any of the following options:
Range options Change the displayed decibel range.
Show Valleys Shows valley indicators at low-amplitude points.
If valley indicators are close to peak indicators, dynamic range (the difference between the quietest and loudest
sounds) is low. If the indicators are spread far apart, dynamic range is high.
Adjust For DC Compensates for DC offset. (For a definition, see “DC offset” on page 274.) During recording, any
offset is indicated by clip indicators in the meters.
Note: Select Adjust For DC if your sound card records with a DC offset, shifting the center of the waveform above or
below the zero amplitude line. This offset can dramatically shift the amplitude measured by meters, causing them to
display levels inaccurately.
Dynamic or Static Peaks Change the mode of peak indicators. Dynamic Peaks resets the yellow peak level indicators
to a new peak level after 1.5 seconds, letting you easily see recent peak amplitude. As the audio gets quieter, the peak
indicators recede. Static Peaks retains peak indicators, letting you determine the maximum amplitude of the signal
Page 69

ADOBE AUDITION 3.0
User Guide
since monitoring, playback, or recording began. However, you can manually reset peak indicators by clicking clip
indicators.
To find out how loud audio will get before you record it, choose Static Peaks. Then monitor input levels and play the
audio. After the audio ends, the peak indicators show the volume of the loudest part.
Adjust levels for a consumer sound card
You may need to adjust levels if recordings are too quiet (causing unwanted noise), too loud (leading to clipped,
distorted sound), or inaudible when played in Adobe Audition. To get the best sounding results, you should record
audio as loud as possible without clipping. Try to keep the loudest peak somewhere between –2 dB and 0 dB when
setting recording levels.
Adobe Audition doesn’t directly control a sound card’s recording and playback levels. For a professional sound card,
youadjusttheselevelswiththemixerapplicationprovidedwiththecard.Forconsumersoundcards,however,you
use the mixer provided by Windows.
1 Open the Windows Volume Control application, which resembles a small mixing board with vertical sliders.
You can usually access this application by choosing Start > All Programs > Accessories > Entertainment (or Multimedia). On many systems, you can also double-click the speaker icon in the system tray.
2 To adjust the sound card’s playback (output) levels, drag Volume sliders as needed. (Below the sliders, ensure that
Mute is deselected.)
3 To adjust the sound card’s record (input) levels, choose Options > Properties, select Recording, and click OK.
Select the input source you want to use, and adjust Volume sliders as needed.
64
To quickly access the Recording section of the Windows mixer, choose Options > Windows Recording Mixer in Adobe
Audition.
Page 70

Chapter 6: Editing audio files
Displaying audio in Edit View
Choose an audio display
In Edit View, you can choose any of four displays for audio data. Each shows you a different visual representation of
soundwaves.Ifyouopenastereofile,theleftchannelappearsatthetopandtherightchannelappearsatthebottom.
If you open a mono file, its single channel fills the total height of the Main panel.
❖ In the toolbar, select Waveform Display , Spectral Frequency Display , Spectral Pan Display , or
Spectral Phase Display .
See also
“Sound fundamentals” on page 8
65
“Comparing Edit View and Multitrack View” on page 20
About Waveform Display
Waveform Display shows a waveform as a series of positive and negative peaks. The x-axis (horizontal ruler)
measures time, and the y-axis (vertical ruler) measures amplitude—the loudness ofthe audio signal. Quiet audio has
bothlowerpeaksandlowervalleysthanloudaudio.YoucancustomizeWaveformDisplaybychangingthevertical
scale, colors, and line visibility.
With its clear indication of amplitude changes, Waveform Display is perfect for identifying percussive changes in
vocals,drums,andmore.Tofindaparticularspokenword,forexample,simplylookforthepeakatthefirstsyllable
and the valley after the last.
Stereo file in Waveform Display
Page 71

ADOBE AUDITION 3.0
User Guide
See also
“Change the vertical scale” on page 71
“Colors preferences” on page 35
“Display preferences” on page 36
About Spectral Frequency Display
Spectral Frequency Display shows a waveform by its frequency components, where the x-axis (horizontal ruler)
measures time and the y-axis (vertical ruler) measures frequency. This view lets you analyze audio data to see which
frequencies are most prevalent. Brighter colors represent greater amplitude components. Default colors range from
dark blue (low-amplitude frequencies) to bright yellow (high-amplitude frequencies). You can modify display
settings for Spectral Frequency Display using the Spectral Controls panel.
Spectral Frequency Display is perfect for removing unwanted sounds, such as coughs and other artifacts. This is
known as frequency-space editing.
66
Spectral Frequency Display, with high frequencies selected
See also
“Select spectral ranges” on page 73
“Adjusting spectral displays” on page 68
“Techniques for restoring audio” on page 141
About Spectral Pan Display
Spectral Pan Display shows the pan (left-right stereo) position of every frequency in an audio file, so you can
visualize the sound locations in the stereo plane. The x-axis (horizontal ruler) measures time and the y-axis (vertical
ruler) measures pan position, with the top of the display (-100%) representing full left and the bottom of the display
(100%) representing full right. Brighter colors represent louder audio signals. You can modify display settings for
Spectral Pan Display using the Spectral Controls panel.
Page 72

ADOBE AUDITION 3.0
User Guide
Spectral Pan Display, with audio moving from left to right
Spectral Pan Display works well in conjunction with the Center Channel Extractor effect. That effect lets you isolate
frequenciesthatarecommontoboththeleftandrightchannels(inotherwords,soundsthatarepannedcenter).In
some cases, you may find that the audio you want to isolate is slightly off-center. You can use Spectral Pan Display
to determine the actual pan position of the audio you want to isolate and enter that value in the Center Channel
Extractor to improve the quality of the extraction. You can also use the Center Channel Extractor to boost the signal
of audio at a particular pan position. For more information, see “Center Channel Extractor effect” on page 163.
67
Another effect that works well with Spectral Pan Display is the Pan/Expand effect. The Pan/Expand effect lets you
shift the center channel of a stereo waveform and expand or narrow the stereo separation of the left and right
channels. For more information, see “Pan/Expand effect (Edit View only)” on page 166.
See also
“Adjusting spectral displays” on page 68
“Noise Reduction effect (Edit View only)” on page 149
About Spectral Phase Display
Spectral Phase Display shows the phase difference, in degrees, between the left and right channels. For example, if
any frequency is 180˚ out of phase, Spectral Phase Display shows bright patches near the +/-180˚ marks. You can
modify display settings for Spectral Phase Display using the Spectral Controls panel.
Audio that is more than 90˚ out of phase creates problems when summing to mono and may sound odd in stereo. To
help you determine how much audio is out of phase, Adobe Audition displays lines at the 90˚ marks by default.
Page 73

ADOBE AUDITION 3.0
User Guide
Spectral Phase Display, with audio moving from out-of-phase (at top and bottom) to in-phase (at center)
For maximum precision, use Spectral Phase Display in conjunction with the Phase Analysis panel. (See “Analyze
phase” on page 91.) For example, if you see a lot of inverse phase information in the Phase Analysis panel, you can
use Spectral Phase Display to find out exactly where in time the out-of-phase audio is occurring.
To correct a phase problem, you can use the Effects > Invert command to inverse phase by 180˚ or the Center
Channel Extractor to extract audio with a certain phase relationship. For more information, see “Invert a waveform”
on page 87 and “Center Channel Extractor effect” on page 163.
68
See also
“Adjusting spectral displays” on page 68
“Techniques for restoring audio” on page 141
Adjusting spectral displays
The Spectral Controls panel (Window > Spectral Controls) gives you precise control over how data is displayed in
Spectral Frequency Display, Spectral Pan Display, and Spectral Phase Display. By changing the color and display
settings, you can enhance different types of detail and better isolate artifacts.
The Spectral Controls panel lets you modify your display settings dynamically, so you can see your changes immediately in any of the spectral views. You can use one of the display presets or fine-tune the settings to your own specifications. Customized settings can be saved as presets.
In the Spectral Controls panel, colors on the left side of the color spectrum represent low amplitudes, and those on
the right side represent high amplitudes. Color points let you precisely adjust the color range. You can also adjust the
color saturation and gamma.
Page 74

Adjusting width of color band in Spectral Controls panel
ADOBE AUDITION 3.0
User Guide
69
See also
“About Spectral Frequency Display” on page 66
“About Spectral Pan Display” on page 66
“About Spectral Phase Display” on page 67
“Techniques for restoring audio” on page 141
Customize a spectral display
1
In Edit View, choose View > Spectral Frequency Display, Spectral Pan Display, or Spectral Phase Display.
2 Choose Window > Spectral Controls to open the Spectral Controls panel.
3 Choose a preset from the pop-up menu at the top of the Spectral Controls panel.
4 To further adjust the colors, do any of the following:
• To pan the color spectrum left or right, click anywhere in the color spectrum and drag to the left or right. The
colors displayed depend on the Gamma value you specify.
• To adjust the color and amplitude relationships, drag a color point horizontally.
To constrain movement of a color point either horizontally or vertically, hold the Shift key and then drag the color
point.
• To edit the hue of each color band in the color spectrum, click the Edit Hue button and then drag a color
point vertically.
• To adjust the brightnessof each colorband, click theEdit Brightness button and then drag a color point verti-
cally. Drag up for brighter colors or down for more muted colors.
• To adjust the color width of bands in the color spectrum, click the Edit Color Width button and then drag a
color point vertically. Drag up to narrow the color width or down to widen it.
Page 75

ADOBE AUDITION 3.0
User Guide
• To add color points, right-click the color spectrum and choose Add New Color Point. To delete a color point,
right-click it and choose Delete Color Point.
• (Spectral Pan Display and Spectral Phase Display only) To tint the display based on the actual frequencies in the
audio signal, click the Tint Using Spectral Prism button .
• To restore color settings to the defaults, click Reset.
5 (Optional) Set additional color and display options at the bottom of the Spectral Controls panel.
6 (Optional) Save the customized settings as a preset for future use.
Spectral Controls panel options
You can set the following options at the bottom of the Spectral Controls panel:
Range Changestheamplitudeoverwhichthecolorsaredisplayed.Lowertherangetoseemoreofthecolorsatthe
left end of the spectrum. Increasing the range may help you see more detail in quieter areas of the audio.
You can also adjust the range by dragging the horizontal ruler. Shift-drag to adjust color points relative to the range.
Saturation Changes the overall strength or purity of the colors. Increasing the saturation can bring out more detail.
Gamma Adjusts the steepness of the brightness curve. Higher gamma values produce a steeper brightness curve,
which can help add contrast to areas of interest. Lower gamma values produce brighter color in the lower decibel
ranges.
70
You can also adjust the gamma value by Shift-dragging in the color spectrum. Ctrl-drag to adjust the gamma curve’s
center point.
Reverse Flips the spectral display so that colors on either end of the spectrum switch positions.
Transparency Determines the visual transparency of selected ranges.
Reverse Selection Color Completely inverts selected ranges relative to the background.
Resolution Specifies the number of vertical bands used in drawing frequencies. The higher the number, the more
accurate the display, but the longer it will take to render the display.
Multiresolution (Spectral Frequency Display only) Specifies the trade-off between frequency detail and time detail.
Multiresolution settings work best if you use a high Resolution value with Logarithmic mode. Choose Off (Fixed)
forfixedresolutionovertheentirefrequencyrange,orchooseTimeImportantorFrequencyImportanttofavortime
or frequency detail, respectively. General Purpose balances between Time Important and Frequency Important.
Logarithmic (Spectral Frequency Display only) Toggles the display between logarithmic and linear display.
Quality (Spectral Pan Display and Spectral Phase Display only) Specifies the display quality. Higher quality displays
are more accurate, but they take longer to render.
Save or delete a Spectral Controls preset
❖ In the Spectral Controls panel, do one of the following:
• To save custom settings as a preset, click the Save button . Enter a name, select Save Colors Only to save only
settings in the color graph, or deselect this option to save all settings. Then click OK.
• To delete a preset, choose it from the Preset menu, and click the Delete button .
Page 76

ADOBE AUDITION 3.0
User Guide
Change the vertical scale
You can change the scale of the vertical ruler in Waveform Display and Spectral Frequency Display.
1 Choose View > Vertical Scale Format.
2 Do one of the following:
• In Spectral Frequency Display, choose a Linear or Logarithmic frequency scale.
• In Waveform Display, choose one of the following amplitude scales:
Sample Values Indicatesamplitude on a scale that shows the range of data valuessupported by the current bit depth.
Normalized Values Indicates amplitude on a normalized scale that ranges from –1 to 1.
Percentage Indicates amplitude on a percentage scale that ranges from –100% to 100%.
Decibels Indicates amplitude on a decibel scale that ranges from –Infinity to zero dBFS.
Double-click the vertical ruler to cycle through the scales.
See also
“About Waveform Display” on page 65
71
“About Spectral Frequency Display” on page 66
View the top and tail of an audio file
To create smooth loops, the end of a file should seamlessly transition to the beginning. The Top/Tail view helps you
focus on these key areas, while also displaying the entire file for reference.
At the top of the Main panel, time displays show how much audio is visible for the top and tail. By default, Adobe
Audition displays 10 seconds in both views. To change the default, choose Edit > Preferences, click the Display tab,
and enter an Initial Viewing Range. (If a file is shorter than twice this setting, no more than 45% of total length
appears in each view.)
A
B
C
D
Top/Tail view
A. Top vie w B. Time visible for top and tail C. Ta i l v iew D. Complete audio file with scroll bar above
1 Choose View > Top/Tail Views.
Page 77

ADOBE AUDITION 3.0
User Guide
2 To zoom in or out on the top and tail, do any of the following:
• Click the Zoom In or Zoom Out button in the upper-left or upper-right corner of the Main panel.
• Right-click and drag in the ruler below the top or tail.
• Position the mouse over the top or tail, and roll the scroll wheel.
By default, the top and tail zoom together. To zoom them independently, choose Edit > Preferences, click the Display
tab, and deselect Link Top/Tail Zoom Levels.
3 Start playback to play the top and tail in a continuous loop. (To change this default playback method, right-click
the Play button in the Transport panel, and choose a different option.)
See also
“Playing audio” on page 60
“Zooming audio” on page 20
“Navigate with a scroll bar or ruler” on page 21
Selecting audio
72
Select time ranges
1 In the toolbar, select the Time Selection tool .
2 Do any of the following:
• To select a range, drag in the Main panel.
Dragging to select time ranges
• To extend or shorten a selection, Shift-click the end of the selection that you wish to modify, and drag to extend
or shorten it.
Note: If you prefer, you can right-click to extend or shorten a selection. To enable this feature, select Extend Selection in
the General tab of the Preferences dialog box. (See “General preferences” on page 33.)
Page 78

ADOBE AUDITION 3.0
User Guide
Select spectral ranges
When working in a spectral display, you can use the Marquee Selection, Lasso Selection, or Effects Paintbrush tool
to select audio data within specific spectral ranges. The Marquee Selection tool letsyou select arectangular area. The
Lasso Selection and Effects Paintbrush tools (available only in Spectral Frequency Display) let you make free-form
selections. All three tools allow for detailed editing and processing, including incredible flexibility in audio restoration work. For example, if you find audio artifacts, you can select and edit just the affected frequencies, producing
superior results with faster processing.
The Effects Paintbrush tool creates unique selections that determine the intensity of applied effects. To adjust
intensity,either layer brush strokes or change the Opacity setting in the toolbar. The more opaque the white, selected
area is, the more intense applied effects will be.
AB C
Types of spectral selections
A. Marquee B. Lasso C. Effects Paintbrush
73
1 In a spectral display, select theMarquee Selection tool , the Lasso Selection tool , or the Effects Paintbrush
tool in the toolbar.
2 Drag in the Main panel to select the desired audio data.
Note: When you make a selection in a stereo waveform, the selection is applied to both channels by default. To select
audio data in just one channel, choose Edit > Edit Channel, and then choose Edit Left Channel or Edit Right Channel.
3 To adjust the selection, do any of the following:
• To move the selection, position the pointer in the selection, and drag it to the desired location.
• To resize the selection, position the pointer on the corner or edge of the selection, and drag it to the desired size.
(For paintbrush selections, you can also adjust the Brush Size setting in the toolbar.)
• To add to a lasso or paintbrush selection, Shift-drag. To subtract from the selection, Alt-drag.
• To determine the intensity of effects applied to paintbrush selections, adjust the Opacity setting in the toolbar.
• To select audio above and below marquee selections, select Exclude Selection in the toolbar. (For example, if you
selectcenter-pannedaudio,thisoptionexcludesthataudioandinsteadselectsleft-andright-pannedaudiointhe
same time range.)
By default, Adobe Audition plays all audio in the same time range as a spectral selection. To hear only the selection,
right-click the standard or circled Play button, and select Play Spectral Selection.
See also
“About Spectral Frequency Display” on page 66
“About Spectral Pan Display” on page 66
Page 79

ADOBE AUDITION 3.0
User Guide
“About Spectral Phase Display” on page 67
“Techniques for restoring audio” on page 141
Select artifacts and repair them automatically
For the quickest repair of small, individual audio artifacts like isolated clicks or pops, use the Spot Healing Brush.
When you select audio with this tool, it automatically applies the Favorites > Auto Heal command.
1 In Spectral Frequency Display, select the Spot Healing Brush in the toolbar.
2 In the toolbar, adjust the Brush Size setting to change the pixel diameter.
3 In the Main panel, click an audio artifact or drag across it.
74
AB
Instantly removing an artifact with the Spot Healing Brush
A. Before B. After
See also
“Adjusting spectral displays” on page 68
“Techniques for restoring audio” on page 141
Select all of a waveform
❖ Do either of the following:
• To select the visible range of a waveform, double-click in the Main panel.
• To select all of a waveform, choose Edit > Select Entire Wave, or triple-click in the Main panel.
Specify which channel you want to edit
By default, Adobe Audition applies selections and edits to both channels of a stereo waveform. However, you can
easily select and edit just the left or right channel of a stereo waveform.
❖ Do any of the following:
• To select a range in only one channel, either drag near the top of the left (upper) channel or near the bottom of the
right (lower)channel. The cursordisplays an L icon or an R icon to indicate the channel in which you are selecting
audio.
Page 80

ADOBE AUDITION 3.0
User Guide
• Choose Edit > Edit Channel, and choose which channel you want to edit.
• Click the Edit Left Channel button , the Edit Right Channel button or the Edit Both channels button
in the View shortcut bar. (See “Display the shortcut bar” on page 27.)
Adjust a selection to zero-crossing points
For many editing tasks, such as deleting orinserting audio in the middle of a waveform, the best placesto make selections are thepoints where theamplitude iszero (called zero-crossings). Selecting the zero-crossing points reduces the
chance that an edit will create an audible pop or click. You can easily adjust a selection to the closest zero-crossing
points by using a Zero Crossing command.
❖ Choose Edit > Zero Crossing, and choose one of the following commands:
Adjust Selection Inward Adjusts both range boundaries inward to the next zero-crossing point.
Adjust Selection Outward Adjusts both range boundaries outward to the next zero-crossing point.
Adjust Left Side To Left Adjusts the left range boundary leftward to the next zero-crossing point.
Adjust Left Side To Right Adjusts the left range boundary rightward to the next zero crossing point.
Adjust Right Side To Left Adjusts the right range boundary leftward to the next zero crossing point.
Adjust Right Side To Right Adjusts the right range boundary rightward to the next zero crossing point.
75
Select audio between beats
For some editing tasks, such as constructing drum loops and similar musical phrases, you need to select audio
between beats. Though you can often identify beats by looking for peaks in a waveform, the Find Beats command
makesthetaskmuchquicker.Afteryoufindbeatswiththiscommand,AdobeAuditionsavesthemasBeatMarkers,
making it easy to locate beats again.
1 Click in the Main panel to the left of the first beat you want to find.
2 Choose Edit > Find Beats > Find Next Beat (Left Side). The cursor moves to the beginning of the next beat.
3 Choose Edit > Find Beats > Find Next Beat (Right Side)to select from the current cursor position to thenext beat.
4 If you want to select more than one beat, choose Edit > Find Beats > Find Next Beat (Right Side) again. Each time
you choose this command, Adobe Audition adds the next beat to the selection.
See also
“Marker types” on page 81
“Set markers automatically” on page 84
Change Find Beats settings
1
Choose Edit > Find Beats > Beat Settings.
2 Enter new values for Decibel Rise and Rise Time, and click OK.
To find beats in material that has fast transient attacks, such as drums, specify a quick Rise Time and a high Decibel
Rise. For material with softer attacks, such as bass, the Rise Time can be slightly slower relative to Decibel Rise.
Page 81

ADOBE AUDITION 3.0
User Guide
Snap to markers, rulers, frames, and zero crossings
Snapping causes selection boundaries, as well as the start-time indicator, to move to items such as markers, ruler
ticks, zero-crossing points, and frames. Enabling snapping helps you make accurate selections; however, if you prefer,
you can disable snapping for specific items.
❖ To enable or disable snapping, choose Edit > Snapping, and choose any of the following commands:
Snap To Markers Snaps to a marker point. For information on defining markers, see “About markers” on page 80.
Snap To Ruler (Coarse) Snaps only to the major numeric divisions (decimal, SMPTE, samples, and so on) in the
timeline.
Note: You can enable only one Snap To Ruler command at a time.
Snap To Ruler (Fine) Snaps to each of the subdivisions (decimal, SMPTE, samples, and so on) within the timeline.
Zooming in (by right-clicking as you drag across the timeline) breaks the display down into more accurate subdivisions, letting you place the cursor more accurately within the timeline.
Snap To Zero Crossings Snaps to the nearest place where audio crosses the center line (the zero amplitude point).
Snap To Frames (Always) Snaps to a frameboundary if the time format is measured inframes (such as CompactDisc
and SMPTE). This command is especially handy for working on audio for CD.
You can access snapping commands by right-clicking the timeline.
76
See also
“Snap to clip and loop endpoints” on page 193
Copying, cutting, pasting, and deleting audio
Choose a clipboard
Adobe Audition gives you access to five internal clipboards for temporary data storage. Each works similarly to the
Windows clipboard, except that they can handle more data at a faster rate.
❖ Choose Edit > Set Current Clipboard, and choose a clipboard.
Choose the Windows clipboard if you want to copy audio data to other Windows applications.
Copy or cut audio data
1 In Waveform Display of Edit View, select the audio data you want to copy or cut. Or, to copy or cut the entire
waveform, deselect all audio data.
2 Choose one of the following:
• Edit > Copy, to copy audio data to the active clipboard.
• Edit > Copy To New, to copy and paste the audio data into a newly created file in one step.
• Edit > Cut, to remove audio data from the current waveform and copy it to the active clipboard.
Page 82

ADOBE AUDITION 3.0
User Guide
Paste audio data
The Paste command puts any audio data in the active clipboard into the current waveform. The Paste To New
command lets you create a new file and insert audio data from the active clipboard.
❖ Do either of the following:
•
To paste audio data into the currentfile, place the cursor whereyou want to insert the audio dataor select the audio
data you want to replace. Then choose Edit > Paste. If the format of the data on the clipboard differs from the format
of the file it’s being pasted into, Adobe Audition automatically converts the format before pasting the data.
• Topasteaudiodataintoanewfile,chooseEdit>PasteToNew.Thenewfileautomaticallyinheritstheproperties
(sample rate, sample frequency, and so on) from the original clipboard material.
The Select Audio After Paste option in the General tab of the Preferences dialog box determines whether or not data
is highlighted after you paste it into a file.
Mix audio data when pasting
The MixPaste command letsyou mixaudio data from the clipboard or a file with the current waveform. If the format
of the data on the clipboard differs from the format of the file it’s being pasted into, Adobe Audition automatically
converts the format before pasting the data.
The Mix Paste command provides a quick alternative to using the more powerful and flexible multitrack functions
in Adobe Audition.
77
1 In the Main panel, place the cursor where you want to start mixing the audio data. Alternately, select the audio
data you want to replace.
2 Choose Edit > Mix Paste.
3 Set the following options as desired, and click OK:
Volume Adjusts the sound level of the left and right channels before pasting. Move the volume sliders, or enter a
percentage in the text boxes to the right of them.
Paste in single channels (either left or right) by adjusting the level of the opposite channel to zero.
Invert Turns that channelof the waveform upside-down. (Any samples above thecenter line are placed below it, and
those below the center line are placed above it.)
This option is handy when you want to take the difference between two samples (or subtract one signal from
another).
Lock Left/Right Locks the volume sliders so that they move together.
Insert Inserts audio at the current location or selection, replacing any selected data. If no data is selected, Adobe
Audition inserts audio at the cursor location, moving any existing data to the end of the inserted material.
Overlap Mixes audio at the selected volume level with the current waveform. If the audio is longer than the current
waveform, the current waveform is lengthened to accommodate the pasted audio.
Replace Overdubs the audio beginning at the cursor location, and replaces the existing material thereafter for the
duration of audio. For example, pasting 5 seconds of material replaces the first 5 seconds after the cursor.
Modulate Modulates the audio with the current waveform for an interesting effect. The result is similar to
overlapping, except that the values of the two waveforms are multiplied by each other, sample by sample, instead of
added.
Page 83

ADOBE AUDITION 3.0
User Guide
YoucancreatefantasticcomboeffectsbyselectingpartofawaveandusingtheMixPastecommandwithModulate
selected. The selection is modulated with the audio signal on the clipboard.
Crossfade Applies a fade to the beginning and end of the pasted audio. Enter a value to specify how many milli-
seconds of the audio are faded.
Use this option for smoother transitions to and from pasted audio.
From Clipboard [number] Pastes audio data from the active internal clipboard.
From Windows Clipboard Pastes audio data from the Windows clipboard. If the Windows clipboard contains no
audio data, this option is disabled.
From File Pastes audio data from a file. Click Select File to browse for the file.
Loop Paste Pastes audio data the specified number of times. If the audio is longer than the current selection, the
current selection is automatically lengthened accordingly.
Delete or trim audio data
Adobe Audition provides two methods for deleting audio: The Delete Selection command lets you remove a range
from a waveform, whereas the Trim commandlets youremove unwanted audio from both sides of theselected audio.
78
Note: Deleted data doesn’t go to the clipboard and can be retrieved only by choosing Edit > Undo or File > Revert To
Saved, but only if you haven’t saved the file since deleting the data.
❖ Do one of the following:
• To delete audio data, select the audio data you want to delete. Then choose Edit > Delete Selection.
• To trim audio data, select the audio data you want to keep. Then choose Edit > Trim.
Visually fading and changing amplitude
About on-clip fade and gain controls
Though various effects can change amplitude or produce fades, on-clip fade and gain controls make the task quick
and intuitive. As you drag these controls in the Main panel, a visual preview helps you precisely adjust audio.
Page 84

A
B
On-clip controls in the Main panel
A. Fade controls B. Gain control
If you find the on-clip controls visually distracting, deselect On-clip UI in the View menu.
ADOBE AUDITION 3.0
User Guide
79
Visually fade in or out
Adobe Audition offers three types of visual, on-clip fades:
• Linear fades produce an even volume change that works well for much material. If this fade sounds too abrupt,
however, try one of the other options.
• Logarithmic fades smoothly change volume slowly and then rapidly, or vice versa.
• Cosine fades are shaped like an S-curve, changing volume slowly at first, rapidly through the bulk of the fade, and
slowly at the finish.
AC
Fade types
A. Linear B. Logarithmic C. Cosine
❖ In the upper left or right of the waveform, drag the Fade In or Fade Out handle inward, and do any of the
following:
• For a linear fade, drag perfectly horizontally.
• For a logarithmic fade, drag up or down.
• For a cosine (S-curve) fade, press Ctrl.
B
To create cosine fades by default and press Ctrl to create linear or logarithmic fades, choose Edit > Preferences, click
the General tab, and change the Default Fade setting.
Page 85

ADOBE AUDITION 3.0
See also
“Amplify/Fade effect (Edit View only)” on page 112
“Envelope effect (Edit View only)” on page 116
“General preferences” on page 33
Visually raise or lower amplitude
1 In the Main panel, select the audio you want to adjust. (To select an entire file, triple-click.)
2 In the on-clip gain control above the selected audio, drag the blue numbers.
The blue numbers indicate how new amplitude compares with existing amplitude. When you release the mouse
button, the numbers return to 0 dB, so you can make further adjustments.
User Guide
80
Changing the volume of selected area
To adjust entire files with the on-clip gain control, without creating a selection, choose Edit > Preferences, click the
Display tab, and select Show On-Clip Gain Control When There Is No Selection Range.
See also
“Amplify effect” on page 112
“Display preferences” on page 36
Working with markers
About markers
Markers are locations that you define in a waveform. Markers make it easy to navigate within a waveform to make a
selection, perform edits, or play back audio.
In Adobe Audition, a marker can be either a point or a range. A point refers to a specific time position within a
waveform (for instance, 1:08.566 from the start of the file). A range has both a start time and an end time (for
example, all of the waveform from 1:08.566 to 3:07.379). You can drag start and end markers for a range to different
times.
Markers have triangular handles that appear at the top and bottom of the Main panel. You use marker handles to
select and adjust markers. You can also right-click a marker handle to access commands for working with markers.
Page 86

ADOBE AUDITION 3.0
User Guide
B C DA
Examples of markers
A. Marker handle B. Marker point C. Marker range D. Nonsplit marker range
Note: To preserve markers when you save a file, make sure that you select Save Extra Non-Audio Information.
Marker types
AdobeAuditionprovidesfivemarkertypes.Allfivecanberangesaswellaspoints.Youcanchangemarkertypesby
clicking Edit Marker Info in the Markers panel and choosing a marker type from the Type menu. (Alternatively,
right-click the marker handle, and choose a marker type from the context menu.)
Cue markers Mark important sections of a waveform for later reference (for example, to identify an editing point).
81
Beat markers Similar to Basic markers, but also identify musical beats for loops, providing very accurate beat
mapping. (See “About loops” on page 221.)
Track markers Indicate tracks for an audio compact disc. Use these markers only for burning CDs. (See “Insert CD
tracks” on page 264.)
Index markers Set markers within a CD track. (Some CD players can navigate to index markers in addition to track
markers.)
For the smoothest CD-creation workflow, specify ranges for Track markers and points for Index markers.
BWF-J markers Specify marker points for Broadcast Wave files for the Japanese broadcasting environment.
Note: To specify a marker asBWF-J, you must first name it withone of the following labels: BC$START, BC$STANDBY,
BC$CM, BC$END, BC$STOP, BC$STOP, BC$FILE, BC$PAUSE, or BC$UTL [*], where * represents the number 1, 2,
3, or 4.
Add, select, and rename markers
Though you can add markers directly in the Main panel, you use the Markers panel (Windows > Marker List) to
define and select markers.
Page 87

Markers panel
Add a marker
1
Do one of the following:
• Play audio.
• Place the cursor exactly where you want the marker point to be.
• Select the audio data you want to define as a marker range.
2 Either press the F8 key, or click the Add Marker button in the Markers panel.
ADOBE AUDITION 3.0
User Guide
82
Select a marker
• Double-click a marker handle in the Main panel.
• Double-click a marker in the Markers panel.
• To select adjacent markers, click the first marker you want to select in the Markers panel, and then Shift-click the
last.
• To select nonadjacent markers, Ctrl-click them in the Markers panel.
To automatically play markers when you select them in the list, click the Auto Play button . This option helps you
quickly identify marker locations.
Rename a marker and add a description
After you create a marker, you can rename it and add descriptive information.
1 Select a marker.
2 Click Edit Marker Info in the Markers panel.
3 Do any of the following:
• Enter a new name in the Label text box.
• Enter a description in the Description text box.
Adjust, merge, convert, or delete markers
After creating markers, you can fine-tune them to best address the needs of an audio project.
Reposition point or range markers
• In the Main panel, drag the marker handle (for point markers) or the red start handle (for range markers) to a
new location.
Page 88

ADOBE AUDITION 3.0
User Guide
• In the Markers panel, select the marker, and enter a new value in the Begin text box.
Change the duration of a range marker
• In the Main panel, drag the blue end handle to a new location.
• In the Markers panel, select the marker, and enter a new value in the End or Length text box.
Merge individual markers
❖ Open the Markers panel, select the markers you want to merge, and click the Merge button .
Note: The new merged marker inherits its name from the first marker. You lose any information in the Label and Desc
text boxes for the subsequent merged marker.
Merge two marker ranges
❖ Open the Markers panel, select the two ranges, and click the Merge button .
Convert a point marker to a range marker
❖ Right-click the marker handle and choose Make Range.
The marker handle splits into two handles.
83
Convert a range marker to a point marker
❖ Right-click a marker handle and choose Make Point.
The two parts of the range marker handle merge into a single handle, with the start time of the range becoming the
time for the point marker.
Delete markers
• Select one or more markers, and click the Delete button in the Markers panel.
• Right-click the marker handle in the Main panel, and choose Delete.
Add silence between markers
1 In Edit View, choose Window > Marker List.
2 Select one or more markers. At least one of the markers you select must be a range.
3 Click Batch in the Markers panel.
4 Click Set Amount Of Silence, enter the desired number of seconds in the Add Silence Before and Add Silence
After boxes, and click OK.
See also
“Save audio between markers to new files” on page 83
“Create silence” on page 86
Save audio between markers to new files
1 In Edit View, choose Window > Marker List.
2 Select one or more markers. At least one of the markers you select must be a range.
3 Click the Batch process button in the Markers panel.
Page 89

ADOBE AUDITION 3.0
User Guide
4 Click Save To Files, set the following options as desired, and click OK:
Use Marker Label As Filename Uses the marker name as the prefix for the filename.
Filename Prefix Specifies a prefix for the new files. Adobe Audition automatically adds numbers after the prefix
(phrase02, phrase03, and so on) as well as the correct extension for the output format you choose.
Seq. Start Specifies the number to begin with when adding numbers to the filename prefix.
Destination Folder Specifies the folder where Adobe Audition places the new files. Click Browse to specify a
different folder.
Output Format Specifies theoutput format for the new files. If the specified format has unique settings, you can click
Options to access them.
See also
“Add silence between markers” on page 83
“About audio file formats” on page 244
“Batch processing overview” on page 259
Set markers automatically
The Auto-Mark feature lets you locate phrases or beats and automatically add them to the marker list. You can also
use this feature to remove silence from the beginning and end of a file.
84
1 Select the general range in which you want to find phrases or beats.
2 Choose Edit > Auto-Mark, and choose one of the following commands:
Adjust Selection To Phrase Selects a phrase within theselected range by adjustingthe highlight inward, ignoring any
silence before and after the audio. Nothing is added to the marker list.
Find Phrases And Mark Scans the selected range, marking nonsilent ranges as basic markers in the marker list.
Find Beats And Mark Scans the selected range, marking beats as beat markers in the marker list.
Trim Digital Silence Trims silence from the beginning and ending of a file. If you select the middle of a waveform,
this command functions like the normal Trim command, trimming out everything else, in addition to any digital
silence in the highlighted range at the endpoints.
Customize Auto-Mark settings
1
Choose Edit > Auto-Mark > Auto-Mark Settings.
2 Adjust the following options, and click OK:
Audio Will Be Considered “Silence” When Specifies parameters for finding silence. In the Signal Is Below text box,
enter the amplitude value (in decibels) you want Adobe Audition to consider as the maximum level for silence. In
the For More Than text box, enter the duration (in milliseconds) of this maximum amplitude value.
For very quiet, high-quality audio,enter alower amplitudevalue (suchas –60 dB). For noisier audio, the value might
be much higher (such as –30 dB). Enter a longer duration to keep groups of words together, for example.
Audio Will Be Considered As Valid When Specifies parameters for determining if audio is valid. In the Signal Is
Above text box, enter the amplitude value (in decibels) you want Adobe Audition to consider as the minimum level
for audio. In the For More Than text box, enter the duration (in milliseconds) of this minimum amplitude.
Page 90

ADOBE AUDITION 3.0
User Guide
Enter a longer duration to ignore short periods of undesired audio (like clicks, static, or other noise). However, if the
value is too high (above 200 milliseconds), short words may be skipped.
Find Levels Scans the waveform (or a selected range) to have Adobe Audition automatically determine a good
starting point for signal levels. Suggested values appear in the appropriate text boxes.
If these values don’twork well—for example, words or phrasesget choppedoff—lower thesignal level values. Increase
the signal level values if not enough silence is removed.
Creating play lists
A play list is an arrangement of marker ranges that you can play back in any order and loop a specified number of
times. A play list lets you try different versions of an arrangement before you commit to edits. You create play lists in
the Play List panel (Window > Play List).
See also
“Working with markers” on page 80
Create a play list
1
If the Markers panel isn’t visible, click Open Marker List in the Play List panel.
2 In the Markers panel, select the marker ranges you want to add to the play list.
3 In the Play List panel, click Insert Marker. The range is inserted either before the currently selected play list item
or at the end of the list if nothing is selected.
85
Play items in a play list
• To play the entire list, select the first item, and click Play Markers.
• To play part of the list, select the first item you want to play, and click Play Markers.
• To play a specific item, select it, and click Play Current Item.
Change the order of items in a play list
1
Select the item you want to move.
2 Click Move Up or Move Down.
Loop an item in a play list
❖ Select an item, and enter a number in the Loops box. Each item can loop a different number of times.
Delete items from a play list
❖ Select the items, and click Remove.
Page 91

ADOBE AUDITION 3.0
User Guide
Creating and deleting silence
Create silence
Creating silence is useful for inserting pauses and removing nonessential noise from an audio file. Adobe Audition
provides two ways to create silence in a waveform: by muting part of the existing waveform or by inserting a new
duration of silence.
❖ Do either of the following:
• To mute existing audio data, select the desired range of audio data and choose Effects > Mute. Unlike deleting or
cutting a selection, which splices the surrounding material together, applying the Mute effect leaves the duration
of the selection intact, and simply zeros the amplitude within it.
• To insert a new duration of silence, place the cursor where you want toinsert the silence. Or, if you want to replace
part of the existing waveform, select the desired range of audio data. Then choose Generate > Silence and enter
the number of seconds of silence you want to generate. Use decimals to enter partial seconds. For example, enter
.3 to generate three-tenths of a second of silence. Click OK. Any audio to the right of the cursor is pushed out in
time, thereby lengthening the waveform’s duration.
Delete silence
The Delete Silence command detects and removes silence between words or other audio. It’s ideal for cleaning up
voice prompts and speeding up narratives without affecting the foreground audio.
86
1 If you want to delete silence from part of a waveform, select the desired range of audio data. If you don’t select a
range, Adobe Audition deletes silence from the entire waveform.
2 Choose Edit > Delete Silence.
3 Set the following options as desired, and click OK:
“Silence” Is Defined As Determines what Adobe Auditionconsiders silence. In the Signal Is Belowtext box, enter the
amplitudevalue (in decibels) you want AdobeAudition to consider as the maximum levelfor silence.In theFor More
Than text box, enter the duration (in milliseconds) of this maximum amplitude value.
For very quiet, low-noise-floor audio, enter a lower amplitude value (such as –60 dB). For noisier audio, you might
enter a higher value (such as –30 dB). Enter a longer duration to keep groups of words together, for example.
“Audio” Is Defined As Determines what Adobe Audition considers audio. In the Signal Is Above text box, enter the
amplitudevalue(indecibels)youwantAdobeAuditiontoconsiderastheminimumlevelforaudio.IntheForMore
Than text box, enter the duration (in milliseconds) of this minimum amplitude value.
Enter a higher duration to ignore short periods of undesired audio (like clicks, static, or other noise). However, if the
value is too high (above 200 milliseconds), short words might be skipped.
Find Levels Scans the waveform (or selected range) to have Adobe Audition automaticallydetermine a good starting
point for signal levels. Suggested values appear in the appropriate text boxes.
If these values don’t do the job—for example, words or phrases are chopped off—lower the signal level values.
Increase the signal level values if not enough silence is removed.
Mark Deletions In Marker List Adds each location where silence is removed to the marker list.
Limit Continuous Silence To Specifies the minimum amount of silence (in milliseconds) to keep at all times. Silent
ranges shorter than this length aren’t removed; silent ranges greater than this length are shortened so that exactly the
specified amount of silence remains. Set this value to zero to remove as much silence as possible.
Page 92

ADOBE AUDITION 3.0
User Guide
When shortening speech segments, use a setting of 150 milliseconds or so to leave a more realistic, natural sounding
pause. Higher values can lead to an artificial sounding pause.
Scan For Silence Now Previews the silence to be removed. This option reports how much silence will be removed
andhowmanysectionsofsilencewerefound.Thisoptiondoesn’tactuallyremovesilence,butitgivesyouanideaof
what to expect with the current settings when you actually choose the Delete Silence command.
If you have an audio presentation that consists of many cuts separated by silence (such as a reel of several jingles),
choose Edit > Delete Silence to make sure that the duration of silence between each cut is the same. For example, if
the difference between cuts 1 and 2 is 3.2 seconds, the difference between cuts 2 and 3 is 4.1 seconds, and the difference
between cuts 3 and 4 is 3.7 seconds, you can use Delete Silence to make the silence duration between all four cuts exactly
3 seconds.
Inverting and reversing audio
Invert a waveform
The Invert effect inverts audio phase by 180 degrees. Inverting doesn’t produce an audible change on an individual
waveform, but you can hear a difference when combining waveforms. For example, you might invert pasted audio
to better align it with existing audio. Or, you could invert one channel of a stereo file to correct an out-of-phase
recording.
87
1 If you want to invert part of a waveform, select the desired range. Or, deselect all audio data to invert the entire
waveform.
2 Choose Effects > Invert.
See also
“Waveform measurements” on page 8
“phase” on page 277
Reverse a waveform
The Reverse effect reverses awaveform fromright to left so itplays backwards.Reversing is useful forcreating special
effects.
1 If you want to reverse part of the waveform,select thedesired range. Or, deselectall audio data to reverse the entire
waveform.
2 Choose Effects > Reverse.
Page 93

ADOBE AUDITION 3.0
User Guide
Generating audio
Generate DTMF signals
Dual Tone Multi-Frequency (DTMF) signals (also known as touch tones) are used for dialing telephone numbers
over phone lines. These signals are recommended for push-button telephones by the International Telegraph and
Telephone Consultative Committee. Keep in mind that the DTMF signals generated by telephone push-button
keypads are different from the Multi-Frequency (MF) tones generated by the telephone network to transmit information. You can use the DTMF Signals command to generate MF tones as well.
1 Place the cursor where you want to insert the signals. Or, if you want to replace part of the existing waveform,
select the desired range of audio data.
2 Choose Generate > DTMF Signals (Process).
3 Set options as desired, and click OK.
DTMF options
Dial String Specifies the phone number for which you want to generate tones. You can also enter other characters,
such as theasterisk (*) and pound (#) symbols,as wellas the letters “A,” “B,” “C,” and “D.” Enteringthe pause character
(see “Pause Character” in this list) inserts a pause of a defined length.
88
Tone Time Specifies the milliseconds for which the tones will last. The standard time for DTMF tones is 100 milli-
seconds.
Break Time Specifies the number of milliseconds of silence between successive tones.
Pause Time Specifies the length that is assigned to the pause character when it is used in the Dial String text box.
Pause Character Specifies which character Adobe Audition interprets as a pause.
DTMF Signals Generates DTMF signals by using combinations of the frequencies 697 Hz, 770 Hz, 852 Hz, 941 Hz
and 1209 Hz, 1336 Hz, 1477 Hz, and 1633Hz.
MF Signals (CCITT R1) Generates MF signals (tones that are internal to telephone networks) using paired combina-
tions of the frequencies 700 Hz, 900 Hz, 1100 Hz, 1300 Hz, 1500 Hz, and 1700 Hz.
Custom Specifies the combinationsof frequencies to be used in generating signals. Select this option, and then enter
values in the Hz text boxes of the keypad.
Amplitude Determines the volume level (as a percentage) of the tones generated, where 100% means maximum
volume without clipping.
Twist Specifies how much louder the higher frequency tone is from the lower frequency tone. Enter a value (in
decibels) in the Twist text box to increase the volume of the higher frequency tone accordingly.
Reset To DTMF Clears any custom frequency entries and replaces them with the standard DTMF frequency combi-
nations.
Page 94

ADOBE AUDITION 3.0
User Guide
Generate noise
The Noise command lets you generate random noise in a variety of colors. (Traditionally, color is used to describe
the spectral composition of noise. Each color has its own characteristics.) Generating noise is useful for creating
soothing sounds like waterfalls (perfect for use with the Binaural Auto-Panner function of Adobe Audition) and for
generating signals that can be used to check out the frequency response of a speaker, microphone, or other audio
system component.
1 Place the cursor whereyou want to insert the noise. Or, if you want to replace part of the existing waveform, select
the desired range of audio data.
2 Choose Generate > Noise.
3 Set options as desired, and click OK.
Noise options
Color Specifies a color for the noise:
• Brown noise Has a spectral frequency of 1/f
low-frequency content. Its sounds are thunder- and waterfall-like. Brown noise is so called because, when viewed,
thewavefollowsaBrownianmotioncurve.Thatis,thenextsampleinthewaveformisequaltotheprevioussample,
plus a small random amount. When graphed, this waveform looks like a mountain range.
2
, which means, in layman’s terms, that the noise has much more
89
• Pink noise Has a spectral frequency of 1/f and is found mostly in nature. It is the most natural sounding of the
noises. By equalizing the sounds, you can generate rainfall, waterfalls, wind, rushing river, and other natural sounds.
Pink noise is exactly between brown and white noise (hence, some people used to call it tan noise). It is neither
random nor predictable; it is fractal-like when viewed. When zoomedin, the pattern looks identical to when zoomed
out, except at a lower amplitude.
• White noise Has aspectral frequency of1, meaning that equal proportions of allfrequencies are present. Because
the human ear is more susceptible to high frequencies, white noise sounds very hissy. Adobe Audition generates
white noise by choosing random values for each sample.
Style Specifies a style for the noise:
• Spatial Stereo
Generates noise by using three unique noise sources and spatially encoding them to seem as if one
comesfromtheleft,onefromthecenter,andonefromtheright.Whenyoulistentotheresultwithstereoheadphones,
your mind perceives sound coming from all around. To specify the distance from center of the left and right noise
sources, enter a delay value in microseconds. About 900 to 1000 microseconds correspond to the maximum delay
perceivable. A delay of zero is identical to monaural noise, where left and right channels are the same.
• Independent Channels Generates noise by using two unique noise sources, one for each channel. The left
channel’s noise is completely independent of the right channel’s noise.
• Mono Generates noise by using a single noise source, with the left and right channels set equally to that source.
• Inverse Generatesnoisebyusingasinglenoisesource(similartotheMonooption).However,theleftchannel’s
noise is exactly inverse of the right channel’s noise. When you listen to the result with stereo headphones, your mind
perceives sound coming from within your head instead of from somewhere externally.
Intensity Specifies the intensity of the noise on a scale of 2 to 40. At higher intensities, the noise becomes more
erratic and sounds harsher and louder.
Duration Determines the number of seconds of noise that Adobe Audition generates.
Page 95

ADOBE AUDITION 3.0
User Guide
For very long periods of noise, it’s faster to generate a shorter period (say, about 10 to 20 seconds) and delete excess
noise at the beginning and end so that the waves start and end at the midpoint. Then, copy and loop (choose Edit >
Mix Paste) as many times as needed.
Generate tones
The Tones command lets you create a simple waveform and gives you control over numerous amplitude- and
frequency-related settings. Generating tones is a great place to start when you create new sound effects.
1 Place the cursor where youwant to insert the tones. Or, if you want to replace part of the existing waveform, select
the desired range of audio data.
2 Choose Generate > Tones.
3 Do one of the following:
• To create a constant tone, select Lock To These Settings Only. Then, set options as desired, and click OK.
• To create atone that changes dynamically over time, deselect Lock To These Settings Only. Usethe Initial Settings
tab to set options for the initial tone, and use the Final Settings tab to set options for the final tone. After you set
options, click OK. The tone generated will gradually go from the initial state to the final state.
Tones options
The Generate Tones dialog box provides the following options:
90
Base Frequency Specifies the main frequency to be used for generating tones.
Modulate By Modulates the base frequency in pitch over a user-defined range. For example, a 100 Hz setting
modulates the original frequency by +– 100 Hz. At a setting of 100 Hz, a 1000 Hz tone would modulate between 950
Hz and 1050 Hz.
Modulation Frequency Specifies the rate (times per second) at which the frequency modulates. Entering a value of
10, for instance, generates tones that seem to warble in amplitude at the rate of 10 times per second. The tones
actually warble in pitch (frequency) as they should, but because of the variance in the perceived energy levels of
different frequencies to the human ear, they seem to warble in amplitude.
Frequency Components Adds up to five overtones to the fundamental frequency (Base Frequency).
Enter a multiplier for each overtone below the Frequency Components sliders. (The actual frequency will be this
many times the fundamental.) Then, use the sliders to mix each of the individual components (0 to 100%) in
proportion to one another. The overall gain (signal level) may be adjusted with the dB Volume sliders.
IfLockToTheseSettingsOnlyisn’tselected,allofthevaluescanchangeoverthedurationoftheaudiofile,sothat
they morph from the initial to final settings.
dB Volume Specifies the overall gainfor each of the right andleft channels from –80 dbto 0 dB. You can control both
channels independently when generating stereo tones.
Start Phase Specifies the starting location in the cycle that will be produced. If Start Phase is set to 0˚, waves will
start at the baseline. If Start Phase is set to 90˚, the wave will start at full amplitude (generating a noticeable click as
well). If you work in great detail with tones and need to have the phase “just so,” this option gives you that control.
Phase Difference Allowstheleftchanneltobeoutofphasewiththerightchannel.Avalueof0causesthechannels
to be completely in phase and a value of 180 causes them to be completely out of phase.
Change Rate Dynamicallychangestherelativephasebetweenthetwochannelsofastereoaudiofileovertimeata
given rate. For example, if you enter 1 Hz, the phase difference will cycle through 360˚ each second.
Page 96

ADOBE AUDITION 3.0
User Guide
DC Offset Adds a constant DC (Direct Current) amplitude to the tone, centering the waveform by shifting it up or
down by the specified percentage. For example, you can apply DC Offset to correct an incoming signal that has
suffered electrical pollution from a strong adjacent current.
Flavor Specifies the type of waveform to use. Each flavor has a particular sound unique unto itself. Sine waveforms
are fundamental, with no harmonics (pure tone). Triangle waveforms have odd harmonics with amplitude of 1 to
itself (squared). Square waveforms have odd harmonics with amplitude of 1 to itself. Sawtooth waveforms have all
harmonics with amplitude of 1 to itself.
Duration Specifies the length of the generated tone (in seconds). Use decimals for partial seconds. For example,
enter .25 to generate tones for exactly one-fourth of a second.
Modulate When a range of audio data is selected, causes the audio to be ring modulated, ormultiplied, by the current
tone settings. This option is great for adding special effects.
Demodulate When a range of audio data is selected, causes the audio to be demodulated. Use Demodulate on a
previously modulated source to produce interesting effects.
Overlap (mix) When a range of audio data is selected, mixes the generated tones on top of the selected audio.
Analyzing phase, frequency, and amplitude
91
Techniques for analyzing audio
Edit View provides several ways to analyze audio. To compare phase relationships between the left and right stereo
channels, use the Phase Analysis panel. To analyze tonal and dynamic range, use the Frequency Analysis panel and
the Amplitude Statistics dialog box.
Edit View also provides Spectral Frequency, Spectral Pan, and Spectral Phase displays, which you can use in
conjunction with the analysis methods above. (See “Displaying audio in Edit View” on page 65.)
Analyze phase
In Edit View, you can use the Phase Analysis panel to reveal out-of-phase channels for stereo waveforms, which you
can correct with the Invert command. Phase analysisalso shows stereo separation, which you can adjust using stereo
imagery effects. (See “Changing stereo imagery” on page 162.)
To evaluate phase in detail, use the Phase Analysis panel in conjunction with Spectral Phase Display. (See “About
Spectral Phase Display” on page 67.)
Page 97

A B
Phase Analysis panel using Histogram (Log Zoom) view:
A. In-phase audio B. Out-of-phase audio
1 In Edit View, choose Window > Phase Analysis.
2 In Waveform Display of Edit View, click a point, select a range, or start playback.
If you select a range, Adobe Audition analyzes the center point of the range.
ADOBE AUDITION 3.0
User Guide
92
3 Use the following display items to interpret the phase information shown in the Phase Analysis panel:
• By default, the graph shows stereo channels on the horizontal axis and phase information on the vertical axis.
In-phase audio appears in the top half of the graph; out-of-phase audio appears in the bottom half.
To zoom in on the graph, use the mouse wheel or right-click a ruler and drag the magnifying glass icon. (See “Zoom
phase and frequency graphs” on page 95.)
• The colored ball shows the overall stereo and phase location of audio. The ball turns red for out-of-phase audio,
green for in-phase audio, and yellow for borderline audio.
• The white outline shows the percentage of samples in each channel that are in- or out-of-phase, reflecting the
width of the stereo image.
Ifyouplantocreateamonoversionofastereofile(forAMradio,forexample),notethewidthofthestereoimage.
If it’s very broad, the file will sound significantly different in mono.
• The colored tracer lines indicate whether the waveform is more in phase (blue) or out of phase (red).
See also
“Invert a waveform” on page 87
“About Spectral Phase Display” on page 67
Phase Analysis options
Set the following options to customize the Phase Analysis panel:
Normalize Adjusts the phase analysis lines so that they reach the edge of the graph.
Chart Type menu Select from the following options:
• Left/Right Displays a Lissajou Plot graph in which a mono waveform appears as a diagonal line ascending from
left to right; a right-channel-only waveform appears as a horizontal line; a left-channel-only waveform appears as a
Page 98

ADOBE AUDITION 3.0
User Guide
vertical line; a completely out-of-phase stereo waveform appears as a diagonal line descending from left to right; a
typical stereo waveform appears as many wavy lines descending from right to left; and a stereo waveform with wide
separation appears as many wavy lines extending in all directions.
• Mid/Side Rotates the Left/Right display to the left by 45˚. The horizontal ruler (x-axis) plots the side channel
([right - left]/2) while the vertical ruler (y-axis) plots the mid channel ([right + left]/2).
• Spin Displays amplitude rather than phase, redrawing the waveform on an axis that rotates in the phase graph.
• Histogram (Log Zoom) Displays the default circular histogram.
• Histogram (Log Full) Similar to Histogram (Log Zoom), but displays the entire range. This option is useful for
viewing pure mono at the edges of the graph.
• Histogram (Linear) Similar to Histogram (Log Zoom), but displays thegraph ona linear (rather than logarithmic)
scale. You may notice larger jumps and variations when usingthis option because of thelinear scale. ClickNormalize
to constrain the display to the full screen.
• Phase Wheel Displays the phase of individual frequencies. Higher frequencies appear toward the outer edge of the
graph.
Samples Defines the number of samples displayed concurrently. Higher sample sizes give you more accurate results,
but they require much more processing power to be effective. Choose the sample size that best suits your system.
93
Additional display options for Histogram modes Right-click the graph and select from the following options:
• Show Tracers Displays blue and red tracer lines that help you see in- and out-of-phase audio, respectively.
• Show Ball Displays a ball that shows the overall stereo and phase location of audio. The ball turns red for
out-of-phase audio, green for in-phase audio, and yellow for borderline audio.
• Modulate By Amplitude Changesthesizeofthephasegraphicrelativetoamplitude.Whenthisoptionisselected,
the phase graphic shrinks for quiet audio and gets larger for loud audio.
• Show Labels Displays the Mono, Left, Right, and Inverse axis labels.
• Show Peaks Displays a yellow line that slowly contracts from the highest recent peak.
• Show Valleys Displays a purple line that slowly expands from the lowest recent valley.
• Static Peaks and Valleys Displays the absolute peak and valley since the start of audio playback.
Additional display option for Spin mode Right-click the graph and select Edit Spin Rate to change the speed of
rotation.
Analyze frequency range
In Edit View, you can use the Frequency Analysis panel toidentify problematic frequency bands, which youcan then
correct with a filter effect. In this panel, the horizontal axis represents frequency (measured in Hz), while the vertical
axis represents amplitude (measured in decibels).
To save or print a Frequency Analysis graph, press Alt+PrtScn, and then paste into an image-editing application.
Page 99

A
D
B
C
E
Frequency Analysis panel displaying Advanced options
A. Musical note B. Frequency scale C. Chart format D. Amplitude scale E. FFT window type
1 In Edit View, choose Window > Frequency Analysis.
2 In the Main panel, click a point, select a range, or start playback.
ADOBE AUDITION 3.0
User Guide
94
If you select a range, Adobe Audition analyzes only the center point. To analyze the overall frequency of a selected
range, click Scan Selection in the Frequency Analysis panel.
3 View frequency and amplitude information in the Frequency Analysis panel:
• The graph displays frequency along the horizontal axis and amplitude on the vertical axis.
To zoom in on a particular area of the graph, right-click on a ruler and drag the magnifying glass icon. (See “Zoom
phase and frequency graphs” on page 95.)
• The musical note of the waveform is displayed in the area above the graph. The numbers indicate the keyboard
position and variance from standard tuning. For example, A2 +7 equals the second-lowest A on a keyboard tuned
7% higher than normal.
• The highest frequency of the entire waveform and the maximum amplitude for each channel is displayed in the
left status area underneath the graph.
• The overall frequency (and equivalent musical note) at the center point of the selected range is displayed in the
right status area underneath the graph.
Frequency Analysis options
Set the following options to customize the Frequency Analysis panel:
Linear View Sets the graph display to a linear horizontal frequency scale when selected or a logarithmic scale when
deselected.
Hold buttons Let you take up to four frequency snapshots as a waveform is playing. The frequency outline (which
is rendered in the same color as the button clicked) is frozen on the graph and overlaid on other frequency outlines.
Up to four frozen frequency outlines may be shown at once. To clear a frozen frequency outline, click its corresponding Hold button again.
Chart Format menu Changes the graph display. Choose one of the following styles:
• Lines Displays amplitude at each frequency with simple lines. The left channel is blue; the right is red.
Page 100

ADOBE AUDITION 3.0
• Area (Left On Top) Displays lines for amplitude, but this option fills the area beneath the lines in a solid color,
smooths out amplitude differences in the same area, and places the left channel in front.
• Area (Right On Top) Functions identically to the option above, but places the right channel in front.
User Guide
95
• Bars (Left On Top)
Shows the limitations on analysis resolution by splitting the display into rectangular segments,
and places the left channel in front. The higher the FFT size, the greater the analysis resolution, and the narrower the bar.
• Bars (Right On Top) Functions identically to the option above but places the right channel in front.
FFT Size menu (Advanced option) Specifies the Fast Fourier Transform size. Higher FFT sizes give you more
accurate results in terms of frequency (such as the overall frequency estimate), but they also create longer processing
times.
You can generate a step-by-step animation by clicking the Main panel and then holding down the Right Arrow key.
As the cursor scrolls across the across the waveform, Adobe Audition displays the corresponding spectral information in the Frequency Analysis panel.
Note: When you set the FFT size to 8192 or lower, the Frequency Analysis panel updates in real time while you play a
file. (Keep in mind that how well it ultimately updates in real time is based on the computer’s speed.)
FFT Window Type menu (Advanced option) Lets you choose from eight types of FFT windows. Each displays a
slightly different kind of frequency graph.
The Triangular option gives a more precise frequency estimate, but it’s also the noisiest, meaning that other
frequencies will be shown as present, even though they may be much lower in volume.
At the other extreme, the Blackmann-Harris option displays a broader frequency band, which isn’t as precise, butthe
sidelobes are very low, making it easier to pick out the major frequency components.
Reference (Advanced option) Determines the amplitude at which full scale, 0 dBFS audio data is displayed. For
example, a value of zero displays 0 dBFS audio at 0 dB. A value of 30 displays 0 dBFS audio at –30 dB. This value
simply moves the display up or down; it does not change the amplitude of audio data.
Copy To Clipboard (Advanced option) Copies a text-based frequency report of the current waveform to the
Windows clipboard.
Zoom phase and frequency graphs
In the Phase Analysis and Frequency Analysis panels, you can zoom graphs to analyze phase and frequency in more
detail.
❖ Do any of the following:
• To zoom in on a graph, right-click and drag the magnifying glass icon in the vertical or horizontal ruler. (In the
Phase Analysis panel, you can also click in the panel and use the mouse wheel to zoom.)
• To navigate a magnified graph, left-click and drag the hand icon in the vertical or horizontal ruler.
• To zoom out on a magnified graph, right-click in the vertical or horizontal ruler, and choose Zoom Out or Zoom
Out Full. Zoom Out to return to the previous magnification. (This option is available only in the Frequency
Analysis panel.) Zoom Out Full to zoom out completely.
 Loading...