

Page 1

ADOBE® AFTER EFFECTS® CS3
PROFESSIONAL
USER GUIDE
Page 2

Copyright
© 2007 Adobe Systems Incorporated. All rights reserved.
Adobe® After Effects® CS3 User Guide for Windows® and Mac OS
If this guide is distributed with software that includes an end user agreement, this guide, as well as the software described in it, is furnished under license and may be used or
copied only in accordance with the terms of such license. Except as permitted by any such license, no part of this guide may be reproduced, stored in a retrieval system, or transmitted, in any form or by any means, electronic, mechanical, recording, or otherwise, without the prior written permission of Adobe Systems Incorporated.Pleasenotethatthe
content in this guide is protected under copyright law even if it is not distributed with software that includes an end user license agreement.
Thecontentofthisguideisfurnishedforinformationaluseonly,issubjecttochangewithoutnotice,andshouldnotbeconstruedasacommitmentbyAdobe Systems Incorporated. Adobe Systems Incorporated assumes no responsibility or liability for any errors or inaccuracies that may appear in the informational content contained in this guide.
Please remember that existing artwork or images that you may want to include in your project may be protected under copyright law. The unauthorized incorporation of such
material into your new work could be a violation of the rights of the copyright owner. Please be sure to obtain any permission required from the copyright owner.
Any references to company names in sample templates are for demonstration purposes only and are not intended to refer to any actual organization.
Adobe, the Adobe logo, Adobe Audition, Adobe Premiere, After Effects, Creative Suite, Encore, Fireworks, Flash, Photoshop, and Soundbooth are either registered trademarks
or trademarks of Adobe Systems Incorporated in the United States and/or other countries.
Apple, Mac, and Mac OS are trademarks of Apple Inc., registered in the United States and other countries. Microsoft, OpenType, and Windows are either registered trademarks
or trademarks of Microsoft Corporation in the United States and/or other countries. Dolby is a trademark of Dolby Laboratories. Intel is a registered trademark of Intel Corporation in the U.S. and other countries. SGI is a trademark of Silicon Graphics, Inc. UNIX is a registered trademark of The Open Group in the United States and other countries.
All other trademarks are the property of their respective owners.
This product includes software developed by the Apache Software Foundation (
http://www.apache.org/).
Portions of the TIFF I/O plug-in were written with MacApp®: ©1985-1988 Apple Inc. APPLE INC. MAKES NO WARRANTIES WHATSOEVER, EITHER EXPRESS OR
IMPLIED, REGARDING THIS PRODUCT, INCLUDING WARRANTIES WITH RESPECT TO ITS MERCHANTABILITY OR ITS FITNESS FOR ANY PARTICULAR
PURPOSE. The MacApp software is proprietary to Apple Inc. and is licensed to Adobe for distribution only for use in combination with Adobe After Effects.
MPEG Layer-3 audio compression technology licensed by Fraunhofer IIS and Thomson Multimedia (
Speech compression and decompression technology licensed from Nellymoser, Inc. (
www.nellymoser.com)
Flash CS3 video is powered by On2 TrueMotion video technology. © 1992-2005 On2 Technologies, Inc. All Rights Reserved.
This product includes software developed by the OpenSymphony Group (
http://www.opensymphony.com/).
http://www.mp3licensing.com).
http://www.on2.com
This product contains either BISAFE and/or TIPEM software by RSA Data Security, Inc.
Sorenson SparkTM video compression and decompression technology licensed from Sorenson Media, Inc.
Notice toU.S. Governmentend users:The Softwareand Documentationare “Commercial Items,”as that term isdefined at48 C.F.R.§2.101, consistingof “Co mmerci al Comp uter
Software” and “Commercial Computer Software Documentation,” as such terms are used in 48 C.F.R. §12.212 or 48 C.F.R. §227.7202, as applicable. Consistent with 48 C.F.R.
§12.212 or 48 C.F.R. §§227.7202-1 through 227.7202-4, as applicable, the Commercial Computer Software and Commercial Computer Software Documentation are being
licensed to U.S. Government end users (a) only as Commercial Items and (b) with only those rights as are granted to all other end users pursuant to the terms and conditions
herein. Unpublished-rights reserved under the copyright laws of the United States. Adobe agrees to comply with all applicable equal opportunity laws including, if appropriate,
the provisions of Executive Order 11246, as amended, Section 402 of the Vietnam Era Veterans Readjustment Assistance Act of 1974 (38 USC 4212), and Section 503 of the
Rehabilitation Act of 1973, as amended, and the regulations at 41 CFR Parts 60-1 through 60-60, 60-250, and 60-741. The affirmative action clause and regulations contained in
the preceding sentence shall be incorporated by reference.
Adobe Systems Incorporated, 345 Park Avenue, San Jose, California 95110, USA.
Page 3

Contents
Chapter 1: Getting started
Installation . . . . . . . . . . . . . . . . . . . . . . . . . . . . . . . . . . . . . . . . . . . . . . . . . . . . . . . . . . . . . . . . . . . . . . . . . . . . . . . 1
Adobe Help . . . . . . . . . . . . . . . . . . . . . . . . . . . . . . . . . . . . . . . . . . . . . . . . . . . . . . . . . . . . . . . . . . . . . . . . . . . . . . . 2
Resources . . . . . . . . . . . . . . . . . . . . . . . . . . . . . . . . . . . . . . . . . . . . . . . . . . . . . . . . . . . . . . . . . . . . . . . . . . . . . . . . 5
What’s new . . . . . . . . . . . . . . . . . . . . . . . . . . . . . . . . . . . . . . . . . . . . . . . . . . . . . . . . . . . . . . . . . . . . . . . . . . . . . . 11
Chapter 2: User interface
Customizing the user interface . . . . . . . . . . . . . . . . . . . . . . . . . . . . . . . . . . . . . . . . . . . . . . . . . . . . . . . . . . . 13
Using the After Effects interface . . . . . . . . . . . . . . . . . . . . . . . . . . . . . . . . . . . . . . . . . . . . . . . . . . . . . . . . . . 18
Chapter 3: Planning and managing projects
Project basics . . . . . . . . . . . . . . . . . . . . . . . . . . . . . . . . . . . . . . . . . . . . . . . . . . . . . . . . . . . . . . . . . . . . . . . . . . . . 23
Project planning and setup . . . . . . . . . . . . . . . . . . . . . . . . . . . . . . . . . . . . . . . . . . . . . . . . . . . . . . . . . . . . . . . 26
Memory, storage, and performance . . . . . . . . . . . . . . . . . . . . . . . . . . . . . . . . . . . . . . . . . . . . . . . . . . . . . . 37
Plug-ins and scripts . . . . . . . . . . . . . . . . . . . . . . . . . . . . . . . . . . . . . . . . . . . . . . . . . . . . . . . . . . . . . . . . . . . . . . 44
iii
Chapter 4: Importing
Importing and interpreting footage items . . . . . . . . . . . . . . . . . . . . . . . . . . . . . . . . . . . . . . . . . . . . . . . . 47
Working with footage items . . . . . . . . . . . . . . . . . . . . . . . . . . . . . . . . . . . . . . . . . . . . . . . . . . . . . . . . . . . . . . 58
Importing from After Effects and Adobe Premiere Pro . . . . . . . . . . . . . . . . . . . . . . . . . . . . . . . . . . . . . 63
Importing video and audio . . . . . . . . . . . . . . . . . . . . . . . . . . . . . . . . . . . . . . . . . . . . . . . . . . . . . . . . . . . . . . . 67
Importing 3D image files . . . . . . . . . . . . . . . . . . . . . . . . . . . . . . . . . . . . . . . . . . . . . . . . . . . . . . . . . . . . . . . . . 77
Importing still images . . . . . . . . . . . . . . . . . . . . . . . . . . . . . . . . . . . . . . . . . . . . . . . . . . . . . . . . . . . . . . . . . . . . 80
Introduction to Camera Raw . . . . . . . . . . . . . . . . . . . . . . . . . . . . . . . . . . . . . . . . . . . . . . . . . . . . . . . . . . . . . . 86
Navigating, opening, and saving images with Camera Raw . . . . . . . . . . . . . . . . . . . . . . . . . . . . . . . . 92
Adjusting color in Camera Raw . . . . . . . . . . . . . . . . . . . . . . . . . . . . . . . . . . . . . . . . . . . . . . . . . . . . . . . . . . . 94
Modifying images with Camera Raw . . . . . . . . . . . . . . . . . . . . . . . . . . . . . . . . . . . . . . . . . . . . . . . . . . . . . 101
Camera Raw settings . . . . . . . . . . . . . . . . . . . . . . . . . . . . . . . . . . . . . . . . . . . . . . . . . . . . . . . . . . . . . . . . . . . . 104
Chapter 5: Compositions
Composition basics . . . . . . . . . . . . . . . . . . . . . . . . . . . . . . . . . . . . . . . . . . . . . . . . . . . . . . . . . . . . . . . . . . . . . 107
Nesting, precomposing, and pre-rendering . . . . . . . . . . . . . . . . . . . . . . . . . . . . . . . . . . . . . . . . . . . . . . 113
Markers . . . . . . . . . . . . . . . . . . . . . . . . . . . . . . . . . . . . . . . . . . . . . . . . . . . . . . . . . . . . . . . . . . . . . . . . . . . . . . . . . 116
Chapter 6: Views and previews
Previewing . . . . . . . . . . . . . . . . . . . . . . . . . . . . . . . . . . . . . . . . . . . . . . . . . . . . . . . . . . . . . . . . . . . . . . . . . . . . . 120
Modifying and using views . . . . . . . . . . . . . . . . . . . . . . . . . . . . . . . . . . . . . . . . . . . . . . . . . . . . . . . . . . . . . . 126
Chapter 7: Layers and properties
Creating layers . . . . . . . . . . . . . . . . . . . . . . . . . . . . . . . . . . . . . . . . . . . . . . . . . . . . . . . . . . . . . . . . . . . . . . . . . . 133
Selecting and arranging layers . . . . . . . . . . . . . . . . . . . . . . . . . . . . . . . . . . . . . . . . . . . . . . . . . . . . . . . . . . 137
Managing layers . . . . . . . . . . . . . . . . . . . . . . . . . . . . . . . . . . . . . . . . . . . . . . . . . . . . . . . . . . . . . . . . . . . . . . . . 147
Modify layer properties . . . . . . . . . . . . . . . . . . . . . . . . . . . . . . . . . . . . . . . . . . . . . . . . . . . . . . . . . . . . . . . . . 152
Page 4

Blending modes . . . . . . . . . . . . . . . . . . . . . . . . . . . . . . . . . . . . . . . . . . . . . . . . . . . . . . . . . . . . . . . . . . . . . . . . 163
Layer styles . . . . . . . . . . . . . . . . . . . . . . . . . . . . . . . . . . . . . . . . . . . . . . . . . . . . . . . . . . . . . . . . . . . . . . . . . . . . . 168
Working with 3D layers . . . . . . . . . . . . . . . . . . . . . . . . . . . . . . . . . . . . . . . . . . . . . . . . . . . . . . . . . . . . . . . . . . 171
Cameras, lights, and points of interest . . . . . . . . . . . . . . . . . . . . . . . . . . . . . . . . . . . . . . . . . . . . . . . . . . . 176
Chapter 8: Animation
Animation basics . . . . . . . . . . . . . . . . . . . . . . . . . . . . . . . . . . . . . . . . . . . . . . . . . . . . . . . . . . . . . . . . . . . . . . . 183
Setting, selecting, and deleting keyframes . . . . . . . . . . . . . . . . . . . . . . . . . . . . . . . . . . . . . . . . . . . . . . . 187
Editing, moving, and copying keyframes . . . . . . . . . . . . . . . . . . . . . . . . . . . . . . . . . . . . . . . . . . . . . . . . . 190
Creating and modifying motion paths . . . . . . . . . . . . . . . . . . . . . . . . . . . . . . . . . . . . . . . . . . . . . . . . . . . 197
Assorted animation tools . . . . . . . . . . . . . . . . . . . . . . . . . . . . . . . . . . . . . . . . . . . . . . . . . . . . . . . . . . . . . . . . 200
Interpolation . . . . . . . . . . . . . . . . . . . . . . . . . . . . . . . . . . . . . . . . . . . . . . . . . . . . . . . . . . . . . . . . . . . . . . . . . . . 204
Speed . . . . . . . . . . . . . . . . . . . . . . . . . . . . . . . . . . . . . . . . . . . . . . . . . . . . . . . . . . . . . . . . . . . . . . . . . . . . . . . . . . 210
Time-stretching and time-remapping . . . . . . . . . . . . . . . . . . . . . . . . . . . . . . . . . . . . . . . . . . . . . . . . . . . 218
Animating with Puppet tools . . . . . . . . . . . . . . . . . . . . . . . . . . . . . . . . . . . . . . . . . . . . . . . . . . . . . . . . . . . . 226
Chapter 9: Color
Color basics . . . . . . . . . . . . . . . . . . . . . . . . . . . . . . . . . . . . . . . . . . . . . . . . . . . . . . . . . . . . . . . . . . . . . . . . . . . . . 234
Color management . . . . . . . . . . . . . . . . . . . . . . . . . . . . . . . . . . . . . . . . . . . . . . . . . . . . . . . . . . . . . . . . . . . . . 241
iv
Chapter 10: Masks, transparency, and keying
Transparency overview . . . . . . . . . . . . . . . . . . . . . . . . . . . . . . . . . . . . . . . . . . . . . . . . . . . . . . . . . . . . . . . . . . 252
Creating and importing masks . . . . . . . . . . . . . . . . . . . . . . . . . . . . . . . . . . . . . . . . . . . . . . . . . . . . . . . . . . 254
Working with masks and mattes . . . . . . . . . . . . . . . . . . . . . . . . . . . . . . . . . . . . . . . . . . . . . . . . . . . . . . . . . 257
Animating masks . . . . . . . . . . . . . . . . . . . . . . . . . . . . . . . . . . . . . . . . . . . . . . . . . . . . . . . . . . . . . . . . . . . . . . . 264
Keying . . . . . . . . . . . . . . . . . . . . . . . . . . . . . . . . . . . . . . . . . . . . . . . . . . . . . . . . . . . . . . . . . . . . . . . . . . . . . . . . . . 268
Chapter 11: Text
Creating and editing text layers . . . . . . . . . . . . . . . . . . . . . . . . . . . . . . . . . . . . . . . . . . . . . . . . . . . . . . . . . 273
Formatting characters . . . . . . . . . . . . . . . . . . . . . . . . . . . . . . . . . . . . . . . . . . . . . . . . . . . . . . . . . . . . . . . . . . . 278
Formatting paragraphs . . . . . . . . . . . . . . . . . . . . . . . . . . . . . . . . . . . . . . . . . . . . . . . . . . . . . . . . . . . . . . . . . . 283
Animating text . . . . . . . . . . . . . . . . . . . . . . . . . . . . . . . . . . . . . . . . . . . . . . . . . . . . . . . . . . . . . . . . . . . . . . . . . . 285
Examples of text animation . . . . . . . . . . . . . . . . . . . . . . . . . . . . . . . . . . . . . . . . . . . . . . . . . . . . . . . . . . . . . 295
Chapter 12: Drawing and painting
Using paint tools . . . . . . . . . . . . . . . . . . . . . . . . . . . . . . . . . . . . . . . . . . . . . . . . . . . . . . . . . . . . . . . . . . . . . . . . 302
Shape layers overview . . . . . . . . . . . . . . . . . . . . . . . . . . . . . . . . . . . . . . . . . . . . . . . . . . . . . . . . . . . . . . . . . . 312
Creating shapes and masks . . . . . . . . . . . . . . . . . . . . . . . . . . . . . . . . . . . . . . . . . . . . . . . . . . . . . . . . . . . . . . 318
Managing and editing shapes . . . . . . . . . . . . . . . . . . . . . . . . . . . . . . . . . . . . . . . . . . . . . . . . . . . . . . . . . . . 325
Chapter 13: Motion tracking
Motion tracking overview . . . . . . . . . . . . . . . . . . . . . . . . . . . . . . . . . . . . . . . . . . . . . . . . . . . . . . . . . . . . . . . 335
Tracking motion . . . . . . . . . . . . . . . . . . . . . . . . . . . . . . . . . . . . . . . . . . . . . . . . . . . . . . . . . . . . . . . . . . . . . . . . 342
Chapter 14: Effects and animation presets
Effects and animation presets overview . . . . . . . . . . . . . . . . . . . . . . . . . . . . . . . . . . . . . . . . . . . . . . . . . . 347
Working with effects and animation presets . . . . . . . . . . . . . . . . . . . . . . . . . . . . . . . . . . . . . . . . . . . . . 350
Page 5

Chapter 15: Effect reference
Galleries of effects . . . . . . . . . . . . . . . . . . . . . . . . . . . . . . . . . . . . . . . . . . . . . . . . . . . . . . . . . . . . . . . . . . . . . . 355
3D Channel effects . . . . . . . . . . . . . . . . . . . . . . . . . . . . . . . . . . . . . . . . . . . . . . . . . . . . . . . . . . . . . . . . . . . . . . 367
Audio effects . . . . . . . . . . . . . . . . . . . . . . . . . . . . . . . . . . . . . . . . . . . . . . . . . . . . . . . . . . . . . . . . . . . . . . . . . . . 371
Blur & Sharpen effects . . . . . . . . . . . . . . . . . . . . . . . . . . . . . . . . . . . . . . . . . . . . . . . . . . . . . . . . . . . . . . . . . . . 375
Channel effects . . . . . . . . . . . . . . . . . . . . . . . . . . . . . . . . . . . . . . . . . . . . . . . . . . . . . . . . . . . . . . . . . . . . . . . . . 381
Color Correction effects . . . . . . . . . . . . . . . . . . . . . . . . . . . . . . . . . . . . . . . . . . . . . . . . . . . . . . . . . . . . . . . . . 387
Distort effects . . . . . . . . . . . . . . . . . . . . . . . . . . . . . . . . . . . . . . . . . . . . . . . . . . . . . . . . . . . . . . . . . . . . . . . . . . . 404
Generate effects . . . . . . . . . . . . . . . . . . . . . . . . . . . . . . . . . . . . . . . . . . . . . . . . . . . . . . . . . . . . . . . . . . . . . . . . 419
Keying effects . . . . . . . . . . . . . . . . . . . . . . . . . . . . . . . . . . . . . . . . . . . . . . . . . . . . . . . . . . . . . . . . . . . . . . . . . . . 440
Matte effects . . . . . . . . . . . . . . . . . . . . . . . . . . . . . . . . . . . . . . . . . . . . . . . . . . . . . . . . . . . . . . . . . . . . . . . . . . . . 450
Noise & Grain effects . . . . . . . . . . . . . . . . . . . . . . . . . . . . . . . . . . . . . . . . . . . . . . . . . . . . . . . . . . . . . . . . . . . . 452
Paint effects . . . . . . . . . . . . . . . . . . . . . . . . . . . . . . . . . . . . . . . . . . . . . . . . . . . . . . . . . . . . . . . . . . . . . . . . . . . . 471
Perspective effects . . . . . . . . . . . . . . . . . . . . . . . . . . . . . . . . . . . . . . . . . . . . . . . . . . . . . . . . . . . . . . . . . . . . . . 481
Simulation effects . . . . . . . . . . . . . . . . . . . . . . . . . . . . . . . . . . . . . . . . . . . . . . . . . . . . . . . . . . . . . . . . . . . . . . . 486
Stylize effects . . . . . . . . . . . . . . . . . . . . . . . . . . . . . . . . . . . . . . . . . . . . . . . . . . . . . . . . . . . . . . . . . . . . . . . . . . . 517
Text effects . . . . . . . . . . . . . . . . . . . . . . . . . . . . . . . . . . . . . . . . . . . . . . . . . . . . . . . . . . . . . . . . . . . . . . . . . . . . . 524
Time effects . . . . . . . . . . . . . . . . . . . . . . . . . . . . . . . . . . . . . . . . . . . . . . . . . . . . . . . . . . . . . . . . . . . . . . . . . . . . 531
Transition effects . . . . . . . . . . . . . . . . . . . . . . . . . . . . . . . . . . . . . . . . . . . . . . . . . . . . . . . . . . . . . . . . . . . . . . . . 536
Utility effects . . . . . . . . . . . . . . . . . . . . . . . . . . . . . . . . . . . . . . . . . . . . . . . . . . . . . . . . . . . . . . . . . . . . . . . . . . . 542
v
Chapter 16: Expressions
Working with expressions . . . . . . . . . . . . . . . . . . . . . . . . . . . . . . . . . . . . . . . . . . . . . . . . . . . . . . . . . . . . . . . 547
The expression language . . . . . . . . . . . . . . . . . . . . . . . . . . . . . . . . . . . . . . . . . . . . . . . . . . . . . . . . . . . . . . . . 556
After Effects expression elements reference . . . . . . . . . . . . . . . . . . . . . . . . . . . . . . . . . . . . . . . . . . . . . . 559
Expression examples . . . . . . . . . . . . . . . . . . . . . . . . . . . . . . . . . . . . . . . . . . . . . . . . . . . . . . . . . . . . . . . . . . . . 582
Chapter 17: Rendering and exporting
Basics of rendering and exporting . . . . . . . . . . . . . . . . . . . . . . . . . . . . . . . . . . . . . . . . . . . . . . . . . . . . . . . 587
Rendering and exporting to Flash formats . . . . . . . . . . . . . . . . . . . . . . . . . . . . . . . . . . . . . . . . . . . . . . . 602
Rendering and exporting still images and still-image sequences . . . . . . . . . . . . . . . . . . . . . . . . . . 606
Exporting project information to other Adobe applications . . . . . . . . . . . . . . . . . . . . . . . . . . . . . . . 608
Encoding and compression options for movies . . . . . . . . . . . . . . . . . . . . . . . . . . . . . . . . . . . . . . . . . . 612
Automated rendering and network rendering . . . . . . . . . . . . . . . . . . . . . . . . . . . . . . . . . . . . . . . . . . .622
Converting movies . . . . . . . . . . . . . . . . . . . . . . . . . . . . . . . . . . . . . . . . . . . . . . . . . . . . . . . . . . . . . . . . . . . . . . 630
Reviewing movies with Clip Notes comments . . . . . . . . . . . . . . . . . . . . . . . . . . . . . . . . . . . . . . . . . . . . 634
Chapter 18: Keyboard shortcuts
Using and modifying keyboard shortcuts . . . . . . . . . . . . . . . . . . . . . . . . . . . . . . . . . . . . . . . . . . . . . . . . 638
Index . . . . . . . . . . . . . . . . . . . . . . . . . . . . . . . . . . . . . . . . . . . . . . . . . . . . . . . . . . . . . . . . . . . . . . . . . . . . . . . . . . 657
Page 6

Chapter 1: Getting started
Installation
Requirements
❖ To review complete system requirements and recommendations for your Adobe® software, see the Read Me file
on the installation disc.
Install the software
1 Close any other Adobe applications open on your computer.
2 Insert the installation disc into your DVD drive, and follow the on-screen instructions.
For each licensed copy of Adobe® After Effects® software, you can activate and use one copy of the full version of the
application on one computer. You can also install additional copies on additional computers to use as After Effects
render engines, which assist with network rendering. You install render engines in the same manner as the full
version of the application, but you do not activate them. You run the render engine using the Adobe After Effects
Render Engine shortcut in the Adobe After Effects CS3 folder.
1
Note: Formoreinformation,seetheReadMefileontheinstallationDVDorvisittheAdobeAfterEffectssupportwebsite
at www.adobe.com/go/learn_ae_support.
See also
“Network rendering with watch folders” on page 625
Activate the software
Ifyouhaveasingle-userretaillicenseforyourAdobesoftware,youwillbeaskedtoactivateyoursoftware;thisisa
simple, anonymous process that you must complete within 30 days of starting the software.
For more informationon productactivation, see the ReadMe file on your installation disc, or visitthe Adobe website
at www.adobe.com/go/activation.
1 If the Activation dialog box isn’t already open, choose Help > Activate.
2 Follow the on-screen instructions.
Note: If you want to install the software on a different computer, you must first deactivate it on your computer. Choose
Help > Deactivate.
Register
Register your product to receive complimentary installation support, notifications of updates, and other services.
❖ To register, follow the on-screen instructions in the Registration dialog box, which appears after you install and
activate the software.
If you postpone registration, you can register at any time by choosing Help > Registration.
Page 7
AFTER EFFECTS CS3
User Guide
Read Me
The installation disc contains the Read Me file for your software. (This file is also copied to the application folder
during product installation.) Open the file to read important information about topics such as the following:
• System requirements
• Installation (including uninstalling the software)
• Activation and registration
• Font installation
• Troubleshooting
• Customer support
• Legal notices
Adobe Help
Adobe Help resources
Documentation for your Adobe software is available in a variety of formats.
2
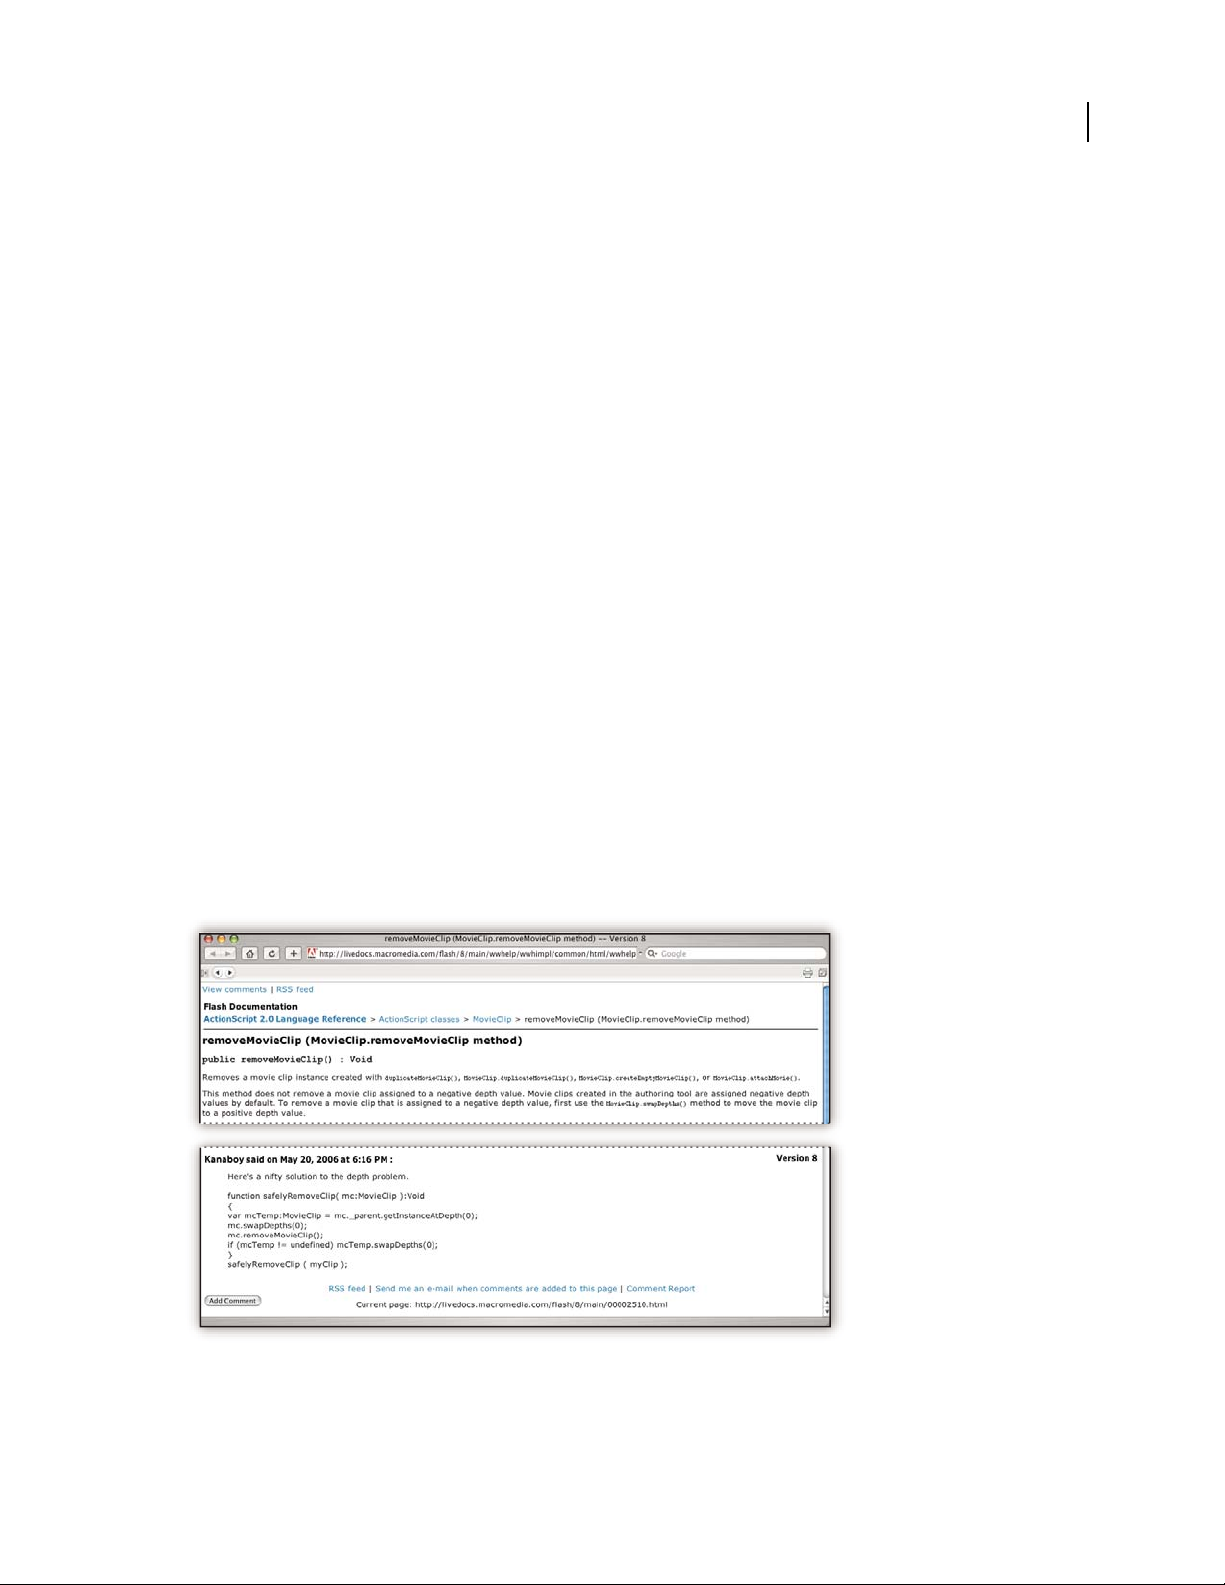
In-product and LiveDocs Help
In-product Help provides access to all documentation and instructional content available at the time the software
ships. It is available through the Help menu in your Adobe software.
LiveDocs Help includes all the content from in-product Help, plus updates and links to additional instructional
content available on the web. For some products, you can also add comments to the topics in LiveDocs Help. Find
LiveDocs Help for your product in the Adobe Help Resource Center, at www.adobe.com/go/documentation.
Page 8

AFTER EFFECTS CS3
User Guide
Most versions of in-product and LiveDocs Help let you search across the Help systems of multiple products. Topics
may also contain links to relevant content on the web or to topics in the Help of another product.
Think of Help, both in the product and on the web, as a hub for accessing additional content and communities of
users. The most complete and up-to-date version of Help is always on the web.
Adobe PDF documentation
The in-product Help is also available as a PDF that is optimized for printing. Other documents, such as installation
guides and white papers, may also be provided as PDFs.
All PDF documentation is available through the Adobe Help Resource Center, at www.adobe.com/go/documen-
tation.Tosee the PDF documentationincluded with your software, look inthe Documents folder on the installation
or content DVD.
Printed documentation
Printed editions of the in-product Help are available for purchase in the Adobe Store, at www.adobe.com/go/store.
You can also find books published by Adobe publishing partners in the Adobe Store.
A printed workflow guide is included with all Adobe Creative Suite® 3 products, and stand-alone Adobe products
may include a printed getting started guide.
3
Using Help in the product
In-productHelpisavailablethroughtheHelpmenu.AfteryoustarttheAdobeHelpViewer,clickBrowsetoseeHelp
for additional Adobe products installed on your computer.
These Help features facilitate cross-product learning:
• Topics may contain links to the Help systems of other Adobe products or to additional content on the web.
• Some topics are shared across two or more products. For instance, if you see a Help topic with an Adobe
Photoshop® CS3 icon and an Adobe After Effects® CS3 icon, you knowthat the topic either describes functionality
that is similar in the two products or describes cross-product workflows.
• You can search across the Help systems of multiple products.
If you search for a phrase, such as “shape tool,” enclose it in quotation marks to see only those topics that include all
the words in the phrase.
Page 9

AFTER EFFECTS CS3
User Guide
A
C
D
B
4
Adobe Help
A. Back/Forwardbuttons(previouslyvisited links) B. Expandablesubtopics C. Icons indicating shared topic D. Previous/Next buttons (topics
in sequential order)
Accessibility features
Adobe Help content is accessible to people with disabilities—such as mobility impairments, blindness, and low
vision. In-product Help supports these standard accessibility features:
• The user can change text size with standard context menu commands.
• Links are underlined for easy recognition.
• If link text doesn’t match the title of the destination, the title is referenced in the Title attribute of the Anchor tag.
For example, the Previous and Next links include the titles of the previous and next topics.
• Content supports high-contrast mode.
• Graphics without captions include alternate text.
• Each frame has a title to indicate its purpose.
• Standard HTML tags define content structure for screen reading or text-to-speech tools.
• Style sheets control formatting, so there are no embedded fonts.
Keyboard shortcuts for Help toolbar controls (Windows)
Back button Alt+Left Arrow
Forward button Alt+Right Arrow
Print Ctrl+P
About button Ctrl+I
Browse menu Alt+Down Arrow or Alt+Up Arrow to view Help for another application
Search box Ctrl+S to place the insertion point in the Search box
Page 10
AFTER EFFECTS CS3
User Guide
Keyboard shortcuts for Help navigation (Windows)
• To move between panes, press Ctrl+Tab (forward) and Shift+Ctrl+Tab (backward).
• To move through and outline links in a pane, press Tab (forward) or Shift+Tab (backward).
• To activate an outlined link, press Enter.
• To make text bigger, press Ctrl+equal sign.
• To make text smaller, press Ctrl+hyphen.
Resources
Adobe Video Workshop
The Adobe Creative Suite 3 Video Workshop offers over 200 training videos covering a wide range of subjects for
print, web, and video professionals.
YoucanusetheAdobeVideoWorkshoptolearnaboutanyCreativeSuite3product.Manyvideosshowyouhowto
use Adobe applications together.
5
Page 11
AFTER EFFECTS CS3
User Guide
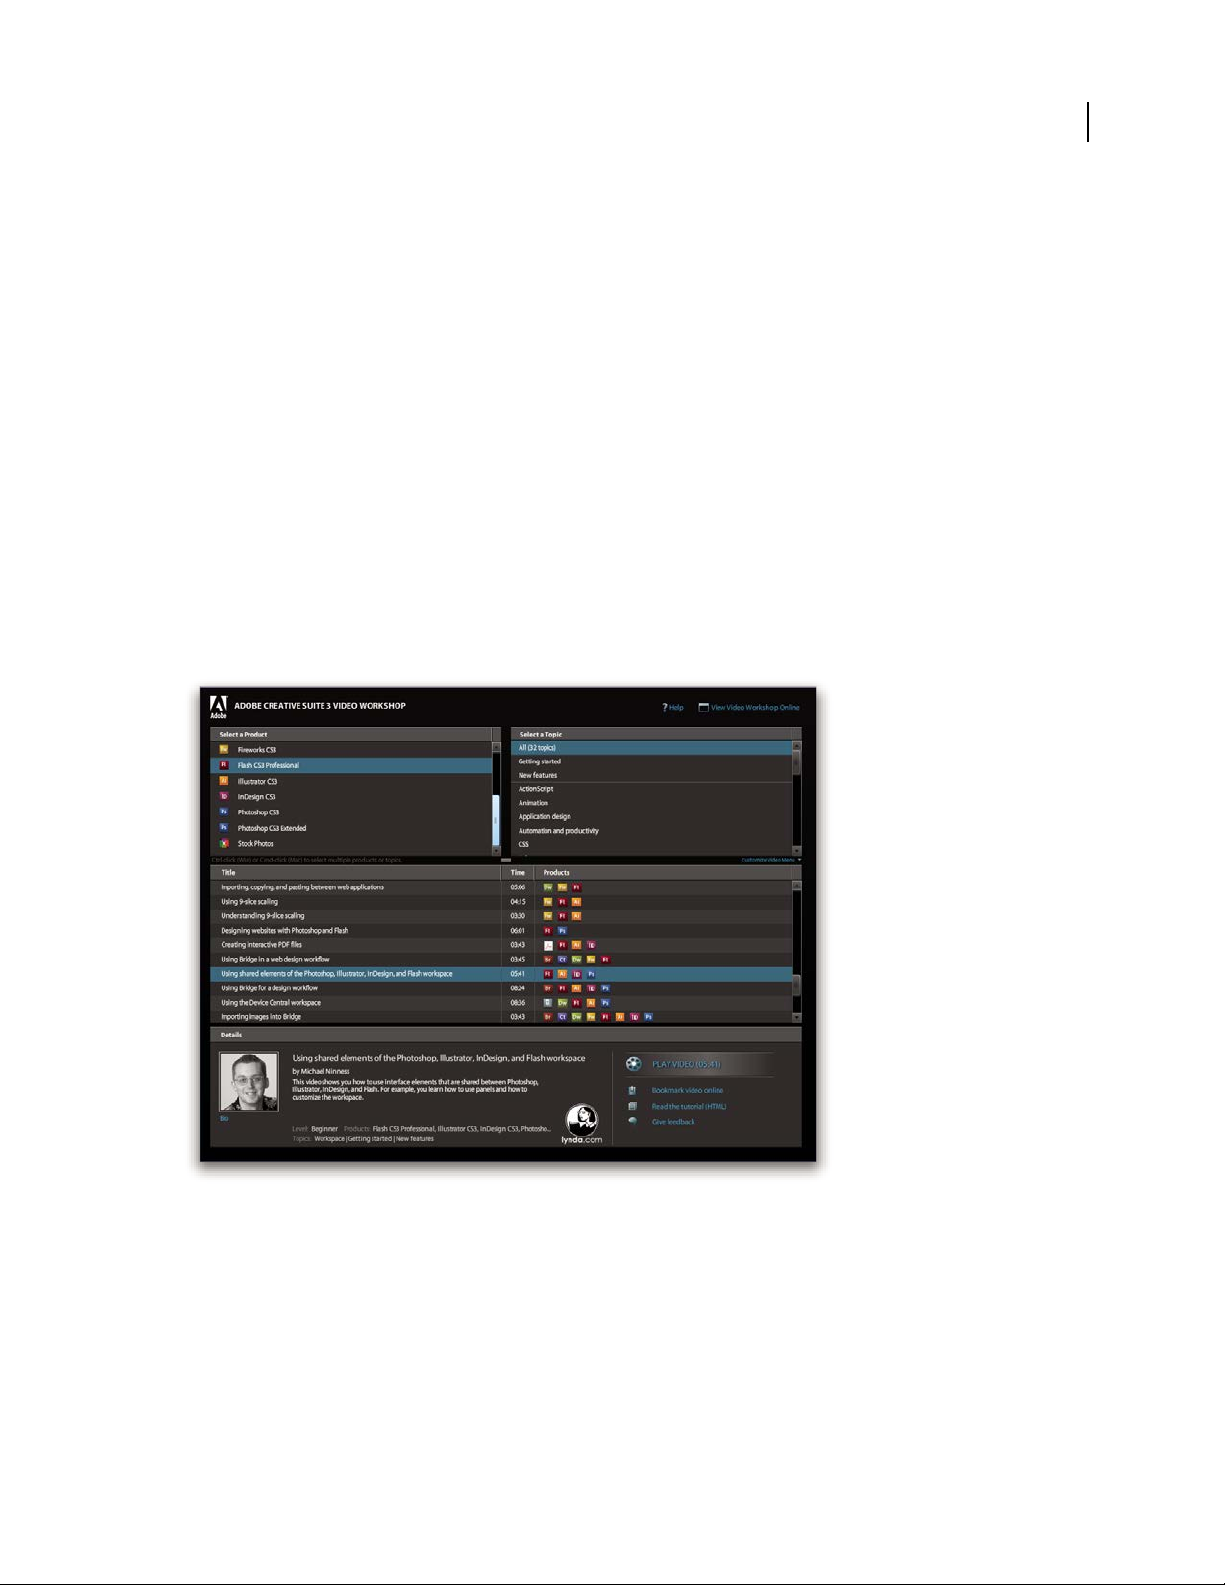
When you start the Adobe Video Workshop, you choose the products you want to learn and the subjects you want
to view. You can see details about each video to focus and direct your learning.
6
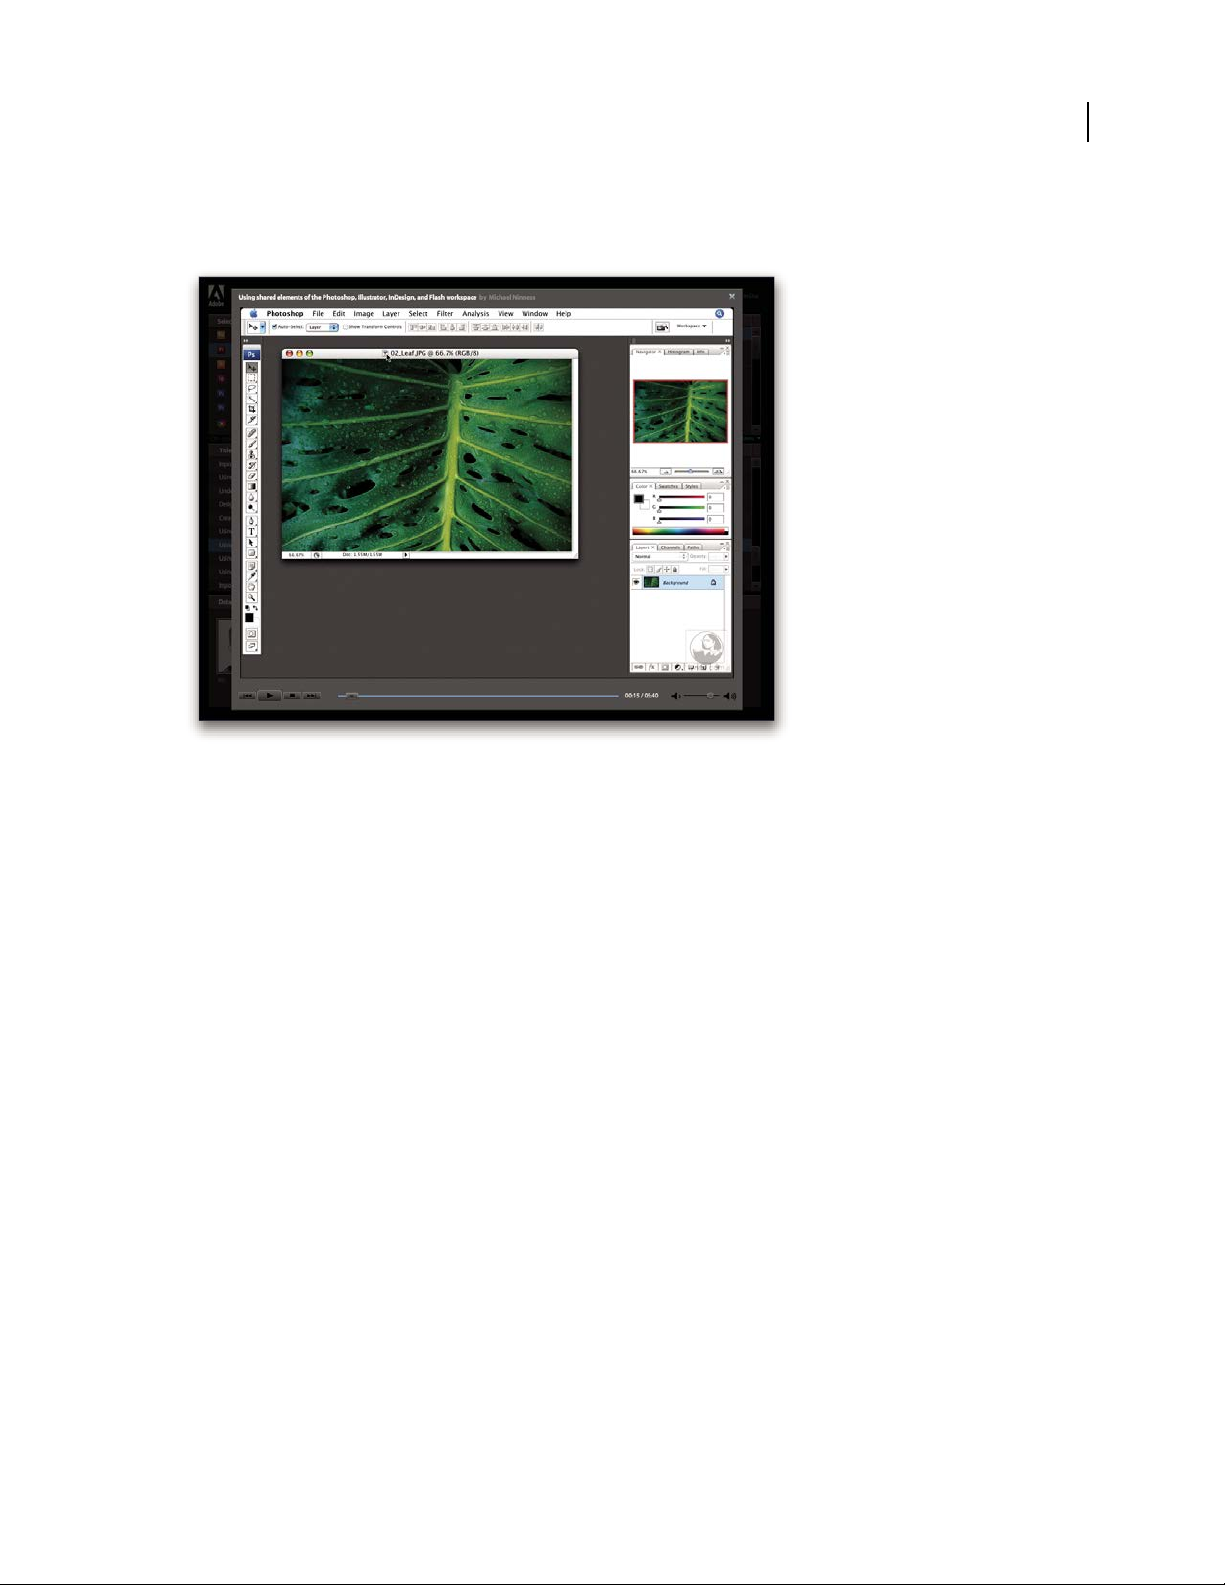
Community of presenters
With this release, Adobe Systems invited the community of its users to share their expertise and insights. Adobe and
lynda.com present tutorials, tips, and tricks from leading designers and developers such as Joseph Lowery, Katrin
Eismann, and Chris Georgenes. You can see and hear Adobe experts such as Lynn Grillo, Greg Rewis, and Russell
Brown. In all, over 30 product experts share their knowledge.
Tutorials and source files
The Adobe Video Workshop includes training for novices and experienced users. You’ll also find videos on new
features and key techniques. Each video covers a single subject and typically runs about 3-5 minutes. Most videos
come with an illustrated tutorial and source files, so you can print detailed steps and try the tutorial on your own.
Using Adobe Video Workshop
YoucanaccessAdobeVideoWorkshopusingtheDVDincludedwithyourCreativeSuite3product.It’salsoavailable
online at www.adobe.com/go/learn_videotutorials. Adobe will regularly add new videos to the online Video
Workshop, so check in to see what’s new.
After Effects CS3 videos
Adobe Video Workshop covers a wide range of subjects for Adobe After Effects® CS3, including these:
• Animating shape layers
• Applying effects
• Working with keyframes and the timeline
• Rendering and exporting
Page 12

AFTER EFFECTS CS3
User Guide
Videos also show you how to use After Effects CS3 with other Adobe products:
• Importing Photoshop files
• Using Dynamic Link
• Sending work for review using Clip Notes
To access Adobe Creative Suite 3 video tutorials, visit Adobe Video Workshop at
www.adobe.com/go/learn_videotutorials.
Extras
You have access to a wide variety of resources that will help you make the most of your Adobe software. Some of
these resources are installed on your computer during the setup process; additional helpful samples and documents
are included on the installation or content disc. Unique extras are also offered online by the Adobe Exchange
community, at www.adobe.com/go/exchange.
Installed resources
During software installation, anumber ofresources are placed in your application folder. Toview those files, navigate
to the application folder on your computer.
• Windows®: [startup drive]\Program Files\Adobe\[Adobe application]
• Mac OS®: [startup drive]/Applications/[Adobe application]
7
The application folder may contain the following resources:
Plug-ins Plug-in modules are small software programs that extend or add features to your software. Once installed,
plug-in modules appear as options in the Import or Export menu; as file formats in the Open, Save As, and Export
Original dialog boxes; or as filters in the Filter submenus. For example, a number of special effects plug-ins are
automatically installed in the Plug-ins folder inside the Photoshop CS3 folder.
Presets Presets include a wide variety of useful tools, preferences, effects, and images. Product presets include
brushes, swatches, color groups, symbols, custom shapes, graphic and layer styles, patterns, textures, actions,
workspaces, and more. Preset content can be found throughout the user interface. Some presets (for example,
Photoshop Brush libraries) become available only when you selectthe correspondingtool. If you don’t want to create
an effect or image from scratch, go to the preset libraries for inspiration.
Templates Template files can be opened and viewed from Adobe Bridge CS3, opened from the Welcome Screen, or
opened directly from the File menu. Depending on the product, template files range from letterheads, newsletters,
Page 13

AFTER EFFECTS CS3
E
T
V
ER
O
EO
S
E
T
AC
C
U
S
AM
E
T
JU
S
T
O
D
UO
DO
LO
R
ES
ET
EA
RE
B
U
M
.
S
T
E
T
CL
I
T
A
KA
SD
.
ET
COSETETUR SAD
IPSCING
01
PelletirInc.
CORE I
NVESTM
ENT SPE CTRUM
Vel illum do
lore eu feugiat nulla facilisis
at vero eros et accums
an
et iusto odio dignissim qui.
RETI
REMEN
T SAVI
NG
PLAN
Vel illum do
lor
e eu feugiat nulla facilisis
at vero eros et accums
an
et iusto odio
dignissim qui.
Your Inv estment G uide
Are
you leav ing mo
ney on the tab le?
01
Typi non habent claritatem
insitam; est usu
s leg
entis in iis qui facit eo
rum
claritatem.
Investig
ationes dem
onst
raverunt lectores lege
re me li
us quod ii
legu
nt saepi
us. Claritas est e
tiam processu
s.
Typi
non
habent cla
ritatem
insitam; est usu
s leg
entis in iis qui facit e
o
rum
claritatem.
In
vestig
ationes dem
onstraverunt lectores lege
re me li
us quod
ii
legu
nt saepi
us. Claritas est e
tiam processu
s.
SURVICE MENU
NULCHE
vero dio eum
nulche
agiam
e
t ad lorperi
t
sum a
$45
agiame
t ad atin utet
vero dio eum
nulche suma
agaim
et ad eum
nullam
$25
lorperit sum a
agiam
e
t ad lorperit
vero dio
eum nullam
$35
SUCCIVEROS
sucicvero dio
vero dio
eum
nul
che su
ma
$15
eum nul
lam
vero dio eum
nulche suma
agaimet ad e
um
nullam
$35
N
eum nullam
$35
SUCCI
VEROS
sucicvero dio
vero dio eum
nulche suma
$15
eum
nullam
vero dio eum
nulche suma
agaimet ad eum
nullam
$35
CC
a
s
i
o
p
i
a
S
p
A
User Guide
and websites to DVD menus and video buttons. Each template file is professionally constructed and represents a
best-use example of product features. Templates can be a valuable resource when you need to jump-start a project.
8
Travel Earth
Best 100 places to see on the planet
in your lifetime
Vel: Ad : Vulputate:
volute
ipsummy
, commy
re eugiarud tem
eraes-
exer
n ullutet
Samples Sample files include more complicated designs and are a great way tosee new featuresin action. These files
demonstrate the range of creative possibilities available to you.
Fonts Several OpenType® fonts and font families are included with your Creative Suite product. Fonts are copied to
your computer during installation:
• Windows: [startup drive]\Windows\Fonts
• Mac OS X: [startup drive]/Library/Fonts
For information about installing fonts, see the Read Me file on the installation DVD.
DVD content
The installation or content DVD included with your product contains additional resources for use with your
software. The Goodies folder contains product-specific files such astemplates, images, presets, actions, plug-ins, and
effects, along with subfolders for Fonts and Stock Photography. The Documentation folder contains a PDF version
of the Help, technical information, and other documents such as specimen sheets, reference guides, and specialized
feature information.
Adobe Exchange
For more free content, visit www.adobe.com/go/exchange, an online community where users download and share
thousands of free actions, extensions, plug-ins, and other content for use with Adobe products.
Bridge Home
Bridge Home, a new destination in Adobe Bridge CS3, provides up-to-date information on all your Adobe Creative
Suite 3 software in one convenient location. Start Adobe Bridge, then click the Bridge Home icon at the top of the
Favorites panel to access the latest tips, news, and resources for your Creative Suite tools.
Page 14
Note: Bridge Home may not be available in all languages.
AFTER EFFECTS CS3
User Guide
9
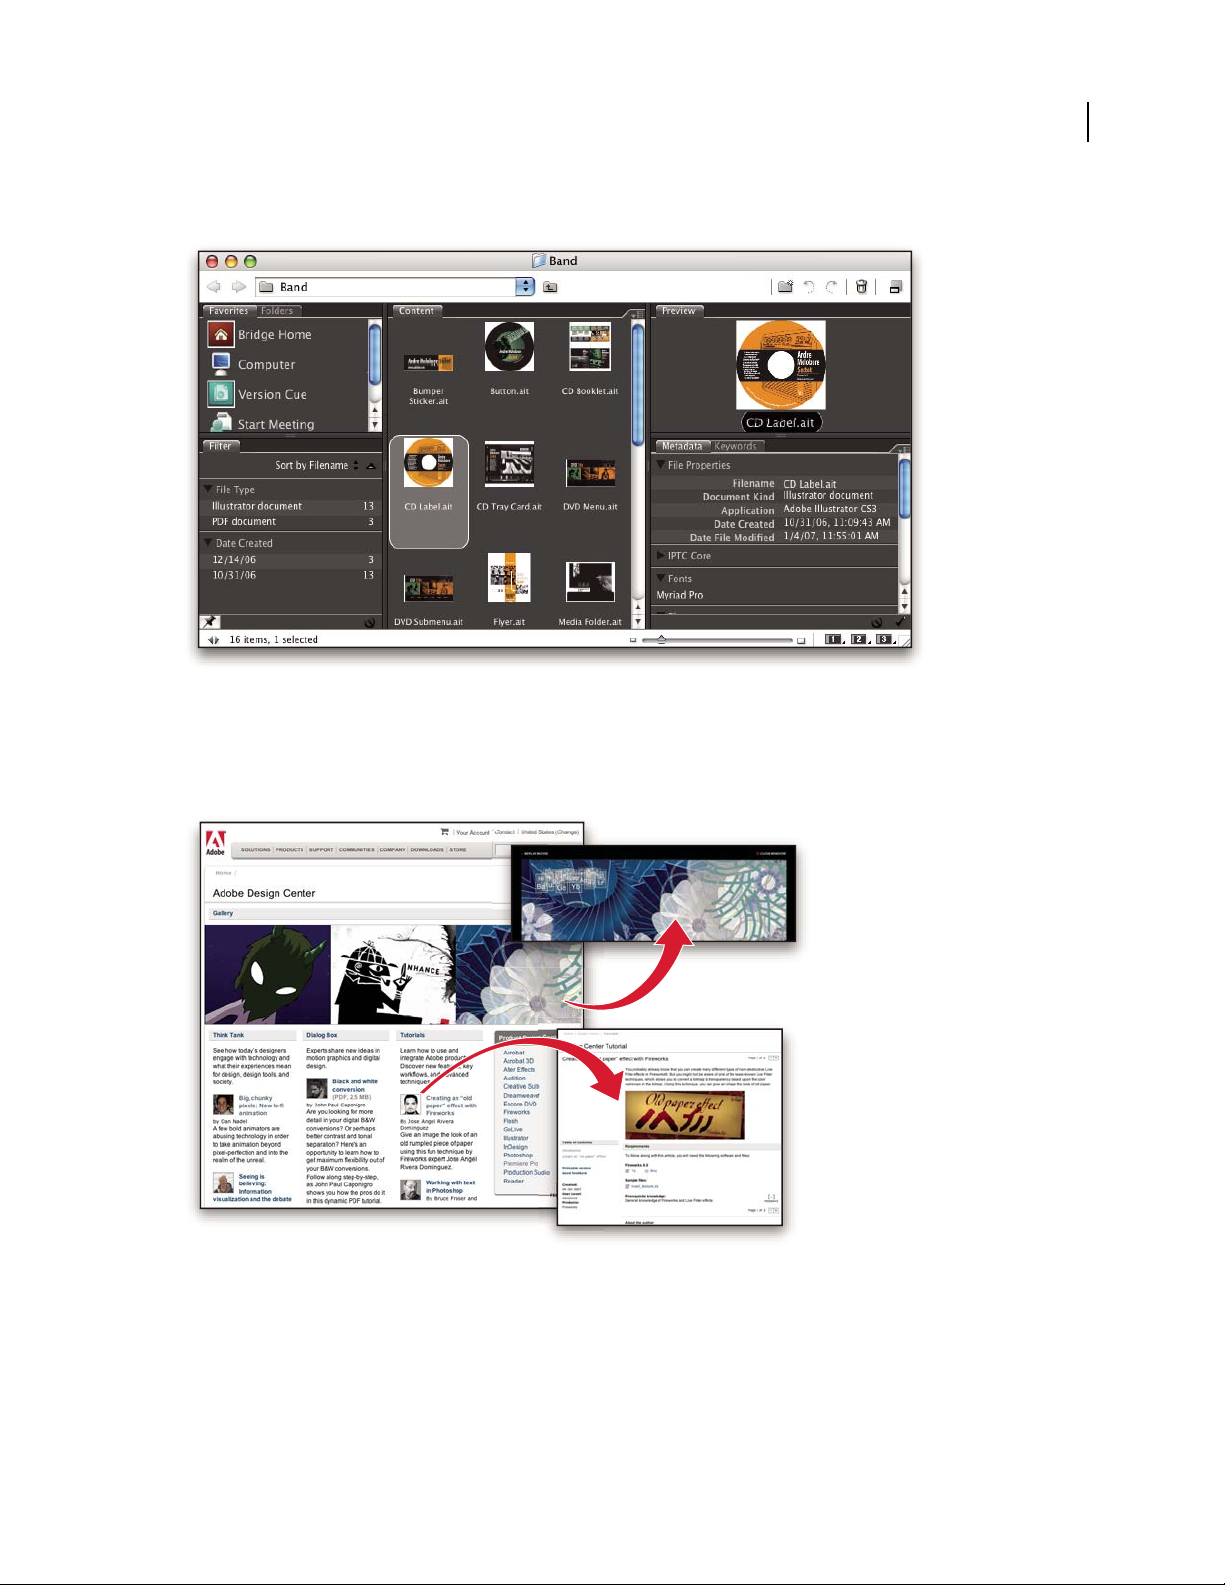
Adobe Design Center
Adobe Design Center offers articles, inspiration, and instruction from industry experts, top designers, and Adobe
publishing partners. New content is added monthly.
You can find hundreds of tutorials for design products and learn tips and techniques through videos, HTML
tutorials, and sample book chapters.
Page 15

AFTER EFFECTS CS3
User Guide
New ideas are the heart of Think Tank, Dialog Box, and Gallery:
• ThinkTankarticlesconsiderhowtoday’sdesignersengagewithtechnologyandwhattheirexperiencesmeanfor
design, design tools, and society.
• In Dialog Box, experts share new ideas in motion graphics and digital design.
• The Gallery showcases how artists communicate design in motion.
Visit Adobe Design Center at www.adobe.com/designcenter.
Adobe Developer Center
Adobe Developer Center provides samples, tutorials, articles, and community resources for developers who build
rich Internet applications, websites, mobile content, and other projects using Adobe products. The Developer Center
also contains resources for developers who develop plug-ins for Adobe products.
10
In addition to sample code and tutorials, you'll find RSS feeds, online seminars, SDKs, scripting guides, and other
technical resources.
Visit Adobe Developer Center at www.adobe.com/go/developer.
Customer support
VisittheAdobeSupportwebsite,atwww.adobe.com/support, to find troubleshooting information for your product
and to learn about free and paid technical support options. Click the Training link for access to Adobe Press books,
a variety of training resources, Adobe software certification programs, and more.
Downloads
Visit www.adobe.com/go/downloads to find free updates, tryouts, and other useful software. In addition, the Adobe
Store (at www.adobe.com/go/store) provides access to thousands of plug-ins from third-party developers, helping
you to automate tasks, customize workflows, create specialized professional effects, and more.
Page 16

AFTER EFFECTS CS3
User Guide
Adobe Labs
Adobe Labs gives you the opportunity to experience andevaluate new andemerging technologies and products from
Adobe.
At Adobe Labs, you have access to resources such as these:
• Prerelease software and technologies
• Code samples and best practices to accelerate your learning
• Early versions of product and technical documentation
• Forums, wiki-based content, and other collaborative resources to help you interact with like-minded developers
Adobe Labs fosters a collaborative software development process. In this environment, customers quickly become
productive with new products and technologies. Adobe Labs is also a forum for early feedback, which the Adobe
development teams use to create software that meets the needs and expectations of the community.
Visit Adobe Labs at www.adobe.com/go/labs.
User communities
User communities feature forums, blogs, and other avenues for users to share technologies, tools, and information.
Users can ask questions and find out how others are getting the most out of their software. User-to-user forums are
available in English, French, German, and Japanese; blogs are posted in a wide range of languages.
11
To participate in forums or blogs, visit www.adobe.com/communities.
What’s new
New features
Shape layers
Use new shape drawing tools to create and animate vector graphics. Strokes andfills—including editable gradients—
can be added to shapes, and these properties can be animated. After Effects also includes shape layer operations
based on Adobe® Illustrator® vector effects. See “About shapes and shape layers” on page 314.
To see a video tutorial introducing shape layers, go to the Adobe website at www.adobe.com/go/vid0224. To see a
video tutorial on animating shape layers, go to the Adobe website at www.adobe.com/go/vid0225.
Puppet tools
Use Puppet tools to easily distort any image with natural, life-like motion. See “Animating with Puppet tools” on
page 226.
Photoshop layer styles and video layers
Layer styles and video layers are preserved when you import a Photoshop file. You can also add and animate layer
styles within After Effects and use advanced blending options. See “Layer styles” on page 168 and “Working with
Photoshop and After Effects” on page 32.
To see a video tutorial on importing Photoshop files, go to the Adobe website at www.adobe.com/go/vid0252.
Page 17

AFTER EFFECTS CS3
User Guide
Flash integration
You can export FLV files with cue points that you create as markers within After Effects. Now, when you import a
SWF file, the alpha channel is preserved, and graphics are continuously rasterized, so they stay sharp as you scale
them up. See “Working withFlash and After Effects” on page 33 and “Rendering and exporting to Flash formats” on
page 602.
To see a video tutorial on exporting to FLV files, go to the Adobe website at www.adobe.com/go/vid0262. To see a
video tutorial on exporting markers as cue points, go to the Adobe website at www.adobe.com/go/vid0255.
Per-character 3D properties for text animation
Move or rotate individual characters or words in 3D space. See “Work with per-character 3D text properties” on
page 293.
To see a video tutorial on animating text, go to the Adobe website at www.adobe.com/go/vid0226.
Brainstorm
Use Brainstorm to experiment with properties and see the results side by side. Choose the variants that you like and
use as is or as input to further experimentation. See “Use Brainstorm to experiment and explore settings” on
page 160.
12
Improved, simpler color management
You can now control the color for each footage item and each output item, all with a robust and simple interface, so
colors look right on any output device. See “Color management” on page 241.
Clip Notes
Add queries to reviewers as markers and then export your composition as a PDF file. Reviewers can use Adobe
Acrobat® or Adobe Reader® to make comments and then return the comments to you by e-mail or FTP. Comments
are imported as markers, which you can see in the Timeline panel. See “Reviewing movies with Clip Notes
comments” on page 634.
Performance improvements
You can use multiple CPUs or multiple processors on one CPU to render multiple frames simultaneously. You can
also use hardware acceleration of previews to move processing to the GPU, freeing up your CPU and providing
greater performance. See “Memory, storage, and performance” on page 37.
Export and preview video for mobile devices
New export presets in the Export Settings dialog box make it easier to export movies suitable for playback on mobile
devices, such as mobile phones and the Apple® iPod®. You can view some output types using Adobe Device Central,
which emulates many mobile devices. See “Preview a movie on a virtual mobile device using After Effects” on
page 618.
Page 18

Chapter 2: User interface
Customizing the user interface
About workspaces
Adobe video and audio applications provide a consistent, customizable workspace.Although each application has its
own set of panels (such as Tools, Properties, Timeline,and so on), you move and group panelsin the same wayacross
products.
The main window of a program is the application window. Panels are organized in this window in an arrangement
called a workspace. The default workspace contains groups of panels as well as panels that stand alone.
You customize a workspace by arranging panels in the layout that best suits your working style. You can create and
save several custom workspaces for different tasks—for example, one for editing and one for previewing.
You can drag panels to new locations, move panels into or out of a group, place panels alongside each other, and
undock a panel so that it floats in a new window above the application window. As you rearrange panels, the other
panels resize automatically to fit the window.
13
YoucanusefloatingwindowstocreateaworkspacemorelikethoseinpreviousversionsofAdobeapplications,orto
place panels on multiple monitors.
BC
A
Example workspace
A. Application window B. Grouped panels C. Individual panel
For a video about the Adobe workspace, see www.adobe.com/go/vid0249.
Page 19

AFTER EFFECTS CS3
User Guide
Choose a workspace
Each Adobe video and audio application includes several predefined workspaces that optimize the layout of panels
for specific tasks. When you choose one of these workspaces, or any custom workspaces you’ve saved, the current
workspace is redrawn accordingly.
❖ Open the project you want to work on, choose Window > Workspace, and select the desired workspace.
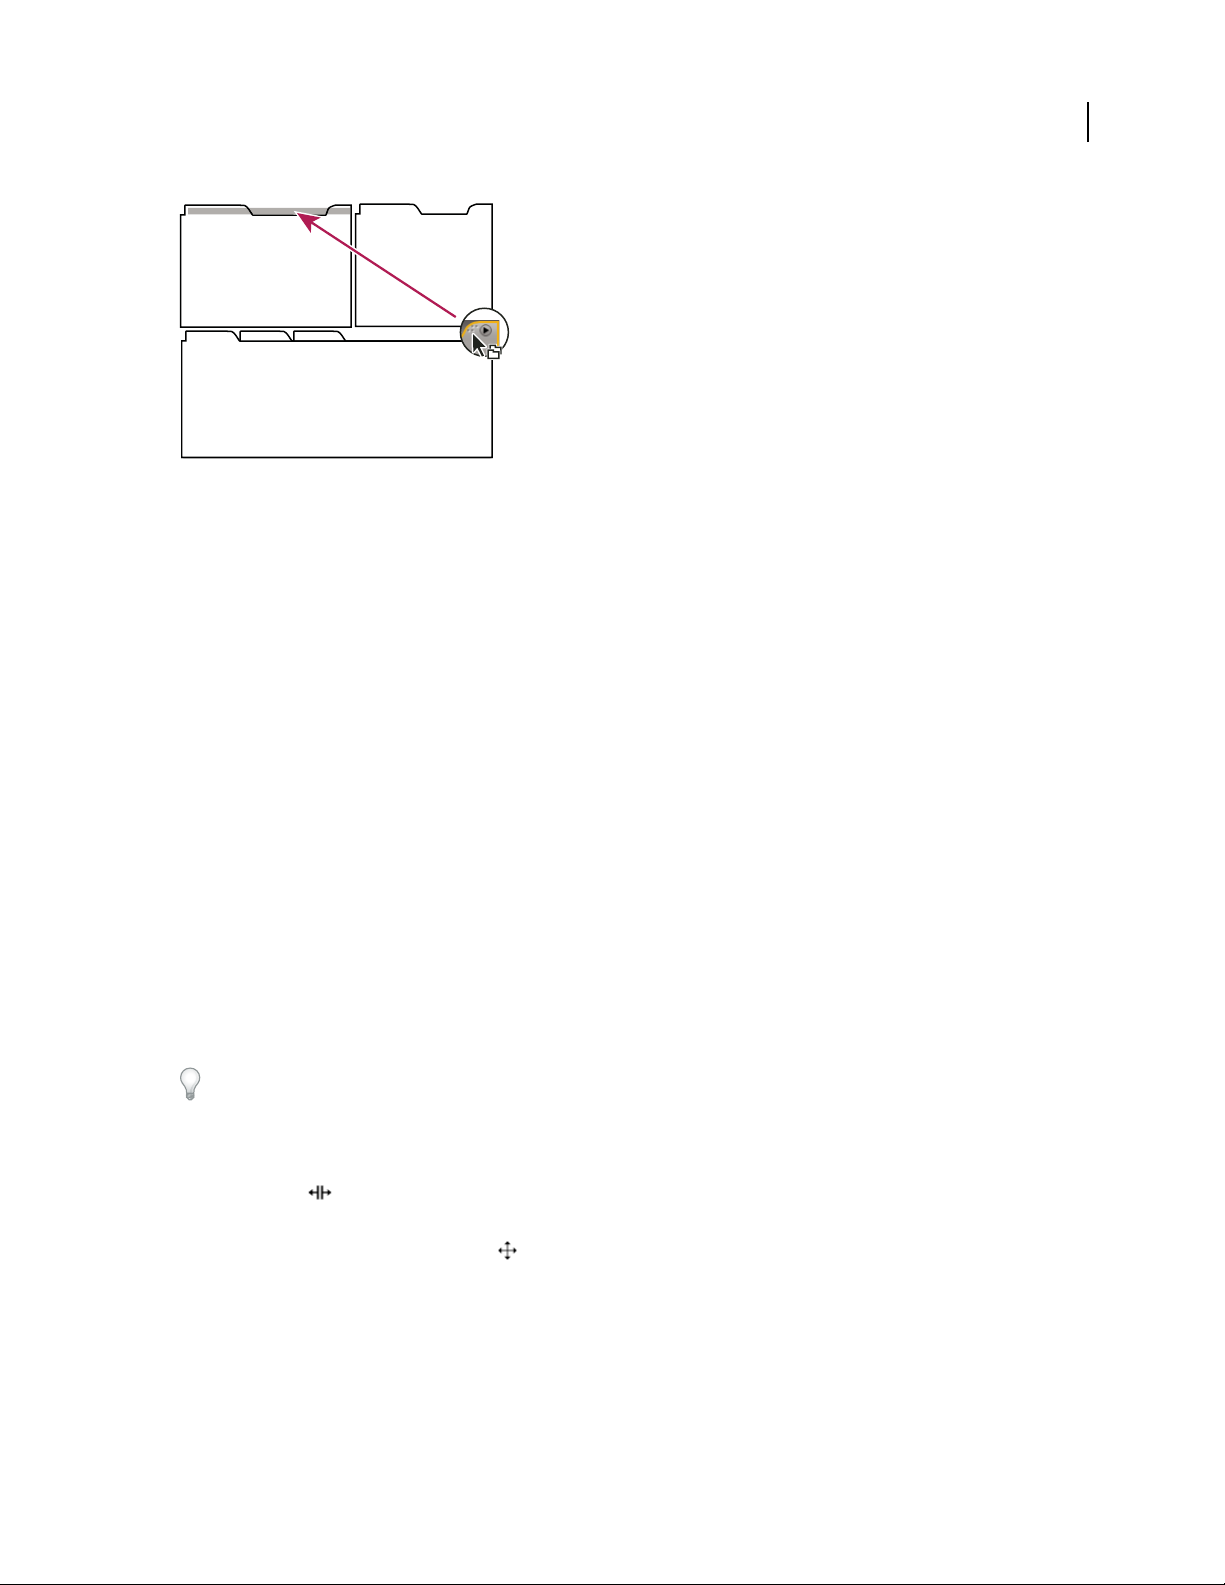
Dock, group, or float panels
You can dock panels together, move panels into or out of a group, and undock a panel so that it floats in a new
window above the application window. Asyou drag a panel, drop zones—areas onto which you can move the panel—
become highlighted. The drop zone you choose determines where the panel is inserted, and whether it docks or
groups with other panels.
Docking zones
Docking zones exist along the edges of a panel, group, or window. Docking a panel places it adjacent to the existing
group, resizing all groups to accommodate the new panel.
14
A
B
C
Dragging panel (A) onto docking zone (B) to dock it (C)
Grouping zones
Groupingzonesexistinthemiddleofapanelorgroup,andalongthetabareaofpanels.Groupingapanelstacksit
with other panels.
Page 20

AFTER EFFECTS CS3
A
B
C
Dragging panel (A) onto grouping zone (B) to group it with existing panels (C)
Dock or group panels
1
If the panel you want to dock or group is not visible, choose it from the Window menu.
2 Do one of the following:
•
To move an individualpanel, drag the gripper area in the upper-left corner of a panel’s tab onto the desired drop zone.
User Guide
15
Drag panel gripper to move one panel
• To move an entire group, drag the group gripper at the upper-right corner onto the desired drop zone.
Page 21
AFTER EFFECTS CS3
User Guide
Drag group gripper to move entire group
The application docks or groups the panel, according to the type of drop zone.
Undock a panel in a floating window
When you undock a panel in a floating window, you can add panels to the window orotherwise modify it, as you do
the application window. You can use floating windows to make use of a secondary monitor, or to create a workspace
like those in earlier versions of Adobe applications.
❖ Select the panel you want to undock (if it’s not visible, choose it from the Window menu), and then do one of the
following:
• Choose Undock Panel or Undock Frame from the panel menu. Undock Frame undocks the panel group.
• Hold down Ctrl (Windows®) or Command (Mac OS®), and drag the panel or group from its current location.
When you release the mouse button, the panel or group appears in a new floating window.
• Drag the panel or group outside the application window. (If the application window is maximized, drag the panel
to the Windows task bar.)
16
Resize panel groups
When you position the pointer over dividers between panel groups, resize icons appear. When you drag these icons,
all groups that share the divider are resized. For example, suppose your workspace contains three panel groups
stacked vertically. If you drag the divider between the bottom two groups, they are resized, but the topmost group
doesn’t change.
To quickly maximize a panel beneaththe pointer, press the tilde (~) key. (Do not pressShift.) Press the tilde key again
to return the panel to its original size.
1 Do either of the following:
• To resize either horizontally or vertically, position the pointer between two panel groups. The pointer becomes a
double-arrow .
• To resize in both directions at once, position the pointer at the intersection between three or more panel groups.
The pointer becomes a four-way arrow .
2 Hold down the mouse button, and drag to resize the panel groups.
Page 22
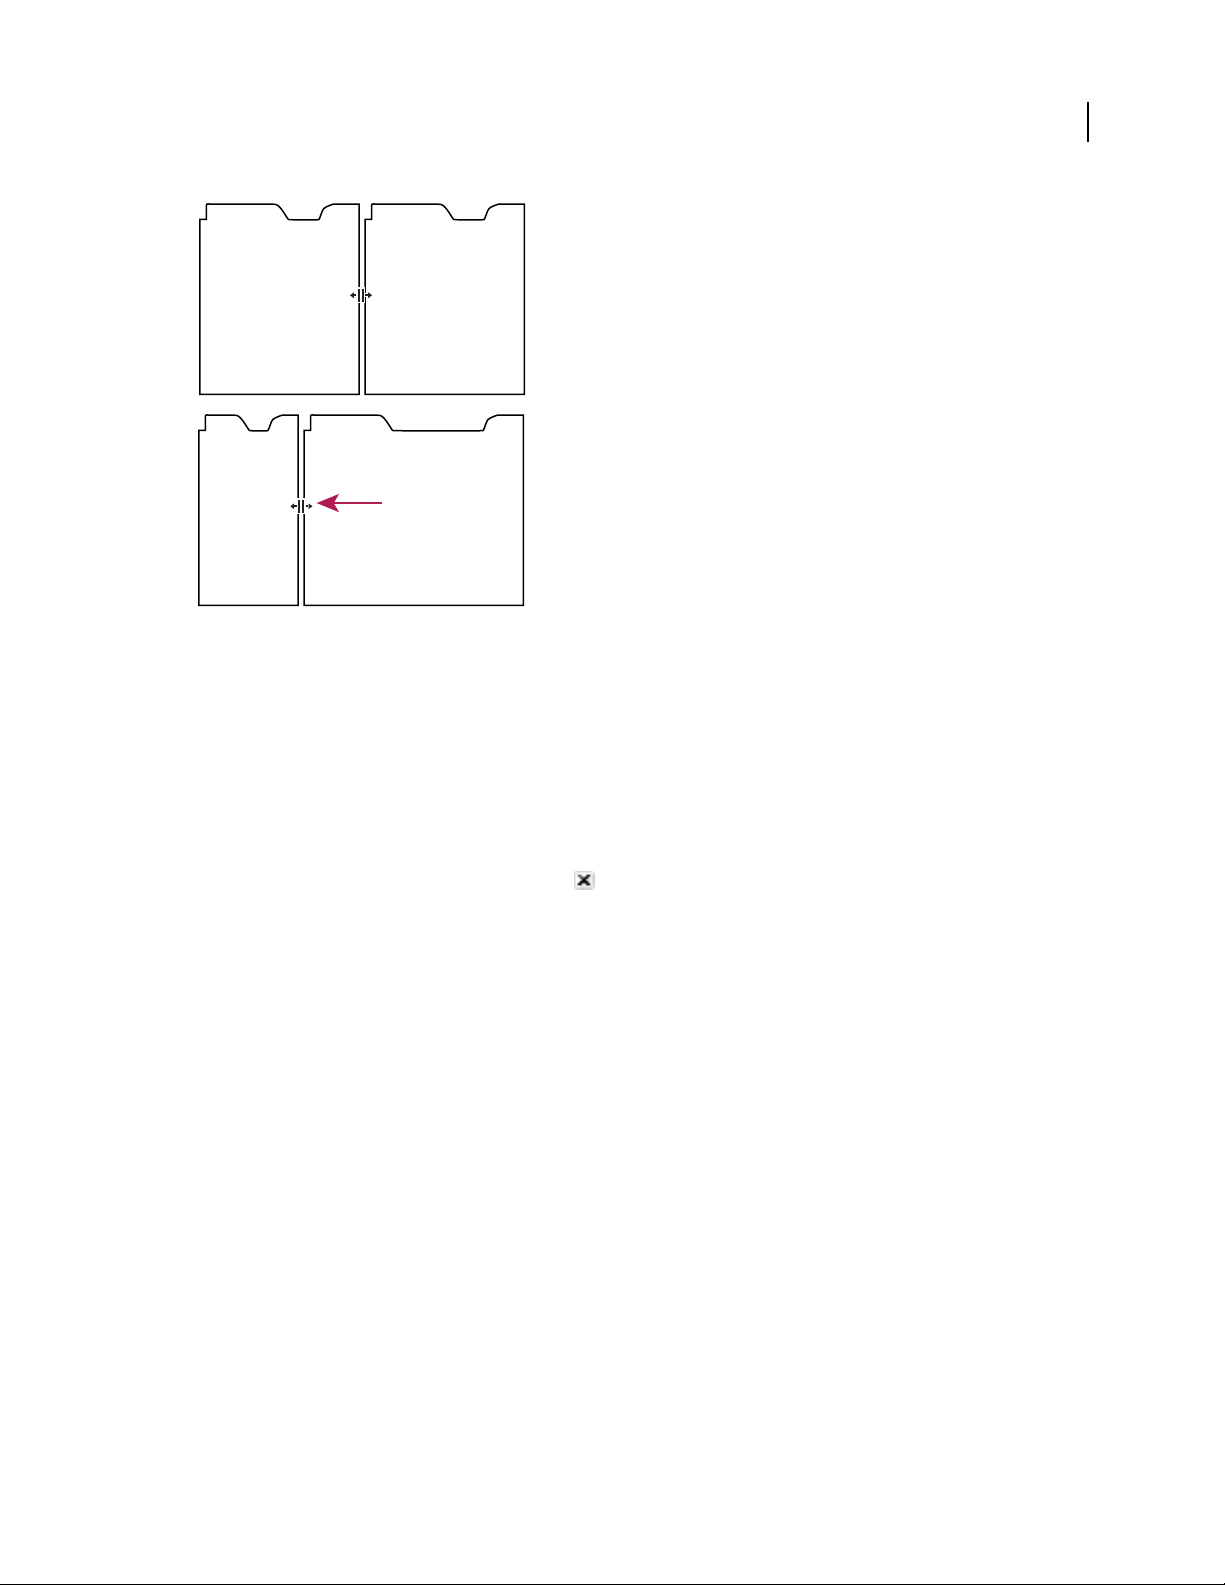
A
B
Dragging divider between panel groups to resize them horizontally
A. Original group with resize icon B. Resized groups
AFTER EFFECTS CS3
User Guide
17
Open and close panels and windows
Even if a panel is open, it may be out of sight, beneath other panels. Choosing a panel from the Window menu opens
it and brings it to the front.
Whenyoucloseapanelgroupintheapplicationwindow,theothergroupsresizetomakeuseofthenewlyavailable
space. When you close a floating window, the panels within it close, too.
• To open or close a panel, choose the panel from the Window menu.
• To close a panel or window, click its Close button .
Working with multiple monitors
To increase the available screen space, use multiple monitors. When you work with multiple monitors, the application window appears on the main monitor, and you place floating windows on the second monitor. Monitor
configurations are stored in the workspace.
See also
“Dock, group, or float panels” on page 14
Save a custom workspace
As you customize aworkspace, the application tracksyour changes,storing the most recent layout. To store aspecific
layout more permanently, save a custom workspace. Saved custom workspaces appear in the Workspace menu,
where you can return to and reset them.
❖ Arrange the frames and panels as desired, then choose Window > Workspace > New Workspace. Type a name for
the workspace, and click OK.
Note: If a project saved with a custom workspace is opened on another system, theapplication looks fora workspace with
a matching name. If it can’t find a match (or the monitor configuration doesn’t match), it uses the current local
workspace.
Page 23

AFTER EFFECTS CS3
User Guide
Reset a workspace
Reset a workspace to return to its original, saved layout of panels.
❖ With the workspace you want to reset active, choose Window > Workspace > Reset workspace name.
Delete a workspace
1 Choose Window > Workspace > Delete Workspace.
2 Choose the workspace you want to delete, and then click OK.
Note: You cannot delete the currently active workspace.
Brighten or darken the interface
Changing the brightness preference affects panels, windows, and dialog boxes.
1 Choose Edit > Preferences > User Interface Colors (Windows) or After Effects > Preferences > User Interface
Colors (Mac OS).
2 Drag the User Interface Brightness slider to the left or right. Click Default to restore the default brightness level.
18
Using the After Effects interface
Work with columns
The Project, Timeline, and Render Queue panels contain columns.
• To show or hide columns, right-click (Windows) or Control-click (Mac OS) a column heading (or choose
Columns from the panel menu), and select the columns that you want to show or hide. A check mark indicates
that the column is shown.
• To reorder columns, select a column name and drag it to a new location.
• Toresizecolumns,dragthebartotherightofacolumnname.Draglefttomakethecolumnsmallerandrightto
make it larger. Some columns—such as the Duration column in the Project panel—cannot be resized.
Scroll or zoom with the mouse wheel
You can use the mouse wheel to zoom in the Timeline, Composition, Layer, and Footage panels, and scroll in the
Timeline, Project, Render Queue, Flowchart, Effect Controls, and Effects & Presets panels.
• To zoom into the center of the panel, or into the feature region when tracking, roll the mouse wheel forward.
• To zoom out of the center of the panel, or out of the feature region when tracking, roll the mouse wheel backward.
• To zoom into the area under the pointer, hold down Alt (Windows) or Option (Mac OS) as you roll the mouse
wheel forward.
• To zoom out of the area under the pointer, hold down Alt (Windows) or Option (Mac OS) as you roll the mouse
wheel backward.
• To scroll vertically, roll the mouse wheel forward or backward.
• To scroll horizontally, hold down Shift as you roll the mouse wheel backward or forward. When you are in the
Timeline panel, rolling backward moves you forward in time and vice versa.
Page 24

AFTER EFFECTS CS3
User Guide
You can scroll in a panel even if it is not currently active, as long as you move the pointer over it. For instance, you
can scroll in the Composition panel even if the Effect Controls panel is currently active.
Open panel, viewer, and context menus
Panel menus provide commands relative to the active panel or frame. Viewer menus provide a list of compositions,
layers, or footage items that can be shown in the viewer, as well as commands for closing items and locking the
viewer. Context menus provide commands relative to the active tool or selected item.
A B
A. Triangle for opening viewer menu B. Triangle for opening panel menu
• To open a panel menu, click the triangle in the upper-right corner of the panel.
• To open a viewer menu, click the name of the active composition, layer, or footage item in the viewer tab.
• To open a context menu, right-click (Windows) or Control-click (Mac OS).
Work with viewers
A viewer is a panel that can contain multiple compositions, layers, or footage items, or multiple views of one such
item. The Composition, Layer, Footage, Flowchart, and Effect Controls panels are viewers.
19
Locking a viewer prevents the currently displayed item from being replaced when you open or select a new item.
Instead, when a viewer is locked and a new item is opened or selected, After Effects creates a new viewer panel for
that item.
Instead of housing multiple items in a single viewer and using the menu to switch between them, you can choose to
open a separate viewer for each open composition, layer, or footage item. When you have multiple viewers open, you
can arrange them by docking or grouping them together, just as with any other panels.
For example, you can create one Composition viewer each for different 3D views (Top, Bottom, Back, Front) so that
you can maximize each of the views with the ` (accent grave) keyboard command, which maximizes or restores the
panel under the pointer.
To create a custom workspace with multiple viewers, ensure that all viewers are unlocked before you save the workspace.
Locked viewers are associated with a specific project context and are therefore not saved in the preferences file.
• To create a new viewer, choose New from the viewer menu.
• To lock or unlock a viewer, choose Locked from the viewer menu, or click the Toggle Viewer Lock button.
• To lock the current viewer, split the current frame, and create a new viewer of the same type in the new frame,
press Ctrl+Alt+Shift+N (Windows) or Command+Option+Shift+N (Mac OS).
• To cycle forward or backward through the items in the viewer menu list for the active viewer, press Shift+period
or Shift+comma.
See also
“Choose a viewer to always preview” on page 124
“Shortcuts for panels, viewers, workspaces, and windows” on page 639
Page 25

AFTER EFFECTS CS3
User Guide
Activate a tool
The Tools panel can be displayed as a toolbar (as shown here) or as a normal panel.
A B C D E F G H I J K L M N
Tools panel
A. Selection B. Hand C. Zoom D. Rotation E. Orbit Camera, Track XY Camera, Track Z Camera F. Pan Behind G. Mask and shape tools
H. Pen tools I. Type too ls J. Brush K. Clone Stamp L. Eraser M. Puppet tools N. Controls related to active tool
Note: Controls related to some tools appear only when the tool is active.
• Click the tool’s button. If the button has a small triangle at its lower-right corner, hold down the mouse button to
view the hidden tools. Then, click the tool you want to select.
• Press the tool’s keyboard shortcut. (Positioning the pointer over a tool button displays a tool tip with the tool’s
name and keyboard shortcut.)
• To cycle through hidden tools, repeatedly press the tool’s keyboard shortcut.
• To momentarily change from one tool to another tool, hold down the shortcut key for the desired tool; release the
shortcut key to return to the previous tool. (This technique does not work with all tools.)
• To view panels most relevant to the active tool, click the panel button if available. For example, clicking this
button when a paint tool is active opens the Paint and Brush Tips panels.
20
See also
“Shortcuts for activating tools” on page 640
Tips for working with the After Effects user interface
• Use ClearType text anti-aliasing on Windows. ClearType makes the outlines of system text, such as menus and
dialog boxes, easier to read. See Windows Help for information on how to enable ClearType text anti-aliasing.
• Toshow tooltips, select the Show ToolTips preference(Edit > Preferences > General(Windows) or After Effects >
Preferences > General (Mac OS)).
• Toassignakeyboardshortcuttothecurrentworkspace,chooseWindow>AssignShortcutTo[Workspace Name]
Wo rk s p ac e .
• Ifaframecontainsmoregroupedpanelsthancanbeshownatonce,dragthesliderbarthatappearsabovethetabs.
Slider bar for showing other tabs
• Use keyboard shortcuts.
Note: On Mac OS, some keyboard commands for interacting with the operating system conflict with keyboard
commands for interacting with After Effects. Select Use System Shortcut Keys in the General preferences category to
override the After Effects keyboard command in cases in which there's a conflict with the Mac OS keyboard command.
Page 26

AFTER EFFECTS CS3
User Guide
See also
“Using and modifying keyboard shortcuts” on page 638
Work with preferences
• To open the Preferences dialog box, choose Edit > Preferences > [category name] (Windows) or After Effects >
Preferences > [category name] (Mac OS).
• To open the Preferences dialog box to the General category, press Ctrl+Alt+; (semicolon) (Windows) or
Command+Option+; (Mac OS).
• To restore default preference settings, hold Ctrl+Alt+Shift (Windows) or Command+Option+Shift while the
application is starting. To also restore default keyboard shortcuts, Alt-click (Windows) or Option-click (Mac OS)
the OK button.
Preference reference
This section provides links to pages in which the various preferences—those that aren’t self-explanatory—are
explained.
General
• Levels Of Undo: “Undo changes” on page 25
• Show Tool Tips: “Tips for working with the After Effects user interface” on page 20
• Create Layers At Composition Start Time: “About layers” on page 133
• Switches Affect Nested Comps: “About nesting and precomposing” on page 113
• Default Spatial Interpolation To Linear: “Controlling change with interpolation” on page 204
• Preserve Constant Vertex Count When Editing Masks: “Designate the first vertex for a Bezier path” on page 325
• Synchronize Time Of All Related Items: “About nesting and precomposing” on page 113
• Expression Pick Whip Writes Compact English: “Add, edit, and remove expressions” on page 549
• Create Split Layers Above Original Layer: “Split a layer” on page 146
• Allow Scripts To Write Files And Access Network: “Work with scripts” on page 45
• Enable JavaScript Debugger: After Effects CS3 Professional Scripting Guide (PDF)
• Use System Color Picker: “Select a color or edit a gradient” on page 236
• Create New Layers At Best Quality: “Layer image quality” on page 150
• Preserve Clipboard Data For Other Applications: “Copy between After Effects and Adobe Premiere Pro” on
page 65
• Use System Shortcut Keys (Mac OS only): “Tips for working with the After Effects user interface” on page 20
21
Previews
• Adaptive Resolution Limit: “Preview modes” on page 124
• Enable OpenGL: “Render with OpenGL” on page 593
• Accelerate Effects Using: “Preview modes” on page 124
• Audio Preview Duration: “Preview video and audio” on page 120
Display
• Motion Path: “Work with motion paths” on page 197
Page 27

AFTER EFFECTS CS3
• Disable Thumbnails In Project Panel: “Work with composition thumbnail images” on page 111
• Auto-zoom When Resolution Changes: “Resolution” on page 128
• Show Rendering Progress In Info Panel & Flowchart: “Preview video and audio” on page 120
• Hardware Accelerate Composition, Layer, And Footage Panels: “Improve performance” on page 41
Import
• Still Footage: “Create layers from footage items” on page 135
• Sequence Footage: “Import a single still image or a still-image sequence” on page 81
• Interpret Unlabeled Alpha As: “Specify alpha channel interpretation” on page 52
• Default Drag Import As: “Import footage items” on page 50
Output
• Overflow Volumes, Segment Sequences At, Segment Movie Files At, and Audio Block Duration: “Overflow
volumes and segment settings” on page 629
Grids & Guides
• Safe Margins: “Work with safe zones, grids, guides, and rulers” on page 130
User Guide
22
Label Colors and Label Defaults
• Label Colors and Label Defaults: “Work with color labels” on page 149
Memory & Cache
• Maximum Memory Usage, Maximum RAM Cache Size, Enable Disk Cache, and Maximum Disk Cache Size:
“Memory & Cache preferences” on page 39
• Conformed Media Cache and Clean Database & Cache: “Work with the media cache” on page 67
• Prevent DLL Address Space Fragmentation (Windows only): “Memory & Cache preferences” on page 39
Video Previews
• Output Device, Output Mode, Output Quality, Output During, and Scale And Letterbox Output To Fit Video
Monitor: “Preview on an external video monitor” on page 126
User Interface Colors
• Cycle Mask Colors: “Control mask path color” on page 260
• User Interface Brightness: “Brighten or darken the interface” on page 18
Auto-Save
• Automatically Save Projects and Maximum Project Versions: “Save and back up projects” on page 24
Multiprocessing
• Render Multiple Frames Simultaneously: “Render multiple frames simultaneously” on page 40
Audio Hardware and Audio Output Mapping
• Audio Hardware and Audio Output Mapping: “Preview video and audio” on page 120
Page 28

Chapter 3: Planning and managing projects
Project basics
About project files
An After Effects project isasinglefilethatstorescompositionsandreferencestoallofthefootageitemsthatyouuse
in that project. Compositions are collections of layers. Many layers use footage items as a source, though some
layers—such as shape layers and text layers—contain graphics that you create within After Effects. A project file has
the file-name extension .aep. The name of the current project appears at the top of the application window.
A template project is a file with the file-name extension .aet. You can use the many template projects included with
After Effects—including DVD menu templates—as the basis for your own projects, and you can create new
templates based on your projects.
A great way to see how advanced users use After Effects is to open one of the template projects included with After
Effects, select all of its layers, and press U or UU to reveal only the animated or modified properties. This shows you
what changes the designer of the template project made to create the template. You may need to unlock some layers to
select them.
23
Create and open projects
Onlyoneprojectcanbeopenatatime.Ifyoucreateoropenanotherprojectfilewhileaprojectisopen,AfterEffects
promptsyoutosavechangesintheopenproject,andthenclosesit.Afteryoucreateaproject,youcanimportfootage
into the project.
• To create a project, choose File > New > New Project.
• To open a project, choose File > Open Project, locate the project, and then click Open.
• To open the most recently opened project, press Ctrl+Alt+Shift+P (Windows) or Command+Option+Shift+P
(Mac OS).
See also
“Import an After Effects project” on page 63
Work with template projects
When you open a template project, After Effects creates a new, untitled project based on the template. This means
that saving changes to the project does not affect the template project.
Often, the creator of a template project will lock layers that should be left unmodified, and leave layers that should
be modified unlocked. This is a convenient way to reuse material and prevent accidental or inappropriate modifications.
Page 29

AFTER EFFECTS CS3
User Guide
See also
“Lock or unlock a layer” on page 149
Open a template project
• To browse and open template projects using Adobe Bridge, choose File > Browse Template Projects. Double-click
a template project to open it.
• To open a template project, choose File > Open Project. On Windows, choose Adobe After Effects Project
Template from the Files Of Type menu.
Create a template project
• To convert a project to a template project, change the file-name extension from .aep to .aet.
• To save a copy of a project as a template project, choose File > Save A Copy, and then rename the copy with the
file-name extension .aet.
Save and back up projects
• To save a project, choose File > Save.
• To save a copy of the project with a new automatically generated name, choose File > Increment And Save, or press
Ctrl+Alt+Shift+S (Windows) or Command+Option+Shift+S (Mac OS).
24
A copy of the current project is saved in the same folder as the original project. The name of the copy is the name of
the original followed by a number. If the name of the original ends with a number, that number is increased by 1.
• To save the project with a different name or to a different location, choose File > Save As.
The open project takes the new name and location; the original file remains unchanged.
• To save a copy of the project with a different name or to a different location, choose File > Save A Copy.
The open project retains itsoriginal name andlocation, and acopy is created with the new settings but isnot opened.
• To automatically save copies of projects at regular intervals, choose Edit > Preferences > Auto-Save (Windows) or
After Effects > Preferences > Auto-Save (Mac OS), and select Automatically Save Projects.
Auto-saved files are saved in the Adobe After Effects Auto-Save folder, which is located in the same folder as the
original project file. Auto-saved file names are based on the project name: After Effects adds “auto-save n”(wheren
is the number of the file in the auto-save series) to the endof the file name. Maximum Project Versions specifies how
many versions of each project file you want to save. When the number of versions saved reaches the maximum you
specify, the Auto-Save feature overwrites them starting with the oldest file.
• To save a copy of the project and copies of assets used in the project, use the Collect Files command. (See “Collect
files in one location” on page 594.)
Work with the Flowchart panel
In each composition’s flowchart, individual boxes (or tiles) represent each composition, footage item, and layer.
Directional arrows represent the relationships between components.
Note: The Flowchart panel shows you only the existing relationships. You cannot use it to change relationships between
project elements.
Nestedcompositions and otherelements that makeup the composition appear when youexpand acomposition tile.
Page 30

AFTER EFFECTS CS3
User Guide
Mid-gray lines between tiles in the flowchart indicate that the Video or Audio switch for those items is deselected in
the Timeline panel. Black or light gray lines indicate that the switch is selected, depending on the User Interface
Brightness preference setting.
• To open the project’s flowchart, press Ctrl+F11 (Windows) or Command+F11 (Mac OS), or click the Project
Flowchart View button at the top of the vertical scroll bar on the right edge of the Project panel.
• To open a composition’s flowchart, select the composition and choose Composition > Comp Flowchart View, or
click the Comp Flowchart View button at the bottom of the Composition panel.
• To activate (select) an item, click its tile in the Flowchart panel.
When you clicka compositionin the flowchart, it becomes active in the Projectpanel and the Timelinepanel. When
you click a layer, it becomes active in the Timeline panel. When you click a footage item, it becomes active in the
Project panel.
• To customize the appearance of the flowchart, use the Flowchart panel menu and the buttons along the bottom of
the panel.
For tool tips identifying the buttons in the Flowchart panel, let your pointer hover over a button until the tool tip
appears.
• To delete elements, select them and press Delete. If the selected element is a footage item or composition, it is
deleted fromthe project and no longer appears in the Timeline andProject panels. If the selected elementis a layer,
it is deleted from the composition in which it appears.
• To access the context menu for a selected element, right-click (Windows) or Control-click (Mac OS) the icon to
the left of the name in the element tile. The icons have various appearances, depending on the element type, such
as layers and compositions . For example, you can usethe context menu fora layer to work with masks and
effects, or to change switches, apply transformations, and adjust layer image quality.
25
Note: When you change element properties in the Flowchart panel, be careful to context-click the icon in the tile, not the
name of the element. The context menu associated with the element icon is different from the one that opens from the
element name.
Undo changes
You can undo only those actions that alter the project; for example, you can undo an edit, but you cannot undo the
scrolling of a panel.
You can sequentially undo as many as 99 of the most recent changes made to the project, depending on the Levels
Of Undo setting (Edit > Preferences > General (Windows) or After Effects > Preferences > General (Mac OS)). The
default is 32.
To avoid wasting time undoing accidental modifications, lock a layer when you want to see it but do not want to
modify it.
• To undo the most recent change, choose Edit > Undo [action].
• To undo a change and all changes after it, choose Edit > History, and select the first change that you want to undo.
• To revert to the last saved version of the project, choose File > Revert. All changes made and footage items
imported since you last saved are lost. You cannot undo this action.
See also
“Lock or unlock a layer” on page 149
Page 31

AFTER EFFECTS CS3
User Guide
Project planning and setup
Workflow
Whether you use Adobe After Effects to animate a simple title or create complex special effects, you generally follow
the same basic workflow, though you may repeat some steps—such as the cycle of modifying layer properties,
animating, and previewing until everything looks right. You can choose a predefined workspace to facilitate each
stage of your work, or you can create your own workspaces adapted to your needs.
Import and organize footage
After you create a project, add your footage to the Project panel. After Effects automaticallyinterprets many common
media formats, but you may also specify how you want After Effects to interpret attributes such as frame rate and
pixelaspectratio.YoucanvieweachiteminaFootagepanelandsetitsstartandendtimestofityourcomposition.
For more information, see “Importing and interpreting footage items” on page 47.
Create and arrange layers in a composition
Create one or more compositions. Any footage item can be the source for one or more layers in a composition. You
can arrange the layers spatially in the Composition panel or arrange them in time using the Timeline panel. You can
stack layers intwo dimensions or arrange them in three dimensions. You can use masks, blending modes,and keying
tools to composite, or combine, the images of multiple layers. You can even use shape layers, text layers, and paint
tools to create your own visual elements. For more information, see Compositions, Layers and properties, Drawing
and painting, and Text.
26
Add effects and modify layer properties
You can add any combination of effects and modify any of a layer’s properties, such as size, position, and opacity.
Using effects, you can alter a layer’s appearance or sound, and even generate visual elements from scratch. You can
apply any of the hundreds of effects, animation presets, and layer styles. You can even create and save your own
animation presets. For more information, see Effects and animation presets.
Animate
You can make any combination of a layer’s properties change over time, using keyframes and expressions. Use the
motion tracking to stabilize motion or to animate one layer so that it follows the motion in another layer. For more
information, see Animation, Expressions, and Motion tracking.
Preview
Previewing compositions on your computer monitor or an external video monitor is fast and convenient, even for
complex projects, especially if you use OpenGL technology to accelerate previews. You can change the speed and
quality ofpreviews by specifying their resolution and frame rate, and bylimiting the area andduration ofthe composition that you preview. You can use color management features to preview how your movie will look on another
output device. For more information, see Views and previews and “Color management” on page 241.
Render and export
Add one or more compositions to the render queue to render them at the quality settings you choose, and to create
movies in the formats that you specify. In some cases, you will export by using the File > Export or Composition
menu, rather than by using the Render Queue panel. For more information, see Rendering and exporting.
Page 32

AFTER EFFECTS CS3
User Guide
Example workflow: Create a simple movie
ThisexampleassumesthatyouhavealreadystartedAfterEffectsandhavenotmadeanychangestotheemptydefault
project. This examples skips the step of importing footage and shows you instead how to create your own visual
elements. After you have rendered a final movie, you can import it into After Effects to view it and use it just as you
would any other footage item.
Some people prefer to use the mouse and menus tointeract with After Effects, whereas others prefer to use keyboard
shortcuts for their common tasks. For several steps in this example, two alternative commands are shown that
produce the same result—one demonstrating the disoverability of menu commands and one demonstrating the
speed and convenience of keyboard shortcuts. You will likely find that you use some combination of keyboard
shortcuts and menu commands in your work.
1 Create a new composition:
• Choose Composition > New Composition.
• Press Ctrl+N (Windows) or Command+N (Mac OS).
2 Change the Duration value inthe Composition Settings dialog box to 5;00 (five seconds),choose Web Video from
the Preset menu, and click OK.
3 Create a new text layer:
• Choose Layer > New > Text.
• Press Ctrl+Alt+Shift+T (Windows) or Command+Option+Shift+T (Mac OS).
4 Type your name. Press Enter on the numeric keypad or press Ctrl+Enter (Windows) or Command+Return (Mac
OS) on the main keyboard to exit text-editing mode.
5 Set an initial keyframe for the Position property:
• ClickthetriangletotheleftofthelayernameintheTimelinepanel,clickthetriangletotheleftoftheTransform
group name, and then click the stopwatch button to the left of the Position property name.
• Press Alt+Shift+P (Windows) or Option+Shift+P (Mac OS).
6 Activate the Selection tool:
• Click the Selection Tool button in the Tools panel.
• Press V.
7 Using the Selection tool, drag your text to the bottom-left corner of the frame in the Composition panel.
8 Move the current-time indicator to the last frame of the composition:
• Drag the current-time indicator in the Timeline panel to the far right of the timeline.
• Press End.
9 Using the Selection tool, drag your text to the top-right corner of the frame in the Composition panel.
27
A new keyframe is created at this time for the Position property. Motion is interpolated between keyframe values.
10 Preview your animation using standard preview:
• Click the the Play button in the Time Controls panel. Click Play again to stop the preview.
• Press the spacebar. Press the spacebar again to stop the preview.
11 Apply the Glow effect:
• Choose Effect > Stylize > Glow.
Page 33

AFTER EFFECTS CS3
User Guide
• Ty pe glow in the Contains field at the top of the Effects & Presets panel to find the Glow effect. Double-click the
effect name.
12 Add your composition to the render queue:
• Choose Composition > Add To Render Queue.
• Press Ctrl+Shift+/ (Windows) or Command+Shift+/ (Mac OS).
13 In the Render Queue panel, click the underlined text to the right of Output To. In the Output Movie To dialog
box, choose a name and location for the output movie file, and then click Save. For the location, choose something
easy to find, like your desktop.
14 Click the Render button to process all items in the render queue. The Render Queue panel shows the progress
of the rendering operation. A sound is generated when rendering is complete.
You’ve just created, rendered, and exported a movie.
You can import the movie that you’ve just created and preview it in After Effects, or you can navigate to the movie
and play it using a movie player such as QuickTime Player or Windows Media Player.
See also
“Using and modifying keyboard shortcuts” on page 638
28
“Import footage items” on page 50
Use Adobe Bridge with After Effects
Adobe Bridge is the control center for Adobe Creative Suite software. Use Adobe Bridge to browse for project
templatesand animationpresets; run cross-product workflowautomation scripts; view andmanage files and folders;
organize your files by assigning keywords, labels, and ratings to them; search for files and folders; and view, edit, and
add metadata.
For more information about Adobe Bridge, see Adobe Bridge.
• To open Adobe Bridge from After Effects, choose File > Browse.
• To reveal a file in Adobe Bridge, select a file in the Project panel and choose File > Reveal In Bridge.
• To use Adobe Bridge to open template projects, choose File > Browse Template Projects.
• To use Adobe Bridge to browse for animation presets, choose Animation > Browse Presets.
See also
“Work with template projects” on page 23
“About animation presets” on page 347
Planning your project
Correct project settings, preparation of footage, and initial composition settings can help you to avoid errors and
unexpected results when rendering your final output movie. Before you begin, think about what kind of work you’ll
be doing in After Effects and what kind of outputyou intend to create. Once you have planned your project and made
some basic decisions about project settings, you’ll be ready to start importing footage and assembling compositions
from layers based on that footage.
Page 34

AFTER EFFECTS CS3
User Guide
The best way to ensure that your movie is suitable for a specific medium is to render a test movie and view it using
thesametypeofequipmentthatyouraudiencewillusetoviewit.It’sbesttodothisbeforeyouhavecompletedthe
difficult and time-consuming parts of your work, to uncover problems early.
AharonRabinowitzhasanarticleontheCreativeCOWwebsiteaboutplanningyourprojectwiththefinaldelivery
specifications in mind: www.adobe.com/go/learn_ae_aharonplanning.
For introductions to digital video, digital audio,high-definition video,DVD, compression, andstreaming video, visit
the Adobe website at www.adobe.com/go/learn_dv_primers.
To see a video tutorial on creating and organizing projects, visit the Adobe website at www.adobe.com/go/vid0221.
Acquiring, choosing, and preparing footage
Before importing footage, first decide which media and formats you'll use for your finished movies, and then
determine the best settings for your source material. Often, it’s best to prepare footage before importing it into After
Effects.
For example, if you want an image to fill your composition frame, configure the image in Adobe® Photoshop® so that
the image size and pixel aspect ratio match the composition size and pixel aspect ratio. If the image is too large when
you import it into AfterEffects, you’ll increase the memory and processor requirements of the compositions that use
it. If the image is too small, you’ll lose image quality when you scale it to the desired size. See “Change pixel aspect
ratio” on page 55.
29
If possible, use uncompressed footage: less compression means betterresults for many operations, suchas keying and
motion tracking. Certain kinds of compression—such as that used in DV encoding—are especially bad for color
keying, because they discard the subtle differences in color that you depend on for good bluescreen or greenscreen
keying. It’s often best to wait until the final rendering phase to use compression. See “Keying overview and tips” on
page 268.
If possible, use footage with a frame rate at least that of your output, so that After Effects doesn’t have to use frame
blending or similar methods to fill in missing frames. See “Change frame rate” on page 53.
The kind of work that you’ll be doing in After Effects and the kind of output movie that you want to create can even
influence how you shoot and acquire your footage. For example, if you know that you want to animate using motion
tracking, you should consider shooting your scene in a manner that optimizes for motion tracking—for example,
attaching a small, brightly colored ball to the object that you intend to track. See “Motion tracking workflow” on
page 336.
Project settings
Project settings fall into three basic categories: how time is displayed in the project, how color data is treated in the
project, and whatsampling rate touse for audio. Of these, the color settings are the ones that you need to think about
before you do much work in your project, because they determine how color data is interpreted as you import
footagefiles,howcolorcalculationsareperformedasyouwork,andhowcolordataisconvertedforfinaloutput.See
“Color management” on page 241 and “Change time display units” on page 131.
Ifyouenablecolormanagementforyourproject,thecolorsthatyouseearethesamecolorsthatyouraudiencewill
see when they view the movie that you create.
Note: Click the color depth indicator at the bottom of the Project panel to open the Project Settings dialog box. Alt-click
(Windows) or Option-click(Mac OS)to cycle through color bit depths: 8 bpc, 16bpc, and32 bpc. See “Set the color depth”
on page 234.
Page 35

AFTER EFFECTS CS3
User Guide
Composition settings
After you prepare and import footage items, you use these footage items to create layers in a composition, whereyou
animate and apply effects. When you create a composition, specify composition settings such as resolution, frame
size, andpixel aspect ratio for your final rendered output. Although you can change composition settingsat any time,
it’s best to set them correctly as you create each new composition to avoid unexpected results in your final rendered
output.Forexample,thecompositionframesizeshouldbetheimagesizeintheplaybackmedium.See“Workwith
composition settings” on page 110.
If you’ll be rendering a composition to more than one media format, always match the resolution setting for your
composition to the highest resolution setting used for your output. Later, you can use output modules in the Render
Queue panel to render a separate version of the composition for each format. See “Work with output module settings”
on page 599.
Performance, memory, and storage considerations
If you work with large compositions, make sure that you configure After Effects and your computer to maximize
performance. Complex compositions can require a large amount of memory to render, and the rendered movies can
takealargeamountofdiskspacetostore.Beforeyouattempttorenderathree-hourmovie,makesurethatyouhave
the disk space available to store it. See “Memory, storage, and performance” on page 37.
Planning for playback from film, videotape, and DVD
If you’re creating a movie for film, consider both the frame aspect ratio of your composition and the frame rate of
your source footage. For footage that was transferred from film tovideo using the 3:2 pulldowntelecine method, you
must remove 3:2 pulldown before adding effects. See “Remove 3:2 or 24Pa pulldown from video” on page 72.
30
For film and video, try to match import and composition settings with settings in the output module used to render
amovie.Insomecases,youmaywanttoconformfootagetoaframeratedifferentthantheframerateofthesource
footage. For example, you may want to conform 25 fps PAL to 24 fps for film. See “Converting movies” on page 630.
If your final output will be videotape, set up your composition to match the requirements of your capture card; or, if
you use an IEEE 1394 (FireWire) port, choose the appropriate DV preset inthe Composition Settings dialog boxand
in the export settings of the output module Render Queue panel.
AharonRabinowitzhasanarticleontheCreativeCOWwebsiteaboutplanningyourprojectwiththefinaldelivery
specifications in mind: www.adobe.com/go/learn_ae_aharonplanning.
See also
“Work with composition settings” on page 110
“Work with output module settings” on page 599
Planning for playback on computer monitors and mobile devices
Whenyoucreateamovieforplaybackonapersonalcomputer—whetherdownloadedfromtheweborplayedfrom
a CD-ROM—specify composition settings, render settings, and output module settings that keep file size low.
Consider that a movie with a high data rate may not play well from an older CD-ROM drive that cannot read data
from the disc fast enough. Similarly, a large movie may take a long time to download over a dial-up network
connection.
For more information about compression, see the Compression Primer (English only) on the Adobe website at
www.adobe.com/go/learn_dv_compressionprimer.
Page 36

AFTER EFFECTS CS3
User Guide
When rendering your final movie, choose a file type and encoderappropriatefor the final media.The corresponding
decodermustbeavailableonthesystemusedbyyourintendedaudience;otherwisetheywillnotbeabletoplaythe
movie. Common codecs (encoders/decoders) include FLV, Sorenson, MPEG-4 video, and codecs installed with
media players such as Flash® Player, RealPlayer, Windows Media Player, and QuickTime Player.
AharonRabinowitzhasanarticleontheCreativeCOWwebsiteaboutplanningyourprojectwiththefinaldelivery
specifications in mind: www.adobe.com/go/learn_ae_aharonplanning.
Mobile devices
Manyoftheconsiderationsforcreatingmoviesforplaybackonmobiledevices,suchasmobilephonesandtheApple
iPod, are similar to those for creating moviesfor playbackon personal computers—but the limitations are even more
extreme. Because the amount of storage (disk space) and processor power are less for mobile phones than for
personal computers, file size and data rate for movies need to be even more tightly controlled.
Use these tips when shooting video for mobile devices:
• Tight shots are better. It’s hard to see a face on a tiny screen unless it’s shot in relative close-up.
• Light your subjects well, and keep them separated from thebackground; the colors and brightnessvalues between
background and subject should not be too similar.
• Avoid excessive zooming and rolling, which hinder temporal compression schemes.
• Because stable (non-shaky) video is easier to compress, shoot video with a tripod to minimize the shaking of the
camera.
• Avoid using auto-focus and auto-exposure features. When these engage, they change the appearance of all of the
pixels in an image from one frame to the next, making compression using interframe encoding schemes less
efficient.
31
Use the following tips when working with After Effects:
• Use a lower frame rate (15-22 fps) for mobile devices.
• Use motion-stabilization tools and noise-reduction or blur effects before rendering to final output, to aid the
compressor in reducing file size.
• Match thecolor paletteto themobile devices that youare targeting. Mobile devices, in general, have a limited color
gamut. Previewing in Adobe Device Central can help determine if the colors used are optimal for an individual
device or range of devices.
• UseFormatOptionspresetsavailablethroughtheoutputmoduleintheRenderQueuepanel.Presetsareavailable
for 3GPP mobile devices, iPod video, and PlayStation Portable.
• Consider using cuts and other fast transitions instead of zooming in and out or using fades and dissolves.Fast cuts
also make compression easier.
Afteryou’verenderedyourmovie,youcanviewitexactlyasitwillappearonanyofalargevarietyofmobiledevices,
using Adobe Device Central.
See also
“Work with composition settings” on page 110
“Work with output module settings” on page 599
“Work with render settings” on page 597
Page 37

AFTER EFFECTS CS3
User Guide
“About compression of movie files” on page 618
“Preview a movie on a virtual mobile device using After Effects” on page 618
Working with Photoshop and After Effects
If you use Photoshop to create still images, you can use After Effects to bring those still images together and make
them move and change. In After Effects, you can animate an entire Photoshop image or any of its layers. You can
even animate individual properties of Photoshop images, such as the properties of a layer style.
If you use After Effects to create movies, you can use Photoshop to refine the individual frames of those movies. You
can remove unwanted visual elements, draw on individual frames, or use the superior selection and masking tools
in Photoshop to divide a frame into elements for animation or compositing.
Comparative advantages for specific tasks
The strengths of After Effects are in its animation and automation features. This means that After Effects excels at
tasks that can be automated from one frame to another. For example, you can use the motion tracking features of
After Effects to track the motion of amicrophone boom, and then automatically apply that same motion to the Clone
Stamp tool. In this manner, you can remove the microphone from every frame of a shot, without having to paint the
microphone out by hand on each frame.
In contrast, Photoshop has excellent tools for painting, drawing, and selecting portions of an image. Tracing a
complex shape to create a mask is much easier with the Photoshop Quick Selection tool or Magnetic Lasso tool than
with the masking tools in After Effects. Rather than hand-drawing a mask on each frame in After Effects, consider
doing this work in Photoshop. Similarly, if you are applying several paint strokes by hand to get rid of dust, consider
using the Photoshop paint tools.
32
Deciding which application to use for painting depends on the task. Paint strokes in Photoshop directly affect the
pixels of the layer. Paint strokes in After Effects are elements of an effect, each of which can be turned on or off or
modified at any time. If the purpose of applying a paint stroke is to permanently modify a still image, use the
Photoshoppainttools.Ifyouwanttohavecompletecontrolofeachpaintstrokeafteryou’veappliedit,orifyouwant
to animate the paint strokes themselves, use the After Effects paint tools.
The animation and video features in Photoshop Extended include simple keyframe-based animation. After Effects
uses a similar interface, though the breadth and flexibility of its animation features are far greater.
After Effects 3D functionality is limited to the manipulation of two-dimensional layers in three dimensions.
Photoshop, however, can manipulate complete 3D models in 3DS and U3D formats, and output two-dimensional
composites and cross-sections of these 3D models from any angle. You can then use these two-dimensional images
in After Effects. After Effects can also automatically create 3D layers to mimic the planes created by the Photoshop
Vanishing Point tool.
Exchanging still images
After Effects can import and export still images in many formats, but you will usually want to use the native
Photoshop PSD format when transferring individual frames or still image sequences between After Effects and
Photoshop.
When importing or exporting a PSD file, After Effects can preserve individual layers, masks, layer styles, and most
other attributes. When you import a PSD file into After Effects, you can choose whether to import it as a flattened
image or with its layers separate and intact.
Page 38

AFTER EFFECTS CS3
User Guide
It is often a good idea to prepare a still image in Photoshop before importing it into After Effects. Examples of such
preparation include correcting color, scaling, and cropping. It is often better for you to do something once to the
source image in Photoshop than to have After Effects perform the same operation many times per second as it
renders each frame for previews or final output.
By creating your new PSD document from the Photoshop New File dialog box with a Film & Video preset, you can
start with a document that is set up correctly for a specific video output type. If you are already working in After
Effects, you can create a new PSD document that matches your composition and project settings by choosing File >
New > Adobe Photoshop File.
Exchanging movies
Youcan also exchange video files, such as QuickTime movies, betweenPhotoshop andAfter Effects. Whenyou open
a movie in Photoshop, a video layer is created that refers to the source footage file. Video layers allow you to paint
nondestructively on the movie’s frames, much as After Effects works with layers with movies as their sources. When
yousaveaPSDfilewithavideolayer,youaresavingtheeditsthatyoumadetothevideolayer,noteditstothesource
footage itself.
You can also render a movie directly from Photoshop. For example, you can create a QuickTime movie from
Photoshop that can then be imported into After Effects.
Color
After Effects works internally with colors in anRGB (red, green, blue) color space. Though After Effects can convert
CMYK images to RGB, you should do video work in Photoshop in RGB.
33
If relevant for your final output, it is better to ensure that the colors in your image are broadcast-safe in Photoshop
before you import the image into After Effects. A good way to do this is to assign the appropriate destination color
space—for example, SDTV (Rec. 601)—to the document in Photoshop. After Effects performs color management
according to color profiles embedded in documents, including imported PSD files.
See also
“Preparing and importing Photoshop files” on page 83
Working with Flash and After Effects
If you use Adobe® Flash® to create video or animation, you can use After Effects® to edit and refine the video. For
example, you can export Flashanimations and applicationsas QuickTime movies or Flash Video (FLV) files. You can
then use After Effects to edit and refine the video.
If you use After Effects to edit and composite video, you can then use Flash to publish that video. You can also export
an After Effects video as Flash content for further editing in Flash.
Exporting QuickTime video from Flash
If you create animations or applications with Flash, you can export them as QuickTime movies using the File >
Export > Export Movie command in Flash. For a Flash animation, you can optimize the video output for animation.
For a Flash application, Flash renders video of the application as it runs, allowing the user to manipulate it. This lets
you capture the branches or states of your application that you want to include in the video file.
Page 39

AFTER EFFECTS CS3
User Guide
Exporting Flash video (FLV) from After Effects
When you render finished video from After Effects, select FLV as the output format in the Render Queue panel to
export directly to the Flash Video (FLV) format. You can specify size, compression, and other output options. Any
After Effects markers are added to the FLV file as cue points.
You can then import the FLV file into Flash and publish it in a SWF file, which can be played by Flash Player.
Importing and publishing video in Flash
When you import a FLV file into Flash, you can use various techniques, such as scripting or Flash components, to
control the visual interface that surrounds your video. For example, you might include playback controls or other
graphics. You can also add graphic layers on top of the FLV file for composite effects.
Composite graphics, animation, and video
Flash and After Effects each include many capabilities that allow you to perform complex compositing of video and
graphics. Which application you choose to use will depend on your personal preferences and the type offinal output
you want to create.
Flash is the more web-oriented of the two applications, with its small final file size. Flash also allows for runtime
control of animation. After Effects is oriented towards video and film production, provides a wide range of visual
effects, and is generally used to create video files as final output.
34
Both applications can be used to create original graphics and animation. Both use a timeline and offer scripting
capabilities for controlling animation programmatically. After Effects includes a larger set of effects, while the Flash
ActionScript™ language is the more robust of the two scripting environments.
Bothapplicationsallowyoutoplacegraphicsonseparatelayersforcompositing.Theselayerscanbeturnedonand
off as needed. Both also allow you to apply effects to the contents of individual layers.
In Flash, composites do not affect the video content directly; they affect only the appearance of the video during
playback in Flash Player. In contrast, when you composite with imported video in After Effects, the video file you
export actually incorporates the composited graphics and effects.
Because all drawing and painting in After Effects is done on layers separate from any imported video, it is always
non-destructive. Flash has both destructive and non-destructive drawing modes.
Exporting After Effects content for use in Flash
You can export After Effects content for use in Flash. You can export a SWF file that can be played immediately in
Flash Player or used as part of another Flash project. When you export content from After Effects in SWF format,
the some of the content may be flattened and rasterized in the SWF file.
Importing Flash SWF files into After Effects
Flash has a unique set of vector art tools that make it useful for a variety of drawing not possible in After Effects or
Adobe Illustrator®. You can import SWF files into After Effects to composite them with other video or render them
as video with additional creative effects. When After Effects imports a SWF file, its internal keyframes are preserved
so that you can continue to use them for timing other effects.
Each SWF file imported into After Effects is flattened into a single continuously rasterized layer, with its alpha
channel preserved. Continuous rasterization means that graphics stay sharp as they are scaled up. This import
method allows you to use the root layer or object of your SWF files as a smoothly rendered element in After Effects,
allowing the best capabilities of each tool to work together.
Page 40

AFTER EFFECTS CS3
User Guide
Working with Adobe Premiere Pro and After Effects
Adobe Premiere® Pro is designed to capture, import, and edit film and video. After Effects is designed to produce
motion graphics andvisual effects for film, broadcast television, DVD, and theweb. You can easilyexchange projects,
compositions, tracks, and layers between After Effects and Adobe Premiere Pro. You can import an Adobe Premiere
Pro project into After Effects, or export an After Effects project as an Adobe Premiere Pro project. You can also
import Adobe Premiere 6.0 and 6.5 projects into After Effects.
You can copy and paste layers and tracks between After Effects and Adobe Premiere Pro. If you have Adobe Creative
Suite® 3 Production Premium, you can use Adobe Dynamic Link to export After Effects compositions into Adobe
Premiere Pro or Adobe Encore without first rendering them, or you can start Adobe Premiere Pro from within After
Effects and capture footage for use in After Effects.
See also
“Copy between After Effects and Adobe Premiere Pro” on page 65
“About Dynamic Link (Production Premium only)” on page 609
“Export an After Effects project to Adobe Premiere Pro” on page 608
Work with Adobe Encore and After Effects
You can use After Effects to quickly create buttons and button layers for importing into Adobe Encore®. Adobe
Encore uses a naming standard todefine a button and the role of individual layersas subpicture highlights and video
thumbnails. When you select a group of layers to create as an Adobe Encore button, After Effects precomposes the
layers and names the precomposition according to the naming standards for buttons.
35
Highlight layer names receive the prefix (=1), (=2), or (=3), and video thumbnail names receive the prefix (%).
After Effects includes template projects that include entire DVD menus for you to use as a basis for your own DVD
menus.TouseAdobeBridgetobrowseandimportthesetemplateprojects,chooseFile>BrowseProjectTemplates.
(See “Work with template projects” on page 23.)
See also
“Create a web link, chapter link, or cue point from a marker” on page 118
Create a button for Adobe Encore
1
In the Timeline panel, select the layers to be used in the button.
2 Choose Layer > Adobe Encore > Create Button.
3 Enter a name for the button.
4 Use the menus to assign up to three highlight layers and one video thumbnail layer, and then click OK.
A new composition is created with the button name.In keeping with the Adobe Encore naming standards, the prefix
(+) is added to the name of the composition to indicate that it is a button.
Important: Ifyourenamethebutton,besuretoretainthe(+)prefix.TheprefixensuresthatAdobeEncorerecognizes
the file as a button.
Assign a subpicture highlight and video thumbnail to a layer
1
Select the layer.
Page 41

AFTER EFFECTS CS3
User Guide
2 Choose Layer > Adobe Encore > Assign To Subpicture [number] or Assign To Video Thumbnail.
Export a button for use in Adobe Encore
1
Open the composition that represents the button, and move the current-time indicator to the desired frame.
2 Choose Composition > Save Frame As > Photoshop Layers.
Creating an animated GIF movie
An animated GIF file is a sequence of GIF images that plays as a movie. This format is commonly used for small,
short, simple movies that play in web browsers.
To play an animated GIF file, the web browser first loads the entire file into memory and then plays it from memory
(not from disk). To prevent excessive delays before playback begins, and to avoid using too much memory, an
animated GIF should have a short duration and a low frame rate. Frame rates of 5 frames per second (or less) are
recommended, unless the duration is very short (1 second or so).
When you render a movie to the animated GIF format, colors are dithered to an 8-bit palette (256 colors). Before
rendering your final movie, render a test composition so that you can adjust colors if the results are not what you
expect.YoucancreateacolorpaletteinAdobePhotoshopifthedefaultWebSafeorSystemcolorpalettesdon’tgive
the results that you want.
36
A pixel in an animated GIF file is either completely opaque or completely transparent. When rendering an animated
GIF movie, After Effects must convert the finely-graded alpha channel of the composition to this much simpler type
of transparency. The transition between transparent and opaque areas is abrupt, and may not be desired for more
subtle visual elements.
You render and export a movie as an animated GIF file using the render queue. Animated GIF is one of the formats
available in the Format menu in the Output Module Settings dialog box.
See also
“Basics of rendering and exporting” on page 587
Cross-platform project considerations
After Effects project files are compatible with Mac OS and Windows operating systems, but some factors—mostly
regardingthelocationsandnamingoffootagefilesandsupportfiles—canaffecttheeaseofworkingwiththesame
project across platforms.
File systems
If you want to transfer a project that contains footage stored on a server from Mac OS to Windows, be sure to mount
the server by using AppleShare (AFP). If you mount the volume in Mac OS by using Samba (SMB), After Effects can’t
reestablish links to footage files stored on the server when you open the project on Windows.
Project paths
When you move a project to a different computer and open it, After Effects attempts to locate the project’s footage
files as follows: After Effects first searches the folder in which the project file is located; second, it searches the file’s
original path or folder location; finally, it searches the root of the directory where the project is located.
Page 42

AFTER EFFECTS CS3
User Guide
If you are building cross-platform projects, it’s best if the full paths have the same names on Mac OS and Windows
systems. If the footage and the project are on different volumes, make sure that the appropriate volume is mounted
before opening the project and that network volume names are the same on both systems.
It’s best to store footage in the same folder as the project file or in another folder within that folder. Here’s a sample
hierarchy:
/newproject/project_file.aep
/newproject/source/footage1.psd
/newproject/source/footage2.avi
You can then copy the newproject folder in its entirety across platforms, and After Effects will properly locate all of
the footage.
Note: Use the Collect Files feature to gather copies of all the files in a project into a single folder. You can then move the
folder containing the copied project to the other platform. See “Collect files in one location” on page 594.
File-naming conventions
Name your footage and project files with the appropriate file-name extensions, such as .mov for QuickTime movies
and .aep for After Effects projects. Don’t use high-ASCII or other extended characters in file names to be used crossplatform.Iffileswillbeusedontheweb,besurethatfilenamesadheretoapplicableconventionsforextensionsand
paths.
37
Supported file types
Some file types are supported on one platform but not another. See “Supported import formats” on page 48 and
“Supported output formats” on page 588.
Resources
Ensure that all fonts, effects, codecs, and other resources are available on bothsystems. Such resources areoften plug-ins.
If you use a native After Effects effect in a project on one operating system, the effect will still work on the other
operatingsystemtowhichyou’vetransferredyourproject.However,somethird-partyeffectsandotherthird-party
plug-ins may not continue to operate, even if you have versions of these plug-ins on the target system. In such cases,
you may need to reapply some third-party effects.
See also
“About plug-ins” on page 44
“Work with fonts” on page 278
Memory, storage, and performance
Memory usage and storage
Memory requirementsfor viewingand renderingincrease with the resolutionof thecomposition frame,the memory
requirement of the most memory-intensive layer in the composition, and the size of the project file.
Page 43

AFTER EFFECTS CS3
User Guide
After Effects renders each frame of a composition one layer at a time. For this reason, the memory requirement of
each individual layer is more important than the duration of the composition or the number of layers in the composition. The memory requirement for a composition is equivalent to the memory requirement for the most memoryintensive single layer in the composition. For example, it generally takes less memory to render 30 layers at NTSC
resolution than 2 layers at motion-picture film resolution.
Note: If the Render Multiple Frames Simultaneously option is selected, each background copy of the After Effects application renders one frame at a time.
When a layer includes a composition as a source item, everything in that composition must be rendered before the
next layer is rendered.
The memory requirements of a layer increase under the following circumstances:
• Using a larger source image
• Enabling color management
• Adding a mask
• Adding per-character 3D properties
• Using certain blending modes, layer styles, or effects, especially those involving multiple layers
• Applying certain output options, such as 3:2 pulldown, cropping, and stretching
• Adding shadows or depth-of-field effects
38
If you have no problems viewing each frame of a full-resolution, best-quality preview of a composition, then you
have enough memory to render the composition. Rendering a composition into a movie takes no more memory than
displaying it on-screen with the same settings.
Occasionally, AfterEffects may display an alert message indicating that it requires more memory todisplay or render
a composition. If you receive an out-of-memory alert, free memory or reduce the memory requirements of the most
memory-intensive layers, and then try again.
Free memory immediately with one or more of the commands in the Edit > Purge menu.
After Effects requires a contiguous block of memory to store each frame; it cannot store a frame in pieces in
fragmented memory.
Use the following formula to determine the number of megabytes required to store one uncompressed frame at full
resolution:
(height in pixels) x (width in pixels) x (number of bits per channel) / 2,097,152
Note: The value 2,097,152 is a conversion factor that accounts for the number of bytes per megabyte (2
20
), the number
of bits per byte (8), and the number of channels per pixel (4).
For example, a DV NTSC frame in an 8-bpc project requires 1.3 megabytes, and a D1/DV PAL frame in an 8-bpc
project requires 1.6 megabytes, whereas a 1080i60 DVCPRO HD frame in a 32-bpc project requires 21.1 megabytes.
Page 44

AFTER EFFECTS CS3
User Guide
The operating system imposes certain limits on the amount of memory that an application can use. After Effects on
the Mac OS X operating system can use up to 3.5 GB of RAM, although only about 3GB is actually available to the
foreground application, because Mac OS X uses approximately 500MB to load the user interface libraries. After
Effects on 32-bit Windows operating systems can use up to 3 GB of RAM; however, to use more than 2 GB in After
Effects, you must configure Windows XP or Windows Vista appropriately. (For details, see the Microsoft website or
Jonas Hummelstrand’s website: www.adobe.com/go/learn_ae_jonaswindows3gb.) After Effects on 64-bit Windows
operating systems can use up to 4 GB of RAM with no special configuration.
Note: These numbers are for each After Effects process. The background processes used to render multiple frames simultaneously can each use the amount of RAM mentioned above. (See “Render multiple frames simultaneously” on
page 40.)
Because video is typically compressed during encoding when you render to final output, you can’t just multiply the
amount of memory requiredfor a single frame by the frame rateand compositionduration to determine the amount
ofdiskspaceneededtostoreyourfinaloutputmovie.However,suchacalculationcangiveyouaroughideaofthe
maximum storage space you mightneed. Forexample, one second of uncompressed standard-definition 8-bpc video
requires approximately 40 megabytes (MB). A feature-length movie at that data rate would require more than 200
GB tostore. Even with DV compression, which reduces file size to 3.6 MB per second of video, this translates to more
than 20 GB for a typical feature-length movie. It is not unusual for a feature-film project—with its higher color bit
depth and greater frame size—to require terabytes of storage for footage and rendered output movies.
39
RAM and disk caches
As you work on a composition, After Effects temporarily stores some rendered frames and source images in RAM,
so that previewing and editing can occur more quickly. After Effects does not cache frames that require little time to
render. Frames remainuncompressed in the cache. You can control how After Effects stores images bysetting imagecaching preferences.
After Effects also caches at the footageand layerlevel for faster previews; layersthat have been modified are rendered
during the preview, and unmodified layers are displayed from the cache.
Blue bars inthe Timeline panel mark framesthat arecached to disk. Green barsmark frames that are cached to RAM.
Choose Show Cache Indicators from the Timeline panel menu to turn the cache indicators on and off. Showing the
cache indicactors decreases performance slightly.
Whenthecacheisfull,anynewframeaddedtothecachereplacesaframecachedearlier.WhenAfterEffectsrenders
frames for RAM previews, it stops adding frames to the cache when the cache is full and begins playing only the
frames that could fit in the cache. The disk cache is not used for RAM previews. If disk caching is enabled, After
Effects can store rendered items to your hard disk when the RAM cache is full during standard previews.
The RAM cache and disk cache are automatically purged when you quit After Effects.
To purge the RAM cache and disk cache, choose Edit > Purge > Image Caches.
Memory & Cache preferences
Set memory and caching preferences by choosing Edit > Preferences > Memory & Cache (Windows) or After
Effects > Preferences > Memory & Cache (Mac OS).
For information on the Conformed Media Cache preferences, see “Work with the media cache” on page 67.
Maximum Memory Usage The maximum amount of memory that After Effects can use to render a single frame.
This preference is only relevant during rendering, either for previews or for final output. When After Effects is not
Page 45

AFTER EFFECTS CS3
User Guide
rendering a frame, memory usage drops back down to, at most, the amount set by the Maximum RAM Cache Size
preference.
You can specify values over 100% (where 100% equals the amount of physical RAM you have installed) because
virtual memory uses hard-disk space. Values over 200% are not recommended. The default value is 120%.
Maximum RAM Cache Size The maximum amount of memory that After Effects will use when not rendering a
frame. Thismemory includes image caches, the application itself, memory reserved for GPUacceleration, andso on.
This setting determines the amount of memory available for (and therefore the duration of) RAM previews.
If you set this value to greater than the default value of 60%, you may encounter problems such as decreased performance when switching from one application to another or increased frequency of errors that say that After Effects
is unable to create an image buffer. Like a hard disk, your address space can become fragmented; if you have
Maximum RAM Cache Size set too high, the memory maybecome too fragmented to store the next rendered frame.
By lowering the cache percentage, you reducethe chanceof fragmentation. Setthis value above 60%only if necessary.
You should not set this value above 90%.
When you have enabled multiprocessing, the amount of RAM available to background processes is affected by the
amount of RAM reserved for the foreground process. Decreasing Maximum RAM Cache Size can free memory for
background processes. (See “Render multiple frames simultaneously” on page 40.)
Enable Disk Cache Moves rendered frames to your hard disk when the RAM cache is full. After Effects will only use
the disk cache to store a frame if it’s faster to retrieve a frame from the cache than to re-render the frame. Select a
folder tocontain yourcache, and click OK (Windows) or Choose (Mac OS). For the bestperformance, select a folder
that’s on a different physical hard disk than your source footage. If possible, the folder should be on a hard disk that
uses a different drive controller than the disk that contains your source footage. The disk cache folder can’t be the
hard disk’s root folder.
40
Maximum Disk Cache Size Specifies the number of megabytes of hard disk space to use. This should be at least 2
gigabytes (GB).
Prevent DLL Address Space Fragmentation (Windows only) Select this option to give After Effects access to more
contiguous memory on a computer with a large amount of RAM. This option may be incompatible with some
OpenGL drivers, which can cause a crash when the application starts. If such a crash occurs, the option will become
unchecked automatically to prevent further crashes when you start After Effects.
For information on working with large images and avoiding the error message that says that After Effects ”could not
create image buffer”, see Jonas Hummelstrand’s website: www.adobe.com/go/learn_ae_jonasimagebuffererror.
Render multiple frames simultaneously
After Effectscan start additional processesof the After Effects applicationto run in the background to assist the main
application with the rendering of frames for RAM previews or final output. These background processes have the
name AfterFX.exe (Windows) or aeselflink (Mac OS).
Each background process renders its own frame and runs on a separate processor core (CPU). The number of
processes used to render multiple frames simultaneously is never more than the number of processors. The number
of background processes that can run on your computer also depends on the total amount of system RAM and the
amount of RAM that is assigned to the main application (Maximum RAM Cache Size). The amount of RAM
required for each background process varies depending on your system configuration; at least 1GB per process is
recommended.
Note: You can check the current value for Maximum RAM Cache Size by choosing Edit > Preferences > Memory &
Cache (Windows) or After Effects > Preferences > Memory & Cache (Mac OS).
Page 46

AFTER EFFECTS CS3
User Guide
Ifbackgroundprocessesareusedforrendering,thenthemainforegroundapplicationisnotalsousedforrendering.
Thismeansthatcreatingbackgroundprocessesonlyaddstothetotalnumberofprocessesusedforrenderingifthere
are enough resources for at least two background processes to run.
1 Choose Edit > Preferences> Multiprocessing (Windows) orAfter Effects >Preferences > Multiprocessing(Mac OS).
2 Select Render Multiple Frames Simultaneously.
The bottom of the Preferences dialog box shows how many additional processors (in addition to the worst-case
scenario of one processor) will be used at the current settings. To increase the number of background processes that
can run, decrease Maximum RAM Cache Size or install more RAM.
Selecting the Render Multiple Frames Simultaneously option does not immediately start the background processes.
The background processes start when the first render operation (for a RAM preview or for final output) is initiated
after the option is selected. The background processes continue running until the option is deselected.
Important: You may experience a small delay when the background processes start for the first time, when the first
render operation occurs. A message in the Info panel indicates when the background processes are initializing.
Deselecting Render Multiple Frame Simultaneously stops the background processes; reselecting the option causes the
same delay when the next render operation begins.
Because antivirus software operates by monitoring every read and write operation, such software can decrease
rendering speed, especially with the Render Multiple Frames Simultaneously preference selected.
41
If the rendering of a single frame requires more RAM than is available to the individual background processes, then
After Effects will not render multiple frames simultaneously and will instead use only the main foreground process
to render all frames for that composition. If After Effects can’t use background processes to render multiple frames
simultaneously, a message appears in the Info panel.
Note: After Effects can also use multiple processes to accelerate rendering of a single frame. This form of multiprocessing
can take advantage ofhyper-threading. The number of CPUs that After Effects reports in the Multiprocessing Preferences
dialog box for accelerating rendering within a single frame counts the virtual (logical) CPUs available due to hyperthreading.
Improve performance
You can improve performance by optimizing your computer system, After Effects, your project, and your workflow.
GridIron Software provides Nucleo Pro 2, which improves rendering performance in After Effects in several ways:
www.adobe.com/go/learn_ae_gridironnucleopro.
Improve performance before starting After Effects
• Make sure that you’ve installed the current version of After Effects, including any available updates. For more
information about updates, visit the Adobe website at www.adobe.com/go/downloads.
• Make sure that you’ve installed the latest versions of drivers and plug-ins, especially video card drivers. To
download updates for drivers and plug-ins, visit the provider’s website.
• Quit applications that arenot necessary for your work. This may includesome applications that start automatically
when the operating system starts.
• Make sure that your system includes a display card that supports OpenGL 2.0 or later (Windows) or OpenGL 1.5
or later (Mac OS). Though After Effects can function without it, OpenGL accelerates various types of rendering,
including rendering to the screen for previews. See “Render with OpenGL” on page 593.
Page 47

AFTER EFFECTS CS3
User Guide
• Adjust the size of the virtual memory paging file (Windows only). Virtual memory enables the system to use hard-
disk space to store information normally stored in RAM. Windows manages virtual memory using a paging file.
To improve performance in After Effects, adjust the size of the paging file to a maximum of twice the amount of
installed RAM—the default in Windows XP. (See Windows Help.)
• Defragment all hard disks regularly. See the documentation for your operating system for details.
• Make sure that your system has enough RAM. See the documentation for your operating system and computer
for details on how to check the amount of installed RAM and how to install RAM.
• Stop or pause resource-intensive operations in other applications, such as video previews in Adobe Bridge.
Improve performance by optimizing memory, cache, and multiprocessing settings
• Usemultipleprocessorstorendermultipleframessimultaneously by selecting the Render Multiple Frames Simul-
taneously preference. See “Render multiple frames simultaneously” on page 40.
• Enable caching frames to disk by selecting the Enable Disk Cache preference.
• Set the Maximum RAM Cache Size preference to an optimum value. See “Memory & Cache preferences” on
page 39.
• Purge RAM and disk caches (choose Edit > Purge > Image Caches).
42
Improve performance by simplifying your project
By simplifying and dividing your project, you can prevent After Effects from using memory and other resources to
process elements that you are not currently working with. Also, by controlling when After Effects performs certain
processing, you can greatly improve overall performance. For example, you can avoid repeating an action that needs
to happen only once, or you can postpone an action until it is more convenient for you.
• Delete unused elements from your project. See “Remove items from a project” on page 60.
• Divide complex projects into simplerprojects, and then recombine them before you render the finished movie.To
recombine projects, import all of the projects into a single project by choosing File > Import > File.
• Before rendering, put all of your source footage files on a local disk—not the one that the application runs from.
A good way to do this is with the Collect Files command. See “Collect files in one location” on page 594.
• Prerender nested compositions. Rendera completed composition as a movie so that After Effects doesn’t rerender
the composition every time it is displayed. See “Pre-render a nested composition” on page 114.
• Restrict the influence of layer switches by choosing Edit > Preferences > General (Windows) or After Effects >
Preferences > General (Mac OS), and deselecting Switches Affect Nested Comps. (Remember to select this option
again before you render the composition for final output.)
• Collapse transformations for nested compositions. See “Render order and collapsing transformations” on
page 115.
• Substitute a low-resolution or still-image proxy for a source item when not working directly with that item. See
“Work with placeholders and proxies” on page 61.
• Lower the composition’s resolution. See “Resolution” on page 128.
Note: To increase the rendering speed of RAM previews, set the resolution of the Composition panel to matchthe magnification. For example, if the magnification is 50%, choose Half from the Resolution menu.
• Isolate the layer you’re working on by using the Solo switch. See “Solo a layer” on page 149.
Page 48

AFTER EFFECTS CS3
User Guide
• Deselect the Continuously Rasterize switch for a vector layer until you need to view or render it in detail. This
prevents After Effects from rasterizing the entire layer after each change. See “Continuously rasterize a layer
containing vector graphics” on page 151.
Improve performance by modifying screen output
You can improve performance in many ways that don’t affect how After Effects treats your project data, only how
output is drawn to the screen as you work. Although it is often useful to see certain items and information as you
work, After Effects uses memory and processor resources to update this information, so be selective in what you
choose to display as you work. You will likely need to see different aspects of your project at different points in your
workflow, so you may apply the following suggestions in various combinations at various stages.
• Turnoff display color managementand outputsimulation when notneeded. See “Simulate how colors will appear
on a different output device” on page 248.
• Enable hardwareacceleration ofpreviews, which uses theGPU to assist indrawing previews to the screen. Choose
Edit > Preferences > Display (Windows) or After Effects > Preferences > Display (Mac OS), and select Hardware
Accelerate Composition, Layer, And Footage Panels.
• Close unneeded panels. After Effects must use memory and processor resources to update open panels, which
may slow the work that you are doing in another panel.
• Create a region of interest. If you are working on a small part of your composition, limit which portion of the
composition is rendered to the screen during previews. See “Work with the region of interest” on page 111.
• Deselect Show Cache Indicators in the Timeline panel menu to prevent After Effects from displaying green and
blue bars in the time ruler to indicate cached frames.
• Deselect the Show Rendering Progress In Info Panel & Flowchart preference (in Display preferences) to prevent
the details of each render operation for each frame from being written to the screen.
• Hide Current Render Details in the Render Queue panel by clicking the triangle beside Current Render Details in
the Render Queue panel.
• Press the CapsLock key to prevent After Effects from updating Footage, Layer, or Composition panels. When you
make a change that would otherwise appear in a panel, After Effects adds a red bar with a text reminder at the
bottom of the panel. After Effects continues to update panel controls such as motion paths, anchor points, and
mask outlines as you move them. To resume panel updates and display all changes, press Caps Lock again.
43
Note: Pressing the Caps Lock key suspends updates (disables refresh) of previews in viewers during rendering for final
output, too, although no red reminder bar appears.
• Lower a layer’s display quality to Draft or Wireframe. See “Layer image quality” on page 150.
• Select Draft 3D in the Timeline panel menu, which disables all lights and shadows that fall on 3D layers. It also
disables the camera’s depth-of-field blur.
• Deselect Live Update in the Timeline panel menu to prevent After Effects from updating compositions dynami-
cally.
• Display audio waveforms in the Timeline panel only when necessary.
• Disable pixel aspect ratio correction by clicking the Toggle Pixel Aspect Ratio Correction button at the bottom
of a Composition, Layer, or Footage panel.
• Deselect Mirror On Computer Monitor when previewing video on an external video monitor. See “Preview on an
external video monitor” on page 126.
• Hide layer controls, such as masks, 3D reference axes, and layer handles. See “Show or hide layer controls in the
Composition panel” on page 127.
Page 49

AFTER EFFECTS CS3
User Guide
• Lowerthecomposition’smagnification.WhenAfterEffectsdisplaystheComposition,Layer,andFootagepanels
at magnifications of 100% or greater, screen redraw speed decreases.
Improve performance when using effects
Some effects, such as blurs and distortions, require large amounts of memory and processor resources. By being
selective about when and how you apply these effects, you can greatly improve overall performance.
• Apply memory-intensive and processor-intensive effects later. Animate your layers and do other work that
requires real-time previews before you apply memory-intensive or processor-intensive effects (such as glows and
blurs), which may make previews slower than real time.
• Temporarily turn off effects to increase the speed of previews. See “Delete or disable effectsand animation presets”
on page 352.
• Limit the number of particles generated by the Particle Playground effect.
• Choose Stiff Elasticity for the Mesh Warp, Reshape, and Smear effects in the Distort effects category.
• Turn off linear blending. See “Linearize working space and enable linear blending” on page 244.
Plug-ins and scripts
44
About plug-ins
Plug-ins are small software modules—with file-name extensions such as .aex and .8bi—that add functionality to an
application. After Effects effects are implemented as plug-ins, as are some features for working with certain file
formats. The Photoshop Camera Raw plug-in, for example, provides After Effects with its ability to work with
camera raw files.
When AfterEffects starts, it loads plug-ins from the Plug-ins folder, which is in the Adobe AfterEffects CS3\Support
Files (Windows) or Adobe After Effects CS3 (Mac OS) folder by default. Several plug-ins come with After Effects
and are automatically installed in this folder. You can obtain other plug-ins for After Effects and other Adobe
products from Adobe or other vendors. For specific instructions for installing a plug-in, refer to its documentation.
Note: (Mac OS) Some third-party plug-in installers incorrectly install their plug-ins into theMac OS XPackage for After
Effects. To reveal these plug-ins, Control-click the After Effects application icon in the Finder and choose Show Package
Contents. You can then move the plug-ins into the After Effects Plug-ins folder.
After Effectscomes with severalthird-party plug-ins, including Foundry Keylight,Synthetic ApertureColor Finesse,
and the Cycore FX plug-ins. Some plug-in installers—including those for Keylight and Color Finesse—install
documentation for the plug-ins in their subfolders in the Plug-ins folder. Documentation for Cycore FX plug-ins is
available on the Cycore website: www.adobe.com/go/learn_ae_cycorefxdocumentation.
When exchanging After Effects projects between computer systems, make sure that the plug-ins that the project
depends on are installed on both systems.
For information on plug-ins available for After Effects, visit the Adobe website at
www.adobe.com/go/learn_ae_plugins. Other resources for purchasing and learning to use plug-ins for After Effects
includetheToolfarmwebsite(www.adobe.com/go/learn_ae_toolfarmhome) and Lutz Albrecht’s Mylenium website
(www.adobe.com/go/learn_ae_lutzplugins).
For information on developing plug-ins for After Effects, visit the Adobe website at
www.adobe.com/go/learn_ae_devcenter.
Page 50

AFTER EFFECTS CS3
User Guide
Plug-ins compiled for the Macintosh PowerPC processor architecture do not run natively on Macintosh computers
that useIntel processors. To use plug-inscompiled for the PowerPC processor architecture, you can run After Effects
CS3 under Rosetta. Rosetta is a software translator for Mac OS X that runs applications for PowerPC processors on
Intel processors. As with any application running in an emulation environment, performance is not as good as it
would be in the native environment.
See also
“Introduction to Camera Raw” on page 86
“About effects” on page 348
Work with scripts
A scriptis a series of commands that tells an application to perform a series of operations. You can use scripts in most
Adobe applications to automate repetitive tasks, perform complex calculations, and even access some functionality
not directly exposed through the graphical user interface. For example, you can direct After Effects to reorder the
layers in a composition, find and replace source text in text layers, or send an e-mail message when rendering is
complete.
After Effects scripts use the Adobe ExtendScript language, which is an extended form of JavaScript, similar to
ActionScript. ExtendScript files have the .jsx file-name extension.
45
When AfterEffects starts, itsearches the Scripts folder for scripts to load. Loaded scripts are available fromthe File >
Scripts menu. If you edit a script while After Effects is running, you must save your changes for the changes to be
applied. If you place a script in the Scripts folder while After Effects is running, you must restart After Effects for the
script to appear in the Scripts menu, though you can immediately run the new script using the Run Script File
command.
After Effects provides several prewritten scripts to assist you in performing common tasks, and to provide abasis for
you to modify and create your own scripts.
Run the sample script DemoPalette.jsx to get an idea of what sorts of things you can do with scripts. For example,
the Reverse Layer Order script makes reversing the stacking order of layers in the Timeline panel much easier than
reordering the layers manually.
You can write your own scripts for use in After Effects by using the script editor, which is part of the ExtendScript
Toolkit. The ExtendScript Toolkit provides a convenient interface for creating, debugging, and testing your own
scripts.
Note: Scripts created in After Effects 6.5 or earlier that use an index to access a property may not work as expected in
After Effects 7 or later. To resolve this issue, modify your scripts so that they contain equivalent expressions accessing
properties by name.
Thedefaultisforscriptstonotbeallowedtowritefilesorsendorreceivecommunicationoveranetwork.Toallow
scripts to write files and communicate over a network, choose Edit > Preferences > General (Windows) or After
Effects > Preferences > General (Mac OS), and select the Allow Scripts To Write Files And Access Network option.
• To run a loaded script, choose File > Scripts > [script name]
• Torun ascript that has notbeen loaded, choose File > Scripts >Run Script File, locate and selecta script, and click
Open.
• To start the script editor, choose File > Scripts > Open Script Editor.
Page 51

AFTER EFFECTS CS3
User Guide
For a complete description of the scripting capabilities available with After Effects, see the After Effects Scripting
Guide on the Adobe website at www.adobe.com/devnet/aftereffects.
To exchange scripts and other useful tools with other After Effects users, visit the After Effects Exchange on the
Adobe website at www.adobe.com/go/learn_ae_exchange.
Jeff Almasol provides a collection of useful scripts on his website: www.adobe.com/go/learn_ae_redefineryhome.
Dan Ebberts provides scripting tutorials and useful scripts on his website:
www.adobe.com/go/learn_ae_danscripting.
The AE Enhancers forum provides example scripts and useful information about scripting (as well as expressions
and animation presets) in After Effects: www.adobe.com/go/learn_ae_aeenhancershome.
This tutorial on the AE Enhancers forum leads the reader step by step through the creation of a script:
www.adobe.com/go/learn_ae_aeenhancersgettingstarted.
46
Page 52

Chapter 4: Importing
Importing and interpreting footage items
Working with imported files
You import footage items into a project and use them as sources for layers. You work with collections of layers in a
composition to animate, composite, and apply effects. You can import many different kinds of files, collections of
files, or components of files as sources for individual footage items, including moving image files, still-image files,
still-image sequences, and audio files. You can even create footage items yourself within After Effects, such as solids
and precompositions. You can import footage items into a project at any time.
When you import files, After Effects does not copy the image data itself into your project but creates a reference link
to the footage item in the Project panel. This keeps project files relatively small.
If you delete, rename, ormove animported sourcefile, youbreak the reference link to that file. When a link isbroken,
the name of the source file appears in italics in the Project panel, and the File Path column lists it as missing. If the
footage item is available, you can reestablish the link—usually just by double-clicking the item and selecting the file
again.
47
To reduce rendering time and increase performance,it is often best to prepare footage before you import it into After
Effects. For example, it is often better to scale or crop a still image in Photoshop beforeyou bring it into AfterEffects,
rather than scaling and cropping the image in After Effects. It is better to perform an operation once in Photoshop
than to force After Effects to perform the same action many times per second—once for each frame in which the
image appears.
Youcan use the Footage panel to evaluate footage and perform simple editing tasks, such as trimminga footageitem’s
duration.
To save time and minimize the size and complexity of a project, import a footage item once and then use it multiple
times in a composition. It is occasionally useful, however, to import a footage item more than once, such as when
you want to use it at two different frame rates.
If you use another application to modify a footage item that is used in a project, the changes appear in After Effects
the next time that you open the project or select the footage item and choose File > Reload Footage.
To replace a layer’s source footage item with another footage item, without affecting edits made to the layer
properties, select the layer and then Alt-drag (Windows) or Option-drag (Mac OS) the new footage item onto the
layer in the Timeline panel.
For introductions to digital video, digital audio,high-definition video,DVD, compression, andstreaming video, visit
the Adobe website at www.adobe.com/go/learn_dv_primers.
See also
“Create layers from footage items” on page 135
“Shortcuts for working with footage” on page 644
Page 53

AFTER EFFECTS CS3
User Guide
Supported import formats
Some file-name extensions—such as MOV and AVI—denote container file formats rather than denoting a specific
audio, video, or image data format. Container files can contain data encoded using various compression and
encoding schemes. After Effects can import these container files, but the ability to import the data that they contain
is dependent on which codecs (specifically, decoders) are installed.
By installing additional codecs, you can extend the ability of After Effects toimport additional filetypes. Mostcodecs
must be installed into the operating system (Windows or Mac OS) and work as a component inside the QuickTime
or Video for Windows formats. Contact the manufacturer of your hardware or software for more information about
codecs that work with the files that your specific devices or applications create.
The Automatic Duck Pro Import AE tool extends your ability to import assets in various formats, including those
used by popular non-linear editing systems. For more information, see the Automatic Duck website:
www.adobe.com/go/learn_ae_automaticduckpiae.
Audio formats
• Advanced Audio Coding (AAC, M4A)
• Audio Interchange File Format (AIF, AIFF)
• MP3 (MP3, MPEG, MPG, MPA, MPE)
• Video for Windows (AVI, WAV; requires QuickTime on Mac OS)
• Waveform (WAV)
48
Still-image formats
• Adobe Illustrator (AI, AI4, AI5, EPS, PS; continuously rasterized)
• Adobe PDF (PDF; first page only; continuously rasterized)
• Adobe Photoshop (PSD)
• Bitmap (BMP, RLE, DIB)
• Camera raw (TIF, CRW, NEF, RAF, ORF, MRW, DCR, MOS, RAW, PEF, SRF, DNG, X3F, CR2, ERF)
• Cineon (CIN, DPX; converts to project’s color bit depth: 8, 16, or 32 bpc)
• Discreet RLA/RPF (RLA, RPF; 16 bpc, imports camera data)
• EPS
• GIF
• JPEG (JPG, JPE)
• Maya camera data (MA)
• Maya IFF (IFF, TDI; 16 bpc)
• OpenEXR (EXR; 32 bpc)
Note: Plug-ins from fnord software provide access to multiple layers and channels of OpenEXR files:
www.adobe.com/go/learn_ae_fnordproexr.
• PCX
• PICT (PCT)
• Pixar (PXR)
• Portable Network Graphics (PNG; 16 bpc)
Page 54

AFTER EFFECTS CS3
• Radiance (HDR, RGBE, XYZE; 32 bpc)
• SGI (SGI, BW, RGB; 16 bpc)
• Softimage (PIC)
• Targa (TGA, VDA, ICB, VST)
• TIFF (TIF)
You can import files of any still-image format as a sequence. See “Importing still images” on page 80.
Video and animation formats
• Animated GIF (GIF)
• DV (in MOV or AVI container, or as containerless DV stream)
• ElectricImage (IMG, EI)
• Filmstrip (FLM)
• Flash (SWF; continuously rasterized)
Note: SWF files are imported with an alpha channel. Interactive content and scripted animation are not retained.
Animation defined by keyframes is retained.
User Guide
49
• Media eXchange Format (MXF; Op-Atom variety used by Panasonic DV, DVCPRO, DVCPRO50, and DVCPRO
HD video cameras to record to Panasonic P2 media)
• MPEG-1, MPEG-2, and MPEG-4 formats (MPEG, MPE, MPG, M2V, MPA, MP2, M2A, MPV, M2P, M2T, AC3,
MP4, M4V, M4A)
Note: Some MPEG data formats are stored in container formats with file-name extensions that are not recognized by
After Effects; examples include .vob and .mod. In some cases, you can import these files into After Effects after changing
the file-name extension to one of the recognized file-name extensions. Due to variations in implementation in these
container formats, compatibility is not guaranteed.
• Open Media Framework (OMF; raw media [or essence] only; Windows only)
• QuickTime (MOV; 16 bpc, requires QuickTime)
• Adobe Photoshop with video layer (PSD; requires QuickTime)
• Video for Windows (AVI, WAV; requires QuickTime on Mac OS)
You can import 10-bpc uncompressed YUV AVI files created in Adobe Premiere Pro into 16-bpc RGB After Effects
projects. You can also render with 10-bpc YUV compression. (See “Specify Video for Windows compression options”
on page 620.)
• Windows Media File (WMV, WMA, ASF; Windows only)
Project formats
• Advanced Authoring Format (AAF; Windows only)
• Adobe Premiere 6.0 and 6.5 (PPJ)
• Adobe Premiere Pro 1.0, 1.5, 2.0, CS3 (PRPROJ; 1.0, 1.5, and 2.0 Windows only)
• Adobe After Effects 4.0 and later (AEP, AET)
• XML Forms Data Format (XFDF; for importing of Clip Notes comments)
Page 55

AFTER EFFECTS CS3
User Guide
For information on importing Apple Motion projects into After Effects, see the Apple website:
www.adobe.com/go/learn_ae_importmotionprojects.
See also
“Supported output formats” on page 588
“Import assets in Panasonic P2 format” on page 73
Import footage items
You can import media files into your project either by using the Import dialog box or by dragging. If the Interpret
Footage dialog box appears after you import a footage item, it contains an unlabeled alpha channel, and you must
select an alpha channel interpretation method or click Guess to let After Effects determine howto interpret the alpha
channel.
Imported footage items appear in the Project panel.
See also
“Specify alpha channel interpretation” on page 52
50
“Import a single still image or a still-image sequence” on page 81
“Shortcuts for working with footage” on page 644
Import footage items using the Import dialog box
1
Choose File > Import > File or File > Import > Multiple Files, or double-click an empty area of the Project panel.
IfyouchooseImportMultipleFiles,thenyoucanperformthenextstepmorethanoncewithoutneedingtochoose
an Import command multiple times.
To display only supported footage files (excluding project files), choose All Footage Files from the Files Of Type
(Windows) or Enable (Mac OS) menu.
2 Do one of the following:
• Select a file, and then click Open.
• Ctrl-click (Windows) or Command-click (Mac OS) multiple files to select them, and then click Open.
• Click a file and then Shift-click another file to select a range of files, and then click Open.
• Select an entire folder, and then click Import Folder.
Note: If the Sequence option is selected, multiple files from the folder will be imported as a sequence of still images.
Import footage items by dragging
If you always want the layered footage that you drag into After Effects to be imported as a composition, choose Edit
> Preferences > Import (Windows) or After Effects > Preferences > Import (Mac OS), and choose Comp from the
Default Drag Import As menu.
• To import the contents of a folder as a sequence of still images that appear in the Project panel as a single footage
item, drag a file or a folder from Windows Explorer (Windows) or the Finder (Mac OS) into the Project panel.
• To import the contents of the folder as individual footage items that appear in the Project panel in a folder, Alt-
drag a folder from Windows Explorer (Windows) or Option-drag a folder from the Finder (Mac OS) into the
Project panel.
Page 56

AFTER EFFECTS CS3
User Guide
Interpret footage items
After Effects uses a set of internal rules to interpret each footage item that you import according to its best guess for
thesourcefile’spixelaspectratio,framerate,colorprofile,andalphachanneltype.IfAfterEffectsguesseswrong,or
if you want to use the footage differently, you can modify these rules for all footage items of a particular kind by
editing the interpretation rules file (interpretation rules.txt), or you can modify the interpretation of a specific
footage item using the Interpret Footage dialog box.
The interpretation settings tell After Effects the following about each footage item:
• How to interpret the alpha channel’s interaction with other channels. (See “Specify alpha channel interpretation”
on page 52.)
• What frame rate to assume for the footage item. (See “Change frame rate” on page 53.)
• Whether to separate fields and, if so, what field order to assume. (See “Separate video fields” on page 71 and
“Determine the original field order” on page 72.)
• Whether to remove 3:2 or 24Pa pulldown. (See “Remove 3:2 or 24Pa pulldown from video” on page 72.)
• The pixel aspect ratio of the footage item. (See “Change pixel aspect ratio” on page 55.)
• The color profile of the footage item. (See “Interpret a footage item by assigning an input color profile” on
page 245.)
51
Important: In all of these cases, the information is used to make decisions about how to interpret data in the imported
footageitem.TheinterpretationsettingsintheInterpretFootagedialogboxshouldmatchthesettingsusedtocreatethe
source footage file. These settings are not to be used to specify settings for your final rendered output.
Generally, you don’t need to change interpretation settings. However, if a footage item isn’t of a common kind, After
Effects may need additional information from you to interpret it correctly.
You can use the controls in the Color Management section of the Interpret Footage dialog box to tell After Effects
how to interpret the color information in a footage item. This is usually only necessary when the footage item does
not contain an embedded color profile.
See also
“Shortcuts for working with footage” on page 644
Interpret a single footage item using the Interpret Footage dialog box
❖ Select a footage item in the Project panel and choose File > Interpret Footage > Main.
Apply Interpret Footage settings to multiple footage items
You can ensure that different footage items use the same settings by copying interpretation settings from one item
and applying them to others.
1 In the Project panel, select the item with the interpretation settings that you want to apply.
2 Choose File > Interpret Footage > Remember Interpretation.
3 Select one or more footage items in the Project panel.
4 Choose File > Interpret Footage > Apply Interpretation.
Page 57

AFTER EFFECTS CS3
User Guide
Edit interpretation rules for all items of a specific kind
The interpretation rules file contains the rules that specify how After Effects interprets footage items. In most cases,
you won’t need to customize the interpretation rules file. When you import a footage item, After Effects looks for a
match in the interpretation rules file, and then determines interpretation settings for the footage item. You can
override these settings after importing, using the Interpret Footage dialog box.
In most cases, the name of the interpretation rules file is interpretation rules.txt; however, some updates to After
Effects install a new interpretation rules file with a name that indicates the updated version number, and the updated
application uses this new file. If you have made changes to the old interpretation rules file, you may need to apply
those changes to the new file, too.
1 Quit After Effects.
2 As a precaution, make a backup copy of the interpretation rules file. By default, this file is in the same location as
the After Effects application.
3 Open the interpretation rules file in a text editor.
4 Modify the settings according to the instructions in the file.
Note: Youmustsupplyafour-characterfile-typecodeforeachfootagetypeorcodec.Ifyoudon’tknowthecodeforafile
or codec in a project, press Alt (Windows) or Option (Mac OS) as you select the file in the Project panel. The file-type
code and codec code (if the file is compressed) appear in the lastlineofthefiledescriptionatthetopoftheProjectpanel.
52
5 Save interpretation rules.txt in the same folder as the After Effects application.
Specify alpha channel interpretation
Alpha channels store transparency information in one of two ways: straight or premultiplied. Although the alpha
channels are the same, the color channels differ. Straight (unmatted) channels store transparency information only
in the alpha channel, not in any of the visible color channels. Premultiplied (matted) channels store transparency
information in the alpha channel and also in the visible RGB channels, which are multiplied with a background color.
The colors of semitransparent areas, such as feathered mask edges, are shifted toward the background color in
proportion to their degree of transparency.
Setting the alpha channel interpretation correctly can prevent problems when you import a file, such as undesirable
colors at the edge of an image or a loss of image quality at the edges of the alpha channel. For example, if channels
are interpreted as straight when they are actually premultiplied, semitransparent areas will retain some of the
background color. If a color inaccuracy, such as a halo, appears along the semitransparent edges in a composition,
try changing the interpretation method.
Page 58

AFTER EFFECTS CS3
User Guide
A footage item with premultiplied channels (top) appears with a black halo when interpreted as Straight-Unmatted (bottom left). When the
footageitem isinterpreted as Premultiplied-Matted WithColor and thebackgroundcolor isspecified asblack, the halodoes notappear (bottom
right).
See also
“About straight and premultiplied channels” on page 253
Set the alpha channel interpretation for a footage item
1
In the Project panel, select a footage item.
2 Choose File > Interpret Footage > Main.
3 If you want to switch the opaque and transparent areas of the image, select Invert Alpha.
4 In the Alpha section, select an interpretation method:
Guess Attempts to determine the type of channels used in the image. If After Effects cannot guess confidently, it
beeps.
53
Ignore Disregards transparency information contained in alpha channel.
Straight - Unmatted Interprets the channels as straight.
Premultiplied - Matted With Color Interprets channels as premultiplied. Use the eyedropper or color picker to
specify the color of the background with which the channels were premultiplied.
Set the default alpha channel preferences
1
Choose Edit > Preferences > Import (Windows) or After Effects > Preferences > Import (Mac OS).
2 Choose optionsfrom theInterpret Unlabeled Alpha As menu.The options in this menu are similar tothe options
in the Interpret Footage dialog box. Ask User specifies that the Interpret Footage dialog box opens each time a
footage item with an unlabeled alpha channel is imported.
Change frame rate
The composition frame rate determines the number of frames displayed per second, and how time is divided into
frames in the time ruler and time display. Composition frame rate is usually determined by the type of output that
you are targeting. NTSC video has a frame rate of 29.97 frames per second (fps), PAL video has a frame rate of 25
fps, and motion picture film typically has a frame rate of 24 fps. Depending on the broadcast system, DVD video can
have the same frame rate as NTSC video or PAL video, or a frame rate of 23.976. Cartoons and video intended for
CD-ROM or the web are often 10 to 15 fps.
Page 59

AFTER EFFECTS CS3
User Guide
Setting the composition frame rate to twice the rate of the output format causes After Effects to display each field of
interlaced source footage as its own, separate frame in the Composition panel. This process lets you set keyframes on
individual fields and gain precision when animating masks.
When you render a movie for final output, you can choose to use the composition frame rate or another frame rate.
This is useful when you are using the same composition to create output for multiple media.
Each motion-footage item in a composition can also have its own frame rate. The relationship between the footageitem frame rate and the composition frame rate determines how smoothly the layer plays. For example, if the
footage-item frame rate is 30 fps and the composition frame rate is 30 fps, then whenever the composition advances
one frame, the next frame from the footage item is displayed. If the footage-item frame rate is 15 fps and the compositionframerateis30fps,theneachframeofthefootageitemappearsintwosuccessiveframesofthecomposition.
(This assumes, of course, the simple case in which no time stretching or frame blending has been applied to the
layer.)
Ideally, use source footage that matches the final output frame rate. This way, After Effects renders each frame, and
thefinaloutputdoesnotomitorduplicateframes.If,however,thesourcefootagehasaframerateslightlydifferent
from what you want to output to (for example, 30-fps footage and 29.97-fps final output), you can make the footage
frame rate match the composition frame rate by conforming it.
Conforming the frame rate of a footageitem doesnot alter the original file, only the reference that After Effects uses.
When conforming, After Effects changes the internal duration of frames but not the frame content. Afterward, the
footage plays back at a different speed. For example, if you conform the frame rate from 15 fps to 30 fps, the footage
plays back twice as fast. In most cases, conform the frame rate only when the difference between the footage frame
rate and the output frame rate is small.
54
Note: Conforming can change the synchronization of visual footage that has an audio track, because changing the frame
rate changes the duration of the video but leaves the audio unchanged. If you want to stretch both audio and video, use
the Time Stretch command. (See “Time-stretch a layer” on page 218.) Keyframes applied to the source footage remain at
their original locations (which retains their synchronization within the composition but not the visual content of the
layer). You may need to adjust keyframe locations after conforming a footage item.
You can change the frame rate for any movie or sequence of still images. For example, you can import a sequence of
ten still images and specify a frame rate for that footage item of 5 frames per second (fps); this sequence would then
have a duration of two seconds when used in a composition.
Note: If you remove 3:2 pulldown from interlaced video footage, After Effects automatically sets the frame rate of the
resulting footage item to four-fifths of the original frame rate. When removing 3:2 pulldown from NTSC video, the
resulting frame rate is 24 fps.
The composition’s frame rate should match that of the final output format. In most cases, you can simply choose a
composition settings preset. In contrast, set the frame rate for each footage itemto that of the original source footage.
See also
“Work with render settings” on page 597
“Converting movies” on page 630
Change frame rate for a footage item
1
Select the footage item in the Project panel.
2 Choose File > Interpret Footage > Main.
3 Select Conform To Frame Rate, enter a new frame rate for Frames Per Second, and then click OK.
Page 60

AFTER EFFECTS CS3
User Guide
Change frame rate for a composition
1
Choose Composition > Composition Settings.
2 Do one of the following:
• Choose a composition settings preset from the Preset menu.
• Set the Frame Rate value.
Note: Jeff Almasol provides a script to set the frame rate and duration of the current composition and all compositions
nested within it: www.adobe.com/go/learn_ae_jeffcompsetter.
Change pixel aspect ratio
Pixel aspect ratio is the ratio of width to height of one pixel in an image. Frame aspect ratio is the ratio of width to
height of the frame dimensions of an image.
416
55
3
A 4:3 frame aspect ratio (left), and a wider 16:9 frame aspect ratio (right)
9
Most computer monitors use square pixels, but many video formats—including ITU-R 601 (D1) and DV—use nonsquare rectangular pixels.
Some video formats output the same frame aspect ratio but use a different pixel aspect ratio. For example, some
NTSC digitizers produce a 4:3 frame aspect ratio, with square pixels (1.0 pixel aspect ratio), and a resolution of 640
x 480. D1 NTSC produces the same 4:3 frame aspect ratio but uses nonsquare pixels (0.9 pixel aspect ratio) and a
resolution of 720 x 486. D1 pixels, which are always nonsquare, are vertically oriented in systems producing NTSC
video and horizontally oriented in systems producing PAL video.
If you display nonsquare pixels on a square-pixel monitor without alteration, images and motion appear distorted;
for example, circles distort into ellipses. However, when displayed on a broadcast monitor, the images are correct.
When you import D1 NTSC or DV source footage into After Effects, the image looks slightly wider than it does on
a D1 or DV system. (D1 PAL footage looks slightly narrower.) The opposite occurs when you import anamorphic
footage usingD1/DV NTSC Widescreen or D1/DV PALWidescreen. Widescreen video formats have a frame aspect
ratio of 16:9.
Note: To preview non-square pixels on a computer monitor, click the Toggle Pixel Aspect Ratio Correction button at
the bottom of the Composition panel.
Page 61

AFTER EFFECTS CS3
User Guide
A
BC
Square and nonsquare pixels
A. Square pixels and 4:3 frame aspect ratio B. Nonsquare pixels and 4:3 frame aspect ratio C. Nonsquare pixels displayed on a square-pixel
monitor
If a footage item uses nonsquare pixels, After Effects displays the pixel aspect ratio next to the footage item’s
thumbnail image in the Project panel. You can change the pixel aspect ratio interpretation for individual footage
items in the Interpret Footage dialog box. By ensuring that all footage items are interpreted correctly, you can
combine footage items with different pixel aspect ratios in the same composition.
56
After Effects reads and writes pixel aspect ratios directly from QuickTime movies. For example, if you import a
movie captured as widescreen (16:9 DV), After Effects automatically tags it correctly. Similarly, AVI and PSD files
contain information that explicitly indicates the pixel aspect ratio of the images.
If a footage item does not contain information that explicitly indicates the image’s pixel aspect ratio, After Effects
uses the dimensions ofthe footage item’s frame to make a guess. When you import a footage item with either the D1
resolution of 720 x 486 or the DV resolution of 720 x 480, After Effects automatically interprets that footage item as
D1/DV NTSC. When you import a footage item with the D1 or DV resolution of 720 x 576, After Effects automatically interprets that footage item as D1/DV PAL. However, you can make sure that all files are interpreted correctly
by looking in the Project panel or the Interpret Footage dialog box.
Note: Make sure to reset the pixel aspect ratio to Square Pixels when you import a square-pixel file that happens to have
a D1 or DV resolution—for example, a non-DV image that happens to have a resolution of 720 x 480.
The composition’s pixels aspect ratio setting should match that of the final output format. In most cases, you can
simply choose a composition settings preset. In contrast, set the pixel aspect ratio for each footage item to that of the
original source footage.
See also
“Common pixel aspect ratios” on page 57
Change pixel aspect ratio for a footage item
1
Select a footage item in the Project panel.
2 Choose File > Interpret Footage > Main.
3 Choose a ratio from the Pixel Aspect Ratio menu and click OK.
Page 62

Change pixel aspect ratio for a composition
1
Choose Composition > Composition Settings.
2 Do one of the following:
• Choose a composition settings preset from the Preset menu.
• Choose a value from the Pixel Aspect Ratio menu.
Common pixel aspect ratios
Asset Pixel aspect ratio When to use
AFTER EFFECTS CS3
User Guide
57
Square pixels 1.0 Footage has a640 x 480 or648 x 486 framesize, is 1920x 1080 HD (not
D1/DV NTSC 0.9 Footage has a 720 x 486 or 720 x 480 frame size,and the desired result
D1/DV NTSC Widescreen 1.2 Footage has a 720 x 486 or 720 x 480 frame size,and the desired result
D1/DV PAL 1.0666 Footage hasa 720 x576 frame size,and the desired result isa 4:3 frame
D1/DV PAL Widescreen 1.422 Footage has a 720 x 576 frame size, and the desired result is a 16:9
Anamorphic 2:1 2.0 Footage was shot using an anamorphic film lens, or it was anamorphi-
HDV 1080/DVCPRO HD 720
(AfterEffects),HD Anamorphic
1080 (Adobe Premiere Pro)
DVCPRO HD 1080 (After
Effects only)
1.33 Footage has a 1440 x 1080 or 960 x 720 frame size, and the desired
1.5 Footage has a 1280 x 1080 frame size, and the desired result is a 16:9
HDV or DVCPROHD), is 1280 x 720 HD orHDV,or was exportedfrom an
application thatdoesn’t support nonsquarepixels.This settingcan also
be appropriatefor footage thatwas transferredfrom film or for customized projects.
is a 4:3 frame aspect ratio. This setting can also be appropriate for
footage that was exported from an application that works with
nonsquare pixels, such as a 3D animation application.
is a 16:9 frame aspect ratio.
aspect ratio.
frame aspect ratio.
cally transferred from a film frame with a 2:1 aspect ratio.
result is a 16:9 frame aspect ratio.
frame aspect ratio.
Use square-pixel footage for output to D1/DV NTSC
If you intend to create a movie for the D1 output format, use the D1 NTSC or D1 PAL composition settings preset.
The correct pixel aspect ratio for D1 NTSC or D1 PAL is chosen automatically when you choose the corresponding
composition settings preset.
1 Prepare square-pixel footage that fills the entire frame for any of the following final output formats:
DV NTSC Create and save it at a 720 x 534 frame size.
D1 NTSC Create and save it at a 720 x 540 frame size.
D1/DV PAL Create and save it at a 768 x 576 frame size.
2 Import the file into After Effects.
3 (Optional) If your square-pixel footage was created and saved at 720 x 486 or 720x 480, select it and choose File >
Interpret Footage > Main. Then choose Square Pixels from the Pixel Aspect Ratio menu and click OK.
Page 63

AFTER EFFECTS CS3
User Guide
4 Choose Composition > New Composition, and then do one of the following:
• If your final output is DV, choose NTSC DV, 720 x 480 for Preset, and D1/DV NTSC (0.9) for Pixel Aspect Ratio.
• If your final output is D1, choose NTSC D1, 720 x 486 for Preset, and D1/DV NTSC (0.9) for Pixel Aspect Ratio.
5 Select your other composition settings as desired, and then click OK.
6 Add your footage to the new composition.
7 Select the layer containing the square-pixel footage and apply the Fit To Comp command: press Ctrl+Alt+F
(Windows) or Command+Option+F (Mac OS).
Note: If your footage was created and saved at a frame size other than those noted in step 1, skip step 7.
See also
“Change pixel aspect ratio” on page 55
Working with footage items
Organize and view items in the Project panel
Compositions and footage items are listed in the Project panel. Unlike items in the Timeline panel and Effect
Controls panel, the order of items in the Project panel has no influence on the appearance of the movies that you
create. This means that you can organize footage items and compositions however you like, including organizing
them using folders. Solids are automatically placed in the Solids folder.
58
Folders that you create in the Project panel exist only in the Project panel. You can expand a folder to reveal its
contents, and put folders inside other folders. To move a file or folder to the top level of the Project panel, drag it to
the gray information area at the top of the panel.
You can use the File > Collect Files command to gather copies of all files in a project into a single folder.
See also
“Collect files in one location” on page 594
“Work with color labels” on page 149
“Shortcuts for working with projects” on page 639
Show information for items
• To show information about a footage item or composition, select it in the Project panel. Information is displayed
at the top of the Project panel next to the thumbnail image.
• To show the file creator ID for a footage item, Alt-click (Windows) or Option-click (Mac OS) it in the Project
panel.
Create a folder
❖ Choose File > New > New Folder, or click the Create Folder icon at the bottom of the Project panel.
Page 64

AFTER EFFECTS CS3
User Guide
Rename and sort items
• To rename a composition, footage item, or folder, select it in the Project panel, press Enter (Windows) or Return
(Mac OS), type the new name, and then press Enter or Return again.
Note: The names of items in the Project panel can be no more than 31 characters long. The same is true for names of
layers, effects, and property groups in the Timeline panel and Effect Controls panel.
• To rename the Comments column, right-click (Windows) or Control-click (Mac OS) the column heading and
choose Rename This.
You can use the Comments column to create a custom sorting option. Rename the column, enter corresponding information for each item (for example, camera number), and then sort by that column.
• To sort items by entries in any column, click the column name in the Project panel.
Copy items
• To duplicate or copy an item in the Project panel, select it and choose Edit > Duplicate or Edit > Copy.
• To copy a footage item to Windows Explorer (Windows) or the Finder (Mac OS), drag the footage item from the
Project panel to the desktop.
Find and view items in the Project panel
• To find items in the Project panel, choose File > Find, or click the Find button at the bottom left of the panel.
Select Find MissingFootage to locateall footage items that refer to a filethat has been moved, deleted, or renamed.
• To find the next item that matches the most recently used search criteria, Alt-click (Windows) or Option-click
(Mac OS) the Find button.
59
Working with footage items in the Footage panel
When you double-click a movie in the Project panel, it opens by default in the Footage panel or in a player window:
QuickTime (.mov) files open in a QuickTime Player window; Video for Windows (.avi) files open in a Video for
Windowsplayerwindow.StillimagesalwaysappearintheFootagepanel.CertainAVIfilesarenotsupportedbythe
AVI player window, and will open in the After Effects Footage panel. These include files created with Microsoft’s
DirectX DV codec and all files over 2 GB.
ToopenaQuickTimeorVideoforWindowsmovieintheFootagepanelinsteadofaplayerwindow,Alt-double-click
(Windows) or Option-double-click (Mac OS) the footage item in the Project panel.
The QuickTime and Video for Windows player windows play the source file, not the edited and interpreted footage
item based on the source file.
YoucanusetheSetInPoint ,SetOutPoint ,RippleInsertEdit ,andOverlayEdit controlsintheFootage
panel to trim a footage item and insert it into a composition. This can be more convenient than adding the footage
item to a composition and then trimming in the Timeline panel.
See also
“Trim, extend, or slip-edit a layer” on page 141
“Shortcuts for working with footage” on page 644
Page 65

AFTER EFFECTS CS3
User Guide
Reveal footage items
• To reveal where a footage item is used in a composition, right-click (Windows) or Control-click (Mac OS) the
footage item in the Project panel and choose Reveal In Composition; then select the specific instance you want to
reveal (composition name, layer name).
• To reveal a layer’s source footage item in the Project panel, right-click (Windows) or Control-click (Mac OS) the
layer in the Timeline panel, and then choose Reveal Layer Source In Project.
• To reveal a footage item’s location in Adobe Bridge, Windows Explorer, or the Finder, right-click (Windows) or
Control-click (Mac OS) the footage item in the Project panel and choose Reveal In Bridge, Reveal In Windows
Explorer, or Reveal In Finder.
Refresh footage items
❖ To refresh footageitems selected in theProject panel to use the current versions of the source footage files, choose
File > Reload Footage.
Edit footage in its original application
Youcan open and edita footage item in the application inwhich it was created, directly from an After Effects project.
The original application must be installed on the computer that you are using, which must have enough available
RAM for it to run. When you edit and save changes to the footage in the original application, the changes are applied
to all instances of the footage when After Effects becomes the active application.
60
Note: If you’re editing footage that has an alpha channel, make sure that you’re viewing and editing all of the channels,
including the alpha channel, in the other application. Otherwise, changes you make might not be applied to the alpha
channel, and it may become misaligned with the color channels.
When you edit a still-image sequence selected in the Timeline or Composition panel, the individual image that is
currently displayed opens. When you edit a still-image sequence selected in the Project panel, the first image in the
sequence opens.
1 IntheProjectpanel,Compositionpanel,orTimelinepanel,selectthefootageitemoralayerthatusesthefootage
item as its source. If you selected a still-image sequence from the Composition or Timeline panel, move the currenttime indicator to the frame displaying the still image you want to edit.
2 Choose Edit > Edit Original.
3 Edit the footage in its original application, and save the changes.
Remove items from a project
• To remove an item from a project, select the item in the Project panel and press Delete.
• To remove all unused footage items from a project, choose File > Remove Unused Footage.
• To remove all duplicate footage items from a project, Choose File > Consolidate All Footage. Note that After
Effects considers footage items to be duplicates only if they use the same Interpret Footage settings.
When a duplicate item is removed, layers that refer to the duplicate item are updated to refer to the remaining copy.
• To remove unselected compositions and unused footage items from selected compositions in the Project panel,
chooseFile>ReduceProject.ThiscommandisavailableonlywhentheProjectpanelisactive,andremovesboth
unused footage items and all other compositions that are not included within a selected composition as nested
(subordinate) compositions.
Page 66

AFTER EFFECTS CS3
D
User Guide
If the selected composition includes items that are turned off (that is, the Video or Audio switch is deselected in the
Timeline panel), the Reduce Project command does not remove those items.
If an expression in a selected composition refers to an element in a nonsubordinate composition, Reduce Project
removes the nonsubordinate composition and the applied expression. A message appears after you choose Reduce
Projectto remind you of this possibility, so youcan undo the commandif needed. To avoid removing the expressions
from a nonsubordinate composition, drag the nonsubordinate composition into the composition that refers to it.
Then deselect the Audio and Video switches for the composition that you added.
Work with placeholders and proxies
When you want to temporarily use a substitute for a footage item, use either a placeholder or a proxy.
Placeholder Astillimageofcolorbarsusedtotemporarilytaketheplaceofamissingfootageitem.Useaplaceholder
when you are building a composition andwant totry out ideas for a footage item that is not yet available.After Effects
generates placeholders automatically, so you do not have to provide a placeholder footage item.
Proxy Any file used to temporarily replace a footage item, but most often a lower-resolution or still version of an
existing footage item used to replace the original. Often, storyboard images are used as proxies. You can use a proxy
either before you have the final footage or when you have the actual footage item but you want to speed up
previewing or rendering of test movies. You must have a file available to use as a proxy.
61
Any masks, attributes, expressions, effects, and keyframes that you apply to the layer are retained when you replace
its placeholder or proxy with the final footage item.
IntheProjectpanel,AfterEffectsmarksthefootagenametoindicatewhethertheactualfootageitemoritsproxyis
currently in use:
• A box containing a black square indicates that a proxy item is currently in use throughout the project; the name
of the proxy appears in boldface in the project list.
• An empty box indicates that the actual footage item is in use throughout the project.
• No box indicates that no proxy is assigned to the footage item.
A
B
C
Proxy items in Project panel
A. Proxy assigned and in use B. Proxy assigned, but original in use C. No proxy assigned D. Proxy name
See also
“Work with render settings” on page 597
“Use a post-render action” on page 602
Page 67

AFTER EFFECTS CS3
User Guide
Work with placeholders and missing footage items
For best results, set the placeholder to exactly the same size, duration, and frame rate as the actual footage.
If After Effects cannot find source footage when you open a project, the footage item appears in the Project panel
labeled Missing, and the name of the missing footage appears in italics. Any composition using that item replaces it
with aplaceholder. You can still work with the missing item in the project, and any effects youapplied to the original
footage remain intact. When you replace the placeholder with the source footage, After Effects places the footage in
its correct location in all the compositions that use it.
• To use a placeholder, choose File > Import > Placeholder.
• To replace the selected footage item with a placeholder, choose File > Replace Footage > Placeholder.
• To replace a placeholder with the actual footage item, select the placeholder you want to replace in the Project
panel, choose File > Replace Footage > File, and locate the actual footage.
Work with proxies for footage items
When you use a proxy, After Effects replaces the actual footage with the proxy in all compositions that use the actual
footage item. When youfinish working, you can switch back to the actual footage item in the project list. After Effects
then replaces the proxy with the actual footage item in any composition.
When you render your composition as a movie, you may choose to use either all the actual high-resolution footage
items or their proxies. You might want to use the proxies for a rendered movie if, for example, you simply want to
test motion using a rough movie that renders quickly.
62
For best results, set a proxy so that it has the same aspect ratio as the actual footage item. For example, if the actual
footage item isa 640 x 480-pixel movie, create and use a160 x 120-pixel proxy. When a proxy itemis imported, After
Effects scales the item to the same size and duration as the actual footage. If you create a proxy with an aspect ratio
that is different from that of the actual footage item, scaling will take longer.
❖ In the Project panel, do any of the following:
• To locate and use a proxy, select a footage item, choose File > Set Proxy > File, locate and select the file you want
to use as a proxy, and click Open.
• To toggle between using the original footage and its proxy, click the proxy indicator to the left of the footage name.
• To stop using a proxy, select the original footage item, and choose File > Set Proxy > None.
Create a proxy
Use the Create Proxy command to create a proxy from footage or compositions selected in the Project panel or the
Timeline panel. This command adds the selected footage to the RenderQueue panel and sets thePost-Render Action
option to Set Proxy.
1 Select a footage item or composition in the Project or Timeline panel.
2 Choose one of the following commands:
• File > Create Proxy > Still to create a still image proxy.
• File > Create Proxy > Movie to create a moving image proxy.
3 Specify a name and output destination for the proxy.
4 In the Render Queue panel, specify render settings, and click Render.
Note: To create a still image proxy from a movie or sequence footage item, open the footage item in the Footage panel
and set as the poster frame the frame that you want to use as the proxy.
Page 68

AFTER EFFECTS CS3
User Guide
Create placeholders for output
Youcan createplaceholder files that can be used in different compositions. Forexample, you can create aplaceholder
for an item in the render queue that will create a 24-fps movie and then drag that placeholder into a 30-fps composition. Then, when you render the 30-fps composition, After Effects first renders the placeholder at 24 fps and uses
this rendered version as it renders the 30-fps composition.
❖ Drag the Output Module heading for a queued item from the Render Queue panel to the Project panel. After
Effects creates a placeholder for output in the Project panel and sets the Post-Render Action option for the item to
Import & Replace Usage.
Loop a footage item
If you intend to loop a visual footage item continuously in your project, you only need to create one cycle of the
footage item in After Effects.
1 In the Project panel, select the footage item to loop.
2 Choose File > Interpret Footage > Main.
3 Type an integer value for Loop and click OK.
63
Importing from After Effects and Adobe Premiere Pro
Import an After Effects project
You can import one After Effects project into another. Everything from the imported project, including footage
items, compositions, and folders, appears inside a new folder in the current Project panel.
You can import an After Effects project from a different operating system, as long as you maintain the file names,
folder names, and either full or relative paths (folder locations) for all files in the project. To maintain relative paths,
thesourcefootagefilesmustresideonthesamevolumeastheprojectfile.UsetheFile>CollectFilescommandto
gather copies of all files in a project or composition into a single location.
Note: When you render a movie and export it to the QuickTime (MOV) or Video for Windows (AVI) container format,
you can embed the After Effects project or a link to the project in the container file. To import the project, import the
MOV or AVI file, and choose Project from the Import As menu in the Import File dialog box. If the file contains a link
to a project that has been moved, you can browse to locate the project.
1 Choose File > Import > File.
2 Select the After Effects project to import, and click Open.
If a file format is not supported by the operating system that you are using, if the file is missing, or if the reference
link is broken, After Effects substitutes a placeholder item containing color bars. You can reconnect the placeholder
to the appropriate file by double-clicking the entry in the Project panel and navigating to the source file. In most
cases, youneed to relink only onefootage file. After Effects locates other missing items if they’re in the same location.
See also
“Collect files in one location” on page 594
“Work with placeholders and proxies” on page 61
Page 69

AFTER EFFECTS CS3
User Guide
Import an Adobe Premiere Pro project
The ability to import Adobe Premiere Pro projects into After Effects eliminates the need to render the project in
Premiere Pro before applying visual effects and animations in After Effects. When you import an Adobe Premiere
Pro project, After Effects imports it into the Project panel as both a new composition containing each Adobe
Premiere Pro clipas a layer, and as a folder containing each clip as an individual footage item. If your AdobePremiere
Pro project contains bins, After Effects converts them to folders within the Adobe Premiere Pro project folder. After
Effects converts nested sequences to nested compositions. You can also import Adobe Premiere 6.0 and 6.5 projects
into After Effects.
Note: After Effects on Mac OS can’t import Adobe Premiere Pro 1.0, 1.5, or 2.0 projects. After Effects on Mac OS can
import Adobe Premiere Pro CS3 and Adobe Premiere 6.0 and 6.5 projects.
After Effects preserves the order of clips in the timeline, the footage duration (including all trimmed In and Out
points), and marker and transition locations. After Effects bases the arrangement of layers in the Timeline panel on
the arrangement of clips in the Adobe Premiere Pro Timeline panel. After Effects adds Adobe Premiere Pro clips to
the Timeline panel as layers in the order they appeared—from the bottom up and from left to right—in the Adobe
PremiereProTimelinepanel.AfterEffectspreserveschangesmadetothespeedofaclip,forexample,withtheClip >
Speed command, and these changes appear as a value in the Stretch column in the After Effects Timeline panel.
After Effects imports effects common to Adobe Premiere Pro and After Effects, and preserves keyframes for these
effects. If you’re working in Adobe Premiere Pro, an After Effects icon in the Effects panel denotes common effects
used by both applications.
64
Transitions and titles (except for dissolves) included in your Adobe Premiere Pro project appear in the After Effects
composition as solid layers with their original location and duration.
Audio Level keyframes are preserved.
1 Choose File > Import > File.
2 Select an Adobe Premiere Pro or Adobe Premiere project, and click OK.
3 Do any of the following:
• To import only one sequence, choose a sequence from the menu.
• To import audio, select Import Audio.
ToaddasingleitemfromatrackinanAdobePremiereProproject,copytheiteminAdobePremierePro,andchoose
Edit > Paste in After Effects.
See also
“Copy between After Effects and Adobe Premiere Pro” on page 65
“About nesting and precomposing” on page 113
Use Adobe Premiere Pro for capture (Production Premium only)
If you have Adobe Creative Suite 3 Production Premium, you can start Adobe Premiere Pro from inside After Effects
and use it to capture footage for use in your After Effects project.
❖ Choose File > Import > Capture In Adobe Premiere Pro.
Page 70

AFTER EFFECTS CS3
User Guide
Copy between After Effects and Adobe Premiere Pro
You can copy and paste layers and assets between Adobe After Effects and Adobe Premiere Pro. For a video on the
workflow between After Effects and Adobe Premiere Pro, see www.adobe.com/go/vid0256.
• From the After Effects Timeline panel, you can copy footage layers or solid layers and paste them into the Adobe
Premiere Pro Timeline panel.
• From the Adobe Premiere Pro Timeline panel, you can copy assets (any items in a track) and paste them into the
After Effects Timeline panel.
• From either After Effects or Adobe Premiere Pro, you can copy and paste footage to the other’s Project panel.
Note: You can’t, however, paste footage from the After Effects Project panel into the Adobe Premiere Timeline panel.
If you want towork with all clipsor a single sequence from an Adobe Premiere Pro project, use the Import command
instead to import the project into After Effects.
Use Adobe Dynamic Link to create dynamic links, without rendering, between new or existing compositions in
After Effects and Adobe Premiere Pro.
See also
“About Dynamic Link (Production Premium only)” on page 609
65
Copy from After Effects to Adobe Premiere Pro
You can copy a footage layer from an After Effects composition and paste it into an Adobe Premiere Pro sequence.
AdobePremiereProconvertsfootagelayerstoclipsinthesequenceandcopiesthesourcefootagetoitsProjectpanel.
If the layer contains an effect that is also used by Adobe Premiere Pro, Adobe Premiere Pro converts the effect and
all of its settings and keyframes.
You can also copy nested compositions, Photoshop layers, solid layers, and audio layers. Adobe Premiere Pro
converts nested compositions to nested sequences, and solid layers to color mattes. You cannot copy text, shape,
camera, light, or adjustment layers to Adobe Premiere Pro.
1 Start Adobe Premiere Pro (you must start Adobe Premiere Pro before you copy the layer in After Effects).
2 Select a layer (or layers) from the After Effects Timeline panel.
Note: If you select multiple layers and the layers don’t overlap in After Effects, they’re placed on the same track in Adobe
Premiere Pro. On the other hand, if the layers overlap in After Effects, the order in which you select them determines the
order of their track placement in Adobe Premiere Pro. Each layer is placed on a separate track, and the last selected layer
appears on Track 1. For example, if you select layers from top to bottom, the layers appear in the reverse order in Adobe
Premiere Pro, with the bottommost layer on Track 1.
3 Choose Edit > Copy.
4 In Adobe Premiere Pro, open a sequence in the Timeline panel.
5 Move the current-time indicator to the desired location, and choose either Edit > Paste or Edit > Paste Insert.
Results of pasting into Adobe Premiere Pro
When you paste a layer into an Adobe Premiere Pro sequence, keyframes, effects, and other properties in the copied
layer are converted as follows:
Page 71

After Effects item Converted to in Adobe Premiere Pro Notes
AFTER EFFECTS CS3
User Guide
66
Transform property values and keyframes Motion or Opacity values and keyframes The keyframe type—Bezier, Auto Bezier,
Effect properties and keyframes Effectproperties andkeyframes,if theeffect
also exists in Adobe Premiere Pro
Audio volume property Channel Volume filter
Stereo Mixer effect Channel Volume filter
Masks and mattes Not converted
Time Stretch property Speed property Speed and timestretch have an inverse rela-
Layer-time markers Clip markers
Time Remapping properties Not converted
Blending modes Not converted
Expressions Not converted
Continuous Bezier, or Hold—is retained.
Adobe Premiere Pro lists unsupported
effects asoffline in theEffect Controls panel.
Some After Effects effects have the same
names as those in Adobe Premiere Pro, but
since they’re actually different effects, they
aren’t converted.
tionship. For example, 200% stretch in
After Effects converts to 50% speed in
Adobe Premiere Pro.
Copy from Adobe Premiere Pro to After Effects
YoucancopyavideooraudioassetfromanAdobePremiereProsequenceandpasteitintoanAfterEffectscomposition. After Effects converts assets to footage layers and copies the source footage into its Project panel. If the asset
contains an effect that is also used by After Effects, After Effects converts the effect and all of its settings and
keyframes.
You can copy color mattes, stills, nested sequences, and offline files as well. After Effects converts color mattes into
solid layers and converts nested sequences into nested compositions. When you copy a Photoshop still image into
After Effects, After Effects retains the Photoshop layer information. You cannot paste Adobe Premiere Pro titles or
effects into After Effects.
1 Select an asset from the Adobe Premiere Pro Timeline panel.
2 Choose Edit > Copy.
3 In After Effects, open a composition in the Timeline panel.
4 With the Timeline panel active, choose Edit > Paste. The asset appears as the topmost layer in the Timeline panel.
Note: To paste the asset at the current-time indicator, position the current-time indicator and press Ctrl+Alt+V
(Windows) or Command+Option+V (Mac OS).
Results of pasting into After Effects
When you paste an asset into an After Effects composition, keyframes, effects, and other properties in a copied asset
are converted as follows:
Page 72

Adobe Premiere Pro asset Converted to in After Effects Notes
AFTER EFFECTS CS3
User Guide
67
Motion or Opacity values and keyframes Transform property values and keyframes Keyframe type—Bezier, AutoBezier,Contin-
Video effect properties and keyframes Effect properties and keyframes, as long as
the effect also exists in After Effects
Crop filter Mask layer
Video and audio transitions Opacity keyframes (Cross dissolve only) or
solids
Volume and Channel Volume audio filters Stereo mixer effect Other audio filters are not converted.
Speed property Time Stretch property Speed and timestretch have an inverse rela-
Frame Hold Time Remap
Clip marker Layer-time marker
Sequence marker Markers on a new solid layer To copy sequence markers, youmust either
Audio track Audio layers Audio tracks that are either 5.1 surround or
Color mattes Solids
uous Bezier, or Hold—is retained.
After Effects doesn’t display unsupported
effects in the Effect Controls panel.
tionship. For example, 50% speed in Adobe
PremierePro isconverted to 200%stretch in
After Effects.
copy the sequence itself or import the
entire Adobe Premiere Pro project as a
composition.
greater than 16-bit aren’t supported. Mono
and stereoaudio tracksare imported asone
or two layers.
Time Remapping effect Not converted
Titles Not converted
Bars and tone Not converted
Universal counting leaders Not converted
Importing video and audio
Work with the media cache
When After Effects imports video and audio in some formats, it processes and caches versions of these items that it
can readily access when generating previews. Imported audio files are each conformed to a new .cfa file, and MPEG
files are indexed to a new .mpgindex file. This greatly improves performance for previews, because the video and
audio items do not need to be reprocessed for each preview.
Note: When you first import a file, you may experience a slight delay while the media is being processed and cached.
Page 73

AFTER EFFECTS CS3
User Guide
A database retains links to each of the cached media files. This media cache database is shared with Adobe Premiere
Pro, Adobe Encore, and Adobe Soundbooth, so each of these applications can each read from and write to the same
set of cachedmedia files. Ifyou change the location of thedatabasefrom within any of theseapplications, the location
is updated for the other applications, too. Each application can use its own cache folder, but the same database keeps
track of them all.
❖ Choose Edit > Preferences > Memory & Cache (Windows) or After Effects > Preferences > Memory & Cache (Mac
OS), and do one of the following:
• Click one of the Choose Folder buttons to change the location of the media cache database or the media cache
itself.
• ClickCleanDatabase&Cachetoremoveconformedandindexedfilesfromthecacheandtoremovetheirentries
from the database. This only affects footage items for which the source file is no longer available.
Note: Before clicking the Clean Database & Cache button, make sure that any drives that contain your currently used
source media are connected to your computer. If footage is determined to be missing because the drive on which it is
locatedisnotconnected,theassociatedfilesinthemediacachewillberemoved.Thiswillresultintheneedtoreconform
or reindex the footage when you attempt to use the footage later.
Types of video and film
Someofthesourcefootageyouusemayhavebeencreateddigitally(forexample,inPhotoshoporAdobePremiere
Pro), but other footage may need to be transferred to the computer from analog sources, such as film and videotape.
Understanding some of the media differences can help you decide how to handle footage as you transfer it between
digital and analog devices.
68
For introductions to digital video, digital audio,high-definition video,DVD, compression, andstreaming video, visit
the Adobe website at www.adobe.com/go/learn_dv_primers.
Analog video Comes from an analog camera and carries picture and sound information by creating continuous
variations in an electromagnetic signal. Before you can import analog video into After Effects, you need to capture
it. Capturing transfers video from tape to your hard disk, and involves the conversion of the analog signal to a digital
signal.
Digital video Comes from a digital video camera, and carries picture information by representing each pixel of a
video frame as discrete color and intensity values and transmitting and storing the pixel values in the binary data
format used by computers. Sound is also carried as binary data.
Digital video is not one format but a medium. There are many digital video file formats exist. Even if your source
footage was created digitally, you need to make sure that it is stored in a file format that After Effects can import.
If you plan to distribute the movie digitally, for example on DVD, you must render it in a file format appropriate for
your distribution method.
DV video format is a form of digital video that can be captured directly to your hard disk for editing in applications
such as After Effects and Adobe Premiere Pro. Most DVcameras and decks canconnect directly toa computerusing
an IEEE 1394 (FireWire/i.Link) interface.
Note: Some formats, such as Adobe Flash Video, have elements of conventional digital video, but represent an intermediate category between what has conventionally been thought of as a video format and what has conventionally been
thought of as computer animation format.
Analog film Carries pictureinformation by creating variations in colored pigmentson a strip of acetate (the long reel
run through the traditional film projector). Examples include still transparencies and common motion-picture film.
Page 74

AFTER EFFECTS CS3
User Guide
To apply digital effects to motion-picture film using After Effects, you must first transfer the film to a digital format.
You can transfer film in two ways:
• Use a film scanner to transfer each analogfilm frame directly to a digital movie frame. This method best preserves
the image quality. Using a film scanner is preferable, because you scan the footage directly to the computer as
noninterlaced, full-resolution, 24-fps footage; in other words, it is ready to use in After Effects.
• Transfer the analog film to analog videotape, and then digitize the videotape. This process is called telecine
transfer. It converts 24-fps film footage to 30-fps videotape using 3:2 pulldown. Transferring using the 3:2
pulldown method introduces two issues: You must resolve the different frame rates of videotape and motionpicture film, and you must separate the fields of the interlaced video. After Effects can automatically resolve both
of these issues while preserving image quality.
Note: To use an After Effects movie in an analog motion-picture film, you must transfer the movie back to the analog
film medium. This transfer process is generally done at a post-production facility.
See also
“Working with Cineon footage items” on page 251
About high-definition (HD) video
High-definition (HD) video refers to any video format with a resolution higher than standard-definition (SD) video
formats. Typically, standard-definition refers to digital formats with resolutions close to those of analog TV
standards, such as NTSC and PAL (around 480 or 576 vertical lines, respectively). The most common HD formats
have resolutions of 1280 x 720 or 1920 x 1080, with a widescreen aspect ratio of 16:9.
69
HD video formats include interlaced and noninterlaced varieties. Typically, the highest-resolution formats are interlaced at the higher frame rates, because noninterlaced video at this resolutionwould requirea prohibitivelyhigh data
rate.
HD video formats are designated by their vertical resolution, scan mode, and frame or field rate (depending on the
scan mode). For example, 1080i60 denotes interlaced scanning of 60 interlaced 1920 x 1080 fields per second,
whereas 720p30 denotes progressive scanning of 30 noninterlaced 1280 x 720 frames per second. In both cases, the
frame rate is approximately 30 frames per second. For more information on high-definition video, see
www.adobe.com/go/learn_dv_primer_highdef.
Programs in Adobe Creative Suite 3 Production Premium (Adobe Premiere Pro, Adobe After Effects, Adobe Soundbooth, andAdobe Encore) includes presets that are designed for workingwith various HD formats.Some of the most
common HD video formats you may encounter include the following:
DVCPRO HD Panasonic’s high-definition variant of its DVCPRO format, which also includes DVCPRO25 and
DVCPRO50. Whereas DVCPRO25 and DVCPRO50 support data rates of 25Mbits/s (megabits per second) and
50Mbit/s, respectively, DVCPRO HD supports a data rate of 100Mbit/s, from which it gets its other name,
DVCPRO100.
HDCAM Sony’s high-definition version of its Digital Betacam format. A variant called HDCAM SR uses a tape with
a higher particle density to record video with greater color sampling and at higher bit rates. However, HDCAM SR
is supported by decks only, and not camcorders.
HDV Developed jointly by several companies, HDV employs a form of MPEG-2 compression to enable high-
definition video to be encoded onto standard miniDV cassette media.
H.264 Also known as MPEG-4 part 10 and AVC (Advanced Video Coding), H.264 can deliver video over a range of
bitrates more efficiently than previous standards. For example,H.264 can deliver the same quality as MPEG-2 at half
Page 75

AFTER EFFECTS CS3
User Guide
the data rate. H.264 is built into the Apple QuickTime 7 multimedia architecture, and it’s supported by both
HD-DVD and Blu-ray Disc, two newer DVD formats.
Uncompressed HD High-definition video in an uncompressed format. Without compression to reduce the video’s
data rate, uncompressed video requires relatively fast computer processors, hard disks, and a specialized capture
device.
WM9 HDTV Microsoft’s high-definition delivery format is among numerous formats included in the Windows
Media 9 (WM9) framework. By employing an aggressive compression scheme, WM9 HDTV permits highdefinition video encoding and playback at relatively low data rates.
About interlaced and noninterlaced video
Interlacing is a technique developed for transmitting standard-resolution television signals using limited bandwidth.
In an interlaced system, only half the number of horizontal lines for each frame of video are transmitted at a time.
But because of the speed of transmission, the afterglow inherent in cathode ray tubes, and the persistence of vision,
the viewer perceives each frame in full resolution. All of the analog television standards use interlacing. Digital
television standards include both interlaced and noninterlaced varieties. Typically, interlaced signals are generated
from interlaced scanning while noninterlaced signals are generated from progressive scanning.
Each interlaced video frame consists of two fields. Each field contains half the number of horizontal lines in the
frame; the upper field (or Field 1) contains the odd-numbered lines, and the lower field (or Field 2)containstheevennumbered lines. An interlaced video monitor displays each frame by first drawing all of the lines in one field and
then drawing all of the lines in the other field. Field order specifies which field is drawn first. In NTSC video, new
fields are drawn to the screen approximately 60 times per second, corresponding to a frame rate of approximately 30
frames per second.
70
A
B
C
Interlaced scanning of interlaced video fields compared with progressive scanning of noninterlaced video frame.
A. Forinterlacedvideo,entireupperfieldisdrawntoscreenfirst,fromtoptobottom,inonepass. B. Next,entirelowerfieldisdrawntoscreen,
from top to bottom, in one pass. C. For noninterlaced video, entire frame is drawn to screen, from top to bottom, in one pass.
Noninterlaced video frames aren’t separated into fields. A progressive-scan monitor displays a noninterlaced video
frame by drawing all the horizontal lines, from top to bottom, in one pass. Computer monitors are almost all
progressive-scan monitors, and most video displayed on computer monitors is noninterlaced.
Page 76

AFTER EFFECTS CS3
User Guide
The terms progressive and noninterlaced are thus closely related and are often used interchangeably, but progressive
refers to the recording or drawing of the scan lines by a camera or monitor, whereas noninterlaced refers to the fact
that the video data itself isn’t separated into fields. For example, it’s possible with some modern cameras to use
progressive scanning to record two simultaneous fields per frame of interlaced video.
Separate video fields
If you want to use interlaced or field-rendered footage (such as NTSC video) in an After Effects project, you will get
the best results if you separate the video fields when you import the footage. After Effects separates video fields by
creating a full frame from each field, preserving all of the image data from the original footage.
Separating fields is critical if you plan to make significant changes to the footage. When you scale, rotate, or apply
effects to interlaced video, unwanted artifacts, such as crossed fields, are often introduced. By separating fields, After
Effects accurately converts the two interlaced frames in the video to noninterlaced frames, while preserving the
maximum amount of image quality. Usingnoninterlaced framesallows After Effects toapply editsand effects consistently and at the highest quality.
After Effects creates field-separated footage from a single formerly interlaced field by splitting fields into two
independent frames.Each new frame hasonly halfthe informationof the original frame, so some frames may appear
to have a lower resolution than others when viewed at Draft quality. When you render the final composition, After
Effects reproduces high-quality interlaced frames for videotape. When you render a movie at Best quality, After
Effects interpolates between the scan lines of a field to produce maximum image quality.
71
If your output will not be interlaced, it's best to use noninterlaced sourcefootage, to avoid the need to separate fields.
However, if a noninterlaced version of your source footage is not available, interlaced footage will work fine.
When you render a composition containing field-separated footage, set the Field Rendering option to the same field
order as your video equipment. If you don’t field-render the composition, or if you field-render with the incorrect
settings, the final movie may appear too soft, jerky, or distorted.
Toveryquicklygivevideofootageamorefilm-likeappearance,importthefootagetwice,andinterpreteachfootage
item with a different field order. Then add them both to the same composition and blend them together. The misin-
terpreted layer will add some film-like blur.
After Effects automatically separates fields for D1 and DV video footage items. You can manually separate fields for
all other types of video footage in the Interpret Footage dialog box.
1 Select the footage item in the Project panel.
2 Choose File > Interpret Footage > Main.
3 Choose an option from the Separate Fields menu.
4 Click Preserve Edges (Best Quality Only) to increase image quality in nonmoving areas when the image is
rendered at Best quality. Then click OK.
Note: If the field settings in the Interpret Footage dialog box are correct for the input footage and the field settings in the
Render Settings dialog box are correct for the output device, you can mix footage items of different field orders in a
composition. If either of these settings is incorrect, however, the frames will be in the correct order, but the field order
may be reversed, resulting in jerky, unacceptable images.
Page 77

AFTER EFFECTS CS3
User Guide
Determine the original field order
The field order for an interlaced video footage item determines the order in which the two video fields (upper and
lower) are displayed. A system that draws the upper lines before the lower lines is called upper-field first; one that
draws the lower lines before the upper lines is called lower-field first. Many standard-definition formats (such as DV
NTSC) are lower-field first, whereas many high-definition formats (such as 1080i DVCPRO HD) are upper-field
first.
Note: Upper-field first corresponds to Even Field First in an ElectricImage file.
The order in which the fields are displayed is important, especially when the fields contain motion. If you separate
video fields using the wrong field order, motion will not appear smooth.
Some programs, including After Effects, label the field order when rendering interlaced video files. When you
import a labeled video file, After Effects honors the field order label automatically. You can override this field order
by applying different footage interpretation settings.
If a file does not contain a field order label, you can match the original field order of your footage. If you are not sure
which field order was used to interlace a footage item, use the procedure below to find out.
1 Select the item in the Project panel.
2 Choose File > Interpret Footage > Main.
3 In the Interpret Footage dialog box, select Upper Field First from the Separate Fields menu, and then click OK.
4 In the Project panel, press Alt (Windows) or Option (Mac OS) as you double-click the footage to open it in the
Footage panel.
5 If the Time Controls panel is not visible, choose Window > Time Controls.
6 In the Footage panel, find a segment that contains one or more moving areas.
7 Usingthe Next Frame button in the TimeControls panel, step forward at leastfive frames inthe Footage panel.
Moving areas should move consistently in one direction. If the moving areas move backward every other frame, the
wrong field-separation option has been applied to the footage.
72
Remove 3:2 or 24Pa pulldown from video
When you transfer 24-fps film to 29.97-fps video, you use a process called 3:2 pulldown,inwhichthefilmframesare
distributed across video fields in a repeating 3:2 pattern. The first frame of film is copied to fields 1 and 2 of the first
frameofvideo,andalsotofield1ofthesecondvideoframe.Thesecondframeoffilmisthenspreadacrossthenext
two fields of video—field 2 of the second video frame and field 1 of the third frame of video. This 3:2 pattern is
repeated until four frames of film are spread over five frames of video, and then the pattern is repeated.
The 3:2 pulldown process results in whole frames (represented by a W) and split-field frames (represented by an S).
The three whole video frames contain two fields from the same film frame. The remaining two split-field frames
contain a video frame from two different film frames. The two split-field frames are always adjacent to each other.
The phase of 3:2 pulldown refers to the point at which the two split-field frames fall within the first five frames of the
footage.
Phase occurs as a result of two conversions that happen during 3:2 pulldown: 24-fps film is redistributed through
30-fps video,so each offour frames of 24-fps film isspread out over five frames of 30(29.97)-fps video. First, the film
is slowed down 0.1% to match the speed difference between 29.97 fps and 30 fps. Next, each film frame is repeated
in a special pattern and mated to fields of video.
Page 78

AFTER EFFECTS CS3
User Guide
2323
A
B
WS S WW
When you apply 3:2 pulldown to footage, one frame of the film (A) is separated into two or three interlaced video fields (B) which are grouped
into video frames containing two fields each.
When importing interlaced video that was originally transferred from film, you can remove the 3:2 pulldown that
was applied during the transfer from film to video as you separate fields so thateffects you apply inAfter Effects don’t
appear distorted.
It’s important to remove 3:2 pulldown from video footage that was originally film so that effects you add in After
Effects synchronize perfectly with the original frame rate of film. Removing 3:2 pulldown reduces the frame rate by
1/5—from 30 to 24 fps or from 29.97 to 23.976 fps, which also reduces the number of frames you have to change. To
remove 3:2 pulldown, you must also indicate the phase of the 3:2 pulldown.
73
After Effects also supports Panasonic DVX100 24p DV camera pulldown, called 24P Advance (24Pa).Thisformatis
used by some cameras to capture 23.976 progressive-scan imagery using standard DV tapes.
Before you remove 3:2 pulldown, separate the fields as either upper-field first or lower-field first. Once the fields are
separated, After Effects can analyze the footage and determine the correct 3:2 pulldown phase and field order. If you
already know the phase and field order, choose them from the Separate Fields and the Remove Pulldown menus in
the Interpret Footage dialog box.
1 In the Project panel, select the footage item from which to remove 3:2 pulldown.
2 Choose File > Interpret Footage > Main.
3 In the Fields and Pulldown section, select Upper Field First or Lower Field First from the Separate Fields menu.
4 Do one of the following and click OK:
• If you know the phase of the 3:2 or 24Pa pulldown, choose it from the Remove Pulldown menu.
• To have After Effects determine the correct settings, click Guess 3:2 Pulldown or Guess 24Pa Pulldown.
Note: Ifyourfootagefilecontainsframesfromdifferentsources,thephasemaynotbeconsistent.Ifthisisthecase,import
the footage multiple times, once for each phase, and interpret each footage item with a different setting. Then, add each
footage item to your composition and trim each layer to use only the appropriate frames.
Import assets in Panasonic P2 format
A P2 card is a solid-state memory device that plugs into the PCMCIA slot of a Panasonic P2 video camera, such as
the AG-HVX200. The digital video and audio data from the video camera is recorded onto the card in a structured,
codec-independent format known as MXF (Media eXchange Format). Specifically, Adobe Premiere Pro and After
Effects support the Panasonic Op-Atom variant of MXF, with video in DV, DVCPRO, DVCPRO50, and DVCPRO
HD formats. A clip is said to be in the P2 format if its audio and video are contained in Panasonic Op-Atom MXF
files, and these files are located in a specific folder structure.
Page 79

AFTER EFFECTS CS3
User Guide
The rootof the P2folder structure is a CONTENTS folder. Each essence item(anitemofvideooraudio)iscontained
in a separate MXF wrapper file; the video MXF files are in the VIDEO subfolder, and the audio MXF files are in the
AUDIO subfolder. The relationships between essence files and the metadata associated with them are tracked by
XML files in the CLIP subfolder.
Note: Adobe Premiere Pro and After Effects do not support proxies recorded by Panasonic P2 camcorders in P2 card
PROXY folders.
The video and audio on a P2 card are already ina digital form, as ifthe P2 card were a hard disk,so there is no capture
step involved in importing media from a P2 card. The process of reading the data from the card and converting it to
a format that can be used in a project is sometimes referred to as ingest.
For your computer to read P2 cards, you must install the appropriate driver, which you can download from the
Panasonic website. Panasonic also provides the P2 Viewer application, with which you can browse and play media
stored on a P2 card. See the Panasonic website for details: www.adobe.com/go/learn_pp_panasonicp2.
Because Panasonic P2 cards use the FAT32 file system, each file is limited to a size of 4 GB. When a shot is recorded
that requires more than the 4 GB, a P2 camera creates another file and continues recording the shot to the new file
without interruption. This is referred to as clip spanning,becausetheshotspansmorethanonefileorclip.Similarly,
a camera may span a shot across files on different P2 cards: if the camera has more than one P2 card loaded, it will
recordtheshotuntilitrunsoutofroomonthefirstP2card,createanewfileonthenextP2cardwithavailablespace,
and continue recording the shot to it. Although a single shot can be recorded to a group of multiple spanned clips,
the multiple-file shot is designed to be treated as a single clip orfootage item in a video editing application. For After
Effects to automatically import a group of spanned clips simultaneously and assemble them into a single footage
item, they must all have been recorded to the same P2 card and none of the files can be missing, including the
associated XML metadata file.
74
1 (Optional) Copy the entire contents of the P2 card to a hard disk.
Though it is possible to import assets into Adobe Premiere Pro or After Effects directly from a P2 card, it is usually
more efficient to copy the contents of the P2 card to a hard disk before importing.
2 Choose File > Import.
3 Navigate to the CONTENTS folder.
4 Select one or more MXF files:
• To import a videoessence item and its associatedaudio essence items, select the MXF files from the VIDEO folder.
• To import only the audio essence items, select the MXF files from the AUDIO folder.
• To import a group of spanned clips for a shot that were recorded onto the same P2 card, select only one of the MXF
files in the group from the VIDEO folder. The group will be imported as a single footage item with a duration
equal to the total duration of all the spanned clips it includes. If you select more than one of these spanned clips,
you will import duplicates of the whole group of spanned clips, as duplicate footage items in the Project panel.
Youcannotimportspannedclipsfromashotthatspanstwodifferentcardsasasinglefootageitem.Rather,youmust
select a single MXF file belonging to the shot from each card to create a separate footage item for the part of the shot
recorded on each card. Forexample, ifa group of spanned clips for a single shotitself spanstwo cards, you must select
a spanned clip from the group on card 1 and another from the group on card 2. This will import the contents of the
shot into two footage items in the Project panel.
The Date column in the Project panel shows when each source clip was acquired. After you import spanned clips,
you can use the Date value to determine their correct chronological order within the shot.
Page 80

AFTER EFFECTS CS3
User Guide
For additional information on the Panasonic P2 format and workflows with Adobe digital video software, see the
Adobe website:
• P2 workflow guide for Adobe digital video products: www.adobe.com/go/learn_dva_p2workflowguide
• Dave Helmly’s video introduction to the P2 workflow in After Effects:
www.adobe.com/go/learn_dva_p2davehelmly
Importing AAF and OMF files (Windows only)
AAF (Advanced Authoring Format) is a multimedia file interchange format that contains all of the editing decisions
of aproject from a non-linear editor (NLE). Using AAF, you can exchange NLE projects between platforms, systems,
and applications.AAF files do not contain media, such as video and audio; rather,they contain editing decisions and
links to media.
OMF (Open Media Framework) is an extensible, object-oriented format that provides a means of tracking
production and post-production information. Unlike AAF files, OMF files can contain media as well as project
information. An AAF file may link to an associated OMF file as a media source. When you import an AAF file that
references an OMF file, the OMFfootage is also imported. After Effects imports only raw (essence) OMF files, which
are OMF files that have embedded media and no project information. After Effects doesn't import OMF project files.
You can use an application such as Automatic Duck to import OMF project files on Windows or Mac OS.
75
Note: You can also output to OMF. See “Render a composition to OMF (Windows only)” on page 622.
The following OMF codecs are supported for importing and outputting to OMF: Uncompressed, Avid AVR, Avid
JPEG, JFIF, and DV.
The OMF file format supports video only. Avid editing systems store audio files as separate .wav files, which you can
import into After Effects if desired. Depending on the resolution and codec, each frame may be composed of a full
noninterlaced frame, two interlaced fields, or a single line-doubled field (for single-field media). The codec used to
encode the media is displayed in the footage information area in the Project panel.
To ensure that the project that you want to import conforms to general AAF specifications and is compatible with
After Effects, consider the following:
Character limits for names The folder name (based on the AAF file name) created in the Project panel is truncated
to 31 characters, the maximum limit in After Effects. Names for items in the Project panel and for layers in the
Timeline panel are also truncated to 31 characters.
Platform-specific footage references Footage referencesare savedwith platform-specific paths and file names inthe
AAF file.
Separate video and audio tracks An AAF file can have separate clips for audio and video. When the AAF file is
imported into After Effects, each clip is converted into a layer. For an audio clip, only the audio switch is enabled for
the layer. For a video clip, only the video switch is enabled for the layer.
Clips on the same track Clips that appear on the same track in Avid appear as separate layers in After Effects.
Depth order of video and audio tracks During AAF import, video tracks are processed before audio tracks, so
converted audio layers will appear above video layers in the After Effects Timeline panel.
Different image dimensions and pixel aspect ratios When an Avid editing system imports footage, it is scaled to the
dimensions of the project regardless of the original dimensions of the footage. When the AAF file is imported into
After Effects, footage appears with its original dimensions and pixel aspect ratio, which may be different from the
dimensions of the project. You can use the Interpret Footage command in After Effects to make pixel aspect ratio
adjustments.
Page 81

AFTER EFFECTS CS3
User Guide
Missing media Referencedmediathatisnotaccessibleduringtheimportoperationappearsasplaceholderfootage
in After Effects.
Empty sequences If a sequence contains no tracks, the composition created when it is imported is set at DV
resolution (720 x 480; 0.9 pixel aspect ratio) with a length of 10 seconds.
Cuts-only video and audio clips Supported.
Audio Audio gain (level) changes are supported, but audio pan is not. Mono and stereo audio are supported; 5.1
audio is not supported. Separate audio channeltracks (even if out of synchronization)are imported into AfterEffects
as a single audio layer.
Clip Speed Clips with a Motion Effect are converted to the corresponding layer Stretch value (for slow or fast
motion) or layer Time Remap keyframes (for reverse motion).
Empty tracks Ignored.
Muted tracks Avid does not save muted track information in an exported AAF file, so muted tracks cannot be
preserved in After Effects.
Locators Ignored.
Composition size and pixel aspect ratio Created based on the StoredWidth and StoredHeight values for the first
media file in the first sequence found.
76
Importing DDR-based footage
To find out if After Effects plug-ins are available for your digital disk recorder (DDR), contact your DDR manufacturer. For information on using your specific DDR with After Effects, refer to your DDR manufacturer’s plug-in
documentation.
Edit audio in Adobe Soundbooth or Adobe Audition
While working in After Effects, you may want to use the more comprehensive audio-editing capabilities of Adobe
Soundbooth or Adobe Audition to fine-tune your audio layers. You can use the Edit In Adobe Soundbooth or Edit
In Adobe Audition command to start Adobe Soundbooth or Adobe Audition from within After Effects.
If you edit an audio-only file (for example, a WAV file) in Adobe Soundbooth or Adobe Audition, you make changes
to the original file. If you edit a layer that contains both audio and video (for example, an AVI file), you edit a copy
of the layer’s audio file.
Important: Adobe Soundbooth is only available for Windows and for Mac OS running on Intel processors. Adobe
Audition is only available for Windows. Neither Adobe Soundbooth nor Adobe Audition are available for Mac OS
running on PowerPC processors.
1 Selectthelayerthatcontainstheaudiothatyouwanttoedit.TheitemmustbeofatypethatiseditableinAdobe
Soundbooth or Adobe Audition.
2 Choose Edit > Edit In Adobe Soundbooth or Edit > EditIn AdobeAudition to openthe clip in Edit view in Adobe
Soundbooth or Adobe Audition.
3 Edit the file, and then do one of the following:
• If you’re editing an audio-only layer, choose File > Save to apply your edits to the original audio file, or choose
File > Save As to apply your edits to a copy of the audio file. If you choose File > Save As, you need to reimport the
copy of the file into After Effects.
Page 82

AFTER EFFECTS CS3
User Guide
• Ifyou’reeditingalayerthatcontainsbothaudioandvideo,chooseFile>SaveAs.Afteryousavethefile,import
it into After Effects, add it to the composition, and mute the original audio in the audio-video clip by deselecting
the Audio switch in the Timeline panel.
Note: Any effects applied to audio in After Effects aren’t included in the copy that is sent to Adobe Soundbooth or Adobe
Audition.
Importing 3D image files
3D files from other applications
After Effects can import 3D-image files saved in Softimage PIC, RLA, RPF, and Electric Image EI format. These 3Dimage files contain red, green, blue, and alpha (RGBA) channels, as well as auxiliary channels with optional information, such as z depth, object IDs, texture coordinates, and more.
Note: Some 3D applications, such as Cinema 4D, can export an After Effects composition directly.
With RLA and RPF files, all of the auxiliary channels are included in a single file. Softimage PIC files have a corresponding ZPIC file that contains the z-depth channel information. Although you can’t import a ZPIC file, you can
access the additional channel information as long as the ZPIC file is stored in the same folder as the imported PIC file.
77
Similarly, Electric Image (EI) files can have associated EIZ files with z-depth channel data. Just as with ZPIC files,
you cannot import EIZ files into After Effects; instead, you simply store them in the same folder as the EI files. For
information about creating EIZ files, see your Electric Image documentation.
After Effects can also import baked camera data, including focal length, film size, and transformation data, from
Maya project files as a single composition or two compositions.
Though you can import composited files with 3D information into After Effects, you cannot manipulate or create
3D models directly with After Effects.
A common technique when working in a 3D modeling application is to insert null objects, such as null lights or null
locator nodes in the locations where you want to composite in an image in After Effects. Then, after you have
importedthe3DfileintoAfterEffects,youcanusethesenullobjectsasareferencefortheplacementsofothervisual
elements.
After Effects treats each composited 3D file from another application as a single 2D layer. That layer, as a whole, can
be given 3D attributesand treated like any After Effects 3D layer,but the objects contained within that3D filecannot
be manipulated individually in 3D space. To access the 3D depth information and other auxiliary channel information in 3D image files, use the 3D Channel effects.
See also
“Working with 3D layers” on page 171
“Cameras, lights, and points of interest” on page 176
“3D Channel effects” on page 367
Page 83

AFTER EFFECTS CS3
User Guide
Importing 3D images from Photoshop Extended and Illustrator
3D models in Photoshop
Adobe Photoshop Extended can import and manipulate 3D models in several popular formats, including 3D Studio
(.3ds) and Universal 3D (.u3d). You can manipulate these 3D models in Photoshop Extended and then save one or
more frames as PSD files that you then import into After Effects.
Vanishing Point exchange
When you use the Vanishing Point feature in Photoshop Extended, you can then use the File > Export For After
Effects CS3 (.vpe) command to save the results as a collection of PNG files—one for each plane—and a .vpe file that
describes the geometry of the scene. You can then import the .vpe file into After Effects. After Effects uses the information in the .vpe file to recreate the scene as a composition containing a camera layer and one perspectivecorrected 3D layer for each PNG file.
The camera is on the negative z axis, at (x,y)=(0,0). The point of interest for the camera is in the center of the composition. The camera zoom is set according to the field of view in the Vanishing Point scene.
The 3D layers for the planes in the scene have a parent layer with its anchor point at the center of the composition,
so the whole scene can be transformed together.
Vanishing Point exchange only works well for images that have square pixels in Photoshop.
78
Illustrator 3D effects
The effects in the 3D category in Illustrator—Extrude & Bevel, Revolve, and Rotate—give a three-dimensional
appearance to any vector graphic object, including textand drawings. If you want to add depth to your vector art and
text, consider creating it in Illustrator, using the 3D effects, and then importing the results into After Effects.
See also
“Working with 3D layers” on page 171
“Cameras, lights, and points of interest” on page 176
Import RLA or RPF data into a camera layer
After Effects imports camera data saved with RLA or RPF sequence files. That data is incorporated into camera
layers—one for each camera in the sequence—that After Effects creates in the Timeline panel. You can access the
camera data of an imported RLA or RPF sequence and create a camera layer containing that data.
1 Add the sequence to a composition, and select its layer in the Timeline panel.
2 Choose Animation > Keyframe Assistant > RPF Camera Import.
Note: To create an RLA or RPF file with the camera data in 3D Studio Max, save your rendering in RPF format with
Coverage, Z Depth, and Alpha Channels enabled.
See also
“Working with 3D layers” on page 171
“Cameras, lights, and points of interest” on page 176
Page 84

AFTER EFFECTS CS3
User Guide
Baking and importing Maya data
After Effects imports camera data from Maya project files. Before importing Maya camera information, you need to
bake it.Thismakesanimatingwithkeyframeseasierlaterinyourproject.Bakingplacesakeyframeateachframeof
the animation. You can have 0, 1, or a fixed number of keyframes for each camera or transform property. For
example, if a property is not animated in Maya, either no keyframes are set for this property or one keyframe is set
at the start of the animation. If a property has more than one keyframe, it must have the same number as all of the
other animation properties with more than one keyframe.
Reduce import time by creating or saving the simplest Maya file possible. In Maya, reduce keyframes by deleting
static channels before baking, and save a version of the Maya project that contains the camera animation only.
Note: The following transformation flags are not supported: query, relative, euler, objectSpace, worldSpace, worldSpaceDistance, preserve, shear, scaleTranslation, rotatePivot, rotateOrder, rotateTranslation, matrix, boundingBox, boundingBoxInvisible, pivots, CenterPivots, and zeroTransformPivots. After Effects skips these unsupported flags, and no
warnings or error messages appear.
By default, After Effects treats linear units specified in the Maya file as pixels.
You can import camera data from Maya project files (.ma) and work with the data as a single composition or two
compositions.
For each Maya file you import, After Effects creates either one or two compositions:
79
• If the Maya project has a square pixel aspect ratio, After Effects creates a single, square-pixel composition
containing the camera data and transformations.
• If the Maya project has a nonsquare pixel aspect ratio, After Effects creates two compositions. The first compo-
sition, which has a file name prefixed by Square, is a square-pixel composition containing the camera data. The
second, or parent, composition is a nonsquare-pixel composition that retains the dimensions of the original file
and contains the square-pixel composition. When working with imported camera data, use 3D layers and squarepixel footage in the square-pixel composition, and use all nonsquare-pixel footage in the parent composition.
When you import a Maya file with a 1-node camera, After Effects creates a camera in the square-pixel composition
that carries the camera's focal length, film size, and transformation data.
When you import a Maya file with a 2-node or targeted camera, After Effects creates a camera and an additional
parent node in the square-pixel composition. The parent node contains only the camera’s transformation data. After
Effects imports 2-node cameras automatically with the locator node as the point of interest, with the camera's AutoOrientation option set to Orient Towards Point Of Interest.
After Effects doesn’t read 3-node cameras.
Note: After Effects reads only the rendering cameras in Maya files and ignores the orthographic andperspective cameras.
Therefore, always generate a rendering camera from Maya, even if it’s the same as the perspective camera. If you apply
the FilmFit camera setting, make sure to use either horizontal or vertical FilmFit, not fill.
After Effects can read Maya locator nodes, which enable you to track objects from the Maya scene as it is translated
into After Effects. After Effects creates a null layer and applies the relevant transformations to it if a Maya locator
node’s name contains the word Null, NULL, or null. Avoid parenting locator nodes to each other in Maya; instead,
parent the locator nodes to geometry.
Note: After Effects doesn’t read World or Underworld coordinates in the LocatorShape.Use atransform node to place them.
Page 85

AFTER EFFECTS CS3
User Guide
See also
“Working with 3D layers” on page 171
“Cameras, lights, and points of interest” on page 176
Importing still images
Preparing still-image files for importing
You can import individual still images into After Effects or import a series of still images as a sequence. You can
import still images from Adobe applications such as Photoshop and Illustrator, or import images using the Adobe
Stock Photos service using Adobe Bridge. For information about the still-image formats that After Effects imports,
see “Supported import formats” on page 48.
After Effects works internally in an RGB color space, but it can import and convert CMYK images. However, when
possible, you should work in an RGB color space in applications such as Illustrator and Photoshop when creating
images for video, film, and other non-print media. Working in RGB provides a larger gamut and more accurately
reflects your final output.
BeforeyouimportastillimageintoAfterEffects,prepareitascompletelyaspossibletoreducerenderingtime.Itis
usually easier and faster to prepare a still image in its original application than to modify it in After Effects. Consider
doing the following to an image before importing it into After Effects:
80
• Make sure that the file format is supported by the operating system you plan to use.
• Crop the parts of the image that you do not want to be visible in After Effects.
Note: Illustrator files canhave fractionaldimensions (e.g., 216.5 x 275.5 pixels). When importingthese files, After Effects
compensates for the fractional dimensions by rounding-up to the next whole number of pixels (e.g., 217 x 278 pixels).
This rounding results in a black line at the right (width) or bottom (height) edge of the imported image. When cropping
in Illustrator, make sure that the dimensions of the cropped area are whole numbers of pixels.
• If you want to designate areas as transparent, create an alpha channel or use the transparency tools in applications
such as Photoshop or Illustrator.
• If final output will be broadcast video, avoid using thin horizontal lines (such as 1-pixel lines) for images or text
because they may flicker as a result of interlacing. If you must use thin lines, add a slight blur so that the image or
text appears in both video fields instead of flickering between them. (See “About interlaced and noninterlaced
video” on page 70.)
• If final output will be broadcast video, make sure that important parts of the image fall within the action-safe and
title-safe zones. Whenyou create a document in Illustrator or Photoshop using a preset for film and video, the safe
zones are shown as guide lines. (See “Work with safe zones, grids, guides, and rulers” on page 130.)
• If the final output will be broadcast video, keep colors within the broadcast-safe ranges. (See “Broadcast-safe
colors” on page 250.)
• Save the file using the correct naming convention. For example, if you plan to import the file into After Effects on
Windows, use a three-character file-name extension.
Page 86

AFTER EFFECTS CS3
User Guide
• Set the pixel dimensions to the resolution and frame aspect ratio that you will use in After Effects. If you plan to
scaletheimageovertime,setimagedimensionsthatprovideenoughdetailatthelargestsizetheimagehasinthe
project. After Effects supports a maximum image size of 30,000 x 30,000 pixels for importing and rendering files,
except for PICT (4,000 x 4,000 pixels) and BMP (16,000 x 30,000 pixels). The size of image that you can import or
export is influenced by the amount of physical RAM available to After Effects. Themaximum composition dimensions are also 30,000 x 30,000 pixels.
Note: The image size or pixel dimensions setting in Photoshop (or other image-editing application) is relevant for the
preparation of image data for import into After Effects—not dpi (dots per inch) or ppi (pixels per inch) settings. The
image size determines how many pixels wide and tall an image is, whether those pixels are the tiny ones on a mobile
deviceorthebigonesonamotionbillboard.Thedpiorppisettingsarerelevanttoprintinganimageandtothescaleof
copied and pasted paths.
See also
“Memory usage and storage” on page 37
“Copy a path from Illustrator, Photoshop, or Fireworks” on page 324
Import a single still image or a still-image sequence
You can import still image files as individual footage items, or you can import a series of still image files as a stillimage sequence, which is a single footage item in which each still image is used as a single frame.
81
To import multiple image files as a single still-image sequence, the files must be in the same folder and use the same
numeric or alphabetic filename pattern (such as Seq1, Seq2, Seq3).
When you import a file that appears to After Effects to be one file in a still-image sequence, After Effects will by
default import all other files in the same folder that appear to be in the same sequence. Similarly, when you select
multiple files that appear to be in a sequence, After Effects will by default import them as a sequence. You can see
what After Effects is about to import by looking at the bottom of the Import dialog box. (You can also import images
and sequences by dragging files and folders into the Project panel.
To prevent After Effects from importing unwanted files when you want to import only a single file, or to prevent After
Effects from interpreting multiple files as a sequence, deselect the Sequence option in the Import dialog box. After
Effects remembers this setting and will henceforth use it as the default.
You can import multiple sequences from the same folder simultaneously by selecting files from different sequences
and selecting Multiple Sequences at the bottom of the Import dialog box.
When importing a sequence of still images, you can use the Force Alphabetical Order option in the Import dialog
box to import a sequence with gaps in its numbering (e.g., Seq1, Seq2, Seq3, Seq5). If you import a sequence with
gaps in its numbering without selecting this option, After Effects warns you of missing frames and replaces them
with placeholders.
After Effects uses settings of the first imagein the sequenceto determine how to interpret the images in the sequence.
If the image files in a sequence are of a layered file type—such as Adobe Photoshop or Adobe Illustrator
documents—then you can choose to import the sequence as a standard footage item, or as a composition in which
each layer in each file is imported as a separate sequence and appears as a separate layer in the Timeline panel.
Note: When you render a composition that contains a numbered sequence, the output module uses the start frame
number as the first frame number. For example, if you start to render on frame 25, the name of the file is 00025.
Page 87

AFTER EFFECTS CS3
User Guide
82
A sequence of still-image files (left) becomes one image sequence when imported into After Effects (right).
See also
“Work with output module settings” on page 599
“Import footage items” on page 50
Import a still-image sequence as a single footage item
1
Choose File > Import > File.
2 Selectanyfileinthesequence.Toimportasubsetoffilesinasequence,selectthefirstfile,holddownShift,and
then select the last file to import.
3 Choose Footage from the Import Kind menu.
4 Click Open (Windows) or Import (Mac OS).
5 In the [filename] dialog box, choose one of the following from the Choose Layer menu:
Merged Layers Imports the sequence as a sequence footage item in which the layers in the file, if any, are merged
into one layer.
Choose Layer Imports the sequence as a sequence footage item in which the same layer from each source file—for
example, layer 3—is imported and used in the sequence. If you choose this option for a PSD sequence, then you can
alsochoosewhethertoignorelayerstylesormergethemintothelayer.YoumustalsochooseaFootageDimensions
option: Layer Size matches thedimensions of the layer to the layer’s content; Document Size matches the dimensions
of the layer to the original document’s size.
6 Click OK.
If at any time you decide that you want access to the individual components of the footage item, you can convert it
to a composition. See “Convert a merged footage item into a composition” on page 83.
Page 88

AFTER EFFECTS CS3
User Guide
Import a still-image sequence as a composition
When you import a Photoshop or Illustrator file as a composition, you have access to the individual layers, blending
modes, adjustment layers, layer styles, masks, guides, and other features created in Photoshop or Illustrator. The
imported composition and a folder containing each of its layers as footage items appears in the Project panel.
1 Choose File > Import > File.
2 Selectanyfileinthesequence.Toimportasubsetoffilesinasequence,selectthefirstfile,holddownShift,and
then select the last file to import.
3 Choose one of the following from the Import Kind menu:
Composition - Cropped Layers Import the layers with their original dimensions. This option makes it easier to
manipulate layers and speeds their rendering time.
Composition Import layers and have them match the dimensions of the composition. This option is helpful when
you need to align layers manually.
4 Click Open (Windows) or Import (Mac OS).
Change the frame rate of a sequence
Whenyouimportasequenceofstillimages,itassumestheframeratespecifiedbytheSequenceFootagepreference
in the Import category. The default rate is 30 frames per second (fps). You can change the frame rate after importing
by reinterpreting the footage item:
83
❖ Select the sequence in the Project panel, choose File > Interpret Footage > Main, and then enter a new value for
Assume This Frame Rate.
For more information, see “Change frame rate” on page 53.
Convert a merged footage item into a composition
When you import a layered file, such as a Photoshop or Illustrator file, as footage, all ofits layers are merged together.
If at any time you decide that you want access to the individual components of the footage item, you can convert it
to a composition.
• To convert all instances of a footage item, select it in the Project panel and choose File > Replace Footage > With
Layered Comp.
• To convert only one instance of the footage item, select the layer in the Timeline panel, and choose Layer >
Convert To Layered Comp.
Note: It may take a few moments to convert a merged footage item to a layered composition.
Preparing and importing Photoshop files
Because After Effects includes the Photoshop rendering engine, After Effects imports all attributes of Photoshop
files, including position, blending modes, opacity, visibility, transparency (alpha channel), layer masks, layer groups
(imported as nested compositions), adjustment layers, common layer styles, layer clipping paths, vector masks,
image guides, and clipping groups.
To see a video tutorial on importing Photoshop files, visit the Adobe website at www.adobe.com/go/vid0252.
Page 89

AFTER EFFECTS CS3
User Guide
A very convenient command within After Effects is Layer > New > Adobe Photoshop File, which adds a layer to a
composition and then opens the source of that layer in Photoshop for you to begin creating a visual element, such as
a background layer for your movie. The layer in Photoshop is created with the correct settings for your After Effects
composition. As with many of the Creative Suite applications, you can use the Edit Original command in After
Effects to open a PSD file in Photoshop, make and save changes, and have those changes appear immediately in the
movie that refers to the PSD source file. Even if you don’t use Edit Original, you can use the Reload Footage
command to have After Effects refresh its layers to use the current version of the PSD file. (See “Create a layer and
new Photoshop footage item” on page 137 and “Edit footage in its original application” on page 60.)
Adobe Photoshop supports a transparent area and one optional layer mask (alpha channel) for each layer in a file.
You can use these layer masks to specify how different areas within a layer are hidden or revealed. If you import one
layer, After Effects combines the layer mask (if present) with the transparent area and imports the layer mask as a
straight alpha channel.
If you import a layered Photoshop file as a merged file, After Effects merges the transparent areas and layer masks of
all the layers into one alpha channel that is premultiplied with white.
If thelayered Photoshop file contains clipping groups,After Effects imports eachclipping group as a precomposition
nested within the main composition. After Effects automatically applies the Preserve Underlying Transparency
option to each layer in the clipping-group composition, maintaining transparency settings. These nested precompositions have the same dimensions as the main composition. (Paul Tuersley provides a script that crops the precompositions to the size of their contents, while retaining their correct position in the main composition:
www.adobe.com/go/learn_ae_paulphotoshopcrop.)
84
WhenyouimportaPhotoshopfileasacomposition,vectormasksareconvertedtoAfterEffectsmasks.Youcanthen
modify and animate these masks within After Effects.
After Effects also supports blending modes and layer styles applied to the file. When you import a Photoshop file
with layer styles, you can choose the Editable Layer Styles option or the Merge Layer Styles Into Footage option:
Editable Layer Styles Matches appearance in Photoshop and preserves supported layer style properties as editable.
Note that a layer with a layer style interferes with intersection of 3D layers and the casting of shadows.
Merge Layer Styles Into Footage Layerstylesaremergedintothelayerforfasterrendering,buttheappearancemay
notmatchtheappearanceoftheimageinPhotoshop.Thisoptiondoesn’tinterferewithintersectionof3Dlayersor
casting of shadows.
Photoshop files can even contain video and animation layers. After Effects can import these files just as any other
Photoshop files, either as a footage item with all layers merged together or as a composition with each Photoshop
layer separate and editable in After Effects. (Working with Photoshop video layers requires QuickTime 7.1 or later.)
Photoshop layer groups are imported as individual compositions.
It is often valuable to group layers into Smart Objects in Photoshop so that you can import meaningful collections
of Photoshop layers as individual layers in After Effects. For example, if you used 20 layers to create your foreground
object and 30 layers to create your background object in Photoshop, you probably don’t need to import all of those
individual layers into After Effects if all that you want to do is animate your foreground object flying in front of your
background object; consider grouping them into a single foreground Smart Object and a single background Smart
Object before importing the PSD file into After Effects.
Page 90

AFTER EFFECTS CS3
User Guide
Before you import a layered Photoshop file into After Effects, prepare it thoroughly to reduce preview and rendering
time. Avoid problems importing and updating Photoshop layers by doing the following:
• Organize and name layers. If you change a layer name in a Photoshop file after you have imported it into After
Effects, After Effects retains the link to the original layer. However, if you delete a layer, After Effects is unable to
find the original layer and lists it as Missing in the Project panel.
• Make sure that each layer has a unique name. This is not a requirement of the software, but it will help to keep you
from becoming confused.
See also
“Layer styles” on page 168
“Working with Photoshop and After Effects” on page 32
Preparing and importing Illustrator files
Before you save an Illustrator file for importing into After Effects, consider doing the following:
• Crop the image so that you are only saving the portion that you want to import into After Effects.
• Toensure that Illustratorfiles appearcorrectly in After Effects, select Create PDF CompatibleFile in the Illustrator
Options dialog box.
• To copy paths between Illustrator and After Effects, make sure that the AICB and Preserve Paths options are
selected in the Files & Clipboard section of the Illustrator Preferences dialog box. If you don’t select AICB in
Illustrator, After Effects prompts you when you attempt to paste the path.
• To ensure that files rasterize most faithfully in After Effects, save your file in AI format instead of Illustrator 8.x or
9.x EPS format.
85
When you import an Illustrator file, After Effects makesall empty areas transparent by converting them into an alpha
channel.
Note: When you’ve imported anIllustrator file, you canspecify whether anti-aliasing is to be performed at higher quality
or at higher speed. Select the footage item in the Project panel and choose File > Interpret Footage > Main, and click the
More Options button at the bottom of the dialog box.
After Effects does not read embedded color profiles from Illustrator files. To ensure color fidelity, assign an input
color profile to the Illustrator footage item that matches the color profile with which the Illustrator file was created.
See also
“Interpret a footage item by assigning an input color profile” on page 245
“Copy a path from Illustrator, Photoshop, or Fireworks” on page 324
Importing Cineon sequences
Youcan importCineon 4.5 or Digital Picture Exchange (DPX) files directly into an AfterEffects project as individual
frames or as a sequence of numbered stills. Once you have imported a Cineon file, you can use it in a composition
and then render the composition as a Cineon sequence.
Page 91

AFTER EFFECTS CS3
User Guide
Cineon files are commonly used to transfer motion-picture film to a digital format. To preserve the full dynamic
range of motion-picture film, Cineon files are stored using logarithmic 10-bpc color. However, After Effects internally uses 8-bpc, 16-bpc, or 32-bpc color, depending on the color bit depth of the project. Work with Cineon files in
a 16- or 32-bpc project—by default, After Effects stretches the logarithmic values to the full range ofvalues available.
In most cases, you should use color management features to automatically interpret the colors of Cineon footage.
(See “Working with Cineon footage items” on page 251.) You can, though, use the Cineon Settings dialog box to
control the conversion manually.
Manual settings in the Cineon Settings dialog box:
Converted Black Point Specifies the black point used for the layer in After Effects.
Converted White Point Specifies the white point used for the layer in After Effects.
10 Bit Black Point Specifies the black level (minimum density) for converting a 10-bit Cineon layer.
10 Bit White Point Specifies the white level (maximum density) for converting a 10-bit Cineon layer.
Current Gamma Specifies the target gamma value.
Highlight Rolloff Specifies the rolloff value used to correct bright highlights. To get over range values when working
in 32 bpc, set the value to 0.
Logarithmic Conversion Converts the Cineon sequence from log color space to the target gamma specified by the
Current Gamma setting. When you’re ready to produce output from the Cineon file, it is important that you reverse
the conversion. (To convert from logarithmic to linear, set Current Gamma to 1.)
86
Units Specifies the units After Effects uses to display dialog values.
See also
“Set the color depth” on page 234
“Color management” on page 241
Introduction to Camera Raw
Note: This document describes features of Photoshop Camera Raw 4.1.
About camera raw files
A camera raw file contains unprocessed, uncompressed grayscale picture data from a digital camera’s image sensor,
along with information about how the image was captured (metadata). Photoshop Camera Raw software interprets
the camera raw file, using information about the camera and the image’s metadata to construct and process a color
image.
Think of a camera raw file as your photo negative. You can reprocess the file at any time, achieving the results that
you want by making adjustments for white balance, tonal range, contrast, color saturation, and sharpening. When
you adjust a camera raw image, the original camera raw data is preserved. Adjustments are stored as metadata in an
accompanying sidecar file, in a database, or in the file itself (in the case of DNG format).
Page 92

AFTER EFFECTS CS3
User Guide
When you shoot JPEG files with your camera, the camera automatically processes the JPEG to enhance and
compress the image. You generally have little control over how this processing occurs. Shooting camera raw images
with your camera gives you greater control than shooting JPEG images, because camera raw does not lock you into
processing done by your camera. You can still edit JPEG and TIFF images in Camera Raw, but you will be editing
pixels that were already processed by the camera. Camera raw files always contain the original, unprocessed pixels
from the camera.
To shoot camera raw images, you need to set your camera to save files in its own camera raw file format.
Note: The Photoshop Raw format (.raw) is a file format for transferring images between applications and computer
platforms. Don’t confuse Photoshop raw with camera raw file formats.
Digital cameras capture and store camera raw data with a linear tone response curve (gamma 1.0). Both film and the
human eye have a nonlinear, logarithmic response to light (gamma greater than 2). An unprocessed camera raw
image viewed as a grayscale image would seem very dark, because what appears twice as bright to the photosensor
and computer seems less than twice as bright to the human eye.
About Camera Raw
Camera Raw software is included as a plug-in with Adobe After Effects and Adobe Photoshop, and also adds
functionality to Adobe Bridge. Camera Raw gives each of these applications the ability to import and work with
camera raw files. You can also use Camera Raw to work with JPEG and TIFF files.
87
You must have Photoshop or After Effects installed to open files in the Camera Raw dialog box from Adobe Bridge.
However, if Photoshop or After Effects is not installed, you can still preview the images and see their metadata in
Adobe Bridge. If another application is associated with the image file type, it’s possible to open the file in that application from Adobe Bridge.
Using Adobe Bridge, you can apply, copy, and clear image settings, and you can see previews and metadata for
camera raw files without openingthem in the CameraRaw dialog box. Thepreview in Adobe Bridge is a JPEGimage
generated using the current image settings; the preview is not the raw camera data itself, which would appear as a
very dark grayscale image.
Note: A caution icon appears in the thumbnails and preview image in the Camera Raw dialog box while the preview
is generated from the camera raw image.
You can modify the default settings that Camera Raw uses for a particular model of camera. For each camera model,
you can also modify the defaults for a particular ISO setting or a particular camera (by serial number). You can
modify and save image settings as presets for use with other images.
When you use Camera Raw to make adjustments (including straightening and cropping) to a camera raw image, the
image’s original camera raw data is preserved. The adjustments are stored for each image in either the Camera Raw
database, as metadata embedded in theimage file,or ina sidecar XMPfile (a metadata file that accompanies a camera
raw file). For more information, see “Specify where Camera Raw settings are stored” on page 104.
After you process and edit a camera raw file using the Camera Raw plug-in, an icon appears in the image
thumbnail in Adobe Bridge.
If you open a camera raw file in Photoshop, you cansave the image in other image formats, such as PSD, JPEG, Large
Document Format (PSB), TIFF, Cineon, Photoshop Raw, PNG, or PBM. From the Camera Raw dialog box in
Photoshop, you can save the processed files in Digital Negative (DNG), JPEG, TIFF, or Photoshop (PSD) formats.
Although Photoshop Camera Raw software can open and edit a camera raw image file, it cannot save an image in a
camera raw format.
Page 93

AFTER EFFECTS CS3
User Guide
Note: In Photoshop, the Camera Raw dialog box is automatically suppressed when you use a batch of files fora web photo
gallery, picture package, or contact sheet.
As new versions of Camera Raw become available, you can update this software by installing a new version of the
plug-in. You can check for updates to Adobe software by choosing Help > Updates.
For up-to-date documentation for Camera Raw, go to the Adobe website at
www.adobe.com/go/learn_ps_camerarawhelp.
Different camera models save camera raw images in many different formats, and the data must be interpreted differently for these formats. Camera Raw includes profiles for many camera models, and it can interpret many camera
raw formats.
Note: For a list of supported cameras and for more information about Camera Raw, see
www.adobe.com/go/learn_ps_cameraraw.
About the Digital Negative (DNG) format
The Digital Negative (DNG) format is a non-proprietary, publicly documented, and widely supported format for
storing raw camera data. Hardware and software developers use DNG because it results in a flexible workflow for
processing and archiving camera raw data. You may also use DNG as an intermediate format for storing images that
were originally captured using a proprietary camera raw format.
88
Because DNG metadata is publicly documented, software readers such as Camera Raw do not need camera-specific
knowledge to decode and process files created by a camera that supports DNG. If support for a proprietary format
is discontinued, users may not be able to access images stored in that format, and the images may be lost forever.
Because DNG is publicly documented, it is far more likely that raw images stored as DNG files will be readable by
software in the distant future, making DNG a safer choice for archival storage.
DNG is an extension of the TIFF 6.0 format and is compatible with the TIFF-EP standard. It is possible (but not
required) for a DNG file to simultaneously comply with both the Digital Negative specification and the TIFF-EP
standard.
Metadata for adjustments made to images stored as DNG files can be embedded in the DNG file itself instead of in
a sidecar XMP file or in the Camera Raw database.
YoucanconvertcamerarawfilestotheDNGformatbyusingtheAdobeDNGConverterortheCameraRawdialog
box. For more information on the DNG format and DNG Converter, see www.adobe.com/go/learn_ps_dng.
Processing images with Camera Raw
1. Copy camera raw files to your hard disk, organize them, and (optionally) convert them to DNG.
Before you do any work on the images that your camera raw files represent, transfer them from the camera’s memory
card, organize them,give them useful names, andotherwise prepare them for use. Use the Get Photos From Camera
command in Adobe Bridge to accomplish these tasks automatically.
2. Open the image files in Camera Raw.
You can open camera raw files in Camera Raw from Adobe Bridge, After Effects, or Photoshop. You can also open
JPEG and TIFF files in Camera Raw from Adobe Bridge. (See “Open images in Camera Raw” on page 92.)
To see a video tutorial on importing images with Camera Raw, go to the Adobe website at
www.adobe.com/go/vid0005.
Page 94

AFTER EFFECTS CS3
User Guide
3. Adjust color.
Color adjustments include white balance, tone, and saturation. You can make mostadjustments on theBasic tab, and
then use controls on the other tabs to fine-tune the results. Ifyou want Camera Raw to analyze your image and apply
approximate tonal adjustments, click Auto on the Basic tab.
To apply the settings used for the previous image, or to apply the default settings for the camera model, camera, or
ISO settings, choose the appropriate command from the Camera Raw Settings menu . (See “Apply savedCamera
Raw settings” on page 105.)
To see a video tutorial on adjusting images with Camera Raw, go to the Adobe website at
www.adobe.com/go/vid0006.
To see a video tutorial on adjusting multiple images with Camera Raw, go to the Adobe website at
www.adobe.com/go/vid0007.
4. Make other adjustments and image corrections.
Use other tools and controls in the Camera Raw dialog box to perform such tasks as sharpening the image, reducing
noise, correcting for lens defects, and retouching.
5. (Optional) Save image settings as a preset or as default image settings.
To apply the same adjustments to other images later, save the settings as a preset. To save the adjustments as the
defaults to be applied to all images from a specific camera model, a specific camera, or a specific ISO setting, save
the image settings as the new Camera Raw defaults. (See “Save, reset, and load Camera Raw settings” on page 104.)
89
6. Set workflow options for Photoshop.
Set options to specify how images are saved from Camera Raw and how Photoshop should open them. You can
accesstheWorkflowOptionssettingsbyclickingthelinkbeneaththeimagepreviewintheCameraRawdialogbox.
7. Save the image, or open it in Photoshop or After Effects.
When youfinish adjusting the image in Camera Raw, you can apply the adjustments to the camera raw file, open the
adjusted image in Photoshop or After Effects, save the adjusted image to another format, or cancel and discard
adjustments. If you open the Camera Raw dialog box from After Effects or Photoshop, the Save and Done buttons
are unavailable.
Save Applies the Camera Raw settings to the images and saves copies of them in JPEG, PSD, TIFF, or DNG format.
Press Alt (Windows) or Option (Mac OS) to suppress the Camera Raw Save Options dialog box and save the files
using the last set of save options. (See “Save a camera raw image in another format” on page 93.)
Open or OK Opens copies of the camera raw image files (with the Camera Raw settings applied) in Photoshop or
After Effects. The original camera raw image file remains unaltered. Press Shift while clicking Open to open the raw
file in Photoshop as a Smart Object. At any time, you can double-click the Smart Object layer that contains the raw
file to adjust the Camera Raw settings.
Done Closes the Camera Raw dialog box and stores filesettings either in the camera raw database file, in thesidecar
XMP file, or in the DNG file.
Cancel Cancels the adjustments specified in the Camera Raw dialog box.
Import and interpret camera raw files
You can import sequences of camera raw files much as you import sequences of other kinds of still image files.
Page 95

AFTER EFFECTS CS3
User Guide
After Effects applies the settings for the first camera raw image in the sequence to all of the images in the sequence
that do not have their own XMP sidecar files. After Effects does not check the Camera Raw database for image
settings.
Note: Camera raw files are uncompressed. Their large size may increase rendering time.
1 Choose File > Import > File.
2 Select the camera raw file, and click Open.
3 Make any necessary adjustments in the Camera Raw dialog box, and click OK.
You can adjust a camera raw image after importing it. To open the image in the Camera Raw dialog box, select the
footage item in the Project panel, choose File > Interpret Footage > Main, and click More Options.
Note: You can’t assign an input color profile to a camera raw image for use in a color-managed project. For information
on how colors are automatically interpreted, see “Interpret a footage item by assigning an input color profile” on
page 245.
See also
“Import a single still image or a still-image sequence” on page 81
“Color management” on page 241
90
Camera Raw dialog box overview
A F GDCB E
H JI K
Camera Raw dialog box
A. Filmstrip B. To gg le Film str ip C. Camera, file name, and Exif information D. Toggle full screen mode E. Image adjustment tabs
F. Histog ram G. Camera Raw Settings menu H. Zoom levels I. Clicktodisplayworkflowoptions J. Navigation arrows K. Adjustment sliders
Page 96

AFTER EFFECTS CS3
User Guide
Note: Somecontrols,suchastheWorkflowOptionslink,thatareavailablewhenyouopentheCameraRawdialogbox
from Adobe Bridge or Photoshop are not available when you open the Camera Raw dialog box from After Effects.
Camera Raw Settings menu
To open the Camera Raw Settings menu, click the button in the upper-right corner of any of the image
adjustment tabs. Several of the commands in this menu are also available from the Edit > Develop Settings menu in
Adobe Bridge.
Camera Raw view controls
Zoom tool Sets the preview zoom to the next higher preset value when you click the preview image. Alt-click
(Windows) or Option-click (Mac OS) to use the next lower zoom value. Drag the Zoom tool in the preview image
to zoom in on a selected area. To return to 100%, double-click the Zoom tool.
Hand tool Moves the image in the preview window if the preview image is set at a zoom level higher than 100%.
Hold down the spacebar to temporarily activate the Hand tool while using another tool. Double-click the Hand tool
to fit the preview image to the window.
Select Zoom Level Choose a magnification setting from the menu or click the Select Zoom Level buttons.
Preview Displays a preview of the image adjustments made in the current tab, combined with the settings in the
other tabs. Deselect to show the image with the original settings of the current tab combined with the settings in the
other tabs.
91
RGB Shows the red, green, and blue values of the pixel under the pointer in the preview image.
Shadows and Highlights Displays shadow and highlight clipping. Clipped shadows appear in blue, and clipped
highlights appear in red. Highlight clipping is shown if any one of the three RGB channels is clipped (fully saturated
with no detail). Shadow clipping is shown if all three RGB channels are clipped (black with no detail).
Image adjustment tabs
Basic Adjust white balance, color saturation, and tonality.
Tone Curve Fine-tune tonality using a Parametric curve and a Point curve.
Detail Sharpen images or reduce noise.
HSL / Grayscale Fine-tune colors using Hue, Saturation, and Luminance adjustments.
Split Toning Color monochrome images or create special effects with color images.
Lens Corrections Compensate for chromatic aberration and vignetting caused by the camera lens.
Camera Calibration Correct a color cast in the shadows and adjust non-neutral colors to compensate for the
difference between the behavior of your camera and the Camera Raw profile for your camera model.
Presets Save and apply sets of image adjustment settings as presets.
Work with the Camera Raw cache in Adobe Bridge
When you view camera raw files inAdobe Bridge,the thumbnailsand previews use either thedefault settingsor your
adjustedsettings.ThecacheinAdobeBridgeandtheCameraRawcachestoredataforthefilethumbnails,metadata,
and file information. Caching this data shortens the loading time when you return to a previously viewed folder.
Because caches can become very large, you may want to purge the cache or limit its size. You can also purge and
regenerate the cache if you suspect that it is corrupted or old. Purging the cache deletes thumbnail information and
metadata added since the camera raw file was opened in Adobe Bridge.
Page 97

AFTER EFFECTS CS3
User Guide
Note: The Camera Raw cache holds data for about 200 images for each gigabyte of disk storage allocated to it. By default,
the Camera Raw cache is set to a maximum size of 1 GB. You can increase its limit in the Camera Raw preferences.
1 In Adobe Bridge, choose Edit > Camera Raw Preferences (Windows) or Bridge > Camera Raw Preferences
(Mac OS), or, with the Camera Raw dialog box open, click the Open Preferences Dialog button .
2 Do any of the following:
• To change the cache size, enter a Maximum Size value.
• To purge the camera raw cache, click the Purge Cache button.
• To change the location of the camera raw cache, click Select Location.
Navigating, opening, and saving images with Camera Raw
Process, compare, and rate multiple images in Camera Raw
The most convenient way to work with multiple camera raw images is to use the Filmstrip view in Camera Raw,
which opens by default when you open multiple images in Camera Raw from Adobe Bridge.
92
Images can have three states in Filmstrip view: deselected, selected (but not active), and active (also selected). In
general, adjustments are applied to all selected images.
Youcan also synchronize settings to apply settings from the activeimage to all selected images. You canquickly apply
a set of adjustments to an entire set of images—such as all shots taken under the same conditions—and then do finetuning on the individual shots later, after you’ve determined which you’ll use for your final output.
• To select an image, click its thumbnail. To select a range of images, Shift-click two thumbnails. To add an image
to a selection, Ctrl-click (Windows) or Command-click (Mac OS) its thumbnail.
• To change which image is active without changing which images are selected, click a navigation arrow at
the bottom of the preview pane.
• To apply settings from the active image to all selected images, click the Synchronize button at the top of the
Filmstrip pane and choose which settings to synchronize.
• To apply a star rating, click a rating under the image thumbnail.
• To mark selected images for deletion, click Mark For Deletion .
A red cross appears in the thumbnail of an image marked for deletion. The file is sent to the Recycle Bin (Windows) or
Trash (Mac OS) when you close theCamera Raw dialog box. (If you decideto keep an image that you marked for deletion,
select it in the Thumbnail pane and click Mark For Deletion again, before you close the Camera Raw dialog box.)
Open images in Camera Raw
• To process raw images in Camera Raw, select one or more camera raw files in Adobe Bridge, and then choose
File > Open In Camera Raw or press Ctrl+R (Windows) or Command+R (Mac OS). When you finish making
adjustments in the Camera Raw dialog box, click Done to accept changes and close the dialog box. You can also
click Open to open a copy of the adjusted image in Photoshop.
Page 98

AFTER EFFECTS CS3
User Guide
• To process JPEG or TIFF images in Camera Raw, select one or more JPEG orTIFF files in Adobe Bridge,and then
choose File > Open In Camera Raw or press Ctrl+R (Windows) or Command+R (Mac OS). When you finish
making adjustments in the Camera Raw dialog box, click Done to accept changes and close the dialog box. You
can specify whether JPEG or TIFF images with Camera Raw settings are always opened in Camera Raw in the
JPEG andTIFF Handlingsection of theCamera Raw preferences. You can also specify thatJPEG and TIFF images
are opened in Camera Raw in the Thumbnail section of the Bridge preferences and the File Handling section of
the Photoshop preferences.
• Toimport camera raw images in Photoshop,select one or more camera raw files inAdobe Bridge,and then choose
File > Open With > Photoshop CS3. (You can also choose File > Open In Photoshop, and browse to select camera
raw files.) When you finish making adjustments in the Camera Raw dialog box, click Open to accept changes.
Press Shift while clicking Open to open the image as a Smart Object in Photoshop. At any time, you can doubleclick the Smart Object layer that contains the raw file to adjust the Camera Raw settings.
Shift-double-click a thumbnail in Adobe Bridge to open a camera raw image in Photoshop without opening the
Camera Raw dialog box. Hold down Shift while choosing File > Open to open multiple selected images.
• To import camera raw images in After Effects using Adobe Bridge, select one or more camera raw files in Adobe
Bridge, and then choose File > Place In After Effects. (You can also choose a File > Import command in After
Effects and browse to select camera raw files.) When you finish making adjustments in the Camera Raw dialog
box, click OK to accept changes.
• To import TIFF and JPEG files into After Effects using Camera Raw, select File > Import in After Effects, select
All Files from the Enable menu (Mac OS) or Filesof Type menu (Windows) inthe After Effects Import dialogbox.
Select the file to import, select Camera Raw from the Format menu, and click Open.
• Placing or dragging image stacks from Adobe Bridge into After Effects imports them as an image sequence. Add
an extrabullet specific to importing camera raw files asa sequence into After Effects. Camera Rawsettings applied
to the first camera raw file upon import are applied to the remaining files in the sequence unless an XMP sidecar
fileispresentforanysubsequentfileinthesequence.Inthatcase,thesettingsintheXMPfileorintheDNGfile
are applied to that specific framein the sequence, all other frames use the settings that the first file in the sequence
specifies.
93
Save a camera raw image in another format
You can save camera raw files from the Camera Raw dialog box in PSD, TIFF, JPEG, or DNG formats.
When you use the Save command in the Camera Raw dialog box, files are placed in a queue to be processed and
saved. This is useful if you are processing several files in the Camera Raw dialog box and saving them in the same
format.
1 In the Camera Raw dialog box, click the Save button in the lower-left corner of the dialog box.
Alt-click (Windows) or Option-click (Mac OS) Save to suppress the Camera Raw Save Options dialog box when
saving a file.
2 In the Save Options dialog box, specify the following options:
Destination Specifies where to save the file. If necessary, click the Select Folder button and navigate to the location.
File Naming Specifies the file name usinga naming convention thatincludes elementssuch as date and camera serial
number. Using informative file names based on a naming convention helps you keep image files organized.
3 Choose a file format from the Format menu.
4 Click Save.
Page 99

AFTER EFFECTS CS3
User Guide
Format options
Digital Negative Saves a copy of the camera raw file in the DNG file format.
• Compressed (lossless) Uses lossless compression, meaning that no information is lost while reducing the file size.
• Convert To Linear Image Stores theimage datain aninterpolated (demosaiced) format. The resultinginterpolated
image can be interpreted by other software even if that software does not have a profile for the digital camera that
captured the image.
• Embed Original Raw File Stores all of the original camera raw image data in the DNG file.
• JPEG Preview Embeds a JPEG preview in the DNG file. If you decide to embed a JPEG preview, you can choose
the preview size. If you embed JPEG previews, other applications can view the contents of the DNG file without
parsing the camera raw data.
JPEG Saves copies of the camera raw files in JPEG (Joint Photographic Experts Group) format. To specify the
amount of compression, enter a value from 0 to 12 or choose from the menu. Entering a higher value, or choosing
High or Maximum, applies less compression and increases file size and image quality. JPEG format is commonly
used todisplay photographs andother continuous-toneimages inweb photo galleries, slideshows, presentations, and
other online services.
TIFF Saves copies of the camera raw files as TIFF (Tagged-Image File Format) files. Specify whether to apply no
compression, or LZW or ZIP file compression. TIFF is a flexible bitmap image format supported by virtually all
paint, image-editing, and page-layout applications. TIFF provides greater compression and compatibility with other
applications than does PSD format.
94
Photoshop Saves copies of the camera raw files in the PSD file format. You can specify whether to preserve cropped
pixel data in the PSD file.
Adjusting color in Camera Raw
Using histogram and RGB levels in Camera Raw
A histogram is a representation of the number of pixels at each luminance value in an image. A histogram that has
nonzero values for each luminance value indicates an image that takes advantage of the full tonal scale. A histogram
that doesn’t use the full tonal range corresponds to a dull image that lacks contrast. A histogram with a spike at the
left side indicates shadow clipping; a histogram with a spike on the right side indicates highlight clipping.
Select Shadows or Highlights to see, in the preview image, which pixels are being clipped. For more information, see
“Preview highlight and shadow clipping in Camera Raw” on page 95.
One common task for adjusting an image is to spread out the pixel values more evenly from left to right on the
histogram, instead of having them bunched up at one end or the other.
A histogram is made up of three layers of color that represent the red, green, and blue color channels. White appears
when all three channels overlap; yellow, magenta, and cyan appear when two of the RGB channels overlap (yellow
equals the red + green channels, magentaequals the red + blue channels, and cyanequals the green + blue channels).
The histogram changes automatically as you adjust the settings in the Camera Raw dialog box.
The RGB values of the pixel under the pointer (in the preview image) appear below the histogram.
Page 100

AFTER EFFECTS CS3
User Guide
Note: You can also use the Color Sampler tool to place up to nine color samplers in the preview image. The RGB values
appear above the preview image. To remove a color sampler, Alt-click (Windows) or Option-click (Mac OS) it. To clear
the color samplers, click Clear Samplers.
The Camera Raw dialog box displays the RGB values of the pixel under the pointer.
Preview highlight and shadow clipping in Camera Raw
Clipping occurs when a pixel’s color values are higher than the highest value or lower than the lowest value that can
be represented in the image; overbright values are clipped to output white, and overdark values are clipped to output
black. The result is a loss of image detail.
• To see which pixels are being clipped with the rest of the preview image, select Shadows or Highlights options
beneath the histogram.
• To see only the pixels that are being clipped, press Alt (Windows) or Option (Mac OS) while dragging the
Exposure, Recovery, or Black sliders.
95
For highlights, pixels that are clipped in all color channels appear white. For shadows, pixels that are clipped in all
color channels appear black. Clipping in one or two channels is shown by the primary color (red, green, blue) or a
combined color (cyan, magenta, yellow).
Note: In some cases, clipping occurs because the color space that you are working has a gamut that is too small. If your
colors are being clipped, consider working in a color space with a large gamut, such as ProPhoto RGB.
White balance controls in Camera Raw
In very simple terms, adjusting the white balance is a matter of identifying what objects in the image should be
neutral-colored (white or gray) and then adjusting the colors in the image to make those objects neutral-colored. A
whiteorgrayobjectinascenetakesonthecolorcastbytheambientlightorflashusedtoshootthepicture.When
you use the White Balance tool to specify an object that should be white or gray, Camera Raw can determine the
color of the light in which the scene was shot and then adjust for scene lighting automatically.
Color temperature (in Kelvins) is used as a measure of scene lighting because natural and incandescent light sources
give off light in a predictable distribution according to their temperature.
A digital camera records the white balance at the time of exposure as a metadata entry. The Camera Raw plug-in
reads this value and makes it the initial setting when you open the file in the Camera Raw dialog box. This setting
usually yields the correct color temperature, or nearly so. You can adjust the white balance if it is not quite right.
Note: Not all color casts are a result of incorrect white balance. Use the controls in the Calibrate tab to correct a color
cast that remains after the white balance is adjusted.
 Loading...