

Page 1
USER GUIDE
Page 2

Copyright
© 2007 Adobe Systems Incorporated. All rights reserved.
Adobe® Reader® 8 for Windows®, Mac OS, and UNIX
If this guide is distributed with software that includes an end user agreement, this guide, as well as the software described in it, is furnished under license and may be used or
copied only in accordance with the terms of such license. Except as permitted by any such license, no part of this guide may be reproduced, stored in a retrieval system, or transmitted, in any form or by any means, electronic, mechanical, recording, or other wise, without the prior written permission of Adobe Systems Incorporated.Pleasenotethatthe
content in this guide is protected under copyright law even if it is not distributed with software that includes an end user license agreement.
Thecontentofthisguideisfurnishedforinformationaluseonly,issubjecttochangewithoutnotice,andshouldnotbeconstruedasacommitmentbyAdobe Systems Incorporated. Adobe Systems Incorporated assumes no responsibility or liability for any errors or inaccuracies that may appear in the informational content contained in this guide.
Please remember that existing artwork or images that you may want to include in your project may be protected under copyright law. The unauthorized incorporation of such
material into your new work could be a violation of the rights of the copyright owner. Please be sure to obtain any permission required from the copyright owner.
Any references to company names in sample templates or images are for demonstration purposes only and are not intended to refer to any actual organization.
Adobe, the Adobe logo, the Adobe PDF logo, Acrobat, Acrobat Connect, Breeze, Distiller, Flash, FrameMaker, Illustrator, InDesign, LiveCycle, Photoshop, Photoshop Album,
PostScript, PostScript 3, Reader, and Version Cue are either registered trademarks or trademarks of Adobe Systems Incorporated in the United States and/or other countries.
Apple, Mac and Macintosh are trademarks of Apple Inc., registered in the United States and other countries. Microsoft and Windows are either registered trademarks or trademarks of Microsoft Corporation in the United States and/or other countries. UNIX is a registered trademark of the Open Group in the US and other countries. Solaris is a
trademark or registered trademark of Sun Microsystems, Inc. in the United States and other countries. All other trademarks are the property of their respective owners.
The Spelling portion of this product is based on Proximity Linguistic Technology. © Copyright 1989, 2004 All Rights Reserved Proximity Technology A Division of Franklin
Electronic Publishers, Inc. Burlington, New Jersey USA. © Copyright 1990 Merriam-Webster Inc. © Copyright 1990 All Rights Reserved Proximity Technology A Division of
Franklin Electronic Publishers, Inc. Burlington, New Jersey USA. © Copyright 2003, 2004 Franklin Electronic Publishers, Inc. © Copyright 2003, 2004 All Rights Reserved
Proximity Technology A Division of Franklin Electronic Publishers, Inc. Burlington, New Jersey USA. © Copyright 1991 Dr. Lluis de Yzaguirre I Maura. © Copyright 1991 All
Rights Reserved Proximity Technology A Division of Franklin ElectronicPublishers, Inc. Burlington, New Jersey USA. © Copyright 1990 Munksgaard International Publishers
Ltd. © Copyright 1990 All Rights Reserved Proximity Technology A Division of Franklin Electronic Publishers, Inc. Burlington, New Jersey USA. © Copyright 1990, 1995 Van
Dale Lexicografie bv © Copyright 1990, 1996 All Rights Reserved Proximity Technology A Division of Franklin Electronic Publishers, Inc. Burlington, New Jersey USA. ©
Copyright 1990,2004 IDE a.s.© Copyright1990, 2004 AllRights Reserved Proximity Technology A Division ofFranklin ElectronicPublishers, Inc.Burlington, New JerseyUSA.
© Copyright 1992Hachette /Franklin Electronic Publishers, Inc.© Copyright 2004 All Rights Reserved ProximityTechnology A Divisionof Franklin Electronic Publishers,Inc.
Burlington, New Jersey USA. © Copyright 1991 Text & Satz Datentechnik © Copyright 1991 All Rights Reserved Proximity Technology A Division of Franklin Electronic
Publishers, Inc.Burlington, New JerseyUSA. © Copyright 2004 Bertelsmann Lexikon Verlag © Copyright2004 All RightsReserved ProximityTechnology A Division ofFranklin
Electronic Publishers, Inc.Burlington, New Jersey USA.© Copyright2004 MorphoLogic Inc.© Copyright 2004All RightsReserved ProximityTechnology A Division of Franklin
Electronic Publishers, Inc. Burlington, New Jersey USA. © Copyright 1990 William Collins Sons & Co. Ltd. © Copyright 1990 All Rights Reserved Proximity Technology A
Division of Franklin Electronic Publishers, Inc. Burlington, New Jersey USA. © Copyright 1993, 1994, 1995 Russicon Company Ltd. © Copyright 1995 All Rights Reserved
Proximity Technology A Division of Franklin Electronic Publishers, Inc. Burlington, New Jersey USA.
Portions of Adobe Acrobat include technology used under license from Autonomy and are copyrighted.
This product contains either BISAFE and/or TIPEM software by RSA Data Security, Inc.
e_Db is a licensed product from Simple Software Solutions, Inc.
Adobe Systems Incorporated, 345 Park Avenue, San Jose, California 95110, USA.
Notice to U.S. Government End Users. The Software and Documentation are “Commercial Items,” as that term is defined at 48 C.F.R. §2.101, consisting of “Commercial
Computer Software” and “Commercial Computer Software Documentation,” as such terms are used in 48 C.F.R. §12.212 or 48 C.F.R. §227.7202, as applicable. Consistent with
48 C.F.R. §12.212 or 48 C.F.R. §§227.7202-1 through 227.7202-4, as applicable, the Commercial Computer Software and Commercial Computer Software Documentation are
being licensed to U.S. Government end users (a) onlyas Commercial Itemsand (b)with onlythose rights asare granted toall otherend users pursuant tothe terms andconditions
herein. Unpublished-rights reserved under the copyright laws of the United States. Adobe agrees to comply with all applicable equal opportunity laws including, if appropriate,
the provisions of Executive Order 11246, as amended, Section 402 of the Vietnam Era Veterans Readjustment Assistance Act of 1974 (38 USC 4212), and Section 503 of the
Rehabilitation Act of 1973, as amended, and the regulations at 41 CFR Parts 60-1 through 60-60, 60-250, and 60-741. The affirmative action clause and regulations contained in
the preceding sentence shall be incorporated by reference.
Page 3

Contents
Chapter 1: Before you begin
Installation . . . . . . . . . . . . . . . . . . . . . . . . . . . . . . . . . . . . . . . . . . . . . . . . . . . . . . . . . . . . . . . . . . . . . . . . . . . . . . . 1
Using Adobe Help . . . . . . . . . . . . . . . . . . . . . . . . . . . . . . . . . . . . . . . . . . . . . . . . . . . . . . . . . . . . . . . . . . . . . . . . 1
Resources . . . . . . . . . . . . . . . . . . . . . . . . . . . . . . . . . . . . . . . . . . . . . . . . . . . . . . . . . . . . . . . . . . . . . . . . . . . . . . . . 3
What’s new . . . . . . . . . . . . . . . . . . . . . . . . . . . . . . . . . . . . . . . . . . . . . . . . . . . . . . . . . . . . . . . . . . . . . . . . . . . . . . . 6
Chapter 2: Work area
Work area basics . . . . . . . . . . . . . . . . . . . . . . . . . . . . . . . . . . . . . . . . . . . . . . . . . . . . . . . . . . . . . . . . . . . . . . . . . . 8
Customizing the work area . . . . . . . . . . . . . . . . . . . . . . . . . . . . . . . . . . . . . . . . . . . . . . . . . . . . . . . . . . . . . . . 11
Maintaining the software . . . . . . . . . . . . . . . . . . . . . . . . . . . . . . . . . . . . . . . . . . . . . . . . . . . . . . . . . . . . . . . . 16
Non-English languages . . . . . . . . . . . . . . . . . . . . . . . . . . . . . . . . . . . . . . . . . . . . . . . . . . . . . . . . . . . . . . . . . . 17
Chapter 3: Viewing, searching, and saving PDFs
Viewing PDF pages . . . . . . . . . . . . . . . . . . . . . . . . . . . . . . . . . . . . . . . . . . . . . . . . . . . . . . . . . . . . . . . . . . . . . . 19
Opening restricted documents . . . . . . . . . . . . . . . . . . . . . . . . . . . . . . . . . . . . . . . . . . . . . . . . . . . . . . . . . . 29
Adjusting PDF views . . . . . . . . . . . . . . . . . . . . . . . . . . . . . . . . . . . . . . . . . . . . . . . . . . . . . . . . . . . . . . . . . . . . . 30
Layers . . . . . . . . . . . . . . . . . . . . . . . . . . . . . . . . . . . . . . . . . . . . . . . . . . . . . . . . . . . . . . . . . . . . . . . . . . . . . . . . . . . 35
Page thumbnails and bookmarks . . . . . . . . . . . . . . . . . . . . . . . . . . . . . . . . . . . . . . . . . . . . . . . . . . . . . . . . . 36
Searching PDFs . . . . . . . . . . . . . . . . . . . . . . . . . . . . . . . . . . . . . . . . . . . . . . . . . . . . . . . . . . . . . . . . . . . . . . . . . . 37
Saving PDFs . . . . . . . . . . . . . . . . . . . . . . . . . . . . . . . . . . . . . . . . . . . . . . . . . . . . . . . . . . . . . . . . . . . . . . . . . . . . . 43
Reusing PDF content . . . . . . . . . . . . . . . . . . . . . . . . . . . . . . . . . . . . . . . . . . . . . . . . . . . . . . . . . . . . . . . . . . . . . 44
iii
Chapter 4: Review and comment
Meetings . . . . . . . . . . . . . . . . . . . . . . . . . . . . . . . . . . . . . . . . . . . . . . . . . . . . . . . . . . . . . . . . . . . . . . . . . . . . . . . . 46
Participating in a PDF review . . . . . . . . . . . . . . . . . . . . . . . . . . . . . . . . . . . . . . . . . . . . . . . . . . . . . . . . . . . . . 47
Tracking PDF reviews . . . . . . . . . . . . . . . . . . . . . . . . . . . . . . . . . . . . . . . . . . . . . . . . . . . . . . . . . . . . . . . . . . . . 51
Commenting . . . . . . . . . . . . . . . . . . . . . . . . . . . . . . . . . . . . . . . . . . . . . . . . . . . . . . . . . . . . . . . . . . . . . . . . . . . . 54
Managing comments . . . . . . . . . . . . . . . . . . . . . . . . . . . . . . . . . . . . . . . . . . . . . . . . . . . . . . . . . . . . . . . . . . . . 65
Approval workflows . . . . . . . . . . . . . . . . . . . . . . . . . . . . . . . . . . . . . . . . . . . . . . . . . . . . . . . . . . . . . . . . . . . . . . 70
Chapter 5: Forms
Forms basics . . . . . . . . . . . . . . . . . . . . . . . . . . . . . . . . . . . . . . . . . . . . . . . . . . . . . . . . . . . . . . . . . . . . . . . . . . . . . 73
Filling in PDF forms . . . . . . . . . . . . . . . . . . . . . . . . . . . . . . . . . . . . . . . . . . . . . . . . . . . . . . . . . . . . . . . . . . . . . . 75
Submitting forms . . . . . . . . . . . . . . . . . . . . . . . . . . . . . . . . . . . . . . . . . . . . . . . . . . . . . . . . . . . . . . . . . . . . . . . . 79
Chapter 6: Adding digital signatures to PDFs
Quickstart . . . . . . . . . . . . . . . . . . . . . . . . . . . . . . . . . . . . . . . . . . . . . . . . . . . . . . . . . . . . . . . . . . . . . . . . . . . . . . . 80
Digital signatures . . . . . . . . . . . . . . . . . . . . . . . . . . . . . . . . . . . . . . . . . . . . . . . . . . . . . . . . . . . . . . . . . . . . . . . . 81
Signing PDFs . . . . . . . . . . . . . . . . . . . . . . . . . . . . . . . . . . . . . . . . . . . . . . . . . . . . . . . . . . . . . . . . . . . . . . . . . . . . 84
Creating or obtaining digital IDs . . . . . . . . . . . . . . . . . . . . . . . . . . . . . . . . . . . . . . . . . . . . . . . . . . . . . . . . . . 86
Page 4

Chapter 7: Validating digital signatures
Validating signatures . . . . . . . . . . . . . . . . . . . . . . . . . . . . . . . . . . . . . . . . . . . . . . . . . . . . . . . . . . . . . . . . . . . . . 91
Sharing and managing certificates . . . . . . . . . . . . . . . . . . . . . . . . . . . . . . . . . . . . . . . . . . . . . . . . . . . . . . . 94
Directory servers . . . . . . . . . . . . . . . . . . . . . . . . . . . . . . . . . . . . . . . . . . . . . . . . . . . . . . . . . . . . . . . . . . . . . . . . 98
Chapter 8: Accessibility, tags, and reflow
Accessibility features . . . . . . . . . . . . . . . . . . . . . . . . . . . . . . . . . . . . . . . . . . . . . . . . . . . . . . . . . . . . . . . . . . . . 100
Checking the accessibility of PDFs . . . . . . . . . . . . . . . . . . . . . . . . . . . . . . . . . . . . . . . . . . . . . . . . . . . . . . . 102
Reading PDFs with reflow and accessibility features . . . . . . . . . . . . . . . . . . . . . . . . . . . . . . . . . . . . . . 104
Chapter 9: Movies, sounds, and 3D models
Movies and sounds . . . . . . . . . . . . . . . . . . . . . . . . . . . . . . . . . . . . . . . . . . . . . . . . . . . . . . . . . . . . . . . . . . . . . 111
Interacting with 3D models . . . . . . . . . . . . . . . . . . . . . . . . . . . . . . . . . . . . . . . . . . . . . . . . . . . . . . . . . . . . . 112
Chapter 10: Printing
Basic printing tasks . . . . . . . . . . . . . . . . . . . . . . . . . . . . . . . . . . . . . . . . . . . . . . . . . . . . . . . . . . . . . . . . . . . . . 123
Other ways to print PDFs . . . . . . . . . . . . . . . . . . . . . . . . . . . . . . . . . . . . . . . . . . . . . . . . . . . . . . . . . . . . . . . . 126
Advanced print settings . . . . . . . . . . . . . . . . . . . . . . . . . . . . . . . . . . . . . . . . . . . . . . . . . . . . . . . . . . . . . . . . . 129
Chapter 11: Keyboard shortcuts
Keyboard shortcuts . . . . . . . . . . . . . . . . . . . . . . . . . . . . . . . . . . . . . . . . . . . . . . . . . . . . . . . . . . . . . . . . . . . . . 132
iv
Index . . . . . . . . . . . . . . . . . . . . . . . . . . . . . . . . . . . . . . . . . . . . . . . . . . . . . . . . . . . . . . . . . . . . . . . . . . . . . . . . . . 139
Page 5
Chapter 1: Before you begin
Installation
Requirements
To review complete system requirements and recommendations for your Adobe® software, see the Read Me file
included with your software.
Using Adobe Help
Adobe Help resources
Documentation for your Adobe software is available in a variety of formats.
In-product and LiveDocs Help
In-product Help provides access to all documentation and instructional content available at the time the software
ships. It is available through the Help menu in your Adobe software.
1
LiveDocs Help includes all the content from in-product Help, plus updates and links to additional instructional
content available on the web. For some products, you can also add comments to the topics in LiveDocs Help. Find
LiveDocs Help for your product in the Adobe Help Resource Center, at www.adobe.com/go/documentation.
Most versions of in-product and LiveDocs Help let you search across the Help systems of multiple products. Topics
may also contain links to relevant content on the web or to topics in the Help of another product.
Page 6

ADOBE READER 8
User Guide
Think of Help, both in the product and on the web, as a hub for accessing additional content and communities of
users. The most complete and up-to-date version of Help is always on the web.
How To topics
The How To topics provide a brief overview of the most common tasks. If you need more information, click the link
at the bottom of the How To topic to view the related Help topic.
PDF documentation
The in-product Help is also available as an Adobe PDF that is optimized for printing. Other documents, such as
installation guides and white papers, may also be provided as PDFs.
All PDF documentation is available through the Adobe Help Resource Center, at www.adobe.com/go/documen-
tation.Tosee the PDF documentation includedwith your software, look in the Documents folder onthe installation
or content disc.
Printed documentation
Printed editions of the in-product Help may be available for purchase in the Adobe Store, at
www.adobe.com/go/store. You can also find books published by Adobe publishing partners in the Adobe Store.
A printed workflow guide is included with all Adobe Creative Suite® 3 products, and stand-alone Adobe products
may include a printed getting started guide.
2
Note: Printed documentation is not available in all languages.
Using Help in the product
In-productHelpisavailablethroughtheHelpmenu.AfteryoustarttheAdobeHelpViewer,youcanaccessHelpfor
additional Adobe products installed on your computer. Topics may contain links to additional content on the web.
If you search for a phrase, such as “shape tool,” enclose it in quotation marks to see only those topics that include all
the words in the phrase (applies to roman language versions of the software).
Accessibility features
Adobe Help content is accessible to people with disabilities—such as mobility impairments, blindness, and low
vision. In-product Help supports these standard accessibility features:
• The user can change text size with standardcontext menu commands (Microsoft® Windows®) and standard menu
commands (Apple Mac OS).
• Links are underlined for easy recognition.
• If link text doesn’t match the title of the destination, the title is referenced in the Title attribute of the Anchor tag.
For example, the Previous and Next links include the titles of the previous and next topics.
• Content supports high-contrast mode.
• Images without captions include alternate text.
• Each frame has a title to indicate its purpose.
• Standard HTML tags define content structure for screen reading or text-to-speech tools.
• Style sheets control formatting, so there are no embedded fonts.
Page 7

ADOBE READER 8
User Guide
Keyboard shortcuts for Help toolbar controls
Back button Alt+Left Arrow (Windows)
Forward button Alt+Right Arrow (Windows)
Print Ctrl+P (Windows)
About button Ctrl+I (Windows)
Help For menu Alt+Down Arrow or Alt+Up Arrow to view Help for another application (Windows/UNIX)
Keyboard shortcuts for Help navigation
• To move between panes, press Ctrl+Tab (forward) and Shift+Ctrl+Tab (backward) (Windows/UNIX).
• To move through and outline links in a pane, press Tab (forward) or Shift+Tab (backward) (Windows/UNIX).
• To activate an outlined link, press Enter (Windows/UNIX).
• To change text size, press Ctrl+plus sign (+) or Ctrl+minus sign (-) (Windows).
Resources
3
Acrobat videos
Adobe Video Workshop covers a wide range of subjects for Adobe Acrobat®, including these:
• Setting up the workspace and taskbars
• Combining files into a PDF
• Converting PDFs
• Modifying PDFs
• Adding comments to PDFs
• Working with shared reviews
• Reviewing and summarizing comments
• Adding security to forms
• Collaborating in real time with Adobe Acrobat Connect™
• Preflighting files
• Printing documents
To access Adobe Creative Suite 3 video tutorials, visit Adobe Video Workshop at
www.adobe.com/go/learn_videotutorials.
Note: Adobe Video Workshop is not available in all languages.
Extras
You have access to a wide variety of resources that will help you make the most of your Adobe software. Some of
these resources are installed on your computer during the setup process; additional content is included on the installation or content disc, if applicable. Unique extras are also offered online by the Adobe Exchange community, at
www.adobe.com/go/exchange.
Page 8
ADOBE READER 8
User Guide
Installed resources
During software installation, a number ofresources are placed inyour applicationfolder.Toview those files, navigate
to the application folder on your computer. In UNIX, navigate to the Resource folder in the Installation directory.
Adobe Exchange
For more free content, visit www.adobe.com/go/exchange, an online community where users download and share
thousands of free actions, extensions, plug-ins, and other content for use with Adobe products.
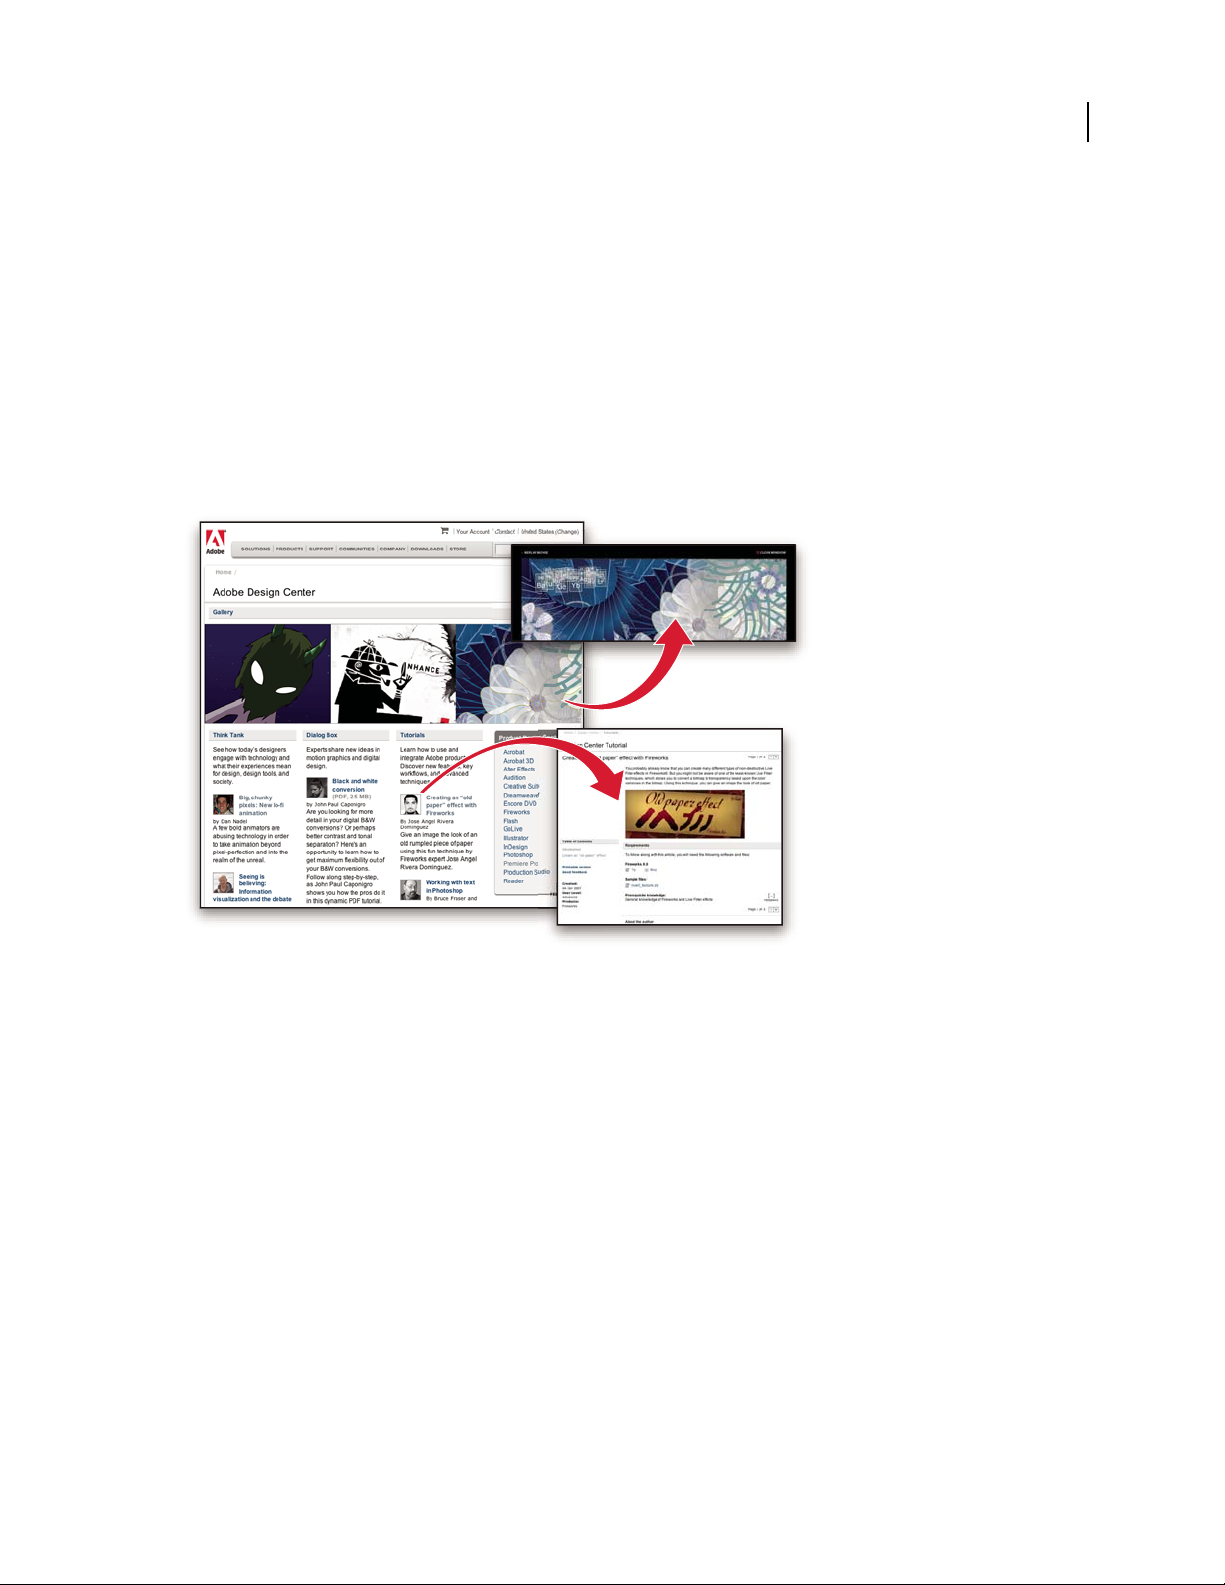
Adobe Design Center
Adobe Design Center offers articles, inspiration, and instruction from industry experts, top designers, and Adobe
publishing partners. New content is added monthly.
4
You can find hundreds of tutorials for design products and learn tips and techniques through videos, HTML
tutorials, and sample book chapters.
New ideas are the heart of Think Tank, Dialog Box, and Gallery:
• ThinkTankarticlesconsiderhowtoday’sdesignersengagewithtechnologyandwhattheirexperiencesmeanfor
design, design tools, and society.
• In Dialog Box, experts share new ideas in motion graphics and digital design.
• The Gallery showcases how artists communicate design in motion.
Visit Adobe Design Center at www.adobe.com/designcenter.
Page 9
ADOBE READER 8
User Guide
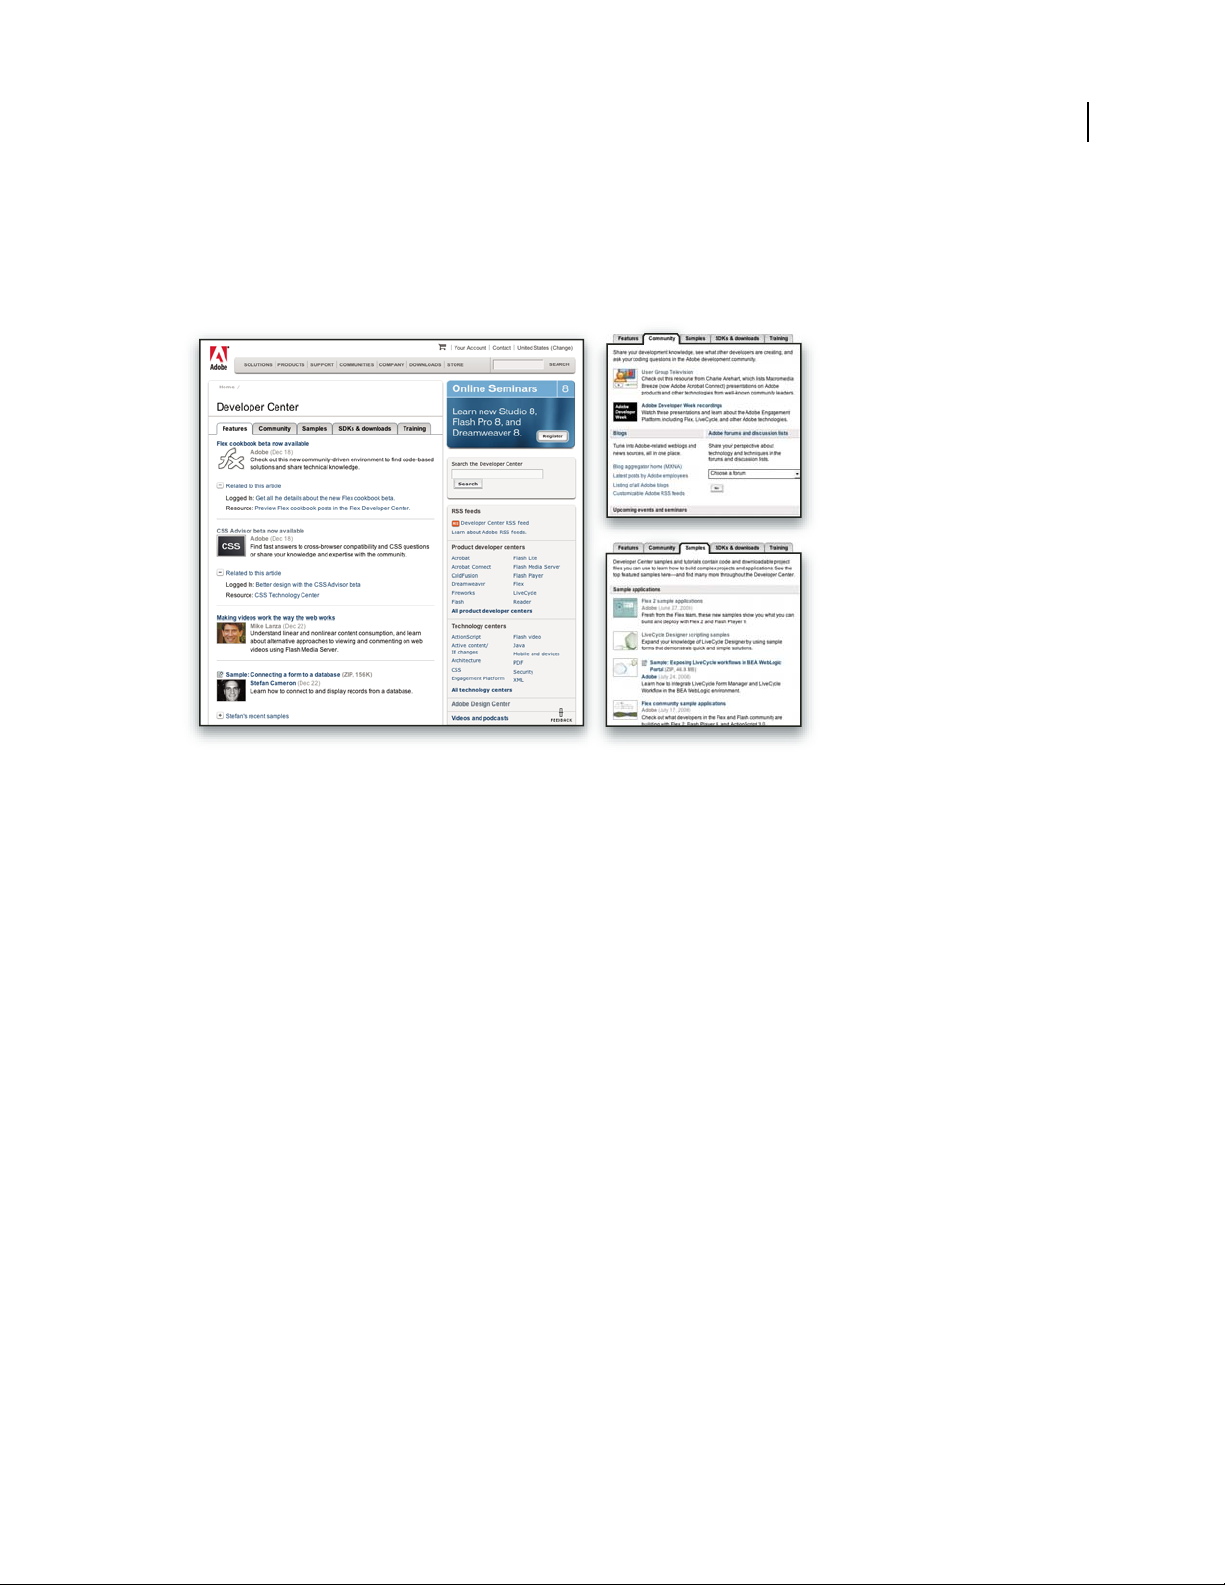
Adobe Developer Center
Adobe Developer Center provides samples, tutorials, articles, and community resources for developers who build
rich Internet applications,websites, mobilecontent, and other projects usingAdobe products.The Developer Center
also contains resources for developers who develop plug-ins for Adobe products.
5
In addition to sample code and tutorials, you'll find RSS feeds, online seminars, SDKs, scripting guides, and other
technical resources.
Visit Adobe Developer Center at www.adobe.com/go/developer.
Customer support
VisittheAdobeSupportwebsite,atwww.adobe.com/support, to find troubleshooting information for your product
and tolearn about freeand paid technicalsupport options.Follow the Training link foraccess to Adobe Press books,
a variety of training resources, Adobe software certification programs, and more.
Downloads
Visit www.adobe.com/go/downloads to find free updates, tryouts,and other useful software. In addition, the Adobe
Store (at www.adobe.com/go/store) provides access to thousands of plug-ins from third-party developers, helping
you to automate tasks, customize workflows, create specialized professional effects, and more.
Adobe Labs
Adobe Labs gives youthe opportunity toexperience andevaluate new and emerging technologies and products from
Adobe.
At Adobe Labs, you have access to resources such as these:
• Prerelease software and technologies
• Code samples and best practices to accelerate your learning
• Early versions of product and technical documentation
Page 10

ADOBE READER 8
User Guide
• Forums, wiki-based content, and other collaborative resources to help you interact with like-minded developers
Adobe Labs fosters a collaborative software development process. In this environment, customers quickly become
productive with new products and technologies. Adobe Labs is also a forum for early feedback, which the Adobe
development teams use to create software that meets the needs and expectations of the community.
Visit Adobe Labs at www.adobe.com/go/labs.
User communities
User communities feature forums, blogs, and other avenues for users to share technologies, tools, and information.
Users can ask questions and find out how others are getting the most out of their software. User-to-user forums are
available in English, French, German, and Japanese; blogs are posted in a wide range of languages.
To participate in forums or blogs, visit www.adobe.com/communities.
What’s new
Viewing, navigating, and searching
Beyond Adobe Reader window At a glance, see the main features of Adobe® Reader® 8, and click links to start tasks,
get Adobe news, or learn more about features. See “Start in the Beyond Adobe Reader window” on page 11.
6
Maximized work area View PDFs in a new visual design for the work area, navigation pane, and toolbars. User
interface elements have been removed to maximize space. See “View the work area” on page 8.
Customizable toolbars Easily hide or show individual tools by right-clicking/Control-clicking a toolbar, or use the
More Tools dialog box to customize toolbars. See “Display and arrange toolbars” on page 12.
Search enhancements Find words or use advanced search tools, all from the same integrated toolbar. View search
results in a floating, resizable panel. Search documents in a PDF package. See “Search features overview” on page 37.
Review and commenting
Acrobat Connect meetings Access the real-time, web-based collaboration capabilities of Acrobat Connect (sold
separately). Click the Start Meeting button to escalate from a document review to real-time communication with
others over the Internet. Acrobat Connect uses Adobe Flash® CS3 Professional and a personal meeting room for
screen sharing, audio and video conferencing, whiteboarding, and more. When you first click the Start Meeting
button, you can create a free trial account. Each subsequent time, you go directly to your Acrobat Connect personal
meeting room. (Acrobat Connect is not available in all languages.) See “Meetings” on page 46.
Shared reviews Participate in a shared review. Comments are stored on a central server, allowing all participants to
see comments in real time. No extra server software is needed. Shared reviews work with a folder on a network
server, a Windows SharePoint workspace, or a web folder on a web server. Comments are automatically retrieved,
evenifAdobeReader®isn’trunning,andcanbeaddedevenwhenyouaredisconnectedfromthenetwork.Notifications alert users that thereare new comments. Comments from reviewers outside thefirewall can be merged into the
shared review. See “Participating in a PDF review” on page 47.
Review Tracker Provides details about all active reviews. For shared reviews, details include the number of
comments from a reviewer, the review deadline, server status, unread reviews, and a summary of updated shared
reviews. See “Tracking PDF reviews” on page 51.
Commenting and markup enhancements View and accurately place callout and cloud markups as you apply them.
The callout leader automatically moves as you position the callout. Selected comments are highlighted for easier
Page 11

ADOBE READER 8
User Guide
visibility when zoomed out. Rotate stamps and select all tools from a single, integrated toolbar. See “Commenting”
on page 54.
Digital signatures
Roaming IDs Enroll in a signing service where the server holds your private key. Authenticate to the server from
Acrobat and allow the document to be signed with your credentials stored on the server. See “Set up a roaming ID
account” on page 88.
Signature preview mode and conformance checker Before signing, view thedocument content as it will appear after
eliminating transparency, scripts, fonts, and other dynamic content that can alter a document’s appearance. Reader
automatically runs the Document Integrity Checker, which now includes checking for Qualified Signatures
conformance before entering signature preview mode. See “Sign in Preview Document mode” on page 85.
Certificate enhancements Predeterminethe signing certificate. Configurethe chain model for certificatevalidation.
See “Sharing and managing certificates” on page 94.
Additional new features
FIPS mode Version 8.1 of Readerprovides aFIPS mode torestrict data protection to Federal InformationProcessing
Standard (FIPS) 140-2 approved algorithms using the RSA BSAFE Crypto-C 2.1 encryption module.
Microsoft Windows Vista™ support Version 8.1 of Reader supports Windows Vista.
7
Installing Acrobat on 64-bit versions of Windows Version 8.1 of Reader supports the 64-bit versions of Microsoft
Windows XP and Windows Vista.
Digital Editions Read and organize eBooks and other publications with Adobe® Digital Editions (a separate
product). When you first click the Digital Editions menu item, you can download and install the Adobe Digital
Editions software. After installation, choose Digital Editions togo directly to your Adobe Digital Editions bookshelf.
See “Adobe Digital Editions” on page 17.
Booklet printing Print pages as a simple booklet, for example, 2-up, saddle-stitched. See “Print a booklet” on
page 127.
Printing over the Internet Print documents to a FedEx Kinkos office in the United States. See “Print over the
Internet” on page 123.
PDF packages Easily extract documents from a package. Search and print the current or selected document, or all
documents within the package. See “About PDF packages” on page 10.
Forms Tracker Track the forms you fill out. See “About Forms Tracker” on page 74.
2D Measurement tool enhancements Measurement is recalculated if start or end points move. Measurements snap
to lines, intersections, or corners. See “Measure the height, width, or area of objects” on page 34.
Support for Acrobat 3D Version 8 Version 8.1 of Reader supports Adobe® Acrobat® 3D version 8.
Page 12

Chapter 2: Work area
As you get acquainted with Adobe® Reader® 8, make setting up your Reader work environment a priority. The more
you learn about its potential, the better you can take advantage of its features, tools, and options.
There’s much more to the application than you see at first glance. Reader has hidden tools, preferences, and options
that can enhance your experience and give you greater control over how your work area is arranged and displayed.
Work area basics
View the work area
Reader opens in two different ways: as a stand-alone application, and in a web browser. The associated work areas
differ in small but important ways.
The Reader work area includes a document pane that displays PDFs and a navigation pane on the left side that helps
you browse through the current PDF. Toolbars near the top of the window provide other controls that you can use
to work with PDFs.
8
Note: OpeningcertaintypesofPDFscausesspecializedpartsoftheworkareatoappear:thedocumentmessagebarand
PDF package navigation features. For other types of PDFs, these areas are not seen and not available.
See also
“Document message bar” on page 9
“Navigation areas for PDF packages” on page 10
View the work area for PDFs open in the application
1
Click the Reader icon on the desktop, or use the Start menu (Windows) or Finder (Mac OS) to start the Reader
application. For UNIX, either click on the desktop icon or select Applications > Office.
2 Choose File > Open, navigate to and select any PDF on your computer, and click Open.
View the work area for PDFs open in a web browser
1
Open a web browser application.
2 Do one of the following:
• Select a PDF anywhere on the Internet and open it.
• Choose File > Open (or Open File). If necessary, choose PDF or All Files in the pop-up menu for the type of file.
Then navigate to and select any PDF on your computer or local network, and click Open.
3 Identify items in the work area.
Open a PDF
You can open a PDF from within the Reader application, from the desktop, or from within certain other applications.
Page 13

ADOBE READER 8
User Guide
Open a PDF in the application
❖ Start Reader and do one of the following:
• Choose File > Open, or click the Open button in the toolbar. In the Open dialog box, select one or more
filenames, and click Open. PDF documents usually have the extension .pdf.
• (Windows/UNIX) Choose File > [a previously opened PDF].
• (Mac OS) Choose File > Open Recent File > [a previously opened PDF].
If more than one document is open, you can switch between documents by choosing the document name from the
Window menu. In Windows, the application places a button for each open document on the Windows taskbar. You
can click this button to move between open documents.
Open a PDF from the desktop or within another application
❖ Do one of the following:
• To open a PDF attached to an email message, open the message, either by double-clicking the PDF icon or right-
clicking/Control-clicking and choosing Open.
• To open a PDF linked to an open web page, click the PDF file link. The PDF usually opens in the web browser. In
UNIX, you can open the PDF in Reader or save it to the desktop.
• Double-click the PDF File icon in your file system.
9
Note: In Mac OS, you may not be able to open a PDF created in Windows by double-clicking the icon. Instead, choose
File > Open With > Reader.
Select another tool
By default, the Select tool is active when Reader opens, because it is the most versatile tool.
Specialized tools, such as those for zooming inor adding review comments, are available in toolbarsand in theTools
menus.
Select a tool
❖ Do one of the following:
• Select a tool in a toolbar.
• Choose Tools > [toolbar name] > [tool].
Switch temporarily to the Zoom In or Hand tool
You can use these tools temporarily, without deselecting the current tool.
• To select the Hand tool temporarily, hold down the spacebar.
• To select the Zoom In tool temporarily, hold down Ctrl+spacebar/Command+spacebar.
When you release the keys, Reader reverts to the previously active tool.
Document message bar
The document message bar appears only in certain types of PDFs. Typically, you see this area when you open a PDF
form, a PDF that has been sent to you for review, or a PDF with special rights or security restrictions. The document
message bar appears immediately below the toolbar area, and can be hidden or shown by clicking its button on
the left side of the work area.
Page 14

ADOBE READER 8
User Guide
Look on the document message bar for instructions on how to proceed and for any special buttons associated with
the task. The bar is color coded: purple for forms, yellow for reviews, and blue for certified or secure PDFs.
See also
“Filling in PDF forms” on page 75
“Commenting” on page 54
Navigation areas for PDF packages
When you open a PDF package, two unique areas appear:
PDF package navigation bar Located immediately below the toolbars area. Look here for the Cover Sheet
button , buttons that hide or set the orientation of the list of component documents, buttons for moving to the
next or previous component document, and an Options menu with commands for viewing, editing, and using the
PDF package.
List of component documents Bydefault,locatedbetweenthePDFpackagenavigationbarandthedocumentpane,
but canbe hidden or displayed vertically, to the left of the navigation pane. Alternately, itcan be located horizontally,
below the PDF package navigation bar. Selecting a component file in the list opens it in the document pane.
10
See also
“About PDF packages” on page 10
“View, sort, and search components in a PDF package” on page 21
About PDF packages
A PDFpackage converts multiple files—whichcan be indifferent formats andcreated in different applications—and
assembles them into an integrated PDF unit. The original files retain their individual identities, but are still part of
the onePDF package file. Each component file can beopened, read, edited, and formatted independentlyof the other
component files in the PDF package.
There are some advantages to working with files combined in a PDF package:
Viewing The component files do not open in separate windows, so you can quickly flip through them and make
changes without having to pause for the Open or Save dialog boxes.
Sorting The component PDFs in a PDF packages are listed under an assortment of categories that you can add to,
delete, hide, and customize. Then, you simply click the category name to sort the list.
Printing The Print command on the File menu includes commands for printing the currently open document, all
the documents in the PDF package, or multiple component documents selected in the PDF package list.
Searching The Advanced Search window includes options for searching the currently open document, all the
documents in the PDF package, or multiple component documents selected in the PDF package list.
See also
“View, sort, and search components in a PDF package” on page 21
“Print documents in a PDF package” on page 128
Page 15

ADOBE READER 8
User Guide
Start in the Beyond Adobe Reader window
The Beyond Adobe Reader® window opens by default when you start Reader from the application icon, Start menu
(Windows),or Dock (Mac OS).In UNIX, choose Application> Office. The home page in this window contains links
that open additional pages, which may include buttons and links that start specific tasks or display topics in the full
Reader Help system (which you are reading now).
Use the controls on the left side of the page to expand the list of new features in Adobe Reader 8.
You can close and reopen the Beyond Adobe Reader window, or simply let it remain open behind or beside the
Reader work area.
Start a task from the Beyond Adobe Reader window
1
OntheBeyondAdobeReaderhomepage,selectatopicgroup,suchasCollaborateorReaderEnabledPDFFiles.
2 Start a task or view a Help topic:
• Click an action text link or button to initiate a task.
• Click an information text link or button to open full Reader Help to the related Help topic.
If you decide totry adifferent topic group,click Homein the upper-left corner to return tothe Beyond Adobe Reader
home page.
11
Reopen and reset the Beyond Adobe Reader window
1
Choose Help > Beyond Adobe Reader to reopen the window.
2 Deselect the Do Not Show At Startup option in the upper-right corner.
Creating PDFs
Adobe Systems invented Portable Document Format (PDF) over15 years ago, asa solutionfor capturing and viewing
robust information from any application on any computer system. You can share PDFs you create with anyone
around the world with full confidence that other users see the document exactly as you see it.
Adobe Reader users can use the Adobe PDF Online Document Service to create PDFs. This web-based service is
available for free trial or subscription to users in the United States and Canada only.
For more information, choose File > Create Adobe PDF Online, which will connect you to the secure Adobe PDF
Online website.
Customizing the work area
Displaying menus
Ordinarily, it’s a good idea to keep the Reader menus visible so that they are available as you work. It is possible to
hidethem,usingtheView>MenuBarcommand.However,theonlywaytodisplayandusethemagainisbypressing
F9/Shift+Command+M (Press F9 on Linux).
Reader also has numerous context-sensitive menus. These menus appear when you right-click/Control-click an
element in the work area or PDF that has such a menu associated with it. A context menu displays commands that
relate to the item or area that you clicked. For example, when you right-click/Control-click the toolbar area, that
context menu displays the same commands as the View > Toolbars menu.
Page 16
ADOBE READER 8
User Guide
Note: The Reader menu bar appears only if Reader is open as a stand-alone application. If Reader is open within the
browser, only the browser application menu appears at the top of the window. However, context menus are available in
both cases.
About toolbars
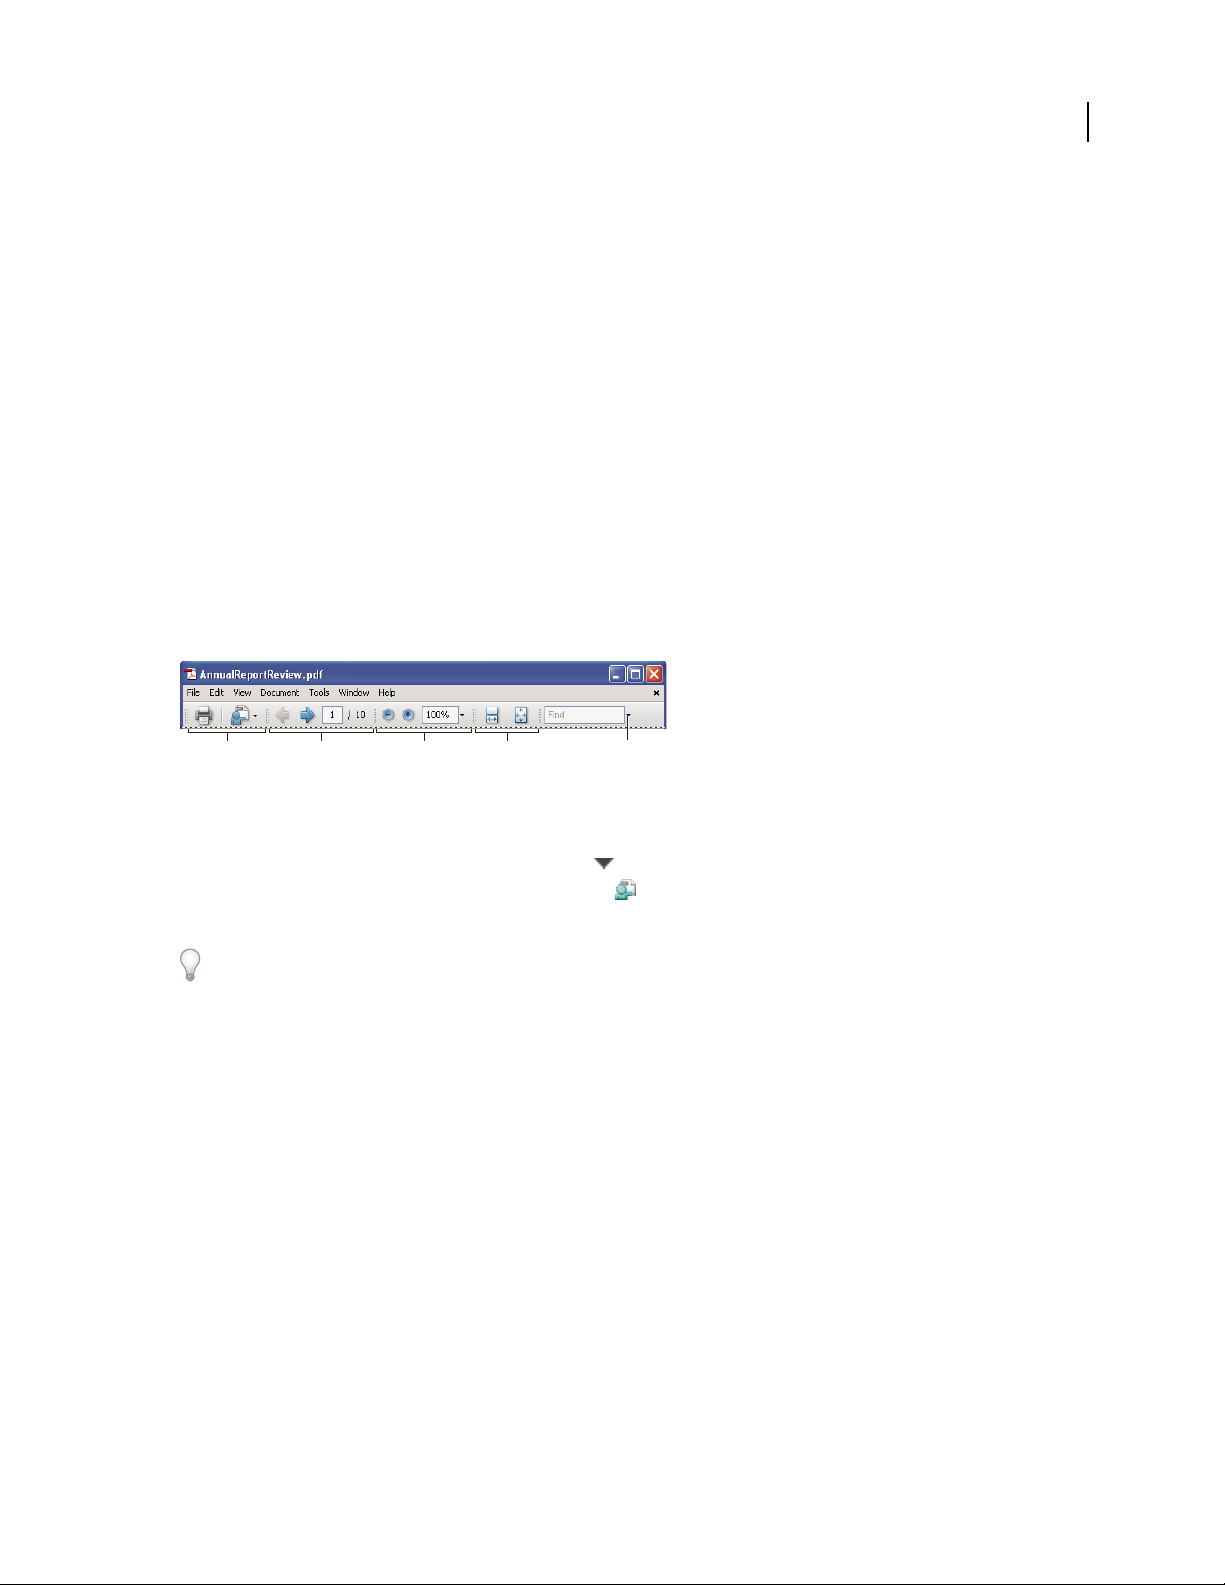
Toolbars reduce clutter in the work area by arranging tools in task-related groups. For example, the Page Display
toolbarincludesbuttonsforchanginghowmanypagesyoucanseeatatimeinthedocumentwindow.TheComment
& Markup toolbar contains tools for reviewing and annotating a PDF.
Any toolbar can float or be docked. Docked toolbars appear in the toolbar area. Floating toolbars appear as
independent panels that you can move anywhere in the work area.
Each toolbar has a grabber bar, which is a vertical gray stripe at the left end of the toolbar.
• When you position the pointer over a grabber bar, a tool tip displays the name of the associated toolbar.
• When you drag a grabber bar, the toolbar moves. You can drag toolbars off the toolbar area (so that they float),
dock them in the toolbar area, or rearrange them in the toolbar area.
Some toolbars appear by default and some are hidden.
12
B C
Toolbars open by default
A. File toolbar B. Page Navigation toolbar C. Select & Zoom toolbar D. Page Display toolbar E. Find toolbar
DA
E
Buttons in the Tasks toolbar behave somewhat differently from other toolbar buttons. Each of these buttons is
associated with a menu of commands. Click the arrow to the right of the button name to open the menu. For
example, click the arrow next to the Start Meeting button to display a menu of commands related to Adobe
Acrobat Connect meetings.
Position the pointer over a tool to see a description of the tool. Position the pointer over the grabber bar on the left
edge of a toolbar to see its name. All tools are identified by name in the More Tools dialog box (Tools > Customize
Toolbars).
See also
“Customizing the work area” on page 11
“Displaying menus” on page 11
Display and arrange toolbars
When your work does not involve using the tools in a toolbar, you can close the toolbar to tidy up the work area. For
example,ifyouarenotaddingreviewcommentstoaPDF,there’snoneedtohavetheComment&Markuptoolbaropen.
Whenyouneedeasyaccesstoatoolbarthatishiddenbydefault,youcanopenit.Thistoolbarappearsasafloating
panel, which you can move or dock in the toolbar area.
Note: If several PDFs are open, you can customize the toolbars for each PDF independently. The different customized
states persist as you switch between PDFs.
Page 17

ADOBE READER 8
User Guide
Show or hide toolbars
• To o p e n a t o o lb a r, c ho o s e V ie w > To o l ba r s > [ toolbar name]. A check mark next to the toolbarname indicates that
the toolbar is displayed.
• To hide all toolbars, choose View > Toolbars > Hide Toolbars.
• To change a toolbar that is either shown or hidden, right-click/Control-click the toolbar area, and choose the
toolbar you want to show or hide.
• To change the visibility of several toolbars, choose Tools > Customize Toolbars or View > Toolbars > More Tools.
Then, select and deselect toolbars. (Check marks by the toolbar names indicate which ones are currently visible.)
Note: Whether a new toolbar opens as a floating toolbar or docked in the toolbar area depends on its default position or
where it appeared in your previous configuration of the work area, if any.
Move toolbars
• To rearrange the docked toolbars, use the toolbar grabber bars to drag them from one position to another.
• To move a floating toolbar, drag it by its title bar or grabber bar to another location in the work area.
• To float a docked toolbar, drag it by its grabber bar from the toolbar area.
• To dock a floating toolbar, drag it by its title bar or grabber bar to the toolbar area.
• To move all floating toolbars to the toolbar area, choose View > Toolbars > Dock Toolbars.
13
Rows may be added to or removed from the toolbar area as you move the toolbars in and out.
Return toolbars to their default configuration
❖ Choose View > Toolbars > Reset Toolbars.
Lock or unlock the toolbar area
Locking the toolbars prevents any rearrangement of the toolbar area, so all grabber bars disappear when the toolbar
area is locked. Locking does not affect the positions of any floating toolbars.
❖ Choose View > Toolbars > Lock Toolbars.
Select the command a second time to unlock the toolbar area.
Note: When the toolbar area is locked, you can still move floating toolbars by dragging them by their title bars. However,
you can’t dock them unless you unlock the toolbar area.
About the Properties toolbar
The Properties toolbar looks like any other toolbar and can be moved, docked, or floated in the same way. It also
contains buttons and can be hidden or displayed by choosing it by name from the View > Toolbars menu.
The buttons in the Properties toolbar display properties of the currently selected tool or object. Unlike buttons in
most toolbars, the buttons in the Properties toolbar can’t be hidden. Also, many of the buttons merely display information, so you cannot use them to make changes to the PDF.
Show and hide toolbar elements
You can alter the display within an individual toolbar to keep just the tools you need available with a minimum of
wasted space. You can also show and hide tool labels.
Page 18

ADOBE READER 8
User Guide
Show or hide individual tools
Reader includes more tools and more toolbars than the set that appears by default. You can customize the toolbars
so that the tools you use most often appear in the toolbar area.
❖ Do any of the following:
• Right-click/Control-click the toolbar, and select a tool that you want to display or deselect a tool that is already
displayed if you want to hide it.
• Right-click/Control-click any toolbar and choose More Tools. Then select individual tools and toolbars that you
want to display, and deselect those that you want to hide.
Note: A selected tool appears in the toolbar area only if its toolbar is also selected in the More Tools dialog box.
Show or hide tool labels
Thedefaultviewshowslabelsforsometoolbarbuttons.Youcanshowlabelsforallbuttonstohelpyouasyoulearn
to use Reader, or you can hide all tool labels to save space in the toolbar area.
❖ Choose View > Toolbars > Button Labels > [option].
Note: Tool labels are turned off selectively when space in the toolbar area becomes limited.
Review properties for tools and objects
The Properties toolbar provides easy access to the properties for many tools and objects such as links, comments,
form fields, media clips, and bookmarks. For example, if you select the Note tool, the Properties toolbar displays the
current default properties for that tool. If you select a note in the document, the Properties toolbar displays
properties for that note.
14
YoucanusethePropertiestoolbartochangemanyofthesettingsthatappearthere.Afewitemsonlyprovideinformation and cannot be edited.
Likealltoolbars,thePropertiestoolbarcanfloatorbedockedinthetoolbararea.ThePropertiestoolbarisdifferent
in that it doesn’t contain tools and can’t be customized to hide options.
1 Do one of the following:
• Choose View > Toolbars > Properties Bar.
• Right-click/Control-click the toolbar area, and choose Properties Bar from the context menu.
2 Select the object or tool that you want to review.
3 Change properties for the selected item, as desired.
If you want to change object properties other than those listed in the Properties toolbar, right-click/Control-click the
object, and choose Properties.
Show or hide the navigation pane
The navigation pane is an area of the work space that can display different navigation panels. Typically, these panels
act like a table of contents, with items you can click to jump to a specific place in the document. For example, the
Pages panel contains thumbnail images of each page; clicking a thumbnail opens that page in the document.
Page 19

ADOBE READER 8
User Guide
When you open a PDF, the navigation pane is closed by default, but buttons along the left side of the work area
provideeasyaccesstovariouspanels,suchasthePagespanelbutton andtheBookmarkspanelbutton .When
Reader is open but empty (no PDF is open), the navigation pane is unavailable.
1 To open the navigation pane, do one of the following:
• Click any panel button on the left side of the work area to open that panel.
• Choose View > Navigation Panels > Show Navigation Pane.
2 To close the navigation pane, do one of the following:
• Click the button for the currently open panel in the navigation pane.
• Choose View > Navigation Panels > Hide Navigation Pane.
Note: The creator of the PDF can control the contents of some navigation panels and may make them empty.
Adjust navigation panels
Like toolbars,navigation panels can be docked in the navigation pane, or they can float anywherein the work area.You
canhideorclosepanelsyoudon’tneedandopentheonesyoudo.Youcanalsoadjustthewidthofthenavigationpane.
Change the display area for navigation panels
• To change the width of the navigation pane, drag its right border.
• To collapse a floating panel without closing it, click the tabname atthe topof the window. Click the tabname again
to restore the panel to its full size.
15
Change the orientation of a docked navigation panel
By default, some panels, such as Bookmarks, appear in a column on the left side ofthe work area. Others, such as the
Comments panel, appear horizontally across the bottom of the document pane. You can change the orientation of
anypaneltoeitherverticalorhorizontalbydraggingthebuttonforthatpanel,whichappearsontheleftsideofthe
work area.
• To orient the panel vertically, drag its button to the upper part of the navigation pane, near the buttons of other
vertically oriented panels.
• To orient the panel horizontally, drag its button to the lower part of the navigation pane, near the buttons of other
horizontally oriented panels.
In either case, a gray frame highlights the entire panel buttons area. If you release the mouse button before the area
is highlighted, the panel will float above the work area. If that happens, try again by dragging the panel tab into the
upper or lower part of the button area.
View a different panel in the navigation pane
Bydefault,onlyaselectedsetofpanelbuttonsappearsontheleftsideoftheworkarea.Otherpanelsareincludedin
theViewmenuandmayopenasfloatingpanelsratherthaninthenavigationpane.However,youcandockthepanel
in the navigation pane later.
❖ Do one of the following:
• On the left side of the navigation pane, select the button for the panel.
• Choose View > Navigation Panels > [panel name].
Page 20

ADOBE READER 8
User Guide
Dock or float navigation panels
• To float a panel that is docked in the navigation pane, drag the panel button into the document pane.
• To dock a floating panel, drag the tab to the navigation pane.
• To group two floating panels, drag the tab of one panel into the other floating panel.
Options in a navigation panel
All navigation panels have an Options menu in the upper-right corner. The commands available in these menu vary.
Some panels also contain other buttons that affect the items in the panel. Again, these vary among the different
panels, and some panels have none.
Maintaining the software
About the updating process
Reader application files and components can be updated in a variety of ways. Some updates are available when you
open a PDF that triggers the updating process automatically. For example, if you open a form that uses Asianlanguage fonts, Reader asks whether you want todownload the fonts. Other updates are available only from the Help
menu, and you must install them manually. Some updates are available both automatically and manually. The
Maintaining Software option isn’t available for UNIX.
16
Depending on your preferences settings, Reader downloads updates in the background.
Update the software
❖ Choose Help > Check For Updates, and follow any on-screen instructions.
Change updating preferences
1 Choose Help > Check For Updates.
2 In the Adobe Updater dialog box, click Preferences.
3 Select Automatically Check For Adobe Updates, and specify whether you want automatic checking on a weekly
or monthly basis and whether or not you want to be asked before updates are downloaded.
4 Makesurethattheapplicationyouarerunning(AdobeReaderorAdobeAcrobat)isselectedasthesoftwarethat
will be updated.
5 If appropriate, click Browse to navigate to the location in which you want the downloads to be placed.
About Speed Launcher (Windows)
WhenyouinstallReader,theSpeedLauncherprogramisinstalledintoyourcomputer’sCommonStartupgroup.The
Speed Launcher shortens the time needed to start Reader.
Although this is not recommended, you can disable Speed Launcher by dragging its icon out of the Startup folder.
Note: If youhave both Acrobat andReader installed on thesame system, two Speed Launcher icons appear inthe Startup
folder. If you want to disable Speed Launcher, remove both Speed Launcher icons from the Startup folder.
For more information about this topic, see the Adobe support website.
Page 21

ADOBE READER 8
User Guide
Adobe Digital Editions
Reader 8 changes the way you open and manage eBooks. Now, you use the free Adobe® Digital Editions software to
read andorganize eBooks and other publications. Digital Editions is a separate web-based Rich Internet Application
(RIA) that replaces the eBooks features in previous versions of Reader.
When you install Digital Editions, your existing bookshelf items are automaticallyimported and available within the
new DigitalEditions bookshelf experience. You can also manually import individual PDFs into your Digital Editions
bookshelf.
Note: When you double-click the icon foran eBook, Reader automatically opens the Digital Editions download website,
where you can start installing the software.
To learn more about how to make the transition to this new solution for eBooks and for a link to the secure download
website, go to the Adobe website.
Non-English languages
Asian language PDFs
You can use Reader to view, search, and print PDF documents that contain Asian text (Traditional and Simplified
Chinese, Japanese, and Korean). You can also use these languages when you fill in forms, add comments, and apply
digital signatures.
17
Almost all of the Reader features are supported for Traditional and Simplified Chinese, Japanese, and Korean text if
you install the respective Asian language font packs.
In Windows, you may be able to view and print files that contain Asian languages without having the necessary Asian
language support installed on your system. In Windows/UNIX, if you try to open a PDF file for which language
support is required, you are automatically prompted to install the required fonts.
Cyrillic, Central European, and Eastern European language PDFs
You can work with Adobe PDF files that contain Cyrillic text (including Bulgarian and Russian), Central European
text, andEastern European text (including Czech, Hungarian, and Polish) if thefonts are embedded in the PDF files.
If the fonts are embedded, you can view and print the files on any system. Fonts do not need to be embedded to use
the Search feature.
Note: If you open a PDF file in which form fields or text boxes contain these languages but the fonts are not embedded
and are not installed on your system, choosing Help > Check For Updates Now automatically prompts you to download
and install the necessary fonts.
Hebrew, Arabic, Thai, and Vietnamese language PDFs
Reader supports the entry and display of Thai and Vietnamese text. In Windows only, Reader also supports Arabic
and Hebrew. By default, Right-To-Left Language Options is enabled under Arabic and Hebrew regional settings (in
Windows).
Page 22

ADOBE READER 8
User Guide
Enable right-to-left languages
Enabling right-to-left language options displays the user interface elements for controllingparagraph direction, digit
style, and ligature. When this option is selected, you can specify the writing direction (left-to-right or right-to-left)
and type of digits (Western or Arabic-Indic) usedfor creating and filling out certain form fields, adding digital signatures, and creating text box markups.
Enable Right-To-Left Language Options is enabled by default under Arabic and Hebrew regional settings.
1 Choose Edit > Preferences (Windows/UNIX) or Reader > Preferences (Mac OS).
2 Under Categories, select International.
3 Select Enable Right-To-Left Language Options.
18
Page 23

Chapter 3: Viewing, searching, and saving PDFs
YoucanopenandviewPDFsinAdobeReader,fromthedesktop,orinawebbrowser.YoucansaveacopyofaPDF
or save a PDF in text format. When you search PDFs, you can refine your search criteria and search across multiple
PDFs for text and other kinds of data.
Viewing PDF pages
Open a PDF
You can open a PDF from within the Reader application, from the desktop, or from within certain other applications.
Open a PDF in the application
❖ Start Reader and do one of the following:
• Choose File > Open, or click the Open button in the toolbar. In the Open dialog box, select one or more
filenames, and click Open. PDF documents usually have the extension .pdf.
• (Windows/UNIX) Choose File > [a previously opened PDF].
• (Mac OS) Choose File > Open Recent File > [a previously opened PDF].
19
If more than one document is open, you can switch between documents by choosing the document name from the
Window menu. In Windows, the application places a button for each open document on the Windows taskbar. You
can click this button to move between open documents.
Open a PDF from the desktop or within another application
❖ Do one of the following:
• To open a PDF attached to an email message, open the message, either by double-clicking the PDF icon or right-
clicking/Control-clicking and choosing Open.
• To open a PDF linked to an open web page, click the PDF file link. The PDF usually opens in the web browser. In
UNIX, you can open the PDF in Reader or save it to the desktop.
• Double-click the PDF File icon in your file system.
Note: In Mac OS, you may not be able to open a PDF created in Windows by double-clicking the icon. Instead, choose
File > Open With > Reader.
Opening pages in a PDF
Depending on the PDF you open, you may need to move forward through multiple pages, see different parts of the
page, or change the magnification. There are many ways to navigate, but the following items are commonly used:
Note: If you do not see these items, choose View > Toolbars > Reset Toolbars.
Next and Previous The Next Page and Previous Page buttons appear on the PageNavigation toolbar. The text
box next to them is also interactive, so you can type a page number and press Enter to go directly to that page.
Page 24

ADOBE READER 8
User Guide
Scroll bars Vertical and horizontal scroll bars appear to the right and bottom of the document pane whenever the
view does not show the entire document. Click the arrows or drag to view other pages or different areas of the page.
Select & Zoom toolbar This toolbar contains buttons and controls for changing the page magnification.
Pages panel The Pages button on the left side of the work area opens the navigation pane to the Pages panel,
which displays thumbnail images of each page. Click a page thumbnail to open that page in the document pane.
See also
“Retrace your viewing path” on page 22
“Adjust page magnification” on page 31
Page through a document
There are many ways to turn pages in a PDF. Many people use the buttons on the Page Navigation toolbar, but you
can also use arrow keys, scroll bars, and other features to move forward and backward through a multipage PDF.
ThePageNavigationtoolbaropensbydefault.Thedefaulttoolbarcontainsfrequentlyusedtools:theNextPage ,
PreviousPage ,andPageNumber.Likealltoolbars,thePageNavigationtoolbarcanbehiddenandreopenedby
choosing it on the Toolbars menu under the View menu. You can display additional tools on the Page Navigation
toolbar by right-clicking/Control-clicking the toolbar and choosing an individual tool, Show All Tools, or More
Tools and then selecting and deselecting tools in the dialog box.
20
Move through a PDF
❖ Do one of the following:
• Click the Previous Page or Next Page button on the toolbar.
• Choose View > Go To > [location].
• Choose View > Go To > Page, type the page number in the Go To Page dialog box and then click OK.
• Press the Page Up and Page Down keys on the keyboard.
Jump to a specific page
❖ Do one of the following:
• Drag the vertical scroll bar until the page appears in the small pop-up display.
• Type the page number to replace the one currently displayed in the Page Navigation toolbar, and press Enter or
Return.
Note: IfthedocumentpagenumbersaredifferentfromtheactualpagepositioninthePDFfile,thepage’spositionwithin
thefileappearsinparenthesesaftertheassignedpagenumberinthePageNavigationtoolbar.Forexample,ifyouassign
numbering for a file that is an 18-page chapter to begin with page 223, the number shown when the first page is active
is 223 (1 of 18). You can turn off logical page numbers in the Page Display preferences. See Renumber pages and “Preferences for viewing PDFs” on page 26.
Jump to bookmarked pages
Bookmarks provide a table of contents and usually represent the chapters and sections in a document. Bookmarks
appear in the navigation pane.
1 Click the Bookmarks button, or choose View > Navigation Panels > Bookmarks.
Page 25

ADOBE READER 8
User Guide
2 To jump to a topic, click the bookmark. Click the plus (+) or minus (-) sign to expand or collapse the bookmark
contents.
Note: Depending on how the bookmark was defined, clicking it maynot take you to thatlocation but perform some other
action instead.
If the list of bookmarks disappears when you click a bookmark, click the Bookmarks button to display the list again.
If you want to hide the Bookmarks button after you click a bookmark, select Hide After Use on the Options menu.
Use page thumbnails to jump to specific pages
Page thumbnails provide miniature previews of document pages. You can use thumbnails in the Pages panel to
change the display of pages and to go to other pages. The red page-view box in the page thumbnail indicates which
area of the page appears. You can resize this box to change the zoom percentage.
1 Click the Pages button or choose View > Navigation Panels > Pages to display the Pages panel.
2 To jump to another page, click its thumbnail.
View, sort, and search components in a PDF package
Both Adobe Reader users and Acrobat users can view, sort, and search component files in a PDF package.
21
See also
“Searching PDFs” on page 37
View component PDFs in a PDF package
ThePDFpackagenavigationbarcontainsbuttonsthatcontrolthevisibilityandplacementofthelistofcomponent
files. If the list is hidden, the View Top button or View Left button will make the list visible either horizontally or
vertically adjacent to the document pane.
1 Open the PDF package in Acrobat.
2 In the PDF package navigation bar, select the View Left or View Top button , as needed, so that you can
see the list of component PDFs.
3 Select the PDF you want to read. Or, use the Open Next and Open Previous buttons to review the
component PDFs one by one.
Sort the components of a PDF package
Because the data categories are shown in columns in View Top mode, use that view to complete this procedure.
1 In the PDF package navigation bar, select the View Top button , if necessary, so that you can see the list of
component PDFs and the categories bar across the top of the list.
2 Do any of the following:
• Click a category name. Click it a second time to reverse the order between Ascending and Descending.
• In the PDF package navigation bar, choose Options > Sort By > [category name].
• Right-click/Control-click aPDF in the list or anywhere inthe categoriesbar and choose Sort By> [category name].
• Right-click/Control-click a PDF in the list or anywhere in thecategories bar and choose Package Properties. Then
choose options in the Sort By and Sort Order menus. (This sets the default sorting for the PDF package.)
Page 26

ADOBE READER 8
User Guide
Note: Unless you change the default sorting for the PDF package, the sorting remains in place for only the current session
or until you change the sorting again. The next time you open the PDFpackage, it will appear in the default sorting order.
Search component PDFs in a PDF package
1
Choose Edit > Search, or choose Open Full Acrobat Search on the Find toolbar pop-up menu.
2 Select which PDFs tosearch. You can searchonly thecurrently open document, severaldocuments that you select,
or all the PDFs in the package.
3 Enter the search text and select other options for searching, as usual.
Automatically scroll through a document
Automatic scrolling advances your view of the PDF at a steady rate, moving vertically down the document. If you
interrupt the process by using the scroll bars to move back or forward to another page or position, automatic
scrolling continues from that point forward. At the end of the PDF, automatic scrolling stops and does not begin
again until you choose automatic scrolling again.
1 Choose View > Automatically Scroll.
2 Press Esc to stop scrolling.
22
Retrace your viewing path
You can find PDF pages that you viewed earlier by retracing your viewing path. It’s helpful to understand the
difference betweenprevious andnext pages and previous and next views.In the case of pages,previous andnext refer
to the two adjacent pages, before and after the currently active page. In the case of views, previous and next refer to
your viewing history. For example, if you jump forward and backward in a document, your viewing history retraces
those steps, showing you the pages you viewed in the reverse order that you viewed them.
Retrace your path in a PDF
1
Choose View > Go To > Previous View.
2 To continue seeing another part of your path, do either of the following:
• Repeat step 1.
• Choose View > Go To > Next View.
Note: You can make the Previous View button and Go To Next View button available in the toolbar area by
right-clicking/Control-clicking the Page Navigation toolbar and choosing them on the context menu, or choosing Show
All Tools.
Retrace your path through multiple PDFs
❖ Choose View > Go To > Previous Document or Next Document. These commands open the other PDF
documents if the documents are closed.
Note: If Reader is open in a web browser, you can use the web browser’s Back and Forward options as usual to retrace
your steps (This feature isn’t available for UNIX).
Navigate with links
Links can take you to another location in the current document, to other PDF documents, or to websites. Clicking
a link can also open file attachments and play 3D content, movies, and sound clips. To play these media clips, you
must have the appropriate hardware and software installed.
Page 27

ADOBE READER 8
User Guide
The person who created the PDF document determines what links look like in the PDF.
Note: Unless a link wascreated in Acrobat using theLink tool, you must have the Automatically Detect URLs From Text
option selected in the General preferences for a link to work correctly.
1 Choose the Select tool .
2 Position the pointer over the linked area on the page until the pointer changes to the hand with a pointing finger.
A plus sign (+) or a w appears within the hand if the link points to the web. Then click the link.
See also
“Multimedia preferences” on page 111
PDFs with file attachments
IfyouopenaPDFthathasoneormoreattachedfiles,theAttachmentspanelautomaticallyopens,listingtheattached
files. You canopen these files for viewing, editthe attachments,and save your changes, as permitted by the document
authors.
If you move the PDF to a new location, the attachments automatically move with it.
23
Open or close reading mode
The reading mode view hides everything in the work area except the document and the menu bar.
❖ Choose View > Reading Mode.
Choosing Reading Mode again restores the work area to its previous view, with the same navigation buttons and
toolbar displays.
View PDFs in Full Screen mode
In Full Screen mode, PDF pages fill the entire screen; the menu bar, toolbars, and window controls are hidden. A
PDF creator can set a PDF to open in Full Screen mode, or you can set the view yourself. Full Screen mode is often
used for presentations, sometimes with automatic page advancement and transitions.
The pointer remains active in Full Screen mode so that you can click links and open notes. There are two ways to
advance through a PDF in Full Screen mode: You can use keyboard shortcuts for navigational and magnification
commands, and you can set a Full Screen preference to display Full Screen navigation buttons that you click to
change pages or exit Full Screen mode.
See also
“Preferences for viewing PDFs” on page 26
Set the Full Screen navigation bar preference
1
Choose Edit > Preferences.
2 Under Categories, select Full Screen.
3 Select Show Navigation Bar.
4 Select View > Full Screen Mode.
The Full Screen navigation bar contains Previous Page , Next Page , and Close Full Screen View buttons,
which appear in the lower left corner of the work area.
Page 28

ADOBE READER 8
User Guide
Read a document in Full Screen mode
If the Full Screen navigation bar is not shown, you can use keyboard shortcuts to navigate through a PDF.
Note: If you have two monitors installed, the Full Screen mode of a page may appear on only one of the monitors. To
page through the document, click the screen displaying the page in Full Screen mode.
1 Choose View > Full Screen Mode.
2 Do any of the following:
• To go to the next page, press the Enter, Page Down, or Right Arrow key.
• To go to the previous page, press Shift+Enter, Page Up, or the Left Arrow key.
• To change the magnification, press Ctrl+0/Command+0 for Fit Page view, Ctrl+1/Command+1 for actual size,
Ctrl+2/Command+2 for Fit Width view, or Ctrl+3/Command+3 for Fit Visible view.
You can show a Full Screen tool on the Page Display toolbar by right-clicking/Control-clicking the Page Display
toolbar and choosing Full Screen Mode. Then, you can click the Full Screen tool to switch to Full Screen mode.
Close Full Screen mode
❖ Do one of the following:
• Press Ctrl+L/Command+L.
• Press Esc. (Escape Key Exits must be selected in the Full Screen preferences. This is the default setting.)
24
Viewing PDFs in a web browser
You can view PDFs in a supported web browser, or you can set your Reader Internet preferences to open linked or
downloaded PDF files in a separate Reader window. If you open PDFs in Reader outside the browser, you cannot use
Fast Web Viewing, form submittal in a browser, or search highlighting on the web.
Because keyboard commands may be mapped to the web browser, some Reader shortcuts may not be available.
Similarly, you may need to use the tools and commands in the Reader toolbar rather than the browser toolbar or
menu bar. For example, to print a PDF document, use the Print button in the Reader toolbar rather than the Print
command in the browser. (In Microsoft Internet Explorer, you can choose File > Print, Edit > Copy, and Edit > Find
on the Internet Explorer toolbar.)
Important: (Mac OS) If you have Adobe Reader installed on your system and subsequently install Acrobat, Safari
continues to use Adobe Reader to open PDFs in your browser. To reconfigure Safari to use Acrobat, you must quit Safari
and all versions of Acrobat or Adobe Reader, start Acrobat, and then start Safari while Acrobat is running.
Internet preferences
In Adobe Reader, choose Edit > Preferences (Windows/UNIX) or Acrobat > Preferences (Mac OS), and select
Internet under Categories.
Display PDF In Browser Displaysany PDF opened from the web inthe browser window. If this option is notselected,
PDFs open in a separate Acrobat window. On Mac OS, if you have installed versions of Adobe Reader and Acrobat,
you can select which application and which version to use. This option isn’t available for UNIX, however browser
preferences can be set in Edit > Preferences and select Internet under Categories, then either type the following path
or browse to /usr/bin/firefox and then click OK.
Allow Fast Web View Downloads PDFs for viewing on the web one page at a time. If this option is not selected, the
entire PDF downloads before it is displayed. If you want the entire PDF to continue downloading in the background
Page 29

ADOBE READER 8
User Guide
while you view the first page of requested information, also select Allow Speculative Downloading In The
Background.
Allow Speculative Downloading In The Background Allows a PDF to continue downloading from the web, even
after the first requested page appears. Downloading in the background stops when any other task, such as paging
through the document, is initiated in Acrobat.
Connection Speed Choose a connection speed from the menu. This setting is also used by the multimedia plug-in.
This option isn’t available for UNIX.
Internet Settings [or Network Settings] Click to open the Internet or network connection dialog box or panel for
your computer. For more information, consult your operating system Help, your Internet service provider, or your
local network administrator. This option isn’t available for UNIX.
Read articles
In PDFs, articles are optional electronic threads that the PDF author may define within that PDF. Articles lead
readers through the PDF content, jumping over pages or areas of the page that are not included in the article, in the
same way that you might skim through a traditional newspaper or magazine, following one specific story and
ignoring the rest. When you read an article, the page view may zoom in or out so that the current part of the article
fills the screen.
25
Open and navigate an article thread
1
Choose Tools > Select & Zoom > Hand Tool, or click the Hand Tool on the Select & Zoom toolbar.
2 Choose View > Navigation Panels > Articles to open the Articles panel.
Note: You cannot open the Articles panel if you are viewing the PDF inside a browser. You must open the PDF in Reader.
3 Double-click the article icon to go to the beginning of that article. The icon changes to the follow-article
pointer .
Note: If the Articles panel is blank, then the author has not defined any article threads for this PDF.
4 With the article thread open, do any of the following:
• To scroll through the article one pane at a time, press Enter/Return or click in the article.
• To scroll backward through the article one pane at a time, Shift-click in the article, or press Shift+Return.
• To go to the beginning of the article, Ctrl-click/Option-click within the article.
5 At the end of the article, click in the article again.
The previous page view is restored, and the pointer changes to the end-article pointer .
Exit a thread before the end of the article
1
Make sure that the Hand tool is selected.
2 Shift+Ctrl-click/Shift+Option-click the page or press Enter/Return.
The previous page view is restored.
Page 30

ADOBE READER 8
User Guide
Preferences for viewing PDFs
The Preferences dialog box defines a default page layout and customizes your application in many other ways. To
modify preferences, choose Edit > Preferences (Windows/UNIX) or Reader > Preferences (Mac OS), and select the
panel you want under Categories. For viewing PDFs, examine the preferences options for Documents, General,
Multimedia, and Page Display.
The preferences settings control how the application behaves whenever you use it; they are not associated with any
particular PDF document.
See also
“3D preferences” on page 120
“Multimedia preferences” on page 111
“Setting accessibility preferences” on page 104
Documents preferences
Open Settings
Show Each Document In Its Own Window Creates multiple Reader windows rather than opening multiple PDFs in
one instance of Reader. This option isn’t available for UNIX. Each document is opened in a new window by default.
26
Restore Last View Settings When Reopening Documents Determineswhether documents open automaticallyto the
last viewed page within a work session.
Open Cross-document Links In Same Window Closes the current document and opens the document being linked
to in the same window, minimizing the number of windows open. If the document being linked to is already open
in another window, the current document is not closed when you click a link to the open document. If you do not
select this option, a new window opens each time you click a link to a different document.
Allow Layer State To Be Set By User Information Allows the author of a layered PDF document to specify layer
visibility based on user information.
Allow Documents To Hide The Menu Bar, Toolbars, And Window Controls AllowsthePDFtodeterminewhetherthe
menu bar, toolbar, and window controls are hidden when the PDF is opened.
Documents In Recently Used List Sets the maximum number of documents listed in the File menu
(Windows/UNIX) or when you choose File > Open Recent File (Mac OS). The default is five for Windows and nine
for Mac OS.
Save Settings
Automatically Save Document Changes To Temporary File Every _ Minutes Determineshow often Acrobat automat-
ically saves changes to an open document.
Save As Optimizes For Fast Web View Restructures a PDF document for page-at-a-time downloading from web
servers.
Full Screen preferences
Full Screen Setup
Current Document Only Specifies whether or not the display is limited to a single PDF.
Fill Screen With One Page At A Time Sets the page view to the maximum screen coverage by a single page.
Page 31

ADOBE READER 8
User Guide
Alert When Document Requests Full Screen Displays a message before going into Full Screen mode. Selecting this
option overrides a previous selection of Do Not Show This Message Again in that message.
Which Monitor To Use Specifies the monitor on which full-screen display appears (for users with multiple-monitor
configurations).
Full Screen Navigation
Escape Key Exits Lets you exit Full Screen mode by pressing the Esc key. If this option is not selected, you can exit
by pressing Ctrl+L/Command+L.
Show Navigation Bar Shows a minimal navigation toolbar regardless of the document settings.
Left Click To Go Forward One Page; Right Click To Go Back One Page Lets you page through an Adobe PDF
document by clicking the mouse. You can also page through a document by pressing Return, Shift-Return (to go
backward), or the arrow keys.
Loop After Last Page Lets you page through a PDF document continuously, returning to the first page after the last.
This option is typically used for setting up kiosk displays.
Advance Every _ Seconds Specifies whether to advance automatically from page to page every set number of
seconds. You can page through a document using mouse or keyboard commands even if automatic paging is
selected.
27
Full Screen Appearance
Background Color Specifies the window’s background color in Full Screen mode. You can select a color from the
color palettet to customize the background color.
Mouse Cursor Specifies whether to show or hide the pointer when Full Screen mode is in operation.
Full Screen Transitions
Ignore All Transitions Removes transition effects from presentations that you view in Full Screen mode.
Default Transition Specifies the transition effect to display when you switch pages in Full Screen mode and no
transition effect has been set for the document.
Direction Determines the flow of the selected default transition on thescreen, such asDown, Left, Horizontally, and
so forth. The available options vary according to the transition. If no directional options affect the selected default
transition, this option is not available.
Navigation Controls Direction Mimics the user’s progress through the presentation, such as transitioning from top
tobottomwhentheuserproceedstothenextpageandfrombottomtotopwhentheuserbacktrackstotheprevious
page. Available only for transitions with directional options.
General preferences
Basic Tools
Use Single Key Accelerators To Access Tools Enables you to select tools with a single keystroke. This is off by default.
Create Links From URLs Specifies whether links that weren’t created with Acrobat are automaticallyidentified in the
PDF document and become clickable links.
Make The Hand Tool Select Text Enables the Hand tool to function as the Select tool when it hovers over text in an
Adobe PDF.
Page 32

ADOBE READER 8
User Guide
Make The Hand Tool Read Articles Changes the appearance of the Hand tool pointer when over an article thread.
Uponthefirstclick,thearticlezoomstofillthedocumentpanehorizontally;subsequentclicksfollowthethreadof
the article.
Make The Hand Tool Use Mouse-wheel Zooming Changes theaction ofthe mousewheel fromscrolling to zooming.
Make The Select Tool Select Images Before Text Changes the order in which the Select tool selects.
Use Fixed Resolution For Snapshot Tool Images Sets the resolution used to copy an image captured with the
Snapshot tool.
Warnings
Do Not Show Edit Warnings Disables warning boxes that would normally appear when you delete items such as
links, pages, page thumbnails, and bookmarks.
Reset All Warnings Restores default settings for warnings.
Print
Show Page Thumbnails In Print Dialog Controls the print preview display in the Print dialog box. Deselecting this
option speeds up the preview.
Application Startup
Show Splash Screen Determines whether the application splash screen appears each time the application starts.
28
Use Only Certified Plug-Ins Ensures that only Adobe-certified third-party plug-ins are loaded. The notation
Currently in Certified Mode will indicate either Yes or No depending on its status.
Page Display preferences
Default Layout And Zoom
Resolution
Use System Setting Uses the system settings for monitor resolution.
Custom Resolution Sets the monitor resolution.
Rendering
Smooth Text Specifies the kind of text-smoothing to apply: None, For Monitor, or For Laptop/LCD.
Smooth Line Art Applies smoothing to remove abrupt angles in lines.
Smooth Images Applies smoothing to minimize abrupt changes in images.
Use Local Fonts Specifies whether the application uses or ignores local fonts installed on your system. When
deselected, substitute fonts are used for any font not embedded in the PDF. If a font cannot be substituted, the text
appears as bullets and an error message appears.
Use 2D GPU Acceleration (Appears only if your computer hardware supports 2D GPU acceleration.) Speeds up
zooming, scrolling, and redrawing of page content, and speeds the rendering and manipulation of 2D PDF content.
This option is deselected by default. This option isn’t available for UNIX.
Note: If the 2D GPU Acceleration option appears on the Page Display preferences but is not available, you may need to
updateyourGPUcarddrivertoenablethishardwarefeature.Contactyourcardvendororcomputermanufacturerfor
an updated driver.
Page 33

ADOBE READER 8
User Guide
Use Page Cache Places the next page in a buffer before the currentpage isviewed to reduce the timerequired to page
through a document.
Page Content And Information
Show Large Images Displays large images. If your system is slow to display image-intensive pages, you can deselect
this option.
Overprint Preview Turns overprint preview on or off. The Overprint Preview mode lets you see (on-screen) the
effects of ink aliasing in the printed output. A printer or service provider may create an ink alias if a document
contains two similar spot colors and only one is required, for example.
Show Art, Trim, & Bleed Boxes Displays any art, trim, or bleed boxes defined for a document.
Show Transparency Grid Displays the grid behind transparent objects.
Use Logical Page Numbers Enables the Number Pages command for matching the position of the page in the PDF
to the number printed on the page. A page number, followed by the page position in parentheses, appears inthe Page
Navigation toolbar and in the Go To Page and Print dialog boxes—for example, i (1 of 1) if the printed number of
the first page is i. If this option is not selected, pages are numbered with arabic numbers starting at 1. Selecting this
option helps prevent unexpected behavior when clicking Back or Go Back in your web browser.
Always Show Document Page Size Displays the page measurements beside the horizontal scroll bar.
29
Use Smooth Zooming When deselected, turns off animation effects, which improves performance.
Use Smooth Scrolling When deselected, turns off animation effects, which improves performance.
Opening restricted documents
Open secured PDFs
If you receive a PDF that is protected by security features, you may need a password to open the document. Some
protected documents have restrictions that prevent you from printing, editing, or copying content in the document.
If a document has restricted features, any tools and menu items related to those features are dimmed.
❖ If a document is restricted or has a special status, the Security Settings button or the Signatures button
appear tothe left of the document window. Click the button to discover the protection settings and determine which
features are restricted.
If you have trouble opening a PDF, or if you’re restricted from using certain features, contact the author of the PDF.
Restrict URLs and attachments in PDFs
Reader warns you any time you try to open a URL (web link) or a file attachment that uses a disallowed file type.
URLs and disallowed file types (for example, EXE) are potentially dangerous because they can transfer or run
programs, macros, or viruses that can damage your computer.
You can allow Reader to contact specific websites by adding those URLs to your list of allowed websites in the Trust
Manager preferences. Remove any URLs you no longer want to visit. To open file attachments in Reader, you must
respond to a prompt by indicating that you always allow files of that type. The attachment’s file type is then added to
a list stored in the registry. If you want to restrict a file type that you permitted in the past, you can reset this list to
its default settings in the Trust Manager preferences.
Page 34

ADOBE READER 8
User Guide
Trust Manager preferences
To open the Trust Manager preferences, choose Edit > Preferences (Windows/UNIX) or Reader > Preferences (Mac
OS), and select Trust Manager on the left.
Allow Opening Of Non-PDF File Attachments With External Applications When selected, allows file attachments to
start external applications when you open the files. You must have the external applications to open the files.
Restore Default List Of Allowed And Disallowed File Attachment Types Removes saved settings you chose for
opening attachments. For example, if you chose to always open TMP attachments when prompted, TMP appears on
the list of allowed file attachment types. By clicking Restore, you remove TMP from the list.
Change Settings When clicked, lets you specify the default behavior for accessing the Internet from PDFs. To
restrict access to only the URLs you specify, select Let Me Specify A List Of Allowed And Blocked Web Sites (the
default). To allow access toall URLs, select Allow All Web Sites. To restrict accesswith all URLsin PDFs, select Block
All Web Sites.
To specify a list of allowed and blocked websites, type each URL in the text box, and click Allow or Block. Then
specify the default behavior for Reader for websites that aren’t in the list.
Note: If you open a protected PDF and a security warning dialog box prompts you to allow or block a URL, select
Remember My Action For This Site, and the URL is added to this list.
Allow External Content Allows Reader to read data from stream objects in a PDF. Stream objects are URLs or file
specifications identified by flags, as specified in PDF Reference Version Fifth Edition: Adobe Portable Document
Format Version 1.6. Use this option if you’re a PDF developer who creates PDF files that contain streams, or if you
work with these types of files.
30
Adjusting PDF views
About PDF packages
A PDFpackage converts multiple files—whichcan be indifferent formats andcreated in different applications—and
assembles them into an integrated PDF unit. The original files retain their individual identities, but are still part of
the onePDF package file. Each component file can beopened, read, edited, and formatted independentlyof the other
component files in the PDF package.
There are some advantages to working with files combined in a PDF package:
Viewing The component files do not open in separate windows, so you can quickly flip through them and make
changes without having to pause for the Open or Save dialog boxes.
Sorting The component PDFs in a PDF packages are listed under an assortment of categories that you can add to,
delete, hide, and customize. Then, you simply click the category name to sort the list.
Printing The Print command on the File menu includes commands for printing the currently open document, all
the documents in the PDF package, or multiple component documents selected in the PDF package list.
Searching The Advanced Search window includes options for searching the currently open document, all the
documents in the PDF package, or multiple component documents selected in the PDF package list.
Page 35

ADOBE READER 8
User Guide
See also
“View, sort, and search components in a PDF package” on page 21
“Print documents in a PDF package” on page 128
Adjust page magnification
Tools on the Select & Zoom toolbar can change the magnification of PDF documents. Only some of these tools
appear on the default view of the toolbar. You can see all the tools by right-clicking/Control-clicking the Select &
Zoom toolbar and choosing either individual tools, Show All Tools, or More Tools and then selecting individual
tools.
• The Marquee Zoom tool works in a few different ways. You can use it to drag a rectangle around a portion of the
page that you want tofill the viewing area. Or,simply clicking the Marquee Zoom tool increases the magnification
by one preset level, centering on the point where you clicked. To decrease the magnification by one preset level,
Ctrl-click/Option-click the Marquee Zoom tool.
• The Dynamic Zoom tool zooms in when you drag it up the page and it zooms out when you drag down. If you
use a mouse wheel, this tool zooms in when you roll forward and zooms out when you roll backward.
• Zoom In and Zoom Out buttons change the document magnification by preset levels.
•
The Zoom Value option changes the page view according toa percentage you type in or select froma pop-up menu.
• Actual Size displays the page at 100% magnification.
• Fit Width adjusts the magnification so that the PDF fills the document pane horizontally.
• Fit Page adjusts the magnification so that one page fills the document pane vertically.
• The Pan & Zoom Window tool adjusts the magnification and position of the view area to match the area in an
adjustable rectangle in the Pan & Zoom window’s thumbnail view of the page.
• TheLoupeToolwindowdisplaysamagnifiedportionofthePDFthatmatchestheareainanadjustablerectangle
on the document pane.
31
Resize a page to fit the window
• To resize the page to fit entirely in the document pane, choose View > Zoom > Fit Page.
• To resize the page to fit the width of the window, choose View > Zoom > Fit Width. Part of the page may be out
of view.
• Toresizethepagetofittheheightofthewindow,chooseView>Zoom>FitHeight.Partofthepagemaybeout
of view.
• Toresizethepagesothatitstextandimagesfitthewidthofthewindow,chooseView>Zoom>FitVisible.Part
of the page may be out of view.
To see keyboard shortcuts for resizing the document, open the View menu.
Show a page at actual size
❖ Choose View > Zoom > Actual Size.
The actual sizefor a PDF page is typically 100%, but the document may have been set to another magnification level
when it was created.
Page 36

ADOBE READER 8
User Guide
Change the magnification with zoom tools
❖ Do one of the following:
• Click the Zoom In button or the Zoom Out button in the toolbar.
• Enter a magnification percentage in the Select & Zoom toolbar, either by typing or choosing from the pop-up
menu.
• Drag the Marquee Zoom tool to define the area of the page that you want to fill the document pane.
• Drag the Dynamic Zoom tool up to increase the magnification and down to decrease magnification.
When the Marquee Zoom tool is selected, you can Ctrl-click/Option-click or Ctrl-drag/Option-drag to zoom out.
Holding down Shift switches temporarily from the Marquee Zoom tool to the Dynamic Zoom tool.
Change the magnification by using a page thumbnail
1
Click the Pages button on the left side of the window to view the page thumbnails.
2 Locatethethumbnailforthecurrentpage,andthenpositionthepointeroverthelowerrightcornerofthepage-
view box until the pointer changes into a double-headed arrow.
3 Drag the corner of the box to reduce or expand the view of the page.
4 As needed, move the pointer over the zoom box frame within the thumbnail until it changes to a Hand icon, and
then drag the frame to see a different area of the page in the document pane.
32
Change the default magnification
1
Choose Edit > Preferences.
2 Under Categories, select Page Display.
3 Open the Zoom pop-up menu and choose a default magnification level.
Set the page layout and orientation
Changingthepagelayoutisespeciallyusefulwhenyouwanttozoomouttogetanoverviewofthedocumentlayout.
You can use the following page layouts when viewing PDF documents:
Single Page Displays one page at a time, with no portion on other pages visible.
Single Page Continuous Displays pages in a continuous vertical column that is one page wide.
Two-Up Displays each two-page spread with no portion of other pages visible.
Two-Up Continuous Displays facing pages side by side in a continuous vertical column.
Note: If a document has more than two pages, the Two-Up and Two-Up Continuous views display the first page alone
on the right side of the document pane, to ensure proper display of two-page spreads.
Set page layout
• To see only one page at a time, choose View > Page Display > Single Page.
• To see two pages at a time, side by side, choose View > Page Display > Two-Up.
• To scroll down continuously through one page after another, choose View > Page Display > Single Page
Continuous.
• To scroll down continuously through two pages at a time, choose View > Page Display > Two-Up Continuous.
Page 37

ADOBE READER 8
User Guide
You can also display buttons for each of these options in the Display Pages toolbar by choosing Tools > Toolbars >
More Tools, and selecting them in the More Tools dialog box.
Note: In Single Page layout, choosing Edit > Select All selects all text on the current page. In other layouts, Select All
selects all text in the PDF.
Rotate the page view
You can change the view of a page in 90˚ increments. This changes the view of the page, not its actual orientation.
You can’t save this change.
❖ Choose View > Rotate View > Clockwise or Counterclockwise, or click the Rotate Clockwise button or the
Rotate Counterclockwise button in the toolbar.
Change the default page layout
1
Choose Edit > Preferences.
2 Under Categories, select Page Display.
3 Open the Page Layout menu and choose Automatic, Continuous, Single Page, Two-Up, or Two-Up Continuous.
View a document in multiple windows
You can create multiple windows forthe same document using the New Window command. New windows have the
same size, magnification, and layout as the original window and open at the same page and on top of the original
window. When you open a new window, Acrobat adds the suffix 1 to the original filename and assigns the suffix 2
tothenewwindow.Youcanopenmultiplewindowswiththesuffixincrementingwitheachnewwindow.Closinga
window causes the remaining open windows to be renumbered sequentially; that is, if you have five windows open
and you close the third window that you opened, the windows are renumbered with the suffixes 1 to 4.
33
Note: This feature is not available when PDFs are viewed in a browser.
Open a new window
❖ Select Window > New Window.
Close a window
❖ Click the close box in the window. You are prompted to save any changes. Closing a window does not close a
document if more than one window is open.
Close all windows for a document
❖ Choose File > Close. You are prompted to save any changes before each window is closed.
Display off-screen areas of a magnified page
When you zoom in to a high magnification, you may be able to see only part of a page. You can shift the view to show
other areas of the page without changing the magnification level.
❖ Do either of the following:
• Use the vertical scroll bars to move up and down the pages or the horizontal scroll bars to move across the page.
• Select the Hand tool in the Select & Zoom toolbar, or choose Tools > Select & Zoom > Hand Tool, and drag to
move the page, as if moving a piece of paper on a table.
Page 38

ADOBE READER 8
User Guide
See also
“About PDF layers” on page 35
Display PDFs in Line Weights view
The Line Weights view applies a constant stroke width (1 pixel) to lines, regardless of zoom. When you print the
document, the stroke will print at the true width. Line Weights view is off by default.
❖ Choose View > Line Weights. To turn off Line Weights view, choose View > Line Weights again.
Note: Line Weights view is not available for viewing PDFs within a web browser.
Measure the height, width, or area of objects
The Measuring toolbar contains tools you can use to measure distances and areas of objects in PDF documents. The
measuring tools are especially useful when you need to know the distances or areas associated with objects in a form
or computer-aided design(CAD) drawing, or when you want to measure certain areas of a document before sending
it to a professional printer. The measuring tools are available to Reader users only if the PDF creator enables
measuring functionality.
When you use a measuring tool, the tool dialog box displays the measurements of the line segments you draw. This
option isn’t available for UNIX.
34
A
B
C
Measuring tools
A. Measuring toolbar B. Object being measured C. To ol display
1 Choose Tools > Measuring, and select a measuring tool. Or, right-click/Control-click the toolbar area, and then
choose Measuring.
2 To measure areas of your PDF document, do any of the following:
• SelecttheDistancetool tomeasurethedistancebetweentwopoints.Clickthefirstpoint,movethepointer
to the second point, and then click again. The measurements appear in the tool dialog box.
Page 39

ADOBE READER 8
User Guide
• Select the Perimeter tool to measure a set of distances between multiple points. Click each point you want to
measure. Then, double-click the last point, or hold the pointer over the last point and click.
• SelecttheAreatool tomeasuretheareawithinthelinesegmentsthatyoudraw.Clickeachpointyouwantto
measure. After you have clicked at least two points, click the first point to complete the area measurement.
Note: You can also finish a measurement by right-clicking/Control-clicking and choosing Complete Measurement from
the context menu.
3 While measuring objects, do any of the following:
• To change the scaling ratio (such as 3:2) on the drawing areas, specify the appropriate numbers in the tool dialog
box. If desired, change the unit of measurement next to this ratio.
• Select Measurement Markup in the tool dialog box if you want the lines you draw to appear as a comment. You
canthenusetheHandtooltodouble-clickthecommentandviewthemeasurementforthelinesegmentsthatyou
draw.UnlessAnnotateisselected,theobjectyoudrawwilldisappearwhenyoumeasureanotherobjectorselect
another tool.
Layers
35
About PDF layers
Reader supports viewing, navigating, and printing layered content in PDFs created from applications such as
InDesign, AutoCAD, and Visio.
You can control the display of layers using the default and initial state settings. For example, if your document
contains a copyright notice, you can easily hide the layer containing that notice whenever the document is displayed
on-screen while ensuring that the layer always prints.
Show or hide layers
Information can be stored on different layers of a PDF. The layers that appear in the PDF are based on the layers
created in the original application. You cannot create layers in Reader; however, you can examine layers and show or
hide the content associated with each layer using the Layers panel in the navigation pane. Items on locked layers
cannot be hidden.
Note: A Lock icon in the Layers panel indicates that a layer is for information only. The locked layer’s visibility cannot
be changed.
1 Choose View > Navigation Panels > Layers, and then do one of the following:
• To hide a layer,click the eye icon. To showa hidden layer, click the empty box. (A layer is visible when the eye icon
is present, and hidden when the eye icon is absent. This setting temporarily overrides the settings in the Layer
Properties dialog box.)
• To show or hide multiple layers, choose an option from the Options menu in the Layers panel.
2 From the Options menu in the Layers panel, choose one of the following:
List Layers For All Pages Shows every layer across every page of the document.
List Layers For Visible Pages Shows layers only on the currently visible pages.
Reset To Initial Visibility Resets layers to their default state.
Page 40

ADOBE READER 8
User Guide
Editing layered content
You can select or copy content using the Select tool or the Snapshot tool if the PDF document includes usage rights.
These tools recognize and select any content that is visible, regardless of whether the content is on a selected layer.
You can add content, such as review comments, stamps, or form fields, to layered documents just as you would to
any other PDF document. However, the content is not added to aspecific layer,even if that layer is selected whenthe
content is added. Rather, the content is added to the entire document.
Page thumbnails and bookmarks
About page thumbnails
Page thumbnails are miniature previews of the pages in a document. You can use page thumbnails in Reader to jump
quickly to a selected page or to adjust the view of the page.
When you move a page thumbnail, you actually move the corresponding page.
About bookmarks
A bookmark is a type oflink with representative text in the Bookmarks panel in the navigation pane.Each bookmark
goes to a different view or page in the document. Bookmarks are generated automatically during PDF creation from
the table-of-contents entries of documents created by most desktop publishing programs. These bookmarks are
often tagged and can be used to make edits in the PDF.
36
See also
“About tags, accessibility, reading order, and reflow” on page 102
Edit a bookmark
You can change a bookmark’s attributes at any time.
You can make bookmarks easier to read by changing their text appearance.
Wrap text in a long bookmark
❖ Click the Bookmarks button, and choose Wrap Long Bookmarks from the Options menu.
All the text of long bookmarks shows regardless of the width of the navigation pane. (This option is on when
checked, and off when not checked.)
Change the text appearance of a bookmark
You can change the appearance of a bookmark to draw attention to it.
1 In the Bookmarks panel, select one or more bookmarks.
2 To change the font size, click the Options menu, and choose Text Size > [size].
Page 41

ADOBE READER 8
User Guide
Searching PDFs
Search features overview
You run searches to find specific items in PDFs. You can run a simple search, looking for a search term within in a
single file, or you can run a more complex search, looking for various kinds of data in one or more PDFs.
You can run a search using either the Search window or the Find toolbar. In either case, Reader searches the PDF
body text, layers, form fields, and digital signatures. You can also include bookmarks and comments in the search.
The Search window offers more options and more kinds of searches than the Find toolbar. When you use the Search
window, object data and image XIF (extended image file format) metadata are also searched. For searches across
multiple PDFs, Reader also looks at document properties and XMP metadata, and it searches indexed structure tags
when searching a PDF index. If some of the PDFs you search have attached PDFs, you can include the attachments
in the search.
Note: PDFs can have multiple layers. If the search results include an occurrence on a hidden layer, selecting that occurrence displays an alert that asks if you want to make that layer visible.
See also
“Show or hide layers” on page 35
37
Access the search features
Where you start your search depends on the type of search you want to run. Use the Find toolbar for a quick search
of the current PDF. Use the Search window to look for words or document properties across multiple PDFs, use
advanced search options, and search PDF indexes.
Note: In UNIX, you can also select a word and choose Edit > Look Up, or right-click a word and choose Look Up.
Display the Find toolbar
By default, the Find toolbar is already open. Use this procedure to open it if it has been closed.
❖ Do one of the following:
• Choose Edit > Find.
• Right-click/Control-click the toolbar area and choose Find on the context menu.
• Press Ctrl+F/Command+F.
Open the Search window
❖ Do one of the following:
• Choose Edit > Search.
• On the Find toolbar, click the arrow and choose Open Full Acrobat Search.
• Press Ctrl+Shift+F.
Search appears as a separate window that you can move, resize, minimize, or arrange partially or completely behind
the PDF window.
Arrange the PDF document window and Search window
❖ In the Search window, click Arrange Windows.
Page 42

ADOBE READER 8
User Guide
Reader resizes and arranges the two windows side by side so that together they almost fill the entire screen.
Note: Clicking the Arrange Windows button a second time resizes the document window but leaves the Search window
unchanged. If you want to make the Search window larger or smaller, drag the corner or edge, as you would to resize any
window on your operating system.
Find text in a PDF
The Find toolbar searches the currently open PDF.
1 Type the text you want to search for in the text box on the Find toolbar.
2 (Optional) Click the arrow next to the text box and choose one or more of the following:
Whole Words Only Finds only occurrences of the complete word you type in the text box. For example, if you search
for the word stick, the words tick and sticky aren’t found.
Case-Sensitive Finds only occurrences of the words that match the capitalization you type. For example, if you
search for the word We b, the words web and WEB aren’t found.
Include Bookmarks Also searches the text in the Bookmarks panel.
Include Comments Also searches the text of any comments.
3 Press Enter.
38
Reader jumps to the first instance of the search term, which appears highlighted.
4 Press Enter repeatedly to go to the next instances of the search term.
Find text in multiple PDFs
The Search window enables you to look for search terms in multiple PDFs. For example, you can search across all
open PDF documents, all PDFs in a specific location, or an open PDF package.
Note: If documents are encrypted (have security applied to them), you cannot search them as part of a multipledocument search. You must open those documents first and search them one at a time. However, documents encrypted
as Adobe Digital Editions are an exception and can be searched as part of a multiple-document search.
See also
“About PDF packages” on page 10
Find text in PDFs in a specific folder
1
Open Reader on your desktop (not in a web browser).
2 Do one of the following.
• In the Find toolbar, type the text you want to search for, and then choose Open Full Acrobat Search from the pop-
up menu.
• In the Search window, type the text you want to search for in the text box.
3 In the Search window, select All PDF Documents In. From the pop-up menu directly below this option, choose
Browse For Location.
4 Select the location you want to search, either on your computer or on a network, and click OK.
5 Ifyou wantto specify additional searchcriteria, click Use Advanced SearchOptions, andselect the options you want.
Page 43

ADOBE READER 8
User Guide
6 Click Search.
During a search, you can click a result or use keyboard shortcuts to navigate the results without interrupting the
search. Clicking the Stop button under the search-progress bar cancels further searching and limits the results to the
occurrences already found. It doesn’t close the Search window or delete the Results list. To see more results, you must run
a new search.
Search a PDF package
1
Open the PDF in Reader on your desktop (not in a web browser).
2 Do one of the following.
• In the Find toolbar, type the text you want to search for in the text box and then choose Open Full Acrobat Search
from the pop-up menu.
• In the Search window, type the text you want to search for in the text box.
3 In the Search window, choose a location to look in:
• To search all PDFs in the package, choose In The Entire PDF Package.
• To search only some PDFs in the package, choose In Selected PDF Documents. Then select the PDFs you want to
search in the PDF package navigation area.
4 Ifyou wantto specify additional searchcriteria, click Use Advanced SearchOptions, andselect the options you want.
5 Click Search.
39
Review search results
After you run a search from the Search window, the results appear in page order, nested under the names of each
searched document. Each item listed includes a few words of context (if applicable) and an icon that indicates the
type of occurrence.
Jump to a specific instance in the search results
1
If necessary, click the plus sign (+) (Windows) or the triangle (Mac OS) to expand the search results. Then
select an instance in the results to view that instance in the PDF.
2 To view other instances, do any of the following:
• Click another instance in the results.
• Choose Edit > Search Results, and then choose Next Result or Previous Result.
Sort instances in the search results
❖ Select an option from the Sort By menu near the bottom of the Search window. Results can be sorted by Relevance
Ranking, Date Modified, Filename, or Location.
Icons shown with search results
The icon next to an instance of the search results indicates the search area in which the instance appears. Selecting
an icon has the following effect:
Document icon Makes the PDF active in the document window. Click the plus (+) (Windows) or the triangle
(Mac OS) next to the icon to show the list of individual search results within that PDF.
(General) Search Result icon Jumpstothatinstanceofthesearchterm,usuallyinthebodytextofthePDF.The
instance of the search term is highlighted in the document.
Page 44

ADOBE READER 8
User Guide
Bookmark icon Opens the Bookmarks panel and highlights the instances of the search terms.
Comments icon Opens the Comments panel and highlights the instances of the search terms.
Layer icon May open a message indicating that the layer is hidden and asking if you want to make it visible.
Attachment icon Opens a PDF file that is attached to the searched parent PDF and shows the highlighted
instances of the search terms.
Advanced Search Options
By default,the Search window displays basic search options.Click Use AdvancedSearch Options near the bottom of
the window to display additional options. To restore the basic options, click Use Basic Search Options near the
bottom of the window.
You can set a preference so that advanced search options always appear in the Search window. Access preferences by
choosing Edit > Preferences (Windows/UNIX) or Reader > Preferences (Mac OS). Then select Search under
Categories.
Return Results Containing Restricts your search results according to the option you choose the following:
• Match Exact Word Or Phrase Searches for the entire string of characters, including spaces, in the same order in
which they appear in the text box.
40
• Match Any Of The Words Searches for any instances of at least one of the words typed. For example, if you search
for each of, the results includeany instances in which one or both of the two wordsappear: each, of, each of, or of each.
• Match All Of The Words Searches for instances that contain all your search words, but not necessarily in the order
you type them. Available only for a search of multiple PDFs or index definition files.
• Boolean Query Uses the Boolean operators that you type with the search words into the What Word Or Phrase
Would You Like To Search For box. Available only for searching multiple PDFs or PDF indexes.
Note: You cannot run wildcard searches using asterisks (*) or question marks (?) when searching PDF indexes.
Use These Additional Criteria (text options) Includes the basic search options plus four additional options:
• Look In Restricts the search to the current PDF, parts or all of a currently open PDF package (if applicable), an
index, or a location on your computer. If you choose to search an index, a location, or a PDF package, additional
options appear under Use These Additional Criteria.
• Proximity Searches for two or more words thatare separated by no more than a specified number of words, as set
in the Search preferences. Available only for a search of multiple documents or index definition files, and when
Match All Of The Words is selected.
• Stemming Finds words that contain part (the stem) of the specified search word. For example, a search for
opening finds instances of open, opened, opens, and openly.Thisoptionappliestosinglewordsandphraseswhenyou
search the current PDF, a folder, or an index created with Acrobat 6.0 or later. Wildcard characters (*, ?) aren’t
permitted in stemming searches. Stemming isn’t available if either Whole Words Only or Case-Sensitive is selected.
• Include Bookmarks Searches the text of any bookmarks, as viewed in the Bookmarks panel.
• Include Comments Searches the text of any comments added to the PDF, as viewed in the Comments panel.
• Include Attachments Searches PDFs that are attached tothe current PDFor other attached PDFs(up to twolevels
deep).
Use These Additional Criteria (document properties) Appears only for searches across multiple PDFs or PDF
indexes. You can select multiple property-modifier-value combinations and apply them to searches.
Page 45

ADOBE READER 8
User Guide
Note: You can search by document properties alone by using document property options in combination with a search
for specific text.
• Check box Applies the criteria set in the three connected options to the search. (The check box is selected
automaticallywhen youenter information in any of the threeoptions for that set. Afteryou enteroptions, deselecting
the check box doesn’t clear the entries; they just aren’t applied to the search.)
• First menu (property) Indicates the document characteristic to search for. The available options include Date
Created, Date Modified, Author, Title, Subject, Filename, Keywords, Bookmarks, Comments, JPEG Images, XMP
Metadata, and Object Data.
• Second menu (modifier) Indicates the level of matching. If the first menu selection is a date, the available options
inthesecondmenuareIsExactly,IsBefore,IsAfter,IsNot.Otherwise,theavailableoptionsareContainsandDoes
Not Contain.
• Third box (value or text) Indicates the information to be matched, which you type in. If the first menu selection
is a date, you can click the arrow to open a calendar that you can navigate to find and select the date you want.
Boolean operators
Commonly used Boolean operators include the following:
AND Use between twowords to find documents that contain both terms, in any order. For example, type paris AND
france to identify documents that contain both paris and france.SearcheswithANDandnootherBooleanoperators
produce the same results as selecting the All Of The Words option.
41
NOT Use before a search term to exclude any documents that contain that term. For example, type NOT kentucky
to find all documents that don’t contain the word kentucky.Or,typeparis NOT kentuckyto find all documents that
contain the word paris but not the word kentucky.
OR Use to search for all instances of either term. For example, type email OR e-mail to find all documents with
occurrences of either spelling. Searches with OR and no other Boolean operators produce the same results as
selecting the Any Of The Words option.
^ (exclusive OR) Use to search for all instances that have either term but not both. For example, type cat ^ dog to
find all documents with occurrences of either cat or dog but not both cat and dog.
( ) Use parentheses to specify the order of evaluation of terms. For example, type white AND (whale OR ahab) to
find all documents that contain either white and whale or white and ahab. (The query processor performs an OR
query on whale and ahab and then performs an AND query on those results with white.
To learn more about Boolean queries, syntax, and other Boolean operators that you can use in your searches, refer
to any standard text, website, or other resource with complete Boolean information.
Search index files of cataloged PDFs
A full-text index is created when someone uses Acrobat to define a catalog of PDFs. You can search that index for
the words you want to find rather than running a full-text search of each individual PDF in the catalog. An index
search produces a results list with links to the occurrences of the indexed documents.
Note: To search a PDF index, you must open Reader as a standalone application, not within your web browser. In
Mac OS, indexes created with some older versions of Reader are not compatible with the Reader 8 Search feature and
must be updated before you can use Reader 8 to search them.
1 OpentheSearchwindow,typethewordsyouwanttofind,andthenclickUseAdvancedSearchOptions(nearthe
bottom of the window).
Page 46

ADOBE READER 8
User Guide
2 For Look In, choose Select Index.
3 IntheIndexSelectiondialogbox,selectanindex,iftheoneyouwanttosearchisavailable,orclickAddandthen
locate and select the index to be searched, and click Open. Repeat as needed until all the indexes you want to search
are selected.
Note: You can read file data about a selected index by clicking Info, and you can exclude indexes from the search either
by selecting them and choosing Remove or by clearing the check box for that index.
4 Click OK to close the Index Selection dialog box,and then choose Currently Selected Indexes on the Look In pop-
up menu.
5 Proceed with your search as usual, selecting other options you want to apply, and clicking Search.
Note: Selecting the Match Whole Word Only option when searching indexes significantly reduces the time taken to
return results.
See also
“Search features preferences” on page 42
Search features preferences
Access preferences forsearch features by choosing Edit > Preferences (Windows) or Reader > Preferences (Mac OS),
and then clicking Search under Categories.
42
Ignore Asian Character Width Finds both half-width and full-width instances of the Asian language charactersin the
search text.
Ignore Diacritics And Accents Finds the search terms with any variation of the alphabetical characters. For example,
typing cafe finds both cafe and café.Likewise,typingcafé finds both versions. If this option isn’t selected, typing cafe
doesn’t find café, and vice versa.
Always Use Advanced Search Options Makes the advanced options available in the Search window, in addition to
the basic options.
Maximum Number Of Documents Returned In Results Limits the search results in the Search PDF window to a
specific number of documents. The default value is 500, but you can enter any number from 1 to 10,000.
Range Of Words For Proximity Searches Limits the search results to those in which the number of words between
the search terms isn’t greater than the number you specify. Accepts a range from 1 to 10,000.
Enable Fast Find Generates a cache of information from any PDF that you search. This cache reduces subsequent
search times for that PDF.
Maximum Cache Size Limits thetemporary cache of search informationfor the Fast Find option to the specified size
in megabytes (between 5 and 10,000). The default setting is 100.
Purge Cache Contents Deletes the Fast Find option’s entire temporary cache of search information.
If you accidentally close the Search window while reviewing the results of a search, click the Search button to display
the results, or choose Edit > Search Results > Next Result or Previous Result. The most recent search results remain
until you run another search or close Reader.
Page 47

ADOBE READER 8
User Guide
Saving PDFs
About saving PDFs
YoucanusuallysaveacopyofaPDF,orifthecreatorofthedocumentenabledadditionalusagerights,youcansave
comments, entries in form fields, or digital signatures that you have added to a document. If a document has
additional or restricted usage rights, thedocument message barunder the toolbararea describes the assigned restrictions or privileges when you open the document.
If the file permissions allow, you can also save the contents of a PDF in text format. This allows you to easily reuse
the text from a PDF and to use the content with a screen reader, screen magnifier, or other assistive technology.
Save a copy of a PDF
1 Choose File > Save As (or Save A Copy, if Save As is not shown).
2 In the Save As dialog box, enter the filename and location, and click Save.
You can save the file only in PDF or txt format.
Save comments, form field entries, and digital signatures
Commenting, filling in forms, and using digital signatures are available when the form creator has extended
additional rights to Reader users.
43
❖ Choose File > Save As.
If you are viewing a PDF in a web browser, the Reader File menu is not available. However, you can use the Save A
Copy button in the Reader toolbar to save the PDF.
See also
“Filling in PDF forms” on page 75
“Participating in a PDF review” on page 47
Save a PDF as a text file
1 Choose File > Save As Text.
2 In the Save As Text dialog box, enter the filename and location, and click Save.
Your file is saved with the .txt extension.
When you are working on a document to which additional usage rights have been assigned, Adobe Reader automat-
ically saves your work every 5 minutes. You change how often Adobe Reader saves your work in the General Preferences.
Recover lost changes
To prevent lost changes after an unexpected interruption, the Autosave feature must be enabled, which is the default
setting.
Set up automatic saving
1
Choose Edit > Preferences (Windows/UNIX) or Reader > Preferences (Mac OS).
Page 48

ADOBE READER 8
User Guide
2 Select Documents in the Categories list.
3 IfAutomaticallySave DocumentChanges To Temporary File Every xx Minutes (1-99) is notselected, select itnow.
4 In the Minutes box, specify how often you want Reader to save files.
Recover lost changes after an unexpected shutdown
1
Start Reader or open the file you were working on last.
2 Whenprompted, click Yes to open the autosave file or files. If multiple files were open, Reader opens all of the files
for you.
3 Save the file or files with the same names as the files you were originally working on.
Reusing PDF content
Select and copy text
TheSelecttool letsyouselecthorizontalandverticaltextorcolumnsoftextinaPDF.YoucanusetheCopyand
Paste commands to copy the selected text into another application. If you hold the pointer over the text selection, a
menu appears that lets you copy, highlight, or underline the text, among other options. Note the following:
44
• If the Cut, Copy, and Paste commands are unavailable when you select text, the author of the PDF may have set
restrictions against copying text.
• If the text you copy uses a font that isn’t available on your system, the font will be substituted with a close match
or a default font.
See also
“Open secured PDFs” on page 29
Select a word or line of text
1
Move the Select tool over the text you want to select. When the pointer changes to the I-beam icon , do one
of the following:
• Drag across the text to be selected. (You can also click to create an insertion point, and Shift-click to create a
second insertion point. The text between the two insertion points is selected.)
• Double-click to select a word.
• Triple-click to select a line of text.
2 Ifyouwanttoextendaselectionletterbyletter,pressShiftandanarrowkey.Toextendaselectionwordbyword,
press Shift+Ctrl (Windows/UNIX) or Shift+Command (Mac OS) and an arrow key.
Select a column of text
1
Using the Select tool , move the pointer toward a column of text. When the pointer changes to a vertical bar
with a box superimposed, the Select tool is in column select mode.
You can force column select mode by pressing the Alt key (Windows), Ctrl+Alt (UNIX), or the Command key (Mac
OS) as you drag a rectangle over the column of text.
2 Drag a rectangle over the column of text. To select text in more than one column, drag from the beginning of the
text in one column to the end of text you want to select.
Page 49

ADOBE READER 8
User Guide
Select all the text on a page
1
Choose View > Page Display > Single Page.
2 Do one of the following:
• Choose Edit > Select All.
• Select any text on the page and then press Ctrl+A (Windows/UNIX) or Command+A (Mac OS).
• Click four times in the text. This method selects all the text on the page regardless of the page layout.
Note: If you choose any other page layout, all the text in the document is selected.
Copy selected text
1
Use the Select tool to select any amount of text on the page.
2 Copy the text:
• Choose Edit > Copy to copy the selected text to another application.
• Hold the pointer over the selection until a menu appears, and then select Copy.
Copy images
You can copy and paste individual images from a PDF to the clipboard (Windows only), to another application, or
to a file using the Select tool.
45
Ifyoucannotselectanimagebecauseofoverlappingtext,chooseEdit>Preferences(Windows)orReader>Preferences (Mac OS), select General on the left, and select the Make Select Tool Select Images Before Text option.
1 Using the Select tool , do one of the following:
• To select the entire image, click it or drag a rectangle around it.
• To select a portion of an image, hold the pointer over the image until the crosshairs icon appears, and then
drag a rectangle around the portion.
Note: To deselect an image and start over, click outside it.
2 Copy the image:
• Choose Edit > Copy, and then choose Edit> Paste to pastethe image inan open document in another application.
• Right-click/Control-click the image and choose an option to copy the image to the clipboard or to a new file.
• Drag the image into an open document in another application.
Take a snapshot of a page
You can use the Snapshot tool to copy all selected content (text, images, or both) to the clipboard or to another application. Text and images are copied as an image.
1 Select the Snapshot tool by choosing Tools > Select & Zoom.
2 Do one of the following:
• Click anywhere in the page to capture the entire content displayed on the screen.
• Drag a rectangle around the text or images, or a combination of both.
• Drag a rectangle within an image to copy just a portion of the image.
Colors in the selected area areinverted momentarily to highlight the selection. The selection is copiedautomatically
to the clipboard when you release the mouse button. If a document is open in another application, you can choose
Edit > Paste to paste the copied selection directly into the target document.
Page 50

Chapter 4: Review and comment
If the form initiator has granted additional usage rights, you can use the commenting and markup tools to review
PDFs and manage, import, and export your review comments. Use Acrobat Connect to start online meetings.
Meetings
Start a meeting
Note: This feature is available in Linux and Solaris.
From Reader, you can start a meeting to share your desktop and review PDF documents. Adobe Acrobat Connect is
a personal web-conference tool that you can access from Reader to conduct real-time meetings on your desktop.
Attendees join the meeting by logging into a web-based meeting space from their own computers.
You must have an Acrobat Connect account to start and attend meetings. You can subscribe or set up a trial account
by clicking the Start Meeting button in Reader to get started.
46
Note: Acrobat Connect is not available in all languages.
1 To start a meeting, do one of the following:
• Click the Start Meeting button.
• Choose File > Start Meeting.
2 In the dialog box that appears, do one of the following:
• If you have an account, click Log In. Type the Meeting URL, login, and password for your Acrobat Connect
account, and then click Log In. Your Acrobat Connect account uses your Adobe ID (your email address) for your
login.
Note: You can also use Meeting URLs for Macromedia Breeze® and Adobe Acrobat Connect Pro accounts. These
accounts require a login that is different than your Adobe ID.
• If you don’t have an account, click Create Trial Account, and follow the on-screen directions.
3 Do one of the following:
• To invite participants to a meeting, click Send An E-mail Invitation, type the email addresses of those you want to
invite, and then click Send.
• To share the document that’s displayed on your screen, click Share My Screen.
As participants join the meeting, their names appear in the Attendee List.
4 Do any of the following:
• Type a message in the Chat pod, select who to send the message to, and click the Send Message button.
• Take notes in the Notes pod and send them out after the meeting.
• If you want another attendee to share his or her desktop, select that person’s name in the Attendee List, click the
Set User Role button, and choose Set As Presenter.
Page 51

ADOBE READER 8
User Guide
Attend a meeting
Note: This feature is available in Linux and Solaris.
If you don’t have an Acrobat Connect account, you can join a meeting as a guest.
Note: Acrobat Connect is not available in all languages.
1 In the email invitation, click the URL for the meeting or type the Meeting URL in the address box of a browser.
2 Type the login and password for your Acrobat Connect account, or log in as a guest.
3 In the Acrobat Connect meeting, do any of the following:
• To send a message, type it in the Chat pod, select who to send it to, and click the Send Message button.
• To clear the Chat pod or change the font size, click the Pod Options button and choose an option.
• To take notes, type them in the Note pod.
Acrobat Connect preferences
Note: This feature is available in Linux and Solaris.
When you start an Acrobat Connect meeting, the Meeting URL and login you provide are stored in the Acrobat
Connect preferences. To change your Acrobat Connect account settings, choose Edit > Preferences
(Windows/Linux) or Reader > Preferences (Mac OS), and select Meeting on the left.
47
The login for your Acrobat Connect account is your Adobe ID. To change your login, create a new Adobe ID on the
Adobe website.
Note: Acrobat Connect is not available in all languages.
Participating in a PDF review
Review a PDF
When you receive an email invitation to a PDF review, the invitation typically includes the PDF as an attachment or
provides a URL to the PDF. Alternatively, you may receive a Forms Data Format (FDF) attachment. When opened,
an FDF file configures your review settings and opens the PDF in a web browser.
PDFs in a review have special features, including commenting tools and a document message bar with instructions.
Use the commenting tools to add comments to the PDF and then submit them, either by publishing comments to a
comment server where others can see them, or by sending comments as an email attachment to the review initiator.
ToreviewthePDFlater,reopenitfromtheReviewTrackertoensurethatyourcommentsareaddedtothetracked
copy of the PDF, and that the initiator receives your comments. If you don’t send or publish your comments right
away, save the PDF before you close it to avoid losing your comments. Until the initiator receives your comments,
they appear only in your local copy of the PDF and aren’t visible to other reviewers.
If you review a PDF using a version earlier than Acrobat 8 or Reader 8, some features may not be available.
Page 52

ADOBE READER 8
User Guide
See also
“Reply to comments” on page 66
“Rejoin a review” on page 51
“Save the PDF with comments” on page 52
Join a review
1
In your email application, open the PDF by double-clicking the attachment (PDF or FDF) or URL.
2 Do one or more of the following, if prompted:
• Click Connect in the Join Shared Review dialog box.
• Click OK in the Welcome To Shared Review window. This window tells you who’s invited to the review and if
they’ve made any comments, and it tells where the comment server is located.
• Type your login name and password for the comment server. If you don’t have access to the comment server, click
Work Offline, or click Save And Work Offline in the Comment & Markup toolbar.
• Type your name, email address, company name, and job title, if prompted.
3 Save the file to a location that you can find easily, such as the desktop.
4 AddcommentstothePDFusingtoolsintheComment&Markuptoolbar.Ifyouneedtodeleteacomment,select
it and press Delete. (You can delete only comments that you made.)
5 Do all of the following that apply:
• If you’re notified that new comments from other reviewers are available, click the message. New comments appear
in the PDF.
• If you want to find out if new comments are available from other reviewers, click the Check For New Comments
button .
6 Submit your comments by doing one of the following:
• Click Publish Comments in the document message bar.
• Click Send Comments or Send And Receive Comments in the Comment & Markup toolbar.
48
When you send comments, a PDF containing your comments is sent as an email attachment to the review initiator.
When you publish comments, your comments are saved to the comment server.
Options in the document message bar
The options that are available in the document message bar depend on how the initiator set up the review and
whether you can access the comment server. Similar options may also appear in the Comment & Markup toolbar.
Check For New Comments Prompts Acrobat to synchronize comments between the comment server and the local
hard drive. If you don’t click thisbutton, Acrobat checksfor newcomments at theintervals specified inthe Reviewing
preferences. This button is available only when new comments are published to the server in a shared review.
Merge Comments Copies the comments in the open PDF to your copy. This option is available only for PDFs you
receive from reviewers in email-based reviews.
Publish Comments Uploads your new comments to the comment server. This option is available only in shared
reviews.
Page 53

ADOBE READER 8
User Guide
Send Comments Creates an email message addressed tothe reviewinitiator that contains the commented PDF as an
attachment. This option is always available in email-based reviews, and it appears in shared reviews only after an
attempt to connecting to the comment server has failed.
Status Displays the connected state of the comment server. If clicked, a menu with additional options appears.
ReviewTrackeropenstheReviewTracker.SaveAsArchiveCopysavesacopyofthePDFthatisnolongerconnected
to the review. Work Offline saves a copy of the PDF that is temporarily disconnected from the review. Reconnect To
Server appears only in the PDF you created by choosing Work Offline.
Check for newly published comments
When you participate in a shared review, Reader synchronizes published comments on your local drive with those
on the comment server, and then notifies you when new comments are available. Notifications appear as bezel-style
messages in the open PDF. In Windows, notifications also appear as balloon-style messages in the notification area
(system tray). These notifications are viewable in all versions of UNIX except Solaris 9 and 10 since the system tray
is not visible. Because synchronization continues after the PDF is closed, you’ll continue to receive notifications.
Messages in the notification area inform you when new reviewers join the review, when updates occur (multiple
reviews), andwhen synchronization attempts fail.They also inform you when a new broadcast subscriptionis added
in the Review Tracker. You can change how often messages appear and how often comments are synchronized, and
you can manually trigger the synchronization process.
49
View new comments
Toviewnewcomments,youmustbeabletoconnecttothenetworkwherethecommentserverislocated.Ifyoucan’t
connect, check the server status in the Review Tracker to determine the cause of the problem. (See “Check server
status” on page 53.)
❖ Do one of the following:
• Click the Check For New Comments button in the document message bar.
• Choose Document > Comments > Check For New Comments.
• Click the message in the notification area (Windows/UNIX).
Change frequency of synchronization and notifications
1
Open the Reviewing preferences:
• Choose Edit > Preferences (Windows/UNIX) or Reader > Preferences (Mac OS), and then click Reviewing on the
left. This option isn’t available for Solaris 9 and 10.
• In Windows/Linux, right-click the notification icon in the notification area, and choose Reviewing Prefer-
ences.
2 Move the sliders to change the following settings:
Check For New Comments The top slider specifies (in minutes) how often comments are synchronized when a
shared PDF is open. The bottom slider specifies (in hours, weeks, days, or months) how often comments are
synchronized when a shared PDF is closed.
Show Review Tracker Alerts Specifies how often alert messages appear.
Page 54

ADOBE READER 8
User Guide
Disable notifications
❖ Do one of the following:
• Choose Edit >Preferences (Windows/UNIX) or Reader > Preferences (Mac OS), click Reviewing on the left,move
the slider for Show Review Tracker Alerts to the far left until the value Never appears, and then click OK.
• In Windows/UNIX, right-click the notification icon in the notification area. If a check mark appears next to
Show Review Notifications, select that option so a check mark no longer appears. This option isn’t available in
Solaris 9 and 10.
Send comments in email
If you review a PDF offline or outside of a firewall, or if you lose your connection to the comment server, you may
need to send your comments in an email message.
❖ Do one of the following:
• Choose File > Attach To Email, type the initiator’s email address, and click Send.
• Click the Send Comments button in theComments & Markups toolbar,type the address for the initiator in the To
text box, and click Send.
Note: IfthePDFexceedsthe5MBfile-sizelimit,you’repromptedtosendyourcommentsinasmallerFormsDataFormat
(FDF) file, which the initiator can import. To adjust the limit, choose Edit > Preferences (Windows) or Reader > Preferences (Mac OS), select Reviewing, and enter the new value for Send Comments As FDF For Files Greater Than [#] MB.
50
Publish comments from other reviewers
When you participate in a review, you may receive comments from other reviewers. If a reviewer can’t access the
comment server, they may send you their comments. Ifyou solicited feedback from individuals who weren’t initially
invitedtothereview,theymayreturnacopyofthereviewPDFtoyouwiththeircomments.Bytakingownershipof
the comments, you can share them with everyone in the review.
Note: If you publish comments from a reviewer who later gains access to the comments server, those comments may
appear in the PDF in duplicate.
1 Open the PDF that contains comments.
2 Do one of the following:
• Click OK when asked if you want to publish comments for this reviewer. The published comments appear in the
PDF. Your name appears in the title bar and the author’s name appears in the body of the comments, preceded by
the text “On behalf of.”
• Click Yes when asked if you want to merge comments, or click Merge Comments in the document message bar
and then click Send Comments. Add email addresses for other reviewers, as needed, and then click Send.
• Open a copy of the PDF, choose Document > Comments > Import Comments, and then click Send Comments.
Add email addresses for other reviewers, as needed, and then click Send.
Only new or edited comments are published or sent.
Page 55

ADOBE READER 8
User Guide
Rejoin a review
UsetheReviewTrackertoreopenPDFsinanactivereview.IfyoureceivedaPDFattachmentwithanemailmessage
anddidn’tsaveitthefirsttimeyouopenedit,reopenthePDFinyouremailapplication.OnlyPDFsthatyou’vesaved
appear in the Review Tracker.
1 Choose View > Review Tracker.
2 In the Review Tracker, double-click the PDF.
In shared reviews, the Welcome Back To Shared Review window shows the number of new comments that were
published since the last time you opened the PDF. Click OK to close this window.
3 Add new comments or edit existing comments. If you need to delete a comment, select it, and press Delete.
Deleted comments are removed from the online PDF the next time comments are synchronized or the browser
window is refreshed. If you delete comments that you sent in an earlier email message, they aren’t deleted in the
initiator’s document.
4 Submit your new comments by doing one of the following:
• Click Publish Comments in the document message bar.
• Click Send Comments or Send And Receive Comments in the Comment & Markup toolbar.
Only new or edited comments are published or sent.
51
See also
“Save the PDF with comments” on page 52
Tracking PDF reviews
Review Tracker overview
You can use the Review Tracker to manage your document reviews. From this window, you can see who’s joined a
shared review and how many comments they’ve published. You can also rejoin a review, access comment servers
used in reviews, and email participants.
The Review Tracker includes links to all PDF documents in managed reviews. Each link lists the date and time the
PDF was sent and the list of invited reviewers. Links to shared PDFs provide additional information, including the
deadline (if set) and the number of comments submitted per reviewer. Deleting a link in the Review Tracker doesn’t
delete the PDF file.
InadditiontotheReviewTrackerpanel,theReviewTrackerincludestwootherpanelswhereyoucanmanageforms
and web broadcast subscriptions (known as RSS feeds). You can access these panels by clicking the Forms button or
the Subscriptions button on the left side of the window. (The feature for managing forms isn’t available in UNIX.)
Page 56

A B C
Review Tracker
A. Review Tracker icon B. Reviews you initiated or received C. Information for the selected review
ADOBE READER 8
User Guide
52
Open the Review Tracker
❖ Do one of the following:
• Choose View > Review Tracker.
• Click the Review & Comment button in the Task toolbar, and choose Review Tracker.
If you’re participating in a shared review, you can open the Review Tracker by clicking the Status button menu
in the document message bar of the shared PDF.
Track reviewed PDFs
1 Choose View > Review Tracker.
2 Expand the appropriate folder:
Reviews I’ve Sent Lists PDFs in reviews that you initiated. (Not available in Reader.)
Reviews I’ve Joined Contains PDFs in reviews that you’ve received. PDFs appear in this list only after you open
them.
Note: PDFs listed in bold contain comments that you haven’t yet read.
3 Select a PDF.
InformationspecifictotheselectedPDFreviewappearsontheright.Sharedreviewsopenasummarypagethatlists
reviewers who have joined the review and the number of new comments.
Save the PDF with comments
You can save a copy of the review PDF that contains all the comments that reviewers have published or that you’ve
imported (merged).
If the PDF is in a shared review, you can save an archive copy. The copy is no longer connected to the shared review,
and you can edit both content and comments in it.
Page 57

ADOBE READER 8
User Guide
If you want to create a copy of a shared PDF to distribute to others, use the Save As command. The resulting file will
include allcomments that were published up to that point, and itcan be moved, copied, or renamed without affecting
its connection to the review or to the comment server.
❖ To save a copy of a review PDF with all the comments, open the file, and then do one of the following:
• Forasharedreview,chooseFile>SaveAsArchiveCopy,orclicktheStatusbuttoninthedocumentmessagebar
and choose Save As Archive Copy.
• Foranemail-basedreview,chooseFile>SaveAstosaveanewcopyofthePDF.Thismostrecentlysavedversion
is now the tracked PDF. The old version is the archive copy.
• For a browser-based review, use the Save And Work Offline button in the Comment & Review toolbar to save a
copy of the PDF with all the comments to the local hard drive.
Check server status
Check the server status in a shared PDF or in the Review Tracker to determine if you can connect to the comment
server.
Check status in a shared PDF
The Status button in the document message bar indicates whether the last attempt to connect to the comment
server was successful.
53
1 Open the shared PDF.
2 In the upper-right corner of the document, the Status button displays either the last attempt successful icon ,
the last attempt unsuccessful icon , or the attempting to connect icon .
Check status in the Review Tracker
1
Choose View > Review Tracker.
2 On the left, click the plus sign (+) next to Review Servers to expand the list.
The green icon next to the server name indicates that the last synchronization attempt was successful. The red
icon indicates that the last synchronization attempt was unsuccessful. The server may be disconnected from the
network, it may have problems writing data to the disk, or it may have some other problem. Contact your network
administrator for help.
Update your profile
Your comments identify you as the author by displaying your name—the name you provided when you joined or
startedareview,oryoursystemlogin.Youcanchangetheauthornameandotherprofileinformationatanytime.If
you do, your updated profile appears only in new comments; existing comments aren’t affected.
Update your review profile
YoucanalsoupdateyourreviewprofilefromtheWelcomeBackToReviewwindowthatappearswhenyourejoina
shared review.
1 Choose Edit > Preferences (Windows/UNIX) or Reader > Preferences (Mac OS).
2 To change your author name, select Commenting from the list on the left, and deselect Always Use Log-In Name
For Author Name.
3 Select Identity from the list on the left.
Page 58

ADOBE READER 8
User Guide
4 Edit your profile, making sure to include the email address that you’ll use for reviews. Click OK.
Update your profile for a shared review
1
Open the shared PDF.
2 In the Welcome screen that appears, click the Edit button for Reviewer Profile.
3 Edit your profile, making sure to include a valid email address, and click OK.
If you change the name in your profile, it will appear twice—in the list of invited participants, and in the list of
uninvited participants.
Subscribe to web broadcast services
You can use the Review Tracker as a news reader by subscribing to web content that uses the RSS (Really Simple
Syndication) format, such as news feeds or music channels. RSS format is compatible with XML and RDF formats.
1 Do one of the following:
• Click the Subscriptions button on the left side of the Review Tracker. Click the Subscribe button, enter a web
address in the URL box, and then click OK.
• Click the link for an RSS service.
2 If a security warning prompts you to approve the link, click OK.
54
Commenting
Commenting and markup tools overview
CommentingtoolsareavailableonlyinPDFsthathavecommentingenabled.PDFsinareviewworkflowtypically
include commenting rights.
You use commenting and markup tools (View > Toolbars > Comment & Markup) to add comments.Commentsare
notes and drawings that communicate ideas or provide feedback for PDFs. You can type a text message using the
Sticky Note tool, or you can use a drawing tool to add a line, circle, or other shape and then type a message in the
associated pop-up note. Text-editing tools let you add editing marks to indicate changes you want in the source
document. Most commenting and markup tools don’t appear in the toolbar until you add them.
Most comments include two parts: the icon, or markup,thatappearsonthepage,andthetextmessagethatappears
in a pop-up note when you click or double-click the icon or place the pointer over the icon.
After you add a comment, it stays selected until you click elsewhere on the page. A selected comment is highlighted
byabluehalotohelpyoufindthemarkuponthepage.Awireframewithselectionhandlesappearssoyoucanadjust
the size and shape.
Page 59

A
B
C
D
Types of comments in a PDF
A. Stamp B. Text edit C. Comment rollover (tool tip) D. Sticky note
See also
“Show and hide toolbar elements” on page 13
ADOBE READER 8
User Guide
55
“Comment on 3D designs” on page 121
Show the Comment & Markup toolbar
The Comment & Markup toolbar doesn’t appear by default, except when you open a PDF in a managed review
workflow.
❖ Do one of the following:
• Choose View > Toolbars > Comment & Markup.
• Choose Tools > Comment & Markup > Show Comment & Markup Toolbar.
• Click the Review & Comment button in the Task toolbar, and choose Show Comment & Markup Toolbar.
To add or remove tools for this toolbar, right-click/Control-click the toolbar, and select the tool. Or, choose Tools >
Customize Toolbars.
Select a commenting or markup tool
❖ Do one of the following:
• Select a tool from the Comment & Markup toolbar.
• Choose Tools > Comment & Markup > [tool].
Note: After you make an initial comment, the tool changes back to the Select tool so that you can move, resize, or edit
your comment. (The Pencil, Highlight Text, and Line tools stay selected.)
Keep a commenting tool selected
You can add multiple comments without reselecting the tool.
1 Select the tool you want to use (but don’t use it yet).
2 Choose View > Toolbars > Properties Bar.
Page 60

ADOBE READER 8
User Guide
3 Select Keep Tool Selected.
Change the look of your comments
CommentingtoolsareavailableonlyinPDFsthathavecommentingenabled.PDFsinareviewworkflowtypically
include commenting rights.
You can change the color and appearance of comments or markups before or after you create them. You can set the
new look as the default appearance for that tool.
B
56
A
Properties toolbar
A. With note icon selected B. With pop-up text selected
Change a comment’s look and set it as the default
1
After you create a comment, do one of the following:
• Choose Properties from the Options menu of the pop-up note.
• Right-click/Control-click the markup, and then choose Properties.
2 In the Properties dialog box, do any of the following, and then click Close:
• Click the Appearance tab to change such options as the color and type of icon used. The type of comment selected
determines which options are available.
• Click the General tab to change the author’s name and subject of the comment.
• Click the Review History tab to see the history of changes people have made to the status of a comment during a
review.
• Select Locked at the bottom of the Properties dialog box to prevent the comment from being edited or deleted.
• Select Make Current Properties Default at the bottom of the Properties dialog box to apply these properties to all
subsequent comments of this type that you make.
Set the default look for a tool
1
In the Comment & Markup toolbar, right-click/Control-click the tool you want to use, and choose Tool Default
Properties.
Note: If the tool you want doesn’t appear in the Comment & Markup toolbar, right-click/Control-click the toolbar, and
select the tool.
Page 61

ADOBE READER 8
User Guide
2 Set the properties as desired, and click OK.
Allcommentsyoucreateusingthistoolwilldisplaythepropertiesyouset.Existingcommentsaren’taffected,noris
the appearance of text in pop-up notes.
Add a sticky note
CommentingtoolsareavailableonlyinPDFsthathavecommentingenabled.PDFsinareviewworkflowtypically
include commenting rights.
Themostcommontypeofcommentisthestickynote.Astickynotehasanoteiconthatappearsonthepageanda
pop-up note for your text message. You can add a sticky note anywhere on the page or in the document area.
A
B
E
C
D
E
57
Use the Sticky Note tool to add a text message in a pop-up note.
A. Comment & Markup toolbar B. Sticky Note tool C. Close button D. Options menu E. Text message
Add a sticky note comment
1
Do one of the following:
• Select the Sticky Note tool in the Comment & Markup toolbar, and either click where you want to place the
note, or drag to create a custom-sized note.
• Choose Document > Comments > Add Sticky Note.
2 Type text in the pop-up note. You can also use the Select tool to copy and paste text from a PDF into the note.
Note: If you close the pop-up note, your text remains.
Edit a sticky note comment
1
Click or double-click the note icon.
2 Make changes, as needed:
• To resize the pop-up note, drag the lower-left or lower-right corner.
• To change the text formatting, choose View > Toolbars > Properties Bar, select the text, and then select the
property you want in the toolbar. Or, select the text, right-click/Control-click, and choose a text style option.
When you’re finished, click the minimize button in the upper-right corner of the pop-up note, or click outside the
pop-up note.
Delete a sticky note
1
Select the Sticky Note tool , the Hand tool , or the Select tool.
2 Select the note icon, and press Delete.
Page 62

ADOBE READER 8
User Guide
Alternatively, double-click the note icon and choose Delete from the Options menu of the pop-up note.
Mark up text with edits
CommentingtoolsareavailableonlyinPDFsthathavecommentingenabled.PDFsinareviewworkflowtypically
include commenting rights.
You can use text edit comments in a PDF to indicate where text should be edited in the source file. Text edit
comments do not change the actual text in the PDF. Instead, they indicate which text should be deleted, inserted, or
replaced in the source file from which the PDF was created.
You can use the Select tool or the Text Edits tool to add most types of text edits. Shortly after you click or select text
with the Text Edits tool, an icon appears. If you right-click this icon, a menu of text editing options appears.
A B
58
Replace Text option
A. Selected text is struck out. B. New text is added to a linked pop-up note.
Replace text
1
Use the Select tool, or select the Text Edits tool from the Comment & Markup toolbar.
If you don’t want the Indicating Text Edits dialog box to appear each time you select the Text Edits tool, select Don’t
Show Again in the dialog box, and then click OK.
2 Select the text you want to replace.
3 Press Enter or Return, or choose Replace Text from the menu that appears, and then do one of the following:
• Type the text to be inserted or added. This text appears in a pop-up note. Any selected text is crossed out. The
insertion caret appears.
• To indicate that a new paragraph should be added, close the pop-up note without adding text. The paragraph
insertion caret appears.
Add a note to a text edit
1
Use the Select tool or the Text Edits tool from the Comment & Markup toolbar.
2 Select Add Note At Cursor from the menu that appears.
3 Type your note in the pop-up note.
Show inserted text
1
Select the Text Edits tool from the Comment & Markup toolbar.
2 Click between the words or characters where you want to insert text.
Page 63

ADOBE READER 8
User Guide
3 Do any of the following:
• Type the text you want to insert.
• To indicate that a new paragraph should be added, press Enter or Return, and then close the pop-up note without
adding text. The paragraph insertion caret appears.
• To indicate that a space should be added, press the spacebar, and then close the pop-up note without adding text.
The space insertion caret appears.
You can also indicate text edits by using the Select tool to select text, right-click/Control-click the selected text,
and then choose Replace Text (Comment).
Delete inserted text
1
In the Comment & Markup toolbar, choose the Text Edits tool .
2 Select the text, and then press Backspace or Delete, or choose Cross-Out Text from the menu.
Delete text markups
If markup comments are stacked, delete the comments in the Comments list: Click the Comments button in the
navigation pane to open the Comments list, select the comment, and press Delete.
❖ Do one of the following:
• Select the markup and press Delete.
• Right-click/Control-click the markup, such as the highlighting or cross-out, and then choose Delete.
59
Highlight, cross out, or underline text
CommentingtoolsareavailableonlyinPDFsthathavecommentingenabled.PDFsinareviewworkflowtypically
include commenting rights.
You can use the Highlight Text tool, Cross-Out Text tool, and the Underline Text tool to add comments by
themselves or in conjunction with notes. The Cross-Out Text tool and the Underline Text tool don’t appear in the
Comment & Markup toolbar, by default.
You can add a highlight with a note or you can cross out text by selecting the text using the Select tool or Text Edits
tool, and then choosing that option from the menu that appears. However, if you’re marking up a lot of text, the
specialized tools are faster and easier to use.
1 Choose Tools > Comment & Markups, and select the Highlight Text tool , the Cross-Out Text tool , or the
Underline Text tool .
Note: If you want to apply more than one comment using the Cross-Out Text tool or the Underline Text tool, choose
View > Toolbars > Properties Bar, and select Keep Tool Selected in the Properties toolbar after you select the tool. The
Highlight Text tool stays selected after you make the first comment.
2 Drag from the beginning of the text you want to mark up. Ctrl-drag (Windows/UNIX) or Option-drag (Mac OS)
to mark up a rectangular area of text. This is especially useful when marking up text in a column.
3 (Optional) To add a note, double-click the markup to add text in a pop-up note.
Stamp a document
CommentingtoolsareavailableonlyinPDFsthathavecommentingenabled.PDFsinareviewworkflowtypically
include commenting rights.
Page 64

ADOBE READER 8
User Guide
You apply a stamp to a PDF in much the same way you apply a rubber stamp to a paper document. You can choose
from a list of predefined stamps, or you can create your own stamps. Dynamic stamps obtain information from your
system andfrom the Identity panel ofthe Preferences dialog box, allowing you to indicate name,date, and time information on the stamp.
The Stamp tool appears in the Comment & Markup toolbar, by default.
Open the Stamps palette
❖ Do one of the following:
• Choose Tools > Comment & Markup > Stamps > Show Stamps Palette.
• In the Comment & Markup toolbar, click the arrow next to the Stamp tool and choose Show Stamps Palette.
Apply a stamp
1
Select a stamp by doing one of the following:
• Click the Stamp tool. The mostly recently used stamp is selected.
• In the Stamps Palette, choose a category from the menu, and then select a stamp.
2 Click the document page where you want to place the stamp, or drag a rectangle to define the size and placement
of the stamp.
3 If you haven’t provided a name in the Identity preferences, the Identity Setup dialog box prompts you to do so.
60
Change a stamp’s location or appearance
❖ Using the Select tool or the Hand tool, do any of the following:
• To move a stamp, drag it to a new location.
• To resize a stamp, click it, and then drag a corner handle.
• Torotateastamp,clickit,movethepointeroverthehandleatthetopofthestamp,anddragwhentherotatestamp
icon appears.
• To delete a stamp, right-click/Control-click the stamp and choose Delete.
• To change the stamp’s opacity or the color of its pop-up note, right-click/Control-click the stamp, and choose
Properties. In the Appearance tab, set the opacity or color.
Move a stamp to the favorites list
1
Using the Select tool or the Hand tool, select a stamp markup on the page.
2 IntheComment&Markuptoolbar,clicktheStamptoolandchooseFavorites>AddCurrentStampToFavorites.
Create a custom stamp
You can create custom stamps from anumber of different formats, including (but not limited to)PDF, JPEG, bitmap,
Adobe® Illustrator® (AI), Adobe® Photoshop® (PSD), and Autodesk AutoCAD (DWT, DWG) files. Create Custom
stamp only allows pdf format in reader.
Note: ToaddanimagetoaPDFonetimeonly,simplypastetheimageintothedocument.Pastedimageshavethesame
characteristics as other stamp comments; each includes a pop-up note and editable properties.
1 Choose Tools > Comment & Markup > Stamps > Show Stamps Palette.
2 Click Import, select the file you want to use, and then click Select.
Page 65

ADOBE READER 8
User Guide
3 If the file has more than one page, scroll to the page you want, and then click OK.
4 Choose a category from the menu or type a new category name, name the custom stamp, and then click OK.
Change the name or category for a custom stamp
1
Choose Tools > Comment & Markup > Stamps > Show Stamps Palette.
2 Choose the stamp category, right-click/Control-click the stamp, and choose Edit.
3 Edit the category or name of the stamp, or replace the image, and then click OK.
Delete a custom stamp
You can delete only the custom stamps that you created, not the predefined stamps. When you delete a stamp, the
stamp is removed from the Stamp tool menu, but the stamp file isn’t deleted.
1 Choose Tools > Comment & Markup > Stamps > Show Stamps Palette.
2 Choose the stamp category from the menu, right-click/Control-click the custom stamp, and choose Delete.
3 If you haven’t provided a name in the Identity preferences, the Identity Setup dialog box prompts you to do so.
Delete a custom stamp category
1
Choose Tools > Comment & Markup > Stamps > Manage Stamps.
2 Select the category you want to delete, and then press Delete.
61
Note: Deleting all stamps in a custom stamp category deletes the custom stamp category.
Add a line, arrow, or shape
Drawing tools are available only in PDFs that have commenting enabled. PDFs in a review workflow typically
include commenting rights.
When selecting a drawing tool, consider the effect you want.
1 Choose Tools > Comment & Markup, and select a drawing tool:
• The Rectangle tool , the Oval tool , the Arrow tool , and the Line tool let you create simple shapes.
• The Cloud tool and Polygon tool create closed shapes with multiple segments. The Polygon Line
tool creates open shapes with multiple segments.
• The Pencil tool creates free-form drawings, and the Pencil Eraser tool removes the pencil markups.
To specify the line width, color, and other properties before you draw, right-click/Control-click the drawing tool,
choose Properties, and set the desired options in the Properties dialog box.
2 Draw in the PDF:
• To create a cloud or polygon shape, click to create the start point, move the pointer, and click to create each
segment. To finishdrawing the shape, click the startpoint, orright-click/Control-click and chooseComplete from
the menu. Double-click to end a polygon line.
• To draw aline, arrow, or rectangle, either dragacross the area where you want the markup to appear, orclick twice:
once to create the start point and once to create the end point.
• To draw a square or circle, or to draw a line that’s horizontal, vertical, or at a 45˚ angle, press Shift while you draw.
Page 66

ADOBE READER 8
User Guide
• To draw free-form lines using the Pencil tool , drag where you want to begin drawing. You can release the
mouse button, move the pointer to a new location, and continue drawing. To erase parts of the drawing, select the
Pencil Eraser tool and drag across the areas of the drawing that you want to remove.
3 To edit or resize the markup, select it and drag one of the handles to make your adjustments.
4 To add a pop-up note to the markup, select the Hand tool, and double-click the markup.
5 (Optional) Click the close button in the pop-up note. A note icon appears to the right of the markup to indicate
the presence of text in the pop-up note.
Note: To delete a drawing markup, select it and press Delete.
Group and ungroup markups
You can group two or more markups so that your comments function as a single comment. You might group
markups temporarily to move them to a new location or to modify their properties rather than editing each one
individually. Grouping also helps to distinguish your markups from other reviewers’ markups in a document review.
Note: You cannot group text edit markups.
Group markups
1
Using the Select tool or the Hand tool, select a markup.
2 Ctrl-click/Command-click to select the markups you want to group.
3 Right-click/Control-click within the selection, and choose Group.
62
Ungroup markups
❖ Right-click/Control-click the grouped selection, and choose Ungroup.
Add comments in a text box or callout
CommentingtoolsareavailableonlyinPDFsthathavecommentingenabled.PDFsinareviewworkflowtypically
include commenting rights.
You can use the Text Box tool to create a box that contains text. You can position it anywhere on the page and
adjust it to any size. A text box remains visible on the document page; it doesn’t close like a pop-up note.
Another way to add a text box is simply to paste copied text into the PDF. Text font and size are based on the system
default settings.
Note: You can add comments to Japanese, Chinese, and Korean text with the Text Box tool,but youmust havethe Asianlanguage resource files installed. Text boxes allow for horizontal text only.
YoucanusetheCallouttool tocreateacallouttextbox.Callouttextboxesareespeciallyusefulwhenyouwant
to single out—but not obscure—a particular area of a document. Callout text boxes have three parts: a text box, a
knee line, and an end-point line. You can resize each part by dragging a handle. The knee line can be resized in one
direction only; horizontal knee lines can be resized horizontally only; vertical knee lines can be resized vertically
only. The text box expands vertically as you type so that all text remains visible.
You can move the text box bar itself or together with the end-point line. The text box moves around a stationary
anchor point—the arrow on the end-point line—which is created when you first click in the PDF. You can modify
the color and appearance of the text box and add arrows or leaders to the end-point line.
Page 67

ADOBE READER 8
User Guide
Add a text box
1
Choose Tools > Comment & Markup > Text Box Tool .
2 Click in the PDF.
3 Choose View > Toolbars > Properties Bar, and set the color, alignment, and font attributes for the text.
4 Type the text.
Text wraps automatically when it reaches the right edge of the box.
5 (Optional) To make further changes to the text box:
• Using the Select tool or the Text Box tool, click an edge of the text box to select it, and then drag a corner to resize
it. Use the Properties toolbar to change the border and fill options.
• Double-click the text box to edit the text or change the text attributes. Drag across text to select it, and then select
options from the Properties toolbar.
6 To delete the text box, right-click/Control-click the text box, and then choose Delete.
You can also paste a block of text by selecting and copying the text in any application, selecting the Hand tool in
Acrobat, and choosing Edit > Paste.
Add a callout
1
Choose Tools > Comment & Markup > Callout tool .
2 Click once to set the location of the end point, and click again to set the location of the text box.
3 Choose View > Toolbars > Properties Bar, and select the color, alignment, and font attributes for the text.
4 Type the text.
63
Text wraps automatically when it reaches the right edge of the box.
5 (Optional) To make further changes to the text box:
• To resize the callout, select it and drag any of the handles that appear.
• To move the text box, click inside the box and drag it.
• To move the entire callout, click either the end-point line or an edge of the text box, and drag it.
• To change the color, opacity, or line characteristics, use the Select tool to right-click/Control-click the callout,
choose Properties, and select the options you want.
Add an audio comment (Windows, Mac OS only)
CommentingtoolsareavailableonlyinPDFsthathavecommentingenabled.PDFsinareviewworkflowtypically
include commenting rights.
You can use the Record Audio Comment tool to add aprerecorded WAV or AIFF file as a comment or to record and
placeanaudiocommentinadocument.AudioattachmentsappearintheCommentslistandcanbeplayedbackon
any platform. However, the appropriate hardware and software for playing audio files must be installed.
The Record Audio Comment tool doesn’t not appear in the Comment & Markup toolbar by default. However, you
can add it by choosing Tools > Customize Toolbars.
See also
“Change the look of your comments” on page 56
Page 68

ADOBE READER 8
Add a prerecorded audio comment
1
Choose Tools > Comment & Markup > Record Audio Comment tool and then click in the PDF where you
want to place the audio comment.
2 Click Browse (Windows) or Choose (Mac OS), and select the audio file you want to add.
3
(Optional) To hear the audio comment, click the Play button . When you’re finished, click Stop and then click OK.
4 Specify options in the Properties dialog box, and then click OK.
Record an audio comment
1
Choose Tools > Comment & Markup > Record Audio Comment tool and then click in the PDF where you
want to place the audio comment.
2 In the dialog box that appears, click the Record button and then speak into the microphone. When you’ve
finished recording, click the Stop button , and then click OK.
3 Specify options in the Properties dialog box, and then click OK.
Add comments in a file attachment
CommentingtoolsareavailableonlyinPDFsthathavecommentingenabled.PDFsinareviewworkflowtypically
include commenting rights.
User Guide
64
Use the Attach File As Comment tool to embed a file at a selected location in a PDF, so that the reader can open it
for viewing. By adding attachments as a comment, you can reference longer documents that can’t easily be pasted
intoapop-upnoteortextbox.IfyoumovethePDFtoanewlocation,theembeddedfileautomaticallygoeswithit.
To view an attachment, the reader must have an application installed that can open the attachment.
1 Choose Tools > Comment & Markup > Attach A File As A Comment Tool .
2 Click in the PDF where you want to place the attachment.
3 Select the file that you want to attach, and then click Select. If you’re attaching a PDF, you can highlight areas of
interest in the file using comments.
4 In the Properties dialog box, select the settings for the file icon that appears in the PDF, and then click Close.
The comment attachment appears in the Attachments tab with a page number indicating its location.
Note: To delete the attachment, right-click/Control-click the attached comment icon, and choose Delete.
Paste images as comments
CommentingtoolsareavailableonlyinPDFsthathavecommentingenabled.PDFsinareviewworkflowtypically
include commenting rights.
YoucanusethePasteClipboardImageAsStamptooltoaddimagestoaPDF.Youcancopymostimageformatsfrom
drawing and image-editing applications, such as Adobe Photoshop and Adobe Illustrator. If you want to add the
image to PDFs repeatedly, create a custom stamp of the image.
Note: The Paste Clipboard Image As Stamp tool isn’t available until you copy an image.
1 Copy an image by doing one of the following:
• In Reader, choose Tools > Select & Zoom > Snapshot Tool , and select an image from a PDF.
• In another application, select an image and choose Edit > Copy.
2 Open a PDF.
Page 69

ADOBE READER 8
3 Choose Tools > Comment & Markup > Stamps > Paste Clipboard Image As Stamp Tool.
4 Click in the PDF where you want the image to appear.
5 Do any of the following:
• To move the image, drag it.
• To resize the image, select it and then drag one of its handles. Press the Shift key when resizing the image to
maintain the original proportions.
• To change the image properties, right-click/Control-click it and choose Properties.
• To delete the image, right-click/Control-click it and choose Delete.
See also
“Copy images” on page 45
Managing comments
View comments
The Comments list displays all the comments in a PDF, and it provides a toolbar with common options, such as
sorting, filtering, deleting, and replying to comments.
User Guide
65
The Comments button in the navigation pane opens the Comments list.
Open the Comments list
1
Do one of the following:
• Click the Comments button in the navigation pane.
• Click the Review & Comment button in the Task toolbar and choose Show Comments List.
2 Using the options at the top of the Comments list, do any of the following:
• Expand or collapse the comments. Click Expand All or Collapse All in the Comments List toolbar. To expand or
collapse individual comments, click the plus and minus signs next to the comment.
Page 70

ADOBE READER 8
User Guide
• Browse through thecomments. Click a comment in the list, or click theNext button orthe Previous button
to go to the next or previous comment. (These buttons are unavailable if no comment is selected.) The page on
whichtheselectedcommentislocatedappearsinthedocumentpane,andtheselectedcommentscrollsintoview.
To go to the page where another comment is located, simply click the comment in the list.
Sort comments
You can sort comments in the Comments list by author, page, type, date, color, checked state, or status by person. In
a thread of replies, only the first message is sorted, andthe reply messages are sorted in the same category as the first
message in the thread.
1 Click the Comments button in the navigation pane.
2 Choose an option from the Sort By menu in the Comments list.
Show or hide comments
You can hide or show comments based on type, reviewer (author), status, or checked state. Hiding comments is also
called filtering. Filtering affects the appearance of comments in both the document window and the Comments list.
When you print or summarize comments, you can specify whether hidden comments are printed or summarized.
When you hide a note comment that has been replied to, all other replies in the thread are hidden as well.
Note: In an email-based review, hidden comments aren’t included when you send the comments to the initiator.
66
❖ From the Show menu in the Comments list, do one of the following:
• To show all comments, choose Show All Comments.
• To hide all comments, choose Hide All Comments.
• To filter comments, choose the categories that you want to appear. For example, if you want only note comments
thatyou haven’t checkedto appear, choose Show By Type > Notesso that only the note comments appear, andthen
choose Show By Checked State > Unchecked so that only unchecked note comments appear.
• To reverse a filter, choose the All command for hidden categories. For example, if you filtered comments so that
only those by a certain reviewer appear, choose Show > Show By Reviewer > All Reviewers.
Reply to comments
Commenting features are available only in PDFs that have commenting enabled. PDFs in a review workflow
typically include commenting rights.
Replies to comments are especially useful in shared and browser-based reviews, when participants can read each
other’s comments. They can also be used by review initiators to let reviewers know how their suggestions are being
implemented. When one or more reviewers reply to a comment, the set of replies is called a thread. All replies in a
thread appear in the pop-up note and in the Comments list. Replies are indented below the original comment. The
number of replies that a comment has received appears in a box when you place the pointer over the comment.
Reply in the pop-up note
1
Open the pop-up note for the comment.
2 Choose Reply from the Options menu.
3 Type your reply in the box that appears.
Reply in the Comments list
1
Click the Comments button in the navigation pane.
Page 71

ADOBE READER 8
User Guide
2 Select a comment in the Comments list.
3 Click the Reply button .
4 Type your reply in the box that appears.
Delete a reply
If you delete a comment that’s been replied to, only the comment is deleted. Any replies remain in the PDF, but they
are no longer part of a thread. These replies may be difficult to view in the PDF because they are stacked. You may
want to view them in the Comments list.
❖ Do one of the following:
• In the pop-up note, right-click/Control-click the reply and choose Delete This Reply.
• Select the reply in the Comments list and then click the trash icon in the Comments List toolbar.
Set a status or check mark
Commenting features are available only in PDFs that have commenting enabled. PDFs in a review workflow
typically include commenting rights.
Statusesandcheckmarksareusefulforkeepingtrackofcommentsthatyou’vereadorthatrequirefurtheraction.In
Windows,you can use a status or a check markto indicate which comments you want to export to a Word document.
By setting the review status, you can show or hide a group of comments and let review participants know how you
are going to handle the comment. Once the review status is set, you cannot remove the review status display from
thecommentintheCommentslist,evenifyouchangethereviewstatustoNone.Checkmarksareforyourpersonal
use and do not appear when others view the PDF unless you change the status of comments.
67
Set a status
1
Select the comment in the Comments list, click the Set Status button , and choose an option.
The review status appears in the comment along with the name of who set the review status. If another reviewer sets
the review status for that comment, both reviewers’ names and review statuses appear in the Comments list.
2 To view a comment’s history of changes, right-click/Control-click the note icon, markup, or title bar of a pop-up
note, and then choose Properties. Click the Review History tab.
Flag comments with a check mark
❖ In the Comments list, click the check box next to a comment so that the check mark icon appears.
Find a comment
Locate a comment in the Comments list by searching for a particular word or phrase.
1 Click the Comments button in the navigation pane to display the Comments list.
2 Click the Search Comments button in the Comments List toolbar.
3 In the Search window, specify the word or phrase you want to search for, and then click Search Comments.
See also
“Search features overview” on page 37
Page 72

ADOBE READER 8
User Guide
Delete comments
You cannotdelete other reviewers’ comments ina sharedreview or a browser-based review, nor canyou deletelocked
comments. If you add comments to a PDF before you upload it to a remote server for review, you can’t delete those
comments.
Delete a comment
❖ Do one of the following:
• Select the comment and press Delete.
• Right-click/Control-click the comment, and choose Delete.
• In the Comments list, select the comments you want to delete, and then click the trash icon .
Note: Before pressing the Delete key, make sure that the comment is selected.
Unlock a comment
1
Right-click/Control-click the comment and choose Properties.
2 Deselect Locked, and then click Close.
Spell-check comments
You can spell-check the text you add in note comments and form fields. However, you cannot spell-check the text in
the underlying PDF. Unrecognized words appear underlined after you type them. You can edit these words in
context, or you can open theCheck Spelling dialogbox. The comment in the document window is updated withyour
changes.
68
See also
“Spell-check form entries” on page 78
Spell-check a single word
1
Open the pop-up note of a comment.
2 Select the word you want to check, and right-click/Control-click the selection.
3 Select the correct word from the list of alternatives that appear at the top of the menu.
Spell-check all text in comments
1
Choose Edit > Check Spelling > In Comments, Fields, & Editable Text. If the PDF is open in a browser, make sure
that the Edit toolbar is open, and click the Spell Check button .
2 Click Start to begin the spell check. When a word that may be misspelled is found, it appears under Word Not
Found. Suggested corrections appear under Suggestions.
3 To change the word that may be misspelled, do one of the following:
• Edit the selected word. To undo your change, click Undo Edit. To accept your change, click Change.
• Double-click a suggested correction.
• Click Ignore if you don’t want to change the word and want to continue with the check.
• Click Ignore All to ignore every instance of the word. Click Add to add the word to your personal dictionary.
Page 73

ADOBE READER 8
User Guide
• Select a suggested correction and then click Change. Click Change All to replace every instance of the unrecog-
nized word with the suggested correction.
4 Click Done.
Specify a language dictionary
1
Choose Edit > Check Spelling > Edit Dictionary.
2 Choose a language dictionary from the Dictionary menu, and click Done.
Add a word to the dictionary
By adding words to the spell-check dictionary, you can reduce the number of words that are flagged during a spell
check, such as names and company terminology. You can also exclude words from being considered during a spell
check. For example, if you want to use an alternate spelling for a common word like “bicycle,” add it to the list of
excludedwordssothatitisflaggedduringaspellcheck.Aseparatesetofaddedandexcludedwordsismaintained
for each installed language.
1 To add a word, do one of the following:
• During a spell check, if an unrecognized word appears in the Check Spelling dialog box, click Add to add it to the
dictionary. The word is added to the language dictionary selected from the Add To menu.
• Choose Edit > Spell Checking > Edit Dictionary. Type the word you want to add in the Entry box, and then click
Add. When you’re finished adding words, click Done.
2 To remove a word from the list, select the word in the Edit Custom Dictionary dialog box, and then click Delete.
69
Exclude a word from a spell check
1
Choose Edit > Check Spelling > Edit Dictionary.
2 Choose a language from the Dictionary menu, and then choose Excluded Words from the unnamed menu.
3 Type the word you want to exclude inthe Entry box,and then click Add. When you’re finished addingwords, click
Done.
Spelling preferences
You can specify whether words are spell-checked while you type, which color is used to underline words, and which
dictionary language is used as the default. To open the Spelling preferences, choose Edit > Preferences (Windows,
UNIX) or Reader > Preferences (Mac OS), and select Spelling from the list on the left.
Check Spelling While Typing When selected, underlines unrecognized words as you type in a form field or
comment.
Underline Color Specifies the color for underlining unrecognized words.
Dictionaries Lists available language dictionaries for spell-checking the PDF. Dictionaries appear in the order in
whichthespellcheckergoesthroughdictionariesinsearchofwords.Thedictionaryatthetopofthelististhefirst
dictionary searched. Click Up or Down to change its position in the list.
Page 74

ADOBE READER 8
User Guide
Approval workflows
About approval workflows
In Acrobat (Traditional Chinese, Simplified Chinese, Japanese, andKorean only), you cansend PDFs as email attachments for others to approve. When participants open an approval request in Reader (all languages), they can approve
the PDF by adding a digital identity stamp. Then, they can send the PDF to other approvers, or return the PDF to
the initiator and other appropriate participants. The initiator can track progress by choosingto be notified each time
the PDF is approved. The workflow ends when the last participant adds the final approval. If a PDF isn’t approved,
the approval workflow must be reinitiated.
Note: To initiate an approval workflow, you must use Acrobat 7.0 or later (except for Acrobat Elements). If you use
Acrobat Professional to initiate the workflow, you can invite users of Adobe Reader 7.0 or later to participate by enabling
commenting in the PDF.
70
Wizard sets up approval workflows (left); Stamps palette provides digital identity stamps for approving documents (right).
Participate in an approval workflow
If you’re invited to participate in an approval workflow, you receive an email message that provides step-by-step
instructions for approving the attached PDF. When you open the PDF, the Stamps palette and the How To window
open, andthe document message bar appears at the topof the PDF.If yourversion ofReader is earlierthan 7.0, you’re
prompted to download the latest version of Adobe Reader.
You can select any of the digital identity stamps in the Stamps palette to approve the document. A digital identity
stamp contains identity information that you provide, such as name, title, organization, and email address, and it can
be used in place of a signature. When you apply a stamp, it becomes part of the document’s page content. You can
delete your own stamp during the approval process; however, once the approval process is completed, your stamp is
locked. You can’t move or delete stamps from other participants.
You may also reject documents that don’t meet your standards.
In addition to adding digital stamps to a PDF, you can add other types of comments, including note comments, text
edits, custom stamps, and file attachments.
See also
“Create a custom stamp” on page 60
“Commenting and markup tools overview” on page 54
Page 75

ADOBE READER 8
User Guide
Approve a PDF
1
Open the PDF attachment in the approval invitation email message.
Note: If you haven’t added identity information to the stamp, you’re prompted to do so.
2 Select a stamp from the Stamps palette. (To view all stamps, scroll or drag a corner to resize the window.)
3 Click the document to apply your approval stamp.
Note: Todeleteadigitalidentitystampthatyou’veapplied,selectitandpressDelete.IfyouselectPrint,SaveACopy,or
Email during the approval process, you can’t delete your stamp.
4 Do one of the following:
• To send the document to the next approver, click the Approve button in the document message bar. In the Send
To Next Approver dialog box, type the email address for the next approver in the To box, add addresses for other
recipients as appropriate, and click Send.
• To complete the approval process, click the Final Approval button in the document message bar. In the Complete
Final Approval dialog box, specify whether to send an approval notification from the Final Approval Method
menu. If you send a notification, type an email address in the To box, add addresses for other recipients as appropriate, and click Send. If you don’t send a notification, click Complete.
If the Notify Initiator Of Approval Status Via Email option is selected, a separate email notification appears,
addressed to the initiator. Click Send to send this notification.
71
PDFs in an approval workflow present instructions and tools.
5 Save the PDF.
Important: If you use the Email button in the toolbar to send the PDF, the PDF is no longer part of the workflow,
and approval options aren’t available to the recipient of that email message.
Reject a PDF
If the PDF you received in an approval request doesn’t meet the requirements for approval, use the options in the
document message bar to reject the document and return it to the initiator. If a PDF is rejected, the approval
workflow must be reinitiated.
1 Open the PDF attachment in the approval invitation email message.
2 Click the Reject button in the document message bar.
Page 76

ADOBE READER 8
User Guide
3 Inthe Reject And Send Notification dialog box, type the email address for the initiator inthe To box. If the Notify
Initiator Of Approval Status Via Email option is selected, a separate email message is sent to the approval initiator.
Click Send.
4 Click Send in the email message that appears.
Add or change identity information for a digital stamp
1
From the Stamp menu, choose Show Stamps Palette.
2 In the Stamps palette, select Digital Identity Stamps, right-click/Control-click your stamp, and choose Edit
Identity.
3 Inthe IdentitySetup dialog box,type or edit your name, title,company name, department, and emailaddress, and
click Complete.
You can also change your identity information by choosing Edit > Preferences (Windows/UNIX) or Reader > Prefer-
ences (Mac OS) and selecting Identity on the left.
72
Page 77

Chapter 5: Forms
Interactive PDFs streamline the process of filling out forms and collecting form information
Forms basics
What are PDF forms?
You’re already familiar with paper forms: documents with blanks that people fill in and deliver to the appropriate
person or organization. An Adobe PDF form is a computer-based version of a form, which can either be distributed
through email or CDs, or published on a website.
PDF forms can be ordinary PDFs with blank form fields or they can be interactive.OrdinaryPDFsareaconvenient
way of publishing forms that must be printed, filled out by hand, and physically delivered, such as by mail or fax. An
interactive form can be filled out on a computer and may be submitted through an Internet or local network
connection. The built-in security features can safeguard the privacy of electronically submitted data.
73
Interactive forms simplify the work users must do toprovide the needed information. Electronically submitted forms
can be labor-saving at the receiving end, too, because the data from many individuals can be set up to be collated
automatically.
Viewing a PDF form
When you open a form that someone sends you to fill out, a document message bar appears between the Reader
toolbars and the form itself.
The left side of the message bar typically displays instructions about how to complete and return the form. If you
open the form in Adobe Reader, the usage rights associated with that form are also described in this area. You can
hide or show the document message bar by clicking its button .
Therightsideofthemessagebarhasoneormorebuttons.ThefirstisaHighlightFieldsbutton ,whichcolorsthe
backgrounds of all blanks to be filled in and outlines any required blanks, making it easy to see them at a glance.
You navigate and adjust views of a form in exactly the same way that you do in ordinary PDFs.
Note: You can change the default settings for highlight color, whether forms open with the document message bar visible
or hidden, and other viewing options in the forms preferences. Choose Edit > Preferences (Windows/UNIX) or Reader
> Preferences (Mac OS), and select Forms under Categories.
Types of PDF forms
The way in which you fill in and submit information on a PDF form is determined by the person who created it.
Fill-and-print PDF forms Contain interactive form fields or static form fields; either way, the person filling in the
form must manually deliver a printed copy of the form, such as by mail or fax.
Submit-by-email PDF forms Contain a button that either extracts all interactive-field data from the PDF form and
attaches it to an email message or attaches the entire filled-in PDF form to the message.
Submit-online PDF forms Contain a button that sends all interactive-field data to an online repository, such as a
database. Available only when Reader is open inside a web browser.
Page 78

ADOBE READER 8
User Guide
When you fill in a PDF form, you can press Tab to jump from one form field to the next. After you Tab to a check
box or button that you want to select, press Enter or spacebar to select it (or to deselect it, if it’s already selected).
Printing and saving PDF forms
Interactive forms can be filled in using either Adobe Reader or Acrobat. Users running either of these applications
can save a blank version of the form, and they can print copies of their completed forms before submitting them.
After aform is filled in,Acrobat users cansave acopy ofthe completedform, showingall the information they typed.
Whether or not Adobe Reader users can save a copy of a completed form depends on the usage rights set up by the
person who created that form.
Note: When you open a form in Adobe Reader, the usage rights appear in the notification area above the form itself.
About Forms Tracker
Note: The Forms Tracker is not available in UNIX.
The Forms Tracker is a panel of the same window in which you track PDF reviews and subscriptions.
To open the Forms Tracker, choose View > Review Tracker, and then click the Forms Tracker button on the left
side of the window.
74
Four buttons appear on the left side of the Forms Tracker. Each one opens a different panel when clicked: To Do,
History, Search Results, and Forms Library. These panels can remind you of the status of various forms that are part
of your workflow and make it easy to find and reopen those forms.
Forms preferences
Set forms preferences to control various aspects of your interaction with form fields.
To open the Preferences dialog box, chooseEdit > Preferences(Windows/UNIX) or Reader > Preferences (Mac OS),
and then select Forms on the left. The forms preferences are organized in three sections: General, Highlight Color,
and Auto-Complete
Note: The forms preferences apply to the way the application handles open forms as you work. The preferences aren’t
saved with the PDF forms themselves.
See also
“Change the Auto-Complete options” on page 76
General
Automatically Calculate Field Values Automatically performs all field calculations upon user entry.
Show Focus Rectangle Indicates which form field currently has the focus.
Keep Forms Data Temporarily Available On Disk Retains forms data in the web browser if you briefly go to another
web page and then click Back to return to the PDF form.
Show Text Field Overflow Indicator Displays a plus sign (+) in text fields that exceed the bounds specified when the
fields were created.
Always Hide Forms Document Message Bar Hides the forms document message bar by default whenever a PDF
form is opened in Adobe Reader.
Page 79

ADOBE READER 8
User Guide
Highlight Color
Show Border Hover Color For Fields Displays a black outline around a form field when you place the pointer over it.
Fields Highlight Color Opens a color picker for selecting the color of highlighted form fields. The highlight appears
when the Highlight Fields button on the document message bar is clicked.
Required Fields Highlight Color Opensacolorpickerforselectingthebordercolorofformfieldsthatmustbefilled
in. The border appears for required form fields only after you attempt to submit the form.
Auto-Complete
Auto-Complete menu Displays three options for Auto-Complete: Off, Basic, or Advanced.
Remember Numerical Data Suggests your previously entered numerical entries when you type the same first
character into a similar field. When deselected, Auto-Complete offers suggestions only for text entries. (Available
only when Basic or Advanced is selected.)
Edit Entry List Displays current entries stored in the Auto-Complete memory. You can select and delete any entries
that you don’t want to keep for filling in future forms. (This option isn’t available if no entries are in the memory.)
Filling in PDF forms
75
Fill in and clear a form
If a PDF form contains interactive form fields, you can fill in the form with one of the tools in the Select & Zoom
toolbar: the Hand tool or the Select tool. When you place the pointer over an interactive form field, the
pointer icon changes to one of the following:
• PointingFinger orPointingHandPlusicon .Appearswhenthepointerisoverabutton,radiobutton,check
box, or item in a list.
• Arrow . Appears when you can select an item in a list of options.
• I-beam icon . Appears when you can type text into the form field.
If the form fields aren’t interactive, the basic pointer icon doesn’t change.
Noninteractive PDF forms can be printed and filled in by hand. Or, you can choose Tools > Typewriter > Typewriter
andusetheTypewritertooltotypeinformationovertheblankformfieldsandthenprintacopyofthecompletedform.
Note: Some text fields are dynamic, meaning that they automatically resize to accommodate the amount of data you
enter and can span across pages.
See also
“Forms preferences” on page 74
Fill in an interactive form
1
If necessary, select either the Hand tool or the Select tool.
2 (Optional) To make form fields easier to identify, click the Highlight Fields button on the document message
bar. Form fields appear with a colored background (light blue by default), and all required form fields are outlined
in another color (red by default).
Page 80

ADOBE READER 8
User Guide
3 Click in the first form field you want to fill in, either to select that option orto place an I-beam pointer in the field
so you can start typing.
4 After making a selection or entering text, do any of the following:
• Press Tab or Shift+Tab to accept the form field change and go to the next or previous field.
• PresstheUpArroworLeftArrowkeytoselectthepreviousradiobuttoninagroupofradiobuttons,orpressthe
Down Arrow or Right Arrow key to select the next radio button.
• Press Esc to reject the form field change and deselect the current form field. If you’re viewing the form in Full
Screen mode, pressing Esc a second time causes you to exit Full Screen mode.
Note: If the current form field is a single-line text box, you can press Enter (Windows/UNIX) or Return (Mac OS) to
accept your typing and deselect the field. If the current field is a check box, pressing Enter or Return turns the check box
on or off. In a multiline text form field, pressing Enter or Return creates a paragraph return in the same form field. In all
cases, you can press Enter on the keypad to accept the change and deselect the current form field.
5 After you fill in the form fields, do any of the following:
• Click the submit form button, if one exists. Clicking this button sends the form data to a database across the web
or over your company intranet.
• Choose File > Save A Copy, and specify a location for the copy.
76
Note: IftheformauthorgaveReaderusersextendedrights,thesavedcopywillincludetheentriesyoumadeintheform.
Otherwise, the saved copy will be blank.
• Print the form.
Clear a form in a browser
❖ Do either of the following:
• Select the reset form button, if one exists. You cannot undo this action.
• Quit the browser, and start again.
Note: Clicking the web browser’s Reload or Refresh button, the Back or Go Back button, or following a link to another
page may not completely clear the form.
Clear unsaved form entries
❖ Choose File > Revert.
Change the Auto-Complete options
The Auto-Complete feature stores any entries that you type in a PDF form field, and then suggests or even automatically enters responses that match your typing in other form fields. The suggestions appear in a pop-up menu, from
which you can select a match. The Auto-Complete feature is off by default, so you must enable it in the forms preferences if you want to use it.
If you want to remove an entry from the Auto-Complete memory—such as a misspelled entry that you found and
corrected later—you can edit the list in the preferences.
Enable the Auto-Complete feature
1
Choose Edit > Preferences (Windows/UNIX) or choose Reader > Preferences (Mac OS).
2 Select Forms on the left.
Page 81

ADOBE READER 8
User Guide
3 Under Auto-Complete, choose Basic or Advanced from the menu.
4 Select Remember Numerical Data if you want the Auto-Complete memory to store numbers that you type into
forms.
When you select an option in the Auto-Complete menu, a description of how it affects the Auto-Complete behavior
appears in the text area below.
Delete an entry from the Auto-Complete memory
1
Choose Edit > Preferences (Windows/UNIX) or choose Reader > Preferences (Mac OS).
2 Select Forms on the left.
3 Click Edit Entry List.
4 Inthe Auto-Complete Entry List dialog box, doone of thefollowing, and then clickYes in the confirmation dialog box:
• To remove all of the entries, click Remove All.
• To remove some of the entries, select the entries and click Remove. (Shift-click to select multiple adjacent entries;
Ctrl-click /Command-click to select multiple nonadjacent entries.)
Adding lengthy entries in forms
PDF forms can contain dynamic text fields, whichgrowinsizetoaccommodatethetextyoutypeintoit.Ascrollbar
appears in dynamic text fields when the text you type exceeds the current size of the field; when you’re finished
typing and the field is deactivated, the text field expands to display all of the typed text.
77
If necessary, the field may span onto the next page. If you want to continue editing a dynamic text field that spans
across pages, you can begin editing the field on either page; you’ll have access to all of the text in the field.
Filling in forms with barcodes
Some forms include barcode fields, which capture and display other information in the form as a black-and-white
pattern. You don’t have to do anything with the barcode area itself. As you fill in the form on your computer, the
information you enter is included in the barcode and changes the barcode appearance.
Important: For any form with barcode fields, it’s essential that you fill it in on your computer. Don’t fill it in by hand on
aprintedcopy.Ifyou’regoingtosubmittheformonpaper,suchasbymailorfax,besuretofillitinelectronicallybefore
you print it.
The barcodefield makes collecting data easierfor the form recipient because thebarcode can simplybe scanned. The
results are an accurate and detailed summary of your input.
Search a form
When you search for words in a PDF, the search includes any text appearing in form fields (as well as other text in
the PDF), whether you typed the text or selected it from a list or menu on the form.
❖ Do one of the following:
• Type the text you want to search for in the Find box in the toolbar, and then press Enter. To find the next instance
of the search text, press Enter again.
• Choose Edit > Search, and type the text into the Search window. Then select other basic or advanced options for
searching, and click Search.
Page 82

ADOBE READER 8
User Guide
Spell-check form entries
You can spell-check the text you typed in note comments and form fields. If you want to check the spelling in a
comment, first open the comment window.
You cannot check the spelling of text in the underlying Adobe PDF document.
Correct a misspelling
❖ Right-click/Control-click the word in the form field or comment window, and then choose the correct word from
the list of alternatives.
Spell-check entries and comments
1
Choose Edit > Check Spelling > In Comments. If the PDF document is open in a web browser, make sure that the
Edit toolbar is open, and click the Spell Check button .
2 Click Start to begin the spell check. When a word that may be misspelled is found, it appears under Word Not
Found. Suggested corrections appear under Suggestions.
3 If a possibly misspelled word appears under Word Not Found, do any of the following:
• Edit the unrecognized word by typing. To undo your change, click Undo Edit. To accept your change, click
Change. To change all instances of the unrecognized word, click Change All.
• Select thecorrect versionof the unrecognized word from the Suggested Corrections section and click Change.Or,
simply double-click the correct version of the word. To change all instances of the word to the selected correct
version, click Change All.
• Click Ignore if you don’t want to change the word and want to continue with the check.
• Click Ignore All to ignore every instance of the word. Click Add if you want to add the word to your personal
dictionary.
4 After you make a selection in step 3, the next unrecognized word (if any) is highlighted; repeat step 3 until the
Restart button appears.
5 Click Done.
78
Specify a dictionary
1
Choose Edit > Check Spelling > Edit Dictionary.
2 Choose the language dictionary you want to use from the Dictionary menu, and then click Done.
Commenting on forms
Acrobat users can comment on PDF forms, just ason any other PDF. If the form creator has extended rights to Adobe
Reader users, they can also add comments.
Whether or not these comments are included when the form is submitted depends on how it’s submitted. For
example,if you use Reader to print the form for mailing or faxing,the commentsdon’t appear. If you attach the filledin form to email as a complete PDF, the comments are included.
See also
“Commenting” on page 54
Page 83

ADOBE READER 8
User Guide
Submitting forms
Exporting and emailing forms
Depending on how the form originator set up and distributed the PDF form, the data you entered in the form may
be uploaded when you click a submit button or it may be exported to a file that you return through email.
See also
“Submit a PDF form at a later time” on page 79
Email a form using your email application
When you click an email-based submit button in a PDF form, youhave the option to submit the form data with your
preferred desktop email application.
1 Click the submit or return form button on the PDF form.
2 In the Select Email Client dialog box, select Desktop Email Application; then click OK.
Your default email application displays a new email message with the To, Subject, Body, and Attachment fields
automatically filled in.
79
3 Send the email.
Email a form using a web service
When you click an email-based submit button in a PDF form, you have the option to submit the form data with a
web-based email service.
1 Click the submit or return form button on the PDF form.
2 In the Select Email Client dialog box, select Internet Email; then click OK.
3 Click Save PDF File or Save Data File, specify a location for the file, and click Save.
4 Log in to your web-based email service, and create a new, blank email message.
5 In the Sending The PDF File dialog box in Acrobat, copy the text in the To box.
6 In the blank email message, paste the copied text into the To box. Repeat the process for the Subject and Message
Text boxes.
7 Attach the file that you saved to the email message.
Submit a PDF form at a later time
When you click an email-based submit button in a PDF form, you have the option of not submitting the form data,
but instead saving it on your computer to send at a later time.
1 Click the submit or return form button on the PDF form.
2 In the Select Email Client dialog box, select Other, and then click OK.
3 Click Save PDF File or Save Data File, specify a location for the file, and click Save.
4 Write down the values that appear in the To, Subject, and Message Text boxes so you’ll have them when you’re
ready to email the form data.
5 To email the form data, create a new message in your email application. Enter the To, Subject, and Message Text
values that you wrote down, attach the data file that you saved, and send the email.
Page 84

Chapter 6: Adding digital signatures to PDFs
Digital signatures identify the person signing a PDF.
Quickstart
Create a signature appearance
You can modify your digital signature appearance. For example, you can include your scanned signature.
1 (Optional) Save the desired image on a page by itself, and convert the page to PDF.
You can create a PDF using Create Adobe PDF Online.
2 Choose Edit > Preferences (Windows/UNIX) or Reader (Mac OS) > Preferences, and select Security.
3 Click New, and type a title.
4 (Optional) Select Imported Graphic, click File, and select the desired file.
5 Specify options as desired.
80
Sign a PDF
Use a digital signature to indicate your approval. For best results, change your security preferences to always sign in
Preview Document mode, so that you can view and sign the PDF in a secure state.
1 Click the signature field. Or, click Sign , and choose Sign Document.
2 Follow the on-screen instructions to apply your digital signature.
If the document does not contain an unsigned signaturefield, click Sign and choose Place Signature to sign the PDF.
Only PDFs enabled for usage rights have the Place Signature option available.
Register a digital ID
You must register a digital ID in Reader before you can use it.
1 Choose Document > Security Settings.
2 Select Digital IDs, and click Add ID.
3 Select Browse For An Existing Digital ID File.
4 Follow the on-screen instructions to select the digital ID file, type your password, and register the digital ID.
Yo u c a n c r e a t e self-signed digital IDs in Reader. Or, see the Adobe website for information on acquiring a digital ID
from Adobe security partners.
Page 85

ADOBE READER 8
User Guide
Create a self-signed digital ID
A digital ID is required to sign documents. Self-signed digital IDs created from Reader may be adequate for many
situations. See the Adobe website for information on acquiring a digital ID from Adobe security partners.
1 Choose Document > Security Settings.
2 Select Digital IDs, and click Add ID.
3 Select Create A Self-Signed Digital ID For Use With Acrobat.
4 Follow the on-screen instructions to set up the self-signed digital ID.
Digital signatures
About digital signatures
A digital signature, like a conventional handwritten signature, identifies the person signing a document. Unlike a
handwritten signature, a digital signature is difficult to forge because it contains encrypted information that is
unique to the signer and easily verified.
Most digital signatures are referred to as approval signatures.SignaturesthatcertifyaPDFarecalledcertifying signa-
tures. Only the first person to sign a PDF (most often, the author) can add a certifying signature. A certifying
signature attests to the contents of the document andallows the signer tospecify the types of changes allowed for the
document to remain certified. Changes to the document are detected in the Signatures panel.
81
To sign a document, you must obtain a digital ID or create a self-signed digital ID in Reader. The digital ID contains
a private key that is used to add the digital signature, and it contains a certificate that you share with those who need
to validate your signature.
Note: You cannot create self-signed digital IDs from within FIPS mode.
When you apply a digital signature, Reader uses a hashing algorithm to generate a message digest, which it encrypts
using your private key. Reader embeds the encrypted message digest in the PDF, along with details from your certificate, a visual representation of your signature, and a version of the document at the time it was signed.
Note: For the latest information about digital signatures, choose Help > Online Support > Knowledge Base to open the
Adobe Acrobat support page on the Adobe website, and then search for “digital signatures.”
See also
“About digital IDs” on page 86
Create the signature appearance
You can set the appearance of your digital signature by selecting options in the Security Preferences. For example,
you can include an image of your handwritten signature, a company logo, or a photograph. You can also create
alternatesignatureappearancesthatyouusefordifferentpurposes.Forsome,youmaywanttoprovideagreaterlevel
of detail.
Page 86

ADOBE READER 8
User Guide
A signature appearance can also include information that helps others verify your signature, such as certificate
revocation status, reasons for signing, contact information, and more. By selecting these preferences, you add
options to the Sign Document dialog box that appears each time you sign a PDF.
1 If you want to include an image of your handwritten signature in the digital signature, scan your signature and
save it as an image file. Place the image in a document by itself, and convert the document to PDF.
You can convert an image file to PDF using Adobe Online Services. For details, choose File > Create Adobe PDF
Online.
2 Choose Edit > Preferences (Windows/UNIX) or Reader (Mac OS) > Preferences, select Security on the left under
Categories, and then click New to create a new signature appearance.
3 In the Configure Signature Appearance dialog box, type a title for the signature appearance. When you sign a
document, you select the signature appearance by its title, so use a short, descriptive title.
4 For Configure Graphic, choose an option:
No Graphic Displays only the default digital signature icon and other information specified in the Configure Text
section.
Imported Graphic Displays an image with your digital signature. Select this option to include an image of your
handwritten signature. To import the image file, click File, click Browse, select the image file, click Select, and then
click OK (Windows/UNIX) or Select (Mac OS).
82
Name Displays only the default digital signature icon and your name as it appears in your digital ID file.
5 For Configure Text, select the options that you want to appear in the signature. Distinguished Name shows the
user attributes defined in your digital ID, including your name, organization, and country.
Important: To include a reason and a location in your signature, you must select those options both in this dialog box
and in the Advanced Preferences.
6 For Text Properties, specify thewriting direction and type of digits (Western or Arabic-Indic) used, and then click OK.
7 Click Advanced Preferences, click the Creation tab, select any of the following, click OK, and click OK again:
Include Signature’s Revocation Status When Signing Embeds information about whether your certificate is valid or
has been revoked (required for signature validation). Selecting this option speeds the validation process by not
having to go online to determine whether the certificate has been revoked.
Show Reasons When Signing Adds your reason for signing to the signature field. When you sign a PDF, a menu
appears in the Sign Document dialog box from which you can select the option that best describes your reason for
signing the PDF.
Show Location And Contact Information When Signing Adds your location information to the signature field.
Contact information appears in the Signer tab of the Signature Properties dialog box. When you sign a PDF, text
boxes appear in the Sign Document dialog box where you can type this information.
Enable Reviewing Of Document Warnings Analyzesdocumentsinasigningworkflowforcontentthatmightchange
the document appearance and then provides an option in the Sign Document dialog box to review this content.
Specify Always, Never, or When Certifying A Document. Available options depend on the Prevent Signing Until
Document Warnings Are Reviewed setting.
Prevent Signing Until Document Warnings Are Reviewed Enable this option to require the signer to review
document warnings before signing or certifying a document. Specify Always, Never, or When Certifying A
Document.
Page 87

ADOBE READER 8
User Guide
To edit or delete a signature appearance, select it in the Appearance box, and then click Edit or Delete.
See also
“Enable right-to-left languages” on page 18
Add a timestamp to signatures
You can include the date and time you signed the document as part of your signature. Like signatures, timestamps
are easier to verify when they’re associated with a timestamp authority’s trusted certificate. Including a timestamp
helps to prove that the document wasn’t changed after you signed it and reduces the chances of an invalid signature.
You can obtaina timestamp from athird-party timestamp authority or from the certificate authority that issued your
digital ID.
Timestamps appear in the signature field and in the Signature Properties dialog box. If a timestamp server is
configured, that timestamp appears in the Date/Time tab of the Signature Properties dialog box. If no timestamp
server is configured, the signatures field displays the local time of the computer at the moment of signing.
Configure a timestamp server
To configure a timestamp server, you need the server name and URL or a Forms Data Format(FDF) file that contains
the server settings.
83
1 Choose Document > Security Settings.
2 Select Time Stamp Servers on the left.
3 Do one of the following:
• If you have an FDF file with the timestamp server settings, click the Import button . Select the FDF file, and
click Open.
• If you have a URL for the timestamp server, click the New button . Type a name and then type the server URL.
Specify whether the server requires a user name and password, and then click OK.
Set a timestamp server as the default
If you have two or more timestamp servers configured, you can set one of them as the default.
Note: Before you set a timestamp server as the default, you may wantto check if the timestamp authorities charge a usage fee.
1 Choose Document > Security Settings.
2 Select the timestamp server, and click the Set Default button .
3 Click OK to confirm your selection.
About graphics tablet signatures
You can sign PDFs using graphics tablets and other input devices by using third-party software. Digital signature
providers, such as Silanis and the Communication Intelligence Corporation (CIC), provide this capability in an
Acrobatsupported plug-in.These plug-ins may limit your accessof certain encryption features inAcrobat. For more
information about third-party providers, visit the Adobe website.
Page 88

ADOBE READER 8
User Guide
Signing PDFs
Before you sign a PDF
You can expedite the signing process and optimize your results by making the following preparations in advance:
• Obtain a digital ID, or create a self-signed digital ID in Reader.
Note: You cannot create self-signed digital IDs from within FIPS mode.
• Set the default signing method.
• Create an appearance for your digital signature.
• Use Preview Document mode to suppress any dynamic content that may alter the appearance of the document
and mislead you into signing something you shouldn’t.
• Review all the pages in a document before you sign. Documents may contain signature fields on multiple pages.
When you sign one field, your signature appears in all occurrences of the field, whether you approve those pages
or not.
See also
“About digital IDs” on page 86
84
“Change the signing method” on page 89
Sign a PDF
You can sign a PDF to indicate your approval. A PDF can be signed more than once and by more than one person.
When you sign a document, your digital signature appears in the signature field. The appearance of the signature
depends on options you choose. The actual information for your digital signature is embedded in the PDF. Only
PDFs with Reader Rights enabled can be signed.
Sign a PDF
For best results, use Preview Document mode to addyour signature. See“Sign in Preview Document mode” on page 85.
1 Click the signature field, or do one of the following:
• Choose Document > Sign > Sign Document.
• Click the Sign button in the Tasks toolbar and choose Sign Document or Place Signature.
2 If you chose Place Signature, you’re prompted to draw a signature field for your signature.
3 If you haven’t specified a digital ID, you’re prompted to find or create one.
4 In the Sign Document dialog box, choose the digital ID you want to use. If you defined a personalized signature,
choose it from the menu.
5 If you selected advanced digital signature preferences, do any of the following:
• Choose a reason for signing the document.
• Type your location and contact information.
• Review any document warnings about content that may impact signing.
6 If your digital ID requires a password, type it in the Password box.
Page 89

ADOBE READER 8
User Guide
7 Click Sign, and specify a new name for the document so you can make changes to the original PDF without inval-
idating the signature, and click Save.
Sign a PDF in a web browser
To sign a PDF on the web, the document must contain an empty signature field. When you sign a document in a
browser, only the incremental portion of the file is saved to your hard drive.
1 Click a signature field, and then follow the steps to add your digital signature.
2 To retain a copy of the signed document, click the Save A Copy button in the File toolbar.
Sign in Preview Document mode
For best results, use the Preview Document feature when you sign documents. This feature analyzes the document
for content that may alter the document’s appearance, and then suppresses that content, allowing you to view and
sign the document in a static and secure state.
When youview a PDF in Preview Document mode, a document message bar lets you know if the PDF complies with
the PDF/SigQ Level A and Level B specification. Level A indicates that the document contains no dynamic content
that can alter its appearance. Level B indicates that the document contains dynamic content that can be suppressed
during signing. If the document doesn’t comply with Level A or B, you may want to refrain from signing the
document and contact the document author about the problem.
85
You can also use Preview Document mode outside of a signing workflow to check the integrity of a document.
Sign a PDF in Preview Document mode
1
Choose Edit > Preferences (Windows/UNIX) or Reader > Preferences (Mac OS), and select Security on the left.
2 Select View Documents In Preview Document Mode When Signing, and click OK.
3 In the PDF, click the signature field, or click the Sign button in the Tasks toolbar and choose Sign Document or
Place Signature.
The document message bar appears with the compliance status and options.
4 (Optional) Click View Report in the document message bar (if available) and select each item in the list to show
details. When you’re done, close the PDF/SigQ Conformance dialog box.
5 Ifyou’resatisfied with the compliance statusof the document,click Sign Document in the document message bar,
and add your digital signature.
6 Save the PDF using a different name than the original, and close the document without making any further
changes. If you save the document a second time, your signature must be verified by using the View Signed Version
option in the Signatures panel. (See “View previous versions of a signed document” on page 94.)
View a PDF in Preview Document mode
1
Choose Document > Sign > Preview Document.
2 Inthe document message bar,click View Report (if available) and select each item in thelist to show details. When
you’re done, click Close, and then click Exit.
Clear or remove a digital signature
❖ Do one of the following:
• To remove a signature, right-click/Control-click the signature field and choose Clear Signature Field.
Page 90

ADOBE READER 8
• To remove all signatures in a PDF, choose Clear All Signature Fields from the Options menu in the Signatures
panel.
Creating or obtaining digital IDs
About digital IDs
User Guide
86
Digital IDs include a private key that you safeguard and a public key (certificate) that you share.
A digital ID is like a driver’s license or passport. It proves your identity to people and institutions that you communicate with electronically. A digital ID usually contains your name and email address, the name of the company that
issued your digital ID, a serial number, and an expiration date.
Digital IDs operate by using a key pair: the public key locks, or encrypts, data; the private key unlocks, or decrypts,
that data. When you sign PDF documents, you use the private key to apply your digital signature. You distribute the
certificate that contains your public key and other identifying information to those who need to validate your
signature, verify your identity, or encrypt information for you. Only your private key can unlock information that
was encrypted using your certificate, so be sure to store your digital ID in a safe place.
You must have a digital ID to sign, certify, and apply certificate encryption to PDFs. You can get a digital ID from a
third-party provider, or you can create a self-signed digital ID. Self-signed digital IDs may be adequate for many
situations. However, to prove your identity in most business transactions, you may need a digital ID from a trusted
third-party provider, called a certificate authority. Because the certificate authority is responsible for verifying your
identity to others, choose one that is trusted by major companies doing business on the Internet. See the Adobe
website for information about Adobe security partners that offer digital IDs and other security solutions.
You can have multiple digital IDs that you use for different purposes, particularly if you sign documents in different
roles or using different certification methods. Digital IDs are usually password protected and can be stored on your
computer in PKCS #12 file format, on a smart card or hardware token, in the Windows certificate store, or on a
signing server (for roaming IDs). Reader includes a default signature handler that can access digital IDs from any of
these following locations. (You must register the digital ID in Reader for it to be available for use.)
Page 91

ADOBE READER 8
User Guide
See also
“Sharing certificates with others” on page 94
“Smart cards and hardware tokens” on page 88
Register a digital ID
You must register your digital ID in Reader before you can use it. If you obtained or created a digital ID file that
doesn’t appear in your list of digital IDs, you can search for the missing digital ID file and add it to the list. You can
identify digital ID files by their file extensions. ForPKCS #12 files, the extension is .pfx in Windows and .p12 in Mac
OS. Digital ID files from some earlier versions of Acrobat have an .apf extension. If you select an .apf digital ID file,
youmaybepromptedtoconvertittoasupportedfiletype.YoumayneedthepasswordcreatedforthedigitalIDto
complete this task.
1 Choose Document > Security Settings.
2 Select Digital IDs on the left.
3 Click the Add ID button .
4 Select one of the following options:
Browse For An Existing Digital ID File Select this option ifyou obtaineda digital ID asan electronicfile or if you store
it in the Windows certificate store. Follow the prompts to select the digital ID file, type your password, and add the
digital ID to the list.
87
Configure A Roaming ID For Use On This Computer Select this option to use a digital ID that’s stored on a signing
server. When prompted, type the server name and URL where the roaming ID is located.
Create A Self-signed Digital ID For Use With Acrobat Select this option to create a self-signed digital ID.
Look For Newly Inserted Hardware Tokens Select this option if you have a security token or hardware token
connected to your computer.
5 Click Next, and follow the on-screen instructions to register your digital ID.
Create a self-signed digital ID
If you’re not using a third-party digital ID, you can create your own self-signed digital ID. When you create a selfsigned digital ID, the resulting file stores an encrypted private key used for signing or decrypting documents and a
public key contained in a certificate, which is used for validating signatures and encrypting documents.
1 Choose Document > Security Settings.
2 Select Digital IDs on the left, and then click the Add ID button .
3 Select Create A Self-Signed Digital ID For Use With Acrobat, and click Next.
4 Specify where to store the digital ID, and click Next.
New PKCS#12 Digital ID File Stores the information in a file that you can send to others. This is a standard
encryption format with a .pfx extension in Windows and .p12 in Mac OS.
Windows Certificate Store (Windows only) Stores the file where other Windows applications can also retrieve it.
5 Type a name, email address, and other personal information for your digital ID. When you certify or sign a
document, the name appears in the Signatures panel and in the signature field.
6 (Optional) To use Unicode values for extended characters, select Enable Unicode Support, and then specify
Unicode values in the appropriate boxes.
Page 92

ADOBE READER 8
User Guide
7 Choose an option from the Key Algorithm menu. 2048-bit RSAoffers more security than1024-bit RSA, but 1024-
bit RSA is more universally compatible.
8 From the Use Digital ID For menu, choose whether you want to use the digital ID for signatures, data encryption,
or both. Click Next.
9 Specify a filename and location for the digital ID file.
10 Type a password; passwords are case-sensitive, must contain at least six characters, and may not contain double
quotation marks orthe following characters: ! @ #$ % ^ & *, | \ ; <> _. Type the same password in both the Password
and Confirm Password boxes. Click Finish.
You can export and send your certificate file to those who need to validate your signature.
Important: Make a backup copy of your digital ID file. If your digital ID file is lost or corrupted, or if you forget your
password, you cannot use that profile to add or validate signatures.
See also
“Sharing and managing certificates” on page 94
Set up a roaming ID account
A roaming ID is a digital ID that is stored on a server and can be downloaded—at the subscriber’s request—to the
roaming subscriber’s location. You must have a working Internet connection to access a roaming ID.
88
1 Choose Document > Security Settings.
2 Expand Digital IDs on the left, select Roaming ID Accounts, and click Add Account.
3 Type the name and URL for the roaming ID server, and click Next.
4 Type the user name and password you’ve been assigned or follow the directions to create a new account. Click
Next, and then click Finish.
5 If you don’t need to use your roaming ID, select it, and click Logout.
When you perform a task that uses your roaming ID, you’re automatically logged in to the roaming ID server if your
authentication assertion hasn’t expired.
See also
“Configure a directory server manually” on page 98
Smart cards and hardware tokens
A smart card looks like a credit card and stores your digital ID on an embedded microprocessor chip. You can use
the digital ID on a smart card to sign and decrypt documents on devices that include a smart card reader.
Similarly, a security hardware token is a small, keychain-sized device that you can use to store digital IDs and authentication data. You can access your digital ID by connecting the token to a USB port on your computer or mobile
device. The token may include a keypad that lets you type a personal identification number (PIN).
If you store your digital ID on a smart card or hardware token, you must specify that information when you sign or
certify documents.
Page 93

ADOBE READER 8
User Guide
See also
“Register a digital ID” on page 87
Change the signing method
You may need to specify a different signing method than the default security method provided in Reader.
1 If necessary, install a third-party signature provider.
2 Choose Edit > Preferences (Windows/UNIX) or Reader > Preferences (Mac OS), and click Security on the left.
3 Click Advanced Preferences, and click the Creation tab.
4 From the menu in the Creation tab, choose the default method you want for signing and encrypting documents,
and click OK.
The menu lists all the security methods installed in the Acrobat plug-ins folder.
Specify the default digital ID
Before you certify, sign, or encrypt a PDF, you may be prompted to select a digital ID file. To avoid being prompted
repeatedly, you can select a digital ID to use every time you sign or certify a document.
1 Choose Document > Security Settings.
2 Click Digital IDs on the left, and then select the digital ID you want to use as the default.
3 Click the Usage Options button , andchoose a task for which you want the digital ID as the default. Ifyou want
to specify the digital ID as the default for two tasks, click the Usage Options button again and select a second option.
89
A check mark appears next to selected options. If you select only the signing option, the Pen icon appears next
to the digital ID. If you select only the encryption option, the Lock icon appears. If you select only the certifying
option, or if you select the signing and certifying options, the Blue Ribbon icon appears.
To clear a default digital ID, repeat these steps, and deselect the usage options you selected.
Change a digital ID’s password and timeout
Passwords and timeouts can be set for PKCS #12 IDs and Windows Personal Certificates. If the PKCS #12 ID
contains multiple IDs, you must configure the password and timeout at the file level.
1 Choose Document > Security Settings.
2 Expand Digital IDs on the left, select Digital ID Files, and then select a digital ID on the right.
3 Click the Change Password button. Type the old password and a new password. Confirm the new password, and
then click OK.
4 With the ID still selected, click the Password Timeout button.
5 Specify how often you want to be prompted for a password:
Always Prompts you each time you use the digital ID.
After Lets you specify an interval.
Once Per Session Prompts you once each time you open Reader.
Never You’re never prompted for a password.
Page 94

ADOBE READER 8
User Guide
6 Type the password, and click OK.
Delete your digital ID
When you delete a digital ID in Reader, you delete the actual PKCS #12 file that contains both the private key and
the certificate. Before you delete your digital ID, make sure that it isn’t in use by other programs or required by any
documents for decryption.
Note: You can delete only self-signed digital IDs that you created in Reader.
1 Choose Document > Security Settings.
2 Select Digital IDs on the left, and then select a digital ID on the right.
3 Click Remove ID, and click OK.
See also
“Delete a certificate from trusted identities” on page 98
Protecting digital IDs
By protecting your digital IDs, you can prevent unauthorized use of your private keys for signing or decryptingconfidential documents. Make sure that you have a procedure in place in the event your digital ID is lost or stolen.
90
How to protect your digital IDs
When private keys are stored on hardware tokens, smart cards, and other hardware devices that are password- or
PIN-protected, be sure to usea strongpassword orPIN. Neverdivulge your password toothers. You shouldnot write
your password down, but if you must, store it in a secure location. Keep your password strong by following these
rules: Use eightor morecharacters; mix uppercase and lowercase letters with numbers and special characters; choose
apasswordthatisdifficulttoguessorhack,butthatyoucanrememberwithouthavingtowriteitdown;donotuse
a correctly spelled word in any language, as these are subject to "dictionary attacks" that can crack these passwords
in minutes; change your password on a regular basis. Contact your system administrator for guidelines on choosing
a strong password.
To protect private keys stored in P12/PFX files, use a strong password and set your password timeout options appropriately. If using a P12 file to store private keys that you use for signing, set your password timeout option so that
your password is always required (this is the default behavior). If using your P12 file to store private keys that are
used todecrypt documents, ensure that there isa backupcopy ofyour private keyor P12 file so that you can continue
to open encrypted documents should you lose your keys.
The mechanisms used to protect private keys stored in the Windows certificate store vary depending on what
company has provided the storage. Contact the provider to determine how best to protect these keys from unauthorizedaccessandforbackuppurposes.Ingeneral,youshouldusethestrongestauthenticationmechanismavailable
and should seek to require a strong password or PIN when possible.
What to do if a digital ID is lost or stolen
If your digital ID was issued by a certificate authority, immediately notify the certificate authority and request the
revocation of your certificate. You should also stop using your private key.
If your digital ID was self-issued, destroy the private key and notify anyone to whom you sent the corresponding
public key (certificate).
Page 95

Chapter 7: Validating digital signatures
When you validate a digital signature, you verify the identity of the person who signed the PDF. In many cases, you’ll
need the signer’s certificate to validate their digital signature.
Validating signatures
Checking the validity of a signature
By default, signatures are validated when you open a PDF. An icon appears in the signature field on the document
page to indicate the signature status. Further details about the status appear in the Signatures panel and in the
Signature Properties dialog box.
Third-party signature handlers may provide alternate methods of validating signatures. Check the documentation
included with your third-party digital ID.
Important: To ensure that signatures are validated when you open a PDF and that all verification details appear with
the signature, set your verification preferences in advance (see “Set signature verification preferences” on page 92).
91
• Thedigitalsignatureicon alongwiththenameofthefieldintheSignaturespanelindicatethepresence
of an unsigned signature field.
• The blue ribbon icon indicates that the PDF is certified—that is, it contains a valid certifying signature. (Certi-
fying signatures can be visible or invisible.)
• The check mark icon indicates that the signature is valid.
• The red x icon indicates that the signature is invalid.
• The caution triangle icon indicates that the document was modified after the signature was added.
• The question mark icon indicates that the signature couldn’t be validated because the signer’s certificate isn’t
in your list of trusted identities.
If the signature status is unknown or unverified, or if the document was modified after it was signed, validate the
signaturemanually todetermine theproblem’s cause and possible solution. If the signature status is invalid (indicated
by the red x icon), contact the signer about the problem.
See also
“Verify information on a certificate” on page 97
“Get certificates from other users” on page 95
What makes a digital signature invalid?
A signature can have an invalid status for the following reasons:
• The signer’s certificate was revoked.
• The signer’s certificate has expired.
• The signer’s certificate was removed from the trusted identities list or the trust level changed.
Page 96

ADOBE READER 8
User Guide
• The PDF was modified after it was signed or certified.
Validate a signature manually
You can assess the validity of a digital signature by checking the signature properties.
1 Set your signature verification preferences. For more information, see “Set signature verification preferences” on
page 92.
2 Open the PDF containing the signature, and click the Signatures button on the left to open the Signatures
panel.
3 Select the signature in the Signatures panel, and then choose Validate Signature from the Options menu. The
Signature Validation Status describes the validity of the signature.
4 Click Signature Properties, and do the following:
• Ifthestatusisunknown,clicktheSignertab,andthenclickShowCertificatetoviewthedetailsofthecertificate.
If you’re working with self-signed digital IDs, confirm that the certificate details are valid. If the certificate isn’t
valid, request a valid certificate from the signer. Click OK.
• Click the Date/Time tab to verify the timestamp, if needed.
• Click the Legal tab to learn more about the legal restrictions of the signature. In the Legal tab, click View
Document Integrity Properties tocheck if the document is PDF/SiqQ-compliant,or if itcontains items thatcould
alter its appearance.
92
If the document was modified after it was signed, check the signed version of the document and compare it to the
current version.
See also
“Validate a timestamp certificate” on page 93
“Sign in Preview Document mode” on page 85
“View previous versions of a signed document” on page 94
Set signature verification preferences
Before you open signed documents, set your preferences to optimize Reader for validating signatures.
1 Choose Edit > Preferences (Windows/UNIX) or Reader > Preferences (Mac OS), and select Security on the left.
2 To automatically validate all signatures in a PDFwhen youopen the document, select Verify SignaturesWhen The
Document Is Opened. This option is enabled by default.
3 Click Advanced Preferences, and then click the Verification tab.
4 Choose the following options:
When Verifying These options specify methods that determine which plug-in to choose when verifying a signature.
The appropriate plug-in is often selected automatically. Contact your system administrator about specific plug-in
requirements for validating signatures.
Require That Certificate Revocation Checking Be Done Whenever Possible During Signature Verification Select this
option to require certificates to be checked against a list of excluded certificates during validation. If this option isn’t
selected, the revocation status for approval signatures is ignored. The revocation status is always checked for certifying signatures.
Page 97

ADOBE READER 8
User Guide
Verify Signatures Using Select an option to determine whether the time that appears in the digital signature reflects
the time the signature was validated (Current Time), the time set by the default timestamp server specified in the
Security Settings, or the time the signature was created.
Hide Signature Field Validity Icon When Signature Is Valid Hidesthesignaturestatusifthesignatureisvalid,evenif
the document has changed since it’s been signed (indicated by a green check mark and caution triangle icon).
5 Click the Windows Integration tab, and specify whether you can import identitiesfrom the Windows Certificates
feature into the list of trusted identities. In addition, specify whether to trust all root certificates in the Windows
Certificates feature when validating signatures and when validating certified documents. Be aware that selecting
these options might compromise security. This option isn’t available for UNIX.
Signatures panel overview
The Signatures panel lists all the signaturesin the current document. Eachsignature has an icon identifying its verification status. Verification details are listed beneath each signature and can be viewed by expanding the signature, or
by making selections from the Options menu in the Security panel.
Display the Signatures panel
❖ Choose View > Navigation Panels > Signatures, or click the Signatures button in the navigation pane. The
Signatures option isn’t available for UNIX.
93
You can right-click/Control-click a signature field in the Signatures panel to do most signature-related tasks,
including adding, clearing, and validating signatures. In some cases, however, the signature field may become locked
after you sign it.
Expand or collapse a signature
❖ In the Signatures panel, click the plus sign (Windows) or triangle (Mac OS) next to the signature to expand it.
Click the minus sign (Windows) or the rotated triangle (Mac OS) to collapse it.
When collapsed, the signature shows only the name, date, and status.
Validate a timestamp certificate
If a signature displays the date and time, that time is the local time on the signer’s computer. However, a second date
and time may appear in the Signature Properties dialog box, indicating that the signer uses a timestamp server. To
validate a signature that contains a timestamp, you must obtain the certificate for the timestamp server and add it to
your list of trusted identities. Otherwise, the timestamp appears in the Signatures panel as unverified, and you must
validate the timestamp manually.
1 Click the Signatures button in the navigation pane, select the signature, and choose Validate Signature from
the Options menu.
2 Click the Signature Properties button in the Signature Validation Status dialog box.
3 In the Signature Properties dialog box, click the Date/Time tab to view the timestamp authority, and then click
the Show Certificate button. (This button appears in the Date/Time tab only if the signer used a timestamp server.)
4 In the Certificate Viewer, click the Trust tab to determine if the timestamp certificate is trusted. If it isn’t trusted,
click Add To Trusted Identities. If a certificate for the timestamp server isn’t listed, request one from the signer.
See also
“Sharing and managing certificates” on page 94
Page 98

ADOBE READER 8
User Guide
View previous versions of a signed document
Eachtimeadocumentissigned,asignedversionofthePDFissavedwiththePDF.Eachversionissavedasappendonly so that it cannot be modified. All signatures and their corresponding versions can be accessed from the Signatures panel.
1 In the Signatures panel, select the signature, and choose View Signed Version from the Option menu.
The previous version opens in a new PDF, with the version information and the name of the signer in the title bar.
2 To return to the original document, choose the document name from the Window menu.
Sharing and managing certificates
Sharing certificates with others
Your digital ID includes a certificate that others require to validate your digital signature and to encrypt documents
for you. If you know that others will need your certificate, you can send it in advance to avoid delays when
exchanging secure documents. Businesses that use certificates to identify participants in signing and secure
workflows often store certificates on a directory server that participants can search to expand their list of trusted
identities.
94
If you use a third-party security method, you usually don’t need to share your certificate with others. Third-party
providers may validate identities using other methods, or these validation methods may be integrated with Reader.
See the documentation for the third-party provider.
When you receive a certificate from someone, their name is added to your list of trusted identities as a contact.
Contacts are usually associated with one or more certificates and can be edited, removed, or reassociated with
another certificate. If you trust a contact, you can set your trust settings to trust all digital signatures and certified
documents created with their certificate.
You can alsoimport certificates froma certificate store, such as the Windows certificate store. A certificate store may
contain numerous certificates issued by different certification authorities.
Send your certificate to others
1 Choose Document > Security Settings.
2 Select Digital IDs on the left.
3 Verify that your certificate information is correct: Select the digital ID you want to share, and click the Certificate
Details button . Click OK to return to the Security Settings dialog box.
4 With the digital ID selected, click the Export button .
5 Do one of the following:
• Select Email TheData To Someone, andclick Next to send your certificate as an FDF file toanother user. Type the
email address, click Email, and then send the email message that appears in the default email application. For
UNIX, type the email address and provide information in the Name, Title, Organization Name, and Organization
Unit fields, then click Next. Click the Sign button to sign the document. You may be required to provide your
password. Click Next. Type a recipient email address in the To field and click Next. Verify the accuracy of the
information in the dialog box and click Finish. The information will be sent using the computer’s default email
client.
Page 99

ADOBE READER 8
User Guide
• SelectSaveTheDataToAFile,andclickNext.Chooseafiletypefromthemenu,specifyanameandlocationfor
the file, and click Save. For UNIX, click the Sign button to add your signature. You may be required to provide
your password. Click Next. In the Name field, provide the path in the directory system to where you want to save
the data, then click OK. Verify the accuracy of the path and click Next. Verify the accuracy of the information
presented and then click Finish.
Get certificates from other users
You keep certificates that you receive from other users in a list of trusted identities. This list is like an address book
that stores certificates. It lets you validate the signatures of these users on any documents you receive. You can also
use the list to encrypt files.
Request a certificate from another user
1
Choose Document > Manage Trusted Identities.
2 Click Request Contact.
3 Type your name, email address, and contact information.
4 To allow other users to add your certificate to their list of trusted identities, select Include My Certificates.
5 Select whether to email the request or save it as a file to email later, and then click Next.
6 Select the digital ID file to use, and then click Select.
7 Do one of the following:
• If the ComposeEmail dialog box appears, typethe email address of theperson you’rerequesting acertificate from,
and click Email.Send the emailmessage that appears, with the attached certificate, in the defaultemail application.
• If the Export Data As dialog box appears, specify a name and location for the file, click Save, and then click OK.
95
Add a certificate from email
1
After a user sends you certificate information, open the email attachment in Reader, and then click Set Contact
Trust in the dialog box that appears.
2 Select trust options, click OK, and follow the prompts.
Add a Windows certificate (Windows only)
This option is recommended if you use the Windows certificate store to organize certificates.
1 In the Security preferences, click Advanced Preferences.
2 Click the Windows Integration tab, and select Enable Searching The Windows Certificate Store For Certificates
Other Than Yours. Select the desired options, and click OK twice.
3 Choose Document > Manage Trusted Identities.
4 Click Add Contacts.
5 Do any of the following:
• If Windows certificate digital IDs are allowed, select the appropriate directory and group.
• If you configured an identity search directory, select the appropriate directory and group. You can then click
Search to locate specific certificates.
• Click Browse, select the certificate file, and click Open.
Page 100

ADOBE READER 8
User Guide
6 Select the added certificate in the Contacts list to add it to the Certificates list. Select the certificate in the Certif-
icates list, and click Details.
7 Inthe Certificate Viewer dialogbox, click theDetails tab andnote the MD5digest and SHA1 digest values (finger-
print). Contact the certificate’s originator to confirm that the values are correct. The certificate should be trusted only
if the values are correct. Click OK.
8 After you verify that the information is correct, click Trust, specify trust options, and click OK.
Import certificates using the Windows Certificate Wizard (Windows only)
If you use the Windows certificate store to organize your certificates, you can import certificates using a wizard in
Windows Explorer.
1 In Windows Explorer, right-click the certificate file and choose Install Certificate.
2 Follow the on-screen instructions to add the certificate to the Windows certificate store.
3 If you’re prompted to validate the certificate before installing it, note the MD5 digest and SHA1 digest values
(fingerprint). Contact the certificate’s originator to confirm that the values are correct. The certificate should be
trusted only if the values are correct. Click OK.
Add a certificate using a signature in a PDF
You can safely add a certificate to your trusted identities from asigned PDF byfirst verifying the fingerprint withthe
certificate’s originator.
96
1 Open the PDF containing the user’s self-signed signature.
2 Click the signature in the document to check whether it’s valid.
3 Click Signature Properties, and then click Show Certificate.
4 Inthe Certificate Viewer dialogbox, click theDetails tab andnote the MD5digest and SHA1 digest values (finger-
print). Contact the certificate’s originator to confirm that the values are correct. The certificate should be trusted only
if the values are correct.
5 After you verify that the certificate information iscorrect, click theTrust tab, click Add To TrustedIdentities, click
OK, specify trust options, and click OK.
Associate a certificate with a contact
Contacts are typically trusted identities with whom you exchange documents. To exchange encrypted PDFs with a
contact, you must associate at least one certificate with that contact.
Adding a contact mayor may not add a certificate because certificates aren’t necessarilyattached to the contact information. Add contact information by browsing to the contact file location or search for the file.
1 Choose Document > Manage Trusted Identities.
2 Select the contact, and click Details.
3 Select a name from the list, and click Associate Certificate.
4 Select a certificate, and click OK. Click OK again.
 Loading...