

Aastra Telecom 8417 User Manual 2

THIS MANUAL IS AVAILABLE FOR FREE
COMPLIMENTS OF
BUYMEBUYME.COM
TO ORDER THIS PRODUCT, PLEASE CALL TOLL-FREE
1-877-992-8963 OR VISIT
WWW.BUYMEBUYME.COM

8417
Installation and User Guide


Table of Contents
Key Descriptions 2
Basic Installation 4
Connecting the handset cord 4
Connecting the line cord when Lines 1
and 2 are on the same line cord. 4
Connecting the line cords when Line 1
and Line 2 are on separate line cords 5
Connecting the power adaptor 5
Checking your telephone 6
Connecting an optional modem or fax 6
Desk Mounting 7
Optional Wall Mounting 7
Basic Features 8
Making a call 8
Answering a call 8
Putting a call on hold 8
Switching between two lines 9
Making a Conference call 9
Making a Handsfree call 9
Putting a call on mute 10
Using the Redial List 10
Telephone Setup 11
Changing the display language 11
Setting the date and time 11
Turning the ringer ON and OFF 12
Setting the ring tone and ringer volume 12
Controlling the ringer volume 12
Controlling the receiver volume 12
Controlling the speaker volume 12
Changing the prime line 13
Directory 13
Saving numbers and names to
the Directory 13
Entering Names 14
Finding items in the Directory 14
Making a call from the Directory 14
Editing in the Directory 15
Deleting items from the Directory 15
Memory keys 16
Saving numbers and names in
memory keys 16
Saving from the display into memory
keys 16
Labeling the memory keys 17
Making calls from memory keys 17
Editing memory keys 17
Deleting memory keys 18
Saving features in memory keys 18
Using feature keys 18
Saving a feature and light in memory
keys 19
Using FeatureLight keys 19
Advanced Features 20
Adding a timer key 20
Using the Call Timer 20
Deleting a timer key 20
Selecting the dial pad mode 21
Selecting the answer mode 21
Extension in use 21
Display messages and lights 22
Knowing when you have a message 22
Viewing multiple display and light
messages 22
Learning about the lights 22
Set indicator light messages 22
Line and Handsfree indicator
light messages 22
General display messages 23
Helpful Hints 24
Index
1
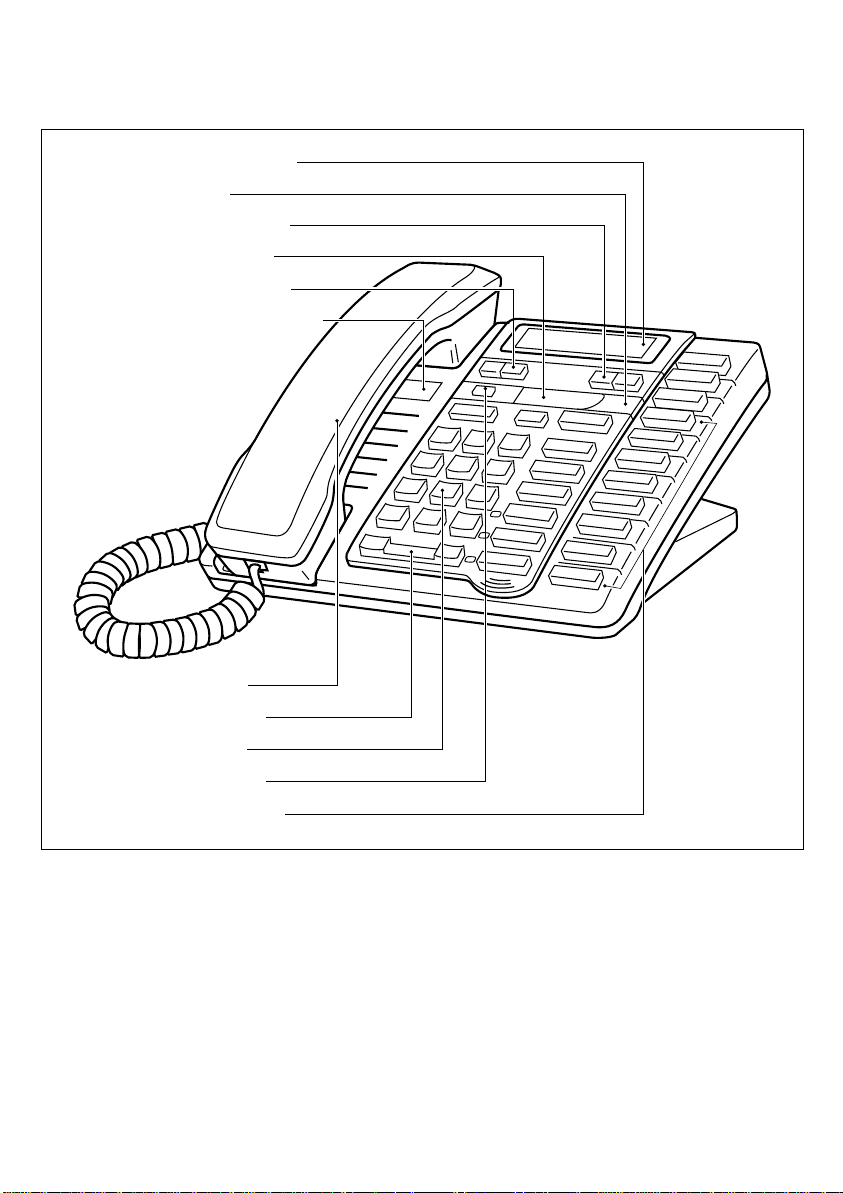
Key Descriptions
Moveable display
Light
Left/right arrows
Sliding panel
Down/up arrows
Number card and lens
Hold
Line 2
Line 1
Handsfree
Mute
Rls
Redial
Dial
Conference
Contrast
Directory
Save
Link
∆
¢
ß
ª
“
2
Handset
Volume bar
Dial pad
Set Options
8 memory keys
Cycles through eight settings to adjust the display contrast.
Allows you to store and access up to 100 numbers and names.
Stores numbers and names in the Directory and in memory keys.
Allows you to move up and down any list such as the Set Options, Directory or
the Redial List.
Allows you to backspace and erase when predialing and when adding or changing
numbers and names in the Directory or in memory keys.

‘
Adds a space when entering names in the Directory or in memory keys. Allows
you to view status messages on the display.
†
˙
®
˚
µ
∂
The unlabeled Set Options key is hidden under the sliding panel. This key gives
you access to seven options to customize your telephone. The table belo w lists the
page numbers where these options are described.
Options
1. Change display language 11
2. Set the time and date 11
3. Select the ring tone 12
4. Add a timer key 20
5. Select the dial pad mode 21
6. Set prime line 13
7. Change answer mode 21
page
Puts the call on hold.
Always hangs up a call. Also allows you leave any list such as the Set Options
List, Redial List or the Directory.
Allows you to access network features such as Call Waiting. Link is also referred
to as Flash.
Allows you to access a list of the last five numbers you dialed.
Selects your prime line and dials any displayed number. Activates Handsfree if
you haven’t lifted the handset.
ç
¬
©
£
√
∫
Joins the calls on the two line keys together.
Selects Line 1 or Line 2 and activates Handsfree if you have not picked up the
handset. Dials any number on the display.
Activates the speaker and microphone so you can listen and talk without lifting
the handset.
Allows you to erase memory keys and delete items in the Directory.
Allows you to adjust the receiver, speaker, and ringer volume.
Memory keys store numbers, names, and features.
3
Basic Installation
This section contains the information you need to install your 8417 telephone.
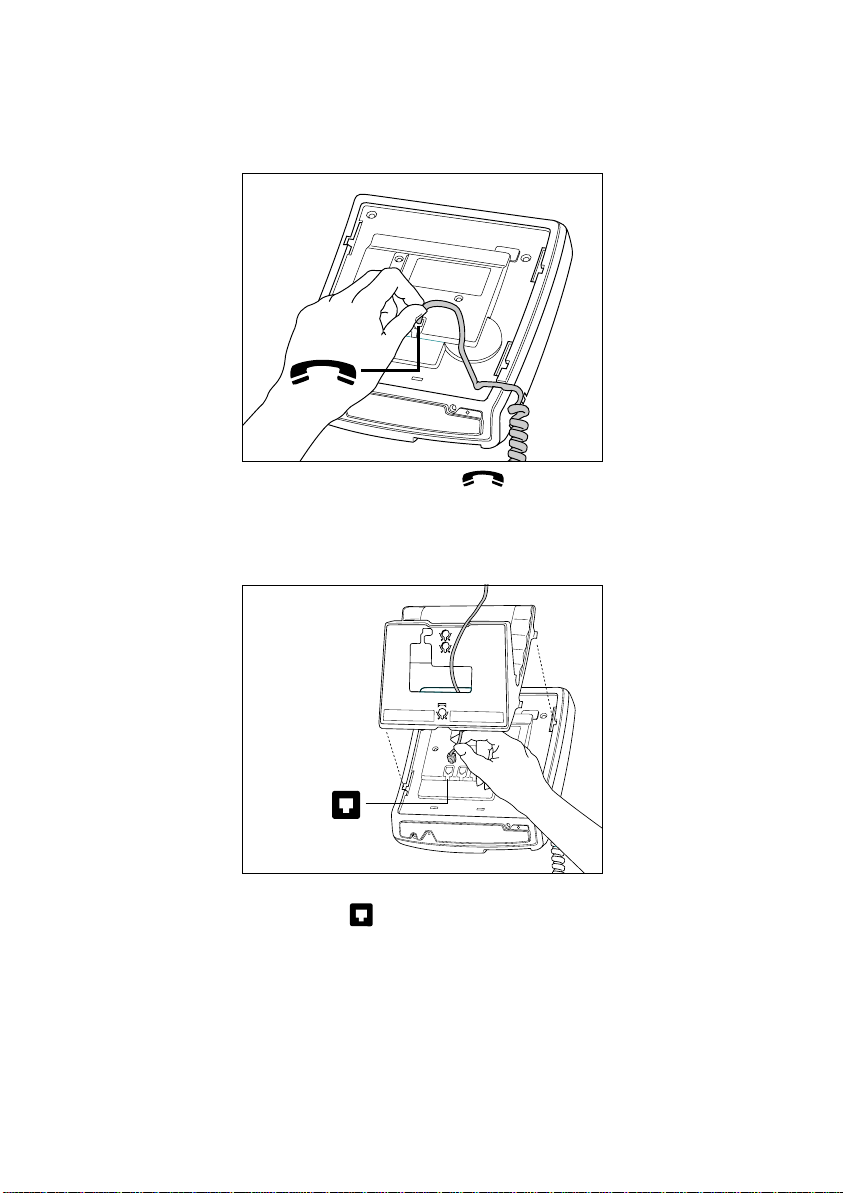
Connecting the handset cord
Attach the handset cord .
Attach one end of the handset cord to the handset and the other end to the handset jack.
Connecting the line cord when Lines 1 and 2 are on the same line cord.
1
Attach the line cord in jack number 1, as
shown by 1 .
Attach one end of the line cord to jack number 1 and the other end of the line cord to the wall
jack. To determine whether both lines are on the same line cord, plug in the power adaptor (see
Connecting the power adaptor
you to select a language. Select your language choice. If Lines 1 and 2 are on the same line cord,
the time and date is shown.
Line 2 ‚
4
appears on the second line of the display if Lines 1 and 2 are on separate line cords.
on the next page) and read the display . The display may prompt
Check line cord
appears on the first line of the display and
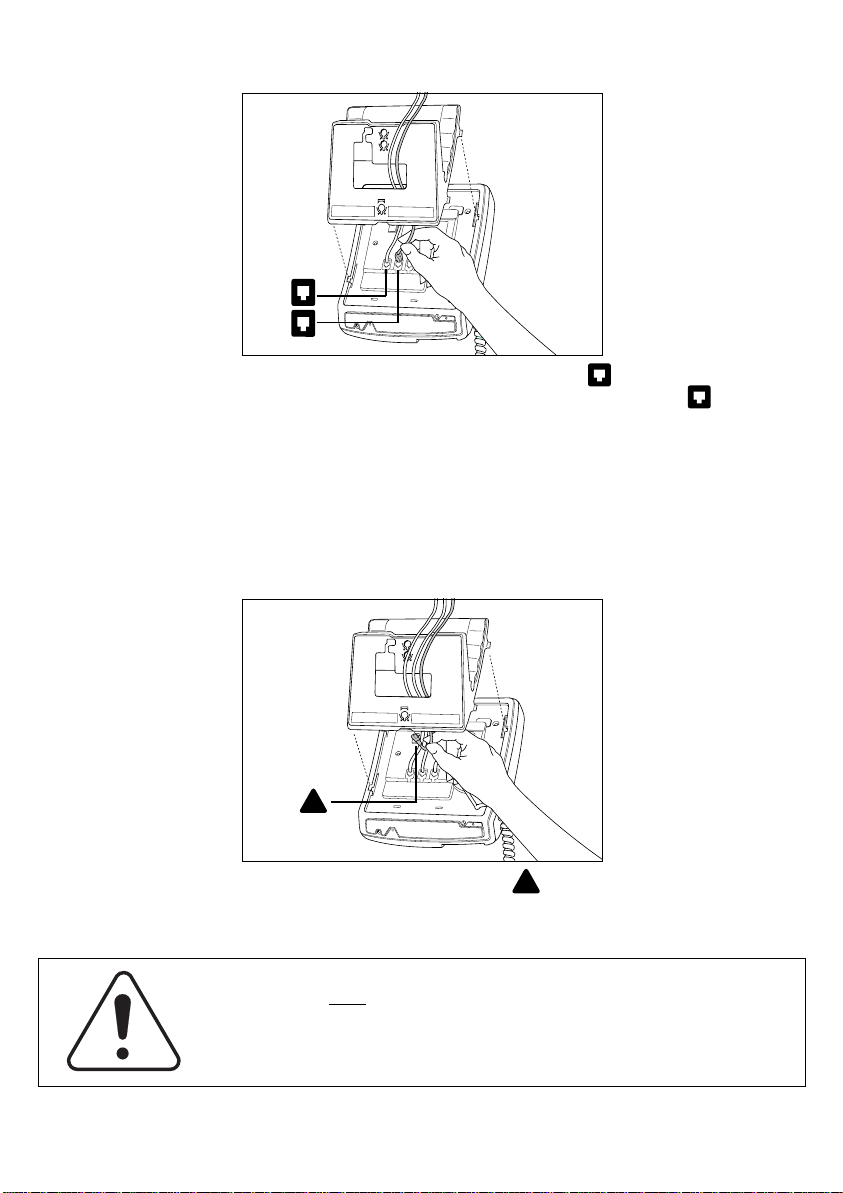
Connecting the line cords when Line 1 and Line 2 are on separate line cords
1
2
Attach line cord in jack 1 as shown by 1 .
Attach the second line cord in jack 2 as shown by 2
Attach one end of the line cord to jack number 1 and the other end to the wall jack. Attach the
second line cord to jack number 2 and the other end to the wall jack. Both line cords are supplied
with the telephone.
Note
: If you want Line 1 and Line 2 on the same line cord, contact your telephone company or
Telecom manager.
Connecting the power adaptor
!
Attach the power adaptor cord
Attach the power adaptor to the base of the telephone, where the warning symbol is marked.
Then connect the power adaptor into the closest electrical outlet.
To avoid potential electrical shock hazard to personnel or damage to the
telephone, use
procedures (specifically the AC adaptor and four wire line cord).
Substitution of non approved equipment will void the Aastra Telecom
warranty.
For more information about installation and safety concerns, call 1-800-574-1611.
only
the manufacturer supplied equipment and installation
!
5
Checking your telephone
When you first plug in your 8417, you may see a message asking you to make a language selection. Follow the directions on the display to select one of the languages.
Your telephone also runs a test to ensure that the line cords are connected properly. If the test
fails, the display identifies which line is not connected. Make sure that all connections are fastened securely.
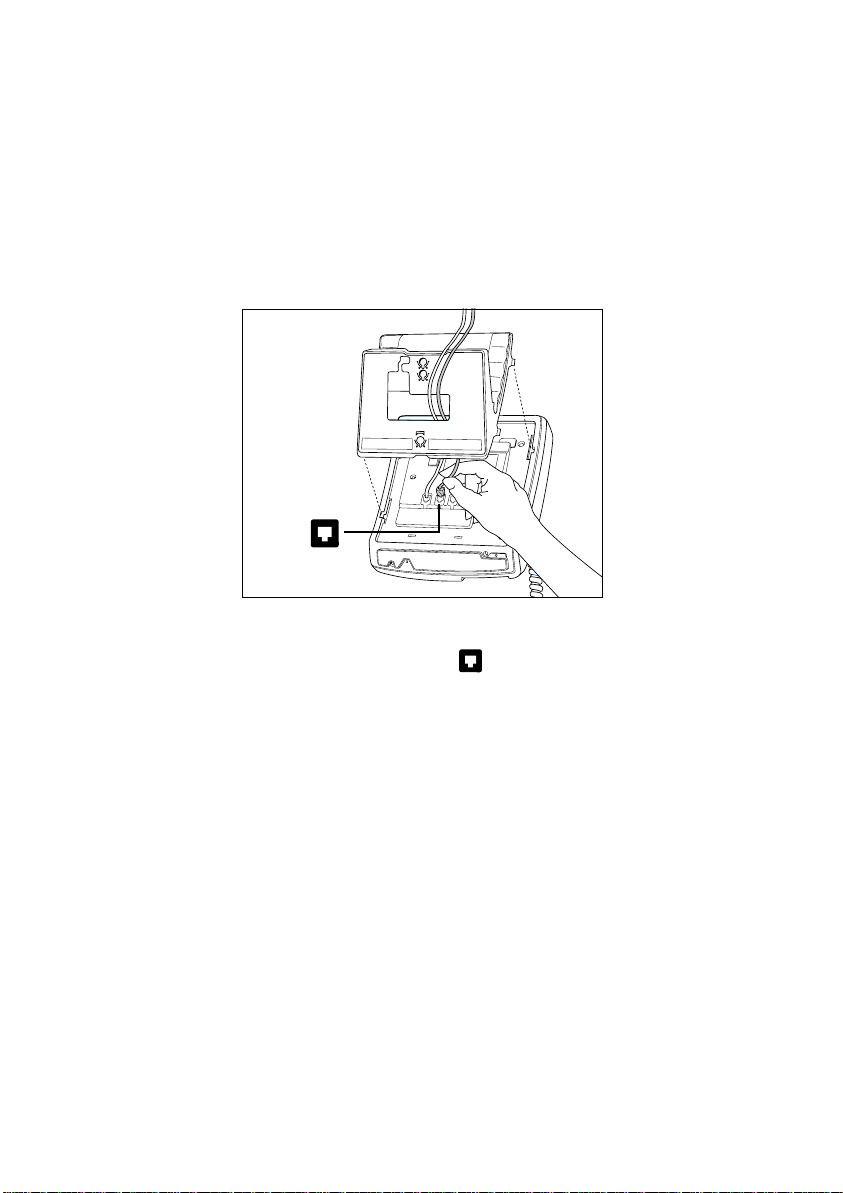
Connecting an optional modem or fax
2
For your fax machine, answering machine
or modem; attach the line cord in jack
number 2 as shown by 2 .
Attach one end of the line cord to jack number 2 and the other end of the line cord to the peripheral.
6
 Loading...