

Page 1
User Guide
Aastra 7187a -
analogue telephone
EN/LZT 102 4163 R1E
© Aastra Telecom Sweden AB 2012 All rights reserved.
Page 2

Table of Contents
Introduction 3
Important User information 4
Telephone Parts 5
Telephone layout 5
Cable inlets and MW switch 7
Incoming calls 8
Outgoing calls 9
During calls 11
Call forwarding 12
Optional Call handling Features 15
Call Records/Call log 22
Speed Dial Memory 23
Phonebook 24
Caller ID display 25
Phone Setting 27
Alarm function 32
System Dependent Phone setting 33
Telephone Specification 35
Wall Mounting 37
Aastra 7187a Analogue Telephone
2
Page 3

Introduction
Aastra 7187a is an advanced line-powered analogue telephone. It
supports multi-languages, call log, message waiting, telephone book and
A-number presentation. This user guide describes the features of the
Aastra 7187a when it is connected to MX-ONE Telephony system,
Telephony Switch or Telephony server.
The latest version of the user guide can be downloaded from:
http://www.aastra.com
Aastra 7187a Analogue Telephone
3
Page 4

Important User information
Safety Instructions
Save these instructions
Read these safety instructions before use!
Note: When using your telephone or connected equipment, the following basic
safety precautions should always be followed to reduce risk of fire, electrical
shock and other personal injury.
• Follow instructions in the equipment's user guide or other documentation.
• Always install equipment in a location and environment for which it is designed.
• Headsets used with this equipment must comply with EN/IEC 60950-1
• Do not make any changes or modifications to equipment without seeking approval
from the party responsible for compliance. Unauthorized changes or modifications
could void the user's authority to operate the equipment.
• Do not use the telephone to report a gas leak in the vicinity of the leak.
• Do not spill liquid of any kind on the product or use the equipment near water, for
example, near a bathtub, washbowl, and kitchen sink, in a wet basement or near a
swimming pool.
• Do not insert any object into equipment slots that is not part of the product or
auxiliary product.
• Do not disassemble the product. Contact a qualified service agency when service or
repair work is required.
• Do not use a telephone (other than cordless type) during an electrical storm.
Disposal of the product
Your product should not be placed in municipal waste. Please check local regulations for
disposal of electronic products
Aastra 7187a Analogue Telephone
.
4
Page 5
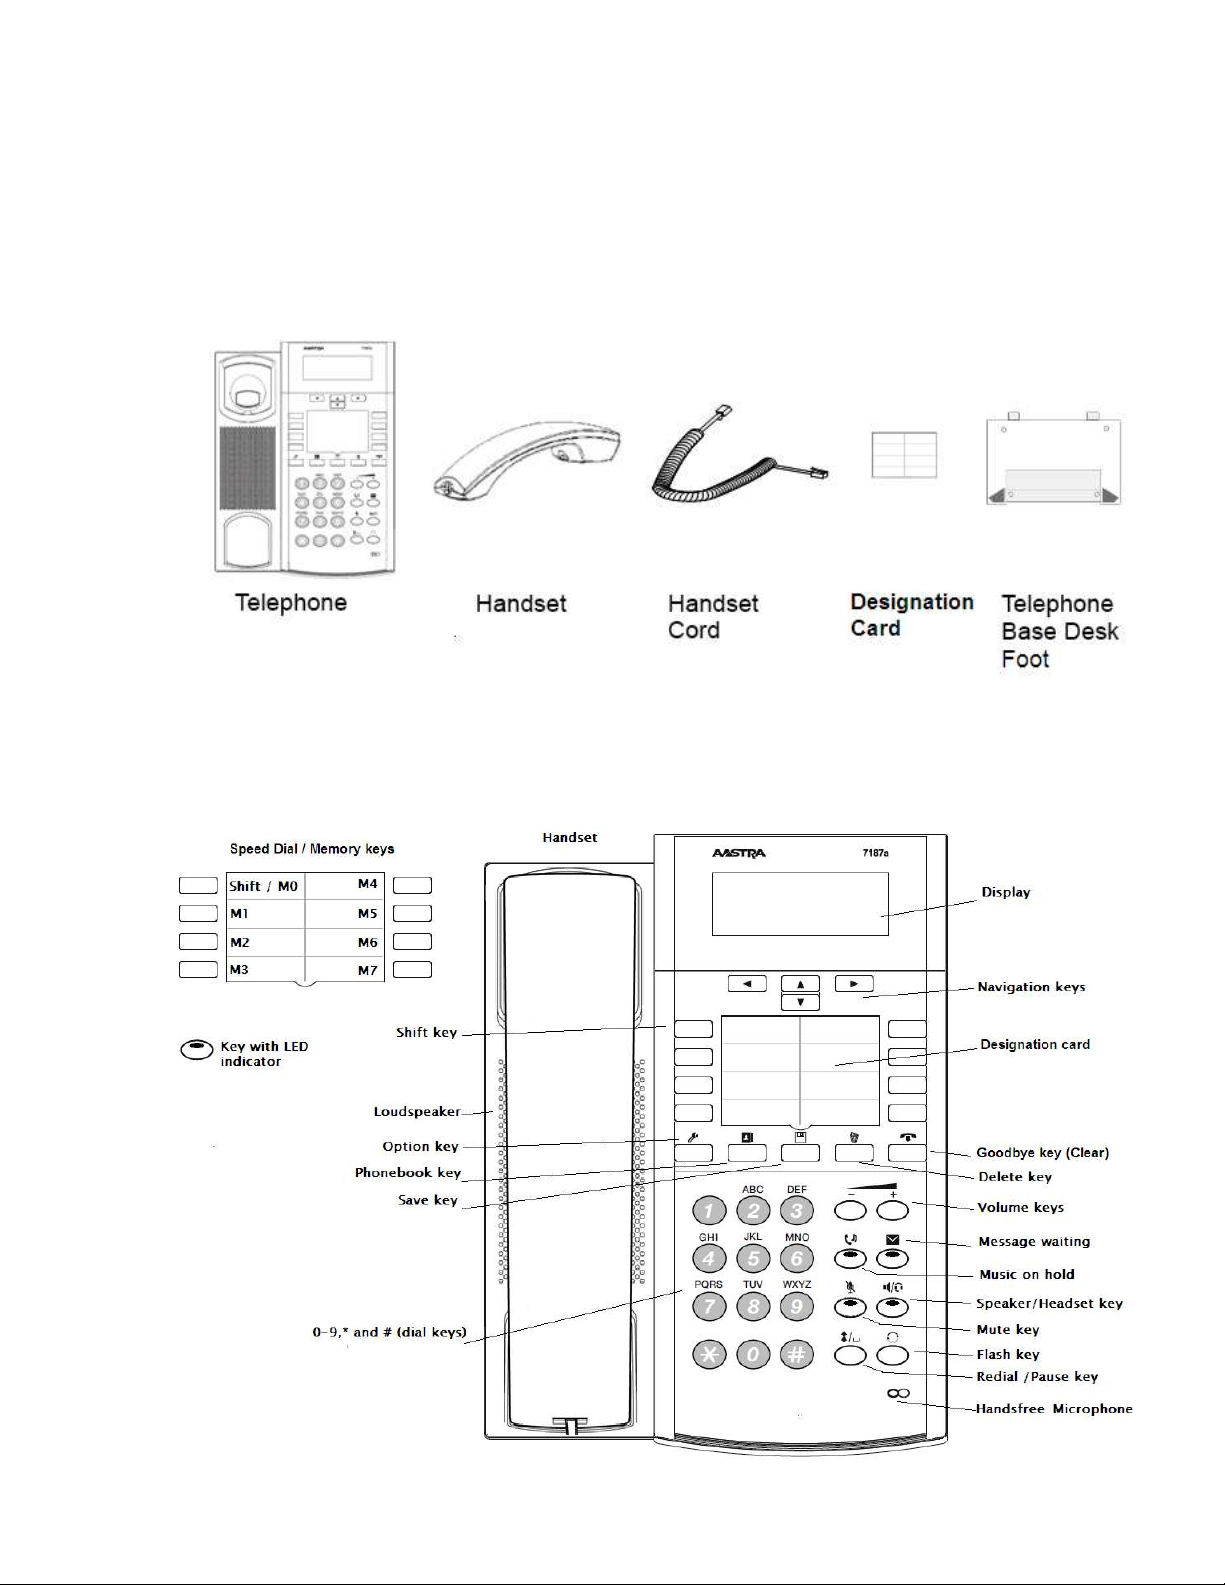
Telephone Parts
When you unpack your phone, you should ensure that you have all of the
following items. If any part is missing, contact the supplier of your phone
.
Telephone layout
Aastra 7187a Analogue Telephone
5
Page 6
Touche Rappel /
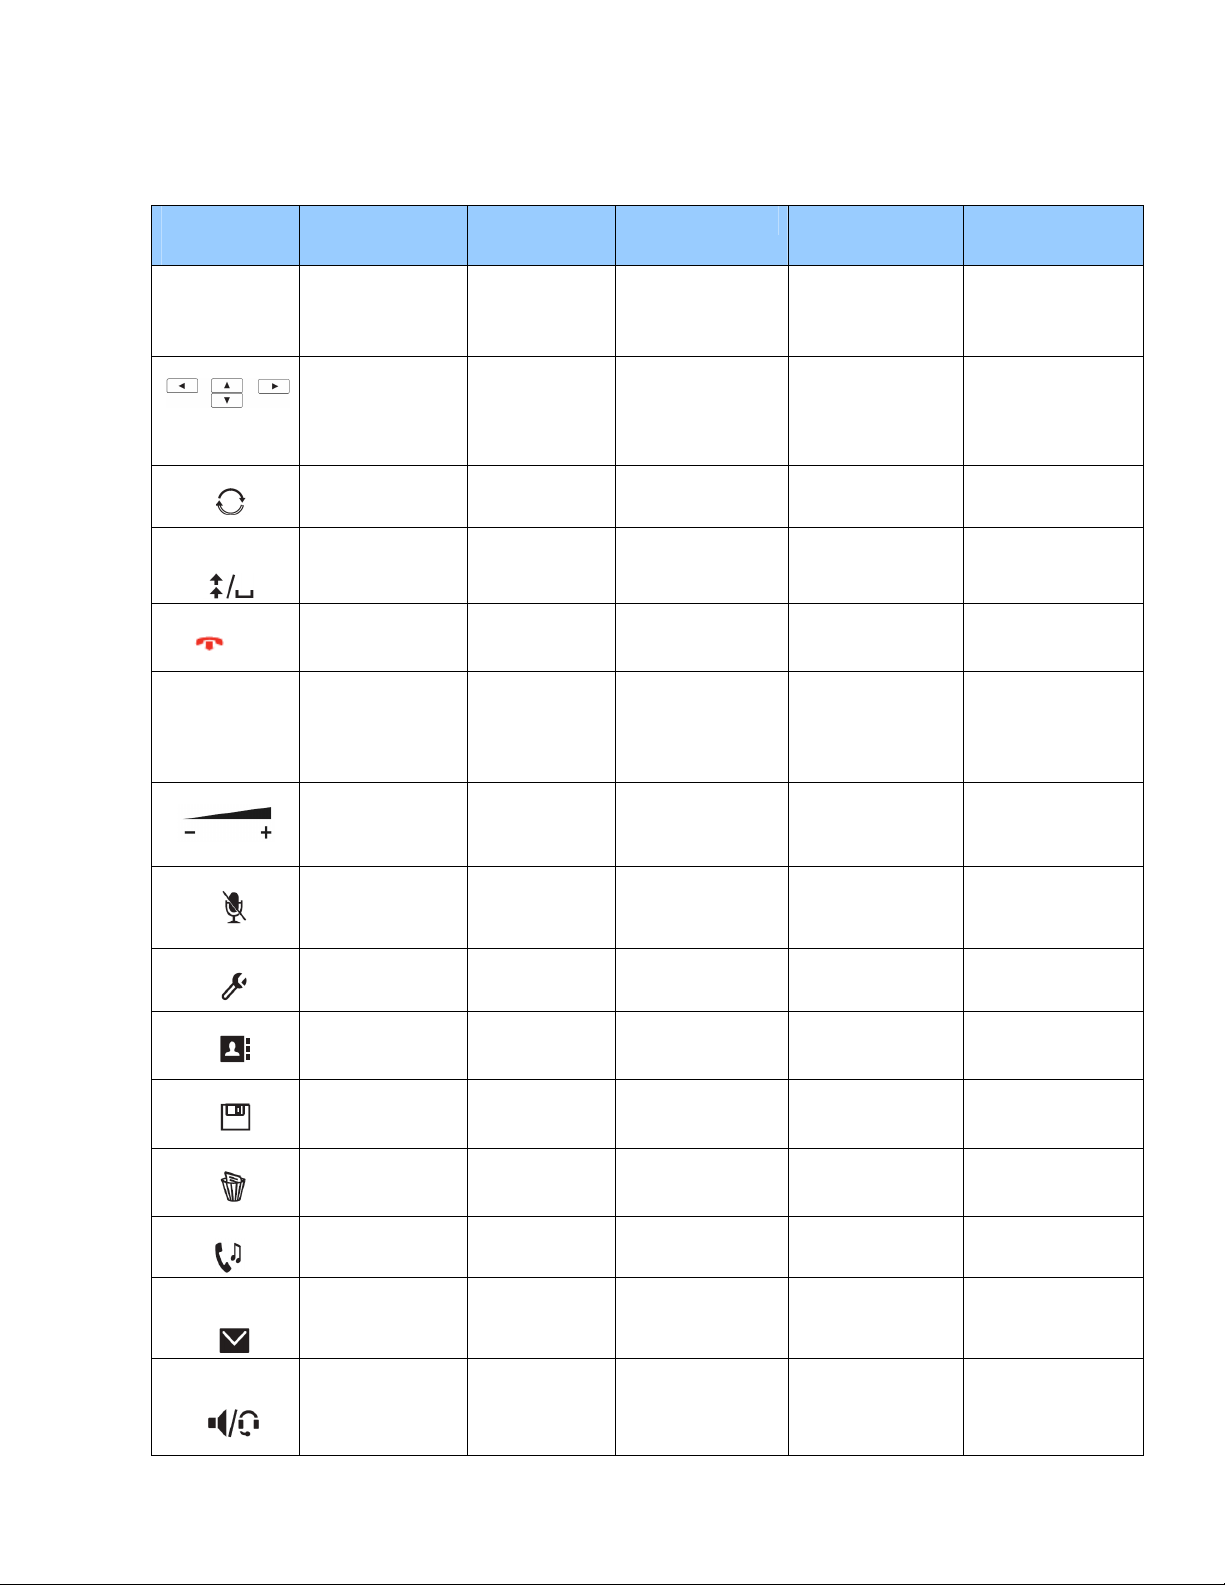
Table with Key-symbols
Symbols /
Keys
Speed-dial
Shift/M0-M7
Navigation keys Touches de
French Spanish German Portuguese Italian
Numérotation
abrégée
Touche Maj/M0M7
navigation
Teclas
programables
Shift/M0-M7
Teclas de
navegación
Kurzwahl
Shift/M0-M7
Navigationstasten
Discagem rápida
Shift/M0-M7
Teclas de
navegação
Numeri brevi
Shift/M0-M7
Tasti di
scorrimento
Flash Key
Radial / Pause
Key
Goodbye key
0-9, * and #
(dial keys)
Volume keys
Mute key
Option Key
PhoneBook Key
Save key
Delete key
Music on hold
Message
waiting
Speaker /
Headset key
Touche R-Flash
Mise en attente
Touche
Au revoir
0-9, * and #
(touches de
numérotation)
Touches de
réglage volume
Touche secret Act./desactivMicro
Touche option Tecla de
Touche d'annuaire
téléphonique
Touche de
sauvegarde
Touche
d'Effacement
Musique d'attente Música en
Message en
attente
Haut-parleur /
Casque
Tecla Flash R- Taste
Rellamada/
Pausa
Desconectar
0-9, * and #
(digitos)
Volumen Lautstärketasten Volume
(Mute) silencio Stummtaste
opciones opción
Agenda Telefonbuchtaste
Salvar Speichertaste Salvar Tasto
Borrado Löschtaste
espera
Mensaje en
espera
Altavoz / Tecla
de manos libre
Flash
Wahlwiederholung /
Pausentaste
Ende Taste
0-9, * and #
(Zifferntasten)
Optionswahltaste Opções
Musik bei Warten
Nachricht wartet
Lautsprecher /
Kopfhörertaste
Rediscagem/tecla
de pausa
Desconectar
0-9, * and #
(Dígitos)
Mudo Tasto mute
Agenda
Excluir
Música em espera
Mensagem em
espera
Alto-falante / Fone
de ouvido
Tasto Flash
Bis/Pausa
Tasto
Riaggancio
0-9, * e #
(Tasti selezione)
Tasti regolazione
volume
Tasto opzioni
Tasto Rubrica
salvataggio
Tasto cancella
Musica d’attesa
Messaggio
Giacente
Altoparlante/
Cuffia
Aastra 7187a Analogue Telephone
6
Page 7

Cable inlets and MW switch
Symbols French Spanish German Portuguese Italian
Line socket
OFF / Hi Volt /
MW(-) / MW(+)
Headset Jack
Handset Jack
Data Jack
Aastra 7187a Analogue Telephone
Prise ligne
téléphonique
ARRET / Haute
Tension / MW(-) /
MW(+)
Prise pour casque Puerto de
Prise pour
combiné
Prise pour
données
Puerto
conneccion de
linea
DE / Alto voltaje /
MW(-) / MW(+)
auricular
Puerto de
microtelefono
Puerto de datos
7
Anschlussbuchse Conector de
linha telefônica
AUS/Spannung/
MW(-) / MW(+
Kopfhörerbuchse Conector do
Hörerbuchse Conector do
Datenbuchse
OFF / Hi Volt /
MW(-) / MW(+)
fone de ouvido
monofone
Conector de
linha de dados
Presa linea
telefonica
OFF/Alta
Tensione
MW(-) / MW(+)
Presa Cuffia
Presa
Microtelefono
Presa dati
Page 8

Incoming calls
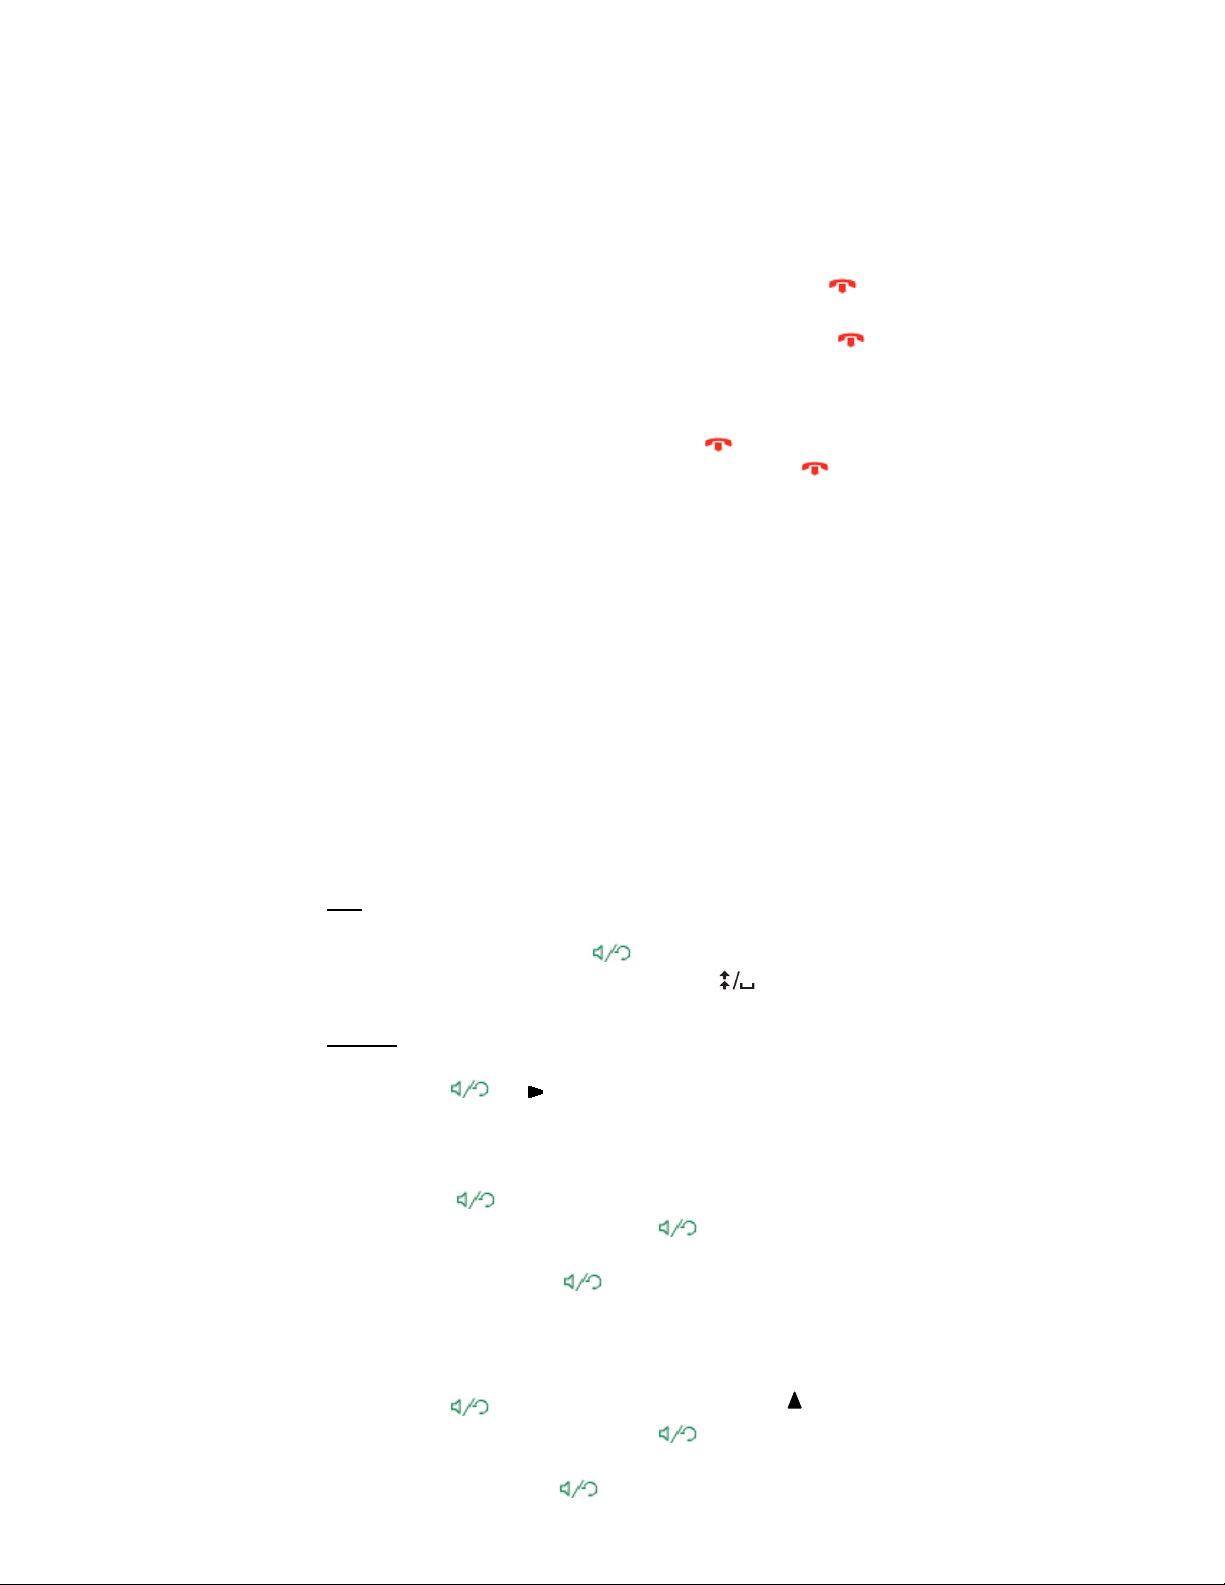
To answer an incoming call
Lift the handset or press without lifting the handset.
Answer a second call
A call waiting tone will inform you, during conversation that a second call is
waiting. You have two options:
Option 1:
1. Press to hang up. The new call will be signaled on your phone
2. Lift the handset to receive the call.
Option 2:
1. Ask the party you are speaking with to wait
2. Press and replace the handset. The waiting call will start
ringing.
3. Lift the handset to receive the new call
4.
Press 2 to return to the first call
After finishing the call, replace the handset to receive the first call again
(Sweden, press )
Answer a call from another extension
You can answer a call from another extension from any phone in your office:
1. Lift the handset and call the ringing extension.
2.
You receive a busy tone, press numeric key, 8
(France:4 Sweden 6)
Mute ring signal
Press to mute the ring signal (LED flashing)
Do not disturb, DND
When you activate DND, calls to your extension is not shown.
Outgoing calls can be made as usual.
Aastra 7187a Analogue Telephone
8
Page 9
Activate DND :
Lift the handset and press numeric keys * 2 7 #, Press [ ] to hang up.
Deactivate DND:
Lift the handset and press numeric keys # 2 7 # Press [ ] to hang up.
Goodbye Key
1. During off-hook by handset, press [ ] to process another call.
2. During off-hook by handsfree/headset, press [ ] to hang up.
Call duration timer for incoming calls
A call duration timer for incoming calls starts 5 seconds after “off hook” status is
established. The call duration is stored in the call list with the caller ID information
.
Outgoing calls
Dial and Pre-dial
Dial
Pick up the handset or press for hands free / headset operation.
Press numeric keys, (if required also * # or to dial out)
Pre-dial
During on-hook, press the keys for the number to be dialed (max. 32
digits). press or key or pick up the handset, the phone will dial
out the number in 1,1s.
Call by Handsfree
1. Press and enter the number by using the dial pad.
2. To hang up the phone, press again.
3. When you are in handset mode, you can switch to handsfree
mode by pressing .
Call by Headset
1. Insert a headset to the phone
2. Press and enter the number using the dial pad.
3. To hang up the phone, press again.
4. When you are in handset mode, you can switch to headset
mode by pressing .
Aastra 7187a Analogue Telephone
9
Page 10

Redial
1. Press , the display shows the last number you have dialed.
2. There are up to 5 most recent redial number, press or to
view the records.
3. Lift the handset or press either or to dial out.
Last External Number Redial
1.
Lift the handset and press numeric key * * *
(Finland and Sweden: * * 0)
Call via the phonebook
1. Press Select SEARCH or press key to enter Phonebook
viewing state
2.
Press or to view the records. Hold the / key for 3s could
activate fast scrolling
3. Lift the handset or press either or to dial out.
Dial Back from Call Record
1. Press > CALL RECORD
2. Press or to select call record that you wish to call
3. Lift the handset or press either or
Speed-dial by Memory Keys (M0-M7)
1. Pick up the handset or press
2. Press memory key (M1 to M7) or to dial a number that is stored on
the second level press Shift (M0) + M1 to M7.
Call Back
If a called extension is busy or there is no answer:
1.
At busy tone, Press numeric key 6 press to hang up.
(Finland, France and Sweden: 5).
2. Lift the handset when you are called back.
If all external lines are busy (after dialing the digit or digits to get the line:
1.
2. Dial the external number and press #, press to hang up.
3. Lift the handset when you are called back.
At busy tone, Press numeric key, 6
Cancel call back
Cancel single call back: Lift the handset and press numeric keys # 3 7* , ext
number, # Press to hang up
Cancel all callbacks: Lift the handset and press numeric keys # 3 7 #
Press to hang up
Aastra 7187a Analogue Telephone
(Finland, France, Sweden: 5).
10
Page 11

Protection (Data Privacy)
Protection allows you to make a call without any disturbances, e.g.
intrusion. The feature is automatically cancelled when the call is finished
Lift the handset and Press numeric keys * 41 #
Number presentation restriction
If you do not want your name and number to be displayed to the person
you are calling.
1. Lift the handset and press numeric keys * 4 2 #
2. Dial the number
Call duration timer for out going calls
A call duration timer for outgoing calls starts 5 seconds after “off hook” status is
established. The call duration is stored in the call list with the caller ID information.
During calls
Mute
1. When a call is in progress, press to mute (LED flashing).
2. To speak to the caller, press again (LED off).
Mute with music/Music on hold
1. When a call is in progress, press to hold the call (LED on).
2. Press again or toggle the hook switch to resume the call (LED off).
Inquiry
1. When a call is in progress, press
2. Call 3rd party and wait for an answer
3. Return to the first call by pressing, 2
Refer back (Switch back)
Press, 2 to refer back to the other party
(Sweden: )
(Sweden: )
Aastra 7187a Analogue Telephone
11
Page 12

Transfer
1. When a call is in progress, press
2.
Call 3rd party and wait for an answer. Replace the handset
before or after the answer
Conference
1. When a call is in progress, press,
2.
3. After answer, press numeric key 3
Repeat the procedure to add more conference members (max 7
members)
Call 3rd party
Hold / Park a call
1. When a call is in progress, Press and press to hang up
2. Lift the handset to resume the call on your own extension
To resume the call from on another extension:
1. Lift the handset
2. Call the extension where the call was put on hold
3. Press numeric key 8
(France: 4. Sweden:6)
Call forwarding
Diversion
If you do not want to be disturbed or will be out of office, you can have all calls to your
extension diverted to a preprogrammed answering position. During diversion you will
hear a special dial tone. You can still make calls as usual. Diversion can be made
direct, on no answer, on busy or to another information service facility.
Order direct diversion from your own extension
The call can be diverted to an individual position or up to three
determined common answering positions (depending on the type of the
incoming call). Pre-programmed by your system administrator.
1.
2.
Cancel diversion from your own extension:
1.
2.
Lift the handset and Press numeric keys * 21 #
Press to hang up
Lift the handset and press numeric keys # 21 #
Press to hang up.
(UK: *2# )
( UK: # 2 # )
,
Diversion when there is no answer
1. Lift the handset and Press numeric keys * 211 #
Norway: *61# )
Aastra 7187a Analogue Telephone
(Finland and
12
Page 13

2. Press to hang up
Cancel diversion when there is no answer:
1. Lift the handset and press numeric keys # 211 #
( UK: #61# )
,
2. Press to hang up.
Diversion when the caller receives a busy tone
1. Lift the handset and Press numeric keys * 212 #
Norway: *67# )
(Finland and
2. Press to hang up
Cancel diversion when the caller receives a busy tone:
1. Lift the handset and press numeric keys # 212 #
( UK: # 67 # )
,
2. Press to hang up.
Internal Follow me
All calls to your extension are diverted to an extension of your choice, within the
private network. For example, when you are working in another room and want your
calls to follow you to that answering position.
When your telephone has Follow-me you can still make calls from it as usual.
As a reminder that your telephone has Follow-me, you will hear a special dial tone
each time you lift the handset to make a call.
Ordering Follow-me from your own phone
1. Lift the handset (dial tone) and press numeric key * 2 1 *
2. Dial extension number of the answering position and press #
(Special dial tone)
3. Press to hang up
Canceling Follow-me from your own phone
1. Lift the handset (special dial tone) and press numeric key # 21 #
(ordinary dial tone)
(UK:#2# )
2. Press to hang up
Ordering Follow-me from another phone
You can order Follow-me of your own extension number from another
telephone.
The first step is to allow that Follow-me is permitted to be done from
another telephone. Do the following from your own telephone:
1. Lift the handset (dial tone) and press numeric keys * 2 1 *
2. Dial own extension number and press #
3. Press to hang up
(UK:*2* )
( UK:*2* )
Aastra 7187a Analogue Telephone
13
Page 14

To order Follow me from another telephone:
1. Lift the handset (dial tone) and press numeric keys * 2 1 *
2. Dial own extension number * the extension number of the new
answering position # (special dial tone)
3. Press to hang up
Canceling Follow-me from another phone
1. Lift the handset (dial tone) and dial # 21*
2. Dial own extension number # (dial tone)
3. Press to hang up
Ordering Follow-me remotely
With this feature you can order follow-me of any extension number from
any telephone.
The prerequisite is that all the involved telephones have the right service
profileTo order remote programming of follow-me, do the following:
1. Lift the handset (dial tone) and press numeric keys * 2 1 *
)
2. Extension number to divert * extension number of the new
answering position #
3. Wait for special dial tone
4. Press to hang up
Canceling Follow-me remotely
To cancel remote programming of Follow-me from another telephone than
the telephone with diverted number:
1. Lift the handset and wait for the dial tone
2. Press numeric keys # 2 1 *
3. Dial diverted extension number and press #
Press to hang up
( UK:*2* )
( UK:*2* )
( UK:*2*
External Follow me
1. Lift the handset and press numeric keys * 2 2 #
2. Dial external line code and external number press # press to
hang up
Cancel: Lift handset and press numeric keys # 2 2 # Press to
hang up
General Cancelation
Cancel all activated features:
Lift the handset and Press numeric keys # 0 0 1 #
Aastra 7187a Analogue Telephone
14
Page 15

Optional Call handling Features
The features below may not be available in your telephony system. Please
contact your system administrator for information.
Free seating
1. Log on: Lift the handset and press numeric keys *11*
2. Dial Authorization code and press numeric key * Own extension
number, press #
Log off: Lift handset and press numeric keys #11# press to
hang up
Personal Number
With the personal numbers and profiles feature you can be reached on your
normal office phone number even if you are out of the office. A search
profile (1-5) can be designed to fit the situation (in the office, traveling, at
home, and so on). Both internal and external phone numbers can be used
in a profile. Your search profile is programmed or modified by system
administrator.
When the feature is activated, incoming calls are transferred to selected phones or
back-up services in the order that you choose. If an answering position in the profile
is busy, the call can be transferred to another predefined position in the profile (Voice
Mail or a colleague). You can handle the profiles from your own office phone. How to
do this is described in this section (an operator can also assist you).
You can also use any of the Personal Assistant applications if available.
Contact your system administrator for more information. When out of the office, the
feature Direct Inward System Access (DISA) can be used, if available in your system.
How to use DISA is described in this section.
Activate or change profile from own extension
1. Lift handset and press numeric keys *1 0 * ( 1- 5 ) #
2. press to hang up
Canceling a profile from your phone
1. Lift handset and press numeric keys #10#
2. Press to hang up
Aastra 7187a Analogue Telephone
15
Page 16

Voice Mail
Enter your mailbox:
1. Lift handset and dial the voice mail number and follow recorded
instruction.
Note: if the number to the voice mail system has been programmed on the
message waiting key you can also press that key to enter the mailbox
Aastra 7187a Analogue Telephone
16
Page 17

Call Waiting
If you urgently wish to contact a busy extension or external line, you can
notify the extension by a call waiting signal:
1. At busy tone, press numeric key, 5
2. Wait on line on line
( Finland, France: 6 Sweden:4).
Account Code
This feature is used to charge a call to an account number or to prevent
unauthorized calls from your phone. The account code can have 1-15
digits.
1. Lift handset and press numeric key * 6 1 * account code #
2. Dial the digit or digits to get an external line and the external
number.
Absence Information
The absent information is used to inform the caller why you are absent and
when you will return. Contact your system administrator regarding the
available absence codes.
With return date and time
1. Lift the handset and press numeric key * 2 3 *
2. Enter absence code (0-9) and press numeric key *
3. Enter the date or time (MMDD) or time (HHMM), press #
Cancel: Lift handset and press numeric key # 2 3 #, press to hang up.
Without return date and time
1. Lift the handset and press numeric key * 2 3 *
2. Enter absence code (0-9) and press numeric key #
Cancel: Lift handset and press numeric keys # 2 3 #, press to hang up
Aastra 7187a Analogue Telephone
17
Page 18

Order for another extension:
1. Lift the handset and press numeric key * 2 3 0 *
2. Dial the extension number and press *
3. Enter the absence code (0-9), press *
Enter date or time (MMDD) or time (HHMM), for the other persons return,
Press #, press to hang up.
Cancel: Lift handset and press numeric key #230* Dial extension number
and press #, press to hang up
Parallel Ringing
This feature makes it possible for an incoming call to ring on several
phones simultaneously and for the call to be answered on any of the
phones. The feature requires all the phones involved to be defined in a
parallel ringing list.
To disable the parallel ringing temporarily:
1. Lift the handset and press numeric key * 2 1 *
2.
To restore Parallel Ringing:
Lift the handset and press numeric key # 21 #, press to hang up.
Dial extension number and press, #, press to hang up.
Intrusion on a busy extension
You can intrude on an ongoing call on a busy extension:
Lift the handset and Press numeric key 4,
Before the intrusion a warning tone is sent to the parties in the ongoing call.
(France and Sweden: 8)
Group features
Group Call – pick - up
In a call-pick-up group, any member can answer any individual call to
group member.
Lift the handset and Press numeric key 8 to answer the call
Sweden: 0)
(Finland and
Aastra 7187a Analogue Telephone
18
Page 19

Common bell group
Calls are signaled on a common bell
Lift the handset and Press numeric key, 8, to answer the call
Sweden: 0)
(Finland and
Group hunting
As a member of a group of extensions that is called by a common number,
you can temporarily leave the group.
1. Lift the handset and Press numeric key * 2 1 *
( U.K: *2*)
2. Dial your own extension number and press #, press to
hang up
To re-enter the group:
Lift the handset and press numeric keys # 21 #, press to hang up
(UK:#2#)
If you are authorized, you can divert all calls to a group, to another
extension or another group:
1. Lift the handset and press numeric key * 2 4 *
2. Dial number of the group to be diverted, Press numeric key *
3. Dial extension number to the new answering position, press #
press to hang up
To cancel the diversion:
1. Lift the handset and press numeric key # 2 4 *
2. Dial the number of the group that has been diverted
3. Press numeric key #, press to hang up
Direct inward system Access - DISA
If you are assigned to use this feature and you are working externally, you
can call your office and get access to an external line in order to make
business calls.
Aastra 7187a Analogue Telephone
19
Page 20

With common authorization code:
1. Lift the handset and call the DISA feature in your office.
2. You receive dial tone, press numeric key: * 7 2 *
3. Dial the authorization code and press numeric key #
4. You receive a dial tone, Dial external number
With individual Authorization code:
1. Lift the handset and call the DISA feature in your office.
2. You receive dial tone, press numeric key: * 7 5 *
3. Dial the authorization code and press numeric key *
4. You receive a dial tone, Dial external number, press *
5. Dial your own extension number and press #
6. You receive a dial tone. Dial external number
Authorization code, Common
If you are authorized to use a common authorization code (1 to 7 digits)
you can temporarily change any phone used within the telephone system
to the authority level connected to this code.
For a single call:
1. Lift the handset and press numeric key * 7 2 *
2. Enter authorization code and press #
3. You receive a verification tone, Dial the digit or digits to get an
external line and the external number.
To open an extension for several calls:
1. Lift the handset and press numeric key # 7 3 *
2. Enter authorization code and press #
3. You receive a verification tone.
To lock an extension:
1. Lift the handset and press numeric key * 73*
2. Enter authorization code and press #
3. You receive a verification tone.
Aastra 7187a Analogue Telephone
20
Page 21

Authorization code, individual
If you are authorized to use an individual authorization code (1-7 digits,
affiliated to your own extension) you can lock your own extension to a
common authority level, e.g. when out of the office. You can also
temporarily change any other phone used within the telephone system to
the same authority level as you have on your own phone. The individual
code can be changed from your own extension.
To lock the phone:
1. Lift the handset and press numeric key * 76 *
2. Enter authorization code and press #
3. You receive a verification tone.
To make calls with your authority level when your phone is locked:
1. Lift the handset and press numeric key *75 *
2. Enter authorization code and press #
3. Dial the digit or digits to get an external line and the external number.
To open your phone:
1. Lift the handset and press numeric key # 76 *
2. Enter authorization code and press #
3. You receive a verification tone.
To assign your own authority level to another phone:
Lift the handset and press numeric key * 75 *
1. Enter authorization code and press *
2. You receive verification tone
3. Enter your own extension number and press #
4. You receive verification tone, Dial the digit or digits to get an
external line and the external number.
To change your individual authorization code:
Lift the handset and press numeric key * 74 *
1. Enter old authorization code and press *
2. Enter new authorization code and press #
3. You receive verification tone.
Aastra 7187a Analogue Telephone
21
Page 22

Call Records/Call log
View Call Records
Press or scroll the list. Hold the key for 3 s could activate fast
scrolling
Press or to scroll the list. Hold the / key for 3s could activate fast
scrolling.
To view the call categories:
1. Press > CALL RECORD
2. Press or
3. Select category “
4. Press or to view the calls list.
5. Press or to scroll the list. Hold the / key for 3s could
activate fast scrolling
MISSED CALL” / “DIALED CALL”/”ANSWERED CALL”
Delete Call Records
1. When you will see ‘DELETE?’ press to confirm or or to
cancel the deletion.
2. If you want to delete ALL the records, press and hold for 3
seconds.
3. When you will see ‘DELETE ALL?’ press to confirm or or
to cancel the deletion.
Note: If the phone was locked, you need to enter the password for deleting the
phonebook entries and speed dial memories (see “Set Lock State”).
Save One-touch / Two-touch memory / Phonebook from Call Records
1. Select the call record that you wish to save. Press to confirm
2. input the Name and press twice
3. The display shows ‘M? ? ’, press (M1-M7) or SHIFT+(M0-M7) or
to save
Dial Back from Call Records
1. Select the call record that you wish to call.
2. Lift the handset or press either or
Aastra 7187a Analogue Telephone
22
Page 23

Area Code Filter
If area code was set (see “Area code setting”), the phone will compare and
filter the initial digits of the incoming number
An example:
The area code was set “755”.
If the incoming call’s number is “755-12345678”, then caller ID will be
displayed “12345678” while “755” will be filtered.
Note: Only numbers with 7 digits or longer could be filtered the area code.
Otherwise the complete number with area code will be displayed
.
Speed Dial Memory
There are seven keys (M1-M7) for storing frequently used number. You
can store two numbers per key by using (shift+M1-M7)
Save a Memory
1. Replace the handset on the phone
2. Press memory key (M1 to M7) or “second level” memory keys
(Shift + M1 to M7)
3. Press and enter the name to be saved
4. Press and enter the number to be saved
5. Press key again to complete saving
Note: For some rare conditions it may be useful to insert a pause between
e.g. the area code and the phone number. To do this; enter the area code,
press the pause key and then continue with the telephone number.
Dial from a Memory key
1. Pick up the handset or press
2. Press memory key (M1 to M7) or “second level” memory keys
(Shift + M1 to M7) to be dialed
Delete Memory
1. Replace the handset on the phone
2. Press memory key (M1 to M7) or “second level” memory keys
(Shift + M1 to M7) to be deleted
3. Press and you will see ‘DELETE?’, then press to confirm the
deletion
Aastra 7187a Analogue Telephone
23
Page 24

Note: If the phone was locked, you need to enter the password for deleting the
phonebook entries and speed dial memories (see “Set Lock State”).
Phonebook
Explore Phonebook
1. Press , the display shows “SEARCH”.
2.
Search the Phonebook
1. Select SEARCH and press key to enter Phonebook viewing state
2. Press or to view the records. Hold the / key for 3s will
3. Lift the handset or press either or to dial out.
Press or to select “SEARCH” or “ADD”.
activate
fast scrolling.
number keys. Pressing dialing key 2 (=“abc”) once will return the first
contact starting with letter “A”, pressing twice the first name on “B” will
be presented and so on.
It is also possible to view the phonebook by using the
Add Contact to Phonebook
1. Select ADD and press key to enter into Phonebook modification
state.
2. Enter the name you wish to record and press to save.
3. Enter the number using the dial pad and press to save.
Note: Pressing in phonebook entry mode is the same as “back space”.
Protect Memories
It is possible to set a password in the telephone for speed dial memories and phone
book entries. Please see “Set Password” found below under the paragraph for
“Phone setting”.
Delete Contact in Phonebook
1. In Phonebook viewing state, press or to find the record you want to
delete.
2. Press and you will see ‘DELETE?’, and then press to confirm the
deletion.
3. If you want to delete all the records, press for 3 seconds. Then you
will see ‘DELETE ALL?’, and then press to confirm.
Note: If the phone was locked, you need to enter the password for
deleting the phonebook entries (see “Set Lock State”).
Aastra 7187a Analogue Telephone
24
Page 25

Caller ID display
After receiving a new incoming call, the number will be displayed on the
LCD and hold for 10s, during this time, if received another new call, it will
continue to display for 10s and then display the new corresponding call.
The Caller ID information is presented in the display and includes alpha
numeric presentation of [Number], [Name], [Time] and additional
information indicated with the Icons shown below.
= Repeat call
= New missed call
= Missed call
= Received call
The display below indicates where in the display the Caller ID information
is presented.
Call Record/Call log Information
The above mentioned information related to incoming and out going calls
is stored in the Call Records memory. If the record is full, the next
incoming call will replace the oldest record one by one.
After viewing new missed incoming calls, the icon will disappear,
and missed icon will be shown
When there is new call, the new call indicator LED will flicker. Pick up and
the record will become received calls.
Aastra 7187a Analogue Telephone
25
Page 26

Shortcut key to view records
When the phone is in idle, press or to view all the call records.
The call details are displayed below:
Note: “12:00” indicate the call’s time and 9/3 indicates the date. Either one of
the icons can be displayed depending on the status for the call.
Call duration time
The call duration is presented in the bottom row. In the picture below 00:06
indicates that the duration of this outgoing call was 6s.
Aastra 7187a Analogue Telephone
26
Page 27

Phone Setting
Display Menu
- Press to enter into main menu.
- Press or to scroll up and down for different options.
- Press or to enter the submenu / confirm selection.
- Pressing to visit the previous menu
- Press to exit the menu
Main
menu
PHONE
SETTING
CALL
RECORD
Submenu Settings Default
SET LANGUAGE
RING VOL OFF / LOW / HIGH HIGH
RING MELODY RING 1 ~ 8 RING 1
SET HANDSET VOL 1 ~ 4 3
SET HANDSFREE VOL 1 ~ 8 7
SET PASSWORD 4 digits combination 0000
SET LOCK STATE LOCK / UNLOCK UNLOCK
LCD CONTRAST 1 ~ 4 2
SET FLASH TIME 100ms / 200ms / 300ms /
SET TIME/DATE 24H, MM/DD 00:00, 01/01
DATE FORMAT MM/DD or DD/MM MM/DD
TIME FORMAT 12/ 24 HOURS 12H
LOCAL AREA CODE 3 ~ 5 digits combination - - - - MISSED CALL
DIALED CALL
ANSWERED CALL (View only)
English, Italiano, Português,
Deutsch, Español, Français
400ms / 600ms / 900ms
(View only)
(View only)
ENGLISH
100ms
ALARM CLOCK 24H
ALARM
SETTING
Aastra 7187a Analogue Telephone
ALARM
ALARM
INTERVAL
ON/OFF
5/ 10 / 15 / 30 min
ON/OFF
27
00:00
10 min
OFF
Page 28

Settings
Set Language
1. Press > PHONE SETTING > SET LANGUAGE
2. Press or to choose the favorite language (English, Italiano,
Português, Deutsch, Español, Français)
3. Press or to confirm
Set Ring Volume
1. Press > PHONE SETTING > RING VOL
2. Press or to adjust the ringer volume (OFF / LOW / HIGH )
3. Press or to confirm
Set Ring Melody
1. Press > PHONE SETTING > RING MELODY
2. Press or to choose ring melody (MELODY 1 to 8 )
3. Press or to confirm
Set Handset Volume
1. Press > PHONE SETTING > SET HANDSET VOL or Pick up the
handset
2. Press or to adjust the volume on the handset.
Handset Volume Display Icon
Level 4 (max)
Level 3
Level 2
Level 1 (min)
▂ ▄ ▆ ▆
▂ ▄ ▆
▂ ▄
▂
3. Press or to confirm
EN/LZT 102 4163 R1E
© Aastra Telecom Sweden AB 2012 All rights reserved.
Page 29

Set Handfree Volume
1. Press > PHONE SETTING > SET HANDSFREE VOL or Press to
activate handsfree
2. Press or to adjust the volume on handsfree loudspeaker.
Handfree Volume Display Icon
Level 8 (Max.)
Level 7
Level 6
Level 5
Level 4
Level 3
Level 2
Level 1 (Min.)
▂ ▂ ▄ ▄ ▆ ▆ ▆ ▆
▂ ▂ ▄ ▄ ▆ ▆ ▆
▂ ▂ ▄ ▄ ▆ ▆
▂ ▂ ▄ ▄ ▆
▂ ▂ ▄ ▄
▂ ▂ ▄
▂ ▂
▂
3. Press or to confirm
Set Headset Volume
1. Plug in the headset
2. Press
3. Press or to adjust the volume on the handset.
Headset Volume Display Icon
Level 4 (max)
Level 3
Level 2
Level 1 (min)
▂ ▄ ▆ ▆
▂ ▄ ▆
▂ ▄
▂
4. Press or to confirm
Factory Reset
1. In idle mode, Press
* # 0 6 *
2. Press:
3. Press to confirm reset
29
Page 30

Set Password - Configuration lock
The activation of the protection lock in the telephone is done in two steps:
First a four (4) digit password is defined by the user. Then the lock state must
be selected.
1. Press > PHONE SETTING > SET PASSWORD
2. Press numeric keys to input the OLD password (default – ‘0000’)
3. Press or to confirm the OLD password
4. Press numeric keys to input the NEW password
5. Press or to confirm the NEW password
6. Enter the NEW password again for reconfirmation
7. Press or to complete the setting
Set Lock state
The lock state protects the content of the phone book and speed dial
memories. It is possible to lock and unlock the protection function
1. Press > PHONE SETTING > SET LOCK STATE
2. When the display shows “ENTER PASSWORD”, enter the password
If the phone was locked:
1. The display shows “UNLOCK?”
2. Press or to unlock / Press or to quit without change
If the phone was unlocked (default):
1. The display shows “LOCK?”
2. Press or to lock / Press or to quit without change
Note: The phone was default unlocked. While the state is changed to
‘LOCK’, you need to enter password for deleting the speed dial memory keys
and phonebook entries that are lock protected (see “Menu Operation”)
LCD Contrast
1. Press > PHONE SETTING > LCD CONTRAST
2. Press or to adjust the display contrast
3. Press or to confirm
30
Page 31

Set Time/Date
1. Press > PHONE SETTING > SET TIME/DATE
2. Press or to adjust the “time”
3. Press or to confirm
4. Press or to adjust the “date”
5. Press or to confirm
Date Format
1. Press > PHONE SETTING > DATE FORMAT
2. Press or to select the date format (MM/DD or DD/MM)
3. Press or to confirm
Time Format
1. Press > PHONE SETTING > TIME FORMAT
2. Press or to select the time format (12 Hours or 24 Hours)
3. Press or to confirm
Area code setting
1. Press > PHONE SETTING > LOCAL AREA CODE
2. Press or to set each digit
3. Press to confirm and move to next digit setting. The area code can
be set in maximum 5 digits combination
4. After finishing the setting press twice or move to the last digit and
leave
31
Page 32

Alarm function
The telephone has a built in alarm that can be used e.g. as a wake up alarm.
The real time clock in the telephone is used. The alarm function is set by
stetting the alarm time.
When the alarm is sounding, press or just lift the handset and the alarm
will be turned off.
If the signal is not shut off manually it will keep on alarming for the whole
alarm duration time.
The preset time will remain active until the alarm function is deactivated.
Alarm Setting
Alarm clock
The alarm clock should be set as 24H, HH/MM and phone should then
activate the alarm in 5 sec after the local clock reached the set time in alarm
clock
1. Press > ALARM SETTING > ALARM CLOCK
2. Press or to adjust the time
3. Press or to confirm
Alarm interval
Options for selecting the desired alarm interval:
1. Press key > ALARM SETTING > ALARM INTERVAL
2. Press or to select the alarm interval (5 / 10 / 15 / 30 min; default
10 min)
3. Press or key to confirm
Alarm ON/OFF
1. Press key > ALARM SETTING > ALARM ON/OFF
2. Press or to select ON / OFF to enable / disable the alarm
3. Press or key to confirm
32
Page 33

System Dependent Phone setting
Message Waiting Memory (MWM
The message waiting memory normally stores the number to reach the voicemail box
)
Save MWM
1. Place the handset on the phone and press
2. Press and enter the number to be saved
3. Press key again to complete saving
Dial from a MWM
1. Pick up the handset or press ‘Speaker/Handset’
2. Press the
Delete MWM
1. Place the handset on the phone
2. Press
3. Press
Message Waiting LED
When there is a message, the message waiting LED will be lighted ON or flashing in
blue.
When there’s message waiting to be read, the message waiting LED will be lighted ON
or flashing in red.
.
The Message Waiting switch (at the back of the phone) is used to select the
appropriate MW mode (HV / + / -). Please check the MW type of the connected PBX to
work with the phone. Select “OFF” on the MW switch to deactivate the message
waiting function.
If the LED is steady active, change the message waiting switch position.
33
Page 34

Set Flash time
Some systems require a different flash time for the flash key. To change the
flash time, proceed as follows:
1. Press > PHONE SETTING > SET FLASH TIME
2. Press or to select the needed flash time
3. Press or to confirm
Parameter
s
Programming key
sequence
Lock
Protecte
d
Valid
Settings
Default
Set flash
time
[save]+[#]+[0]+[1]+[#]+[X]+[#
]
Yes 1: 100ms
2: 200ms
3: 300ms
4: 400ms
6: 600ms
9: 900ms
100ms
34
Page 35

Telephone Specification
Professional Telephone Single line
Signaling
Market Certification Europe (CE)
Body Color Dark grey
Features
Language Support (Display) English, Italian, Portuguese, German, Spanish, French
Visual indicator for incoming call Flashing LED
DTMF dialing Yes
Phone book Stores 100 telephone numbers
Last number Redial Yes
Main Characteristics
Analog (DTMF)
Flash function (R)
Programmable flash time
Hearing aid compatible Yes
Volume control
Microphone Mute Yes
Music on Hold
Call Waiting indication
Message Waiting (MW )
Caller ID display
Call List: Incoming and missed calls 50 call records/call list
Call List: Outgoing calls 50 call records
Reset calling/redial list Erase content
Call Timer Yes
Real time clock Yes
Alarm clock Yes
Moth / Date presentation Yes
Delete calling/redial list Yes
Handsfree Loudspeaker or Default (Headset disabled)
Head set pre-set mode (Hands free disabled)
Configuration Lock (4-digit pass-code) speed-dial memory and phone book content
Ringer melody 8 types
Ringer volume 2 levels
Ringer silence Yes
Memory protection with pass word Yes
Data port For connecting the PC to the telephone line
100 ms (default), 200 ms, 300 ms, 400 ms, 600 ms, 900 ms
4 alternatives supported: MW+/MW-/HV/Off
FSK and DTMF signaling – according to selected parts of ETSI
100 ms (default)
Handset / Headset (4 levels)
Handsfree (8 levels)
Yes
Yes
EN300 659-1, -2, -3
35
Page 36

Hardware
LCD Display
Speed dialing keys 8
Memory card 1
Redial/Pause 1
Flash key (R) 1
Mute key with LED 1
Handsfree / Headset pre-set key with LED 1
Hold key with LED 1
MW with LED indicator 1
Volume control 2
Save 1
Call list key 1
Delete key 1
Line 3: 16 characters (5x7 dot matrix)
Line 1: Functional icons
Line 2: 16 digits (7-segment)
)
Goodbye key /Hang up 1
Handset receiver Electro-dynamic
Microphone Electret
Tone ringer Piezo type
Headset interface 1
Data port 1
Wall mounting Yes
Accessories
Connection cable, RJ11/ RJ45
Number card 1 pcs (not included)
1 pcs, 2 meters (not included)
36
Page 37

Wall Mounting
37
Page 38

Copyright
Copyright © Aastra Telecom Sweden AB, 2012. All rights reserved.
No parts of this publication may be reproduced, stored in retrieval systems, or transmitted in
any form or by any means, electronic, mechanical, photocopying, recording or otherwise,
without prior written permission of the publisher except in accordance with the following terms.
When this publication is made available on Aastra media, Aastra gives its consent to downloading and
printing copies of the content provided in this file only for private use and not for redistribution. No parts of
this publication may be subject to alteration, modification or commercial use. Aastra will not be liable for any
damages arising from use of an illegal modified or altered publication.
Trademark
Aastra is a registered trademark of Aastra Technologies Limited. All other trademarks herein
are the property of their respective owners.
Disclaimer
While every effort has been made to ensure accuracy, Aastra will not be liable for technical or
editorial errors or omissions contained within this documentation. The information contained in this
documentation is subject to change without notice.
Declaration of conformity
Hereby, Aastra Telecom Sweden AB, Box 42214, SE-126 17 Stockholm, declares that this
telephone is in conformity with the essential requirements and other relevant provisions of the
European Directive 1999/5/EC (R&TTE Directive).
Details to be found at www.aastra.com/sdoc
38
 Loading...