

Page 1
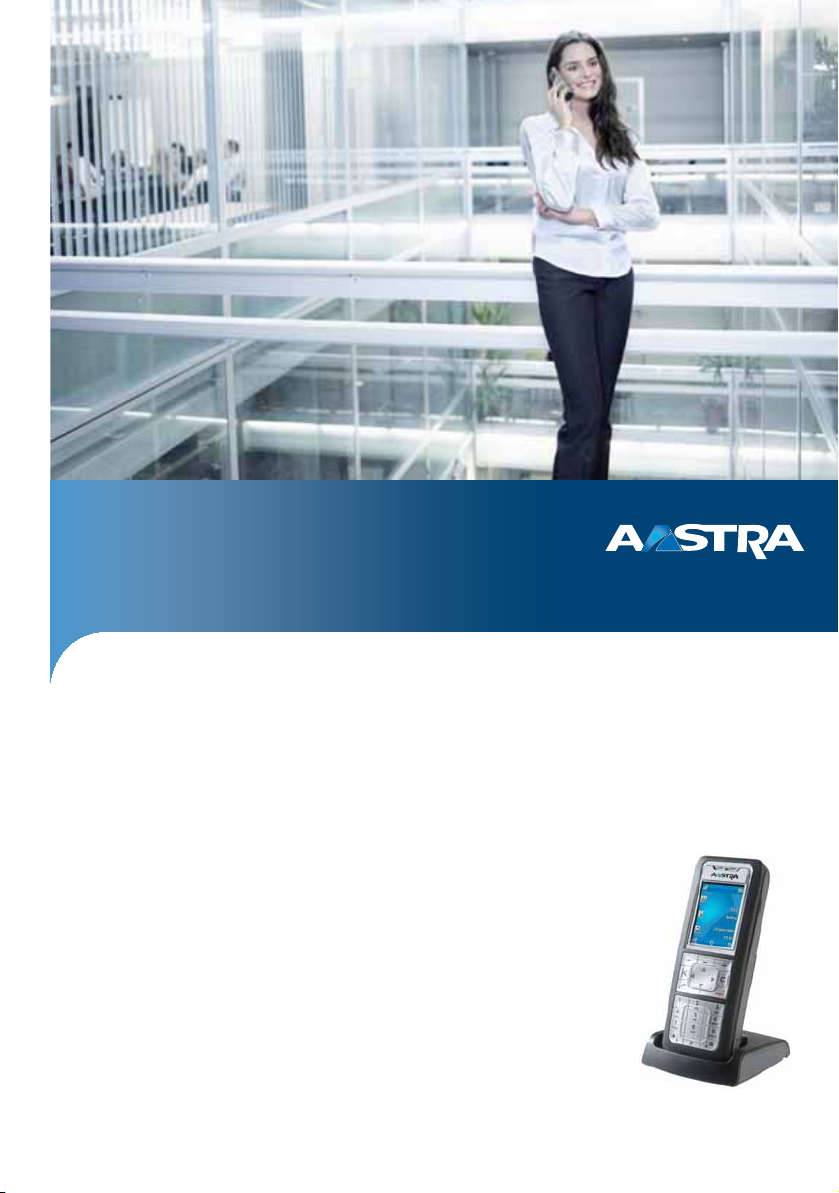
Aastra Multimedia
Communications Systems
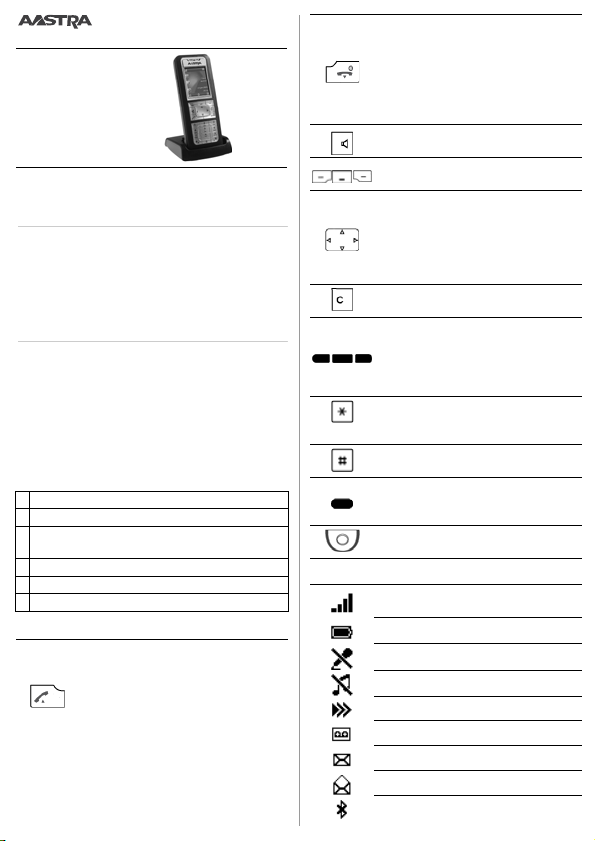
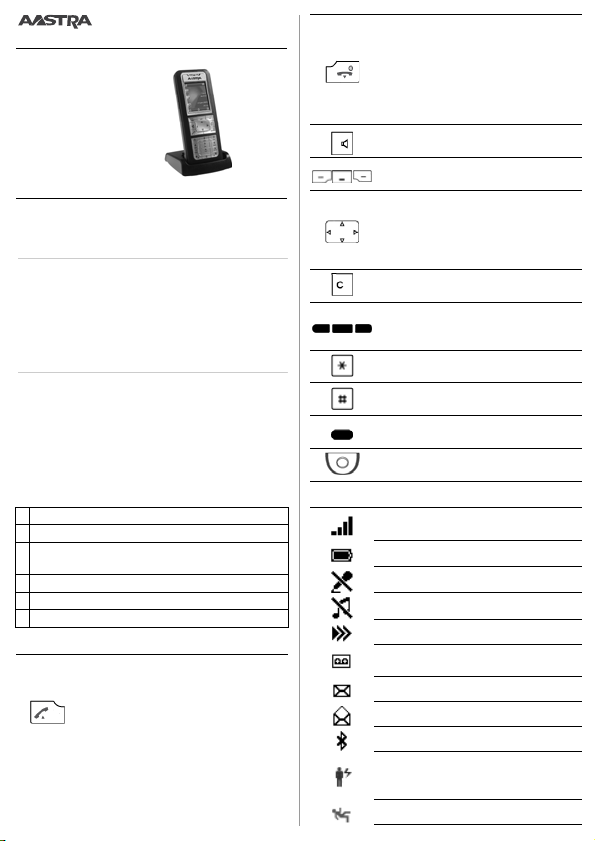
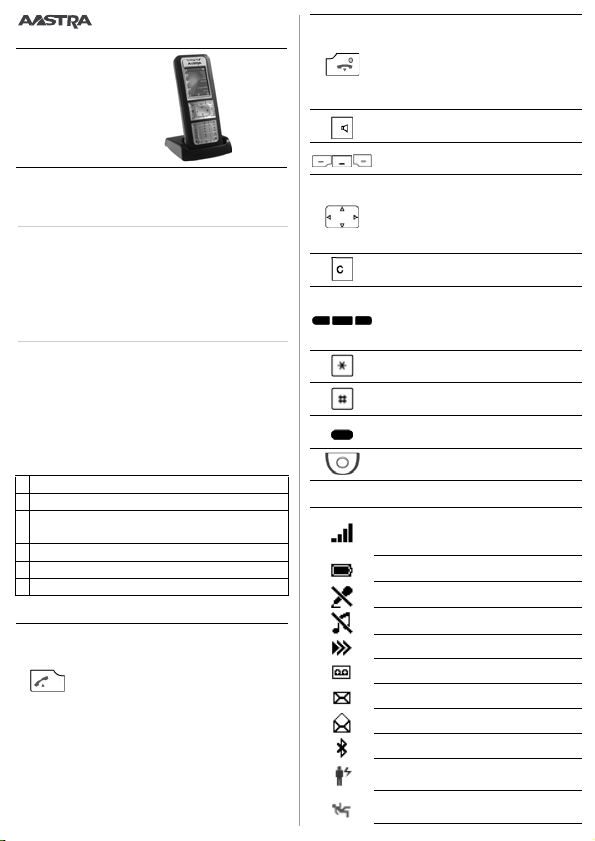
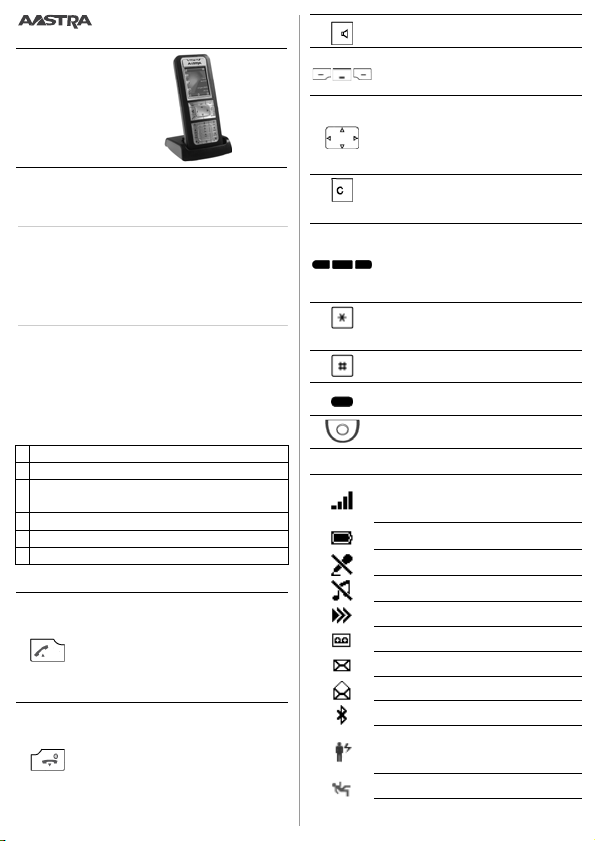
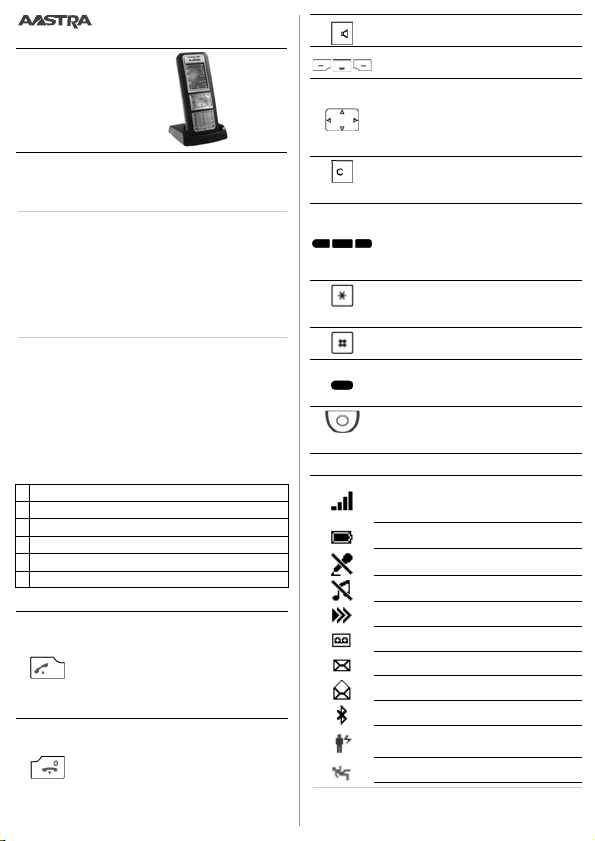
Aastra 630d
Quick User’s Guide
Supported platforms:
Aastra 5000 in DECT TDM as of R5.1A, Aastra 5000 in DECT IP as of R5.1B
Aastra X Series in DECT TDM as of R5.1A, Aastra X Series in DECT IP as of R5.1B
NeXspan in DECT TDM as of R4.2, NeXspan in DECT IP as of R4.2
Aastra 800 as of Rel. 9.0
OpenCom 100 as of Rel. 9.0, OpenCom 1000 as of Rel. 5.0
Aastra 400 Series as of R1.0
Aastra IntelliGate® Series as of I7.8
MX-ONE SIP-DECT as of 4.1 SP1, SP2
eud-1128_xx/1.2 – – 03.2011
Page 2
Aastra 630d
Deutsch
Dokumentbezeichnung
• Dokumentnummer: eud-1128 / 1.2
• Copyright © 03.2011 Aastra Technologies Limited
Allgemeine In formationen
Ihr Gerät wurde mit einer Kurzbedienungsanleitung, mit Sicherheitshinweisen und unter Umständen mit weiteren gerätespezifischen Informationen ausgeliefert. Sie finden diese und weitere Dokumente zu Ihrem Gerät auf www.aastra.com oder ➃: www.aastra.com/docfinder.
Kommunikationssysteme
Ihr Telefon kann an unterschiedlichen Kommunikationssystemen betrieben werden, daher ist die
Handhabung je nach System unterschiedlich.
Die Verfügbarkeit der Funktionen, Merkmale,
Tastenbelegungen und Produkte ist ebenfalls
vom Kommunikationssystem abhängig.
Markieren Sie nachfolgend Ihr Kommunikationssystem:
System
➀ Aastra 5000 ❏, Aastra X Series ❏, NeXspan ❏
Aastra 800 ❏, OpenCom 100 ❏,
➁
OpenCom 1000 ❏
➂ SIP-DECT ❏
➃ Aastra 400 ❏, Aastra IntelliGate® ❏
➄ MX-ONE SIP-DECT ❏
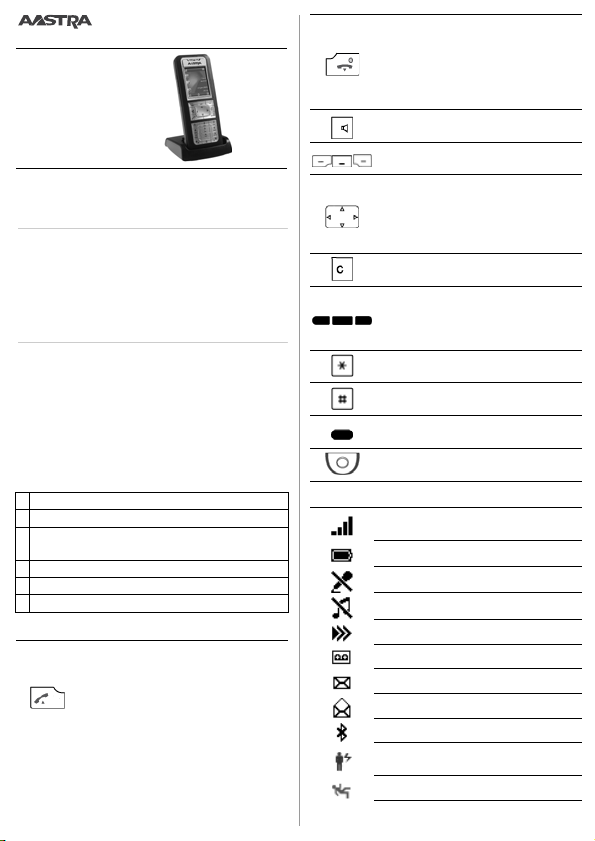
Tas ten
Gesprächstaste:
• Verbindung aufbauen.
• R-Tastenfunktion.
Wahlwiederholungsliste:
• ➀/➁/➂: Gesprächstaste lang drücken.
• ➃: Gesprächstaste drücken.
Beendentaste:
• Verbindung beenden.
• Editor ohne Änderung en verlassen.
• Im Menü: Zurück in Ruhezustand.
• Lang drücken: Telefon ein-/ausschalten.
Lautsprechertaste: Freisprechen ein-/
ausschalten.
Softkeys: Angezeigte Funktion über
der Taste ausführen.
Navigationst asten:
• Im Menü: Vor- und zurückblättern.
• In Listen: Navigieren.
• In Ruhe: Aufruf der belegten Funktionen.
Korrekturtaste: Letztes Zeichen löschen oder im Menü zurückblättern.
Konfigurierbare Seitentasten (links):
• Hörlautstärke der aktuellen Verbindung einstellen.
• Aufruf der konfigurie rten Funktion.
Stern-Taste: Lang drücken, um Tonruf
ein-/auszuschalten.
Raute-Taste: Lang drücken, um Tastensperre einzuschalten.
Konfigurierbare Seitentaste (rechts):
Aufruf der belegten Funktionen.
SOS-Taste (oben): Absetzen eines
Notrufs.
Anzeige-Symb ole (Auswahl)
Qualität der Funkverbindung
(4 Säulen: gut, 1 Säule:schlecht)
Ladezustand der Akkus
Mikrofon ausgeschaltet
Tonruf ausgeschaltet
Weitere Optionen verfügbar
Neue Nachricht in der Voicemailbox
➀/➃: Neue Textnachrichten
➀/➃: Gelesene Textnachrichten
Bluetooth® aktiviert
➀/➁/➂/➄: Sensoralarm aktiviert
➃: Ruhealarm aktiviert
➃: Lagealarm aktiviert
Page 3

Aufmerksamkeits-LED
Grün • Blinkt schnell: Ankommender An-
Rot Blinkt langsam:
ruf, Rückruf.
• Leuchtet: Freisprechen ein.
• ➀/➁/➂/➄: Neue Einträge im Info-Bereich, Wecker/Termin.
• ➃: Neue Voicemail-Nachricht.
Blinkt schnell:
• Ausserhalb der Reichweite des Systems.
• ➀/➁/➂/➄: Sensoralarm.
• ➃: Ruhe- und Lagealarm.
Orange Leuchtet: Akku wird geladen.
Allgemeine Merkmale
• Headset-Anschluss über Kabel oder Bluetooth®
• Mini-USB-Anschluss
• Schutzklasse IP 65 (Staub- und Strahlwassergeschützt)
• Powerakku (optional)
•Eingebauter Alarm-Sensor
Installation
Akku einlegen
Legen Sie den Akku mit den Kontakten nach unten ein, verschließen Sie das Akkufach mit dem
Deckel und verschrauben Sie ihn mit einem geeignetem Werkzeug. Beschädigen Sie beim Zusammenbau nicht die Gummidichtung.
Verb indu ng
• Anruf annehmen: Gesprächstaste drücken.
• Verbindung beenden: Beendentaste drücken.
• Aus Listen (Wahlwiederholung, Anruflisten, Telefonbuch) anrufen: Aufruf abhängig vom
Kommunikationssystem, Eintrag auswählen
und Gesprächstaste drücken.
Telefonbuch/Namenwahl
➀/➁/➂/➄: Navigationstaste nach oben oder unten drücken. Name bzw. Namensanfang eingeben. Gegebenenfalls Eintrag auswählen. Zum
Wählen: Gesprächstaste drücken.
➃: Für die ersten Buchstaben des gesuchten Namens die entsprechenden Tasten je einmal drücken. Vor- und Nachname m it der Rautetaste
trennen, z. B. "no s" (6 6# 7) für Nobel Stefan.
Softkey
ABC
der ausgewählte Eintrag wird angerufen.
drücken. Gesprächstaste drücken,
Während einer Verbindung...
Rückfrage
➀/➁/➄: R und Rufnummer eingeben.
➂: R und Rufnummer eingeben und Raute drü-
cken.
➃: Softkey
cken und Rufnummer eingeben.
Rückfrage beenden
➀: R und 1 [ ] eingeben.
➁/➂: >>> drücken,
Ok
➃/➄: Softkey
Makeln
Zwischen zwei Gesprächspartnern wechseln
ohne die Gesprächsverbindungen abzubrechen.
Sie sind in einem Gespräch:
➀: R und 2 [ ] eingeben.
➁/➂/➄: R drücken.
➃/➄: Softkey
Konferenz einleiten
Mehrere Gesprächspartner zu einem Konferenzgespräch zusammenschalten. Ein Gesprächspartner wird gehalten (siehe "Rückfrage"):
➀/➄: R und 3 [ ] eingeben.
➁: >>> drücken,
mit
➃: Softkey
Konferenz verlassen: Beendentaste drücken.
Verbindung vermitteln
➀/➁/➂/➄: R drücken, Rufnummer eingeben und
Beendentaste drücken.
➃: Softkey
geben und Softkey
Anruf annehmen während eines Gesprächs
(Ank lopfen)
➀: R und Stern 10 [ ] eingeben.
➁/➂: R drücken.
➃: Softkey
Rückruf
Der gewünschte Gesprächspartner ist besetzt
oder antwortet nicht.
➀: R und 5 [ ] eingeben.
➁: >>> drücken,
bestätigen.
➃: Softkey
➄: 6 [ ] drücken.
Rückfrage
oder Gesprächstaste drü-
bestätigen, R drücken.
Ok
bestätigen.
Trennen
Beenden
drücken.
Makeln
drücken.
3’er Konferenz
Konferenz
drücken.
Rückfrage
drücken, Rufnummer ein-
Verbinden
Anklopfen
drücken.
Rückruf
Rückruf
drücken.
auswählen und mit
auswähle n und
drücken.
auswählen und mit Ok
Page 4

Aastra 630d
English
Document Designation
• Document number: eud-1128 / 1.2
• Copyright © 03.2011 Aastra Technologies Limited
General Information
Your device has been supplied with a Quick User’s Guide, safety information and, where applicable, with other device-specific information.
You will find this and other documents for your
device at www.aastra.com or
➃: www.aastra.com/docfinder.
Communication Systems
Your telephone can be used with different communication systems; therefore, the operation differs according to system. The availability of the
functions, feat ures, key assignments and pr oducts
also depends on the communication system.
Mark your communication system as follows:
System
➀ Aastra 5000 ❏, Aastra X Series ❏, NeXspan ❏
Aastra 800 ❏, OpenCom 100 ❏,
➁
OpenCom 1000 ❏
➂ SIP-DECT ❏
➃ Aastra 400 ❏, Aastra IntelliGate® ❏
➄ MX-ONE SIP-DECT ❏
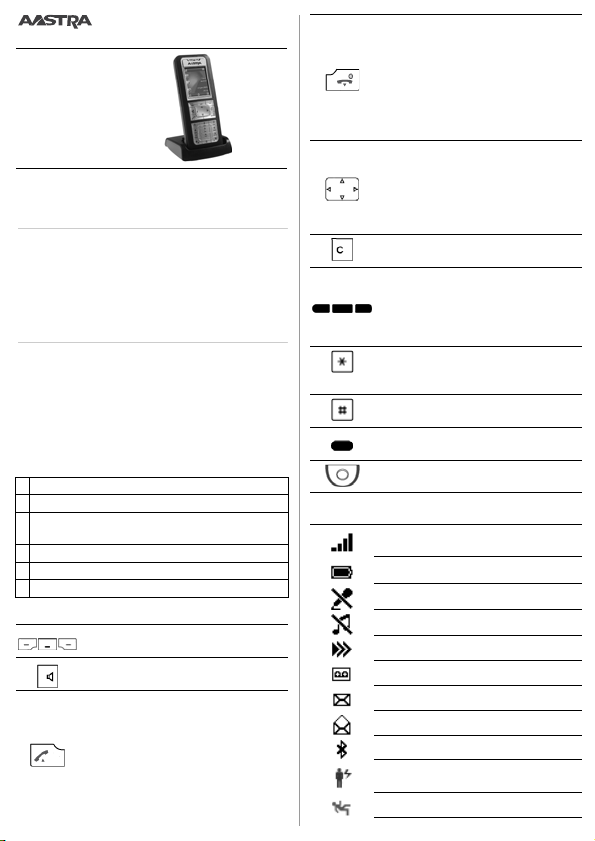
Keys
Call key:
• Set up a connection.
•R-key function.
Redial list:
• ➀/➁/➂: Press and hold down the
Call key.
• ➃: Press the Call key.
End key:
• Cut connection.
• Exit editor without changes.
• In a menu: Back to idle state.
• Press and hold down: Telephone
on/off.
Loudspeaker k ey: Activates/deact ivates hands-free mode.
Softkeys: Executes displayed function above key.
Navigation keys:
• In a menu: Scroll forward and backward.
• In lists: Navigate.
• In idle: Call up stored functions.
Correction key : Deletes the last character or goes back one step in the
menu.
Configurable side keys (on the left):
• Adjust current connection volume.
• Call up configured function.
Star key: Press and hold down to activate/deactivate ring tone.
Hash key: Press and hold down to
lock keypad.
Configurable side key (on the right):
Call up stored functions.
SOS key (on top): Se t off an emergency call.
Display Symbols (select ion)
Radio link quality
(4 signal bars: good, 1 signal bar: bad)
State of cha rge
Microphone off
Ring tone off
More options available
New message in the voice mailbox
➀/➃: New text messages
➀/➃: Read text messages
Bluetooth® activated
➀/➁/➂/➄: Alarm sensor activated
➃: No-movement alarm activated
➃: Man-down alarm activated
Page 5

LED indicator
Green • Flashes fast: Incoming ca ll, enquiry
Red Flashes slowly:
call.
• Lit: Handsfree on.
• ➀/➁/➂/➄: New entries in the info
area, alarm/appointment.
• ➃: New voice mail.
Flashes fast:
• Outside the system’s service area.
• ➀/➁/➂/➄: Alarm sensor.
• ➃: No-movement and man-down
alarm.
Orange Lit: Battery charging.
General Characteristics
• Headset connection via a cable or Bluetooth®
• Mini USB connection
• Protection class IP 65 (dust and water-jet proof)
• Power battery (optional)
• Inbuilt alarm sensor
Installation
Installing th e battery
Insert the battery with the contacts downwards,
close the battery compartment with the cover
and screw them together with an appropriate
tool. Do not damage the rubber seal during assembly.
Connection
• Taking a call: Press the Call key.
• To end the connection: Press the End key.
• To make a call from lists (redial list, call lists,
phone book): Call up depends on the communication system, select an entry, then press the
Call key.
Phone book/Name selection
➀/➁/➂: Press the navigation key upwards or
downwards. Enter name or first letter of the
name. If necessary select entry. To dial: Press the
Call key.
➃: Press each of the corresponding keys on ce for
the first few letters of the name you are looking
for. Separate the first name and the surname
with the #-key, e.g."no s" (6 6 # 7) for Nobel
Stephen. Press the
key; the selected entry is called.
ABC
softkey. Press the Call
During a connection...
Enquiry
➀/➁/➄: Enter R and call number.
➂: Enter R and call number then press hash.
➃: Press the
ter the call number.
To e nd th e en qu ir y ca ll
➀: Enter R and 1 [ ].
➁/➂: Press >>>, select
with
➃/➄: Press the
Brokering
Switches between two callers without interrupting the calls. You are making/taking a call:
➀: Enter R and 2 [ ].
➁/➂/➄: Press R.
➃/➄: Press the
To set up a conference
Connects several callers for a conference call. A
call participant is put on hold (see "Enquiry"):
➀/➄: Enter R and 3 [ ].
➁ : Press >>>, select
➃: Press the
Leaving a conference call: Press the End key.
To set up a connection
➀/➁/➂/➄: Press R, enter call number and press
End key.
➃: Press the
and press the
To take a call during a conversation (Call waiting)
➀: Enter R and Star 10 [ ].
➁/➂: Press R.
➃: Press the
Callback
The person is busy or does not answer.
➀: Enter R and 5 [ ].
➁: Press >>>, select
Ok
➃: Press the
➄: Press 6 [ ].
.
Ok
, press R.
Enquiry
softkey or Call key then en-
Release call
End call
softkey.
Brokering
softkey.
3 party
Conference
Enquiry
Connect
Call waiting
Callback
and confirm with Ok.
softkey.
softkey, enter call number
softkey.
softkey.
Callback
and confirm with
softkey.
and confirm
Page 6
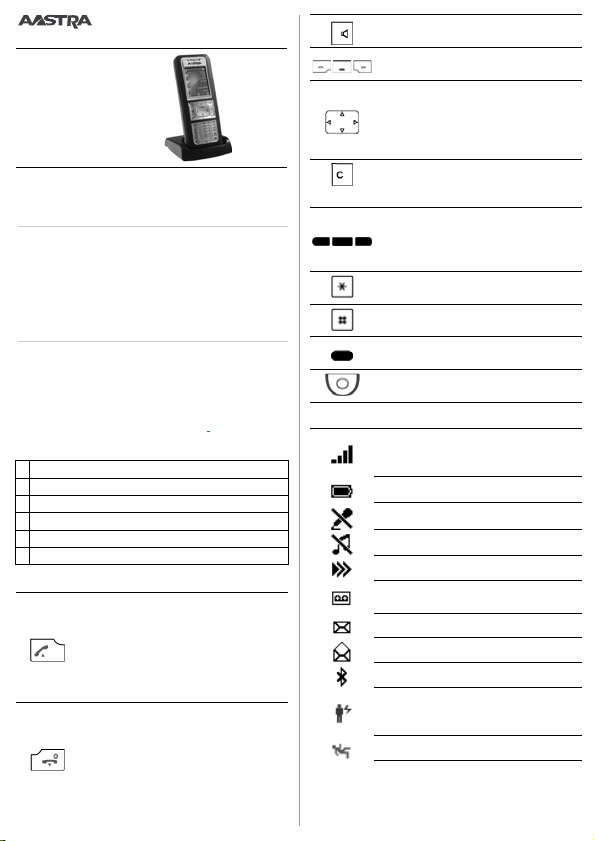
Aastra 630d
Français
Désignation du docum ent
• N° de document: eud-1128 / 1.2
• Copyright © 03.2011 Aastra Technologies Limited
Informations générales
Votre appareil vous a été livré avec un mode d'emploi succinct contenant des indications de sé curité
et, selon les circonstances, d'autres informations
spécifiques à l'appareil. Vous trouverez ce document
ainsi que d'au tres concernant votre appareil sur
www.aastra.com ou
Systèmes de communication
Votre téléphone peut être exploité sur différents
systèmes de communication, raison pour laquelle son utilisation est différente selon le système.
La disponibilité des fonctions, caractéristiques,
affectations de touches et produits dépend également du système de communication.
ci-après votre système de communication :
Système
➀ Aastra 5000 ❏, Aastra X Series ❏, NeXspan ❏
Aastra 800 ❏, OpenCom 100 ❏,
➁
OpenCom 1000 ❏
➂ SIP-DECT ❏
➃ Aastra 400 ❏, Aastra IntelliGate® ❏
➄ MX-ONE SIP-DECT ❏
Tou c he s
: www.aastra.com/docf inder.
Coche z
Touches afficheur : Exécuter la fonction affichée à l'aide de la touche.
Touche de haut-parleur : Activer/désactiver le mode mains libres.
Touche de prise de ligne :
• Etablir la communication.
• Touche de fonction R.
Liste de répétition de la numérotation :
• ➀/➁/➂: Appuyer longuement sur
la touche de prise de ligne.
• ➃: Appuyer sur la touche de prise
de ligne.
Touche de fin :
• Fin de l'appel.
• Quitter l'éditeur de texte sans effectuer de modifications.
• Dans le menu : Retour à l'état de repos.
• Appuyer longuement : Activer/désactiver le téléphone.
Touches de navigation :
• Dans le menu : Défiler en avant et
en arrière.
• Dans des listes : Naviguer.
• Au repos : Appels des fonctions affectées.
Touche de correction : Effacer le dernier caractère ou rec uler dans le menu.
Touches latérales configurables (à
gauche) :
• Régler le volume d'écoute de la
communication en cours.
• Appel de la fonction configurée.
Touche Etoile : Appuyer longuement
pour activer/d ésactiver la tonalité de
sonnerie.
Touche Dièse : Appuyer longuemen t
pour activer le verrouillage des touches.
Touche latérale configurable (à droite) : Appels des fonctions affectées.
Touche SOS (en haut) : Envoi d'un appel d'urgence.
Symboles d’affichage (sélection)
Qualité de la liaison radio
(4 colonnes : bon, 1 col onne : mauvais)
Etat de charge des accus
Microphone désactivé
Tonalité de sonnerie désactivée
Autres options disponibles
Nouveau message dans la boîte vocale
➀/➃: Nouveaux messages textuels
➀/➃: Messages textuels lus
Bluetooth® activé
➀/➁/➂/➄: Alarme de capteur activée
➃: Alarme d'immobilité activée
➃: Alarme d’homme à terre activée
Page 7

LED d'avertissem ent
Ver t • Clignote rapidement : Appel en-
Rouge Clignote lentement :
trant, rappel.
• Allumé : Mains libres activé.
• ➀/➁/➂/➄: Nouvelles entrées dans
la zone Info, réveil/rendez-vous.
• ➃: Nouvelle messages vocaux.
Clignote rapidement :
• Hors de portée du système.
•➀/➁/➂/➄: Alarme de capteur activée
•➃: Alarme Immobilité et Homme à terre.
Orange Allumé : Accu en phase de recharge.
Caractéristiques générales
• Raccordeme nt du casque par câble ou Bluetooth®
• Mini connecteur USB
• Classe de protection IP 65 (protection contre la
poussière et les projections d'eau)
• Accumulateur haute performance (en option)
• Capteur d'alarme intégré
Installation
Insérer l'accu
Insérez l'accumulateur avec les contacts vers le
bas, refermez le compartiment de l'accumulateur
avec le couvercle et revissez-le avec un outil approprié. Veillez à ne pas endommager le joint en
caoutchouc lors de l'assemblage.
Appels
• Prise d'un appel : Appuyer sur la touche de prise de ligne.
• Fin de l'appel : Appuyer sur la touche de fin.
• Emettre un appel depuis une liste (répétition
de la numérotation, listes d'appels, annuaire
téléphonique) : Appel dépendant du système
de communication, sélectionner l'entrée et actionner la touche de prise de ligne.
Annuaire téléphon./numérotation par le nom
➀/➁/➂/➄
: Appuyer sur la touche de navigation vers
le haut ou vers le bas. Entrer le nomou le début du
nom. Le cas échéa nt, sélectionner l'e ntrée. Pour numéroter : Appuyer sur la touche de prise de ligne.
➃: Pour les premières lettres du nom recherché,
appuyer une fois sur chaque touche correspondante. Séparer le prénom et le nom avec la touche Dièse, p. ex. "no s" (6 6 #7) pour Nobel Stefan. Actionner la touche afficheur
sur la touche de prise de ligne, l'entrée sélection-
ABC
. Appuyer
née est appelée.
Pendant une communication...
Double-appel
➀/➁/➄: Entrer R et le numéro d'appel.
➂: Entrer R et le numéro d'appel et actionner la
touche Dièse.
➃: Actionner la touche afficheur
appuyer sur la touche de prise de ligne et entrer
le numéro d'appel.
Terminer le double-appel
➀: Entrer R et 1 [ ].
➁/➂: Actionner >>>, choisir
confirmer avec
➃/➄: Actionner la touche afficheur
Va-e t-v ient
Commuter entre deux interlocuteurs sans interrompre
les communications. Vous êtes en communication :
➀: Entrer R et 2 [ ].
➁/➂/➄: Actionner R.
➃/➄: Actionner la touche afficheur
Engager une conférence
Connecter plusieurs interlocuteurs entre eux
pour établir une conférence. Un interlocuteur est
en maintien (voir "Double-appel") :
➀/➄: Entrer R et 3 [ ].
➁: Actionner >>>, choisir
confirmer avec
➃: Actionner la touche afficheur
Quitter la conférence: Appuyer sur la touche de fin.
Commuter une communication
➀/➁/➂/➄: Actionner R, entrer le numéro d'appel
et actionner la touche de fin.
➃: Actionner la touche afficheur
entrer le numéro d'appel et appuyer sur la touche programmable
Accepter un appel pendant une conversation
(Appel en attente)
➀: R et entrer Etoile 10 [ ].
➁/➂: Actionner R.
➃: Actionner la touche afficheur
Rappel
L'interlocuteur sou haité est occupé ou ne répond
pas.
➀: Entrer R et 5 [ ].
➁: Actionner >>>, choisir
avec
➃: Actionner la touche afficheur
➄: Actionner 6 [ ].
Ok
, actionner R.
Ok
.
Connecter
Ok
.
Double-appel
Déconnecter
Terminer
Va-et-vient
Conférence à 3
Conférence
Double-appel
.
Signal d'appel
Rappel
et confirmer
Rappel
ou
et
.
.
et
.
,
.
.
Page 8
Aastra 630d
Italiano
Denominazione documento
• Numero di documento: eud-1128 / 1.2
• Copyright © 03.2011 Aastra Technologies Limited
Informazioni generali
Il vostro apparecchio viene fornito con un a guida
rapida, con norme di sicurezza e a seconda dei
casi, con ulteriori informazioni specifiche dell'apparecchio. Potete trovare questo e altri documenti relativi al vostro apparecchio su www.aastra.com oppure ➃: www.aastra.com/docfinder.
Sistemi di comunicazione
Il vostro telefono può esse re collegato a sistemi di
comunicazione diversi, quindi l'utilizzo può ess ere
diverso a seconda del sistema. Anche l e funzioni, le
caratteristiche, i tasti assegnati ed i prodotti dipendono dal sistema di comunicazione.
seguito il proprio sistema di comunicazione:
Sistema
➀ Aastra 5000 ❏, Aastra X Series ❏, NeXspan ❏
Aastra 800 ❏, OpenCom 100 ❏, OpenCom 1000
➁
➂ SIP-DECT ❏
➃ Aastra 400 ❏, Aastra IntelliGate® ❏
➄ MX-ONE SIP-DECT ❏
Tas ti
Tasto Conversazione:
• Stabilire il collegamento.
• Funzione del tasto R.
Lista riselezione:
• ➀/➁/➂: Premere a lungo il tasto
Conversazione.
• ➃: Premere il tasto Conversazione.
Tas to Fi ne:
• Concludere la chiamata.
• Uscire dall'editor senza apportare
modifiche.
• Nel menu: Per ritornare allo stato riposo.
• Premere a lungo: Attivaz ione/disattivazione telefono.
Selezionare di
Tasto Altoparlante: Attivazione/disattivazione viva-voce.
Softkeys: Eseguire tramite il tasto la
funzione visualizzata.
Tas ti di n aviga zio ne:
• Nel menu: Avanti/Indietro.
• Negli elenchi: Spostarsi.
•Non disturbare: Richiamare le funzioni assegnate.
Tasto di Correzione: Cancellare l’ultimo carattere o tornare indietro nel
menu.
Tasti laterali configurabili (a sinistra):
• Regolazione del volum e del collegamento attuale.
• Richiamare la funzione configurata.
Tasto asterisco: Premere a lungo per
attivare/disattivare la su oneria.
Tasto cancelletto: Premere a lungo
per attivare il blocco tastiera.
Tasto laterale configurabile (a destra ):
Richiamare le funzioni assegnate.
Tasto SOS (in alto): Inviare una chiamata di emergenza.
Simboli del display (Selezi one)
Qualità collegamento radio
(4 colonne: buono, 1
colonna: cattivo)
❏
Stato di carica delle batterie
Microfono spento
Suoneria disattivata
Altre opzioni disponibili
Nuovo messaggio nella Voi-
ce-Mail-Box
➀/➃: Nuovi messaggi di testo
➀/➃: Messaggi di testo già letti
Bluetooth® attivato
➀/➁/➂/➄: Allarme sensore attivato
➃: Allarme di assenza movimento at-
tivato
➃: Allarme di posizione attivato
Page 9

LED di Attenzione
Verd e • Lampeggio veloce: Chiamata in ar-
Rosso Lampeggio lento:
rivo, Prenotazione automatica.
• Acceso: Viva-voce attivato.
•➀/➁/➂/➄: Nuove voci nella sezione
informazioni, sveglia/appuntamenti.
• ➃: Nuova Voice Mail.
Lampeggio veloce:
• Fuori copertura del sistema.
• ➀/➁/➂/➄: Allarme sens ore.
• ➃: Allarme di assenza movimento e
di posizione.
Arancione Acceso: Batteria in carica.
Caratteristiche generali
• Collegamento cuffia via cavo oppure Bluetooth
• Collegamento Mini-USB
• Classe di protezione IP 65 (protetto contro la
polvere e contro gli spruzzi d'acqua)
• Batteria (opzionale)
• Sensore allarme incorporato
Installazione
Inserire la batteria
Inserire la batteria con i contatti verso il basso,
chiudere il vano batteria con il coperchio e fissarlo con le viti, utilizzando un attrezzo adeguato.
Durante il montaggio non danneggiare la guarnizione in gomma.
Connessione
• Rispondere ad una chiamata: Premere il tasto
Conversazione.
• Concludere la chiamata: Premere il tasto Fine.
• Effettuare una chiamata da un elenco (ripetizione della selezione, lista chiamate, rubrica):
Chiamata dipe ndente dal sistema di comunica zione, selezionare una voce e premere il tasto
Conversazione.
Rubrica/Selezione nome
➀/➁/➂/➄
: Premere il tasto di spostamento verso
l'alto o verso il basso. Inserire il nome oppure l'iniziale del nome. Eventualmente selezionare una voce. Per selezionare: Premere il tasto Conversazione.
➃: Per le iniziali del nome cercato premere una
sola volta i tasti corrispon denti. Separare il nom e
e il cognome con il tasto cancelletto (#), ad
es."ro m" (7 7 7 # 6) per Rossi Mario. Premere il
softkey
ABC
. Premere il tasto Conversazione, vie-
ne chiamata la voce corrispondente.
Durante un collegam ento ...
Richiamata
➀/➁/➄: Inserire R e il numero di chiamata.
➂: Inserire R e il numero di chiamata e premere il
tasto cancelletto.
➃: Premere il softkey
conversazione e inserire il numero di chiamata.
Per chiudere la richiamata
➀: Inserire R e 1 [ ].
➁/➂: Premere >>>, selezionare
confermare con
➃/➄: Premere il softkey
Richiamata alternata
Per parlare con due interlocutori alternativamen-
®
te senza interrompere le conversazioni. Si sta effettuando una conversazione:
➀: Inserire R e 2 [ ].
➁/➂/➄: Premere R.
➃/➄: Premere il softkey
Avviare una conferenza
È possibile tenere attivi diversi interlocutori per
eseguire una conferenza. Un interlocutore viene
tenuto in attesa (vedi "Richiamata"):
➀/➄: Inserire R e 3 [ ].
➁: Premere >>>, selezionare
confermare con
➃: Premere il softkey
Per concludere la conferenza: Premere il tasto Fine.
Tra sfer ire la c hia mat a
➀/➁/➂/➄: Premere R, inserire il numero di chiamata e premere il tasto Fine.
➃: Premere il softkey
mero di chiamata e premere il softkey
Rispondere ad un a chiamata durante una conversazione (avvi so di chiamata in coda)
➀: Inserire R e asterisco 10 [ ].
➁/➂: Premere R.
➃: Premere il softkey
Prenotazione automatica
L'interlocutore desiderato è occupato oppure
non risponde.
➀: Inserire R e 5 [ ].
➁: Premere >>>, selezionare
matica
e confermare con Ok.
➃: Premere il softkey
➄: Premere 6 [ ].
Richiamata
Ok
, premere R.
Ok
.
Conferenza
Richiamata
Avviso di chiamata
Prenotazione automatica
oppure il tasto
Disconnetti
Termina
.
Richiamata alternata
Conferenza a 3
.
, inserire il nu-
Prenotazione auto-
e
Connetti
.
.
e
.
.
Page 10
Aastra 630d
Español
Designación del documento
• N° de documento:eud-1128 / 1.2
• Copyright © 03.2011 Aastra Technologies Limited
Información general
Su aparato le ha s ido suministrado con la informacíón de seguridad, una Guía rápida y según las circunstancias con otras informaciones específicas
para este aparato en particular. Encontrará éste y
otros documentos para su dispositivo en
www.aastra.com o
Sistemas de comunicac ión
Usted puede usar su teléfono con diferentes sistemas de comunicación; por eso, el modo de
operación varía según el sistema. La disponibilidad de funciones, características, asignaciones
de teclas y produc tos también depende de l sistema de comunicación.
Marque su sistema de comunicación como se indica a continuación:
Sistema
➀ Aastra 5000 ❏, Aastra X Series ❏, NeXspan ❏
Aastra 800 ❏, OpenCom 100 ❏,
➁
OpenCom 1000 ❏
➂ SIP-DECT ❏
➃ Aastra 400 ❏, Aastra IntelliGate® ❏
➄ MX-ONE SIP-DECT ❏
Tec l as
➃
: www.aastra.com/docfinder.
Tecla de Llamada:
•Establecer una conexión.
• Función tecla R.
Lista de rellamadas:
• ➀/➁/➂: Pulsar y mantener apretada la tecla de llamada.
• ➃: Pulsar la tecla de Llamada.
Tecla Terminar:
• Finalizar una llamada.
• Salir del editor sin modificaciones.
• En el menú: Volver al estado de reposo.
• Mantener pulsada la tecla: Encender / apagar el teléfono.
Tecla de altavoz: Activar / desactivar
el modo Manos libres.
Teclas programables: Se ejecuta la
función visualizada al pulsar la tecla.
Teclas de navegación:
• En el menú: Desplazamiento por la
pantalla hacia delante y atrás.
•En listas: Navegación.
• En reposo: Selección de funciones
almacenadas.
Tecla de corrección: Borra el últi mo carácter o retroced e un nivel en el menú.
Teclas laterales configurables (a la izquierda):
• Ajuste del volumen de la conexión
activa.
• Selección de l a función configurada.
Tecla asterisco: Mantener pulsada
para activar / desactivar el timbre de
llamada.
Tecla almohadilla: Mantener pulsada
para bloquear el teclado.
Tecla laterale configurable (a la derecha): Selección de funciones almacenadas.
Tecla SOS (arriba): Desactivar una llamada SOS.
Símbolos de la pantalla (selección)
Calidad de la conexión de radio
(4 barras: buena, 1 barra:mala)
Estado de carga
Micrófono desactivado
Timbre de llamada desactivado
Otras opciones disponibles
Nuevo mensaje vocal
➀/➃: Nuevos mensajes de texto
➀/➃: Leer mensajes de texto
Bluetooth® activado
Page 11
➀/➁/➂/➄: Sensor de alarma activado
➃: Alarma sin movimiento activada
➃
: Alarma detector de posición activada
Indicador LED
Verd e • Parpadea rápidamente: Llamada
Rojo Parpadea lentamente:
entrante, cons ulta.
• Encendido: Manos libres activada.
• ➀/➁/➂/➄: Nuevas entradas en el
área de información, alarma/cita.
• ➃: Nuevo mensaje vocal.
Parpadea rápidamente:
• Fuera del área de cober tura del sistema.
• ➀/➁/➂/➄: Sensor de alarma.
• ➃: Alarma sin movimiento y de detector de posición.
Naranja Encendido: Cargand o batería.
Características generales
• Conexión de los cascos con un cable o Bluetooth
• Toma mini-USB
• Clase de protección IP 65 (impermeable al polvo y al agua)
• Batería de altas prestaciones (opcional)
• Sensor de alarma integrado
Instalación
Colocación de la batería
Introduzca la batería con los contactos hacia abajo, cierre el compartimento con la tapa y fíjela
con una herramienta apropiada. Evite dañar la
junta de goma durante la colocación.
Conexió n
• Atender una llamada: Pulsar la tecla de Llamada.
• Terminar la llamada: Pulsar la tecla terminar.
• Hacer una llamada a partir de una lista (rellamada, listas de llamadas, directorio): La llamada depende del sistema de comunicación. Seleccionar una entrada y pulsar después la tecla
de llamada.
Agenda / selección de nom bres
➀/➁/➂/➄: Pulsar la tecla de navegación hacia
arriba o hacia abajo. Entrar el nombre o la inicial
del nombre. Dado el c aso, seleccionar la entra da.
Marcar: Pulsar la tecla de Llamada.
➃: Pulsar una vez cada tecla correspondiente a
los primeros caracteres del nombre que está buscando. Separar el nombre y el apellido con la tecla #, por ejemplo "no s" (6 6 # 7) para Nobel Ste-
phen. Pulsar la tecla programable
tecla de llamada. El teléfono llama al núm ero de
la entrada seleccionada.
ABC
Durante una llamada...
Consul ta
➀/➁/➄: Introducir R y el número de llamada.
➂: Introducir R y el número de llamada y pulsar
después la tecla almohadilla.
➃: Pulsar la tecla prog ramable
de llamada y marcar después el número.
Terminar la llamada de consulta
➀: Introducir R y 1 [ ].
➁/➂: Pulsar >>>, seleccionar
firmar con
➃/➄: Pulsar la tecla programable
Alternancia de Llamadas
Conmuta entre dos interlocutores sin interrumpir las llamadas. Está efectuando o atendiendo
una llamada:
®
➀: Introducir R y 2 [ ].
➁/➂/➄: Pulsar R.
➃/➄: Pulsar la tecla programable
Hacer una llamada de conferencia
Conecta a varios llamantes en una conferenc ia. Un
participante está en espera (véase "Consulta"):
➀/➄: Introducir R y 3 [ ].
➁: Pulsar >>>, seleccionar
firmar con
➃: Pulsar la tecla programable
Para abandonar una conferencia: Pulsar la tecla
terminar.
Establecer una conexión
➀/➁/➂/➄: Pulsar R, introduzca el número y pulsar la tecla Terminar.
➃: Pulsar la tecla programable
número y pulsar la tecla programable
Atender una llamada durante una conversación (Llamada en e spera)
➀: Introducir R y asterisco 10 [ ].
➁/➂: Pulsar R.
➃: Pulsar la tecla programable
Retrollamada
El usuario está ocupado o no responde.
➀: Introducir R y 5 [ ].
➁: Pulsar >>>, seleccionar
con
➃: Pulsar la tecla programable
➄: Pulsar 6 [ ].
Ok
, Pulsar R.
Ok
.
Ok
.
Consulta
Desconectar
Terminar
Alternancia
Conferencia a 3
Conferencia
Consulta
Llamada espera
Rellamada
Retrollamada
. Pulsar la
o la tecla
y con-
.
.
y con-
.
, marcar el
Conectar
.
y confirmar
.
.
Page 12
Aastra 630d
Português
Designação do docum ento
• N° do documento: eud-1128 / 1.2
• Copyright © 03.2011 Aastra Technologies Limited
Informações gerais
O seu equipamento foi forn ecido com um Manual
de Utilização Rápida, Informação de Segurança e,
onde for aplicável, com outras informações sobre
o equipamento especí ficas. Encontra este e outros
documentos para o seu aparelho em www.aastra.com ou
Sistemas de comunicaç ão
Este telefone pode ser usado com diferentes sistemas de comunicações, pelo que o funcionamento difere segundo o sistema. A disponibilidade das funções, características, atribuições de teclas e de produtos também depende do sistema
de comunicação.
Marcar o siste ma de comunicação como se seg ue:
Tec l as
➃
: www.aastra.com/ docfinder.
Sistema
➀ Aastra 5000 ❏, Aastra X Series ❏, NeXspan ❏
Aastra 800 ❏, OpenCom 100 ❏,
➁
OpenCom 1000 ❏
➂ SIP-DECT ❏
➃ Aastra 400 ❏, Aastra IntelliGate® ❏
➄ MX-ONE SIP-DECT ❏
Tecla de Chamar:
• Fazer uma ligação.
• Função da tecla R.
Lista de repetição:
• ➀/➁/➂: Pressionar e manter a tecla
de chamada.
• ➃: Pressionar a tecla de chamada.
Tecla Terminar:
•Cortar ligação.
• Sair do editor sem alterações.
• No menu: Regressar ao estado
inactivo.
• Manter premido: Ligar / desligar telefone.
Tecla de Altifalante: Activa/desactiva
modo de mãos livres.
Softkeys: Executam a função mostrada acima da tecla.
Tec las de naveg açã o:
• No menu: Avançar e recuar.
•Em listas: Navegar.
• Em desactivado: Chamar funções
em memória.
Tecla de correcção: Elimina o último
caractere e recua um passo no menu.
Teclas laterais configuráveis (à esq.):
• Regular volume da ligação.
• Chamar função configurada.
Tecla Asterisco: Pressionar e manter
para activar/desac tivar o som.
Tecla Cardinal: Pressionar e manter
para bloquear o teclado.
Tecla lateral configurável (à dir.): Chamar funções em memória.
Tecla SOS (em cima): Enviar chamada
de emergência.
Mostrar símbolos (selecção)
Qualidade da rede
(4 barras: boa, 1 barra:má)
Carga
Microfone desligado
Som desligado
Mais opções disponíveis
Novas mensagens na caixa de Voice
Mail
➀/➃: Novas mensagens de texto
➀/➃: Ler mensagens de texto
Bluetooth® activada
➀/➁/➂/➄: Sensor de alarme activado
➃: Alarme de nenhum movimento
activado
➃: Alarme de homem caído activado
Page 13

Indicações do LED
Verd e • Pisca rapidamente: Chamada rece-
Verm elh o Pisca lentamente:
bida, chamada de pedido.
•Aceso: Mãos livres ligado.
•
➀/➁/➂/➄: Novas entradas na área de
informação, alarme/marcar encontro.
• ➃: Nova mensagem d e voz.
Pisca rapidamente:
• Fora da área de serviço do sistema.
• ➀/➁/➂/➄: Sensor de alarme.
• ➃: Alarme de nenhum movimento
e de homem caído.
Laranja Aceso: Bateria a carregar.
Características gerais
• Ligação de auriculares por cabo ou Bluetooth®
• Mini ligação USB
• Classe de protecção IP 65 (impermeável ao pó
e a borrifos de água)
• Bateria de corrente (opção)
• Sensor de alarme incorporado
Instalação
Instalação da bateria
Instalar a bateria com os contactos para baixo, fechar o compartimento da bateria com a tampa e
aparafusar com uma ferramenta apropriada.
Não danificar o vedante de borracha durante a
montagem.
Ligação
• Receber chamadas: Pressionar a tecla de chamada.
• Terminar a ligação: Premir a tecla Terminar.
• Para fazer uma chamada a partir de listas (lista
de remarcação, listas de chamadas, lista telefónica): A chamada depende do sistema de comunicação; seleccionar um número e pressionar a tecla de chamada.
Lista telefónica/Selecção de nomes
➀/➁/➂/➄: Pressionar a tecla de navegação para
cima ou para baixo. Escrever o no me ou a primeira letra do no me. Se necessá rio, seleccionar a marcação. Para marcar: Pressionar a tecla de chamada.
➃: Pressionar uma vez cada uma das teclas correspondentes às primeiras letras do nome pretendido. Separar o nome próprio do apelido com
a tecla #, p.ex."no s" (6 6 # 7) para Nobel Stephen. Prima a tecla Softkey
cla de chamada; é feita a ligação para a marcação
ABC
. Pressionar a te-
seleccionada.
Durante uma ligação...
Consul ta
➀/➁/➄: Marcar R e o número a ligar.
➂
: Marcar R, o núm ero a ligar e pressionar c ardinal.
➃: Pressionar a softkey
chamada e a seguir marcar o número a ligar.
Para terminar a cha mada de consulta
➀: Marcar R e 1 [ ].
➁/➂: Pressionar >>>, seleccionar
confirmar com
➃/➄: Pressionar a softkey
Comutaç ão
Comutar entre dois interlocutores sem interrupção das chamadas. Está a fazer/receber uma chamada:
➀: Marcar R e 2 [ ].
➁/➂/➄: Pressionar R.
➃/➄: Pressionar a softkey
Para estabelecer uma conferência
Liga vários interlocutores numa conferência de
chamadas. Um participante da chamada é colocado em espera (ver "Consulta"):
➀/➄: Marcar R e 3 [ ].
➁: Pressionar >>>, seleccionar
confirmar com
➃: Pressionar a softkey
Abandonar Chamada de conferência: Premir a tecla Terminar.
Para estabelecer uma liga ção
➀/➁/➂/➄: Pressionar R, marcar o número e pressionar a tecla de finalizar.
➃: Pressionar a softkey
ro e pressionar a softkey
Para atender uma chama da durante uma chamada (Chamada em espera)
➀: Marcar R e asterisco 10 [ ].
➁/➂: Pressionar R.
➃: Pressionar a softkey
Rechamada
Essa pessoa está ocupada ou não atende.
➀: Marcar R e 5 [ ].
➁: Pressionar >>>, seleccionar
e confirmar com
➃: Pressionar a softkey
➄: Pressionar 6 [ ].
Consulta
Ok
, pressionar R.
Ok
.
Conferência
Consulta
Ligar
Chamada em espera
Ok
.
Rechamar
ou a tecla de
Desconectar
Terminar
.
Comutação
Conferência a 3
, marcar o núme-
.
Chamada d e vo lta
.
e
.
.
.
e
Page 14

Aastra 630d
Nederlands
Document toepas sing
• Documentnummer: eud-1128 / 1.2
• Copyright © 03.2011 Aastra Technologies Limited
Algemene informatie
Uw apparaat werd voorzien van een Verkorte gebruiksaanwijzing, veiligheidsinformatie e n, in geval van toepassing, met andere apparaat-specifieke informatie. U vindt deze en andere documenten voor uw toestel op www.aastra.com of
➃: www.aastra.com/docfinder.
Communicatiesystemen
Uw telefoon ka n worden gebruikt met vers chillende
communicatiesystemen; daarom verschilt de werking
per systeem. De beschikbaarheid van functies, mogelijkhede n, toetstoewijzingen e n producten is eveneens afhankelijk van het communicatiesysteem. Identificeer uw communicatiesysteem als volgt:
Systeem
➀ Aastra 5000 ❏, Aastra X Series ❏, NeXspan ❏
Aastra 800 ❏, OpenCom 100 ❏, OpenCom 1000
➁
➂ SIP-DECT ❏
➃ Aastra 400 ❏, Aastra IntelliGate® ❏
➄ MX-ONE SIP-DECT ❏
Toe t se n bo r d
Oproep toets:
• Een verbinding tot stand brengen.
•R-toetsfunctie.
Oproepherhaling:
• ➀/➁/➂: Druk de oproeptoets in en
houd deze vast.
• ➃: Druk op de Oproeptoets.
End-toets:
• Verbinding verbreken.
• Annuleren zonder wijzigingen.
• Tijdens een menu: Terug naar rustsituatie.
• Drukken en ingedrukt houden: Telefoon aan/uit.
Luidspreker toets: Handsfreemodus
activeren/deactiveren.
Softkeys: Voert de boven de toets
weergegeven functie uit.
Navigatietoetsen:
• Tijdens een menu: Vooruit en terugschuiven.
• In lijsten: Navigeren.
• In rust: Opgeslagen functies oproepen.
Correctietoets: Wist het laatste karakter o f gaat één s tap te rug in de men u.
Configureerbare zijtoetsen (aan de
linkerkant):
• Huidig verbindingsvolume aanpassen.
• Geconfigureerde functie oproepen.
Stertoets: I ndrukken en vasthoude n
om ringtone te activeren/deactiveren.
Hekje-toets: Indrukken en vasthouden om toetsenbord te vergrendelen.
Configureerbare zijtoets (aan de
rechterkant): Opgeslagen functies
oproepen.
SOS-toets (bovenaan): Een noodop-
❏
Displaysymbolen (sel ectie)
roep initiëren.
Kwaliteit verbinding
(4 signaalbalken: goed, 1 signaalbalk:
slecht)
Status batterij capaciteit
Microfoon uit
Ringtone uit
Meer opties beschikbaar
Nieuw bericht in voicemailbox
➀/➃: Nieuwe tekstberichten
➀/➃: Tekstberichten lezen
Bluetooth® geactiveerd
Page 15

➀/➁/➂/➄: Alarmsensor geactiveerd
➃: Bewegingsalarm geactiveerd
➃: Man- down alarm geac tiveerd
LED indicatie s
Groen • Knippert snel: Inkomende oproep,
Rood Knippert langzaam:
ruggespraak.
• Continue: Handsfree aan.
• ➀/➁/➂/➄: Nieuwe gegevens in info, alarm/afspraak.
• ➃: Nieuwe voicemail.
Knippert snel:
• Buiten bereik van provider.
• ➀/➁/➂/➄: Alarmsens or.
•➃: Bewegings- en ma n-down alarm.
Oranje Continue: Accu opladen.
Algemene kenmerken
• Headsetaansluiting via kabel of Bluetooth®
• Mini-USB-aansluiting
• Beschermingsklasse IP 65 (stof- en waterdruppelbestendig)
• Accu (optioneel)
• Ingebouwde alarmsensor
Installeren
Vervangen van de accu
Plaats de accu met de contacten omlaag. Sluit het
accuvak met de deksel en maak de schroeven vast
met gesc hikt gereeds chap. Pas op dat u de rubber
afdichting tijdens het plaatsen ni et beschadigt.
Verb indi ng
• Een gesprek aannemen: Druk op de Oproeptoets.
• Om de verbinding te verbreken: Druk op de
End-toets.
• Om een gesprek vanuit de lijst te starten (oproepherhaling, oproeplijsten, telefoonboek):
Opbellen is afhankelijk van het communicatiesysteem. Selecteer een onderdeel en druk vervolgens op de oproeptoets.
Telefoonboek/naamselec tie
➀/➁/➂/➄: Druk de navigatietoets omhoog of
omlaag. Voer de naam of de eerste letter van de
naam in. Selecteer indien nodig een onderdeel.
Om te kiezen: Druk op de Oproeptoets.
➃: Druk op de overeenkomstige toetsen, telkens
één keer, voor de eerste paar letters. De achternaam en de voornaam moeten gescheiden zijn
door een spatie (# toets), bijvoorbeeld "no s"
(6 6 # 7) voor Noble Stephen. Druk op de soft key
ABC
. Druk op de Oproeptoets en het gekozen
contact wordt gebeld.
Tijde ns een ve rbinding ...
Ruggespraak
➀/➁/➄: Voer R en het te bellen nummer in.
➂: Voer R en het te bellen nummer in en druk op
hekje.
➃: Druk op de softkey
roeptoets en voer het te bellen nummer in.
Om de ruggespraa kverbinding te verbreken
➀: Voer R en 1 [ ] in.
➁/➂: Druk op >>>, kies
vestig me t
➃/➄: Druk op de softkey
Pende len
Tussen twee bellers wisselen zonder de oproepen te onderbreken. U bent aan de lijn / een gesprek aan het voeren:
➀: Voer R en 2 [ ] in.
➁/➂/➄: Druk op R.
➃/➄: Druk op de softkey
Een conferentie-o proep opbouwen
Conferentiegesprek met meerdere gebruikers.
Een gesprekspartner wordt in de wacht gezet
(zie "Ruggespraak"):
➀/➄: Voer R en 3 [ ] in.
➁
➃: Druk op de softkey
Hoe verlaat ik een conferentiegesprek: Druk op
de End-toets.
Een verbinding tot stand brengen
➀/➁/➂/➄: Dr uk op R, voer het te bellen num mer
in en druk op de End-toets.
➃
bellen nummer in en druk op de softkey
Een oproep aannemen tijdens een gesprek
(oproep in wacht)
➀: Voer R en sterretje 10 [ ] in.
➁/➂: Druk op R.
➃: Druk op de softkey
Ter u gb e ll e n
De persoon is bezet of antwoordt niet.
➀: Voer R en 5 [ ] in.
➁: Druk op >>>, kies
met
➃: Druk op de softkey
➄: Druk op 6 [ ].
Ok
: Druk op > >>, kies
: Druk op de softkey
Ok
.
, druk op R.
3 gesprek
Ruggespraak
Terugbellen
Ruggespraak
Oproep verbreken
Conferentie
of op de op-
Einde
.
Pendelen
.
en bevestig met Ok.
.
, voer het te
Aakloppen
.
en bevestig
Terugoproep
.
en be-
Verbinden
.
Page 16

Aastra 630d
Dansk
Manual placerin g
• Dokumentnummer: eud-1128 / 1.2
• Copyright © 03.2011 Aastra Technologies Limited
Generelle oplysninger
Med din udstyr følger en Quick User’s Guide, sikkerheds information, samt andre udstyr specifik
information. Du finder dette og andre dokumenter til enheden på www.aastra.com eller
➃: www.aastra.com/docfinder.
Kommunikationssystemer
Telefonen kan anvendes med forskellige kommunikationssystemer, og derfor varierer brugen
alt efter systemet. De tilgængelige funktioner,
egenskaber, tastetildelinger og produkter afhænger også af kommunikationssystemet.
Vælg dit kommunikationssystem nedenfor:
System
➀ Aastra 5000 ❏, Aastra X Series ❏, NeXspan ❏
Aastra 800 ❏, OpenCom 100 ❏,
➁
OpenCom 1000 ❏
➂ SIP-DECT ❏
➃ Aastra 400 ❏, Aastra IntelliGate® ❏
➄ MX-ONE SIP-DECT ❏
Tas ter
Opkaldstast:
• Konfigurer en forbindelse.
•R-tastfunktion.
Genkaldsliste:
• ➀/➁/➂: Tryk på opkaldstasten, og
hold den nede.
• ➃: Tryk på opkaldstasten.
End tast:
• Afbryd forbindelsen.
• Afbryd editoren uden at foretage
ændringer.
• I en menu: Tilbage til ledig status.
• Tryk og hold nede: Telefon til/fra.
Højttalertast: Aktiverer/deaktiverer
håndfri.
Softkey-knapper: Udfører den funktion, der vises over tasten.
Navigationst aster:
• I en menu: Scroll fremad og tilbage.
•På lister: Naviger.
• I ledig status: Hent gemte funktioner.
Slette tast: Slettet sidst ind tastet karakter eller går et step tilbage i menuen.
Konfigurerbare s idetaster (til venstre):
• Juster aktuel tilslutningslydstyrke.
• Hent konfigureret funktion.
Tasten Stjerne: Tryk på tasten, og
hold den nede for at aktivere/deaktivere ringetonen.
Tasten Firkant: Tryk på tasten, og hold
den nede for at låse tastaturet.
Konfigurerbare sidetast (til højre):
Hent gemte funktioner.
Tasten SOS (øverst): Foretag et
nødopkald.
Displaysymboler (valg)
Signalkvalitet
(4 signalbjælker: god, 1 signalbjælke:
dårlig)
Opladningsstatus
Mikrofon fra
Ringtone fra
Flere tilgængelige indstillinger
Ny meddelelse i din voicemail
➀/➃: Nye tekstbeskeder
➀/➃: Læs tekstbeskeder
Bluetooth® aktiveret
➀/➁/➂/➄: Alarmsensor aktiveret
➃: Ingen bevægelse-alarm aktiveret
➃: Ingen man-down-alarm aktiveret
Page 17

LED indicator
Grøn • Blinker hurtigt: Indkommende op-
Rød Blinker langsomt:
kald, forespørgselsopkald.
•Lys: Håndfri til.
• ➀/➁/➂: Nye poster i info-området,
alarm/aftale.
• ➃: Ny Voice Mail.
Blinker hurtigt:
• Uden for systemets serviceområde.
• ➀/➁/➂: Alarmsensor.
• ➃: Ingen bevægelse-alarm og
man-down-alarm.
Orange Lys: Bat teriet oplader.
Generelle egenskaber
• Tilslutning af hovedsæt via kabel eller Bluetooth
• Tilslutning via mini-USB
• Kapslingsklasse IP 65 (støvtæt og beskyttet
mod vandstråler)
• Batteri (ekstraudstyr)
• Indbygget alarmsensor
Installation
Isætning af batteriet
Isæt batteriet med kontakterne nedad, sæt låget
på batterirummet, og skru det fast med et passende værktøj. Undgå at beskadige gummitætningen under monteringen.
Forbin delse
• Besvarelse af et opkald: Tryk på opkaldstasten.
• Sådan afbrydes forbindelsen: Tryk på tasten Afslut.
• Sådan foretages et opkald fra en liste (genkaldsliste, opkaldsliste, telefonbog): Opkaldet
foretages forskelligt afhængigt af kommunikationssystemet, vælg et nummer, og tryk derefter på opkaldstasten.
Valg af telefonbog/navn
➀/➁/➂: Tryk op eller ned på navigationstasten.
Indtast navnet eller første bogstav i navnet. Vælg
en post om nødvendigt. Sådan kaldes op: Tryk på
opkaldstasten.
➃: Indtast de første bogstaver i det navn, du søger, indtil navnet vises i displayet. Adskil fornavn
og efternavn med tasten #, f.eks. "no s" (6 6 # 7)
for Noble Stephen. Tryk på softkey-knappen
ABC
. Tryk på tasten Opkald; den valgte person
ringes op.
Under et opkald...
Foresp ørgsel
➀/➁: Tryk på R, og ring op til nummeret.
➂: Tryk på R, og ring op til nummeret, og tryk
derefter på Firkant.
➃: Tryk på softkey-knappen
sten Opkald, og indtast derefter opkaldsnummeret.
Sådan afsluttes et forespørg selsopkald
➀: Tryk på R og 1 [ ].
➁/➂: Tryk på >>>, vælg
og tryk på R.
➃: Tryk på softkey-knappen
2. Part
Skift mellem 2 parter uden afbrydelse af forbin-
®
delserne. Du har et kald:
➀: Tryk på R og 2 [ ].
➁/➂/➄: Tryk på R.
➃/➄: Tryk på softkey-knappen
Sådan arrangeres en konference
Flere partnere kan deltage i en konference. En
modtager sættes på hold (se "Forespørgsel"):
➀: Tryk på R og 3 [ ].
➁: Tryk på >>>, vælg
med
Ok
.
➃: Tryk på softkey-knappen
Forlade en konference: Tryk på tasten Afslut.
Sådan oprettes forbinde lse
➀/➁/➂: Tryk p å R, indtast et opkaldsnu mmer, og
tryk på tasten Afslut.
➃: Tryk på softkey-knappen
opkaldsnummer, og tryk på softkey-knappen
.
slut
Sådan besvares et opkald under en samtale
(Banke på)
➀: Tryk på R og Stjerne 10 [ ].
➁/➂: Tryk på R.
➃: Tryk på softkey-knappen
Notering
Personen er optaget elle svarer ikke.
➀: Tryk på R og 5 [ ].
➁: Tryk på >>>, vælg
med
Ok
.
➃: Tryk på softkey-knappen
➄: Tryk på 6 [ ].
2.Opkald.
Afbryd
, bekræft med Ok,
Afslut kald
Brokering
3 parts konf.
Konference
2.Opkald.
Banke på
Tilbagekald
Notering
, og bekræft
, og bekræft
eller ta-
.
.
.
, indtast et
.
.
Til-
Page 18

Aastra 630d
Svenska
Dokument betäckning
• Dokumentnumret: eud-1128 / 1.2
• Copyright © 03.2011 Aastra Technologies Limited
Allmän informatio n
Din enhet är utrustad med en Snabb Guide, säkerhetsinformation och annan relevant enhet
specifik information. Du hittar detta och andra
dokument för din enhet på www.aastra.com or
➃: www.aastra.com/docfinder.
Kommunikation ssystem
Din telefon kan användas med olika kommunikationssystem, och därför ser användningen olika
ut beroende på system. Tillgänglighet av funktioner, finesser, knapptilldelning och produkter beror också på tillkopplat kommunikationssystem.
Märk ditt k ommunikationssystem enligt följande:
Systemet
➀ Aastra 5000 ❏, Aastra X Series ❏, NeXspan ❏
Aastra 800 ❏, OpenCom 100 ❏,
➁
OpenCom 1000 ❏
➂ SIP-DECT ❏
➃ Aastra 400 ❏, Aastra IntelliGate® ❏
➄ MX-ONE SIP-DECT ❏
Knappen
Samtalsknapp:
• Etablera en anslutning.
• R-knappfunktion.
Återuppringningslista:
• ➀/➁/➂: Tryck och håll nere samtalsknappen.
• ➃: Tryck på samtalsknappen.
End-knapp:
• Avbryt anslutningen.
• Avsluta redigeraren utan ändringar.
• I meny: Tillbaka till vänteläge.
• Tryck och håll ner: Telefon på / av.
Högtalarknapp: Aktiverar/deaktiverar handsfreeläge.
Softkeys: Utför aktuell funktion ovanför knappen.
Navigationsknappar:
• I meny: Scrolla framåt och bakåt.
•I listor: Navigera.
• I vänteläge: Ring upp sparade funktioner.
Korrigeringsknapp: Raderar sista
tecknet eller gå r tillbaka ett steg i menyn.
Programmerbara sidoknappar (till
vänster):
• Justera aktuell anslutningsvolym.
•Ring upp programmerad funktion.
Stjärnknapp: Tryck och håll nere för
att aktivera/deaktivera ringtonen.
Fyrkantsknappen: Tryck och håll nere
för att låsa knappsatsen.
Programmerbara sidoknapp (till höger): Ring upp sparade funktioner.
SOS-knapp (överst): Ring ett nödsamtal.
Displaysymboler (urval)
Kvaliteten på radioförbindelsen
(4 signalpunkter: bra, 1 signalpunkt:
dålig)
Laddningsstatus
Mikrofon av
Ringsignal av
Fler alternativ tillgängliga
Nytt meddelande i röstbrevlådan
➀/➃: Nya textmeddelanden
➀/➃: Läs text meddelande
Bluetooth® aktiverat
➀/➁/➂: Alarmsensor aktiverad
➃: Positionsalarmet aktiverat
➃: Fallalarmet aktiverat
Page 19

LED-indikati oner
Grön • Blinkar hastigt: Inkommande sam-
Röd Blinkar långsamt:
tal, förfrågningssamtal.
• Belyst: Handsfree på.
• ➀/➁/➂/➄: Nya alternativ i informationsfältet, alarm/avtal.
• ➃: Nytt röstmeddelande.
Blinkar hastigt:
•Utanför räckviddsområdet.
• ➀/➁/➂/➄: Alarmsens or.
• ➃: Positionsalarm och fallalarm.
Orange Belyst: Batterierna laddas.
Allmänt
• Headsetanslutning via en kabel eller Bluetooth®
• Mini USB-uttag
• Skyddsklass IP 65 (damm- och vattenstrålesäker)
• Batteri (tillval)
• Inbyggd alarmsensor
Installation
Installera batteriet
Sätt i batteriet med kontakterna neråt, stäng batteriluckan med skyddet och skruva fast med
lämpligt verktyg. Se till att inte skada gummiförslutningen under hanteringen.
Förbin delse
• Ta ett samtal: Tryck på samtalsknappen.
• För att avsluta förbindelsen: Tryck på
End-knappen.
• För att ringa ett samtal från en lista (återuppringningslistor, samtalslistor, telefonbok): Uppringningen beror på kommunikationssystemet, välj ett alternativ, tryck sedan på samtalsknappen.
Telefonbok/nämn val
➀/➁/➂/➄: Tryck på navigationsknappen uppåt
eller neråt. Ange namn eller första bokstaven i
namnet. Välj alternativ om det behövs. För att
ringa: Tryck på samtalsknappen.
➃: Tryck på respektive knappar, en gång var, för
de första bokstäverna i det namn du söker. Separera förnamn och efternamn med #-knappen,
t.ex. "no s" (6 6 # 7) för Noble Stephen. Tryck på
knappen
ABC
ternativ rings upp.
. Tryck på samtalsknappen; valt al-
Under en förbindelse...
Nytt samtal
➀/➁/➄: Ange R och telefonnummer.
➂: Ange R och telefonnummer och tryck sedan
fyrkant.
➃: Tryck på knappen
nappen och ange sedan telefonnummer.
För att avsluta förfråg ningssamtalet
➀: Ange R och 1 [ ].
➁/➂: Tryck >>> , välj
Ok
, tryck R.
➃/➄: Tryck på knappen
Pendli ng
Pendla mellan två samtal utan avbrott. Du ringer
upp/tar emot ett samtal:
➀: Ange R och 2 [ ].
➁/➂/➄: Tryck R.
➃/➄: Tryck på knappen
Etablera ett konferenssamtal
Kopplar ihop flera samtalspartner för ett konferenssamtal. En samtalsmedlem väntar (se ”Nytt
samtal”):
➀/➄: Ange R och 3 [ ].
➁: Tryck >>>, välj
Ok
.
➃: Tryck på knappen
Lämna ett konferenssamtal: Tryck på End-knappen.
Etablera en anslutning
➀/➁/➂/➄: Tryck R, ange telefonnummer och
tryck på End-knappen.
➃: Tryck på knappen
nummer och tryck på knappen
Att ta ett samtal u nder ett annat samtal (samtal väntar)
➀: Ange R och stjärna 10 [ ].
➁/➂: Tryck R.
➃: Tryck på knappen
Ring tillbaka
Personen är upptagen eller svarar inte.
➀: Ange R och 5 [ ].
➁: Tryck >>>, välj
med
Ok
.
➃: Tryck på knappen
➄: Tryck på 6 [ ].
Nytt samtal
Avsluta
och bekräfta med
Av. sam
Pendling
3-parts konf.
Återuppringning
och bekräfta med
Konferens
Nytt samtal
Koppla
Samtal väntar
Ring tillbaka
eller samtalsk-
.
.
.
, ange telefon-
.
.
och bekräfta
.
Page 20
Aastra 630d
Norsk
Dokumentbetegnelse
• Dokumentnr.: eud-1128 / 1.2
• Copyright © 03.2011 Aastra Technologies Limited
Generell informasjon
Din enheten er har blitt levert med en hurtigveiledning, sikkerhetsinformasjon og hvor gjeldende, annen enheten spesifikkk dokumentasjon. Dette og andre dokumenter for apparatet
ditt finner du på www.aastra.com eller
➃: www.aastra.com/docfinder.
Kommunikasjonssystemer
Telefonen din kan brukes med ulike kommunikasjonssystemer og varierer derfor avhengig av
system. De tilgjengelige funksjonene, tjenestene,
tastefunksjonene og produktene avhenger også
av kommunikasjonssystemet.
Marker kommunik asjonssystemet på følgende
måte:
System
➀ Aastra 5000 ❏, Aastra X Series ❏, NeXspan ❏
Aastra 800 ❏, OpenCom 100 ❏,
➁
OpenCom 1000 ❏
➂ SIP-DECT ❏
➃ Aastra 400 ❏, Aastra IntelliGate® ❏
➄ MX-ONE SIP-DECT ❏
Tas ter
Samtaletast:
• Opprett forbindelse.
•R-tastefunksjon.
Repetisjonsliste:
• ➀/➁/➂: Trykk og hold inne ringetasten.
• ➃: Trykk på ringetasten.
End-tasten:
• Avbryt forbindelse.
• Avslutt red igeringsp rogrammet
uten endringer.
• I en meny: Tilbake til hovedside.
• Langt tr ykk: Telefon av / på.
Høyttalertast: Aktiverer/deaktiverer
håndfrimodus.
Taster: Utfører den viste funksjonen
over tasten.
Navigeringstaster:
• I en meny: Rull frem og tilbake.
•I lister: Naviger.
• I hvilemodus: Ring opp lagrede
funksjoner.
Rette- tast: Sletter det siste tegnet eller går tilbake et trinn i menyen.
Programmerbare sidetaster (til venstre):
• Juster volum for aktuell forbindelse.
• Ring opp konfigurert funksjon.
Stjernetast: Trykk og hold inne for å
aktivere/deaktivere ringetone.
Firkanttast: Trykk og hold inne for å
låse taster.
Programmerbare sidetast (til høyre):
Ring opp lagrede funksjoner.
SOS-tast (oppe): Utløs nødanrop.
Displaysymboler (utvalg)
Kvalitet på radioforbindelse
(4 signalstreker: god, 1 signalstrek:
dårlig)
Ladestatus
Mikrofon av
Ringetone av
Flere alternativer tilgjengelig
Ny melding i talepostkassen
➀/➃: Nye tekstmeldinger
➀/➃: Lese en tekstmelding
Bluetooth® aktivert
➀/➁/➂/➄: Alarmsensor aktivert
➃: Ingen bevegelse-alarm er aktivert
➃: Ingen mann-nede-alarm er akti-
vert
Page 21

Indikator-LED
Grønn • Blinker fort: Innkommende anrop,
Rød Blinker sakte:
spørreanrop.
•Lyser: Håndfri på.
• ➀/➁/➂/➄: Nye poster i infoområdet, alarm/avtale.
• ➃: Ny Voice Mail.
Blinker fort:
• Utenfor systemets serviceområde.
• ➀/➁/➂/➄: Alarmsens or
• ➃: Ingen-bevegelse og mann-nede
alarm.
Oransje Lyser: Batteri lades opp.
Generelle egenskaper
• Tilkobling av hodesett via kabel eller Bluetooth®
• Mini USB-forbindelse
• Beskyttelsesklasse IP 65 (støv- og vanntett)
• Power-batteri (tilleggsutstyr)
• Innebygd alarmsensor
Installasjon
Sette i batteriet
Sett i batteriet med kontaktene nedover, lukk
batterirommet med dekselet og skru dem igjen
med passende verktøy. Ikke skad gummiforseglingen ved montering.
Samtale
• Motta en samtale: Trykk på ringetasten.
• Avslutte en samtale: Trykk på End-tasten.
• Ringe opp fra lister (repetisjonsliste, anropsliste, telefonbok): Oppringing avhenger av kommunikasjonssystemet. Velg en post og trykk på
ringetasten.
Tel ef onb ok /Va lg av n av n
➀/➁/➂/➄: Trykk navigeringstasten oppover eller
nedover. Angi navn eller navnets første bokstav.
Velg post ved behov. For å ringe: Trykk på ringetasten.
➃: Trykk hver av de tilsvarende tastene én gang
for å f å de først e bokstav ene i navn et du søk er etter. Skill fornavn og etternavn med #-tasten,
f.eks."nei s" (6 6 # 7) for Jan Erik Pedersen. Trykk
på
ABC
-tasten. Trykk på ringetasten. Den valgte
posten ringes opp.
Under en samtale...
Ny samtale
➀/➁/➄: Skriv R og ring nummeret.
➂: Skriv R og ring nummer. Trykk så på firkanttas-
ten.
➃: Trykk på
og slå inn nummeret.
For å avslutte spørreanropet
➀: Skriv inn R og 1 [ ].
➁/➂: Trykk på >>>, velg
kreft med
➃/➄: Trykk på
Megling
Bytte mellom to samtalepartnere uten avbrytelser i samtalene. Du ringer / tar imot en samtale:
➀: Skriv inn R og 2 [ ].
➁/➂/➄: Trykk på R.
➃/➄: Trykk på
Opprette telefonkonferanse
Kobler sammen flere samtalepartnere til en konferansesamtale. En samtaledeltaker settes på
vent (se "Ny samtale"):
➀/➄: Skriv inn R og 3 [ ].
➁: Trykk på >> >, velg
Ok
➃: Trykk på
Forlate en telefonkonferanse: Trykk på End-tasten.
Opprette forbindelse
➀/➁/➂/➄: Trykk på R, oppgi et nummer og trykk
på End-tasten.
➃: Trykk på
ret og trykk på
Ta imot anrop under en samtale (samtale venter)
➀: Skriv inn R og stjerne 10 [ ].
➁/➂: Trykk på R.
➃: Trykk på
Tilbakering
Abonnenten er opptatt eller svarer ikke.
➀: Skriv inn R og 5 [ ].
➁: Trykk på >>>, velg
med
➃: Trykk på
➄: Trykk på 6 [ ].
.
Ok
.
Ny samtale
Ok
, trykk på R.
Avslutt
Veksle
Konferanse
Ny samtale
Sett over
Anrop venter
Ring tilbake
-tasten eller ringetasten
Frikoble anrop
og be-
-tasten.
-tasten.
3partskonf.
og bekreft med
-tasten.
-tasten, tast inn numme-
-tasten.
-tasten.
Ring når le di g
og bekreft
-tast.
Page 22
Aastra 630d
Suomi
Dokumentin kuvaus
• Dokumentti nro.: eud-1128 / 1.2
• Copyright © 03.2011 Aastra Technologies Limited
Yleistietoa
Användare Puhelimesi mukaan on liitetty pikakäyttöopas, turvallisuustiedot ja mahdollisesti muita
puhelinkohtaisia tietoja. Tämän ohjeen ja muita
hyödyllisiä tietoja voit hakea osoitteesta www.aastra.com tai
➃
: www.aastra.com/docfinder.
Viestintäjärjestelmät
Puhelintasi voidaan käyttää eri viestintä järjestelmien kanssa, ja sen toiminta vaihtelee järjestelmän mukaan. Toimintojen, ominaisuuksien, tärkeimpien tehtävien ja tuotteiden käytettävyys
vaihtelee niin ikään viestintäjärjes telmän mukaan.
Merkitse viestintäjärjestelmäsi seuraavalla tavalla:
Järjestelmä
➀ Aastra 5000 ❏, Aastra X Series ❏, NeXspan ❏
Aastra 800 ❏, OpenCom 100 ❏,
➁
OpenCom 1000 ❏
➂ SIP-DECT ❏
➃ Aastra 400 ❏, Aastra IntelliGate® ❏
➄ MX-ONE SIP-DECT ❏
Painikkeet
Soittonäppäin:
• Aseta yhteys.
• Uudelleenvalintatoiminto.
Uudelleenvalintalista:
• ➀/➁/➂: Paina soittonäppäintä ja
pidä se painettuna.
• ➃: Paina soittonäppäintä.
Lopetusnäppäintä:
• Katkaise yhteys.
• Poistu muokkausohjelmasta tekemättä muutoksia.
• Valikossa: Palaa perustilaan.
• Paina ja pidä pohjassa: Puhelin
päälle / pois päältä.
Kaiutinnäppäin: Ottaa käyttöön /
poistaa käytöstä kädet vapaana -tilan.
Toimintonäppäimet: Toteuttaa näppäimen yläpuolella näk yvän toiminnon.
Navigointinäppäimet:
• Valikossa: Selaa eteen- ja taaksepäin.
• Luetteloissa: Navigoi.
• Perustilassa: Couda tallennettuja
toimintoja.
Korjausnäppäin: Poistaa viimeisen
merkin tai palaa valikossa yhden vaiheen taaksepäin.
Mukautettavat sivunäppäimet (vasemmalla):
• Säädä nykyisen yhteyden äänenvoimakkuutta.
• Nouda mukautettu toiminto.
Tähtinäppäin: Paina ja pidä painettuna, kun haluat ottaa käyttöön / poistaa käytöstä soittoäänen.
Ruutupainike: Lukitse näppäimistö
painamalla ja pitämällä painettuna.
Mukautettavat sivunäppäin (oikealla): Couda tallennettuja toimintoja.
SOS-näppäin (päällä): Soita hätäpuhelu.
Näyttösymbolit (valinta)
Radioyhteyden laatu
(4 signaalipalkkia: hyvä, 1 signaalipalkki: huono)
Lataustila
Mikrofoni pois päältä
Soittoääni pois päältä
Lisää vaihtoehtoja valittavana
Uusi viesti puhepostilaatikossa
➀/➃: Uusia tekstiviestejä
➀/➃: Luettuja tekstiviestejä
Bluetooth® otettu käyttöön
➀/➁/➂/➄: Hälytysanturi otettu käyt-
töön
➃: Liikehälytys käytössä
➃: Kaatumishälytys käytössä
Page 23

LED-merkkivalo
Vihreä • Vilkkuu nopeasti: Saapuva puhelu,
Punainen Vilkkuu hitaasti:
välipuhelu.
• Palaa: Kädet vapaana -toiminto
käytössä.
• ➀/➁/➂/➄: Uusia tietueita tietoalueella, hälytys/tapaaminen.
• ➃: Uusi puheviesti.
Vilkkuu nopeasti:
• Järjestelmän toiminta-alueen ulkopuolella.
• ➀/➁/➂/➄: Hälytysanturi.
• ➃: Liikehälytys ja asentohälytys.
Oranssi Palaa: Akku latautuu.
Yleisiä ominaisuuksia
• Kaapeli- tai Bluetooth®-kuulokeliitäntä
• Mini USB -liitäntä
• Suojausluokka IP 65 (pölyn ja roiskeen kestävä)
• Tehoakku (lisävaruste)
• Kiinteä hälytysanturi
Asennus
Akun asentami nen
Asenna akku siten, että koskettimet osoittavat
alaspäin. Sulj e akkukotelon kansi ja k iinnitä se paikoilleen ruuveilla ja asianmukaisella työkalulla.
Älä vaurioita kumitiivistettä asennuksen aikana.
Yhteys
• Puheluun vastaaminen: Paina soittonäppäintä.
• Yhteyden katkaiseminen: Paina lopetusnäppäintä.
• Puhelun soittaminen luettelosta käsin (uudelleenvalintaluettelo t, puheluluettelot, puhelinluettelo): Menetelmä riippuu viesti ntäjärjestelmästä. Valitse tietue ja paina soittonäppäintä.
Puhelinluettelo/Nimen valinta
➀/➁/➂/➄: Paina navigointinäppäintä ylös- tai
alaspäin. Anna nimi tai nimen ensimmäinen kirjain. Valitse tietue tarvittaessa. Valitseminen: Paina soittonäppäintä.
➃: Paina etsimäsi nimen ensimmäisiä kirjaimia
vastaavia näppämiä. Erota etunimi ja sukunimi
#-näppäimellä, esim."no s" (6 6 # 7), jos nimi on
Nobel Stephen. Paina
tonäppäintä. Valittuun numeroon soitetaan.
ABC
-näppäintä. Paina soit-
Yhteyd en aika na...
Väli puhe lu
➀/➁/➄: Paina R ja soitettava numero.
➂: Paina R, soitettava numero ja ruutu.
➃: Paina
Välipuhelu
päintä ja anna sitten soitettava numero.
Välipuhelun lopetta minen
➀: Paina R ja 1 [ ].
➁/➂: Paina >>>, valitse
namalla
Ok
➃/➄: Paina
Vuorottelu
Vuorottelu kahden puhelun välillä keskeytyksettä. Soitat puhelua / vastaat puheluun:
➀: Paina R ja 2 [ ].
➁/➂/➄: Paina R.
➃/➄: Paina
Neuvottelupuhelun muodostaminen
Yhdistää useampia puheluita neuvottelupuheluksi. Puheluun osallistuva soittaja laitetaan pitoon (katso "Välipuhelu"):
➀/➄: Paina R ja 3 [ ].
➁: Paina >>>, valitse
namalla
Ok
➃: Paina
Confer.
Neuvottelupuhelusta poistuminen: Paina lopetusnäppäintä.
Yhteyden muodosta minen
➀/➁/➂/➄: Paina R, anna soitettava numero ja
paina lopetusnäppäintä.
➃: Paina
Välipuhelu
numero ja paina
Puheluun vastaaminen keskustelun aikana
(puhelu odot taa)
➀: Paina R ja tähti 10 [ ].
➁/➂: Paina R.
➃: Paina
Puhelu odottaa
Soittopyy ntö
Tavoittelemasi henkilö on varattu tai ei vastaa
puheluusi.
➀: Paina R ja 5 [ ].
➁: Paina >>>, valitse
painamalla
➃: Paina
Soittopyyntö
➄: Paina 6 [ ].
-näppäintä tai soittonäp-
ja R.
Lopetus
Vuorottelu
.
Katkaise
-näppäintä.
-näppäintä.
3-neuvottelu
-näppäintä.
-näppäintä, anna soitettava
Yhdistä
-näppäintä.
-näppäintä.
Takaisinsoitto
Ok
.
-näppäintä.
ja vahvista pai-
ja vahvista pai-
ja vahvista
Page 24

Aastra 630d
Čeština
Označení do kumentu
• Císlo dokumentu: eud-1128 / 1.2
• Copyright © 03.2011 Aastra Technologies Limited
Všeobecné informace
Zařízení je dodáváno se Stručnou uživatelskou
příručkou, bezpečnostními informacemi a v případě potřeby i dalšími informacemi týkajícími se
tohoto zařízení. Tento a další dokumenty k vašemu přístroji naleznete na /www.aastra.com či
➃: www.aastra.com/docfinder.
Komunikační systémy
Váš telefon může být užívaný s různými komunikačními systémy; proto se operace dle systému
liší. Na komunikačním systému závisí také
použitelnost funkcí, vlastnosti, funkčnost kláves
a výrobků.
Označte váš komunikační systém následovně:
Systém
➀ Aastra 5000 ❏, Aastra X Series ❏, NeXspan ❏
Aastra 800 ❏, OpenCom 100 ❏,
➁
OpenCom 1000 ❏
➂ SIP-DECT ❏
➃ Aastra 400 ❏, Aastra IntelliGate® ❏
➄ MX-ONE SIP-DECT ❏
Tlačítka
Klávesa volání:
• Navázat spojení.
• Funkce klávesy R.
Opakování volby:
• ➀/➁/➂: Stiskněte a držte klávesu
Volání.
• ➃: Stiskněte klávesu Volání.
Klávesa ukončení:
•Přerušit spojení.
• Ukončit editor beze změn.
• V menu: Návrat do stavu neči nnosti.
• Stiskně te a držte: Zapnut í / Vypnutí
telefonu.
Klávesa reproduktoru: Aktivuje/deaktivuje režim hands-free.
Soft tlačítka: Klávesa provede zobrazenou funkci výše.
Navigační klávesy:
• V menu: Prochází dopř edu či dozadu.
•V seznamech: Navigovat.
• V nečinnosti: Vyvolejte uložené
funkce.
Klávesa úprav: Vymaže poslední znak
nebo vás vrátí o krok zpět v menu.
Konfigurovatelné boční klávesy (vlevo):
• Nastavte aktuální hlasitost spojení.
• Vyvolejte konfigurované funkce.
Klávesa hvězdičky: Stiskněte a držte k
aktivaci/deaktivaci vyzváněcího
tónu.
Klávesa křížku: Stiskněte a držte k
uzamčení klávesnice.
Konfigurovatelné boční klávesu
(vpravo): Vyvolejte uložené funkce.
Klávesa SOS (nahoře): Spustí tísňové
volání.
Symboly na displeji (výb ěr)
Kvalita rádiového spojení
(4 čtverečky signálu: dobrý, 1 čtvereček signálu: špatný)
Stav nabití
Vypnutý mikrofon
Vypnutý vyzváněcí tón
Více dostupných možností
Nová zpráva v Hlasové schránce
➀/➃: Nové textové zprávy
➀/➃: Čtení textových zpráv
Funkce Bluetooth® aktivována
➀/➁/➂/➄: Alarmový senzor aktivo-
ván
➃: Alarm detekce pohybu aktivován
➃: Alarm „man-down“ aktivován
Page 25

LED indikátor y
Zelená • Bliká r ychle: Příchozí hovor, vedlejší
Červená Bliká pomalu:
hovor.
• Svítí: Hands-free zapnuto.
• ➀/➁/➂/➄: Nové záznamy v oznamovací oblasti, alarm/schůzka.
• ➃: Nové Hlasové zprávy.
Bliká rychle:
• Mimo oblast systémové služby.
• ➀/➁/➂/➄: Alarmový senzor
• ➃: Alarm detekce pohybu a
„man-down“ alarm.
Oranžová Svítí: Baterie se nabíjí.
Všeobecné vlastnosti
• Spojení náhlavní soupravy přes kabel nebo
Bluetooth®
• Mini USB spojení
• Třída ochrany IP 65 (odolná proti prachu a vodnímu paprsku)
• Baterie (volitelné)
• Zabudovaný alarmový senzor
Instalace
Instalování baterie
Vložte baterii s kontakty směrem dolů, uzavřete
prostor baterie krytem a za použití vhodného
nářadí zašroubujte. Během montáže nepoškoďte
gumovou pečeť.
Spojení
• Přijímání hovoru: Stiskněte klávesu Volání.
• K ukončení spojení: Stisk něte klávesu ukončení.
• K uskutečnění hovoru ze seznamu (opakování
volby, seznamy hovorů, telefonní seznam):
Vyvolání závisí na komunikačním systému,
vyberte požadovaný záznam a poté stiskněte
klávesu Volání.
Telefonní seznam/Výběr jména
➀/➁/➂/➄: Stiskněte navigační klávesu směrem
nahoru nebo dolů. Zadejte jméno nebo první
písmeno jména. V případě potřeby zvolte položku. Pro vytáčení: Stiskněte klávesu Volání.
➃
: Stiskněte k lávesy prvních několika pí smen jména,
které hledáte, každou klávesu pouze jednou. Křestní
jméno a příjmení oddělte klávesou #, např. „no s“
(6 6 # 7) pro jméno Nobel Stephen. Stisknět e programovateln ou klávesu
Volání; na zvolenou položku je zavoláno.
ABC
. Poté stiskněte klávesu
Během spojení...
Dotaz
➀/➁/➄: Zadejte R a volejte číslo.
➂: Zadejte R a volejte číslo, poté stiskněte křížek.
➃
: Stiskněte programovatelnou klávesu
nebo klávesu Volání a poté zadejte telefonní číslo.
K ukončení vedlejšího hovoru
➀: Zadejte R a 1 [ ].
➁/➂: Stiskněte >>>, zvolte
te pomocí
Ok
.
.
.
.
Ok
.
Ok
.
, stiskněte R.
Připojit
➃/➄: Stiskněte programovatel. klávesu
Přepínání
Přepínání mezi dvěma volajícími bez přerušení
hovorů. Uskutečňujete/přijímáte hovor:
➀: Zadejte R a 2 [ ].
➁/➂/➄: Stiskněte R.
➃/➄: Stiskněte programovatelnou klávesu
vani
Zahájení konference
Připojuje několik volajících do konferenčního
hovoru. Hovor účastníka p řejde do režimu čekání
(viz "Do taz"):
➀/➄: Zadejte R a 3 [ ].
➁: Stiskněte >>>, zvolte
pomocí
➃: Stiskněte programovatelnou klávesu
rence
Opuštění konferenčního hovoru: Stiskněte klávesu ukončení.
K zahájení sp ojení
➀/➁/➂/➄: Stiskněte R, zadejte telefonní číslo a
zvolte klávesu ukončení.
➃: Stiskněte programovatelnou klávesu
zadejte telefonní číslo a stiskněte programovatelnou klávesu
K přijmutí hovoru během hovoru (Čekající hov.)
➀: Zadejte R a Hvězdičku 10 [ ].
➁/➂: Stiskněte R.
➃: Stiskněte programovatelnou klávesu
hovor
Zpětné volání
Tato osoba má obsazeno nebo neodpovídá.
➀: Zadejte R a 5 [ ].
➁: Stiskněte >>>, zvolte
pomocí
➃: Stiskněte programovatelnou klávesu
volání
➄: Stiskněte 6 [ ].
Odp. hovor
Konference
.
Zpětné volání
Prepojit
a potvrď-
Ukoncit
Maklo-
a potvrďte
Konfe-
Prepojit
Čekající
a potvrďte
Zpětné
.
,
Page 26
Aastra 630d
polski
Tytu ł dok umen tu
• Numer dokumentu: eud-1128 / 1.2
• Copyright © 03.2011 Aastra Technologies Limited
Informacje ogólne
Urządzenie zostało dostarczone ze „Skróconą instrukcją użytkowania”, wskazówkami na temat bez pieczeństwa oraz z innymi informacjami dotyczącymi
urządzenia, jeśli mają one zastosowanie. Powyższe informacje oraz inne dokumenty dot yczące urządzenia
zamieszczono na stronie www.aastra.com lub
➃
: www.aas tra.com/docfi nder.
Systemy komunikacyjne
Ponieważ telefon może współdziałać z różnymi systemami komunikacyjnymi, sposób jego działania
zależy od systemu. Od platformy systemowej zależna jest również dostępność opcji i funkcji urządzenia oraz produktów dodatkowych, a także sposób przyporządkowania poszczególnych funkcji
do klawiszy. System komunikacyjny należy określić
w następujący sposób:
System
➀ Aastra 5000 ❏, Aastra X Series ❏, NeXspan ❏
➁
Aastra 800 ❏, OpenCom 100 ❏, OpenCom 1000
➂ SIP-DECT ❏
➃ Aastra 400 ❏, Aastra IntelliGate® ❏
➄ MX-ONE SIP-DECT ❏
Klawisze
Klawisz wywołania (Call):
• Ustanowienie połączenia.
•Klawisz R.
Lista ostatnio wybranych numerów:
• ➀/➁/➂: Wciśnięcie i przytrzymanie
klawisza wywołania.
• ➃: Naciśnięcie klawisza wywołania.
Klawisz zakończenia rozmowy (End):
•Rozłączenie.
• Wyjście z edytora bez zapis u zmian.
• W menu: Powrót do stanu bezczynności.
• Wciśnięcie i przytrzymanie: Włączanie/wyłączanie telefonu.
Klawisz trybu głośnomówiącego: Włączanie/wyłączan ie trybu głośnomówiącego.
Klawisze programowalne: Realizacja
funkcji wyświetlanej nad klawiszem.
Klawisze nawigacyjne:
• W menu: Przewijanie w przód i w tył.
• W listach: Nawigacja.
• W trybie bezczynności: Wy woływa-
Klawisz korekcji: Usunięcie ostatniego
znaku lub powrót do poprzedniej pozycji menu.
Boczne klawisze programowalne
(umieszczone po lewej stronie):
• Regulacja poziomu głośności bieżą-
• Wywoływanie skonfigurowanej funkcji.
Klawisz oznaczony gwiazdką: Wciśnię-
cie i przytrzymanie powoduje włączenie/wyłączenie dzwonka.
Klawisz #: Wciśnięcie i przytrzymanie
powoduje zablokowanie klawiatury.
Boczne klawisz programowalne
(umieszczone po prawej stronie): Wywoływanie funkcji z pamięci.
Klawisz SOS (umieszczony u góry):
Ustanowienie połączenia ze służbami
ratownicz ymi.
Symbole ekranowe (wybór)
❏
Wsk aźni k LED
Jakość połączenia radiowego
(wyświetlenie 4 pasków: dobra, wyświetlenie 1 paska: słaba)
Stan naładowania baterii
Wyłączenie mikrofonu
Wyłączeni e dzwonka
Pozostałe dostępne opcje
Nowa wiadom ość poczty głos owej
➀/➃: Nowa wiadomość tekstowa
➀/➃: Odczyt wiadomości tekstowych
Uaktywnienie połączenia Bluetooth
➀/➁/➂
➃: Uaktywnienie alarmu braku ruchu
➃: Uaktywnienie alarmu upadku
nie funkcji z pamięci.
cego połączenia.
/
➄
: Uaktywnienie czujnika alarmu
®
Page 27

Zielony • Szybkie miganie: Połączenie przy-
Czerwony Powolne miganie:
Pomara ńczowy
Charakterystyka ogólna
• Podłączenie zestawu słuchawkowego za pomocą kabla lub Bluetooth
•Złącza mini-USB
• K lasa ochrony IP 65 (obu dowa pyło- i bryzg oszczelna)
• Zasilanie z akumulatora (opcja)
• Wbudowany czujnik alarmu
chodzące, połączenie zestawione.
• Świecenie: Włączony tryb głośnomówiący.
•
➀/➁/➂
/
➄
: Nowe pozycje w obszarze
informacyjnym, alarm/spotkanie.
➃
: Nowa wiadomość poczty głosowej.
•
Szybkie miganie:
• Urządzenie poza obszarem obsługiwanym przez system.
• ➀/➁/➂/➄: Czujnik alarmu.
• ➃: Alarm braku ruchu i upadku.
Świecenie: Ładowanie baterii.
®
Instalacja
Instalowanie akumulatora
Włożyć akumul ator skierowany stykami w dół, zamknąć przedział akumulatora pokrywą, po czym
połączyć oba elementy śrubami przy użyciu odpowiedniego narz ędzia. Podczas montażu należy
uważać, aby nie uszkodzić gumowej uszczelki.
Połąc zenia
• Nawiąz ywanie połączenia: Nacisnąć klawisz wywołania.
• Zakończenie połączenia: Nacisnąć k lawisz zakończenia rozmowy.
• Łącze nie z numerem zapis anym na liście (l isty
ostatnio wybranych numerów, połączeń, książki telefonicznej): Sposób wykonywania połączenia zależy od platformy systemowej; wybrać pozycję z listy, po czym nacisnąć klawisz wywołania.
Książka telefoniczna/Wybór naz wy rozmówcy
➀/➁/➂
/➄: Nacisnąć klawisz nawigacyjny przewija-
nia w górę lub w dół. Wprowadzić nazwę lub
pierwszą literę nazwy rozmówcy. Jeśli to konieczne, wybrać pozycję z listy. Wybranie numeru: Nacisnąć klawisz wywołania.
➃
: Nacisnąć jednokrotnie każdy z k lawiszy odpowiadających pierwszym literom nazwy rozmówcy.
Skrót imienia i nazwiska rozmówcy należy oddzielić
za pomocą klawisza #; przykład owo: dla rozmówcy
Nobel Stephen, nale ży wprowadzić kolejno
litery„nos” (66#7). Nacisnąć klawisz programowalny
ABC
. Nacisnąć k lawisz wywołania; nast ąpi
wywołanie numeru wybranego rozmówcy.
W trakcie rozmowy...
Zestaw połączenie
/➄: Wprowadzić R i numer rozmówcy.
➀/➁
➂: Wprowadzić R i numer rozmówcy, po czym na-
cisnąć klawisz #.
➃: Nacisnąć klawisz programowalny
czenie
lub kla wisz wywołania, po czym wprowa-
dzić numer rozmówcy.
Zakończenie zestawiania połączenia
➀: Wprowadzić R i 1 [ ].
➁/➂: Nacisnąć >>>, wybrać opcję
, potwierdzić naciśnięciem klawisza Ok,
połączenia
nacisnąć klawisz R.
/➄: Nacisnąć klawisz programowalny
➃
Przeł ączanie
Funkcja ta umożliwia przełączanie użytkownika telefonu pomiędzy dwoma rozmówcami bez rozłączania nawiązanych połączeń. Realizacja/nawiązywanie połączenia:
➀: Wprowadzić R i 2 [ ].
/➄: Nacisnąć klawisz R.
➁/➂
➃
/➄: Nacisnąć klawisz program. Przełączanie.
Organizacja kon ferencji
Funkcja ta umożliwia łączenie kilk u rozmówców w
trybie konferencji. Wstrzymanie rozmowy z jednym
z jej uczestników (zob "Zestaw połączenie"):
➀/➄: Wprowadzić R i 3 [ ].
➁
: Nacisnąć >> >, wybrać
twierdzić wybór naciśnięciem klawisza
➃
: Nacisnąć klawisz programowalny
Wyjście z trybu konferencji: Nacisnąć klawisz zakończenia rozmowy.
Ustanowienie połączenia
➀/➁/➂
/
➄
: Nacisnąć k lawisz R, wprowadzić nume r
rozmówcy i nacisnąć klawisz zakończenia rozmowy.
➃
: Nacisnąć klawisz
żądany numer rozmówcy i nacisnąć klawisz
Wykonywanie połączenia podc zas rozmowy
(poł. oczekujące)
➀: Wybrać R, gwiazdkę i 10 [ ].
➁/➂: Nacisnąć klawisz R.
➃
: Nacisnąć klawisz programowalny
Oddzwani anie
Rozmówca jest zajęty lub nie odpowiada.
➀: Wprowadzić R i 5 [ ].
➁: Nacisnąć >>>, wybrać
dzić wybór naciśnięciem klawisza
➃
: Nacisnąć k lawisz programowalny
➄
: Nacisnąć 6 [ ].
Trzeciego rozmówcę
Zestaw połączenie
Zestaw połą-
Rozłączenie
Konferencja
Poł. oczekujące
Oddzwanianie
Ok
.
Oddzwanianie
Koniec
.
i za-
Ok
.
, wprowadzić
Połącz
i zatwier-
.
.
.
.
Page 28
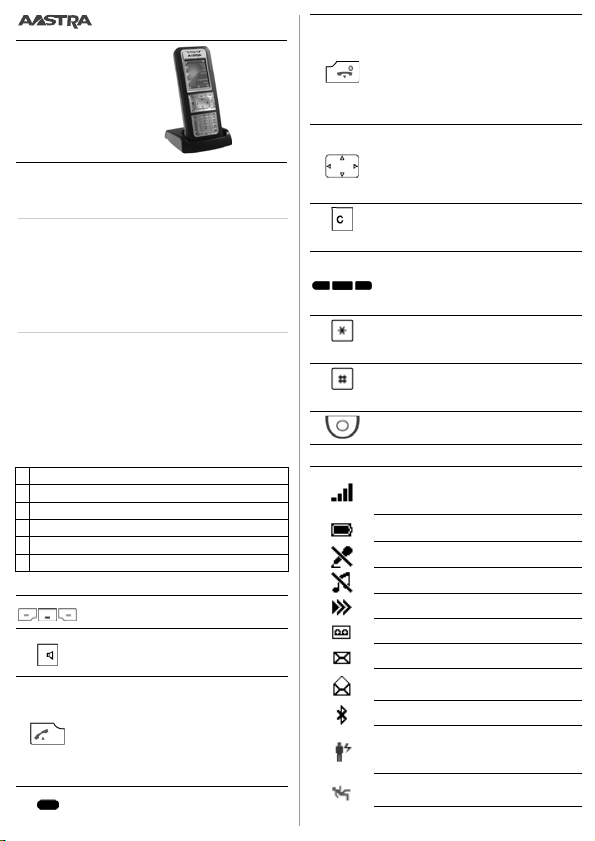
Aastra 630d
русский
Обозначение документ а
• Номер документа: eud-1128 / 1.2
• Copyright © 03.2011 Aastra Technologies Limited
Общая информация
Ваше устройство снабжено краткой инструкцией по находятся, по безопасной работе и, в
случае необходимости, другой конкретной
информацией о нем. Те или иные документы
об устройстве выложены на www.aastra.com
или ➃: www.aastra.com/docfinder.
Система коммуникации
Ваш телефон может быть использован в различных коммуникационных с истемах, поэтому работа с ним имеет особенности в соответствии с
той или иной системой. Наличие функций, особенности, назначение клавиш и результаты работы также зависят от коммуникационной системы. Разметка системы коммуникаций:
Система
➀ Aastra 5000 ❏, Aastra X Series ❏, NeXspan ❏
Aastra 800 ❏, OpenCom 100 ❏, OpenCom 1000
➁
➂ SIP-DECT ❏
➃ Aastra 400 ❏, Aastra IntelliGate® ❏
➄ MX-ONE SIP-DECT ❏
Клавиши
Сенсорные клавиши: Выполняет обозначенную над клавишей функцию.
Клавиша громкоговорителя: Активировать/деактивировать режим
работы без снятия трубки.
Клавиша вызова:
• Установить связь.
• Функция R-клавиши.
Список вызовов:
• ➀/➁/➂: Нажать и держать нажатой клавишу вызова.
• ➃: Нажать клавишу вызова.
Конфигурируемые клавиша (справа): Вызвать сохраненные функции.
Клавиша окончания:
•Отбой связи.
• Выход из редактора без изменений.
• В меню: Вернуться в состояние
"незанято".
• Нажать и держать нажатой: Телефон вкл / выкл.
Клавиша навигации:
• В меню: Прокрутк а вперед и назад.
•В списках: Навигация.
• В режиме "незанято": Вызвать сохраненные функции.
Клавиша исправления: Удаляет
последний символ или возвращает
на один шаг в мен ю.
Конфигурируемые клавиши (слева):
• Регулирует громкость текущей
связи.
• Вызвать сохраненную функцию.
Клавиша со звездочкой: Нажать и
держать для включения/выключения звонка.
Клавиша с решеткой: Нажать и держать нажатой для блокирования
клавиатуры.
SOS-клавиша (вверху): Отправить
Символы-индикаторы (извлечен ие)
❏
срочный вызов.
Качество радиосвязи
(4 столбика: хорошее, 1 столбик:
плохое)
Состояние аккумуляторов
Микрофон выкл
Звонок выкл
Имеются другие опции
Новое сообщение в Voice Mail box
➀/➃: Новые текстовые сообщения
➀/➃: Прочитанные текстовые со-
общения
Bluetooth® активирован
➀/➁/➂/➄: Датчик сигнала тревоги
активирован
➃
: Активирован сигнал " без движения"
➃: Активирован сигнал "абонент
отключился"
Page 29

Индикатор-светодиод
Зеленый • Часто мигает: Входящий звонок,
Красный Редко мигает:
Оранжевый
Общие сведения
• Гарнитура подключена через кабель или Bluetooth
• Соединение через мини-USB
• Класс защиты I P 65 (пыле- и водонепроницаемы)
• Батарея питания (опция)
• Встроенный датчик сигнала тревоги
звонок-вызов.
• Горит: Вкл режим без снятия
трубки.
• ➀/➁/➂/➄: Новые записи в инфо-блоке, будильник/встреча.
• ➃: Новое голосовое сообщение.
Часто мигает:
• Вне зоны обслуживания системы.
•➀/➁/➂/➄: Датчик сигнала тревоги.
• ➃: Сигнал "без движения" и "абонент отключился".
Горит: Заряжается аккумулятор.
Инсталляция
Установка батареи
Вставить батарею контактами вниз, закрыть
батарейный отсек крышкой и привинтить ее
подходящей отверткой. При установке не
повредить резиновое уплотнение.
Соединение
• Принять вызов: Нажать клавишу вызова.
• Для окончания связи: Нажать клавишу окончания.
• Чтобы вызвать номер из списка (список
дозвона, список телефонов, телефонная
книжка): Сделать вызов для данной коммуникационной системы, выбрать запись и нажать клавишу вызова.
Телефонная кни жка/Выбор имени
➀/➁/➂/➄: Нажать клавишу навигации вверх
или вниз. Ввести имя или его первые буквы.
Если нужно, нажать на ввод. При наборе: Нажать клавишу вызова.
➃
: Наж ать по разу н ужные к лавиш и с бук вами дл я
первых нескольких букв искомого имени. Отделять фамилию и имя клавишей #, например " no s"
(6 6 # 7) для Nobel Stephen. Нажать сенсорную
клавишу
ABC
дится вызов для набранного ввода.
. Нажать клавишу вызова, п роизво-
Установив связь...
Перевызо в
➀/➁/➄: Нажать R и ввести номер.
➂: Нажать R и ввести номер, затем нажать кла-
вишу с решеткой.
➃: Нажать сенсорную клавишу
клавишу вызова, затем набрать номер.
Для окончания вызова
➀/➄: Нажать R и 1 [ ].
➁/➂: Нажать >>>, выбрать
дить через
➃: Нажать сенсорну ю клавишу
Посредничество
Переключаться между двумя абонентами не прерывая вызова. Вы позвонили/принял и вызов:
➀: Нажать R и 2 [ ].
➁/➂/➄: Нажать R.
®
➃/➄
во
Организация конфере нции
Соединить нескольких абонентов для телефонной конференции. Абонент остается в режи- ме ожидания (см. Перевызов):
➀/➄: Нажать R и 3 [ ].
➁: Нажать >>>, выбрать
твердить через
➃: Нажать сенсорну ю клавишу
Закончить конференцию: Нажать клавишу
окончания.
Установит ь связь
➀/➁/➂/➄: Нажать R, ввести номер и нажать
клавишу окончания.
➃: Нажать сенсорну ю клавишу
ввести номер и нажат сенсорную клавишу
единить
Сделать вызов во время разговора (ожидание вызова)
➀: Нажать R и звездочку 10 [ ].
➁/➂: Нажать R.
➃
Обратный звонок
Вызываемый номер занят или не отвечает.
➀: Нажать R и 5 [ ].
➁: Нажать >>>, выбрать
подтвердить через
➃
➄: Нажать 6 [ ].
Да
, нажать R.
: Нажать сенсорную клавишу
.
Да
.
.
: Нажать сенсорную клавишу
: Нажать сенсорную клавишу
Да
Перевызов
Отбой
и подтвер-
Перевызов
Посредничест-
Конференция 3
Конференция
Перевызов
Ожидание вызова
Обратный звонок
.
Обратный звонок
или
.
и под-
Со-
и
.
.
.
Page 30

Declaration of Conformity
Aastra Telecom Schweiz AG hereby declares that
• the Aastra 400 products conform to the basic
requirements and other relevant stipulations of
Directive 1999/5/EC.
• all our products are manufactured in conformity
with RoHS and WEEE (2002/95/EC and
2002/96/EC).
The product-specific declarations of conformity
can be found on the Aastra document portal:
www.aastra.com/docfinder.
Exclusion of Liability
Aastra® is a registered trademark of Aastra
Technologies Limited. Technical modifications and product availability subject to
change without notice.
Copyright © 2011 Aastra Technologies Limited
 Loading...