

Page 1
Aastra IntelliGate® Communications Systems
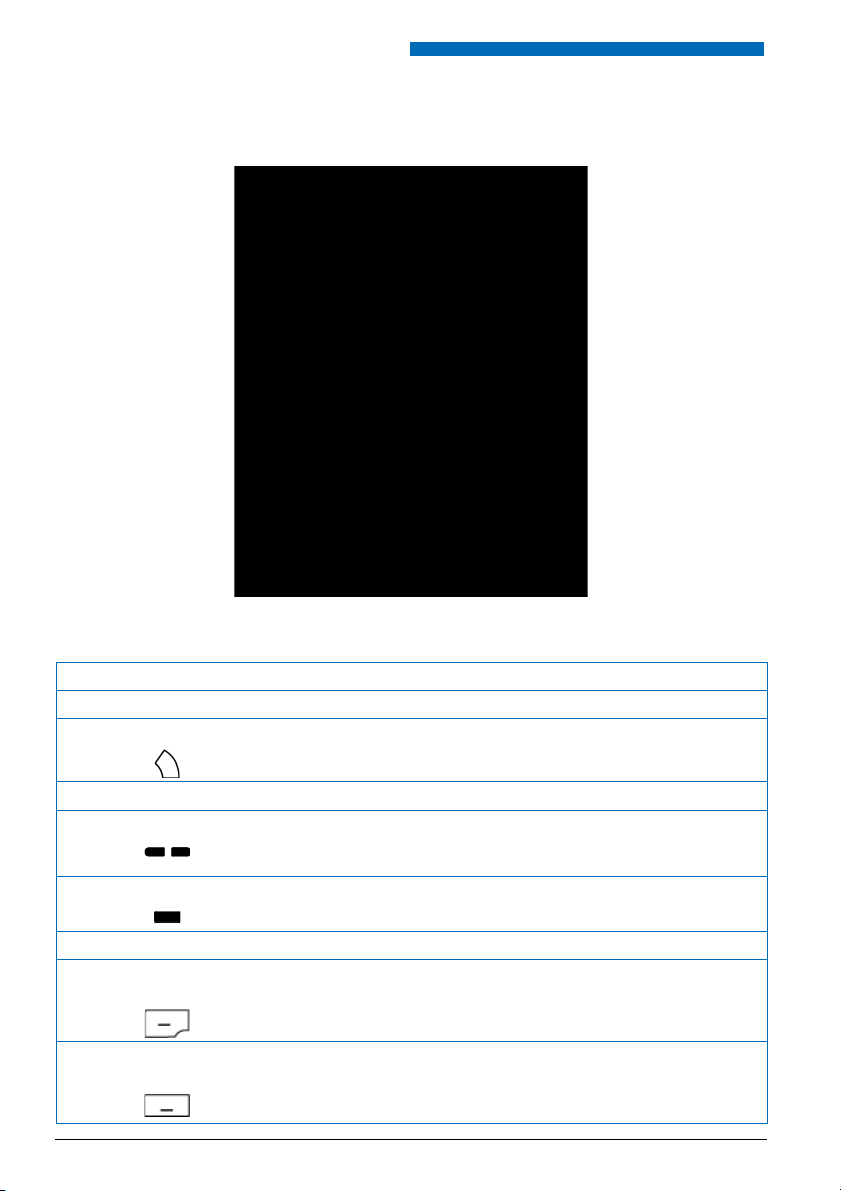
Aastra 620d
User’s Guide
A150
A150
A300
A300
2025
2025
2045
2045
2065
2065
Page 2
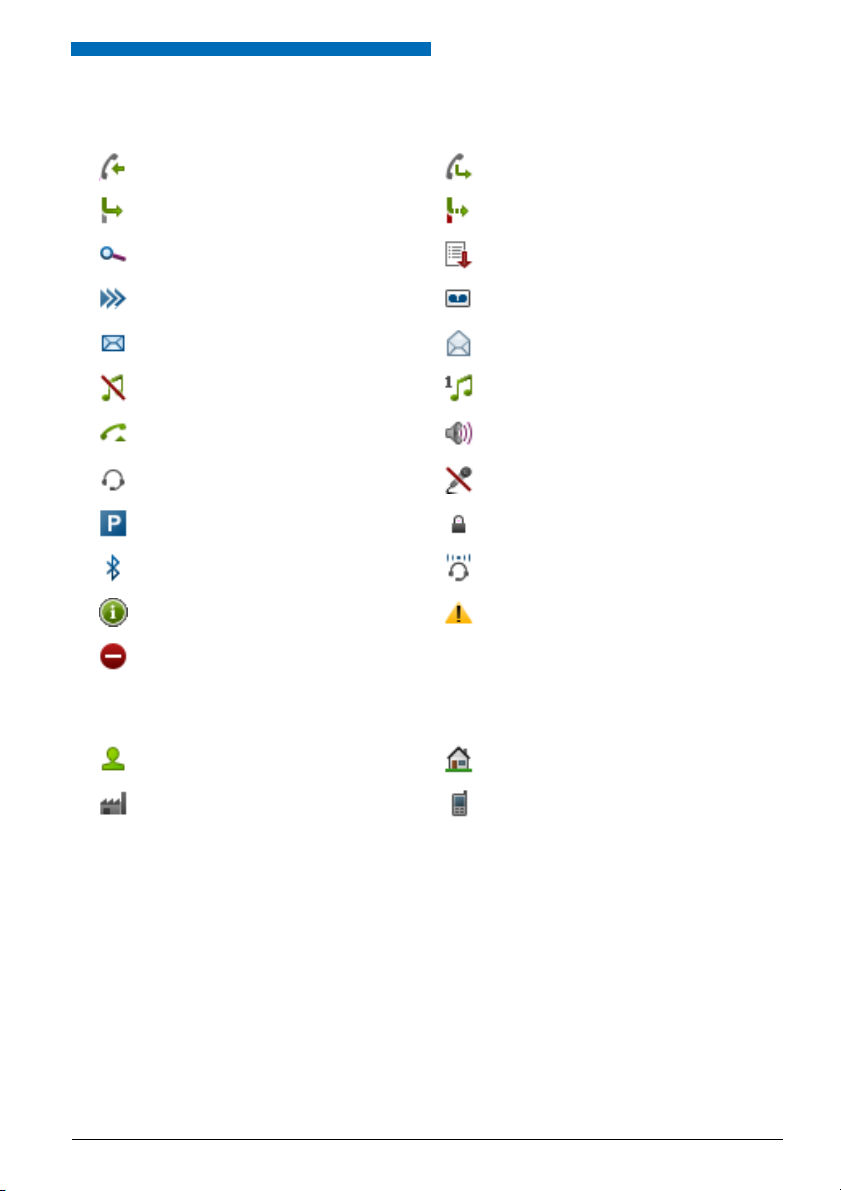
Operating and Display Elements
Operating and Display Elements
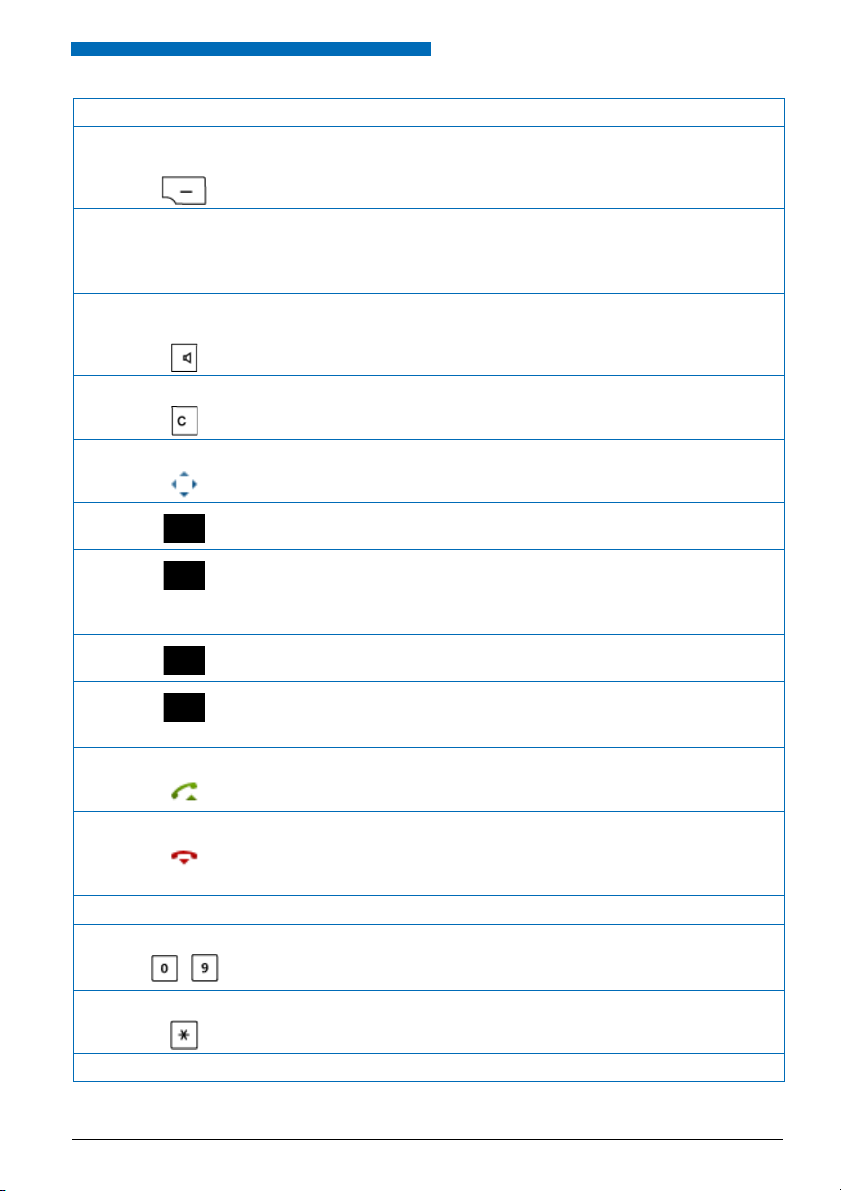
■ Operating and Display Elements
■ Operating elements
key Press In the state... Description
1 Loudspeaker
2Indicator LED LED as per Table in Chapter "Indicator LED
3Display
4Side keys + / - short • Idle state
Middle side key short All states Excute configured call number
long Idle state Configure side key
5Left softkey/
foxkey
Middle softkey/
foxkey
2 Aastra 620d
short • Idle state
short • Idle state
• In a connection
•Menus
•Menu
Signals", page 23
• Retrieves the phone number
•Adjust volume
• Call up complete menu
• Executes displayed function above key.
• Call up configured call number
• Executes displayed function above key.
eud-1094/1.0 – I7.8 – 05.2009
Page 3
Operating and Display Elements
key Press In the state... Description
Right softkey/
foxkey
short • Idle state
•Menu
• Call up configured call number
• Executes displayed function above key.
approx.
2 seconds
each
6Loudspeaker
key
7Correction key short • Editor
8 Navigation key
9Call key short • Idle state
short • Idle state
top • Idle state
right • Idle state
bottom • Idle state
left • Idle state
Idle state Configures key
• In a connection
•Menu
•Lists
•Menu
•Editor
•Lists
•Lists
•Menu
•Editor
•Lists
• Activate/deactivate open listening
• Activate/deactivate open listening
• Deletes last character
• Scroll back in the menu
• Call up activated features
• Navigation
• Call up complete menu
• Goes forward one step in the menu
•Navigate cursor
•Call up details
• Call up phone book
• Navigation
•Call up profiles
• Scroll back in the menu
•Navigate cursor
• Call up redial list
• Dial select call number
10 End key short • In a connec-
tion
•Menu
•Editor
long Idle state Switch phone on/off
11 Key block short • Idle state
•Editor
12 Asterisk key short Idle state, Editor * input
long Idle state Activate/deactivate ring tone
eud-1094/1.0 – I7.8 – 05.2009
•Ending a Call
• Back to idle state
• Exit Editor without changes
• Digit input
• Characters as per Table in Chapter "Digit
keys", page 19
Aastra 620d 3
Page 4
Operating and Display Elements
key Press In the state... Description
13 Hash key short Idle state, Editor # input
long Idle state Activate keylock
14 Connecting a
headset
15 Microphone
16 USB connection
17 Hotkey short All states List of 6 configurable phone numbers
long Idle state Configures Hotkey
■ Display symbols
Radio link quality
Very good Good
Disruption probable Phone calls not possible
State of charge
Charge state 81-100% Charge state 61-80 %
Charge state 41-60 % Charge state 21-40 %
Charge state 0-20 %
Notes:
• If the battery is completely discharged when the phone is placed in the charging bay, there will be no
display initially until the battery has reached a certain charge level. This may take several minutes and
does not mean there is a malfunction.
• Even when the phone is switched off, the battery will still slowly discharge.
• When the batter y capacity is almost exhausted, a series of warning beeps sounds. This warning can be
disabled, see Chapter "Setting up a profile", page 54. If you are making a call, you have approximately
five minutes' talk time left before the handset switches itself off.
System registrations
Phone registered in system A, B, C, or D
and ready for use (only displayed when
phone is registered on more than one
system)
4 Aastra 620d
Running firmware update
eud-1094/1.0 – I7.8 – 05.2009
Page 5
Operating and Display Elements
Status information
Incoming call Incoming call forwarded
Call forwarding active Call Forwarding on No Reply activated
Search mode Entries on the call list
More softkeys available New Voice Mail
New text messages Text messages read
Ringing tone deactivated Discreet ringing activated
Call key pressed
Headset mode activated Microphone deactivated
Call parked Keypad locked
Bluetooth® activated Bluetooth® headset connected
About Warning
Not permitted
Phone book
Name Private phone number
Business phone number Mobile phone number
Loudspeaker/hands-free mode activated
eud-1094/1.0 – I7.8 – 05.2009
Aastra 620d 5
Page 6

System Information
System Information
■ Trial licences
Trial licences are available for various features and phones. With that licensed features can be
used for a certain period license-free.
■ One Number user concept
Your system administrator can set up phones for you that hold all the same phone number (one
number user concept). You have only one name and phone number with which to identify
yourself to your call partners, regardless of which of the phones you make your calls. The advantage is that you can always be reached under the same phone number, regardless of where you
happen to be.
With the Personal call routing you can define where incoming calls shall be routed to (see chapter "Personal call routing", page 45). Your system administrator can set whether or not you are
busy for further incoming calls (Busy if busy). When Busy if busy is activated, calls can still be
made with your other phones.
Call lists and contacts are available on all phones and are automatically synchronised.
An announcement is signalled on all your phones which support announcement.
6 Aastra 620d
eud-1094/1.0 – I7.8 – 05.2009
Page 7
Security
■ Safety Information
Failure to observe this information can be hazardous and infringe existing laws.
Medical equipment
The handset must not be used near medical equipment, such as pacemakers or hearing
aids.
Availability of telephone connections
Do not rely on your handset as your only means of communication in emergency or
critical situations. Availability cannot always be guaranteed.
Risk of explosion through sparking
On premises subject to explosion hazards only use ATEX models specially approved for
that purpose.
Hands-free mode and Ringing tone
Do not hold the handset up against your ear in hands-free operation and during ringing
tone, as the volume is then very high.
Mains connection
Use the original power supply only. Connect the power supply only to power sources
that conform to the indications on the device.
Maintenance
Make sure all installation and repair work is carried out by a specially qualified technician. Do not touch the charging contacts with sharp, metallic, and/or greasy objects.
Always use a soft, moistened, or antistatic cloth to clean your device. Do not use chemicals or other chemical products.
Cost control
You should protect your device with a PIN so that no-one can make phone calls at your
expense. A code will also protect your personal settings. When carrying the handset
around, you should lock the keypad so it cannot be accidentally activated.
Ambient conditions
Do not operate the device outside the temperature range of +5 °C to approx. +40 °C.
Avoid direct sunlight and other sources of heat.
Protect your device against the wet, excessive dust, corrosive liquids and steam.
Do not expose your device to electromagnetic fields (electric motors, household appliances). The speech quality could be affected. To prevent interference, avoid placing
your handset in the immediate vicinity of computers, radios, TV sets, VCRs, and other
telephone sets.
Disposal
Be sure to dispose of your device, batteries and its packaging in an environmentally
compatible way. Electrical equipment does not belong in domestic waste. Deposit it at
a return centre.
Security
Accessories
Use original accessories or specifically approved accessories only. The use of other
accessories may decrease performance or pose a risk to your health or safety.
eud-1094/1.0 – I7.8 – 05.2009
Aastra 620d 7
Page 8

Security
■ Dealing with batteries
Please observe the following rules and regulations when dealing with batteries:
General rules when dealing with batteries
• Never tamper with or dismantle batteries.
• Never immerse the batteries in water or throw it into a fire.
• Do not expose the batteries to high temperatures.
When putting your mobile phone into operation
• Only use the battery pack supplied by the manufacturer.
• Take note of the instructions in the "Battery", page 71 chapter and follow the procedure described
there.
• It takes two to three charging cycles for the batteries to reach their fully charged state.
• Only use the charging bay supplied by the manufacturer.
• For the charging bay only use the plug-in power adapter supplied by the manufacturer
(ID: 23-00-1061-00). Otherwise the battery may be damaged.
When operating your mobile phone
• It is normal for the batteries to become warm when charging.
• Discharge the batteries from time to time to prolong their service life. To do so do not place the phone
back into the charging bay until the batteries are completely or almost completely discharged.
To replace the batteries
• Switch off the phone before removing the batteries.
• Only use original batteries and charging units approved by the manufacturer. To do so, contact your
supplier or servicing agent.
To store the phone or the batteries
• If you do not intend to use the phone for some time, switch off the phone and take out the battery
pack.
• Store the batteries at room temperature. Above-average temperatures tend to reduce the service life of
batteries.
To dispose of the battery packs
Do not throw away the batteries with your domestic waste. Take the batteries to an appropriate collection point for recycling.
8 Aastra 620d
eud-1094/1.0 – I7.8 – 05.2009
Page 9

Security
■ User information
Your terminal has been supplied with a Quick User’s Guide, safety information and, where applicable, with other terminal-specific information. You will find this and other documents for your
device at
http://www.aastra.com/docfinder.
More information on your terminal can be found in the documentation or your dealer’s
homepage. It is your responsibility to inform yourself about the scope of functions, operation
and proper use of your equipment.
• Check whether you have all the user information available on your terminal, whether it conforms to your terminal’s version and whether it is up to date.
• Read through the user information carefully before putting your terminal into operation.
• Store the user information within easy reach and refer to it whenever uncertainties arise in
connection with the use of the terminal.
• When handing over your terminal to others, make sure you enclose the relevant user information.
■ Intended Purpose
This phone is part of the Aastra IntelliGate® communication system and is intended to be operated on that system. Any other use does not comply with the intended purpose and is not permitted.
Aastra IntelliGate® is an open, modular and comprehensive communication system that comprises the IP-PBX (referred to in the end-user information as “the system”), a vast number of
expansion cards and modules, and a complete series of system terminals including IP system
terminals. The system and all its component parts were designed to cover in full all the telecommunication requirements of companies and organisations with a single user-friendly solution.
The individual components of the overall systems are fully compatible and must not be used for
other purposes or replaced by third-party components (except when connecting other authorized networks, applications and terminals to the interfaces provided specifically for that purpose).
eud-1094/1.0 – I7.8 – 05.2009
Aastra 620d 9
Page 10

Security
■ Disclaimer
This product was manufactured in accordance with ISO 9001 quality guidelines.
This product and the user information belonging to it have been produced with the utmost
care. The product’s functions have been tested and approved after comprehensive conformity
tests. Nonetheless errors cannot be entirely excluded. The warranty is limited to the replacement of defective hardware.
The manufacturers shall not be liable for any direct or indirect damage that may be caused by
incorrect handling, improper use, or any other faulty behaviour on the part of a product. Potential hazards are mentioned in the relevant places in the user information. Liability for loss of
profit shall be excluded in any case.
■ Trademarks
Aastra IntelliGate® is a registered trademark of Aastra Technologies Limited. Bluetooth® is a registered Bluetooth SIG. All other trademarks are trademarks of the respective proprietors.
■ Document information
• Document number: eud-1094
•Document version:1.0
•Valid upwards:I7.8
• © 05.2009
10 Aastra 620d
eud-1094/1.0 – I7.8 – 05.2009
Page 11

Content
Content
Dialling and Phoning . . . . . . . . . . . . . . . . . . . . . . . . . . . . . . . . . . . . . . . . . . . . . . . . . . . . . . . . . . . . . 12
Answering Calls. . . . . . . . . . . . . . . . . . . . . . . . . . . . . . . . . . . . . . . . . . . . . . . . . . . . . . . . . . . . . . . . . . . . . . . . . . . .13
Making calls . . . . . . . . . . . . . . . . . . . . . . . . . . . . . . . . . . . . . . . . . . . . . . . . . . . . . . . . . . . . . . . . . . . . . . . . . . . . . . .14
Using the Display and Operating Elements . . . . . . . . . . . . . . . . . . . . . . . . . . . . . . . . . . . . . . . . . 17
Keys . . . . . . . . . . . . . . . . . . . . . . . . . . . . . . . . . . . . . . . . . . . . . . . . . . . . . . . . . . . . . . . . . . . . . . . . . . . . . . . . . . . . . . .18
Input . . . . . . . . . . . . . . . . . . . . . . . . . . . . . . . . . . . . . . . . . . . . . . . . . . . . . . . . . . . . . . . . . . . . . . . . . . . . . . . . . . . . . .19
Menu-Guided Navigation . . . . . . . . . . . . . . . . . . . . . . . . . . . . . . . . . . . . . . . . . . . . . . . . . . . . . . . . . . . . . . . . . .21
Signals . . . . . . . . . . . . . . . . . . . . . . . . . . . . . . . . . . . . . . . . . . . . . . . . . . . . . . . . . . . . . . . . . . . . . . . . . . . . . . . . . . . .23
Supplementary features . . . . . . . . . . . . . . . . . . . . . . . . . . . . . . . . . . . . . . . . . . . . . . . . . . . . . . . . . . 24
Making and answering calls . . . . . . . . . . . . . . . . . . . . . . . . . . . . . . . . . . . . . . . . . . . . . . . . . . . . . . . . . . . . . . . .25
Using functions while in a call . . . . . . . . . . . . . . . . . . . . . . . . . . . . . . . . . . . . . . . . . . . . . . . . . . . . . . . . . . . . . .33
Organising absences from the desk. . . . . . . . . . . . . . . . . . . . . . . . . . . . . . . . . . . . . . . . . . . . . . . . . . . . . . . . .36
Functions for special situations . . . . . . . . . . . . . . . . . . . . . . . . . . . . . . . . . . . . . . . . . . . . . . . . . . . . . . . . . . . . .40
Setting functions by remote control . . . . . . . . . . . . . . . . . . . . . . . . . . . . . . . . . . . . . . . . . . . . . . . . . . . . . . . .46
Personalizing Your Phone . . . . . . . . . . . . . . . . . . . . . . . . . . . . . . . . . . . . . . . . . . . . . . . . . . . . . . . . 47
Configuring Phone Functions . . . . . . . . . . . . . . . . . . . . . . . . . . . . . . . . . . . . . . . . . . . . . . . . . . . . . . . . . . . . . .48
Display settings. . . . . . . . . . . . . . . . . . . . . . . . . . . . . . . . . . . . . . . . . . . . . . . . . . . . . . . . . . . . . . . . . . . . . . . . . . . .52
Adjusting the volume . . . . . . . . . . . . . . . . . . . . . . . . . . . . . . . . . . . . . . . . . . . . . . . . . . . . . . . . . . . . . . . . . . . . . . 53
Profile settings. . . . . . . . . . . . . . . . . . . . . . . . . . . . . . . . . . . . . . . . . . . . . . . . . . . . . . . . . . . . . . . . . . . . . . . . . . . . .54
Hands-free and headset settings . . . . . . . . . . . . . . . . . . . . . . . . . . . . . . . . . . . . . . . . . . . . . . . . . . . . . . . . . . .56
General settings . . . . . . . . . . . . . . . . . . . . . . . . . . . . . . . . . . . . . . . . . . . . . . . . . . . . . . . . . . . . . . . . . . . . . . . . . . .58
Protection settings. . . . . . . . . . . . . . . . . . . . . . . . . . . . . . . . . . . . . . . . . . . . . . . . . . . . . . . . . . . . . . . . . . . . . . . . . 62
Managing your private contacts . . . . . . . . . . . . . . . . . . . . . . . . . . . . . . . . . . . . . . . . . . . . . . . . . . . . . . . . . . . .63
Configuring Voice Mail . . . . . . . . . . . . . . . . . . . . . . . . . . . . . . . . . . . . . . . . . . . . . . . . . . . . . . . . . . . . . . . . . . . . .65
Configuring Keys . . . . . . . . . . . . . . . . . . . . . . . . . . . . . . . . . . . . . . . . . . . . . . . . . . . . . . . . . . . . . . . . . . . . . . . . . .66
Formulating Functions . . . . . . . . . . . . . . . . . . . . . . . . . . . . . . . . . . . . . . . . . . . . . . . . . . . . . . . . . . . . . . . . . . . . .67
Installation and commissioning . . . . . . . . . . . . . . . . . . . . . . . . . . . . . . . . . . . . . . . . . . . . . . . . . . . 68
Equipment provided . . . . . . . . . . . . . . . . . . . . . . . . . . . . . . . . . . . . . . . . . . . . . . . . . . . . . . . . . . . . . . . . . . . . . . .69
Options . . . . . . . . . . . . . . . . . . . . . . . . . . . . . . . . . . . . . . . . . . . . . . . . . . . . . . . . . . . . . . . . . . . . . . . . . . . . . . . . . . .69
Connecting a mobile phone. . . . . . . . . . . . . . . . . . . . . . . . . . . . . . . . . . . . . . . . . . . . . . . . . . . . . . . . . . . . . . . .70
Battery . . . . . . . . . . . . . . . . . . . . . . . . . . . . . . . . . . . . . . . . . . . . . . . . . . . . . . . . . . . . . . . . . . . . . . . . . . . . . . . . . . . .71
Carry clip or swivel clip . . . . . . . . . . . . . . . . . . . . . . . . . . . . . . . . . . . . . . . . . . . . . . . . . . . . . . . . . . . . . . . . . . . . .72
Carry strap. . . . . . . . . . . . . . . . . . . . . . . . . . . . . . . . . . . . . . . . . . . . . . . . . . . . . . . . . . . . . . . . . . . . . . . . . . . . . . . . .72
USB and external charging socket . . . . . . . . . . . . . . . . . . . . . . . . . . . . . . . . . . . . . . . . . . . . . . . . . . . . . . . . . . 73
Logging your phone on . . . . . . . . . . . . . . . . . . . . . . . . . . . . . . . . . . . . . . . . . . . . . . . . . . . . . . . . . . . . . . . . . . . . 73
Further information . . . . . . . . . . . . . . . . . . . . . . . . . . . . . . . . . . . . . . . . . . . . . . . . . . . . . . . . . . . . . . 74
Troubleshooting . . . . . . . . . . . . . . . . . . . . . . . . . . . . . . . . . . . . . . . . . . . . . . . . . . . . . . . . . . . . . . . . . . . . . . . . . . .75
Technical Data . . . . . . . . . . . . . . . . . . . . . . . . . . . . . . . . . . . . . . . . . . . . . . . . . . . . . . . . . . . . . . . . . . . . . . . . . . . . .76
Index . . . . . . . . . . . . . . . . . . . . . . . . . . . . . . . . . . . . . . . . . . . . . . . . . . . . . . . . . . . . . . . . . . . . . . . . . . . . 78
eud-1094/1.0 – I7.8 – 05.2009
Aastra 620d 11
Page 12

Dialling and Phoning
The following sections explain how to make phone calls simply and the functions your phone offers
you whenever you receive a call.
Answering Calls. . . . . . . . . . . . . . . . . . . . . . . . . . . . . . . . . . . . . . . . . . . . . . . . . . . . . 13
Making calls . . . . . . . . . . . . . . . . . . . . . . . . . . . . . . . . . . . . . . . . . . . . . . . . . . . . . . . . 14
12 Aastra 620d
eud-1094/1.0 – I7.8 – 05.2009
Page 13

Dialling and Phoning
Answering Calls
This section explains the procedure for answering a call.
■ Answering a Call
Your phone is ringing and the indicator LED is flashing. To answer the call, proceed as follows:
The volume of the ringing call can become very loud. Do not hold the sound aperture up to
your ear.
Press the Call key.
Note:
If the call er's p hone numb er is r eceived , it is show n on th e dis play. I f the phon e
number is stored in the private phone book or in the system, the display also
shows the corresponding name.
Notes:
• To find out how to phone with headset, refer to the Chapter "Using a Head-
set", page 16.
• To find out how to activate the hands-free mode, refer to the Chapter "Using
Your Phone in Hands-Free Mode", page 15.
■ Ending a Call
You want to end the call.
The call duration is displayed both during and after the call.
Call charges are also displayed after any external call which you initiated, provided your provider supports this function.
Press the End key.
Notes:
• To find out how to phone with headset, refer to the Chapter "Using a Head-
set", page 16.
• To find out how to activate the hands-free mode, refer to the Chapter "Using
Your Phone in Hands-Free Mode", page 15.
eud-1094/1.0 – I7.8 – 05.2009
Aastra 620d 13
Page 14

Dialling and Phoning
Making calls
This section explains the different ways you can make a call with your phone.
■ Dialling with the Phone Number
You want to call someone and key in that person's phone number.
With call preparation you can enter a phone number without it being dialled automatically, so
you have time to check the number and, if necessary, correct it. The number is not dialled until
you press the Call key.
<Phone number>
Enter a phone number in call preparation.
You can use the Correction key to delete any incorrect character.
Press the Call key.
➔ The enquiry call party is called.
■ Dialling with Redial
You want to call a person you have already called.
In the last-number redial list your phone automatically stores the phone numbers of the persons you have already called, complete with their names, where available. You can now call the
person in question using this last-number redial list.
The last-number redial list has a maximum of 10 entries.
Press the Call key.
➔ The redial list is displayed.
To scroll through the call numbers last dialled, press the navigation key downwards.
Press the Call key.
➔ The phone number displayed is dialled.
14 Aastra 620d
eud-1094/1.0 – I7.8 – 05.2009
Page 15
Dialling and Phoning
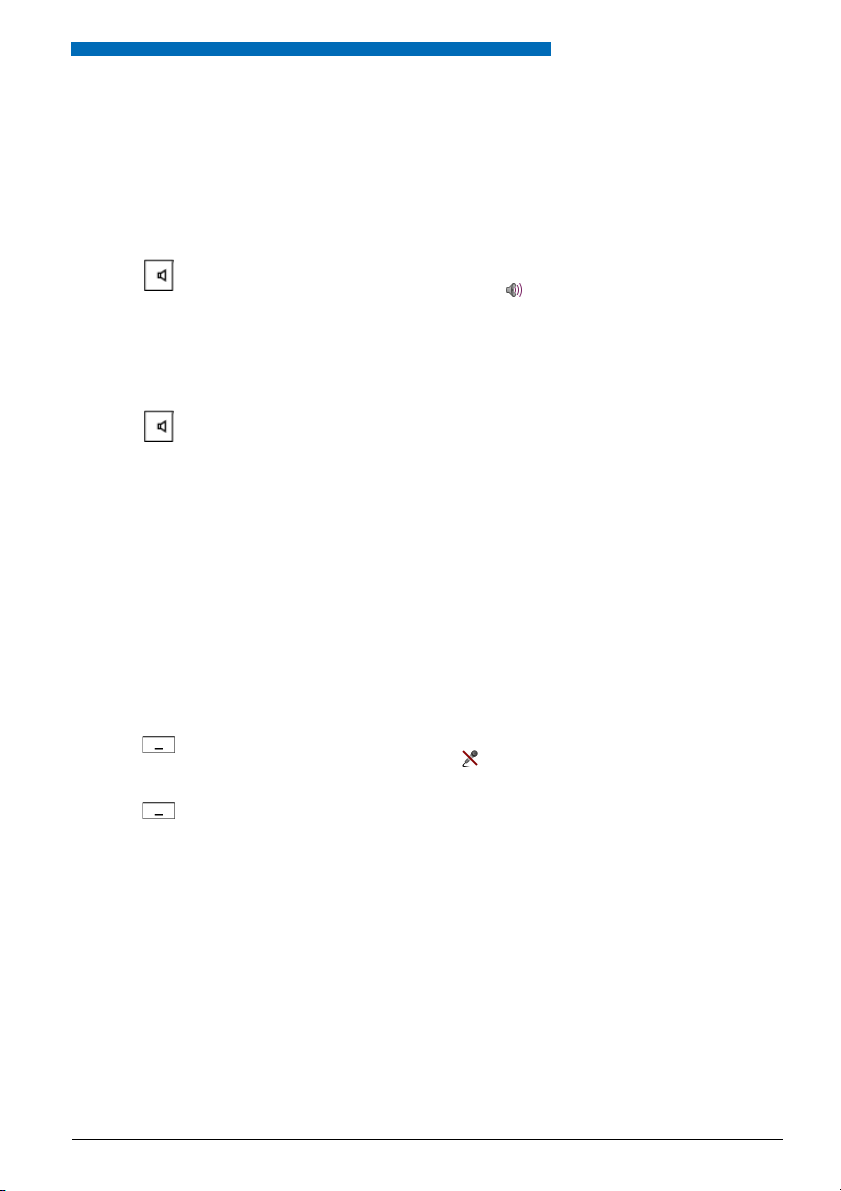
■ Using Your Phone in Hands-Free Mode
You want other people to join the conversation or to have your hands free while making the
call.
The hands-free mode function activates the loudspeaker and the microphone.
During a call:
Press the Loudspeaker key.
➔ Hands-free operation is activated, is displayed.
Notes:
• Make sure the hands-free microphone is not obstructed.
• The sound quality is improved if you set the volume of your phone to a low
setting.
To continue the call without hands-free operation:
Press the Loudspeaker key.
➔ The loudspeaker and hands-free microphone are now deactivated.
Notes:
• To end a call in open-listening mode, press the End call key.
• To find out how to phone with headset, refer to the Chapter "Using a Head-
set", page 16.
■ Muting the Microphone
In the middle of a call you want to talk briefly with other persons in the room without your call
partner hearing your conversation.
You can switch the microphone on and off during a call.
<Micro>
<Micro>
eud-1094/1.0 – I7.8 – 05.2009
Switching the microphone off:
Press the Micro softkey.
➔ Microphone is deactivated, is displayed.
Switching the microphone back on:
Press the Micro softkey a second time.
Aastra 620d 15
Page 16
Dialling and Phoning
■ Using a Headset
To make a phone call with the headset.
If you answer a call in headset mode using the Call key or Loudspeaker key, the call is provided
on the headset.
Note:
If you loose the radio contact with a Bluetooth® headset, you can go back into the radio area without
being disconnected from the active connection.
Phone is ringing. To answer the call, proceed as follows:
Press the Call key or Loudspeaker key.
➔ The call is provided on your headset.
Press the Loudspeaker key.
➔ The phone’s microphone is switched on and the headset microphone is
switched off.
Headset <--> Handset
You can use the Headset or Handset softkey to switch modes.
Ending a Call:
Press the End key.
Notes:
• To find out how to activate the headset, refer to the Chapter "To activate
headset operation", page 56.
• To find out how to connect a Bluetooth® headset, refer to Chapter "Activating
Bluetooth® mode and Bluetooth® devices", page 57.
• To call a user, dial the user’s phone number and press the Call key or Loudspeaker key.
• For more information refer to your headset’s operating instructions.
16 Aastra 620d
eud-1094/1.0 – I7.8 – 05.2009
Page 17

Using the Display and
Operating Elements
The following sections explain how to operate your phone quickly and simply.
Keys . . . . . . . . . . . . . . . . . . . . . . . . . . . . . . . . . . . . . . . . . . . . . . . . . . . . . . . . . . . . . . . . .18
Input . . . . . . . . . . . . . . . . . . . . . . . . . . . . . . . . . . . . . . . . . . . . . . . . . . . . . . . . . . . . . . . .19
Menu-Guided Navigation. . . . . . . . . . . . . . . . . . . . . . . . . . . . . . . . . . . . . . . . . . . .21
Signals . . . . . . . . . . . . . . . . . . . . . . . . . . . . . . . . . . . . . . . . . . . . . . . . . . . . . . . . . . . . . .23
eud-1094/1.0 – I7.8 – 05.2009
Aastra 620d 17
Page 18

Using the Display and Operating Elements
Keys
■ Pressing a Key
A key may have various functions depending on the situation and the operating mode. The
function activated depends on the number of times the key is pressed or whether it is pressed
quickly or held down for a moment. Here are some examples:
Press the softkey.
<long>
Keep the softkey held down for a moment (about 2 seconds).
■ Softkey
The 3 softkeys have variable functions. These functions are displayed above the key.
You can also store phone numbers on a softkey (see Chapter "Store a phone number under a
key", page 66).
<Setting value>
Press the softkey under the desired function on the display.
■ Hotkey
The hotkey is a user configurable key for 1 to 6 phone numbers and names.
Press the Hotkey to open the Hotkey menu.
<long>
To configure the Hotkey, keep it pressed down for approx. 2 seconds.
18 Aastra 620d
eud-1094/1.0 – I7.8 – 05.2009
Page 19

Using the Display and Operating Elements
Input
■ Digit keys
The characters are assigned to the digit keys as follows. Press the relevant digit key repeatedly
until the character you want is displayed.
- . _ ? 1 ! , : ; ’ " ¿ ¡
D E F 3 É
d e f 3 é è ê
J K L 5
j k l 5
P Q R S 7
p q r s 7 ß
W X Y Z 9
w x y z 9
@ * / ( ) < = > % £ $ ¥ ª & § <Space> #
A B C 2 Ä Æ Å Ç
a b c 2 ä æ å à ç
G H I 4
g h i 4 ì
M N O 6 Ñ Ö Ø
m n o 6 ñ ö ø ò
T U V 8 Ü
t u v 8 ü ù
+ 0
■ Enters digits
The digit keys are used to enter the digits 0 to 9.
■ Enter the letters
You can also use the digit keys to enter letters and special characters. A number of letters and
special characters are assigned to each key.
To enter letters using the digit keys, you need to be in text mode. The text mode is activated
automatically if the phone is expecting a text input. You can switch back and forth between
number mode and letter mode during your input.
abc-->123
eud-1094/1.0 – I7.8 – 05.2009
Switching between number mode and letter mode during your input:
Press the abc-->123 and 123-->abc softkey.
Aastra 620d 19
Page 20
Using the Display and Operating Elements
■ Switching between Upper and Lower Case
You want to switch between upper and lower case while making an input in text mode.
Upper-case input is automatically activated when the first letter is entered. The text mode then
automatically switches to lower-case input. You can use the softkey to switch manually
between upper-case and lower-case input.
a-->A
Switching between upper case and lower case in text mode:
Press the a-->A or >A-- a softkey.
■ Correcting your Input
You notice you have entered a wrong digit or character. You can either delete the input one
character at a time or cancel the entire input.
To delete the last character:
Press the Correction key or the Delete softkey.
Exit Editor without changes:
Press the End key.
■ Moving the Cursor
You want to go to a certain character for an input or correction.
With the navigation key you can move the cursor to the left or right.
Move the cursor with the horizontal navigation key.
20 Aastra 620d
eud-1094/1.0 – I7.8 – 05.2009
Page 21
Using the Display and Operating Elements
Menu-Guided Navigation
■ Accessing the menu
The phone is in standby mode:
Press the navigation key to the right or the Menu softkey.
➔ The first menu entry is displayed.
Use the vertical navigation key to scroll through the menu entries.
Selecting
Press the Select softkey.
➔ Accessing the displayed menu.
■ Navigation key
You can retrieve a particular menu entry even more simply and efficiently using the navigation
key. You can scroll vertically and horizontally through the different menu entries.
Navigation key in the idle state:
Left: Pr ofiles
Right: Main menu
Top : Activated features
Bottom: Phone book
Horizontal navigation key:
Left: scrolls back through the menu.
Right: opens displayed menu, scrolls forward through the menu, retrieves
detailed information.
Vertical navi gation key:
Top: scrolls upwards in the list.
Bottom: scrolls downwards in the list.
eud-1094/1.0 – I7.8 – 05.2009
Aastra 620d 21
Page 22

Using the Display and Operating Elements
■ Cancelling operating steps
To cancel operating steps, proceed as follows:
Exit Editor without changes:
Press the End key.
Scrolling back through the menu step by step:
Press the correction key.
Back to the idle state in the menu:
Press the End key.
■ Enabling/Disabling function
You can enable or disable a function or a menu entry by selecting the entry you want and pressing the Select softkey.
Selecting
Enabling/disabling function:
Press the Select softkey.
■ Resetting activated features
You can deactivate again all the activated functions (e.g. Forwarding).
Press the navigation key up.
➔ Activated features is opened.
Or:
Activated features are also available via the menu: Menu > Activated features.
Deactivate
Press the Deactivate softkey to deactivate the function you want.
➔ The function is now deactivated.
22 Aastra 620d
eud-1094/1.0 – I7.8 – 05.2009
Page 23

Using the Display and Operating Elements
Signals
■ Indicator LED Signals
Depending on the situation the indicator LEDs will flash or light up in different colours.
Colour State Description
Flashes fast • Incoming call
Lit Hands-free on
Flashes slowly New Voice Mail or new text message
Flashes fast Outside the system’s range
• Callback
Flashes slowly • Battery almost empty
Lit Battery charging
• Not subscribed to any system
eud-1094/1.0 – I7.8 – 05.2009
Aastra 620d 23
Page 24

Supplementary features
The following sections explain the supplementary features provided by your phone for more efficient
use.
Making and answering calls . . . . . . . . . . . . . . . . . . . . . . . . . . . . . . . . . . . . . . . . . 25
Using functions while in a call . . . . . . . . . . . . . . . . . . . . . . . . . . . . . . . . . . . . . . . 33
Organising absences from the desk. . . . . . . . . . . . . . . . . . . . . . . . . . . . . . . . . . 36
Functions for special situations . . . . . . . . . . . . . . . . . . . . . . . . . . . . . . . . . . . . . . 40
Setting functions by remote control. . . . . . . . . . . . . . . . . . . . . . . . . . . . . . . . . . 46
24 Aastra 620d
eud-1094/1.0 – I7.8 – 05.2009
Page 25
Supplementary features
Making and answering calls
This section explains some convenient features provided by your phone for making a call.
■ Dialling by name – quick search
You want to make a call by entering a name.
With quick search you only need to press the digit keys once for each letter even though several
letters are stored under each key. An efficient algorithm provides quick search results.
Requirement: The name and the corresponding call number have to be stored in one of the system’s phone books.
The surname and first name have to be separated by a space (# key), for example "no s" (6 6 # 7)
for Noble Stephen. Ask your system administrator whether you should start with the surname
or the first name.
Note:
The response time may vary greatly depending on the size and the number of phone books connected.
<Setting value>
ABC
eud-1094/1.0 – I7.8 – 05.2009
Quick find:
For the initial letters of the name you are searching for, press the corresponding digit key once.
➔ For each letter, the display shows the corresponding digit, for example a "6"
for the letter "n".
Press the ABC softkey until the user or a list is displayed.
Or:
Phone book is also available via the menu: Menu > Phone book> Quick search.
Scroll through the list until the user you want is displayed. Select the phone
number you want.
Press the Call key.
➔ The phone number displayed is dialled.
Note:
If the phone is unable to find a matching user, List empty will appear on the display.
Aastra 620d 25
Page 26

Supplementary features
■ Dialling from the phone book - Alpha search
You want to search for a user directly in one of the connected phone books.
The surname and first name have to be separated by a space, for example "no s" for Noble
Stephen. Ask your system administrator whether you should start with the surname or the first
name.
To find out to create a new contact in your private phone book, refer to the Chapter "Creating a
new contact entry", page 63.
Press the navigation key downwards.
Or:
Phone book is also available via the menu: Menu > Phone book.
Alpha search
Scroll to Alpha search and press the Select softkey.
If required, enter the first few letters of the name you are looking for (first name
and surname separated by a space) until the user or a list is displayed.
Notes:
• Text mode is activated automatically.
•Use the #key to enter spaces.
Scroll through the list until the user you want is displayed. Select the phone
number you want.
Press the Call key.
➔ The phone number displayed is dialled.
Notes:
• The search function is not affected by upper/lower case and special characters.
• If the phone is unable to find a matching user, List empty will appear on the
display.
26 Aastra 620d
eud-1094/1.0 – I7.8 – 05.2009
Page 27

Supplementary features
■ Dialling from the Call List of Unanswered Calls
You want to call someone who has previously tried to reach you.
Your phone automatically stores the phone number of this user in a calllist and the display
reads Missed calls. You can now call the person back using this call list.
The call list of unanswered calls contains a maximum of 10 entries.
Show
End
Calling a user back:
Press the Show softkey.
➔ The display shows a list of the last unanswered calls.
Scroll through the list until the user you want is displayed.
Press the Call key.
➔ The phone number displayed is dialled. Once the call has been successfully
connected, the entry is deleted from the call list.
Clearing the "Missed calls" display:
Press the End softkey.
➔ Deletes the display. The entry remains stored in the list of the last unan-
swered calls, is displayed.
Note:
Call list of unanswered calls is also available via the menu: Menu > Call lists >
Unanswered calls.
■ Dialling from the Call List of Answered Calls
You want to call back someone whose call you answered.
Your phone automatically stored the person's phone number on the list of answered calls. You
can now call the person back using this call list.
The list of answered calls contains a maximum of 10 entries.
Press the navigation key to the right or the Menu softkey.
Call lists
Scroll to Call lists and press the Select softkey.
Answered calls
eud-1094/1.0 – I7.8 – 05.2009
Scroll to Answered calls call list and press the Select softkey.
➔ The display shows a list of the last answered calls.
Scroll through the list until the user you want is displayed.
Press the Call key.
➔ The phone number displayed is dialled.
Aastra 620d 27
Page 28

Supplementary features
■ Dialling with Redial
You want to call a person you have already called.
In the last-number redial list your phone automatically stores the phone numbers of the persons you have already called, complete with their names, where available. You can now call the
person in question using this last-number redial list.
The last-number redial list has a maximum of 10 entries.
Press the Call key.
➔ The redial list is displayed.
To scroll through the call numbers last dialled, press the navigation key downwards.
Press the Call key.
➔ The phone number displayed is dialled.
Note:
Redial list is also available via the menu: Menu > Call lists > Redial list.
■ Dialling with a configured softkey
You want to call a user whose phone number is stored under a softkey.
You can call the user by pressing the corresponding softkey. To find out how to configure a
softkey, refer to Chapter "Configuring Keys", page 66.
<Setting value>
Press the configured softkey.
➔ The key’s allocated function is shown on the display.
Press the Call key.
➔ The phone number displayed is dialled.
■ Dialling with a configured hotkey
You want to call a user whose call number is stored under a configurable hotkey.
You can call the user by pressing the hotkey. To find out how to configure a hotkey, refer to
Chapter "Configuring Keys", page 66.
Press the Hotkey.
➔ The key’s allocated function is shown on the display.
Press the Call key.
➔ The phone number displayed is dialled.
28 Aastra 620d
eud-1094/1.0 – I7.8 – 05.2009
Page 29

Supplementary features
■ Requesting a Callback
You want to talk to a certain person. The person is busy or does not answer. You can make callback requests to both internal and external users. Not all providers support this function.
If the called party is busy, you can activate an automatic callback. In this case, your phone will
start ringing as soon as the party you are trying to reach goes on-hook. Then when you press
the Call key, the user is called directly.
If the called party does not answer, you can also request a callback. The user then obtains a
message indicating your callback request on his display.
You called someone and hear the busy tone or the ring-back tone.
Callback
End
Deactivate
To activate a callback request:
Press the Callback softkey.
➔ The display shows Call expected.
Back to the idle state:
Press the End softkey.
➔ Callback remains activated.
Note:
The call back is stored in Menu > Activated features as long as it was not
answered or cancelled by the system.
Reset callback:
Press the Deactivate softkey.
➔ Callback is deactivated.
Note:
You can only have 1 call back activated at a time and only 1 call back can be
expected from you. Your callback request will automatically be cancelled by
the system after about half an hour.
■ To answer the callback request
Someone has asked you to call back. The display reads Call back requested.
Call
Delete
eud-1094/1.0 – I7.8 – 05.2009
Aastra 620d 29
To answer the callback request:
Press the Call softkey.
➔ The phone number is dialled.
Clear call back:
Press the Delete softkey.
➔ Callback is deleted.
Note:
As long as the callback is not answered or deleted by the system, it can be
edited using Menu > Activated features > Delete or Answer.
Page 30

Supplementary features
■ Call waiting with an internal user
You want to talk to an internal user. However, the person is busy.
As a result of your call waiting, the person hears a call waiting tone and your phone number or
name appears on his display. The user has the possibility of answering, deflecting or rejecting
your call.
Requirement: It is essential that the internal user has not barred the Call waiting function on his
phone (for configuration see the Chapter "Activating protection against certain types of calls",
page 62).
Ask your system administrator whether the Call waiting function is enabled on the system.
Call waiting
User is busy:
Press the Call waiting softkey.
➔ You hear the dialling tone.
Note:
If the user rejects the call request or if call waiting is not possible, depending on
the system configuration the call is either disconnected (busy tone) or forwarded to a preconfigured destination.
■ Answering Call Waiting
You are in a call and hear the call waiting tone. Another user urgently wants to speak to you.
You can either answer, deflect or reject the call.
Answer
Deflect
<Phone number>
Answering the call:
Press the Answer softkey.
➔ 1.Your original call partner is put on hold. You are now connected with the
party who initiated the call waiting.
Note:
For more detailed information on how to broker between callers or set up a
conference, please refer to Chapter "Brokering between an Enquiry Call Party
and Your Call Partner", page 33 or Chapter "Making a Conference Call", page
34.
Deflect call:
Press the Deflect softkey.
Enter the user’s call number and confirm with the Ok softkey.
➔ Call-waiting party is put through.
Note:
You can also find the call number of the user you want in the phone book or in
a call list.
30 Aastra 620d
eud-1094/1.0 – I7.8 – 05.2009
Page 31

Supplementary features
Reject
End
Rejecting the call:
Press the Reject softkey or the End call key.
➔ You remain connected with your first call partner. Depending on the sys-
tem configuration the caller who has initiated call waiting either obtains
the busy tone or is forwarded to a preconfigured destination.
Ending a current call:
Press the End call softkey.
➔ 1. The first call is terminated. You are now connected with the party who
initiated the call waiting.
■ Starting an Announcement
You want to address internal users directly via their loudspeaker – where available – , without
waiting for a reply (similar principle to that of an intercom system).
Requirement: It is essential that the internal user has not barred his phone against announcement (for configuration see the Chapter "Activating protection against certain types of calls",
page 62).
<Phone number>
Announcement
OK
Enter the call number and press the Announcement softkey.
➔ The call number is displayed.
Note:
You can also find the call number of the user you want in the phone book or in
a call list.
Confirm with the Ok softkey.
➔ User is made aware of the announcement by an acoustic signal. The display
reads Announcement: You can now talk.
Or:
You can also start the announcement using Menu > Call features > Announce-
ment.
eud-1094/1.0 – I7.8 – 05.2009
Aastra 620d 31
Page 32

Supplementary features
■ Receiving an Announcement
After an attention tone you will be addressed via your loudspeaker.
You can listen to the announcement or stop it.
To continue the announcement as a phone call:
Press the Call key.
➔ You are now connected to the person who initiated the announcement.
To stop the announcement:
Press the End key.
■ Private call with PIN
You want to make a private call on your phone or on a third-party phone.
With the aid of your PIN you can use any phone to make an external call with your own personal
settings, even if that phone is locked for external calls. The called party's display shows your
personal phone number and not the number of the phone from which you are making your
call. Any call charges incurred will be charged to you.
The call number dialled is not stored in the last-number redial list.
<Setting value>
32 Aastra 620d
1. Enter #46 followed by your internal call number.
2. Enter your PIN.
3. Enter the external call number directly, without the exchange access digit.
Press the Call key.
➔ The phone is now enabled. The external user is called.
Note:
The factory setting "0000" is not accepted. First change the PIN as described in
chapter "Changing the PIN", page 59 or use the */# procedure *47 (see "User’s
Guide */# Procedures"). If you have forgotten your PIN, your system administrator can reset it to the factory setting.
eud-1094/1.0 – I7.8 – 05.2009
Page 33

Supplementary features
Using functions while in a call
This section explains the different options provided by your phone while you are in a call.
■ Enquiry Call During a Call
You want to call someone else briefly without losing your current call partner. Then you want to
resume your conversation with your original call partner.
With the Enquiry call function you can call someone else in the middle of a call and put your
original call partner on hold. You can make enquiry calls to both internal and external users.
Enquiry
<Phone number>
End
You are making/taking a call:
Press the Enquiry softkey.
Enter the phone number of the enquiry call party.
➔ Enquiry call party is called; 1st call partner is on hold.
Note:
You can also find the call number of the user you want in the phone book or in
a call list.
To end the enquiry call:
Press the End call softkey or the End key.
➔ You are now back through to your 1. call partner.
Notes:
• If your enquiry call party hangs up and you also go on-hook by mistake, you
will hear a continuous ringing signal for 10 seconds to draw your attention to
the person still on hold. If you press the Call key during the continuous ringing, you will be reconnected with your first call partner.
• If the other user does not answer, you can use the End call softkey to cancel
the enquiry and take back the first call.
■ Brokering between an Enquiry Call Party and Your Call Partner
You are talking with an enquiry call party and have your original call partner on hold. You want
to be able to switch back and forth between the two.
In an enquiry call you can use the brokering function to switch back and forth between an
enquiry call party and the party on hold. Brokering is possible with both internal and external
users. You can also broker between conference parties as a group and an enquiry call party.
Brokering
End
eud-1094/1.0 – I7.8 – 05.2009
Brokering:
Press the Brokering softkey.
➔ Your call partner changes. The other call party is put on hold.
To terminate the current connection:
Press the End call softkey.
➔ Call party disconnected. Connected with the call party on hold.
Aastra 620d 33
Page 34

Supplementary features
■ Making a Conference Call
You are in a call and have a call party on hold at the same time. You want to include the party on
hold in the conversation and hold a conference call.
With the conference function you can include a call party on hold in the current conversation.
From the conference call you can initiate an enquiry call to someone else. You can broker
between the parties of the conference and the enquiry call party.
Depending on the system, a conference call can consist of up to 6 conference participants. You
can hold a conference call with internal and external users.
Conference
Add a caller on hold:
Press the Conference softkey.
➔ The call party on hold is now included in the call.
Note:
Depending on the system’s configuration you may hear an attention tone.
Leaving a conference call:
Press the End key.
➔ The other conference parties remain in the call.
■ Connecting a caller through
You want to put your call partner through to someone else.
With the Enquiry call function you can connect your call partner with someone else. You can
connect internal and external users with one another.
Enquiry
<Phone number>
Connect
34 Aastra 620d
You are making/taking a call:
Press the Enquiry softkey.
Enter the phone number of the enquiry call party.
➔ Enquiry call party is called; 1st call partner is on hold.
Note:
You can also find the call number of the user you want in the phone book or in
a call list.
Connecting with notification:
Wait until the person has answered the call. Announce the call party.
Press the Connect softkey or the End key.
➔ 1.Your call partner and the other person are now connected with each
other.
Note:
If the other user does not answer, you can use the End call softkey to cancel the
enquiry and take back the 1. call.
Connecting without notification:
Wait for the first ringing tone, then press the End key.
➔ The other party is then called directly by your first call partner.
Note:
Recall: If the other party does not answer, the call comes back to your phone.
eud-1094/1.0 – I7.8 – 05.2009
Page 35

Supplementary features
■ Parking a Call Partner
You want to put your call partner on hold without using a phone channel as a result.
You can park your call partner locally. A locally parked call partner can only be retrieved by the
phone from which the function was initially carried out.
Park
Tak e b ac k
Press the Park softkey.
➔ Your call partner is now parked locally; is displayed.
To retrieve a parked call party:
Press the Tak e ba ck softkey.
Notes:
• The End call key returns the display to the idle state. As long as your call partner does not hang up, he remains parked. You can retrieve your parked caller
using Menu > Activated features > Take ba ck .
• The */# procedure for central parking can be found in the "User’s Guide */#
Procedures".
eud-1094/1.0 – I7.8 – 05.2009
Aastra 620d 35
Page 36

Supplementary features
Organising absences from the desk
This section explains the different options provided by your phone when you want to leave your
desk.
Note:
Call forwarding is valid for all the connected phones.
■ Forwarding calls (call forwarding)
You want to leave your desk. Calls made to you are to be forwarded to a different destination
(phone, Voice Mail).
With Call Forwarding you can forward incoming calls directly to a different destination.
Activating forwarding:
Press the navigation key to the right or the Menu softkey.
Forw ardin g
Scroll to For wardin g and press the Select softkey.
Call Forwarding
User
Scroll to Call forwarding and confirm with the Ok softkey.
Scroll to User and confirm with the Ok softkey.
Enter the user’s call number and confirm with the Ok softkey.
➔ Forwarding is activated.
Note:
You can also find the call number of the user you are looking for in the redial
list.
Deactivating forwarding:
Press Menu > Activated features > Deactivate.
Notes:
• If a call is to be forwarded only when you are already in a call, select Call for-
warding if busy .
• You can also forward to your Voice Mail (see Chapter "Forward to Voice Mail",
page 38) or to a Message (see Chapter "Forwarding to a message", page 39).
• You can also activate forwarding by remote control, see Chapter "Setting
functions by remote control", page 46.
36 Aastra 620d
eud-1094/1.0 – I7.8 – 05.2009
Page 37

Supplementary features
■ Forwarding calls (Call Forwarding on No Reply)
You want calls that you receive on your phone to be forwarded to another destination.
Both your own phone and the other destination will then start ringing. The system configuration determines whether or not there is a ringing delay at the other destination. Whoever goes
off-hook first, answers the call. Depending on the system configuration, Call Forwarding on No
Reply can also be activated when your phone is busy.
Activating forwarding:
Press the navigation key to the right or the Menu softkey.
Forwa rding
Call Forwarding on No
Reply
Scroll to For wardin g and press the Select softkey.
Scroll to Call forwarding on No Reply and confirm with the Ok softkey.
User
Scroll to User and confirm with the Ok softkey.
Enter the call number of the destination to which you want your calls to be forwarded and confirm with the Ok softkey.
➔ Forwarding is activated.
Note:
You can also find the call number of the user you are looking for in the redial
list.
Deactivating forwarding:
Press Menu > Activated features > Deactivate.
Notes:
• You can also forward to your Voice Mail (see Chapter "Forward to Voice Mail",
page 38).
• You can also activate forwarding by remote control, see Chapter "Setting
functions by remote control", page 46.
eud-1094/1.0 – I7.8 – 05.2009
Aastra 620d 37
Page 38

Supplementary features
■ Forward to Voice Mail
You cannot momentarily be reached on your phone. If you forward to your Voice Mail, a user
can leave you a voice message.
You can use the global greeting or your own greeting (see Chapter "Configuring Voice Mail",
page 65).
For more information on Voice Mail please refer to the "User’s Guide Voice Mail Systems".
Activating forwarding:
Press the navigation key to the right or the Menu softkey.
Forw ardin g
Scroll to For wardin g and press the Select softkey.
Call Forwarding
Voice Mail
Scroll to Call forwarding and confirm with the Ok softkey.
Scroll to Voice Mail and confirm with the Ok softkey.
➔ Forwarding is activated.
Deactivating forwarding:
Press Menu > Activated features > Deactivate.
Notes:
• You can specify whether your Voice Mail should answer directly (Call For-
warding ) or with a delay (Call Forwarding on No Reply), or only if you are
already on the phone (Call Forwarding if busy).
• A new Voice Mail message is signalled with a text message on the display and
a red-flashing LED indicator in the idle state..
38 Aastra 620d
eud-1094/1.0 – I7.8 – 05.2009
Page 39

Supplementary features
■ Forwarding to a message
You cannot be reached on your phone. You want any internal user who calls you to get a text
message. The subscriber hears the busy tone and obtains a text message on his display.
Requirement: The internal user must have a phone capable of receiving text messages. Users
whose phone cannot receive text messages are put through to your phone or rerouted to a destination predefined within the system.
Activating forwarding:
Press the navigation key to the right or the Menu softkey.
Forwa rding
Scroll to For wardin g and press the Select softkey.
Call Forwarding
Message
<Text>
Scroll to Call forwarding and confirm with the Ok softkey.
Scroll to Message and confirm with the Ok softkey.
Enter the text and confirm with the Ok softkey.
➔ Forwarding is activated.
Deactivating forwarding:
Press Menu > Activated features > Deactivate.
Note:
If you activate another call forwarding, your forwarding to message is deactivated.
eud-1094/1.0 – I7.8 – 05.2009
Aastra 620d 39
Page 40

Supplementary features
Functions for special situations
This section explains the different options provided by your phone to deal with special situations.
■ Forwarding a call during the ringing phase
You do not want to answer a call yourself but deflect it to another user.
The Deflect function allows you to deflect a call during the ringing phase, to an internal or external user or to your Voice Mail.
Your phone is ringing and the indicator LED is flashing. To deflect the call, proceed as follows.
Deflect
<Phone number>
Press the Deflect softkey.
Enter the call number and confirm with the Ok softkey.
➔ The call is deflected to the desired user.
Notes:
• You can also find the call number of the user you want in the phone book or
in a call list.
• If the user you want to deflect to is busy, the call will not be deflected. The display reads Busy and your phone still rings.
■ Rejecting a call during the ringing phase
You do not want to answer a call.
You can reject a call already during the ringing phase
Reject
Press the Reject softkey or the End call key.
➔ The connection is rejected and, depending on the system configuration,
the caller obtains the busy tone or is forwarded to a preconfigured destination.
40 Aastra 620d
eud-1094/1.0 – I7.8 – 05.2009
Page 41

Supplementary features
■ Listening to Voice Mail
Your display reads Voice Mail from and the indicator LED is flashing red.
Listen
Menu
Voice Mail
Inbox
Delete
Listening to a new message:
Press the Listen softkey.
➔ The message is played back.
Or:
Voice Mail is also available via the menu: Menu > Voice Mail > Inbox > Listen.
To delete the message:
Press the navigation key to the right or the Menu softkey.
Scroll to Voice Mail and press the Select softkey.
Scroll to Inbox and press the Select softkey.
Press the Delete softkey.
➔ The Voice Mail is deleted.
Notes:
• To find out how to configure call forwarding to your Voice Mail, refer to the
Chapter "Forward to Voice Mail", page 38.
• To find out how to configure a Voice Mail please refer to the Chapter "Config-
uring Voice Mail", page 65 or to the "User’s Guide Voice Mail Systems".
eud-1094/1.0 – I7.8 – 05.2009
Aastra 620d 41
Page 42

Supplementary features
■ Sending text messages
You want to send a written message to an internal user.
You can send a text message to an internal user. The text message will appear on the person's
display.
Requirement: The internal user must have a phone capable of receiving messages.
You can use one of the text messages stored in the system directly, modify it or create a new
message.
Press the navigation key to the right or the Menu softkey.
Text message
New
<Text message>
<Text>
<Destination>
<Phone number>
Scroll to Tex t me ssa ge and press the Select softkey.
Scroll to New and press the Select softkey.
Select one of the text messages stored in the system and press the Select
softkey.
Adapt or expand the text and press the Send softkey.
Select the destination and press the Select softkey.
For user and group: Enter the phone number and press the Send softkey.
➔ The text message is sent.
Note:
If the display reads Not available, the text message could not be sent.
42 Aastra 620d
eud-1094/1.0 – I7.8 – 05.2009
Page 43

Supplementary features
■ Reading text messages
Your display shows New message received and the envelope symbol. The LED indicator is
red-flashing.
Show
Read
Delete
Showing text message:
Press the Show softkey.
➔ The display shows the sender and the date/time of the text message.
Reading text message:
Select the text message you want and press the Read softkey.
➔ If the message runs over several lines, use the navigation key to scroll.
Deleting text message:
Press the Delete softkey.
➔ The text message is deleted; the next text message is retrieved from the
memory.
Or:
Press Menu > Text message > Inbox to select the text message and continue as
described above.
■ Picking up a call
You hear a phone ringing in your vicinity and want to pick up the call.
With the Pick up function you can pick up the call from the other phone on your own phone.
Press the navigation key to the right or the Menu softkey.
Call features
Pick up
Scroll to Call features and press the Select softkey.
Scroll to Pick up and press the Select softkey.
<Phone number>
eud-1094/1.0 – I7.8 – 05.2009
Enter the call number of the phone from which you want to pick up the call and
confirm with the Ok softkey.
Note:
You can also find the call number of the user you want in the phone book or in
a call list.
Aastra 620d 43
Page 44

Supplementary features
■ Making a call on a third-party phone
You want to make a call on a third-party phone using your personal settings, for example on a
colleague’s phone or in a meeting room.
You can activate a third-party phone to make an internal or external call using your personal
settings, even if the phone is locked for external calls.
You can activate the phone for a business or private call.
Once you have activated the phone using a */# procedure and your PIN, dialling by your private
phone book is available.
The called party's display shows your personal phone number and not the number of the
phone from which you are making your call.
Any call charges incurred will be charged to you.
<Setting value>
1. Enter #36.
2. Enter your internal phone number.
3. Enter your PIN.
4. Enter the internal or external phone number with the exchange access
digit.
Press the Call key.
➔ The phone number displayed is dialled.
Note:
When you hang up, dialling by name and your private phone book remain
available for a whole minute so you can make another call.
Or:
1. Enter #46 for a private call.
2. Enter your internal phone number.
3. Enter your PIN.
4. Enter the external call number directly, without the exchange access digit.
5. Press the Call key.
➔ The phone is now enabled; the external user is called.
Note:
The factory setting "0000" is not accepted. First change the PIN as described in
chapter "Changing the PIN", page 59 or use the */# procedure *47 (see "User’s
Guide */# Procedures"). If you have forgotten your PIN, your system administrator can reset it to the factory setting.
44 Aastra 620d
eud-1094/1.0 – I7.8 – 05.2009
Page 45

Supplementary features
■ Personal call routing
You wan to specify which of your phones shall ring when you receive a call.
If your system administrator has set up a phone number with several phones for you as well as
the call routings, you can specify which of your phones shall signal a call by using the personal
call routing. Your system administrator can set up to 5 call routings. You can only answer a call
on phones where the call is signalled. Contact your system administrator for more information.
You can activate a call routing for all phones. If you have not configured a call routing, the factory setting (all phones are ringing) is used as standard.
Activating personal call routing:
Press the navigation key to the right or the Menu softkey.
Settings
Scroll to Settings and press the Select softkey.
General
Pers. call routing
<Setting value>
Scroll to General and press the Select softkey.
Scroll to Personal call routing and press the Select softkey.
Select the call routing you want and confirm with the Select softkey.
➔ Personal call routing is activated.
Deactivating personal call routing:
Press Menu > Activated features > Deactivate.
eud-1094/1.0 – I7.8 – 05.2009
Aastra 620d 45
Page 46

Supplementary features
Setting functions by remote control
This section explains how you can change your phone's settings even if you are not directly at your
phone.
You are not at your desk and want to set various functions on your phone from a different
phone.
You can activate/deactivate many of your phone's functions by remote control from a different
phone.
The remote control is initiated using a special */# procedure. You can then enter the function
commands and */# procedures.
<Setting value>
Using remote control from a third-party phone:
1. Enter */# procedure #36.
2. Enter your phone number.
3. Enter your PIN.
4. Enter the */# procedure for activating/deactivating the function you want.
Press the Call key.
➔ Acknowledgement tone sounds; function is activated/deactivated.
Note:
The factory setting "0000" is not accepted. First change the PIN as described in
chapter "Changing the PIN", page 59 or use the */# procedure *47 (see "User’s
Guide */# Procedures"). If you have forgotten your PIN, your system administrator can reset it to the factory setting.
46 Aastra 620d
eud-1094/1.0 – I7.8 – 05.2009
Page 47

Personalizing Your Phone
These sections explain how to adapt the phone’s basic settings to suit your personal requirements.
Configuring Phone Functions . . . . . . . . . . . . . . . . . . . . . . . . . . . . . . . . . . . . . . . 48
Display settings . . . . . . . . . . . . . . . . . . . . . . . . . . . . . . . . . . . . . . . . . . . . . . . . . . . . . 52
Adjusting the volume . . . . . . . . . . . . . . . . . . . . . . . . . . . . . . . . . . . . . . . . . . . . . . . 53
Profile settings . . . . . . . . . . . . . . . . . . . . . . . . . . . . . . . . . . . . . . . . . . . . . . . . . . . . . . 54
Hands-free and headset settings . . . . . . . . . . . . . . . . . . . . . . . . . . . . . . . . . . . . 56
General settings . . . . . . . . . . . . . . . . . . . . . . . . . . . . . . . . . . . . . . . . . . . . . . . . . . . . 58
Protection settings . . . . . . . . . . . . . . . . . . . . . . . . . . . . . . . . . . . . . . . . . . . . . . . . . . 62
Managing your private contacts . . . . . . . . . . . . . . . . . . . . . . . . . . . . . . . . . . . . 63
Configuring Voice Mail. . . . . . . . . . . . . . . . . . . . . . . . . . . . . . . . . . . . . . . . . . . . . . 65
Configuring Keys. . . . . . . . . . . . . . . . . . . . . . . . . . . . . . . . . . . . . . . . . . . . . . . . . . . . 66
Formulating Functions. . . . . . . . . . . . . . . . . . . . . . . . . . . . . . . . . . . . . . . . . . . . . . 67
eud-1094/1.0 – I7.8 – 05.2009
Aastra 620d 47
Page 48

Personalizing Your Phone
Configuring Phone Functions
This section explains how to set special mobile functions on your phone.
■ Switching the mobile phone on/off
You want to switch your phone on or off.
Switching the phone off:
Keep the End call key pressed down for approx. 2 seconds and answer Ok to
the safety prompt.
➔ The phone is switched off.
Or:
Function is also available via the menu: Menu > Settings > General > Switch off.
Notes:
• You cannot switch the phone off in a call.
• When the phone is switched off, incoming calls are stored in the call list.
• When you place the phone in the charging bay, the phone automatically
switches itself on.
Switching the phone on:
Place the phone in the charging bay or keep the End call key pressed down for
approx. 2 seconds.
➔ The phone is switched on.
Note:
If you mobile phone cannot find a system, the display reads "No system". You
can switch to an available system using Menu > Settings > System > System reg-
istrations.
■ Locking/unlocking the keypad
You leave your workstation and want to avoid accidentally pressing your phone keys.
Locking the keypad:
Keep the hash key pressed down for approx. 2 seconds.
➔ The keypad is locked.
Unlocking the keypad:
Press the Unlock softkey and the hash key.
➔ The keypad is unlocked.
48 Aastra 620d
eud-1094/1.0 – I7.8 – 05.2009
Page 49

Personalizing Your Phone
■ Locking your phone
You need to leave your desk and want to ensure that no-one can alter your phone's settings,
look at your private data, or make outside calls from your phone.
You can lock your phone with a PIN consisting of two to ten digits. First change the PIN as
described in chapter "Changing the PIN", page 59) or use the */# procedure *47 (see "User’s
Guide */# Procedures").
You can lock either just the configuration (Configuration locked) or the entire phone (Phone
locked). With Phone locked your private data cannot be viewed and external calls can only be
made from your phone in accordance with the system settings.
Press the navigation key to the right or the Menu softkey.
Settings
General
Barring
<PIN>
<Setting value>
Scroll to Settings and press the Select softkey.
Scroll to General and press the Select softkey.
Scroll to Barring and press the Select softkey.
➔ You are prompted to enter your PIN.
Enter the PIN and confirm with the Ok softkey.
Select the barring you want and enable with the Select softkey.
➔ The phone is locked, is displayed.
➔ To lock all your phones, execute the *33* <PIN> # function code (see
"User’s Guide */# Procedures").
eud-1094/1.0 – I7.8 – 05.2009
Aastra 620d 49
Page 50

Personalizing Your Phone
■ Unlocking your phone
You want to unlock you phone.
You can use your PIN to unlock your phone. If you have forgotten your PIN, your system administrator can reset it to the factory setting.
Press the navigation key to the right or the Menu softkey.
Activated features
<Barring>
<PIN>
Free
Scroll to Activated features and press the Select softkey.
Select the barring you want and press the Deactivate softkey.
➔ You are prompted to enter your PIN.
Enter the PIN and confirm with the Ok softkey.
Scroll to Free and confirm with the Select softkey.
➔ The phone is unlocked.
➔ To lock all your phones, execute the *33* <PIN> # function code (see
"User’s Guide */# Procedures").
■ Activate range alarm and system busy beep
You want to set the system parameters with your mobile phone.
The Range alarm indicates that the connection between your phone and the system is weak.
The System busy beep tells you that the system is overloaded – you need to wait until the system
is available again.
Press the navigation key to the right or the Menu softkey.
Settings
General
Scroll to Settings and press the Select softkey.
Scroll to General and press the Select softkey.
<Setting>
50 Aastra 620d
Select the setting you want and switch on or off with the Select softkey.
eud-1094/1.0 – I7.8 – 05.2009
Page 51

Personalizing Your Phone
■ Setting the server alarm
Depending on the system’s settings, you can receive server alarms for specific situations. These
settings are made by your system administrator in the system. Contact your system administrator for more information.
When the server alarms are activated in the system, you can select from the alarm signalling as
follows: Vibracall, Progressive ring tone, Suppress ring tone. Check the system settings with Tran s-
mit test alarm.
Press the navigation key to the right or the Menu softkey.
Settings
Server alarm
<Setting>
Scroll to Settings and press the Select softkey.
Scroll to Server alarm and press the Select softkey.
Select the setting you want and switch on or off with the Select softkey.
■ Logging a mobile phone on/off
See (also) the Chapter "Managing communication systems", page 60.
■ Combining the charging contact with direct call answering
You want to choose whether to answer a call simply by lifting the phone out of its charging bay
or whether you also need to press the Call key after lifting out the phone.
You can specify that your mobile phone should behave like a fixed phone when you answer a
call. In this case you do not have to press the Call key when you lift the phone out of its charging
bay.
Press the navigation key to the right or the Menu softkey.
Settings
Scroll to Settings and press the Select softkey.
General
Direct call answer
eud-1094/1.0 – I7.8 – 05.2009
Scroll to General and press the Select softkey.
Scroll to Direct call answer and press the Select softkey.
➔ The setting is stored.
Aastra 620d 51
Page 52

Personalizing Your Phone
Display settings
This section explains how to set display properties.
■ Setting the display
You want to optimise the display settings.
You can activate or deactivate the following settings:
•Font size (Font)
• Colour scheme
• Illumination: Brightness, Idle timeout, Charging bay timeout, Display dimming (display is
dimmed during an entire call)
Press the navigation key to the right or the Menu softkey.
Settings
Display
<Display setting>
<Setting value>
Scroll to Settings and press the Select softkey.
Scroll to Display and press the Select softkey.
Scroll to the display setting you want and press the Select softkey.
Select the setting you want.
Note:
The Select softkey displays the colour scheme you want.
➔ The setting is stored.
52 Aastra 620d
eud-1094/1.0 – I7.8 – 05.2009
Page 53

Personalizing Your Phone
■ Setting the indicator LED
You can activate or deactivate the following settings:
• In Service (Phone is switche on)
• Incoming call
• Info
• Appointment call (function can only be set with a function code, see Chapter "*/# Proce-
dures", page 67)
• Hands-free operation
• Battery empty
Press the navigation key to the right or the Menu softkey.
Settings
LED display
<LED setting>
Scroll to Settings and press the Select softkey.
Scroll to LED display and press the Select softkey.
Scroll to the LED setting you want and confirm with the Select softkey.
Adjusting the volume
All the ring tone properties are set using the profiles, see Chapter "Profile settings", page 54.
■ Setting the volume during a call
You want to adjust the volume while in a call. The handset and loudspeaker volumes need to be
set separately.
The new volume will remain stored even after the call is ended.
Louder: Press top side key.
Quieter: Press bottom side key.
eud-1094/1.0 – I7.8 – 05.2009
Aastra 620d 53
Page 54

Personalizing Your Phone
Profile settings
There are five different application profiles to adapt the phones to any given work situation, e.g.
headset or conference mode.
■ Setting up a profile
All your phone’s ringing properties are stored in the profiles.
Three default profiles are factory-set: Normal, Meeting, Charging bay. You can set up to 5 profiles.
A profile comprises a set of ringing and phone settings, which you can specify individually for
each profile. 1 profile is always active in telephone mode. The default profile is the Normal profile. Activate the appropriate profile depending on the situation (e. g. before a meeting you can
activate the Meeting profile). The Charging bay profile is selected automatically whenever the
phone is placed in the charging bay.
You can set the following profile properties:
• Ring volume,
• Ring melody for Internal ring, External ring and Discreet ring,
• Vibracall, Discreet ring (phone only rings once), Suppress ring tone ( is displayed), Progres-
sive ring tone, Confirmation tone (each key stroke is confirmed with a beep), Battery warning
(battery nearly run-down triggers a warning).
Press the navigation key to the left.
Or:
Profiles are also available via the menu: Menu > Settings > Profiles.
New
Modify
Rename
Delete
54 Aastra 620d
Creating a new profile:
Press the New softkey.
Setting up a profile:
1. Scroll to the profile you want and press the Modify softkey.
2. Scroll to the setting you want and confirm your choice of setting with the
Select softkey.
➔ The setting is stored.
Note:
To listen to all the ring properties use the Tes t softkey.
Renaming a profile:
Scroll to the profile you want and press the Rename softkey.
➔ The setting is stored.
Delete profile:
Scroll to the profile you want and press the Delete softkey.
➔ The profile is deleted.
eud-1094/1.0 – I7.8 – 05.2009
Page 55

Personalizing Your Phone
■ Activate profile
In your everyday phoning habits you want to adapt your phone’s ringing properties to each situation.
The ringing properties are stored in different profiles. Select the profile you want from the list of
profiles.
The current profile is indicated on the display (except for Normal profile).
Press the navigation key to the left.
Or:
Profiles are also available via the menu: Menu > Settings > Profiles.
➔ All the profiles are displayed.
Selecting
Select the profile you want and activate with the Select softkey.
➔ The profile is activated.
eud-1094/1.0 – I7.8 – 05.2009
Aastra 620d 55
Page 56

Personalizing Your Phone
Hands-free and headset settings
This section explains other ways in which you can make calls with your phone.
■ Connecting a headset
Connect your headset to the socket on the bottom left-hand side of your phone. The headset
mode is then automatically activated.
Your phone also has a Bluetooth® interface (2.0) so you can operate the corresponding headsets. Only audio data can be transmitted via the Bluetooth® interface with a headset.
■ To activate headset operation
You have connected a headset and now want to activate the headset mode.
A headset can be connected in parallel with the handset.
If you answer a call in headset mode using the Call key or Loudspeaker key, the call is provided
on the headset.
This phone supports wireless headsets based on the DHSG standard, which allows you to set up
and to end calls from the headset. Ask your dealer which headsets are particularly well suited
for this phone.
When you connect a Bluetooth® headset (see chapter "Activating Bluetooth® mode and Blue-
tooth® devices", page 57), the headset is automatically activated.
Note:
To find out how to phone with headset, refer to the Chapter "Using a Headset", page 16.
56 Aastra 620d
eud-1094/1.0 – I7.8 – 05.2009
Page 57

Personalizing Your Phone
■ Activating Bluetooth® mode and Bluetooth® devices
You want to make and receive phone calls with a Bluetooth®-supported headset.
You can activate Bluetooth® devices as soon as you have activated the Bluetooth® mode.
You can activate or deactivate the Bluetooth® manually.
Notes:
• Only one Bluetooth® connection at a time is possible.
• To find out how to phone with headset, refer to the Chapter "Using a Headset", page 16.
Press the navigation key to the right or the Menu softkey.
Settings
Bluetooth
Activating Bluetooth
Subscribe headset
Select headset
Delete
Scroll to Settings and press the Select softkey.
Scroll to Bluetooth and press the Select softkey.
Activating/deactivating Bluetooth® mode:
Scroll to Enable Bluetooth and press the Select softkey.
➔ The setting is stored, is displayed.
Note:
An activated Bluetooth® operation does not imply that a Bluetooth® connection is running.
Pair new device:
Scroll to Subscribe headset and press the Select softkey.
Switch on the device you want and set to subscribe mode. Select the device
you want and enter the Bluetooth® device PIN.
➔ Device is paired, is displayed.
List of paired devices:
Switch on the device you want, scroll to Select headset, press the Select softkey
and select a device from the list.
➔ The list of coupled devices is displayed.
Note:
The list is limited to 2 Bluetooth® devices. Remove a device before you connec t
another one.
Remove device:
Scroll to Select headset and press the Select softkey.
Select the device you want and press the Delete softkey.
➔ Device was removed.
eud-1094/1.0 – I7.8 – 05.2009
Aastra 620d 57
Page 58

Personalizing Your Phone
General settings
This section explains other settings you can make on your phone.
■ Selecting the language
The display text is not in the language you want.
You can select a different language. The menu item under which you select your language is
marked by an "*" in front of the word for "language" in the language of your choice, e.g. "*Language" for English.
Press the navigation key to the right or the Menu softkey.
<*Language>
<Language>
Scroll to *Language and press the Select softkey.
Select the language you want and confirm with the Select softkey.
➔ The display text appears in your selected language.
58 Aastra 620d
eud-1094/1.0 – I7.8 – 05.2009
Page 59

Personalizing Your Phone
■ Changing the PIN
You want to change the PIN used to lock/unlock your phone (see Chapter "Locking your
phone", page 49 and "Unlocking your phone", page 50).
The factory setting is digit combination "0000"; you can select any 2 to 10-digit combination for
your new PIN.
If you have forgotten your PIN, your system administrator can reset it to the factory setting.
Note:
Your pin applies to all your phones.
Press the navigation key to the right or the Menu softkey.
Settings
General
New user PIN
<Old PIN>
<New PIN>
<New PIN>
Scroll to Settings and press the Select softkey.
Scroll to General and press the Select softkey.
Scroll to New user PIN and press the Select softkey.
➔ The display reads User PIN.
Enter the old PIN and confirm with the Ok softkey.
➔ The display reads New user PIN.
Enter the new PIN and confirm with the Ok softkey.
➔ The display reads Confirm user PIN.
Enter the new PIN a second time and confirm with the Ok softkey.
➔ New PIN is stored.
Notes:
• For each digit entered, the display shows an "*".
• You can also change the PIN with the *47 function code (see "User’s Guide */
# Procedures").
eud-1094/1.0 – I7.8 – 05.2009
Aastra 620d 59
Page 60

Personalizing Your Phone
■ Enter display text for the idle state
You want to change the text displayed by your phone in the idle state.
In addition to the date and time you can enter a personal text for the text displayed in the idle
state.
Press the navigation key to the right or the Menu softkey.
Settings
General
Idle text
<Text>
Scroll to Settings and press the Select softkey.
Scroll to General and press the Select softkey.
Scroll to Idle text and press the Modify softkey.
Enter the text and confirm with the Save softkey.
➔ The text is stored.
■ Managing communication systems
This menu allows you to specify the active system for your phone and to manage registrations
to different systems. Contact your system administrator for more information.
If your phone is registered with several systems, the name of the active system is shown on the
display.
The DECT-specific information is retrievable in the DECT identities menu.
For more information on the Download server refer to Chapter "Software", page 70.
Press the navigation key to the right or the Menu softkey.
Settings
Scroll to Settings and press the Select softkey.
System
System Registration
New
60 Aastra 620d
Scroll to System and press the Select softkey.
Scroll to System registrations and press the Select softkey.
Registering to a new system:
Press the New softkey, enter AC code, and press the Save softkey.
➔ The phone searches for the system.
eud-1094/1.0 – I7.8 – 05.2009
Page 61
Personalizing Your Phone
Rename
Delete
Selecting
Renaming a system:
Scroll to the system you want and press the Rename softkey.
Enter a new number and press the Save softkey.
➔ The setting is stored.
Deleting a system:
Scroll to the system you want, press the Delete softkey and answer Ok to the
safety prompt.
➔ The system is deleted.
Switching system:
Scroll to the system you want and confirm with the Select softkey.
■ Retrieve information on your phone
Your phone’s software-relevant data is stored in this menu.
Press the navigation key to the right or the Menu softkey.
Settings
Information
<Information>
Scroll to Settings and press the Select softkey.
Scroll to Information and press the Select softkey.
Select the setting you want.
➔ The information can now be retrieved.
eud-1094/1.0 – I7.8 – 05.2009
Aastra 620d 61
Page 62

Personalizing Your Phone
Protection settings
This section explains how you can protect yourself against certain types of call.
■ Activating protection against certain types of calls
You want to protect yourself against certain types of calls.
You can set your phone so that these functions are not permitted on it. Ask your system administrator whether these functions are enabled on the system.
Press the navigation key to the right or the Menu softkey.
Settings
Protection
<Setting value>
Scroll to Settings and press the Select softkey.
Scroll to Protection and press the Select softkey.
Select the setting you want and switch on or off with the Select softkey.
➔ The setting is stored.
Note:
You can deactivate an activated protection using Menu > Activated features >
Deactivate.
62 Aastra 620d
eud-1094/1.0 – I7.8 – 05.2009
Page 63

Personalizing Your Phone
Managing your private contacts
This section explains how to manage your private contacts.
■ Creating a new contact entry
You want to store your own phone numbers. You can store your own phone numbers as private
contacts.
For each contact you have the possibility of making several call number entries (Business ,
Mobile , Private ). You can specify one of these numbers as the standard call number, the
one which is used whenever you do not make a particular selection.
Press the navigation key downwards.
Or:
Phone book is also available via the menu: Menu > Phone book.
Private contacts
Scroll to Private contacts and press the Select softkey.
New
<Contact>
Default
Press the New softkey.
Enter the user’s contact data (Name , Business , Mobile , Private ).
Use the navigation key to scroll between the entries.
Confirm with the Save softkey.
➔ The contact is now stored.
Specify the selected phone number as default number using the Default
softkey.
eud-1094/1.0 – I7.8 – 05.2009
Aastra 620d 63
Page 64

Personalizing Your Phone
■ Editing or deleting a contact
You want to edit a call number which you have stored in your private contacts.
Note:
You cannot modify entries in other phone books.
Press the navigation key downwards.
Or:
Phone book is also available via the menu: Menu > Phone book.
Private contacts
Scroll to Private contacts and press the Select softkey.
Edit
Delete
To change an entry:
Select the entry you want and press the Edit softkey.
Modify the contact data and confirm with the Save softkey.
To delete an entry:
Select the entry you want and press the Delete softkey.
➔ The entry is now deleted.
■ Transferring a call number from the call list to the private contacts
You want to transfer a call number from one of the call lists to your private contacts.
You can add a phone number to an existing contact or create a new contact.
Press the navigation key to the right or the Menu softkey.
Call lists
<Call list>
Add to exist. contact
Add new contact
Scroll to Call lists and press the Select softkey.
Select the call list and user you want and press the Save softkey.
Adding to existing contact:
Press the Add to existing contact softkey, select the contact and number type
you want, and confirm with the Save softkey.
Adding new contact:
Press the Add new contact softkey, select the number type you want, and confirm with the Save softkey.
64 Aastra 620d
eud-1094/1.0 – I7.8 – 05.2009
Page 65

Personalizing Your Phone
Configuring Voice Mail
This section explains how to set your Voice Mail.
■ Managing a personal greeting
You have the possibility of recording up to three different greetings. If no personal greeting is
activated or if none is available, the global greeting is activated automatically, provided it has
been recorded. Contact your system administrator for more information.
Press the navigation key to the right or the Menu softkey.
Voice Mail>Greeting
<Greeting>
<Greeting>
<Greeting>
Scroll to Voice Mail and Greeting and press the Select softkey.
Recording a greeting:
Select the greeting you want and press the Record softkey.
➔ Now record your personal greeting text.
Listening to the greeting:
Select the greeting you want and press the Listen softkey.
➔ You can monitor your personal greeting text and re-record it if necessary.
Select the greeting:
Select the greeting you want and confirm with the Ok softkey.
➔ The announcement last recorded is automatically activated.
Notes:
• To find out how to configure call forwarding to your Voice Mail, refer to the
Chapter "Forward to Voice Mail", page 38.
• For more information on Voice Mail please refer to the Chapter "Listening to
Voice Mail", page 41 or to the "User’s Guide Voice Mail Systems".
eud-1094/1.0 – I7.8 – 05.2009
Aastra 620d 65
Page 66

Personalizing Your Phone
Configuring Keys
This section explains how to assign phone numbers to a configurable key.
Your system administrator can additionally set a function key. Contact your system administrator for
more information.
■ Available keys
You can store call numbers on 3 different types of keys:
• a configurable key – accessible at all times
• directly to the softkey – retrievable in the idle position only
• on a Hotkey – accessible any time
■ Store a phone number under a key
You want to retrieve a frequently used phone number with a single keystroke rather than enter
it digit by digit.
You can store a maximum of three call numbers including names on a configurable key.
The system administrator can disable any possibility of modifying the configuration of a key
that has already been configured.
<long>
New
Modify
Delete
66 Aastra 620d
Keep the key you want pressed down for approx. 2 seconds.
Or:
Keys are also available via the menu: Menu > Settings > Keys > Softkey/Hotkey.
Creating a new key assignment:
Press the New softkey, enter the name and number, and confirm with the Save
softkey.
➔ The allocated function is stored.
Modify a key assignment:
Select the key you want and press the Modify softkey. Make the changes and
confirm with the Save softkey.
➔ The allocated function is stored.
Deleting a key assignment:
Select the key you want and confirm with the Delete softkey.
➔ The assignment is deleted.
eud-1094/1.0 – I7.8 – 05.2009
Page 67

Personalizing Your Phone
Formulating Functions
This section explains how you can activate an individual function, e.g. call forwarding, using the
function commands.
■ Function Commands
You can use function commands to define a function to suit your personal requirements. A
function can consist of one or more function commands, function codes, and the phone
number.
Tab. 1 The following function commands are available:
"I" Seize line
"X" Disconnect
"P" Pause 1 second before the next operation
"N" Use the phone number entered in call preparation
"." Control key function (up-circuit system)
"Z" Activate/deactivate DTMF mode
"R" Use the phone number last dialled
"Y" Disconnect and reseize the line.
Tab. 2 Examples of how to define a function:
"IR" Seize line ("I"),
"I201" Seize line ("I") and dial phone number 201
"I*21201X" Seize line ("I"),
dial phone number last dialled ("R")
activate call forwarding unconditional ("*21") to phone number 201,
disconnect ("X")
Notes:
• Text mode has to be activated before you can enter function commands.
• Functions that are not available via the menu can be activated using the */#
procedures (see "User’s Guide */# Procedures").
• You can either type in a */# procedure directly or store it under a key.
• You can only activate certain */# procedures if the same function cannot be
obtained via the menu.
• The availability of cer tain */# procedures may be restricted depending on the
system and software version.
■ */# Procedures
A list with all */# procedures can be found at http://www.aastra.com/docfinder ("User’s Guide */
# Procedures").
eud-1094/1.0 – I7.8 – 05.2009
Aastra 620d 67
Page 68

Installation and
commissioning
These sections explain the setup options available with your phone.
Equipment provided. . . . . . . . . . . . . . . . . . . . . . . . . . . . . . . . . . . . . . . . . . . . . . . . . 69
Options . . . . . . . . . . . . . . . . . . . . . . . . . . . . . . . . . . . . . . . . . . . . . . . . . . . . . . . . . . . . .69
Connecting a mobile phone . . . . . . . . . . . . . . . . . . . . . . . . . . . . . . . . . . . . . . . . . 70
Battery . . . . . . . . . . . . . . . . . . . . . . . . . . . . . . . . . . . . . . . . . . . . . . . . . . . . . . . . . . . . . .71
Carry clip or swivel clip . . . . . . . . . . . . . . . . . . . . . . . . . . . . . . . . . . . . . . . . . . . . . .72
Carry strap . . . . . . . . . . . . . . . . . . . . . . . . . . . . . . . . . . . . . . . . . . . . . . . . . . . . . . . . . . 72
USB and external charging socket . . . . . . . . . . . . . . . . . . . . . . . . . . . . . . . . . . .73
Logging your phone on. . . . . . . . . . . . . . . . . . . . . . . . . . . . . . . . . . . . . . . . . . . . . . 73
68 Aastra 620d
eud-1094/1.0 – I7.8 – 05.2009
Page 69

Equipment provided
Installation and commissioning
Cordless phone Battery
Quick User's Guide and safety
information
Options
Charging bay and plug-in
power supply unit with coun-
try-specific adapters
"Easy" or "Rotary" belt clip Carry strap
eud-1094/1.0 – I7.8 – 05.2009
Aastra 620d 69
Page 70

Installation and commissioning
Connecting a mobile phone
■ Connecting the charging bay
The phone can be operated without modifying the charging bay.
1. Plug the cable connector into the socket on the underside of the charging station.
2. Feed the cable through the strain relief provided.
3. Plug the plug-in power adapter into an available socket outlet.
Note:
Plug designs vary from country to country.
■ Power supply / Plug-in power supply unit
The power supply unit is rated for 100 V to 240 V AC (50-60 Hz). It is supplied with four interchangeable adapters, which means it can be used more or less worldwide. Where necessary, fit
the standard adapter head for your country to the power supply unit. As the plug-in power supply unit comes in two variants, the assembly differs slightly:
• Variant 1: Set the switch on the power supply unit to OPEN and slide the existing adapter
head upwards and out. Next fit the new adapter head to the power supply unit and lock it
into place using the switch (LOCK).
• Variant 2: First remove any adapter head that may already be fitted by pressing OPEN. Next
fit the new adapter head onto the power supply unit at a slight angle with the end marked
TOP at the top. Press it down until it clicks into place.
■ Software
New device software can simply be updated during operation using automatic firmware
updates, reducing maintenance costs as a result.
70 Aastra 620d
eud-1094/1.0 – I7.8 – 05.2009
Page 71

Installation and commissioning
Battery
Take also note of the safety information on handling the battery set out in Chapter "Dealing with
batteries", page 8.
■ Inserting the battery
1. Push the battery cover downwards until it is released from the lock, then take it off.
2. Insert the battery with the contacts downwards.
3. Replace the battery cover and push it upwards until it locks.
■ Charging the battery
The batteries are supplied uncharged. To charge the batteries, place the phone in the charging
bay.
It is only after the battery has been charged for the first time that your phone is ready for use,
that calls can be answered and that you can make calls from the phone.
Notes:
• It takes several charging cycles before a new battery reaches full capacity.
• The technical data can be found in the Chapter "Technical Data", page 76.
• The descriptions of the display symbols can be found in the Chapter "Display symbols", page 4.
eud-1094/1.0 – I7.8 – 05.2009
Aastra 620d 71
Page 72

Installation and commissioning
Carry clip or swivel clip
■ Fitting / removing the carry clip or swivel clip
The carry clip supplied with the phone is placed on the two openings at the top end of the
phone and pressed in until it snaps into place. To remove the carry clip, press the small recesses
on the edge of the strap and gently pull the strap apart.
The phone can also be equipped with a swivel clip accessory. The holding clip is also placed on
the two openings at the top end of the phone and pressed in until it snaps into place. Next slide
the clip onto the prominent button. To release the phone from the clip, press the upper button.
Carry strap
■ Securing the carry strap
The top part of the carry clip has two openings. You can feed the bottom end of the carry strap
through these openings (detach the carry clip first before fitting the strap). Carry straps are
optionally available.
72 Aastra 620d
eud-1094/1.0 – I7.8 – 05.2009
Page 73

Installation and commissioning
USB and external charging socket
■ Mini USB socket
There is a mini USB socket (2.0) in the bottom right-hand corner. It has two functions.
• As an interface for connection with a PC, for instance for loading data to or from the device. If
the phone is connected with a PC, the battery is loaded at the same time. However the
charging process is slower than when the phone is charged in the charging bay.
• As a connection socket for a USB charging bay, for instance for charging the phone. Here,
too, the charging process is slower compared with charging in the charging bay.
Use a screened USB cable only.
Logging your phone on
■ Registering your phone on the system
Your system administrator has to prepare the system before you can log on your phone.
Your phone can be operated on a maximum of 4 different communication systems. To do so, it
must be registered on each system. As a rule your phone is registered with the communication
system by your system administrator. Contact your system administrator for more information.
■ Registration
A registration is stored on the phone for each communication system with which your phone is
registered. A registration entry contains, among others, a system name (e. g. A, B, C).
If your phone is registered with several systems, the name of the active system is shown on the
display.
■ Register
Once the phone is registered with one or more communications systems, you can make and
receive phone calls (see also Chapter "Managing communication systems", page 60).
eud-1094/1.0 – I7.8 – 05.2009
Aastra 620d 73
Page 74

Further information
The following sections contain more useful information about your phone.
Troubleshooting . . . . . . . . . . . . . . . . . . . . . . . . . . . . . . . . . . . . . . . . . . . . . . . . . . . . 75
Technical Data . . . . . . . . . . . . . . . . . . . . . . . . . . . . . . . . . . . . . . . . . . . . . . . . . . . . . . 76
74 Aastra 620d
eud-1094/1.0 – I7.8 – 05.2009
Page 75

Further information
Troubleshooting
This section contains a few tips on how to operate your phone if you encounter any problems.
■ Malfunctions
The display reads: "System overload"
At the moment no connection can be set up via the current system base. The phone is trying to set up
a better radio connection with the same or a different system base. This message appears in standby
mode only.
The display reads: "No System"
You have moved out of the coverage area; the radio connection is interrupted. Move closer to a radio
station.
Leaving the coverage area
You are outside the coverage range. You can set the phone so that you receive a warning signal if you
leave the coverage area (see Chapter "Activate range alarm and system busy beep", page 50).
Display is working, but connection is not possible
Your phone may be locked. Unlock your phone (see Chapter "Locking/unlocking the keypad", page 48).
Display brightness insufficient
The setting for the display’s brightness is unsuitable. Change the setting (see Chapter "Setting the dis-
play", page 52).
Impaired sound quality during hands-free operation
The sound quality can be affected if the volume is too loud – turn down the volume. If the sound quality
fluctuates, contact your system administrator.
Note:
For all other messages, faults and questions you may have, contact your system administrator.
eud-1094/1.0 – I7.8 – 05.2009
Aastra 620d 75
Page 76

Further information
Technical Data
■ Operation
Standards DECT, GAP
DECT encryption supported
Frequency range 1880 MHz up to 1900 MHz
Transmitted power 10 mW (average power per channel)
Range
■ Interfaces
Headset 2,5 mm jack and Bluetooth®
PC USB - PC
■ Battery charge and usage times
Battery capacitance 850 mAh lithium-ion (Li-Ion)
Power battery capacitance 1800 mAh lithium-ion (Li-Ion)
Operating time, talk time up to 12 hours
Operating time, standby up to 100 hours
Operating time, talk time with power battery up to 24 hours
Operating time, standby with power battery up to 200 hours
Charging time in the charging bay 2 hours for fully charged state
• up to 300 m outdoors
• up to 50 m in indoors
■ Ambient conditions
Operating temperature 5° C to 40° C
Storage temperature -5° C to +45° C
Class of protection IP 50
Noise Ambient noise filter for loud environments
Hands-free operation Full-duplex hands-free operation
76 Aastra 620d
eud-1094/1.0 – I7.8 – 05.2009
Page 77

■ Dimensions, weight and surface finish
Further information
Mobile phone with battery
Charging bay without mains adapter
Surface finish (sides and front) Silicone treated
Length x Width x Depth: 135 x 49 x 22.5 mm
120 g
Length x Width x Depth: 76 x 75 x 24 mm
40 g
eud-1094/1.0 – I7.8 – 05.2009
Aastra 620d 77
Page 78

Index
Index
Dialling
%, *,+...
*/# Procedures . . . . . . . . . . . . . . . . . . . . . . . . . . . . . . . . 67
A
Accessing the menu . . . . . . . . . . . . . . . . . . . . . . . . . . 21
Accessories
Activate profiles
Adjust volume
Alpha search
Ambient conditions
Announcement (Protection)
Answering a Call
Answering Call Waiting
Availability of telephone connections
Available keys
B
Battery . . . . . . . . . . . . . . . . . . . . . . . . . . . . . . . . . . . . . . . 71
Battery charge and usage times
Bluetooth® operation
Brokering
C
Call duration . . . . . . . . . . . . . . . . . . . . . . . . . . . . . . . . . . 13
Call Forwarding
Call Forwarding on No Reply
Call list
Call waiting (Protection)
Call waiting on an internal user
Carry strap
Changing the PIN
Charges
Charging the battery
Colour scheme
Conference Call
Configuring Keys
Configuring Voice Mail
Connect
Connecting a headset
Connecting a mobile phone
Connecting the charging bay
Correcting your Input
Cost control
Creating a new contact entry
D
Dealing with batteries . . . . . . . . . . . . . . . . . . . . . . . . . 8
Deflect
Deflect a call during the ringing phase
Deleting a contact
78 Aastra 620d
. . . . . . . . . . . . . . . . . . . . . . . . . . . . . . . . . . . . 7
. . . . . . . . . . . . . . . . . . . . . . . . . . . . . . 55
. . . . . . . . . . . . . . . . . . . . . . . . . . . . . . . . 53
. . . . . . . . . . . . . . . . . . . . . . . . . . . . . . . . . 26
. . . . . . . . . . . . . . . . . . . . . . . . 7, 76
. . . . . . . . . . . . . . . . . . 62
. . . . . . . . . . . . . . . . . . . . . . . . . . . . . . 13
. . . . . . . . . . . . . . . . . . . . . . . 30
. . . . . . . . . . 7
. . . . . . . . . . . . . . . . . . . . . . . . . . . . . . . . 66
. . . . . . . . . . . . . . . 76
. . . . . . . . . . . . . . . . . . . . . . . . . 57
. . . . . . . . . . . . . . . . . . . . . . . . . . . . . . . . . . . . . 33
. . . . . . . . . . . . . . . . . . . . . . . . . . . 36, 39
. . . . . . . . . . . . . . . . . . 37
. . . . . . . . . . . . . . . . . . . . . . . . . . . . . . . . . . . . . . . 27
. . . . . . . . . . . . . . . . . . . . . . 62
. . . . . . . . . . . . . . . . 30
. . . . . . . . . . . . . . . . . . . . . . . . . . . . . . . . . . . . 72
. . . . . . . . . . . . . . . . . . . . . . . . . . . . . 59
. . . . . . . . . . . . . . . . . . . . . . . . . . . . . . . . . . . . . . 13
. . . . . . . . . . . . . . . . . . . . . . . . . . 71
. . . . . . . . . . . . . . . . . . . . . . . . . . . . . . . 52
. . . . . . . . . . . . . . . . . . . . . . . . . . . . . . . 34
. . . . . . . . . . . . . . . . . . . . . . . . . . . . . 66
. . . . . . . . . . . . . . . . . . . . . . . . 65
. . . . . . . . . . . . . . . . . . . . . . . . . . . . . . . . . . . . . . 34
. . . . . . . . . . . . . . . . . . . . . . . . . 56
. . . . . . . . . . . . . . . . . . . 70
. . . . . . . . . . . . . . . . . 70
. . . . . . . . . . . . . . . . . . . . . . . . . 20
. . . . . . . . . . . . . . . . . . . . . . . . . . . . . . . . . . . 7
. . . . . . . . . . . . . . . . . . 63
. . . . . . . . . . . . . . . . . . . . . . . . . . . . . . . . . . . . . . . 40
. . . . . . . . 40
. . . . . . . . . . . . . . . . . . . . . . . . . . . . 64
. . . . . . . . . . . . . . . . . . . . . . . . . . . . . . . . . . . . . . .12
Dialling by Name
Dialling from the Call List of Answered Calls
Dialling from the Call List of Unanswered Calls
Dialling from the phone book
Dialling with a hotkey
Dialling with a softkey
Dialling with Redial
Dialling with the Phone Number
Digit keys
Dimensions, weight and surface finish
Display settings
Display symbols
Display text for the idle state
Disposal
Do not disturb (Protection)
Document information
E
Editing a Phone Book Entry . . . . . . . . . . . . . . . . . . . .64
Enabling/disabling function
Ending a Call
Enquiry Call During a Call
Enters digits
Enters letters
Equipment provided
F
Firmware update . . . . . . . . . . . . . . . . . . . . . . . . . . . . . .70
First-Time Operation
Fitting / removing the carry clip
Fitting / removing the swivel clip
Font
. . . . . . . . . . . . . . . . . . . . . . . . . . . . . . . . . . . . . . . . . .52
Formulating Functions
Forwarding (Protection)
Forwarding a Call
Forwarding a Call on No Reply
Forwarding to a message
Forwarding to Voice Mail
Function Commands
Further information
H
Hands-free operation . . . . . . . . . . . . . . . . . . . . . . . . . .15
Headset
Hotkey
. . . . . . . . . . . . . . . . . . . . . . . . . . . . . . . . . . . . . . . .18
I
Illumination . . . . . . . . . . . . . . . . . . . . . . . . . . . . . . . . . . .52
Information
. . . . . . . . . . . . . . . . . . . . . . . . . . . . . .25
. . . .27
.27
. . . . . . . . . . . . . . . . .26
. . . . . . . . . . . . . . . . . . . . . . . . .28
. . . . . . . . . . . . . . . . . . . . . . . . .28
. . . . . . . . . . . . . . . . . . . . . . . . . . . .28
. . . . . . . . . . . . . . .14
. . . . . . . . . . . . . . . . . . . . . . . . . . . . . . . . . . . . .19
. . . . . . . . .77
. . . . . . . . . . . . . . . . . . . . . . . . . . . . . . .52
. . . . . . . . . . . . . . . . . . . . . . . . . . . . . . . . 4
. . . . . . . . . . . . . . . . . .60
. . . . . . . . . . . . . . . . . . . . . . . . . . . . . . . . . . . . . . .7
. . . . . . . . . . . . . . . . . . . .62
. . . . . . . . . . . . . . . . . . . . . . . .10
. . . . . . . . . . . . . . . . . . .22
. . . . . . . . . . . . . . . . . . . . . . . . . . . . . . . . . .13
. . . . . . . . . . . . . . . . . . . . . .33
. . . . . . . . . . . . . . . . . . . . . . . . . . . . . . . . . .19
. . . . . . . . . . . . . . . . . . . . . . . . . . . . . . . . . .19
. . . . . . . . . . . . . . . . . . . . . . . . . .69
. . . . . . . . . . . . . . . . . . . . . . . . . .68
. . . . . . . . . . . . . . .72
. . . . . . . . . . . . . .72
. . . . . . . . . . . . . . . . . . . . . . . .67
. . . . . . . . . . . . . . . . . . . . . . .62
. . . . . . . . . . . . . . . . . . . . . . . . . . . . .36
. . . . . . . . . . . . . . . . .37
. . . . . . . . . . . . . . . . . . . . . .39
. . . . . . . . . . . . . . . . . . . . . .38
. . . . . . . . . . . . . . . . . . . . . . . . . .67
. . . . . . . . . . . . . . . . . . . . . . . . . . .74
. . . . . . . . . . . . . . . . . . . . . . . . . . . . . . . . . . . . . . .16
. . . . . . . . . . . . . . . . . . . . . . . . . . . . . . . . . . .61
eud-1094/1.0 – I7.8 – 05.2009
Page 79

Index
Inserting the battery
Installation
Intended Purpose
Interfaces
Intrustion (Protection)
L
Language . . . . . . . . . . . . . . . . . . . . . . . . . . . . . . . . . . . . 58
LED
Linking the Charging Contact
to Direct Answering
Listening to Voice Mail
Locking/unlocking the keypad
Logging a mobile phone on/off
M
Mains connection . . . . . . . . . . . . . . . . . . . . . . . . . . . . . .7
Maintenance
Making a Call
Making a call on a third-party phone
Malfunctions
Medical equipment
Menu-Guided Navigation
Mini USB connection
Moving the Cursor
Muting the Microphone
N
Navigation key . . . . . . . . . . . . . . . . . . . . . . . . . . . . . . . 21
Number key
O
One Number user concept . . . . . . . . . . . . . . . . . . . . .6
Operating elements
Operation
Options
P
Park . . . . . . . . . . . . . . . . . . . . . . . . . . . . . . . . . . . . . . . . . 35
Personal call routing
Personal greeting
Picking Up a Call
Plug-in power adapter
Power supply
Pressing a Key
Private call with PIN
Profiles
Protection
Q
Quick find . . . . . . . . . . . . . . . . . . . . . . . . . . . . . . . . . . . . 25
eud-1094/1.0 – I7.8 – 05.2009
Aastra 620d 79
. . . . . . . . . . . . . . . . . . . . . . . . . . . . . . . . . . . 68
. . . . . . . . . . . . . . . . . . . . . . . . . . . . . . . . . . . . 76
. . . . . . . . . . . . . . . . . . . . . . . . . . . . . . . . . . . . . . . . . . 23
. . . . . . . . . . . . . . . . . . . . . . . . . . . . . . . . . . . . 76
. . . . . . . . . . . . . . . . . . . . . . . . . . . . . . . . . . . . . . 69
. . . . . . . . . . . . . . . . . . . . . . . . . . . . . . . . . . . . . . 54
. . . . . . . . . . . . . . . . . . . . . . . . . . . . . . . . . . . 62
. . . . . . . . . . . . . . . . . . . . . . . . . 71
. . . . . . . . . . . . . . . . . . . . . . . . . . . . . .9
. . . . . . . . . . . . . . . . . . . . . . . . 62
. . . . . . . . . . . . . . . . . . . . . . . . . . 51
. . . . . . . . . . . . . . . . . . . . . . . 41
. . . . . . . . . . . . . . . . 48
. . . . . . . . . . . . . . . 51
. . . . . . . . . . . . . . . . . . . . . . . . . . . . . . . . . . .7
. . . . . . . . . . . . . . . . . . . . . . . . . . . . . . . . . 12
. . . . . . . . . . 44
. . . . . . . . . . . . . . . . . . . . . . . . . . . . . . . . . 75
. . . . . . . . . . . . . . . . . . . . . . . . . . . .7
. . . . . . . . . . . . . . . . . . . . . 21
. . . . . . . . . . . . . . . . . . . . . . . . . 73
. . . . . . . . . . . . . . . . . . . . . . . . . . . 20
. . . . . . . . . . . . . . . . . . . . . . 15
. . . . . . . . . . . . . . . . . . . . . . . . . . . . . . . . . . 66
. . . . . . . . . . . . . . . . . . . . . . . . . . . .2
. . . . . . . . . . . . . . . . . . . . . . . . . 45
. . . . . . . . . . . . . . . . . . . . . . . . . . . . 65
. . . . . . . . . . . . . . . . . . . . . . . . . . . . . 43
. . . . . . . . . . . . . . . . . . . . . . . 70
. . . . . . . . . . . . . . . . . . . . . . . . . . . . . . . . 70
. . . . . . . . . . . . . . . . . . . . . . . . . . . . . . . . 18
. . . . . . . . . . . . . . . . . . . . . . . . . . 32
R
Range alarm . . . . . . . . . . . . . . . . . . . . . . . . . . . . . . . . . . 50
Reading text messages
Receiving an Announcement
Redial
. . . . . . . . . . . . . . . . . . . . . . . . . . . . . . . . . . . . 14, 28
Register
. . . . . . . . . . . . . . . . . . . . . . . . . . . . . . . . . . . . . . 73
Registering your phone on the system
Registration
Reject
Reject a call during the ringing phase
Remote control
Requesting a Callback
Resetting activated features
S
Safety Information . . . . . . . . . . . . . . . . . . . . . . . . . . . . . 7
Securing the carry strap
Sending text messages
Set the ringing volume
Setting the display
Setting the indicator LED
Setting up profiles
Signals
Softkey
Software
Starting an Announcement
Store a phone number under a key
Supplementary features
Switching the mobile phone on/off
System busy beep
System Information
T
Technical Data . . . . . . . . . . . . . . . . . . . . . . . . . . . . . . . . 76
Text mode
To activate headset operation
To answer the callback request
To lock the phone
To unlocking the phone
Trademarks
Transferring a call number
from the call list to the private contacts
Transferring a Call Partner
Trial licences
Troubleshooting
U
Undoing Actions . . . . . . . . . . . . . . . . . . . . . . . . . . . . . 22
Upper and Lower Case
. . . . . . . . . . . . . . . . . . . . . . . . . . . . . . . . . . 73
. . . . . . . . . . . . . . . . . . . . . . . . . . . . . . . . . . . . . . . . 40
. . . . . . . . . . . . . . . . . . . . . . . . . . . . . . . . . . . . . . . 23
. . . . . . . . . . . . . . . . . . . . . . . . . . . . . . . . . . . . . . . 18
. . . . . . . . . . . . . . . . . . . . . . . . . . . . . . . . . . . . . 70
. . . . . . . . . . . . . . . . . . . . . . . . . . . . . . . . . . . . 19
. . . . . . . . . . . . . . . . . . . . . . . . . . . . . . . . . . . 10
. . . . . . . . . . . . . . . . . . . . . . . . . . . . . . . . . . . 6
. . . . . . . . . . . . . . . . . . . . . . . 43
. . . . . . . . . . . . . . . . . 32
. . . . . . . . 73
. . . . . . . . . 40
. . . . . . . . . . . . . . . . . . . . . . . . . . . . . . . 46
. . . . . . . . . . . . . . . . . . . . . . . . 29
. . . . . . . . . . . . . . . . . . 22
. . . . . . . . . . . . . . . . . . . . . . . 72
. . . . . . . . . . . . . . . . . . . . . . . 42
. . . . . . . . . . . . . . . . . . . . . . . 53
. . . . . . . . . . . . . . . . . . . . . . . . . . . . 52
. . . . . . . . . . . . . . . . . . . . . 53
. . . . . . . . . . . . . . . . . . . . . . . . . . . . 54
. . . . . . . . . . . . . . . . . . . 31
. . . . . . . . . . . . 66
. . . . . . . . . . . . . . . . . . . . . . 24
. . . . . . . . . . . 48
. . . . . . . . . . . . . . . . . . . . . . . . . . . . 50
. . . . . . . . . . . . . . . . . . . . . . . . . . . . 6
. . . . . . . . . . . . . . . . . 56
. . . . . . . . . . . . . . . . 29
. . . . . . . . . . . . . . . . . . . . . . . . . . . . 49
. . . . . . . . . . . . . . . . . . . . . . 50
. . . . . . . 64
. . . . . . . . . . . . . . . . . . . . 34
. . . . . . . . . . . . . . . . . . . . . . . . . . . . . . 75
. . . . . . . . . . . . . . . . . . . . . . . . 20
Page 80

Index
User information . . . . . . . . . . . . . . . . . . . . . . . . . . . . . . . 9
Using a Headset
Using the Display and Operating Elements
V
Voice Mail . . . . . . . . . . . . . . . . . . . . . . . . . . . . . . . . . . . . 38
. . . . . . . . . . . . . . . . . . . . . . . . . . . . . . 16
. . . . 17
80 Aastra 620d
eud-1094/1.0 – I7.8 – 05.2009
Page 81

Declaration of Conformity
Aastra Technologies Limited hereby
declares that the equipment
Aastra IntelliGate® and the accessories
there to comply with the basic requirements and other relevant stipulations of
Directive 1999/5/EC.
You will find the complete text of the
declaration of conformity and other documents for this device and the communications systems Aastra IntelliGate®
under:
http://www.aastra.com/docfinder.
IntelliGate® is a registered trademarks of Aastra.
Technical modifications and product availability subject to change without notice.
Copyright © Aastra Technologies Limited
eud-1094/1.0 – I7.8 – 05.2009
 Loading...