

Page 1
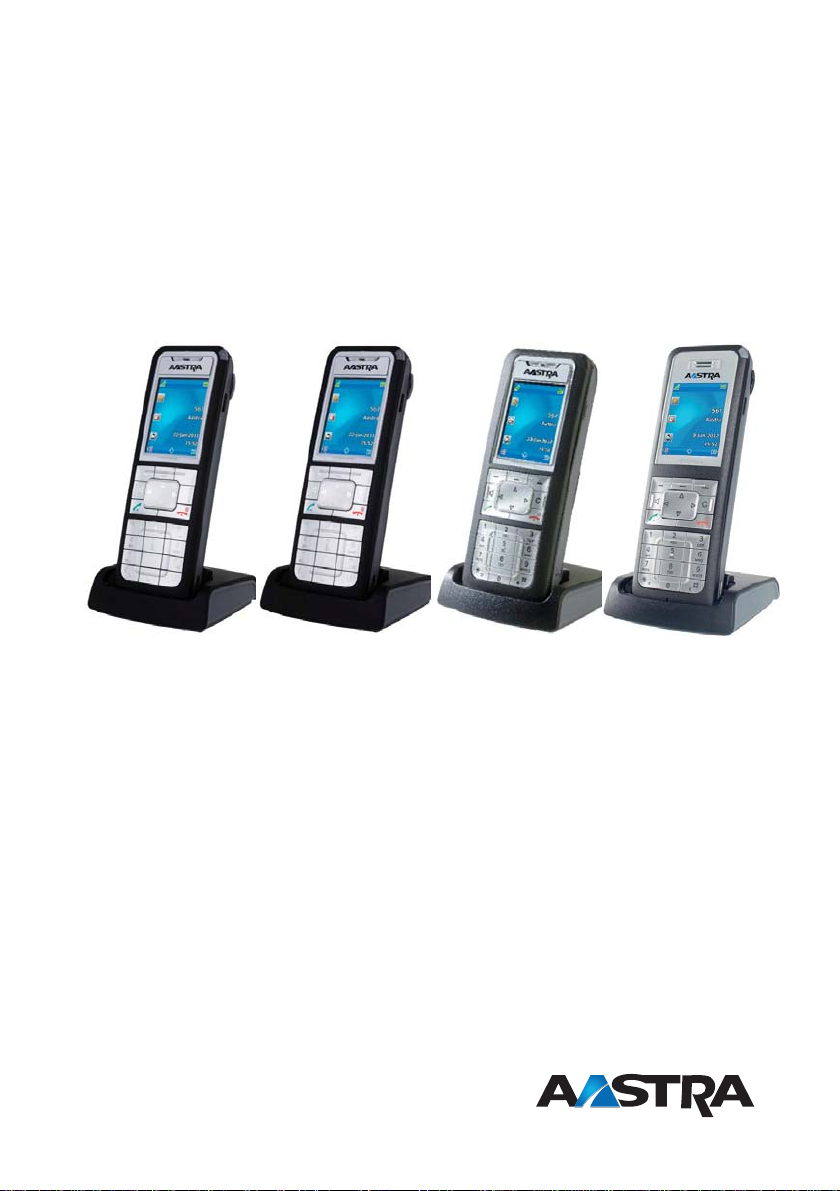
Aastra 612d, 622d, 632d and 650c
SIP DECT for MX-ONE
Quick Reference Guide
Cover Page Graphic
Place the graphic directly on the page, do not care
about putting it in the text flow. Select Graphics >
Properties and make the following settings:
• Width: 15,4 cm (Important!)
• Height: 11,2 cm (May be smaller)
• Top: 5,3 cm (Important!)
• Left: -0,3 cm (Important!)
This text should then be hidden.
™
Page 2

1424-EN/LZT 103 092 RA
© Copyright Aastra Telecom Sweden 2013. All rights reserved.
Page 3

Important User Information
Copyright
Copyright © Aastra Telecom Sweden AB 2013. All rights
reserved.
No parts of this publication may be reproduced, stored
in retrieval systems, or transmitted in any form or by any
means, electronic, mechanical, photocopying, recording
or otherwise, without prior written permission of the
publisher except in accordance with the following terms.
When this publication is made available on Aastra
media, Aastra gives its consent to downloading and
printing copies of the content provided in this file only
for private use and not for redistribution. No parts of this
publication may be subject to alteration, modification or
commercial use. Aastra will not be liable for any
damages arising from use of an illegal modified or
altered publication.
Trademark
Aastra is a registered trademark of Aastra Technologies
Limited. All other trademarks mentioned herein are the
property of their respective owners.
Disclaimer
While every effort has been made to ensure accuracy,
Aastra will not be liable for technical or editorial errors or
omissions contained within this documentation. The
information contained in this documentation is subject to
change without notice.
Declaration of conformity
Hereby Aastra Telecom Sweden AB, Box 42214, SE-126
STOCKHOLM declares that this product (s) is in
conformity with the essential requirements and other
relevant provisions of the European Directive 1999/5/EC
(R&TTE directive)
Details to be found at www.aastra.com/sdoc
Limited Warranty(applicable for sales in USA,
Canada)
• Aastra warrants this product against defects and
malfunctions during a one (1) year period from the
date of original purchase. If there is a defect or
malfunction, Aastra shall, at its option, and as the
exclusive remedy, either repair or replace the
telephone set at no charge, if returned within the
warranty period. If replacement parts are used in
making repairs, these parts may be refurbished, or
may contain refurbished materials. If it is necessary
to replace the telephone set, it may be replaced
with a refurbished telephone of the same design
and color.
• If it should become necessary to repair or replace a
defective or malfunctioning telephone set under
this warranty, the provisions of this warranty shall
apply to the repaired or replaced telephone set
until the expiration of ninety (90) days from the
date of pick up, or the date of shipment to you, of
the repaired or replacement set, or until the end of
the original warranty period, whichever is later.
Proof of the original purchase date is to be provided
with all telephone sets returned for warranty
repairs.
Exclusion
• Aastra does not warrant its telephone sets to be
compatible with the equipment of any particular
telephone company. This warranty does not extend
to damage to products resulting from improper
installation or operation, alteration, accident,
neglect, abuse, misuse, fire or natural causes such
asstorms or floods, after the telephone is in your
possession.
• Aastra shall not be liable for any incidental or
consequential damages, including, but not limited
to, loss, damage or expense directly or indirectly
arising from the customers use of or inability to use
this telephone, either separately or in combination
with other equipment. This paragraph, however,
shall not apply to consequential damages for injury
to the person in the case of telephones used or
bought for use primarily for personal, family or
household purposes.
• This warranty sets forth the entire liability and
obligations of Aastra with respect to breach of
warranty, and the warranties set forth or limited
herein are the sole warranties and are in lieu of all
other warranties, expressed or implied, including
warranties or fitness for particular purpose and
merchantability.
3Aastra 612d, 622d, 632d and 650c
Page 4

Notes on safety
It is imperative to observe the following instructions
when setting up, connecting and using the telephone.
• Place the charger cradle on a non-slip surface.
• Lay the connection cable so it cannot cause
accidents!
• Please read Important instructions for using the
battery on this page.
• Do not place the handset or the charger cradle
– close to heat sources
– in direct sunlight
– next to other electrical devices
• Protect your telephone from moisture, dust,
aggressive liquids and gases.
• Only use approved accessories.
• Only use the enclosed plug-in power supply unit
23-00-1089-00 on Aastra 612d, 622d, 632d and
650c.
• Only use the standard batteries 23-001059-00 or
23-001080-00 or as accessories the power batteries
23-001060-00 or 23-001081-00.
• Always switch off the handset before removing the
battery
• Never
– open the charger cradle or the handset
(except for the battery compartment cover)
yourself!
– touch the plug contacts with pointed metallic
objects!
– carry the charger cradle by the connection
cable!
• Only clean your telephone with a slightly moist
cloth.
• Do not use your telephone in explosive areas.
• Do not use the Aastra 612d, 622d,632 and 650c in
wet rooms (e.g. bathrooms).
• Do not hold the handset up to your ear in handsfree
mode or when the ringer is ringing as the volume
can be very loud.
• This product’s earcap region (at the front) and the
loudspeaker region (at the rear) is slightly magnetic
and may pick up metallic objects, such as staples or
pins. Please check both regions for metallic object
before use
Note for wearers of hearing aid
Before using the handset, users of hearing aids should
note that radio signals can affect hearing aids and, if
powerful enough, can cause an unpleasant buzzing
sound.
Disposal of the product
Your product should not be placed in
municipal waste. Please check local
regulations for disposal of electronic
products.
Important information about the batteries
The devices are powered by a Li-ion battery (both
standard and power battery). It is vital that you read the
safety regulations before using the battery for the first
time. Keep these safety regulations and all instructions
for use at hand for future reference.
• Dispose of used batteries is according to the
regulations for disposal of electronic products.
Failure to heed any of the following precautions
when using the battery can lead to overheating, fire
and danger of explosion.
• CAUTION: Risk of explosion if the battery is
replaced by an incorrect type.
• Never try to use the battery for the power supply of
any device other than these handsets.
• Never use or leave the battery close to a naked
flame.
• Never put the battery into a microwave oven, do
not throw it into a fire and do not expose it to high
temperatures by any other means.
• Never carry or store the battery together with
electrically conducting objects (neck chains, pencil
leads, etc.)
• Never attempt to open the battery, never modify it
in any way or subject it to severe blows.
• Never immerse the battery in fresh or salt water.
• Never use or leave the battery in direct sunlight, in
a vehicle parked in blazing sunlight or in any other
location with high temperatures.
• If you ever notice liquid leaking out, unusual odour,
build-up of heat, discolouration, deformation or
any other abnormal condition when you use,
charge or store the battery, remove the battery
immediately from the handset and keep it away
from naked flames.
• The battery fluid can damage your sight. If at any
time battery fluid accidentally gets into your eyes,
rinse your eyes immediately with clean tap water
and contact a doctor.
• If the battery is to be used by children, make sure a
responsible adult instructs the children in the
precautions and proper handling, and make sure
the children handle the battery correctly.
• If battery fluid accidentally gets onto your clothing
or skin, rinse the affected place immediately with
pure tap water. Prolonged contact with battery
fluid can lead to skin inflammation.
Aastra 612d, 622d, 632d and 650c4
Page 5

Precautions during use
• The battery is designed for use with these handsets
only.
• Only use the charger cradle supplied for charging.
• A new battery is not charged so you need to charge
it before using for the first time.
• Using the battery in a cold environment can
shorten the expected operating life of a full charge.
Charge the battery at a location with a temperature
between 10° C and 35° C. Charging outside this
temperature range can lead to a longer-than-usual
charging time or even to failure of the charging
process.
• An extremely short operating time after a full
charge indicates that the lifetime of the battery has
expired. Replace the battery.
• Never wipe the battery with thinners, benzene,
alcohol, or other volatile substances, or chemically
treated cloths. These can cause deformation of the
battery and malfunction.
• If you need to send your handset with an installed
li-ion battery or li-ion batteries separately, make
sure you comply with the applicable laws and
regulations with regard to the shipment of
hazardous goods.
Aastra 612d, 622d, 632d and 650c
5
Page 6

Aastra 612d, 622d, 632d and 650c
6
Page 7

Aastra 612d, 622d, 632d and 650c
Quick Reference Guide
This Quick Reference Guide includes short descriptions
on how to use the basic features. More features and
technical requirements are available in the User Guide.
1
2
4
9
12
14
18
17
3
5
6
Rear:
Loudspeaker
13
7
8
10
11
15
16
The complete User Guide is available in electronic format
on the Enterprise Telephone Toolbox CD and on
www.aastra.com (see MX-ONE platform).
Read the safety instructions before use!
1 Aastra 632d: Emergency call key
2 Earpiece
3 LEDs
4 Aastra 612d: +/- key (volume adjustment)
Aastra 622d/632d/650c: 3 side keys
(programmable) and volume adjustment
5 Hotkey (programmable , not Aastra 612)
6 Display
7 3 softkeys (programmable in part)
8 Navigation keys (programmable in part)
9 Open listening/hands-free mode
10 Delete key
11 Cancel key/power on/off key
12 Call key/consultation key
13 Number/letter key
14 Headset connection
15 Mini USB connection (not Aastra 612d)
16 Key lock
17 Microphone
18 Ringer on/off
Input Modes:
Switch between digit/letter and upper case/
-*
lower case
Note!
When digits are activated, you must do a long
press for the 2nd
(example: *23*long press)
* key to be inputed.
7Aastra 612d, 622d, 632d and 650c
Page 8

Aastra 612d, 622d, 632d and 650c Quick Reference Guide
Switch On and Off
Switch on: Press and hold until the
display lights
Switch off: Press briefly, select switch off
and press Ok
Confirm Switch off
Select YES
Answer Calls
Do not hold the handset up to your ear in handsfree mode
as the volume can be very loud
Answer: Press
or
Press and select from options:
Accept
Reject
Add to (the call number will be
transferred to the personal phone
book, the call filter or the VIP list)
Headset: Press the answering button on the
headset.
Call pick-up: Call ringing extension
France and New Zealand: Press 4;
Sweden: Press 6
Group call pick-up:
End call: Press
Reject call: Press Reject softkey
* 8 #
Finland and Sweden: Press * 0 #;
U.S.A. and Canada: Press * 59 #
8
Make Calls
Pre dial: Dial extension number or external
line and number Press
Dial from Personal
Phone book:
In idle mode press
Enter the first letter of name
or
Select entry with navigation keys
Press for different call
numbers belonging to the name
Press
Dial from Central
Directory
In idle mode press
Enter the first letter of name
Press OK
Select entry with navigation keys
Press OK
Press
8
Aastra 612d, 622d, 632d and 650c
Page 9

Aastra 612d, 622d, 632d and 650c Quick Reference Guide
Make Calls
Dial by caller list:
(received and missed
calls)
In idle mode press
Select Caller list
Select name or number by pressing
The following symbols indicate the
respective call type:
Received,answered call
Missed call
Rejected call
Filtered call
Forwarded call
SOS call
Call with automatic accept
Press to set up the call
Dial from Redial list:
In idle mode Press Long
Select name or number by pressing
Redial last external
number:
Silent Ringing and Mute
Switch ring signal off/
on in idle mode
* * *
Finland and Sweden: Press * * 0
Press * long
Symbol will appear on the
display when switched off
Silent Ringing and Mute
Switch ring signal off
during calling:
Mute microphone
during call:
C key to suppress the ringing
Press
or Press Sofkey
Press softkey
Volume and Ringing
Adjust speaker
volume during a call:
Adjust ringing and
volume in idle mode:
For Aastra 612d : Press the volume
+/- button on the side of the phone
For Aastra 622d, 632d, 650d:
Press the upper/lower sidekeys
(press long if the keys are
programmed).
Press
Select Audio - Ringer settings/
Volume
Callback
(When you receive a busy tone)
Order: Press
Cancel all
callbacks:
Cancel single
callback:
6 (remote subscriber will be
called back when disengaged)
France, New Zealand and Sweden: Press 5
# 37 #
U.S.A. and Canada: Press # 6 #
# 37 * extension number #
U.S.A. and Canada: Press # 6 *
Intrusion
(Intrude a busy extension to ask the party to hang up.)
Activate: Press
4
France, New Zealand and Sweden: Press 8
Aastra 612d, 622d, 632d and 650c
9
Page 10

Aastra 612d, 622d, 632d and 650c Quick Reference Guide
Bypass
(Bypass Follow-me on a specific extension.)
Activate:
* 60 * desired number #
U.S.A. and Canada: Press * 1 *
Inquiry
(The first call is parked automatically.)
Ongoing
conversation:
Refer back: Press
On hold
Put on hold: Press
Call resumed: Within 30 sec
Resume a call on
another extension:
Press
or
or
Press and select brokering.
The first connection is on hold.
Dial number
or
or
Press
Press and select from list
-Central directory
-Personal directory
-Redial list
-Caller list
Press
2
Sweden: Press R
Call the extension where call was
put on hold. Press
France and New Zealand: Press 4;
Sweden: Press 6
Conference
Ongoing
conversation:
Press softkey
Dial number
At answer, press
Repeat to add more.
3 - Conference
Transfer
Ongoing
conversation:
Transfer from
Bluetooth headset
to phone (Aastra 622d,
632d, 650d):
Press softkey
or
Press
Dial number
Before or after answer Press
Press softkey and select
Transfer BT to handset
Note: Bluetooth is optional, see the User Guide for
more information.
Call Forwarding
Follow-me
Order from your
extension:
8
Press softkey long
Select Server menu- FollowMe
Enter extension number and Press
OK
or
* 21 * extension number #
U.S.A and U.K : Press * 2 *
10
Aastra 612d, 622d, 632d and 650c
Page 11

Aastra 612d, 622d, 632d and 650c Quick Reference Guide
Call Forwarding Text Messages
Cancel: Press softkey long
Select Server menu
or
(You can send and receive text messages to and from
other phones in the system.)
Confirmation of text
message:
# 21#
U.S A and U.K : Press # 2 #
External follow-me
Order:
Cancel: Press softkey long
Press softkey long
Select Server menu- Ext.Follow
Me
Enter external line code and
number and press OK
or
Press
* 22 # External line code
and number
Select Server menu
or
#
U.S.A. and Canada: Press * 23 #
Read message: Press select Text messages
Write and send
text message:
# 22 #
U.S.A. and Canada: Press # 23 #
Personal Number
Order or
change to another
profile from
own extension:
Cancel: # 10 #
* 10 * (1-5) #
The profile digits (1-5), are programmed by
system administrator.
When receiving a text message
Press softkey Read
The message is saved to your text
message inbox
or
Press select Info - Text
messages
In idle mode Press
Select Text messages - New
message
Confirm with softkey OK
Enter the text message
Press softkey Next
Enter address
or
Press and select from
directory/list
Press softkey Send
Choose the kind of message
Press softkey OK
Voice Mail (Optional)
New voice mail
message received:
Aastra 612d, 622d, 632d and 650c
A new voice mail message
Press
Select Voice box or
Press
Select info-Voice box
11
Page 12

Aastra 612d, 622d, 632d and 650c Quick Reference Guide
Personal Directory
Add/edit new entry:
New entry from caller
list:
Press navigation keys
or
Press softkey
Select Directories -Personal
directory
If the phone book is emty press
softkey New
If entries already exist, press
softekey select New entry
Enter phone book detailes and
confirm with softkey OK
Press softkey to save the
phone book entry.
Press Select entry from caller
list
Press softkey select Add to
Enter entry details
Confirm with softkey OK
Press softkey to save
Personal Directory
Edit Phone book
details:
Delete entry: Select entry
Press navigation key
or
Press softkey
Select Directories -Personal
directory
Press softkey select Edit
Edit entries by moving cursor to the
number/letters with the keys
input with OK.
Press softkey to save the the
phone book entry.
Press select Delete and OK
Confirm with OK
C to delete. Confirm
press
Account Code
Activate: * 61 * account code #
external number
Norway and Finland: Press * 71 *
12
Aastra 612d, 622d, 632d and 650c
Page 13

Aastra 612d, 622d, 632d and 650c Quick Reference Guide
Presence
Order absence reason:Press softkey long
Select Server menu-Presence
Select reason for absence and enter
time/date for return
Press OK
or
* 23 *absence code (0-9)
Enter time or date (if requested)
#
U.S.A. and Canada: Press * 24 *
Cancel: Press softkey long
Select Server menu
or
# 23 #
U.S.A. and Canada: Press # 24 #
General Deactivation
Cancel all
features:
Display Language
Change display
language:
# 001 #
U.S.A. and Canada: Press # 0 #
Press softkey
Select Settings - Display Language
Select language.
Press softkey to save
Time/Date/Format
Set time, date and
format:
Press softkey
Select Time/Alarms
Change values of time, date (and
alarms, appointment) by pressing
Press softkey to save
Program Soft Keys and Hotkey
Softkeys: Press softkey
Select Settings - Key
programming
Press the key to be programmed
Select function from the list
Press softkey to save
Hotkey/VIP list (622d,
632d, 650c):
Press the Hotkey briefly to be
programmed.
Press softkey New
You can specify further numbers
Press and select New entry
Profiles
Select profile: Press select Profiles-Select
Press softkey to save
Make changes of the
profiles:
Press select Profile- Settings
Adjust the settings for the chosen
profile
Leave the menu with Esc
Aastra 612d, 622d, 632d and 650c
13
Page 14

Aastra 612d, 622d, 632d and 650c Quick Reference Guide
Bluetooth (Aastra 622d, 632d, 650c)
Subscribe headset: Switch the bluetooth headset to
“Pairing mode” (see user’s manual
for the bluetooth headset)
Press softkey and select
Settings - Bluetooth- BT Status
Press Change to switch bluetooth
on
Select Subscribe headset
Press New to register a new
Bluetooth headset.
The handset searches for BT devices
for approx 30 sec.
Confirm the found headset with OK
and enter PIN of the headset.
Status: Press select S ettings-
Bluetooth-BT Status
Press Change to switch Bluetooth
on or off
Inserting standard battery
Aastra 612d, 622d, 650c:
Push the battery cover downwards until it disengages
from the locking mechanism and lift off. Insert the
battery with contacts downwards. Replace the battery
cover and push upwards until it snaps into place
Aastra 632d:
Undo the two screws on the back of the handset with a
suitable tool and remove the cover. Insert the battery
with the contacts downwards, close the battery
compartment with the cover (insert underneath, press
down from above) and screw back in place. Do not
damage the rubber seal when assembling
14
Aastra 612d, 622d, 632d and 650c
Page 15

Aastra 612d, 622d, 632d and 650c Quick Reference Guide
Connecting the charging unit
Aastra 612d, 622d, 650c: This handset can be used
without any changes to the charger cradle.
Aastra 632d: To use this handset, you must remove the
two lateral guides in the charger cradle. They are easy to
lift on the inside edge using a fingernail or a paper clip.
The plastic guides can also be removed, by pushing a
suitable screwdriver into the slits on the bottom of the
charger.
Connect the plug-in power supply to the charger cradle
and place the connection cable through the cable guide.
Place the charger cradle on a non-slip surface. Change
the plug of the power supply unit if necessary.
Power Supply / Power unit
The power supply unit is designed for 100V to 240V AC
(50-60 Hz). It is supplied with four change adapters
enabling virtually worldwide use. Where necessary,
connect the plug normally used in your country to the
power supply unit. There are two versions of the plug-in
power supply unit that are connected slightly differently:
Version 1: Press the pushbutton switch on the power
supply unit and push out the existing plug upwards.
Insert the new plug from above into the power supply
unit
Version 2: Remove any existing plug by pressing OPEN.
Then insert the required new plug into the power
supply unit at a slight angle with the label TOP upwards.
Press downwards until it snaps into place
Accessories
The following accessories are available:
Aastra 600c/d charger with international AC-Adapter
Aastra 612d / Handset
Aastra 622d / Handset
Aastra 632d / Handset
Aastra 650c / Handset
Aastra 612d, 622d, 632d and 650c
Aastra 622d, 632d, 650c / Power-Battery-Pack
Aastra 622d, 632d, 650c/ Cover for Power Battery
Compartment
Aastra 612d, 622d, 632d, 650c/ Rotary-Belt Clip
Aastra 612d, 622d, 632d, 650c/ Leather Pouch
Neck Band, including band holder for Aastra 632d
Aastra 622d, 632, 650/MicroSD-card
Aastra 600d/c charger Rack with 8 charger cradles
15
Page 16

Aastra 612d, 622d, 632d and 650c Quick Reference Guide
16
Aastra 612d, 622d, 632d and 650c
Page 17

General information
FCC Statement (U.S. only). (Not applicable for
Aastra 650c)
This device complies with part 15 of the FCC Rules. Operation is subject to the following two conditions:
(1) This device may not cause harmful interference, and
(2) this device must accept any interference received,
including interference that may cause undesired operation. Modifications not expressly approved by this company could void the user's authority to operate the
equipment.
NOTE: This equipment has been tested and found to
comply with the limits for a Class B digital device, pursuant to Part 15 of the FCC Rules. These limits are designed
to provide reasonable protection against harmful interference in a residential installation. This equipment generates, uses and can radiate radio frequency energy and,
if not installed and used in accordance with the instructions, may cause harmful interference to radio communications. However, there is no guarantee that interference will not occur in a particular installation. If this
equipment does cause harmful interference to radio or
television reception, which can be determined by turning the equipment off and on, the user is encouraged to
try to correct the interference by one or more of the following measures:
• Reorient or relocate the receiving antenna.
• Increase the separation between the equipment and
receiver.
• Connect the equipment into an outlet on a circuit dif-
ferent from that to which the receiver is connected.
• Consult the dealer or an experienced radio/TV techni-
cian for help.
energy for the general population. The guidelines are
based on the safety standards previously set by both U.S.
and international standards bodies. These standards
include a substantial safety margin designed to assure
the safety of all persons, regardless of age and health.
This device and its antenna must not be co-located or
operating in conjunction with any other antenna or
transmitter.
This EUT has been shown to be capable of compliance
for localized specific absorption rate (SAR) for uncontrolled environment/general population exposure limits
specified in ANSI/IEEE Std. C95.1- 1992 and had been
tested in accordance with the measurement procedures
specified in FCC/OET Bulletin 65 Supplement C (2001)
and IEEE 1528-2003.
Health and Safety Information
Exposure to Radio Frequency (RF) Signals:
The wireless phone is a radio transmitter and receiver. It
is designed and manufactured not to exceed the emission limits for exposure to radio frequency (RF) energy
set by the Federal Communications Commission (FCC)
of the U.S. Government. These limits are part of comprehensive guidelines and establish permitted levels of RF
17
Page 18

Industry Canada (Canada only)
Operation of this device is subject to the following two
conditions:
(1) this device may not cause interference, and (2) this
device must accept any interference, including interference that may cause undesired operation of the device.
Privacy of communications may not be ensured when
using this telephone.
Exposure to Radio Frequency (RF) Signals:
The wireless phone is a radio transmitter and receiver. It
is designed and manufactured not to exceed the emission limit for exposure to radio frequency (RF) energy set
by the Ministry of Health (Canada), Safety Code 6. These
limits are part of comprehensive guidelines and established permitted levels of RF energy for the general population. These guidelines are based on the safety standards previously set by international standard bodies.
These standards include a substantial safety margin
designed to assure the safety of all persons, regardless of
age and health.
This device and its antenna must not be co-located or
operating in conjunction with any other antenna or
transmitter.
This device has been shown to be capable of compliance
for localized specific absorption rate (SAR) for uncontrolled environment / general public exposure limits
specific in ANSI/IEEE C95.1-1992 and had been tested in
accordance with the measurement procedures specified
in IEEE 1528-2003.
Declaration of conformity
Hereby Aastra Telecom Sweden AB, Box 42214, SE-126
STOCKHOLM declares that this product (s) is in
conformity with the essential requirements and other
relevant provisions of the European Directive 1999/5/EC
(R&TTE directive)
Details to be found at www.aastra.com/sdoc
Please also use the other documentation that was
supplied with the parts of your telephone system.
Page 19

Subject to change without prior notice.
For questions regarding the product,
please contact your Aastra Certified Sales Partner.
Also visit us on www.aastra.com
© Aastra Telecom Sweden AB 2013. All rights reserved.
1424-EN/LZT103 092 RA
Printed on chlorine free paper.
 Loading...