

ZyXEL NWD210N User Manual

Appendix B Wireless LANs
Encryption
Both WPA and WPA2 improve data encryption by using Temporal Key Integrity Protocol
(TKIP), Message Integrity Check (MIC) and IEEE 802.1x. WPA and WPA2 use Advanced
Encryption Standard (AES) in the Counter mode with Cipher block chaining Message
authentication code Protocol (CCMP) to offer stronger encryption than TKIP.
TKIP uses 128-bit keys that are dynamically generated and distributed by the authentication
server. AES (Advanced Encryption Standard) is a block cipher that uses a 256-bit
mathematical algorithm called Rijndael. They both include a per-packet key mixing function,
a Message Integrity Check (MIC) named Michael, an extended initialization vector (IV) with
sequencing rules, and a re-keying mechanism.
WPA and WPA2 regularly change and rotate the encryption keys so that the same encryption
key is never used twice.
The RADIUS server distributes a Pairwise Master Key (PMK) key to the AP that then sets up
a key hierarchy and management system, using the PMK to dynamically generate unique data
encryption keys to encrypt every data packet that is wirelessly communicated between the AP
and the wireless clients. This all happens in the background automatically.
The Message Integrity Check (MIC) is designed to prevent an attacker from capturing data
packets, altering them and resending them. The MIC provides a strong mathematical function
in which the receiver and the transmitter each compute and then compare the MIC. If they do
not match, it is assumed that the data has been tampered with and the packet is dropped.
By generating unique data encryption keys for every data packet and by creating an integrity
checking mechanism (MIC), with TKIP and AES it is more difficult to decrypt data on a Wi-Fi
network than WEP and difficult for an intruder to break into the network.
The encryption mechanisms used for WPA(2) and WPA(2)-PSK are the same. The only
difference between the two is that WPA(2)-PSK uses a simple common password, instead of
user-specific credentials. The common-password approach makes WPA(2)-PSK susceptible to
brute-force password-guessing attacks but it’s still an improvement over WEP as it employs a
consistent, single, alphanumeric password to derive a PMK which is used to generate unique
temporal encryption keys. This prevent all wireless devices sharing the same encryption keys.
(a weakness of WEP)
User Authentication
WPA and WPA2 apply IEEE 802.1x and Extensible Authentication Protocol (EAP) to
authenticate wireless clients using an external RADIUS database. WPA2 reduces the number
of key exchange messages from six to four (CCMP 4-way handshake) and shortens the time
required to connect to a network. Other WPA2 authentication features that are different from
WPA include key caching and pre-authentication. These two features are optional and may not
be supported in all wireless devices.
Key caching allows a wireless client to store the PMK it derived through a successful
authentication with an AP. The wireless client uses the PMK when it tries to connect to the
same AP and does not need to go with the authentication process again.
112
Pre-authentication enables fast roaming by allowing the wireless client (already connecting to
an AP) to perform IEEE 802.1x authentication with another AP before connecting to it.
NWD210N User’s Guide
Wireless Client WPA Supplicants
A wireless client supplicant is the software that runs on an operating system instructing the
wireless client how to use WPA. At the time of writing, the most widely available supplicant is
the WPA patch for Windows XP, Funk Software's Odyssey client.
The Windows XP patch is a free download that adds WPA capability to Windows XP's built-in
"Zero Configuration" wireless client. However, you must run Windows XP to use it.
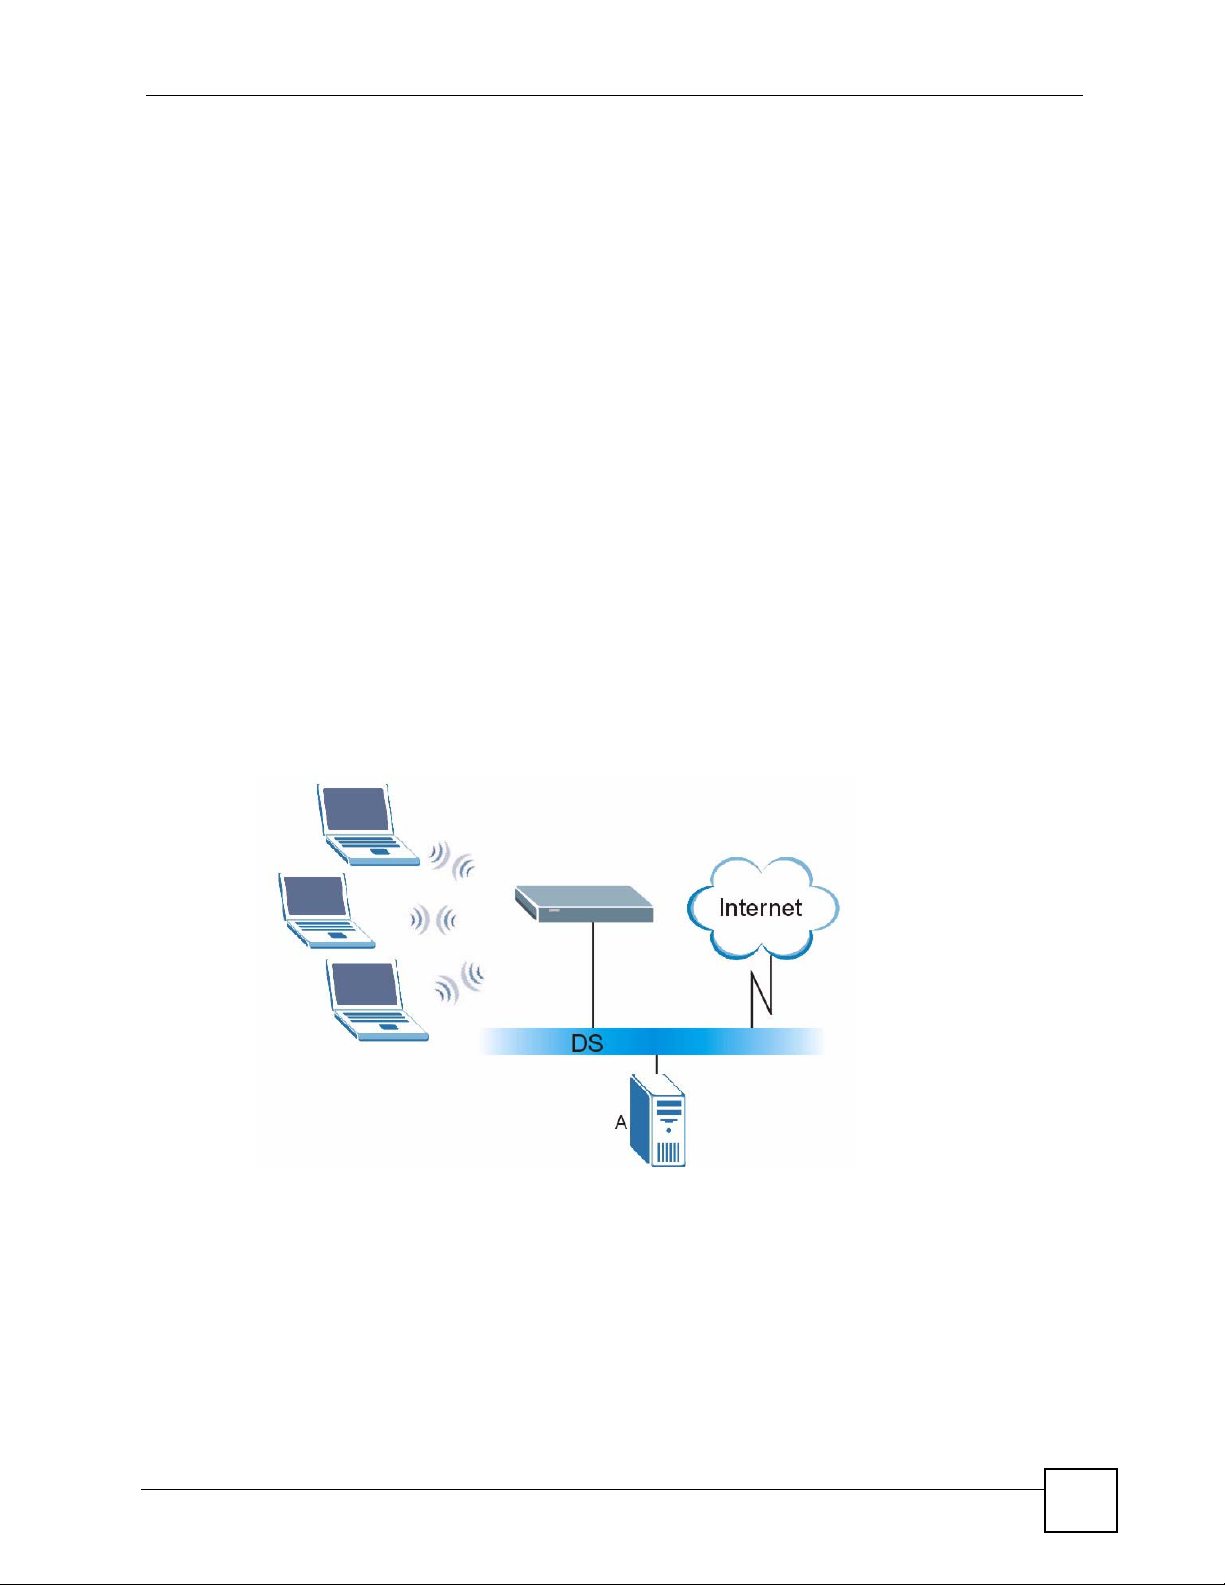
WPA(2) with RADIUS Application Example
To set up WPA(2), you need the IP address of the RADIUS server, its port number (default is
1812), and the RADIUS shared secret. A WPA(2) application example with an external
RADIUS server looks as follows. "A" is the RADIUS server. "DS" is the distribution system.
1 The AP passes the wireless client's authentication request to the RADIUS server.
2 The RADIUS server then checks the user's identification against its database and grants
or denies network access accordingly.
3 A 256-bit Pairwise Master Key (PMK) is derived from the authentication process by the
RADIUS server and the client.
4 The RADIUS server distributes the PMK to the AP. The AP then sets up a key hierarchy
and management system, using the PMK to dynamically generate unique data encryption
keys. The keys are used to encrypt every data packet that is wirelessly communicated
between the AP and the wireless clients.
Appendix B Wireless LANs
Figure 89 WPA(2) with RADIUS Application Example
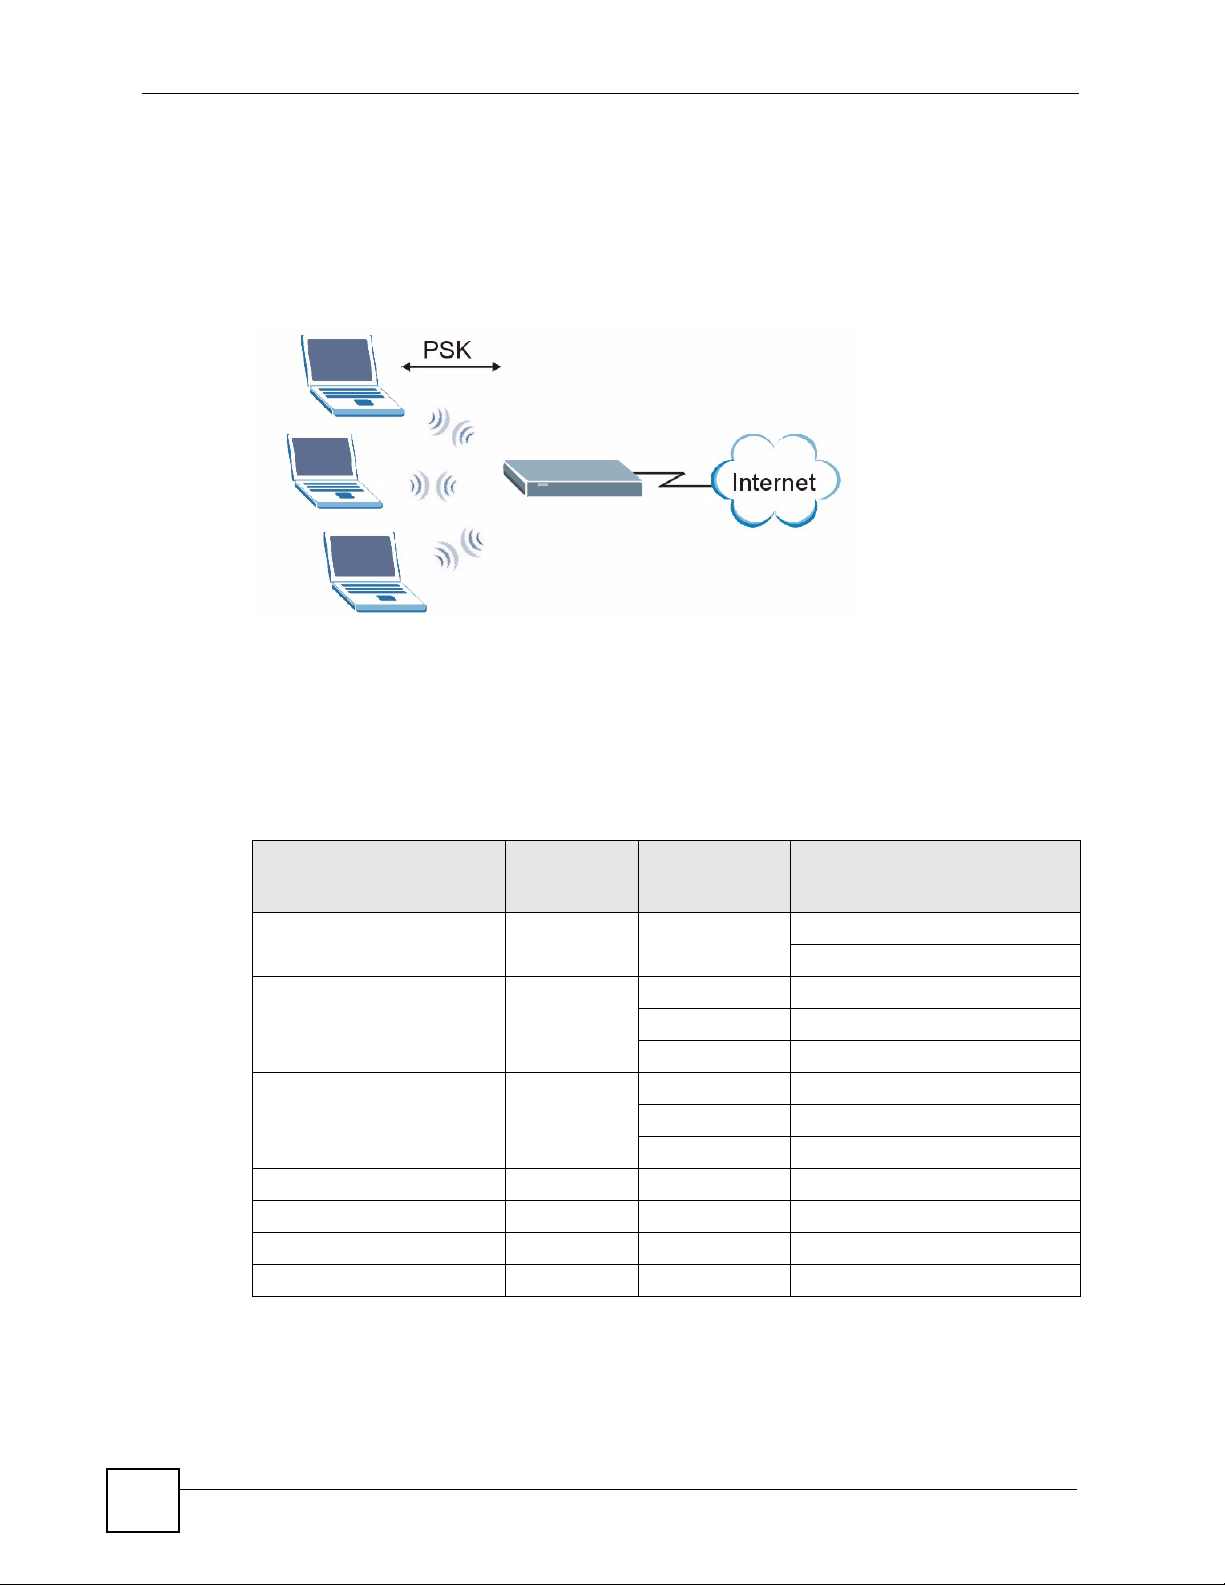
WPA(2)-PSK Application Example
A WPA(2)-PSK application looks as follows.
1 First enter identical passwords into the AP and all wireless clients. The Pre-Shared Key
(PSK) must consist of between 8 and 63 ASCII characters or 64 hexadecimal characters
(including spaces and symbols).
2 The AP checks each wireless client's password and allows it to join the network only if
the password matches.
NWD210N User’s Guide
113
Appendix B Wireless LANs
3 The AP and wireless clients generate a common PMK (Pairwise Master Key). The key
itself is not sent over the network, but is derived from the PSK and the SSID.
4 The AP and wireless clients use the TKIP or AES encryption process, the PMK and
information exchanged in a handshake to create temporal encryption keys. They use
these keys to encrypt data exchanged between them.
Figure 90 WPA(2)-PSK Authentication
Security Parameters Summary
Refer to this table to see what other security parameters you should configure for each
authentication method or key management protocol type. MAC address filters are not
dependent on how you configure these security features.
Table 25 Wireless Security Relational Matrix
AUTHENTICATION
METHOD/ KEY
MANAGEMENT PROTOCOL
Open None No Disable
Open WEP No Enable with Dynamic WEP Key
Shared WEP No Enable with Dynamic WEP Key
WPA TKIP/AES No Enable
WPA-PSK TKIP/AES Yes Disable
WPA2 TKIP/AES No Enable
WPA2-PSK TKIP/AES Yes Disable
ENCRYPTIO
N METHOD
ENTER
MANUAL KEY
Yes Enable without Dynamic WEP Key
Yes Disable
Yes Enable without Dynamic WEP Key
Yes Disable
IEEE 802.1X
Enable without Dynamic WEP Key
114
NWD210N User’s Guide

Antenna Overview
An antenna couples RF signals onto air. A transmitter within a wireless device sends an RF
signal to the antenna, which propagates the signal through the air. The antenna also operates in
reverse by capturing RF signals from the air.
Positioning the antennas properly increases the range and coverage area of a wireless LAN.
Antenna Characteristics
Frequency
An antenna in the frequency of 2.4GHz (IEEE 802.11b and IEEE 802.11g) or 5GHz (IEEE
802.11a) is needed to communicate efficiently in a wireless LAN
Radiation Pattern
A radiation pattern is a diagram that allows you to visualize the shape of the antenna’s
coverage area.
Appendix B Wireless LANs
Antenna Gain
Antenna gain, measured in dB (decibel), is the increase in coverage within the RF beam width.
Higher antenna gain improves the range of the signal for better communications.
For an indoor site, each 1 dB increase in antenna gain results in a range increase of
approximately 2.5%. For an unobstructed outdoor site, each 1dB increase in gain results in a
range increase of approximately 5%. Actual results may vary depending on the network
environment.
Antenna gain is sometimes specified in dBi, which is how much the antenna increases the
signal power compared to using an isotropic antenna. An isotropic antenna is a theoretical
perfect antenna that sends out radio signals equally well in all directions. dBi represents the
true gain that the antenna provides.
Types of Antennas for WLAN
There are two types of antennas used for wireless LAN applications.
• Omni-directional antennas send the RF signal out in all directions on a horizontal plane.
The coverage area is torus-shaped (like a donut) which makes these antennas ideal for a
room environment. With a wide coverage area, it is possible to make circular overlapping
coverage areas with multiple access points.
• Directional antennas concentrate the RF signal in a beam, like a flashlight does with the
light from its bulb. The angle of the beam determines the width of the coverage pattern.
Angles typically range from 20 degrees (very directional) to 120 degrees (less directional).
Directional antennas are ideal for hallways and outdoor point-to-point applications.
NWD210N User’s Guide
115

Appendix B Wireless LANs
Positioning Antennas
In general, antennas should be mounted as high as practically possible and free of
obstructions. In point-to–point application, position both antennas at the same height and in a
direct line of sight to each other to attain the best performance.
For omni-directional antennas mounted on a table, desk, and so on, point the antenna up. For
omni-directional antennas mounted on a wall or ceiling, point the antenna down. For a single
AP application, place omni-directional antennas as close to the center of the coverage area as
possible.
For directional antennas, point the antenna in the direction of the desired coverage area.
116
NWD210N User’s Guide
APPENDIX C
Windows Wireless Management
This appendix shows you how to manage your NWD210N using the Windows Vista and
Windows XP wireless configuration tools.
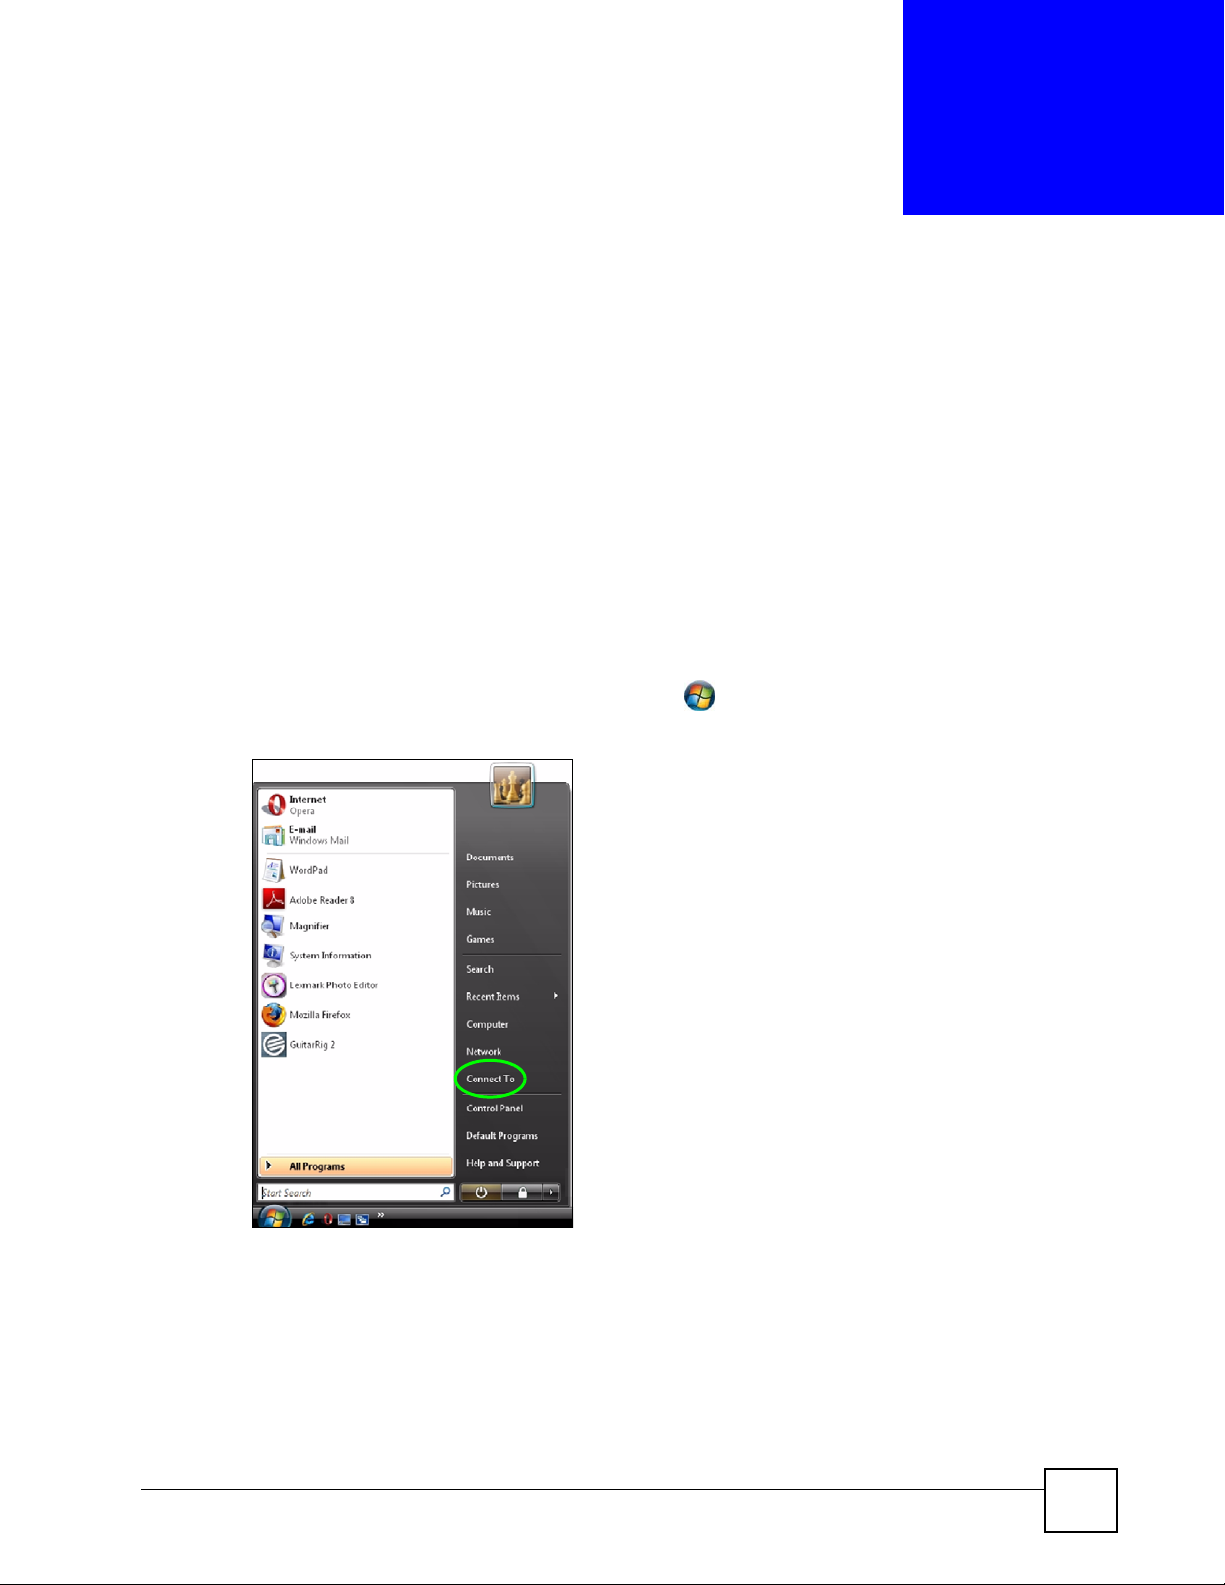
Windows Vista
Take the following steps to connect to a wireless network using the Windows Vista wireless
configuration tool (WLAN AutoConfig).
Connecting to a Wireless Network
1 In the Windows Vista taskbar, click Start () > Connect To.
Figure 91 Vista: Start Menu
The Connect To window displays, showing all available networks.
NWD210N User’s Guide
117
Appendix C Windows Wireless Management
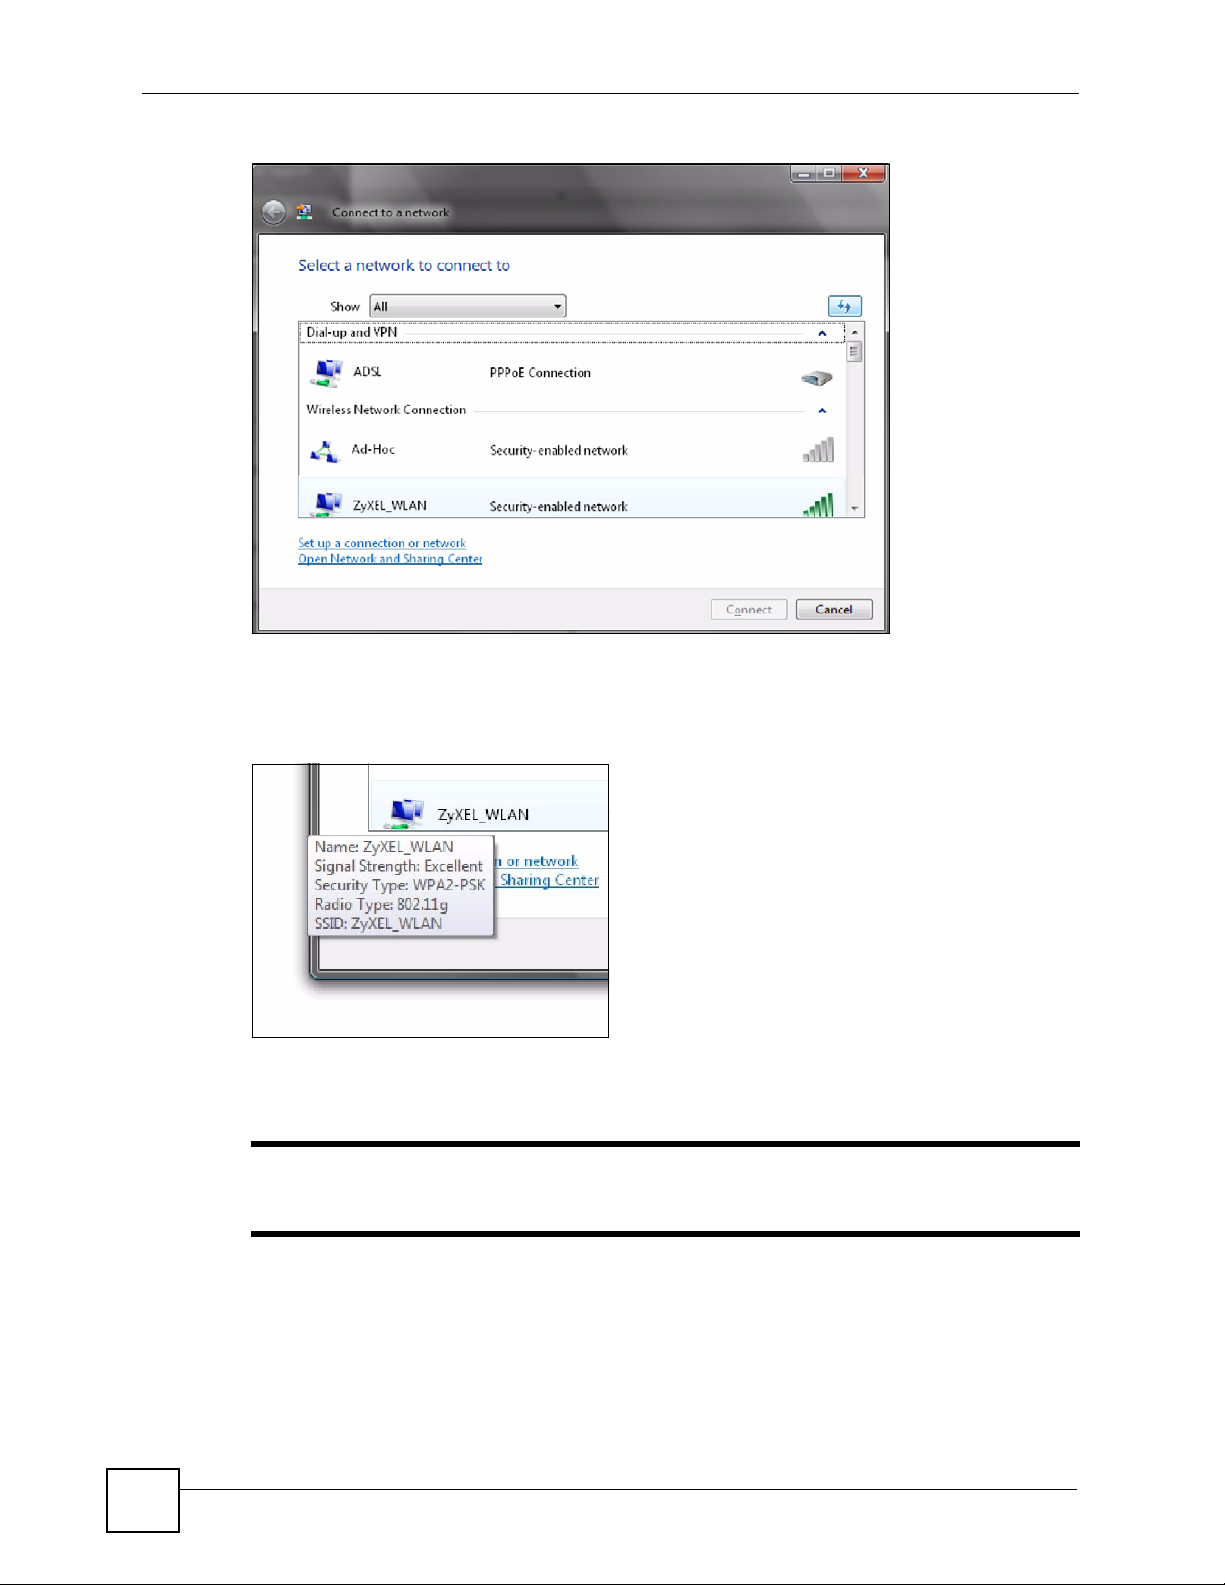
Figure 92 Vista: The Connect To Window
The security status of each wireless network displays, as well as an indication of its
signal strength. If you use the mouse pointer to hover over a network’s entry, additional
information about the network displays.
Figure 93 Vista: Additional Information
2 Double-click the network’s name to join the network, or select a network and click
Connect.
" If the network to which you want to connect does not display, see the section
on setting up a connection manually on page 120.
3 If security is enabled, you may be prompted to enter your security key.
118
NWD210N User’s Guide
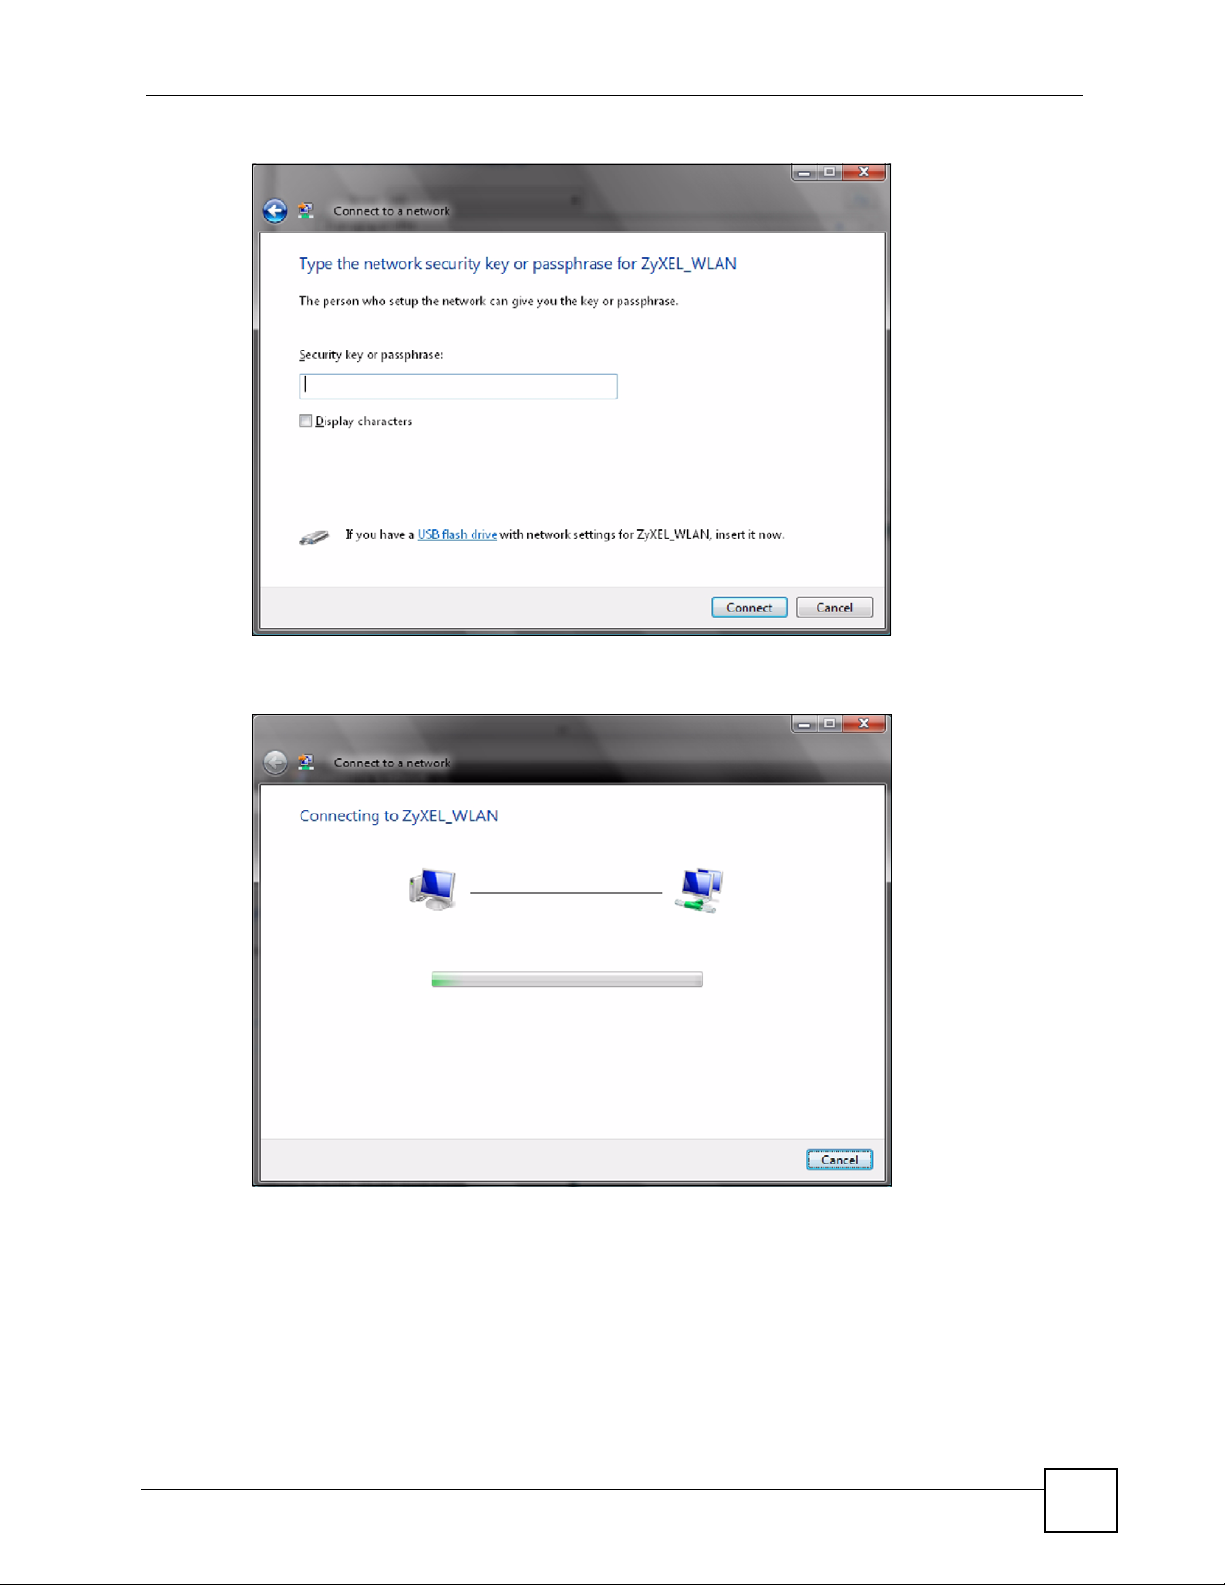
Figure 94 Vista: Enter Security Key
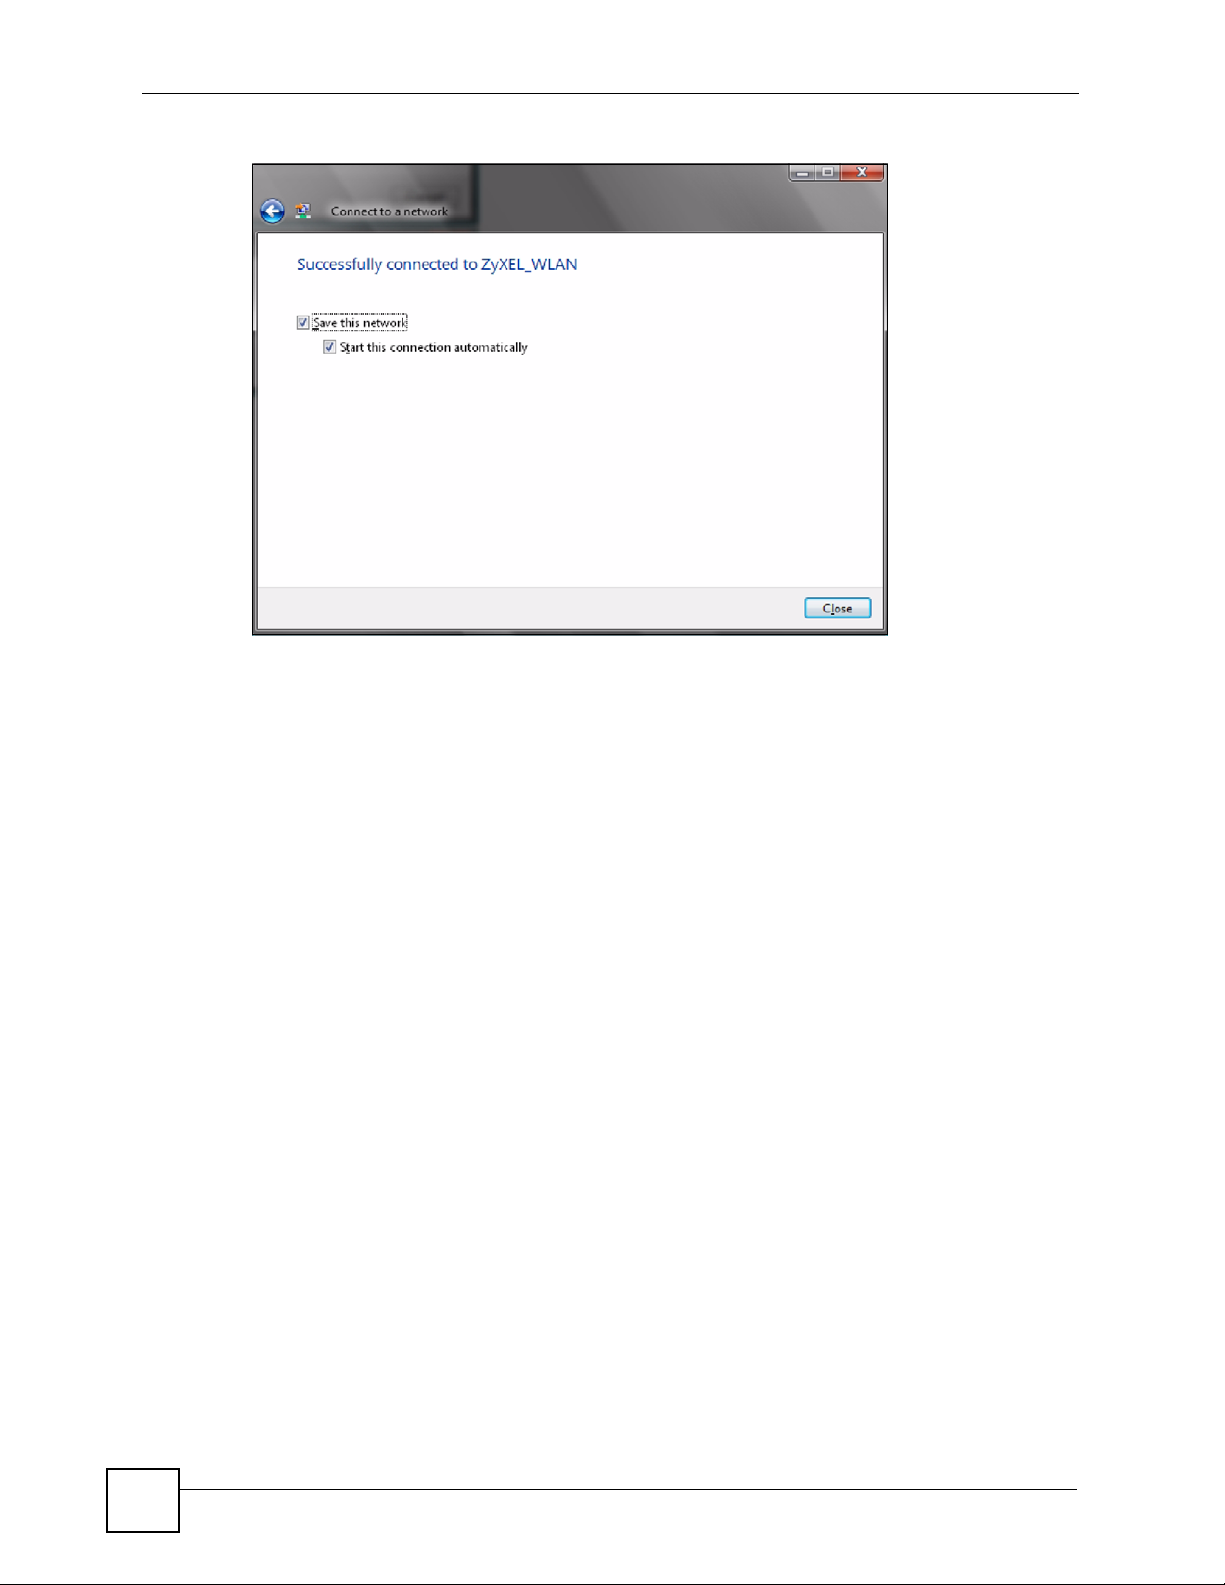
Your computer tries to connect to the wireless network.
Appendix C Windows Wireless Management
Figure 95 Vista: Connecting
If your computer has connected to the wireless network successfully, the following
screen displays.
NWD210N User’s Guide
119
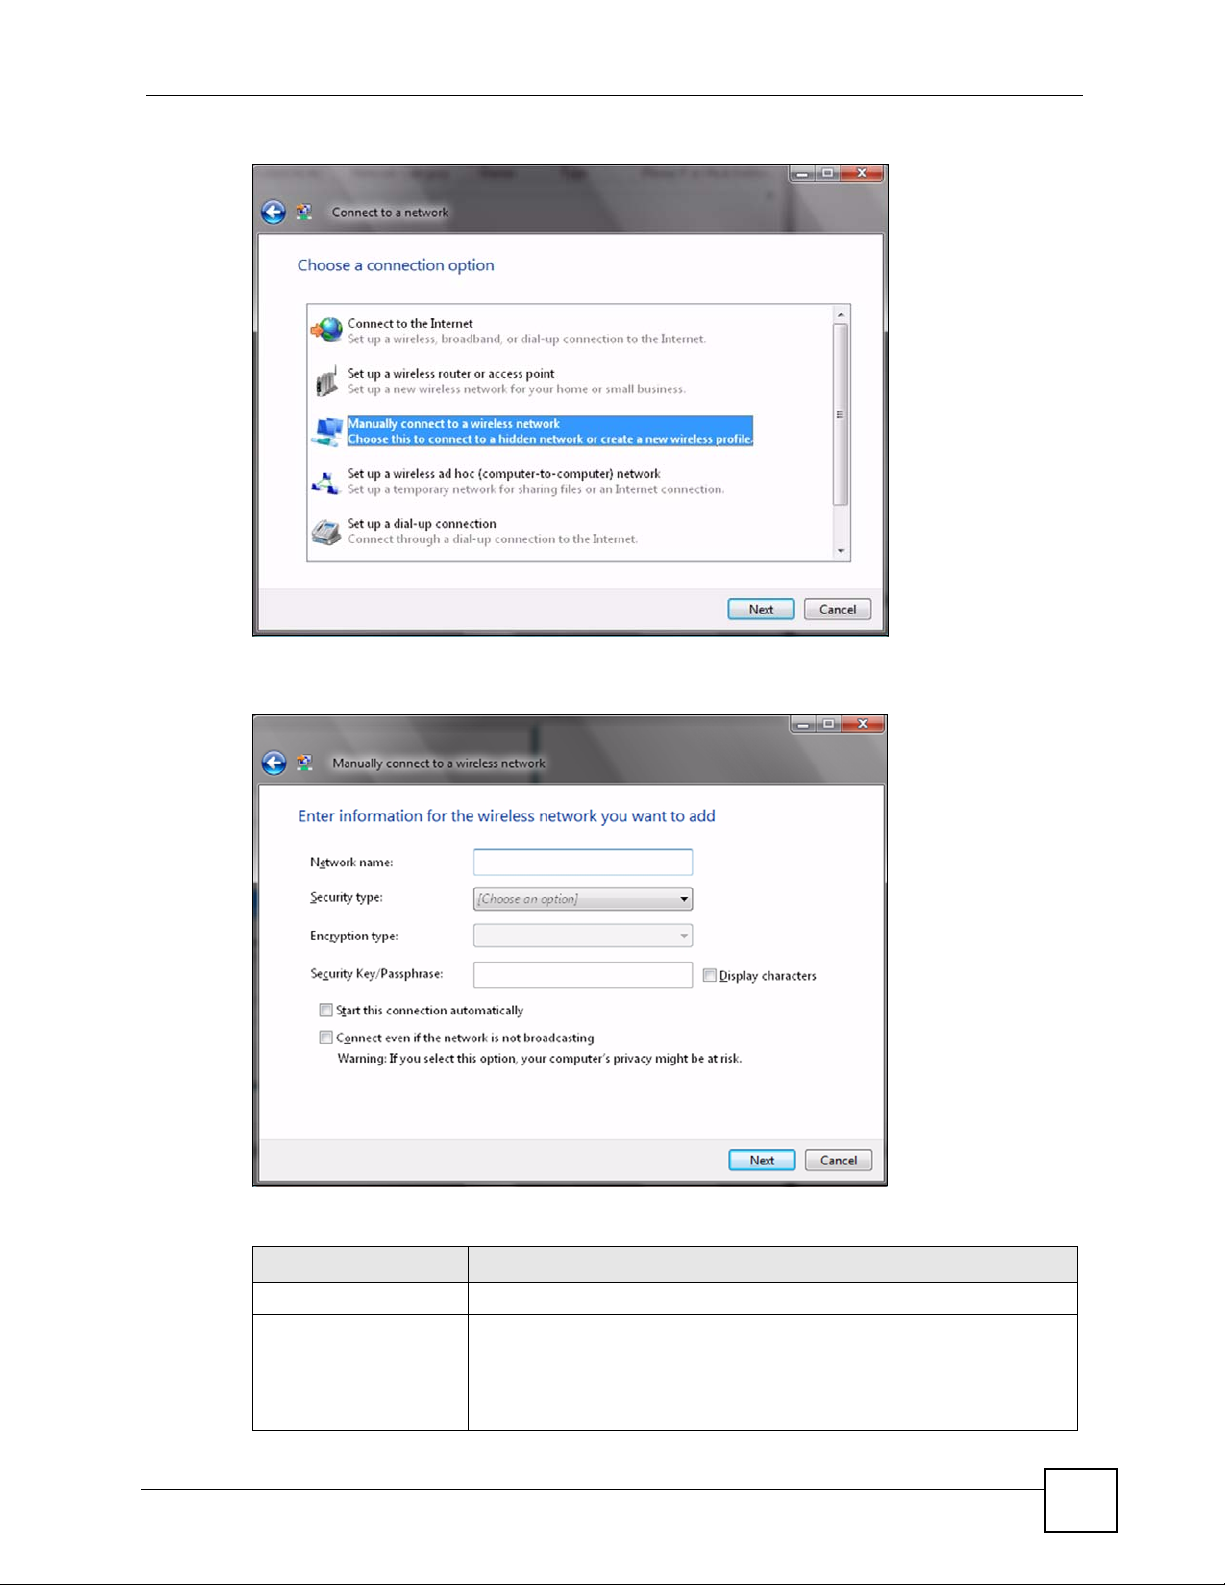
Appendix C Windows Wireless Management
Figure 96 Vista: Successful Connection
4 If you will use this network again, ensure that Save this network is selected. If you save
the network, you do not have to configure its settings again.
5 Select Start this connection automatically if you want Windows to always try to use
this network when you start up your computer. If you do not select this (but select Save
this network) you can connect manually each time by clicking Start > Connect to and
selecting the network’s name from the list.
Connecting to a Network Manually
If the wireless network to which you want to connect does not appear in the Connect to
window (if your network’s SSID is hidden, for example), take the following steps to configure
your network connection manually
1 Click Set up a connection or network at the bottom of the Connect to screen. The
following screen displays.
120
NWD210N User’s Guide
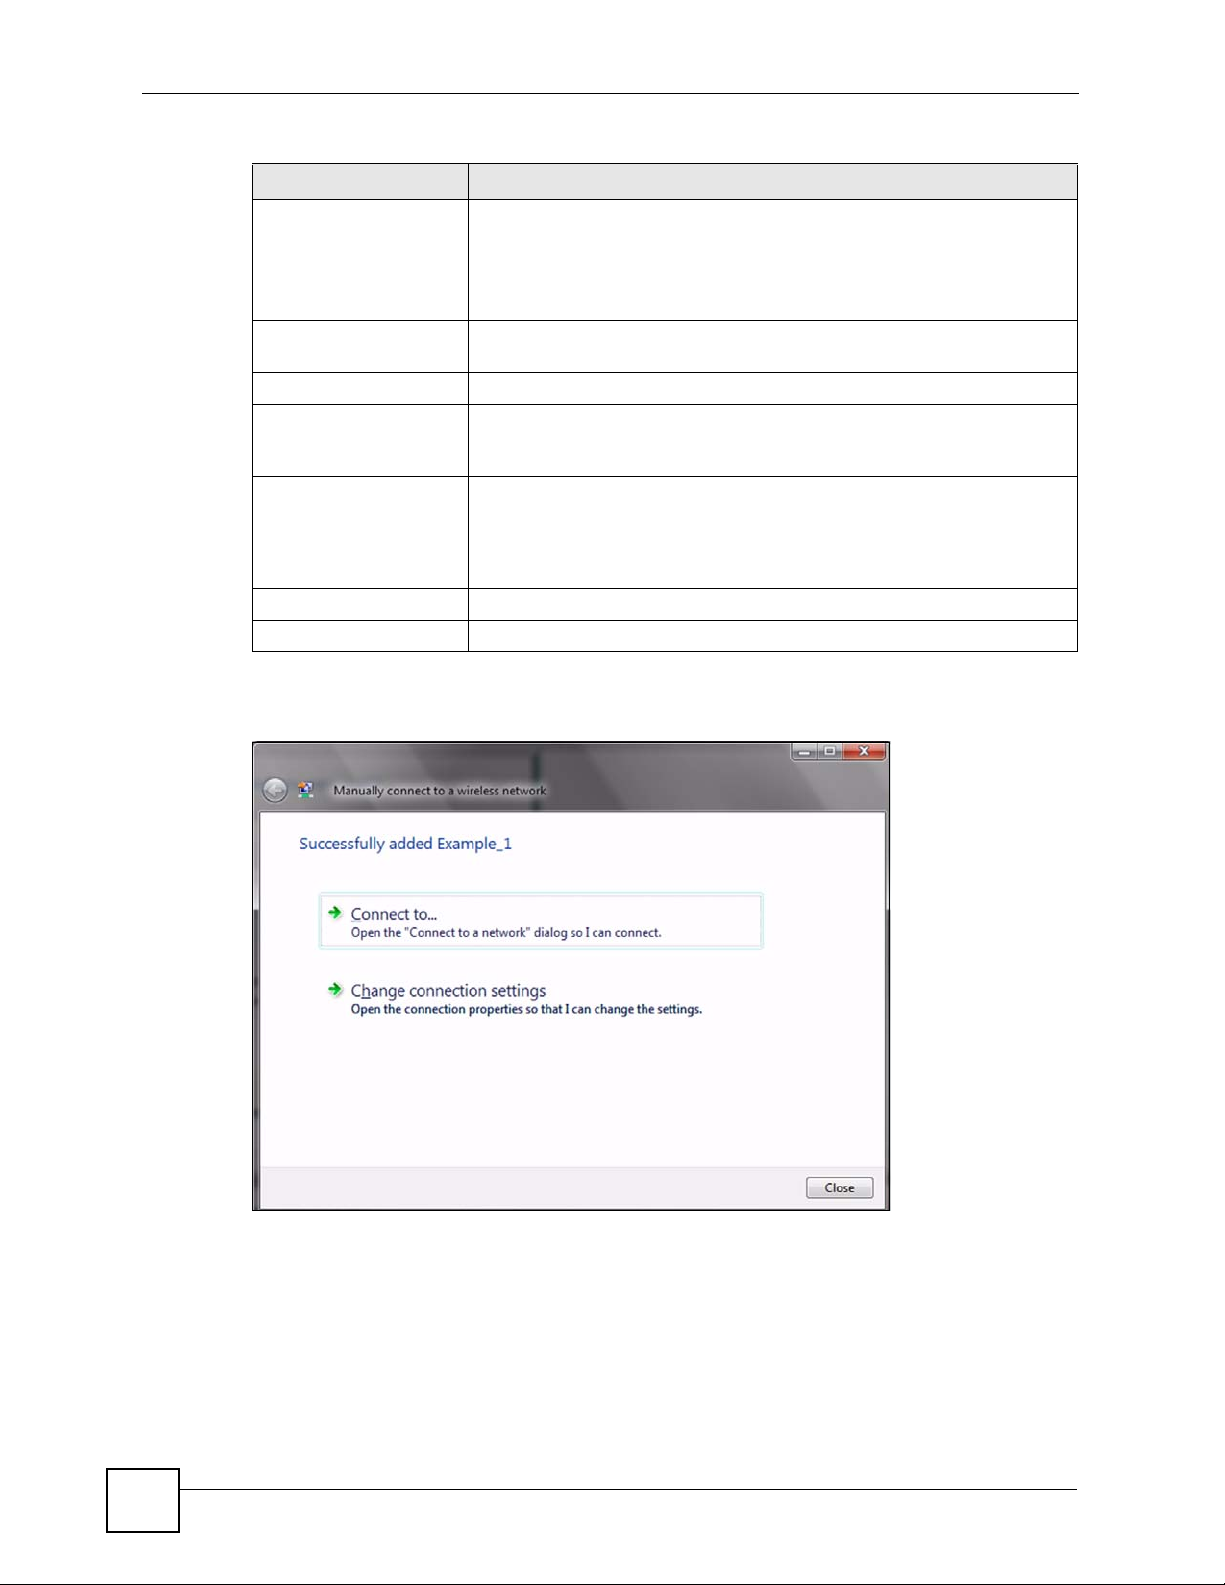
Appendix C Windows Wireless Management
Figure 97 Vista: Choose a Connection Option
2 Click Manually connect to a wireless network. The following screen displays.
Figure 98 Vista: Connect Manually
The following table describes the labels in this screen.
Table 26 Vista: Connect Manually
LABEL DESCRIPTION
Network name Enter your network’s SSID (Service Set IDentifier).
Security type Select the type of security used by the network to which you want to
connect. The types of available security shown depend on your computer’s
wireless client.
In this field, WPA(2)-Personal is the same as WPA(2)-PSK, and WPA(2)-
Enterprise is the same as WPA(2)
NWD210N User’s Guide
121
Appendix C Windows Wireless Management
Table 26 Vista: Connect Manually
LABEL DESCRIPTION
Encryption type Select the type of encryption used by the network.
When you use WEP or 802.1x, WEP displays.
When you use a WPA mode (WPA(2)-Personal or WPA(2)-Enterprise)
you can choose AES or TKIP (if supported by your computer’s wireless
client).
Security Key /
Passphrase
Display Characters Select this if you do not want the security key characters to be hidden.
Start this connection
automatically
Connect even if the
network is not
broadcasting
Next Click this to save your settings and move on to the next page.
Cancel Click this to stop setting up your network.
If your network uses WEP or WPA(2)-Personal security, enter the key
here.
Select this box if you always want to try to connect to this network at
startup. If you leave this box unchecked, you will need to connect manually
each time.
Select this box if you always want to try to connect to this network at
startup, even if the network is not broadcasting its SSID. The warning in
this field refers to the fact that if you do this, your computer sends out probe
request packets, which contain the network’s SSID and could be used by
an attacker to access the network.
3 When you have finished filling in the fields, click Next. the following screen displays.
Figure 99 Vista: Successfully Added Network
4 If you want to make any changes to the settings you just configured, click Change
connection settings. Otherwise, click Connect to.... In the window that displays,
double-click the new network’s name to connect to the network.
Setting Up An Ad-Hoc Network
Take the following steps to set up a wireless connection between two computers in Windows
Vista.
122
NWD210N User’s Guide
Appendix C Windows Wireless Management
1 Click Start () > Connect To. In the Connect to screen, click Set up a connection
or network. The following screen displays.
Figure 100 Vista: Set Up An Ad-hoc Network
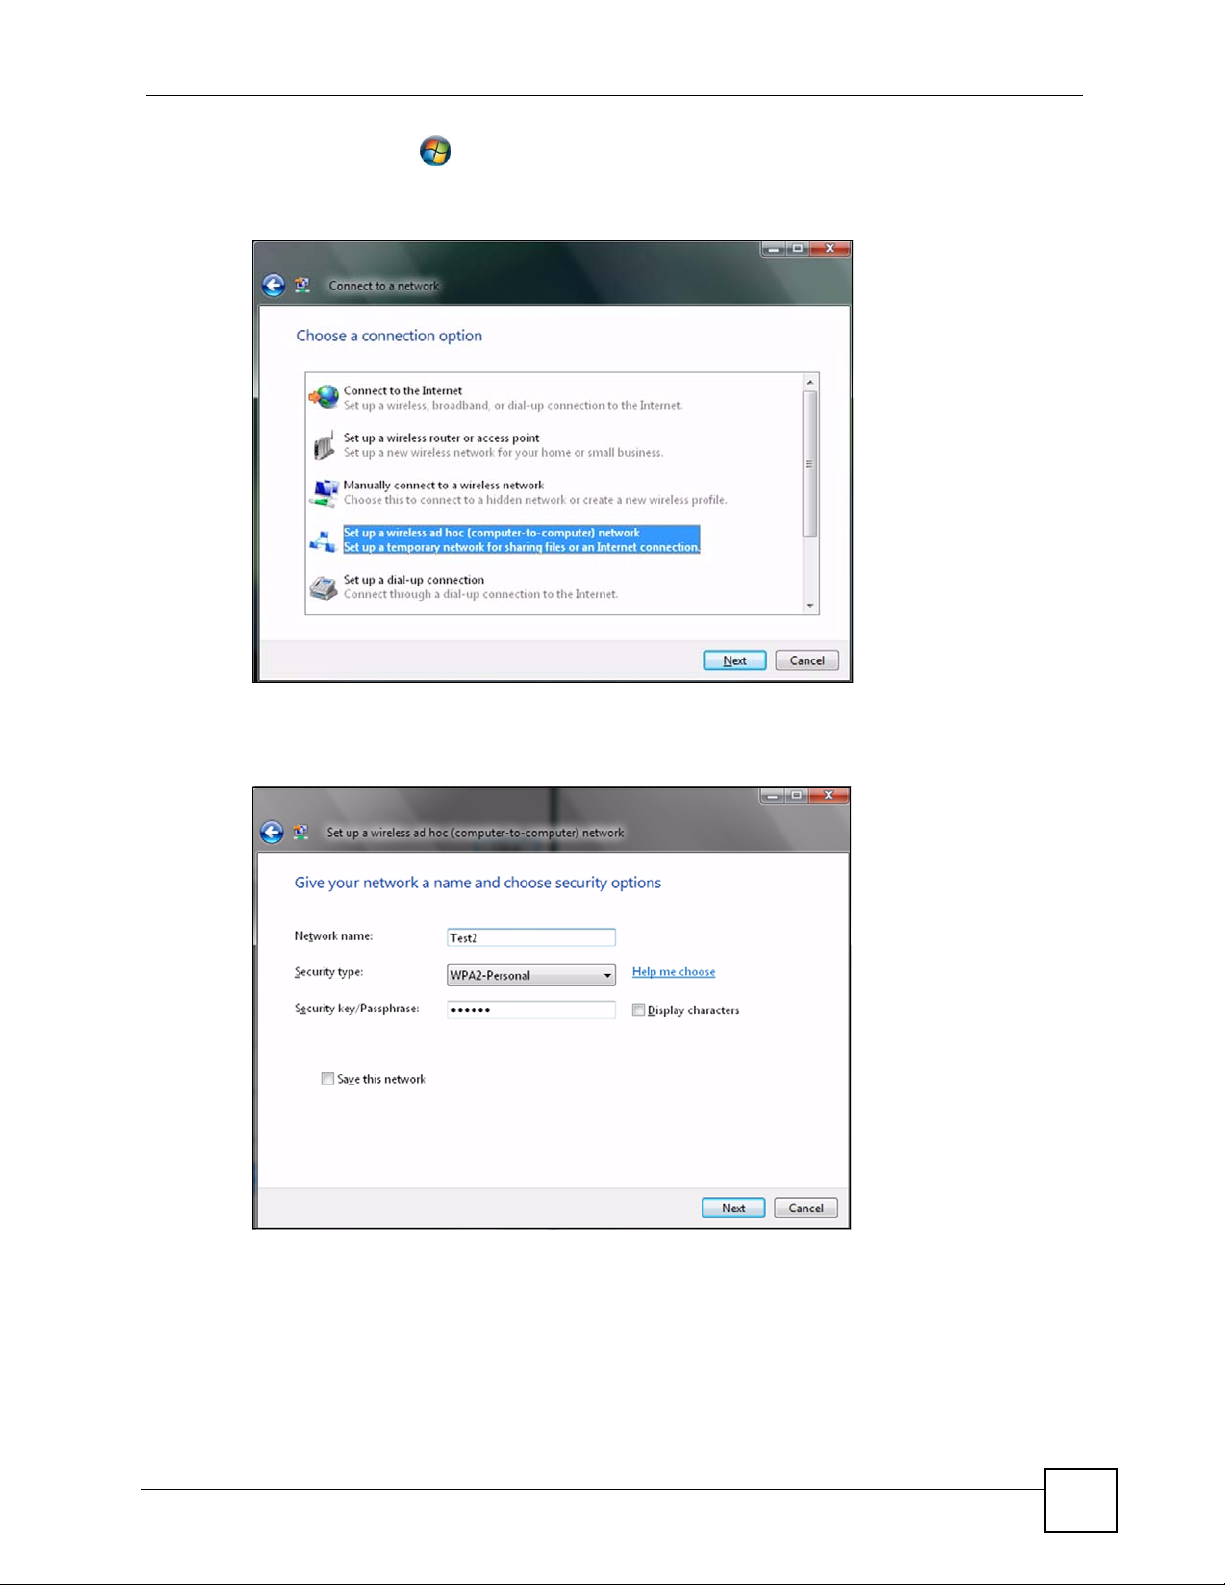
2 Select Set up a wireless ad hoc (computer-to-computer) network and click Next. The
following screen displays.
Figure 101 Vista: Ad-hoc Options
3 Enter the Network name (SSID) you want to use for your network. Select a Security
type. If you are not sure what kind of security you want to use, click the Help me choose
link.
NWD210N User’s Guide
123
Appendix C Windows Wireless Management
" Make sure all the wireless clients on your ad-hoc network can support the type
of security you select.
4 Enter the Security key/Passphrase. Everybody on the network must enter this key in
their computer’s wireless client in order to access the network. If you want to see the
characters you entered, select the Display characters box. Otherwise, leave it empty
(dots display instead of the characters).
5 If you will use this ad-hoc network again, select the Save this network box. If you do
this, the next time you click Start > Connect to, you can select the network from the list.
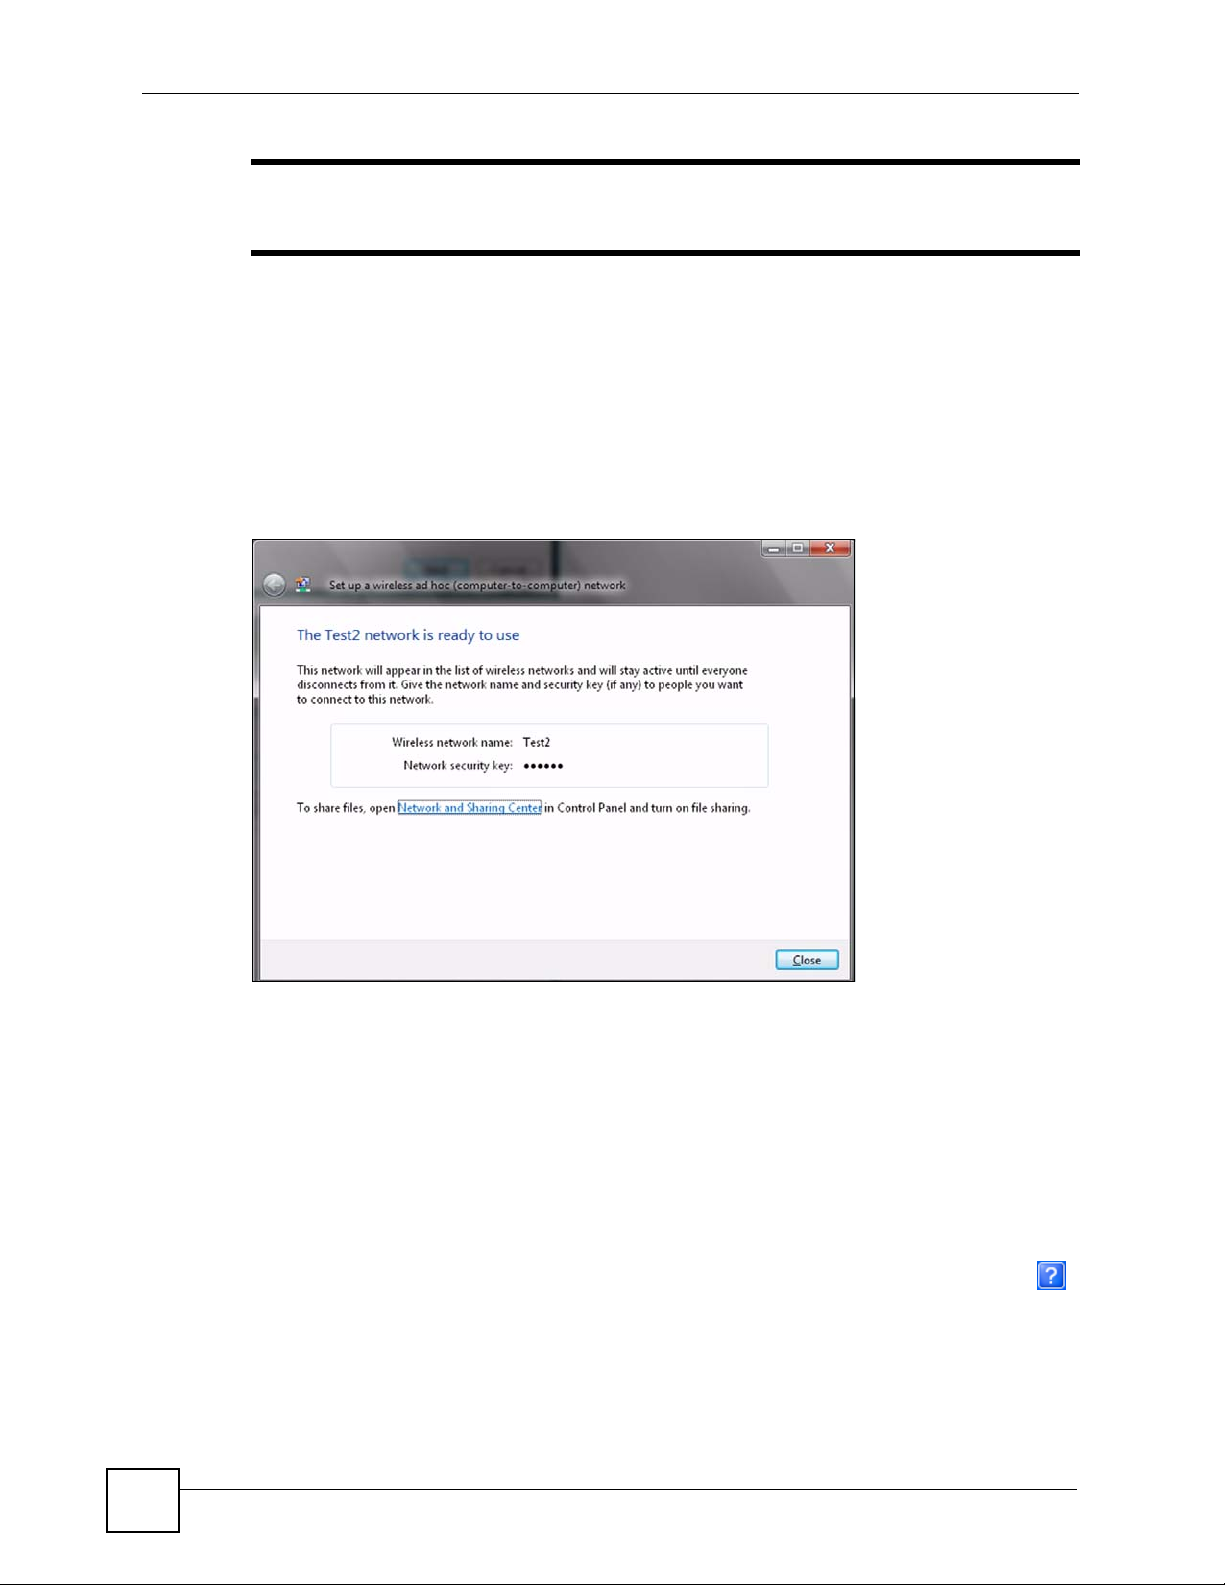
6 Click Next. The following screen displays.
Figure 102 Vista: Ad-hoc Network Ready
7 If you want to share files with other computers on the ad-hoc network, or let other
computers use your Internet connection, click the Network and Sharing Center link.
Otherwise, click Close.
Windows XP
Be sure you have the Windows XP service pack 2 installed on your computer. Otherwise, you
should at least have the Windows XP service pack 1 already on your computer and download
the support patch for WPA from the Microsoft web site.
Windows XP SP2 screen shots are shown unless otherwise specified. Click the help icon ( )
in most screens, move the cursor to the item that you want the information about and click to
view the help.
Activating Wireless Zero Configuration
1 Click Start, Control Panel and double-click Network Connections.
124
NWD210N User’s Guide
 Loading...