


R Series® Configuration Manual
9650-0902-01 Rev. K

The issue date for the R Series Configuration Guide (REF 9650-0902-01 Rev. K) is May, 2012.
If more than 3 years have elapsed since the issue date, contact ZOLL Medical Corporation to determine if additional product information updates are available.
© 2012 ZOLL Medical Corporation. All rights reserved. R Series, pedi-padz, Real CPR Help, Code-Ready, and OneStep are trademarks or registered trademarks of ZOLL Medical Corporation in the United States and/or other countries.
Masimo is a registered trademark of Masimo Corporation in the United States and/or other countries. All other trademarks are the property of their respective owners.
ZOLL Medical Corporation
269 Mill Road Chelmsford, MA USA 01824-4105
ZOLL International Holding B.V.
Newtonweg 18
6662 PV ELST
The Netherlands
0123

|
Table of Contents |
|
Chapter 1 |
Introduction |
|
Entering System Configuration Mode .................................................................................... |
2 |
|
Printing Configuration Settings and Activity Logs .................................................................. |
3 |
|
Uploading Data from a Compact Flash Card ......................................................................... |
6 |
|
Saving Configuration to a Compact Flash Card..................................................................... |
8 |
|
Restoring Default Values ....................................................................................................... |
9 |
|
Accessing and Changing Configuration Settings................................................................. |
10 |
|
Leaving Configuration Mode................................................................................................. |
11 |
|
Chapter 2 |
Configuration Settings |
|
General Settings .................................................................................................................. |
14 |
|
Device Identifier ........................................................................................................... |
14 |
|
Configuration Mode Passcode ..................................................................................... |
16 |
|
Code Markers .............................................................................................................. |
17 |
|
ECG Settings |
....................................................................................................................... |
19 |
Notch Filter .................................................................................................................. |
19 |
|
Display Lead ..........................................................................................on Power-Up |
19 |
|
Frequency ...................................................................................................Response |
19 |
|
Gain on Power .......................................................................................................Up |
20 |
|
Enable Leads .........................................................................................................Off |
20 |
|
Enable Pacer ...............................................................................................Detection |
20 |
|
Audio Settings...................................................................................................................... |
21 |
|
QRS Volume ..........................................................................................on Power-Up |
21 |
|
Low Battery .........................................................................................................Tone |
21 |
|
Enable Corrective ................................................................................Voice Prompts |
21 |
|
Basic Defibrillation .................................................................................................Settings |
22 |
|
Defib Default ...................................................................................................to Pads |
22 |
|
Basic Auto ......................................................................................Energy Escalation |
22 |
|
Retain Sync ...............................................................................................After Defib |
22 |
|
Defib Ready ................................................................................................Hold Time |
23 |
|
Enable Remote ...................................................................................................Sync |
23 |
|
9650-0902-01 Rev. K |
ZOLL R Series Configuration Manual |
i |

TABLE OF CONTENTS |
|
Advisory Defib...................................................................................................................... |
24 |
Energy Level: Shock 1 ................................................................................................. |
24 |
Energy Level: Shock 2 ................................................................................................. |
25 |
Energy Level: Shock 3 ................................................................................................. |
25 |
Ped Energy Level Shock 1 .......................................................................................... |
25 |
Ped Energy Level Shock 2 .......................................................................................... |
26 |
Ped Energy Level Shock 3 .......................................................................................... |
26 |
Auto Analyze ................................................................................................................ |
26 |
Enable Check Pulse Prompt ........................................................................................ |
27 |
Check Patient Prompt .................................................................................................. |
27 |
Auto Charge in Advisory Mode .................................................................................... |
27 |
Enable Voice in Advisory Mode ................................................................................... |
28 |
Display DO CPR Message .......................................................................................... |
28 |
CPR Message After No Shock Advised ....................................................................... |
29 |
CPR Message After Shock .......................................................................................... |
29 |
Stacked Shocks ........................................................................................................... |
30 |
Restart Analysis After CPR .......................................................................................... |
30 |
CPR Interval ................................................................................................................ |
30 |
CPR Settings ....................................................................................................................... |
31 |
Enable CPR Voice Prompts ......................................................................................... |
31 |
Enable CPR Display .................................................................................................... |
31 |
Enable CPR Metronome .............................................................................................. |
31 |
Target CPR Depth ....................................................................................................... |
31 |
Display Fully Release Prompt ...................................................................................... |
32 |
Pace Settings....................................................................................................................... |
33 |
Pace Rate Setting on Power-Up .................................................................................. |
33 |
Async Softkey in Pace Mode ....................................................................................... |
33 |
Alarms Settings.................................................................................................................... |
34 |
Alarm Limits at Power Up ............................................................................................ |
35 |
Alarms Active at Power Up .......................................................................................... |
39 |
Display Settings ................................................................................................................... |
40 |
Display Time ................................................................................................................ |
40 |
Select Trace 2 At Power Up ........................................................................................ |
40 |
Select Trace 3 At Power Up ........................................................................................ |
41 |
ECG Color ................................................................................................................... |
41 |
SpO2 Color .................................................................................................................. |
41 |
CPR Color .................................................................................................................... |
41 |
EtCO2 Color ................................................................................................................. |
42 |
NIBP Color ................................................................................................................... |
42 |
SPO2 at Power Up ....................................................................................................... |
42 |
ii |
www.zoll.com |
9650-0902-01 Rev. K |

NIBP Settings (Optional)...................................................................................................... |
43 |
Blood Pressure Units ................................................................................................... |
43 |
Trigger NIBP Meas on BP Alarm ................................................................................. |
43 |
Trigger NIBP Meas on HR Alarm ................................................................................. |
43 |
NIBP Auto Interval Default ........................................................................................... |
44 |
Adult Initial Cuff Inflation .............................................................................................. |
44 |
Pediatric Initial Cuff Inflation ........................................................................................ |
44 |
Neonatal Initial Cuff Inflation ........................................................................................ |
44 |
NIBP Patient Mode at Power Up ................................................................................. |
45 |
NIBP Button Press & Hold ........................................................................................... |
45 |
Enable Motion Tolerance ............................................................................................. |
45 |
EtCO2 Settings (Optional).................................................................................................... |
46 |
Default EtCO2 Units ..................................................................................................... |
46 |
Displayed Zoom Level ................................................................................................. |
46 |
Default EtCO2 Comp Setting ....................................................................................... |
46 |
Power Save Mode at Power Up ................................................................................... |
47 |
EtCO2 Average On Power Up ..................................................................................... |
47 |
Printer & Report Settings ..................................................................................................... |
48 |
Set Report Restart Delays ........................................................................................... |
48 |
Auto Generate Strips ................................................................................................... |
48 |
Print 3 Leads When Leads Sel. ................................................................................... 48 |
|
Readiness Test Settings ...................................................................................................... |
49 |
Automatic Readiness Test ........................................................................................... |
49 |
Readiness Test Time ................................................................................................... |
49 |
Print Readiness Test Results ...................................................................................... |
49 |
Enable Readiness Test Audible Alert (Future Use) ..................................................... |
50 |
One Step Padz Installed .............................................................................................. |
50 |
AED Mode ........................................................................................................................... |
51 |
Display ECG in AED Mode .......................................................................................... |
51 |
Display HR in AED Mode ............................................................................................. |
51 |
Manual Confirm Enable ............................................................................................... |
51 |
Extra CPR Interval Before 1st Analysis ....................................................................... |
52 |
Duration of Extra CPR Interval .................................................................................... |
52 |
Display Remaining CPR Timer .................................................................................... |
52 |
9650-0902-01 Rev. K |
ZOLL R Series Configuration Manual |
iii |

TABLE OF CONTENTS
Wi-Fi Settings (Optional)...................................................................................................... |
53 |
Full Disclosure Transfer Mode ..................................................................................... |
53 |
Defib History Transfer Mode ........................................................................................ |
53 |
Infrastructure Mode Options ........................................................................................ |
53 |
DHCP/Static IP ............................................................................................................ |
53 |
Local IP Address .......................................................................................................... |
54 |
Gateway IP Address .................................................................................................... |
55 |
Subnet Mask ................................................................................................................ |
56 |
Use DNS ...................................................................................................................... |
57 |
Primary/Secondary DNS IP Address ........................................................................... |
57 |
SSID Names (up to 2 entries) ...................................................................................... |
58 |
Server Name (Full Disclosure) ..................................................................................... |
59 |
Server IP (Full Disclosure) ........................................................................................... |
60 |
Server Port (Full Disclosure) ........................................................................................ |
61 |
Server Name (Defib History) ........................................................................................ |
62 |
Server IP (Defib History) .............................................................................................. |
63 |
Server Port (Defib History) ........................................................................................... |
65 |
Passphrase/Keys (up to 2 entries) ............................................................................... |
66 |
Enable Report ID ......................................................................................................... |
67 |
Wi-Fi Region ................................................................................................................ |
67 |
Wi-Fi Radio .................................................................................................................. |
67 |
iv |
www.zoll.com |
9650-0902-01 Rev. K |

Chapter 1
Introduction
The R Series® is designed with several user selectable features that allow operators to configure the device according to their protocols and local requirements. This manual describes the configuration settings (options and defaults) and how to change them for ALS, Plus, and BLS models. References to AED settings are for Plus and BLS models only.
Note: Your unit may not contain all features listed. For BLS/Plus units, some features are available in manual mode operation only.
For more information, see the following sections:
•“Entering System Configuration Mode” on page 2
•“Printing Configuration Settings and Activity Logs” on page 3
•“Uploading Data from a Compact Flash Card” on page 6
•“Saving Configuration to a Compact Flash Card” on page 8
•“Restoring Default Values” on page 9
•“Accessing and Changing Configuration Settings” on page 10
•“Leaving Configuration Mode” on page 11
9650-0902-01 Rev. K |
1 |
Chapter 1 Introduction
Entering System Configuration Mode
In order to make any changes to unit configuration, you must first power on the unit in System Configuration mode.
Procedure
Follow these steps to power on the unit in System Configuration mode:
Step Action
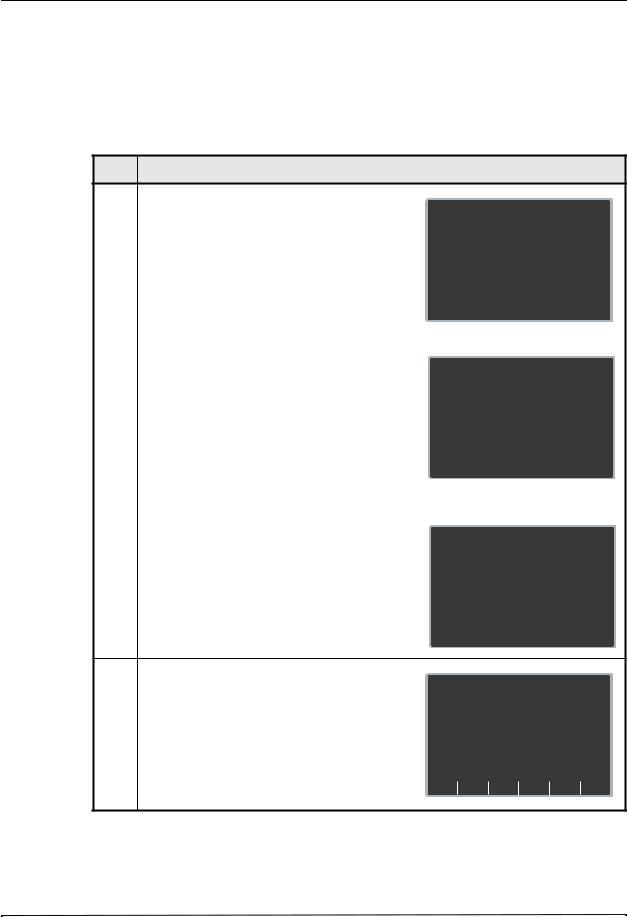
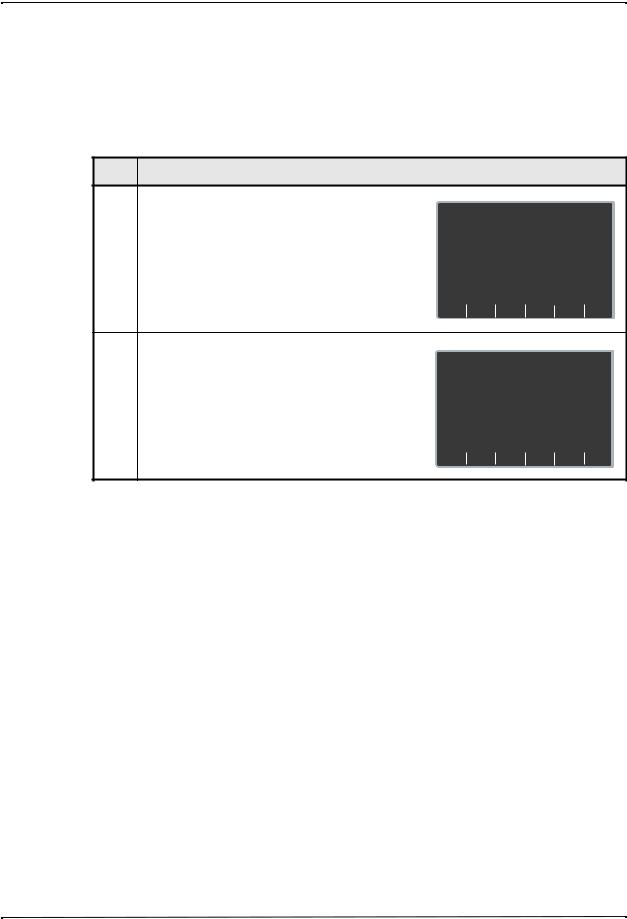
1.Turn the selector switch to OFF, and wait 10 seconds.
|
Simultaneously press and hold the right-most and |
|
System Configuration |
||||
|
|
|
|
|
|
|
|
|
left-most softkeys (below the monitor) while turning |
|
Set Configuration Passcode |
||||
|
the selector switch to MONITOR (for ALS models) |
|
|
or Power Off to Exit |
|
||
|
|
|
|
|
|
|
|
|
or ON (for Plus and BLS models), and hold the |
0 |
0 0 0 |
? ? |
? |
? |
|
|
softkeys for approximately 4 seconds. |
|
|
|
|
|
|
|
The unit powers on in System Configuration mode. |
|
0 |
1 |
2 |
3 |
Delete |
|
|
||||||
|
|
|
|
|
|
|
|
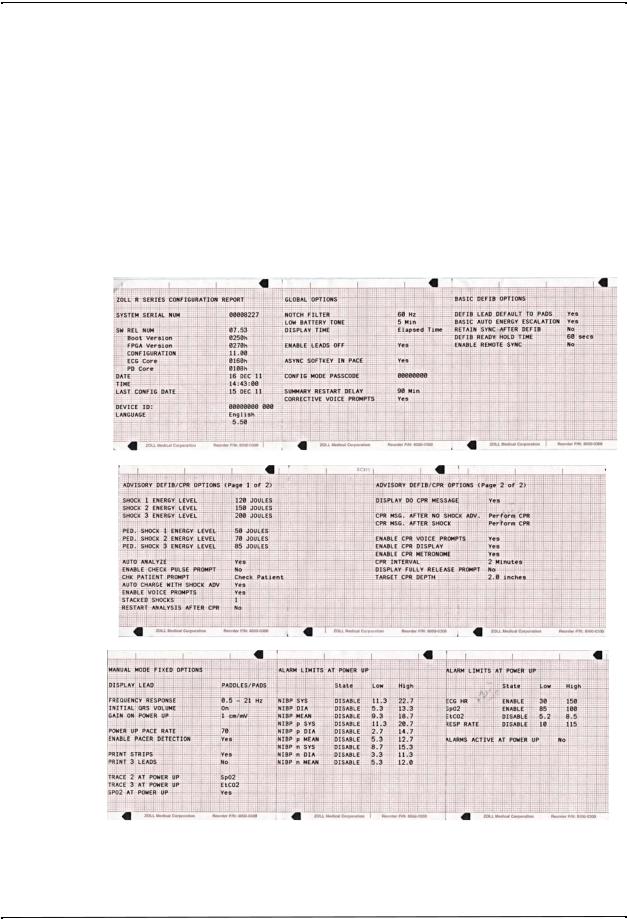
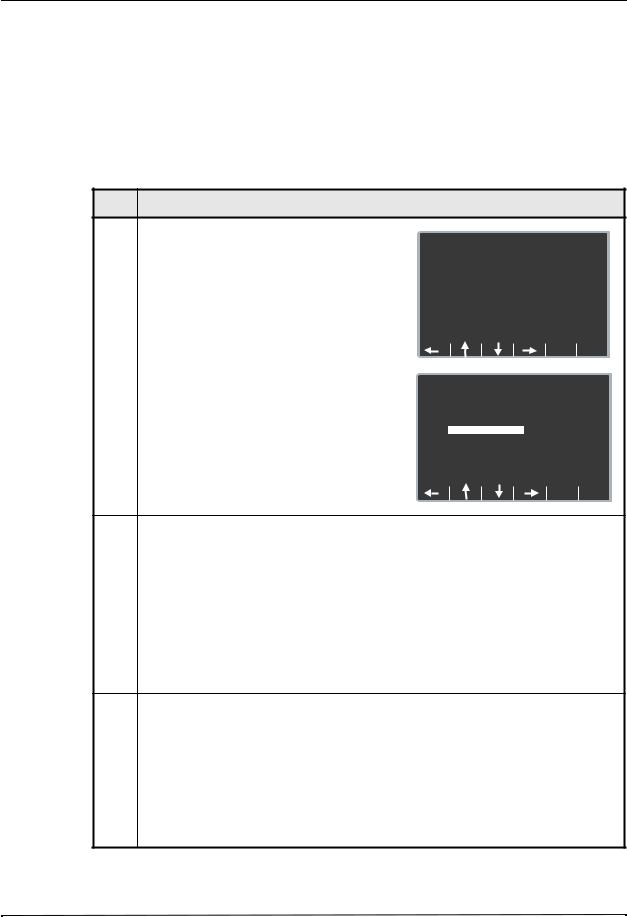
2. |
Enter the passcode using the appropriate softkeys. |
|
|
|
|
|
|
|
Note: When you enter System Configuration for |
|
|
|
|
|
|
|
the first time, enter the default pass code of |
|
System Configuration |
|
||||
|
|
|
|
|
|
|
|
|
|
00000000. |
Enter Configuration Passcode |
||||||
|
To change a digit, use the Delete softkey to |
|
or Power Off to Exit |
|
||||
|
|
|
|
|
|
|
|
|
|
highlight the entry and re-enter the digit. |
0 |
0 0 ? |
? ? |
? ? |
|
||
|
When all 8 digits have been entered, the unit |
|
0 |
1 |
2 |
3 |
Delete |
|
|
|
|||||||
|
automatically advances to the Select Language |
|
||||||
|
screen. |
|
|
|
|
|
|
|
|
|
|
|
|
|
|
|
|
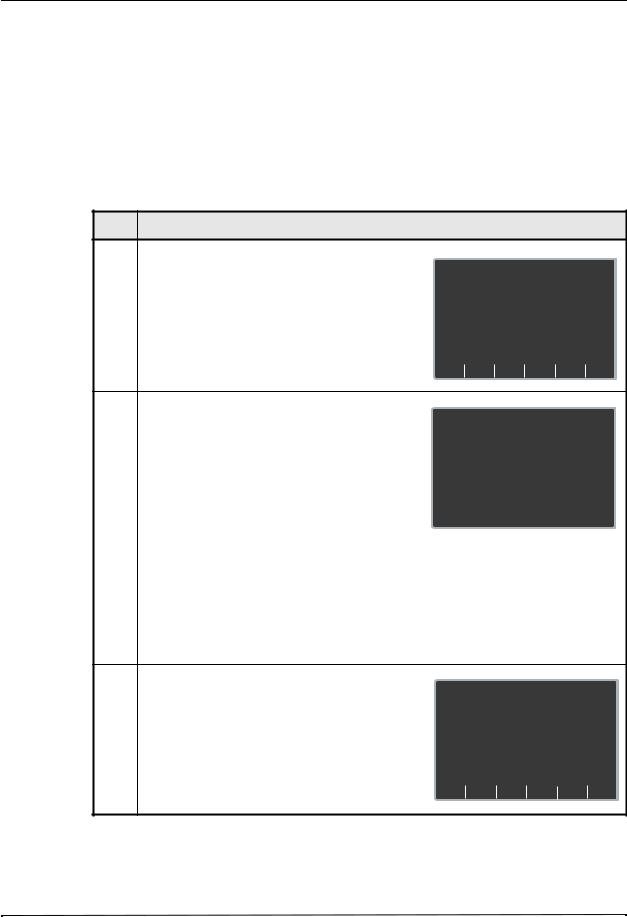
3. |
Use the Prev Value and Next Value softkeys to |
|
|
|
|
|
|
|
|
toggle the highlighted area between the language |
|
System Configuration |
|
||||
|
options. |
|
|
|||||
|
|
|
Select Language |
|
||||
|
|
|
|
|
||||
|
|
|
|
|
|
|
|
|
|
|
|
|
|
ENGLISH |
|
|
|
|
|
|
|
|
FRANCAIS |
|
|
|
|
|
|
|
|
Prev |
Next |
|
Exit |
|
|
|
|
|
|
|||
|
|
|
|
|
Value |
Value |
Enter |
Config |
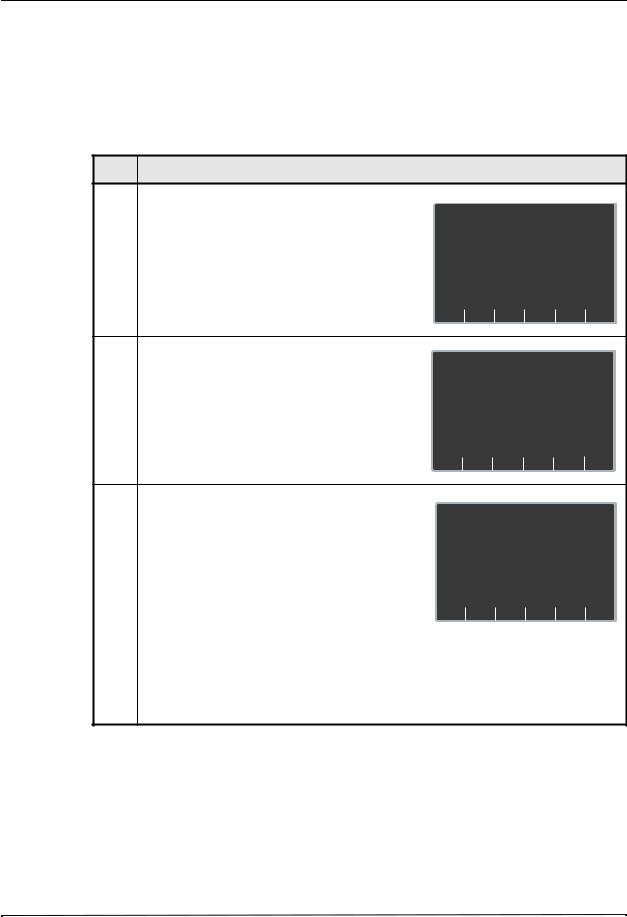
4.Press the Enter softkey to select the highlighted
language.
All subsequent configuration menus will be in the System Configuration selected language.
The unit automatically advances to the Main Configuration menu.
Read
Restore From Change Exit
Print Defaults Card Config Config
2 |
9650-0902-01 Rev. K |
Printing Configuration Settings and Activity Logs
Printing Configuration Settings and Activity Logs
To print the current configuration or activity log of your unit while the unit is in the System Configuration mode, press the Print softkey from the Main System Configuration menu. For instructions on putting the unit in System Configuration mode, refer to the previous section, “Entering System Configuration Mode.”
Printing Configuration Settings
In System Configuration mode, press the Print softkey, then the Print Config softkey to print a stripchart of all the unit’s configuration settings. See a copy of a sample Configuration Report below.
Note: In normal operation, you can print the configuration by pressing the following softkeys: Options, More, then Print Config.
9650-0902-01 Rev. K |
3 |

Chapter 1 Introduction
4 |
9650-0902-01 Rev. K |
Printing Configuration Settings and Activity Logs
Printing the Activity Log
In System Configuration mode, press the Print softkey, then the Print Activity Log softkey to print a stripchart of the unit’s activity log. The log consists of the last 1,024 user entries or system prompts. See a copy of a sample Activity Log report below.
9650-0902-01 Rev. K |
5 |
Chapter 1 Introduction
Uploading Data from a Compact Flash Card
You can upload data from a compact flash card to perform the following tasks:
•Copy the configuration of one unit to any number of units
•Install new software to the unit
•Copy a second language to the unit
Procedure
Follow these steps to load a configuration, another language, or software from a compact flash card:
Step Action
1.Install the compact flash card in the R Series unit,
and power on the unit in System Configuration mode
as described in “Entering System Configuration System Configuration Mode” on page 2.
|
Read |
|
|
Restore |
From |
Change |
Exit |
Print Defaults |
Card |
Config |
Config |
2. |
Press the Read From Card softkey to display the |
|
|
|
|
|
Read Card screen. |
System Configuration |
|||
|
Use the Prev Value and Next Value softkeys to |
||||
|
Read Which Type of Card? |
||||
|
toggle the highlighted area between the following |
||||
|
|
|
|
|
|
|
options: |
|
|
|
|
|
|
LANGUAGE |
|||
|
CONFIGURATION |
||||
|
• LANGUAGE - allows you to upload a second |
||||
|
|
PROGRAM |
|||
|
language to the unit. English is always on the |
|
|
|
|
|
unit as default, and one other language can be |
|
Prev |
Next |
|
|
|
||||
|
added. |
|
Value |
Value Enter |
|
|
|
|
|||
•CONFIGURATION -allows you to read the configuration data from a card, thereby configuring this unit.
•PROGRAM - allows you to install new software in either the PD processor or the ECG processor.
Note: Do not install an older version of software over a newer version because it will cause software problems.
3. |
Press the Enter softkey to initiate reading and |
|
|
|
|
|
|
storing the information from the installed compact |
System Configuration |
|
|||
|
flash card. |
|
||||
|
|
|
|
|
|
|
|
Once the card has been read and loaded, the unit |
|
Card Read |
|
|
|
|
displays the CARD READ message (for a language |
Press Change Config to View |
|
|||
|
|
|
|
|
|
|
|
card) or the CARD READ and PRESS CHANGE |
|
|
|
|
|
|
CONFIG TO VIEW messages (for a configuration |
|
|
|
|
|
|
card). |
|
Restore |
From |
Change |
Exit |
|
|
|
|
Read |
|
|
|
|
Defaults |
Card |
Config |
Config |
|
If you want to review configuration settings, press the Change Config softkey. See “Accessing and Changing Configuration Settings” on page 10 for more information. If you want to leave
6 |
9650-0902-01 Rev. K |

Uploading Data from a Compact Flash Card
System Configuration mode, press the Exit Config softkey. See “Leaving Configuration Mode” on page 11 for more information.
If the unit encounters an error reading the memory card, one of the following error messages is displayed:
Error Message |
Description |
|
|
CARD READ FAILED |
No response is detected from the card reader. |
|
|
BAD CARD |
The unit cannot read the card. |
|
|
NO CARD INSERTED |
The card is not installed in the data card slot. |
|
|
9650-0902-01 Rev. K |
7 |
Chapter 1 Introduction
Saving Configuration to a Compact Flash Card
Whenever you exit configuration mode, you can optionally save the configuration to a compact flash card. This allows you to copy the configuration from one unit to any number of units.
Procedure
Follow these steps to save configuration data to a compact flash card:
Step Action
1.Power on the unit in System Configuration mode as
described in “Entering System Configuration Mode”
on page 2. System Configuration
|
Read |
|
|
Restore |
From |
Change |
Exit |
Print Defaults |
Card |
Config |
Config |
2.Press the Exit Config softkey to display the Exit
Configuration screen, and then install the flash card |
System Configuration |
|
in the R Series unit. |
|
|
|
|
|
|
Save Changes and Exit |
|
|
Discard Changes and Exit |
|
|
Return to Main Menu |
|
|
Prev |
Next |
|
Item |
Item Enter |
3.Press the Enter softkey to save the configuration changes and exit.
|
The unit displays the SAVING CONFIGURATION |
System Configuration |
|||
|
Save Changes to Card? |
||||
|
and DO NOT POWER OFF messages and then the |
||||
|
|
|
|
|
|
|
Save Changes To Card screen appears. |
|
|
|
|
|
|
|
NO |
||
|
|
|
|
YES |
|
|
|
Prev |
Next |
||
|
|
Item |
Item Enter |
||
|
|
|
|
|
|
4. |
Press the Next Item softkey to highlight YES, then |
|
|
|
|
|
press the Enter softkey. |
|
|
|
|
|
The unit displays the SAVING TO CARD message |
|
|
|
|
|
and then the POWER OFF TO EXIT |
|
|
|
|
|
CONFIGURATION message. |
|
|
|
|
8 |
9650-0902-01 Rev. K |
Restoring Default Values
Restoring Default Values
You can restore all configuration settings to their factory default settings. Only the display language, if different from the default, does not change.
Procedure
Follow these steps to restore all configuration settings to default values:
Step Action
1.Power on the unit in System Configuration mode as
described in “Entering System Configuration Mode”
on page 2. |
System Configuration |
|
|
Read |
|
|
Restore |
From |
Change |
Exit |
Print Defaults |
Card |
Config |
Config |
2. |
Press the Restore Defaults softkey to reconfigure |
|
|
|
|
|
|
settings to their default settings. |
System Configuration |
|
|||
|
|
|
||||
|
Once default settings are restored, the unit displays |
|
Defaults Restored |
|
||
|
the DEFAULTS RESTORED and PRESS CHANGE |
Press Change Config to View |
|
|||
|
|
|
|
|
|
|
|
CONFIG TO VIEW messages. |
|
|
|
|
|
|
|
|
|
Read |
|
|
|
|
|
Restore |
From |
Change |
Exit |
|
|
Defaults |
Card |
Config |
Config |
|
If you want to review configuration settings, press the Change Config softkey. See “Accessing and Changing Configuration Settings” on page 10 for more information. If you want to leave System Configuration mode, press the Exit Config softkey. See “Leaving Configuration Mode” on page 11 for more information.
9650-0902-01 Rev. K |
9 |
Chapter 1 Introduction
Accessing and Changing Configuration Settings
You can change the current value for any configuration setting. You access most of the settings in the same way as described below. Additional steps are required to access and modify several settings. For those settings, the additional steps are provided with the setting description in the next chapter.
Procedure
Follow these steps to access the settings.
Step Action
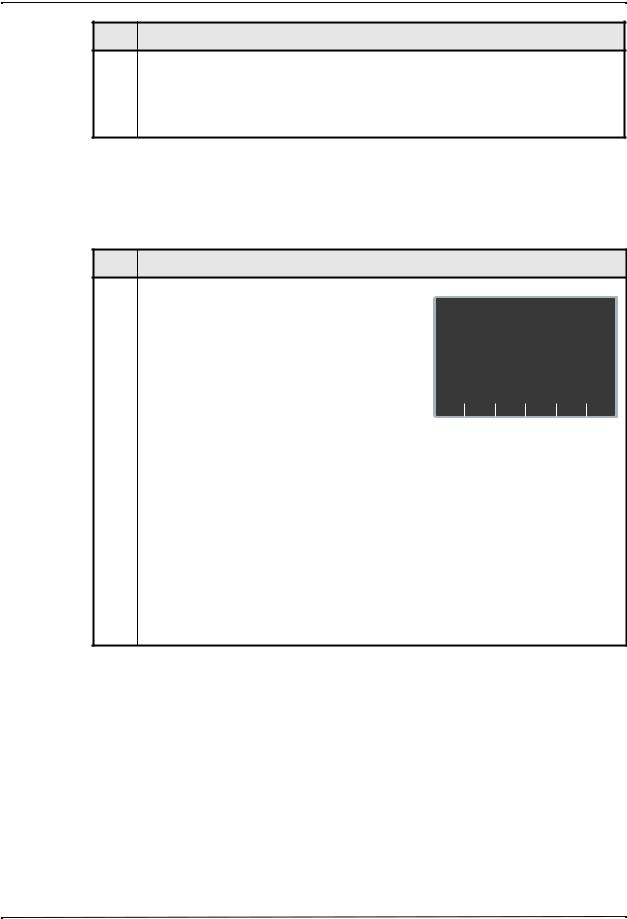
1.Press the Change Config softkey from the Main System Configuration screen.
The unit advances to the Select Configuration |
System Configuration |
|||
Select Configuration Category |
||||
Category screen. |
||||
|
|
CPR |
||
|
General |
|
||
|
ECG |
|
PaceS t/Review |
|
|
Audio |
|
Alarms |
|
|
Basic Defib |
|
Display |
|
|
Advisory Defib |
|
Printer & Report |
|
|
|
Page 1 of 2 |
||
|
|
|
Main |
|
|
|
|
Enter Menu |
|
System Configuration
Select Configuration Category
Readiness Test
AED Mode
NIBP
EtCO2
Wi-Fi
Page 2 of 2
Main
Enter Menu
2.Use the softkeys on the screen to move through the list and select a category, or to exit as follows:
• — moves the highlight up, down, left, and right through the list of categories.
•Enter — provides you access to the options of the highlighted category. Press this softkey once you have highlighted the appropriate category.
•Main Menu — returns you to the Main System Configuration screen.
3.Once you select and access the options for a category, you can highlight the specific setting you want to change, then press the Change Value softkey until the appropriate value is displayed.
Note: Some options require and evoke an additional screen to set the value (for example, setting the Device Identifier). Specific instructions for those options are provided in the next chapter.
10 |
9650-0902-01 Rev. K |
Leaving Configuration Mode
Step Action
4.When you are finished, you can either press the Category List softkey to return to the Category screen, or press the Prev Item or Next Item softkey to move to another option whose settings you want to modify.
Leaving Configuration Mode
Procedure
Follow the step below to leave System Configuration mode:
Step Action
1.Press the Exit Config softkey from the Main System
Configuration screen to display the Exit |
System Configuration |
||
Configuration screen. |
|||
|
|
||
Use the Prev Item and Next Item softkeys to toggle |
|
|
|
the highlighted area between the following options: |
Save Changes and Exit |
||
|
|||
• SAVE CHANGES AND EXIT - saves all |
Discard Changes and Exit |
||
Return to Main Menu |
|||
configuration changes you made and prompts |
|
|
|
you to Save to Card. If you specify Yes, the |
Prev |
Next |
|
configuration information is saved to the installed |
Item |
Item Enter |
|
|
|||
Compact Flash card. Lastly, the message
POWER OFF TO EXIT CONFIG is displayed.
Power off the unit.
•DISCARD CHANGES AND EXIT-disregards the changes you made and displays the message
POWER OFF TO EXIT CONFIG. Power off the unit.
•RETURN TO MAIN MENUreturns you to the Main System Configuration screen, where you can make more changes by selecting the Change Config softkey. You do not have to reenter the passcode.
Note: No changes are made if you turn the unit off without saving the configuration.
9650-0902-01 Rev. K |
11 |

Chapter 1 Introduction
12 |
9650-0902-01 Rev. K |

Chapter 2
Configuration Settings
This chapter describes all of the configuration settings on the R Series and includes the following sections.
•“General Settings” on page 14
•“ECG Settings” on page 19
•
•“Basic Defibrillation Settings” on page 22
•“Advisory Defib” on page 24
•“CPR Settings” on page 31
•“Pace Settings” on page 33
•“Alarms Settings” on page 34
•“Display Settings” on page 40
•“NIBP Settings (Optional)” on page 43
•“EtCO2 Settings (Optional)” on page 46
•“Printer & Report Settings” on page 48
•“Readiness Test Settings” on page 49
•“AED Mode” on page 51
•“Wi-Fi Settings (Optional)” on page 53
Note: The instructions in this chapter assume that you powered on the unit in System Configuration mode as described in “Entering System Configuration Mode” on page 2, and are familiar with how to access the settings, see “Accessing and Changing Configuration Settings” on page 10.
9650-0902-01 Rev. K |
13 |
Chapter 2 Configuration Settings
General Settings
General settings are attributes that affect the unit’s basic operation and accessibility and include:
•Device Identifier
•Configuration Mode Passcode
•Code Markers
Device Identifier
The Device Identifier feature allows you to set an 11-digit device identifier code. This code is divided into two sub codes: the site ID (consisting of eight alphanumeric characters) and the device ID (consisting of three alphanumeric characters). The device identifier is printed on the summary report and fax printouts.
Values are as follows:
Possible Values: |
0 through 9, A through Z, blank and underscore inclusive for each digit. |
|
|
Default: |
00000000 000 |
|
|
Procedure
Follow these steps to set up a device identifier.
Step |
Action |
|
|
|
|
|
|
|
|
|
|
|
|
1. |
From the Select Configuration Categories screen, |
|
|
|
|
|
|
select General, then press the Enter softkey. |
|
|
|
|
|
|
The General Settings screen appears. |
System Configuration |
|
|||
|
|
|
General Settings |
|
|
|
|
DEVICE IDENTIFIER |
ABCDEFGH 777 |
||||
|
CONFIGURATION |
Set/Review |
|
|||
|
00000000 |
|
||||
|
MODE PASSCODE |
|
|
|
||
|
CODE MARKERS |
Config/Review |
|
|||
|
|
|
Page 1 of 1 |
|
|
|
|
Change |
Prev |
Next |
Category |
Main |
Exit |
|
Value |
Item |
Item |
List |
Menu |
Config |
2.Select DEVICE IDENTIFIER and press the
Change Value softkey.
The Device Identifier screen appears. |
System Configuration |
||||||||||||
|
|
|
|
Set Site ID |
|
|
|
||||||
|
|
|
|
|
|
|
|
||||||
|
|
|
|
0 |
0 |
0 |
0 |
0 |
0 |
0 |
0 |
|
|
|
|
|
|
|
Set Device ID |
|
|
|
|||||
|
|
|
|
|
|
0 |
0 |
|
0 |
|
|
|
|
|
|
|
|
|
|
|
|
|
|
|
|
|
|
|
|
A |
B |
C |
D |
E |
F |
|
G |
H |
I |
Cancel |
|
|
|
J |
K |
L |
M N |
O |
|
P |
Q |
R |
Del |
|
|
|
|
S T U V W X Y, Z 0 < > |
|
||||||||||
|
|
1 |
2 |
3 |
4 |
5 |
6 |
|
7 |
8 |
9 |
_ |
|
|
|
|
|
|
|
|
|
|
|
|
|
Enter |
|
|
|
|
|
|
|
|
|
|
|
|
|
Char Return |
|
14 |
9650-0902-01 Rev. K |
General Settings
Step Action
3.In the character selection table:
• lets you move to the next or previous characters.
Use the softkeys as follows:
• — moves the highlight up, down, left, and right through the character selection table.
•Enter Char — enters the highlighted character for 8 digits of the Site ID and the 3 digits of the Device ID.
•Return — returns you to the General Settings screen. Press the Return softkey when you are finished entering the IDs. Note that selecting Enter also returns you to the General Settings screen.
9650-0902-01 Rev. K |
15 |

Chapter 2 Configuration Settings
Configuration Mode Passcode
This feature allows you to set an 8-digit system configuration passcode. Once set, only those people who know the passcode can access the configuration mode and modify settings.
Values are as follows:
Possible Values: 0 through 3 inclusive for each digit
Default: 00000000
Procedure
Follow these steps to set up a configuration mode passcode:
Step |
Action |
|
|
|
|
|
|
|
|
|
|
|
|
|
|
1. |
From the Select Configuration Categories |
|
|
|
|
|
|
|
screen, select General, then press the Enter |
|
System Configuration |
|
|||
|
softkey. |
|
|
||||
|
The General Settings screen appears. |
|
|
General Settings |
|
|
|
|
|
|
|
|
|
||
|
DEVICE IDENTIFIER |
ABCDEFGH 777 |
|||||
|
|
|
|
|
Set/Review |
|
|
|
CONFIGURATION |
00000000 |
|
||||
|
MODE PASSCODE |
|
|
|
|||
|
CODE MARKERS |
Config/Review |
|
||||
|
|
|
|
Page 1 of 1 |
|
|
|
|
Change |
|
Prev |
Next |
Category |
Main |
Exit |
|
|
||||||
|
Value |
|
Item |
Item |
List |
Menu |
Config |
2.Select CONFIGURATION MODE PASSCODE and press the Change Value softkey.
|
The Set Configuration Passcode screen appears. |
System Configuration |
|||||||
|
Set Configuration Passcode |
|
|||||||
|
|
|
|||||||
|
|
0 |
0 |
0 |
0 |
0 |
0 |
0 |
0 |
|
|
Prev |
|
Inc |
|
Dec |
Next |
||
|
|
|
|
||||||
|
|
Digit |
|
Digit |
|
Digit |
Digit Enter |
||
|
|
|
|
|
|
|
|
|
|
3. |
Use the softkeys as follows: |
|
|
|
|
|
|
|
|
|
• Prev Digit — moves the highlight left to the |
|
|
|
|
|
|
|
|
|
previous digit. |
|
|
|
|
|
|
|
|
|
• Inc Digit or Dec Digit — increments or |
|
|
|
|
|
|
|
|
|
decrements the value of the selected digit. |
|
|
|
|
|
|
|
|
|
• Next Digit — moves the highlight right to the |
|
|
|
|
|
|
|
|
|
next digit to be entered. |
|
|
|
|
|
|
|
|
|
• Enter — saves the values that you entered |
|
|
|
|
|
|
|
|
|
and returns the unit to the General |
|
|
|
|
|
|
|
|
|
Configuration menu. |
|
|
|
|
|
|
|
|
16 |
9650-0902-01 Rev. K |
General Settings
Code Markers
This setting allows you to review and change the preconfigured list of Code Markers for use in DEFIB, MONITOR, and PACE modes. Code Marker settings are language dependent. You can specify up to three groups (MONITOR, DEFIB, and PACE) of 20 entries each.
Procedure
Follow these steps to review, change, or reset code marker settings:
Step |
Action |
|
|
|
|
|
|
|
|
|
|
|
|
|
|
1. |
From the Select Configuration Categories |
|
|
|
|
|
|
|
screen, select General, then press the Enter |
|
System Configuration |
|
|||
|
softkey. |
|
|
||||
|
The General Settings screen appears. |
|
|
General Settings |
|
|
|
|
|
|
|
|
|
||
|
DEVICE IDENTIFIER |
ABCDEFGH 777 |
|||||
|
|
|
|
|
Set/Review |
|
|
|
CONFIGURATION |
00000000 |
|
||||
|
MODE PASSCODE |
|
|
|
|||
|
CODE MARKERS |
Config/Review |
|
||||
|
|
|
|
Page 1 of 1 |
|
|
|
|
Change |
|
Prev |
Next |
Category |
Main |
Exit |
|
|
||||||
|
Value |
|
Item |
Item |
List |
Menu |
Config |
2. |
Select CODE MARKERS and press the Change |
|
Value softkey. |
|
The Select Code markers screen appears. |
|
|
|
System Configuration |
|
|||
|
|
|
|
General Settings |
|
||||
|
|
|
|
|
|
||||
|
|
|
|
|
DEFIB |
|
|
Config/Review |
|
|
|
|
CODE MARKERS |
Set/Review |
|
||||
|
|
|
|
|
MONITOR |
|
|
Config/Review |
|
|
|
|
CODE MARKERS |
|
|
||||
|
|
|
|
|
PACE |
|
|
Config/Review |
|
|
|
|
CODE MARKERS |
|
|
||||
|
|
|
|
|
|
Page 1 of 1 |
|
|
|
|
|
Change |
|
Prev |
Next |
Enter |
|
||
|
|
|
|
||||||
|
|
Value |
|
Item |
Item |
Return |
|||
|
|
|
|
|
|
|
|
|
|
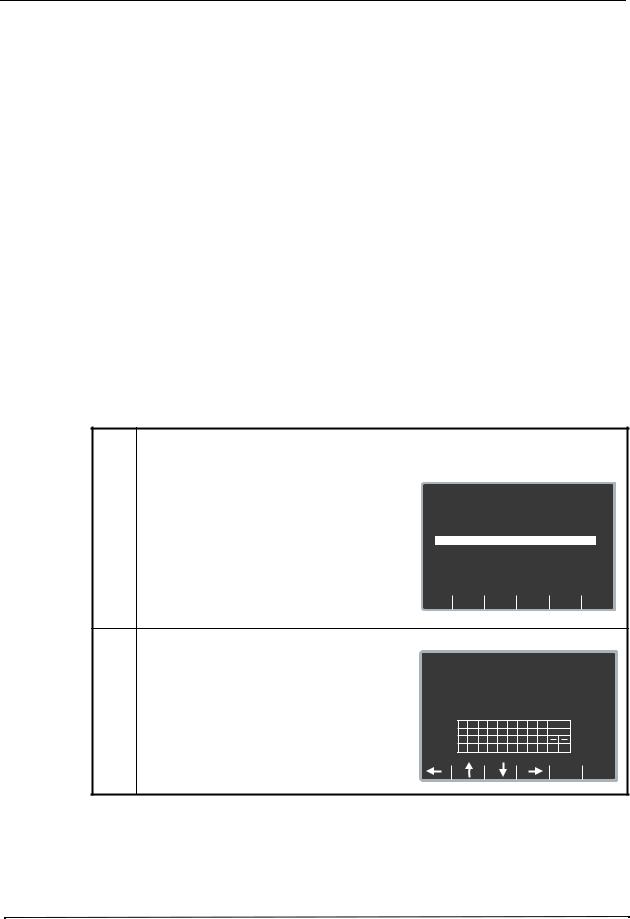
3. |
Select either DEFIB CODE MARKERS, |
|
|
|
|
|
|
|
|
|
MONITOR CODE MARKERS, or PACE CODE |
|
|
|
|
|
|
|
|
|
MARKERS, then press the Change Value |
|
|
|
System Configuration |
|
|||
|
softkey to toggle between Change/Review or Set |
|
Defib Markers |
Markers List |
|||||
|
to Defaults. |
|
|||||||
|
|
|
|
|
|
CPR |
|
||
|
|
Item 1: CPR |
|
|
|
||||
|
• If you select Set to Defaults, press the Enter |
|
Item 4: LIDO |
|
|
DOPA |
|
||
|
|
|
Item 2: Intubate |
|
|
EPI |
|
||
|
softkey to set the chosen code markers to |
|
Item 3: EPI |
|
|
Atrop |
|
||
|
|
Item 6: B-block |
|
|
Bicarb |
|
|||
|
their default values. |
|
Item 5: Narcan |
|
|
PHEN |
|
||
|
|
Item 8: Mag Sulf |
|
|
Oxygen |
|
|||
|
|
|
Item 7: Atrovent |
|
|
Aspirin |
|
||
|
• If you select Change/Review, press the Enter |
Change |
|
Prev |
Next |
Delete |
Return |
||
|
|
||||||||
|
softkey to access the screen that allows you |
Value |
|
Item |
Item |
to End |
|||
|
|
|
|
|
|
|
|
|
|
|
to change the marker, as shown. |
|
|
|
|
|
|
|
|
|
Note: This example shows the screen that |
|
|
|
|
|
|
|
|
|
allows you to change DEFIB CODE |
|
|
|
|
|
|
|
|
|
MARKERS. |
|
|
|
|
|
|
|
|
|
Only 8 items are displayed on the |
|
|
|
|
|
|
|
|
|
screen at one time. When you get to the |
|
|
|
|
|
|
|
|
|
last item on the screen and press the |
|
|
|
|
|
|
|
|
|
Next Item softkey, you see the next 8 |
|
|
|
|
|
|
|
|
|
items. When you get to the last item on |
|
|
|
|
|
|
|
|
|
that screen and press the Next Item |
|
|
|
|
|
|
|
|
|
softkey, you see the remaining 4 items. |
|
|
|
|
|
|
|
|
9650-0902-01 Rev. K |
17 |
 Loading...