


YRD620-ZW2-0BP
® ®
Yale Assure Lock
Touchscreen Deadbolt
Installation and Programming Instructions
(YRD226/YRD620)
This manual will walk you through all the required steps to add your new
Yale Assure Lock to your door.
• Remove Existing Door Hardware
• Double Check Door Measurements
• Install your Assure Lock
• Program your Assure Lock
• Add your Assure Lock to your smart home system or August App*
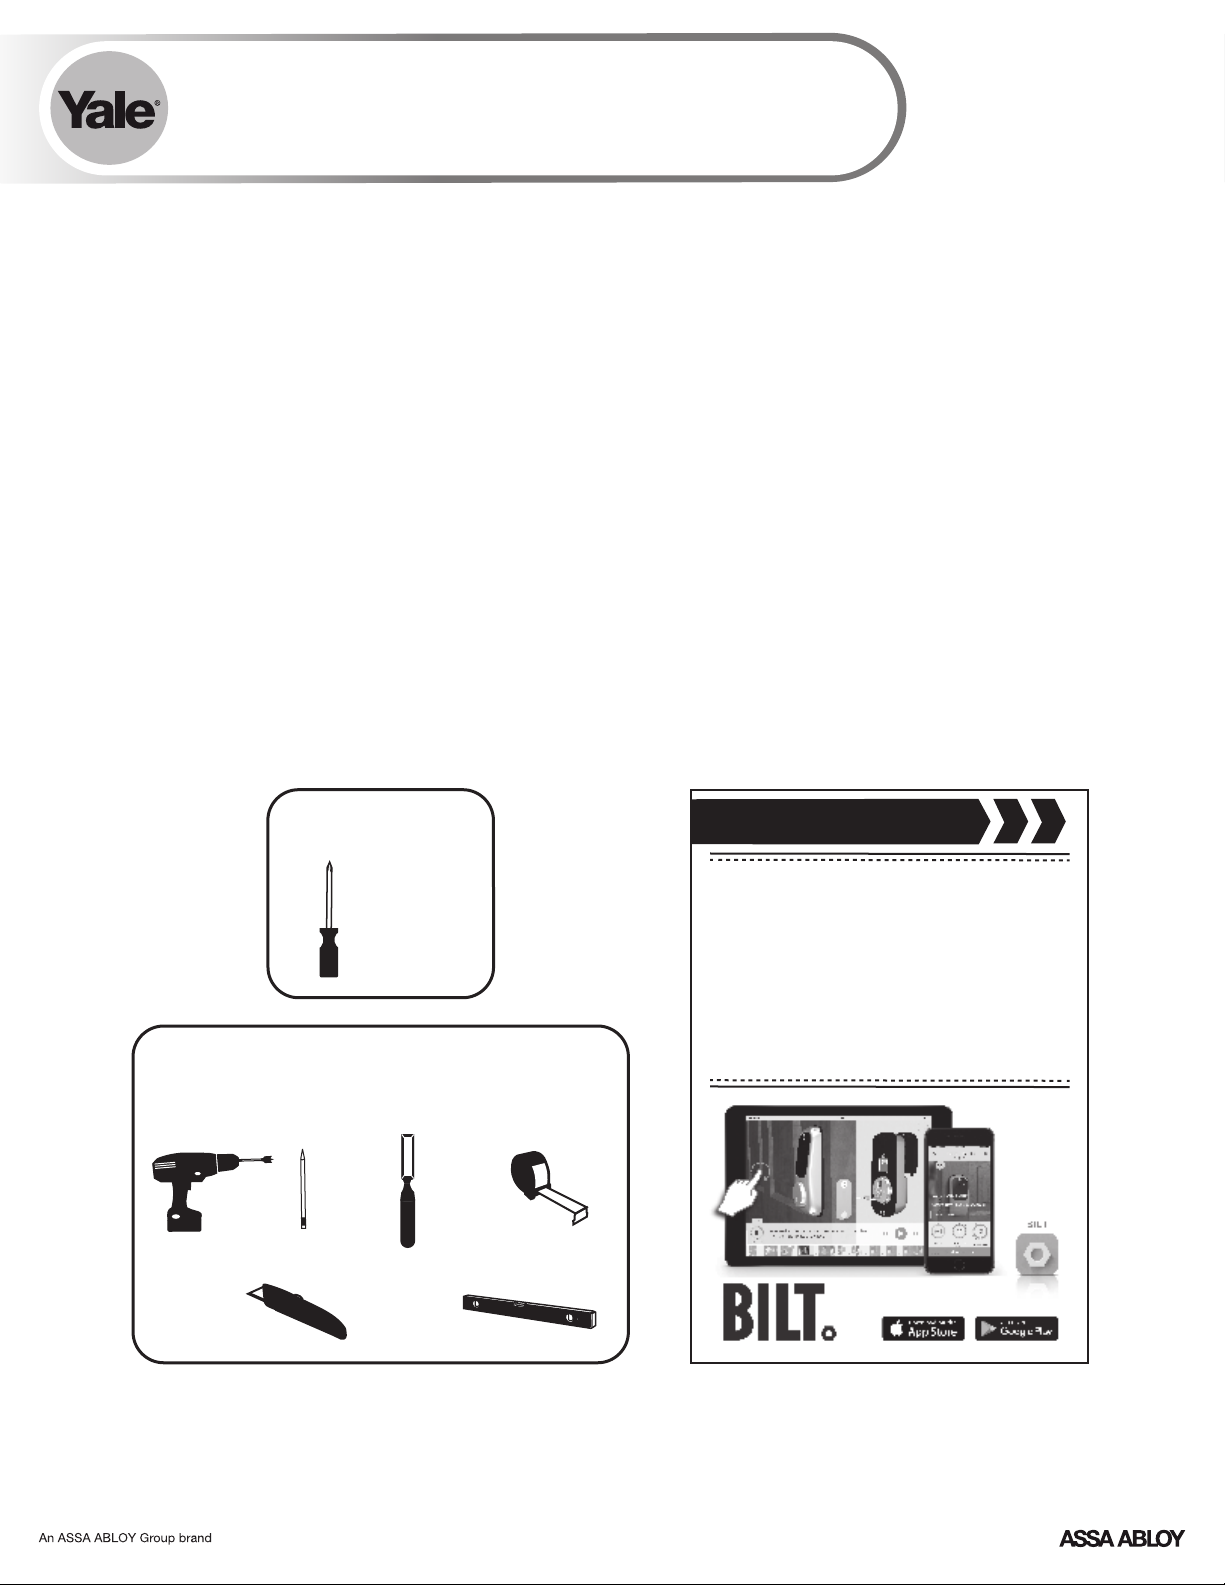
Tools Needed
Standard
Phillips Head
Screwdriver
Before you begin
DOWNLOAD
THE BILT APP
for step-by-step installation
instructions & to register
Tools necessary only for new doors
or adjusting existing door
Tape
Drill
Pencil
Wood Mortise
Chisel
Measure
your product
Utility Knife
*If purchased with Yale Smart Module or Connected by August Kit
FAILURE TO FOLLOW THESE INSTRUCTIONS COULD RESULT IN DAMAGE TO THE PRODUCT, VOIDING THE FACTORY WARRANTY AND COULD LEAD TO FAILURE OF THE PRODUCT TO PROVIDE ACCESS.
Level
1
P/N YRD226-MNL-0001 Rev I
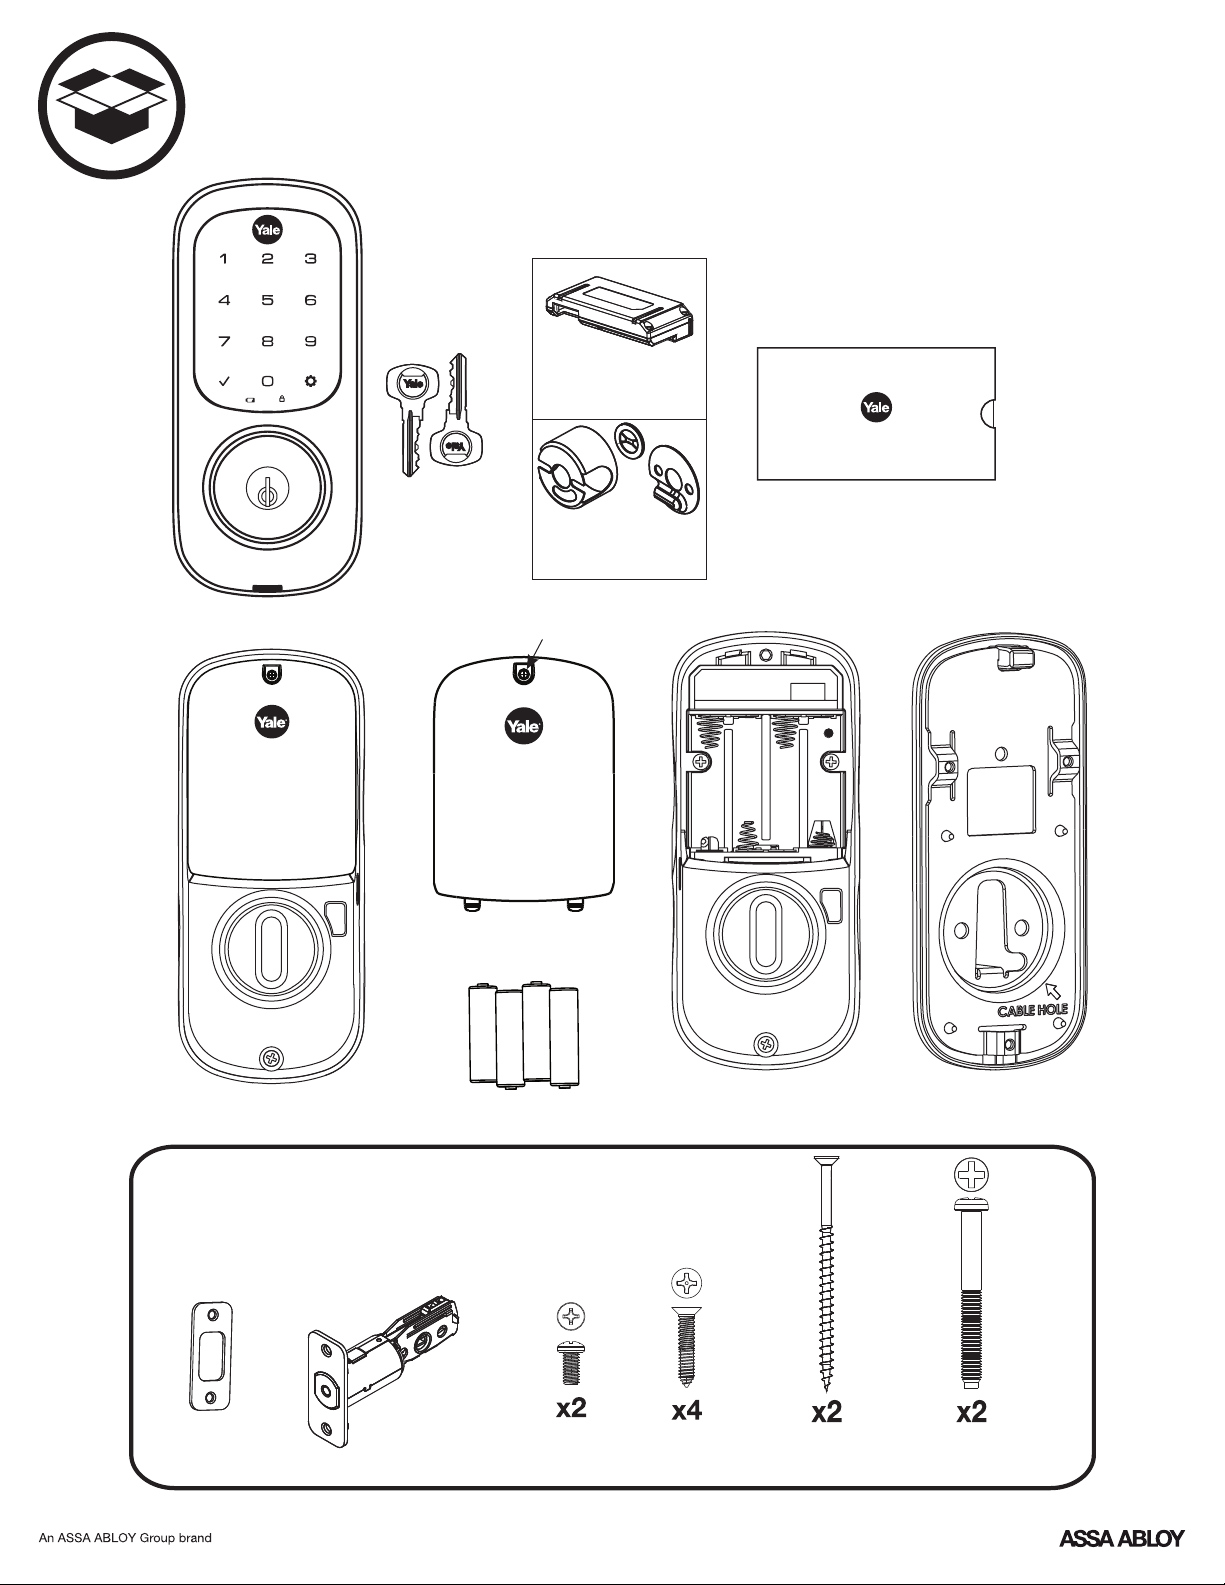
What's In The Box
Optional Yale
Smart Module
Let's Get Started
Touchscreen Keypad
Keys
Loosen screw to
remove cover
Battery Cover
Optional
Fire Kit Parts
Installation Guide Envelope
(Includes this manual and
door checker with template)
Inside Lock Assembly
(Separates into 3 components)
4 AA Batteries
Mounting Hardware
The mounting hardware box includes 12 components
Adjustable
Strike Plate
Deadbolt
Inside Lock
P/N YRD226-MNL-0001 Rev I
Screws
Strike Plate
Deadbolt Screws
2
Inside Lock Mounting Plate
and
Optional
Security
Strike Plate Screws
Long through bolt for
1-3/4" - 2-1/4"
Door Thickness
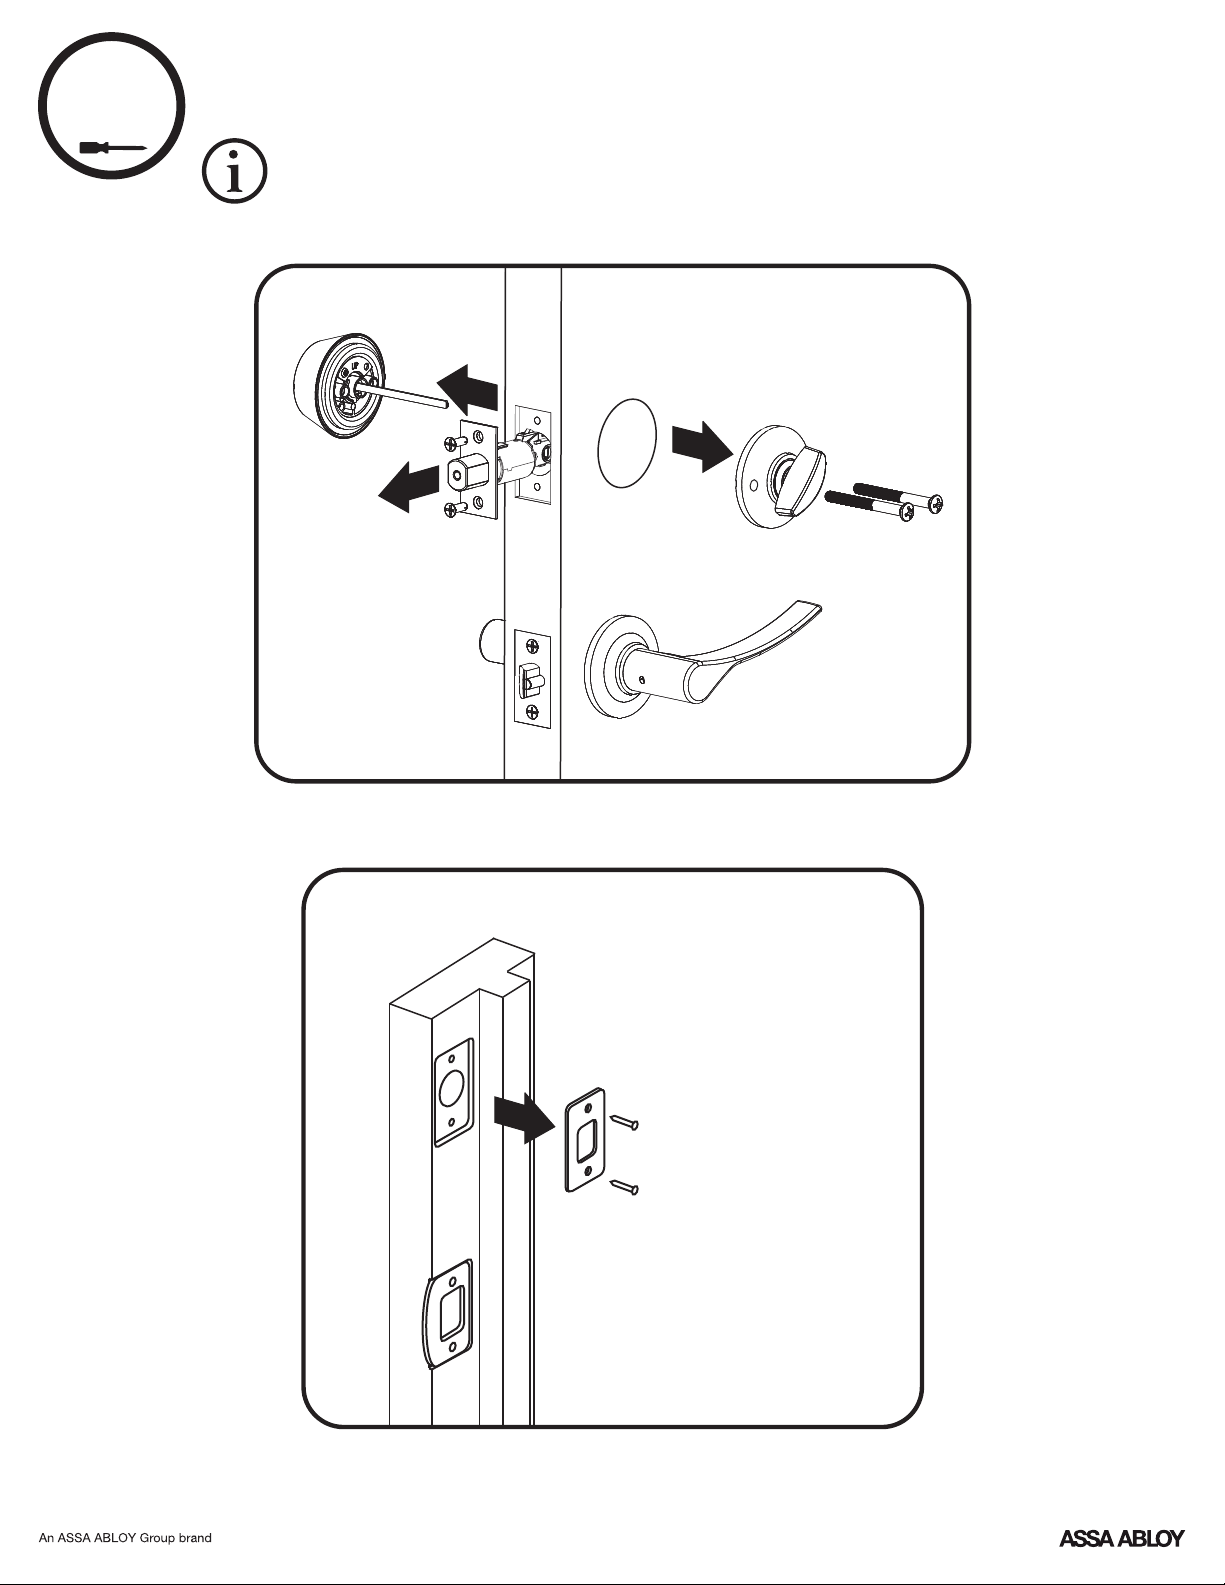
1
Removing Existing Door Hardware
Do not discard old lock hardware until Assure Lock has been successfully installed.
Frame
3
P/N YRD226-MNL-0001 Rev I
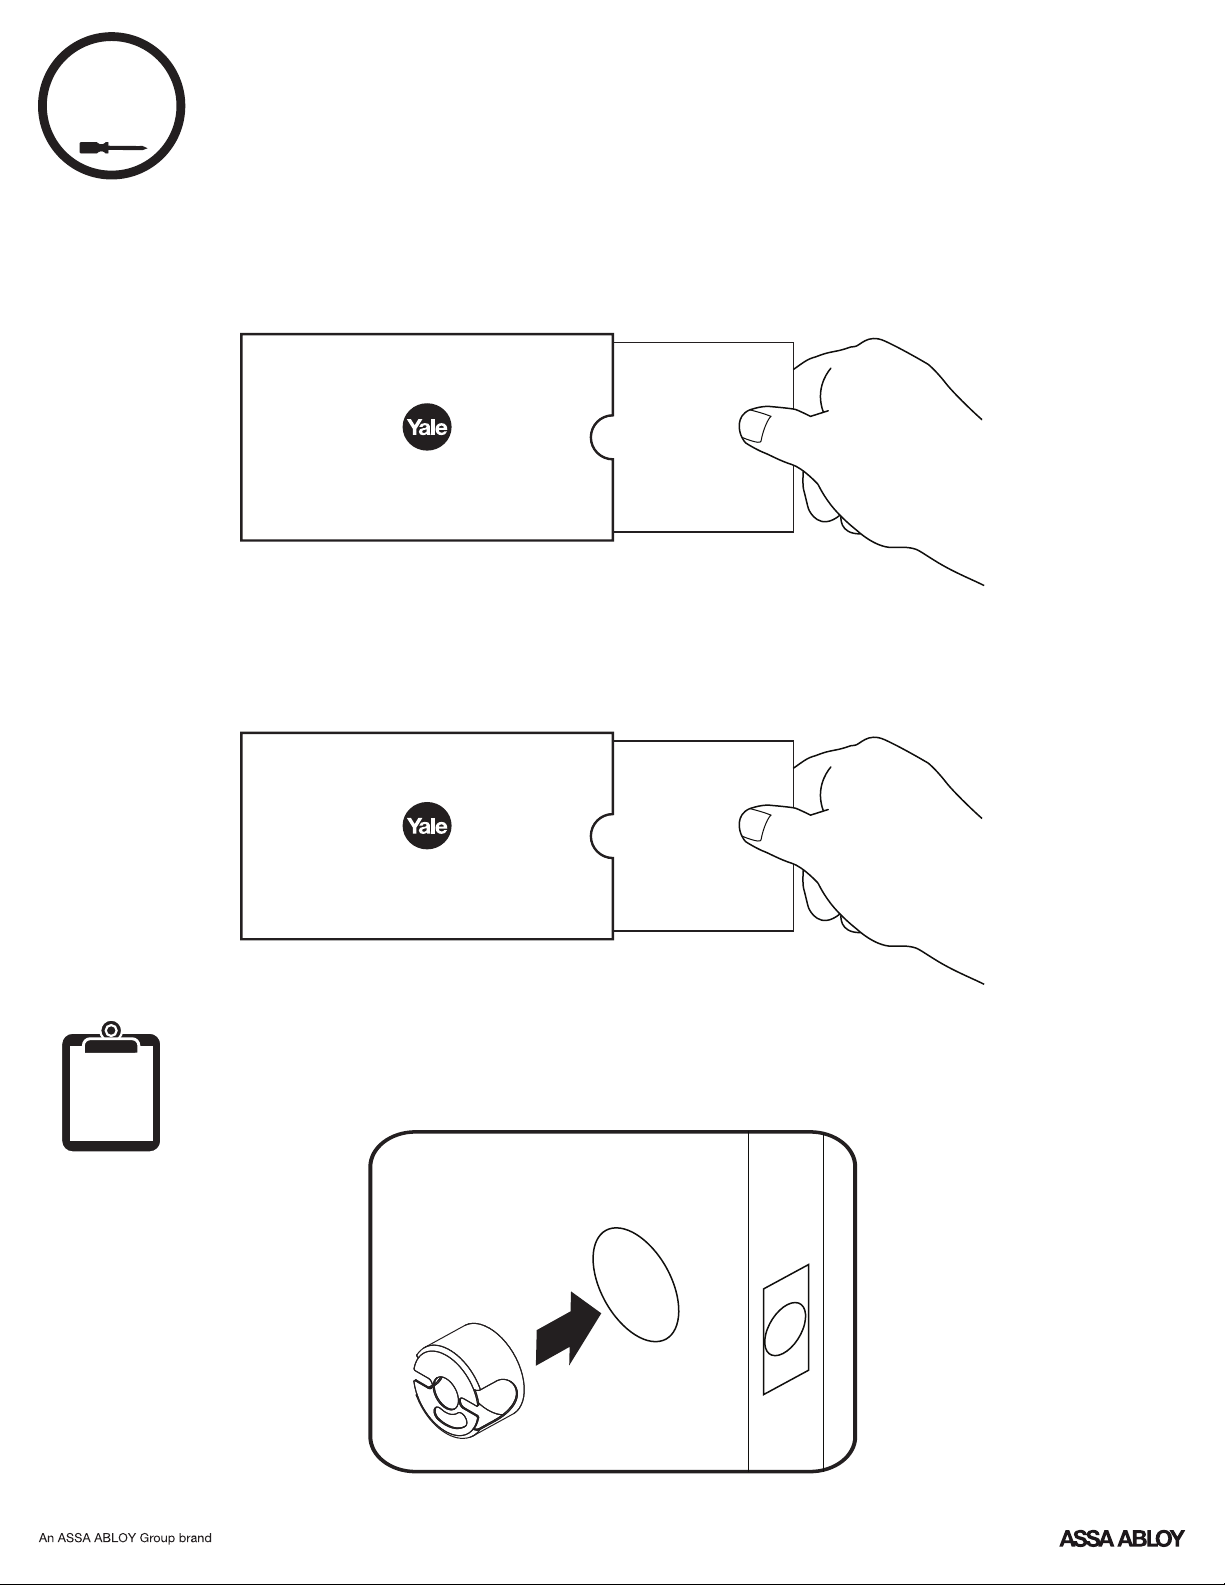
Check Door Measurements and
2
Make Adjustments If Needed
Door Checker
Use door checker from installation guide envelope to verify your door measurements and make any needed adjustments.
Check
Your Door
Let's Get Started
Guide
New Door Marking Template
With door checker, use template from installation guide envelope to prep a new door that has not been predrilled for hardware.
O
optional
New Door
Marking
Template
Let's Get Started
Installing Optional Fire Cup
Inside of Door
4
P/N YRD226-MNL-0001 Rev I
3
x2
Actual Size
x2
Actual Size
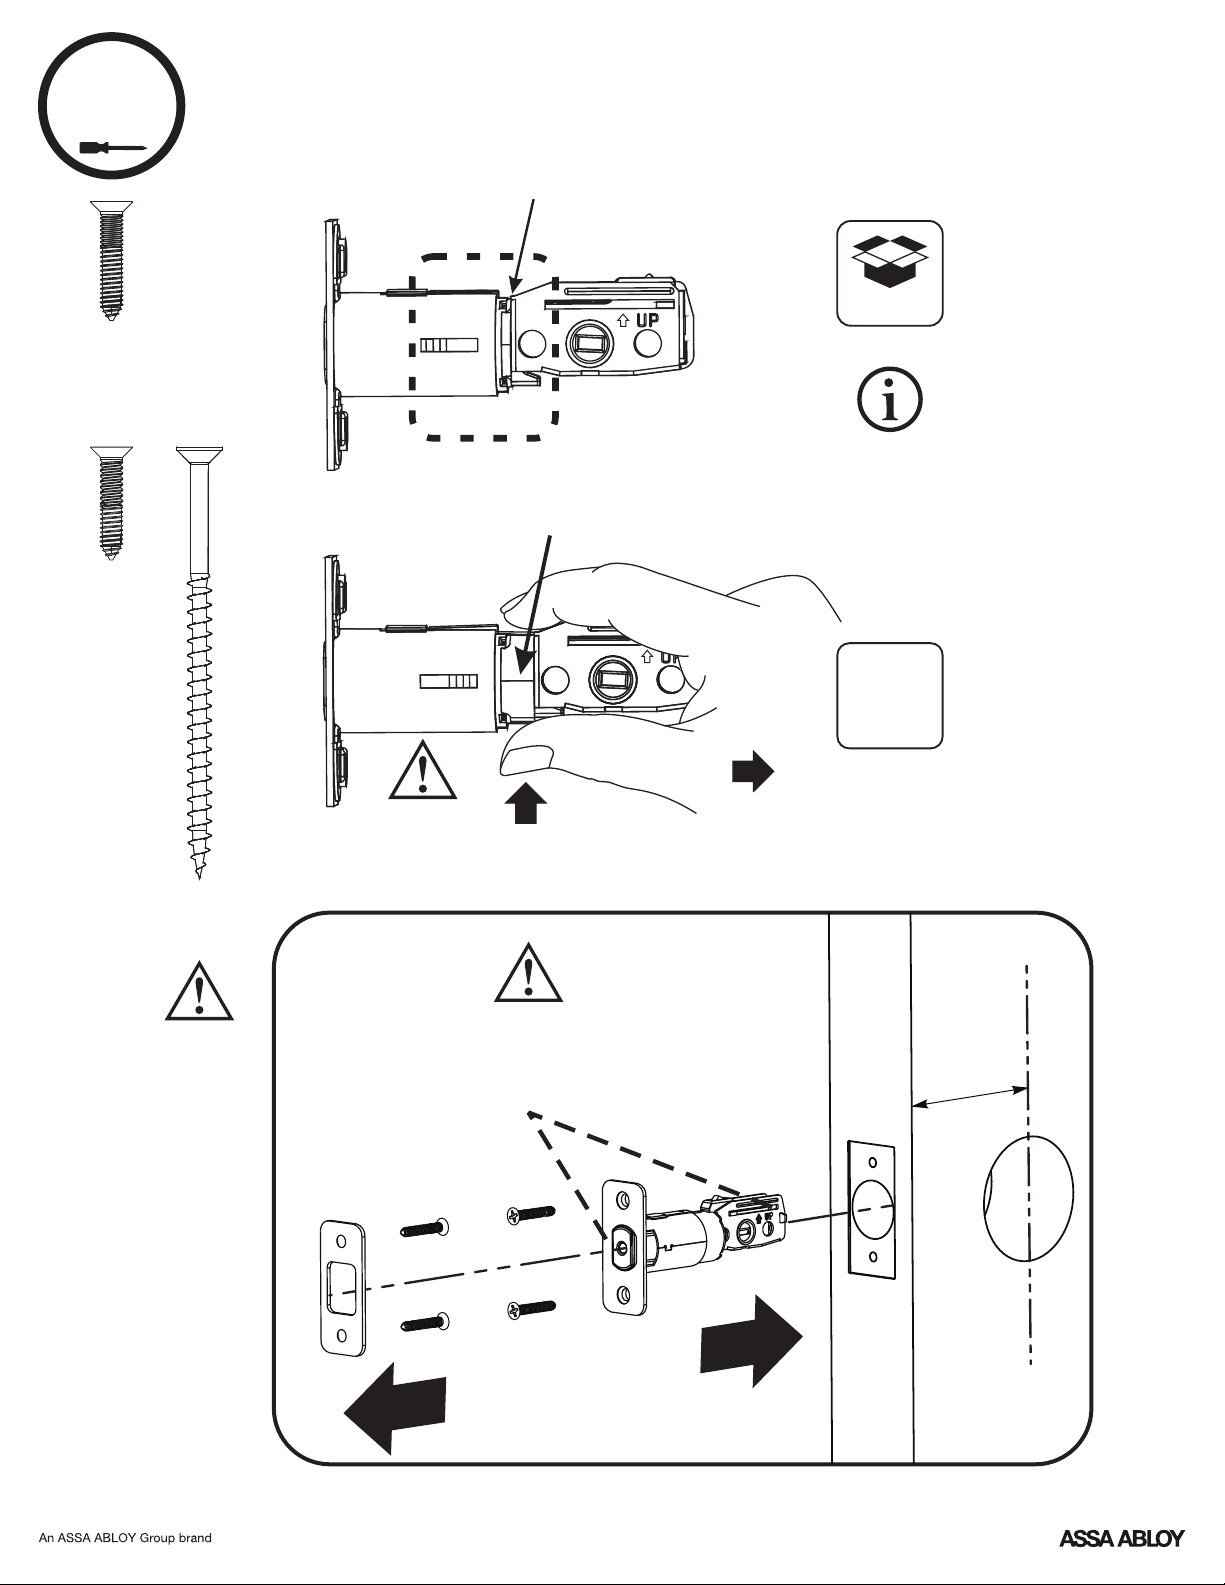
Installing Latch & Strike Plate
*2-3/8" Backset
*Deadbolt latch position is based
*2-3/4" Backset
default
on backset. Choose position
appropriate for your door.
Reference Door Checker
measurements E and F.
x2
Actual Size
Choose
standard
strike plate
screws or
security
screws.
Bolt must be
in retracted
(unlocked)
position.
Bolt must be in retracted
(unlocked) position. Note horizontal
orientation of tailpiece slot and UP
orientation of deadbolt latch.
Press
O
optional
Pull
Backset
5
P/N YRD226-MNL-0001 Rev I
4
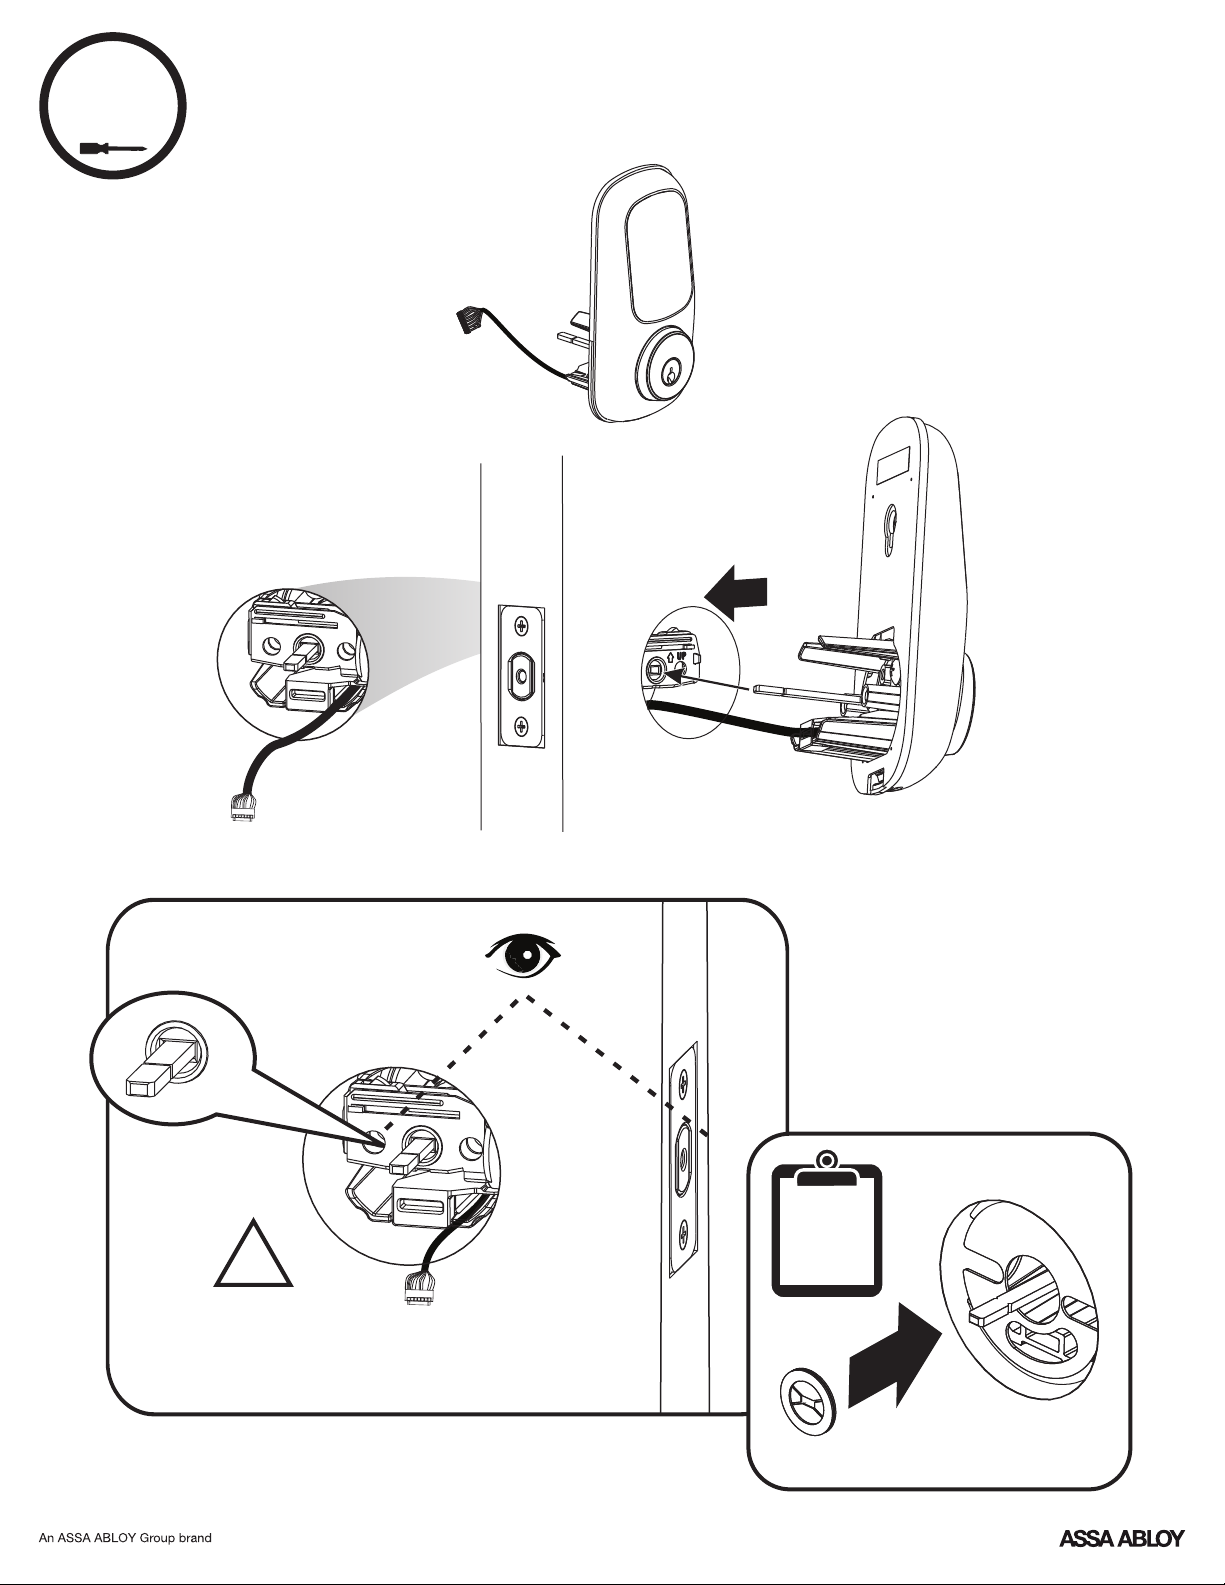
Installing Touchscreen Keypad
Inside of Door
Outside of Door
!
Bolt must be in retracted
(unlocked) position. Note
horizontal orientation of
mechanism.
O
optional
6
P/N YRD226-MNL-0001 Rev I
5
x2
Actual Size
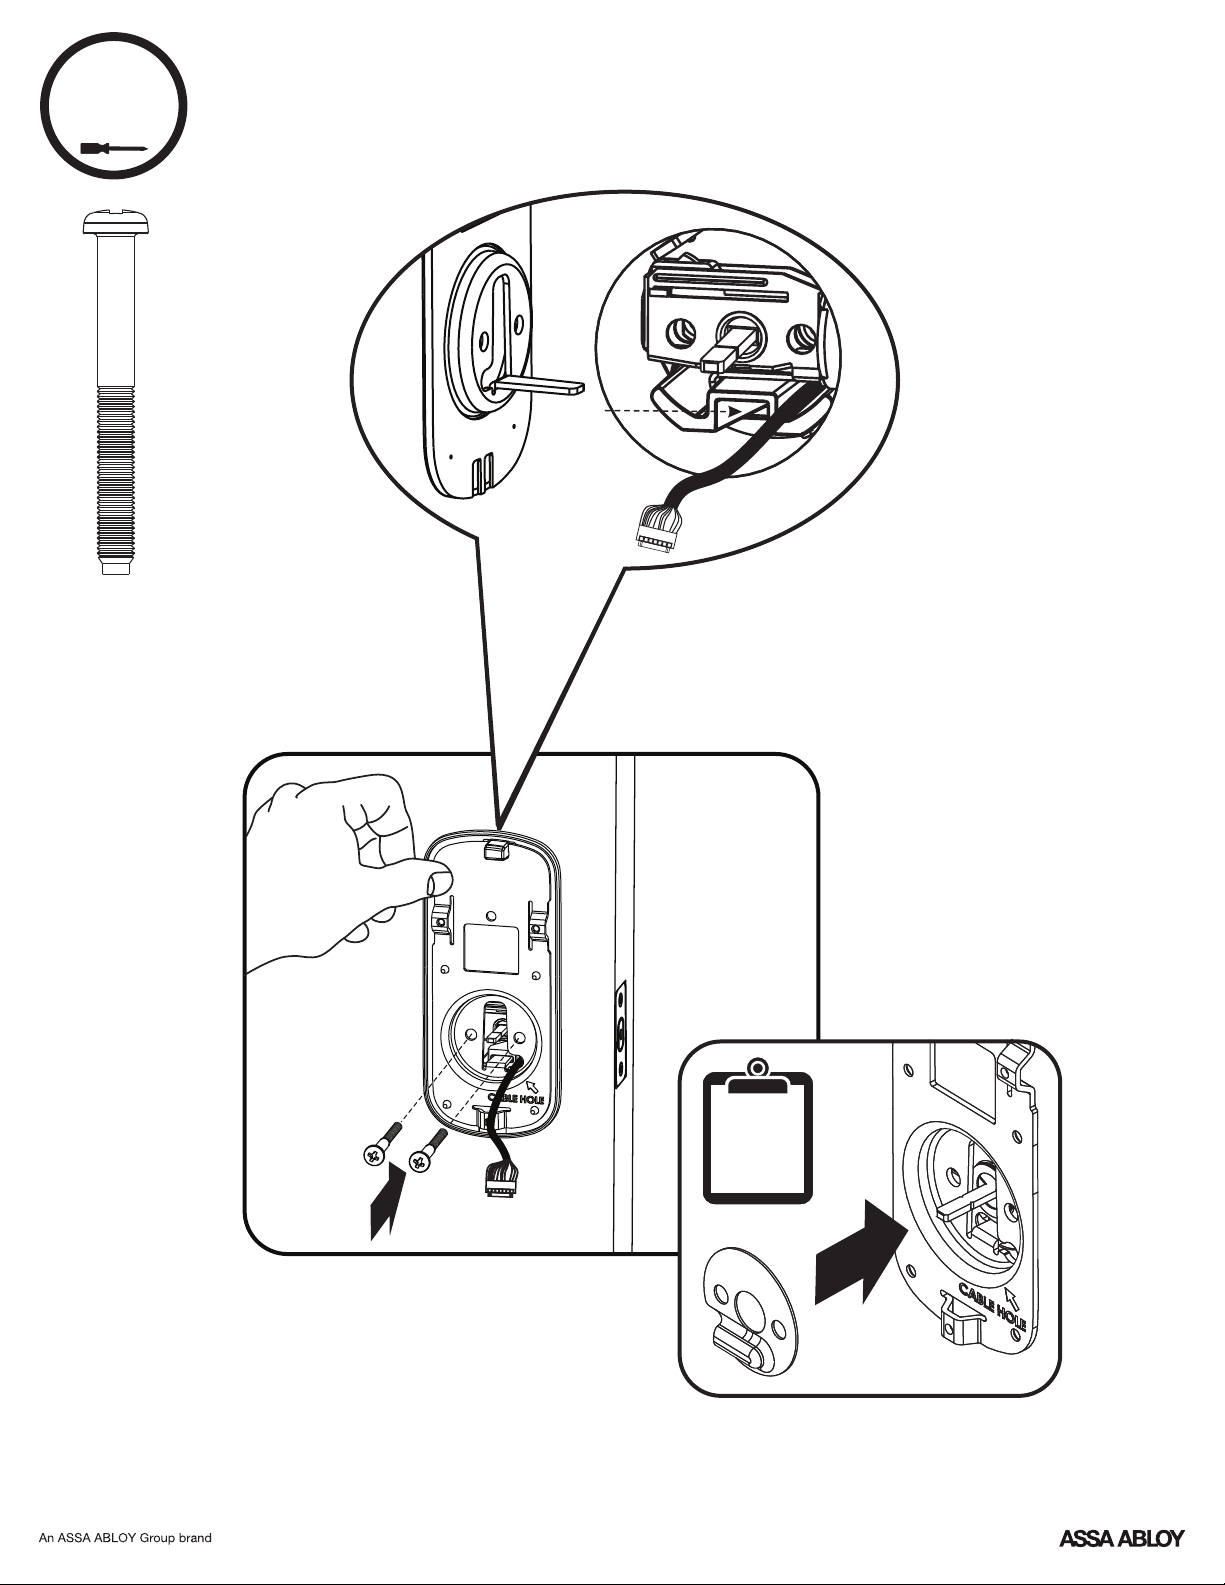
Installing Inside Mounting Plate
7
P/N YRD226-MNL-0001 Rev I
O
optional
6
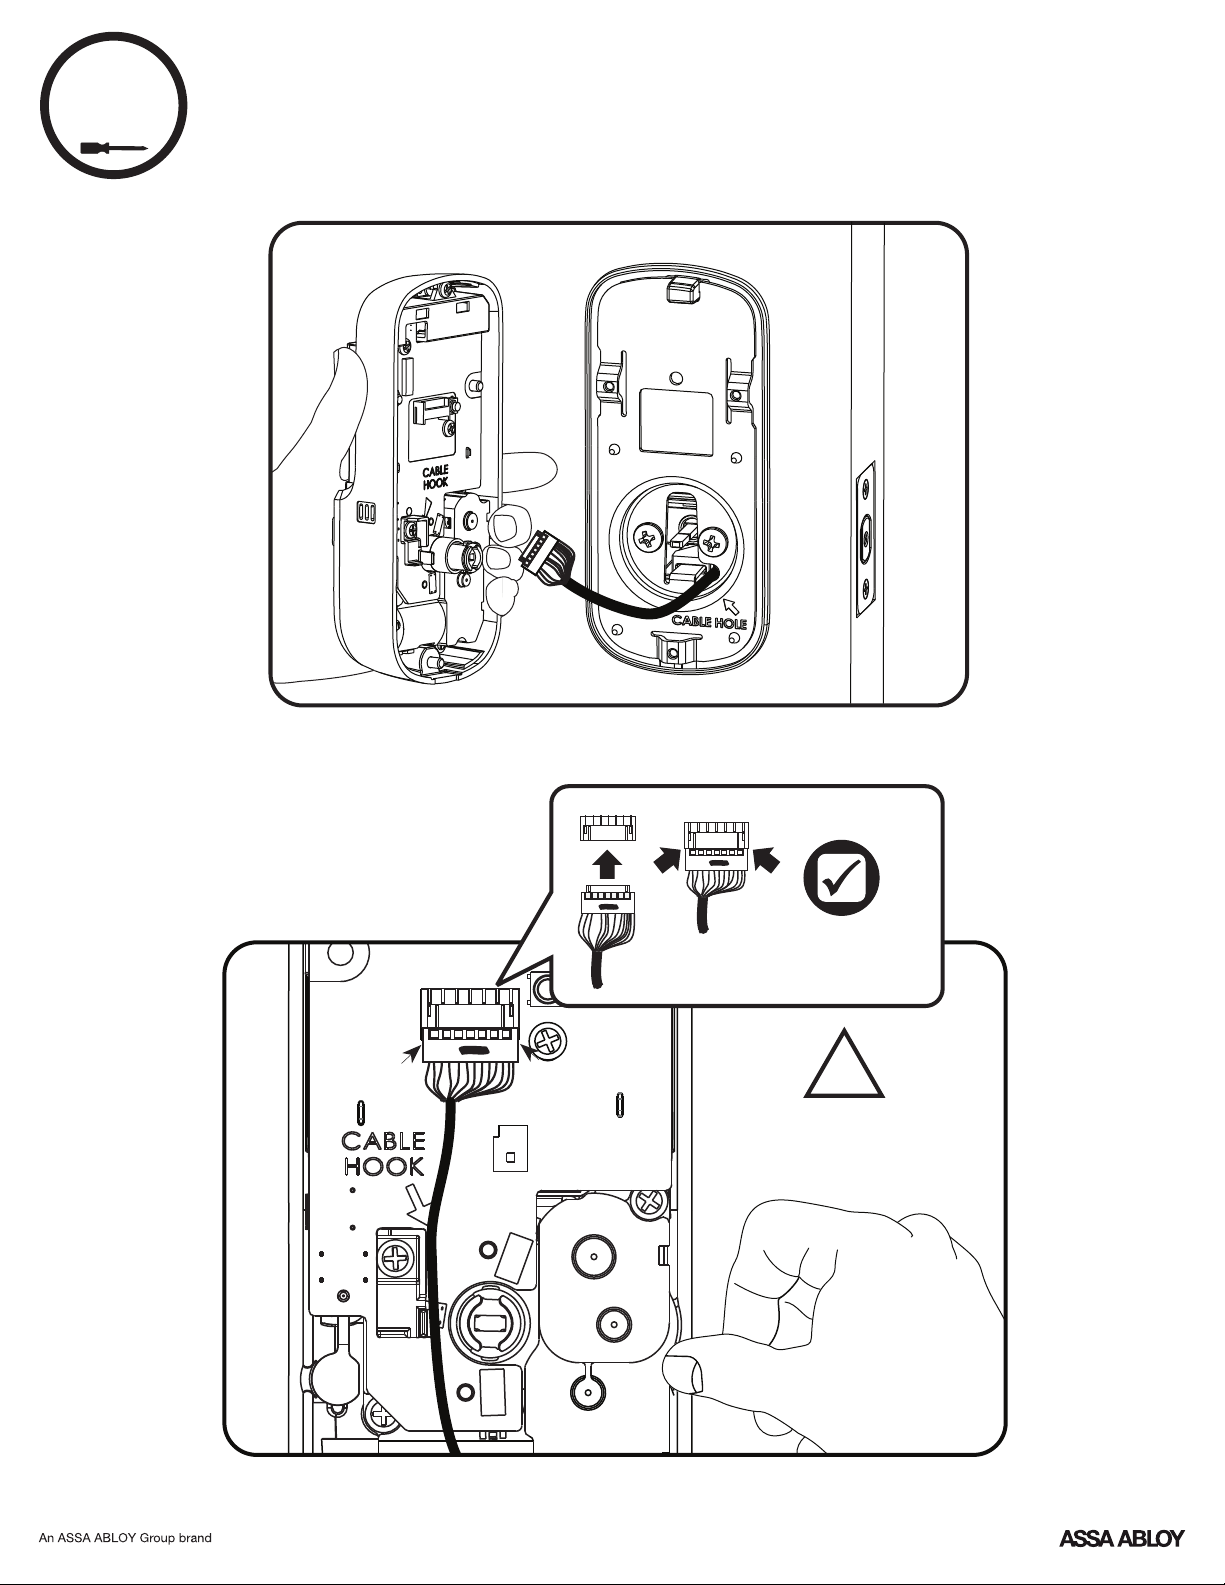
Attaching the Cable Assembly
8
P/N YRD226-MNL-0001 Rev I
Ensure cable is
securely fastened
into adapter.
!
Use cable hooks to
ensure proper routing.
Do not pinch wire.
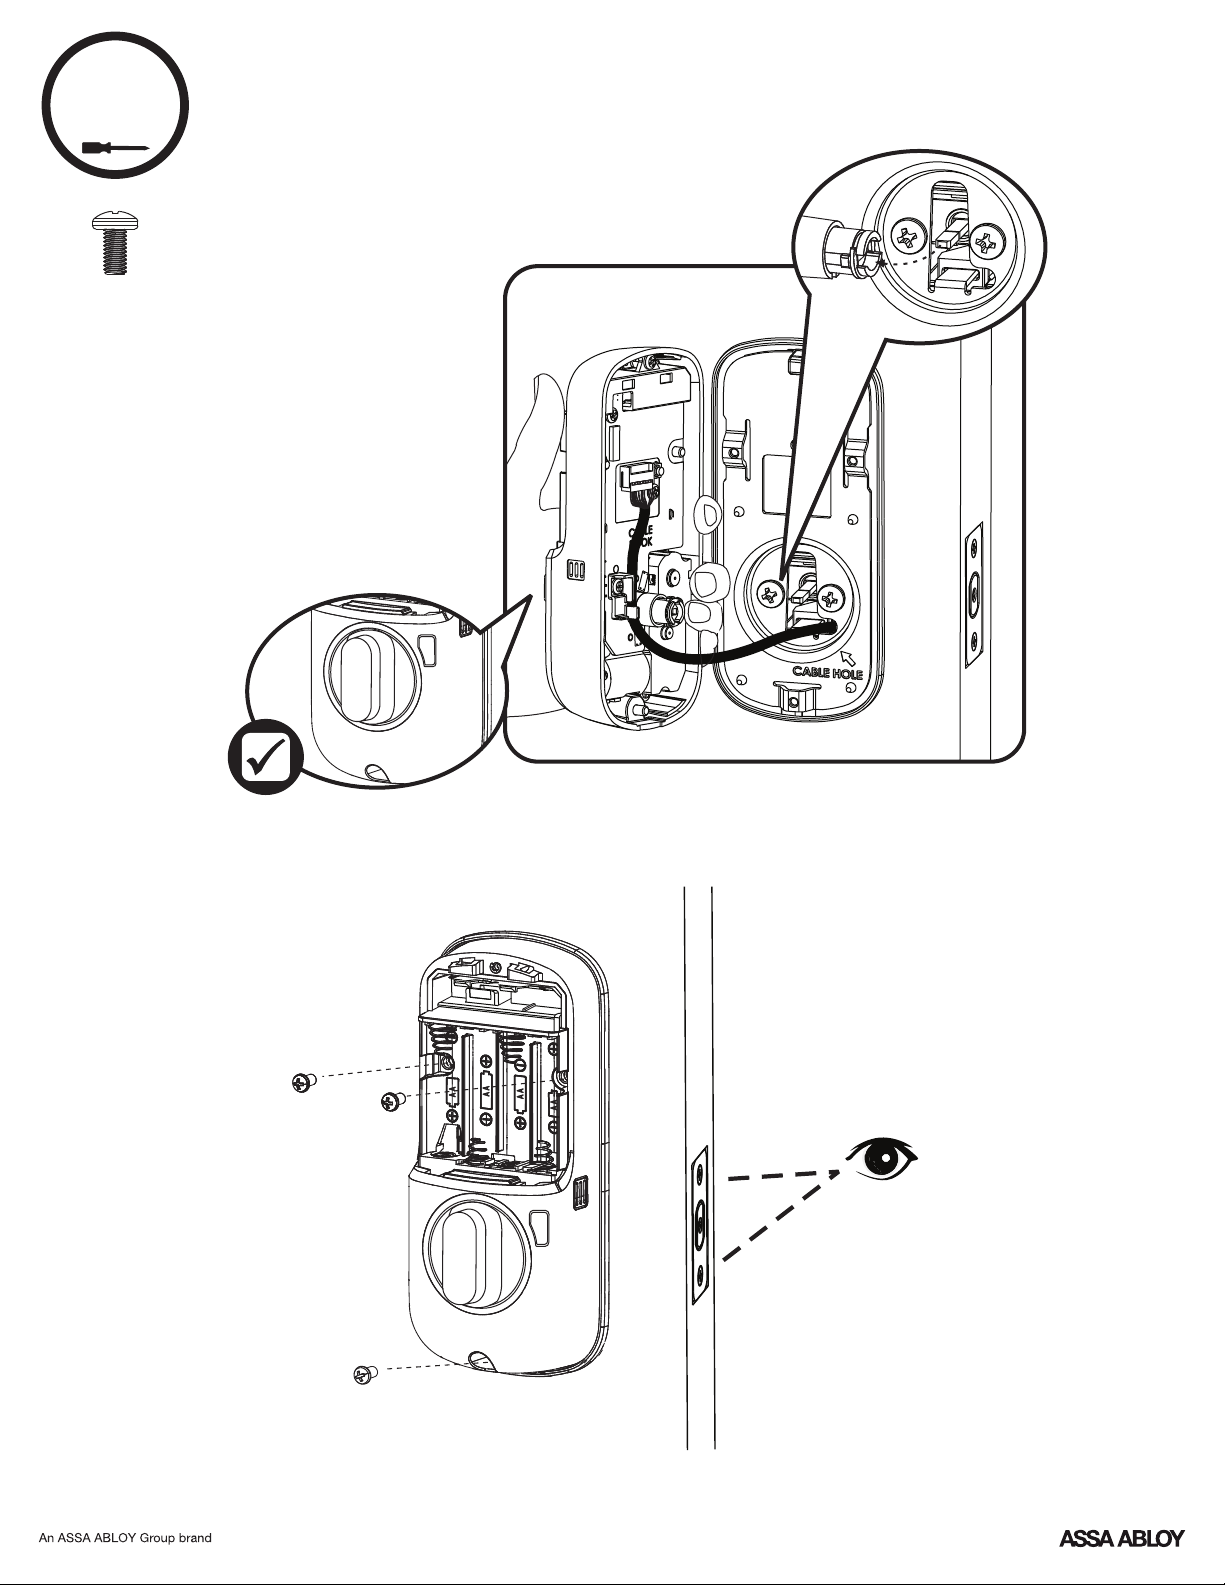
7
x3
Actual Size
Installing Inside Lock
Ensure thumbturn
is vertical. If the thumbturn
does not move freely, refer
to the hardware
troubleshooting steps.
9
P/N YRD226-MNL-0001 Rev I
 Loading...