


Conexis® L1
Manual
The Secure, Keyless
Smart Door Lock
The smarter way to protect your home•
Discover
Our Range of
Products
ALARMS
ACCESSORIES
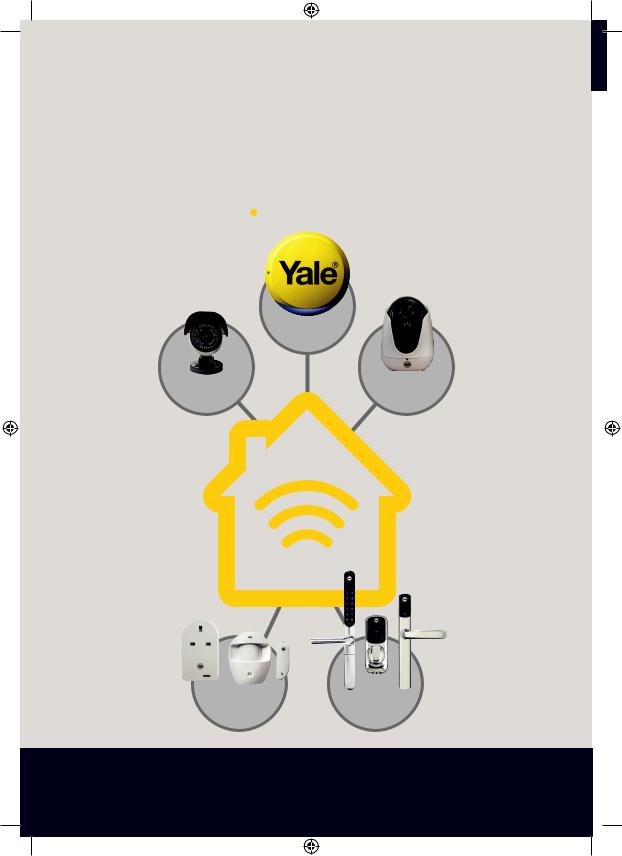
Yale® Connected
Secure, monitor and control your home with a range of smart security devices from Yale. Whether it’s a Smart Door Lock, an Alarm or CCTV system, Yale Smart Living products put you in control of your home security.
www.yale.co.uk/smart-living
VIEW
SMART DOOR
LOCKS
The smarter way to protect your home•

Introduction
Thank you for choosing the Yale Conexis® L1 Smart Door Lock. This simple to install product has been designed with the user in mind. Please read this manual completely before using the Yale Conexis® L1 Smart Door Lock.
Contents
Installation |
4 |
Unlock With Cards/Tags |
17 |
Yale Lock App |
18 |
Create Mobile Key Account |
19 |
Adding Cards/Tags Via App |
20 |
Unlock With Yale App |
21 |
Locking The Conexis® L1 Smart Door Lock |
22 |
Battery Indicator |
23 |
Pairing With A Third Party Gateway |
24 |
Factory Reset |
25 |
Search for Conexis® L1 Installation Video on You Tube
For more information on this product and Yale Smart Living Range visit www.yale.co.uk/smart-living
Consumer Support: info@yale.co.uk
Tel: 01902 364606
|
The 2 year guarantee for this |
2 |
product is active from the date |
of purchase (A copy of this |
guarantee is available on our website).
Hereby, ASSA ABLOY UK Ltd declares that the Conexis® L1 Smart Door Lock is in compliance with Directive 2014/53/EU. The full text of the EU declaration of conformity is available at the following internet address: www.yale.co.uk/declaration-of-conformity
3
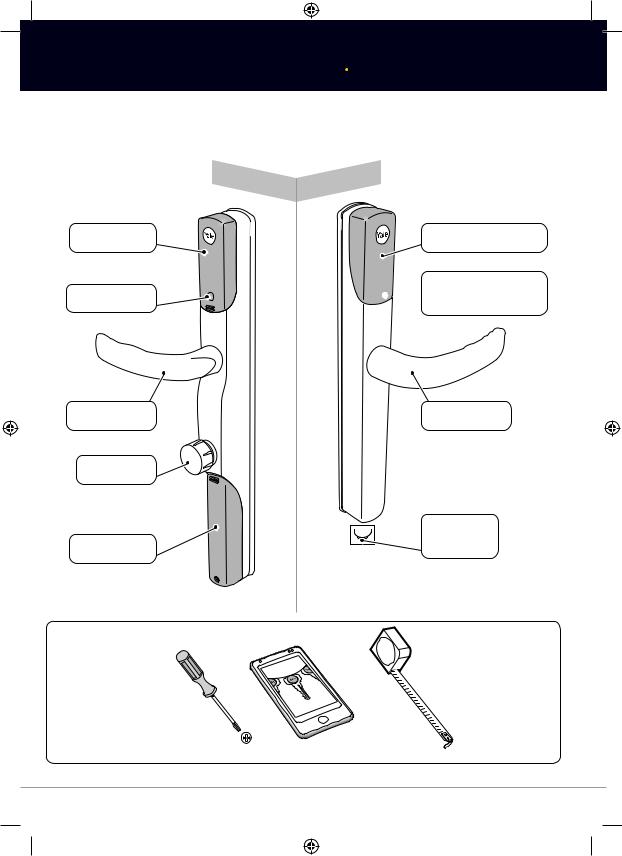
ConexisTM L1 Smart Door Lock
INSIDE
Radio Cover
Inside LED
OUTSIDE
Key Card/Tag Reader
Bluetooth Wakeup
 Button and LED
Lever Handle |
Lever Handle |
Thumbturn |
|
|
Backup 9V |
Battery Cover |
contacts |
|
Tools Required
4

Inside The Box
4x AA Alkaline
Fixing Pack A
|
|
The smart way to protect your home. |
Fixing Pack B |
Fixing Pack C |
Fixing Pack D |
55m |
m |
|
70m |
|
80m |
|
|
|
|
|
|
|
|
145m |
m |
160m |
m |
170m |
m |
|
|
|
|
||||
5
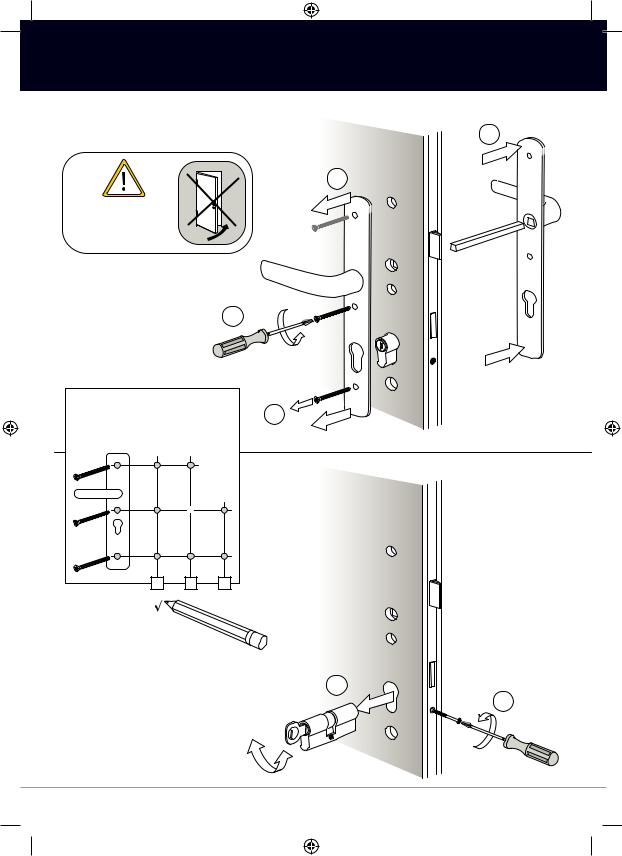
Remove the Current Handle•
4
3
Do not close door until installation is complete.
1
Please make a note of
your current fixing screws. 2 You should have 2 or 3 as
below.
Remove the cylinder |
2 |
|
1 |
6
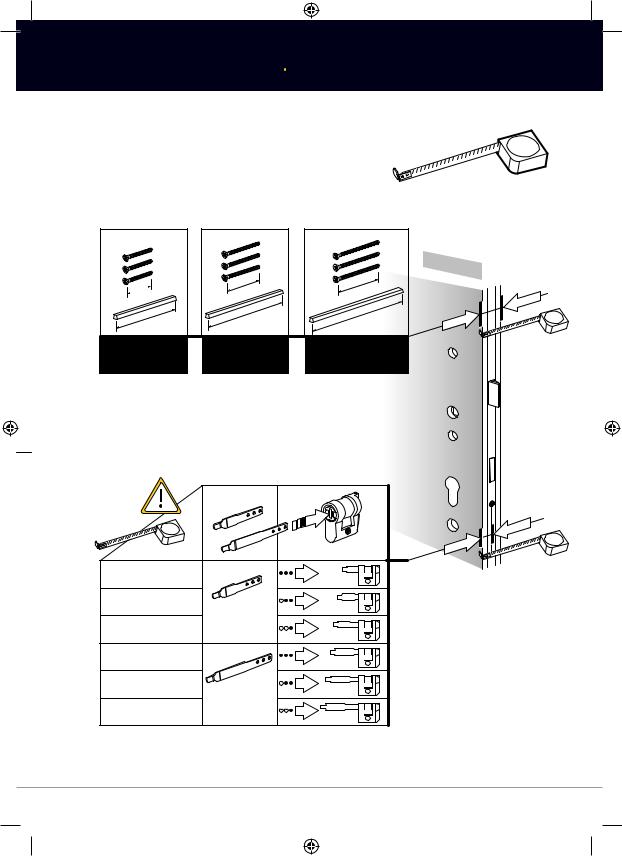
Measuring Your Door
Please measure the thickness of the door and the distance between the centre of the lock and the inside of the door to select the correct fixing pack and tailbar.
Fixing Pack B Fixing Pack C Fixing Pack D
|
|
|
|
INSID |
E |
|
|
|
|
|
|
55mm |
|
70mm |
80mm |
|
|
|
|
|
|
|
|
145m |
m |
160m |
m |
170mm |
|
|
|
||||
|
|
|
|||
Door thickness |
Door thickness |
Door thickness |
|
||
44-50mm |
58-65mm |
70mm |
|
||
21mm - 26mm |
|
|
26mm - 31mm |
Short |
|
31mm - 36mm |
||
Tailbar |
||
|
||
36mm - 41mm |
|
|
41mm - 46mm |
Long |
|
46mm - 51mm |
||
Tailbar |
7

Install lock Actuator•
1 |
2 |
1 |
2 |
|
|
|
INSIDE |
Tip:
After installing actuator make sure it is not tilted in the door.
Please screw lug into position to line up with previous handle fixing screws (see page 6).
8
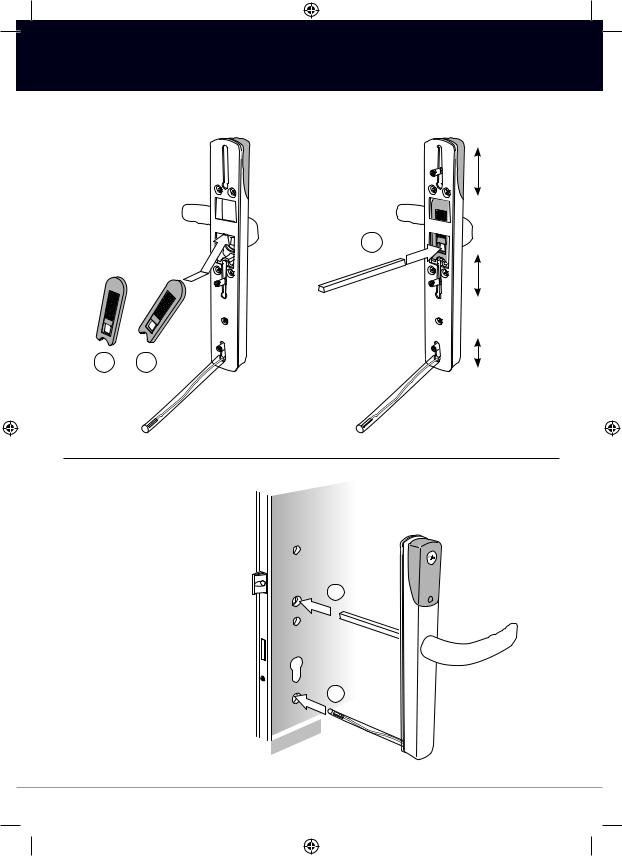
Fit External Handle•
Lugs can be slid up and down to fit current fixing holes.
3
x2
2 1
Slide the lug up or down to align with the holes in the door.
2
1
|
SIDE |
|
|
|
|
OU |
T |
|
|
|
9
 Loading...