


CCTV Menu Operations
Manual
SV-4C-2ABFX / SV-8C-4ABFX |
SV-4C-2DB4MX |
Disclaimer!
This Manual will guide you through the standard settings and operations for normal Residential CCTV usage.The system is based on a professional system and may contain advanced features and settings that are typically not needed for residential use.
This manual will be continuously updated and be available at www.yalelock.com/smart-living.
The smarter way to protect your home.
02
(GB) Index
Section |
Page |
1 Plan the camera location |
03 |
Connect cables as described in the manual that was included in the Kit. |
2Download App - Personal registration in the App
|
(It is better to have the App ready before starting the setup of the system.) |
04 |
||
|
Initial setup: |
3 |
Wired Kit |
05-06 |
|
|
4 |
WiFi Kit |
07-11 |
5 |
Menu overview |
|
|
12 |
6 |
Setting Date and Time - Synchronizing WiFi camera time |
13 |
||
7 |
Setting up recording and motion detection |
14-16 |
||
8 |
Searching in recorded video |
17-18 |
||
9 |
Backing up a video sequence |
19 |
||
10 |
Adding a WiFi camera |
|
20 |
|
11 |
Moving WiFi camera up in the channel list |
21 |
||
12 |
Notification via email and App message |
22 |
||
13 |
System information |
|
23 |
|
|
Yale info and help desk |
|
24 |
|

03
1 |
Plan camera locations and connect cables |
It is the users responsibility to make sure to follow the local regulations for setting up camera surveillance.
Plan the camera location
Face detection is useful at locations like front door, at face hight or slightly above.
( p.16)
p.16)
Connect cables according to the manual that came with your Kit.
IP-cam |
IP-cam |
HDMI
Router
Not included
Nicht enthalten
Non inclusa
Non inclus
No incluido
HDMI
Router
Not included
Nicht enthalten
Non inclusa
Non inclus
No incluido
HDMI / VGA
VGA
Not included |
Router |
|
|
Nicht enthalten |
|
Non inclusa |
|
Non inclus |
|
No incluido |
|
04
2 |
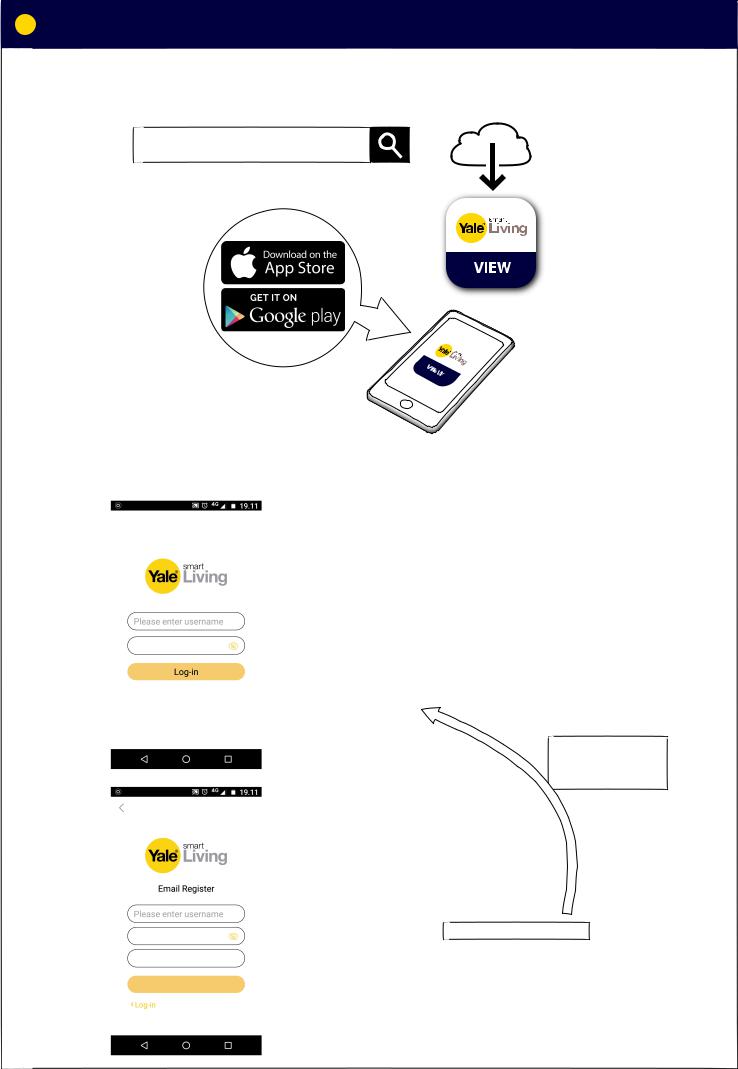
Download App - Personal registration in the App |
Download App for Android or IOS: “Yale Smart Living VIEW”
Yale Smart Living VIEW
Personal registration in the App
Enter password
Register,Forgotten password?
Enter password
App Log-in page:
Initial setup:
1) Click Register
This will be your opening page,after you have registered in steps 2) to 6).
7) Enter username
8) Enter password
9) Click Log-in
Email Register page:
Initial setup:
2) Enter username
3)Enter password
4)Enter email
5)Click Register
6) Click Log-in |
This will take you back to. |
Register

05
3 |
Initial setup - Wired Kit |

 Initial setup for system with wired cameras.
1) Key in password |
/ ? : & @ |
(Click in box and keyboard display will appear)
 2) Confirm password
 3) Click NEXT
4) Draw unlock pattern (Min.4 dots)
Draw again to confirm Draw unlock pattern
Remember this pattern! This will be your key to access the system.
 5) Click NEXT
6) write email address and complete security Questions (These are optional and can be switched OFF by “un-ticking” boxes)
 7) Security Questions:
 8) Click SAVE
9) As default leave Auto-check for updates ticked. (This will automatically keep your system up to date; but only if connected to the internet via Router)
 10) Click NEXT
06
3 |
Initial setup - Wired Kit |

 Initial setup for system with wired cameras.
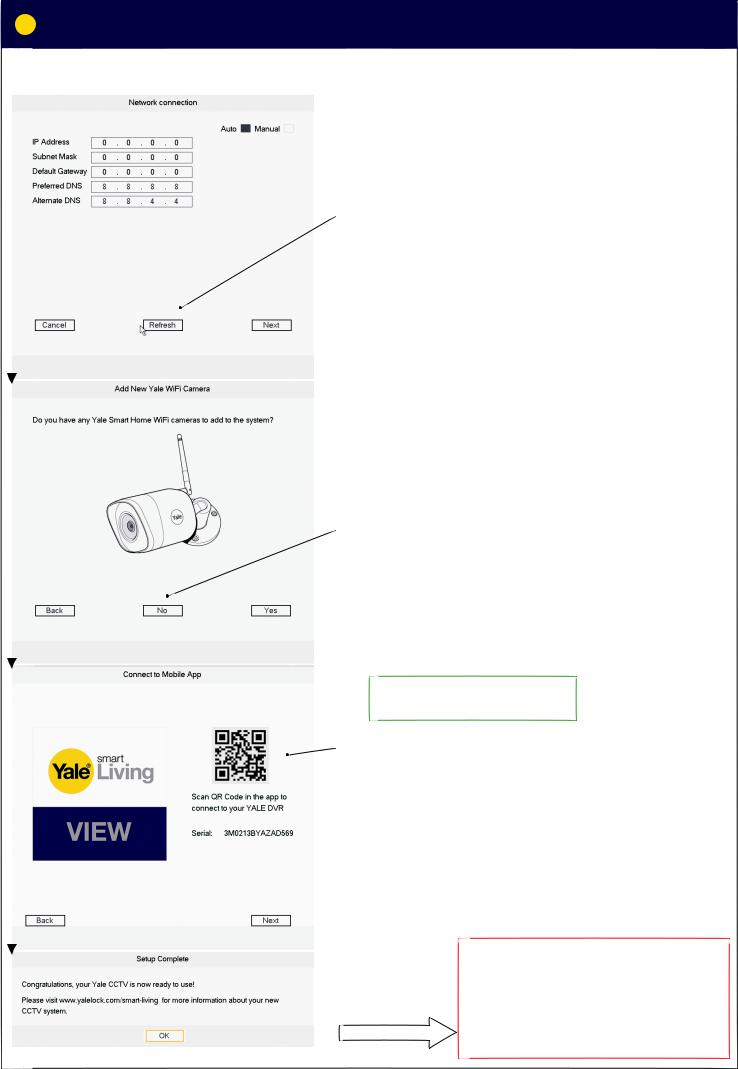
11) Click Refresh to update Network connection.
 12) Click NEXT
13) If you have only wired cameras in your Kit click NO. (WiFi cameras can be added later if needed)
The App needs to be installed and registered before scanning.
14) If you want access to your system via the Yale View App,scan the QR code to connect to your DVR system.
(If not click NEXT)
 15) Click NEXT
The DVR system is now turned ON and cameras are recording.System is as default running in “Regular Mode”, which means that cameras are recording 24 hours a day and will overwrite the hard drive when full.
 16) Click OK Other “Modes”and backing up recorded video will be explained later in the manual.

07
4 |
Initial setup - WiFi Kit |

 Initial setup for system with WiFi cameras.
1) Key in password |
/ ? : & @ |
(Click in box and keyboard display will appear)
 2) Confirm password
 3) Click NEXT
4) Draw unlock pattern (Min.4 dots)
Draw again to confirm Draw unlock pattern
Remember this pattern! This will be your key to access the system.
 5) Click NEXT
6) Write email address and complete security Questions (These are optional and can be switched OFF by “un-ticking” boxes)
 7) Security Questions:
 8) Click SAVE
9) As default leave Auto-check for updates ticked. (This will automatically keep your system up to date; but only if connected to the internet via Router)
 10) Click NEXT
08
4 |
Initial setup - WiFi Kit |

 Initial setup for system with WiFi cameras.
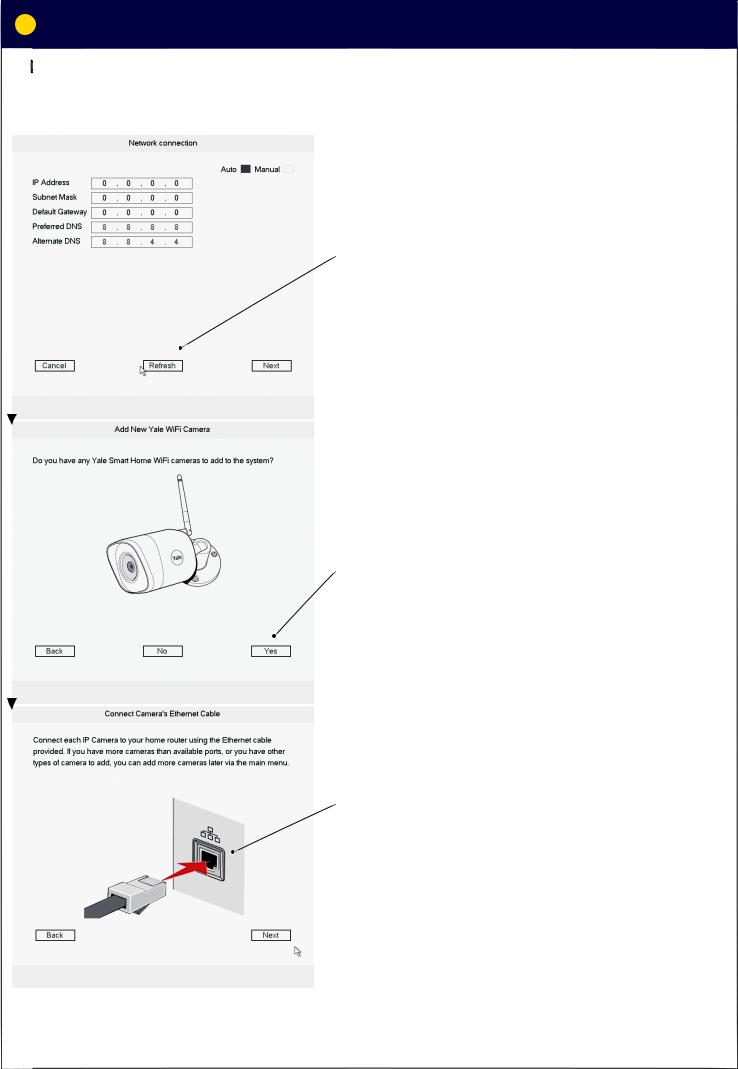
11) Click Refresh to update Network connection.
 12) Click Next
13) If you have WiFi cameras in your Kit (wiereless camera) click YES.
14) Connect Ethernet cables as described in the Yale Quick guide included in the box with the DVR unit.
 15) Click Next
 Loading...