


|
|
|
|
Yale® Assure Lock® SL |
|
|
|
|
|
|
|
® |
Key Free Touchscreen Deadbolt |
|
|
|
|||
|
|
|
|
Installation and Programming Instructions |
|
|
|
|
|
|
|
|
|
(YRD256/YRD456) |
Optional
Network Module
Before you begin |
DOWNLOAD |
THE BILT APP |
for step-by-step installation |
instructions & to register |
your product |
x3 |
x4 |
#7 wood & #8-32 |
|
#8-32 x 5/16" |
machine x 20mm |
Machine screws |
Combination screws |
|
OR |
OR |
x2 Silver |
x2 Gold |
x2 Black |
||
M6x36mm |
M6x44mm |
|
M6x55mm |
PPHMS |
PPHMS |
|
PPHMS |
(1-3/8" ) |
(Standard 1-3/4" |
- 2" ) |
(2-1/4" ) |
FAILURE TO FOLLOW THESE INSTRUCTIONS COULD RESULT IN DAMAGE TO
THE PRODUCT AND VOID THE FACTORY WARRANTY
1
P/N YRL-SLKFTSINSTL-FUL Rev D

Preparing Door
Refer to template for ! correct door prep
2
P/N YRL-SLKFTSINSTL-FUL Rev D
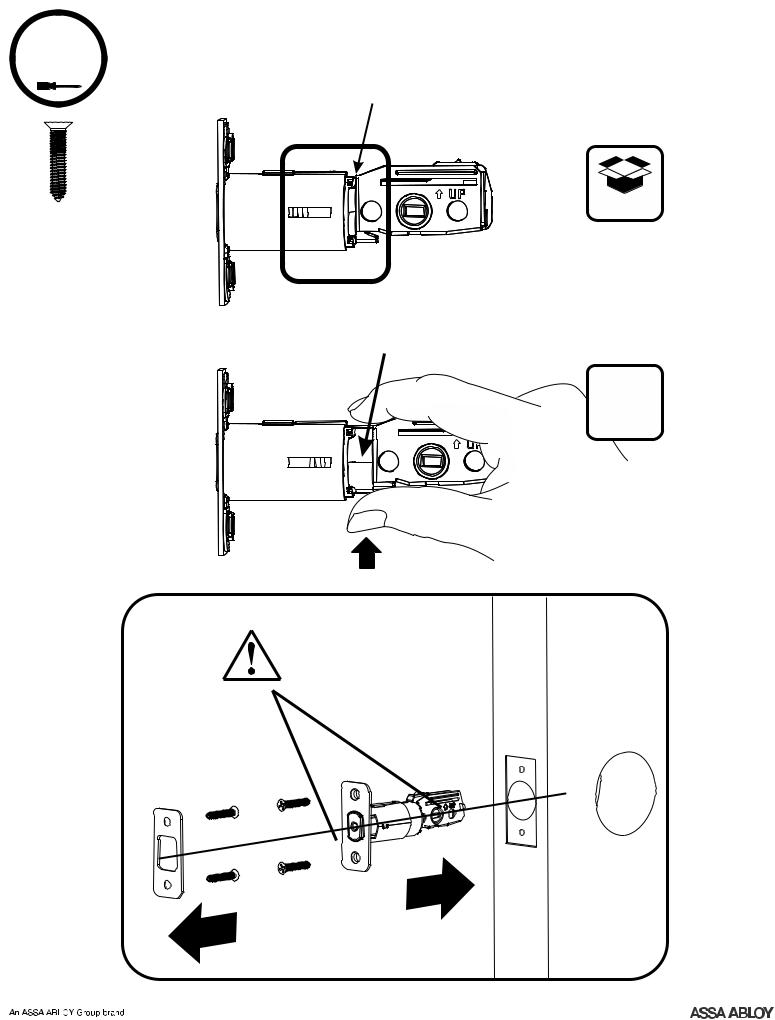
1 Installing Latch & Strike Plate
2-3/8" position
x4 |
defaut |
|
2-3/4" position
O
optional
Pull 
Press
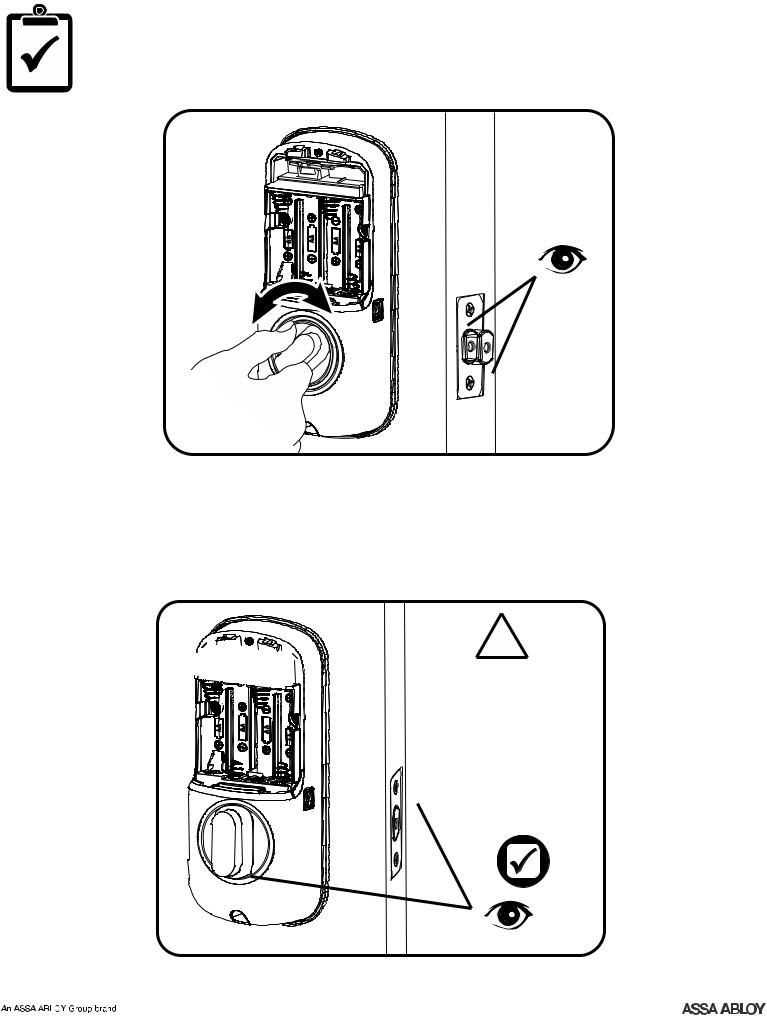
Bolt must be in retracted (unlocked) position. Note horizontal orientation of mechanism.
3
P/N YRL-SLKFTSINSTL-FUL Rev D
2 |
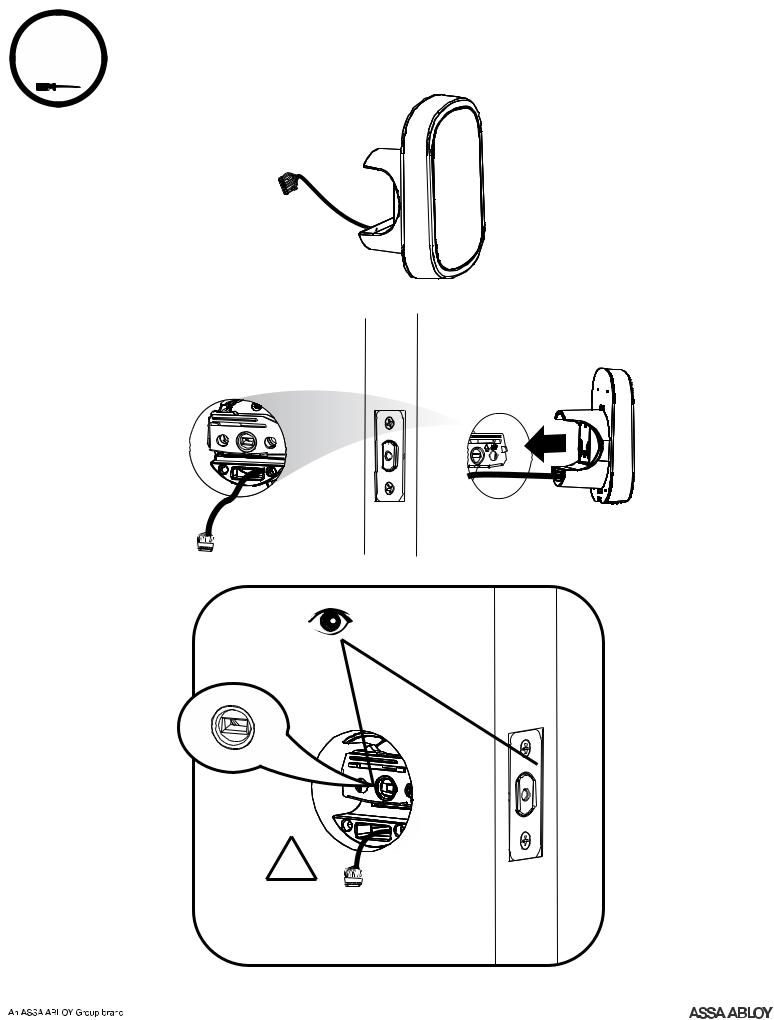
Installing Touchscreen Escutcheon |
Inside of Door |
Outside of Door |
|||||
|
|
|
|
|
|
|
|
|
|
|
|
|
|
!
Bolt must be in retracted (unlocked) position. Note horizontal orientation of mechanism.
4
P/N YRL-SLKFTSINSTL-FUL Rev D
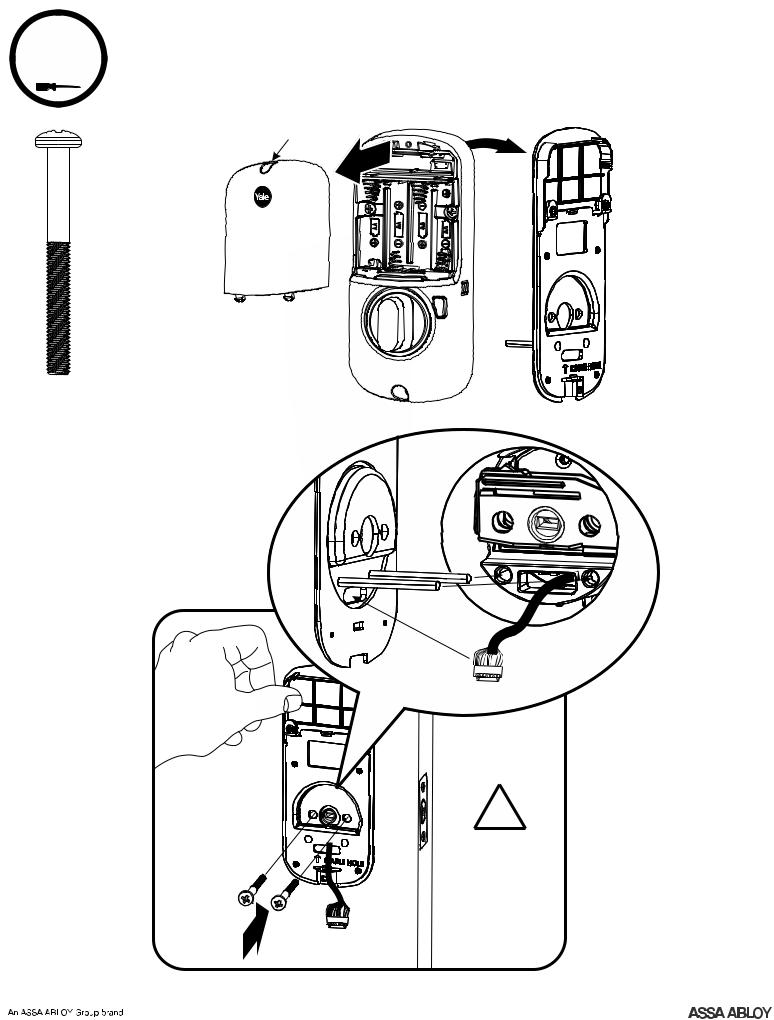
3
x2
Installing Interior Mounting Plate
Loosen screw to remove cover.
!
Choose through bolt appropriate for your door thickness.
5
P/N YRL-SLKFTSINSTL-FUL Rev D
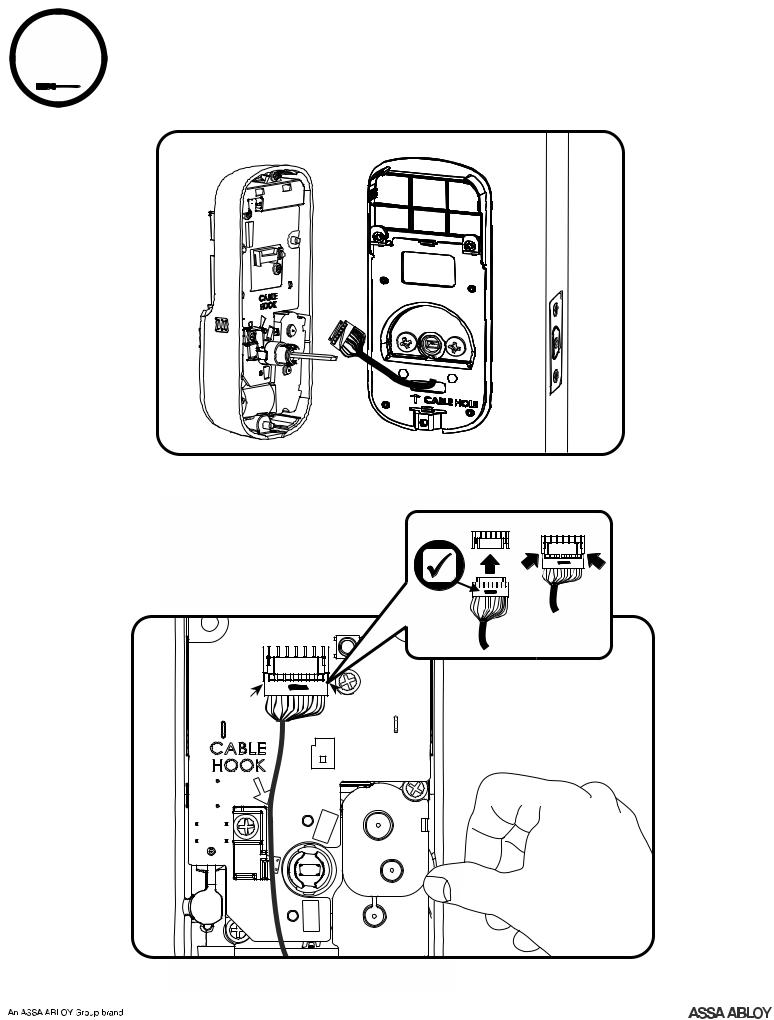
4 Attaching the Cable Assembly
6
P/N YRL-SLKFTSINSTL-FUL Rev D

5 Installing Interior Escutcheon
x3
7
P/N YRL-SLKFTSINSTL-FUL Rev D
Testing Operation
3
!
Bolt must be in retracted (unlocked) position before installing batteries.
8
P/N YRL-SLKFTSINSTL-FUL Rev D
 Loading...